

Horse Bits Explained - Holistic Horse Bodyworks
Horse Bits Explained - Holistic Horse Bodyworks
Horse Bits Explained - Holistic Horse Bodyworks

You also want an ePaper? Increase the reach of your titles
YUMPU automatically turns print PDFs into web optimized ePapers that Google loves.
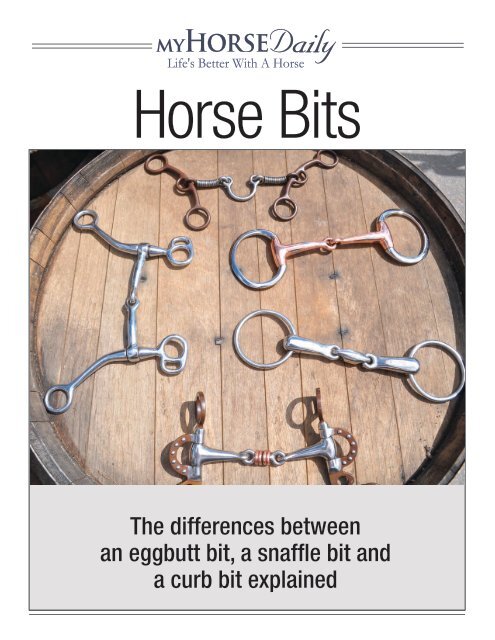
<strong>Horse</strong> <strong>Bits</strong><br />
The differences between<br />
an eggbutt bit, a snaffle bit and<br />
a curb bit explained
A Note From The Editor<br />
Here at My<strong>Horse</strong> Daily we are committed to bringing<br />
you the latest information designed to keep you and your horse<br />
healthy, happy and productive.<br />
Enjoy the read!<br />
Amy Herdy, Managing Editor<br />
My<strong>Horse</strong> Daily<br />
Visit My<strong>Horse</strong>Daily.com Equine Network/Not to be reprinted/All rights reserved/www.My<strong>Horse</strong>Daily.com
Apopular feature of many<br />
tack shops is the “Bit<br />
Wall.” This is usually a<br />
rather intimidating array<br />
of different types of bit,<br />
each with different features<br />
designed to work in a slightly different<br />
way. Trying to decide which is the right<br />
bit for your horse can be confusing, but<br />
when you look closely, you’ll see that<br />
there are only two basic types of bit: the<br />
snaffle bit and the curb bit.<br />
Most people assume that because the<br />
snaffle is usually a jointed bit and the<br />
curb usually is not, the mouthpiece is<br />
what determines whether a particular bit<br />
is a snaffle or a curb. However, according<br />
to veteran horse trainer Jessica Jahiel, the<br />
difference between snaffles and curbs has<br />
nothing to do with the mouthpiece. The<br />
difference between the two types of bit<br />
is that the snaffle is a non-leverage bit<br />
and the curb is a leverage bit.<br />
Snaffle vs. Curb<br />
On a snaffle bit, the rein attaches<br />
directly to the mouthpiece. The bit acts<br />
with a nutcracker action (provided it is<br />
jointed) on the bars of the mouth (the<br />
area of gum between the front and back<br />
teeth), the corners of the mouth and the<br />
tongue. As the rider takes contact on the<br />
rein, the horse feels an equal amount of<br />
contact on the bit in his mouth.<br />
On a curb bit, the rein attaches to a<br />
shank or cheek piece that adds leverage.<br />
When the rider takes contact on the<br />
Equine Network/Not to be reprinted/All rights reserved/www.My<strong>Horse</strong>Daily.com<br />
From explaining your<br />
choices to determining your<br />
horse’s correct bit size, this<br />
guide is for you.<br />
Adapted from articles by Jayne Wilson,<br />
Ron Meredith and Suzanne Vlietstra<br />
Photos by Joshua Polson<br />
rein, the horse feels a greater amount of<br />
contact, depending on the length of the<br />
shank. Following the basic physics of leverage,<br />
the longer the shank, the greater<br />
the leverage. The curb bit works on the<br />
bars of the mouth, as well as under the<br />
chin (by way of the curb chain, which is<br />
attached to the bit) and over the poll.<br />
Types of Snaffles<br />
The gentlest type of snaffle bit is the<br />
eggbutt snaffle. The name comes from<br />
the somewhat egg-shaped connection<br />
between the mouthpiece and the bitring.<br />
The mouthpiece of an eggbutt can<br />
be made of a variety of materials (as can<br />
any bit), including copper and synthetic<br />
(either solid or covered). The reason this<br />
bit is so gentle is that it doesn’t pinch the<br />
corners of the mouth.<br />
Another style of snaffle bit is the<br />
D-ring snaffle. The name is self-explanatory<br />
in that the ring of the bit is in the<br />
shape of a “D.”<br />
In the loose-ring snaffle, the mouthpiece<br />
is attached to a full-round ring and<br />
can slide around on it, allowing the bit<br />
to lay in the most natural position, regardless<br />
of the horse on which it is used.<br />
Some snaffle bits, such as the fullcheek<br />
snaffle, have cheek pieces that prevent<br />
the bit from being pulled through<br />
the mouth.<br />
Types of Curbs<br />
Curb bits are leverage bits. They act<br />
3<br />
on the horse’s mouth, poll and chin in<br />
several ways.<br />
The mouthpiece acts as a fulcrum.<br />
When contact is taken on the reins,<br />
which are attached to the lower end of<br />
the shank, the leverage action tightens<br />
the bit in the horse’s mouth, exerts<br />
downward pressure on the crown piece<br />
of the bridle over the top of the horse’s<br />
head and behind the ears, and closes the<br />
curb chain under the chin, exerting pressure<br />
on the lower jaw.<br />
The severity of the curb bit is partly<br />
dependent upon the length of the shanks.<br />
The longer the shanks, the greater the<br />
pressure exerted on the mouth and poll.<br />
Needless to say, curb bits should only<br />
be used by experienced riders with quiet<br />
hands. Otherwise they can easily turn<br />
into instruments of torture.<br />
A basic Western curb bit has a gently<br />
ported mouthpiece and shanks to which<br />
the reins attach. As the rider takes a feel<br />
of the reins, more leverage is exerted on<br />
the horse’s mouth and also on the poll<br />
(where the bridle goes over the head, behind<br />
the ears). By increasing the amount<br />
of port on the mouthpiece, pressure is<br />
also applied to the roof of the mouth.<br />
Since Western horses are ridden on a<br />
loose rein, the longer shank allows the<br />
rider to utilize the leverage by giving extremely<br />
light rein aids and attaining the<br />
same result as a rider using a snaffle on<br />
firmer contact.<br />
In the English curb bit, the port can<br />
also vary in severity. In general, the<br />
shanks on English bits are shorter than<br />
Visit My<strong>Horse</strong>Daily.com
on Western bits: four to five inches on<br />
an English bit as opposed to up to eight<br />
or nine inches on a Western one. The<br />
English curb bit is often used in a double<br />
bridle. In the double bridle, two bits are<br />
actually used. One is the curb, called the<br />
Weymouth, and the other is the snaffle,<br />
called the bridoon (or bradoon). Both<br />
of these bits are used together to refine<br />
the aids in the higher levels of dressage<br />
competition.<br />
How Are <strong>Bits</strong><br />
Named?<br />
It seems as if there’s a neverending<br />
list of bit names. But<br />
when you know how to break<br />
it down, you can often tell<br />
quite easily what a bit is, just by<br />
studying the components. The<br />
names of the various types of<br />
bit are taken from the characteristics<br />
of the bit in question.<br />
The most basic names are<br />
taken from either the bit rings,<br />
as in eggbutt snaffle, D-ring<br />
snaffle or loose ring snaffle; or<br />
the mouthpiece, as in mullenmouth<br />
snaffle, French-link<br />
snaffle or Dr. Bristol.<br />
To give a more accurate description,<br />
the full name of the bit may be taken<br />
from both the rings and the mouthpiece.<br />
This makes for some long names sometimes,<br />
but by breaking the name down,<br />
you can tell what characteristics it has.<br />
Conversely, you can look at a bit’s characteristics<br />
and come up with a name for it!<br />
For example, we’ll take the full-cheek<br />
snaffle, named for the cheek extensions<br />
on either side. Combine that with the<br />
eggbutt connection and you’ve got a<br />
full-cheeked eggbutt snaffle.<br />
Or add in a description of the mouthpiece,<br />
such as slow twist, and you get a<br />
full-cheeked snaffle with a slow twist.<br />
Other combinations might be Dr.<br />
Bristol eggbutt snaffle, or full-cheeked<br />
French-link snaffle — you get the idea!<br />
Speaking of snaffles…<br />
A three-ring snaffle, sometimes called<br />
an “American gag,” is a loose-ring bit<br />
with distinct sidepieces composed, despite<br />
its name, of four rings. You attach<br />
the cheek piece to the tiny top ring;<br />
then you can attach the rein to the big<br />
snaffle ring (the one that’s connected to<br />
the mouthpiece) for minimal effect, the<br />
second (small) ring for moderate effect,<br />
or the third (bottom) ring for maximum<br />
effect. (Some riders attach a rein to the<br />
snaffle ring and another to the bottom<br />
ring, as on a Pelham; some prefer a single<br />
rein because it is easier to use.)<br />
The bit works by providing:<br />
Leverage. When you pull back on one<br />
of the lower rings with the rein, the top<br />
ring levers forward and pulls the cheek<br />
piece down, which applies pressure to<br />
the horse’s poll and encourages him to<br />
lower his head.<br />
Lift. As you pull on the reins, the<br />
mouthpiece rides up the snaffle ring in<br />
an elevating action. When combined<br />
with a strong leg pushing the horse forward<br />
into the bridle, it helps to balance<br />
him off his forehand. (This effect can be<br />
increased by the style of mouthpiece; it’s<br />
normally smooth but can be a stronger<br />
slow-twist or even a custom design.)<br />
Turning power. The sidepieces<br />
4<br />
Western<br />
snaffle<br />
function like the shanks of a full-cheek<br />
snaffle, helping to steer the horse by<br />
pressing against the outside of his face<br />
in a turn.<br />
Some use a three-ring snaffle on bigger,<br />
stronger horses because it helps keep<br />
them lighter in hand so they rebalance<br />
quickly and turn better, enabling them<br />
to go faster. Furthermore, it’s almost like<br />
three bits in one.<br />
A bit with a similar action and much<br />
less potential for trouble is<br />
the loose-ring “loop” snaffle.<br />
You attach the cheek piece to<br />
an inward-facing loop at 12<br />
o’clock and the rein to another<br />
loop at 5 o’clock. By fixing the<br />
cheek piece and rein in place<br />
relative to each other, you<br />
achieve the lift and leverage<br />
of the three-ring snaffle—but<br />
without its severity.<br />
Remember, though, you<br />
always want to work toward a<br />
“snaffle-mouth” level of training<br />
and response.<br />
Choosing a Snaffle<br />
That Fits<br />
Depending upon your<br />
horse’s facial conformation, you’ll need<br />
to choose the correct width of bit to fit<br />
him comfortably.<br />
<strong>Bits</strong> range from the smallest ponysized<br />
bits (approximately 3 ½ inches<br />
wide) to draft-horse-sized bits (5 ½ inches<br />
and up). <strong>Horse</strong>s with slender muzzles,<br />
such as Arabians, will require a narrower<br />
bit than a Quarter <strong>Horse</strong>.<br />
Single-jointed snaffles should be fitted<br />
to allow about 1/4 inch clearance<br />
between the bit ring and the horse’s lips.<br />
If the bit is too narrow, it will pinch the<br />
lips as contact is taken on the reins. <strong>Bits</strong><br />
that are too wide will slide from side to<br />
side and may bruise the lips and/or bars<br />
of the mouth.<br />
Another factor to take into consideration<br />
is the height of the bit in the<br />
horse’s mouth. This can be adjusted by<br />
Visit My<strong>Horse</strong>Daily.com Equine Network/Not to be reprinted/All rights reserved/www.My<strong>Horse</strong>Daily.com
tightening or loosening the cheek pieces<br />
of the bridle. Ideally, a correctly adjusted<br />
bit will make one or two small wrinkles<br />
in the corner of the horse’s mouth.<br />
Lower than this, and the bit may clank<br />
on his teeth, causing him discomfort.<br />
Higher, and the bit will pinch.<br />
Choosing the Right Bit<br />
for Your <strong>Horse</strong><br />
<strong>Bits</strong> are one of the most misunderstood<br />
pieces of horse equipment man has<br />
ever invented. The things that people<br />
think they’re supposed to do with a bit<br />
in a horse’s mouth are unbelievable.<br />
All too often, the human take on<br />
the situation is that a horse is a big animal,<br />
and that therefore, the pressures<br />
needed to control it must be big and<br />
strong. That’s a myth. A rocket engine<br />
is controlled by tiny bits of information<br />
being fed one at a time by a computer.<br />
Each of those bits is either a “zero” or a<br />
“one.” The bits flow in a pattern called<br />
a program that the rocket understands.<br />
Same thing with a horse. All it needs are<br />
tiny bits of information fed to it with the<br />
right timing to get with the program.<br />
There are very few surfaces where the<br />
bit can apply pressure. So it takes some<br />
pretty complex applications of pressure<br />
to those few points to create complex<br />
communication. The bit must be shaped<br />
in such a way and fit properly within the<br />
mouth so that the horse is able to understand<br />
the communication. Therefore, a bit<br />
must be both directional and horse-logical.<br />
It must not cause any injury which<br />
will result in temporary numbness.<br />
As noted earlier, the area in the horse’s<br />
mouth where a bit communicates our<br />
pressures most effectively is called the<br />
bars. These gaps between the front teeth<br />
and the back teeth on either side of the<br />
jaw consist of tissue-covered, pressuresensitive<br />
cartilage. The bit lays across<br />
the bars and presses against the horse’s<br />
tongue. Depending on its shape and<br />
adjustment, a bit can also put pressure<br />
on the horse’s lips and on the roof of its<br />
Equine Network/Not to be reprinted/All rights reserved/www.My<strong>Horse</strong>Daily.com<br />
5<br />
Snaffle bits<br />
twisted wire D-ring snaffle<br />
eggbutt snaffle<br />
hard rubber<br />
full-cheeked snaffle<br />
copper eggbutt snaffle<br />
Visit My<strong>Horse</strong>Daily.com
Curb <strong>Bits</strong><br />
mouth. Pressures on the lips are the least<br />
effective because the lips are an unstable<br />
surface and easily injured.<br />
The first thing to look at on any<br />
device you put in the horse’s mouth is<br />
the size of its contact area, which is the<br />
area that actually touches the horse and<br />
transmits pressure or feel. When trainers<br />
talk about “pounds of pressure” on a<br />
bit, they are really talking about pounds<br />
per square inch of pressure over this<br />
contact area. The thinner the bit, the<br />
less contact area it has and the greater<br />
the pounds-per-square-inch of pressure.<br />
The thicker the bit, the greater the contact<br />
area and the lower the pounds-persquare-inch<br />
of pressure.<br />
Put another way, the thinner the bit,<br />
the more noticeable any pressure on<br />
the bars will be. With a thicker bit, the<br />
same amount of rein pressure will be less<br />
noticeable. So the effective size of the<br />
mouthpiece is the first thing to look at,<br />
because it will determine how noticeable<br />
the pressure you apply will be. Rough bit<br />
surfaces such as twists reduce the area<br />
where pressure is felt, much like rough<br />
tread reduces a tire’s surface area where it<br />
meets the road.<br />
The second thing to look at is whether<br />
the mouthpiece is straight or shaped so<br />
that it relieves the pressure on the tongue.<br />
If the bit is straight, the horse’s tongue absorbs<br />
some of the pressure and the horse<br />
will feel less pressure on the bars. The bars<br />
are the only places in the mouth we can<br />
use to communicate an understandable<br />
directional pressure. If the mouthpiece is<br />
6<br />
hinged or grooved so it relieves pressure<br />
on the tongue, the bit is more noticeable<br />
on the bars of the mouth and gives more<br />
directional guidance.<br />
A tongue groove and a port are not<br />
the same thing. A tongue groove is a<br />
shallow, raised indentation in the center<br />
of the mouthpiece only high enough to<br />
relieve tongue pressure. It allows the bit’s<br />
pressures to be felt on the bars. A port is<br />
a raised groove or attached spoon so tall<br />
that it puts pressure on the roof of the<br />
mouth when the shanks of the bit are<br />
rotated by pulling on the reins. If you<br />
could park a little boat in it, it’s a port.<br />
A port is severe and non-directional and<br />
cannot teach the horse anything.<br />
The third thing to look at is whether<br />
the bit has leverage. The way to measure<br />
leverage is to compare the distance from<br />
the mouthpiece to where the reins attach<br />
to the distance from the mouthpiece to<br />
the curb chain (or strap). Most curb bits<br />
have a 3:1 leverage ratio. That means if<br />
you put 10 pounds of pull on the reins,<br />
the horse will feel 30 pounds of pressure<br />
squeezing his mouth.<br />
Leverage decreases the amount of<br />
time it takes for the horse to feel bit pressure.<br />
If you have a bit with 3:1 leverage,<br />
the horse feels 10 pounds of pressure<br />
three times faster than he would if you<br />
applied 10 pounds of pressure with a<br />
non-leverage bit like a snaffle. To make<br />
this kind of bit pressure understandable<br />
and horse-logical, you would have to<br />
soften the pressure to reward the horse<br />
three times as quickly as you would with<br />
Visit My<strong>Horse</strong>Daily.com Equine Network/Not to be reprinted/All rights reserved/www.My<strong>Horse</strong>Daily.com
a non-leverage bit. Because of this exaggerated<br />
pressure and release, curb bits<br />
impede true feel and understanding between<br />
you and your horse.<br />
Curbs are also non-directional.<br />
Their pressure is felt as a clamping<br />
between the horse’s chin and the<br />
bars of his mouth, and therefore can<br />
convey minimal direction to the<br />
horse. If you use a chain, the pressure<br />
is more noticeable underneath<br />
the chin. If you use a thick leather<br />
strap, the pressure is more noticeable<br />
on the bars of the mouth. In most<br />
cases, curb bits are used as a signaling<br />
device rather than as a training<br />
device to help the horse learn to<br />
shape himself correctly.<br />
One of the biggest mistakes people<br />
make is picturing the bit by itself.<br />
The bit is only part of the overall<br />
corridor of aids you use to create the<br />
shapes you want the horse to take.<br />
You do not want the bit to be louder<br />
Equine Network/Not to be reprinted/All rights reserved/www.My<strong>Horse</strong>Daily.com<br />
The bit is only part of the overall<br />
corridor of aids you use to create<br />
the shapes you want the horse to<br />
take. You do not want the bit to be<br />
louder than your legs or seat.<br />
than your legs or seat. You don’t<br />
need a big bit to get the horse’s attention<br />
and you don’t need a big bit<br />
to get the horse stopped. You just<br />
need to know how to use a bit to<br />
make it understandable and directional<br />
to the horse.<br />
Whenever you see a horse fighting<br />
the bit, he has lost feeling for<br />
the rest of the aids. It is just like<br />
two people who speak different languages<br />
raising their voices louder<br />
and louder in an effort to be understood.<br />
Rhythm, relaxation and<br />
repetition are the cornerstones of<br />
good training.<br />
7<br />
What Are <strong>Bits</strong> Made Of?<br />
While history tells us that bits used<br />
to be made of bone or wood, nowadays<br />
bits are available in a variety of<br />
materials.<br />
Probably the most inexpensive (and<br />
least desirable) material is nickel plate.<br />
With wear, the plating can flake off, revealing<br />
the core metal underneath and<br />
leaving rough patches that can injure<br />
the horse’s lips and tongue. These bits<br />
also tend to rust.<br />
Stainless steel is a much better option.<br />
It doesn’t flake or rust. Stainless<br />
steel is probably the most common material<br />
for bits these days.<br />
Some bits come with mouthpieces<br />
made of a different material.<br />
Vulcanized rubber is a hard rubber coating<br />
that is baked on to the mouthpiece.<br />
This baking process makes the rubber<br />
stronger and less prone to flaking<br />
than non-vulcanized rubber. Rubber<br />
Visit My<strong>Horse</strong>Daily.com
Bit mouthpieces come in different materials, such as A) stainless steel or steel combined with other metals; B) vulcanized rubber; C) copper or copper<br />
combined with other metals; and D) Happy Mouth plastic.<br />
Subscribe today & Get a<br />
Free Gift!<br />
SUBSCRIBE NOW<br />
A. B.<br />
C. D.<br />
8<br />
mouthpieces are warmer on the bars of<br />
the mouth and the tongue, and some<br />
horses prefer the softer feel that they<br />
give.<br />
Copper is another popular choice for<br />
mouthpieces, with either the complete<br />
mouthpiece being made of rubber, or<br />
with copper inserts or rollers incorporated<br />
into it. Copper helps some drymouthed<br />
horses salivate and become<br />
more responsive to the bit. It does tend<br />
to “pit,” though, so care should be taken<br />
to make sure there aren’t any sharp<br />
edges to hurt the horse’s mouth.<br />
“Happy Mouth” bits are made of<br />
high-tech plastics. They are soft and<br />
flexible, and come with an apple scent<br />
to encourage the most bit-shy of horses<br />
to accept them.<br />
Another material that encourages<br />
horses to salivate and become softer<br />
and more responsive in the mouth is<br />
the “sweet iron” mouthpiece. Whether<br />
they actually taste sweet to the horse is<br />
unknown.<br />
Sometimes, finding the right material<br />
for your horse is a matter of trial and error.<br />
What works on one horse may not<br />
work on another.<br />
Visit My<strong>Horse</strong>Daily.com Equine Network/Not to be reprinted/All rights reserved/www.My<strong>Horse</strong>Daily.com
Proper Bit Sizing<br />
Is your snaffle bit the right width for<br />
your horse?<br />
Whether you’re looking for a bit for<br />
a green horse or a veteran campaigner,<br />
you want to be sure you’re selecting<br />
the right size for your horse’s mouth.<br />
If your snaffle bit’s mouthpiece is too<br />
wide or too narrow for your horse’s<br />
mouth, the bit can’t do its job effectively.<br />
Here’s how to make a tool<br />
to measure the width of your horse’s<br />
mouth—and how to use it as a guide to<br />
proper bit fit.<br />
(Note: The measurement you get<br />
from this method isn’t absolute; it’s<br />
simply a guide to help you pick the<br />
correct mouthpiece for your horse.<br />
Standard width is 5 inches. Generally,<br />
horses with small muzzles and jaws<br />
wear a 4 ½-inch mouthpiece, as a<br />
5-inch model may look sloppy. <strong>Horse</strong>s<br />
with larger muzzles and jaws are usually<br />
more comfortable in 5 ½- or 6-inch<br />
mouthpieces, so the bit won’t pinch<br />
the corners of their mouths.)<br />
You’ll Need:<br />
An 8-inch section of ½-inch hose; a<br />
ruler; a pocketknife or leather punch;<br />
two rolls of different-colored, ½-inchwide<br />
electrical tape (we’ll use red and<br />
yellow for ease of description); two split<br />
key rings; a lightweight headstall; and<br />
two swivel snaps (optional).<br />
Making the Measuring Tool<br />
1. Using the ruler, mark points ½,<br />
1, and 1 ½ inches from each hose end.<br />
(The space between the two 1 ½-inch<br />
marks should be 5 inches.)<br />
2. Wrap a strip of red tape between<br />
the ½- and 1-inch marks at each end.<br />
Then wrap a strip of yellow tape between<br />
the 1- and 1 ½-inch marks.<br />
Looking at the hose from left to right,<br />
you’ll see ½ inch of bare hose, then a<br />
red piece of tape, then a yellow piece,<br />
then 5 inches of bare hose, followed<br />
by yellow tape, red tape and ½ inch of<br />
bare hose.<br />
3. Using a pocketknife or leather<br />
punch, pierce a small hole in the hose<br />
end about ¼ inch from each end. Then<br />
Equine Network/Not to be reprinted/All rights reserved/www.My<strong>Horse</strong>Daily.com<br />
If your snaffle bit’s<br />
mouthpiece is too wide<br />
or too narrow for your<br />
horse’s mouth, the bit<br />
can’t do its job effectively.<br />
thread a split key ring through each hole.<br />
4. Secure the rings to your headstall’s<br />
cheek pieces, as though you’re putting<br />
on a bit. Or fasten swivel snaps to your<br />
headstall’s cheek pieces. Then clasp the<br />
snaps to the key rings. (The latter is a<br />
bit faster.)<br />
Mouth Measuring<br />
1. To measure the width of your horse’s<br />
mouth, bridle him with the measuring<br />
tool attached to the headstall, placing<br />
the hose in his mouth just like a bit.<br />
(Note: adjust your headstall so that the<br />
9<br />
hose lies flat in your horse’s mouth.)<br />
2. The colored tape markers will tell<br />
you at a glance what size mouthpiece<br />
your horse needs. If the corners of his<br />
mouth are within the standard 5-inch<br />
width (the corners of his mouth are<br />
within the bare-hose area) a 5-inch<br />
mouthpiece may be fine. However,<br />
when it comes to snaffle mouthpieces,<br />
wider is often better. Try a 5 ½-inch<br />
mouthpiece; you may find him more<br />
comfortable and responsive.<br />
3. If there’s a gap of 1 inch or more<br />
between the corners of his mouth and<br />
the edge of the yellow tape marker, try a<br />
4 ½- inch or 5-inch mouthpiece.<br />
4. On the other hand, if the corners<br />
of his mouth spread onto the yellow<br />
tape marker, opt for a 5 ½-inch<br />
mouthpiece.<br />
5. If his mouth spreads onto the<br />
red (or farthest) tape marker, a 6-inch<br />
mouthpiece may be best.<br />
Get Your Daily Dose of <strong>Horse</strong><br />
Check out tips from top trainers, horse care advice<br />
vet how-to’s and more at My<strong>Horse</strong>Daily.com<br />
My<strong>Horse</strong> Daily<br />
Community Features:<br />
• Free downloadable guides<br />
• New book & DVD reviews<br />
• Daily articles about all<br />
things horses<br />
• Free how-to and training<br />
videos<br />
Visit My<strong>Horse</strong>Daily.com
Credits<br />
Bit Basics<br />
This report is brought to you<br />
by the editors of EquiSearch.<br />
com and Practical <strong>Horse</strong>man<br />
magazine.<br />
• Visit My<strong>Horse</strong>Daily.com for<br />
daily articles on all things<br />
horses.<br />
• Subscribe to My<strong>Horse</strong> Daily<br />
and weekly e-newsletters,<br />
free how-to videos, tips and<br />
much more.<br />
• Peruse hundreds of horse<br />
books and DVDs at our store,<br />
<strong>Horse</strong>BooksEtc.com.<br />
10<br />
Visit My<strong>Horse</strong>Daily.com Equine Network/Not to be reprinted/All rights reserved/www.My<strong>Horse</strong>Daily.com