

The Magazine of the Computer Textile Design Group
The Magazine of the Computer Textile Design Group
The Magazine of the Computer Textile Design Group

Create successful ePaper yourself
Turn your PDF publications into a flip-book with our unique Google optimized e-Paper software.
<strong>The</strong> <strong>Magazine</strong> <strong>of</strong> <strong>the</strong> <strong>Computer</strong> <strong>Textile</strong> <strong>Design</strong> <strong>Group</strong><br />
Issue 62 October 2007<br />
Landscape<br />
Squared<br />
page 4<br />
A Figurative<br />
Challenge<br />
page 6<br />
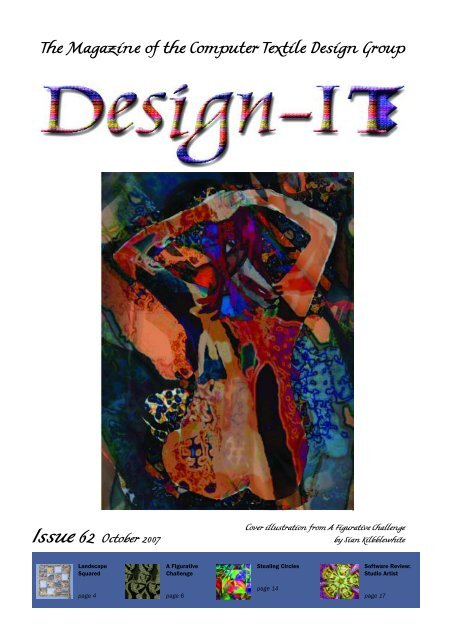
Cover illustration from A Figurative Challenge<br />
by Sian Kilbblewhite<br />
Stealing Circles<br />
page 14<br />
S<strong>of</strong>tware Review:<br />
Studio Artist<br />
page 17
Dear Members<br />
When you receive this issue <strong>of</strong> <strong>Design</strong>-IT we will have exhibited<br />
at both <strong>the</strong> NEC in Birmingham and at Alexandra Palace.<br />
Many thanks to all those members who volunteered to<br />
steward at <strong>the</strong>se events - we could not manage without you.<br />
Special thanks to Sandra Bingham who has co-ordinated all<br />
aspects <strong>of</strong> <strong>the</strong> exhibitions.<br />
This is Marlene Allinson’s second issue <strong>of</strong> <strong>the</strong> <strong>Magazine</strong> and<br />
we hope you enjoy it as much as <strong>the</strong> last one for which we<br />
received many favourable comments. Keep sending your<br />
articles and comments to Marlene.<br />
Please take time to read about <strong>the</strong> Workshops we are planning<br />
to run in August 2008. This may seem a long time ahead but<br />
venues and Tutors are booked well in advance. To encourage<br />
<strong>the</strong> Committee to continue working on this project it would<br />
help if you could indicate an interest to me at<br />
chairman@ctdg.org.uk or on <strong>the</strong> Forum.<br />
Biographies<br />
Shirley Sherris is a retired teacher<br />
who uses <strong>the</strong> computer for much <strong>of</strong><br />
her designing in many fields:<br />
embroidery and textiles, mixed<br />
media, photography and digital<br />
collage imaging, and is continually<br />
experimenting with new techniques.<br />
Sian Kibblewhite is a semi-retired<br />
teacher who works for Worcestershire<br />
LEA as a ‘Hands-on Support’<br />
teacher trainer specializing in Art and<br />
ICT. She is a keen promoter <strong>of</strong> using<br />
computers in <strong>the</strong> school curriculum<br />
as a means <strong>of</strong> getting more children<br />
involved in <strong>the</strong> creative process as<br />
well as supporting and enriching<br />
classroom learning.<br />
Sarah Brownie studied at Camberwell<br />
School <strong>of</strong> Art followed by a<br />
PGCE in Manchester and a solo<br />
exhibition <strong>of</strong> etchings. <strong>The</strong> acid baths<br />
used in <strong>the</strong> etching process did not<br />
mix well with children so Sarah<br />
moved into Adult Education, teaching<br />
a range <strong>of</strong> levels in digital and<br />
2 <strong>Design</strong>-IT Issue 62<br />
Judith Butt, Chairman<br />
traditional media. Sarah has written<br />
two CTDG workbooks and is<br />
President <strong>of</strong> <strong>the</strong> <strong>Group</strong>.<br />
Janice Hay used to teach City &<br />
Guilds embroidery and has had<br />
articles accepted in Embroidery,<br />
Stitch and <strong>Design</strong>-IT. Some <strong>of</strong> her<br />
work has been illustrated in books on<br />
embroidery and design and she is<br />
now a freelance embroiderer,<br />
working to commission.<br />
Rosemary Hufton studied maths and<br />
design before becoming involved<br />
with textiles. Rosemary has<br />
completed City & Guilds courses in<br />
fashion, machine knitting,<br />
embroidery and machine embroidery<br />
and received a Certificate <strong>of</strong><br />
Excellence for her C&G diploma<br />
embroidery in 2002. After three<br />
years studying with BCUC at Windsor<br />
for <strong>the</strong> H.E.Diploma in Stitched<br />
<strong>Textile</strong>s she graduated with<br />
distinction in 2005, and is a mixed<br />
media artist whose work has a<br />
Contents<br />
CTDG News 2 - 3<br />
Landscape Squared 4 - 5<br />
A Figurative Challenge 6 - 7<br />
Screen Printing from<br />
‘Found Objects’ 8 -1 3<br />
Stealing Circles 14 - 16<br />
S<strong>of</strong>tware Reviews<br />
Studio Artist 3.5 17 -20<br />
SnagIt 8.2.3 21 - 22<br />
CTDG New Website 22<br />
Book Review<br />
Fallert’s Guide to<br />
Images on Fabric 23<br />
CTDG Publications 24 - 25<br />
Advertisements 26 - 27<br />
strong dimensional element and<br />
<strong>of</strong>ten incorporates unusual<br />
materials, bold colours, dyeing,<br />
shibori and screen printing.<br />
Marlene Allinson ran a graphic<br />
design company before completing a<br />
City & Guilds in s<strong>of</strong>t furnishings<br />
followed by a PGCE. She began<br />
teaching adults a range <strong>of</strong> subjects<br />
including s<strong>of</strong>t furnishings, machine<br />
embroidery, Photoshop, creative<br />
computing and ECDL. Marlene has<br />
regularly contributed to <strong>Design</strong>-IT<br />
and is now <strong>the</strong> publication’s editor.<br />
Judith Butt was a teacher and<br />
latterly a lecturer in Higher Education<br />
in <strong>Design</strong> and Technology. She<br />
studied Part II City & Guilds Creative<br />
Embroidery with Val Campbell<br />
Harding and later joined <strong>the</strong><br />
Urchfont Manor Masterclass. She is<br />
currently studying Part III City &<br />
Guilds Advanced Embroidery at<br />
Urchfont Manor.
Advance Notice CTDG Workshops<br />
August 2008<br />
<strong>The</strong> Committee are hoping to set up Workshops in<br />
August 2008. A provisional booking has been made for<br />
Aug 18th /19th at Christleton High School, Chester,<br />
where a complete IT studio toge<strong>the</strong>r with technician is<br />
available to us. <strong>The</strong>re is also a large area where an Art<br />
Workshop can take place and an area<br />
where we can stitch.<br />
It is thought that Tutors will work toge<strong>the</strong>r<br />
in Art, <strong>Design</strong> and Stitch ra<strong>the</strong>r than having<br />
separate Workshops.<br />
Christleton is a pretty village three miles from <strong>the</strong><br />
centre <strong>of</strong> Chester. Bed and Breakfast is available within<br />
walking distance or short driving distance from <strong>the</strong><br />
school. <strong>The</strong>re is a pool and gym to which we would<br />
have access.<br />
We aim to keep <strong>the</strong> cost to a minimum.<br />
More details <strong>of</strong> this will appear in <strong>the</strong> next <strong>Design</strong>-IT<br />
but, in order to assess interest and to progress, it<br />
would be most helpful if you could e-mail<br />
chairman@ctdg.org.uk if you think you might be<br />
interested in <strong>the</strong>se Workshops. Husbands and <strong>of</strong>fspring<br />
would find plenty to do and see in Chester<br />
if <strong>the</strong>y came with you!!<br />
You are not committing yourself to anything at this<br />
stage, but we would like to know whe<strong>the</strong>r to go ahead<br />
with <strong>the</strong> plans<br />
Judith Butt<br />
DISCLAIMER FOR VIEWS & INFORMATION IN THE MAGAZINE<br />
Whilst every effort is made to ensure that <strong>the</strong> information contained in <strong>the</strong> magazine is<br />
accurate, <strong>the</strong> CTDG cannot be held responsible for changes which occur after <strong>the</strong> magazine<br />
has gone to print.<br />
CONTENTS OF THE ARTICLES<br />
<strong>The</strong> views expressed in articles submitted to <strong>Design</strong>-IT are those <strong>of</strong> <strong>the</strong> authors and not<br />
necessarily <strong>the</strong> views <strong>of</strong> <strong>the</strong> CTDG.<br />
COPYRIGHT<br />
All <strong>the</strong> illustrations in this magazine are <strong>the</strong> property <strong>of</strong> <strong>the</strong> authors and should not be used<br />
for any o<strong>the</strong>r purpose without <strong>the</strong>ir permission.<br />
CTDG Announcements<br />
October 2007 <strong>Design</strong>-IT 3
Landscape Squared<br />
After a visit to <strong>the</strong> beautiful coastline <strong>of</strong><br />
Northumberland I used many <strong>of</strong> <strong>the</strong><br />
photographs taken as design sources for a lot <strong>of</strong><br />
textile and embroidery pieces. To create<br />
Landscape Squared a photograph <strong>of</strong> rocks with<br />
<strong>the</strong> castle in <strong>the</strong> distance was used. (Fig 1)<br />
1<br />
4 <strong>Design</strong>-IT Issue 62<br />
<strong>The</strong> photograph was<br />
imported into <strong>the</strong><br />
computer and I used<br />
Adobe Photoshop to<br />
manipulate it. Firstly<br />
I selected a square <strong>of</strong><br />
<strong>the</strong> image, cropped<br />
and resized it to <strong>the</strong><br />
largest size possible<br />
which would print<br />
within A4. I intended to<br />
cut <strong>the</strong> image into<br />
small squares and mix<br />
<strong>the</strong>m up, but wanted to<br />
do this before printing<br />
to avoid having to join pieces back toge<strong>the</strong>r. <strong>The</strong><br />
size, <strong>the</strong>refore, was also determined by <strong>the</strong><br />
number <strong>of</strong> squares into which I wanted to cut<br />
<strong>the</strong> image. This meant that <strong>the</strong> photo would<br />
need to be 20 x 20cm so that I could cut <strong>the</strong><br />
image into 5x5cm squares (Fig 2).<br />
<strong>The</strong> image was to be printed onto silk which was<br />
prepared for printing using Bubble jet set liquid.<br />
It would have also worked by printing onto a<br />
commercial ready prepared silk sheet. I always<br />
enhance <strong>the</strong> colours <strong>of</strong> <strong>the</strong> image by increasing<br />
<strong>the</strong> brightness and contrast and sometimes a<br />
little increased colour saturation. This provides a<br />
much punchier image to print onto fabric. I find<br />
that when printing onto fabrics prepared with<br />
Bubble jet set, <strong>the</strong> resulting image is usually<br />
much paler and duller so increasing <strong>the</strong><br />
brightness, contrast and some saturation<br />
counters this effect. Not having used<br />
commercially-produced silk papers, I do not<br />
know how <strong>the</strong> colours print so you would have to<br />
test this out for yourself if you are using <strong>the</strong>m.<br />
Shirley Sherris<br />
Cutting <strong>the</strong> image into squares and mixing <strong>the</strong>m<br />
up is easy to do on <strong>the</strong> computer screen. First I<br />
used <strong>the</strong> guide lines to mark <strong>the</strong> squares on <strong>the</strong><br />
image. This was done by moving <strong>the</strong> cursor onto<br />
<strong>the</strong> rulers (if <strong>the</strong>y are not visible use View Menu<br />
> Rulers r or Ctrl +R) on <strong>the</strong> left and top edges<br />
<strong>of</strong> <strong>the</strong> window. While holding <strong>the</strong> right hand<br />
mouse key, I dragged <strong>the</strong> cursor <strong>of</strong>f <strong>the</strong> ruler<br />
and a blue guide line followed <strong>the</strong> cursor. I<br />
dragged it to <strong>the</strong> first dividing position and<br />
released. I repeated this for each dividing line<br />
needed – horizontally and vertically (Fig 3).<br />
Next I opened a new window <strong>the</strong> same size and<br />
dpi as <strong>the</strong> cropped and squared image and<br />
using <strong>the</strong> guide lines again, marked out <strong>the</strong><br />
same size grid as on <strong>the</strong> image (Fig 4).<br />
2<br />
3
At this point, I made sure<br />
that <strong>the</strong> ‘Auto select<br />
layer’ box was checked<br />
on <strong>the</strong> top toolbar. For<br />
<strong>the</strong> next stage I used <strong>the</strong><br />
two top tools in <strong>the</strong> tools<br />
palette – <strong>the</strong> rectangle<br />
select tool and <strong>the</strong> move<br />
tool (Fig 5).<br />
With <strong>the</strong> rectangle tool selected, I dragged it<br />
from corner to corner <strong>of</strong> <strong>the</strong> first box on <strong>the</strong><br />
image window. I <strong>the</strong>n selected <strong>the</strong> ‘Move’ tool<br />
and ‘dragged and dropped’ a copy <strong>of</strong> <strong>the</strong><br />
selected square over to <strong>the</strong> new empty window<br />
and set it into one <strong>of</strong> <strong>the</strong> squares. This created<br />
Layer 1. In o<strong>the</strong>r s<strong>of</strong>tware, <strong>the</strong>re may not be a<br />
‘drag and drop’ facility. If <strong>the</strong>re isn’t, you will<br />
have to use copy and paste and move it into<br />
position. I reselected <strong>the</strong> rectangle tool and on<br />
<strong>the</strong> image window, moved <strong>the</strong> selection onto <strong>the</strong><br />
next square. Using <strong>the</strong> ‘Move’ tool again,<br />
I dragged and dropped a copy <strong>of</strong> <strong>the</strong> second<br />
square onto <strong>the</strong> new window but into a different<br />
position on <strong>the</strong> grid. This created Layer 2.<br />
I repeated this process (Fig 6) until all <strong>the</strong><br />
squares had been copied and mixed up on <strong>the</strong><br />
new window (Fig 7). It is at this point that<br />
squares can be moved around until you are<br />
happy with <strong>the</strong> balance <strong>of</strong> <strong>the</strong> new mixed-up<br />
image. Simply click on any square to select it<br />
and drag to move it.<br />
<strong>The</strong> new mixed up image was ready to print. <strong>The</strong><br />
silk was adhered to a carrier (a sheet <strong>of</strong> A4<br />
paper will do) with a temporary spray adhesive<br />
and printed or print onto a commercially<br />
prepared silk A4 sheet. Once printed, I ironed<br />
<strong>the</strong> silk onto a medium weight iron-on Vilene.<br />
4<br />
5<br />
7<br />
I stitched fancy machine patterns to cover <strong>the</strong><br />
join lines <strong>of</strong> <strong>the</strong> small squares which were <strong>the</strong>n<br />
embellished with free machining, hand<br />
embroidery and beads. <strong>The</strong> finished embroidery<br />
was <strong>the</strong>n laid over a piece <strong>of</strong> white fleece and<br />
onto a craft Vilene. Single lines <strong>of</strong> machining<br />
along <strong>the</strong> centre <strong>of</strong> <strong>the</strong> fancy machine stitches<br />
gave <strong>the</strong> piece a gentle quilted effect I used<br />
textured threads to plait <strong>the</strong> border. A landscape<br />
with a difference (Fig 8).<br />
8<br />
October 2007 <strong>Design</strong>-IT 5<br />
6
A Figurative Challenge<br />
I have always admired people who can draw <strong>the</strong><br />
human figure and create in just a few strokes<br />
<strong>the</strong> feeling <strong>of</strong> movement.<br />
I had been to Life Drawing classes many years<br />
ago and since being retired from full-time<br />
teaching now had <strong>the</strong> time to pursue <strong>the</strong><br />
subject again.<br />
<strong>The</strong> tutor had an interesting approach and, at<br />
<strong>the</strong> start <strong>of</strong> each session, gave us approximately<br />
ten minutes to sketch <strong>the</strong> main elements <strong>of</strong><br />
<strong>the</strong> model. This was followed by a longer period<br />
to draw <strong>the</strong> full figure in charcoal or any<br />
preferred medium.<br />
At this time I had just completed a project on<br />
Matisse for my Creative Computing course at<br />
Westhope College with Marie Roper and had<br />
spent lots <strong>of</strong> time researching his work on<br />
human figures. What intrigued me was <strong>the</strong><br />
simplicity <strong>of</strong> <strong>the</strong> paper-cut figure and how<br />
effective it was in creating movement.<br />
At this stage I wondered whe<strong>the</strong>r it would be<br />
possible to use <strong>the</strong> computer in conjunction with<br />
<strong>the</strong> scanned images <strong>of</strong> my drawings to create a<br />
simple form similar to what Matisse had<br />
achieved (Fig 1).<br />
6 <strong>Design</strong>-IT Issue 62<br />
1<br />
Sian Kibblewhite<br />
I returned to Matisse’s paper cuts and took<br />
special note <strong>of</strong> where he split <strong>the</strong> body up into<br />
sections since this was <strong>the</strong> key to <strong>the</strong> success <strong>of</strong><br />
<strong>the</strong> work. My first attempt involved opening up a<br />
scanned image <strong>of</strong> one <strong>of</strong> my drawings and using<br />
it as a background layer, using a thin brush and<br />
drawing over <strong>the</strong> main lines <strong>of</strong> <strong>the</strong> body <strong>the</strong>n<br />
saving it as a second layer and filling <strong>the</strong> parts<br />
<strong>of</strong> layer two with a blue fill.<br />
<strong>The</strong> images showing <strong>the</strong> development from<br />
scan to paper-cut shape are shown as Figs 2,<br />
3 and 4).<br />
This exercise, despite <strong>the</strong> help <strong>of</strong> modern<br />
technology, made me realize what a great<br />
artist Matisse was! However, I decided to<br />
continue to use this method to see if <strong>the</strong>re<br />
was any future potential.<br />
<strong>The</strong> following figures show some <strong>of</strong> <strong>the</strong><br />
developments from this technique.<br />
Fig 5 shows <strong>the</strong> simplified scanned drawing,<br />
Fig 6 includes <strong>the</strong> blue fill and Fig 7 is a<br />
layered composition <strong>of</strong> selections <strong>of</strong> Fig 6<br />
copied and pasted.<br />
2
Figure 7 was <strong>the</strong>n manipulated using various<br />
effects, including blending modes and altering<br />
<strong>the</strong> opacity <strong>of</strong> some <strong>of</strong> <strong>the</strong> layers to create a<br />
more pleasing image (Figs 8 and 9).<br />
Not being totally satisfied with <strong>the</strong> images so far,<br />
I went on to experiment with <strong>the</strong> tonal changes<br />
in <strong>the</strong> charcoal drawings and created lacy<br />
patterns from scanned material collages, which<br />
emulated <strong>the</strong> three main tones <strong>of</strong> light, medium<br />
and dark. <strong>The</strong> custom brushes which resulted<br />
3 4<br />
5 6<br />
7 8<br />
9 10<br />
were useful in painting in <strong>the</strong> tones from <strong>the</strong><br />
original drawing (Figs 10, 11 and 12).<br />
Article continues on back cover<br />
October 2007 <strong>Design</strong>-IT 7
Screen Printing from<br />
‘Found Objects’<br />
This article describes in detail a simple<br />
technique for using <strong>the</strong> computer as a tool to<br />
enable images <strong>of</strong> a solid object to be transferred<br />
by screen printing onto almost any fabric.<br />
Whilst walking on holiday recently, I picked up<br />
an old horseshoe which still had nails in <strong>the</strong><br />
holes. I wanted to use such a ‘lucky’ find as a<br />
starting point for various textiles, some <strong>of</strong> which<br />
could be used in <strong>the</strong> celebrations <strong>of</strong> our<br />
youngest son’s wedding in September.<br />
I didn’t sketch <strong>the</strong> horseshoe, but decided<br />
instead to make a computer generated ‘clear<br />
line drawing’ <strong>of</strong> it. My aim was to make a<br />
<strong>the</strong>rmoplastic screen from this line drawing, and<br />
<strong>the</strong>reby print <strong>the</strong> horseshoe image onto fabric in<br />
various ways.<br />
<strong>The</strong> first step was to scan <strong>the</strong> actual horseshoe,<br />
using PaintShopPro9 (PSP9) to give a computer<br />
image. <strong>The</strong> horseshoe was put onto <strong>the</strong> glass <strong>of</strong><br />
<strong>the</strong> flatbed scanner, in <strong>the</strong> centre with its nails<br />
sticking up. This meant that <strong>the</strong> scanner lid had<br />
to be partly open, allowing some light to get into<br />
<strong>the</strong> background.<br />
<strong>The</strong> sequence <strong>of</strong> instructions for scanning is:<br />
File > Import > TWAIN > Acquire. I chose to use<br />
my default settings <strong>of</strong> ‘Output Resolution’ = 200<br />
and Output Type’ = True Colour 100%<br />
It is tempting at this point to choose ‘Black and<br />
White’ as <strong>the</strong> output type, but <strong>the</strong> resulting<br />
scanned image wouldn’t have <strong>the</strong> clear lines<br />
that are necessary for making a good<br />
<strong>the</strong>rmoplastic screen.<br />
After <strong>the</strong> lamp has warmed up, a pre-scan<br />
‘horseshoe’ image is shown on <strong>the</strong> screen<br />
version <strong>of</strong> <strong>the</strong> scanner glass.<br />
I ‘enclosed’ part <strong>of</strong> this image in a ‘box’ <strong>of</strong><br />
dotted lines. This is done by left-clicking on <strong>the</strong><br />
required top left-hand corner and dragging with<br />
<strong>the</strong> mouse to <strong>the</strong> bottom right corner before<br />
8 <strong>Design</strong>-IT Issue 62<br />
Rosemary Hufton<br />
releasing <strong>the</strong> button. It is better to include a<br />
decent border around <strong>the</strong> object being scanned.<br />
<strong>The</strong> need for this becomes apparent at a later<br />
stage, when printing with <strong>the</strong> resultant<br />
<strong>the</strong>rmoplastic screen.<br />
<strong>The</strong> next instruction sequence, to actually<br />
perform <strong>the</strong> scan is: Scan > Return to PSP.<br />
Fig 1 shows <strong>the</strong> scan <strong>of</strong> <strong>the</strong> lucky horseshoe.<br />
<strong>The</strong> scan is saved and named. <strong>The</strong> instruction<br />
sequence is: File > Save As (or use <strong>the</strong> keyboard<br />
shortcut for <strong>the</strong>se two steps which is F12).<br />
A folder must be chosen to save <strong>the</strong> images into.<br />
I usually use an empty USB memory stick for a<br />
project, saving everything I may possibly need<br />
onto it, including failed experiments, and <strong>the</strong>n<br />
editing later to burn onto a permanent CD.<br />
In <strong>the</strong> ‘Save as Type’ box, choose ‘Paint Shop<br />
Pro Image’, as this will be necessary when doing<br />
manipulations fur<strong>the</strong>r down <strong>the</strong> line.<br />
<strong>The</strong> open scanner lid gives a graduated<br />
background with shadows, all <strong>of</strong> which must be<br />
removed to concentrate on <strong>the</strong> actual image<br />
details. This is done by selection using <strong>the</strong><br />
‘lasso’ tool to isolate <strong>the</strong> horseshoe and ‘paste it<br />
as a new image’ onto a background.<br />
Choose <strong>the</strong> ‘selection’ tool from <strong>the</strong> column <strong>of</strong><br />
icons down <strong>the</strong> left side <strong>of</strong> <strong>the</strong> screen. This will<br />
1
show as ei<strong>the</strong>r a dotted rectangle, a ‘lasso’<br />
which looks like a lollipop, or a ‘magic wand’<br />
which looks like a sparkler firework. <strong>The</strong> middle<br />
<strong>of</strong> <strong>the</strong>se options is <strong>the</strong> one required. If one <strong>of</strong><br />
<strong>the</strong> o<strong>the</strong>rs is showing, click on <strong>the</strong> tiny black<br />
arrow beside <strong>the</strong> icon to give <strong>the</strong> choice <strong>of</strong> all<br />
three, and pick <strong>the</strong> lasso.<br />
<strong>The</strong> only o<strong>the</strong>r necessary choice is ‘selection<br />
type’ in <strong>the</strong> lower menu bar across <strong>the</strong> top <strong>of</strong> <strong>the</strong><br />
screen (towards <strong>the</strong> left side). Pick ‘point to<br />
point’ and leave all <strong>the</strong> o<strong>the</strong>r parameters at <strong>the</strong>ir<br />
default settings.<br />
<strong>The</strong> selection is actually carried out by outlining<br />
<strong>the</strong> horseshoe shape in short steps. Left click at<br />
any starting point on <strong>the</strong> edge <strong>of</strong> <strong>the</strong> horseshoe<br />
image, drag <strong>the</strong> mouse a little distance away to<br />
ano<strong>the</strong>r position on <strong>the</strong> edge and left click<br />
again. Keep doing this all <strong>the</strong> way round <strong>the</strong><br />
horseshoe image and finish back at <strong>the</strong> starting<br />
point with a double left click.<br />
<strong>The</strong> selection shows up as a series <strong>of</strong> flashing<br />
dashes (marching ants) around <strong>the</strong> horseshoe.<br />
This selection must be copied onto <strong>the</strong> clipboard,<br />
as follows: Edit > Copy (shortcut Ctrl+C).<br />
We want to paste <strong>the</strong> horseshoe image onto a<br />
background <strong>of</strong> <strong>the</strong> same size as <strong>the</strong> original<br />
shadowy one. This is because, to make a<br />
satisfactory <strong>the</strong>rmoplastic screen from <strong>the</strong> line<br />
image we eventually get, <strong>the</strong>re needs to be<br />
some empty space all around. Because <strong>of</strong> this<br />
fact, <strong>the</strong> easy option <strong>of</strong> ‘pasting as a new image’<br />
is not <strong>the</strong> best choice, since it removes all <strong>the</strong><br />
extra background. Instead, paste <strong>the</strong> image as a<br />
new layer by <strong>the</strong> following: Edit > Paste > Paste<br />
as a New Layer (shortcut Ctrl+L).<br />
Next, click on <strong>the</strong> blue bar <strong>of</strong> <strong>the</strong> ‘layers palette’<br />
which should be showing on-screen. Clicking <strong>the</strong><br />
word ‘background’ beneath will turn it blue. <strong>The</strong><br />
background needs to be deleted, leaving <strong>the</strong><br />
horseshoe image floating against a transparent<br />
space <strong>the</strong> same size as <strong>the</strong> original background.<br />
This deletion is done by clicking <strong>the</strong> ‘delete’<br />
icon, which looks like two pages with a cross<br />
through <strong>the</strong> front one. <strong>The</strong>re will be a query box<br />
asking you to confirm that you really want to<br />
delete <strong>the</strong> background layer.<br />
<strong>The</strong> transparency <strong>of</strong> <strong>the</strong> background for this new<br />
image is indicated by grey and white checks.<br />
This is just a device to get over <strong>the</strong> impossibility<br />
<strong>of</strong> depicting transparency on-screen; <strong>the</strong><br />
checkerboard pattern isn’t actually <strong>the</strong>re.<br />
<strong>The</strong> ‘marching ants’ <strong>of</strong> selection are still visible<br />
and must be removed. Use <strong>the</strong> ‘selections’<br />
menu at <strong>the</strong> top <strong>of</strong> <strong>the</strong> screen as follows, and<br />
<strong>the</strong>y will disappear: Selections > Select None.<br />
To get rid <strong>of</strong> <strong>the</strong> checkerboard and make a plain<br />
white background, first go into <strong>the</strong> materials<br />
palette by clicking on <strong>the</strong> word ‘materials’ in <strong>the</strong><br />
pale blue on-screen bar. <strong>The</strong>n pick white as a<br />
foreground colour by left-clicking on <strong>the</strong> white<br />
box within it. Choose <strong>the</strong> ‘flood-fill tool’ from <strong>the</strong><br />
list down <strong>the</strong> left side <strong>of</strong> <strong>the</strong> screen by clicking<br />
on <strong>the</strong> icon which looks like a tipping paint pot<br />
with a drip. Flood fill <strong>the</strong> transparent<br />
background white by left clicking anywhere<br />
within it. <strong>The</strong> checkerboard transparency pattern<br />
will go, replaced by a plain white background<br />
(Fig 2).<br />
<strong>The</strong> image needs to be saved now, with <strong>the</strong><br />
name ‘LuckyShoe2’, in <strong>the</strong> same format and<br />
place as <strong>the</strong> first scanned image, and by <strong>the</strong><br />
same method.<br />
<strong>The</strong> next stage in simplifying <strong>the</strong> image is to<br />
s<strong>of</strong>ten <strong>the</strong> horseshoe outline a little with one <strong>of</strong><br />
<strong>the</strong> ‘artistic effects’ filters, and to reduce <strong>the</strong><br />
number <strong>of</strong> colours with ano<strong>the</strong>r.<br />
Before using effects filters, it is good practice to<br />
duplicate <strong>the</strong> image and to work on this copy<br />
only, not <strong>the</strong> original. It is really easy to make a<br />
duplicate <strong>of</strong> an open image in PSP, just key in<br />
shift+D and it appears immediately.<br />
<strong>The</strong> ‘Coloured Foil’ filter is <strong>the</strong> first to use, with<br />
very low settings as follows: Effects > Artistic<br />
Effects > Coloured Foil (Blur 1, Detail 20, Colour<br />
Black, Angle 90º).<br />
2<br />
October 2007 <strong>Design</strong>-IT 9
<strong>The</strong>n, without saving in between, use <strong>the</strong><br />
‘Posterize’ filter at <strong>the</strong> lowest level to drastically<br />
reduce <strong>the</strong> number <strong>of</strong> colours, by clicking on:<br />
Effects > Artistic Effects > Posterize (level 2).<br />
<strong>The</strong> horseshoe image now has clearly defined<br />
areas <strong>of</strong> single colours, which manage to<br />
indicate <strong>the</strong> rust and o<strong>the</strong>r imperfections, but<br />
perhaps still in too much detail (Fig 3).<br />
This interim image should be saved, with <strong>the</strong><br />
name ‘LuckyShoe3’, in <strong>the</strong> same format and<br />
place as <strong>the</strong> first scanned image, and by <strong>the</strong><br />
same method.<br />
In this particular case, using a horseshoe, <strong>the</strong><br />
shapes defined by <strong>the</strong> colours are still too small<br />
and bitty. A second passage through <strong>the</strong><br />
‘Coloured Foil’ filter with higher settings for more<br />
drastic changes gives <strong>the</strong> effect we require after<br />
a bit <strong>of</strong> experimentation. Every individual ‘found<br />
object’ image will respond to different settings,<br />
but <strong>the</strong> basic method <strong>of</strong> proceeding with <strong>the</strong><br />
exploration remains <strong>the</strong> same. Whilst<br />
experimenting with possibilities, you will need to<br />
have clicked on <strong>the</strong> ’autopro<strong>of</strong>’ button in <strong>the</strong><br />
effect window. This looks like an eye with a<br />
padlock under it. Also it is fun to select <strong>the</strong><br />
‘random’ button (dice icon) for completely<br />
unexpected parameter choices. Serendipity<br />
operates here and you can come up with<br />
wonderful results.<br />
After exploring possibilities on a duplicate <strong>of</strong><br />
LuckyShoe3.psp, I decided to use <strong>the</strong> following<br />
settings: Effects > Artistic Effects > Coloured Foil<br />
(Blur 35, Detail 15, Colour Grey, Angle 104º).<br />
This result was saved with <strong>the</strong> name<br />
‘LuckyShoe4’, in <strong>the</strong> same format and place as<br />
<strong>the</strong> o<strong>the</strong>rs (Fig 4).<br />
10 <strong>Design</strong>-IT Issue 62<br />
3<br />
To turn this latest horseshoe into a line drawing,<br />
<strong>the</strong> contrast threshold was explored until I<br />
achieved a sufficiently accurate black and white<br />
outline image. To do this, left click on <strong>the</strong><br />
‘Adjust’ button on <strong>the</strong> top menu bar on-screen<br />
and select ‘Brightness and Contrast’ followed by<br />
‘Threshold.’ <strong>The</strong> number indicating <strong>the</strong> threshold<br />
level can be continually changed until <strong>the</strong> line<br />
drawing pro<strong>of</strong> looks right. In this case, a suitable<br />
drawing was reached at level 80, and so <strong>the</strong><br />
‘apply’ button was clicked at that figure: Fig 5.<br />
This final image needs to be saved, with <strong>the</strong><br />
name ‘LuckyShoe5’, as with previous images.<br />
Now that we have a suitable line drawing, it<br />
must be ei<strong>the</strong>r laser printed or photocopied from<br />
an inkjet print. This is because <strong>the</strong> making <strong>of</strong><br />
<strong>the</strong> printing screen uses a <strong>the</strong>rm<strong>of</strong>ax machine<br />
which relies on a heat process to do its magic.<br />
<strong>The</strong> heat must be applied through a toner-based<br />
image, and in effect it melts <strong>the</strong> image into a<br />
specialized plastic coated polyester mesh. This<br />
action reproduces <strong>the</strong> image as lines <strong>of</strong> melted<br />
plastic in <strong>the</strong> mesh. When <strong>the</strong> mesh is enclosed<br />
in a rigid frame it can be used for screen<br />
printing by allowing ink or dye to be forced<br />
through <strong>the</strong> mesh holes where <strong>the</strong> plastic has<br />
been melted, using a squeegee.<br />
5<br />
4
Fig 6 shows <strong>the</strong> <strong>The</strong>rmoplastic screen.<br />
To make a <strong>the</strong>rmoplastic screen, an original<br />
<strong>the</strong>rm<strong>of</strong>ax machine must be used, also sheets<br />
<strong>of</strong> special mesh and rigid frames. <strong>The</strong>re is an<br />
agency which provides this screen making<br />
service; we only have to send <strong>the</strong>m <strong>the</strong> right sort<br />
<strong>of</strong> image. Fig 7 is a scan <strong>of</strong> <strong>the</strong> agency’s<br />
publicity card, which shows <strong>the</strong> web address and<br />
some details. <strong>The</strong> service isn’t expensive, prices<br />
start at £7.50 for an A5 sized screen.<br />
I made a series <strong>of</strong> samples using my horseshoe<br />
screen, to give an indication <strong>of</strong> <strong>the</strong> wide variety<br />
<strong>of</strong> ways it can be used. Screen printing can be<br />
done on almost any fabric. I chose to use an old<br />
tablecloth which I had previously dyed to give<br />
strong colour all over in an uneven block<br />
pattern. This was actually achieved using a<br />
traditional wooden screen which was blank –<br />
had no pattern at all in it. I used procion dyes<br />
thickened with manutex to <strong>the</strong> consistency <strong>of</strong><br />
thick cream, in shades <strong>of</strong> gold and green. This<br />
was forced through <strong>the</strong> mesh <strong>of</strong> a blank screen<br />
with a squeegee, in different positions all over<br />
<strong>the</strong> cloth. I also sprayed with a plum-coloured<br />
thin dye in a bottle. This was done while <strong>the</strong><br />
blank screen printing was still wet, to add<br />
spotty marks around and between <strong>the</strong> blocks <strong>of</strong><br />
strong colour. <strong>The</strong> result provided an interesting,<br />
colour-textured cloth with a lot <strong>of</strong> variety –<br />
perfect for a background (Fig 8).<br />
<strong>The</strong> background cloth described above was used<br />
damp first, so that when screen printing on it<br />
6 7<br />
with dye paint, <strong>the</strong> colour would run a little, and<br />
s<strong>of</strong>ten <strong>the</strong> lines in <strong>the</strong> design. Thick, black dye<br />
paint was used in <strong>the</strong> horseshoe screen for <strong>the</strong><br />
first printing. When this had dried, been heat<br />
set, rinsed, washed and ironed, it was ready for<br />
<strong>the</strong> second stage. It sounds like a lot to do for<br />
one small sample, but <strong>of</strong> course I did more.<br />
I covered a large piece <strong>of</strong> my background fabric<br />
as well, as <strong>the</strong> first stage towards making a<br />
celebration cloth.<br />
<strong>The</strong> second screen printing on this sample was<br />
carried out with silver coloured screen printing<br />
ink. It gives a sharp, well-defined image which<br />
I slightly <strong>of</strong>fset relative to <strong>the</strong> blurry black<br />
October 2007 <strong>Design</strong>-IT 11<br />
8
horseshoe screen printed first. This emphasises<br />
<strong>the</strong> effect <strong>of</strong> a shadow. This screen ink image<br />
also needs to be heat set after it has dried. It<br />
will survive hand washing, but <strong>the</strong> colours and<br />
fibres should be left to settle for a week or so<br />
before trying to wash it (Fig 9).<br />
<strong>The</strong> second screen printing on this<br />
celebration cloth was different from <strong>the</strong> sample<br />
above. This is because it will need to be washed<br />
more frequently, and <strong>the</strong> silver ink image is<br />
ra<strong>the</strong>r fragile. <strong>The</strong> fragility arises from <strong>the</strong> fact<br />
that <strong>the</strong> ink sits on top <strong>of</strong> <strong>the</strong> fibres ra<strong>the</strong>r than<br />
being absorbed into <strong>the</strong>m like dye. As an<br />
alternative to silver ink, I screen printed with<br />
Jacquard discharge paste. This removes <strong>the</strong><br />
procion dye from both <strong>the</strong> background and <strong>the</strong><br />
first horseshoe screen printing. It gives an<br />
interesting shadowy look, very similar to that <strong>of</strong><br />
<strong>the</strong> first sample. <strong>The</strong> discharge paste is a bit<br />
runnier than ink, so spreads a little and gives a<br />
slightly s<strong>of</strong>ter image. It’s ra<strong>the</strong>r hard to see<br />
whilst working, because <strong>the</strong> paste is clear and<br />
<strong>the</strong> screen printing simply looks wet at this<br />
stage. It must be allowed to dry and <strong>the</strong>n steam<br />
12 <strong>Design</strong>-IT Issue 62<br />
9<br />
10<br />
ironed to remove <strong>the</strong> colour. This process makes<br />
ra<strong>the</strong>r smelly fumes, but <strong>the</strong> excitement <strong>of</strong><br />
watching <strong>the</strong> images change before you<br />
eyes is worth it.<br />
This panel is just a fancier, more worked version<br />
<strong>of</strong> <strong>the</strong> previous two. <strong>The</strong> background was altered<br />
by ironing on a couple <strong>of</strong> rectangles <strong>of</strong> fabric<br />
using Bondaweb. <strong>The</strong> fabric was very thin cotton<br />
turban cloth, which can be obtained in a lovely<br />
variety <strong>of</strong> colours. It is a quick and easy way to<br />
alter a background without adding too much<br />
thickness. I <strong>the</strong>n sponged some discharge paste<br />
on <strong>the</strong> background surface, to remove bits <strong>of</strong><br />
colour and relieve <strong>the</strong> ‘block’ look.<br />
<strong>The</strong> horseshoe on <strong>the</strong> left is screen printed in<br />
two stages exactly like <strong>the</strong> first shadowed<br />
sample. <strong>The</strong> one on <strong>the</strong> right is a single screen<br />
print in silver ink. <strong>The</strong>y are both embellished<br />
with some very plain and simple stitching<br />
(french knots and running stitch).<br />
<strong>The</strong> text is screen printed in ink, using two<br />
more <strong>the</strong>rmoplastic screens. I manipulated <strong>the</strong><br />
text on <strong>the</strong> computer in PSP9 to make it sit on a<br />
wavy line, and <strong>the</strong>n made a laser print <strong>of</strong> it to<br />
use for a screen in exactly <strong>the</strong> same way as<br />
with <strong>the</strong> horseshoe (Fig 10).<br />
11<br />
This little panel (Fig 11) is similar to <strong>the</strong> previous<br />
one, but uses no dye at all, which makes it<br />
much simpler to achieve. <strong>The</strong> background is a<br />
piece <strong>of</strong> old sheeting with three colours <strong>of</strong> silk<br />
paint sprayed on it randomly. It colours are<br />
ra<strong>the</strong>r dull in comparison to procion dye.<br />
However, <strong>the</strong> background is brightened up again
with squares <strong>of</strong> turban cotton ironed on with<br />
Bondaweb as in <strong>the</strong> previous sample.<br />
<strong>The</strong> screen printing is simply done with inks,<br />
silver for <strong>the</strong> horseshoes with white and<br />
red text. Again here is a little simple<br />
stitch embellishment.<br />
I carried on playing with horseshoe shapes,<br />
whilst still in <strong>the</strong> mood. I had an old, tatty plastic<br />
tablecloth, and I cut a section <strong>of</strong> it to fit inside<br />
my wooden blank screen. <strong>The</strong> horseshoe shape<br />
was <strong>the</strong>n cut out <strong>of</strong> this section. <strong>The</strong> paper<br />
template used to cut <strong>the</strong> shape was one <strong>of</strong> <strong>the</strong><br />
trial screen prints which had been done on<br />
paper, testing out <strong>the</strong> screen before using it on<br />
fabric. <strong>The</strong>se trials, by <strong>the</strong> way, are ideal for<br />
making into greetings cards (Fig 12).<br />
12<br />
<strong>The</strong> flowery plastic horseshoe screen was <strong>the</strong>n<br />
used to print a large piece <strong>of</strong> silk organza with a<br />
range <strong>of</strong> golden browns and chestnut colours.<br />
This was done by fixing <strong>the</strong> plastic, with its cutout<br />
horseshoe shape, to <strong>the</strong> bottom <strong>of</strong> <strong>the</strong><br />
screen with masking tape. Printing was carried<br />
out with <strong>the</strong> screen adapted in this way, all over<br />
<strong>the</strong> fabric in exactly <strong>the</strong> same manner as <strong>the</strong><br />
original background fabric was printed with a<br />
blank screen. Extra lines from <strong>the</strong> edge <strong>of</strong> <strong>the</strong><br />
squeegee and spotty marks from spraying dye<br />
were also incorporated.<strong>The</strong> resulting textile<br />
would make a very good wrapping for an<br />
awkwardly shaped gift, or could be incorporated<br />
into a garment or a large decorative hanging.<br />
<strong>The</strong> two illustrations show a detail <strong>of</strong> <strong>the</strong><br />
finished printed organza, and <strong>of</strong> <strong>the</strong> work in<br />
progress on <strong>the</strong> fabric (Figs 13 and 14).<br />
13<br />
14<br />
<strong>The</strong>se notes on dyeing and screen printing are<br />
necessarily brief. Extra information can easily be<br />
obtained from <strong>the</strong> large number <strong>of</strong><br />
books available.<br />
An excellent book list can be obtained from<br />
Committed to Cloth on 01737 - 844228. <strong>The</strong>y<br />
also run a variety <strong>of</strong> courses and can <strong>of</strong>ten give<br />
advice or information.<br />
www.committedtocloth.com<br />
Blank screens, dyes, screen printing inks and<br />
discharge paste can be obtained from<br />
Fibrecrafts and George Weil, 01483 - 565800<br />
<strong>The</strong> address is Old Portsmouth Road,<br />
Peasmarsh, Guildford, Surrey GU3 1LZ.<br />
October 2007 <strong>Design</strong>-IT 13
Stealing Circles<br />
Having had a glorious month <strong>the</strong> wea<strong>the</strong>r has<br />
turned aggressively wet forcing me into my study<br />
to play. Once started, it is difficult to shift me<br />
from my revolving chair and rotating gaily<br />
I began to create some circular designs. This<br />
article describes a design exercise that uses <strong>the</strong><br />
minimum <strong>of</strong> tools (<strong>the</strong> Gradient Tool and <strong>the</strong><br />
Magic Wand). However, those who wish to follow<br />
it through will need an understanding <strong>of</strong> Layers<br />
or a helpful manual.<br />
I happened to use Adobe Elements but for some<br />
who are irritated by step-by-step instructions or<br />
just have different s<strong>of</strong>tware and need to adapt,<br />
this experiment depends on a gradient that has<br />
a translucent surround and a selection tool for<br />
stealing distorted circles from one layer and<br />
colours from ano<strong>the</strong>r.<br />
Method<br />
Open a new RGB file (A4) with a decent<br />
resolution <strong>of</strong> 300ppi. Most home printers use<br />
this resolution so it is sensible to begin with this<br />
at <strong>the</strong> outset.<br />
1<br />
Toolbar with Gradient Options labelled.<br />
14 <strong>Design</strong>-IT Issue 62<br />
Sarah Brownie<br />
Select <strong>the</strong> Gradient Tool and, from <strong>the</strong> Tool<br />
Option Bar, choose a multiple colour range, one<br />
that has an outer transparent ring for best effect<br />
(mine was called Spectrum and is shown in<br />
Fig 1 with a black ring around it. Also select <strong>the</strong><br />
Radial Option; Multiply Mode; 50% Opacity;<br />
Di<strong>the</strong>r and Transparency as shown in Fig 1.<br />
When personalizing an exercise it is sometimes<br />
fun to wander from <strong>the</strong> instructions so any<br />
gradient will do, but ticking that transparency<br />
box is a must.<br />
Figs 2 and 3 shows <strong>the</strong> difference between a<br />
ticked or not ticked transparent box working with<br />
<strong>the</strong> partly transparent colour range. At this point<br />
you may wish to discover how <strong>the</strong> o<strong>the</strong>r options<br />
affect <strong>the</strong> outcome but if not <strong>the</strong>y can be seen<br />
in Fig 4 to 6.<br />
4<br />
Without <strong>the</strong><br />
multiply mode<br />
(but with <strong>the</strong><br />
transparent<br />
option).<br />
3<br />
2<br />
Without <strong>the</strong><br />
transparent option.<br />
With <strong>the</strong><br />
transparent<br />
option.
Once all <strong>the</strong> relevant options are chosen, click<br />
and drag your mouse in any direction for about<br />
two centimeters in your file. A multi- coloured<br />
circle should appear. Repeat this click and drag<br />
process beginning from ano<strong>the</strong>r starting point<br />
and dragging for a different length; say 1cm.<br />
Continue to build up with fur<strong>the</strong>r circles<br />
overlapping, each one making use <strong>of</strong> <strong>the</strong><br />
Transparent Option and Multiple Mode chosen<br />
earlier. Fig 6 shows <strong>the</strong> Diamond Gradient<br />
Option with Opacity option altered for each<br />
diamond. Fig 6: Making use <strong>of</strong> <strong>the</strong> opacity<br />
option with <strong>the</strong> diamond gradient option.<br />
6<br />
When you have produced a satisfactory design<br />
(I had about 5 circles) copy <strong>the</strong> layer, <strong>the</strong>n invert<br />
and rotate or flip it: this is a quick way <strong>of</strong><br />
increasing <strong>the</strong> number <strong>of</strong> circles.<br />
<strong>The</strong>re are a number <strong>of</strong> different ways to use <strong>the</strong><br />
next tool, <strong>the</strong> Magic Wand, and many depend on<br />
<strong>the</strong> tool options chosen and <strong>the</strong> layer<br />
highlighted. I used all <strong>the</strong> methods described<br />
below at some stage in my design.<br />
5<br />
With both multiple<br />
mode and<br />
transparent option.<br />
To select from all Layers: use <strong>the</strong> Magic Wand<br />
Tool and <strong>the</strong> following Tool Options: Add to<br />
Selection; Tolerance <strong>of</strong> your choice (perhaps<br />
50); Add all Layers. Click in a part <strong>of</strong> your image<br />
to select an area, if you are not happy with this<br />
selection use Ctrl Z to undo and click<br />
somewhere else. Repeatedly click in different<br />
parts to build up a series <strong>of</strong> shapes. At this<br />
stage it is an interesting shape you are<br />
searching for as <strong>the</strong> colours can be changed at<br />
any time. I preferred selections that included<br />
part circles or circles with bits hacked <strong>of</strong>f as<br />
shown in Fig 7.<br />
If your circles are too complete or include<br />
unwanted areas, undo <strong>the</strong> selection and check<br />
<strong>the</strong> Contiguous Option is ticked and alter <strong>the</strong><br />
Tolerance value. <strong>The</strong>n copy and paste your<br />
selection onto a new layer.<br />
To select shape from one layer and colour from<br />
ano<strong>the</strong>r: Untick <strong>the</strong> All Layers option in <strong>the</strong><br />
Magic Wand Tool Option Bar and select from<br />
one layer only, <strong>the</strong>n change layers in <strong>the</strong> Layer<br />
Palette (those marching ants will stay marching).<br />
<strong>The</strong>n copy and paste to a new layer. <strong>The</strong> shapes<br />
selected from <strong>the</strong> first layer will pick up colours<br />
from your second choice layer and copy onto a<br />
third layer.<br />
To build up a shape from different layers:<br />
Choose New Selection in <strong>the</strong> Tool Option Bar<br />
and make a selection from one layer only,<br />
change layers and choose Add to Selection (or<br />
Subtract from Selection) to build up a shape<br />
from different layers. For those totally new to<br />
this field look under ‘Selection’ title in <strong>the</strong> menu<br />
bar for fur<strong>the</strong>r options.<br />
October 2007 <strong>Design</strong>-IT 15<br />
7<br />
Magic<br />
Wand<br />
Selections<br />
from all<br />
layers.
Fig 8: Selecting colour from more than one layer.<br />
16 <strong>Design</strong>-IT Issue 62<br />
9<br />
8<br />
Fig 9 shows <strong>the</strong><br />
Layer Palette<br />
with many layers<br />
in use.<br />
Selecting from many specific layers: I turned <strong>of</strong>f<br />
some <strong>of</strong> <strong>the</strong> layers and ticked <strong>the</strong> All Layers<br />
option to find colour from more than one but not<br />
all <strong>the</strong> layers: Fig 8.<br />
In <strong>the</strong> Layer Palette alter <strong>the</strong> Blend Mode <strong>of</strong> all<br />
<strong>the</strong>se layers and make fur<strong>the</strong>r selections if you<br />
wish. Turn on and <strong>of</strong>f <strong>the</strong> layers until you are<br />
happy with your choices. Of course any layer,<br />
once chosen in <strong>the</strong> Layer Palette (with Select ><br />
Select All can be inverted, rotated or flipped as<br />
before), see Fig 10.<br />
10<br />
Blended<br />
design.<br />
11<br />
Inverted<br />
design.<br />
12<br />
<strong>The</strong><br />
final<br />
design.<br />
To save a final design I chose Select > Select All<br />
<strong>the</strong>n Copy Merge and Pasted into a New File.<br />
This merged copy can be filtered, inverted or<br />
distorted at whim to produce a design that is<br />
personal. My favourite is shown in Fig 12.
Studio Artist version 3.5<br />
Free Demo: 20.7Mb download www.syn<strong>the</strong>tik.com<br />
System Requirements: Power Mac 8.6 (or higher);<br />
Quicktime 6.0 (or higher)<br />
PC USERS leave e-mail address on<br />
<strong>the</strong> website (Under Free Demo on <strong>the</strong><br />
home page) to be informed when a<br />
Windows-compatible version<br />
becomes available.<br />
This is a demo well worth installing.<br />
Although <strong>the</strong>re is a 40 minute<br />
restriction each time you open it,<br />
<strong>the</strong>re is no time out (30 days with<br />
many demos). <strong>The</strong>re is limited<br />
functionality, however, but <strong>the</strong>re are<br />
plenty <strong>of</strong> things to play with and<br />
<strong>the</strong>se are hard to stop using. <strong>The</strong><br />
program doesn’t allow you to save or<br />
print, but this can be got around by<br />
taking screen shots <strong>of</strong> any <strong>of</strong> your<br />
results. (Apple + Shift+ 3 ) and<br />
saving <strong>the</strong>m in ano<strong>the</strong>r program, <strong>the</strong>n<br />
reopening in Studio Artist or opening<br />
and printing in ano<strong>the</strong>r application.<br />
After <strong>the</strong> 40 minutes, just close down<br />
and reopen. <strong>The</strong> price for <strong>the</strong><br />
complete program is currently $395,<br />
plus shipping from <strong>the</strong> USA, but when<br />
you consider that <strong>the</strong>re are over<br />
4000 paint presets, it’s well worth it,<br />
especially if <strong>the</strong> exchange rate is<br />
favourable. <strong>The</strong> package comes with<br />
tutorial CDs.<strong>The</strong> Demo has a<br />
downloadable tutorial which is well<br />
worth having,and by visiting <strong>the</strong><br />
website you can also view <strong>the</strong> latest<br />
tutorials under Support.<br />
On opening <strong>the</strong> application a visual<br />
box appears (Fig 1), mouse-click on it<br />
and a “Select a Source Image” box<br />
appears which is in fact a browser.<br />
On choosing an image, a size box<br />
appears, click OK. (I find it useful to<br />
reduce <strong>the</strong> size to 50% as this<br />
quickens up <strong>the</strong> processes).<br />
You are now presented with a white<br />
page with <strong>the</strong> image at top left. Also<br />
on <strong>the</strong> left-hand side you will see one<br />
<strong>of</strong> two Presets pull-down menus<br />
giving a large selection (Fig 2).<br />
1<br />
2<br />
S<strong>of</strong>tware Review<br />
October 2007 <strong>Design</strong>-IT 17
I’ll refer to <strong>the</strong>m as Upper and Lower Presets for<br />
<strong>the</strong> methods used in this article. Also note that<br />
each and every time an option is selected, a<br />
whole new set appears to choose from.<br />
I began by leaving <strong>the</strong> page at “White” (see top<br />
right for pull-down list) with “Source Image” and<br />
“Paint” at <strong>the</strong> top left and chose <strong>the</strong> Lower Paint<br />
Syn<strong>the</strong>sizer preset, with <strong>the</strong> Thread Category<br />
and Directional Threads Patch selected (Fig 3).<br />
Also shown is a list <strong>of</strong> some <strong>of</strong> <strong>the</strong> Patch Paint<br />
Options. I used a mouse to do this, but <strong>the</strong><br />
demo does support a graphics tablet.<br />
18 <strong>Design</strong>-IT Issue 62<br />
3<br />
4<br />
I <strong>the</strong>n moved from “White” to “Source Image”<br />
(top right) to bring up <strong>the</strong> image on <strong>the</strong> page,<br />
and repeated my action again to give a subtle<br />
effect (Fig 4). This gives a different result to<br />
filters in o<strong>the</strong>r applications, as you can stop at<br />
any point.<br />
A word <strong>of</strong> warning though, when using any <strong>of</strong> <strong>the</strong><br />
operations that need an “Action” button, clicking<br />
<strong>the</strong> mouse will halt <strong>the</strong> operations. (This is <strong>of</strong><br />
course useful if you feel <strong>the</strong> process has gone<br />
far enough.)<br />
After using <strong>the</strong> “Action” button it’s fascinating to<br />
watch <strong>the</strong> changes taking place.<br />
Some operations can be undone (Edit > Undo),<br />
but o<strong>the</strong>rs can’t. If you don’t like <strong>the</strong> result and<br />
can’t undo <strong>the</strong> action, go to <strong>the</strong> Pull-down menu<br />
on <strong>the</strong> top right and click on ano<strong>the</strong>r option and<br />
<strong>the</strong>n back to “Source Image” again to get back<br />
to <strong>the</strong> beginning. In Fig 5 I chose “Image B/W<br />
Threshold”. Don’t worry if, after clicking <strong>the</strong><br />
Action button, <strong>the</strong> page goes black, just wait and<br />
<strong>the</strong> operation will begin.<br />
Studio Artist 3.5 also uses Layers. To open <strong>the</strong><br />
Layer window go Canvas > Layer Window . Click<br />
on <strong>the</strong> New button to make a new Layer. If<br />
“Source Image” is still chosen at <strong>the</strong> top right,<br />
this will make a copy <strong>of</strong> <strong>the</strong> first Layer, and can<br />
also be selected from an option at <strong>the</strong> top.<br />
My third Layer was made by changing to<br />
“White”. I used an Action on this Layer<br />
(Fragmented Clone) and changed all <strong>the</strong> Layer<br />
modes by clicking on <strong>the</strong> Replace button (Fig 6).<br />
5
<strong>The</strong> option is available to change <strong>the</strong> Layer<br />
mode on all <strong>the</strong> layers, again this in different<br />
from o<strong>the</strong>r applications.<br />
I particularly like <strong>the</strong> Lower Preset Vectorizer and<br />
chose this close-up as an example (Fig 7),<br />
picking Orient Regionizer from <strong>the</strong> Patch list.<br />
This suggests a cartoon for weaving, knitting,<br />
canvaswork, felting or blocks for printing.<br />
By far <strong>the</strong> most exciting results came from using<br />
<strong>the</strong> Upper Presets Warp option, and scrolling <strong>the</strong><br />
Type box to one <strong>of</strong> <strong>the</strong> Kaleidoscope choices.<br />
Instructions are given on-screen and quite easy<br />
to follow. I began with my Source Image and<br />
Fig 8 is <strong>the</strong> result <strong>of</strong> repeating and changing <strong>the</strong><br />
6<br />
7<br />
start position four times. I took a screenshot <strong>of</strong><br />
this, and re-opened it again (40 minutes had<br />
soon gone) to develop <strong>the</strong> pattern. I also tried<br />
changing <strong>the</strong> Kaleidoscope choice each time<br />
and here is one <strong>of</strong> my designs (Fig 9).<br />
Some <strong>of</strong> <strong>the</strong> actions are quite gimmicky, but<br />
mostly <strong>the</strong>se can be left unused, or tried<br />
and rejected.<br />
<strong>The</strong> one I decided to work in textiles was not too<br />
far removed from <strong>the</strong> original image, but I really<br />
October 2007 <strong>Design</strong>-IT 19<br />
8<br />
9
like <strong>the</strong> effect <strong>of</strong> <strong>the</strong> moth-like shapes (Fig 10).<br />
I increased <strong>the</strong> saturation <strong>of</strong> some <strong>of</strong> <strong>the</strong> colours<br />
to give more vibrancy as printing onto fabric<br />
usually dulls <strong>the</strong>m.<br />
<strong>The</strong> translated textile piece was worked using<br />
layers. <strong>The</strong> background was printed onto fabric<br />
and three more prints made using water-soluble<br />
paper. <strong>The</strong>se were treated in different ways,<br />
ending with putting <strong>the</strong> third print into a hoop<br />
and using free machine embroidery and<br />
dissolving <strong>the</strong> paper to produce <strong>the</strong> yellow<br />
and purple “eyelashes” (Fig 11) and close-up<br />
(Fig 12).<br />
20 <strong>Design</strong>-IT Issue 62<br />
10<br />
I haven’t slavishly followed my design, preferring<br />
to adapt <strong>the</strong> shapes as I worked and to stay<br />
open-minded right up until <strong>the</strong> last stitch<br />
is in place,<br />
Consider using <strong>the</strong> best results as Layers in<br />
o<strong>the</strong>r programs. O<strong>the</strong>r textile methods that come<br />
to mind are Patchwork, Quilting and Applique.<br />
When it comes to closing <strong>the</strong> application, go to<br />
Studio Artist Demo at top left , scroll to Quit<br />
Studio Artist and <strong>the</strong> original visual box appears,<br />
mouse-click on that and it will shut down.<br />
I’ve only touched on a few ways <strong>of</strong> working in<br />
this Review, but hope <strong>the</strong> examples will inspire<br />
you to download <strong>the</strong> s<strong>of</strong>tware. I know I shall<br />
continue to enjoy <strong>the</strong> Demo which should keep<br />
me busy for some time to come.<br />
12<br />
11<br />
Janice Hay<br />
Articles for <strong>Design</strong>-IT are<br />
welcomed by <strong>the</strong> editor and a<br />
small fee is paid for those<br />
printed. Please send your<br />
ideas or articles to Marlene<br />
Allinson: editor@ctdg.co.uk<br />
Membership enquires to<br />
Carol: memsec@ctdg.co.uk
SnagIT version 8.2.3<br />
Screen Capture & Image Editing Program<br />
TechSmith for PC only £27 for a single<br />
user licence (multiple user licences<br />
available as are German and French versions)<br />
Free 30-day Trial version available for download<br />
from www.techsmith.com<br />
SnagIt is a wonderful and invaluable<br />
program for all who write and/or<br />
teach and is “Drop-Dead Useful” as<br />
stated in PC magazine’s review.<br />
SnagIt allows <strong>the</strong> user to capture<br />
anything on <strong>the</strong> computer screen and<br />
is much more flexible than <strong>the</strong><br />
Windows’ PrintScreen facility.<br />
Anything on <strong>the</strong> screen can be<br />
selected: an area, image, text, error<br />
message, dialog box, you can even<br />
scroll down and capture a full web<br />
page. <strong>The</strong> resulting capture can be<br />
saved as a bmp, tif, jpg, gif, swf, png,<br />
web page with image, windows<br />
cursor, windows icon or SnagIt’s own<br />
native format. Screen captures can<br />
be spooled to a virtual printer to be<br />
printed later.<br />
Basic input capture options are<br />
Region, Window, Full Screen, Scrolling<br />
Window (web page) or Web Page with<br />
fully working links; o<strong>the</strong>r pr<strong>of</strong>iles<br />
include capturing a scrolling window<br />
to pdf, a menu with time delay, image<br />
from a web page and text from a<br />
window, or a screen video <strong>of</strong> your<br />
actions can be made as a record for<br />
yourself or as a video for teaching.<br />
When <strong>the</strong> PrintScreen button is<br />
pressed (or SnagIt is started from <strong>the</strong><br />
program or via a shortcut) <strong>the</strong> utility<br />
opens with <strong>the</strong> last input option used,<br />
but this can be changed at any time.<br />
For example, I have my SnagIt set up<br />
to capture a Region:<br />
I press <strong>the</strong> PrintScreen button and an<br />
instruction dialog box opens in <strong>the</strong><br />
top left corner <strong>of</strong> <strong>the</strong> screen.To<br />
capture, I click <strong>the</strong> left mouse button,<br />
hold it down and drag a marquee<br />
around <strong>the</strong> region <strong>of</strong> <strong>the</strong> screen<br />
I want to capture and <strong>the</strong>n let go: <strong>the</strong><br />
capture is taken into <strong>the</strong> SnagIt<br />
Editor (this option can be changed:<br />
you can save direct to your favourite<br />
program, for example Photoshop,<br />
Word or Powerpoint). You <strong>the</strong>n save<br />
<strong>the</strong> capture in your chosen format,<br />
send it to print, direct it to<br />
e-mail or to <strong>the</strong> SnagIt Catalog.<br />
SnagIt’s built-in Editor can be used<br />
for cropping, adding edge effects,<br />
stamps, highlight areas, captions,<br />
annotations and more. Extra<br />
catalogues <strong>of</strong> stamps are available as<br />
free downloads to add to those which<br />
come as standard. <strong>The</strong> keyboard<br />
letters and symbols are especially<br />
useful for writing teaching handouts.<br />
S<strong>of</strong>tware Review<br />
Fig 1 shows a number stamp saved<br />
along with <strong>the</strong> image and Fig 2 a<br />
stamp and annotation added to an<br />
open dialog box (<strong>the</strong> callouts,<br />
annotations and stamps are saved as<br />
part <strong>of</strong> <strong>the</strong> captured image, not as<br />
separate items). <strong>The</strong> captured<br />
screenshots can be taken into<br />
Photoshop, Paint or any o<strong>the</strong>r<br />
painting, drawing or layout program<br />
which supports <strong>the</strong> format in which<br />
October 2007 <strong>Design</strong>-IT 21
1<br />
<strong>the</strong> capture was saved and fur<strong>the</strong>r annotated or<br />
amended <strong>the</strong>re.<br />
<strong>The</strong> user can create and save his own capture<br />
pr<strong>of</strong>iles, for example you might always save a<br />
fixed area as a tiff and always want to capture<br />
<strong>the</strong> cursor in with your screenshot and save <strong>the</strong><br />
CTDG’s New Website<br />
22 <strong>Design</strong>-IT Issue 62<br />
2<br />
image into Photoshop: it is easy to set up this<br />
pr<strong>of</strong>ile and give it your chosen name: you can<br />
<strong>the</strong>n select your input pr<strong>of</strong>ile from <strong>the</strong> pop-up<br />
SnagIt window which sits down at <strong>the</strong> bottom<br />
right <strong>of</strong> your screen in <strong>the</strong> System Tray: or you<br />
can turn on <strong>the</strong> One Click option which means<br />
that <strong>the</strong> SnagIt window will appear when you<br />
hover over part <strong>of</strong> your computer screen: even<br />
this option is customisable! If required you can<br />
still keep <strong>the</strong> Windows PrintScreen utility, SnagIt<br />
does not have to replace it. SnagIt comes with<br />
its own comprehensive Help and Video Tutorials<br />
and an e-mail newsletter is available which<br />
suggests different uses for SnagIt as well as<br />
support and o<strong>the</strong>r useful documentation. This<br />
utility is a real timesaver and worth its weight in<br />
gold: once you have it I guarantee you will<br />
wonder how you ever managed without it. After<br />
<strong>the</strong> 30-day free trial <strong>the</strong> program can be<br />
registered and paid for: an unlock code is sent<br />
to you by e-mail. It could not be simpler.<br />
Marlene Allinson<br />
Hopefully, you, as members, will all have seen <strong>the</strong> new website by now.<br />
<strong>The</strong> first thing that needs to be made clear is that this new site is totally separate from <strong>the</strong> original one,<br />
and no previous passwords will work on it. It is made up <strong>of</strong> three sections: <strong>The</strong> Website, <strong>The</strong> Shop and<br />
<strong>The</strong> Forum.<br />
<strong>The</strong> website is available to anyone to look at, and is intended to be your ‘window to <strong>the</strong> world’,<br />
detailing what <strong>the</strong> group is about, what you all do, and how to join in.<br />
<strong>The</strong> shop is also available to anyone who follows <strong>the</strong> link. In here, you can renew your membership<br />
on-line and buy CTDG publications. When you first try to buy something from <strong>the</strong> shop, you will be<br />
asked for various personal details – remember, it does not know who you are! When you go back<br />
again, it will remember you. We hope to have more products available in <strong>the</strong> shop over <strong>the</strong><br />
coming months.<br />
<strong>The</strong> forum is <strong>the</strong> section available ONLY to members. When you first enter <strong>the</strong> forum, you will be<br />
asked to sign up with a user name and password. Again, remember this new forum does not know<br />
you! Please keep a record <strong>of</strong> your user name and password. Once you have registered, ei<strong>the</strong>r myself<br />
or CTDG’s forum moderator, Dorothy Gibbs, will check you are a CTDG member. You will <strong>the</strong>n be<br />
authorised to enter, and join in with o<strong>the</strong>r members. Over time, we expect <strong>the</strong> forum to be a hugely<br />
valuable resource to you all.<br />
New Ideas, Events & Show Notices, Help and Tips on <strong>Design</strong>-IT Articles, Help with Technical Issues,<br />
Reviews <strong>of</strong> Courses: <strong>the</strong>se are just some ideas, please take a look and keep building up <strong>the</strong> forum.<br />
We already have some regular users – a big thank you!<br />
New members, and renewing members, please note that <strong>the</strong>re are three steps to take full advantage<br />
<strong>of</strong> CTDG: 1) Complete <strong>the</strong> membership form on <strong>the</strong> website 2) Pay via <strong>the</strong> shop 3) Join <strong>the</strong> forum.<br />
Beverley Miles CTDG Webmaster Webmaster@ctdg.org.uk www.ctdg.org.uk
Fallert's Guide<br />
to Images<br />
on Fabric<br />
by Caryl Bryer Fallert<br />
Published by <strong>The</strong> American Quilters'<br />
Society ISBN 1-57432-842-5<br />
At first sight this looks a small book for<br />
<strong>the</strong> money as it is in a half A4 vertical<br />
format, but it is a magical book if you want<br />
to manipulate designs and transfer <strong>the</strong>m<br />
to fabric.<br />
Directed mainly at quilters, it has so much<br />
information which is useful to all textile<br />
artists. You are shown how to print your<br />
own images directly on to fabric from<br />
scanned or copied photographs and<br />
everyday objects.<br />
At <strong>the</strong> end <strong>of</strong> each part here is a question and answer section. <strong>The</strong>se<br />
questions range from <strong>the</strong> simplest such as “what is <strong>the</strong> difference<br />
between copying and scanning?” to more complicated such as “what<br />
is <strong>the</strong> difference<br />
between a vector object<br />
and a bitmap?”<br />
<strong>The</strong>re are wonderfully<br />
inspiring coloured<br />
photographs to illustrate<br />
each example.<br />
As this book is published<br />
in America <strong>the</strong> list <strong>of</strong><br />
suppliers is not very<br />
useful to UK readers, but<br />
<strong>the</strong>re are UK suppliers<br />
with <strong>the</strong> same materials<br />
on <strong>the</strong> internet.<br />
This book can be<br />
obtained from<br />
Amazon and o<strong>the</strong>r<br />
good booksellers.<br />
Judith Butt<br />
Book Review<br />
October 2007 <strong>Design</strong>-IT 23
CTDG Publications<br />
Workbooks<br />
<strong>The</strong> CTDG workbooks are useful to beginners<br />
and <strong>the</strong> more experienced. <strong>The</strong>y are designed to<br />
be used individually, in groups, or in a Workshop<br />
and will help students understand how to use a<br />
computer to develop different design methods<br />
for a variety <strong>of</strong> textile skills. <strong>The</strong>y are designed to<br />
take <strong>the</strong> reader through various techniques by<br />
using worked examples, which can be worked<br />
using most paint or draw programs, on ei<strong>the</strong>r<br />
AppleMac or Windows.<br />
1 Colour & <strong>Design</strong><br />
This workbook covers computer design for<br />
textiles: including mark making, colour <strong>the</strong>ory,<br />
and designing with pattern.<br />
2 Screen to Fabric<br />
A colour printer is an important tool for<br />
transferring designs and <strong>the</strong> choice <strong>of</strong> paper or<br />
fabric used for printing depends to a large extent<br />
on <strong>the</strong> textile technique to be used.<br />
3 Fabulous Filters<br />
What are filters: Black and White filters:<br />
Simplifying designs: Reducing <strong>the</strong> detail:<br />
Stylising Images: Changing <strong>the</strong> colours: Altering<br />
<strong>the</strong> settings: Making filters transparent: <strong>The</strong><br />
<strong>the</strong>ory <strong>of</strong> blending modes.<br />
4 All About Selections<br />
This workbook guides <strong>the</strong> student through <strong>the</strong><br />
main selection tools found in most paint<br />
programs and will clarify <strong>the</strong> fundamentals <strong>of</strong><br />
each selection tool and show different results<br />
that can be achieved.<br />
5 Draw programs and pattern making<br />
How to get <strong>the</strong> best out <strong>of</strong> draw or vector<br />
programs, so that you will feel confident in using<br />
<strong>the</strong>m for a variety <strong>of</strong> design applications.<br />
6 Scan, Scanners, Scan<br />
What is a scanner?, How does a scanner work?,<br />
What you Might Want to Know, Twain Drivers,<br />
Scanner Dialogue Screens, How to take a<br />
Screen shot. Projects include: <strong>The</strong> First Scan; a<br />
torn or cut collage, Settings, Folds and Creases,<br />
Textured Backgrounds, Assorted Grids,<br />
Translucent Papers, Wrappings, Multiple Views<br />
and Reflections.<br />
24 <strong>Design</strong>-IT Issue 62<br />
7 Using Your Digital Camera<br />
Lighting & Wea<strong>the</strong>r, Exposure Compensation,<br />
Through <strong>the</strong> Viewfinder, Framing, Using a Grid,<br />
Diagonals & Triangles, Using Flash, From<br />
Camera to <strong>Computer</strong>, Contacts & Filing,<br />
Cropping, Simplifying & Combining Photos.<br />
8 <strong>Design</strong>ing on Your <strong>Computer</strong><br />
To help you get to grips with a paint program<br />
and develop digital designs, demystifying some<br />
<strong>of</strong> <strong>the</strong> most useful paint program features.<br />
Selections<br />
<strong>The</strong>re are five booklets published so far, each<br />
containing a number <strong>of</strong> Back Issue <strong>Design</strong>-IT<br />
articles on a <strong>the</strong>me.<br />
Something for everybody, includes articles on<br />
Layers, Blending, pieces for free machine<br />
quilting, embroidery, computerised sewing<br />
machines, computer designs to fabric, digital<br />
camera and scanners.<br />
1 Fractals<br />
This publication in <strong>the</strong> Selections series includes<br />
three articles on <strong>the</strong> generation and potential<br />
uses <strong>of</strong> fractal patterns.<br />
2 Ideas Made Easy<br />
This publication in <strong>the</strong> Selections series includes<br />
five articles written around various paint and<br />
sewing machine programs and design to fabric<br />
techniques.<br />
3 Inspiration from Nature<br />
This publication in <strong>the</strong> Selections series includes<br />
three articles on <strong>Textile</strong> designs created from<br />
photos or scanned images <strong>of</strong> flowers leaves and<br />
sea shells.<br />
4 Women <strong>of</strong> Letters<br />
This publication in <strong>the</strong> Selections series includes<br />
four articles on <strong>the</strong> <strong>the</strong>me <strong>of</strong> <strong>Textile</strong> <strong>Design</strong>s<br />
based on patterns generated from <strong>the</strong> alphabet.<br />
5 Working With Bernina<br />
This publication in <strong>the</strong> Selections series includes<br />
three articles devoted to <strong>Computer</strong>ised Sewing<br />
Machines.<br />
Additional information is available on our<br />
website www.ctdg.co.uk
Title Author Quantity Price inc. VAT<br />
WORKBOOKS<br />
Members Non-Members<br />
1 Colour and <strong>Design</strong> Valerie Campbell-Harding £10.00 £12.50<br />
2 Screen to Fabric Hazel Credland £10.00 £12.50<br />
3 Fabulous Filters Valerie Campbell-Harding £10.00 £12.50<br />
4 All About Selections Maggie Grey £10.00 £12.50<br />
5 Draw Programs & Pattern<br />
Making<br />
Rosemary Muntus £10.00 £12.50<br />
6 Scanners, Scanning, Scans Sarah Brownie £10.00 £12.50<br />
7 Using your Digital Camera Valerie Campbell-Harding £10.00 £12.50<br />
8 <strong>Design</strong>ing on Your <strong>Computer</strong> Sarah Brownie £10.00 £12.99<br />
Workbooks Post & Packing<br />
one book<br />
For each subsequent<br />
book add<br />
SELECTIONS<br />
ORDER FORM<br />
UK<br />
£1.50<br />
£1.00<br />
1 Fractals £3.00<br />
2 Ideas Made Easy £3.00<br />
3 Inspiration from Nature £3.00<br />
4 Women <strong>of</strong> Letters £3.00<br />
5 Working with Bernina £3.00<br />
All 5 Selections £12.50<br />
Selections Post & Packing<br />
Please make<br />
each one<br />
cheques payable<br />
UK<br />
to CTDG<br />
£1.00<br />
Name Tel no<br />
Address<br />
Post/Zip Code County/State<br />
Country<br />
e-mail<br />
Membership No for discount<br />
Overseas<br />
£3.50<br />
£2.00<br />
Overseas<br />
£1.50<br />
Photocopy this form if you do not want to damage your<br />
<strong>Design</strong>-It or download it from our website and post with your<br />
cheque to: Gilly Beton, 110A Selbourne Road,<br />
Southgate, London N14 7DG<br />
October 2007 <strong>Design</strong>-IT 25
Please mention CTDG when replying to advertisements October 2007<br />
26 <strong>Design</strong>-IT Issue 62
Suppliers to<br />
<strong>Textile</strong> Artists Worldwide<br />
Lutradur, <strong>The</strong>rmogauze, Soluble Paper<br />
Chiffon Scarves, Sheer Heaven, Grilon<br />
Sassa Lynne range <strong>of</strong> hand threads,<br />
fibres and fabrics<br />
A good selection <strong>of</strong> quality machine<br />
embroidery threads<br />
Colinette yarns<br />
<strong>The</strong>se are just some <strong>of</strong> <strong>the</strong> items we stock.<br />
For fur<strong>the</strong>r details email for a full price<br />
list or send an sae (large letter)<br />
www.winifredcottage.co.uk<br />
www.sassalynne.com<br />
email: sales@winifredcottage.co.uk<br />
17 Elms Road, Fleet,<br />
Hampshire, GU51 3EG<br />
01252 617667<br />
A Quarterly web-based textile review featuring<br />
Workshops with <strong>the</strong><br />
very best tutors.<br />
Interviews with<br />
international artists<br />
New product roundup<br />
Gallery feature<br />
Book Reviews<br />
Traders’ Mall<br />
News, letters and much more<br />
All for £15.50 for a year’s subscription.<br />
www.workshopon<strong>the</strong>web.com<br />
October 2007 <strong>Design</strong>-IT 27
<strong>The</strong>re were some aspects <strong>of</strong> this new image<br />
which I liked, especially <strong>the</strong> texture created<br />
within <strong>the</strong> figure. I realized that I had<br />
strayed from <strong>the</strong> original focus but felt <strong>the</strong><br />
experimentation was worth it. I returned to<br />
Fig 10, <strong>the</strong> tonal painting, which I had done<br />
previously and played with copying and pasting<br />
selections <strong>of</strong> <strong>the</strong> body, going on to layering using<br />
blending modes and adding my custom brush<br />
textures. <strong>The</strong> resulting image is shown as Fig 13.<br />
Fig 14 (front cover image) shows <strong>the</strong> resulting<br />
image when Fig 10 was combined with this<br />
new image which was printed and transferred<br />
on to silk.<br />
12<br />
Article continued from page 7<br />
Congratulations to Sian who, earlier this year, was awarded a<br />
City & Guilds Medal for Excellence in relation to her<br />
Creative Computing course at Westhope College.<br />
<strong>Design</strong>-IT is printed and distributed by Words & Pictures Ltd, 25-27 Westow Street, London SE19 3RY.<br />
<strong>Design</strong> and Artwork by Marlene P Allinson<br />
11<br />
13