

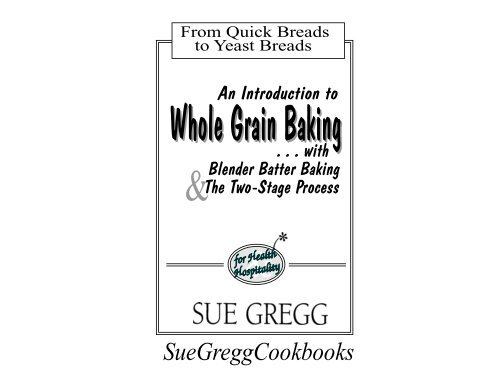
Whole Grain Baking - Sue Gregg Cookbooks
Whole Grain Baking - Sue Gregg Cookbooks
Whole Grain Baking - Sue Gregg Cookbooks

Create successful ePaper yourself
Turn your PDF publications into a flip-book with our unique Google optimized e-Paper software.
From Quick Breads<br />
to Yeast Breads<br />
<strong>Whole</strong> <strong>Grain</strong> <strong>Baking</strong><br />
&<br />
An Introduction to<br />
. . . with<br />
Blender Batter <strong>Baking</strong><br />
The Two-Stage Process<br />
&<br />
<strong>Sue</strong><strong>Gregg</strong><strong>Cookbooks</strong>
PUBLICATIONS BY SUE GREGG<br />
<strong>Sue</strong><strong>Gregg</strong><strong>Cookbooks</strong><br />
Main Dishes, 3rd edition<br />
Soups & Muffins, 2nd edition<br />
Meals in Minutes, 4th edition<br />
Lunches & Snacks, 3rd edition<br />
Breakfasts, 3rd edition<br />
Desserts, 2nd edition<br />
Master Index & Menu Planner<br />
Holiday Menus<br />
The Creative Recipe Organizer<br />
Four Food Storage Plans<br />
Будте здоровы! Recipes with Nutrition Basics<br />
for Russian and Russian-speaking families<br />
Curriculum<br />
Taste & Tell<br />
Cooking with Children<br />
<strong>Baking</strong> with <strong>Whole</strong> <strong>Grain</strong>s<br />
Published and distributed by<br />
<strong>Sue</strong><strong>Gregg</strong><strong>Cookbooks</strong><br />
8830 Glencoe Drive<br />
Riverside, California 92503-2135<br />
www.suegregg.com 951.687.5491<br />
An Introduction to <strong>Whole</strong> <strong>Grain</strong> <strong>Baking</strong><br />
© 2007 by Rich & <strong>Sue</strong> <strong>Gregg</strong><br />
ISBN 1-878272-20-9<br />
Printed April 2007<br />
All rights reserved. No part of this book may be copied or reproduced<br />
in any form without the written consent of the publishers.<br />
All scripture quotations, unless otherwise indicated, are taken from<br />
the HOLY BIBLE, NEW INTERNATIONAL VERSION®. NIV®. Copyright<br />
© 1973, 1978, 1984 by International Bible Society. Used by<br />
permission of Zondervan Publishing House. All rights reserved.
Contents<br />
Introduction 2<br />
Getting Started 3<br />
<strong>Grain</strong> Wonders 39<br />
Quick Breads 79<br />
Yeast Breads 117<br />
Living Bread 166<br />
Index 169<br />
Cut-Out Tabs 173
Introduction<br />
<strong>Whole</strong> grains are a wonderful gift from God, both for our health<br />
and our enjoyment. No food seems to touch the heart more than a<br />
hearty tasty bread. Regardless of inroads of high protein or other lowcarb<br />
diets, bread has a very long history. It is here to stay. But we have<br />
lessons to learn in its proper preparation. I have dreamed about<br />
writing this book for some time. Finally, it has become a reality. With<br />
the growing awareness to properly process whole grains to release<br />
more nutrients and improve digestability, I have been prompted to<br />
offer this book, incorporating the two-stage process into whole grain<br />
baking, my own coined term for any one of the three preparation<br />
methods: soaking, sprouting, or fermenting.<br />
As the title suggests, this book is an introduction. It is not intended<br />
to be an in-depth presentation of the subject from every angle nor to<br />
include all of my whole grain recipes. Rather, it is intended to give you<br />
the basics for whole grain baking with the two-stage process, both for<br />
quick breads and for yeast breads. Thus, key recipes of both types<br />
are introduced. An important purpose of this introduction is to teach<br />
adapting the process to all whole grain recipes, whether found in my<br />
other cookbooks, other wholefoods cookbooks or among your own<br />
favorites. This book will provide the basics of what you need to<br />
become proficient in two-stage baking.<br />
Not everyone involved in working with whole grains believes that<br />
the two-stage process is essential. I recommend you begin by reading<br />
Understanding the Two-Stage Process and Evaluating the Importance<br />
of the Two-Stage Process, pp. 12-14.<br />
This book has grown out of our <strong>Baking</strong> with <strong>Whole</strong> <strong>Grain</strong>s<br />
semester course for high school home schoolers. As a result, An<br />
Introduction to <strong>Whole</strong> <strong>Grain</strong> <strong>Baking</strong> replaces Breakfasts as the text for<br />
that course. It also stands alone, however, as an introductory<br />
cookbook in whole grain baking for all ages. The accompanying<br />
PowerPoint CD provides over 30 step-by-step demonstrations so<br />
that you may see clearly how to prepare the recipes.The close-up<br />
color photos will bring the recipe steps to life. The slide format is<br />
deliberate, allowing you to go your own pace through a demonstration,<br />
pausing at, returning to, and reviewing steps as you find a need.<br />
It also acts as a "mother's helper" in teaching children and a "leader's<br />
helper" in teaching small groups a foods class in whole grain baking.<br />
Please be aware that this introduction does not cover recipes in the<br />
desserts category such as as cookies, cakes, or pie crusts.<br />
2
Getting Started<br />
She is like the merchant ships, bringing her food from afar.<br />
Proverbs 31:14
Getting Started Contents<br />
Should We Eat <strong>Grain</strong>s? 5<br />
Quick Shopping Guide for Quality Ingredients 6<br />
Equipment Check List 10<br />
Understanding the Two-Stage Process 12<br />
Evaluating the Importance of<br />
The Two-Stage Process<br />
13<br />
Liquids for <strong>Baking</strong> 15<br />
Coconut Milk for <strong>Baking</strong> 16<br />
Almond Milk for <strong>Baking</strong> 16<br />
Eggs 17<br />
<strong>Whole</strong> <strong>Grain</strong>s 17<br />
Fats 18<br />
Butter 18<br />
Coconut Oil 18<br />
Olive Oil 19<br />
What about Canola Oil? 20<br />
Sweeteners 21<br />
Honey 21<br />
Sucanat 23<br />
What Happened to Crystalline Fructose? 24<br />
What About Xylitol? 24<br />
Leavenings 25<br />
Homemade <strong>Baking</strong> Powders 26<br />
Spices & Flavorings 28<br />
Salt 29<br />
Nuts & Seeds 30<br />
The Wonder of Flax Seeds 30<br />
Flaxseed Egg Alternative 31<br />
Allergy Alternatives 32<br />
Measuring Techniques 33<br />
Accuracy, Convenience & Safety Habits<br />
for Recipe Preparation<br />
35<br />
Getting Started Bibliography 38<br />
4
Should We Eat <strong>Grain</strong>s?<br />
Several leading nutritionists are cautioning the consumption of<br />
whole grains. There may be reasons for this in the lives of individuals<br />
with particular health needs. In general, however, taking grains out<br />
of the diet over the long term overlooks the historical grain food<br />
foundation of many cultures. Rather, a better approach includes<br />
selecting grains according to individual needs, preparing them by a<br />
two-stage process, and balancing them appropriately in menus.<br />
Bread has traditionally been regarded as the staff of life for a<br />
reason. Bread and meat were the staples of the biblical levitical diet<br />
in the Old Testament. God sent ravens to Elijah morning and evening<br />
for a season to bring him bread and meat to strengthen him for the<br />
task ahead of him. During a famine he sent Elijah to the widow of<br />
Zeraphath who sustained herself, her child, and Elijah on bread<br />
alone. God sent Joseph to Egypt to store up grain for a 7-year famine.<br />
The Egyptians traded livestock for grain during this famine. Jesus<br />
fed the 5000 with a boy's lunch of two fish and five loaves of barley<br />
bread. Our resurrected Lord served his disciples a breakfast of bread<br />
and fish on the beach. What are we to conclude from this biblical<br />
evidence? Was our Creator God ignorant about the dangers of grain,<br />
or somehow so spiritually minded, that he doesn't care about the<br />
health of our bodies? Psalm 65:9 makes it clear that grain is a Godgiven<br />
gift. Every good and perfect gift comes down from the Father of<br />
lights (James 1:17). Take cautiously what the modern health gurus<br />
say about grains and learn to think biblically (i.e. from a Christian<br />
perspective) about the foods we are given to prepare and enjoy. See<br />
also "<strong>Grain</strong>s & Bread in the Bible," p. 77.<br />
God has provided grains as a wonderful resource for our health, as<br />
well as our enjoyment, but we must manage them through the<br />
progressive discovery of how to select and prepare them (see Genesis<br />
1:29 and Proverbs 25:2). This is what this book seeks to do in the<br />
baking of breads. There is much to learn and we undoubtedly still do<br />
not have all the information. But let the lessons and recipes of this<br />
book be a good start for you. It is divided into 4 sections: Getting<br />
Started, <strong>Grain</strong> Wonders, Quick Breads, and Yeast Breads. For a<br />
quick reference to the contents of each section, attach the tabs (p.<br />
173) to the section pages. Getting Started and <strong>Grain</strong> Wonders<br />
applies to both quick breads and yeast breads. The latter two<br />
sections focus on procedures and recipes specific to each type.<br />
5
Understanding the Two-Stage Process<br />
Maximizing the Nutritional Value of <strong>Whole</strong> <strong>Grain</strong>s<br />
Just because you’ve switched from white flour to whole grains<br />
does not mean that you are getting all the nutritional value. In fact<br />
you may also experience new problems with digestion and assimilation.<br />
That is because whole grains contain phytic acid in the bran of<br />
the grain. Phytic acid combines with key minerals, especially calcium,<br />
magnesium, copper, iron, and zinc and prevents their absorption<br />
in the intestinal tract.<br />
Soaking, fermenting, or sprouting the grain before cooking or<br />
baking will neutralize a large portion of the phytic acid, releasing<br />
these nutrients for absorption. This process allows enzymes, lactobacilli,<br />
and other helpful organisms to not only neutralize the phytic<br />
acid, but also to break down complex starches, irritating tannins,<br />
and difficult-to-digest proteins including gluten. For many, this may<br />
lessen their sensitivity or allergic reactions to particular grains. Everyone<br />
will benefit, nevertheless, from the release of nutrients and<br />
greater ease of digestion.<br />
The first stage of preparation in making baked recipes by the<br />
soaking method is to soak the whole grain flour in an acid medium.<br />
In quick breads this is usually a cultured milk such as kefir, plain<br />
yogurt, sour raw milk, or buttermilk. A small amount of vinegar,<br />
whey, 1 or lemon juice is added when the primary liquid in the recipe<br />
is either water, 2 sweet raw milk, or almond or coconut milk.<br />
As little as 7 hours soaking will neutralize a large portion of the<br />
phytic acid in grains. Twelve to 24 hours is even better with 24 hours<br />
yielding the best results. Brown rice, buckwheat, and millet are<br />
more easily digested because they contain lower amounts of phytates<br />
than other grains, so 7 hours soaking is sufficient. Other grains,<br />
particularly oats, highest in phytates of the whole grains, are best<br />
soaked up to 24 hours.<br />
There are two other advantages of the two-stage process. Several<br />
hours of soaking serves to soften the grain, resulting in baked<br />
goods lighter in texture, closer to the texture of white flour. This is<br />
especially helpful when making blender batters, where the initial<br />
blending may not smooth out the grain as much as desired. Secondly,<br />
this is a great step in convenience, dividing the task into two<br />
shorter time periods. It cuts the time needed to prepare the recipe<br />
1Yogurt usually separates somewhat once opened or even before opening, leaving some<br />
liquid on top. This is whey. To make a quantity of whey from yogurt, see the demonstration<br />
CD; it may be frozen in 2 tbsps. portions.<br />
12<br />
2An acid medium is given as optional in the<br />
flatbread recipes (Blender Crepes and Torillas or Chapatis); see p. 14.
ight before cooking and baking when you feel rushed to get food on<br />
the table. Doing food preparation tasks in advance is a great convenience<br />
facilitator. The two-stage process fits right in.<br />
I believe that,<br />
in addition to enhancingnutritional<br />
value, the<br />
two-stage process<br />
may minimize<br />
the sensitivity<br />
to whole<br />
grains that many<br />
people frequently<br />
experience. As<br />
...this is a great step in convenience, dividing<br />
the task into two shorter time periods, cutting<br />
the time needed to prepare the recipe right before<br />
cooking and baking when you feel rushed to<br />
get food on the table. Doing food preparation<br />
tasks in advance is a great convenience facilitator.<br />
The two-stage process fits right in.<br />
Sally Fallon and Mary Enig, PhD point out, “...virtually all<br />
preindustrialized peoples soaked or fermented their grains before<br />
making them into porridge, breads, cakes and casseroles.” (Nourishing<br />
Traditions p. 452).<br />
Many are overwhelmed by the thought of doing the two-stage<br />
process. This is because it is a paradigm shift, something completely<br />
foreign to our normal way of doing things. For decades it has<br />
never been part of cookbooks with whole grain recipes. Thus a variety<br />
of questions arise, such as, "Do I soak the grain and then grind<br />
it? Do I grind the flour and then soak it? How will I use the soaked<br />
flour or grain in the recipe?," etc. Instead of worrying about how to<br />
do it, just follow the recipes in this book, step-by-step. As you become<br />
familiar with the basic two-stage preparation for either a quick<br />
bread or yeast bread, you will easily learn how to adapt it to any<br />
recipe that does not follow two-stage preparation. The only time<br />
that separate preparation is needed is when the method used is<br />
sprouting the grain. There are some wonderful advantages in using<br />
sprouted grain. I have introduced it in the Yeast Breads section.<br />
Sprouted grain can be used in both quick and yeast breads.<br />
Evaluating the Importance of the Two-Stage Process<br />
While the whole truth is probably not yet known (recall Proverbs<br />
25:2 ), phytates also have promising benefits. Research shows that<br />
they may be involved in curbing free radicals in the body that contribute<br />
to heart disease and cancers, as well as preventing excessive<br />
mineral build up in the body, especially of iron, which also contributes<br />
to free radical formation. It is thought that it may be the phytates<br />
in the bran layers of whole grains, in legumes, and in nuts and seeds<br />
that are providing these protections. However, I question the fear of<br />
excessive mineral buildup when real whole foods are consumed.<br />
13
The value of phytates does not warrant ignoring the value of the twostage<br />
process. First of all, neutralizing phytic acid to release nutrients<br />
bound up in the form of phytates is not 100% accomplished<br />
except under ideal conditions of temperature and pH. These conditions<br />
cannot be easily achieved in home baking. Perhaps they are<br />
best achieved in making sourdough breads, a time-honored practice<br />
for millenia. Second, take a realistic look at your habits. Home<br />
baking notwithstanding, commercial whole grain products not processed<br />
by a two-stage process will find their way to our tables (as<br />
whole grain pastas, commercially purchased breads, e.g.). Likewise,<br />
only the most dedicated will do the two-stage process with every<br />
recipe. Stop worrying that you will ruin the benefits of phytates by<br />
using the two-stage process. Many more people lack essential minerals<br />
and have difficulty with the digestion of gluten in grains. The<br />
two-stage process, therefore, plays a valuable role in baking with<br />
whole grains.<br />
Kaayla T. Daniel, PhD, CNN, author of The <strong>Whole</strong> Soy Story, points<br />
to the Hebrews as an example of consuming both leavened and unleavened<br />
bread. The former, which was produced through the fermentation<br />
process from wild yeasts, was practiced most of the time.<br />
The latter, unleavened bread, was part of the the Hebrew preparation<br />
for Passover in early spring (see also p. 113), "a natural time for<br />
fasting, a practice that encourages detoxification." Daniel suggests<br />
that these yearly short periods "might have been a very effective way<br />
to rid the body of any heavy metals through the action of phytic<br />
acid." On the other hand, she reminds us that "decades of research<br />
on the phytates of real foods have shown that phytates are<br />
antinutrients--more likely to contribute to disease than prevent it." 1<br />
I suggest that occasional or even short periods of consuming of<br />
whole grains that are not processed by one of the three<br />
two-stage methods (soaking, fermenting, sprouting)<br />
is not likely detrimental to health and may contribute<br />
a plus, 2 while those that are properly processed<br />
as the main dietary choice will be greatly beneficial<br />
to health.<br />
1 The <strong>Whole</strong> Soy Story, by Kaayla T. Daniel, PhD, CNN, Chapter 17, “Phytates ties that<br />
bind,” pp. 221, 224, quotes by permission. 2 For this reason, I have made the two stage<br />
process optional for the two flatbread recipes, Blender Crepes and Tortillas or Chapatis.<br />
However, to many gluten-sensitive and grain-allergic persons, the two-stage process may<br />
be beneficial on a basically consistent basis. See also, "Against the <strong>Grain</strong>-The Case for<br />
Rejecting or Respecting the Staff of Life" by Katherine Czapp, Wise Traditions, Summer<br />
2006: http://www.westonaprice.org/moderndiseases/gluten-intolerance.html<br />
14
<strong>Grain</strong> Wonders<br />
...the valleys are mantled with grain;<br />
they shout for joy and sing.<br />
Psalm 65:13
Isaiah 28:23-29<br />
Whatever Happened<br />
to <strong>Whole</strong> <strong>Grain</strong>s?<br />
A Little Fiber History<br />
A Fiber Analysis<br />
A Kernel of Truth<br />
God's <strong>Grain</strong> Wonders<br />
<strong>Grain</strong>s Have Protein!<br />
<strong>Grain</strong>s are Low Fat!<br />
A Summary of <strong>Baking</strong><br />
Characteristics<br />
Great <strong>Grain</strong>s!<br />
40<br />
Wheat, King of <strong>Grain</strong>s<br />
Wheat Bran & Germ<br />
Hard Red Winter<br />
& Spring Wheats<br />
Hard White Spring<br />
Wheat<br />
Soft Spring Wheat<br />
Kamut ® grain<br />
Spelt<br />
Corn<br />
<strong>Grain</strong> Wonders Contents<br />
41<br />
42<br />
44<br />
46<br />
47<br />
48<br />
50<br />
51<br />
52<br />
53<br />
53<br />
54<br />
54<br />
55<br />
55<br />
56<br />
58<br />
59<br />
Oats<br />
Brown Rice<br />
Barley<br />
Rye<br />
Millet<br />
Triticale<br />
Buckwheat<br />
Sorghum<br />
Quinoa<br />
Amaranth<br />
Teff<br />
Wild Rice<br />
All <strong>Grain</strong>s are Low Cost!<br />
<strong>Whole</strong> <strong>Grain</strong><br />
Storage & Care<br />
What About <strong>Whole</strong><br />
<strong>Grain</strong> Flour?<br />
The Value of a <strong>Grain</strong> Mill<br />
<strong>Grain</strong>s & Bread in the<br />
Bible<br />
<strong>Grain</strong> Wonders<br />
Bibliography<br />
61<br />
63<br />
64<br />
65<br />
66<br />
67<br />
67<br />
68<br />
68<br />
69<br />
70<br />
70<br />
71<br />
73<br />
74<br />
75<br />
77<br />
78
Whatever Happened to <strong>Whole</strong> <strong>Grain</strong>?<br />
We may not understand the way that ancient harvesting methods<br />
worked as mentioned in the Bible, yet it is clear from Isaiah 28:23-29<br />
that God had an ordered plan for producing and harvesting the food we<br />
eat and that plan was magnificent in wisdom. Surely God's plan was<br />
intended to produce health-giving grain for mankind's use!<br />
For centuries the bread of peasants in Europe was a coarse, dark,<br />
and heavy loaf made of perhaps a little wheat and a quantity of rye or<br />
barley, or of barley and oats. For example, from the time of Charlemagne<br />
a bread even as hard as Trencher Bread was common in the European<br />
household. Trencher came from a French word referring to a wooden<br />
plate. This coarse square-cut flat bread was so hard it served as the<br />
plate shared between two people on which they placed their food!<br />
It is little wonder that civilizations have attempted to produce<br />
breads more appealing in texture and color. Little progress was made<br />
in these attempts until the 19th century. Fine flour was expensive and<br />
thus limited to use by the wealthy before then. All this changed when<br />
Governor Washburn of Minnesota tasted his first white French roll at<br />
an exhibition in Paris in 1876.<br />
Washburn returned to America and introduced the steel roller mill,<br />
an economical method of making white flour available. This flour<br />
stored well, traveled across the pioneer miles well, and baked into nice<br />
high light loaves of pleasant textured bread. What defined status for the<br />
wealthy now became accessible to all. Homemakers were thrilled and<br />
no one was the wiser for its nutritional bankruptcy.<br />
When the Depression hit in the 1930's people relied more on<br />
inexpensive foods, including white bread. This resulted in a rampant<br />
spread of the Vitamin B-1 deficiency disease, beri beri. There were just<br />
not enough sustaining nutrients in white bread. Enrichment was thus<br />
introduced, adding three synthetic B-vitamins and iron to white flour.<br />
1Bailey, Adrian. The Blessings of Bread. Adrian Bailey. New York: Paddington Press LTD,<br />
1975, p. 37.<br />
42<br />
Lay a clean trencher before you, and when your pottage is<br />
brought, take your spoon and eat quietly; and do not leave your<br />
spoon in the dish, I pray you. Lay salt honestly on your trencher,<br />
for that is courtesy. Do not put the meat off your trencher into<br />
the dish, but get a voider and empty it into that. Do not play with<br />
the spoon, or your trencher, or your knife; but lead your life in<br />
cleanliness and honest manners. Heap not they trencher high<br />
with many morsels. . . Advice to a Child, 1500 1
But the full nutritional value of over thirty nutrients was not restored,<br />
nor was fiber loss even considered.<br />
Enriched white flour products of all kinds have not only become<br />
entrenched in our society, but have rapidly spread throughout the<br />
world. The desire for convenience, ready availability, and familiarity of<br />
taste and preparation far outweigh awareness and concern for nutritional<br />
value--even for those who believe in God's magnificent wisdom.<br />
As a consequence, we have lost the synergistic value of whole grains,<br />
that is, nutrients of a whole food working together more effectively than<br />
when separated.<br />
Let's consider, for example, the role of dietary fiber. Plant cell walls<br />
and properties associated with them make up the dietary fiber in<br />
foods. It has traditionally been termed roughage or bulk, although<br />
this doesn't describe soluble fibers very well. It is primarily nondigestible,<br />
but not all. The American diet, typically under 20 grams<br />
dietary fiber daily, falls far short of the need. In contrast, citizens of<br />
countries such as Africa, where dietary fiber averages 40-60 grams<br />
daily, do not suffer diseases and health conditions resulting from a<br />
deficiency of high fiber foods. While whole grains are not the<br />
highest fiber foods, small amounts do add up, making a<br />
significant contribution to meet the need. In addition, by<br />
studying "A Kernel of Truth," p. 47, you can see that the nutrient<br />
losses in white flour are significant. Most of this loss<br />
comes from the dietary fiber and wheat germ combined. Thus,<br />
more is lost from the absence of dietary fiber than the effective<br />
benefits of the fiber alone.<br />
"A Fiber Analysis," p. 46 identifies the types and forms of fiber and<br />
what they do, at least according to what was discovered as the end of<br />
the 20th century approached. Upon reading "A Little Fiber History,"<br />
pp. 44-45, you can expect more news to be added to the fiber puzzle<br />
beyond the year 2000. Proverbs 25:2 is still relevant in the 21st<br />
century. For example, it is already being discovered that phytates,<br />
found in dietary fiber may provide some of the benefits, although this<br />
is not to diminish the importance of the "Two-Stage Process" (pp. 13-<br />
14).<br />
I want you to appreciate the nutritional<br />
riches of whole grains. With tasty recipes<br />
you can be liberated from dependence on<br />
nutrient and fiber-depleted wheat flour,<br />
one recipe at a time!<br />
43
<strong>Grain</strong>s have Protein!<br />
Dairy products compliment grain proteins to provide<br />
complete, highly usable protein. 1 For example<br />
milk and eggs with whole grain in muffins, waffles,<br />
French toast and other baked goods, milk served<br />
with breakfast cereals, and eggs served with whole<br />
grain toast, rolls, or biscuits. Legumes (dry beans)<br />
also compliment grain protein, such as Chili with<br />
Cornbread or including a portion of bean flour in<br />
yeast breads.<br />
1 A complete protein includes all eight essential amino acids that the body cannot produce, in<br />
amounts that makes them highly usable protein.<br />
2 These grains contain higher amounts of lysine, the essential amino acid that is normally low<br />
in grains. The protein value of grains high in lysine is a more complete (usable) protein on<br />
its own, but all grain proteins are well utilized when served in the suggested food combinations<br />
listed above. If one were on a subsistence diet of grain only, the lysine content would become<br />
more significant (see e.g. high-lysine corn and millet, pp. 60, 66).<br />
50<br />
Protein Value of <strong>Grain</strong>s by Weight<br />
Kamut ® grain 17.3%<br />
triticale 17%<br />
quinoa 2 16.2% - 20%<br />
oats 14 - 16.7%<br />
amaranth 2 15.7%<br />
spelt 13.1 - 14.28%<br />
wild rice 14%<br />
wheat, hard spring (durum) 12 - 14%<br />
wheat, hard spring/winter (bread) 12 - 14%<br />
teff 12%<br />
rye 2 12%<br />
barley 2 10 -12%<br />
sorghum 11%<br />
buckwheat 2 10 -11%<br />
millet 2 6-11%<br />
wheat, soft (pastry) 9.1%<br />
corn 9%<br />
brown rice 2 7.5 - 9%
<strong>Grain</strong>s are Low Fat!<br />
All grains are low fat, high energy<br />
foods. <strong>Grain</strong>s that are both higher in<br />
fat and protein than other grains are<br />
considered especially high energy<br />
foods.<br />
Quality low fat foods are not better<br />
than quality high fat foods. They are<br />
just different; these differences allow<br />
balance in the daily diet.<br />
Fat Value of <strong>Grain</strong>s 1<br />
(% of Calories)<br />
oats 15.0%<br />
amaranth 14.0%<br />
quinoa 13.5%<br />
triticale 12.0%<br />
corn 10.5%<br />
millet 8.2%<br />
spelt 6.9%<br />
barley 5.5%<br />
Kamut ® grain 6.6%<br />
sorghum 8.0%<br />
teff 4.5%<br />
wheat 6.9%<br />
buckwheat 6.4%<br />
rye 5.9%<br />
brown rice 4.7%<br />
wild rice 1.8%<br />
1 The fat in grains contain valuable essential fatty acids in a whole food package. In the 21st<br />
century, many nutritionists are gaining a higher appreciation for the role of quality fats, not<br />
only in a healthful diet, but for weight management as well. See Recommended Reading, p.<br />
38.<br />
51
A Summary of <strong>Baking</strong> Characteristics<br />
How whole grain flours act in baking depends mostly on the gluten<br />
content. High gluten grains, for example, are best for yeast bread<br />
recipes. The gluten, a protein part of the grain, develops elasticity as it<br />
is kneaded. This in turn traps the gas formed by the yeast as it grows<br />
and gives the bread its rise and lightness of texture. Gluten-free and lowgluten<br />
grains, therefore, do not produce light textured yeast breads,<br />
although a portion of the flour may consist of another grain or<br />
combination of grains (see Yeast Breads section).<br />
<strong>Grain</strong>s may be classified as having no gluten, low gluten or high<br />
gluten content:<br />
Gluten-free grains<br />
brown rice<br />
corn<br />
millet<br />
amaranth<br />
quinoa<br />
sorghum<br />
Gluten flour, a commercial product made from white flour, is often<br />
added to make whole grain yeast breads lighter. I have never found this<br />
a necessity and discourage its use. Gluten flour is an unnecessary<br />
expense, costing ten times that of the whole wheat, even if only a small<br />
portion is needed. I don't even use it when combining wheat with other<br />
grains. Pleasing yeast breads can be made that are light enough without<br />
this addition. There also are enough people who have a problem with<br />
gluten without adding more of it to recipes. Rather, I believe it is best<br />
to develop a taste for denser breads. The measure of taste and texture<br />
quality is not in making whole grain breads match refined breads.<br />
Quick breads are more easily adaptable to the use of grains with<br />
varying degrees of gluten content, although different results in texture<br />
will be achieved. Gluten development is not desirable in quick bread<br />
baking for lightness as it is in yeast bread baking. A wider range of grain<br />
options in quick breads is a boon for persons with grain allergies or<br />
gluten intolerance.<br />
52<br />
Low-gluten grains<br />
barley<br />
oats<br />
rye<br />
buckwheat<br />
triticale<br />
teff<br />
soft wheat (pastry)<br />
High-gluten grains<br />
hard red winter wheat<br />
hard spring wheat<br />
hard white wheat<br />
Kamut ® grain<br />
spelt
All <strong>Grain</strong>s are Low Cost!<br />
Why spend money on what is not bread,<br />
and your labor on what does not satisfy?<br />
Listen, Listen to me, and eat what is good.<br />
Isaiah 55:2<br />
Some grains do cost more than others, yet as a food group, grains<br />
are a low budget food item. The higher the proportion of grains to dairy<br />
and meats in the diet, the less costly meals will be, even when more<br />
expensive grains are included.<br />
Comparative prices of certified organic grains, recorded below from<br />
SunOrganic Farm, 2006 prices (www.sunorganic.com), will give you<br />
some idea of grain costs. Note that bulk prices are lower cost per lb.<br />
than smaller packages.<br />
GRAIN 1 lb. 3 lb. 25 lbs.<br />
Rye Berries 1.95 2.95 15.00<br />
Wheat, Pastry 1.95 2.95 16.00<br />
Wheat, Hard Red Winter 1.95 2.95 16.50<br />
Wheat, Hard Red Spring 1.95 2.95 17.50<br />
Cornmeal, stoneground 1.95 3.25 17.50<br />
Corn, whole kernel 1.95 3.25 18.50<br />
Millet, hulled 1.95 3.35 24.50<br />
Wheat, Hard White Spring 1.95 3.45 18.50<br />
Barley, hulled 1.95 3.50 18.50<br />
Buckwheat, sprouting 1.95 3.50 19.95<br />
Oats, Rolled 1.95 3.50 21.00<br />
Oat Groats 2.25 3.95 23.85<br />
Kamut ® grain 1.95 4.25 22.25<br />
Brown Rice, Long/Short <strong>Grain</strong> 1.95 4.65 26.75<br />
Triticale 2.25 4.85 29.50<br />
Buckwheat, hulless 2.25 5.85 35.50<br />
Spelt 2.25 5.65 32.50<br />
Quinoa 2.75 7.35 43.50<br />
Amaranth 3.50 9.35 49.50<br />
Wild Rice 7.65 22.50 147.00<br />
Translating cost into a recipe, e.g. Blender Banana Muffins, p. 108:<br />
3 lbs. pastry wheat @ $2.95 = about 8 cups grain. Divide 8 cups grain<br />
by 1¹⁄₃ cups per recipe = 6 recipes. Each recipe makes 14 muffins or<br />
84 muffins for 6 recipes; $2.95 divided by 84 muffins = $.035 per<br />
muffin. The average cost of most whole grain muffin recipes is about<br />
$.20 per muffin. The flour is less than 1/5 the total cost. Be aware,<br />
however that when mail ordering, the cost of shipping and handling<br />
must be added.<br />
71
Quick Breads<br />
...establish the work of our hands for us-yes,<br />
establish the work of our hands.<br />
Psalm 90:17
Quick Breads<br />
<strong>Whole</strong> <strong>Grain</strong> Blender Magic! 81<br />
Techniques & Tips for Quick Breads 85<br />
Additional Tips for Coffee Cakes,<br />
Cornbread & Quick Loaf Breads<br />
88<br />
Biscuits & Scones 88<br />
Waffles/Pancakes Making Tips 92<br />
<strong>Grain</strong> Variety for Blender Waffles/Pancakes 95<br />
Tips for Making Crepes 97<br />
Making Muffins 105<br />
Quick Bread Recipes Nutrient Information 116<br />
QUICK BREAD RECIPES<br />
Almond Coffee Cake 89<br />
Blender Cornbread 90<br />
Cornbread 91<br />
Blender Waffles/Pancakes 96<br />
Blender Crepes 101<br />
Blender Banana Muffins 108<br />
Banana Nut Muffins 109<br />
Cinnamon Scones 110<br />
Hearty Biscuits 111<br />
Tortillas or Chapatis 112<br />
Pumpkin Bread 114<br />
Zucchini Bread 115<br />
FILLINGS & TOPPING RECIPES 102<br />
Cottage Filled Fruit Crepes 102<br />
Fresh Berry Topping 103<br />
Mixed Berry Topping 103<br />
Whipped Cream 103<br />
Fresh Apple Topping 104<br />
Dried Apple Topping<br />
80<br />
104
<strong>Whole</strong> <strong>Grain</strong> Blender Magic!<br />
With my blender, I have always been able to grind rolled<br />
oats and tiny grains such as millet, quinoa, amaranth, and teff<br />
into flour, to coarsely grind cornmeal from whole corn (this<br />
takes a sturdy blender), and to unevenly crack most other<br />
whole grains for hot cereal. Then a neighbor shared a whole<br />
wheat pancake recipe with me that called for adding the grain, whole<br />
and raw, to the liquid ingedients in the blender. The high speed<br />
blending action of the blender completely "milled" the grain.<br />
The result was incredible! Instead of making whole wheat pancakes,<br />
however, I converted my recipe for kamut-oat waffles to the blender<br />
procedure, using 1 egg to replace my usual 3 egg yolks + 3 beaten egg<br />
whites. These blender waffles were the lightest, most tender I had ever<br />
made. Why hadn't I thought of this fifteen years earlier? Convinced this<br />
blender process was working, I started experimenting with more waffle/<br />
pancake recipes, muffins, coffee cakes, crepes, and cornbread. They<br />
all turned out successfully, using all kinds of grains, except instant or<br />
parboiled brown rice.<br />
What's most exciting about this is that most households have<br />
blenders and they are not expensive. To do many recipes with whole<br />
grains you don't have to have a grain mill. This is the ultimate in<br />
convenience --requiring less than 15 minutes of your time to get the<br />
blender process going and completed, even with the two-stage process.<br />
What could be easier?<br />
Now there are limitations to this. There must be enough liquid in<br />
proportion to the grain to keep the blender churning for 3 minutes to<br />
grind the grain without putting excessive stress on the blender. This is<br />
why I call it blender batter baking. Any batter recipe with a ratio of<br />
about 1 cup grain to 1-1¹⁄₄ cups combined liquid ingredients usually<br />
works. The steps are simple and virtually the same for any blender<br />
batter recipe. The details follow the summary of steps below.<br />
Summary of Steps<br />
1. Blend liquids and grain on high speed 3 - 5 minutes.<br />
2. Cover blender and let stand several hours.<br />
3. Add egg and reblend 1 - 3 minutes.<br />
4. Add leavenings, salt, spices; blend just to mix.<br />
5. Fold in nuts, etc.<br />
6. Pour into pan or pans and bake.<br />
81
Steps in Detail<br />
1. Put all the liquid ingredients (except egg) with grain whole and raw<br />
(not flour) in the blender. Put liquids in first, followed by the grain.<br />
2. Blend on highest speed 3 - 5 minutes. As the batter blends, it will<br />
thicken because the grain is being ground into flour. Sometimes a<br />
bubble will form over the blades and stop the churning. The churning<br />
creates a vortex. Keep the vortex going. If the vortex disappears,<br />
slowing or changing the blender speed will help to get the batter<br />
churning again. If necessary, add a bit more liquid. Do not worry if<br />
you still feel grit in the batter from not-quite-ground grain. It will have<br />
a second chance in the second blending stage.<br />
3. Cover blender, unplug it and let stand at room temperature 7 hours<br />
or 12 - 24 hours depending on the grain (see p. 12). I have been asked<br />
the question: "won't the milk spoil?" The answer is no. The reason is<br />
that the milk is cultured either naturally or by adding vinegar to sour<br />
it. It is only sweet milk that could spoil, especially in hot weather. And<br />
it is not good to leave eggs at room temperature, which is the reason<br />
we save them for the second stage of blending.<br />
Another question I have often been asked: "Won't the blended grain<br />
lose nutritional value standing at room temperature for several<br />
hours?" Use your logic here. The grain is not directly exposed dry to<br />
the air. Secondly, neutralizing the phytic acid is releasing nutrients<br />
that will make them available to the body when digested. Two<br />
contradictory processes are not going on at the same time.<br />
4. Add egg and reblend about 1 - 3 minutes. This normally completes<br />
the grinding of the grain. Change blender speed as needed as in step<br />
#2 above to keep the vortex going. Add a bit extra liquid, if needed.<br />
Feel batter between fingers. If grit remains, you can blend 2 or 3<br />
minutes longer. Beyond that, the grain is probably as smooth as it's<br />
going to get. But don't worry, because the grain has already soaked<br />
and softened to become edible and nutritious when baked.<br />
5. Blend or thoroughly stir in leavening and spices (baking powder,<br />
soda, salt, cinnamon, etc) just before baking and just until mixed<br />
in. Stir these through a small strainer into a small bowl or<br />
container with a measuring spoon as you are measuring them.<br />
This will take out any lumps. Even though a powerful blender will<br />
do this, it is a good practice to follow. I usually include the spices<br />
in this process for the sake of convenience, even though they don't<br />
need sifting. I do this measuring and sifting in the first stage of<br />
recipe preparation. Then they are immediately ready to add to the<br />
batter in the second stage when you want to save last minute time.<br />
82
If the blender does not immediately churn when you add the<br />
leavenings, don't add more liquid. Just help the blender out by<br />
folding them in with a rubber spatula.<br />
6. Fold in any ingredients such as nuts just before baking without delay.<br />
Chopped nuts soaked for 7 hours will improve digestiblilty and<br />
nutrition (see p. 30). Drain and rinse them well before adding<br />
leavenings to a recipe.<br />
7. Pour into baking pan or pans and bake. When you start the final<br />
mixing of the second stage, preheat the oven and grease the pans.<br />
All these basic steps are written into the recipes, but not all the<br />
details. Review these as often as you need to. You will be surprised how<br />
fast you will learn and therefore not need to read these details every<br />
time.<br />
I can't begin to tell you how easy it is to use the blender method with<br />
whole grains for batter recipes. I love it and use it wherever possible<br />
even though I have a grain mill. Just remember, you are not going to<br />
be making any yeast loaf breads, biscuits, or cookie doughs in your<br />
blender! Quick loaf breads and even some muffin recipes will not have<br />
enough liquid for the blender method. So if you adapt recipes other<br />
than those in this book to the blender, do take care to<br />
follow the guidelines given here.<br />
A WORD ABOUT BLENDERS<br />
Generally a blender that crushes ice cubes is acceptable<br />
for the blender recipes. Most do. Be cautious if using an old<br />
or dull-bladed blender. Turn off a motor that stalls or<br />
begins to smell hot and give it a rest. If your blender isn't<br />
adequate, this method is worth a new blender for $30-<br />
$40. Two blenders suitable for blender batters in this<br />
cost range are the 450 watt, 12 or16 speed Oster or 525<br />
watt, 5 speed Braun. The Oster has a slight edge over the Braun<br />
with its metal gear, which is not as much at risk of cracking through<br />
repeated use. On the other hand, the Braun has a higher wattage which<br />
is an additional advantage. More heavy-duty blenders, of course, such as<br />
a Vita-Mix, a Bosch blender or DLX blender are ideal. Be aware that you<br />
may need to cut the blending time when using a Vita-Mix.<br />
Do not double recipes in a blender! When you add the leavenings you<br />
may get a volcanic eruption over the top of the blender. On the other<br />
hand, some heavy duty machines have larger capacity blender bowls.<br />
You will need to experiment since whole grain blender batters do<br />
require more power to blend; less batter in the bowl can ease this<br />
process.
Almond Coffee Cake<br />
Our most often served blender coffee cake. See pp. 81-83 for blender tips<br />
and pp. 85-88 for additional tips. To mix by hand with flour see p. 84 and<br />
use 2 cups whole wheat pastry flour or Kamut ® grain flour, 2¹⁄₄ cups barley flour<br />
or brown rice flour, or 2¹⁄₂ cups spelt flour.<br />
AMOUNT: 11" or 11.5" x 8" Pan (recommended, p.88)<br />
Bake: 325°F (165°C) - 30 to 40 minutes<br />
STAGE 1<br />
1. Place in blender; blend at highest speed 3 - 5 minutes; cover<br />
blender; let stand at room temperature several hours (p. 12):<br />
1 cup cultured milk or non-dairy alternative (p. 6)<br />
¹⁄₄ cup melted butter or olive oil (p. 7; or add melted coconut<br />
oil in step 6 below; see p. 19)<br />
³⁄₄ cup honey (p. 9; warm slightly if not easily pourable)<br />
grain choice (not flour): 1¹⁄₃ cups whole wheat pastry berries<br />
or 1¹⁄₂ cups spelt, Kamut ® grain or brown rice<br />
or 1¹⁄₄ cups hulled barley<br />
2. For topping blend together in order given with a fork except nuts;<br />
soak nuts in salted water overnight (p. 30); set aside:<br />
2 tablespoons melted butter (unsalted preferred, p. 7)<br />
2 tablespoons Sucanat or Rapadura (p. 9)<br />
¹⁄₂ cup uncooked rolled oats<br />
(with kamut only) 1 teaspoon cinnamon<br />
¹⁄₂ cup sliced or chopped almonds<br />
3. Sift through small strainer into a small bowl; set aside:<br />
1 teaspoons baking powder (p. 8)<br />
1 teaspoon baking soda (p. 8)<br />
¹⁄₂ teaspoon salt, to taste (p. 9)<br />
2 teaspoons cinnamon (omit with kamut)<br />
¹⁄₄ teaspoon ginger<br />
STAGE 2<br />
4. Preheat oven and grease baking pan (p. 82).<br />
5. Drain and rinse almonds well; stir into other topping ingredients.<br />
6. Just before baking, add eggs and blend on highest speed for 1 - 3<br />
minutes; briefly blend in leavening, salt and spices just to mix in<br />
evenly:<br />
2 eggs or alternative (p. 7)<br />
leavenings, salt and spices (from step 3)<br />
7. Pour batter into baking pan. Distribute topping evenly over top<br />
with fingers, pressing it slightly into batter with a fork.<br />
Bake at 325°F (165°C) for 30 - 40 minutes or until knife or toothpick<br />
comes clean out of center of cake. Serve cake hot or cold.<br />
89
Blender Cornbread<br />
A popular quick bread and so easy to make with<br />
whole dry corn or a blend of corn and another grain<br />
in the blender. See pp. 81-83 for blender tips and pp.<br />
85-88 for additional tips. To mix by hand with flour, see<br />
recipe, p. 91.<br />
AMOUNT: 8" Square <strong>Baking</strong> Pan (recommended, p.87)<br />
Bake: 325° (165°C) - 25 to 35 minutes<br />
STAGE 1<br />
1. Place in blender; blend at highest speed 3 - 5 minutes;<br />
cover blender (expect batter to be gritty); let stand at room<br />
temperature 12 - 24 hours (p. 12):<br />
1 cup cultured milk or non-dairy alternative (p. 6)<br />
¹⁄₄ cup melted butter or extra virgin olive oil (p. 7)<br />
3 tablespoons maple syrup or honey (p. 9)<br />
²⁄₃ cup whole kernel dry corn (p. 7)<br />
²⁄₃ cup additional whole kernel dry corn<br />
or ²⁄₃ cup whole wheat pastry grain<br />
or ³⁄₄ cup Kamut ® grain<br />
2. Sift through small strainer into a small bowl; set aside:<br />
1¹⁄₂ teaspoons baking powder (p. 8)<br />
¹⁄₂ teaspoon baking soda (p. 8)<br />
1 teaspoon salt (p. 9)<br />
STAGE 2<br />
3. Preheat oven to 325°F (165°C) and grease pan (p. 82).<br />
4. Just before baking, add eggs and blend on highest speed for<br />
1-3 minutes; briefly blend in leavening and salt just to mix in evenly:<br />
2 eggs or alternative (p. 7)<br />
leavenings and salt (from step 2)<br />
5. Pour batter immediately into greased baking pan.<br />
Bake at 325°F (165°C) for 25 - 35 minutes or until knife comes<br />
clean out of center. 1<br />
1 Sometimes my cornbread rises well. Sometimes it hardly rises at all. Who knows why?<br />
Maybe it is the liveliness of the leavening. But I don't worry about it because it always<br />
tastes good either way!<br />
Toasty Cornbread<br />
Great for leftover cornbread! Split cornbread pieces in half.<br />
Spread each half with butter and toast buttered side down on griddle.<br />
90
Waffle/Pancake Making Tips<br />
Become an expert in whole grain waffle/pancake making in no time<br />
with the following steps:<br />
1. Use the recipe for Blender Waffles/Pancakes, p. 96.<br />
2. Acquaint yourself with <strong>Whole</strong> <strong>Grain</strong> Blender Magic, pp. 81-83.<br />
3. Take advantage of the additional tips below.<br />
· Waffle iron Waffle irons are problematic. Belgian<br />
waffle irons, 7" in diameter, make the best whole<br />
grain waffles, but all modern irons have a nonstick<br />
finish that is suspect of releasing toxic<br />
compounds at high heat. An alternative is Rome's<br />
Cast Iron Waffle Iron (http://www.wisementrading.com/<br />
outdoorcooking/castiron.htm). The cost with shipping at the time of<br />
this writing is under $25. It is non-electric, made for stove top<br />
burner, and makes 6¹⁄₂" waffles. The grid is very shallow. It comes<br />
with its own seasoning instructions.<br />
· Griddle A cast iron griddle is the best! It is great to have one that fits<br />
over two burners. You can season your griddle in advance to<br />
minimize greasing when baking (see seasoning a crepe pan, p. 98).<br />
· <strong>Grain</strong> Since practically any whole grain or grain combination works<br />
great in this recipe, minimize the use of wheat. Wheat makes waffles<br />
and pancakes heavier than any other grain, and is used in many<br />
other recipes where a wide variety of grains don't work well. This<br />
is your opportunity to use variety (see p. 95) and also to meet allergy<br />
needs. With experimentation you will discover what grains you like<br />
best. My personal favorite is a combination of kamut and oats.<br />
· Liquid Cultured or soured milk will make the lightest waffles.<br />
I use yogurt thinned to the consistency of buttermilk, or 1 cup yogurt<br />
+ ¹⁄₂ cup water for 1¹⁄₂ cups cultured milk. See alternative choices,<br />
pp. 15-16. Keep the batter quite pourable--better thin than too<br />
thick. A vortex (large hole in the center of churning batter) insures<br />
best consistency for waffle batter. Adjust batter consistency to your<br />
preference. You may want your batter thicker for pancakes. To<br />
substitute juice, stay away from those with high sugar content, e.g.<br />
strawberry, that will cause the batter to stick in the waffle iron.<br />
Apple or orange juice are fairly safe. Nutritionally, however, I believe<br />
nut milks such as almond or coconut milk are better non-dairy<br />
alternatives to juice (recipes, p. 16). Even unsweetened fruit juices<br />
are concentrated in sugar.<br />
· Egg The egg is optional so there is no need for a substitute, but we<br />
always use it. See p. 17 for more information on quality of eggs.<br />
92
· Oil Fat is for crispy waffle lovers, but it also adds nutritional value<br />
if you add the right kind (see pp. 18-20). Fat also makes the waffles<br />
more golden brown. Nutritionally I recommend butter, coconut<br />
oil or extra virgin olive oil. If you omit the fat, special care must be<br />
taken to prepare the waffle iron or griddle so the batter does not<br />
stick (see <strong>Baking</strong> Waffles and <strong>Baking</strong> Pancakes, pp. 93, 94).<br />
· Vanilla Extract Many waffle and pancake recipes call for a little<br />
sugar. Vanilla acts somewhat similar to sugar in adding that<br />
certain something to the flavor. I call it the secret ingredient for<br />
especially tasty waffles, except in buckwheat waffles.<br />
· Salt See p. 9.<br />
· Sweetener Traditional recipes call for a bit. We don't add any. Who<br />
needs it with all that sweet stuff on top! Besides, added sugar in the<br />
batter will just mean more sticking problems in the waffle iron.<br />
· Leavening See p. 8.<br />
· Follow the two-stage process of mixing<br />
Recall the key reasons (pp. 12-14):<br />
Nutritional Value - Releasing nutrients; aids digestion of grains.<br />
Smoother Batter - Allows second blending after grain is soaked.<br />
Convenience - Cuts last minute mixing time in half.<br />
· <strong>Baking</strong> waffles<br />
The demonstration CD is especially helpful with this.<br />
Turn waffle iron to hottest setting and allow it to heat up fully. For<br />
stove top cast iron, heat as for griddle using sizzling water drops to<br />
test for readiness.<br />
Grease surface with coconut oil, or spray just before pouring in<br />
batter for first waffle (see Olive Oil Non-Stick Spray, p. 7).<br />
Do not pour batter quite to edges of iron-- ³⁄₄ cup batter is about<br />
right to fill a 7" waffle iron.<br />
Allow waffles to bake until light goes off or about 4-5 minutes for most<br />
of the newer waffle irons. Set a timer! Gently test lifting the lid. If the<br />
waffle is done, the lid will lift easily without the waffle sticking to both<br />
surfaces of the iron. If it does not come up easily, give it a little more<br />
baking time. Stove top cast iron requires turning waffle over.<br />
The best way to prevent scratching the waffle iron while removing<br />
the waffle is to loosen and lift the edge up with a shish kabob or<br />
party stick (see photo for crepes, p. 99).<br />
Don't throw away broken up waffle pieces! This may happen occasionally<br />
when removing waffles stuck to the iron. Dad and boys will<br />
eat them!<br />
93
· <strong>Baking</strong> pancakes:<br />
The demonstration CD is especially helpful with this.<br />
Turn griddle to medium-high; drops of water should sizzle<br />
on the griddle surface.<br />
Grease surface just before pouring on batter for first pancakes.<br />
If seasoned well, you may not need to do this at all.<br />
Pour on batter for any size pancakes you want.<br />
Number of pancakes given in recipe are for about<br />
4" pancakes.<br />
Turn pancakes when the bubbles<br />
on the top side start to break.<br />
Turn only once.<br />
· Keeping Waffles or Pancakes Hot<br />
Serving them directly from the iron is best. Otherwise, stack plates<br />
in the oven to get hot. As waffles bake, stack them on the top plate.<br />
Turn the oven to 200 - 300°. Waffles will crisp up a bit more in the<br />
oven. To serve, have syrup heated and/or other toppings already<br />
prepared.<br />
· To keep pancakes hot, overlap them on one hot serving plate in the<br />
oven or on a plate covered with a large inverted metal mixing bowl<br />
on top of the range next to the griddle. As hot baked pancakes are<br />
added to the serving plate covered with the bowl, they warm the<br />
bowl which in turn keeps the cakes hot until ready to serve. This<br />
works especially well if the bowl is metal; I use my large stainless<br />
steel mixing bowl.<br />
· Waffles and pancakes also keep hot in a rice cooker turned on low.<br />
We have used this successfully in serving groups. A stainless steel<br />
rice cooker is now available (look up Lotus Foods on Internet).<br />
· Freezing & Reheating Leftover Waffles/Pancakes<br />
Allow to thoroughly cool. Wrap snugly in plastic wrap (see p. 11),<br />
then firmly in foil. Use within 2 weeks. There are several methods<br />
to reheat. For waffles I use the first method.<br />
Turn the waffle iron on medium heat setting. Match the waffles<br />
with the grid and reheat. If waffles are still frozen use lower<br />
heat.<br />
Toast in toaster on lightest setting. Great for a snack!<br />
Warm on oven rack 3-5 minutes at 350°.<br />
Heat pancakes covered.<br />
94
<strong>Grain</strong> Variety for Blender Waffles/Pancakes<br />
In Blender Waffles/Pancakes, p. 96, use 1¹⁄₂ cups grain or less<br />
depending on the grains used. Amounts below are approximations.<br />
Start with lesser amounts when first learning; make adjustments as<br />
desired. The following combinations work well; we like them all.<br />
· 1¹⁄₈ - 1¹⁄₂ cups brown rice or millet (gluten free)<br />
Wonderfully light, these look like white flour waffles! Batter may be<br />
very thin. Fill waffle iron almost completely to edges. These two grains<br />
also make a great combination using equal parts of each grain.<br />
· 1¹⁄₈ - 1¹⁄₃ cups Kamut ® grain, spelt, wheat<br />
Kamut ® grain is a favorite. We seldom use wheat except kamut because<br />
this recipe is our chance to use so many wheat-free grains. Wheat will<br />
make the heaviest waffles or pancakes of all the whole grains and many<br />
persons are either sensitive or allergic to wheat.<br />
· 1 cup buckwheat<br />
Reduce to 1 cup grain (equal to about 1¹⁄₂ cups flour) for 4 servings.<br />
It expands. Sprouting buckwheat is our favorite and it is much less<br />
costly than toasted or raw buckwheat (see p. 68). Sprouting buckwheat<br />
includes the dark outer hull. My husband's favorite. I like this<br />
grain best when not combined with other grains. Omit vanilla.<br />
· 1 cup barley<br />
Hulled, not pearled. Reduce to 1 cup grain (equal to about 1¹⁄₂ cups<br />
flour) for 4 servings. It expands.<br />
· 1¹⁄₈ - 1¹⁄₃ cups corn (gluten free)<br />
Use dry whole corn, not cornmeal for the blender method. Expect<br />
some crunch and a distinct corn flavor, appealing to most tastes. Also<br />
a good combination with whole wheat pastry berries using equal parts<br />
of each grain.<br />
· 1¹⁄₂ cups quinoa (gluten free)<br />
Thoroughly rinse quinoa for 3 minutes in strainer to remove bitter<br />
saponins flavor (see p. 69). Use 1³⁄₄ cups liquid in recipe for either<br />
pancakes or waffles.<br />
· oats<br />
Especially good in combination with other grains, using ¹⁄₂ cup<br />
rolled oats or ¹⁄₃ cup oat groats. Reduce the amount of the primary<br />
grain by about ¹⁄₃ cup. My favorite, for example is ¹⁄₂ cup rolled oats<br />
+ ³⁄₄ - 1 cup Kamut ® grain.<br />
· nuts & seeds<br />
Add 2 tablespoons ground flax seed with the egg in step 4, p. 96<br />
(see pp. 30-31 for nutrition and grinding). Sprinkle nuts or seeds over<br />
the top of the batter in waffle iron: chopped pecans, walnuts, sunflower<br />
seeds (see p. 30 for soaking preparation).<br />
95
Blender Waffles/Pancakes<br />
Enjoy surprisingly light and crispy whole grain waffles<br />
without an expensive grain mill. Versatile allergy alternatives<br />
with grain variations. See pp. 81-84 for blender tips and<br />
pp. 92-94 for additional tips. For 6 servings you can increase this recipe 1¹⁄₂<br />
times, but do not double it; this will overload the blender unless you have<br />
a Vita-Mix. To mix by hand with flour see p. 84; use about 2¹⁄₄ cups flour.<br />
AMOUNT: Serves 4 (4 - 5 waffles--7"; 18 - 20 pancakes--4")<br />
STAGE 1<br />
1. Place in blender; blend at highest speed 3 - 5 minutes;<br />
cover blender; let stand at room temperature several hours (p. 12):<br />
1¹⁄₂ - 1³⁄₄ cups cultured milk or non-dairy alternative (p. 6)<br />
Use the lesser amount liquid for pancakes; batter should be<br />
a little thicker than for waffles; adjust to your preference.<br />
2 tablespoons melted butter or olive oil (p. 7; or add melted coconut<br />
oil in step 4 below; p. 19)<br />
1 teaspoon vanilla extract (omit with buckwheat)<br />
1 cup raw brown rice + ¹⁄₂ cup uncooked rolled oats (pp. 7-8)<br />
or other grain choice (see suggestions, p. 95)<br />
2. Sift through small strainer into a small bowl; set aside (see step 5, p. 82):<br />
2 teaspoons baking powder (p. 8)<br />
¹⁄₂ teaspoon baking soda (p. 8)<br />
¹⁄₂ - 1 teaspoon salt, to taste (p. 9)<br />
STAGE 2<br />
3. Preheat waffle iron at highest temperature, or griddle on mediumhigh<br />
(pp. 93, 94).<br />
4. Just before baking, add egg and any extra liquid; blend on highest speed<br />
1 - 3 minutes; briefly blend in optional ground flax seeds, then<br />
leavenings and salt (assist with rubber spatula, if needed):<br />
1 egg or alternative (p. 7)<br />
additional liquid (add water if batter needs thinning to keep a vortex going)<br />
2 tablespoons ground flax seeds, optional (p. 95)<br />
leavenings and salt (from step 2)<br />
5. Grease waffle iron or griddle if needed.<br />
Pour batter onto hot waffle iron or<br />
griddle for pancakes. Bake until light<br />
goes off on waffle iron or according to<br />
appliance instructions. For pancakes,<br />
bake on first side until bubbles on unbaked side begin<br />
to break; turn and bake on second side.<br />
6. Serve hot (see p. 94).<br />
96
Fresh Apple Topping<br />
A favorite waffle, pancake or crepe topping when<br />
fresh apples are in abundance. I like tart apples<br />
such as Gravenstein, Greening, Newton Pippin, or<br />
Granny Smith. Jonathan are also especially good.<br />
AMOUNT: 4 - 6 Servings (2¹⁄₂ - 3 Cups)<br />
1. Combine in saucepan, bring to boil, lower heat and simmer until<br />
apples are just tender, about 5 minutes:<br />
4 apples, cored, peeled or unpeeled; coarsely chopped<br />
just enough water to prevent sticking while cooking<br />
2. Remove from heat, drain, if desired, and stir in:<br />
¹⁄₄ cup honey, to taste (p. 9)<br />
¹⁄₂ teaspoon cinnamon, to taste (p. 9)<br />
Dried Apple Topping<br />
A favorite off-season waffle and pancake topping. Delicious with yogurt.<br />
Dried apples are the least expensive dried fruit to keep on hand.<br />
AMOUNT: About 3 Cups<br />
1. Soak several hours or overnight:<br />
1 cup dried apples, unsulfured (p. 7)<br />
2 cups filtered water (p. 9)<br />
2. Drain the apples, saving the juice. Measure the<br />
juice and add enough water to make 1 cup liquid;<br />
pour into saucepan and whisk in:<br />
¹⁄₄ cup honey (p. 9)<br />
2 tablespoons arrowroot powder (see below) or cornstarch<br />
¹⁄₂ teaspoon cinnamon (p. 9)<br />
3. Bring to a low boil over medium heat, stirring constantly with<br />
wire whisk. Continue to cook until thickened and clear, about<br />
1 minute. Remove from heat.<br />
4. Snip apples in pieces with kitchen shears, or chop small<br />
with a chef's knife. Fold into cooked sauce.<br />
5. To serve, rewarm or keep warm, as needed over low heat.<br />
104<br />
Ingredient Tip Arrowroot powder comes from the tubers of several<br />
tropical plants, containing trace minerals, better nutritionally than cornstarch,<br />
but more unstable. It requires lower heat and is best not boiled<br />
vigorously. It generally does not hold or reheat well, although this recipe<br />
remains thick upon refrigerating and reheating leftover topping. This may<br />
be partly due to the thickening effect of the pectin in the apples. Although<br />
arrowroot has twice the thickening power of cornstarch, I prefer to use the<br />
same amount of either in recipes. Purchase at a health food store.
Data based on first ingredients listed in recipe; g = grams; % = % of Calories<br />
RECIPE SERVING SIZE CALORIES PROTEIN FAT CARB DIETARY FIBER<br />
116<br />
cultured milk in recipes is based on using 2 parts whole yogurt + 1 part water.<br />
Blender Waffles/Pancakes (rice/oat), p. 96 1 Serving of 4 335 8 g (10%) 12 g (33%) 47 g (57%) 2.5 g<br />
Blender Waffles/Pancakes (Kamut ® grain/oat) 1 Serving of 4 315 10 g (12%) 11 g (33%) 43 g (55%) 9 g<br />
pp. 95, 96<br />
Almond Coffee Cake (cut 3 x 5), p. 89 1 piece of 15 201 4 g (7%) 8 g (33%) 30 g (59%) 3 g<br />
Blender Crepes, p. 101 1 crepe of 15 54 2 g (12%) 2 g (25%) 8 g (62%) 1 g<br />
Blender Cornbread or Cornbread (cut 3 x 3) 1 piece of 9 135 3 g (9%) 6 g (38%) 18 g (53%) 1 g<br />
pp. 90, 91<br />
Blender Banana Muffins without nuts, p. 108 1 muffin of 14 170 3 g (7%) 7 g (38%) 24 g (55%) 3 g<br />
Banana Nut Muffins, p. 109 1 muffin of 12 207 4 g (8%) 8 g (35%) 30 g (58%) 4 g<br />
Cinnamon Scones, p. 110 1 scone of 12 170 2 g (6%) 8 g (44%) 21 g (50%) 3 g<br />
Hearty Biscuits, p. 111 1 biscuit of 9 131 3 g (9%) 4 g (30%) 20 g (61%) 3 g<br />
Tortillas or Chapatis, p. 112 1 tortilla of 12 89 3 g (12%) 1 g (15%) 16 g (74%) 4 g<br />
Pumpkin Bread, p. 114 1 slice of 16 172 3 g (6%) 4 g (18%) 34 g (76%) 3 g<br />
Zucchini Bread, p. 115 1 slice of 16 130 2 g (7%) 4 g (25%) 23 g (68%) 2 g
Yeast Breads<br />
Again he asked, "What shall I compare the kingdom<br />
of God to? It is like yeast that a woman took<br />
and mixed into a large amount of flour until it<br />
worked all through the dough." Luke 13:20-21
Yeast Breads Contents<br />
Introducing Yeast Breads 119<br />
Outline of Steps in Yeast Bread <strong>Baking</strong> 121<br />
The Value of a Bread Kneader 122<br />
What About Auto-Bake Machines? 122<br />
Pans for Bread <strong>Baking</strong> 123<br />
Ingredients for Yeast Breads 124<br />
Yeast Bread <strong>Baking</strong> Techniques 130<br />
Evaluating a Yeast Bread Loaf 141<br />
Trouble Shooting Your Bread 142<br />
Sensational Sourdough 156<br />
The Best Thing Before Sliced Bread 160<br />
Yeast Bread Recipes Nutrient Information 168<br />
RECIPES<br />
Delicious <strong>Whole</strong> <strong>Grain</strong> Dough 144<br />
Delicious <strong>Whole</strong> <strong>Grain</strong> Bread 145<br />
Break-Apart Loaves 146<br />
<strong>Whole</strong> <strong>Grain</strong> Dinner Rolls 147<br />
Cinnamon Rolls 148<br />
Prune Rolls 149<br />
Cinnamon Bread 150<br />
Oatmeal Bread 150<br />
Little Wheat Nuggets Bread 150<br />
Barley Malt Bread 150<br />
Seven <strong>Grain</strong> Bread 151<br />
Bread in the Round 151<br />
Parmesan Herb Bread 152<br />
Pizza Crust 153<br />
Party Pizza 153<br />
Sprouted <strong>Grain</strong> 154<br />
Sprouted <strong>Whole</strong> <strong>Grain</strong> Bread 155<br />
Sourdough Starter 157<br />
Sourdough Bread 158<br />
Sourdough English Muffins 159<br />
118
Introducing Yeast Breads<br />
The wonderful world of whole grain baking is not complete<br />
without an introduction to yeast breads. The combination of a variety<br />
of whole grain quick breads and yeast breads adds tremendous<br />
nutritional and creative value to family meals. Yeast bread baking is<br />
more involved and complex than baking quick breads. Most homemakers<br />
shy away from it. Nevertheless, yeast breads fill a niche in our<br />
diet that quick breads, tasty as they are, fail to completely satisfy. Not<br />
only do they provide contrast in taste and texture, but they are suited<br />
to all meals and snacks. In comparison, most sweetened quick breads<br />
are more suitable for breakfast menus, snacks, brunch or desserts.<br />
A Russian experience will serve to illustrate. During my first classes<br />
for Russian women, I prepared a quick bread such as muffins to serve<br />
with a main dish. While dining on the main dish, I expected the women<br />
to eat the muffins as an accompaniment. Instead, they wanted to save<br />
the muffins for dessert with tea, and while dining on the main dish<br />
asked, "Isn't there any bread?" In Russia, a meal is not a meal without<br />
bread, and that means yeast bread.<br />
Yeast bread has been loved by virtually all peoples for millennia,<br />
while most quick breads are more recent. Homebaked yeast breads<br />
are worthy of our attention since most commercial yeast breads,<br />
including whole grain, fail to measure up nutritionally. Likewise, the<br />
delectable taste and texture of homebaked yeast breads is hard to<br />
match com-mercially. People who are served a slice of homebaked<br />
yeast bread feel like they are getting the royal treatment.<br />
There is always more to be learned about whole grain baking and<br />
especially about making yeast breads. For years I made the first basic<br />
yeast bread recipe that came with my electric bread kneader with<br />
success every time. I have happily used my Bosch Universal Kitchen<br />
Machine for thirty years (not an autobake machine). I followed the<br />
easiest guidelines for producing this recipe almost effortlessly, doing<br />
a variety of variations with the same dough: loaves, dinner rolls,<br />
variations of cinnamon rolls, date pecan ring, pizza crust, parmesan<br />
herb bread, hamburger and hot dog buns. I used hard winter red<br />
wheat exclusively until I was introduced to spelt, Kamut ® grain, hard<br />
white wheat and hard red spring wheat. I continued to have consistent<br />
success substituting these grains in the same recipe with slight<br />
variations in flour quantity.<br />
The original recipe, Delicious <strong>Whole</strong> <strong>Grain</strong> Dough, p. 144 still<br />
remains my basic recipe, although now incorporating changes based<br />
on current nutritional understanding concerning the issue of phytates.<br />
119
Although instruction is given in the recipes for hand-kneading, I<br />
have always used my electric bread kneader. If you have a machine that<br />
does the work for you, who wants to discourage it? On the other hand,<br />
I believe one gains a much better understanding of the kneading<br />
process by learning to hand-knead. Likewise, not everyone will have an<br />
electric bread kneader. Either way, try your hand at hand-kneading<br />
first before relying completely on an electric bread kneader.<br />
Recall key nutritional reasons for neutralizing the phytic acid in<br />
whole grains: to release valuable nutrients, to make the protein more<br />
usable, and to reduce stress of gluten on the digestive system. Fermentation<br />
with yeast is one of the three ways to accomplish this. Unfortunately,<br />
commercial yeast, which includes only one strain of bacteria,<br />
does not adequately break down the phytates. According to Claude<br />
Aubert in Les Aliments Fermentes Traditionnels, as quoted in Nourishing<br />
Traditions, 1 the fermentation of commercial yeast "becomes<br />
mainly an alcoholic fermentation and the acidification is greatly lessened.<br />
The bread is less digestible, less tasty and spoils more easily."<br />
Thus the two-stage method of soaking is still called for even in my yeast<br />
bread recipes that rely on commercial yeast fermentation to neutralize<br />
phytic acid. The exception is that when sprouted grain is used for the<br />
flour, the soaking stage may be omitted. Likewise, sourdough breads,<br />
fermented by a combination of several yeasts, do not require the<br />
soaking stage in the same way as when using commercial yeast.<br />
Sourdough, nevertheless, has its own soaking stage. Each of these<br />
three methods for making yeast breads is introduced in this book.<br />
Since you have learned the two-stage method of soaking for quick<br />
breads, making the transition to yeast breads and even sourdough<br />
bread will not seem so strange or difficult. You will also be able to apply<br />
the principles of yeast bread baking in this book to your own favorite<br />
recipes as well as all other yeast bread recipes from additional cookbooks<br />
and resources.<br />
A yeast bread is not a quick bread because of the time involved in<br />
the fermentation process and the kneading process. Yet your own time<br />
involved is probably not more than 35 - 40 minutes for two loaves of<br />
bread even if you hand-knead without a machine. Shaping the dough<br />
into rolls or items other than loaves may add another 10 minutes. It is<br />
the hand-kneading process that requires the most effort. Otherwise, it<br />
is an exercise in patient waiting for the dough to do its own work. It will<br />
not do to be in a rush to start and complete a yeast bread recipe of high<br />
nutritional value (see, for example, Exodus 12:39).<br />
1 Nourishing Traditions by Sally Fallon with Mary G. Inig, Ph.D.. Washington D.C. ,<br />
NewTrends Publishing, Inc. (www.newtrendspublishing.com), 2001, p. 489.<br />
120
The instructions and techniques explained for making yeast<br />
breads seem complicated and involved, especially at first. The actual<br />
practice, however, is really quite simple and easily understood after<br />
a few practices. With increasing experience, you can make yeast<br />
breads of any type with ease and confidence and will not need to refer<br />
to involved instructions. The basic techniques are the same for all with<br />
slight variation for sourdough or sprouted breads. Don't expect to<br />
learn all there is to know from this book. It is an introduction to the<br />
basics.<br />
Getting the perspective from the outline below will provide a<br />
clearer sense of direction to build your confidence.<br />
Detailed explanations of these steps follow on<br />
the succeeding pages, paralleling the basic<br />
yeast dough and yeast bread recipes. After a<br />
few yeast bread baking experiences, the recipes<br />
alone will give you sufficient instruction.<br />
Outline of Steps in Yeast Bread <strong>Baking</strong><br />
1. Soak major portion of flour.<br />
2. Let stand 12 - 24 hours.<br />
3. Proof the yeast.<br />
4. Add remaining ingredients with yeast.<br />
5. Knead, adding more flour as needed.<br />
6. 1st rise - in the bowl<br />
7. Press down gently.<br />
8. 2nd rise - in the bowl<br />
9. Press down gently; knead briefly.<br />
10. Divide and shape; place in pans.<br />
11. 3rd rise - Proofing - in the pans<br />
12. Bake (4th rise - Oven Spring).<br />
13. Turn loaves out to cool.<br />
14. Cool completely before slicing/storing.<br />
121
Troubleshooting<br />
Your Bread<br />
Check out the positives first! See p. 141.<br />
Too soft, sticky, or "gooey" after baking?<br />
· Not enough flour added<br />
· Not baked long enough<br />
· Unpasteurized milk not scalded<br />
· If sprouted grain added, sprouts too long or mature<br />
· Too much potato or potato water added<br />
Too dry or crumbly?<br />
· Too much flour added<br />
· Flour too coarse in texture<br />
· Raisins not soaked or drained before adding<br />
Dough doesn't rise?<br />
· Yeast left out (It does happen!)<br />
· Yeast is dead or inactive<br />
· Yeast proofed in too hot water<br />
· Bread allowed to rise in too hot a place (as oven or hot stove top)<br />
Dough rises too slowly?<br />
· Water added was too cool<br />
· Flour was refrigerator cold<br />
· Place of rising too cool<br />
· Yeast old, but not dead<br />
Falls while baking?<br />
· Allowed to rise too high before baking<br />
· Temperature in oven not turned high enough<br />
Doesn't rise very high?<br />
· Don't expect it to rise as high as white bread<br />
· Addition of grains other than wheat<br />
· Dough took too long to rise (see reasons above)<br />
· Not enough kneading to develop gluten, or over-kneading<br />
· Pans too large<br />
· Too much liquid in recipe<br />
Burned?<br />
· Oven temperature too hot<br />
· Baked too long<br />
· Glass pans absorb more heat. Lower by 25° if needed.<br />
· The more honey used, the faster the bread browns.<br />
142
Tastes flat?<br />
· Salt left out<br />
· Not enough salt<br />
Poor flavor?<br />
· Recipe not followed correctly<br />
· Recipe doesn't suit your taste--adjust to suit your taste<br />
· Your creative additions didn't quite work, but don't give up<br />
Has large air holes?<br />
· Air bubbles not pressed out adequately<br />
while shaping the dough (pp. 136-137)<br />
Crumbles when sliced?<br />
· Too dry (p. 131)<br />
· Not allowed to cool thoroughly before slicing<br />
· Wrong kind of knife for the task--an all too common occurrence<br />
Causes indigestion, drowsiness, or other discomfort?<br />
· Not baked long enough<br />
· Sensitive or allergic to wheat, gluten, or other ingredient<br />
· Carbohydrate eaten alone can cause drowsiness--eat some<br />
protein with the bread<br />
· The condition, Candida Albicans, a proliferation of yeast throughout<br />
the body cells, is aggravated by eating foods containing yeast<br />
· Bread eaten while too fresh (p. 140)<br />
What to do with Bread 'Failures'<br />
Make bread crumbs<br />
Trim off burned part, break up into blender and process to crumbs;<br />
freeze in tightly covered container. Use to garnish casseroles or in<br />
recipes calling for bread crumbs.<br />
Make bread cubes<br />
Trim off burned part, cut in cubes and freeze to use in bread stuffing.<br />
Make croutons<br />
Make Soup 'n Salad Croutons, Soups & Muffins or Meals in Minutes.<br />
Make a dessert<br />
Use in Sweet 'n Spicy Pudding, Desserts; rich and delicious!<br />
143
Delicious <strong>Whole</strong> <strong>Grain</strong> Dough<br />
Master this one recipe and you will be able to make several delicious<br />
variations with it. Easily double this recipe with an electric bread kneader<br />
(p. 122). For additional ingredient variations not included in specific recipe<br />
variations, see pp. 128-129.<br />
AMOUNT: About 3 lbs. Dough (See Recipe Variations)<br />
STAGE 1 (pp.130-131)<br />
1. Blend well in mixing bowl (dough may be quite firm); lay plastic<br />
wrap snuggly on top of dough (p. 11); cover bowl with damp cloth<br />
(p.131); let stand 12-24 hours:<br />
2 cups warm filtered water (p.9)<br />
2 tablespoons whey or apple cider vinegar (pp.6, 128)<br />
4 - 6 cups whole wheat flour, spelt or Kamut ® grain flour (p.7)<br />
STAGE 2 (pp.131-136)<br />
2. Blend and allow to stand 5-10 minutes until it bubbles up (p.131):<br />
¹⁄₄ cup very warm (but not hot) water<br />
1 tablespoon active dry yeast (or ¹⁄₄ oz. packet) (p.8)<br />
¹⁄₂ teaspoon baking soda (neutralizes acid in step 1; see p. 128)<br />
¹⁄₂ teaspoon honey<br />
3. Blend following ingredients in measuring cup; work into dough<br />
followed by proofed yeast until all is well blended (pp.131-132):<br />
¹⁄₃ cup melted coconut oil or butter, or olive oil (p.7)<br />
¹⁄₃ cup honey (p.9)<br />
2 teaspoons salt (p.9)<br />
4. Add flour in the bowl until dough can be handled easily outside<br />
the bowl; turn out of bowl and knead 20 minutes or 600-800<br />
strokes until smooth and resistant to kneading action, adding<br />
more flour, as needed to prevent sticking (pp. 132-134):<br />
2 - 3 cups flour (sprouted flour or unbleached white bread flour, pp.8, 132)<br />
(expect to use more if spelt flour used in step 1)<br />
5. 1st Rise (p.135) Place dough in lightly greased bowl, grease top of<br />
dough lightly, cover with damp cloth; let rise in a warm place until<br />
double, about 1-1¹⁄₂ hours. Use finger poke test.<br />
6. 2nd Rise (pp.135-136) Punch dough down gently, turn it over; cover<br />
and let rise until double, about 45 minutes. Use finger poke test.<br />
7. Punch down down; place on counter with a little flour under it;<br />
knead briefly, round it up and cover with a damp cloth; let it rest<br />
10-15 minutes (p.136).<br />
8. Shape dough and bake, as desired, into bread loaves, rolls, or pizza<br />
crust, etc. using recipes that follow.<br />
144
Living Bread<br />
I love working with food. I marvel at the variety, the textures, the<br />
flavors, the colors, and the endless ways to prepare it. There is almost<br />
nothing I like better than to serve others a beautiful satisfying meal of<br />
tasty, nutritious food. This interest was sparked in me even before I<br />
began my university years in home economics education.<br />
But I had little awareness of the Master Chef, the personal Creator<br />
who had originated the foods I loved to prepare. My background wasn't<br />
religious, although from childhood I believed in my own idea of God. I<br />
had heard of Jesus, but I thought of him only as the greatest man who<br />
ever lived. I did not think he was essential to my belief in God. Although<br />
I felt some security in my belief in God, it left me with only a vague<br />
understanding of who he was. Consequently, as with everything else in<br />
my life, my choice of an education in home economics was not<br />
grounded in any kind of conscious relationship with him.<br />
When I was invited to attend a Bible study held weekly at my<br />
university residence, I brought my own idea of Jesus with me. I wasn't<br />
aware that He had created a complete meal for over 5,000 people out<br />
of two fish and five loaves of barley bread just by giving thanks for it to<br />
his heavenly Father and distributing it to the multitude through the<br />
helping hands of his disciples! I soon learned that my conception of<br />
him was far too limited.<br />
In the beginning was the Word and the Word was with God, and the<br />
word was God...The Word became flesh and lived for a while among<br />
us. We have seen his glory, the glory of the one and only Son, who<br />
came from the Father, full of grace and truth. John 1:1, 14.<br />
Who was Jesus Christ? The greatest Man that ever lived? Yes! But<br />
much more. Was it possible that I could believe in God and reject Jesus<br />
Christ? Through him all things were made; without him nothing was<br />
made that has been made (John 1:3). Obviously not; Jesus Christ was<br />
present and active in the creation of the world!<br />
Why did I need to concern myself with believing in Jesus Christ? Out<br />
of his own eternal relationship with his heavenly Father, he was seeking<br />
a personal relationship with me, as well. My sheep listen to my voice,<br />
I know them, and they follow me (John 10:27). While God created food<br />
for me, he created me for himself, to honor and reflect his creative and<br />
moral magnificence.<br />
166
Yet, there is a separation between human beings and God ever since<br />
Eve deliberately chose to defy his instructions by eating and serving the<br />
wrong food. Just imagine that he chose a food issue to test man's<br />
obedience to himself--so homely, so every-day! Adam and Eve suffered<br />
the consequences of that choice--separation from his fellowship and<br />
death, both physical and spiritual. They chose to make their decisions<br />
about life independently of God, and that was exactly what I had been<br />
doing!<br />
No one had ever explained to me that I was spiritually dead or that<br />
the purpose of God, the Son, becoming flesh was not just to identify<br />
with my human situation alone. He took the death penalty on himself,<br />
to pay the price for my rebellion, that is my independence from God,<br />
and to restore a fellowship relationship with himself. Imagine, the<br />
eternal, living, personal God taking my death sentence upon himself!<br />
Thus I discovered it is not possible to honor God or to know him apart<br />
from Jesus. I learned that receiving God, the Son, Jesus Christ, was<br />
receiving the Father as well. I am the way and the truth and the life.<br />
No one comes to the Father except through me. If you really knew me,<br />
you would know my Father as well. From now on, you do know him<br />
and have seen him...Anyone who has seen me has seen the Father<br />
(John 14:6-7, 9).<br />
I gave my life to Jesus Christ. Yet to all who received him, to those<br />
who believed in his name, he gave the right to become children of God<br />
(John 1:12). It was the beginning of a transformed life. ...if anyone is<br />
in Christ, he is a new creation; the old has gone, the new has come!<br />
All this is from God....God made him who had no sin to be sin for us,<br />
so that in him we might become the righteousness of God (2 Corinthians<br />
5:17, 21).<br />
"I am the bread of life. He who comes to me will never go hungry...I<br />
am the living bread that came down from heaven. If a man eats of this<br />
bread, he will live forever" (John 6:35, 51). This is Jesus' astounding<br />
offer to "whosoever" believes in him (John 3:16).<br />
This is the living bread that you may eat<br />
of and not die, the central message God<br />
desires to make known to us even as<br />
reflected in and made known through<br />
our daily bread (Romans 1:20; Jeremiah<br />
15:16).<br />
167
Data based on first ingredients listed in recipe; g = grams; % = % of Calories<br />
_____________________________________________________________________________________________<br />
RECIPE SERVING SIZE CALORIES PROTEIN FAT CARB DIETARY FIBER<br />
168<br />
Delicious <strong>Whole</strong> <strong>Grain</strong> Bread, p. 145 1 slice/16 per loaf 108 4 g (12%) 3 g (19%) 22 g (69%) 3 g<br />
(6 cups wheat flour; 1 cup=407 Calories)<br />
Parmesan Herb Bread, p. 152 1 slice/16 per loaf 111 4 g (12%) 3 g (22%) 19 g (68%) 3 g<br />
<strong>Whole</strong> <strong>Grain</strong> Dinner Rolls, p. 147 1 roll/15 pan 115 3 g (11%) 3 g (21%) 19 g (68%) 3 g<br />
(without sesame seeds)<br />
Cinnamon Rolls, p. 148 (w/out opt. ingred.) 1 roll/15 pan 138 3 g (9%) 3 g (18%) 19 g (68%) 3 g<br />
Prune Rolls, p. 149 1 roll/15 pan 179 4 g (9%) 6 g (26%) 19 g (68%) 4 g<br />
Cinnamon Bread, p. 150 (with raisins) 1 slice/16 per loaf 143 3 g (9%) 3 g (16%) 19 g (68%) 3 g<br />
Oatmeal Bread, p. 150 (¹⁄₄ C. ea. honey, oil) 1 slice/16 per loaf 107 3 g (12%) 2 g (19%) 19 g (68%) 3 g<br />
Little Nuggets Bread, p. 150 1 slice/16 per loaf 118 4 g (12%) 3 g (20%) 19 g (68%) 3 g<br />
Barley Malt Bread, p. 150 1 slice/16 per loaf 118 4 g (12%) 3 g (20%) 19 g (68%) 3 g<br />
Seven <strong>Grain</strong> Bread, p. 151 1 slice/16 per loaf 98 3 g (12%) 3 g (23%) 17 g (64%) 3 g<br />
Party Pizza, 13" pizza, p. 153 (all ingred.) 1 wedge of 6 376 20 (21%) 16 (36%) 42 (43%) 6 g<br />
Sourdough Bread, p. 158 1 slice/16 per loaf 91 4 g (15%) 1 g (8%) 19 g (68%) 2 g<br />
Sprouted <strong>Whole</strong> <strong>Grain</strong> Bread, p. 155 1 slice/16 per loaf 121 4 g (12%) 3 g (19%) 22 g (69%) 3 g<br />
Sourdough English Muffins, p. 159 1/2 muffin of 20 88 4 g (15%) 1 g (6%) 19 g (68%) 2 g
A<br />
Allergy alternatives, 27, 30,<br />
32, 56-57, 58<br />
Almond Coffee Cake, 89<br />
Almond milk, 9, 16<br />
Almond Milk for <strong>Baking</strong>, 16<br />
Amaranth, 50-52, 69<br />
Apple cider vinegar 6, 15, 32,<br />
128, 130<br />
Apple Topping, Dried, 104<br />
Apple Topping, Fresh, 104<br />
Appliances, 10<br />
B<br />
<strong>Baking</strong> pans , 10<br />
<strong>Baking</strong> powder, 8, 25-27, 32<br />
<strong>Baking</strong> soda, 8, 25-27,128<br />
Banana Muffins, Blender,<br />
108<br />
Banana Nut Muffins, 109<br />
Barley, 50-52, 64-65<br />
Barley malt, 9<br />
Barley Malt Bread, 150<br />
Berry Topping, Fresh, 103<br />
Berry Topping, Mixed, 103<br />
Biscuits, 88<br />
Hearty Biscuits, 111<br />
See also quick breads<br />
Blender, 10, 81-84<br />
Blender Banana Muffins, 108<br />
Blender Corbbread, 90<br />
Blender Crepes, 101<br />
Blender Waffles/Pancakes, 96<br />
Bread in the Round, 151<br />
Bread kneaders, 122<br />
Break-Apart Loaves, 146<br />
Brewer’s yeast, 129<br />
Brown rice, 50-52, 63-64<br />
Buckwheat, 50-52, 67-68<br />
Butter, 7, 18, 34<br />
Buttermilk, 6, 15<br />
Index<br />
C<br />
Canola oil, 20-21<br />
Chapatis, See tortillas<br />
Cheese cloth, 10<br />
Cinnamon Bread, 149<br />
Cinnamon Rolls, 148<br />
Cinnamon Scones, 110<br />
Coconut milk, 9, 16<br />
Coconut Milk for <strong>Baking</strong>, 9, 16<br />
Coconut oil,7, 18-19<br />
Coffee bean mill, See mills<br />
Coffee cakes, 88<br />
See also quick breads<br />
Corn, 50-52, 59-60<br />
Cornbread, 88<br />
Cornbread, 91<br />
Cornbread, Blender, 90<br />
See also quick breads<br />
Cornmeal, 8<br />
Cottage Filled Fruit Crepes,<br />
102<br />
Crepe pan, 10<br />
Crepes, 97-100<br />
See also quick breads<br />
Crepes, Blender, 101<br />
Crystalline fructose, 24<br />
Cultured milk, 6, 15<br />
D<br />
Dehydrator, 10<br />
Delicious <strong>Whole</strong> <strong>Grain</strong> Bread, 145<br />
Delicious <strong>Whole</strong> <strong>Grain</strong> Dough, 144<br />
Dietary fiber , See fiber<br />
Dinner Rolls, <strong>Whole</strong> <strong>Grain</strong>, 147<br />
Dried Apple Topping, 104<br />
E<br />
Eggs, 7, 17, 31, 32, 129<br />
Equipment, 10-11<br />
169
F<br />
Flaxseed Egg Alternative, 31<br />
Flour, 7, 47, 124, 132<br />
White, 8, 42-43, 47<br />
Wheat/whole grain, 8, 17,<br />
54-55, 74-75<br />
Fresh Apple Topping, 104<br />
Fresh Berry Topping, 103<br />
Fructose, crystalline, 22<br />
Fruits, 7<br />
G<br />
Gluten, 32, 52, 133-134, 136,<br />
139<br />
<strong>Grain</strong>, 7, 17, 48-72, 124<br />
Biblical, 5, 42, 48, 77<br />
Cost of, 71<br />
Converting to flour, 17<br />
Flour, whole See flour<br />
Storage of, 73-74<br />
<strong>Whole</strong>, 17, 42-46<br />
<strong>Grain</strong> mills See mills<br />
H<br />
Hearty Biscuits, 111<br />
Honey, 21<br />
K<br />
Kamut, 50-52, 56-57<br />
Kefir, 6, 15<br />
Kneading, 120,122, 124-135<br />
L<br />
Leavenings, 8, 25-26<br />
Legumes, 128<br />
Little Nuggets Wheat Bread,<br />
150<br />
Loaf pans, 10<br />
M<br />
Maple syrup, 21<br />
Measuring, 33-34, 35<br />
Milk, 129<br />
Millet, 15,50-52,66<br />
Mills<br />
170<br />
Coffee bean, 10, 76<br />
<strong>Grain</strong> or flour, 10, 75-76,<br />
130<br />
Mixed Berry Topping, 103<br />
Muffins, 105-107<br />
See also quick breads<br />
Muffin pans , 10<br />
N<br />
Nonstick spray, 7<br />
Nuts & seeds, 8, 30, 129<br />
O<br />
Oatmeal Bread, 150<br />
Oats, 50-52, 61-62<br />
Oils, 7, 93<br />
See fats, individual names<br />
Olive oil, 7, 19-20<br />
Olive oil nonstick spray, 7, 18<br />
Organic foods 6<br />
P<br />
Pancakes, 92-95<br />
See also quick breads<br />
Blender Waffles/Pancakes,<br />
96<br />
Parmesan HerbBread, 152<br />
Party Pizza, 153<br />
Pastry blender, 11<br />
Phytates. 13-14, 54,62, 128<br />
Phytic acid, 12-14, 15, 26,<br />
29, 128,130<br />
Pizza Crust, 153<br />
Prune Rolls, 149<br />
Pumpkin Bread, 114<br />
Q<br />
Quick breads, 80, 81-88,<br />
92-95, 97-100, 105-107,<br />
112-113, 116<br />
Pumpkin Bread, 114<br />
Zucchini Bread, 115<br />
Quinoa, 50-52, 68
R<br />
Rapadura, 9, 24<br />
Raw milk, 6, 15<br />
Rice, See brown rice<br />
Rolled oats, 8<br />
Rye, 50-52, 65<br />
S<br />
Salt, 9,29, 126<br />
Scones, Cinnamon, 110<br />
Seeds, See nuts & seeds<br />
Seven <strong>Grain</strong> Bread, 151<br />
Shopping<br />
Quick shopping guide, 6-9<br />
Sorghum, 50, 68<br />
Sourdough, 156-157<br />
Sourdough Bread, 158<br />
Sourdough English Muffins,<br />
159<br />
Sourdough Starter, 157<br />
Spelt, 53, 58<br />
Spices & flavorings, 9,28<br />
Sprouts, 128<br />
Sprouted grain, 17<br />
Sprouted <strong>Grain</strong>, 154<br />
Sprouted <strong>Whole</strong> <strong>Grain</strong> Dough,<br />
155<br />
Sucanat, 9, 23-24<br />
Sugar<br />
Brown, 9<br />
White, 9<br />
Sweeteners 9, 21-24, 125<br />
T<br />
Teff, 50-52, 70<br />
Thermometer<br />
Chef’s, 10<br />
Digital, 10<br />
Oven, 11, 138<br />
Tortillas, 112-113<br />
Triticale, 50-52, 67<br />
Two-stage process, 12-14,<br />
81-84<br />
U<br />
Utensils, 10<br />
See also individual items<br />
V<br />
Vanilla extract,28<br />
W<br />
Waffle iron, 10<br />
Waffles, 92-95<br />
See also quick breads<br />
Waffles/Pancakes, Blender ,<br />
96<br />
Water, 9,127<br />
Wheat, 32,47, 50-55<br />
Wheat bran,46, 54<br />
Wheat germ, 54<br />
Whipped Cream, 103<br />
White flour See flour<br />
<strong>Whole</strong> <strong>Grain</strong> Dinner Rolls, 147<br />
<strong>Whole</strong> grain (wheat) flour<br />
See flour<br />
Wild rice, 50-51, 70<br />
Xylitol, 24<br />
X<br />
Y<br />
Yeast, 8, 25, 126, 135-136,<br />
156<br />
Proofing, 131-132<br />
Yeast breads, 118-143, 141<br />
Z<br />
Zucchini Bread, 115<br />
171