Pocket Colorimeter™II Test Kit - Equipco
Pocket Colorimeter™II Test Kit - Equipco
Pocket Colorimeter™II Test Kit - Equipco

You also want an ePaper? Increase the reach of your titles
YUMPU automatically turns print PDFs into web optimized ePapers that Google loves.
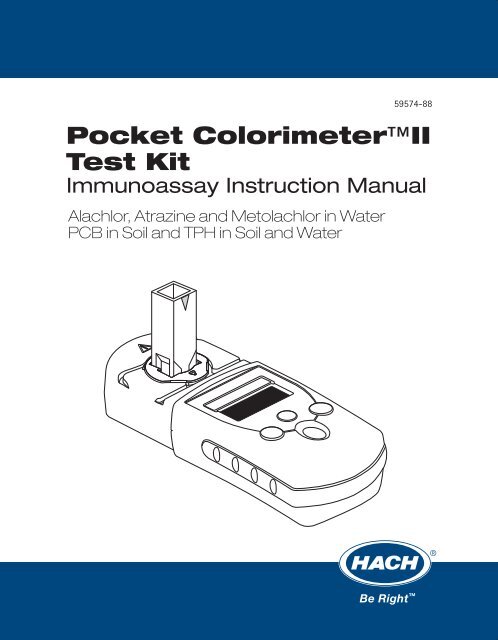
59574-88<br />
<strong>Pocket</strong> ColorimeterII<br />
<strong>Test</strong> <strong>Kit</strong><br />
Immunoassay Instruction Manual<br />
Alachlor, Atrazine and Metolachlor in Water<br />
PCB in Soil and TPH in Soil and Water
HACH Company Trademarks<br />
AccuGrow® H2O University Pond In Pillow<br />
AccuVac® H2OU PourRite®<br />
AccuVer Hach Logo® PrepTab<br />
AccuVial Hach One® ProNetic<br />
Add-A-<strong>Test</strong> Hach Oval® Pump Colorimeter<br />
AgriTrak Hach.com QuanTab®<br />
AluVer® HachLink Rapid Liquid<br />
AmVer Hawkeye The Hach Guy RapidSilver<br />
APA 6000 HexaVer® Ratio<br />
AquaChek HgEx RoVer®<br />
AquaTrend® HydraVer®<br />
sension<br />
BariVer® ICE-PIC<br />
Simply Accurate<br />
BODTrak IncuTrol®<br />
SINGLET<br />
BoroTrace Just Add Water<br />
SofChek<br />
BoroVer® LeadTrak®<br />
SoilSYS<br />
C. Moore Green M-ColiBlue24®<br />
SP 510<br />
CA 610 ManVer®<br />
Spec√<br />
CalVer® MolyVer®<br />
StablCal®<br />
ChromaVer® Mug-O-Meter®<br />
StannaVer®<br />
ColorQuik® NetSketcher<br />
SteriChek<br />
CoolTrak® NitraVer®<br />
StillVer®<br />
CuVer® NitriVer®<br />
SulfaVer®<br />
CyaniVer® NTrak®<br />
Surface Scatter®<br />
Digesdahl® OASIS<br />
TanniVer®<br />
DithiVer® On Site Analysis.<br />
TenSette®<br />
Dr. F. Fluent<br />
Results You Can TrustSM <strong>Test</strong> ‘N Tube<br />
Dr. H. Tueau<br />
OptiQuant <strong>Test</strong>YES! SM<br />
DR/Check<br />
OriFlow TitraStir®<br />
EC 310<br />
OxyVer TitraVer®<br />
FerroMo®<br />
FerroVer®<br />
FerroZine®<br />
FilterTrak 660<br />
PathoScreen<br />
PbEx ®<br />
PermaChem®<br />
PhosVer ®<br />
ToxTrak<br />
UniVer®<br />
VIScreen<br />
Voluette®<br />
Formula 2533<br />
<strong>Pocket</strong> Colorimeter WasteAway<br />
Formula 2589<br />
Gelex®<br />
<strong>Pocket</strong> Pal<br />
<strong>Pocket</strong> Turbidimeter<br />
ZincoVer®<br />
SM
59574-88<br />
<strong>Pocket</strong> ColorimeterII <strong>Test</strong> <strong>Kit</strong><br />
Immunoassay Instruction Manual<br />
Alachlor, Atrazine, and Metolachlor in Water<br />
PCB in Soil and TPH in Soil and Water<br />
© Hach Company, 2003. All rights reserved. Printed in the U.S.A. ap/dk 05/03 1ed
1—2
Table of Contents<br />
Safety Precautions ................................................................................................................. 1—5<br />
Laboratory Safety .............................................................................................................. 1—5<br />
Use of Hazard Information............................................................................................... 1—5<br />
Precautionary Labels......................................................................................................... 1—5<br />
Specifications.......................................................................................................................... 1—7<br />
Instrument Keys and Display ............................................................................................... 1—7<br />
Instrument Cap Cord ............................................................................................................. 1—8<br />
Operation.................................................................................................................................. 1—9<br />
Data Sheet ............................................................................................................................. 1—10<br />
Chapter 1 Procedure for Alachlor in Water .................................................................. 1—11<br />
Immunoassay ...................................................................................................................1—12<br />
Color Development..........................................................................................................1—14<br />
Measuring the Color........................................................................................................1—14<br />
Chapter 2 Procedure for PCB in Soil...............................................................................1—19<br />
Immunoassay ...................................................................................................................1—22<br />
Color Development..........................................................................................................1—24<br />
Measuring the Color........................................................................................................1—25<br />
Chapter 3 Procedure for Metolachlor in Water ...........................................................1—29<br />
Immunoassay ...................................................................................................................1—30<br />
Color Development..........................................................................................................1—32<br />
Measuring the Color........................................................................................................1—33<br />
Chapter 4 Procedure for Atrazine in Water ..................................................................1—37<br />
Immunoassay ...................................................................................................................1—39<br />
Color Development..........................................................................................................1—41<br />
Measuring the Color........................................................................................................1—42<br />
Required Reagents ...........................................................................................................1—46<br />
Chapter 5 Procedure for TPH in Soil and Water ..........................................................1—47<br />
Immunoassay ...................................................................................................................1—50<br />
Color Development..........................................................................................................1—52<br />
Measuring the Color........................................................................................................1—53<br />
1—3
Table of Contents, continued<br />
Section 2 Instrument Manual............................................................................................. 2—1<br />
Accessories............................................................................................................................... 2—3<br />
The 1-cm MicroCuvette Rack........................................................................................... 2—3<br />
Using the Precision Pipettor............................................................................................. 2—4<br />
Using the WireTrol Pipet ................................................................................................ 2—4<br />
Instrument Operation............................................................................................................ 2—5<br />
Key Functions .................................................................................................................... 2—5<br />
Menu Selections.................................................................................................................2—5<br />
Switching Ranges .............................................................................................................. 2—5<br />
Setting the Time ................................................................................................................2—5<br />
Recalling Stored Measurements....................................................................................... 2—5<br />
Battery Installation............................................................................................................2—6<br />
Error Codes .............................................................................................................................. 2—7<br />
Error Messages................................................................................................................... 2—7<br />
Standard Calibration Adjust................................................................................................ 2—9<br />
User-Entered Calibration ....................................................................................................2—11<br />
Overview........................................................................................................................... 2—11<br />
Calibration Procedure Using Prepared Standards ....................................................... 2—12<br />
Entering a Predetermined Calibration Curve ............................................................... 2—13<br />
Editing a User-entered or Factory Calibration Curve ................................................. 2—14<br />
Exiting the Calibration Routine..................................................................................... 2—15<br />
Deleting Calibration Points ............................................................................................ 2—15<br />
Retrieving the Factory Calibration................................................................................ 2—16<br />
Maximum/Minimum Displayed Value.......................................................................... 2—16<br />
Certification .......................................................................................................................... 2—17<br />
General Information ............................................................................................................ 2—19<br />
How To Order ........................................................................................................................ 2—20<br />
Repair Service ....................................................................................................................... 2—21<br />
Warranty ................................................................................................................................2—22<br />
1—4
Safety Precautions<br />
Laboratory Safety<br />
Use of Hazard Information<br />
Precautionary Labels<br />
Please read this entire manual before unpacking, setting up, or<br />
operating this instrument. Pay particular attention to all danger<br />
and caution statements. Failure to do so could result in serious<br />
injury to the operator or damage to the equipment.<br />
To ensure the protection provided by this equipment is not<br />
impaired, do not use or install this equipment in any manner<br />
other than that which is specified in this manual.<br />
As part of good laboratory practice, please familiarize yourself<br />
with the reagents used in these procedures. Read all product<br />
labels and the material safety data sheets (MSDS) before using<br />
them. It is always good practice to wear safety glasses when<br />
handling chemicals. Follow instructions carefully. Rinse<br />
thoroughly if contact occurs. If you have questions about<br />
reagents or procedures, please contact the manufacturer.<br />
If multiple hazards exist, this manual will use the signal word<br />
(Danger, Caution, Note) corresponding to the greatest hazard.<br />
DANGER<br />
Indicates a potentially or imminently hazardous situation<br />
which, if not avoided, could result in death or serious injury.<br />
CAUTION<br />
Indicates a potentially hazardous situation that may result in<br />
minor or moderate injury.<br />
NOTE<br />
Information that requires special emphasis.<br />
Read all labels and tags attached to the instrument. Personal<br />
injury or damage to the instrument could occur if not observed.<br />
This symbol, if noted on the instrument, references the<br />
instruction manual for operational and/or safety information.<br />
1—5
1—6
Specifications<br />
Instrument Keys and Display<br />
* Backlight usage will decrease battery life.<br />
Lamp: Light emitting diode (LED)<br />
Detector: Silicon photodiode<br />
Photometric Precision: ±0.0015 Absorbance<br />
Filter bandwidth: 15 ±2 nm<br />
Wavelength: 450 nm<br />
Absorbance range: 0 to 2.50 Abs<br />
Dimensions: 3.2 x 6.1 x 15.2 cm (1.25 x 2.4 x 6 inches)<br />
Weight: 0.2 kg (0.43 lbs)<br />
Sample cells: 1 cm cuvette<br />
Operating conditions: 0 to 50 °C (32 to 122 °F); 0 to 90%<br />
relative humidity (noncondensing)<br />
Power supply: Four AAA alkaline batteries; approximate life is<br />
2000 tests*<br />
1—7<br />
Item Description<br />
1 POWER Key<br />
2 ZERO/SCROLL Key<br />
3 MENU Key<br />
4 Numeric Display<br />
5 Range Indicator<br />
6 Range Indicator<br />
7 Menu Indicator<br />
8 Calibration Adjusted Indicator<br />
9 Battery Low Indicator<br />
10 READ/ENTER Key
Instrument Cap Cord<br />
Figure 1 Attaching the Instrument Cap Cord<br />
The instrument cap for the <strong>Pocket</strong> Colorimeter II doubles as a<br />
light shield. Accurate measurements cannot be obtained unless<br />
the sample or blank is covered with the cap. Use the instrument<br />
cap cord to secure the cap to the body of the colorimeter and<br />
prevent loss of the cap. See Figure 1.<br />
1. Loop the instrument cap cord through the ring on the cap.<br />
2. Remove the battery compartment cover. Press the knotted<br />
end of the cord into the hole indicated by the arrow.<br />
3. Slide the cord into the slot on the battery compartment<br />
cover. Snap the cover into place.<br />
1—8
Operation<br />
DANGER<br />
Handling chemical samples, standards, and reagents can be dangerous. Review the<br />
necessary Material Safety Data Sheets and become familiar with all safety procedures<br />
before handling any chemicals.<br />
DANGER<br />
La manipulation des échantillons chimiques, étalons et réactifs peut être dangereuse. Lire<br />
les Fiches de Données de Sécurité des Produits (FDSP) et se familiariser avec toutes les<br />
procédures de sécurité avant de manipuler tous les produits chimiques.<br />
PELIGRO<br />
La manipulación de muestras químicas, estándares y reactivos puede ser peligrosa. Revise<br />
las fichas de seguridad de materiales y familiarícese con los procedimientos de seguridad<br />
antes de manipular productos químicos.<br />
GEFAHR<br />
Das Arbeiten mit chemischen Proben, Standards und Reagenzien ist mit Gefahren<br />
verbunden. Es wird dem Benutzer dieser Produkte empfohlen, sich vor der Arbeit mit<br />
sicheren Verfahrensweisen und dem richtigen Gebrauch der Chemikalien vertraut zu<br />
machen und alle entsprechenden Materialsicherheitsdatenblätter aufmerksam zu lesen.<br />
PERIGO<br />
A manipulação de amostras, padrões e reagentes químicos pode ser perigosa. Reveja a folha<br />
dos dados de segurança do material e familiarize-se com todos os procedimentos de<br />
segurança antes de manipular quaisquer produtos químicos.<br />
PERICOLO<br />
La manipolazione di campioni, standard e reattivi chimici può essere pericolosa. La<br />
preghiamo di prendere conoscenza delle Schede Techniche necessarie legate alla Sicurezza<br />
dei Materiali e di abituarsi con tutte le procedure di sicurezza prima di manipolare ogni<br />
prodotto chimico.<br />
1—9
Data Sheet*<br />
Location:<br />
Date of <strong>Test</strong>ing:<br />
Operator:<br />
Lot Number of Reagent Set:<br />
Serial Number of Immunoassay <strong>Pocket</strong> Colorimeter:<br />
* This page may be duplicated as needed.<br />
CALIBRATORS<br />
Calibrator Value Absorbance Comments<br />
SAMPLES<br />
Sample Number Absorbance Interpretation Comments<br />
1—10
Chapter 1 Procedure for Alachlor in Water<br />
1.1 Overview<br />
1.2 <strong>Test</strong>ing Hints<br />
Alachlor is a widely-used herbicide for the control of grasses<br />
and broadleaf weeds. It is sold by several companies under a<br />
variety of trade names. The Maximum Contaminant Level for<br />
Alachlor in the United States has been set at 2 parts per billion<br />
(ppb) by the U.S. Environmental Protection Agency.<br />
Samples, calibrators, and reagents are added to cuvettes coated<br />
with antibodies specific for Alachlor. The resultant color is<br />
measured with a Hach <strong>Pocket</strong> Colorimeter II. The concentration<br />
of Alachlor in a sample is determined by comparing the<br />
developed color intensity to that of an Alachlor calibrator. The<br />
Alachlor concentration is inversely proportional to the color<br />
development: the lighter the color, the higher the Alachlor<br />
concentration.<br />
This method provides semi-quantitative screening based on<br />
thresholds for Alachlor in the following concentrations:<br />
0.1 ppb and/or 0.5 ppb. Other concentrations of Alachlor in<br />
water can be tested by first diluting the sample with deionized<br />
water. (See Section Diluting Water Samples on page 1—17.)<br />
1. Read the entire procedure before starting. Identify and<br />
have ready all the necessary reagents, cuvettes, and other<br />
apparatus before beginning the analysis.<br />
2. Timing is critical; follow instructions carefully.<br />
3. A consistent technique when mixing the cuvettes is<br />
critical to this test. Using the cuvette rack and mixing, as<br />
described in The 1-cm MicroCuvette Rack on page 2—3 ,<br />
yields the best results. Cuvettes can be mixed individually,<br />
but test results may not be as consistent.<br />
4. The test requires about 30 minutes for complete analysis.<br />
As many as 20 cuvettes (18 samples and 2 calibrators) can<br />
be run simultaneously.<br />
5. Handle the cuvettes carefully. Scratches on the inside or<br />
outside may cause erroneous results. Gently clean the<br />
outside of the cuvettes with a clean absorbent cloth or<br />
tissue before placing them into the instrument. (Kimwipe®<br />
tissues are provided with the kit.)<br />
6. Antibody cuvettes and enzyme conjugate are<br />
manufactured in matched lots. Do not mix reagent lots.<br />
1—11
Chapter 1, continued<br />
1.3 Procedure<br />
Immunoassay<br />
0.1 0.5<br />
1. Label two Antibody<br />
Cuvettes: one for the 0.1<br />
ppb Alachlor Calibrator,<br />
and the other for the<br />
0.5 ppb Alachlor<br />
Calibrator. Label the<br />
required number of<br />
cuvettes with sample<br />
identification.<br />
Note: As many as 18<br />
samples may be tested<br />
with each two calibrators.<br />
7. Twenty Antibody Cuvettes are provided with each reagent<br />
set. One Antibody Cuvette will be used for each calibrator<br />
and each sample. Antibody Cuvettes are not reusable.<br />
8. The Immunoassay <strong>Pocket</strong> Colorimeter provides a reading in<br />
absorbance units. This unit of measurement will allow you<br />
to compare your samples to the calibrators.<br />
9. To avoid damaging the Color Developing Solution, do not<br />
expose it to direct sunlight.<br />
10. Store the reagents at 4 °C when they are not in use. Allow<br />
the reagents to reach room temperature before using them<br />
in an analysis. Actual testing may be done at temperatures<br />
ranging from 1 °C to 38 °C.<br />
2. Place the cuvettes<br />
snugly into the rack.<br />
1—12<br />
3. Pipet 0.5 mL of the<br />
0.1 ppb Alachlor<br />
Calibrator into the<br />
appropriate cuvette.<br />
Pipet 0.5 mL of the<br />
0.5 ppb Alachlor<br />
Calibrator into the second<br />
cuvette.<br />
Note: Use a new pipette<br />
tip for each cuvette.<br />
4. Pipet 0.5 mL of each<br />
sample to be tested into<br />
the appropriate cuvette.<br />
Note: Use a new pipette<br />
tip for each sample.
Chapter 1, continued<br />
5. Using the Precision<br />
Pipettor, immediately<br />
pipet 0.5 mL of Alachlor<br />
Enzyme Conjugate into<br />
each cuvette.<br />
Note: The same pipette<br />
tip can be used repeatedly<br />
for this step.<br />
9. Wash each cuvette<br />
forcefully and thoroughly<br />
four times with deionized<br />
water. Empty the cuvettes<br />
into the waste container.<br />
Note: Ensure most of the<br />
water is drained from the<br />
cuvettes by turning the<br />
cuvettes upside down and<br />
gently tapping them on a<br />
paper towel to drain.<br />
HRS MIN SEC HRS MIN SEC<br />
6. Begin a 20-minute<br />
reaction period and mix<br />
following the instructions<br />
on page 2—3.<br />
1—13<br />
7. After 10 minutes, mix<br />
the contents of the rack a<br />
second time for a period<br />
of 30 seconds using the<br />
same technique.<br />
Note: Solutions will turn<br />
blue in some or all of the<br />
cuvettes.<br />
8. At the end of the<br />
20-minute period, discard<br />
the contents of all the<br />
cuvettes. Use an<br />
appropriate waste<br />
container.
Chapter 1, continued<br />
Color Development<br />
Note: Timing is critical; follow instructions carefully.<br />
10. With the cuvettes still<br />
held snugly in the rack,<br />
pipet 0.5 mL of Color<br />
Developing Solution into<br />
each Antibody Cuvette.<br />
Note: Use a new pipette<br />
tip for each cuvette.<br />
Measuring the Color<br />
DI<br />
1. Label and fill a<br />
Zeroing Cuvette with<br />
deionized water. Wipe the<br />
outside of all the cuvettes<br />
with a tissue to remove<br />
water, smudges, and<br />
fingerprints.<br />
HRS MIN SEC HRS MIN SEC<br />
11. Begin a 10-minute<br />
reaction period and mix<br />
following the instructions<br />
on page 2—3.<br />
2. Insert the Zeroing<br />
Cuvette into the 1-cm<br />
micro-cuvette cell holder.<br />
Cover the zeroing cuvette<br />
with the instrument cap.<br />
Note: The arrow at the<br />
top of the cuvette should<br />
always face the display.<br />
1—14<br />
12. After 5 minutes, mix<br />
the contents of the rack a<br />
second time for a period of<br />
30 seconds using the same<br />
technique.<br />
Note: Solutions will turn<br />
blue in some or all of the<br />
cuvettes.<br />
3. Press the POWER key<br />
to turn the meter on. The<br />
arrow can indicate either<br />
channel 1 or 2 for this<br />
method.<br />
Note: A user calibration<br />
should not be stored in<br />
the channel that you<br />
choose to use.<br />
13. At the end of the<br />
10-minute reaction period,<br />
pipette 0.5 mL of Stop<br />
Solution into each cuvette<br />
in the same order as the<br />
Color Developing Solution<br />
was added.<br />
Slide the rack for<br />
20 seconds using the<br />
technique described on<br />
page 2—3.<br />
Note: Blue solutions will<br />
turn yellow with the addition<br />
of the Stop Solution.<br />
Note: The same pipette tip<br />
can be used repeatedly for<br />
this step.<br />
4. Press: ZERO/SCROLL.<br />
The instrument display<br />
will turn on and the<br />
display will show “---”,<br />
followed by “0.000”.
Chapter 1, continued<br />
5. Remove the zeroing<br />
cuvette and insert the 0.1<br />
ppb Alachlor calibrator<br />
into the cell holder. Cover<br />
the cuvette with the<br />
instrument cap.<br />
6. Press: READ/ENTER.<br />
Record the absorbance<br />
value displayed.<br />
1.4 Interpreting the Results<br />
There is an inverse relationship between the concentration of<br />
Alachlor and the absorbance. In other words, the higher the<br />
absorbance value, the lower the concentration of Alachlor.<br />
Example:<br />
0.1 ppb Alachlor Calibrator: 0.450 Abs.<br />
0.5 ppb Alachlor Calibrator: 0.230 Abs.<br />
Sample #1: 0.150 Abs.<br />
Sample #2: 0.350 Abs.<br />
Sample #3: 0.550 Abs.<br />
Sample #1 — Sample absorbance is less than the absorbance<br />
for both calibrators. Therefore the sample concentration is<br />
greater than 0.1 and greater than 0.5 ppb Alachlor.<br />
1—15<br />
Repeat<br />
Steps 18—19<br />
7. Repeat step 5 and step<br />
6 for all remaining<br />
calibrators and samples.<br />
Record the absorbance<br />
value of each calibrator<br />
and sample. A Data Sheet<br />
(page 1—10) has been<br />
provided that may be<br />
photocopied and used for<br />
each set of tests.<br />
If the sample absorbance is… Sample Alachlor Concentration is…<br />
…less than calibrator absorbance …greater than the calibrator value<br />
…greater than calibrator absorbance …less than the calibrator value
Chapter 1, continued<br />
Sample #2 — Sample absorbance is between the absorbance<br />
for the 0.1 and 0.5 ppb Alachlor calibrators. Therefore the<br />
concentration of Alachlor is between 0.1 and 0.5 ppb Alachlor.<br />
Sample #3 — Sample absorbance is greater than the<br />
absorbance for both calibrators. Therefore the sample<br />
concentration is less than 0.5 ppb and less than 0.1 ppb<br />
Alachlor.<br />
1.5 Storing and Handling Reagents<br />
Wear protective gloves and eyewear.<br />
When storing reagent sets for extended periods of time,<br />
keep them out of direct sunlight. Reagent shelf life can be<br />
extended by refrigerating the reagents and is<br />
strongly recommended.<br />
Keep the foil pouch containing the Alachlor Antibody<br />
Cuvettes sealed when not in use.<br />
If Stop Solution comes in contact with eyes, wash<br />
thoroughly for 15 minutes with cold water and seek<br />
immediate medical help.<br />
1.6 Sensitivity<br />
Compound<br />
The Alachlor immunoassay test cannot differentiate between<br />
the various acetanilide herbicides and metabolites, but it<br />
detects their presence to differing degrees. The following table<br />
shows the required concentration for selected chemicals.<br />
Concentration required to<br />
give a positive response of<br />
0.1 ppb Alachlor<br />
The following compounds are not detectable at 10,000 ppb:<br />
1—16<br />
Concentration required to<br />
give a positive response of<br />
0.5 ppb Alachlor<br />
Acetochlor 0.45 ppb 4 ppb<br />
Butachlor 0.09 ppm 1 ppm<br />
2 Chloro-2’,6’-Diethylacetaniline 0.030 ppm 2 ppm<br />
Metolachlor 0.085 ppm 2 ppm<br />
2,6-Diethylaniline 0.3 ppm 9 ppm<br />
Propachlor 0.72 ppm 12 ppm<br />
Atrazine Carbofuran Carbendazim<br />
Aldicarb 2, 4-D<br />
Diazoton Chlorpyrifos
Chapter 1, continued<br />
1.7 Diluting Water Samples<br />
Other levels of Alachlor can be tested by diluting the sample<br />
and comparing the results to the 0.1 ppb Calibrator. From the<br />
table choose the appropriate sample volume, place it in a<br />
graduated mixing cylinder, and dilute it to 50 mL with<br />
deionized water.<br />
mL Sample Representative Concentration using 0.1 ppb Calibrator<br />
0.5 10 ppb<br />
1.0 5 ppb<br />
2.5 2 ppb<br />
5.0 1 ppb<br />
Example:<br />
Dilute 2.5 mL of sample to 50 mL with deionized water. Run the<br />
diluted sample in the procedure along with the 0.1 ppb<br />
calibrator. If the absorbance of the diluted sample is less than<br />
the 0.1 ppb calibrator, the concentration of the original sample<br />
is greater than 2 ppb.<br />
1.8 Sample Collection and Storage<br />
Collect samples in a clean glass bottle. Do not pre-rinse the<br />
bottle with the sample. If there is greater than 0.5 ppm chlorine<br />
in the sample, dechlorinate with sodium thiosulfate<br />
(Cat. No. 323-32), using 1 drop per 25 mL of sample.<br />
If the sample cannot be analyzed immediately, store the sample<br />
at 4 °C. Samples may be kept for as long as 14 days. Warm the<br />
samples to room temperature before analysis.<br />
1.9 Summary of Method<br />
Hach immunoassay tests use antigen/antibody reactions to test<br />
for specific organic compounds in water and soil. Alachlorspecific<br />
antibodies, attached to the walls of plastic cuvettes,<br />
selectively bind and remove Alachlor from complex sample<br />
matrices. A prepared sample and a reagent containing enzymeconjugate<br />
molecules (analyte molecules attached to molecules<br />
of an enzyme) are added to the Antibody Cuvettes. During<br />
incubation, enzyme-conjugate molecules and Alachlor<br />
compete for binding sites on the antibodies. Samples with<br />
higher levels of analyte will have more antibody sites occupied<br />
by Alachlor and fewer antibody sites occupied by the enzymeconjugate<br />
molecules.<br />
1—17
Chapter 1, continued<br />
After incubation, the sample and unbound enzyme conjugate<br />
are washed from the cuvette and a color-development reagent is<br />
added. The enzyme in the conjugate catalyzes the development<br />
of color. Therefore, there is an inverse relationship between<br />
color intensity and the amount of Alachlor in the sample. The<br />
resulting color is then compared with a calibrator to determine<br />
whether the Alachlor concentration in the sample is greater or<br />
less than the threshold levels.<br />
Required Reagents<br />
Description Unit Cat. No.<br />
Reagent Set, Alachlor*......................................................................20 cuvettes..........28130-00<br />
Deionized water....................................................................................... 500 mL..............272-48<br />
Required Apparatus<br />
Battery, alkaline AAA 1.5 volts................................................................ 4/pkg..........46743-00<br />
Caps, flip spout........................................................................................... 2/pkg..........25818-02<br />
Instruction Manual, Immunoassay <strong>Pocket</strong> Colorimeter .......................... each..........59574-88<br />
Marker, laboratory........................................................................................ each..........20920-00<br />
Pipettor, fixed volume, 0.5–mL .................................................................. each..........27641-00<br />
Tips, for pipettor 27641-00 ................................................................... 100/pkg..........27642-00<br />
<strong>Pocket</strong> Colorimeter, Immunoassay ............................................................. each..........59530-66<br />
Rack, for 1-cm MicroCuvettes .................................................................... each..........48799-00<br />
Talking Timer, Sper Scientific..................................................................... each..........27644-00<br />
Wipes, disposable ...........................................................................................box..........20970-00<br />
* Immunoassay components are manufactured for Hach Company by Beacon Analytical Systems, Inc.<br />
1—18
Chapter 2 Procedure for PCB in Soil<br />
2.1 Overview<br />
2.2 <strong>Test</strong>ing Hints<br />
Soil samples are collected and PCB is extracted. Sample<br />
extracts, calibrators, and reagents are added to cuvettes coated<br />
with antibodies that are specific for PCB. Color develops and is<br />
then measured with a <strong>Pocket</strong> Colorimeter II. The test requires<br />
about 20 to 30 minutes for complete analysis. As many as<br />
10 cuvettes can be run simultaneously.<br />
The concentration of PCB in a sample is determined by<br />
comparing the developed color intensity to that of a PCB<br />
calibrator. The PCB concentration is inversely proportional to<br />
the color development: the lighter the color, the higher the PCB<br />
concentration. The Immunoassay <strong>Pocket</strong> Colorimeter provides<br />
a reading in terms of absorbance. This unit of measurement will<br />
allow you to compare your samples to the calibrators.<br />
This method provides semi-quantitative screening based on<br />
thresholds for PCB in the following concentrations: 1 ppm,<br />
5 ppm, 10 ppm and/or 50 ppm as Aroclor 1248.<br />
1. Read the entire procedure before starting. Identify and<br />
have ready all the necessary reagents, cuvettes, and other<br />
apparatus before beginning the analysis.<br />
2. Timing is critical; follow instructions carefully.<br />
3. A consistent technique when mixing the cuvettes is<br />
critical to this test. The best results come from using the<br />
cuvette rack and mixing as described in The 1-cm<br />
MicroCuvette Rack on page 2—3. Cuvettes can be mixed<br />
individually, but test results may not be as consistent.<br />
4. Handle the cuvettes carefully. Scratches on the inside or<br />
outside may cause erroneous results. Clean the outside of<br />
the cuvettes with a clean absorbent cloth or tissue before<br />
placing them into the instrument. (Kimwipe ® tissues are<br />
provided with the kit.)<br />
5. Antibody cuvettes and enzyme conjugate are made in<br />
matched lots. Do not mix reagent lots.<br />
6. Twenty Antibody Cuvettes are provided with each reagent<br />
set. One Antibody Cuvette will be used for each calibrator<br />
and each sample. Antibody Cuvettes are not reusable.<br />
7. To avoid damaging the Color Developing Solution, do not<br />
expose it to direct sunlight.<br />
1—19
Chapter 2, continued<br />
8. There are two protocols in this procedure, one for levels of<br />
1 ppm and 5 ppm, and another for 10 ppm and 50 ppm.<br />
Each uses a different quantity of calibrator and sample<br />
extract as follows:<br />
Range<br />
Quantity of calibrator and<br />
sample extract used<br />
1 ppm and 5 ppm 50 µL<br />
10 ppm and 50 ppm 10 µL<br />
9. To test across ranges, such as 1 and 50 ppm, test the lower<br />
concentration first. If the result is positive then test at the<br />
higher level. If the result of the test at the lower<br />
concentration is negative, the higher range test will be<br />
negative also, and need not be performed.<br />
10. The same filtered extract can be used for both protocols if<br />
it is tightly capped between assays. The maximum time<br />
between assays cannot exceed one-half hour.<br />
11. Store the reagents at 4 °C when they are not in use. Allow<br />
the reagents to reach room temperature before using them<br />
in an analysis. Actual testing may be done at temperatures<br />
ranging from 1 °C to 38 °C.<br />
2.3 Procedure for Soil Extraction<br />
The Soil Extractant contains methyl alcohol which is poisonous<br />
and flammable. Before using this and other reagents, read the<br />
Material Safety Data Sheet (MSDS) for proper use of protective<br />
equipment and other safety information.<br />
Note: The manufacturer recommends wearing protective gloves for this<br />
procedure.<br />
1—20
Chapter 2, continued<br />
1. Place a plastic<br />
weighing boat on the<br />
AccuLab ® balance. Zero<br />
or tare the balance.<br />
Note: Refer to the<br />
instructions for operating<br />
the AccuLab balance.<br />
5. Cap the extraction vial<br />
tightly and shake<br />
vigorously for<br />
one minute.<br />
2. Weigh out 5.0 g of<br />
soil in the plastic<br />
weighing boat. Carefully<br />
pour the soil into the<br />
extraction vial.<br />
6. Allow to settle for at<br />
least one minute. Gently<br />
open the extraction vial.<br />
1—21<br />
3. Use the 5 g scoop to<br />
add one scoop of sodium<br />
sulfate to the extraction<br />
vial.<br />
7. Using the disposable<br />
bulb pipet, withdraw 1.0–<br />
1.5 mL from the liquid<br />
layer at the top of the<br />
extraction vial.<br />
Transfer it into the<br />
filtration barrel (the<br />
bottom part of the<br />
filtering assembly into<br />
which the plunger<br />
inserts).<br />
Note: Do not use more<br />
than 1.5 mL. The bulb is<br />
marked in 0.25–mL<br />
increments<br />
4. Use the graduated<br />
cylinder to transfer 10 mL<br />
of soil extractant into an<br />
extraction vial.<br />
Note: Read <strong>Test</strong>ing Hints<br />
on page 1—19, before<br />
performing the test.<br />
8. Insert the filtration<br />
plunger into the filtration<br />
barrel. Press firmly on the<br />
plunger until the sample<br />
extract is forced upward<br />
into the center of the<br />
plunger.<br />
Use the resultant filtrate<br />
for the immunoassy in<br />
Procedure for Soil<br />
Extracts on page 1—22.<br />
Note: It may be necessary<br />
to place the filtration<br />
assembly on a table and<br />
press down on the<br />
plunger.
Chapter 2, continued<br />
2.4 Procedure for Soil Extracts<br />
Note: Read <strong>Test</strong>ing Hints on page 1—19 before proceeding.<br />
Immunoassay<br />
1. Label an Antibody<br />
Cuvette for each<br />
Calibrator to be used and<br />
for each sample to be<br />
tested.<br />
2. Place the cuvettes into<br />
the rack snugly.<br />
1—22<br />
3. Use the Precision<br />
Pipettor to pipet 0.5 mL<br />
of Diluent Solution into<br />
each Calibrator cuvette.<br />
Note: The same pipette<br />
tip can be used repeatedly<br />
for this step.<br />
4. Have the necessary<br />
apparatus ready as the<br />
next three steps must be<br />
done without delays.<br />
Use a WireTrol pipet to<br />
transfer the appropriate<br />
volume of Calibrator and<br />
sample extract into each<br />
cuvette.<br />
Note: When testing at the<br />
1 ppm and/or 5 ppm<br />
levels use 50 µL of<br />
calibrator and sample.<br />
When testing at the<br />
10 ppm and/or 50 ppm<br />
levels, use 10 µL of<br />
calibrator and sample.<br />
Note: Use a separate<br />
capillary tube for each<br />
solution.
Chapter 2, continued<br />
5. Using the Precision<br />
Pipettor, immediately<br />
pipet 0.5 mL of PCB<br />
Enzyme Conjugate into<br />
each cuvette.<br />
Note: The same pipette<br />
tip can be used repeatedly<br />
for this step.<br />
9. At the end of the<br />
10-minute period, discard<br />
the contents of all the<br />
cuvettes into an<br />
appropriate waste<br />
container.<br />
HRS MIN SEC HRS MIN SEC<br />
6. Begin a 10-minute<br />
reaction time and proceed<br />
immediately to the next<br />
step.<br />
10. Wash each cuvette<br />
forcefully and thoroughly<br />
four times with deionized<br />
water. Empty the cuvettes<br />
into the waste container.<br />
Note: Ensure most of the<br />
water is drained from the<br />
cuvettes by turning the<br />
cuvettes upside down and<br />
tapping them lightly on a<br />
paper towel.<br />
1—23<br />
7. Mix the contents of the<br />
cuvettes for 30 seconds<br />
using the mixing technique<br />
described on page 2—3.<br />
8. After 5 minutes, mix<br />
the contents of the rack a<br />
second time for a period<br />
of 30 seconds using the<br />
same technique.
Chapter 2, continued<br />
Color Development<br />
Note: Timing is critical; follow instructions carefully.<br />
11. With the cuvettes<br />
still held snugly in the<br />
rack, pipet 0.5 mL of<br />
Color Developing<br />
Solution into each<br />
Antibody Cuvette.<br />
Note: Use a new pipette<br />
tip for each cuvette.<br />
HRS MIN SEC<br />
12. Begin a 5-minute<br />
reaction period.<br />
After 2.5 minutes have<br />
passed, slide the rack for<br />
20 seconds using the<br />
technique described on<br />
page 2—3.<br />
Note: Solutions will turn<br />
blue in some or all of the<br />
cuvettes.<br />
1—24<br />
13. At the end of the<br />
5-minute reaction period,<br />
pipette 0.5 mL of Stop<br />
Solution into each<br />
cuvette in the same order<br />
as the Color Developing<br />
Solution was added.<br />
Slide the rack for<br />
20 seconds using the<br />
technique described on<br />
page 2—3.<br />
Note: Blue solutions will<br />
turn yellow with the<br />
addition of the Stop<br />
Solution.<br />
Note: The same pipette<br />
tip can be used repeatedly<br />
for this step.
Chapter 2, continued<br />
Measuring the Color<br />
DI<br />
HO<br />
2<br />
1. Label and fill a<br />
Zeroing Cuvette with<br />
deionized water. Wipe the<br />
outside of all the cuvettes<br />
with a tissue to remove<br />
water, smudges, and<br />
fingerprints.<br />
5. Remove the zeroing<br />
cuvette and insert the<br />
first PCB calibrator into<br />
the cell holder. Cover the<br />
cuvette with the<br />
instrument cap.<br />
2. Press the POWER key<br />
to turn the meter on. The<br />
arrow can indicate either<br />
channel 1 or 2 for this<br />
method.<br />
Note: A user calibration<br />
should not be stored in<br />
the channel that you<br />
choose to use.<br />
6. Press: READ/ENTER.<br />
Record the absorbance<br />
value displayed. Hold the<br />
adapter in place when<br />
removing the cuvette.<br />
1—25<br />
3. Insert the Zeroing<br />
Cuvette into the 1-cm<br />
micro-cuvette cell holder.<br />
Cover the zeroing cuvette<br />
with the instrument cap.<br />
Note: The arrow at the<br />
top of the cuvette should<br />
always face forward.<br />
Repeat<br />
Steps 18–19<br />
7. Repeat step 5 and step<br />
6 for all remaining<br />
calibrators, and samples.<br />
Record the absorbance<br />
value of each calibrator<br />
and sample. A Data Sheet<br />
(page 1—10) has been<br />
provided that may be<br />
photocopied and used for<br />
each set of tests.<br />
4. Press: ZERO/SCROLL.<br />
The instrument display<br />
will turn on and the<br />
display will show “---”,<br />
followed by “0.000”.
Chapter 2, continued<br />
2.5 Interpreting the Results<br />
There is an inverse relationship between the concentration of<br />
PCB and absorbance. In other words, the higher the<br />
absorbance, the lower the concentration of PCB.<br />
Example of Count Values<br />
Interpretation<br />
If the sample absorbance is… Sample PCB Concentration is…<br />
…less than calibrator absorbance …greater than the calibrator value<br />
…greater than calibrator absorbance …less than the calibrator value<br />
1 ppm PCB Calibrator: 0.450 Abs.<br />
5 ppm PCB Calibrator: 0.230 Abs.<br />
Sample #1: 0.150 Abs.<br />
Sample #2: 0.350 Abs.<br />
Sample #3: 0.550 Abs.<br />
Sample #1 — Sample absorbance is less than the absorbance<br />
for both calibrators. Therefore the sample concentration is<br />
greater than 1 ppm and greater than 5 ppm as Aroclor 1248.<br />
Sample #2 — Sample absorbance is between the absorbance<br />
for the 1 ppm and the 5 ppm PCB calibrators. Therefore the<br />
concentration of PCB is between 1 ppm and 5 ppm PCB as<br />
Aroclor 1248.<br />
Sample #3 — Sample absorbance is greater than the<br />
absorbance for both calibrators. Therefore the sample<br />
concentration is less than 5 ppm and less than 1 ppm PCB as<br />
Aroclor 1248.<br />
2.6 Storing and Handling Reagents<br />
Wear protective gloves and eyewear.<br />
When storing reagent sets for extended periods of time, keep<br />
them out of direct sunlight. Store reagents at a temperature<br />
of 4 °C when not in use.<br />
Keep the foil pouch containing the PCB Antibody Cuvettes<br />
sealed when not in use.<br />
If Stop Solution comes in contact with eyes, wash<br />
thoroughly for 15 minutes with cold water and seek<br />
immediate medical help.<br />
1—26
Chapter 2, continued<br />
2.7 Sensitivity<br />
The PCB immunoassay cannot differentiate between the<br />
various Aroclors, but it detects their presence in differing<br />
degrees.<br />
Compound<br />
Concentration (ppm) to give a positive result at<br />
1 ppm 5 ppm 10 ppm 50 ppm<br />
1248 1 5 10 50<br />
1016 2 9 20 67<br />
1242 1.2 6 14 50<br />
1254 1.4 4.6 11 28<br />
1260 1.1 4.9 11 38<br />
The following compounds are not detectable at 1000 ppm.<br />
Biphenyl 2,4,6-trichlorophenyl 1,3-dichlorobenzene<br />
2,4-dicholorophenyl pentachlorophenol 1,4-dichlorobenzene<br />
2,4,5-trichlorphenyl 1,2-dichlorobenzene 1,2,4-trichlorobenzene<br />
2.8 Sample Collection and Storage<br />
Analyze the samples as soon as possible after collection. If the<br />
samples must be stored, collect them in glass or Teflon ®<br />
containers that have been washed with soap and water and<br />
rinsed with methanol. The container should be capped with a<br />
Teflon-lined cap. If a Teflon cap is not available, aluminum foil<br />
rinsed in methanol may be used as a substitute cap liner.<br />
2.9 Summary of Method<br />
Hach immunoassay tests use antigen/antibody reactions to test<br />
for specific organic compounds in water and soil. PCB-specific<br />
antibodies, attached to the walls of plastic cuvettes, selectively<br />
bind and remove PCB from complex sample matrices. A<br />
prepared sample and a reagent containing enzyme-conjugate<br />
molecules (analyte molecules attached to molecules of an<br />
enzyme) are added to the Antibody Cuvettes. During<br />
incubation, enzyme-conjugate molecules and PCB compete for<br />
binding sites on the antibodies. Samples with higher levels of<br />
analyte will have more antibody sites occupied by PCB and<br />
fewer antibody sites occupied by the enzyme-conjugate<br />
molecules.<br />
1—27
Chapter 2, continued<br />
After incubation, the sample and unbound enzyme conjugate<br />
are washed from the cuvette and a color-development reagent<br />
is added. The enzyme in the conjugate catalyzes the<br />
development of color. Therefore, there is an inverse<br />
relationship between color intensity and the amount of PCB in<br />
the sample. The resulting color is then compared with a<br />
calibrator to determine whether the PCB concentration in the<br />
sample is greater or less than the threshold levels.<br />
Required Reagents<br />
Description Unit Cat. No.<br />
Reagent Set, PCB in Soil*.................................................................20 cuvettes..........27735-00<br />
Required Apparatus<br />
Battery, alkaline AAA 1.5 volts................................................................ 4/pkg..........46743-00<br />
Caps, flip spout........................................................................................... 2/pkg..........25818-02<br />
Instrument Manual, Immunoassay <strong>Pocket</strong> Colorimeter .......................... each..........59574-88<br />
Marker, laboratory........................................................................................ each..........20920-00<br />
Pipettor, fixed volume, 0.5–mL .................................................................. each..........27641-00<br />
Tips, for pipettor 27641-00 ................................................................... 100/pkg..........27642-00<br />
<strong>Pocket</strong> Colorimeter, Immunoassay ............................................................. each..........59530-66<br />
Rack, for 1-cm Micro Cuvettes................................................................... each..........48799-00<br />
Talking Timer, Sper Scientific..................................................................... each..........27644-00<br />
Wipes, disposable ...........................................................................................box..........20970-00<br />
For Soil Extraction only:<br />
Soil Extraction <strong>Kit</strong>........................................................................................ each..........27751-00<br />
Includes:<br />
Balance, Acculab <strong>Pocket</strong> Pro 150B.........................................................each.......... 27969-00<br />
Dropper, LDPE, 0.5 and 1.0-mL, ........................................................ 20/pkg.......... 21247-20<br />
Filter and Barrel Assembly..................................................................20/pkg.......... 25676-20<br />
Sodium Sulfate, anhydrous.................................................................... 250 g............ 7099-14<br />
Soil Extractant Solution......................................................................200 mL.......... 25677-29<br />
Soil Sample Container......................................................................... 20/pkg.......... 25929-20<br />
Soil Scoop, 5 g, 4.25 cc ...........................................................................each.......... 26572-05<br />
Weighing Boat, 8.9 cm square............................................................. 20/pkg.......... 21790-20<br />
Soil Extraction Refill <strong>Kit</strong> (resupplies the consumables for 27751-00) .. each..........27752-00<br />
* Immunoassay components are manufactured for Hach Company by Beacon Analytical Systems, Inc.<br />
1—28
Chapter 3 Procedure for Metolachlor in Water<br />
3.1 Overview<br />
3.2 <strong>Test</strong>ing Hints<br />
Metolachlor is a widely-used herbicide for the control of<br />
grasses and broadleaf weeds. It is sold by several companies<br />
under a variety of trade names.<br />
Samples, calibrators, and reagents are added to cuvettes coated<br />
with antibodies specific for Metolachlor. The resultant color is<br />
measured with a <strong>Pocket</strong> Colorimeter II. The concentration of<br />
Metolachlor in a sample is determined by comparing the<br />
developed color intensity to that of a Metolachlor calibrator.<br />
The Metolachlor concentration is inversely proportional to the<br />
color development: the lighter the color, the higher the<br />
Metolachlor concentration.<br />
This method provides semi-quantitative screening based on<br />
thresholds for Metolachlor in the following concentrations:<br />
0.5 ppb and/or 2.0 ppb. Other concentrations of Metolachlor in<br />
water can be tested by first diluting the sample with deionized<br />
water. (See Summary of Method on page 1—35.)<br />
1. Read the entire procedure before starting. Identify and<br />
have ready all the necessary reagents, cuvettes, and other<br />
apparatus before beginning the analysis.<br />
2. Timing is critical; follow instructions carefully.<br />
3. A consistent technique when mixing the cuvettes is<br />
critical to this test. Using the cuvette rack and mixing as<br />
described in The 1-cm MicroCuvette Rack on page 2—3,<br />
yields the best results. Cuvettes can be mixed individually,<br />
but test results may not be as consistent.<br />
4. The test requires about 30 minutes for complete analysis.<br />
As many as 20 cuvettes (18 samples and 2 calibrators) can<br />
be run simultaneously.<br />
5. Handle the cuvettes carefully. Scratches on the inside or<br />
outside may cause erroneous results. Gently clean the<br />
outside of the cuvettes with a clean absorbent cloth or<br />
tissue before placing them into the instrument. (Kimwipe ®<br />
tissues are provided with the kit.)<br />
6. Antibody cuvettes and enzyme conjugate are made in<br />
matched lots. Do not mix reagent lots.<br />
1—29
Chapter 3, continued<br />
3.3 Procedure<br />
Immunoassay<br />
0.5<br />
ppb<br />
2.0<br />
ppb<br />
1. Label two Antibody<br />
Cuvettes: one for the<br />
0.5 ppb Metolachlor<br />
Calibrator, and the other<br />
for the 2.0 ppb<br />
Metolachlor Calibrator.<br />
Label the required<br />
number of cuvettes with<br />
sample identification.<br />
Note: As many as 18<br />
samples may be tested<br />
with each two calibrators.<br />
7. Twenty Antibody Cuvettes are provided with each reagent<br />
set. One Antibody Cuvette will be used for each calibrator<br />
and each sample. Antibody Cuvettes are not reusable.<br />
8. The Immunoassay <strong>Pocket</strong> Colorimeter provides a reading in<br />
terms of absorbance. This unit of measurement will allow<br />
you to compare your samples to the calibrators.<br />
9. To avoid damaging the Color Developing Solution, do not<br />
expose it to direct sunlight.<br />
10. Store the reagents at 4 °C when they are not in use. Allow<br />
the reagents to reach room temperature before using them<br />
in an analysis. Actual testing may be done at temperatures<br />
ranging from 1 °C to 38 °C.<br />
2. Place the cuvettes<br />
snugly into the rack.<br />
1—30<br />
3. Pipet 0.5 mL of the<br />
0.5 ppb Metolachlor<br />
Calibrator into the<br />
appropriate cuvette.<br />
Pipet 0.5 mL of the<br />
2.0 ppb Metolachlor<br />
Calibrator into the second<br />
cuvette.<br />
Note: Use a new pipette<br />
tip for each cuvette.<br />
4. Pipet 0.5 mL of each<br />
sample to be tested into<br />
the appropriate cuvette.<br />
Note: Use a new pipette<br />
tip for each sample.
Chapter 3, continued<br />
5. Using the Precision<br />
Pipettor, immediately<br />
pipet 0.5 mL of<br />
Metolachlor Enzyme<br />
Conjugate into<br />
each cuvette.<br />
Note: The same pipette<br />
tip can be used repeatedly<br />
for this step.<br />
9. Wash each cuvette<br />
forcefully and thoroughly<br />
four times with deionized<br />
water. Empty the cuvettes<br />
into the waste container.<br />
Note: Ensure most of the<br />
water is drained from the<br />
cuvettes by turning the<br />
cuvettes upside down and<br />
gently tapping them on a<br />
paper towel to drain.<br />
HRS MIN SEC HRS MIN SEC<br />
6. Begin a 20-minute<br />
reaction period and mix<br />
following the instructions<br />
on page 2—3.<br />
1—31<br />
7. After 10 minutes, mix<br />
the contents of the rack a<br />
second time for a period<br />
of 30 seconds using the<br />
same technique.<br />
Note: Solutions will turn<br />
blue in some or all of the<br />
cuvettes.<br />
8. At the end of the<br />
20-minute period, discard<br />
the contents of all the<br />
cuvettes. Use an<br />
appropriate waste<br />
container.
Chapter 3, continued<br />
Color Development<br />
Note: Timing is critical; follow instructions carefully.<br />
10. With the cuvettes<br />
still held snugly in the<br />
rack, pipet 0.5 mL of<br />
Color Developing<br />
Solution into each<br />
Antibody Cuvette.<br />
Note: Use a new pipette<br />
tip for each cuvette.<br />
HRS MIN SEC HRS MIN SEC<br />
11. Begin a 10-minute<br />
reaction period and mix<br />
following the instructions<br />
on page 2—3.<br />
1—32<br />
12. After 5 minutes, mix<br />
the contents of the rack a<br />
second time for a period<br />
of 30 seconds using the<br />
same technique.<br />
Note: Solutions will turn<br />
blue in some or all of the<br />
cuvettes.<br />
13. At the end of the<br />
10-minute reaction<br />
period, pipette 0.5 mL of<br />
Stop Solution into each<br />
cuvette in the same order<br />
as the Color Developing<br />
Solution was added.<br />
Slide the rack for<br />
20 seconds using the<br />
technique described on<br />
page 2—3.<br />
Note: Blue solutions will<br />
turn yellow with the<br />
addition of the Stop<br />
Solution.<br />
Note: The same pipette<br />
tip can be used repeatedly<br />
for this step.
Chapter 3, continued<br />
Measuring the Color<br />
DI<br />
HO<br />
2<br />
14. Label and fill a<br />
Zeroing Cuvette with<br />
deionized water. Wipe the<br />
outside of all the cuvettes<br />
with a tissue to remove<br />
water, smudges, and<br />
fingerprints.<br />
18. Remove the zeroing<br />
cuvette and insert the 0.5<br />
ppb Metolachlor<br />
calibrator into the cell<br />
holder. Cover the cuvette<br />
with the instrument cap.<br />
15. Press the POWER<br />
key to turn the meter on.<br />
The arrow can indicate<br />
either channel 1 or 2 for<br />
this method.<br />
Note: A user calibration<br />
should not be stored in<br />
the channel that you<br />
choose to use.<br />
19. Press:<br />
READ/ENTER. Record<br />
the absorbance value<br />
displayed.<br />
1—33<br />
16. Insert the Zeroing<br />
Cuvette into the 1-cm<br />
micro-cuvette cell holder.<br />
Cover the zeroing cuvette<br />
with the instrument cap.<br />
Note: The arrow at the<br />
top of the cuvette should<br />
always face the display.<br />
Repeat<br />
Steps 18—19<br />
20. Repeat step 18 and<br />
step 19 for all remaining<br />
calibrators and samples.<br />
Record the absorbance<br />
value of each calibrator<br />
and sample. A Data Sheet<br />
(page 1—10) has been<br />
provided that may be<br />
photocopied and used for<br />
each set of tests.<br />
17. Press:<br />
ZERO/SCROLL. The<br />
instrument display will<br />
turn on and the display<br />
will show “---”, followed<br />
by “0.000”.
Chapter 3, continued<br />
3.4 Interpreting the Results<br />
There is an inverse relationship between the concentration of<br />
Metolachlor and the absorbance. In other words, the higher the<br />
absorbance value, the lower the concentration of Metolachlor.<br />
If the sample absorbance is… Sample Metolachlor Concentration is…<br />
…less than calibrator absorbance …greater than the calibrator value<br />
…greater than calibrator absorbance …less than the calibrator value<br />
Example:<br />
0.5 ppb Metolachlor Calibrator: 0.450 Abs.<br />
2.0 ppb Metolachlor Calibrator: 0.230 Abs.<br />
Sample #1: 0.150 Abs.<br />
Sample #2: 0.350 Abs.<br />
Sample #3: 0.550 Abs.<br />
Sample #1 — Sample absorbance is less than the absorbance<br />
for both calibrators. Therefore the sample concentration is<br />
greater than 0.5 and greater than 2.0 ppb Metolachlor.<br />
Sample #2 — Sample absorbance is between the absorbencies<br />
the 0.5 and 2.0 ppb Metolachlor calibrators. Therefore the<br />
concentration of Metolachlor is between 0.5 and 2.0 ppb<br />
Metolachlor.<br />
Sample #3 — Sample absorbance is greater than the<br />
absorbance for both calibrators. Therefore the sample<br />
concentration is less than 2.0 ppb and less than 0.5 ppb<br />
Metolachlor.<br />
3.5 Storing and Handling Reagents<br />
Wear protective gloves and eyewear.<br />
When storing reagent sets for extended periods of time, keep<br />
them out of direct sunlight. Reagent shelf life can be<br />
extended by refrigerating the reagents and is strongly<br />
recommended.<br />
Keep the foil pouch containing the Metolachlor Antibody<br />
Cuvettes sealed when not in use.<br />
If Stop Solution comes in contact with eyes, wash<br />
thoroughly for 15 minutes with cold water and seek<br />
immediate medical help.<br />
1—34
Chapter 3, continued<br />
3.6 Sensitivity<br />
Compound<br />
The Metolachlor immunoassay test cannot differentiate<br />
between certain herbicides and metabolites, but it detects their<br />
presence to differing degrees. The following table shows the<br />
required concentration for selected chemicals.<br />
Concentration to give a<br />
positive response of 0.5 ppb<br />
Metolachlor<br />
Acetochlor 74 ppm 398 ppm<br />
Butachlor 84 ppb 550 ppb<br />
2 Chloro-2',6'-Diethylacetaniline 8 ppm 60 ppm<br />
2,6-Diethylaniline 61 ppm 313 ppm<br />
Propachlor 60 ppb 295 ppb<br />
The following compounds are not detectable at 10,000 ppb:<br />
3.7 Sample Collection and Storage<br />
Collect samples in a clean glass bottle. Do not pre-rinse the<br />
bottle with the sample. If there is greater than 0.5 ppm chlorine<br />
in the sample, dechlorinate with sodium thiosulfate (Cat. No.<br />
323-32), using 1 drop per 25 mL of sample.<br />
If the sample cannot be analyzed immediately, store the sample<br />
at 4 °C. Samples may be kept for as long as 14 days. Warm the<br />
samples to room temperature before analysis.<br />
3.8 Summary of Method<br />
Hach immunoassay tests use antigen/antibody reactions to test<br />
for specific organic compounds in water and soil. Metolachlorspecific<br />
antibodies, attached to the walls of plastic cuvettes,<br />
selectively bind and remove Metolachlor from complex sample<br />
matrices. A prepared sample and a reagent containing enzymeconjugate<br />
molecules (analyte molecules attached to molecules<br />
of an enzyme) are added to the Antibody Cuvettes. During<br />
incubation, enzyme-conjugate molecules and Metolachlor<br />
compete for binding sites on the antibodies. Samples with<br />
higher levels of analyte will have more antibody sites occupied<br />
1—35<br />
Concentration to give a<br />
positive response of 2.0 ppb<br />
Metolachlor<br />
Atrazine Carbofuran Carbendazim<br />
Aldicarb 2, 4-D<br />
Diazoton Chlorpyirfos
Chapter 3, continued<br />
by Metolachlor and fewer antibody sites occupied by the<br />
enzyme-conjugate molecules.<br />
After incubation, the sample and unbound enzyme conjugate<br />
are washed from the cuvette and a color-development reagent<br />
is added. The enzyme in the conjugate catalyzes the<br />
development of color. Therefore, there is an inverse<br />
relationship between color intensity and the amount of<br />
Metolachlor in the sample. The resulting color is then compared<br />
with a calibrator to determine whether the Metolachlor<br />
concentration in the sample is greater or less than the threshold<br />
levels.<br />
Required Reagents<br />
Description Unit Cat. No.<br />
Reagent Set, Metolachlor*................................................................20 cuvettes..........28135-00<br />
Deionized water....................................................................................... 500 mL..............272-48<br />
Required Apparatus<br />
Battery, alkaline AAA 1.5 volts................................................................ 4/pkg..........46743-00<br />
Caps, flip spout........................................................................................... 2/pkg..........25818-02<br />
Instruction Manual, Immunoassay <strong>Pocket</strong> Colorimeter .......................... each..........59574-88<br />
Marker, laboratory........................................................................................ each..........20920-00<br />
Pipettor, fixed volume, 0.5–mL .................................................................. each..........27641-00<br />
Tips, for pipettor 27641-00 ................................................................... 100/pkg..........27642-00<br />
<strong>Pocket</strong> Colorimeter, Immunoassay ............................................................. each..........59530-66<br />
Rack, for 1-cm MicroCuvettes .................................................................... each..........48799-00<br />
Talking Timer, Sper Scientific..................................................................... each..........27644-00<br />
Wipes, disposable ...........................................................................................box..........20970-00<br />
* Immunoassay components are manufactured for Hach Company by Beacon Analytical Systems, Inc.<br />
1—36
Chapter 4 Procedure for Atrazine in Water<br />
4.1 Overview<br />
4.2 <strong>Test</strong>ing Hints<br />
Atrazine is a widely-used herbicide for the control of broadleaf<br />
weeds. It is sold by several companies under a variety of trade<br />
names. Atrazine is stable in water and is a regulated substance.<br />
The Maximum Contaminant Level for Atrazine in the United<br />
States has been set at 3 parts per billion (ppb) by the<br />
U.S. Environmental Protection Agency.<br />
Samples, calibrators, and reagents are added to cuvettes coated<br />
with antibodies specific for Atrazine. The resultant color is<br />
measured with a <strong>Pocket</strong> Colorimeter II. The concentration of<br />
Atrazine in a sample is determined by comparing the developed<br />
color intensity to that of an Atrazine calibrator. The Atrazine<br />
concentration is inversely proportional to the color<br />
development: the lighter the color, the higher the Atrazine<br />
concentration.<br />
This method provides semi-quantitative screening based on<br />
thresholds for Atrazine in the following concentrations:<br />
0.1 ppb, 0.5 ppb, and/or 3.0 ppb.<br />
1. Read the entire procedure before starting. Identify and<br />
have ready all the necessary reagents, cuvettes, and other<br />
apparatus before beginning the analysis.<br />
2. Timing is critical; follow instructions carefully.<br />
3. A consistent technique when mixing the cuvettes is<br />
critical to this test. Using the cuvette rack and mixing, as<br />
described in The 1-cm MicroCuvette Rack on page 2—3 ,<br />
yields the best results. Cuvettes can be mixed individually,<br />
but test results may not be as consistent.<br />
4. The test requires about 30 minutes for complete analysis.<br />
As many as 20 cuvettes (18 samples and 2 calibrators) can<br />
be run simultaneously.<br />
5. Handle the cuvettes carefully. Scratches on the inside or<br />
outside may cause erroneous results. Gently clean the<br />
outside of the cuvettes with a clean absorbent cloth or<br />
tissue before placing them into the instrument. (Kimwipe®<br />
tissues are provided with the kit.)<br />
6. Antibody cuvettes and enzyme conjugate are made in<br />
matched lots. Do not mix reagent lots.<br />
1—37
Chapter 4, continued<br />
7. Cuvettes should fit snugly into the cuvette rack. Do not<br />
force the cuvettes into the rack as they may be difficult to<br />
remove and the contents may spill.<br />
8. The cuvette rack is designed to be inverted with the<br />
cuvettes in place. This is especially helpful when running<br />
many samples at once; the cuvettes can remain in the rack<br />
and be processed together until they are read in the<br />
Immunoassay <strong>Pocket</strong> Colorimeter. (See Measuring the Color<br />
on page 1—42.)<br />
9. Five Zeroing Cuvettes are provided with each reagent set.<br />
The Zeroing Cuvettes can be re-used.<br />
10. Twenty Antibody Cuvettes are provided with each reagent<br />
set. One Antibody Cuvette will be used for each calibrator<br />
and each sample. Cuvettes are not reusable.<br />
11. The Immunoassay <strong>Pocket</strong> Colorimeter provides a reading in<br />
absorbance. This unit of measurement will allow you to<br />
compare your samples to the calibrators.<br />
12. To avoid damaging the Color Developing Solution, do not<br />
expose it to direct sunlight.<br />
13. For European applications, use the 0.1 ppb and 0.5 ppb<br />
Atrazine calibrators rather than the 0.5 ppb and 3.0 ppb<br />
calibrators.<br />
1—38
Chapter 4, continued<br />
4.3 Procedure<br />
Immunoassay<br />
0.5<br />
ppb<br />
3.0<br />
ppb<br />
1. Label two Antibody<br />
Cuvettes: one for the<br />
0.5 ppb Atrazine<br />
Calibrator, and the<br />
other for the 3.0 ppb<br />
Atrazine Calibrator.<br />
Label the required<br />
number of cuvettes<br />
with sample<br />
identification.<br />
Note: As many as 18<br />
samples may be tested<br />
with each two<br />
calibrators.<br />
Note: For European<br />
applications, use<br />
0.1 ppb and 0.5 ppb<br />
calibrators.<br />
2. Place the cuvettes<br />
into the rack snugly.<br />
Note: Cuvettes should<br />
remain in the rack when<br />
it is inverted and tapped<br />
gently.<br />
1—39<br />
3. Pipet 0.5 mL of the<br />
0.5 ppb Atrazine<br />
Calibrator into the<br />
appropriate cuvette.<br />
Pipet 0.5 mL of the<br />
3.0 ppb Atrazine<br />
Calibrator into the<br />
second cuvette.<br />
Note: Use a new<br />
pipette tip for<br />
each cuvette.<br />
4. Pipet 0.5 mL of each<br />
sample to be tested<br />
into a cuvette.<br />
Note: Use a new<br />
pipette tip for<br />
each sample.
Chapter 4, continued<br />
5. Immediately pipet<br />
0.5 mL of Atrazine<br />
Enzyme Conjugate into<br />
each cuvette.<br />
Note: The same pipette<br />
tip can be used<br />
repeatedly for this step.<br />
9. Wash each cuvette<br />
forcefully and<br />
thoroughly four times<br />
with deionized water.<br />
Empty the cuvettes into<br />
the waste container.<br />
Note: Ensure most of<br />
the water is drained<br />
from the cuvettes by<br />
turning the cuvettes<br />
upside down and gently<br />
tapping them on a<br />
paper towel to drain.<br />
Note: Rinsing may be<br />
done with the cuvettes<br />
still in the rack.<br />
6. Set the rack on a<br />
hard, flat surface that is<br />
at least twice the<br />
length of the rack.<br />
Holding one end of the<br />
rack, slide it back and<br />
forth along its long axis<br />
for 30 seconds to mix.<br />
The rack should move<br />
through a distance<br />
equal to its length in<br />
each direction.<br />
1—40<br />
HRS MIN SEC<br />
7. Begin a 20-minute<br />
reaction time.<br />
When 10 minutes have<br />
passed, shake the rack<br />
for 20 seconds as<br />
described in step 6<br />
Note: Time this step<br />
carefully.<br />
8. After the 20-minute<br />
period, discard the<br />
contents of all the<br />
cuvettes. Use an<br />
appropriate waste<br />
container.<br />
Note: If all the cuvettes<br />
are snugly fitted into the<br />
rack, they may be<br />
emptied simultaneously<br />
by inverting the rack<br />
over the waste<br />
container.
Chapter 4, continued<br />
Color Development<br />
Note: Timing is critical; follow instructions carefully<br />
10. With the cuvettes<br />
still held snugly in the<br />
rack, pipet 0.5 mL of<br />
Color Developing<br />
Solution into each<br />
Antibody Cuvette.<br />
Note: Use a new<br />
pipette tip for<br />
each cuvette.<br />
11. Set the rack on a<br />
hard, flat surface that is<br />
at least twice the<br />
length of the rack.<br />
Holding one end of the<br />
rack, slide it back and<br />
forth along its long axis<br />
for 30 seconds to mix.<br />
The rack should move<br />
through a distance<br />
equal to its length in<br />
each direction.<br />
1—41<br />
HRS MIN SEC<br />
12. Begin a<br />
10-minute reaction<br />
period.<br />
After five minutes have<br />
passed, slide the rack<br />
for 20 seconds using<br />
the technique<br />
described in step 11.<br />
Note: Solutions will turn<br />
blue in some or all of<br />
the cuvettes.<br />
13. At the end of the<br />
10-minute reaction<br />
period, pipette 0.5 mL<br />
of Stop Solution into<br />
each cuvette in the<br />
same order as the Color<br />
Developing Solution<br />
was added.<br />
Slide the rack for 20<br />
seconds using the<br />
technique described in<br />
step 11.<br />
Note: Blue solutions<br />
will turn yellow with the<br />
addition of the Stop<br />
Solution.<br />
Note: The same pipette<br />
tip can be used<br />
repeatedly for this step.
Chapter 4, continued<br />
Measuring the Color<br />
DI<br />
HO<br />
2<br />
14. Label and fill a<br />
Zeroing Cuvette with<br />
deionized water. Wipe<br />
the outside of all the<br />
cuvettes with a tissue<br />
to remove water,<br />
smudges, and<br />
fingerprints.<br />
18. Remove the<br />
zeroing cuvette and<br />
insert the 0.5 ppb<br />
Atrazine calibrator into<br />
the cell holder. Cover<br />
the cuvette with the<br />
instrument cap.<br />
15. Press the POWER<br />
key to turn the meter<br />
on. The arrow can<br />
indicate either channel<br />
1 or 2 for this method.<br />
Note: A user calibration<br />
should not be stored in<br />
the channel that you<br />
choose to use.<br />
19. Press:<br />
READ/ENTER. Record<br />
the absorbance value<br />
displayed.<br />
1—42<br />
16. Insert the Zeroing<br />
Cuvette into the 1-cm<br />
micro-cuvette cell<br />
holder. Cover the<br />
zeroing cuvette with<br />
the instrument cap.<br />
Note: The arrow at the<br />
top of the cuvette<br />
should always face the<br />
key pad.<br />
Repeat Repeat step 18<br />
and Steps step 18–19<br />
19.<br />
20. Repeat step 18<br />
and step 19 for the<br />
remaining calibrator.<br />
17. Press:<br />
ZERO/SCROLL. The<br />
instrument display will<br />
turn on and the display<br />
will show “---”,<br />
followed by “0.000”.<br />
21. Insert the first<br />
sample cuvette into the<br />
cell holder. Cover the<br />
cuvette with the<br />
instrument cap.
Chapter 4, continued<br />
22. Press:<br />
READ/ENTER. Record<br />
the absorbance value<br />
displayed.<br />
Repeat Repeat step 21<br />
and Steps step21–22 22.<br />
23. Repeat step 21<br />
and step 22 for all of<br />
the remaining samples.<br />
4.4 Interpreting the Results<br />
There is an inverse relationship between the concentration of<br />
Atrazine and the absorbance. In other words, the higher the<br />
count value, the lower the concentration of Atrazine.<br />
If the sample absorbance is… Sample Atrazine Concentration is…<br />
…less than calibrator absorbance …greater than the calibrator value<br />
…greater than calibrator absorbance …less than the calibrator value<br />
Example:<br />
0.5 ppb Atrazine Calibrator: 0.450 Abs.<br />
3.0 ppb Atrazine Calibrator: 0.230 Abs.<br />
Sample #1: 0.150 Abs<br />
Sample #2: 0.350 Abs<br />
Sample #3: 0.550 Abs<br />
Sample #1 — Sample absorbance is less than the absorbance<br />
for both calibrators. Therefore the sample concentration is<br />
greater than 0.5 and greater than 3.0 ppb Atrazine.<br />
Sample #2 — Sample absorbance is between the absorbance<br />
for the 0.5 and 3.0 ppb Atrazine calibrators. Therefore the<br />
concentration of Atrazine is between 0.5 and 3.0 ppb Atrazine.<br />
Sample #3 — Sample absorbance is greater than the<br />
absorbance for both calibrators. Therefore the sample<br />
concentration is less than 3.0 ppb and less than 0.5 ppb<br />
Atrazine.<br />
1—43
Chapter 4, continued<br />
4.5 Storing and Handling Reagents<br />
Wear protective gloves and eye wear.<br />
4.6 Sensitivity<br />
When storing reagent sets for extended periods of time,<br />
keep them out of direct sunlight. Reagent shelf life can be<br />
extended by refrigerating the reagents and is<br />
strongly recommended.<br />
Keep the foil pouch containing the Atrazine Antibody<br />
Cuvettes sealed when not in use.<br />
If Stop Solution comes in contact with eyes, wash<br />
thoroughly for 15 minutes with cold water and seek<br />
immediate medical help.<br />
The Atrazine immunoassay test cannot differentiate between<br />
the various triazines and metabolites, but it detects their<br />
presence to differing degrees. The following table shows the<br />
required concentration for selected chemicals.<br />
Compound<br />
Concentration Required to give a<br />
positive result at 3 ppb (in ppb)<br />
Ametryne 1<br />
Atrazine 3<br />
Atrazine, de-ethylated 115<br />
Atrazine, de-isopropyl 714<br />
Cyanazine 460<br />
Cyromazine 1200<br />
Prometon 8<br />
Prometryne 0.7<br />
Propazine 2.3<br />
Simetryne 5.4<br />
Simazine 37<br />
Terbuthylazine 91<br />
Terbutryne 8.3<br />
1—44
Chapter 4, continued<br />
The following compounds are not detectable at 10,000 ppb:<br />
Alachlor Carbofuran Metaolachlor<br />
Aldicarb Diaminoatrazine 2,4-D<br />
Carbendazim Melamine<br />
4.7 Sample Collection and Storage<br />
Collect samples in a clean glass bottle. Do not pre-rinse the<br />
bottle with the sample. If the sample cannot be analyzed<br />
immediately, store the sample at 4 °C. Samples may be kept for<br />
as long as 14 days. Warm the samples to room temperature<br />
before analysis.<br />
4.8 Summary of Method<br />
The immunoassay tests use antigen/antibody reactions to test<br />
for specific organic compounds in water and soil. Atrazinespecific<br />
antibodies, attached to the walls of plastic cuvettes,<br />
selectively bind and remove Atrazine from complex sample<br />
matrices. A prepared sample and a reagent containing enzymeconjugate<br />
molecules (analyte molecules attached to molecules<br />
of an enzyme) are added to the Antibody Cuvettes. During<br />
incubation, enzyme-conjugate molecules and Atrazine<br />
compete for binding sites on the antibodies. Samples with<br />
higher levels of analyte will have more antibody sites occupied<br />
by Atrazine and fewer antibody sites occupied by the enzymeconjugate<br />
molecules.<br />
After incubation, the sample and unbound enzyme conjugate<br />
are washed from the cuvette and a color-development reagent<br />
is added. The enzyme in the conjugate catalyzes the<br />
development of color. Therefore, there is an inverse<br />
relationship between color intensity and the amount of<br />
Atrazine in the sample. The resulting color is then compared<br />
with a calibrator to determine whether the Atrazine<br />
concentration in the sample is greater or less than the threshold<br />
levels.<br />
1—45
Chapter 4, continued<br />
Required Reagents<br />
Description Unit Cat. No.<br />
Reagent Set, Atrazine*......................................................................20 cuvettes..........27627-00<br />
Required Apparatus<br />
Battery, alkaline AAA 1.5 volts................................................................ 4/pkg..........46743-00<br />
Caps, flip spout........................................................................................... 2/pkg..........25818-02<br />
Instruction Manual, Immunoassay <strong>Pocket</strong> Colorimeter .......................... each..........59574-88<br />
Marker, laboratory........................................................................................ each..........20920-00<br />
Pipettor, fixed volume, 0.5–mL .................................................................. each..........27641-00<br />
Tips, for pipettor 27641-00 ................................................................... 100/pkg..........27642-00<br />
<strong>Pocket</strong> Colorimeter, Immunoassay ............................................................. each..........59530-66<br />
Rack, for 1-cm Micro Cuvettes................................................................... each..........48799-00<br />
Talking Timer, Sper Scientific..................................................................... each..........27644-00<br />
Wipes, disposable ...........................................................................................box..........20970-00<br />
Optional Reagents<br />
Reagent Set, Atrazine .....................................................................100 cuvettes..........27627-10<br />
* Immunoassay components are manufactured for Hach Company by Beacon Analytical Systems, Inc.<br />
1—46
Chapter 5 Procedure for TPH in Soil and Water<br />
5.1 Overview<br />
5.2 Tips and Techniques<br />
This TPH test can be used for both soil and water testing. When<br />
testing soil, purchase the Soil Extraction <strong>Kit</strong> (see page 1—58)<br />
and perform the Procedure for Soil Extraction on page 1—48.<br />
When testing water samples only, proceed directly with the<br />
Immunoassay Procedure for Soil Extracts and Water Samples<br />
on page 1—50.<br />
Soil samples or water samples are collected. If testing soils, first<br />
extract the TPH using the procedure in Chapter 5.3. Water<br />
samples or soil extracts, calibrators, and reagents are added to<br />
cuvettes that are coated with antibodies specific for TPH. Color<br />
develops and is then measured with a Hach <strong>Pocket</strong> Colorimeter.<br />
The test requires about 20 to 30 minutes for complete analysis.<br />
As many as 10 cuvettes can be run simultaneously.<br />
The concentration of TPH in a sample is determined by<br />
comparing the developed color intensity to that of a TPH<br />
calibrator. The TPH concentration is inversely proportional to<br />
the color development: the lighter the color, the higher the TPH<br />
concentration. The Immunoassay <strong>Pocket</strong> Colorimeter provides<br />
a reading in terms of absorbance. This unit of measurement will<br />
allow you to compare your samples to the calibrators.<br />
This method provides semi-quantitative screening based on<br />
thresholds for TPH as diesel fuel in the following<br />
concentrations:<br />
Soil 20, 50, 100, 200 ppm as diesel fuel<br />
Water 2, 5, 10, 20 ppm as diesel fuel<br />
Higher concentrations in water can be tested by first diluting<br />
the sample with deionized water (see Diluting Water Samples<br />
on page 1—56). <strong>Test</strong> for other TPH compounds (i.e., gasoline)<br />
by using the conversion factors given in Table 1 and Table 2 on<br />
page 1—56.<br />
1. Read the entire procedure before starting. Identify and<br />
have ready all the necessary reagents, cuvettes, and other<br />
apparatus before beginning the analysis.<br />
2. Timing is critical; follow instructions carefully.<br />
3. A consistent technique when mixing the cuvettes is<br />
critical to this test. The best results come from using the<br />
cuvette rack and mixing as described in The 1-cm<br />
1—47
Chapter 5, continued<br />
MicroCuvette Rack on page 2—3. Cuvettes can be mixed<br />
individually, but test results may not be as consistent.<br />
4. Handle the cuvettes carefully. Scratches on the inside or<br />
outside may cause erroneous results. Carefully clean the<br />
outside of the cuvettes with a clean absorbent cloth or<br />
tissue before placing them into the instrument. (Kimwipe ®<br />
tissues are provided with the kit.)<br />
5. Antibody cuvettes and enzyme conjugate are made in<br />
matched lots. Do not mix reagent lots.<br />
6. Twenty Antibody Cuvettes are provided with each reagent<br />
set. One Antibody Cuvette will be used for each calibrator<br />
or sample. Antibody Cuvettes are not reusable.<br />
7. To avoid damaging the Color Developing Solution, do not<br />
expose it to direct sunlight.<br />
8. Store the reagents at 4 °C when they are not in use. Allow<br />
the reagents to reach room temperature before using them<br />
in an analysis. Actual testing may be done at temperatures<br />
ranging from 1 °C to 38 °C.<br />
9. If the soil sample contains more than 20% moisture, it must<br />
be dried before analysis. Please contact Technical Support<br />
(see page 2—20) for further information about soil drying<br />
techniques.<br />
5.3 Procedure for Soil Extraction<br />
The Soil Extractant contains methyl alcohol which is poisonous<br />
and flammable. Before using this and other reagents, read the<br />
Material Safety Data Sheet (MSDS) for proper use of protective<br />
equipment and other safety information.<br />
1—48
Chapter 5, continued<br />
Note: Hach Company recommends wearing protective gloves for this procedure.<br />
1. Place a plastic<br />
weighing boat on the<br />
AccuLab ® balance. Zero,<br />
or tare, the balance.<br />
Note: Refer to the<br />
operating Instructions for<br />
AccuLab Balance.<br />
5. Cap the extraction vial<br />
tightly and shake<br />
vigorously for<br />
one minute.<br />
2. Weigh out 10 g of soil<br />
in the plastic weighing<br />
boat. Carefully pour the<br />
soil into an extraction<br />
vial.<br />
6. Allow to settle for at<br />
least one minute.<br />
Carefully open the<br />
extraction vial.<br />
1—49<br />
3. Use the 5 g scoop to<br />
add one scoop of sodium<br />
sulfate to the extraction<br />
vial.<br />
7. Using the disposable<br />
bulb pipet, withdraw 1.0–<br />
1.5 mL from the liquid<br />
layer at the top of the<br />
extraction vial.<br />
Transfer it into the<br />
filtration barrel (the<br />
bottom part of the<br />
filtering assembly into<br />
which the plunger<br />
inserts).<br />
Note: Do not use more<br />
than 1.5 mL. The bulb is<br />
marked in 0.25–mL<br />
increments<br />
4. Use the graduated<br />
cylinder to transfer 10 mL<br />
of Soil Extractant into the<br />
extraction vial.<br />
8. Insert the filtration<br />
plunger into the filtration<br />
barrel. Press firmly on the<br />
plunger until the sample<br />
extract is forced upward<br />
into the center of the<br />
plunger. Use the resultant<br />
filtrate for the<br />
immunoassay in the<br />
Immunoassay Procedure<br />
for Soil Extracts and<br />
Water Samples on<br />
page 1—50.<br />
Note: You may need to<br />
place the filtration<br />
assembly on a table and<br />
press down on the<br />
plunger.
Chapter 5, continued<br />
5.4 Immunoassay Procedure for Soil Extracts and Water Samples<br />
Immunoassay<br />
9. Label an Antibody<br />
Cuvette for each<br />
calibrator and each<br />
sample to be tested.<br />
To select the proper<br />
calibrators, see Table 1<br />
on page 1—55.<br />
Note: As many as<br />
10 cuvettes may be tested<br />
at one time and may<br />
comprise any combination<br />
of samples and<br />
calibrators.<br />
Note: See example<br />
below.<br />
10. Place the cuvettes<br />
into the rack snugly.<br />
1—50<br />
11. Use the Precision<br />
Pipettor to pipet 0.5 mL<br />
of Diluent Solution into<br />
each Calibrator cuvette.<br />
Note: The same pipette<br />
tip can be used repeatedly<br />
for this step.<br />
12. If testing soil: Pipet<br />
0.5 mL of Diluent<br />
Solution into each sample<br />
cuvette.<br />
If testing water: Pipet<br />
0.5 mL of each water<br />
sample into the<br />
appropriate cuvette.<br />
Note: Use a new pipette<br />
tip for each water sample.<br />
EXAMPLE<br />
To test samples against the 50 ppm and 100 ppm diesel fuel calibrators, label one<br />
Antibody Cuvette “50” and a second cuvette “100.” Then label an Antibody<br />
Cuvette for each of up to eight samples to be tested. In this example, there is<br />
room for eight samples; samples plus calibrators cannot exceed 10. Using more<br />
calibrators will reduce the number of samples that can be run at the same time.
Chapter 5, continued<br />
13. Have the necessary<br />
apparatus at hand as the<br />
next three steps must be<br />
done without delays.<br />
Use a WireTrol pipet to<br />
transfer 50 µL of each<br />
calibrator to be used into<br />
the calibrator cuvettes.<br />
Mix the cuvettes after<br />
each addition.<br />
Note: Use a separate<br />
capillary tube for each<br />
solution.<br />
17. Mix the contents of<br />
the cuvettes for<br />
30 seconds using the<br />
technique described on<br />
page 1—16.<br />
14. If testing soil: Use a<br />
WireTrol pipet to transfer<br />
50 µL of the filtered<br />
extract from step 8 into<br />
the appropriately labeled<br />
cuvette.<br />
Mix the cuvettes after the<br />
addition of each sample.<br />
If testing water: Use a<br />
WireTrol pipet to transfer<br />
50 µL of methanol into<br />
each sample cuvette<br />
Note: Use a separate<br />
capillary tube for each<br />
solution.<br />
HRS MIN SEC<br />
18. After 5 minutes, mix<br />
the contents of the rack a<br />
second time for a period<br />
of 30 seconds using the<br />
same technique.<br />
Note: Read Tips and Techniques on page 1—47 before proceeding.<br />
1—51<br />
15. Using the Precision<br />
Pipettor, immediately<br />
pipet 0.5 mL of TPH<br />
Enzyme Conjugate into<br />
each calibrator and<br />
sample cuvette.<br />
Note: The same pipette<br />
tip can be used repeatedly<br />
for this step.<br />
19. At the end of the<br />
10-minute period, discard<br />
the contents of all the<br />
cuvettes into an<br />
appropriate waste<br />
container.<br />
HRS MIN SEC<br />
16. Begin a 10-minute<br />
reaction time and proceed<br />
immediately to the next<br />
step.<br />
20. Wash each cuvette<br />
forcefully and thoroughly<br />
four times with deionized<br />
water. Empty the rinse<br />
water into the waste<br />
container.<br />
Note: Ensure most of the<br />
water is drained from the<br />
cuvettes by turning the<br />
cuvettes upside down and<br />
tapping them lightly on a<br />
paper towel.
Chapter 5, continued<br />
Color Development<br />
Note: Timing is critical; follow instructions carefully.<br />
21. With the cuvettes<br />
still held snugly in the<br />
rack, pipet 0.5 mL of<br />
Color Developing<br />
Solution into each<br />
Antibody Cuvette.<br />
Note: Use a new pipette<br />
tip for each cuvette.<br />
HRS MIN SEC<br />
22. Begin a 10-minute<br />
reaction period and mix<br />
following the instructions<br />
on page 1—16.<br />
1—52<br />
HRS MIN SEC<br />
23. After 5 minutes, mix<br />
the contents of the rack a<br />
second time for a period<br />
of 30 seconds using the<br />
same technique.<br />
Note: Solutions will turn<br />
blue in some or all of the<br />
cuvettes.<br />
24. At the end of the<br />
10-minute reaction<br />
period, pipette 0.5 mL of<br />
Stop Solution into each<br />
cuvette in the same order<br />
as the Color Developing<br />
Solution was added in<br />
step 21.<br />
Slide the rack for 20<br />
seconds using the<br />
technique described on<br />
page 1—16.<br />
Note: Blue solutions will<br />
turn yellow with the<br />
addition of the Stop<br />
Solution.<br />
Note: The same pipette<br />
tip can be used repeatedly<br />
for this step.
Chapter 5, continued<br />
Measuring the Color<br />
DI<br />
HO<br />
2<br />
25. Label and fill a<br />
Zeroing Cuvette with<br />
deionized water. Wipe the<br />
outside of all the cuvettes<br />
with a tissue to remove<br />
water, smudges, and<br />
fingerprints.<br />
29. Remove the zeroing<br />
cuvette and insert the<br />
first TPH calibrator into<br />
the cell holder. Cover the<br />
cuvette with the<br />
instrument cap.<br />
26. Press the POWER<br />
key to turn the meter on.<br />
The arrow can indicate<br />
either channel 1 or 2 for<br />
this method.<br />
Note: A user calibration<br />
should not be stored in<br />
the channel that you<br />
choose to use.<br />
30. Press:<br />
READ/ENTER. Record<br />
the absorbance value<br />
displayed. Hold the<br />
adapter in place when<br />
removing the cuvette.<br />
1—53<br />
27. Insert the Zeroing<br />
Cuvette into the adapter.<br />
Cover with the instrument<br />
cap.<br />
Note: The arrow at the<br />
top of the cuvette should<br />
always face forward.<br />
Repeat<br />
Steps 29—30<br />
31. Repeat step 29 and<br />
step 30 for all remaining<br />
calibrators and samples.<br />
Record the absorbance<br />
value of each calibrator<br />
and sample. A Data Sheet<br />
(page 1—10) has been<br />
provided that may be<br />
photocopied and used for<br />
each set of tests.<br />
28. Press:<br />
ZERO/SCROLL. The<br />
instrument display will<br />
turn on and the display<br />
will show “---”, followed<br />
by “0.000”.
Chapter 5, continued<br />
5.5 Interpreting the Results<br />
There is an inverse relationship between the concentration of<br />
TPH and the absorbance value. In other words, the higher the<br />
absorbance value, the lower the concentration of TPH.<br />
If the sample absorbance is… the sample TPH Concentration is…<br />
…less than calibrator absorbance …greater than the calibrator value<br />
…greater than calibrator absorbance …less than the calibrator value<br />
Example of Count Values<br />
Interpretation<br />
TPH Calibrator #1: 0.800 Abs.<br />
TPH Calibrator #2: 0.600 Abs.<br />
Sample #1: 0.150 Abs.<br />
Sample #2: 0.700 Abs.<br />
Sample #3: 0.950 Abs.<br />
Interpretation for a soil sample:<br />
Sample #1 — Sample absorbance is less than the absorbance<br />
for both calibrators. Therefore the sample concentration of TPH<br />
is greater than both 20 ppm and 50 ppm diesel fuel.<br />
Sample #2 — Sample absorbance is between the absorbance<br />
for the TPH calibrators. Therefore the sample concentration of<br />
TPH is between 20 ppm and 50 ppm diesel fuel.<br />
Sample #3 — Sample absorbance is greater than the<br />
absorbance for both calibrators. Therefore the sample<br />
concentration of TPH is less than both 20 ppm and 50 ppm<br />
diesel fuel.<br />
Interpretation for a water sample*:<br />
Sample #1 — Sample absorbance is less than the absorbance<br />
for both calibrators. Therefore the sample concentration of TPH<br />
is greater than both 2 ppm and 5 ppm diesel fuel.<br />
Sample #2 — Sample absorbance is between the absorbance<br />
for the TPH calibrators. Therefore the sample concentration of<br />
TPH is between 2 ppm and 5 ppm diesel fuel.<br />
Sample #3 — Sample absorbance is greater than the<br />
absorbance for both calibrators. Therefore the sample<br />
* See Diluting Water Samples on page 1—56 for instructions on how to correct for sample dilutions.<br />
1—54
Chapter 5, continued<br />
concentration of TPH is less than both 2 ppm and 5 ppm diesel<br />
fuel.<br />
5.6 Storing and Handling Reagents<br />
Wear protective gloves and eyewear.<br />
When storing reagent sets for extended periods of time, keep<br />
them out of direct sunlight. Store reagents at a temperature<br />
of 4 °C when not in use.<br />
Keep the foil pouch containing the TPH Antibody Cuvettes<br />
sealed when not in use.<br />
If Stop Solution comes in contact with eyes, wash<br />
thoroughly for 15 minutes with cold water and seek<br />
immediate medical help.<br />
5.7 Sensitivity<br />
Compound<br />
The antibodies used in the TPH <strong>Test</strong> <strong>Kit</strong> react with a variety of<br />
compounds found in petroleum fuels; however, each TPH<br />
calibrator has been formulated to represent a specific<br />
concentration of diesel fuel. To use the calibrators for other<br />
TPH compounds, see Table to select the proper TPH calibrator<br />
for the compound, sample, and range you want to test. To test<br />
concentrations in water higher than those covered by the<br />
calibrators, dilute the original sample as described in Diluting<br />
Water Samples on page 1—56.<br />
Example: To use the TPH calibrators for gasoline, find<br />
“Gasoline” in the first column of Table 1 or Table 2. Read across<br />
the column to find the ppm represented by each calibrator. For<br />
gasoline, calibrator #1 = 15 ppm, calibrator #2 = 35 ppm, and<br />
so forth.<br />
TPH calibrator<br />
#1<br />
Table 1<br />
TPH calibrator<br />
#2<br />
1—55<br />
TPH calibrator<br />
#3<br />
TPH calibrator<br />
#4<br />
ppm<br />
Diesel 20 50 100 200<br />
Gasoline 15 35 70 140<br />
Kerosene 35 75 140 250<br />
Benzene 20 45 85 160<br />
Toluene 15 30 50 90<br />
Ethylbenzene 5 15 35 75
Chapter 5, continued<br />
Compound<br />
TPH calibrator<br />
#1<br />
Table 1 (Continued)<br />
TPH calibrator<br />
#2<br />
m-Xylene 9 20 35 70<br />
o-Xylene 10 20 40 80<br />
p-Xylene 3 5 9 16<br />
BTEX 5 15 25 45<br />
Compound<br />
TPH calibrator<br />
#1<br />
Table 2<br />
TPH calibrator<br />
#2<br />
5.7.1 Diluting Water Samples<br />
Dilute the sample to 50 mL with deionized water in a graduated<br />
cylinder. (See Reagent Set, TPH 20 cuvettes 27743-00.)<br />
Choose the mL of undiluted sample from Table 3. Use the<br />
multiplier value for the chosen quantity to multiply the value<br />
from Table 1 or Table 2, above.<br />
1—56<br />
ppm<br />
TPH calibrator<br />
#3<br />
TPH calibrator<br />
#3<br />
TPH calibrator<br />
#4<br />
TPH calibrator<br />
#4<br />
ppm<br />
Diesel 2 5 10 20<br />
Gasoline 1.5 3.5 7 14<br />
Kerosene 3.5 7.5 14 25<br />
Benzene 2 4.5 8.5 16<br />
Toluene 1.5 3 5 9<br />
Ethylbenzene 0.5 1.5 3.5 7.5<br />
m-Xylene 0.9 2 3.5 7<br />
o-Xylene 1 2 4 8<br />
p-Xylene 0.3 0.5 0.9 16<br />
BTEX 0.5 1.5 2.5 4.5<br />
Table 3<br />
mL Sample Multiplier mL Sample Multiplier<br />
0.5 100 5.0 10<br />
1.0 50 10.0 5<br />
2.0 25 25.0 2
Chapter 5, continued<br />
For example: If a 0.5 mL water sample is diluted to 50 mL and<br />
tested, the calibrator levels for diesel fuel in water would<br />
represent 200, 500, 1000, and 2000 ppm respectively.<br />
5.8 Sample Collection and Storage<br />
Analyze the samples as soon as possible after collection. If the<br />
samples must be stored, collect them in glass or Teflon ®<br />
containers that have been washed with soap and water and<br />
rinsed with methanol. The container should be capped with a<br />
Teflon-lined cap. If a Teflon cap is not available, aluminum foil<br />
rinsed in methanol may be used as a substitute cap liner.<br />
When collecting water samples, fill the container completely<br />
(no head space) and cover the container with a tightly-sealed<br />
lid immediately after collection.<br />
For Soil: Store the samples at 4 °C for no longer than 14 days.<br />
For Water: Chill the sample in an ice bath or refrigerator to<br />
limit the loss of volatile compounds. Store samples no longer<br />
than 24 hours.<br />
5.9 Summary of Method<br />
Hach immunoassay tests use antigen/antibody reactions to test<br />
for specific organic compounds in water and soil. Antibodies<br />
specific for TPH are attached to the walls of plastic cuvettes.<br />
They selectively bind and remove TPH from complex sample<br />
matrices. A prepared sample and a reagent containing enzymeconjugate<br />
molecules (analyte molecules attached to molecules<br />
of an enzyme) are added to the Antibody Cuvettes. During<br />
incubation, enzyme-conjugate molecules and TPH compete for<br />
binding sites on the antibodies. Samples with higher levels of<br />
analyte will have more antibody sites occupied by TPH and<br />
fewer antibody sites occupied by the enzyme-conjugate<br />
molecules.<br />
After incubation, the sample and unbound enzyme conjugate<br />
are washed from the cuvette and a color-development reagent<br />
is added. The enzyme in the conjugate catalyzes the<br />
development of color. Therefore, there is an inverse<br />
relationship between color intensity and the amount of TPH in<br />
the sample. The resulting color is then compared with a<br />
calibrator to determine whether the TPH concentration in the<br />
sample is greater or less than the threshold levels.<br />
1—57
Chapter 5, continued<br />
Required Reagents<br />
Description Unit Cat. No.<br />
Reagent Set, TPH * ............................................................................20 cuvettes..........27743-00<br />
Deionized water....................................................................................... 500 mL..............272-48<br />
Required Apparatus<br />
Battery, alkaline AAA, 1.5 volts............................................................... 4/pkg..........46743-00<br />
Caps, flip spout........................................................................................... 2/pkg..........25818-02<br />
Instruction Manual, Immunoassay <strong>Pocket</strong> Colorimeter .......................... each..........59574-88<br />
Marker, laboratory........................................................................................ each..........20920-00<br />
Pipettor, fixed volume, 0.5-mL................................................................... each..........27641-00<br />
Tips, for pipettor 27641-00 ................................................................... 100/pkg..........27642-00<br />
<strong>Pocket</strong> Colorimeter, Immunoassay .......................................................... each..........59530-66<br />
Rack, for 1-cm Micro Cuvettes................................................................... each..........48799-00<br />
Talking Timer, Sper Scientific..................................................................... each..........27644-00<br />
Wipes, disposable ...........................................................................................box..........20970-00<br />
For Soil Extraction only:<br />
Soil Extraction <strong>Kit</strong>........................................................................................ each..........27751-00<br />
Includes:<br />
Balance, Acculab <strong>Pocket</strong> Pro 150B.........................................................each.......... 27969-00<br />
Dropper, LDPE, 0.5 and 1.0-mL, ........................................................ 20/pkg.......... 21247-20<br />
Filter and Barrel Assembly..................................................................20/pkg.......... 25676-20<br />
Sodium Sulfate, anhydrous.................................................................... 250 g............ 7099-14<br />
Soil Extractant Solution......................................................................200 mL.......... 25677-29<br />
Soil Sample Container......................................................................... 20/pkg.......... 25929-20<br />
Soil Scoop, 5 g, 4.25 cc ...........................................................................each.......... 26572-05<br />
Weighing Boat, 8.9 cm square............................................................. 20/pkg.......... 21790-20<br />
Soil Extraction Refill <strong>Kit</strong><br />
(resupplies the consumables for 27751-00)........................................... each..........27752-00<br />
* Immunoassay components are manufactured for Hach Company by Beacon Analytical Systems, Inc.<br />
1—58
Section 2 Instrument Manual<br />
2—1
2—2
Accessories<br />
The 1-cm MicroCuvette Rack<br />
Figure 1 The 1-cm MicroCuvette Rack<br />
This rack (see Figure 1) has been designed specifically to aid in<br />
achieving precise and accurate results when using the<br />
immunoassay technique to analyze several samples at the same<br />
time.<br />
Loading the Rack — The cuvette rack is designed so that it<br />
may be inverted with the cuvettes in place. Identify each<br />
cuvette with a sample or calibrator number and place all the<br />
cuvettes in the rack before beginning the procedure. Fit the<br />
cuvettes snugly into the rack, but do not force them or they<br />
may be difficult to remove and their contents may spill. The<br />
cuvettes should remain in place when the rack is inverted and<br />
tapped lightly.<br />
Mixing — Set the rack on a hard, flat surface that is at least<br />
twice the length of the rack. Hold the rack by one end and<br />
vigorously slide it back and forth along its long axis for 30<br />
seconds.<br />
The rack should move through a distance equal to its own<br />
length in each direction.<br />
2—3
Accessories, continued<br />
Using the Precision Pipettor<br />
1. Press a pipette tip<br />
firmly onto the fixedvolume<br />
Precision Pipettor.<br />
Using the WireTrol Pipet<br />
1. Gently insert the<br />
orange-tipped end of the<br />
WireTrol plunger into<br />
the end of the capillary<br />
tube with the colored<br />
band on it.<br />
Note: The pipet will<br />
operate more freely after<br />
the Teflon ® tip is wetted.<br />
2. Depress the plunger<br />
gently to the first stop.<br />
Note: This is<br />
approximately half way.<br />
Do not depress the<br />
plunger past this first stop<br />
or measured quantities<br />
may be inaccurate and the<br />
Pipettor body may be<br />
damaged.<br />
2. Push the tip to the<br />
other end of the capillary<br />
tube until it barely<br />
extends beyond the end<br />
of the capillary tube.<br />
2—4<br />
3. With the tip immersed<br />
in the solution to be<br />
pipeted, allow the<br />
plunger to return slowly<br />
to its original position<br />
Note: Do not let the<br />
plunger snap into place.<br />
This will decrease<br />
accuracy.<br />
3. Submerge the capillary<br />
tube below the sample or<br />
standard surface. Slowly<br />
and smoothly draw the<br />
WireTrol plunger up until<br />
the bottom of the<br />
plunger tip reaches the<br />
appropriate volume line.<br />
Note: Touch the end of<br />
the tube to the side of the<br />
vessel to release drops on<br />
the capillary tube tip.<br />
4. Position the Pipettor<br />
tip over the receiving<br />
vessel. Depress the<br />
plunger fully (past the<br />
stop) to dispense the<br />
sample. Allow the plunger<br />
to return slowly to the<br />
starting position.<br />
4. To discharge the pipet,<br />
place the tip of the<br />
capillary tube below the<br />
surface of the solution<br />
and push the WireTrol<br />
plunger down in one<br />
smooth motion. Change<br />
capillary tubes for each<br />
standard and sample.
Instrument Operation<br />
Key Functions<br />
Key Description Function<br />
POWER<br />
Key<br />
ZERO/SCROLL<br />
Key<br />
READ/ENTER<br />
key<br />
MENU<br />
Key<br />
Menu Selections<br />
Switching Ranges<br />
Setting the Time<br />
Recalling Stored Measurements<br />
On/Off/Backlight<br />
To turn on backlight, turn on the instrument, then press and hold the<br />
power key until the backlight turns on. Press and hold again to turn off the<br />
backlight. This key functions the same in all instrument modes and ranges.<br />
In measurement mode, sets the instrument to zero.<br />
In menu mode, scrolls through menu options. Also scrolls numbers when<br />
entering or editing a value.<br />
In measurement mode, initiates sample measurement.<br />
In menu mode, selects a menu option. When entering numbers, moves one<br />
space to the right and executes the function when the entry is complete.<br />
Enter/Exit for the menu mode<br />
Press and hold for about 5 seconds to enter user-entered method mode.<br />
Press the MENU key to access the menu selections.<br />
1. Press the MENU key. The display will show “SEL”. A flashing<br />
arrow indicates the current range.<br />
2. Press the READ/ENTER key to toggle between ranges.<br />
3. Press menu again to accept and exit back to the<br />
measurement screen.<br />
1. Press the MENU key, then press the ZERO/SCROLL key until the<br />
display shows a time in the “00:00” format.<br />
2. Press READ/ENTER. The digit to be edited will flash.<br />
3. Use the ZERO/SCROLL key to change the entry, then press<br />
READ/ENTER to accept and advance to the next digit. The<br />
time is entered in 24-hour format.<br />
1. Press the MENU key, then press the ZERO/SCROLL key until the<br />
display shows “RCL”. The instrument automatically stores<br />
the last 10 measurements.<br />
2—5
Instrument Operation, continued<br />
Battery Installation<br />
Figure 1 Battery Installation<br />
2. In RCL mode, press READ/ENTER to recall the stored<br />
measurements, beginning with the most recent<br />
measurement taken. The meter stores the measurement<br />
number as 01 (most recent) through 10 (oldest), the time the<br />
measurement was taken, and the measurement value. The<br />
ZERO/SCROLL key allows for selection of a specific<br />
measurement by number. The READ/ENTER key scrolls<br />
through all stored data points.<br />
Figure 1 on page 2—6 provides an exploded view of battery<br />
installation.<br />
1. Unhook the latch and remove the battery compartment<br />
cover. The polarities are shown on the battery holder.<br />
2. Place the four batteries provided with the instrument in the<br />
holder as indicated and replace the battery compartment<br />
cover. The display will show the software version number<br />
(e.g., “P 1.6”) after correct battery installation.<br />
When replacing discharged batteries, always replace the<br />
complete set of four alkaline batteries. Rechargeable batteries<br />
are not recommended and cannot be recharged in the<br />
instrument.<br />
Note: The Low Battery icon will appear on the display when the batteries<br />
have 10% battery life remaining. The battery icon will flash when the<br />
batteries are too low to complete measurements. See Instrument<br />
Keys and Display on page 1—7.<br />
2—6
Error Codes<br />
Error Messages<br />
When the instrument cannot perform the function initiated by<br />
the operator, an error message will appear in the display. Refer<br />
to the appropriate message information below to determine<br />
what the problem is and how it can be corrected. Resolve error<br />
messages in the order that they appear on the display. Service<br />
Centers are listed on page 2—20.<br />
1. E-0 No Zero (User mode)<br />
Error occurs when trying to read a standard in the user<br />
calibration mode before setting the meter to zero.<br />
Zero the instrument on an appropriate blank.<br />
2. E-1 Ambient Light Error<br />
There is too much light present to take a valid measurement.<br />
Verify instrument cap is correctly seated.<br />
Contact a Service Center.<br />
3. E-2 LED Error<br />
The LED (light source) is out of regulation.<br />
Replace the batteries.<br />
Verify LED lights up (inside the cell holder) when the<br />
READ/ENTER or ZERO/SCROLL key is pressed.<br />
Contact a Service Center.<br />
Note: When an E-1 or E-2 error occurs on a measurement, the display will<br />
show “_.__”. (The decimal place is determined by the chemistry.) If<br />
the E-1 or E-2 error occurs while zeroing the meter, the meter will<br />
require the user to re-zero.<br />
4. E-3 Standard Adjust Error<br />
The value obtained on the prepared standard exceeds the<br />
adjustment limits allowed for the standard concentration, or the<br />
concentration of the standard is outside the concentration range<br />
allowed for standard calibration adjust.<br />
Prepare the standard and rerun according to the procedure.<br />
Prepare a standard at or near the recommended concentrations<br />
given in the procedure.<br />
Verify that the concentration of the standard has been entered<br />
correctly.<br />
Contact a Service Center.<br />
2—7
Error Codes, continued<br />
5. E-6 Abs Error (User mode)<br />
Indicates that the absorbance value is invalid, or indicates an<br />
attempt to make a curve with less than two points.<br />
Enter or measure the absorbance value again.<br />
Contact a Service Center.<br />
6. E-7 Standard Value Error (User mode)<br />
Standard concentration is equal to another standard<br />
concentration that is already entered.<br />
Enter the correct standard concentration.<br />
Contact a Service Center.<br />
7. E-9 Flash Error<br />
The meter is unable to save data.<br />
Contact a Service Center.<br />
8. Underrange—flashing number below stated test range<br />
Verify instrument cap is correctly seated.<br />
Check zero by measuring a blank. If error recurs, re-zero the<br />
instrument.<br />
Contact a Service Center.<br />
Note: See Maximum/Minimum Displayed Value on page 2—16 for more<br />
information.<br />
9. Overrange—flashing number above stated test range<br />
Note: Flashing value will be 10% over the upper test limit.<br />
Check for light blockage.<br />
Dilute and retest sample.<br />
Note: See Maximum/Minimum Displayed Value on page 2—16 for more<br />
information.<br />
2—8
Standard Calibration Adjust<br />
The <strong>Pocket</strong> Colorimeter II instrument is factory-calibrated and<br />
ready for use without calibration by the user. Use of the factory<br />
calibration is recommended when permitted. The Standard<br />
Calibration Adjust can be used to meet regulatory<br />
requirements.<br />
This feature allows the factory default calibration curve to be<br />
adjusted with a known standard. Use the standard described in<br />
the procedure.<br />
1. Place a blank in the meter. Press ZERO/SCROLL.<br />
2. Place the reacted standard in the meter. Press READ/ENTER.<br />
3. Press MENU, then press the ZERO/SCROLL key until the<br />
display shows “SCA”.<br />
4. Press READ/ENTER to display the standard calibration adjust<br />
value.<br />
5. Press READ/ENTER to adjust the curve to the displayed value.<br />
The meter will return to the measurement mode and the<br />
“calibration adjusted” icon will appear in the display<br />
window.<br />
If an alternate concentration is used or if a standard<br />
concentration is not given:<br />
6. Repeat steps 1–4.<br />
7. Press ZERO/SCROLL to access the Edit function, then press<br />
READ/ENTER to begin editing. The digit to be edited will<br />
flash. Use the ZERO/SCROLL key to change the entry, then<br />
press READ/ENTER to accept and advance to the next digit.<br />
When the last digit is entered, press READ/ENTER and the meter<br />
will adjust the curve to the value entered. The meter will return to<br />
the measurement mode and the “calibration adjusted” icon will<br />
appear in the display window.<br />
To turn off Standard Calibration Adjust:<br />
1. Press MENU.<br />
2. Press ZERO/SCROLL until “SCA” appears in the display.<br />
3. Press READ/ENTER, then press ZERO/SCROLL until “Off”<br />
appears in the display.<br />
4. Press READ/ENTER to turn off SCA.<br />
Note: Another standard calibration adjust must be performed to turn SCA<br />
“on” again.<br />
Note: For meters with factory-calibrated ranges or methods, Standard<br />
Calibration Adjust (SCA) will be disabled when a user-entered<br />
method is programmed into the meter. To turn SCA back on,<br />
restore the meter to factory default calibration. See Retrieving the<br />
Factory Calibration on page 2—23.<br />
2—9
2—10
User-Entered Calibration<br />
Overview<br />
The <strong>Pocket</strong> Colorimeter II will accept a user-prepared<br />
calibration curve. The curve can extend from 0 to 2.5<br />
absorbance. A user-prepared calibration curve may be entered<br />
into any channel that does not contain a factory-programmed<br />
curve. These channels are labeled “abs” on instruments having<br />
a single factory calibration or are labeled “1” and “2” on the<br />
uncalibrated single wavelength instruments. Any chemistry<br />
that can be run at the instrument wavelength may be<br />
user-entered in these channels.<br />
Using prepared standard solutions that cover the analyst’s<br />
range of interest, the meter generates a calibration curve by<br />
calculating the straight-line segments between each standard<br />
entered. A calibration curve may be entered using the keypad.<br />
Factory-entered calibration curves may also be recalculated or<br />
adjusted using the same procedure.<br />
To enter the user-entered calibration mode, press the MENU key<br />
and hold it down until the display shows “USER” (about 5<br />
seconds), followed by “CAL”. Press ZERO/SCROLL to scroll<br />
through the options.<br />
CAL—Used to enter and edit standard values and measure<br />
absorbance values, or review the existing calibration.<br />
Edit—Used to enter and edit standard values and absorbance<br />
values with the keypad or review the existing calibration.<br />
Used to enter a predetermined calibration curve.<br />
dFL—Used to return the instrument back to the default<br />
factory calibration. User-entered calibrations are stored<br />
upon exit from the calibration or edit modes.<br />
If the instrument is shut off or loses power during data entry, all<br />
edits will be lost. Automatic shut-off in user calibration entry<br />
mode is 60 minutes.<br />
“CAL” and “Edit” Submenus<br />
In CAL mode, standard values are entered and absorbance<br />
values are measured. In Edit mode, standard and absorbance<br />
values are entered.<br />
To select CAL from the User menu, press READ/ENTER.<br />
To select Edit from the User menu, press ZERO/SCROLL and<br />
READ/ENTER.<br />
Once in the CAL or Edit option, press the READ/ENTER key to<br />
navigate through each option.<br />
Note: Press ZERO/SCROLL to quickly scroll through each option.<br />
2—11
User-Entered Calibration, continued<br />
Calibration Procedure Using Prepared Standards<br />
Note: Deionized water or<br />
a reagent blank can<br />
be used to zero<br />
during the<br />
calibration<br />
procedure.<br />
Calibrations<br />
generated with<br />
deionized water as<br />
the zero will give<br />
less accurate<br />
results if the reagent<br />
blank is significantly<br />
different from<br />
deionized water.<br />
Use the deionized<br />
water or the reagent<br />
blank as the zero<br />
concentration point<br />
(S0) in the following<br />
calibration<br />
procedure.<br />
Note: Deionized water or a reagent blank can be used to zero during the<br />
calibration procedure. Calibrations generated with deionized water<br />
as the zero will give less accurate results if the reagent blank is<br />
significantly more turbid or colored than deionized water. Use the<br />
deionized water or the reagent blank as the zero concentration<br />
point (S0) in the following calibration procedure.<br />
1. Turn on the instrument and select the range to be<br />
calibrated. An arrow at the top of the display will point to<br />
the selected range. To change ranges, press the MENU key,<br />
then use the READ/ENTER key to toggle between ranges 1<br />
and 2. Press MENU again to return to measurement mode.<br />
2. Follow the procedure for the chemical method to be<br />
calibrated. Prepare a reagent blank (if needed) and a<br />
standard solution. Allow the color to develop fully.<br />
3. Insert the reagent blank or deionized water into the meter<br />
and cover with the cap. Press the ZERO/SCROLL key. The<br />
meter will display “- - - -”, followed by “0.000”. This<br />
initializes (zeroes) the meter.<br />
4. Press the MENU key and hold it down until the display<br />
shows “USER”, followed by “CAL”. Press READ/ENTER to<br />
enter the calibration mode.<br />
5. In factory-calibrated meters, “S0” will appear in the<br />
display.<br />
Note: When recalibrating a factory-calibrated meter or range, RES<br />
(resolution) cannot be changed.<br />
6. In uncalibrated meters or meters with ranges labeled Abs,<br />
“RES” will appear. Press ZERO/SCROLL to review the current<br />
resolution. Press ZERO/SCROLL again to accept the current<br />
resolution. To change the resolution, press READ/ENTER, then<br />
ZERO/SCROLL to change the resolution (decimal placement).<br />
Press READ/ENTER to accept the new resolution. “S0” will<br />
appear on the display.<br />
7. Press the READ/ENTER key again, then enter the blank value.<br />
Note: Press the READ/ENTER key to move from digit to digit. Use<br />
the ZERO/SCROLL key to change the number.<br />
8. After completing entry of the blank value, press the<br />
READ/ENTER key. The display will show “A0”.<br />
9. Insert the reagent blank or deionized water into the cell<br />
holder. Cover the blank with the instrument cap.<br />
10. Press the READ/ENTER key. The meter will measure and<br />
display the absorbance value for S0.<br />
2—12
User-Entered Calibration, continued<br />
11. Remove the sample blank. Press the ZERO/SCROLL key. “S1”<br />
will appear. Press the READ/ENTER key, then enter the first<br />
standard value.<br />
Note: Press the READ/ENTER key to move from digit to digit. Use<br />
the ZERO/SCROLL key to change the number.<br />
12. After completing entry of the first standard value, press the<br />
READ/ENTER key. The display will show “A1”.<br />
13. Insert the first reacted standard solution into the cell<br />
holder. Cover the prepared standard with the instrument<br />
cap.<br />
14. Press the READ/ENTER key. The meter will measure and<br />
display the absorbance value for S1.<br />
15. The calibration is complete with two points. If additional<br />
standards are required, press ZERO/SCROLL until “Add”<br />
appears on the display. Repeat steps 11–14 to enter<br />
additional standards.<br />
16. Press the MENU key twice to exit and accept the changes.<br />
The instrument will use this calibration to determine the<br />
displayed concentration of future sample measurements.<br />
Entering a Predetermined Calibration Curve<br />
Note: Entering a predetermined calibration curve requires at least two<br />
data pairs. Each data pair requires a concentration value and the<br />
absorbance value for the given concentration. Up to 10 data pairs<br />
may be entered. This procedure uses the Edit mode.<br />
1. Turn on the instrument and select the range to be<br />
calibrated. An arrow at the top of the display will point to<br />
the selected range. To change ranges, press the MENU key,<br />
then use the READ/ENTER key to toggle between ranges 1<br />
and 2. Press MENU again to return to measurement mode.<br />
2. Press the MENU key and hold it down until the display<br />
shows “USER”, followed by “CAL”. Press ZERO/SCROLL to<br />
scroll to EDIT. Press READ/ENTER.<br />
3. In uncalibrated meters or in Abs range, “RES” will appear.<br />
Press ZERO/SCROLL. To change the resolution (decimal<br />
placement), press READ/ENTER. Press ZERO/SCROLL to select<br />
the new resolution, then press READ/ENTER the accept. “S0”<br />
will appear on the display.<br />
4. Enter the concentration value and absorbance value of the<br />
first data pair (S0, A0).<br />
5. To enter the S0 value, press the READ/ENTER. Use the<br />
ZERO/SCROLL key to select the numerical value, then press<br />
2—13
User-Entered Calibration, continued<br />
the READ/ENTER key to accept the entry and advance to the<br />
next decimal place. Repeat this sequence until the S0<br />
concentration value is entered.<br />
6. After editing the S0 value, press READ/ENTER to accept. “A0”<br />
will appear on the display.<br />
7. To enter the absorbance value for A0, press the READ/ENTER<br />
key to go to entry mode. Use the ZERO/SCROLL key to select<br />
the numerical value, then press the READ/ENTER key to<br />
accept the entry and advance to the next decimal place.<br />
Repeat this sequence until the absorbance value for A0 is<br />
entered.<br />
8. After entering A0, press READ/ENTER to accept. “S1” will<br />
appear on the display.<br />
9. Repeat steps 5 through 8 for each standard value and<br />
absorbance value pair in the calibration curve<br />
Note: After A1 is entered, “Add” will appear in the display. If<br />
additional data pairs are to be entered, press READ/ENTER<br />
and continue with step 9.<br />
10. When all the calibration data has been entered, press MENU<br />
twice to return to the measurement mode.<br />
Editing a User-entered or Factory Calibration Curve<br />
1. Press the MENU key and hold it down until the display<br />
shows “USER”, followed by “CAL”. Press ZERO/SCROLL until<br />
EDIT appears.<br />
2. Press the READ/ENTER key to enter Edit mode. In<br />
factory-calibrated meters, “S0” will appear in the display.<br />
Note: When editing a factory-calibrated meter or range, RES<br />
(resolution) cannot be changed.<br />
Note: When RES or S0 appears in the display, press ZERO/SCROLL<br />
to quickly scroll the data to be edited.<br />
3. In uncalibrated meters or in Abs range, “RES” will appear.<br />
Press ZERO/SCROLL to review the current resolution. Press<br />
ZERO/SCROLL again to accept the displayed resolution. To<br />
change the resolution, press READ/ENTER. Press ZERO/SCROLL<br />
to select the new resolution, then press READ/ENTER the<br />
accept. S0 will appear on the display.<br />
4. Press READ/ENTER. The current concentration value for S0<br />
will appear on the display.<br />
5. To edit the S0 value, press the READ/ENTER. Use the<br />
ZERO/SCROLL key to select the numerical value, then press<br />
the READ/ENTER key to accept the entry and advance to the<br />
2—14
User-Entered Calibration, continued<br />
Exiting the Calibration Routine<br />
Deleting Calibration Points<br />
next decimal place. Repeat this sequence until the S0<br />
concentration value is entered.<br />
6. After editing the S0 value, press READ/ENTER to accept. “A0”<br />
will appear on the display.<br />
7. To edit the absorbance value for A0, press the READ/ENTER<br />
key to go to entry mode. Use the ZERO/SCROLL key to select<br />
the numerical value, then press the READ/ENTER key to<br />
accept the entry and advance to the next decimal place.<br />
Repeat this sequence until the absorbance value for A0 is<br />
entered.<br />
8. After editing A0, press READ/ENTER to accept. “S1” will<br />
appear on the display.<br />
9. Repeat steps 4 through 8 for each standard value and<br />
absorbance value pair in the calibration curve.<br />
10. When all calibration data has been reviewed or edited, Add<br />
will appear in the display.<br />
11. Press READ/ENTER to add more calibration points, or press<br />
MENU twice to return to the measurement mode.<br />
Note: When a factory calibration curve has been edited, the<br />
“calibration adjust” icon will appear in the display.<br />
Exit the calibration routine by pressing the MENU key to step<br />
back through to measurement mode. The instrument uses the<br />
last completed user-entered calibration or the factory<br />
calibration if no user-entered calibration has been completed.<br />
1. Select the range containing user-entered calibration points.<br />
See Switching Ranges on page 2—4.<br />
2. Press and hold the MENU key until “USER”, then “CAL”<br />
appears. Press READ/ENTER.<br />
Note: Calibration points can also be deleted in Edit mode.<br />
3. Press ZERO/SCROLL to select the point to delete (e.g., S0 or<br />
S1 or S2). Press READ/ENTER.<br />
4. The left digit will flash. Press ZERO/SCROLL until “dEL”<br />
appears. (“dEL” will appear after the numeral 9.)<br />
5. Press READ/ENTER to delete. Repeat for all points to be<br />
deleted.<br />
Note: The minimum number of valid points is two. For example, if<br />
five points have been entered, three can be deleted using this<br />
feature.<br />
2—15
User-Entered Calibration, continued<br />
Retrieving the Factory Calibration<br />
Maximum/Minimum Displayed Value<br />
6. Press MENU to return to the measurement mode.<br />
1. Select the range to restore factory default calibration. See<br />
Switching Ranges on page 2—4.<br />
2. Press and hold the MENU key until “User”, then “CAL”<br />
appears.<br />
3. Press the ZERO/SCROLL key to find dFL.<br />
4. Press the READ/ENTER key to select dFL and restore the<br />
instrument to the factory default calibration.<br />
Note: For meters with factory-calibrated ranges or methods,<br />
Standard Calibration Adjust (SCA) will be disabled when a<br />
user-entered method is programmed into the meter. To turn<br />
SCA back on, restore the meter to factory default calibration.<br />
In meters with absorbance (Abs) ranges, the maximum<br />
displayed value and minimum displayed value is related to the<br />
value of the standards entered in a user calibration.<br />
Measurements that exceed the minimum or maximum<br />
standards entered in the user calibration will return a flashing<br />
number indicating “underrange” or “overrange”. See Error<br />
Messages on page 2—7 for more information.<br />
Example 1<br />
For a calibration with the following standards:<br />
S0=0.000<br />
S1=1.000<br />
Maximum Displayed Value 1.000<br />
Minimum Displayed Value 0.000<br />
Example 2<br />
For a calibration with the following standards:<br />
S0=1.00<br />
S1=2.00<br />
S2=4.00<br />
Maximum Displayed Value 4.00<br />
Minimum Displayed Value 1.00<br />
For factory-calibrated programs, the maximum and minimum<br />
displayed values always equal the factory-calibrated values,<br />
and cannot be changed.<br />
2—16
Certification<br />
Hach Company certifies this instrument was tested thoroughly,<br />
inspected, and found to meet its published specifications when<br />
it was shipped from the factory.<br />
The <strong>Pocket</strong> Colorimeter II instrument has been tested and is<br />
certified as indicated to the following instrumentation<br />
standards:<br />
EMC Immunity:<br />
Per 89/ 336/ EEC EMC: EN 61326: 1998 (Electrical Equipment<br />
for measurement, control and laboratory use—EMC<br />
requirements). Supporting test records by Hach Company,<br />
certified compliance by Hach Company.<br />
Standard(s) include:<br />
IEC 1000-4-2: 1995 (EN 61000-4-2: 1995) Electrostatic<br />
Discharge Immunit (Criteria B)<br />
IEC 1000- 4- 3: 1995 (EN 61000- 4- 3: 1996) Radiated RF<br />
Electromagnetic Field Immunity (Criteria A)<br />
Additional Immunity Standard( s) include:<br />
ENV 50204: 1996 Radiated Electromagnetic Field from Digital<br />
Telephones (Criteria A) Radio Frequency Emissions:<br />
Per 89/ 336/ EEC EMC: EN 61326: 1998 (Electrical Equipment<br />
for measurement, control and laboratory use—EMC<br />
requirements) “Class B” emission limits. Supporting test records<br />
from Hach EMC <strong>Test</strong> Facility, certified compliance by Hach<br />
Company.<br />
Additional Radio Frequency Emissions Standard(s) include:<br />
EN 55022 (CISPR 22), Class B emissions limits.<br />
Canadian Interference-causing Equipment Regulation, IECS-<br />
003, Class A: Supporting test records from Hach EMC <strong>Test</strong><br />
Facility, certified compliance by Hach Company.<br />
This Class A digital apparatus meets all requirements of the<br />
Canadian Interference-Causing Equipment Regulations.<br />
Cet appareil numérique de la classe A respecte toutes les<br />
exigences du Règlement sur le matériel brouilleur du Canada.<br />
FCC Part 15, Class “A” Limits: Supporting test records from<br />
Hach EMC <strong>Test</strong> Facility, certified compliance by Hach<br />
Company.<br />
This device complies with Part 15 of the FCC Rules. Operation<br />
is subject to the following two conditions:<br />
2—17
Certification, continued<br />
(1) This device may not cause harmful interference, and (2) This<br />
device must accept any interference received, including<br />
interference that may cause undesired operation Changes or<br />
modifications to this unit not expressly approved by the party<br />
responsible for compliance could void the user's authority to<br />
operate the equipment.<br />
This equipment has been tested and found to comply with the<br />
limits for a Class A digital device, pursuant to Part 15 of the<br />
FCC Rules. These limits are designed to provide reasonable<br />
protection against harmful interference when the equipment is<br />
operated in a commercial environment. This equipment<br />
generates, uses, and can radiate radio frequency energy and, if<br />
not installed and used in accordance with the instruction<br />
manual, may cause harmful interference to radio<br />
communications. Operation of this equipment in a residential<br />
area is likely to cause harmful interference, in which case the<br />
user will be required to correct the interference at his own<br />
expense. The following techniques of reducing the interference<br />
problems are applied easily<br />
1. Remove power from the <strong>Pocket</strong> Colorimeter II instrument by<br />
removing one of its batteries to verify that it is or is not the<br />
source of the interference.<br />
2. Move the <strong>Pocket</strong> Colorimeter II instrument away from the<br />
device receiving the interference.<br />
3. Reposition the receiving antenna for the device receiving the<br />
interference.<br />
4. Try combinations of the above.<br />
2—18
General Information<br />
At Hach Company, customer service is an<br />
important part of every product we make.<br />
With that in mind, we have compiled the<br />
following information for your convenience.<br />
2—19
How To Order<br />
Information Required<br />
Technical and Customer Service (U.S.A. only)<br />
International Customers<br />
By Telephone: By Mail:<br />
6:30 a.m. to 5:00 p.m. MST<br />
Monday through Friday<br />
(800) 227-HACH<br />
(800-227-4224)<br />
By FAX: (970) 669-2932<br />
Hach Technical and Customer Service Department personnel<br />
are eager to answer questions about our products and their use.<br />
Specialists in analytical methods, they are happy to put their<br />
talents to work for you.<br />
Call 1-800-227-4224 or E-mail techhelp@hach.com.<br />
Hach maintains a worldwide network of dealers and distributors. To<br />
locate the representative nearest you, send E-mail to intl@hach.<br />
com or contact:<br />
In Canada, Latin America, Africa, Asia, Pacific Rim:<br />
Telephone: (970) 669-3050; FAX: (970) 669-2932<br />
In Europe, the Middle East, or Mediterranean Africa:<br />
HACH Company, c/o<br />
Dr. Bruno Lange GmbH<br />
Willstätterstr. 11<br />
D-40549 Düsseldorf<br />
Germany<br />
Telephone: +49/[0]211.52.88.0<br />
Fax: +49/[0]211.52.88.231<br />
2—20<br />
Hach Company<br />
P.O. Box 389<br />
Loveland, CO 80539-0389<br />
U.S.A.<br />
Ordering information by E-mail: orders@hach.com<br />
Hach account number (if available) Billing address<br />
Your name and phone number Shipping address<br />
Purchase order number Catalog number<br />
Brief description or model number Quantity
Repair Service<br />
Authorization must be obtained from Hach Company before<br />
sending any items for repair. Please contact the HACH Service<br />
Center serving your location.<br />
In the United States:<br />
Hach Company<br />
100 Dayton Avenue<br />
Ames, Iowa 50010<br />
(800) 227-4224 (U.S.A. only)<br />
Telephone: (515) 232-2533<br />
FAX: (515) 232-1276<br />
In Canada:<br />
Hach Sales & Service Canada Ltd.<br />
1313 Border Street, Unit 34<br />
Winnipeg, Manitoba<br />
R3H 0X4<br />
(800) 665-7635 (Canada only)<br />
Telephone: (204) 632-5598<br />
FAX: (204) 694-5134<br />
E-mail: canada@hach.com<br />
In Latin America, the Caribbean, the Far East, the<br />
Indian Subcontinent, Africa, Europe, or the Middle East:<br />
Hach Company World Headquarters<br />
P.O. Box 389<br />
Loveland, Colorado, 80539-0389<br />
U.S.A.<br />
Telephone: (970) 669-3050<br />
FAX: (970) 669-2932<br />
E-mail: intl@hach.com<br />
2—21
Warranty<br />
Hach Company warrants this product to the original purchaser against any<br />
defects that are due to faulty material or workmanship for a period of one year<br />
from date of shipment.<br />
In the event that a defect is discovered during the warranty period, Hach<br />
Company agrees that, at its option, it will repair or replace the defective<br />
product or refund the purchase price, excluding original shipping and handling<br />
charges. Any product repaired or replaced under this warranty will be<br />
warranted only for the remainder of the original product warranty period.<br />
This warranty does not apply to consumable products such as chemical<br />
reagents; or consumable components of a product, such as, but not limited to,<br />
lamps and tubing.<br />
Contact Hach Company or your distributor to initiate warranty support.<br />
Products may not be returned without authorization from Hach Company.<br />
Limitations<br />
This warranty does not cover:<br />
damage caused by acts of God, natural disaster, labor unrest,<br />
acts of war (declared or undeclared), terrorism, civil strife or acts<br />
of any governmental jurisdiction<br />
damage caused by misuse, neglect, accident or improper<br />
application or installation<br />
damage caused by any repair or attempted repair not authorized<br />
by Hach Company<br />
any product not used in accordance with the instructions<br />
furnished by Hach Company<br />
freight charges to return merchandise to Hach Company<br />
freight charges on expedited or express shipment of warranted<br />
parts or product<br />
travel fees associated with on-site warranty repair<br />
This warranty contains the sole express warranty made by Hach Company in<br />
connection with its products. All implied warranties, including without<br />
limitation, the warranties of merchantability and fitness for a particular<br />
purpose, are expressly disclaimed.<br />
Some states within the United States do not allow the disclaimer of implied<br />
warranties and if this is true in your state the above limitation may not apply to<br />
you. This warranty gives you specific rights, and you may also have other<br />
rights that vary from state to state.<br />
This warranty constitutes the final, complete, and exclusive statement of<br />
warranty terms and no person is authorized to make any other warranties or<br />
representations on behalf of Hach Company.<br />
Limitation of Remedies<br />
The remedies of repair, replacement or refund of purchase price as stated<br />
above are the exclusive remedies for the breach of this warranty. On the basis<br />
of strict liability or under any other legal theory, in no event shall Hach<br />
Company be liable for any incidental or consequential damages of any kind for<br />
breach of warranty or negligence.<br />
2—22
HACH Technical Training Center<br />
HACH analytical training programs<br />
Workshops in analytical theory and procedure, and in the application of Hach<br />
products, are available in cities across the United States and at the HACH<br />
Technical Training Center in Loveland, Colorado. Find the latest schedule of<br />
classes and locations by visiting our website (www.hach.com).<br />
HACH Technical Training Center (HTTC)<br />
HTTC offers technical training workshops for a wide variety of applications. Our<br />
purpose is to help analysts from all backgrounds understand analytical theory,<br />
gain practical, hands-on experience with instrumentation and chemistries, and<br />
return to their jobs with increased understanding and confidence.<br />
To register for an HTTC workshop:<br />
Review class descriptions to determine the workshop you wish to attend, then<br />
check the class schedule and class fees before registering. There are no<br />
prerequisites for any of the workshops.<br />
You may use the online HTTC registration form, e-mail httc@hach.com,<br />
call 800-227-4224, extension 2391, or fax 970-461-3915. From outside the<br />
United States, call 970-669-3050, extension 2391.<br />
When you register for a workshop, please provide your HACH customer number<br />
(if you have one) and a purchase order number or credit card number to reserve<br />
your space in the class. After your registration has been processed, a<br />
confirmation packet will be sent to you. Please wait for registration<br />
confirmation before making travel arrangements. An invoice will be mailed<br />
under separate cover.<br />
If you are outside the United States, training is frequently available directly<br />
from your local HACH Distributor. Please contact your distributor or the HACH<br />
International Department for more information.
ap/dk 05/03 1ed<br />
HACH COMPANY World Headquarters<br />
P.O. Box 389<br />
Loveland, Colorado 80539-0389<br />
Telephone: (970) 669-3050<br />
Fax: (970) 669-2932<br />
For Technical Assistance, Price Information and Ordering:<br />
In the U.S.A. - Call toll-free 800-227-4224<br />
Outside the U.S.A. - Contact the HACH office or distributor serving you.<br />
On the Worldwide Web - www.hach.com; E-mail - techhelp@hach.com