SHOP PRACTICES - Salomon Certification
SHOP PRACTICES - Salomon Certification
SHOP PRACTICES - Salomon Certification

You also want an ePaper? Increase the reach of your titles
YUMPU automatically turns print PDFs into web optimized ePapers that Google loves.
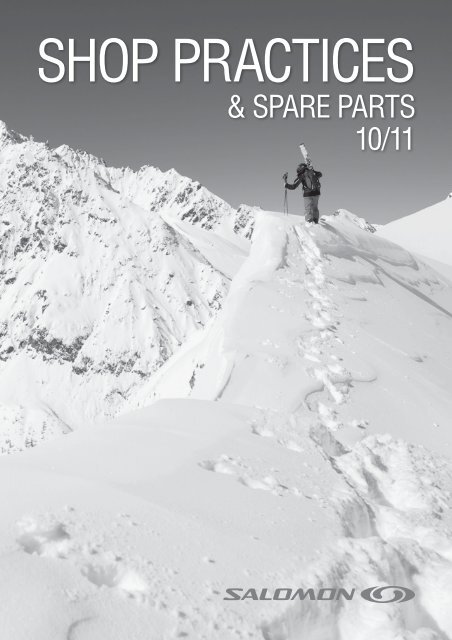
<strong>SHOP</strong> <strong>PRACTICES</strong><br />
& SPARE PARTS<br />
10/11
contentS<br />
2010/2011 Shop practiceS Manual<br />
Binding 1<br />
Alpine Binding Liability Indemnification 4<br />
Binding Quick Reference Chart 6<br />
retail Binding<br />
SySteMS 7<br />
Preparation 7<br />
Installation 8<br />
Binding-to-Boot Adjustments 14<br />
Release Value Selection & Adjustment 15<br />
Final Checking & Visual Inspection 17<br />
Mechanical Inspection 18<br />
Skier Instruction, Warning & Record Keeping 20<br />
rental & deMo Binding SySteMS 22<br />
Preparation 22<br />
Installation 23<br />
Binding-to-Boot AdJustments 24<br />
Release Value Selection & Adjustment 25<br />
Rental Visual & Mechanical Inspection 25<br />
Skier Instruction, Warning & Record Keeping 29<br />
Binding Maintenance<br />
& repair 32<br />
Maintenance & Repair 32<br />
certification prograM 34<br />
Technician <strong>Certification</strong> Exam 34<br />
alpine SKi 38<br />
Technical Features 39<br />
Maintenance & Repairs 43<br />
Boot 47<br />
Standard Boot Norms 47<br />
Technical Features 48<br />
<strong>Salomon</strong> Foot Measurer 49<br />
Advanced Fit Technology Liner 50<br />
Custom Shell technology 52<br />
<strong>Salomon</strong> Boot Technologies 54<br />
Boot Concepts 55<br />
Foot Anatomy And Fit 63<br />
helMet & pole 66<br />
Helmet Technology 67<br />
Pole Technonolgy 69<br />
Spare partS 70<br />
Warranty 85<br />
The 2010/2011 Shop Practices Manual is published<br />
by <strong>Salomon</strong> for <strong>Salomon</strong> Authorized Alpine Binding<br />
Dealers. This manual provides current technical<br />
information, certification requirements, and indemnification<br />
information. Please keep a copy of this<br />
Manual on hand as a quick, easy, and reliable reference<br />
for servicing <strong>Salomon</strong> alpine bindings. Because<br />
the content of the Manual changes every year, you<br />
should keep previous editions available as references<br />
for servicing older products. Your <strong>Salomon</strong><br />
<strong>Certification</strong> Web site will one day provide a resource<br />
of archived material for your reference as well.<br />
<strong>Salomon</strong> continues to be the number one winter<br />
sports brand worldwide. Our goal is to advance our<br />
breakthrough technologies featuring innovation in<br />
safety and performance binding systems.<br />
Cover Photo<br />
Photographer: Scott Markewitz.<br />
Skier: Rick Armstrong.<br />
Rev. 01 - 101007
Photo: Adam Clark. Skier: Cody Townsend Binding<br />
Binding<br />
Technical reference for the<br />
complete line of current<br />
<strong>Salomon</strong> alpine bindings
Binding<br />
2010/2011 certification prograM<br />
<strong>Salomon</strong> provides its Authorized Alpine Binding Dealers with information contained in this publication:<br />
1. To help assure skiers that <strong>Salomon</strong> alpine<br />
bindings are properly selected, mounted,<br />
adjusted, and serviced.<br />
authorized alpine dealer requirements<br />
While it is not necessary for an Authorized Location to have all of its<br />
personnel certified, sales people and managers are encouraged to remain<br />
aware of <strong>Salomon</strong>’s certification and record keeping requirements.<br />
• <strong>Salomon</strong> Authorized Alpine Binding Dealers must have at least one<br />
<strong>Salomon</strong> Certified Technician working at each Authorized Location selling,<br />
servicing or renting <strong>Salomon</strong> alpine bindings.<br />
• The technician who signs the Authorized Location’s workshop or rental<br />
form for any transaction must be currently <strong>Salomon</strong> alpine binding certified.<br />
• It is an Authorized Dealer’s responsibility to maintain sufficient records<br />
to identify its Certified Technicians.<br />
2010/2011 certification Kit<br />
This manual forms part of a kit which is available each year to <strong>Salomon</strong><br />
Authorized Binding Dealers. Enclosed in the kit you will find the necessary<br />
materials to certify your shop technicians for mounting and adjusting<br />
<strong>Salomon</strong> Bindings for the 2010/2011 season. This packet should have the<br />
following items:<br />
• 2010/2011 <strong>Salomon</strong> Shop Practices Manual & Spare Parts<br />
• 2010/2011 <strong>Salomon</strong> Shop Practices CD (instructional video & manuals)<br />
• Skier Classification Chart<br />
• Visual Indicator Adjustment Chart<br />
• Toe Height Adjustment Card<br />
If this packet is missing any of these items, or you need any more, please<br />
contact <strong>Salomon</strong> Customer Service at 1 (800) 654-2668 (in the U.S.) or<br />
1 (800) 361-3398 (in Canada).<br />
electronic documentation<br />
An electronic version of the 2010/2011 Shop Practices Manual is<br />
available both on the media CD included with this <strong>Certification</strong> Kit<br />
as well as online at www.salomoncertification.com (in the U.S.) or<br />
www.salomonhookup.ca (in Canada). The media CD PDF version of the<br />
manual is identical to the printed copy included in this kit, with the added<br />
convenience of a fully hyperlinked table of contents and reference boxes<br />
for easy navigation. The online PDF version of the <strong>Salomon</strong> Shop Practices<br />
Manual is continuously updated with the most current technical language<br />
and thus may have additions not appearing in the print version of the<br />
<strong>Salomon</strong> SPM. The printed version of the <strong>Salomon</strong> SPM is still completely<br />
valid and all procedures described within follow industry standards.<br />
2. To serve as a risk management tool for the<br />
Authorized Dealer.<br />
certification fees<br />
Authorized Alpine Binding Dealers will be invoiced an administrative registration<br />
fee for technician certifications.<br />
u.S. dealers<br />
• For the U.S., a $12 fee will be invoiced for each Registration and Exam<br />
submitted on line at www.salomoncertification.com<br />
• The U.S. fee is $20 for each Registration/ Exam submitted by mail or<br />
fax to <strong>Salomon</strong>, or for technicians certified by any approved industry<br />
training program.<br />
Fax: (801) 334-4502<br />
<strong>Salomon</strong> <strong>Certification</strong>/Customer Service<br />
<strong>Salomon</strong> U.S.A.<br />
2030 Lincoln Ave.<br />
Ogden, UT 84401<br />
canadian dealers<br />
• For Canada, a $30.00 fee will be invoiced for each <strong>Certification</strong> Kit sent<br />
to the dealer. Technicians must Register and take the Exam on-line at<br />
www.salomonhookup.ca<br />
Media cd<br />
IntroductIon > 2<br />
The training video comes on a cross-platform CD-ROM<br />
(Windows, Mac & Linux) along with a fully indexed PDF<br />
of the Shop Practices Manual and several forms for<br />
convenient access, duplication and printing.<br />
To view the videos you’ll need a computer with<br />
any web browser with the Quicktime plug-in<br />
installed (if it is not already installed, your browser<br />
will provide a link to easily obtain the free software).<br />
In addition, to view the Shop Practices document and open the other forms<br />
you’ll need a pdf document reader such as the free adobe reader (available at<br />
http://www.adobe.com/products/acrobat/readstep2.html)<br />
Insert the CD into a computer, navigate to the top-level of the CD-ROM and double-click<br />
the “WelcoMe-BienVenue.html” file – this should open the file in your<br />
internet web browser. Alternately, with the disk in the computer, you can launch a<br />
new internet browser window, choose “Open” from the “File” menu of the browser<br />
and navigating to location of the file on the CD-ROM.
Binding<br />
2010/2011 <strong>Salomon</strong> certified technician certification process<br />
Only a technician sponsored by a <strong>Salomon</strong> Authorized Alpine Binding Dealer may be certified. Authorized Dealers can log onto<br />
www.salomoncertification.com (in the U.S.) or www.salomonhookup.ca (in Canada) to receive a current list of their <strong>Salomon</strong><br />
Certified Technicians. To complete the technician certification process:<br />
1. Read this manual and become familiar with required <strong>Salomon</strong> shop<br />
practices. A corresponding CD is available to assist in this process. For<br />
a copy of the CD, contact your <strong>Salomon</strong> sales or Customer Satisfaction<br />
Representative.<br />
2. Be familiar with earlier editions of <strong>Salomon</strong> Shop Practices Manuals<br />
and <strong>Salomon</strong> Technical Updates.<br />
technician certification Validity period and transfer<br />
• Technician certification is valid for two years from the exam date<br />
(unless <strong>Salomon</strong> provides further notice).<br />
• Technician certification is not valid at a location that is not a<br />
<strong>Salomon</strong> Authorized Alpine Binding Location.<br />
instructions for taking the on-line exam<br />
1. log onto the certification website<br />
• In the U.S. log onto www.salomoncertification.com<br />
• In Canada log onto www.salomonhookup.ca<br />
2. register your information<br />
• Once you have signed in, you will get a prompt asking you to confirm<br />
your login-ID. Write this information down in case you need to stop<br />
your test in the middle and return later.<br />
3. take the on-line exam<br />
• Once the test begins, do not use your web browser to move “back”<br />
or “forward”. Doing this will result in a cancelled session and you<br />
will need to start at the beginning.<br />
• A score of 90%, or 23 correct answers, must be obtained to pass.<br />
• In addition, questions 12 to 25 are considered core questions and<br />
must be answered correctly.<br />
3. Be familiar with <strong>Salomon</strong> bindings through hands-on experience.<br />
4. For the U.S., log on to www.salomoncertification.com. For Canada,<br />
log on to www.salomonhookup.ca. Complete the on-line 2010/2011<br />
<strong>Salomon</strong> Certified Technician Registration and Exam and receive confirmation<br />
of your certification instantly.<br />
Once you have become familiar with the procedures for mounting, adjusting, and testing <strong>Salomon</strong> bindings, take the exam on-line for instant results<br />
and obtain your certificate immediately. (If for some reason you are unable to take the test on line, please contact your <strong>Salomon</strong> sales representative.)<br />
Just follow these easy steps:<br />
finding currently certified technicians for your Shop<br />
finding currently certified technicians is a service only available the u.S.<br />
1. Simply log onto the site and click on the button “Search for certified<br />
technicians”.<br />
2. Enter your shop ship-to code or certificate number to search the certification<br />
database.<br />
IntroductIon > 3<br />
2010/2011 certification prograM continued<br />
• Technician certification may be transferred from one<br />
<strong>Salomon</strong> Authorized Alpine Binding Dealer to another by<br />
contacting the certification coordinator by mail or telephone<br />
(Ogden, UT for U.S. dealers and Markham for Canadian dealers).<br />
4. once you pass the test<br />
• In the U.S. click on the button to create a printable certificate. (The<br />
certificate will be created in Acrobat. If you do not have Acrobat<br />
Reader on your computer, click on the icon, and you can download it<br />
free from the web.) or Write down your certificate number and return<br />
later to retrieve your printable certificate. An invoice for $12 will be<br />
generated and sent to your shop. If you do not pass, your shop will<br />
not be invoiced. Only passing exams will receive certificate numbers<br />
and generate an invoice.<br />
• In Canada, click on the Download Certificate box to create a printable<br />
certificate. (The certificate will be created in Acrobat. If you do<br />
not have Acrobat Reader on your computer, click on the icon and you<br />
can download it free from the web.) or click on e-mail Certificate to<br />
receive an e-mail version.<br />
3. You may retrieve printable certificates from the database for any certified<br />
tech.<br />
4. If you need to know who in your shop is certified, log on and search<br />
for certified technicians for your shop. An updated list will appear so<br />
you have constant access to the information.
Binding<br />
IndemnIfIcatIon > 4<br />
alpine Binding liaBility indeMnification<br />
Schedule of indemnified bindings<br />
<strong>Salomon</strong> alpine binding indemnification applies to the 2010/2011 Retail Binding Line, 2010/2011 Rental<br />
Binding Line, Non-current Retail Binding Line and Non-current Rental Binding Line models listed below.<br />
Indemnification does not apply to older non-indemnified binding models.<br />
non-indemnified Bindings<br />
Older models of <strong>Salomon</strong> bindings no longer on the Schedule of Indemnified Bindings may still be serviced, however Liability Indemnification will not<br />
be offered by <strong>Salomon</strong> for these models of bind ings. Dealers wishing to service these models of bindings can reduce their liability risk by requiring an<br />
additional waiver and release agreement and attaching it to the Workshop Form. Such waivers should be reviewed by a dealer’s own legal counsel to<br />
ensure compliance with applicable laws.<br />
<strong>Salomon</strong> bindings are not designed or tested for use with Mono Boards, therefore bindings mounted on Monoboards will not be indemnified.<br />
retail Binding line<br />
2010/2011<br />
STH 16<br />
STH 16 Steel<br />
STH 14 Driver<br />
STH 14<br />
STH 12 Oversized<br />
STH 12 Driver<br />
Z 14<br />
Z 12<br />
Z 12 Ti<br />
Z 11<br />
Z 10<br />
Z 10 Ti<br />
Z 10 Women<br />
Z 10 Ti Women<br />
L10<br />
L10 Jr<br />
L9<br />
L7<br />
T5<br />
rental Binding line<br />
2010/2011<br />
KR Z 12<br />
KR Z 11<br />
KR Z 10<br />
KR Z 10 W<br />
Z 12 SC<br />
Z 10 SC<br />
L 10 SC<br />
L 10 SR<br />
L 9 W SC<br />
L 7 SC<br />
L 7 SR<br />
T 5 SC<br />
T 5 SR<br />
non current<br />
C610 Cp<br />
C610<br />
C609 Ti<br />
C609 D+<br />
C609<br />
C608 FIS 17<br />
C608 Cp<br />
C608<br />
C607<br />
C509 Dr+<br />
C509<br />
C305 / C305 MINI<br />
Z 920 Lab<br />
Z 916 Lab<br />
Z 914 Lab<br />
N 920 Equipe Race<br />
N 916 Equipe Comp.<br />
S914 Axe+<br />
S914 Lab<br />
non current<br />
S912 Ti SC<br />
S810 Ti SC<br />
712 e 2<br />
Cosmic S712 SC<br />
KRR 711<br />
711 SC<br />
710 e 2<br />
710 SC<br />
Cosmic S710 SR<br />
Cosmic S710 SC<br />
Cosmic S710<br />
Q700 SC<br />
S700 SR<br />
S700 SC Drive Plus<br />
S700 SC<br />
S914 FIS 26.3/20/17<br />
S914 FIS<br />
S914 Pe 2<br />
S914<br />
S914 FIS Pilot<br />
S914 Pilot<br />
914 F1S 20<br />
914 FIS<br />
914<br />
S912 Ti Pe 2<br />
S912 FIS<br />
S912 FIS 24<br />
S912 Ti<br />
S912 Ps<br />
S912 FIS Pilot<br />
S912 Ti Pilot<br />
S912 Ti SC Pilot<br />
S912<br />
S910 T FIS 26,3/24/20<br />
S910 T Ps<br />
Q7 SC<br />
Q7 SR<br />
ST610 e 2<br />
C609 SC<br />
609 SC<br />
609 SR<br />
C608 SR<br />
C608 SC<br />
608 SC<br />
C607 SC<br />
C607 SR<br />
607 SR<br />
Quadrax 6 SC<br />
C509 SR<br />
C509 SC<br />
Q500 SC Drive Plus<br />
S910 FIS 24<br />
S910 T<br />
S910<br />
S910 T Ps<br />
S910 T Axe+<br />
S812 Pa<br />
S811 PS<br />
S810 Ti<br />
S810 Ti Axe+<br />
S810 Cp<br />
S810 Ps<br />
S810<br />
S810 Ti Pilot<br />
S810 Pilot<br />
S810 Ti SC Pilot<br />
S810 Ti Ps<br />
S711 Ps<br />
S711 Pa<br />
S711 Cp<br />
711<br />
Q500 SC<br />
Q500 SR<br />
Quadrax 5 SR<br />
Q5 SR<br />
Snowtrip ST 410<br />
Q400 SR<br />
C305 SR<br />
305 SC<br />
305 SR<br />
S305 SC<br />
S305 Grom SC<br />
C305 Grom SR<br />
Q300 SC<br />
Q300 SR<br />
S300 SC<br />
Quadrax 3 SC<br />
S710 Cp<br />
S710 Ti<br />
S710<br />
S710 Pilot<br />
S710 SC Pilot<br />
S710 Ti Pilot<br />
S710 Ti Cp 2<br />
S710 Pa<br />
S710 DP<br />
S710 CP 2<br />
710 Smartrak Grip<br />
710<br />
C610 CP 2<br />
610 CP<br />
610<br />
609 D+<br />
609<br />
S608 CP<br />
C608 CP 2<br />
608<br />
Quadrax 3 SR<br />
Q3 SC<br />
Q3 SR<br />
KRR Z 12 Ti<br />
KRR Z 12<br />
Z 12 Ti Smartrak<br />
Z 12 Ti Smartrak<br />
Control<br />
Z 12 Ti SC<br />
KRR Z 10<br />
Z 10 Ti SC<br />
Z 10 Smartrak<br />
LZ 8 SC<br />
LZ 7 SR<br />
607<br />
C509 D+<br />
S305 GROM<br />
C305 GROM<br />
C305 MINI GROM<br />
305<br />
Z 12 Ti Smartrak<br />
Control<br />
STH 12<br />
Z 10 Smartrak Control<br />
Z 10 Ti Axe +<br />
Z 10 Ti<br />
Z 10 FIS 20<br />
LZ 9<br />
LZ 8<br />
LZ 7<br />
TZ 5<br />
KRR TZ 5 SC<br />
TZ 5 SR<br />
TZ 5 SC<br />
TZ 5 SC Junior Track
Binding<br />
IndemnIfIcatIon > 5<br />
alpine Binding liaBility indeMnification continued<br />
<strong>Salomon</strong> authorized dealers<br />
<strong>Salomon</strong> offers liability indemnification to <strong>Salomon</strong> Authorized Dealers. <strong>Salomon</strong> will to the extent and<br />
within the limits that insurance coverage is available defend and indemnify a <strong>Salomon</strong> Authorized Alpine<br />
Binding Dealer against liabilities from claims presented by any customer of the Authorized Dealer arising<br />
solely from the use of <strong>Salomon</strong> alpine bindings, provided:<br />
A. The dealer purchased the alpine bindings from <strong>Salomon</strong>.<br />
B. The dealer has received written notice of a claim involving alpine bindings.<br />
C. The claim alleges use of the alpine bindings resulted in injury.<br />
D. All <strong>Salomon</strong> recommendations, procedures and policies in effect at the<br />
time of the incident were followed, including, but not limited to, those<br />
contained in the <strong>Salomon</strong> Shop Practices Manual, <strong>Salomon</strong> Technical<br />
Update (if applicable), <strong>Salomon</strong> Purchaser Policies and <strong>Salomon</strong><br />
General Terms & Conditions.<br />
E. The Certified Technician is of legal age.<br />
F. The dealer uses workshop and/or rental forms the same as, or equivalent<br />
to, <strong>Salomon</strong> forms with currently approved Liability Release<br />
Language.<br />
G. The dealer maintains proper and complete records for all <strong>Salomon</strong><br />
bindings mounted and/or adjusted for a period of two years or the<br />
statute of limitations of the state or province, whichever is longer.<br />
legal claims<br />
1. Use your best efforts to determine the exact nature and details of the<br />
claim.<br />
2. Avoid expressing opinions concerning the claim. You may, to the<br />
extent that you have complied with all recommended procedures,<br />
indicate to the claimant or the claimant’s representative that recommended<br />
procedures for service and adjustment of the equipment were<br />
followed.<br />
3. Notify your insurance company. <strong>Salomon</strong> indemnification is not a substitute<br />
for liability insurance.<br />
H. The dealer provides written documentation of the technician’s employment<br />
and training (e.g., method of training, proof of certification, etc.).<br />
I. A copy of the properly completed workshop form or rental form, including<br />
a signed release, is submitted.<br />
J. A properly completed Post Accident Ski Equipment Inspection Report,<br />
the same as or equivalent to the exemplary form displayed in this<br />
manual, is submitted.<br />
K. Any other helpful information such as a Ski Patrol Incident Report<br />
Form is submitted.<br />
L. The dealer notifies <strong>Salomon</strong> in writing within ten days of the date on<br />
which the dealer first receives written notice of the claim.<br />
M. The dealer cooperates fully in the investigation, litigation and/or settlement<br />
of the claim.<br />
<strong>Salomon</strong> may terminate indemnification, with respect to <strong>Salomon</strong><br />
alpine bindings, upon providing written notice to the dealer.<br />
In the event a <strong>Salomon</strong> equipment user or anyone acting upon the equipment user’s behalf contacts the<br />
Authorized Dealer regarding a potential claim:<br />
4. Gather all information and documents required by <strong>Salomon</strong> listed in<br />
the Liability Indemnification section for that specific product and send<br />
the documents with a brief description of the incident to:<br />
u.S.a.<br />
Alpine Legal Claims<br />
Department,<br />
<strong>Salomon</strong> U.S.A.,<br />
2030 Lincoln Ave.,<br />
Ogden, UT 84401.<br />
canada<br />
Legal Claims Department<br />
<strong>Salomon</strong> Canada Sports<br />
2700 14th Ave Unit 1-4<br />
Markham, On L3R 0J1
Binding<br />
Binding QuicK reference chart<br />
retail<br />
À la carte ModelS<br />
Brakes<br />
N STH16 102972 R90/R100/R115/R130<br />
56 mm - 99 mm (Ref. #)<br />
Jig Ref. # 001156<br />
Jig Selecion<br />
(given ski width)<br />
70 mm - 116 mm (Ref. #)<br />
80 mm - 123 mm (Ref. #)<br />
Jig Ref. # 001157<br />
4.1 mm diameter<br />
(skis with metal) (Ref. #)<br />
Drill Bit Ref. # 000893<br />
Drill Bit Selection<br />
3.6 mm diameter<br />
(skis with no metal) (Ref. #)<br />
Drill Bit Ref. # 000892<br />
Drill Bit Length<br />
DIN Scale<br />
Height (mm)<br />
Skier Weight<br />
kg<br />
lbs<br />
Adj.<br />
Range<br />
Wing<br />
Adj.<br />
(mm)<br />
US Size<br />
Weight 1/2 pair (g)<br />
Micro Simultaneous<br />
Automatic<br />
Vertical Progressive Pivot<br />
SCP (<strong>Salomon</strong> Control Pedal)<br />
(E) Elastic pedal / (S) Stomp pedal<br />
Adult / Junior Norms<br />
Ski/Binding Interface<br />
6<br />
Ti Line<br />
High Lateral Transmission<br />
Removable Brake<br />
9.5 9-16 17.5 > 95 > 209 19 2.5 1161 S S A • •<br />
N STH14 Driver 110723 R90/R100/R115 9.5 6-14 17.5 58-130 127-286 19 2.5 1060 S S A • •<br />
N STH14 102975 R90/R100/R115/R130 9.5 6-14 17.5 58-130 127-286 19 2.5 1025 A V S A • •<br />
N STH12 Oversized 110601 R80/R90/R100/R115 9.5 4-12 17.5 42-120 92-264 19 2.5 1025 A V S A • •<br />
N L10 110604 B80 9.5 3-10 16.5 30-107 66-235 28 3.5 860 A E A •<br />
N L9 108044 B80 9.5 2,5-9 16.5 25-100 55-220 28 3.5 861 A E A •<br />
N Z14 110583 B75/B80 9.5 6-14 16.5 58-130 127-286 28 3.5 1050 A V • A • •<br />
N Z12 110599 B80/B90/B100 9.5 4-12 16.5 42-120 94-264 28 3.5 1050 A V • A • •<br />
N Z12 Ti 110453 B80/B90/B100 9.5 4-12 16.5 42-120 92-264 28 3.5 937 A V • A Ti • •<br />
N Z11 110602 B80/B90 9.5 3,5-11 16.5 36-115 79-253 28 3.5 970 A V • A • •<br />
N Z10 110603 B80/B90 9.5 3-10 16.5 30-107 66-235 28 3.5 970 A V • A • •<br />
N Z10 Ti W 892976 B80/B90 9.5 3-10 16.5 30-107 66-235 28 3.5 857 A V • A Ti • •<br />
Junior<br />
N L7 111617 / 111623 B80 001156 001157<br />
# 000813<br />
# 000814<br />
8.0 2-7,5 16.5 22-85 55-187 28 3.5 861 A E A&J •<br />
N T5 111639 / 111619 NS 784061 8.0 0,5-4,5 14 10-45max 22-100 44 5.5 561 A E A&J •<br />
N T5 Juniortrack 111641 NS 247290 8.0 0,5-4,5 22 10-45max 22-100 104 13 681 A E A&J Junior Track •<br />
BindingS for SetS<br />
K Z14 120025 B75<br />
# 788403<br />
# 000893<br />
# 000892<br />
9.5 6-14 23 58-130 127-286 100 15 1370 A V • A Smartrak • •<br />
K Z12 108772 / 108785 B75/B80/B90 9.5 4-12 31.5 42-120 92-264 120 15 1310 A V • A Smartrak • •<br />
K Z11 110671 B80 9.5 3,5-11 16.5 36-115 79-253 120 3.5 1305 A V • A Smartrak • •<br />
J Z11 120026 B75 9.5 3,5-11 16.5 36-115 79-253 120 3.5 1157 A V • A Smartrak • •<br />
K Z10 110672 / 110673 B80 9.5 3-10 31.5 30-107 66-235 120 15 1305 A V • A Smartrak • •<br />
K Z10 Ti 102174 / 110677 B80 9.5 3-10 31.5 30-107 66-235 120 15 1030 A V • A Smartrak Ti • •<br />
J L10 110674 B80<br />
001156<br />
001157<br />
9.5 3-10 31.5 30-107 66-235 120 15 950 A E A •<br />
J L9 102192 / 104442 B80 9.5 2,5-9 31.5 25-100 55-220 120 15 950 A E A •<br />
J L10 Jr 111300 B80 9.5 3-10 31.5 30-107 66-235 80 10 950 A E A •<br />
rental<br />
SMartraK rental<br />
KR Z12 110605 B80/B90 9.5 4-12 31.5 42-120 92-264 120 15 1310 A V • A Synchro-Center • •<br />
KR Z11 110606 B80/B90 9.5 3,5-11 31.5 36-115 79-253 120 15 1305 A V • A Synchro-Center • •<br />
KR Z10 110607 B80 9.5 3-10 31.5 30-107 66-235 120 15 1305 A V • A Synchro-Center • •<br />
KR Z10 W 110608 B80 9.5 3-10 31.5 30-107 66-235 120 15 1305 A V • A Synchro-Center • •<br />
BindingS for SetS<br />
FR L10 SC 110676 B80<br />
FR L7 SC 111813 B80<br />
# 001003<br />
# 001040<br />
000893 000892 9.5 3-10 31.5 30-107 66-235 122 15 860 A E A Synchro-Center •<br />
# 000813<br />
# 000814<br />
8.0 2-7,5 31.5 22-85 55-187 122 15 860 A E A&J Synchro-Center •<br />
FR T5 SR 111622 NS 8.0 0,5-4,5 14 10-45max 22-100 56 7 572 A E A&J Synchro-Rental •<br />
FR T5 SC 111640 NS 8.0 0,5-4,5 28 10-45max 22-100 86 11 810 A E A&J Synchro-Center •<br />
adult<br />
NR Z12 SC 110609 B80/B90/B100/B115<br />
# 001003<br />
# 001040<br />
# 000893<br />
# 000892<br />
9.5 4-12 31.5 42-120 92-264 122 15 1386 A V • A Synchro-Center • •<br />
NR Z10 SC 110610 B80/B90 9.5 3-10 31.5 30-107 66-235 122 15 1370 A V • A Synchro-Center • •<br />
NR L10 SC 110612 B80 9.5 3-10 31.5 30-107 66-235 122 15 1100 A E A Synchro-Center •<br />
NR L10 SR 110613 B80 9.5 3-10 18 30-107 66-235 80 10 952 A E A Synchro-Rental •<br />
NR L9 W SC 107279 B80 9.5 2,5-9 31.5 25-100 55_220 122 15 861 A E A Synchro-Center •<br />
Junior<br />
NR L7 SC 111812 B80<br />
# 001003<br />
# 001040<br />
# 000813<br />
# 000814<br />
8.0 2-7,5 31.5 22-85 55-187 122 15 1100 A E A&J Synchro-Center •<br />
NR L7 SR 111618 B80 8.0 2-7,5 18 22-85max 55-187 80 10 958 A E A&J Synchro-Rental •<br />
NR T5 SR 111642 NS 8.0 0,5-4,5 14 10-45max 22-100 56 7 572 A E A&J Synchro-Rental •<br />
NR T5 SC 111643 NS 001003 8.0 0,5-4,5 28 10-45max 22-100 86 11 810 A E A&J Synchro-Center •
Photo: Dan Carr. Skier: Sammy Carlson. Binding<br />
retail Binding<br />
SySteMS<br />
reference<br />
page # Section Name<br />
18 Clean vs. Lubricated Test<br />
47 Standard Boot Sole<br />
Dimensions<br />
retaIl systems > 7<br />
Proper procedures for<br />
a <strong>Salomon</strong> Certified<br />
Technician to follow<br />
while mounting and<br />
adjusting <strong>Salomon</strong><br />
Retail bindings.<br />
preparation<br />
Start out prepared with an efficient working area. Your bench should be the right height, with proper lighting,<br />
and with the necessary tools at hand. Familiarize yourself with all procedures before you start: being<br />
prepared is the best way to avoid errors and costly mistakes. It is important that all components match<br />
those listed on the workshop form. Refer to your workshop form and make sure the bindings are appropriate<br />
for the skier. If the bindings have been used, make sure they are in good condition and no parts are<br />
missing, broken, or showing signs of wear.<br />
Boot-to-Binding compatibility<br />
Before drilling the ski, be sure the<br />
boot you are using is compatible with<br />
the binding. Only boots that conform<br />
with applicable standards may be<br />
used with <strong>Salomon</strong> bindings. (See<br />
Standard Boot Sole dimensions<br />
on page 47 for reference). If a boot<br />
sole is warped, worn or improp erly<br />
canted, such that there is more than<br />
a 1 mm difference in sole flatness<br />
measured across its width, the boot<br />
is incompatible.<br />
other compatibility problems you<br />
May encounter<br />
• Cut-outs in the boot sole that<br />
prevent the brake from engaging<br />
properly.<br />
• Excessive ramping or wear of the<br />
boot sole at the point where it<br />
contacts the binding. Any wear that<br />
inhibits binding function is excessive.<br />
• Tread, grid pattern or insignia<br />
present in the AFD area of the boot<br />
sole. This area must be flat over its<br />
entire surface.<br />
• Non-compatible boot sole composition.<br />
Low-grade thermoplastic<br />
(T.P.) boots may not be used with<br />
<strong>Salomon</strong> bindings. If you are uncertain<br />
as to the quality of the boot<br />
sole material, perform the clean<br />
vs. lubricated test as described<br />
on page 19.<br />
Only adult norm boots may be used<br />
with adult bindings. Under no circumstances<br />
should a junior norm<br />
boot ever be used with an adult binding.<br />
<strong>Salomon</strong> bindings that can be<br />
used with both junior and adult norm<br />
boot soles are: TZ5, S305, C305,<br />
Q300, S300, their mini equivalents,<br />
earlier model indemnified equivalents,<br />
and their various counter parts.<br />
(The added width of an adult norm<br />
boot sole somewhat limits the shock<br />
absorption capability of these models<br />
and they should not be used with a<br />
boot sole longer than 304 mm. As<br />
a result, it is recommended that an<br />
aggressive junior skier with an adult<br />
norm boot sole use a model designed<br />
exclusively for adult norm boots.)<br />
A <strong>Salomon</strong> toe or heel may not be<br />
mounted with another manufacturer’s<br />
toe or heel. Indemnification and warranty<br />
are automatically voided for<br />
such mixed systems.<br />
For Rental specific preparation instructions,<br />
please refer to page 22.<br />
Junior Boot to Binding compatibility chart<br />
Junior<br />
Boot Junior<br />
Boot Models norms Bindings only<br />
Falcon 100 Adult<br />
Course 90 Adult<br />
Course 80 Adult<br />
Course 70 Adult<br />
Falcon 60 Junior X<br />
Performa T3 Adult<br />
Performa T2 Junior X<br />
15 Mini Junior X<br />
Performa T3 Rental Adult<br />
Performa T2 Rental Junior X<br />
iMportant:<br />
<strong>Salomon</strong> bindings that can<br />
be used with both junior<br />
and adult norm boot soles<br />
are: tZ5, S305, c305, Q300,<br />
S300, their mini equivalents,<br />
earlier model indemnified<br />
equivalents, and their various<br />
counter parts.<br />
Step 1
Step 2<br />
Binding<br />
inStallation<br />
Jig Selection & use<br />
retaIl systems > PreParatIon > 8<br />
<strong>Salomon</strong> bindings are installed 3 ways. “À la carte” bindings are installed by drilling holes into the surface<br />
of the ski with the aid of a <strong>Salomon</strong> jig. Pilot Systems require no jigs and are simply secured to pre-drilled<br />
holes on a premounted <strong>Salomon</strong> interface. Smartrak Systems can require a combination of these two techniques.<br />
Please refer to the specific instructions in this Manual.<br />
legend<br />
A Handle with Self-Centering Clamps<br />
S Toe Guide<br />
D Tip-of-Boot Sole Indicator<br />
F Locking Lever<br />
G Mid-Sole Indicator<br />
H Boot Size Indicator<br />
J Drill Bit Bushing<br />
K Self-Centering Guide for Heel of Boot<br />
ref. # Jig Jig range application<br />
retail JigS<br />
788403 Smartrak 70mm - 116mm Smartrak binding systems only<br />
001156 Adult Retail 56mm - 99mm<br />
STH 16, STH 14, STH 12, STH 14 Driver, Z14, Z12 Ti, Z12, Z12++, Z10 FIS 20, Z10 Ti, Z10 Tiw, 710, 610 CP,<br />
610, 609 D+, 609 Ti, 609, 608, L 8, L 9; Drill bit length 8 mm: 607, L 7<br />
001157 Wide Adult Retail 80mm - 123mm (Same as above)<br />
78406101 Junior Retail<br />
rental JigS<br />
56mm - 99 mm 305 and 305 Mini, TZ 5<br />
001003<br />
Synchro Center & Synchro<br />
Rental/ Senior Junior<br />
56mm - 99mm All SC and SR models both Senior & Junior (except TZ 5 Juniortrak)<br />
001040<br />
Wide Synchro Center &<br />
Synchro Rental/ Senior Junior<br />
80mm - 123mm All SC and SR models both Senior & Junior (except TZ 5 Juniortrak)<br />
24729001 TZ 5 Juniortrak Rental 56mm - 99mm TZ 5 Juniortrak bindings only<br />
* Contact your customer service representative for additional jigs.<br />
Jig use (10 Steps)<br />
A jig ensures that all holes for binding mounting are drilled in the correct location. The bushings guide the<br />
drill bit so that it remains perpendicular to the ski.<br />
A S Correct Incorrect<br />
1. Select the proper jig for the<br />
binding model to be mounted<br />
by referencing the Jig<br />
Reference Guide.<br />
2. check the skis’ serial number<br />
to ensure you are mounting a<br />
matched pair. Place the skis on<br />
the workbench with the ski tips<br />
pointed to your left.<br />
3. open the jig by twisting both<br />
handles inward. Place the jig on<br />
the ski.<br />
4. open the locking lever.<br />
5. extend the jig to accept the<br />
boot.<br />
6. place the toe of the boot sole<br />
against the toe guide. Twist the<br />
A<br />
S D<br />
rear handle to open the rear<br />
clamps and slide the heel guide<br />
snugly against the boot heel.<br />
fig. A<br />
7. close the locking lever.<br />
(Compare the mid-sole mark<br />
on the boot with the mid-sole<br />
indicator on the jig. If the midsole<br />
mark on the boot and the<br />
mid-sole indicator on the jig<br />
do not agree, use the mid-sole<br />
mark on the boot. This requires<br />
leaving the boot in the jig to<br />
position it on the ski.)<br />
8. position the jig on the ski.<br />
fig. S<br />
F<br />
G<br />
H J K<br />
a. If the ski has a mid-sole mark,<br />
align the mid-sole mark on the<br />
boot with the mid-sole mark on<br />
the ski.<br />
b. If the ski has a tip-of-boot<br />
mark, align the tip-of-boot sole<br />
indicator on the jig with the tipof-boot<br />
mark on the ski.<br />
c. If the ski has no visible markings<br />
for jig location, consult<br />
the ski manu facturer for proper<br />
mounting position.<br />
9. once the jig is in position,<br />
release the handles simultaneously<br />
and the jig will center<br />
itself on the ski.<br />
10. re-check your work. The<br />
ski is now ready to be drilled.<br />
(Customers may request that<br />
specific mounting instructions be<br />
followed. This is particularly true<br />
for skiers who want to initiate<br />
turns more easily. Make a note<br />
on the Workshop Form of any of<br />
these special instructions.)<br />
reference<br />
page # Section Name<br />
10 4-Hole Toe / Spheric<br />
Oversize<br />
10 3-Hole Toe / Spheric Sport<br />
& Quadrax<br />
23 SC System Demo<br />
23 SR System Rental & Demo
Binding<br />
inStallation > Drilling, Tapping and Glue<br />
drilling, tapping & glue<br />
drilling<br />
A<br />
tapping<br />
A<br />
glue<br />
Mounting<br />
correct incorrect<br />
For drilling and tapping <strong>Salomon</strong> skis,<br />
please refer to drill Bit Selection for<br />
<strong>Salomon</strong> Skis (page 40). For other<br />
skis, follow the recommendations of<br />
the ski manufacturer. In their absence,<br />
<strong>Salomon</strong> suggests that you use the<br />
<strong>Salomon</strong> drill Bit Selection guide<br />
(below). When in doubt about the ski’s<br />
core composition, select a 3.6 mm<br />
diameter bit and drill one hole. If the<br />
bit comes in contact with any metal,<br />
re-drill with a 4.1 mm bit to ensure<br />
proper screw retention. exceptions:<br />
for Equipe T, XW Fury Junior, Jade<br />
<strong>Salomon</strong> drill Bit Selection guide<br />
Skis diameter length ref. aspect<br />
Junior<br />
adult<br />
4.1 mm<br />
(ski with metal)<br />
3.6 mm<br />
(ski with no metal)<br />
4.1 mm<br />
(ski with metal)<br />
3.6 mm<br />
(ski with no metal)<br />
diameter<br />
8 mm<br />
8 mm<br />
9.5 mm<br />
9.5 mm<br />
length<br />
000813<br />
1 x 5<br />
000814<br />
1 x 5<br />
000893<br />
1 x 5<br />
000892<br />
1 x 5<br />
glue must be used when inserting binding screws to:<br />
• Lubricate the screw during insertion.<br />
• Create a watertight seal.<br />
• Ensure that the screws will hold<br />
while the ski is in use by acting as a<br />
dampener.<br />
retaIl systems > InstallatIon > 9<br />
Junior, Teneighty Fish, and Teneighty<br />
Kitten skis, drill using either a 3,6 mm<br />
diameter drill bit (for skis under<br />
140 cm) or a 4,1 mm diameter drill<br />
bit for skis greater than or equal to<br />
140 cm. Neither tap nor glue. Use a<br />
hand screwdriver only (3 Nm torque)<br />
to tighten the screws on the bindings.<br />
Drill through the jig’s proper bushings<br />
applying moderate downward<br />
pressure on the drill. Verify that the<br />
counter sink bevel on the drill bit has<br />
properly de-burred the hole. fig. A<br />
After drilling, turn the ski over and hit<br />
Tap all binding mounting holes<br />
unless otherwise recommended<br />
by the ski manufacturer. Failing<br />
to tap when necessary can result<br />
in topskin delamination, sidewall<br />
delamination, broken screws or<br />
damage to the ski core.<br />
The tap should be mounted into<br />
a brace. Position the brace so the<br />
Place a drop of glue on the surface<br />
of each hole. As the screw passes<br />
through the glue it coats itself.<br />
caution: <strong>Salomon</strong> strongly recommends<br />
its own glue for <strong>Salomon</strong> skis.<br />
A Posidrive No. 3 screwdriver, not a Phillips, is used to mount <strong>Salomon</strong><br />
bindings. Consult the <strong>Salomon</strong> Spare parts catalog (page 70) for reference<br />
on the <strong>Salomon</strong> screws. They are available through your customer<br />
service representative.<br />
S<br />
the base several times with the palm of<br />
your hand to remove any debris from<br />
the drilled holes.<br />
When mounting thin skis or junior skis<br />
with adult bindings you may need to<br />
use shorter screws or add washers to<br />
the existing screws between the binding<br />
and the ski to prevent damaging<br />
the ski base. Before drilling any junior<br />
ski, check the screw depth by positioning<br />
the binding over the mounting area<br />
so that the binding screws on one side<br />
of the heel track appear alongside the<br />
ski sidewall. fig. S<br />
Special cases When drilling<br />
Junior Skis<br />
• Use a 9.5 mm length drill bit<br />
when mounting Z10 Ti, Z10 Ti SC,<br />
Z10 SC, Z10, Z10 Fis 20, 710,<br />
710 SC, 610, 609, 609 SR, 609 SC,<br />
608, 608 SC, L 7 SC, L 8, L 8 SC<br />
bindings. These models use the<br />
same screws as the <strong>Salomon</strong> adult<br />
models and should be drilled and<br />
tapped accordingly.<br />
• As a general rule, the S910 Team is<br />
mounted on skis 170 cm or longer<br />
and the S608 or C608 on skis<br />
tap goes straight into the drilled<br />
hole. fig. A Apply only enough<br />
pressure to the brace to start the<br />
tap, as the tap is a self-cutting<br />
tool.<br />
A ski mounting plate is usually<br />
no more than 8 mm below the<br />
topskin. Tapping any deeper than<br />
8 mm can strip the hole or break<br />
140–170 cm. The S608 or C608 can<br />
also be used with skis 120–140 cm.<br />
The S305 Grom and C305 Grom<br />
are generally used with skis 80-140<br />
cm*. The shorter the ski, the more<br />
likely washers will be necessary to<br />
avoid dimpling the ski base.<br />
• The new <strong>Salomon</strong> C607 junior accommodates<br />
adult norm boot soles<br />
and offers a 2 to 7 DIN scale. This<br />
new intermediate binding for 5 to<br />
10-year-olds features shorter 6 mm<br />
screws for use on junior skis as<br />
short as 120 cm.<br />
• Whenever junior bindings are<br />
mounted on adult skis, an increased<br />
possibility exists of binding pull-out<br />
due to poor screw reten tion. The<br />
penetration depth of junior screws<br />
into the ski core is only 7 mm. If<br />
neces sary, use adult drill bits and<br />
screws to penetrate any mounting<br />
platform.<br />
• The hole must be deep enough to<br />
accommodate the screw length you<br />
are using or ski damage may result.<br />
* eXception: S305’s and C305’s cannot<br />
be mounted on the Crossmax 10<br />
Team or XScream 10 Team models<br />
manufactured from 2001 to 2003<br />
inclusively. Both bindings may be<br />
mounted on the 2004-2005 models<br />
of the Crossmax 10T and Crossmax<br />
T, 2006/2007 models of the X Wing T,<br />
and 2007/2008 X Wing Fury Junior<br />
and Jade Junior.<br />
the tap. Each full turn of the brace<br />
cuts the tap approximately 2 mm<br />
into the ski. After tapping, turn the<br />
ski over and hit the base several<br />
times with the palm of your hand<br />
to remove shavings from the hole.<br />
reference<br />
page # Section Name<br />
8 Jig Selection & Use<br />
10 Retail Mounting<br />
23 Rental & Demo Mounting<br />
partS (see page 70)<br />
reference # Item Name<br />
000821 Blue Plastic Plugs<br />
000818 Black Plastic Plugs<br />
000819 White Plastic Plugs<br />
000822 Grey Plastic Plugs<br />
000820 Red Plastic Plugs<br />
000823 Orange Plastic Plugs<br />
000870 Green Plastic Plugs<br />
000816 Taps<br />
000817 Tap Brace<br />
000811 Glue<br />
000862 Posidrive Screwdriver<br />
B18486 (CAN) Posidrive Bit<br />
Step 2
Step 2<br />
Binding<br />
inStallation > General Retail Installation<br />
general retail Mounting<br />
A<br />
toe piece<br />
S D F<br />
4-hole toe inStallation<br />
performance/Spheric oversize<br />
A long bit is needed (Posidrive<br />
Bit, CAN. only Ref. #B18486, for<br />
power drills and <strong>Salomon</strong> Manual<br />
Screwdriver Ref. #000862) to<br />
mount the 4-hole pattern toes as<br />
the front two screws must be inserted<br />
through the binding housing.<br />
fig. S<br />
heel piece Ski Brake<br />
heel piece inStallation<br />
G H<br />
legend<br />
Heel Track<br />
Heel Housing<br />
Heel Lever<br />
Heel Cup<br />
Treadle<br />
Brake Pedal<br />
Pressure<br />
Distributors<br />
* Use <strong>Salomon</strong> grease (Ref. #000905) on track.<br />
Spheric Pedal/<br />
AFD<br />
Toe Cup<br />
retaIl systems > InstallatIon > 10<br />
All <strong>Salomon</strong> bindings feature<br />
the E-Z Mount System with the<br />
screws already in place. Position<br />
the component over the prepared<br />
holes to begin installation<br />
(fig. A). If a power screwdriver<br />
is used, adjust the clutch for the<br />
appropriate ski core construc-<br />
Use a crisscross screwing pattern<br />
and insert each screw until nearly<br />
seated. fig. D Do not tighten<br />
until all the screws are in place.<br />
The baseplate of the AFD should<br />
be flush with the topskin of the ski<br />
and each screw should be flush<br />
with the baseplate of the toe piece.<br />
This procedure applies for all toe<br />
pieces with a four-hole pattern.<br />
Z12 Ti<br />
S912 Ti<br />
Toe Height<br />
Adjustment Screw<br />
Visual Indicator<br />
Housing<br />
tion. Hand check each screw after<br />
mounting.<br />
Toe Installation differs for 4-hole toe and 3-hole toe bindings. The former requires a criss-cross screwing pattern while the latter starts with a center<br />
mounting hole sliding track beneath the front of the toe.<br />
Place the heel over the prepared<br />
holes and insert the screws using<br />
a crisscross screwing pattern. (Do<br />
not compress the ski brake before<br />
it is mounted on the ski.) fig. G<br />
do not over tighten.<br />
3-hole toe inStallation<br />
Z-concept bindings, Spheric<br />
Sport and Quadrax<br />
For models with a 3-hole pattern,<br />
first pull the center mounting hole<br />
sliding track out from the binding far<br />
enough to insert the screw into the<br />
ski. A long bit is needed (Posidrive<br />
Bit, CAN. only Ref. #B18486, for<br />
power drills and <strong>Salomon</strong> Manual<br />
Screwdriver Ref. #000862) fig. F<br />
Adjustment<br />
Screw<br />
Baseplate<br />
Brake Arm<br />
Sliding Center<br />
Mounting Hole<br />
Lubrication<br />
Point*<br />
tighten the screw until it is firmly<br />
seated. Next, slide the toe piece towards<br />
the seated center screw until<br />
the two rear screws align with their<br />
respective holes.<br />
tighten the rear screws until they<br />
are firmly seated. The base plate<br />
should be flush with the topskin of<br />
the ski and the head of each screw<br />
should be flush with the baseplate.<br />
SKi BraKe inStallation<br />
Do not compress the ski brake<br />
before installing it. Place the two<br />
metal tabs on the front of the<br />
brake into the slots in the heel<br />
base plate fig. H. Rotate the rear<br />
of the brake downwards to start<br />
the screw in the track. Tighten<br />
screws with a hand screwdriver<br />
(4 Nm maximum).<br />
note: The brake can be removed to<br />
facilitate ski maintenance.<br />
to remove it: turn the center screw<br />
counterclockwise and remove<br />
the brake.<br />
reference<br />
page # Section Name<br />
9 Drilling, Tapping & Glue<br />
14 Binding-to-Boot<br />
Adjustments<br />
23 SC System Demo<br />
23 SR System Rental & Demo<br />
32 Maintenance and Repairs<br />
partS (see page 70)<br />
reference # Item Name<br />
000905 <strong>Salomon</strong> Grease<br />
000862 Posidrive Screwdriver<br />
B18486 (CAN) Posidrive Bit
Binding<br />
inStallation > Model-specific Installation<br />
Smartrak System<br />
Smartrak interface Mounting<br />
retaIl systems > InstallatIon > 11<br />
A S D F<br />
Smartrak System installation<br />
There are two different mounting procedures for the Smartrack interface, based on the system type.<br />
Smartrack grip & grip plus (fixed<br />
toe systems):<br />
insert metal band into the recessed<br />
slots in the plate. fig. A<br />
determine sole length in mm of<br />
boot.<br />
identify the letter on the metal<br />
band that corresponds to the boot<br />
sole length. If the boot sole length<br />
is between two numbers, choose<br />
the higher number.e.g.: For a boot<br />
sole of 320mm, choose setting<br />
“334mm D”.<br />
Screw the center mounting sliding<br />
track into the correspondingly<br />
lettered hole at the front of the<br />
Smartrak plate. fig. S<br />
finish mounting the three hole toe<br />
as usual.<br />
The Smartrak interface is available<br />
for use with flat skis.<br />
position the Smartrak metal jig<br />
(ref# 788403) so center mark on<br />
Wide Ski installation<br />
install the heel unit by lifting the<br />
tab located just in front of the heel<br />
piece and sliding the heel assembly<br />
onto the Smartrak plate. fig. F<br />
attach the brake in the usual<br />
manner.<br />
position the boot against the toe<br />
piece and slide the heel forward until<br />
it contacts the boot. Make sure<br />
the heel piece “clicks” and locks<br />
into position on the track.<br />
push the boot into the system and<br />
verify the forward pressure.Once<br />
the forward pressure is correct, the<br />
number on the metal band directly<br />
in front of the heel provides a<br />
guide to the quick positioning of<br />
the second heel.<br />
jig aligns with center mark of ski.<br />
When installing a Smartrak plate<br />
make sure the recessed slots at the<br />
front of the interface are positioned<br />
towards the tip of ski<br />
Smartrak control, response, and<br />
prolink (adjustable toe systems):<br />
insert the metal band into the<br />
recessed slots in center of plate.<br />
fig. A<br />
determine the sole length of boot<br />
to being used.<br />
lift the tab behind the AFD on the<br />
toe piece and slide the toe piece<br />
from the rear of track to the front<br />
until the boot sole length number<br />
on the metal band corresponds<br />
to, or is slightly greater than, the<br />
sole length of the boot being used.<br />
For example: a boot sole length<br />
of 306mm would require that you<br />
chose a setting on the band of<br />
308mm. Make sure the toe piece<br />
“clicks” and locks into position on<br />
the track. fig. D<br />
proceed with drilling, taping, and<br />
gluing as described on page 9.<br />
install the heel piece by lifting the<br />
tab located just in front of the heel<br />
piece and sliding the heel assembly<br />
onto the Smartrak plate until<br />
the boot sole length number on the<br />
metal band corresponds to, or is<br />
slightly greater than, the sole length<br />
of the boot being used. For example:<br />
a boot sole length of 306mm<br />
would require that you chose a setting<br />
on band of 308mm. Make sure<br />
the heel piece “clicks” and locks<br />
into position on the track. fig. F<br />
install the break in the normal<br />
manner and proceed with binding<br />
to boot adjustments as described<br />
on page 14 or page 24.<br />
assemble Smartrak binding following<br />
instruction as explained above<br />
in Smartrak System installation.<br />
A S Wide Ski Brakes<br />
a<br />
Wide Ski Jigs are available from<br />
<strong>Salomon</strong> to mount bindings on<br />
wide skis. Select the proper jig for<br />
the binding to be mounted by referencing<br />
the Jig Selection chart.<br />
Reversible pads adapt fat ski jigs to<br />
different widths of skis. The pads<br />
are changed by pulling them off<br />
b<br />
the jig and repositioning them to<br />
achieve the desired width. fig. A<br />
the pads are properly positioned<br />
when they touch the jig shoulder.<br />
• 98-124 mm skis: Thin sides of<br />
the reversible pads are positioned<br />
to the inside of the ski. fig. Sa<br />
• 80-106 mm skis: Wide sides of<br />
the reversible pads are positioned<br />
to the inside of the ski. fig. Sb<br />
Refer to the Wide Ski Brakes chart<br />
(right). The proper width fat ski<br />
brake must be installed for each<br />
specific system or indemnification<br />
for that system will not apply.<br />
Ski<br />
Width<br />
(mm)<br />
1999 to<br />
Current Bindings<br />
(except LAB &<br />
STH)*<br />
Performance<br />
Ref. #<br />
Leasure<br />
(Quadrax)<br />
Ref. #<br />
2007 to<br />
Current<br />
(LAB &<br />
STH)*<br />
Freeskiing<br />
Ref. #<br />
80 78574801 78574801 78575501<br />
85<br />
78145901<br />
78574901<br />
90 78575001 78575701<br />
100 78575101 78575801<br />
115 78575201 78575901<br />
130 78830601 78855701<br />
*See Spare Parts (page 70) for full details.<br />
Step 2
Step 2<br />
Binding<br />
retaIl systems > InstallatIon > 12<br />
inStallation > Model-specific Installation (continued)<br />
lightrak plate<br />
A S<br />
D F<br />
Mounting and adjusting<br />
open and set the blade in straight<br />
position and place it on the plate<br />
with a rotational motion. fig. A.<br />
identify the length of the boot sole.<br />
Mount the toe piece:<br />
identify the letter that corresponds<br />
the sole length and screw the toe<br />
piece (if you are between two letters,<br />
choose the higher one).<br />
Steeringplate interface<br />
Jig use With extra large Boot Soles<br />
occasionally a boot sole is too<br />
large to fit a jig. in this instance,<br />
the following procedure should<br />
be used to allow correct mounting<br />
of the binding:<br />
1. Open the jig to its fully extended<br />
position.<br />
2. Place the boot heel into the jig<br />
against the heel guide.<br />
Mount the heel piece:<br />
Slide the heel piece on the interface<br />
from the rear using the manual lock<br />
to authorize the gliding. fig. S.<br />
Mount the brake following the<br />
usual procedure. fig. D.<br />
position the boot in the toe and<br />
slide the heel until it touches the<br />
boot.<br />
Compatible with quadrax and Z binding.<br />
Mounting: according to the boot sole<br />
length selected, tighten the screws<br />
competition Bindings > intended use<br />
<strong>Salomon</strong> distributes competition<br />
bindings to racers and coaches.<br />
These bindings are intended to be<br />
used by skiers with special reten-<br />
3. Measure the length of the sole<br />
that extends over the toe arrow<br />
(viewed from the underside) of<br />
the jig.<br />
4. Divide this length in half (measurement<br />
A).<br />
5. Place the fully extended jig onto<br />
the ski with the boot mid-sole<br />
mark aligned with the mid-sole<br />
mark on the ski.<br />
tion needs. If these bindings are<br />
used by recreational skiers, there<br />
is a far greater risk of injury due to<br />
the use of more powerful springs.<br />
Step in the boot and check forward<br />
pressure, the arrow on the lock<br />
must be within the scribed area.<br />
fig. F.<br />
note: the rear number on the blade<br />
is an indication for a quick adjustment<br />
of the second ski.<br />
on the toe and heel pieces (4Nm<br />
torque) in the corresponding position<br />
on interface:<br />
253-281mm 273-301mm<br />
293-321mm 313-341mm<br />
6. Move the jig forward of the<br />
mid-sole the same distance as<br />
measurement A and drill the toe<br />
holes.<br />
7. Re-align the jig’s mid-sole mark<br />
to the ski’s mid-sole mark.<br />
Move the jig backwards from<br />
the mid-sole mark the same<br />
distance as measurement A and<br />
drill the heel holes.<br />
Refer to requested Settings for<br />
instructions for skiers requesting<br />
settings not recommended by<br />
<strong>Salomon</strong>.<br />
333-361mm 353-381mm<br />
Mount the brake following the usual<br />
procedure.<br />
8. Install the bindings. (Verify that<br />
screw penetration will not exceed<br />
hole depth.)
Binding<br />
retaIl systems > InstallatIon > 13<br />
inStallation > Model-specific Installation (continued)<br />
laB Binding installation<br />
installation of the Z14 laB, 914 laB, 916 laB, 920 laB bindings<br />
Warning: the 914 laB, 916 laB, and 920 laB are the only bindings that should be installed on the ZZ interface<br />
A S D F<br />
G H<br />
assembly<br />
Measure boot sole length in mm and<br />
then break the yellow plastic blade<br />
spacer (fig. A) at the appropriate<br />
length (the resulting spacer should<br />
include the last tab which matches<br />
the boot length).<br />
Mounting<br />
To begin mounting any LAB binding<br />
model onto any interface except the<br />
ZZ Speed 2 see the note below then<br />
procede to next step. To mount<br />
onto the ZZ Speed 2 interface,<br />
select a ski with the correct size<br />
ZZ interface plate (S, M, or L) for<br />
the boot sole length by referring to<br />
the ZZ Speed 2 installation chart.<br />
Align the binding assembly on the<br />
adjustment<br />
place boot into binding system<br />
and adjust the toe as usual.<br />
check the forward pressure: With<br />
the boot in the binding (closed posi-<br />
note<br />
Slide the yellow blade spacer onto the<br />
metal blade until it rests against the<br />
black base plate. Make sure the metal<br />
blade is properly seated in spacer.<br />
insert the end of the blade spacer<br />
into the recessed area on the bottom<br />
of the toe piece base plate. fig. S<br />
ZZ interface using the screw position<br />
number code (1 or 2) found in<br />
the ZZ Speed 2 installation chart.<br />
fig. F<br />
tighten the toe screws in a crisscross<br />
pattern.<br />
Verify that the heel track is positioned<br />
correctly. The end of the<br />
metal blade should be 3 mm for-<br />
tion), adjust the forward pressure to<br />
align the top of the head screw with<br />
the back of the heel track. fig. H<br />
insert the post of the metal blade<br />
lock plate between the rear two<br />
screws of the toe piece. Press<br />
firmly into place. fig. D<br />
Lifter shims are an option on all<br />
LAB models except the Z14 LAB.<br />
If required, attach the appropri-<br />
ward of the end of the stainless<br />
steel heel track. fig. G<br />
tighten the heel screws in a crisscross<br />
pattern.<br />
Verify that the height suits FIS<br />
norm limits (50-55 mm).<br />
install the brake.<br />
Installing any LAB binding model onto any interface except the ZZ Speed 2 requires a slightly different approach to assembly<br />
and mounting. assembly: the yellow plastic blade spacer has letter codes corresponding to the boot sole length and must be<br />
broken at the appropriate tab. Make a note of this letter. The rest of the assembly is the same. Mounting begins by aligning the<br />
binding assembly’s center mark (arrow on the yellow blade spacer) to the corresponding letter code on the interface before<br />
tightening the toe screws and continuing with the rest of the mounting and adjustment as with current models.<br />
ate lifter shim, (yellow = 2 mm,<br />
black = 1 mm). do not add more<br />
than 5 mm of lifters.<br />
ZZ Speed 2 Installation<br />
Boot sole Size Screw Position<br />
length<br />
(mm)<br />
Letter<br />
Code 1 2<br />
265-297 S 265-282 283-297<br />
298-327 M 298-311 312-327<br />
328-343 L (N/A) 328-343<br />
reference<br />
page # Section Name<br />
8 Jig Selection & Use<br />
9 Drilling, Tapping & Glue<br />
15 Release Value Selection &<br />
Adjustment<br />
15 Requested Settings<br />
partS (see page 70)<br />
reference # Item Name<br />
000902 <strong>Salomon</strong> Adjustment Tool<br />
001023 Adult Binding Paper Jig<br />
001056 <strong>Salomon</strong> Powder Option<br />
887528 Poweraxe Paper Jig<br />
Step 2
Step 3<br />
Binding<br />
Binding-to-Boot adJuStMentS<br />
adjusting<br />
heel position / forward pressure<br />
all forward pressure adjustments should be verified with the boot in the binding.<br />
A<br />
adjustment tab Models.<br />
(All current retail models) Check<br />
that the tip of the boot sole is<br />
flush against the butt plate of<br />
the toe piece (or central roller of<br />
applicable models). The forward<br />
pressure is correct when the arrow<br />
on the adjustment tab lines<br />
up within the scribed area at the<br />
end of the heel housing fig. A or<br />
when the arrow of the rear of the<br />
heel housing lines up within the<br />
toe cup Width<br />
G H J<br />
correct<br />
independent Wing<br />
adjustment Models.<br />
The adjustment screws for models<br />
with independent wing adjustments<br />
are located on each side of<br />
the toe piece. Adjust each wing<br />
snugly against the boot sole so<br />
that the boot is centered over the<br />
ski. fig. G do not over tighten<br />
fig. H as it forces the boot backward,<br />
increasing the forward pressure.<br />
When properly adjusted, the<br />
toe height<br />
K<br />
retaIl systems > adjustment > 14<br />
S D<br />
F<br />
scribed area on the adjustment<br />
tab. fig. S 2009/2010 models<br />
no longer have embossed arrows<br />
on the adjustment tab. The back<br />
edge of the tab should be used<br />
instead. fig. D If this adjustment<br />
is incorrect, remove the boot from<br />
the binding, lift the adjustment tab<br />
using a <strong>Salomon</strong> Adjustment Tool<br />
and slide the heel to the desired<br />
position. fig. F Re-insert the<br />
boot and check the adjustment.<br />
incorrect<br />
toe contacts the boot sole at three<br />
points: the butt plate and the low<br />
friction inserts in each wing arm.<br />
Simultaneous Wing<br />
adjustment Models.<br />
(916, S914, S912, S810, S850<br />
Models and their predecessors). The<br />
adjustment screw for models with<br />
simultaneous wing adjustments is<br />
located on the left of the toe piece.<br />
fig. J By turning this screw, both<br />
toe wings adjust<br />
All <strong>Salomon</strong> retail binding models<br />
must have a clearance of 0-0.5<br />
mm between the AFD and boot<br />
toe. fig. K<br />
automatic Wing<br />
adjustment Models.<br />
Toe height adjusts automatically<br />
on all current automatic wing<br />
adjustment binding models (Z14<br />
to TZ 5).<br />
Micro Metric heel adjustment<br />
for the Sth 16 and 12.<br />
With the boot in the binding (closed<br />
position), adjust the forward pressure<br />
to align the top of the screw<br />
head with the back of the heel track.<br />
fig. G<br />
simultaneously. Adjust the wings<br />
snugly against the boot sole. do not<br />
over tighten. The toe cup adjustment<br />
is correct when there are three<br />
points of contact: the butt plate<br />
and the low friction inserts on each<br />
wing arm.<br />
automatic Wing<br />
adjustment Models.<br />
Spheric Sport and Quadrax model<br />
toe wings adjust automatically. The<br />
C305 adjusts automatically to ac-<br />
Manual Models.<br />
Currently only the 914 binding<br />
model features manual toe<br />
height adjustment. Raise the toe<br />
by turning the adjustment screw,<br />
located on top of the toe piece,<br />
counterclockwise. Pull the boot<br />
back to create a gap between the<br />
boot sole and the binding AFD.<br />
Adjust the toe height to create a<br />
gap of not more than 0.5 mm or<br />
until the boot sole just touches the<br />
G<br />
cept either children’s or adult norm<br />
boots. (The added width of an adult<br />
norm boot sole somewhat limits the<br />
shock absorption capability of the<br />
C305. It is suggested that aggressive<br />
junior skiers with an adult norm<br />
boot sole use a model designed exclusively<br />
for adult norm boots.)<br />
AFD. You can use a <strong>Salomon</strong> 0.5<br />
mm toe height adjust ment card to<br />
gauge this clearance. do not over<br />
tighten. (Always re-check the<br />
forward pressure adjustment after<br />
making any toe cup adjustments.)<br />
reference<br />
page # Section Name<br />
15 Release Value Selection &<br />
Adjustment<br />
33 AFD Replacement
Binding<br />
What type of skier are you?<br />
determining your SKier type is<br />
your responsibility! Your skier<br />
type, height, weight, age and ski<br />
boot sole length are used by the<br />
shop to determine the visual indicator<br />
settings of your ski bindings.<br />
Be sure to provide accurate information,<br />
as any error may increase<br />
your risk of injury. Consult these<br />
descriptions to select your classification:<br />
Skiers requesting Settings not recommended by <strong>Salomon</strong><br />
The 2010/2011 <strong>Salomon</strong> adjustment chart is the only release adjustment<br />
chart authorized for use by <strong>Salomon</strong> dealers during the 2010/2011 season.<br />
<strong>Salomon</strong> recognizes a skier’s right to choose settings outside those<br />
recommended as per the current <strong>Salomon</strong> Adjustment Chart (particularly<br />
when the skier’s preferred setting is also within the range of acceptable<br />
settings).<br />
If the skier requests a setting other than the one derived from the current<br />
<strong>Salomon</strong> Adjustment Chart, the shop may:<br />
• Adjust the system to individual requests IF the technician notes on<br />
the workshop or rental form the reason the higher or lower setting<br />
was requested. The customer must verify the request for the higher or<br />
lower settings by signing and dating the form by the noted reason of<br />
the setting request. (It is suggested that the shop have the skier sign a<br />
release identical to the release agreement printed on this page. The<br />
release must then be attached to the completed workshop or rental<br />
form.) NOTE: Current <strong>Salomon</strong> workshop and rental forms include a<br />
"Requested Settings" option for customer requested settings, which<br />
eliminates the need for a separate release in such instances.<br />
• Adjust the system to the setting derived from the <strong>Salomon</strong> Adjustment<br />
Chart and instruct the skier on how to change the setting.<br />
retaIl systems > release value > 15<br />
releaSe Value Selection & adJuStMent<br />
determining Skier type<br />
It is the skier’s responsibility to determine Skier<br />
Type. Skier Type is not the same as skier ability<br />
and the two should not be confused. Skier Type<br />
must be indicated on the workshop form or rental<br />
form by the skier. The Skier classification chart<br />
is available in small and large poster size versions<br />
from <strong>Salomon</strong> and should be displayed to assist<br />
customers in classifying themselves.<br />
requested Settings<br />
These descriptions are compatible with ASTM and ISO documents.<br />
type 1 “cautious skiing at<br />
loWer visual indicator settings”<br />
• Prefer slow to moderate speeds.<br />
• Prefer gentle to moderate terrain.<br />
• Receive lower than average visual<br />
indicator settings. This may<br />
increase the risk of inadvertent<br />
binding release in order to increase<br />
the likelihood of release<br />
in a fall.<br />
• Type 1 settings apply to “entrylevel<br />
skiers uncertain of their<br />
classification”.<br />
type 2 “Moderate skiing at<br />
aVerage visual indicator settings”<br />
• Prefer a variety of speeds.<br />
• Prefer varied terrain.<br />
• Type 2 skiers are skiers who do<br />
not meet all the descriptions of<br />
Type 1 or Type 3 skier types.<br />
release agreement<br />
i,<br />
hereby acknowledge that I have been advised by the<br />
type 3 “aggressive skiing at<br />
higher visual indicator settings”<br />
• Prefer fast speeds.<br />
• Prefer steep terrain.<br />
• Receive higher than average visual<br />
indicator settings. This may<br />
reduce the likelihood of release<br />
in a fall in order to decrease the<br />
risk of inadvertent binding release.<br />
If from experience, you have been<br />
dissatisfied with visual indicator<br />
settings resulting from your selected<br />
skier type classification, you<br />
may wish to consider: (a) changing<br />
your skier type classification;<br />
(b) selecting different skier type<br />
classifications for toe and heel<br />
components; (c) selecting skier<br />
Types -1 ("for skiers who desire<br />
visual indicator settings lower than<br />
settings for a Type 1 skier") or 3+<br />
("for skiers who desire visual indicator<br />
settings higher than settings<br />
for a Type 3 skier").<br />
(rental shop, sales department, etc.) that the setting which I have<br />
requested for my bindings (Model )<br />
is not the setting recommended by the manufacturer of the bindings for<br />
a skier of my height, weight, age and skier type. I understand that as a<br />
condition of obtaining this setting on the bindings at the time of their delivery,<br />
I must agree to forever release the shop, its employees and agents,<br />
the manufacturer, and the distributor from any and all liability for injury<br />
or death which results to me or others from the use of these bindings. I<br />
acknowledge that there may be increased risk of injury or death to me as<br />
a result of my own personal preference for binding setting, particularly in<br />
view of the inherent and other risks of the sport of skiing. I hereby waive<br />
all claims arising from the use of the bindings and release from all liability<br />
the shop, the distributor and the manufacturer, their agents and employees<br />
and I further agree to indemnify them from any and all liability or<br />
harm or damage of any kind whatsoever which may result from the use of<br />
these bindings by myself or anyone I allow to use the bindings.<br />
I, the undersigned, have read and understand this liability release agreement,<br />
and agree that it is binding upon me, my heirs, guardians, administrators,<br />
assigns, and legal representatives.<br />
Skier Signature<br />
(or, in the case of a minor, that of the skier’s parent or guardian)<br />
Shop Manager’s Signature<br />
Step 4
Step 4<br />
Binding<br />
2010/2011 <strong>Salomon</strong> adjustment chart<br />
retaIl systems > release value > 16<br />
releaSe Value Selection & adJuStMent > (continued)<br />
All current model <strong>Salomon</strong><br />
bindings use the DIN<br />
adjustment scale. Release<br />
setting numbers on this<br />
scale are referred to as<br />
“visual indicator settings.”<br />
Some older model<br />
<strong>Salomon</strong> bindings were<br />
manufactured prior to the<br />
establishment of the DIN<br />
standard scale and use<br />
a different adjustment<br />
scale. Refer to previous<br />
Shop Practices Manuals to<br />
adjust these models.<br />
The 2010/2011<br />
Adjustment Chart is the<br />
only release adjustment<br />
chart authorized for<br />
<strong>Salomon</strong> dealers during<br />
the 2010/2011 season.<br />
Only those settings<br />
recommended by <strong>Salomon</strong><br />
should be used when determining<br />
the appropriate<br />
adjustment for each skier’s<br />
system. Refer to Skier’s<br />
requesting Settings<br />
not recommended by<br />
<strong>Salomon</strong> (page 15) for<br />
skiers requesting other<br />
settings.<br />
determining & adjusting Visual indicator Settings<br />
The following procedure is used for<br />
determining visual indicator settings<br />
using the 2010/2011 <strong>Salomon</strong><br />
Adjustment Chart.<br />
1. Find the Skier’s Code. Locate the<br />
skier’s weight and height in the<br />
first two columns. If the skier’s<br />
weight and height are not in the<br />
same row, select the Skier’s code<br />
that is closest to the top of the<br />
chart.<br />
2. The skier’s code is appropriate for<br />
Type 1 skiers:<br />
• For Type 2 skiers, move down<br />
on the chart one row.<br />
• For Type 3 skiers, move down<br />
on the chart two rows.<br />
2010/2011 ADJUSTMENT CHART<br />
22-<br />
29<br />
30-<br />
38<br />
39-<br />
47<br />
48-<br />
56<br />
57-<br />
66<br />
67-<br />
78<br />
79-<br />
91<br />
92-<br />
107<br />
108-<br />
125<br />
126-<br />
147<br />
148-<br />
174<br />
175-<br />
209<br />
>-<br />
210<br />
10-<br />
13<br />
14-<br />
17<br />
18-<br />
21<br />
22-<br />
25<br />
26-<br />
30<br />
31-<br />
35<br />
36-<br />
41<br />
42-<br />
48<br />
49-<br />
57<br />
58-<br />
66<br />
67-<br />
78<br />
79-<br />
94<br />
>-<br />
95<br />
Skier<br />
Weight Height Skier<br />
lb kg ft-in/cm Code*<br />
- 6'5"<br />
>- 195 cm<br />
A<br />
B<br />
C<br />
D<br />
E<br />
F<br />
G<br />
H<br />
I<br />
J<br />
K<br />
L<br />
M<br />
N<br />
O<br />
P<br />
< - 231- 251- 271- 291- 311- 331- > -<br />
230 mm 250 mm 270 mm 290 mm 310 mm 330 mm 350 mm 351 mm<br />
3 /4<br />
1<br />
11 1 / 2<br />
1 1 / 2<br />
1 / 2<br />
2<br />
3<br />
3 /4<br />
3 /4<br />
11 1 / 4<br />
1 1 / 4<br />
1 / 4<br />
21 / 2 21 2 / 4<br />
1 / 2 21 2 / 4<br />
1 / 2 21 / 4<br />
* Based on "Type 1" Skier<br />
• For Type -1 skiers, move up on<br />
the chart one row.<br />
• For Type 3+ skiers, move down<br />
on the chart three rows.<br />
• A skier may select different skier<br />
types for toe and heel piece.<br />
3. For skiers age 9 and younger or<br />
age 50 and older, move up the<br />
chart one row.<br />
• For skiers 29 lbs. and under, no<br />
further correction is appropriate.<br />
• For skiers 38 lbs. and under,<br />
Skier Type -1 is inappropriate.<br />
4. Locate the column that represents<br />
the skier’s boot sole length (in<br />
mm).<br />
3 /4<br />
23 / 4 21 2 / 2<br />
3 / 4 21 2 / 2<br />
3 / 4 21 / 2<br />
31 3 / 2<br />
1 3 / 2<br />
1 / 2<br />
3 /4<br />
11 1 / 4<br />
1 1 / 4<br />
1 / 4<br />
13 / 4 11 1 / 2<br />
3 / 4 11 1 / 2<br />
3 / 4 11 / 2<br />
Initial Toe/Heel Indicator<br />
by Boot Sole Length (mm)<br />
2<br />
3<br />
3 /4<br />
1<br />
11 1 / 1<br />
2 1 /4 1 / 1 1 2 1 /4 1 / 1<br />
2 1 /4<br />
13 1 / 1<br />
4 1 /2 1 1 /2<br />
3 / 1<br />
4 1 /2 1 1 1 /2<br />
3 / 1<br />
4 1 /2 1 1 /2<br />
21 2 / 3<br />
4 2 1 /4<br />
1 / 3 2 4 2 1 /4<br />
1 / 3<br />
4 2 1 /4<br />
23 2 / 1<br />
4 2 /2 1 2 /4<br />
3 / 1<br />
4 2 /2 1 2 2 /4<br />
3 / 1<br />
4 2 /2 1 2 /4<br />
31 3 / 3<br />
2 3 3 2 /4<br />
1 / 3 3 2 3 3 2 /4<br />
1 / 3<br />
2 3 3 2 /4<br />
41 4 / 1<br />
2 4 3 /2 1 3 /2<br />
1 / 1<br />
2 4 3 /2 1 4 3 /2<br />
1 / 1<br />
2 4 3 /2 1 3 /2<br />
13 1 / 4<br />
3 1 / 4<br />
3 / 4<br />
2<br />
21 2 / 2<br />
1 2 / 2<br />
1 / 2<br />
3<br />
3 1 / 2<br />
51 / 1<br />
2 5 4 /2 4 3 3 1 5 / 2<br />
1 / 1<br />
2 5 4 /2 4 3 3 1 5 / 2<br />
1 / 1<br />
2 5 4 /2 4 3<br />
61 / 1<br />
2 6 5 /2 5 4 4 1 6 / 2<br />
1 / 1<br />
2 6 5 /2 5 4 4 1 6 / 2<br />
1 / 1<br />
2 6 5 /2 5 4 4 1 / 2<br />
71 / 1<br />
2 7 6 /2 6 5 5 1 7 / 2<br />
1 / 1<br />
2 7 6 /2 6 5 5 1 7 / 2<br />
1 / 1<br />
2 7 6 /2 6 5 5 1 / 2<br />
81 / 2 8 7 6 6 1 8 / 2<br />
1 / 2 8 7 6 6 1 8 / 2<br />
1 / 2 8 7 6 6 1 / 2<br />
10 91 10 9 / 1<br />
2 8 /2 1 8 7 /2<br />
1 / 1<br />
2 8 /2 1 10 9 8 7 /2<br />
1 / 1<br />
2 8 /2 1 8 7 /2<br />
9 1 / 2<br />
111 / 2 11 10 9 9 1 11 / 2<br />
1 / 2 11 10 9 9 1 11 / 2<br />
1 / 2 11 10 9<br />
5. The box at the intersection of the<br />
skier’s boot sole length column<br />
and the Skier’s Code row shows<br />
the initial visual indicator setting<br />
for the skier. If the intersection<br />
of the row and column falls in a<br />
blank box, move left or right on<br />
the same row to the nearest box<br />
showing a visual indicator setting.<br />
6. Record the visual indicator settings<br />
on the Workshop Form.<br />
• If a skier selects different skier<br />
types for toe and heel piece, it<br />
must be recorded on the workshop<br />
or rental form in the order<br />
toe/heel (T/H), using a (/) to<br />
separate the two types.<br />
12 101 12 11 10 / 2<br />
1 12 11 10 / 2<br />
1 11 / 2<br />
Torque Range<br />
(Newton Meters)<br />
REF.<br />
Inspection Range<br />
In-use Range<br />
Twist Forward<br />
Lean<br />
5 18<br />
8 29<br />
11 40<br />
14 52<br />
17 64<br />
20 75<br />
23 87<br />
27 102<br />
31 120<br />
37 141<br />
43 165 165<br />
50 194<br />
58 229<br />
67 271 271<br />
78 320 320<br />
91 380<br />
105 452<br />
121 520<br />
137 588<br />
Visual indicator Setting adjustment<br />
Adjust both toes and heels of the<br />
system to the visual indicator setting<br />
derived from the adjustment chart.<br />
Sometimes a technician may experience<br />
difficulty determining exactly<br />
where the visual indicator should<br />
appear in the binding’s visual indicator<br />
window. For example, a setting of<br />
51/2 is not precisely marked on the<br />
binding. The technician should use<br />
those values that are clearly marked<br />
on the binding as reference points<br />
and set the release adjustment as<br />
close as possible to the setting that<br />
is recorded on the Workshop Form.
Binding<br />
Visual inspection of System components<br />
retaIl systems > fInal checkIng > 17<br />
final checKing & ViSual inSpection<br />
While anyone can mount and adjust a <strong>Salomon</strong> binding, to receive indemnification from <strong>Salomon</strong> a <strong>Salomon</strong><br />
Certified Technician must sign or initial the Workshop Form attesting that all systems inspections have been<br />
performed. A Final Check is your quality control measure to verify that all required procedures have been<br />
properly completed.<br />
common compatibility problems<br />
the Boot<br />
• Inconsistencies with ISO and<br />
applicable norms.<br />
• Gross irregularities where the<br />
boot contacts the binding and<br />
the AFD.<br />
• Unacceptable low grade<br />
thermoplastic construction.<br />
• Rubber and/or metal tip<br />
protectors<br />
• Mold flashings.<br />
• Excessive wear.<br />
the Binding components<br />
• Stripped, loose or<br />
missing screws.<br />
• Condition of the AFD (ripped,<br />
loose, imbedded dirt, boot sole<br />
pattern, tread imprint, etc.).<br />
• Condition of anti-friction inserts<br />
(where applicable).<br />
• Missing or unreadable visual<br />
indicators and missing windows.<br />
• Bent or broken baseplate,<br />
principal axis or housing.<br />
test for elastic travel & return<br />
A<br />
• Debris lodged in the sole.<br />
• Warped or improperly canted<br />
boot sole.<br />
• Cut-outs in the sole that<br />
impede proper brake function.<br />
(If you are uncertain of boot<br />
compatibility, perform the clean<br />
vs. lubricated test. Boots that<br />
fail this test or violate any of the<br />
above points should not be used<br />
with any <strong>Salomon</strong> binding.)<br />
• Stripped or jammed toe height<br />
and cup adjustment screws.<br />
• Jammed release adjustment<br />
screw.<br />
• Other visible wear.<br />
• Improperly installed leash<br />
or brake.<br />
• Irregular heel track function.<br />
• Bent or broken baseplate, track<br />
or heel.<br />
S<br />
lateral<br />
Secure the ski. Hit the forefoot area of the boot with an object that will not<br />
damage the boot, such as a rubber hammer. fig. A Use sufficient force<br />
to move the boot off-center, but not hard enough to release the system.<br />
The boot should move off-center at least 5 mm and return to center<br />
within 2 mm of its original position.<br />
Vertical<br />
Depress the heel lever while pulling forward on the upper cuff of the boot<br />
until the boot heel lifts at least 5 mm. fig. S Release both hands simultaneously.<br />
The boot should return to the ski quickly and smoothly. This<br />
inspection can be performed either manually or by using a mechanical<br />
testing device. If a testing device is used, follow the recommendations of<br />
the test device manufacturer for proper procedure.<br />
If the system passes these tests, mark “Pass” ( ) on the Workshop<br />
Form for “Test for Elastic Travel & Return”. If the system fails, see<br />
troubleshooting.<br />
the Ski<br />
• Mounting screws protruding<br />
through the base.<br />
• Delaminated sidewall. This can<br />
be detected visually or by running<br />
your fingers along the sides<br />
of the ski.<br />
• Binding baseplates not flush with<br />
ski surface.<br />
the Ski Brake<br />
• Improper brake arm length.<br />
• Improper installation.<br />
• Broken entry pedals.<br />
• Bent or broken brake arms.<br />
test for Boot/Binding compatibility<br />
• Delaminated topskin.<br />
• Pre-drilled holes. As a general<br />
rule, bindings should not be<br />
installed on skis that have previously<br />
been drilled for three or<br />
more sets of bindings.<br />
• Strength of ski brake. A brake<br />
must not compress totally when<br />
the ski is set on a flat surface.<br />
• Other visible wear.<br />
Visual inspection of the complete System<br />
place the boot in the binding and check the accuracy of:<br />
• Toe height adjustment<br />
(if applicable).<br />
• Toe cup width adjustment<br />
(if applicable).<br />
• Central roller adjustment<br />
(if applicable).<br />
• Forward pressure adjustment.<br />
• Visual indicator settings.<br />
• Symmetrical mounting of bindings<br />
to ski center line (%1 mm).<br />
This should be in the same location<br />
on both skis.<br />
Check the boot/binding combination to ensure all components are compatible.<br />
Unless a binding is specifically designed for use with both junior<br />
and adult norm boot soles, adult and junior systems cannot be combined,<br />
e.g., junior boots with adult bindings or vice versa. If the system passes<br />
this test, mark “Pass” ( ) on the Workshop Form for “Test of Boot-<br />
Binding Compatibility.”<br />
If you are not sure that the boot complies with standards or if you are not<br />
sure that the system components are compatible, see troubleshooting.<br />
reference<br />
page # Section Name<br />
47 Standard Boot Sole<br />
Dimensions<br />
19 Troubleshooting<br />
21 <strong>Salomon</strong> Workshop Form<br />
Step 5
Step 6<br />
Binding<br />
Mechanical inSpection<br />
retaIl systems > testIng > 18<br />
It is a requirement* for <strong>Salomon</strong> indemnification that all ski/binding/boot systems be verified using a force<br />
or torque measuring device.**<br />
A previously damaged binding component or boot may break during the added stress of mechanical testing.<br />
Consumers should be advised of this possibility prior to any mechanical testing of their equipment.<br />
twist test & forward lean tests > release Value Within Specified range<br />
twist test (toe)<br />
A<br />
Exercise the toe by releasing it once<br />
in each direction. Measure and<br />
record the test result for both clockwise<br />
and counterclockwise directions<br />
fig. A with a force or torquemeasuring<br />
device. The test result is<br />
the middle quantitative value of three<br />
measured release values. If the first<br />
forward lean test (heel)<br />
S<br />
If the twist test or forward<br />
lean test results are not within<br />
the “Inspection Range” but are<br />
within the greater “In-Use Range,”<br />
the visual indicator of the component<br />
affecting the test result<br />
should be readjusted to bring the<br />
test result within the “Inspection<br />
Range.” If the test result is outside<br />
the “In-Use Range,” refer to<br />
troubleshooting. It is not neces-<br />
examples of Middle<br />
Quantitative Values<br />
3 Maximum<br />
release<br />
Values<br />
Middle<br />
Quantitative Value<br />
(Test Result)<br />
45, 40, 50 45<br />
60, 50, 50 50<br />
30, 40, 45 40<br />
55, 65, 60 60<br />
two measured values are the same,<br />
there is no need to take a third measurement.<br />
See examples of Middle<br />
Quantitative Values (above)<br />
The toe passes this inspection if<br />
the test results in both directions<br />
fall within the “Inspection Range”<br />
Exercise the heel by releasing it<br />
once. Measure and record the<br />
test result using a force or torque<br />
measuring device. fig. S The<br />
test result should be within the<br />
“Inspection Range.” If both twist<br />
and forward lean results fall<br />
results not Within the Specified range<br />
sary to record any of the test results<br />
on the Workshop form. It is<br />
only necessary to record whether<br />
the system passed or failed each<br />
inspection and the final visual<br />
indicator settings. Any system<br />
component that repeatedly fails<br />
any inspection should not remain<br />
in use. When the technician is satisfied<br />
that all required procedures<br />
have been completed according<br />
Sample Systems inspection ranges<br />
Based on Skier Code "L"<br />
x<br />
ref<br />
x<br />
43<br />
50<br />
58<br />
67<br />
78<br />
inSpection range<br />
as determined from the <strong>Salomon</strong><br />
adjustment chart. See Sample<br />
Systems inspection ranges<br />
(above).<br />
If your test results for clock wise and<br />
counterclockwise release appear<br />
to be at opposite extremes of the<br />
within the appropriate inspection<br />
range, mark “Pass” ( ) on<br />
the Workshop form for “Release<br />
Value Within Specified Range.”<br />
in-uSe range<br />
to <strong>Salomon</strong>’s recommendations in<br />
this manual, he or she must sign<br />
the Workshop form. (The signing<br />
technician must be currently certified<br />
by <strong>Salomon</strong>.)<br />
inspection range, you may have an<br />
installation error or an incompatible<br />
boot. This is known as asymmetric<br />
release. Troubleshoot the system and<br />
re-test after the problem has been<br />
corrected.<br />
reference<br />
page # Section Name<br />
16 2010/2011 <strong>Salomon</strong><br />
Adjustment Chart<br />
19 Troubleshooting<br />
21 <strong>Salomon</strong> Workshop Form<br />
note<br />
*U.S. Dealers only; recommended<br />
for Canadian Dealers.<br />
**For <strong>Salomon</strong> indemnification to<br />
apply, the shop must follow the<br />
test device<br />
manufacturer’s requirements for:<br />
• Proper use.<br />
• Valid calibration.<br />
• Calibration check at recommended<br />
intervals.<br />
• Consistent results between technicians<br />
operating this device.
Binding<br />
troubleshooting<br />
retaIl systems > testIng > 19<br />
Mechanical inSpection > Troubleshooting<br />
Boot/Binding systems wear with time. This is expected. Normal wear and/or fatigue of a system can be<br />
expected. If a system inspection indicates a system is not functioning as intended, the cause of the problem<br />
must be identified and corrective action should be taken.<br />
The first step is to re-examine each<br />
component of the ski/binding/boot<br />
system individually. If a problem<br />
is found, e.g., stripped toe height<br />
screw, out-of-standard boot sole,<br />
improperly mounted binding, missing<br />
AFD, etc., proper Binding-to-<br />
Boot adjustments cannot be made.<br />
No further work can be performed<br />
on the system. Mark “Fail” ( )<br />
on this section of the Workshop<br />
form.*<br />
On used bindings, inspect all boot<br />
to binding points of contact for excessive<br />
wear.<br />
If the system failed the test for<br />
elastic travel & return, check<br />
that all boot/binding interfaces are<br />
clean, smooth and clear of debris.<br />
If the boot is dirty, clean it with a<br />
solution of mild dish washing soap<br />
and water. If the binding is dirty,<br />
clean it according to the procedures<br />
described in Maintenance<br />
and repair. Check that the boot<br />
enters the binding correctly. Make<br />
lubricated test<br />
Twist (Nm)<br />
100<br />
90<br />
80<br />
70<br />
60<br />
50<br />
40<br />
30<br />
20<br />
fail<br />
pass<br />
10<br />
0<br />
0 10 20 30 40 50 60 70 80 90 100<br />
Twist (Nm)<br />
clean test<br />
sure the boot is properly positioned<br />
in the toe and heel cups. Check<br />
the visual indicator settings. They<br />
should not exceed the minimum or<br />
maximum setting and should be set<br />
appropriately for the skier. Re-test<br />
the system for elastic travel &<br />
return. If the system fails this test,<br />
mark "Fail" ( ) on this section of<br />
the Workshop form.*<br />
If the system failed the Test For<br />
Boot/Binding Compatibility, mark<br />
"Fail" ( ) on this section of the<br />
Workshop form.* If you are not<br />
sure that the boot complies with<br />
the mandatory standards, or if you<br />
are not sure that the boot/binding<br />
system components are compatible,<br />
do a clean vs. lubricated<br />
test. To perform a clean vs.<br />
lubricated test, all adjustments<br />
to the system, e.g., visual indicator<br />
settings, forward pressure adjustments,<br />
etc., must be the same as<br />
when the system was previously<br />
tested. Lubricate the boot with a<br />
compatibility tables: clean vs. lubricated tests<br />
twist test<br />
fail<br />
mild dish washing soap wherever<br />
it contacts the binding and wipe off<br />
any excess lubricant. Perform the<br />
twist test and forward lean test<br />
as done previously and record your<br />
results. Next, compare the results<br />
of the lubricated test with those of<br />
the previously performed non-lubricated<br />
clean test. Plot the results<br />
on the compatibility tables. If the<br />
results don’t fall within the shaded<br />
“Pass” window on the table, the<br />
BOOT is incompatible with the<br />
binding and should not be used.<br />
Mark “Fail” ( ) on the Workshop<br />
form.*<br />
If no problems have been found<br />
with the system and the release<br />
Value Within Specified range cannot<br />
be obtained, further tests must<br />
be undertaken. First, switch testers<br />
to check operator accuracy. Next,<br />
check the accuracy of the testing<br />
device per the device manufacturer’s<br />
recommendations. Re-test<br />
the system. If the system releases<br />
* the customer should be informed of, and authorize, action needed to correct the problem. please refer to<br />
the technical reference section for warranty information on binding components covered under warranty.<br />
forward lean test<br />
lubricated test<br />
Forward Lean (Nm)<br />
400<br />
360<br />
320<br />
280<br />
240<br />
200<br />
160<br />
120<br />
80<br />
fail<br />
outside the “In-Use Range,” mark<br />
“Fail” ( ) on this section of the<br />
Workshop form.*<br />
If the customer refuses to have<br />
work done that is necessary to<br />
bring the system within standards,<br />
or requests work that violates the<br />
recommendations of this manual,<br />
the technician should check the box<br />
next to the statement indicating<br />
out-of-standard components on<br />
the Workshop form. A note should<br />
be made in the Comment section<br />
of the form describing the problem<br />
and the skier should be warned<br />
that continued use of the system<br />
is inadvisable. The shop will not be<br />
indemnified for work done on that<br />
system.<br />
reference<br />
page # Section Name<br />
17 Test For Elastic Travel<br />
and Return<br />
17 Test For Boot/Binding<br />
Compatibility<br />
21 <strong>Salomon</strong> Workshop Form<br />
85 <strong>Salomon</strong> Retail Binding<br />
Limited Warranty<br />
pass<br />
fail<br />
40<br />
0<br />
0 40 80 120 160 200 240 280 320 360 400<br />
Forward Lean (Nm)<br />
clean test<br />
Step 6
Step 7<br />
Binding<br />
retaIl systems > record keePIng > 20<br />
SKier inStruction, Warning & record Keeping<br />
Skier instruction & Warning<br />
When the Certified Technician signs<br />
or initials the Workshop Form, the<br />
technician attests that all procedures<br />
have been completed. It is<br />
not necessary for the technician to<br />
personally provide the skier with instructions<br />
as long as the shop does.<br />
To help reduce your shop’s liability<br />
risk and to receive indemnification<br />
from <strong>Salomon</strong>, take the following<br />
steps whenever a skier picks up<br />
their equipment. (If the individual<br />
picking up the equipment is not the<br />
intended user, treat that individual as<br />
though they were the intended user.<br />
In the case of minor skiers, follow<br />
these steps in the presence of both<br />
the minor skier and a parent or legal<br />
guardian.)<br />
explanation of entry/exit/re-entry<br />
The proper use of the system (entry,<br />
exit and re-entry) must be explained<br />
using the skier’s own system as an<br />
example.<br />
explanation of parts and<br />
release adjustments<br />
Show the skier where the visual<br />
indicator adjustment caps/screws<br />
are located. Point out the bindingto-boot<br />
adjustments. Indicate where<br />
the visual indicator settings are<br />
retail record Keeping<br />
A <strong>Salomon</strong> authorized shop is<br />
required to keep accurate records<br />
of work performed. Aside from the<br />
legal reasons, accurate records provide<br />
a permanent history of the customers<br />
you have serviced over the<br />
years. Workshop records must be<br />
kept for five years or for the statute<br />
of limitations of the state or province,<br />
whichever period is longer.<br />
The following is a list of information*<br />
that must be recorded every<br />
time a <strong>Salomon</strong> binding is mounted<br />
and/or adjusted. It is not necessary<br />
to use a <strong>Salomon</strong> Workshop form,<br />
but any form that the shop uses<br />
should include all the information<br />
listed below.*<br />
1. *Date of transaction.<br />
2. *Name and address of the skier.<br />
3. *Skier’s height, weight, age and<br />
skier type.<br />
4. *Skis (brand, model and serial<br />
number).<br />
5. *Boot (brand, model and sole<br />
length).<br />
6. *Binding (brand and model).<br />
recorded on the Workshop Form and<br />
have the customer verify that the<br />
settings recorded on the form agree<br />
with the settings appearing in the<br />
visual indicator window of the binding.<br />
(It is not necessary to explain<br />
how these numbers are derived.)<br />
Although skiers may work on their<br />
own system, suggest that if a problem<br />
develops, the system should<br />
be taken to a <strong>Salomon</strong> Authorized<br />
Binding Dealer.<br />
receipt of in-Box instructions<br />
When a skier purchases a new<br />
binding, it is required that they also<br />
receive the in-box pamphlet included<br />
in each binding box. The pamphlet<br />
should be reviewed with the skier so<br />
that it is fully understood.<br />
Skier Signature on the<br />
Workshop form<br />
The skier must read and understand<br />
the conditions specified in the<br />
Liability Release Agreement. Point<br />
out that the skier is signing a release<br />
of liability and that included in the<br />
release is a specific warning that<br />
the binding will not release under<br />
all circumstances nor is it possible<br />
to predict every situation in which it<br />
7. *Skier’s Code.<br />
8. *System inspection results<br />
("Pass" or "Fail" for all functional<br />
tests must be indicated).<br />
9. *Visual indicator settings.<br />
10. *<strong>Salomon</strong> Certified Technician’s<br />
initials or signature attesting<br />
that all functional tests and<br />
instructional procedures have<br />
been completed.<br />
11. *Liability Release Agreement<br />
which is either the same as/<br />
or substantial equivalent of the<br />
<strong>Salomon</strong> form.<br />
12. *Skier signature (or that of the<br />
skier’s agent or, in the case of a<br />
minor, that of the skier’s parent<br />
or guardian) attesting that the<br />
skier:<br />
a. Has been instructed in the<br />
proper use of the equipment.<br />
b. Has received the in-box pamphlet<br />
(new bindings only).<br />
c. Has verified that the visual<br />
indicator settings correspond<br />
to the recorded visual indicator<br />
settings.<br />
will release, and it is, therefore, no<br />
guarantee of the skier’s safety.<br />
the Skier must then sign the<br />
Workshop form, indicating the<br />
skier:<br />
• Has been instructed in the proper<br />
use of the equipment.<br />
• Has received the in-box pamphlet<br />
(new bindings only).<br />
• Has verified that the visual indicator<br />
settings correspond to the recorded<br />
settings on the Workshop Form.<br />
• Has read and understands the specific<br />
information on the Workshop<br />
Form that releases the shop, manufacturer<br />
and distributor from liability.<br />
• Understands that skiing involves<br />
inherent risks and that injuries are<br />
a common and ordinary occurrence<br />
of the sport.<br />
• Understands that included in the<br />
Liability Release Agreement is the<br />
specific warning that the binding<br />
will not release at all times or under<br />
all circumstances where release<br />
may prevent injury or death, nor is<br />
it possible to predict every situation<br />
in which it will release, and it<br />
is, therefore, no guarantee of their<br />
safety.<br />
d. Has read and understands the<br />
Liability Release Agreement<br />
on the Workshop Form.<br />
e. Understands that there are<br />
inherent and other risks in<br />
the sport of snow skiing and<br />
agrees to assume those risks.<br />
f. Understands that included<br />
in the Liability Release<br />
Agreement is the specific<br />
warning that the binding will<br />
not release under all circumstances<br />
where release may<br />
prevent injury or death, nor<br />
is it possible to predict every<br />
situation in which it will release,<br />
and it is, therefore, no<br />
guarantee of their safety.<br />
g. Understands that bindings<br />
should be maintained as per<br />
suggestions in Maintenance<br />
Guidelines.<br />
13. Notes on the boot sole’s material,<br />
shape and/or condition<br />
should be made when necessary.<br />
• Understands that the bindings<br />
should be maintained as per<br />
suggestions in Maintenance<br />
guidelines prior to the beginning<br />
of each season and every 30 skier<br />
days per year.<br />
The person who signs the Workshop<br />
Form should be the intended user of<br />
the equipment. In the case of a minor<br />
skier, the signature on the form<br />
must be that of the skier’s parent<br />
or legal guardian. If someone other<br />
than the skier or the skier’s parent<br />
or guardian picks up the equipment,<br />
this person should be treated as<br />
though he or she were the skier and,<br />
therefore, must sign the Workshop<br />
Form. A note must be placed on the<br />
Workshop Form that the “agent”<br />
must transmit the information to the<br />
intended user. If a skier refuses to<br />
sign the Workshop Form, <strong>Salomon</strong><br />
will not provide indemnification and<br />
the shop should consider refusing to<br />
provide service to the skier.<br />
receipt of Workshop form<br />
The skier must be given a copy of<br />
the Workshop Form that includes a<br />
signed copy of the Liability Release<br />
Agreement.<br />
14. If the visual indicator settings<br />
vary from the recommended<br />
setting, note the reason for this.<br />
Attach a signed release to the<br />
Workshop Form. NOTE: Current<br />
<strong>Salomon</strong> workshop and rental<br />
forms include a "Requested<br />
Settings" option for customer<br />
requested settings, which eliminates<br />
the need for a separate<br />
release in such instances.<br />
15. Refusal to serve statement. This<br />
statement should be written so<br />
as to absolve the ski shop from<br />
any liability when the customer<br />
refuses to have work performed<br />
as per guidelines of <strong>Salomon</strong><br />
and the shop<br />
note<br />
* Without this information, indemnification<br />
will not apply.<br />
reference<br />
page # Section Name<br />
21 <strong>Salomon</strong> Workshop Form<br />
21 Liability Release<br />
Agreement<br />
32 Maintenance Guidelines
Binding<br />
(Shaded areas for shop use only)<br />
SKier inStruction, Warning & record Keeping<br />
Taken<br />
By:<br />
Name:<br />
Street<br />
City<br />
Phone #<br />
Name<br />
Last<br />
First<br />
State Zip<br />
Your Weight lbs.<br />
Date<br />
Due:<br />
Downhill Skiing<br />
Snowboard<br />
Indicate Skier Type: Stance:<br />
Regular Goofy<br />
L ° R °<br />
Acknowledgement of Personal Information,<br />
Equipment Instructions & Liability Release<br />
Agreement<br />
I have accurately represented the above listed information and it is<br />
true and correct. I will not use any of my equipment until I have<br />
received instruction on its use and I fully understand its use and<br />
function [including receipt of accompanying manufacturer’s<br />
instruction pamphlet[s] for new equipment]. I agree to verify that the<br />
visual indicator settings to be recorded on this form for downhill ski<br />
equipment, and skiboards equipped with release bindings, agree with<br />
the number appearing in the visual indicator windows of the<br />
equipment to be listed on this form. I agree to read and execute the<br />
LIABILITY RELEASE AGREEMENT on the back of this form.<br />
Equipment User’s<br />
Signature:<br />
Parent/Guardian Signature<br />
(if not adult user):<br />
SKIS/SNOWBOARD/SKIBOARD<br />
Serial No:<br />
BOOTS<br />
Model:<br />
BINDINGS<br />
Brand:<br />
POLES<br />
Brand:<br />
Other:<br />
Work Requested<br />
Technician’s Signature:<br />
M.I.<br />
Date:<br />
Your<br />
Height ft. in. Age<br />
Model<br />
Sole Length (cm):<br />
Model:<br />
Length:<br />
Binding-to-Boot Adjustment<br />
Test for Elastic Travel & Return<br />
Test of Boot-Binding Compatibility<br />
Release Value Within Specified Range<br />
8410009333 ©2005, Moore Wallace All rights reserved. - 0207<br />
<strong>Salomon</strong> Workshop form*<br />
EQUIPMENT TOTAL<br />
FWD PRESSURE<br />
Equipment<br />
DIN SETTING<br />
TOE HEIGHT<br />
SCREW TENSION<br />
WAXED / EDGED<br />
TECH INITIAL:<br />
Labor<br />
Sub-Total<br />
Tax<br />
TOTAL $<br />
RELEASE BINDING SYSTEM INSPECTION Skier’s Code<br />
PASS FAIL N/A<br />
( )<br />
( )<br />
( )<br />
( )<br />
Due to system components that are out of standard or otherwise unsuitable,<br />
the work cannot be performed. (See COMMENTS below)<br />
Visual Indicator Settings Requested Settings<br />
L Toe<br />
R Toe L Toe<br />
R Toe<br />
L Heel<br />
Comments:<br />
R Heel L Heel<br />
R Heel<br />
Name<br />
retaIl systems > record keePIng > 21<br />
$<br />
$<br />
( )<br />
( )<br />
( )<br />
( )<br />
( )<br />
( )<br />
( )<br />
( )<br />
.<br />
.<br />
.<br />
LIABILITY RELEASE AGREEMENT<br />
I understand that the binding system cannot guarantee the user’s<br />
safety. In downhill skiing, and skiboarding with skiboards equipped<br />
with release bindings, this binding system will not release at all<br />
times or under all circumstances where release may prevent injury<br />
or death, nor is it possible to predict every situation in which it<br />
will release. In snowboarding, cross-country skiing, skiboarding<br />
with skiboards equipped with non-release bindings, snowshoeing<br />
and other sports utilizing equipment with non-release bindings, the<br />
binding system will not ordinarily release during use; these bindings<br />
are not designed to release as a result of forces generated during<br />
ordinary operation.<br />
I understand that the sports of skiing, snowboarding, skiboarding,<br />
snowshoeing and other sports (collectively "RECREATIONAL SNOW<br />
SPORTS") involve inherent and other risks of INJURY and DEATH.<br />
I voluntarily agree to expressly assume all risks of injury or death<br />
that may result from these RECREATIONAL SNOW SPORTS, or<br />
which relate in any way to the use of this equipment.<br />
I understand that a helmet designed for RECREATIONAL SNOW<br />
SPORTS use will help reduce the risk of some types of injuries to<br />
the user at slower speeds. I recognize that serious injury or death<br />
can result from both low and high energy impacts, even when a<br />
helmet is worn.<br />
I AGREE TO RELEASE AND HOLD HARMLESS the facility servicing<br />
this equipment, its employees, owners, affiliates, agents, officers,<br />
directors, and the equipment manufacturers and distributors and<br />
their successors in interest (collectively "PROVIDERS"), from all<br />
liability for injury, death, property loss and damage which results<br />
from the equipment user’s participation in the RECREATIONAL<br />
SNOW SPORTS for which the equipment is provided, or which is<br />
related in any way to the use of this equipment, including all<br />
liability which results from the NEGLIGENCE of PROVIDERS, or<br />
any other person or cause.<br />
I further agree to defend and indemnify PROVIDERS for any loss<br />
or damage, including any that results from claims or lawsuits for<br />
personal injury, death, and property loss and damage related in<br />
any way to the use of this equipment.<br />
This agreement is governed by the applicable law of this state or<br />
province. If any provision of this agreement is determined to be<br />
unenforceable, all other provisions shall be given full force and<br />
effect.<br />
I, THE UNDERSIGNED, HAVE READ AND UNDERSTAND THIS<br />
LIABILITY RELEASE AGREEMENT.<br />
User’s Signature:<br />
Date:<br />
Parent/Guardian/Agent: I verify that I am the parent, guardian or<br />
agent of the equipment user; I have the authority to enter into this<br />
agreement on behalf of the equipment user; and I agree to be<br />
bound by the terms and conditions of this agreement.<br />
Parent/Guardian/<br />
Agent’s Signature:<br />
Date:<br />
note<br />
*U.S. form shown.<br />
reference<br />
page # Section Name<br />
20 Skier Instruction &<br />
Warning<br />
partS (see page 70)<br />
reference # Item Name<br />
B1WSfM (U.S. only)<br />
Workshop Form<br />
B10008 (Can. Bilingual)<br />
Workshop Form<br />
Step 7
Step 1<br />
Binding<br />
rental &<br />
deMo Binding<br />
SySteMS<br />
Proper procedures for a <strong>Salomon</strong> Certified<br />
Carlson.<br />
Technician to follow while mounting and<br />
Sammy Skier:<br />
adjusting <strong>Salomon</strong> Rental<br />
Carr. Dan<br />
and Demo bindings. Photo:<br />
preparation<br />
For general Preparation Instructions, please refer to page 7.<br />
All rental skis must have an Identification Number and a method to record maintenance and testing information<br />
(e.g., <strong>Salomon</strong> sample Ski/Binding Maintenance record and Boot Maintenance record).<br />
Boot-to-Binding compatibility<br />
Bindings are designed to be used with specific norm boot soles, i.e., junior<br />
norm boot soles with junior bindings and adult norm boot soles with<br />
adult bindings. Under no circumstances should a junior boot be used with<br />
Jig Selection<br />
Two jigs are needed to mount<br />
current model <strong>Salomon</strong> rental<br />
bindings. The jigs can be used for<br />
both Synchro and non Synchro<br />
Systems. Please refer to the<br />
rental Jig Selection chart (right)<br />
for the reference numbers.<br />
See page 24 for Synchro preset<br />
requirements. Contact your<br />
partS (see page 70)<br />
reference # Item Name<br />
001156 Adult Retail Jig<br />
001003 Rental Jig<br />
001040 Rental Jig Wide Skis<br />
78313301 Extralight Jig<br />
customer service representative<br />
for additional jigs to mount older<br />
models of <strong>Salomon</strong> rental bindings.<br />
See Jig Selection & use on<br />
page 8 for more information.<br />
reference<br />
page # Section Name<br />
7 Boot-to-Binding<br />
Compatibility<br />
8 Jig Selection & Use<br />
9 Drilling, Tapping & Glue<br />
25 Rental Visual &<br />
Mechanical Inspections<br />
28 Maintenance Records<br />
an adult binding. The C305 and S305 are designed for use with junior<br />
norm boot soles and smaller adult norm boot soles.<br />
rental Jig Selection chart<br />
Models Din Scale<br />
Z12 SC 4 to 12<br />
Ski width<br />
56 - 99 mm<br />
Jig Ref. # 001003<br />
Jig Ref. #<br />
Wide skis<br />
80 - 123 mm<br />
Jig Ref. # 001040<br />
Boot Sole<br />
Range<br />
(mm)<br />
22<br />
Synchro<br />
Pre-Sets<br />
Required<br />
(Toe height<br />
& Toe wings)<br />
260 - 382 •<br />
710 SC 3 to 10 260 - 382<br />
609 SC 2.5 to 9 260 - 382<br />
609 SR 2.5 to 9 230 - 308<br />
608 SC 2 to 7.5 260 - 382<br />
711 SC 3.5 to 11 260 - 382<br />
L 8 SC 2.5 to 8 260 - 382<br />
L 7 SC 2 to 7.5 260 - 382<br />
607 SR 2 to 7 230 - 308<br />
L 7 SR 2 to 7.5 230 - 308<br />
305 SC 0.75 to 4.5 216 - 304<br />
305 SR 0.75 to 4.5 190 - 246<br />
TZ 5 SR 0.5 to 4.5 190 - 246<br />
TZ 5 SC 0.5 to 4.5 216 - 304<br />
TZ 5 Juniortrak 0.5 to 4.5 24729001 200 - 308
Binding<br />
inStallation<br />
There are two basic types of<br />
Synchro System bindings: SC and<br />
SR. While both have a moveable<br />
heel piece, only the SC (Synchro<br />
Center) models have a moveable<br />
toe, allowing both the toe and heel<br />
piece to be adjusted to “center”<br />
the boot.<br />
To set up the Synchro Systems,<br />
you will need: <strong>Salomon</strong> rental bindings<br />
with Synchro Heel Guides and<br />
the parts listed below<br />
partS (see page 70)<br />
reference # Item Name<br />
001156 Adult Retail Jig<br />
001003 Rental Jig<br />
001191 Wide Sizes Rental Sticker<br />
001189 <strong>Salomon</strong> Boot Sole<br />
Measuring Device<br />
000902 Rental Adjustment Tool<br />
legend<br />
<strong>Salomon</strong> Synchro System<br />
A S<br />
D<br />
Sr Models (non-moveable toe) are<br />
mounted using the Retail procedures.<br />
non-Synchro System Follow Synchro<br />
System procedures, omitting measurement<br />
of boots and affixing<br />
Synchro Stickers.<br />
Sc Models (moveable toe) are<br />
mounted using the procedures described<br />
below.<br />
first, set the jig to the proper position.<br />
It is imperative that the jig be<br />
set correctly and all bindings be<br />
mounted at the correct position. For<br />
consistent mounting, drill the jig and<br />
pin it in the correct position.<br />
Heel Track<br />
Adjustment<br />
Loop<br />
Adjustment<br />
Screw<br />
rental & demo > PreParatIon 23<br />
Visual Indicator<br />
Heel Lever<br />
Heel Cup<br />
Brake Pedal<br />
* Use <strong>Salomon</strong> grease (Ref. #000905) on track.<br />
F<br />
next, place the jig properly on the<br />
ski, drill the ski and remove any<br />
shavings. Place a drop of glue onto<br />
the drilled holes. On SC (move able<br />
toe) model bindings, mount the toe<br />
plate securely with the four screws<br />
provided fig. A. Move the adjustment<br />
lever on the front of the toe to<br />
the left and con tinue to slide the toe<br />
onto the plate fig. S.<br />
Slide the central plate onto the toe<br />
piece, fig. D then position the heel<br />
over the central plate and holes,<br />
fig. F and tighten using a crisscross<br />
pattern.<br />
S912 Light<br />
Adjustment<br />
Range<br />
Indicators<br />
Spheric Pedal/<br />
AFD<br />
C608 SR<br />
Toe Cup<br />
Toe Height<br />
Adjustment<br />
Screw<br />
Visual Indicator<br />
G H<br />
Adjustment<br />
Screw<br />
Toe Length<br />
Adjustment<br />
Screw<br />
color-coded adjustment range indicators<br />
Brake Arm<br />
Heel Housing<br />
Baseplate<br />
Lubrication<br />
Point*<br />
2004/2005 and later Synchro center Systems use color-coded adjustment<br />
range indicators.<br />
Simply read the boot sole length in mm’s (stamped on the side of the boot<br />
sole) and move the toe to the corresponding mm length range position<br />
fig. G. Each range is individually color coded.<br />
Then move the heel to the correct color coded mm length mark shown on the<br />
heel track cover fig. H.<br />
Color coding makes it easier to read. For example: when the toe is positioned<br />
in the yellow (296 – 307 mm) range, look for the matching yellow rectangles<br />
(296 mm, 304 mm, 307 mm) on the heel track cover.<br />
Lines on the<br />
heel track<br />
300 to 303 mm Heel piece position for a boot<br />
sole length of 302 mm<br />
(white triangle on the heel housing)<br />
Toe piece position for a boot<br />
sole length of 302 mm<br />
Step 2
Step 3<br />
Binding<br />
Binding-to-Boot adJuStMentS<br />
adjusting<br />
toe position<br />
A<br />
Synchro center Models. Move<br />
the button on the front of the toe<br />
to the left, and slide the toe to the<br />
Synchro position indicated. Ensure<br />
S D<br />
rental & demo > InstallatIon > 24<br />
the toe locks firmly in place. For<br />
S850 and other non-current SC<br />
models, push the toe back, depress<br />
the button on the left side<br />
of the toe, and slide the toe into<br />
position. fig. A The toe locks into<br />
place automatically. The adjustment<br />
is correct when the mid-sole<br />
mark on the ski is aligned with the<br />
mid-sole mark on the boot.<br />
toe height<br />
heel position / forward pressure toe cup Width<br />
finger adjustment Models.<br />
Lift the adjustment loop at the<br />
back of the heel and slide the<br />
heel forward to the Synchro position<br />
indicated or until the binding<br />
heel cup contacts the boot heel.<br />
fig. S Release the loop, push the<br />
Junior tZ 5 Sc installation<br />
reference<br />
page # Section Name<br />
15 Release Value Selection &<br />
Adjustment<br />
25 Pre-Season Inspections<br />
A S D<br />
F<br />
G H<br />
The TZ 5 SC comes with an interface<br />
plate which must first be installed<br />
on the ski before sliding the toe and<br />
heel pieces onto its tracks. Mounting<br />
the TZ 5 SC interface plate requires<br />
a new jig (ref. #24729001) though<br />
the procedure should otherwise be<br />
familiar.<br />
boot down and check the forward<br />
pressure indicator. The silver tab<br />
should be visible in the housing<br />
window. fig. D (It is not necessary<br />
to put the boot in the binding<br />
for Synchro applications.)<br />
center the jig on the ski and drill<br />
as usual (refer to Jig Use as well as<br />
Drilling Tapping & Glue on pages<br />
8 and 9).<br />
Mount the TZ 5 SC interface on the<br />
ski using the screws provided.<br />
check the manual lock of the toe<br />
piece is totally opened (fig. A)<br />
automatic Models.<br />
Sport/Quadrax toes have automatic<br />
toe height adjustment.<br />
Micrometric Models.<br />
Raise the toe by turning the adjustment<br />
screw, located on top of<br />
the toe piece counterclockwise.<br />
Pull the boot back and continue to<br />
automatic Wing adjustment<br />
Models. Same as retail counterparts<br />
(see page 14).<br />
independent Wing adjustment<br />
Models. Same as retail counterparts<br />
(see page 14) or preset for<br />
Synchro systems using a preset<br />
toe width.*<br />
and remove the brake lock from<br />
the brake.<br />
Slide the toe piece onto the front<br />
of the interface until it corresponds<br />
with or is just above your boot sole<br />
length (fig. S). Make sure the toe<br />
unit clicks into place.<br />
close the manual lock (fig. D).<br />
turn the adjustment screw counterclockwise<br />
until you see light<br />
between the boot sole and the<br />
binding AFD. Turn the screw clockwise<br />
until the gap is no more than<br />
0.5 mm or preset for Synchro systems<br />
using a preset toe height.*<br />
Simultaneous Wing adjustment<br />
Models. Same as retail counterparts<br />
(see page 14) or preset for<br />
Synchro systems using a preset<br />
toe width.*<br />
note<br />
* Synchro presets.<br />
Micrometric toe heights, independent<br />
and simultaneous wing<br />
adjustments can be preset using<br />
a Standard norm Boot Sole (page<br />
47) for Synchro applications. A<br />
dab of silicone caulk can then be<br />
put into the slot of the adjustment<br />
screws to prevent tampering.<br />
Slide the heel piece onto the back of<br />
the heel track while holding up the<br />
manual lock (fig. F) until it corresponds<br />
with or is just above your<br />
boot sole length (fig. G). Make<br />
sure the heel unit clicks into place.<br />
caution: check again that the manual<br />
lock of the toe piece is closed<br />
(fig. H).
Binding<br />
rental & demo > adjustments > 25<br />
releaSe Value Selection & adJuStMent<br />
2010/2011 <strong>Salomon</strong> adjustment chart<br />
All current <strong>Salomon</strong> rental bindings must be adjusted according to the 2010/2011 <strong>Salomon</strong> adjustment chart. This is the only<br />
release adjustment chart authorized for <strong>Salomon</strong> bindings during the 2010/2011 season. For a detailed description of the charts<br />
and procedures recommended by <strong>Salomon</strong>, please refer to pages 15 & 16 of this Manual.<br />
rental ViSual & Mechanical inSpection<br />
The mechanical inspections discussed in this section are required of U.S. dealers and are strongly recommended for Canadian dealers, both<br />
in the interest of consumer protection and as a sound risk-management strategy. Maintenance records must be kept for all bindings and<br />
boots in inventory for both pre-season and in-season inspections. Only Pass/Fail results should be recorded. If bindings are switched from<br />
one pair of skis to another, this should be noted on the records. To receive indemnification from <strong>Salomon</strong>, maintenance records must be kept<br />
on file for five years or the statute of limitations in your state or province, whichever is longer.<br />
rental inspection Summary<br />
Since it is impractical to perform a<br />
full inspection each time a system<br />
is rented, a routine of preseason<br />
and inseason inspections has been<br />
pre-Season inspection<br />
Preseason inspections are performed<br />
on components of the<br />
release system: bindings and boots.<br />
All rental bindings, new and used,<br />
are visually inspected, and then<br />
tested using specially selected<br />
Reference Boots. Bindings that fail<br />
go through a troubleshooting proce-<br />
inseason inspection<br />
Inseason inspections are performed<br />
on complete rental systems to ensure<br />
that the equipment is adjusted appropriately<br />
and continues to function correctly.<br />
Typically 5% of the rental inventory<br />
is tested during each two weeks<br />
sampling period. The random sample<br />
is equally divided between equipment<br />
important terms<br />
correction factor: The value that<br />
must be added or subtracted from the<br />
initial visual indicator setting to bring<br />
the test result within the Inspection<br />
Tolerance (or Inspection Range).<br />
developed to verify release indicator<br />
accuracy, confirm correct<br />
equipment function, and assure<br />
proper assembly and adjustment<br />
dure to identify and correct the deviation<br />
or malfunction. If this procedure<br />
does not correct the problem,<br />
the binding is removed from inventory.<br />
All rental boots, new and used,<br />
are visually inspected for damage,<br />
wear, contamination, broken or<br />
missing parts, or inferior materials<br />
that is available for rental and equipment<br />
that has just been rented. The<br />
equipment in the “as rented” category<br />
is from real skiers in the condition in<br />
which it is either dispatched or returned,<br />
while the “available for rental”<br />
equipment may be set up for fictitious<br />
skiers. Only single skis, not pairs, are<br />
directions of release: Unless<br />
otherwise specified (see Inseason<br />
Inspection), the directions of release<br />
to be tested are forward lean and<br />
clockwise and counter clockwise<br />
in twist.<br />
procedures by the rental shop<br />
staff. Fully implemented, the procedures<br />
that follow provide rental<br />
shop customers a standard of care<br />
at contact points with the binding.<br />
In addition, one boot per “cell” is<br />
tested for boots that are new to the<br />
rental inventory. A cell is all boots<br />
of the same make, model, age, and<br />
shell size. A random selection of<br />
5% of all boots, previously accepted<br />
into inventory, is also tested. Tests<br />
tested, and testing at the toe is only<br />
required in one direction. A count is<br />
maintained of test results that exceed<br />
allowable limits. The magnitude and<br />
frequency of these deviations determines<br />
the frequency of future inspections.<br />
Shops that fail an inspection<br />
must sample daily until the source of<br />
test device: A device that meets ISO<br />
standard 11110 [or ASTM standard<br />
F1061] and has been checked and<br />
maintained in the manner specified by<br />
the device manufacturer.<br />
equivalent to that provided retail<br />
shop customers under current ISO<br />
[and ASTM] standards.<br />
are performed with a test device and<br />
a pair of specially selected reference<br />
bindings. If a boot fails, all boots<br />
from that cell are then tested. Boots<br />
that fail and cannot be repaired are<br />
removed from inventory.<br />
the problem is found and corrected.<br />
Then, as inspection results improve,<br />
the frequency of sampling and inspection<br />
is relaxed.<br />
test result or release torque: The<br />
middle quantitative value of three<br />
tests made in the same direction.<br />
Step 4<br />
Step 5<br />
Step 6
Step 6 Step 5<br />
Binding<br />
rental & demo > InsPectIon > 26<br />
rental ViSual & Mechanical inSpection > (continued)<br />
inspection procedures<br />
preseason inspection<br />
reference Boot Selection<br />
The Reference Boot is a boot of a<br />
designated sole length that is otherwise<br />
typical of the boot inventory.<br />
Use the procedure below if the boot<br />
inventory includes several models<br />
and a representative boot cannot be<br />
easily identified.<br />
1. Select five single boots with sole<br />
lengths as specified in table a<br />
for the binding type to be tested:<br />
adult, junior, or child.<br />
2. Clean all five boots with a mild<br />
detergent and water.<br />
3. Adjust a rental binding to the release<br />
indicator setting specified<br />
in table a for the binding type.<br />
4. Fit the binding to the boots and<br />
determine the Release Torque<br />
in all three directions of release<br />
(forward lean and both directions<br />
in twist).<br />
5. Average the Release Torque for<br />
CW and CCW twist release.<br />
6. Reject and replace any boot with<br />
a CW to CCW difference of more<br />
than 6 Nm for adult boots or<br />
4 Nm when testing child boot<br />
types.<br />
7. Rank the five twist results and<br />
select as the Reference Boot for<br />
twist, the middle boot.<br />
8. Rank the five forward lean results<br />
and select as the Reference<br />
Boot for forward lean, the middle<br />
boot.<br />
preseason Binding inspection<br />
The procedure that follows is an<br />
integral part of preseason maintenance.<br />
It is also a good way to determine<br />
if maintenance is adequate<br />
and which units have outlived their<br />
usefulness and must be removed<br />
from inventory.<br />
1. Clean areas of the bindings that<br />
contact the boot and perform<br />
all preseason binding maintenance.<br />
reference<br />
page # Section Name<br />
17 Final Checking<br />
17 Test for Elastic Travel &<br />
Return<br />
18 Release Value Within<br />
Specified Range<br />
19 Troubleshooting<br />
47 Standard Boot Sole<br />
Dimensions<br />
2. Visually or manually check:<br />
• AFD condition.<br />
• Brakes function.<br />
• Release indicator readability<br />
and travel.<br />
• Screw tightness.<br />
• [other product specific inspections<br />
if required]<br />
3. Fit each binding to the<br />
Reference Boot and adjust the<br />
release indicators to the value<br />
in table a.<br />
4. Check that the heel track and<br />
toe track code (if any) agree<br />
with the sole length code (if<br />
any) of the Reference Boot.<br />
5. With the Reference Boot in the<br />
binding, verify elastic travel of<br />
the toe piece by striking the<br />
boot toe with a mallet or dead<br />
hammer and checking that<br />
the toe piece returns the boot<br />
quickly and completely to center.<br />
6. Verify elastic travel of the heel<br />
piece by lifting the boot while<br />
depressing the heel piece cocking<br />
lever and checking that<br />
the heel piece returns the boot<br />
quickly and completely to the<br />
latched position. [other product<br />
specific procedures if required]<br />
7. Manually release the binding 3<br />
times in each direction.<br />
8. Lubricate all boot/binding interfaces<br />
with a mild liquid detergent<br />
and water solution.<br />
9. With the Ski Binding Test<br />
Device determine the Release<br />
Torque for each direction of<br />
release (forward lean and both<br />
directions in twist).<br />
10. Record “PASS” in the binding’s<br />
maintenance record if<br />
Test Results are within the<br />
Inspection Ranges provided in<br />
table a.<br />
11. Set the ski aside if the Test<br />
Result in any directions of release<br />
is outside the Inspection<br />
Range in table a.<br />
12. Follow Troubleshooting<br />
Procedure from the binding<br />
manufacturer’s tech manual for<br />
units that have been set aside<br />
and retest if changes in the<br />
unit’s condition or adjustment<br />
are made.<br />
13. Record “FAIL” in the binding’s<br />
maintenance record if, after<br />
troubleshooting, test results in<br />
any direction of release are outside<br />
the In-Use Range. Replace<br />
the “failed” unit and retest before<br />
returning the ski to service.<br />
14. If after troubleshooting,<br />
Test Results are outside the<br />
Inspection Range but within<br />
the In-Use Range, apply a<br />
Correction Factor to the unit<br />
and note the Correction Factor<br />
for that unit in the binding’s<br />
maintenance record.<br />
15. If many bindings fail, check the<br />
test device and re-inspect the<br />
Reference Boot. If necessary,<br />
select another boot and retest<br />
the bindings.<br />
preseason Boot preparation<br />
The procedure that follows is an<br />
integral part of preseason maintenance.<br />
1. Clean all boots with [a mild<br />
detergent and water], and repair<br />
or replace damaged or missing<br />
parts.<br />
2. Visually check:<br />
• Conformance with ISO and<br />
other applicable standards. If<br />
the boot contacts the binding,<br />
brake, or AFD in areas other<br />
than the designated contact<br />
points, it may be incompatible<br />
with the binding. [product<br />
specific figure or description]<br />
table a : preseason Binding inspection*<br />
Skier<br />
Code<br />
Binding<br />
Type<br />
Sole<br />
Length<br />
(mm)<br />
Release<br />
Indicator<br />
Setting<br />
Reference Torque<br />
(Nm)<br />
Inspection Range<br />
(Nm)<br />
• Boot material. If the sole<br />
at the contact points with<br />
the binding or AFD can be<br />
scratched with a finger nail,<br />
the boot may be of inferior<br />
quality and incompatible with<br />
the binding.<br />
• Boot sole condition. If the<br />
boot sole is damaged, worn,<br />
or contaminated at contact<br />
points with the binding or AFD<br />
in a manner which can not be<br />
corrected, the boot may be<br />
incompatible with the binding.<br />
• Brake compatibility with sole.<br />
• Rubber and/or metal sole<br />
protectors. If such materials<br />
contact the binding or AFD<br />
the boot may be incompatible<br />
with the binding.<br />
• Mold flashings. Flashing<br />
which can be seen or felt at<br />
contact points with the binding,<br />
brake, or AFD must be<br />
carefully removed.<br />
3. Remove from inventory all<br />
boots that have failed the visual<br />
check.<br />
preseason Boot Sampling<br />
Although sampling eliminates the<br />
need to test every boot before the<br />
season starts, the sample chosen<br />
must be representative of the<br />
inventory.<br />
1. For boots that are new to inventory<br />
or have never been inspected,<br />
take a single boot from<br />
each cell (a cell is all boots of<br />
the same make, model, year,<br />
and shell size).<br />
2. For used boots, take a 5% (but<br />
not less than 16 or more than<br />
80) random sample of the entire<br />
inventory. Make sure that<br />
there is at least one boot from<br />
each cell in the sample.<br />
In-Use Range<br />
(Nm)<br />
Twist Forward Lean Twist Forward Lean Twist Forward Lean<br />
F Children 270 2.5 23 87 20-27 75-102 17-31 64-120<br />
J Junior 306 4.5 43 141 37-50 141-194 31-58 120-229<br />
L Adult 327 6.0 58 229 50-67 194-271 43-78 165-320<br />
* This is an example only. Check the manufacturer’s tech manual before proceeding
Binding<br />
rental & demo > InsPectIon > 27<br />
rental ViSual & Mechanical inSpection > (continued)<br />
inspection procedures (continued)<br />
preseason Boot inspection<br />
The procedure that follows helps to<br />
assure both boot/binding compatibility<br />
and boot interchange ability.<br />
Note: when using table a, in the<br />
Boot Inspection procedures that<br />
follow, the Sole Length and Release<br />
Indicator Setting columns should<br />
be ignored.<br />
1. Randomly select a pair of<br />
bindings that have passed the<br />
preseason inspection from each<br />
binding type; adult, junior, child.<br />
2. Lubricate all boot/binding contact<br />
points with a mild liquid<br />
detergent.<br />
3. Without regard to whether the<br />
boot is new or used, sort the<br />
sample by sole type and length<br />
inseason Sampling and inspection<br />
The Inseason Inspection is a test of<br />
complete systems and all the procedures<br />
used by the rental staff to<br />
assemble and adjust the system.<br />
The program uses random samples<br />
of rental inventory taken at routine<br />
intervals. Any sampling program<br />
that gives every unit of inventory<br />
the same chance as every other of<br />
being picked is valid.<br />
Sample frequency<br />
Random sampling is conducted<br />
throughout the entire season.<br />
Frequency is as follows:<br />
1. After 7 days of operation.<br />
2. If the sample passes, the next<br />
sampling is taken after another 7<br />
days of operation.<br />
3. If two consecutive samples pass,<br />
sampling frequency is increased<br />
to 14 days.<br />
4. If a sample fails at any time,<br />
daily sampling is instituted until<br />
two consecutive samples pass,<br />
at which point weekly sampling<br />
resumes.<br />
according to the 20mm Sole<br />
Length Categories defined by<br />
the binding manufacturer’s<br />
Release Value Selection.<br />
4. In each Sole Length Category<br />
rank the boots by sole length<br />
and select the middle boot.<br />
5. In each Sole Length Category fit<br />
the appropriate reference bindings<br />
to this “typical” boot and<br />
adjust the two bindings to release<br />
as close as practical to the<br />
Reference Torque in table a.<br />
Use the Reference Torque corresponding<br />
to Skier Code [L]<br />
for the Adult binding, [J] for the<br />
Junior binding, and [J] for the<br />
Child binding.<br />
Sample Size<br />
Sample size is 5% of inventory but<br />
not less than 16 nor more than 80<br />
units as noted in table B. Sample<br />
size is based on average daily output.<br />
If rental output drops below<br />
50% of capacity over the sampling<br />
period, the sample size can be reduced<br />
proportionately.<br />
inseason inspection<br />
1. Take a random sample of the<br />
rental inventory as determined<br />
by table B. Take half the sample<br />
from inventory as it is either<br />
rented or returned and the remainder<br />
from inventory available<br />
for rental.<br />
2. Wipe the boot clean and cycle<br />
the boot/binding systems at<br />
least once in each direction.<br />
3. Test sample units in Twist (one<br />
direction only) and Forward Lean.<br />
4. Compare the Test Results with<br />
the Inspection Range for the appropriate<br />
Skier Code.<br />
5. If the results are within the<br />
Inspection Range, the unit passes.<br />
demo inspections > incomplete Systems<br />
Skis<br />
Bindings intended for demo applications,<br />
where customers supply<br />
their own boots, must be inspected<br />
using the procedures described<br />
for rental equipment. Whenever a<br />
demo or rental binding is used with<br />
a customer’s own boot, inspect the<br />
customer’s boot for Boot/Binding<br />
compatibility as described on<br />
page 17. Reject any boots that fail<br />
visual inspection. Both boots of<br />
the pair must be inspected and the<br />
boot sole lengths of both boots<br />
verified.<br />
6. Rinse the lubricant from one<br />
binding and mark it “clean.”<br />
Mark the other “lubricated.”<br />
7. Test each boot in the Sole<br />
Length Category with the clean<br />
Reference Binding and then the<br />
lubricated Reference Binding<br />
in both twist and forward lean<br />
(only one direction in twist is<br />
required for the clean binding).<br />
8. Set aside any boots for which<br />
the lubricated Test Result is<br />
more than 20% less than the<br />
clean Test Result in the same<br />
direction of release or the lubricated<br />
Test Result, in any direction<br />
of release, is outside of the<br />
Inspection Range provided in<br />
table a for the Skier Code used<br />
6. If the results are outside<br />
Inspection Range but within the<br />
In-Use Range, count the unit as<br />
a Class I Deviation.<br />
7. If the results are outside the In-<br />
Use Range, count the unit as a<br />
Class II Deviation.<br />
8. Check elastic travel and visually<br />
inspect the ski brake function,<br />
interface areas between boot<br />
and binding, including AFD, lug<br />
height adjustment (if appropriate),<br />
and forward pressure.<br />
Count any deficiencies as Class<br />
I Deviations.<br />
9. If more than the maximum<br />
number of Class I Deviations<br />
given in table B are found in<br />
the sample, or a single Class II<br />
Deviation is detected the sample<br />
fails and daily sampling must<br />
be conducted until the problem<br />
that led to the failed sample<br />
is found and corrected. See<br />
the “Troubleshooting” chapter<br />
of the binding manufacturer’s<br />
Boots<br />
Whenever customers rent boots<br />
for use with their own skis, the<br />
customer’s binding system must<br />
be mechanically inspected (using<br />
the rental boot) according to<br />
procedures described for retail<br />
equipment.<br />
to set up the Reference Binding<br />
(L, J, or F).<br />
9. Repeat the Visual Check on all<br />
boots that have been set aside,<br />
correct any defects noted, and<br />
retest. Remove from inventory<br />
boots that fail the retest.<br />
10. Check all other boots from the<br />
same cell (make, model, year,<br />
and shell size) as those that<br />
failed.<br />
note: On completion of the preseason<br />
inspection, clean the liquid<br />
detergent from the equipment (and<br />
lubricate the binding before returning<br />
it to service).<br />
technical manual following a<br />
failed Inseason Inspection.<br />
10. Record the date the sample<br />
was tested, the number of units<br />
tested, the number of Class I<br />
and Class II (or III) Deviations,<br />
whether the sample passed or<br />
failed and any actions taken.<br />
There is no need to record the<br />
identity of units tested or actual<br />
Test Results.<br />
table B : Sample Size<br />
Inventory<br />
Size<br />
(Pairs)<br />
reference<br />
Sample<br />
Size<br />
(Units)<br />
Maximum<br />
Class I<br />
Deviations<br />
100 16 3<br />
200 20 4<br />
300 30 6<br />
400 40 8<br />
500 50 10<br />
600 60 12<br />
700 70 14<br />
800 80 16<br />
900 80 16<br />
page # Section Name<br />
17 Final Checking<br />
17 Test for Elastic Travel &<br />
Return<br />
18 Release Value Within<br />
Specified Range<br />
19 Troubleshooting<br />
Step 5 Step 6
Step 6 Step 5<br />
Binding<br />
rental ViSual & Mechanical inSpection > (continued)<br />
Maintenance records<br />
SKi/Binding Maintenance record<br />
rental & demo > InsPectIon > 28<br />
invenory #: Ski Serial #: Binding Model:<br />
Date of Service/Inspection<br />
Boot Maintenance record<br />
Repairs/Service<br />
Performed Visual<br />
Inspection<br />
Correction Factors Left Ski Right Ski<br />
Left Right Twist<br />
Toe Heel Toe Heel<br />
invenory #: Boot Model: Sole length:<br />
Date of<br />
Service/Inspection<br />
Norm Compatible<br />
Interchangeable<br />
All Adjustments/Parts<br />
Functionsl<br />
Repairs/Service<br />
Performed<br />
Forward<br />
Lean<br />
Twist<br />
Clean Test Lubricated Test<br />
Twist<br />
Forward<br />
Lean<br />
Twist<br />
Forward<br />
Lean<br />
Forward<br />
Lean<br />
Technician’s<br />
Initials<br />
Legend: Clockwise Counter-clockwise<br />
Technician’s<br />
Initials<br />
Legend: Clockwise Counter-clockwise
Binding<br />
SKier inStruction, Warning & record Keeping<br />
rental Skier instrucion & Warning<br />
rental & demo > record keePIng > 29<br />
It is the Dealer’s responsibility to adequately assist each rental customer in equipment selection and to properly<br />
fit rental boots. Instructions regarding proper use of equipment must also be given at the time rental<br />
equipment is provided.<br />
When the Certified Technician<br />
signs or initials the Rental Form,<br />
the technician is attesting that all<br />
functional and instructional procedures<br />
have been completed. To<br />
reduce your shop’s liability risk and<br />
to receive indemnification from<br />
<strong>Salomon</strong>, you must take the following<br />
steps when the skier receives<br />
their equipment. (The individual<br />
picking up the equipment<br />
must be the intended user, or in<br />
the case of a minor, the user’s parent<br />
or guardian.)<br />
rental record Keeping<br />
Proper rental record keeping is key to your shop’s risk management program. Without a properly filled out<br />
form, including a signed Liability Release Agreement, indemnification from <strong>Salomon</strong> will not apply.<br />
A Rental Form must be filled out<br />
for each rental transaction (exchange<br />
of equipment is considered<br />
to be a transaction). A Liability<br />
Release Agreement the same as<br />
or the equivalent to the <strong>Salomon</strong><br />
Liability Release Agreement must<br />
be included on the Rental Form.<br />
The skier must read, under stand,<br />
sign and date this release. A copy<br />
of the properly filled out Rental<br />
Form must be kept on file for five<br />
years or the statute of limitations<br />
of the state or province, whichever<br />
is longer. Multiple skier forms that<br />
allow each skier to read and sign<br />
the same form may be used if the<br />
form meets the requirements outlined<br />
in this section. It is recommended<br />
that the form be reviewed<br />
by <strong>Salomon</strong>’s Legal department<br />
prior to use. The person who signs<br />
the rental form must be the skier<br />
who is going to use the rental<br />
equipment. In the case of a minor<br />
skier, the signature on the form<br />
must be that of the skier’s parent<br />
or legal guardian.<br />
1. Show how to step into the binding.<br />
2. Show how to step out of the<br />
binding.<br />
3. Point out the visual indicator<br />
settings on the binding’s toe<br />
and heel pieces. The skier must<br />
verify that these settings agree<br />
with the settings recorded on<br />
the Rental Form.<br />
4. Ask the skier to read the<br />
Liability Release Agreement.<br />
Point out that the skier is signing<br />
a release that limits liabil-<br />
The following is a list of information<br />
that should be recorded for<br />
every rental transaction. It is not<br />
necessary to use a <strong>Salomon</strong> Rental<br />
Form, but any form that the shop<br />
uses must include the information*<br />
listed below. Without this<br />
information*, indemnification will<br />
not apply.<br />
1. *Rental dates.<br />
2. *Name and home address of<br />
the skier.<br />
3. Skier’s home phone number.<br />
4. Skier’s identification.<br />
5. *Skier’s height, weight, age,<br />
and skier type.<br />
6. *Boots' inventory number. (If<br />
the skier is using their own<br />
boots, the boot brand, model<br />
and sole length must be indicated<br />
on the Rental Form<br />
and the boot must pass visual<br />
examination.)<br />
7. *Skis' inventory number. (If<br />
the skier is using their own<br />
skis, the system would fall<br />
under Retail guidelines and a<br />
complete system inspection,<br />
ity. Included in this Liability<br />
Release Agreement is the<br />
specific warning that bindings<br />
will not release under all circumstances<br />
where release may<br />
prevent injury or death, nor is it<br />
possible to predict every situation<br />
in which they will release,<br />
and are, therefore, no guarantee<br />
of safety.<br />
5. The skier must understand that<br />
there are inherent and other<br />
risks in the sport of skiing.<br />
including a mechanical inspection,<br />
must be performed and<br />
documented on a Workshop<br />
Form.)<br />
8. *Visual Indicator Settings.<br />
9. *<strong>Salomon</strong> Certified<br />
Technician’s signature or initials<br />
attesting that all required<br />
procedures have been completed.<br />
10. Rental fee.<br />
11. *Liability Release Agreement<br />
that is either the same as, or<br />
the substantial equivalent of,<br />
the <strong>Salomon</strong> release. Consult<br />
your shop’s legal advisor to<br />
be sure the language and type<br />
size of this agreement conforms<br />
to state or provincial<br />
law. If a form other than the<br />
<strong>Salomon</strong> form is used, the<br />
language shall accomplish<br />
the same purpose and have<br />
the same legal effect as the<br />
language contained in the<br />
<strong>Salomon</strong> agreement.<br />
note<br />
* On the 2010/2011 <strong>Salomon</strong> Rental<br />
Form, the skier (or in the case of<br />
a minor, the skier’s parent or legal<br />
guardian) must sign and date the<br />
Liability Release Agreement.<br />
6. The skier* must then sign and<br />
date the Rental Form.<br />
7. The skier must be given a copy<br />
of the rental form that includes<br />
a signed copy of the Liability<br />
Release Agreement.<br />
12. *Skier’s signature (in the case<br />
of a minor skier, the signature<br />
on the form must be that<br />
of the skier’s parent or legal<br />
guardian) and date attesting<br />
that the skier:<br />
a. Has been instructed in the<br />
proper use of the equipment.<br />
b. Has verified that the visual<br />
indicator settings correspond<br />
to the recorded visual<br />
indicator settings.<br />
c. Has read and understands<br />
the Rental and Liability<br />
Release Agreement on the<br />
rental form, releasing the<br />
shop from liability.<br />
reference<br />
page # Section Name<br />
17 Final Checking & System<br />
Inspection<br />
30 <strong>Salomon</strong> Rental Form<br />
30 Equipment Rental<br />
& Liability Release<br />
Agreement<br />
31 Post Accident Ski<br />
Equipment Inspection<br />
Report<br />
Step 7
Step 7<br />
Binding<br />
SKier inStruction, Warning & record Keeping<br />
<strong>Salomon</strong> rental form*<br />
Name:<br />
Street<br />
City<br />
Phone #<br />
Driver’s Lic.#<br />
note<br />
* U.S. form shown. The Canadian<br />
equivalent to this form has bilingual<br />
content.<br />
reference<br />
page # Section Name<br />
rental & demo > record keePIng > 30<br />
PLEASE PRINT CLEARLY<br />
(shaded areas for shop use only)<br />
EQUIPMENT RENTAL & LIABILITY RELEASE AGREEMENT<br />
I accept for use AS IS the equipment listed on this form, and accept full financial responsibility for the care of the equipment<br />
while it is in my possession. I will be responsible for the replacement at full value of any equipment rented under this form,<br />
but not returned to the rental facility. I agree to return all rental equipment by the agreed date.<br />
I understand that the binding system cannot guarantee the user’s safety. In downhill skiing, and skiboarding with skiboards<br />
equipped with release bindings, the binding system will not release at all times or under all circumstances where release<br />
may prevent injury or death, nor is it possible to predict every situation in which it will release. In snowboarding,<br />
cross-country skiing, skiboarding with skiboards equipped with non-release bindings, snowshoeing and other sports utilizing<br />
equipment with non-release bindings, the binding system will not ordinarily release during use; these bindings are not<br />
designed to release as a result of forces generated during ordinary operation.<br />
I understand that the sports of skiing, snowboarding, skiboarding, snowshoeing and other sports (collectively "RECREATIONAL<br />
SNOW SPORTS") involve inherent and other risks of INJURY and DEATH. I voluntarily agree to expressly assume all risks of<br />
injury or death that may result from these RECREATIONAL SNOW SPORTS, or which relate in any way to the use of this<br />
equipment.<br />
I understand that a helmet designed for RECREATIONAL SNOW SPORTS use will help reduce the risk of some types of<br />
injuries to the user at slower speeds. I recognize that serious injury or death can result from both low and high energy<br />
impacts, even when a helmet is worn.<br />
I AGREE TO RELEASE AND HOLD HARMLESS the equipment rental facility, its employees, owners, affiliates, agents, officers,<br />
directors, and the equipment manufacturers and distributors and their successors in interest (collectively "PROVIDERS"), from<br />
all liability for injury, death, property loss and damage which results from the equipment user’s participation in the<br />
RECREATIONAL SNOW SPORTS for which the equipment is provided, or which is related in any way to the use of this<br />
equipment, including all liability which results from the NEGLIGENCE of PROVIDERS, or any other person or cause.<br />
I further agree to defend and indemnify PROVIDERS for any loss or damage, including any that results from claims or<br />
lawsuits for personal injury, death, and property loss and damage related in any way to the use of this equipment.<br />
This agreement is governed by the applicable law of this state or province. If any provision of this agreement is determined<br />
to be unenforceable, all other provisions shall be given full force and effect.<br />
I THE UNDERSIGNED, HAVE READ AND UNDERSTAND THIS EQUIPMENT RENTAL & LIABILITY RELEASE AGREEMENT.<br />
29 Rental Skier Instruction &<br />
Warning<br />
partS<br />
Date<br />
Out:<br />
Last First<br />
M.I.<br />
State Zip<br />
Your Weight Lbs. Your Height ft. in. Age<br />
Acknowledgement of Personal Information & Equipment Instructions<br />
I have accurately represented the above listed information and it is true and correct. I will not use any of the equipment to be provided to<br />
me during this transaction until I have received instruction on its use and function. I agree to verify that the visual indicator settings to be<br />
recorded on this form for downhill ski equipment, and skiboards equipped with release bindings, agree with the number appearing in the<br />
visual indicator windows of the equipment to be listed on this form.<br />
Boot I.D.#<br />
Sole Length & Synchro # (Downhill Skiing):<br />
Ski/Board I.D.#<br />
Pole Code:<br />
Visual Indicator Settings Requested Settings<br />
Equipment Subtotal:<br />
L Toe<br />
L Heel<br />
R Toe L Toe<br />
R Heel L Heel<br />
R Toe<br />
R Heel<br />
Equipment Damage Protection:<br />
Total:<br />
Technician’s Signature:<br />
reference # Item Name<br />
B1rSfM (U.S.) <strong>Salomon</strong> Rental Form<br />
B10019 (CAN) <strong>Salomon</strong> Rental Form<br />
Date<br />
Due:<br />
Snowboard<br />
Stance: (check one)<br />
Regular Goofy<br />
User’s Signature:<br />
Date:<br />
Parent/Guardian: If equipment user is a minor, I verify that I have the authority to enter into this agreement on behalf of the<br />
equipment user and I agree to be bound by all terms and conditions of this agreement.<br />
Parent/Guardian’s Signature:<br />
State<br />
Local Accommodations<br />
Equipment User’s Signature: Parent/Guardian Signature (if required):<br />
Total Rental Days:<br />
Downhill Skiing<br />
Indicate skier type<br />
Date:<br />
$<br />
$<br />
$<br />
T H
Binding<br />
post accident Ski equipment inspection report form<br />
rental & demo > record keePIng > 31<br />
SKier inStruction, Warning & record Keeping<br />
A Post Accident Ski Equipment Inspection Report Form the same as or equivalent to the form provided must be<br />
filled out if a person returns the equipment, whether the equipment is theirs or belongs to someone else, and<br />
claims that they or someone else were injured. The report must be completed with “as is” mechanical inspection<br />
measured release values. An insufficient or improperly completed form may cause denial of indemnification.<br />
inspection report instructions<br />
general information<br />
• All information should be printed<br />
clearly.<br />
• Any mistakes should be corrected<br />
and initialed.<br />
• If information is unknown, mark<br />
UNK in the appropriate area.<br />
• If information does not apply, mark<br />
N/A in the appropriate area.<br />
Skier information Section<br />
• Skier information should be taken<br />
from the rental or workshop form.<br />
• Accident/injury information should<br />
be taken from the ski patrol accident<br />
report (if available).<br />
equipment information Section<br />
• Information should be taken from<br />
the visual inspection of equipment.<br />
equipment inspection/tests<br />
Section<br />
• Refer to the most current Shop<br />
Practices Manual for Standard<br />
Boot Sole information.<br />
• Equipment inspections should be<br />
conducted on the equipment “as<br />
is”.<br />
• Inspection of binding adjustments<br />
should be in accordance<br />
with recommendations set forth in<br />
the most current Shop Practices<br />
Manual.<br />
• System visual inspections should<br />
be in accordance with recommendations<br />
set forth in the most current<br />
Shop Practices Manual.<br />
• Mechanical inspection tests should<br />
be conducted at room temperature.<br />
• The mechanical testing device<br />
should be properly calibrated and<br />
operated in the manner recommended<br />
by the device manufacturer.<br />
• Mechanical tests should be conducted<br />
on the equipment “as is”.<br />
• Test results should be recorded in<br />
Newton meters.<br />
facility/personnel/testing device<br />
Section<br />
• The “Inspection Technician” should<br />
be a current <strong>Salomon</strong><br />
Certified Technician.<br />
• The report should be reviewed by<br />
the shop manager.<br />
post accident Ski equipment<br />
inspection report<br />
Skier information<br />
NAME<br />
v accident date<br />
height v<br />
Weight<br />
vage v<br />
SeX (circle one) v<br />
SKier type (circle one)<br />
inJury<br />
M f 1 2 3 -1 3+<br />
right or left (circle one) v SKi area<br />
r l<br />
equipment information<br />
SKi MaKe<br />
Serial no.<br />
Boot MaKe<br />
Boot Sole length in mm<br />
Binding MaKe<br />
v Model<br />
v rental i.d. no. (if applicable)<br />
v Model<br />
v rental i.d. no. (if applicable)<br />
v Model<br />
toe ViSual indicator (din) Scale vheel ViSual indicator (din) Scale<br />
to<br />
rental forWard preSSure (Synchro) Setting(S):<br />
to<br />
equipment inspection/tests<br />
right Ski/Binding/Boot left Ski/Binding/Boot<br />
n/a yeS no (check one) n/a yeS no (check one)<br />
Boot sole within Industry Norm Standards Boot sole within Industry Norm Standards<br />
All boot parts present, working correctly All boot parts present, working correctly<br />
AFD OK and intact AFD OK and intact<br />
Forward Pressure correct Forward Pressure correct<br />
Toe Height correct Toe Height correct<br />
Toe Wings set correctly Toe Wings set correctly<br />
Brake fully functional Brake fully functional<br />
Ski damaged (bent etc.) Ski damaged (bent etc.)<br />
System passes visual inspections System passes visual inspections<br />
Rental heel forward pressure setting correct Rental heel forward pressure setting correct<br />
ViSual indicator SettingS ViSual indicator SettingS<br />
toe: heel: toe: heel:<br />
clocKWiSe tWiSt MeaSured releaSe ValueS* clocKWiSe tWiSt MeaSured releaSe ValueS*<br />
i ii iii i ii iii<br />
counterclocKWiSe tWiSt MeaSured releaSe ValueS* counterclocKWiSe tWiSt MeaSured releaSe ValueS*<br />
i ii iii i ii iii<br />
forWard lean MeaSured releaSe ValueS* forWard lean MeaSured releaSe ValueS*<br />
i ii iii i ii iii<br />
* record the number of results recommended by the manufacturer of the testing device. if not certain, record 3 values for each test.<br />
facility/personnel/testing device<br />
Workshop/rental form no.<br />
v length<br />
Shop naMe v inSpection technician v date<br />
report reVieWed By v date v teSting deVice Brand v Model<br />
v SiZe<br />
Step 7
Binding<br />
Binding Maintenance<br />
& repair<br />
All <strong>Salomon</strong> bindings have<br />
replaceable AFDs<br />
Maintenance & repair<br />
retail & rental guidelines<br />
retail guidelines<br />
rental guidelines<br />
maIntenance & rePaIr > 32<br />
Any incorrect use of a <strong>Salomon</strong> part or accessory or installation of a non-compatible brand accessory with a<br />
<strong>Salomon</strong> system will automatically void both the warranty and indemnification for that system.<br />
<strong>Salomon</strong> bindings require a minimum<br />
of maintenance to enhance<br />
performance and their useful life.<br />
They should be cleaned, inspected<br />
and lubricated prior to each season<br />
and every 30 skier days per season<br />
as follows:<br />
• Inspect all components for damage<br />
or excessive wear. Repair or<br />
Proper maintenance of rental systems<br />
includes a complete inspection of the<br />
entire rental inventory prior to the ski<br />
season. Bindings should be cleaned,<br />
inspected and lubricated in the following<br />
manner:<br />
• Inspect all components of each<br />
set for damage or excessive wear.<br />
Repair or replace damaged or excessively<br />
worn parts and/or components.<br />
• Remove the heel by sliding the housing<br />
off the rear of the heeltrack*.<br />
cants > acceptable use<br />
replace damaged or excessively<br />
worn parts and/or components.<br />
• Clean the exposed areas of the<br />
components with a cloth or rag.<br />
Wipe any dirt or grit from the<br />
binding housings, heel track and<br />
the region under the heel cup. Do<br />
not use solvents or high pressure<br />
• Clean the exposed areas of the components<br />
with a cloth or rag. Wipe<br />
any dirt or grit from the binding<br />
housings, heel track and the region<br />
under the heel cup. Do not use solvents<br />
or high pressure liquid cleaning<br />
systems to clean bindings.<br />
• Apply <strong>Salomon</strong> Grease (Ref.<br />
#000905) or the equivalent to the<br />
lubrication points indicated for each<br />
model. Do not use silicone or penetrating<br />
oils unless the lubricant is<br />
specifically approved.<br />
liquid cleaning systems to clean<br />
bindings.<br />
• Apply <strong>Salomon</strong> Grease (Ref.<br />
#000905) or the equivalent to the<br />
lubrica tion points indicated for<br />
the appropriate model. Do not use<br />
silicone or penetrating oils unless<br />
the lubricant is specifically approved.<br />
• Replace the heel on the track.<br />
• This should be followed by periodic<br />
in-season inspections and when a<br />
binding looks particularly dirty or if<br />
visual inspection reveals that something<br />
may be wrong. This helps<br />
to ensure that all components are<br />
functioning correctly.<br />
Never attempt to interchange any SR,<br />
SC or retail toe baseplates or heel<br />
tracks with other model baseplates or<br />
heel tracks.<br />
<strong>Salomon</strong> bindings should not be altered in any way except as explicitly outlined in this manual.<br />
the use of cants with <strong>Salomon</strong> bindings is acceptable, provided:<br />
• The cants are of a high grade material<br />
designed for this use.<br />
• The cants are installed in a professional<br />
manner.<br />
• Proper screw penetration into the<br />
ski meets current norms.<br />
• The cants do not impede the binding’s<br />
function as it was designed,<br />
including proper function of the<br />
brake.<br />
• Recommend to the skier that<br />
routine maintenance and inspections<br />
be performed by a <strong>Salomon</strong><br />
Authorized Dealer. This will help<br />
ensure that any problem that<br />
may develop with the system can<br />
be detected and corrected by a<br />
trained technician.<br />
rental post Season Storage<br />
To prepare rental equipment for summer<br />
storage:<br />
• All binding visual indicator adjustments<br />
should be reduced to the lowest<br />
setting. Do not attempt to adjust<br />
the release setting below the lowest<br />
setting as damage may result.<br />
• The binding heels should be stored<br />
in the closed position.<br />
• The equipment should be stored in<br />
a cool, dry and ventilated area away<br />
from direct sunlight.<br />
note<br />
* To remove heel pieces on tracks<br />
with heel locks, loosen the rear<br />
mounting screws at least three<br />
turns. Pull the heel piece back ward<br />
while lifting it up over the heel<br />
lock. To replace the heel pieces,<br />
follow the removal proce dure in reverse<br />
and tighten the rear mounting<br />
screws securely.<br />
Photo: Alexander Klun. Skier: Kaj Zackrisson.
Binding<br />
<strong>Salomon</strong> offers a Screw Extractor/<br />
Repair Kit (Ref. #000878) to remove/<br />
replace broken binding<br />
mounting screws. The kit comes<br />
with two different length bits and<br />
a quantity of repair plugs. fig. A<br />
Repair plugs may be ordered separately.<br />
maIntenance & rePaIr > guIdelInes > 33<br />
Maintenance & repair > (continued)<br />
Screw extractor/repair Kit<br />
A<br />
afd/Scp replacement<br />
Stripped Screw holes<br />
Follow instructions for the installation<br />
of repair plugs (below).<br />
Broken Screw or Broken tap<br />
removal<br />
When a screw or tap breaks in a<br />
ski, it must be removed to avoid<br />
further damage. It can be removed<br />
as follows:<br />
fit the extractor drill bit into the<br />
electric drill with the shoulder<br />
touching the chuck.<br />
position the appropriate jig onto<br />
the ski with the jig bushing directly<br />
over the broken screw or tap.<br />
drill slowly around the broken<br />
piece using an up-and-down move-<br />
tZ 5, tZ 5 Sc & lZ 7-8-9 anti friction plate replacement<br />
A S D F G<br />
1. Insert a 6-8 mm wide screwdriver<br />
at the front of the plate. fig. A<br />
2. Move over the screwdriver to<br />
eject the plate. fig. S<br />
3. Place the new plate and hand clip<br />
it. fig. D & F<br />
Junior performance afd upgrade<br />
tZ 5, tZ 5 Sc, tc45 bindings were<br />
developed to fit both adult and junior<br />
boot standards, and are delivered with<br />
other Models<br />
Scp reference numbers<br />
Scp ref. n° Binding / System<br />
78830001 914 FIS 20 / 914<br />
Z12 Ti, Z12, Z12 Ti SC,<br />
Z10 Ti Axe+, Z10 TI,<br />
78830101 Z10 FIS 20, Z10 Ti SC,<br />
Z10, 710 Ti, 710 SC,<br />
710, 710 ITF.<br />
78829401 Smartrak Prolink +914<br />
Smartrak Prolink &<br />
78829501 Smartrak Control+ Z14,<br />
Z12, Z10, 711<br />
Smartrak Prolink &<br />
78829601 Smartrak Control+ Z12<br />
Ti, Z10 Ti, 710 Ti<br />
a universal junior pedal which has<br />
been validated by dealers and the TÜV<br />
organization. <strong>Salomon</strong> also offers<br />
a specific Junior performance afd<br />
(ref. 89267001) upgrade meant to<br />
increase slope performance for junior<br />
specialists, which can be exchanged<br />
with the universal one. note: The replacement<br />
junior pedal (red) must be<br />
used only with junior boot standards.<br />
1. Dismount the toe piece from the interface or from the ski.<br />
2. Remove the AFD from the toe piece baseplate.<br />
3. Position the replacement AFD on the baseplate and press it into place.<br />
4. Remount the toe piece.<br />
note<br />
For instructions on replacing the<br />
AFD on Quadrax models, please refer<br />
to the 2006-2007 <strong>Salomon</strong> Shop<br />
practices Manual<br />
For instructions on replacing the AFD<br />
on Spheric Performance and S710 Ti<br />
Spheric models, please refer to the<br />
2005-2006 <strong>Salomon</strong> Shop practices<br />
Manual<br />
ment to let the shavings escape.<br />
Use caution not to hit the broken<br />
piece.<br />
continue to drill until the chuck<br />
touches the bushings of the jig.<br />
This is the correct drilling depth<br />
of 10 mm.<br />
remove the broken piece inside the<br />
extractor bit with a pair of pliers.<br />
turn the ski over and hit the base<br />
lightly to remove all shavings.<br />
follow instructions for the installation<br />
of repair plugs (below).<br />
re-mount the binding.<br />
clean the extractor bit after each<br />
use.<br />
JUNIOR<br />
JUNIOR<br />
fig. G Specifically, it may only be<br />
used with junior boots with a toe<br />
thickness of 16.5 +/- 1.5 mm.<br />
caution: for models with elastic pedal<br />
(range 08), check the presence of the<br />
elastic block under the pedal. fig. H<br />
!<br />
installation of repair plugs<br />
The existing hole may need to be<br />
widened using an 8 mm diameter<br />
bit, however do not drill more than<br />
10 mm deep.<br />
place a drop of glue onto the top<br />
of the hole.<br />
tap a repair plug into the hole with<br />
a hammer until it is flush with the<br />
topskin of the ski.<br />
partS (see page 70)<br />
reference # Item Name<br />
000905 <strong>Salomon</strong> Grease<br />
000878 Screw Extractor/Repair Kit<br />
000846 Repair Plugs<br />
H<br />
reference<br />
page # Section Name<br />
47 Standard Boot Sole<br />
Dimensions<br />
partS (see page 70)<br />
reference # Item Name<br />
54834001 TZ 5/TZ 5 SC Universal AFD<br />
89267001 TZ 5/TZ 5 SC Junior AFD<br />
<strong>Salomon</strong> control pedal replacement<br />
All <strong>Salomon</strong> bindings have replaceable<br />
SCPs. The specific SCP item numbers<br />
can be found in the <strong>Salomon</strong> Spare<br />
parts catalog (page 70), though some<br />
SCP Reference Numbers are listed in<br />
the chart below..<br />
Replacement procedures for SCPs<br />
are as follows.<br />
for toes mounted on interfaces and<br />
Skis (Smartrak grip/grip plus, Sc,<br />
and itf)<br />
1. Dismount the Toe piece from the<br />
Ski or The Interface by completely<br />
loosening the mounting screws.<br />
2. Dismount manually the SCP on<br />
the Toe piece.<br />
3. Take the new SCP and mount it<br />
manually under the Toe piece.<br />
4. Tighten the Toe piece on the ski or<br />
the Interface (4Nm torque).<br />
for toes mounted on Smartrak<br />
prolink/control/response<br />
1. Put the Toe Piece out the<br />
Interface.<br />
2. Dismount the Toe piece from the<br />
Set by completely loosening the<br />
mounting screws.<br />
3. Dismount manually the<br />
SCP+Stirrup on the toe piece.<br />
4. Take the new Set SCP+Stirrup and<br />
mount it manually under the Toe<br />
piece.<br />
5. Tighten the Toe piece on the<br />
Stirrup (4Nm torque).<br />
6. Remount the Toe piece on the<br />
Interface.
Binding<br />
certification prograM<br />
The technician who signs the Authorized<br />
Location’s workshop or rental form for any<br />
transaction must be currently <strong>Salomon</strong><br />
alpine binding certified<br />
technician certification eXaM<br />
2010/2011 technician certification exam Questions<br />
1 indemnified Bindings are:<br />
a) Those that appear on the 2010/2011 Schedule of Indemnified Bindings<br />
in the <strong>Salomon</strong> Shop Practices Manual.<br />
b) The 2010/2011 models only.<br />
c) Not something a technician needs to know about.<br />
d) Any <strong>Salomon</strong> binding still in use.<br />
2 <strong>Salomon</strong> technician certification:<br />
a) Never has to be renewed. Once you’ve past the exam.<br />
b) Is valid whether or not the employer is a <strong>Salomon</strong> Authorized Alpine<br />
Binding Dealer.<br />
c) Is valid for 2 years from the exam date and may be transferred<br />
between <strong>Salomon</strong> Authorized Alpine Binding Dealers.<br />
d) Does not require that Certified Technicians be familiar with <strong>Salomon</strong><br />
Bindings through hands-on experience.<br />
3 What is Skier type?<br />
a) Unnecessary information.<br />
b) A classification system based on “cautious,” “moderate,” or<br />
“aggressive” skiing preferences.<br />
c) The degree of skill a skier possesses.<br />
d) A person who enjoys skiing.<br />
4 When a skier picks up their equipment from your shop make sure:<br />
a) You wish them luck.<br />
b) You only hand it over to the intended user.<br />
c) Someone explains the use of the equipment to them and provides<br />
them with signed copies of the Workshop/Rental Form and Liability<br />
Release Agreement.<br />
d) They speak with the technician who did the installation/adjustment.<br />
5 a mechanical testing device:<br />
a) Never needs re-calibration.<br />
b) Requires properly trained technicians for consistent results.<br />
c) Gives consistent results even when it is operated incorrectly.<br />
d) Is only used in rental shops.<br />
certIfIcatIon > exam > 34<br />
do not write on this form. indicate answers on the registration form.<br />
A score of 90%, or 23 correct answers, must be obtained to pass. In addition, questions 12 to 25 are<br />
considered core questions and must be answered correctly.<br />
6 When is the forward pressure correct on the ZZ laB and Sth 12, 14 & 16.<br />
a) When the boot in the binding, adjust DIN number.<br />
b) Place boot in binding and center with mid boot mark.<br />
c) When the boot is in the binding and the top of the head screw is<br />
aligned with the back of the heel track.<br />
d) Thereís no need for adjustment it is automatic.<br />
7 Mechanical inspections of rental equipment:<br />
a) Ensure that all components are functioning properly.<br />
b) Are required periodically in-season.<br />
c) Are required pre-season .<br />
d) All of the above.<br />
8 Workshop or rental forms must:<br />
a) Be kept on file for 5 years or for the statute of limitations.<br />
b) Be signed by the customer and the Certified Technician.<br />
c) Be used for every transaction.<br />
d) All of the above.<br />
9 a post accident Ski equipment inspection report form:<br />
a) Is a critical tool in defending liability claims.<br />
b) Must be completed each time an accident is reported.<br />
c) Answers A and B.<br />
d) Is only necessary in the case of lower body injuries.<br />
10 if the mid-sole indicator on a <strong>Salomon</strong> jig and the mid-sole indicator on a<br />
boot do not agree, you should:<br />
a) Not install the binding.<br />
b) Leave the boot in the jig and use the mid-sole mark on the boot to<br />
position the jig on the ski.<br />
c) Use the mid-sole mark on the jig to position it on the ski.<br />
d) Position the jig by splitting the difference between the two marks.<br />
11 When adjusting the toe height on <strong>Salomon</strong> Quadrax (leisure) bindings,<br />
you should:<br />
a) Use a <strong>Salomon</strong> rental adjustment tool for the toe height screw.<br />
b) Check your adjustment with a <strong>Salomon</strong> toe height card.<br />
c) Answers A & B.<br />
d) None of the above; toe height adjustment is automatic.<br />
Photo: Mattias Fredriksson.
Binding<br />
certIfIcatIon > exam > 35<br />
technician certification eXaM > (continued)<br />
2010/2011 technician certification exam Questions (continued)<br />
12 What should the initial visual indicator setting be for a 220 lb, 6’5”,<br />
type 3+ skier who is 25 years old and uses boots with a sole length of<br />
310 mm?<br />
a) 11 b) Ask the customer.<br />
c) Not possible to determine. d) 12<br />
13 When testing the toe for elastic travel and return, the boot should:<br />
a) Elastic travel only occurs while skiing and cannot be tested in the<br />
shop.<br />
b) Move off center at least 5 mm and return to within 2 mm of its original<br />
position.<br />
c) Move slightly off center then release completely.<br />
d) None of the above.<br />
14 a skier weighs 165 lb and measures 5’8” tall. he is a type 1 skier who is<br />
59 years old. What is his Skier code on the chart?<br />
a) H b) J<br />
c) L d) K<br />
15 When mounting bindings, <strong>Salomon</strong>ís recommendation for tapping is:<br />
a) Always tap.<br />
b) Always tap unless the manufacturer cautions against it.<br />
c) Never tap. Itís too easy to damage the ski or break the tap.<br />
d) If you countersink the holes with the drill bit, there is no need to tap.<br />
16 Skiers requesting personal settings higher or lower than are indicated by<br />
the 2010/2011 <strong>Salomon</strong> adjustment chart should:<br />
a) Be given the settings they want provided they sign a Requested<br />
Setting Release Agreement.<br />
b) Be asked if they wish to identify themselves as Type 3+ or Type -1 and<br />
use the indicated settings.<br />
c) Be instructed to adjust their bindings themselves.<br />
d) Answer A or B.<br />
17 a six year old is being fitted for her first pair of skis. She weighs 42 lb.<br />
What Skier code would you use to help determine the visual indicator<br />
setting of her bindings?<br />
a) B b) A<br />
c) -1 d) 3/4<br />
18 a boot is considered incompatible with a <strong>Salomon</strong> binding if:<br />
a) It does not pass visual inspection.<br />
b) There is more than a I mm difference in sole flatness across its width.<br />
c) It does not conform to Standard Boot Sole Dimensions.<br />
d) All of the above.<br />
19 if the mid-sole indicator on a <strong>Salomon</strong> jig and the mid-sole indicator on a<br />
boot do not agree, you should:<br />
a) Leave the boot in the jig and use the mid-sole mark on the boot to<br />
position the jig on the ski.<br />
b) Use the mid-sole mark on the jig to position it on the ski.<br />
c) Position the jig by splitting the difference between the two marks.<br />
d) Not install the binding.<br />
20 if the forward pressure indicators on the heel are not aligning properly<br />
you should:<br />
a) Ignore it if they are close.<br />
b) Remove the boot and move the heel forward or back to correct.<br />
c) Make sure (adjustable) toe wings and toe height are correct.<br />
d) Answers B & C.<br />
21 you are testing a used boot-binding system on a mechanical testing<br />
device. the <strong>Salomon</strong> binding has a visual indicator setting of 6 and the<br />
boot sole is 320 mm long. What is the in-use range for twist?<br />
a) 58 Newton meters b) 58 to 78 Nm<br />
c) 43 to 78 Nm d) 50 to 67 Nm<br />
22 if there are no manufacturerís recommendations for drill bit selection<br />
you should:<br />
a) Drill the ski with the bit in your drill, you can’t go wrong.<br />
b) Use a 3.6 mm bit, you can always increase the torque on the screwshooter.<br />
c) Drill one hole with a 3.6 mm bit and check for metal before switching<br />
to a 4.1 mm bit.<br />
d) Always use a 4.1 mm bit, all mounting platforms contain metal.<br />
23 What is the correct maintenance procedure for <strong>Salomon</strong> binding?<br />
a) Cleaning all exposed area of the components with a cloth or rag,<br />
cleaning binding housing, heel tracks and apply grease.<br />
b) You may use any solvent or high pressure liquids to clean bindings.<br />
c) Bindings are self cleaning and do not need maintenance at any time.<br />
d) None of the above.<br />
24 What should the visual indicator setting be for a skier who weighs 69 kg,<br />
height 152 cm, boot sole length 310 mm, skier type ii, age 52?<br />
a) 3 b) 3.5<br />
c) 4 d) 4.5<br />
25 examples of <strong>Salomon</strong> bindings that may be used with both junior & adult<br />
boot sole norms are:<br />
a) 607 & 608<br />
b) STH 12 & STH 16<br />
c) TZ 5 & C305<br />
d) You canít use an adult norm sole with a <strong>Salomon</strong> junior binding.<br />
on-line registration instructions<br />
Applying technicians must complete the 2010/2011 <strong>Salomon</strong> on-line certification registration and test.<br />
A score of at least 90% (23 correct answers) must be achieved to pass the exam. Applying technicians are<br />
not certified until a passing score is achieved.<br />
• u.S. dealers will find the on-line certification<br />
registration and test at:<br />
http://www.salomoncertification.com<br />
• For the U.S., a $12 fee will be invoiced for<br />
each Registration and Exam submitted on line<br />
at www.salomoncertification.com<br />
• The U.S. fee is $20 for each Registration/<br />
Exam submitted by mail or fax to <strong>Salomon</strong>,<br />
or for technicians certified by any approved<br />
industry training program.<br />
Fax: (801) 334-4502<br />
<strong>Salomon</strong> <strong>Certification</strong>/ Customer Service<br />
<strong>Salomon</strong> USA<br />
2030 Lincoln Ave<br />
Ogden, UT 84401<br />
• canadian dealers will find the on-line<br />
certification registration and test at:<br />
http://www.salomonhookup.ca
22-<br />
29<br />
30-<br />
38<br />
39-<br />
47<br />
48-<br />
56<br />
57-<br />
66<br />
67-<br />
78<br />
79-<br />
91<br />
92-<br />
107<br />
108-<br />
125<br />
126-<br />
147<br />
148-<br />
174<br />
175-<br />
209<br />
>-<br />
210<br />
Binding<br />
2010/2011 ADJUSTMENT CHART<br />
10-<br />
13<br />
14-<br />
17<br />
18-<br />
21<br />
22-<br />
25<br />
26-<br />
30<br />
31-<br />
35<br />
36-<br />
41<br />
42-<br />
48<br />
49-<br />
57<br />
58-<br />
66<br />
67-<br />
78<br />
79-<br />
94<br />
>-<br />
95<br />
Skier<br />
Weight Height Skier<br />
lb kg ft-in/cm Code*<br />
- 6'5"<br />
>- 195 cm<br />
A<br />
B<br />
C<br />
D<br />
E<br />
F<br />
G<br />
H<br />
I<br />
J<br />
K<br />
L<br />
M<br />
N<br />
O<br />
P<br />
< -<br />
230 mm<br />
3 /4<br />
1<br />
11 1 / 2<br />
1 1 / 2<br />
1 / 2<br />
2<br />
21 2 / 2<br />
1 2 / 2<br />
1 / 2<br />
3<br />
* Based on "Type 1" Skier<br />
231-<br />
250 mm<br />
3 /4<br />
3 /4<br />
11 1 / 4<br />
1 1 / 4<br />
1 / 4<br />
13 1 / 4<br />
3 1 / 4<br />
3 / 4<br />
21 2 / 4<br />
1 2 / 4<br />
1 / 4<br />
23 2 / 4<br />
3 2 / 4<br />
3 / 4<br />
31 3 / 2<br />
1 3 / 2<br />
1 / 2<br />
Initial Toe/Heel Indicator<br />
by Boot Sole Length (mm)<br />
251-<br />
270 mm<br />
3 /4<br />
3 /4<br />
11 1 / 4<br />
1 1 / 4<br />
1 / 4<br />
11 1 / 2<br />
1 1 / 2<br />
1 / 2<br />
2<br />
21 2 / 2<br />
1 2 / 2<br />
1 / 2<br />
3<br />
271-<br />
290 mm<br />
3 /4<br />
1<br />
291-<br />
310 mm<br />
11 1 / 1<br />
2 1 /4 1 / 1 1 2 1 /4 1 / 1<br />
2 1 /4<br />
13 1 / 1<br />
4 1 /2 1 1 /2<br />
3 / 1<br />
4 1 /2 1 1 1 /2<br />
3 / 1<br />
4 1 /2 1 1 /2<br />
21 2 / 3<br />
4 2 1 /4<br />
1 / 3 2 4 2 1 /4<br />
1 / 3<br />
4 2 1 /4<br />
23 2 / 1<br />
4 2 /2 1 2 /4<br />
3 / 1<br />
4 2 /2 1 2 2 /4<br />
3 / 1<br />
4 2 /2 1 2 /4<br />
31 3 / 3<br />
2 3 3 2 /4<br />
1 / 3 3 2 3 3 2 /4<br />
1 / 3<br />
2 3 3 2 /4<br />
41 4 / 1<br />
2 4 3 /2 1 3 /2<br />
1 / 1<br />
2 4 3 /2 1 4 3 /2<br />
1 / 1<br />
2 4 3 /2 1 3 /2<br />
adjustment chart > 36<br />
311-<br />
330 mm<br />
331-<br />
350 mm<br />
13 1 / 4<br />
3 1 / 4<br />
3 / 4<br />
2<br />
21 2 / 2<br />
1 2 / 2<br />
1 / 2<br />
3<br />
3 1 / 2<br />
51 / 1<br />
2 5 4 /2 4 3 3 1 5 / 2<br />
1 / 1<br />
2 5 4 /2 4 3 3 1 5 / 2<br />
1 / 1<br />
2 5 4 /2 4 3<br />
61 / 1<br />
2 6 5 /2 5 4 4 1 6 / 2<br />
1 / 1<br />
2 6 5 /2 5 4 4 1 6 / 2<br />
1 / 1<br />
2 6 5 /2 5 4 4 1 / 2<br />
71 / 1<br />
2 7 6 /2 6 5 5 1 7 / 2<br />
1 / 1<br />
2 7 6 /2 6 5 5 1 7 / 2<br />
1 / 1<br />
2 7 6 /2 6 5 5 1 / 2<br />
81 / 2 8 7 6 6 1 8 / 2<br />
1 / 2 8 7 6 6 1 8 / 2<br />
1 / 2 8 7 6 6 1 / 2<br />
10 91 10 9 / 1<br />
2 8 /2 1 8 7 /2<br />
1 / 1<br />
2 8 /2 1 10 9 8 7 /2<br />
1 / 1<br />
2 8 /2 1 8 7 /2<br />
9 1 / 2<br />
> -<br />
351 mm<br />
111 / 2 11 10 9 9 1 11 / 2<br />
1 / 2 11 10 9 9 1 11 / 2<br />
1 / 2 11 10 9<br />
12 101 12 11 10 / 2<br />
1 12 11 10 / 2<br />
1 11 / 2<br />
Torque Range<br />
(Newton Meters)<br />
REF.<br />
Twist<br />
Inspection Range<br />
In-use Range<br />
Forward<br />
Lean<br />
5 18<br />
8 29<br />
11 40<br />
14 52<br />
17 64<br />
20 75<br />
23 87<br />
27 102<br />
31 120<br />
37 141<br />
43 165<br />
50 194<br />
58 229<br />
67 271<br />
78 320<br />
91 380<br />
105 452<br />
121 520<br />
137 588
Binding<br />
technician certification anSWer forM<br />
2010/2011 technician certification answer form<br />
this form is for u.S. dealers only.<br />
Get all your certification needs<br />
at www.salomoncertification.com<br />
fees<br />
On line certification test: $12 Faxed or mailed test: $20<br />
technician & Store information<br />
EXAM DATE<br />
STORE ACCOUNT #<br />
<strong>SHOP</strong> PHONE #<br />
instructions<br />
TECHNICIAN’S NAME (PRINT CLEARLY)<br />
STORE NAME<br />
STORE ADDRESS<br />
please print clearly your information above and fax or mail your certification answers to (801) 334-4502.<br />
A score of 90%, or 23 correct answers, must be obtained to pass.<br />
In addition, questions 12 to 25 are considered core questions and must be answered correctly.<br />
please circle your answer for each question.<br />
all answers must be clearly marked. any partially circled answers could be marked incorrect.<br />
answer Section<br />
a b c d<br />
a b c d<br />
a b c d<br />
a b c d<br />
a b c d<br />
Mail or faX to:<br />
a b c d<br />
a b c d<br />
a b c d<br />
a b c d<br />
a b c d<br />
a b c d<br />
a b c d<br />
a b c d<br />
a b c d<br />
a b c d<br />
a b c d<br />
a b c d<br />
a b c d<br />
a b c d<br />
a b c d<br />
<strong>Salomon</strong> <strong>Certification</strong><br />
<strong>Salomon</strong> U.S.A.<br />
2030 Lincoln Ave., Ogden, UT 84401<br />
Fax: (801) 334-4502<br />
Phone: 1 (800) 654-2668<br />
TECHNICIANS SIGNITURE SIGNITURE DATE<br />
37<br />
a b c d<br />
a b c d<br />
a b c d<br />
a b c d<br />
a b c d
SKi38<br />
Technical reference for the<br />
complete line of current<br />
<strong>Salomon</strong> alpine skis<br />
Photo: Hal Thomson. Skier: Rick Armstrong. alpine
alpine SKi<br />
adult Ski length Selection<br />
technIcal features > 39<br />
for the <strong>Salomon</strong> skis, find the corresponding centimetre length for your weight.<br />
Add to that number any additional length from the boxes below according to your ability, aggressiveness, the snow conditions you ski most of the time and the kind of skis you want to choose.<br />
Kg<br />
corresponding<br />
< 47 48 - 52 53 - 58 59 - 65 66 - 73 74 - 82 83 ><br />
SKi length cm 140 cm 145 cm 150 cm 155 cm 160 cm 165 cm 170 cm<br />
+<br />
+<br />
+<br />
=<br />
SKi<br />
3V powerline; 24 hours; 24 daytona; 24 hours powerline S5;<br />
24 hours powerline S3; Select touch; Vital touch; fresh touch<br />
Junior Ski length Selection<br />
- 1 cm<br />
Kind of SKi<br />
total<br />
This total centimetre length is a guide, your preferred length will be the ski closest to the recommended total.<br />
Ski length (and binding) according to weight and height of children*<br />
XW fury Junior XS<br />
102861<br />
Jade Junior XS 102868<br />
24 Junior 111236<br />
XW fury Junior S<br />
102860<br />
Jade Junior S 102867<br />
24 Junior 111236<br />
XW fury Junior M<br />
102858<br />
Jade Junior M 102866<br />
24 Junior 111237<br />
XW fury Junior l<br />
102857<br />
Jade Junior l 102862<br />
24 Junior 111237<br />
Shogun Junior 111203<br />
Mai tai Junior 111204<br />
1. Beginner<br />
You are skiing the first<br />
week (rental skis)<br />
- 20 cm<br />
discover first ski sensations<br />
Approx.<br />
Age<br />
of Child<br />
3 to 7<br />
years old<br />
3 to 7<br />
years old<br />
6 to 10<br />
years old<br />
8 to 15<br />
years old<br />
6 to 12<br />
years old<br />
SKi<br />
2V powerline; crossmax; 24 hours powerline lM; 24 hours<br />
powerline S1; 24 X / 24 gt pro / 24 Sport; X-Wing; rocker / czar<br />
/ Shog un / lord / Knight; el dictator / Sentinel / twent y twelve;<br />
pro pipe / Suspect / threat; geisha / lad y / Maï taï / Vamp;<br />
origins diamond, origins opal, origins topa; origins pearl / origins amber<br />
+ 4 cm<br />
Child Height 85 to 95 cm 95 to 105 cm 105 to 115 cm 115 to 125 cm 125 to 135 cm 135 to 145 cm 145 to 155 cm 155 to 165 cm 165 to 175 cm<br />
Child Weight* 10 to 14 kg 14 to 18 kg 18 to 22 kg 22 to 26 kg 26 to 30 kg 30 to 37 kg 37 to 45 kg 45 to 55 kg 55 to 65 kg<br />
Skiing<br />
Aptitude<br />
Beginner<br />
Intermediate<br />
Good<br />
Beginner<br />
Intermediate<br />
Good<br />
Beginner<br />
Intermediate<br />
Good<br />
Beginner<br />
Intermediate<br />
Good<br />
Beginner<br />
Intermediate<br />
Good<br />
2. interMediate<br />
Able to ski most runs<br />
in good conditions<br />
- 5 cm<br />
Prefer moderate speeds<br />
Most of the time on groomed piste or on hard snow conditions<br />
+ 0 cm<br />
70 cm<br />
T5<br />
80 cm<br />
T5<br />
80 cm<br />
T5<br />
90 cm<br />
T5<br />
90 cm<br />
T5<br />
100 cm<br />
T5<br />
110 cm<br />
T5<br />
100 cm<br />
T5<br />
110 cm<br />
T5<br />
120 cm<br />
T5<br />
110 cm<br />
T5<br />
120 cm<br />
T5<br />
110 cm<br />
T5<br />
120 cm<br />
T5<br />
130 cm<br />
L7<br />
110 cm<br />
T5<br />
120 cm<br />
T5<br />
130 cm<br />
L7<br />
120 cm<br />
T5<br />
130 cm<br />
L7<br />
140 cm<br />
L7<br />
120 cm<br />
T5<br />
130 cm<br />
L7<br />
140 cm<br />
L7<br />
130 cm<br />
L7<br />
140 cm<br />
L7<br />
150 cm<br />
L7<br />
130 cm<br />
L7<br />
140 cm<br />
L7<br />
140 cm<br />
L7<br />
150 cm<br />
L7<br />
example for Shogun Junior / Mai tai Junior: a 6-year-old child weighing 25 kg (and measuring 120 cm), skiing at an intermediate level, must choose a 115 cm ski with a “tZ5” binding.<br />
*If weight is over 45 kg (142 Ibs), SALOMON strongly recommend to use an ADULT ski.<br />
Weight<br />
leVel<br />
3. adVanced<br />
Able to ski all runs<br />
in good conditions<br />
+ 0 cm<br />
Prefer a variety of speeds<br />
terrain<br />
4. eXpert<br />
Able to ski on all runs<br />
in any conditions<br />
+ 5 cm<br />
Prefer high speeds<br />
5. SpecialiSt<br />
Able to ski on all runs in<br />
changing conditions<br />
+ 10 cm<br />
Prefer highest speeds<br />
Most of the time off piste or on soft snow conditions<br />
+ 5 cm<br />
140 cm<br />
L7<br />
150 cm<br />
L7
alpine SKi<br />
drill Bit Selection for <strong>Salomon</strong> Skis<br />
recommendations for use of Skis according to the Mass of Skier<br />
To guarantee the sufficient parameters<br />
of safety (i.e. the resistance of<br />
the screws to wrench), skiers must<br />
use skis, approximate with groups 1<br />
to 4, in connection with the mass of<br />
the skier**.<br />
ALL-MOUNTAIN SKIS: X-Wing<br />
ON PISTE: Race / Allround<br />
Ref. and<br />
Commercial Designation<br />
Length (cm)<br />
Radius (mm)<br />
Midsole (mm)<br />
Weight (g per 1/2 pair)<br />
Thickness<br />
Rocker Shape (mm)<br />
Binding<br />
System<br />
technIcal features > 40<br />
Ski Model Ski Size Drill Bit Diameter Tapping Glue* Torque<br />
Equipe T, XW Fury Junior,<br />
Jade Junior, Shogun Junior,<br />
Mai Tai Junior<br />
< 140 cm<br />
>= 140 cm<br />
3,6 mm<br />
4,1 mm<br />
No No<br />
3 Nm (for these skis, use a hand screwdriver<br />
only to tighten the screws on the bindings.)<br />
All other models<br />
(except those above)<br />
All sizes 4,1 mm No<br />
<strong>Salomon</strong> glue<br />
4 Nm<br />
or epoxy<br />
*Put the glue at the bottome of the hole<br />
Ski technical reference chart<br />
TECHNICAL RECAP MEASUREMENTS Option Construction & Core Reinforcement Edges Base Specific Features<br />
SIDECUTS<br />
Waist<br />
Width<br />
Other<br />
Tip (mm)<br />
Waist (mm)<br />
Tail (mm)<br />
Group of Ski Skier Weight (kg)<br />
1 greater than 65 kg<br />
1, 2 65 kg or less<br />
1, 2, 3 45 kg or less<br />
(1, 2) 3, 4 25 kg or less<br />
**Extract from NF ISO 8364 June 2007<br />
Full<br />
Full<br />
• • •<br />
•<br />
Full<br />
Full<br />
Full<br />
•<br />
K XW Enduro +<br />
Z12 B90<br />
163 127 82 109 14.0<br />
108788 170 127 83 110 15.6<br />
119924 177 127 84 111 17.4<br />
184 127 85 112 19.3<br />
706<br />
744<br />
781<br />
816<br />
2130 47.0 260<br />
2230 47.7 270<br />
2330 48.5 280<br />
Z12<br />
2430 49.3 290<br />
Protrak •<br />
N XW Enduro<br />
163 127 82 109 14.0<br />
111687<br />
170 127 83 110 15.6<br />
177 127 84 111 17.4<br />
184 127 85 112 19.3<br />
706<br />
744<br />
781<br />
816<br />
1850 47.0 260<br />
1950 47.7 270<br />
2050 48.5 280<br />
2150 49.3 290<br />
•<br />
K XW Tornado Ti Pl +<br />
Z12 B<br />
152 120 76 104 11.4<br />
159 120 77 105 12.9<br />
111127 166 120 78 106 15.6<br />
173 120 79 107 16.3<br />
180 120 80 108 18.2<br />
633<br />
668<br />
704<br />
740<br />
776<br />
2000 46.3<br />
2070 47.1<br />
2140 47.9<br />
2210 48.7<br />
2280 49.5<br />
Z12 Protrak<br />
K XW Tornado Ti +<br />
Z12 B80<br />
159 120 77 105 12.9<br />
111135<br />
166 120 78 106 15.6<br />
173 120 79 107 16.3<br />
180 120 80 108 18.2<br />
668<br />
704<br />
740<br />
776<br />
1990 47.1<br />
2060 47.9<br />
2130 48.7<br />
2200 49.5<br />
Z12 Protrak<br />
N XW Tornado Ti<br />
159 120 77 105 12.9<br />
119981<br />
166 120 78 106 15.6<br />
173 120 79 107 16.3<br />
180 120 80 108 18.2<br />
668<br />
704<br />
740<br />
776<br />
1710 47.1<br />
1780 47.9<br />
1850 48.7<br />
1920 49.5<br />
K XW Storm +<br />
Z11 B80<br />
152 120 73 101 12.0<br />
111136<br />
160 120 74 102 13.6<br />
168 120 75 103 15.3<br />
176 120 76 104 17.2<br />
645<br />
685<br />
725<br />
766<br />
1760<br />
1880<br />
2000<br />
2120<br />
Z11 Smartrak<br />
H X-Wing 8 +<br />
KZ10 B80<br />
152 120 73 101 12.0<br />
111137<br />
160 120 74 102 13.6<br />
168 120 75 103 15.3<br />
176 120 76 104 17.2<br />
645<br />
685<br />
725<br />
766<br />
1740<br />
1860<br />
1980<br />
2100<br />
Z10 Lightrak C<br />
H X-Wing 6 +<br />
JL10 B80<br />
151 114 72 100 12.2<br />
111139<br />
158 115 72 101 13.2<br />
165 116 72 102 14.1<br />
172 117 72 103 15.1<br />
642<br />
678<br />
713<br />
749<br />
1620<br />
1725<br />
1830<br />
1935<br />
L10 Lightrak C<br />
H X-Wing 4 +<br />
JL10 B80<br />
144 113 72 99 11.4<br />
151 114 72 100 12.2<br />
111140 158 115 72 101 13.2<br />
165 116 72 102 14.1<br />
172 117 72 103 15.1<br />
599<br />
642<br />
678<br />
713<br />
749<br />
1515<br />
1620<br />
1725<br />
1830<br />
1935<br />
L10 Lightrak C<br />
K 2V Race Powerline +<br />
Z14<br />
164 112 68 98 16.0<br />
120030<br />
171 112 68 98 17.0<br />
178 112 68 98 17.5<br />
185 112 68 98 19.0<br />
680<br />
721<br />
752<br />
783<br />
2180 49.5<br />
2250 50.2<br />
2320 51.0<br />
2390 51.8<br />
Z14 Protrak<br />
K 2V Race Powerline +<br />
Z12<br />
164 112 68 98 16.0<br />
111101<br />
171 112 68 98 17.0<br />
178 112 68 98 17.5<br />
185 112 68 98 19.0<br />
680<br />
721<br />
752<br />
783<br />
2300 52.5<br />
2400 53.2<br />
2500 54.0<br />
2620 54.8<br />
Z12 Protrak<br />
K 3V Race Powerline +<br />
Z14 B75<br />
155 117 67 102 11.2<br />
120031<br />
160 118 67 102 12.0<br />
165 119 67 102 12.5<br />
170 120 67 102 13.2<br />
638<br />
663<br />
690<br />
720<br />
2300 44.4<br />
2400 45.0<br />
2500 45.6<br />
2620 46.2<br />
Z14 Protrak<br />
K 3V Race Powerline +<br />
Z12<br />
155 117 67 102 11.2<br />
111104<br />
160 118 67 102 12.0<br />
165 119 67 102 12.5<br />
170 120 67 102 13.2<br />
638<br />
663<br />
690<br />
720<br />
2130 44.4<br />
2230 45.0<br />
2330 45.6<br />
2450 46.2<br />
Z12 Protrak<br />
K Crossmax +<br />
Z12 B75<br />
154 119 70 99 12.1<br />
111113<br />
162 119 71 101 13.6<br />
170 119 72 103 15.1<br />
178 119 73 105 16.8<br />
645<br />
687<br />
730<br />
774<br />
1900 47.4<br />
1980 48.3<br />
2080 49.2<br />
2180 50.1<br />
Z12 Protrak •<br />
K 24 X +<br />
Z12 B75<br />
154 119 70 99 12.1<br />
111100<br />
162 119 71 101 13.6<br />
170 119 72 103 15.1<br />
178 119 73 105 16.8<br />
645<br />
687<br />
730<br />
774<br />
1900 47.4<br />
1980 48.3<br />
2080 49.2<br />
2180 50.1<br />
Z12 Protrak •<br />
K 24 Hours +<br />
Z12 B75<br />
154 119 70 99 12.1<br />
111116<br />
162 119 71 101 13.6<br />
170 119 72 103 15.1<br />
178 119 73 105 16.8<br />
645<br />
687<br />
730<br />
774<br />
1900 47.4<br />
1980 48.3<br />
2080 49.2<br />
2180 50.1<br />
Z12 Protrak •<br />
K 24 Daytona +<br />
Z11 B80<br />
148 119 69 101 10.4<br />
155 119 70 102 11.7<br />
111118 162 119 71 103 13.1<br />
169 119 72 104 14.6<br />
176 119 73 105 16.3<br />
611<br />
648<br />
686<br />
725<br />
765<br />
1720 46.0<br />
1790 45.8<br />
1860 47.5<br />
1930 48.3<br />
2000 49.0<br />
Z11 Smartrak •<br />
K 24 GT Pro +<br />
Z10 B80<br />
144 115 72 98 11.9<br />
151 116 72 99 12.8<br />
111120 158 117 72 100 13.9<br />
165 118 72 101 14.8<br />
172 119 72 102 15.7<br />
606<br />
641<br />
676<br />
712<br />
748<br />
1575<br />
1680<br />
1785<br />
1890<br />
1995<br />
Z10 Smartrak<br />
H 24 Sport +<br />
JL10 B80<br />
144 115 72 98 11.9<br />
151 116 72 99 12.8<br />
111741 158 117 72 100 13.9<br />
165 118 72 101 14.8<br />
172 119 72 102 15.7<br />
606<br />
641<br />
676<br />
712<br />
748<br />
1535<br />
1640<br />
1745<br />
1850<br />
1955<br />
L10 Lightrak<br />
C<br />
Sandwich Sidewalls<br />
Monocoque<br />
Edgy Monocoque<br />
Twintip<br />
Woodcore<br />
Composite<br />
Powerline<br />
Bamboo layer<br />
Basalt layer<br />
3D Race Frame<br />
Ti Laminate<br />
Wider Edges<br />
Total Edge Reinforcement<br />
Edge Armor<br />
Race Base<br />
Double<br />
Double<br />
Double<br />
3D Race<br />
3D Race<br />
3D Race<br />
3D Race<br />
3D Sport<br />
3D Sport<br />
Full<br />
Full<br />
Full<br />
•<br />
Full<br />
Full<br />
Full<br />
Full<br />
•<br />
All Mtn.<br />
All Mtn.<br />
Titanium<br />
Race<br />
Race<br />
Race<br />
Race<br />
Platinum<br />
Race<br />
Titanium<br />
Magnesium<br />
Magnesium<br />
Alium<br />
Double<br />
Double<br />
Double<br />
Double<br />
Double<br />
Single<br />
Single<br />
Single<br />
Double<br />
Double<br />
Double<br />
Double<br />
Carbon<br />
Double<br />
•<br />
•<br />
Double<br />
Double<br />
Single<br />
Single<br />
T<br />
T<br />
T<br />
T<br />
T<br />
T •<br />
T •<br />
T •<br />
T •<br />
T<br />
T<br />
T<br />
4000 Ptex<br />
XL (85) Chassis (mm)<br />
Body (mm)<br />
4000<br />
XL (85)<br />
4000<br />
L (79)<br />
4000<br />
L (79)<br />
4000<br />
L (79)<br />
4000<br />
M (75)<br />
2000<br />
M (75)<br />
2000<br />
S (72)<br />
2000<br />
S (72)<br />
4000<br />
4000<br />
4000<br />
4000<br />
4000<br />
4000<br />
4000<br />
4000<br />
4000<br />
2000<br />
Wide Sensitive Plate; Oversized Pulse Pad; Square Tail;<br />
All Terrain Rocker; G1 ISO Norm; Tip Protector<br />
Wide Sensitive Plate; Oversized Pulse Pad; Square Tail;<br />
All Terrain Rocker; G1 ISO Norm; Tip Protector<br />
Oversized Pulse Pad; 3D Stealth Tip; G1 ISO Norm; Tip Protector<br />
Oversized Pulse Pad; 3D Stealth Tip; G1 ISO Norm; Tip Protector<br />
Oversized Pulse Pad; 3D Stealth Tip; G1 ISO Norm; Tip Protector<br />
Oversized Pulse Pad; 3D Stealth Tip; G1 ISO Norm; Tip Protector<br />
Oversized Pulse Pad; 3D Stealth Tip; G1 ISO Norm; Tip Protector<br />
Pulse Pad; 3D Stealth Tip; G1 ISO Norm; Tip Protector<br />
Pulse Pad; 3D Stealth Tip; G1 ISO Norm; Tip Protector<br />
Pulse Pad; G1 ISO Norm; Tip Protector<br />
Pulse Pad; G1 ISO Norm; Tip Protector<br />
Pulse Pad; G1 ISO Norm; Tip Protector<br />
Pulse Pad; G1 ISO Norm; Tip Protector<br />
Pulse Pad; G1 ISO Norm; Tip Protector<br />
Pulse Pad; G1 ISO Norm; Tip Protector<br />
Pulse Pad; G1 ISO Norm; Tip Protector<br />
Pulse Pad; G1 ISO Norm; Tip Protector<br />
Pulse Pad; G1 ISO Norm; Tip Protector<br />
Pulse Pad; G1 ISO Norm; Tip Protector
alpine SKi<br />
ON PISTE: Japanese Demo<br />
FREESKI: Exploring<br />
FREESKI: Big Mountain<br />
FREESKI: Park & Pipe<br />
WOMEN: On piste<br />
WOMEN: All-Mountain<br />
WOMEN: Freeski<br />
Ref. and<br />
Commercial Designation<br />
Length (cm)<br />
Radius (mm)<br />
Midsole (mm)<br />
Weight (g per 1/2 pair)<br />
Thickness<br />
Rocker Shape (mm)<br />
Binding<br />
System<br />
technIcal reference > 41<br />
TECHNICAL RECAP MEASUREMENTS Option Construction & Core Reinforcement Edges Base Specific Features<br />
SIDECUTS<br />
Waist<br />
Width<br />
Other<br />
K 24 Hours Powerline LM+<br />
Z14<br />
K 24 Hours Pwline S5 +<br />
Z12<br />
K 24 Hours Pwline S3+<br />
Z10 B<br />
H 24 Hours Pwline S1+<br />
L10<br />
Tip (mm)<br />
Waist (mm)<br />
Tail (mm)<br />
155 117 67 102 11.2<br />
120033<br />
160 118 67 102 12.0<br />
165 119 67 102 12.5<br />
170 120 67 102 13.2<br />
154 119 70 99 12.1<br />
111471<br />
162 119 71 101 13.6<br />
170 119 72 103 15.1<br />
178 119 73 105 16.8<br />
155<br />
111467<br />
162<br />
169<br />
176<br />
151<br />
111694<br />
158<br />
165<br />
172<br />
119<br />
119<br />
119<br />
119<br />
116<br />
117<br />
118<br />
119<br />
70<br />
71<br />
72<br />
73<br />
72<br />
72<br />
72<br />
72<br />
102<br />
103<br />
104<br />
105<br />
99<br />
100<br />
101<br />
102<br />
11.7<br />
13.1<br />
14.6<br />
16.3<br />
12.8<br />
13.9<br />
14.8<br />
15.7<br />
638<br />
663<br />
690<br />
720<br />
645<br />
687<br />
730<br />
774<br />
648<br />
686<br />
725<br />
765<br />
641<br />
676<br />
712<br />
748<br />
2300 44.4<br />
2400 45.0<br />
2500 45.6<br />
2620 46.2<br />
1900 47.4<br />
1980 48.3<br />
2080 49.2<br />
2180 50.1<br />
1790<br />
1860<br />
1930<br />
2000<br />
1680<br />
1785<br />
1890<br />
1995<br />
45.8<br />
47.5<br />
48.3<br />
49.0<br />
Z14 Protrak<br />
Sandwich Sidewalls<br />
Monocoque<br />
Edgy Monocoque<br />
Twintip<br />
Woodcore<br />
Composite<br />
Powerline<br />
Bamboo layer<br />
Basalt layer<br />
3D Race Frame<br />
Ti Laminate<br />
Wider Edges<br />
Total Edge Reinforcement<br />
Edge Armor<br />
Race Base<br />
3D Race<br />
Full<br />
Z12 Protrak • Full<br />
Z10 Smartrak • •<br />
L10 Lightrak<br />
N El Dictator 111144 194 139 114 124 43.4 856 2600 300 Dbl.<br />
170<br />
N Sentinel 111145<br />
177<br />
184<br />
191<br />
129<br />
129<br />
129<br />
129<br />
93<br />
94<br />
95<br />
96<br />
119<br />
120<br />
121<br />
122<br />
17.8<br />
19.8<br />
21.1<br />
24.3<br />
715<br />
754<br />
792<br />
832<br />
1900<br />
2000<br />
2100<br />
2200<br />
270<br />
280<br />
290<br />
300<br />
N Rocker 111691 192 147 127 137 48.5 840 290 720 •<br />
3D Sport<br />
•<br />
Full<br />
• Full<br />
•<br />
Double<br />
•<br />
Double<br />
•<br />
•<br />
•<br />
•<br />
•<br />
•<br />
•<br />
•<br />
•<br />
•<br />
•<br />
Full<br />
Full<br />
Full<br />
•<br />
•<br />
•<br />
Full<br />
C<br />
Race<br />
Titanium<br />
Magnesium<br />
Alium<br />
Titanium<br />
Magnesium<br />
Alium<br />
•<br />
•<br />
•<br />
Double<br />
Double<br />
Single<br />
Double<br />
Single<br />
Single<br />
Single<br />
Single<br />
Single<br />
Single<br />
Single<br />
T •<br />
T<br />
W T<br />
W T<br />
W T<br />
Ptex<br />
Chassis (mm)<br />
Body (mm)<br />
4000<br />
4000<br />
4000<br />
2000<br />
4000<br />
4000<br />
4000<br />
4000<br />
4000<br />
4000<br />
2000<br />
4000<br />
4000<br />
2000<br />
2000<br />
2000<br />
2000<br />
4000<br />
4000<br />
4000<br />
4000<br />
2000<br />
2000<br />
2000<br />
2000<br />
4000<br />
4000<br />
4000<br />
L (79)<br />
M (75)<br />
M (75)<br />
M (75)<br />
S (72)<br />
S (72)<br />
S (72)<br />
S (72)<br />
Pulse Pad; G1 ISO Norm; Tip Protector<br />
Pulse Pad; G1 ISO Norm; Tip Protector<br />
Pulse Pad; G1 ISO Norm; Tip Protector<br />
Pulse Pad; G1 ISO Norm; Tip Protector<br />
Pulse Pad; Flat Tail; All Terrain Rocker; G1 ISO Norm<br />
Pulse Pad; Square Tail; All Terrain Rocker; G1 ISO Norm<br />
Flat Tail; Rocker; G1 ISO Norm<br />
N Czar<br />
166 125 105 115 38.3 745/775 2020<br />
111143<br />
174 128 108 118 40.0 780/810 2120<br />
182 131 111 121 44.7 816/846 2220<br />
190 133 114 123 54.9 853/883 2318<br />
581<br />
626<br />
670<br />
670<br />
W T<br />
Pulse Pad; High Twin Tip Tail; Rocker; G1 ISO Norm<br />
N Shogun<br />
164 126 97 116 20.6<br />
102732<br />
173 128 99 118 23.1<br />
182 130 101 120 25.9<br />
191 132 103 122 28.7<br />
730<br />
770<br />
810<br />
850<br />
1852<br />
1944<br />
2040<br />
2140<br />
250<br />
300<br />
350<br />
400<br />
• • W T A<br />
Pulse Pad; Semi Twin Tip Tail; Rocker; G1 ISO Norm<br />
N Lord<br />
161 128 85 113 13.6<br />
102735<br />
169 128 86 114 15.4<br />
177 128 87 115 17.4<br />
185 128 88 116 19.5<br />
706<br />
748<br />
791<br />
835<br />
1690<br />
1790<br />
1890<br />
1990<br />
210<br />
210<br />
210<br />
210<br />
W T A<br />
Pulse Pad; Semi Twin Tip Tail; Rocker; G1 ISO Norm<br />
N The Knight<br />
151 122 85 14.2 713/738 1560<br />
107490<br />
161 122 85<br />
171 122 85<br />
112<br />
16.3 740/775 1660<br />
18.5 820/855 1760<br />
176 122 85 19.6 851/886 1800<br />
C W T<br />
Semi Twin Tip Tail; G1 ISO Norm<br />
N Dumont Pro Pipe 111146 161<br />
Full<br />
Sandwich<br />
122 85 112 15.7<br />
171 122 85 112 18.0<br />
181 122 85 112 20.5<br />
796<br />
845<br />
895<br />
1785<br />
1885<br />
1985<br />
• W T • Pulse Pad; G1 ISO Norm<br />
N Twenty Twelve 111147 163<br />
Full<br />
Full<br />
•<br />
•<br />
Full<br />
• •<br />
•<br />
•<br />
•<br />
123 91 116 17.6<br />
171 123 91 116 19.7<br />
179 123 91 116 21.9<br />
803<br />
843<br />
882<br />
1785<br />
1885<br />
1985<br />
• • W T<br />
Pulse Pad; Twin Rocker FS; G1 ISO Norm<br />
N Suspect<br />
151 122 86 115 13.0 692/742 1560<br />
161 122 86 115 15.1 742/792 1650<br />
111148 171 122 86 115 17.3 792/842 1740<br />
176 122 86 115 18.5 817/867 1790<br />
181 122 86 115 19.7 842/892 1840<br />
• • W T A<br />
Pulse Pad; G1 ISO Norm<br />
N Threat<br />
141 122 85 112 14.0 666/691 1285<br />
151 122 85 112 14.2 713/738 1560<br />
102752 161 122 85 112 16.3 740/775 1660<br />
171 122 85 112 18.5 820/855 1760<br />
176 122 85 112 19.6 851/886 1800<br />
• C W T<br />
G1 ISO Norm<br />
H Select Touch +<br />
KZ10 Ti B<br />
144 115 72 98 11.9<br />
151 116 72 99 12.8<br />
111161 158 117 72 100 13.9<br />
165 118 72 101 14.8<br />
172 119 72 102 15.7<br />
614<br />
649<br />
684<br />
720<br />
756<br />
1515<br />
1620<br />
1725<br />
1830<br />
1935<br />
Z10 Ti Lightrak G1 ISO Norm; Tip Protector<br />
H Vital Touch +<br />
KZ10 Ti B8<br />
144 115 72 98 11.9<br />
151 116 72 99 12.8<br />
111163 158 117 72 100 13.9<br />
165 118 72 101 14.8<br />
172 119 72 102 15.7<br />
614<br />
649<br />
684<br />
720<br />
756<br />
1515<br />
1620<br />
1725<br />
1830<br />
1935<br />
Z10 Ti Lightrak C<br />
G1 ISO Norm; Tip Protector<br />
H Fresh Touch +<br />
JL9 B80<br />
144 115 72 98 11.9<br />
151 116 72 99 12.8<br />
111165 158 117 72 100 13.9<br />
165 118 72 101 14.8<br />
172 119 72 102 15.7<br />
614<br />
649<br />
684<br />
720<br />
756<br />
1515<br />
1620<br />
1725<br />
1830<br />
1935<br />
L9 Lightrak • C<br />
G1 ISO Norm; Tip Protector<br />
K Origins Diamond +<br />
Z10 Ti<br />
152 120 76 104 11.4<br />
111150<br />
159 120 77 105 12.9<br />
166 120 78 106 15.6<br />
173 120 79 107 16.3<br />
633<br />
668<br />
704<br />
740<br />
1750 46.3<br />
1820 47.1<br />
1890 47.9<br />
1960 48.7<br />
Z10 Ti Protrak • T<br />
Oversized Pulse Pad; 3D Stealth Tip; G1 ISO Norm; Tip Protector<br />
H Origins Opal +<br />
KZ10 Ti B<br />
144 120 72 100 10.5<br />
111156<br />
152 120 73 101 12.0<br />
160 120 74 102 13.6<br />
168 120 75 103 15.3<br />
614<br />
653<br />
693<br />
733<br />
1620<br />
1740<br />
1860<br />
1980<br />
Z10 Ti Lightrak •<br />
T<br />
Oversized Pulse Pad; 3D Stealth Tip; Women Stance<br />
(Fwd mounted binding (+ 8 mm)); G1 ISO Norm; Tip Protector<br />
H Origins Topaz +<br />
KZ10 Ti<br />
144 120 72 100 10.5<br />
111154<br />
152 120 73 101 12.0<br />
160 120 74 102 13.6<br />
168 120 75 103 15.3<br />
614<br />
653<br />
693<br />
733<br />
1620<br />
1740<br />
1860<br />
1980<br />
Z10 Ti Lightrak C •<br />
Pulse Pad; Women Stance (Fwd mounted binding (+ 8 mm));<br />
G1 ISO Norm; Tip Protector<br />
N Origins Topaz<br />
144 120 72 100 10.5<br />
118469<br />
152 120 73 101 12.0<br />
160 120 74 102 13.6<br />
168 120 75 103 15.3<br />
614<br />
653<br />
693<br />
733<br />
1360<br />
1480<br />
1600<br />
1720<br />
C •<br />
Pulse Pad; Women Stance (Fwd mounted binding (+ 8 mm));<br />
G1 ISO Norm; Tip Protector<br />
H Origins Pearl +<br />
JL9 B80<br />
137 112 72 98 10.5<br />
144 113 72 99 11.4<br />
111416 151 114 72 100 12.2<br />
158 115 72 101 13.2<br />
165 116 72 102 14.1<br />
581<br />
607<br />
650<br />
686<br />
721<br />
1410<br />
1515<br />
1620<br />
1725<br />
1830<br />
L9 Lightrak C •<br />
Women Stance (Fwd mounted binding (+ 8 mm)); G1 ISO Norm;<br />
Tip Protector<br />
H Origins Pearl +<br />
JL9 B80<br />
137 112 72 98 10.5<br />
144 113 72 99 11.4<br />
111157 151 114 72 100 12.2<br />
158 115 72 101 13.2<br />
165 116 72 102 14.1<br />
581<br />
607<br />
650<br />
686<br />
721<br />
1410<br />
1515<br />
1620<br />
1725<br />
1830<br />
L9 Lightrak C •<br />
Women Stance (Fwd mounted binding (+ 8 mm)); G1 ISO Norm;<br />
Tip Protector<br />
N Origins Pearl<br />
137 112 72 98 10.5<br />
144 113 72 99 11.4<br />
118468 151 114 72 100 12.2<br />
158 115 72 101 13.2<br />
165 116 72 102 14.1<br />
581<br />
607<br />
650<br />
686<br />
721<br />
1150<br />
1255<br />
1360<br />
1465<br />
1570<br />
C •<br />
Women Stance (Fwd mounted binding (+ 8 mm)); G1 ISO Norm;<br />
Tip Protector<br />
H Origins Amber +<br />
JL9 B80<br />
137 112 72 98 10.5<br />
144 113 72 99 11.4<br />
111159 151 114 72 100 12.2<br />
158 115 72 101 13.2<br />
165 116 72 102 14.1<br />
581<br />
607<br />
650<br />
686<br />
721<br />
1410<br />
1515<br />
1620<br />
1725<br />
1830<br />
L9 Lightrak C<br />
Women Stance (Fwd mounted binding (+ 8 mm)); G1 ISO Norm;<br />
Tip Protector<br />
N Geisha 102734 153<br />
Double<br />
Full<br />
124 95 114 18.5<br />
164 126 97 116 20.6<br />
173 128 99 118 23.1<br />
690<br />
730<br />
770<br />
1640<br />
1852<br />
1944<br />
225<br />
250<br />
300<br />
• • • W T A<br />
Semi Twin Tip Tail; Rocker; G1 ISO Norm<br />
N Lady 102748 153 128 84 112 11.9<br />
161 128 85 113 13.6<br />
169 128 86 114 15.4<br />
664<br />
706<br />
748<br />
1590<br />
1690<br />
1790<br />
210<br />
210<br />
210<br />
W T A<br />
Pulse Pad; Semi Twin Tip Tail; Rocker; G1 ISO Norm<br />
N Mai Tai 111170 151<br />
Full<br />
122 86 115 13.0 692/742 1560<br />
161 122 86 115 15.1 742/792 1650<br />
171 122 86 115 17.3 792/842 1740<br />
• • W T A<br />
Pulse Pad; G1 ISO Norm ; Wide Body Shape (> – 85 mm)<br />
N Vamp<br />
141 122 85 112 14.0 666/691 1283<br />
102753<br />
151 122 85 112 14.2 713/738 1560<br />
161 122 85 112 16.3 740/775 1660<br />
171 122 85 112 18.5 820/855 1760<br />
• C W T<br />
G1 ISO Norm ; Wide Body Shape (> – 85 mm)<br />
•<br />
•<br />
2000
alpine SKi<br />
JUNIOR: On piste Jr<br />
JUNIOR: All-Mountain Jr<br />
JUNIOR: Freeski Jr<br />
RENTAL: All-Mountain<br />
RENTAL: On piste<br />
R: Freeski<br />
RENTAL: Women Rtl<br />
Ref. and<br />
Commercial Designation<br />
Length (cm)<br />
Radius (mm)<br />
Midsole (mm)<br />
Weight (g per 1/2 pair)<br />
Thickness<br />
Rocker Shape (mm)<br />
Binding<br />
System<br />
technIcal reference > 42<br />
TECHNICAL RECAP MEASUREMENTS Option Construction & Core Reinforcement Edges Base Specific Features<br />
SIDECUTS<br />
Waist<br />
Width<br />
Other<br />
J 2V Race Jr +<br />
Z11 B75<br />
H 2V Race Jr +<br />
JL10 Jr B80<br />
J 3V Race Jr +<br />
Z11 B75<br />
H 3V Race Jr +<br />
JL10 Jr B80<br />
H 24 Jr +<br />
JL10 Jr B80<br />
Tip (mm)<br />
Waist (mm)<br />
Tail (mm)<br />
120035 151 101 64 84 17.0<br />
158 103 64 86 17.0<br />
165 105 64 88 17.5<br />
625<br />
660<br />
695<br />
870 12.65<br />
970 13.5<br />
1060 14.6<br />
111304 130 96 63 80 14.0<br />
137 101 64 83 14.0<br />
144 104 64 86 14.0<br />
540<br />
575<br />
610<br />
850 10.9<br />
935 11.6<br />
1020 12.45<br />
120037 144<br />
151 110 64<br />
112 64<br />
111306 130<br />
137 105 63<br />
108 63<br />
93<br />
96 11.0<br />
11.5<br />
88<br />
91 10.0<br />
10.5<br />
595<br />
630<br />
525<br />
560<br />
905 12.8<br />
1050 13.64<br />
920<br />
980<br />
11.5<br />
11.9<br />
Z11 Smartrak Grip<br />
L10 Jr Lightrak Jr<br />
Z11 Smartrak Grip<br />
L10 Jr Lightrak Jr<br />
117955 140<br />
150 107 65 88<br />
108 65 89 13.0<br />
•<br />
14.0<br />
585<br />
635<br />
1360<br />
1460<br />
L10 Jr Lightrak<br />
N 24 Jr<br />
120 106 65 86 9.5<br />
111237<br />
130 107 65 87 11.0<br />
140 107 65 88 13.0<br />
150 108 65 89 14.0<br />
485<br />
535<br />
585<br />
635<br />
880<br />
1000<br />
1100<br />
1200<br />
N 24 Jr<br />
70 91 65 75 4.5<br />
80 96 65 79 5.0<br />
111236 90 100 65 83 5.5<br />
100 100 65 84 7.0<br />
110 103 65 86 7.5<br />
300<br />
330<br />
365<br />
405<br />
450<br />
400<br />
440<br />
530<br />
620<br />
640<br />
N XW Fury Junior L 102857 140<br />
150 107 65 88<br />
108 65 89 13.0<br />
14.0<br />
585<br />
635<br />
1100<br />
1200<br />
N XW Fury Junior M 102858 120<br />
130 106 65 86 9.5<br />
107 65 87 11.0<br />
485<br />
535<br />
880<br />
1000<br />
N XW Fury Junior S 102860 90 100 65 83 5.5<br />
100 100 65 84 7.0<br />
110 103 65 86 7.5<br />
365<br />
405<br />
450<br />
530<br />
620<br />
640<br />
N XW Fury Junior XS 102861 70 91<br />
80 96<br />
65 75 4.5<br />
65 79 5.0<br />
300<br />
330<br />
400<br />
440<br />
N Jade Junior L 102862 140<br />
150 107 65 88<br />
108 65 89 13.0<br />
14.0<br />
585<br />
635<br />
1100<br />
1200<br />
N Jade Junior M 102866 120<br />
130 106 65 86 9.5<br />
107 65 87 11.0<br />
485<br />
535<br />
880<br />
1000<br />
N Jade Junior S 102867 90 100 65 83 5.5<br />
100 100 65 84 7.0<br />
110 103 65 86 7.5<br />
365<br />
405<br />
450<br />
530<br />
620<br />
640<br />
N Jade Junior XS 102868 70<br />
•<br />
•<br />
•<br />
•<br />
•<br />
91<br />
80 96<br />
65 75 4.5<br />
65 79 5.0<br />
300<br />
330<br />
400<br />
440<br />
N Shogun Jr<br />
110 92 76 84 19.5<br />
111203<br />
120 99 78 91 17.0<br />
130 106 80 98 15.5<br />
140 122 85 112 14.0<br />
487<br />
532<br />
577<br />
666<br />
715<br />
905<br />
1095<br />
1285<br />
N Mai Tai Jr<br />
110 92 76 84 19.5<br />
111204<br />
120 99 78 91 17.0<br />
130 106 80 98 15.5<br />
140 122 85 112 14.0<br />
487<br />
532<br />
577<br />
666<br />
715<br />
905<br />
1095<br />
1285<br />
HR X-Wing 8 R +<br />
Lightrak R<br />
144 120 72 100 10.5<br />
152 120 73 101 12.0<br />
102808 160 120 74 102 13.6<br />
168 120 75 103 15.3<br />
176 120 76 104 17.2<br />
606<br />
645<br />
685<br />
725<br />
766<br />
1620<br />
1740<br />
1860<br />
1980<br />
2100<br />
Lightrak<br />
FR X-Wing 6 R +<br />
L10 SC B80<br />
137 112 72 98 10.5<br />
111328<br />
144 113 72 99 11.4<br />
151 114 72 100 12.2<br />
158 115 72 101 13.2<br />
111218<br />
165 116 72 102 14.1<br />
172 117 72 103 15.1<br />
573<br />
599<br />
642<br />
678<br />
713<br />
749<br />
1550<br />
1655<br />
1760<br />
1865<br />
1970<br />
2075<br />
L10 SC ITF Loc<br />
NR X-Wing 6 R<br />
137 112 72 98 10.5<br />
144 113 72 99 11.4<br />
102815 151 114 72 100 12.2<br />
111212 158 115 72 101 13.2<br />
165 116 72 102 14.1<br />
172 117 72 103 15.1<br />
573<br />
599<br />
642<br />
678<br />
713<br />
749<br />
1150<br />
1255<br />
1360<br />
1465<br />
1570<br />
1675<br />
FR XW Focus +<br />
L10 SC B80<br />
111331<br />
125 112 78 102 10.5<br />
135 113 74 93 13.0<br />
111467<br />
145 116 74 96 13.5<br />
155 119 74 100 14.0<br />
165 122 74 103 14.5<br />
119391<br />
175 123 74 107 15.0<br />
556<br />
545<br />
595<br />
645<br />
695<br />
755<br />
1580<br />
1690<br />
1800<br />
1910<br />
2020<br />
2130<br />
L10 SC ITF Loc<br />
HR 24 GT Pro R +<br />
Lightrak<br />
144 115 72 98 11.9<br />
151 116 72 99 12.8<br />
111205 158 117 72 100 13.9<br />
165 118 72 101 14.8<br />
172 119 72 102 15.7<br />
606<br />
641<br />
676<br />
712<br />
748<br />
1495<br />
1600<br />
1705<br />
1810<br />
1915<br />
Lightrak<br />
FR 24 Sport R +<br />
L10 SC B80<br />
144 115 72 98 11.9<br />
151 116 72 99 12.8<br />
111207 158 117 72 100 13.9<br />
165 118 72 101 14.8<br />
172 119 72 102 15.7<br />
606<br />
641<br />
676<br />
712<br />
748<br />
1635<br />
1740<br />
1845<br />
1950<br />
2055<br />
L10 SC ITF Loc<br />
NR 24 Sport R<br />
144 115 72 98 11.9<br />
151 116 72 99 12.8<br />
111208 158 117 72 100 13.9<br />
165 118 72 101 14.8<br />
172 119 72 102 15.7<br />
606<br />
641<br />
676<br />
712<br />
748<br />
1235<br />
1340<br />
1445<br />
1550<br />
1655<br />
FR Crossmax 120 +<br />
L10 SC B<br />
111209 125 112 78 102 10.5 556 1580 L10 SC ITF Loc<br />
NR The Knight R<br />
151 122 85 112 14.2 713/738 1560<br />
111217<br />
161 122 85 112 16.3 740/775 1660<br />
171 122 85 112 18.5 820/855 1760<br />
176 122 85 112 19.6 851/886 1800<br />
FR Origins Crystal +<br />
L10 SC<br />
137 112 72 98 10.5<br />
144 113 72 99 11.4<br />
111216 151 114 72 100 12.2<br />
158 115 72 101 13.2<br />
165 116 72 102 14.1<br />
581<br />
607<br />
650<br />
686<br />
721<br />
1550<br />
1655<br />
1760<br />
1865<br />
1970<br />
L10 SC ITF Loc<br />
NR Origins Crystal R<br />
137 112 72 98 10.5<br />
144 113 72 99 11.4<br />
102820 151 114 72 100 12.2<br />
158 115 72 101 13.2<br />
165 116 72 102 14.1<br />
581<br />
607<br />
650<br />
686<br />
721<br />
1150<br />
1255<br />
1360<br />
1465<br />
1570<br />
FR 24 Jr R L +<br />
L7 SC<br />
111814 140<br />
150 107 65 88<br />
108 65 89 13.0<br />
•<br />
14.0<br />
585<br />
635<br />
1460<br />
1560<br />
L7 SC ITF Loc Junior<br />
RENTAL: Junior Rtl<br />
FR 24 Jr R M +<br />
T5 SC<br />
111817 120<br />
130 106 65<br />
107 65<br />
86<br />
87<br />
9.5<br />
11.0<br />
485<br />
535<br />
1240<br />
1360<br />
FR 24 Jr R S +<br />
T5 SC<br />
111820 100<br />
110 100 65 84 7.0<br />
103 65 86 7.5<br />
405<br />
450<br />
980<br />
1000<br />
FR 24 Jr R XS +<br />
T5 SR<br />
111824 70 91<br />
80 96<br />
90 100<br />
65 75 4.5<br />
65 79 5.0<br />
65 83 5.5<br />
300<br />
330<br />
365<br />
760<br />
800<br />
890<br />
FR XW Fury Junior L +<br />
L7 S<br />
111815 140<br />
150 107 65 88<br />
108 65 89 13.0<br />
14.0<br />
585<br />
635<br />
1460<br />
1560<br />
FR XW Fury Junior M+<br />
T5 SC<br />
111822 120<br />
130 106 65<br />
107 65<br />
86<br />
87<br />
9.5<br />
11.0<br />
485<br />
535<br />
1240<br />
1360<br />
FR XW Fury Junior S+<br />
T5 SC<br />
111821 100<br />
110 100 65 84 7.0<br />
103 65 86 7.5<br />
405<br />
450<br />
980<br />
1000<br />
FR XW Fury Junior XS +<br />
T5<br />
111825 70 91<br />
80 96<br />
90 100<br />
65 75 4.5<br />
65 79 5.0<br />
65 83 5.5<br />
300<br />
330<br />
365<br />
760<br />
800<br />
890<br />
FR Jade Junior L+<br />
L7 SC<br />
111816 140<br />
150 107 65 88<br />
108 65 89 13.0<br />
14.0<br />
585<br />
635<br />
1460<br />
1560<br />
FR Jade Junior M+<br />
T5 SC<br />
FR Jade Junior S+<br />
T5 SC<br />
FR Jade Junior XS+<br />
T5 SR<br />
111818 120<br />
130 106 65<br />
107 65<br />
86<br />
87<br />
9.5<br />
11.0<br />
485<br />
535<br />
1240<br />
1360<br />
111819 100<br />
110 100 65 84 7.0<br />
103 65 86 7.5<br />
405<br />
450<br />
980<br />
1000<br />
111826 70 91<br />
80 96<br />
90 100<br />
65 75 4.5<br />
65 79 5.0<br />
65 83 5.5<br />
300<br />
330<br />
365<br />
760<br />
800<br />
890<br />
Sandwich Sidewalls<br />
Monocoque<br />
Edgy Monocoque<br />
Twintip<br />
Woodcore<br />
Composite<br />
Powerline<br />
Bamboo layer<br />
Basalt layer<br />
3D Race Frame<br />
Ti Laminate<br />
Wider Edges<br />
Total Edge Reinforcement<br />
Edge Armor<br />
Race Base<br />
3D Race<br />
3D Race<br />
3D Race<br />
3D Race<br />
•<br />
•<br />
•<br />
•<br />
•<br />
•<br />
•<br />
•<br />
•<br />
•<br />
•<br />
•<br />
•<br />
3D Sport<br />
3D Sport<br />
3D Race<br />
•<br />
•<br />
•<br />
T5 SC ITF Loc Junior •<br />
T5 SC ITF Loc Junior •<br />
T5 SR ITF Loc Junior •<br />
L7 SC ITF Loc Junior •<br />
T5 SC ITF Loc Junior •<br />
T5 SC ITF Loc Junior •<br />
T5 SR ITF Loc Junior •<br />
L7 SC ITF Loc Junior •<br />
T5 SC ITF Loc Junior •<br />
T5 SC ITF Loc Junior •<br />
T5 SR ITF Loc Junior •<br />
Full<br />
Full<br />
Full<br />
Full<br />
C<br />
C<br />
C<br />
C<br />
C<br />
C<br />
C<br />
C<br />
C<br />
C<br />
C<br />
• C<br />
• C<br />
•<br />
C •<br />
C •<br />
C •<br />
C<br />
C<br />
C<br />
C<br />
Double<br />
Double<br />
Double<br />
Double<br />
C W T<br />
C<br />
C<br />
C<br />
C<br />
C<br />
C<br />
C<br />
C<br />
C<br />
C<br />
C<br />
C<br />
C<br />
C<br />
4000 Ptex<br />
Chassis (mm)<br />
Body (mm)<br />
4000<br />
4000<br />
4000<br />
1840<br />
1840<br />
1840<br />
1840<br />
1840<br />
1840<br />
1840<br />
1840<br />
1840<br />
1840<br />
1840<br />
1840<br />
1840<br />
4000<br />
M (75)<br />
2000<br />
S (72)<br />
2000<br />
S (72)<br />
2000<br />
M (75)<br />
4000<br />
4000<br />
4000<br />
2000<br />
2000<br />
4000<br />
4000<br />
1840<br />
1840<br />
1840<br />
1840<br />
1840<br />
1840<br />
1840<br />
1840<br />
1840<br />
1840<br />
1840<br />
1840<br />
S (72)<br />
S (72)<br />
Pulse Pad; G3 ISO Norm<br />
Pulse Pad; G3 ISO Norm<br />
Pulse Pad; G3 ISO Norm<br />
Pulse Pad; G3 ISO Norm<br />
G3 ISO Norm; Reinforced Structured Top Sheet; Tip Protector<br />
G3 ISO Norm; Reinforced Structured Top Sheet; Tip Protector<br />
Screw Length < 6 mm +/- 0,5; G3 ISO Norm;<br />
Reinforced Structured Top Sheet<br />
G3 ISO Norm; Reinforced Structured Top Sheet; Tip Protector<br />
Screw Length < 6 mm +/- 0,5; G3 ISO Norm;<br />
Reinforced Structured Top Sheet; Tip Protector<br />
Screw Length < 6 mm +/- 0,5; G3 ISO Norm;<br />
Reinforced Structured Top Sheet<br />
Screw Length < 6 mm +/- 0,5; G3 ISO Norm;<br />
Reinforced Structured Top Sheet<br />
Screw Length < 6 mm +/- 0,5; G3 ISO Norm<br />
Screw Length < 6 mm +/- 0,5; G3 ISO Norm<br />
Pulse Pad; Women Stance (Fwd mounted binding (+ 8 mm));<br />
G1 ISO Norm; Bar Coding; Reinforced Structured Top Sheet;<br />
Reinforced Mat Top Sheet; Reinforced Black Base; Tip Protector<br />
G1 ISO Norm; Bar Coding; Size Color Coding;<br />
Reinforced Structured Top Sheet; Reinforced Mat Top Sheet<br />
(only C/O version is concerned); Reinforced Black Base;<br />
Tip Protector<br />
G1 ISO Norm; Bar Coding; Reinforced Structured Top Sheet;<br />
Reinforced Mat Top Sheet (only C/O version is concerned);<br />
Reinforced Black Base; Tip Protector<br />
G1 ISO Norm; Bar Coding; Size Color Coding;<br />
Reinforced Structured Top Sheet; Reinforced Black Base;<br />
Tip Protector<br />
Pulse Pad; G1 ISO Norm; Bar Coding;<br />
Reinforced Structured Top Sheet; Reinforced Black Base;<br />
Tip Protector<br />
Pulse Pad; G1 ISO Norm; Bar Coding; Size Color Coding;<br />
Reinforced Structured Top Sheet; Reinforced Black Base;<br />
Tip Protector<br />
Pulse Pad; G1 ISO Norm; Bar Coding;<br />
Reinforced Structured Top Sheet; Reinforced Black Base;<br />
Tip Protector<br />
Bar Coding; Size Color Coding; Reinforced Structured Top Sheet;<br />
Reinforced Mat Top Sheet; Reinforced Black Base; Tip Protector<br />
Semi Twin Tip Tail; G1 ISO Norm; Bar Coding;<br />
Reinforced Structured Top Sheet; Reinforced Black Base;<br />
Tip Protector<br />
Women Stance (Fwd mounted binding (+ 8 mm));<br />
G1 ISO Norm; Bar Coding; Reinforced Structured Top Sheet;<br />
Reinforced Mat Top Sheet; Reinforced Black Base; Tip Protector<br />
Women Stance (Fwd mounted binding (+ 8 mm));<br />
G1 ISO Norm; Bar Coding; Reinforced Structured Top Sheet;<br />
Reinforced Mat Top Sheet; Reinforced Black Base; Tip Protector<br />
G3 ISO Norm; Bar Coding; Reinforced Structured Top Sheet;<br />
Reinforced Black Base; Tip Protector<br />
Screw Length < 6 mm +/- 0,5; G3 ISO Norm; Bar Coding;<br />
Reinforced Structured Top Sheet; Reinforced Black Base;<br />
Tip Protector<br />
Screw Length < 6 mm +/- 0,5; G3 ISO Norm; Bar Coding;<br />
Reinforced Structured Top Sheet; Reinforced Black Base<br />
Screw Length < 6 mm +/- 0,5; G3 ISO Norm; Bar Coding;<br />
Reinforced Structured Top Sheet; Reinforced Black Base<br />
G3 ISO Norm; Bar Coding; Reinforced Structured Top Sheet;<br />
Reinforced Black Base; Tip Protector<br />
Screw Length < 6 mm +/- 0,5; G3 ISO Norm; Bar Coding;<br />
Reinforced Structured Top Sheet; Reinforced Black Base;<br />
Tip Protector<br />
Screw Length < 6 mm +/- 0,5; G3 ISO Norm; Bar Coding;<br />
Reinforced Structured Top Sheet; Reinforced Black Base<br />
Screw Length < 6 mm +/- 0,5; G3 ISO Norm; Bar Coding;<br />
Reinforced Structured Top Sheet; Reinforced Black Base;
alpine SKi<br />
Maintenance & repairS<br />
Ski maintenance<br />
Good ski maintenance is just as important for the recreational skier as for the racer. A fine-tuned ski lasts<br />
longer. A well-prepared ski turns better, grips the snow better and glides better on all types of snow.<br />
the ski tune-up involves three steps:<br />
1. daily check-up - at the end of everyday of skiing.<br />
2. Machine tuning - for quick work.<br />
3. complete hand tuning - for skier’s specific needs.<br />
check-up<br />
• Visually check to see if any rust<br />
has developed on the edges.<br />
Machine tuning<br />
A S<br />
Stone grinding the ski base<br />
Surface Smoothing<br />
grinding<br />
rotation speed<br />
1000 t/mn<br />
pressure 2,5<br />
Ski feed speed<br />
10 m/mn<br />
dressing<br />
Dressing rate<br />
9 - 12 mm/s<br />
(depending on the condition of the ski)<br />
dressing speed<br />
Micro automatic<br />
(1300t/mn)<br />
Semi finishing<br />
grinding<br />
rotation speed<br />
800 to 900 t/mn<br />
pressure 2,5<br />
Ski feed speed<br />
10 m/mn<br />
dressing<br />
Dressing rate<br />
4 - 16 mm/s<br />
dressing speed<br />
(1300 t/mn)<br />
• Remove any traces with fine,<br />
220-230 grit sandpaper.<br />
finishing<br />
grinding<br />
rotation speed<br />
400 to 500 t/mn<br />
Minimum pressure<br />
Ski feed speed<br />
10 - 11 m/mn<br />
dressing<br />
Dressing rate<br />
7 - 8 mm/s<br />
dressing speed<br />
(1300 t/mn)<br />
Values from Wintersteiger machines (Micro 81 – Micro 91) or equivalent machines.<br />
Ski tuning on beveled/recessed edges<br />
parameter of the<br />
machine<br />
Beveled edge recessed edge<br />
program 1 angle 1° angle 1°<br />
Program from Wintersteiger machine (Trim Disc).<br />
maIntenance & rePaIr > 43<br />
• If necessary, sharpen and polish<br />
edges using sandpaper wrapped<br />
around a file.<br />
D Fa<br />
a) Surface smoothing<br />
– Place the skis on a flat surface.<br />
– Eliminate any excess polyethylene<br />
on the base with a hand base<br />
plane to decrease the risks of<br />
contaminating the stone.<br />
b) Semi finishing<br />
– Stone grind until the base becomes<br />
flat and glossy.<br />
– Avoid overheating and use of a<br />
dirty stone (lengthwise streaks on<br />
base are from stone contaminant).<br />
– Dress the stone regularly to keep<br />
it in good condition (when using a<br />
belt grinding machine: use 80 grit<br />
belt).<br />
edge finishing<br />
We recommend grinding the edges<br />
with a cup grinding wheel. fig. D<br />
• Check the angle adjustment beforehand.<br />
• Make sure the stones are well<br />
lubricated.<br />
• Make sure the edges are not<br />
burnt (brown color).<br />
• Check the tuning lengths.<br />
• Clean the base and wax with<br />
Swix wax.<br />
Ski check-up<br />
• Visually check to determine what needs to be tuned.<br />
• Remove major deep scratches on edges with whetstone (see page 44 for repairing).<br />
• Remove any traces of wax or grease.<br />
fill in any holes in the base<br />
(see base repairs on page 45)<br />
depending on the conditions of the base and materials available:<br />
a) Grind entire base surface. fig. A<br />
Stone grinding<br />
b) Fill-in scratches with base repair material.<br />
For Prolink skis, install the Binding-Bridge kit according to the<br />
c) Repair any large damaged areas with base patch/die.<br />
Maintenance Specifics paragraph on page 44.<br />
F<br />
b<br />
c) finishing fig. S<br />
– Stone grind to obtain a fine structure<br />
(when using a belt grinding<br />
machine: use 150 grit belt).<br />
– Do not use a dirty stone which<br />
creates fluff/hair.<br />
d) Beveled/recessed finish<br />
For skis with beveled/recessed finish,<br />
we recommend a straight, fine<br />
stone-ground structured base.<br />
note: always make the last run in this<br />
direc tion: Tip – Tail. Concerning<br />
the machine parame ters, consult<br />
the machine manufacturer.<br />
• Smooth the edges by hand with<br />
a soft stone (fig. Fa) or Scotch<br />
Brite ® (fig. Fb)<br />
• Make sure all burrs are removed<br />
and smooth down again, if necessary.<br />
for non equiped retailers they<br />
can do a classic tuning.
alpine SKi<br />
Maintenance & repairS (continued)<br />
Machine tuning (continued)<br />
G H J<br />
lateral finish (fig. G):<br />
• Lateral finishing with lubricated<br />
220 belt (or use the smallest grit<br />
possible).<br />
• Pass over the edges 1-2 times<br />
depending on the condition of the<br />
edges.<br />
• A double sided sharpener will<br />
maintain the ski’s proper side cut.<br />
• For a performance preparation,<br />
polish the base edge with a polish<br />
ing stone or whetstone to<br />
elim i nate any file marks on the<br />
edges.<br />
K L :<br />
Waxing, scraping and brushing<br />
a) Waxing (fig. K)<br />
- It’s best to use melted wax.<br />
- Clean the base thoroughly.<br />
- Make sure the iron is set at the appropriate<br />
temperature so that only<br />
the wax is melted. (Temperature<br />
110 °C +/- 5 °C or 230 °F +/-<br />
10 °F).<br />
hand tuning<br />
a true bar is the basic tool for<br />
checking and assessing:<br />
• ski base flatness,<br />
• that the edge is slightly recessed<br />
from the base,<br />
• the extent of base scratches and<br />
appropriate repair. The edge angle<br />
checking tool is used to verify<br />
that the edge has an angle of 90°.<br />
Ski check-up<br />
• Check the base and edges of your<br />
skis with a true bar.<br />
• If repairs are necessary, see instructions<br />
on page 45.<br />
cleaning the skis > Warning<br />
excess heat (above 120 °c or 248°f)<br />
can be harmful to both wax and ski,<br />
and can even cause permanent loss<br />
of glide qualities in the base.<br />
- Choose a wax according to the wax<br />
manu facturer’s recommendations.<br />
- Melt the selected wax over the entire<br />
length of the base, and let the<br />
wax cool to room temperature.<br />
Smoothing the base<br />
and edges (fig. D)<br />
classic finish: If damage is only minor,<br />
use a file to tune ; otherwise the<br />
ski must be tuned on a machine.<br />
Beveled/recessed finish: the<br />
recommended bevel is between 1°<br />
and 1.5°.<br />
edge sharpening (fig. D)<br />
• Sharpen base edges.<br />
• Sharpen side edges.<br />
on classic finish: make sure the<br />
edges are at 90°.<br />
Pressurized cleaners are prohibited, as well as the following solvents:<br />
› acetone<br />
› 95° alcohol<br />
(due to risk of damaging the cosmetics of the top surface of the ski).<br />
maIntenance & rePaIr > 44<br />
• Remove burrs and polish edges<br />
with a lubricated Scotch Brite ®<br />
belt machine at a slow speed.<br />
fig. J<br />
• Be careful to lubricate sufficiently<br />
to avoid burning the base.<br />
b) Scraping (fig. L)<br />
- Remove the excess wax with a<br />
plastic scraper from tip to tail to<br />
leave only a very thin layer.<br />
- Remove wax from the base groove<br />
and ski edges as well.<br />
c) Brushing (fig. :)<br />
- Brush the base with a nylon brush<br />
(or other type depending on the<br />
on Beveled/recessed finish: make<br />
sure that the beveled and recessed<br />
edge angle is between 1° and 1.5°.<br />
• Round off the tip and tail slightly.<br />
• Remove any burrs with soft stone<br />
or Scotchbrite ® .<br />
polishing the edges<br />
Polish the edges with a whetstone,<br />
starting first on the base and then<br />
the sides.<br />
Waxing, scraping and<br />
brushing<br />
Follow the same instructions as in<br />
machine tuning.<br />
tuning skis with prolink on automatically<br />
programmable machines<br />
and machines with a lead:<br />
To be able to tune skis with the Y<br />
and V prolink, we have developed<br />
a specific tuning kit in cooperation<br />
with the Wintersteiger company.<br />
• Carefully remove all burrs with a<br />
soft stone.<br />
• Quickly wipe the ski to avoid<br />
staining from the dried lubricant.<br />
a well-sharpened ski is always<br />
sharper underfoot than at the<br />
extremities of the ski.<br />
toolS:<br />
• Wax remover<br />
• Iron with thermostat<br />
• Wax applicator<br />
• Plastic scraper<br />
• Brush<br />
structure desired) working from tip<br />
to tail.<br />
- A rotating brush removes the structure<br />
of the base for good glide.<br />
Strap the skis together. Position the<br />
straps at the base contact points.<br />
note: The skis can be stored readywaxed<br />
(unscraped) for an extended<br />
period of time (e.g. between ski<br />
seasons).<br />
toolS:<br />
- Square<br />
- 20 cm (8 inch)<br />
file<br />
- Whetstone<br />
- Soft stone<br />
- Scrapers<br />
- Brushes<br />
de-tuning the edge angle at<br />
the extremities<br />
important: After all finishing operations<br />
(by hand or machine) it is<br />
essential to remove any burrs from<br />
edges and to polish the edges to<br />
ensure good ski performance.<br />
Maintenance specifics > prolink adapter<br />
- Scotchbrite ®<br />
- Sandpaper<br />
(220-320 grit)<br />
- Central holding<br />
vise<br />
- Swix wax<br />
This new Prolink adapter can<br />
be mounted on the adjustable<br />
Wintersteiger bridge (ref. 2000:<br />
7217-0111-V01) and is available at<br />
Wintersteiger under the reference<br />
7217-0111- V05.
alpine SKi<br />
Maintenance & repairS (continued)<br />
repairing the surface of skis and snowblades<br />
A<br />
G<br />
L<br />
there are two methods for<br />
repairing the ski surface:<br />
1) ‘One colored’ paste + Araldite ®<br />
2) ‘Multi colored’ Araldite ® + white<br />
+ coloring<br />
repair process:<br />
1. With a cutter, outline the area<br />
to be repaired, then cut the top<br />
surface. fig. A<br />
2. Result after cutting the top surface.<br />
fig. S<br />
3. With a cutter, score area to repair<br />
(fibers) to improve bonding.<br />
fig. D<br />
4. To protect top surface, put adhesive<br />
tape around the area to<br />
repair. fig. F<br />
5. Prepare Araldite ® resin with gun.<br />
6. Which type of repair to choose:<br />
a) One-color surface repair<br />
b) Multicolored surface repair<br />
7. Add a small quantity of coloring<br />
paste to the Araldite ® resin.<br />
Gently mix (in order to avoid<br />
the tpp top surface<br />
All the adult and Rental models are<br />
protected by the TPP (Transparent<br />
Polyamide Protection). Regarding<br />
the Junior models, they are<br />
protected by TP (Transparent<br />
Protection).<br />
The transparent tops cover the<br />
cosmetics underneath, which<br />
guarantees the durability of the<br />
cosmetics.<br />
S<br />
H<br />
:<br />
bubbles) to obtain a homo geneous<br />
mixture. Add a small<br />
quantity of coloring paste (White<br />
DW 0131) to the Araldite ® resin.<br />
White paste is used as a primer<br />
in order to have the desired<br />
colors afterwards. Gently mix (in<br />
order to avoid bubbles) to obtain<br />
a homogeneous mixture. fig. G<br />
8. Apply thicker than top surface of<br />
the ski in the areas to be filled.<br />
Wait a few moments to eliminate<br />
bubbles if necessary. fig. H<br />
9. Put adhesive tape on the area to<br />
avoid running. Let it dry for 12<br />
hours. fig. J<br />
10. After 12 hours of drying, remove<br />
the adhesive tape from the mixture.<br />
Do not remove the adhesive<br />
tape around the area which<br />
protects the top surface from<br />
scratches. Use the flat side of a<br />
cutter to scrape off the excess<br />
mixture. fig. K<br />
Base repairs<br />
Superficial scratches<br />
Machine tuning will make the<br />
scratch disappear (see the ski maintenance<br />
repair)<br />
maIntenance & rePaIr > 45<br />
D<br />
J<br />
11<br />
11. Smooth it down with 600 grain<br />
sand paper. Remove the adhesive<br />
tape. fig. L<br />
12. Finish sanding gently in order<br />
to obtain a smooth surface. Be<br />
careful of the ski’s decor/cosmetics.<br />
create a decoration<br />
13. For the coloring stage, do not try<br />
creating tone on tone to create<br />
the exact color of the ski. Trying<br />
to reproduce a motif of the ski<br />
design already present elsewhere<br />
is better and easier. The<br />
final layer of Araldite ® tends to<br />
lighten colors. fig. :<br />
14. Use the Araldite ® gun for a<br />
varnish finish which will protect<br />
the ski surface from cuts from<br />
the edges. A small quantity of<br />
Araldite ® is sufficient.<br />
15. Apply a fine layer of Araldite ®<br />
with a cutter to avoid excessive<br />
thickness. fig. ● 11<br />
not very deep scratches or<br />
marks to be filled by machine<br />
- Pour the polyethylene.<br />
- Wait 10 minutes for the material<br />
to harden.<br />
- Remove the excess polyethylene<br />
with a steel spatula for a flat surface.<br />
- Proceed with machine tuning.<br />
F<br />
K<br />
12<br />
16. Using a dust-free cloth, wipe off<br />
the excess Araldite ® to obtain<br />
a smooth, even surface. Let it<br />
dry for 30 minutes. The repair is<br />
finished. fig. ● 12<br />
MaterialS needed:<br />
• Araldite ® 2011<br />
• Araldite ® gun 50 ml<br />
• Araldite ® coloring paste for<br />
smooth color (DW 0131 White,<br />
DW 0133 Red, DW 0137 Black,<br />
DW 0132 Yellow, DW 0134 Green,<br />
DW 0135 Blue)<br />
• White paste for undercoating<br />
for decoration (DW 0131 White)<br />
• Felt pen to color the design,<br />
type 3 points, permanent<br />
(Ref: Pantone 87828 -<br />
color number).<br />
acceSSorieS:<br />
• Cutter<br />
• Adhesive tape<br />
• Towel<br />
• Sand paper, Grain 600<br />
deep cuts<br />
- Cut out the damaged area with the<br />
base patch die.<br />
- Cut a piece of the base material<br />
with the base patch die.<br />
- Glue it into the damaged area.<br />
- Hold it in place with a clamp and<br />
press repair (glue the pieces with<br />
Loctite ® 406 or slow Araldite ® ).<br />
- Proceed with machine tuning.
alpine SKi<br />
Maintenance & repairS (continued)<br />
replacing the tip protector<br />
A S D<br />
a<br />
F G H<br />
J<br />
b<br />
a<br />
b<br />
replacing edges<br />
A<br />
F<br />
repair process:<br />
1. Verify that the ski can be repaired.<br />
2. Remove the binding and clean<br />
the ski.<br />
3. Check the length of the edge to<br />
be replaced. fig. A<br />
Cut out the base where the<br />
edge must be changed (10 mm<br />
beyond) with the base patch die<br />
or cutter (in this case, make a<br />
reproducible cut-out). fig. S<br />
4. Cut the 2 sides of edges between<br />
two wings with 45°<br />
angle, as illustrated.<br />
5. Cut out the edge carefully with<br />
cutter or wood chisel, then<br />
roughen the area with 80 grit<br />
sandpaper. fig. D<br />
6. Cut the new edge, trim it and<br />
remove the grease.<br />
S<br />
G<br />
7. Place the new edge and screw<br />
2 wings near the tip.<br />
Wedge in place in order to<br />
maintain a good profile and<br />
keep the edge horizontal.<br />
fig. F<br />
8. Apply epoxy to affected area<br />
and heat slightly with heat gun,<br />
concentrating on each wing.<br />
9. Put plastic over cut out area<br />
and insert piece of new base<br />
material.<br />
10. Cover the affected area with<br />
mold release paper and place<br />
ski in heat press. fig. G<br />
11. When the epoxy has cured,<br />
remove the ski from the heat<br />
press and remove base patch<br />
and plastic film.<br />
maIntenance & rePaIr > 46<br />
2007/2008 rental tip protector<br />
“triangle” tip protector (fig. Aa).<br />
“hexagonal” tip protector<br />
(fig. Ab).<br />
1. Check that the tip protector is on<br />
the right position (<strong>Salomon</strong> logo<br />
on top foil side (fig. S).<br />
2. Set up the tip protector on the<br />
lateral groove with a rubber hammer<br />
(fig. D&F).<br />
3. Set up the tip protector on the<br />
central groove (fig. G).<br />
4. Finish the mounting on the second<br />
lateral groove with a rubber<br />
hammer (fig. H).<br />
D<br />
12. Reapply epoxy to the affected<br />
area.<br />
13. Carefully insert piece of base<br />
material into cut-out area.<br />
14. Cover affected area with mold<br />
release paper and place ski in<br />
heat press.<br />
15. When the epoxy has cured,<br />
remove the ski from the heat<br />
press.<br />
16. Grind base and edge locally.<br />
17. Plane patch area to obtain<br />
proper geometry with base<br />
plane or file.<br />
18. Repair any damage to top layer<br />
with a mixture of epoxy and<br />
colorant.<br />
19. Tune and wax the ski.<br />
others rental models use<br />
rental tip protector range 05<br />
”triangle” tip protector (fig. Ja).<br />
“hexagonal” tip protector<br />
(fig. Jb).<br />
1. Insert the tip protector on<br />
the ski.<br />
2. Place the 2 screws in the 2 holes<br />
face the running base and screw<br />
on (1N.m).<br />
MaterialS<br />
• screw (wood, 1,5 x 15 mm)<br />
• epoxy<br />
• epoxy colorant or methane glue<br />
• mold release paper or PE film<br />
• base patch die (KT Technic)<br />
• cutter, ruler<br />
• scale model drilling machine with<br />
cutting disc<br />
• narrow screwdriver<br />
• heat gun<br />
• wood chisel<br />
• repair press 200 mm length<br />
• base plane Wintersteiger, file<br />
• belt grinder<br />
• stone grinder<br />
partS (see page 70)<br />
reference # Item Name<br />
S90190 Standard <strong>Salomon</strong> edges<br />
for all skis
Boot<br />
Technical reference<br />
for the complete<br />
line of current<br />
<strong>Salomon</strong> alpine<br />
boots<br />
Standard Boot norMS<br />
Standard Boot Sole dimensions > iSo 5355<br />
The Alpine boot soles are standardized and bindings are designed accordingly.<br />
The standard norm concerns not only the shape and dimensions as illustrated, but also the friction coefficient<br />
of the area of the sole which is in contact with the anti-friction plate on the binding.<br />
in practical terms:<br />
The boot manufacturers who display<br />
one of the following markings:<br />
DIN, ISO, ÖN, UNI guarantee that they<br />
use standard norms.<br />
In the absence of any of these, check<br />
first with the boot manufacturer. These<br />
boots are designed for use with a pair<br />
of classic skis, and not with a monoski,<br />
snowboard or skiboard.<br />
It is the skier’s own responsibility if (s)<br />
he chooses to take the additional risks.<br />
When a pair of used boots is brought<br />
in, make sure that any worn parts are<br />
still within the norm.<br />
adult boot Junior boot<br />
a 69 ± 2 62 ± 2<br />
B 70 65<br />
c 70 50<br />
d* 100 (L < 300 mm) 80 (L < 240 mm)<br />
120 (L<br />
1,5<br />
max. I H<br />
G 40 min.<br />
(side view)<br />
> = 300 mm) 90 (L > legend (measurements in mm) Boot heel<br />
= 240 mm)<br />
e 5 ± 1 3 ± 1<br />
f 19 ± 1 16.5 ± 1.5<br />
g<br />
h<br />
i<br />
30 ± 2<br />
30 ± 1<br />
4 ± 1<br />
25 ± 2<br />
27.5 ± 2<br />
3 ± 1<br />
ra 41.5 ± 3.5 35 ± 3<br />
rB 18 ± 1.5 16 ± 2<br />
rc 37 ± 4 27 ± 3<br />
rd 36.25 ± 0.75 34.5 ± 1<br />
*L = boot sole length<br />
Boot Modification<br />
Boot toe<br />
A<br />
RB<br />
RA<br />
B<br />
(bottom view)<br />
7 ± 1<br />
5 min.<br />
F<br />
E<br />
G 40 min.<br />
(side view)<br />
6 min.<br />
8 ± 1<br />
RD<br />
RC<br />
D C<br />
(bottom view)<br />
any performance or fit modification of a boot that could effect the function between the boot and binding should be inspected to verify that the<br />
boot meets Standard alpine Boot norms. Mechanical inspection is recommended after any such modification.<br />
47<br />
1,5<br />
max.<br />
A<br />
Photo: Christoffer Sjostrom. Skier: Kaj Zackrisson.
Boot<br />
technical featureS<br />
Boot sole lengths<br />
last recap per concept<br />
Models<br />
95 mm<br />
Last<br />
98 mm<br />
Last<br />
rental: intelligent color coding<br />
standards & technIcal features > 48<br />
Mondopoint SiZeS<br />
ModelS<br />
15 16 17 18 19 20 21<br />
22<br />
22.5<br />
23<br />
23.5<br />
24<br />
24.5<br />
25<br />
25.5<br />
26<br />
26.5<br />
27<br />
27.5<br />
28<br />
28.5<br />
29<br />
29.5<br />
30<br />
30.5<br />
31<br />
31.5<br />
32<br />
32.5<br />
33<br />
33.5<br />
X3 laB<br />
X3 rc cS / X3 10 cS /<br />
275 285 295 305 315 325<br />
X3 cS / ghoSt / Shogun /<br />
poiSon / X3 Jr pro / X3 Jr<br />
265 274 285 295 305 315 326 336<br />
MiSSion rS / diVine rS 268 278 288 298 308 318 328 338 358 358 378 378<br />
MiSSion / diVine 268 277 288 298 307 317 328 339 350 360<br />
pro Model/Kaïd/Keira/<br />
KaoS/Kreation<br />
267 277 287 297 307 317 327 337<br />
iMpact / idol / iMpact Jr 267 277 287 297 307 317 327 337 347 357<br />
charM 265 274 286 295 307<br />
focuS 267 277 287 297 307 317 327 337 357 357<br />
focuS gt 277 277 297 297 317 317 337 337 357 357<br />
X3 60 240 240 247 257 267 277 287 295 307<br />
t3 266 276 285 296 306<br />
t2 / team 240 240 247 259<br />
t1 208 208 223 223<br />
perforMa / irony 267 277 287 298 307 319 329 339 349 359 380 380<br />
SyMBio rental 263 275 284 296 306 317 326 336 345<br />
100 mm<br />
Last<br />
102 mm<br />
Last<br />
104 mm<br />
Last<br />
106 mm<br />
Last<br />
X3 LAB •<br />
X3 / Instinct Custom Shell<br />
Impact / Idol Custom Shell<br />
Mission RS / Divine RS •<br />
Mission / Divine •<br />
Charm •<br />
Quest •<br />
Focus • • •<br />
color coding per concept Size<br />
108 mm<br />
Last<br />
S<br />
A rental : global solution provider.<br />
available on all <strong>Salomon</strong> rental<br />
boots.<br />
Color Code Black Green Yellow Orange Red Purple Blue<br />
Boot Sole Lengths (mm) 260-273 274-288 289-304 305-318 319-334 335-348 349-384<br />
Impact/Idol<br />
Mission RS Divine RS<br />
Quest<br />
Focus RS/ RS W / Jp<br />
Mission/Divine<br />
Symbio<br />
Focus GT<br />
Warning! 1 shell length for 2 sizes<br />
22/22,5<br />
267 mm<br />
22/22,5<br />
267 mm<br />
22/22,5<br />
268 mm<br />
22/22,5<br />
263 mm<br />
22/22,5<br />
278 mm<br />
23/23,5<br />
277 mm<br />
22/22,5<br />
278 mm<br />
23/23,5<br />
277 mm<br />
23/23,5<br />
278 mm<br />
23/23,5<br />
275 mm<br />
22<br />
277 mm<br />
23/23,5<br />
278 mm<br />
24/24,5<br />
287 mm<br />
23/23,5<br />
288 mm<br />
24/24,5<br />
287 mm<br />
24/24,5<br />
288 mm<br />
24/24,5<br />
284 mm<br />
23<br />
277 mm<br />
24/24,5<br />
288 mm<br />
24<br />
297 mm<br />
25/25,5<br />
297 mm<br />
25/25,5<br />
298 mm<br />
24/24,5<br />
298 mm<br />
25/25,5<br />
297 mm<br />
25/25,5<br />
298 mm<br />
25/25,5<br />
296 mm<br />
25<br />
297 mm<br />
Color coding on the boots (fig. A)<br />
matches the Synchro Center toe<br />
piece markings (fig. S).<br />
26/26,5<br />
307 mm<br />
26/26,5<br />
308 mm<br />
25/25,5<br />
308 mm<br />
26/26,5<br />
307 mm<br />
26/26,5<br />
307 mm<br />
26/26,5<br />
306 mm<br />
26<br />
317 mm<br />
27/27,5<br />
317 mm<br />
27/27,5<br />
318 mm<br />
26/26,5<br />
318 mm<br />
27/27,5<br />
317 mm<br />
27/27,5<br />
317 mm<br />
27/27,5<br />
317 mm<br />
27<br />
317 mm<br />
28/28,5<br />
327 mm<br />
28/28,5<br />
328 mm<br />
27/27,5<br />
328 mm<br />
28/28,5<br />
327 mm<br />
28/28,5<br />
328 mm<br />
28/28,5<br />
326 mm<br />
29/29,5<br />
337 mm<br />
29/29,5<br />
336 mm<br />
28<br />
337 mm<br />
29/29,5<br />
338 mm<br />
28/28,5<br />
338 mm<br />
29/29,5<br />
337 mm<br />
29/29,5<br />
339 mm<br />
30/30,5<br />
347 mm<br />
30/30,5<br />
345 mm<br />
29<br />
337 mm<br />
30/30,5<br />
358 mm<br />
30/30,5<br />
357 mm<br />
30/30,5<br />
350 mm<br />
30<br />
357 mm<br />
31/31,5<br />
357 mm<br />
31/31,5<br />
358 mm<br />
31/31,5<br />
357 mm<br />
31/31,5<br />
360 mm<br />
31<br />
357 mm<br />
32/33,5<br />
378 mm
Boot<br />
SaloMon foot MeaSurer<br />
Warning, procedure, and recommendations<br />
Warning<br />
<strong>Salomon</strong> developed a foot mea sur er<br />
that will help you provide better customer<br />
service by being able to recommend<br />
the size that cor re sponds<br />
to the dimensions (length and<br />
width) of the skier’s feet. however,<br />
using the measurer can never replace<br />
trying on a boot.<br />
The volume fit can be measured in<br />
two dimensions. The morphology of<br />
the foot and physical sensitivity of<br />
each individual, according to his/her<br />
sports activities and level (comfort/<br />
performance ratio), are also determining<br />
factors in the choice of size.<br />
The <strong>Salomon</strong> measurer can be used<br />
for all <strong>Salomon</strong> footwear products<br />
procedure<br />
1. Have your customer take off<br />
his/her shoes and make sure<br />
that he/she is wearing appropriate<br />
ski socks (size and thickness).<br />
2. With your customer standing<br />
up, legs parallel and knees<br />
slightly bent, make sure his/her<br />
heels and medial side of both<br />
feet are touching the sides of<br />
the measurer.<br />
3. Slowly move the length guide<br />
fig. A until it touches the tip<br />
of one foot.<br />
iMportant: When you are<br />
moving the black transversal<br />
length guide, make sure you<br />
don’t put any pressure on the<br />
toes when measuring the foot.<br />
All you need to do is to barely<br />
touch the end of the longest<br />
toe. Too much pressure on the<br />
toes could lead to errors in<br />
reading by a few millimeters.<br />
4. Read the size written vertically<br />
where the red line is in the window.<br />
fig. S<br />
For Mondopoint, you have to take<br />
the width into account in the following<br />
manner: if the length of<br />
the foot measured is situated in<br />
this zone, this means the foot<br />
measures between 260 mm and<br />
Maintenance recommendations<br />
(Alpine, X-C, Hiking, In-line skates,<br />
Snowboard) and takes into account<br />
the two fundamental dimensions of<br />
both feet.<br />
› The length (main measure ment) :<br />
it can be read directly on 5 international<br />
size scales (US men’s/<br />
US women’s/ UK / EUR /<br />
Mondopoint).<br />
› The width in direct correlation<br />
with the length measured. The<br />
width measurement is partic u larly<br />
useful to refine the mea sure ment<br />
in Mondopoint because it orients<br />
the customer towards the .0 sizes<br />
(narrow feet) or .5 sizes (wide<br />
feet).<br />
269 mm. Then, to choose between<br />
26.0 and 26.5, you must look at<br />
the width scale fig. D (in this<br />
case, make it correspond to the<br />
maximum foot width with size 26).<br />
A foot that measures 261 mm<br />
would fit in size 26.5 (wide foot),<br />
whereas a foot that measures 268<br />
mm can fit in size 26.0 (narrow<br />
foot). fig. F<br />
note: The increases in<br />
Mondopoint sizes represented by<br />
two triangles in a rectangle is made<br />
to remind you that the boot sole<br />
lengths change at the whole sizes,<br />
not the half sizes.<br />
remember that the size<br />
indicated on the measurer<br />
should be used to help the<br />
dealer orient the customer<br />
towards the proper size.<br />
The final choice as to the appropriate<br />
size should be left to the customer<br />
depending on whether he/<br />
she prefers a snug fit or not.<br />
In principle, a technical skier who<br />
appreciates a snug fit will choose<br />
the size indicated on the measurer,<br />
while a ‘recreational’ skier will<br />
prefer a roomier fit and will choose<br />
one size higher.<br />
Use a damp cloth to clean the measurer. It is prohibited to use chemical<br />
agents, hot water, pressurized water, gasoline, alcohol, detergents, solvents<br />
or aerosols, which could permanently damage the plastic materials<br />
and erase the marks.<br />
salomon foot measurer > 49<br />
A<br />
F<br />
D<br />
S<br />
the new <strong>Salomon</strong> SidaS Measurer<br />
This measurer allows measures of:<br />
• Length: real Mondopoint/french sizes/UK sizes/US sizes<br />
• Floating width in mm with the integration of the cos18 factor to<br />
extrapolate the length first head/fifth head.<br />
• Precision: +/- 3 mm<br />
• No care
Boot<br />
adVanced fit technology liner<br />
technical description<br />
thermoforming<br />
thermoformable zones:<br />
A Straight and anatomical<br />
tongue<br />
- A thermoformable internal side<br />
that provides precision and<br />
comfort.<br />
- An external side that is more<br />
rigid on the tibia and more supple<br />
in the flex area for excellent<br />
pressure distribution without<br />
hindering flex.<br />
S opened ankle area<br />
For ideal morphological adaptation<br />
regardless of the size and<br />
shape of the bones.<br />
non-thermoformable zones:<br />
D asymmetrical and rigid cuff<br />
Distributes pressure for instanta<br />
neous transmission of efforts.<br />
layer construction<br />
external layer<br />
Middle layer<br />
internal layer<br />
internal layer for foot hold:<br />
For warmth and comfort<br />
- Polyurethane (PU), open cell foam<br />
envelopment, breathability,<br />
comfort<br />
High density CustomFit foam for superior<br />
envelopment.<br />
Women’s specific features<br />
F<br />
S<br />
A<br />
D<br />
J<br />
F<br />
A<br />
Middle layer: For foot envelopment<br />
and power transmission<br />
- Thermoformable PE (CustomFit) or<br />
self-molding PU (Autofit)or preformed<br />
PE (Thermic Fit)<br />
suppleness<br />
Transmission foam coming from the<br />
Neoprene family for quick reactions.<br />
external layer for contact with the<br />
shell: For pressure distribution and<br />
thermal insulation<br />
- Polyethylene, closed cell foam: insulation,<br />
warmth, lightness, better fit<br />
- PVC (Thermic + Rental): protection,<br />
ruggedness, durability<br />
- Sensifit cuff construction for envelopment<br />
of the leg<br />
- Supple exterior for contact with the<br />
shell and foot envelopment<br />
- Anatomical tongue<br />
Women’s liner with anatomic<br />
tongues made of highly moldable<br />
foams for better shin and instep<br />
comfort in sensitive foot zones.<br />
A Sliding band<br />
Helps the heel slide in.<br />
S Specific tongue<br />
Autofit and CustomFit foams for<br />
better shin and forefoot comfort.<br />
D My customfit performance<br />
For a total CustomFit.<br />
F polar fleece and/or fur<br />
Forefoot warmth.<br />
G therm-ic<br />
G<br />
D<br />
S<br />
H<br />
F Watertight gusset<br />
G Specific cuts for women and<br />
men to avoid pressure points<br />
on the lower calf.<br />
H More supple zones allow for<br />
easy entry/exit of the boot.<br />
J forefoot – The space in front<br />
of the metatarsal is not thermo<br />
formable, which allows the<br />
toes to move freely.<br />
liner Models<br />
new customfit generation<br />
My customfit World cup:<br />
Best performance. Extra low<br />
volume Compact Race liner (3<br />
layers). Specific World Cup tongue<br />
allowing shock absorbing.<br />
My customfit race:<br />
Best performance. Low volume<br />
Compact Race liner (3 layers).<br />
Rigid sole.<br />
My customfit performance:<br />
Better comfort on the heel, metas<br />
& sole without altering performance.<br />
Two layers liner: thermoformable<br />
foam 80 % on all sensitive<br />
areas (heel + metas + sole).<br />
old customfit generation<br />
course cf pro / customfit pro:<br />
CustomFit technology + bi-material<br />
technology. 100 % foot hold<br />
and contact with the shell. Due<br />
to a specific 3 layer performance<br />
construction.<br />
3d customfit / customfit:<br />
Comfort, warmth and ‘customized’<br />
envelopment. Thermoformable<br />
foams allow the liner to take on the<br />
shape of the foot after a heating<br />
procedure is performed with a<br />
special machine designed by<br />
<strong>Salomon</strong>. + Thermoformable insole<br />
(3D CustomFit)<br />
autocf: Automoulding foam in the<br />
foot envelopment for exceptional<br />
comfort. CustomFit tongue for a<br />
better tibial customization.<br />
Xfit and Biovent<br />
Xfit active: A comfortable, single<br />
layer constructed thermo moldable<br />
liner with customizable tongue<br />
area for shin comfort and a wide<br />
ankle area, positioned at the back<br />
of the leg, for heel lock.<br />
Xfit advanced: A comfortable,<br />
single layer constructed thermo<br />
moldable liner with customizable<br />
tongue area for shin comfort. The<br />
wide ankle area positioned at the<br />
back of the leg and metas covers<br />
all the critical foot comfort zones.<br />
Xfit comfort: A comfortable,<br />
single layer constructed thermo<br />
moldable liner with a customizable<br />
tongue area for shin and ankle<br />
comfort.<br />
advanced fIt > 50<br />
My customfit Sport: Better customization<br />
of the tibia and ankles.<br />
One layer liner: thermoformable<br />
foam 70 % on original areas.<br />
My customfit comfort: Better<br />
tibial customization. One layer liner:<br />
thermoformable foam 60 % on basic<br />
area (tongue).<br />
autofit: Comfort, warmth,<br />
insulation and personalized foot<br />
envelopment. Self-molding foams<br />
allow the liner to take on the shape<br />
of the foot allowing anatomical<br />
adaptation of the foot’s sensitive<br />
areas: the tibia, ankle, forefoot and<br />
anklebones.<br />
thermicfit: Comfort and warmth<br />
- Pre-formed zones protect the tibia<br />
and the forefoot.<br />
- A pleasure to slip into due to its<br />
construction and materials.<br />
Biovent: The very first breathable<br />
liner in a ski boot to keep feet<br />
warm all day. This technology<br />
helps regulate body temperature<br />
thanks to a multilayer construction<br />
inspired from apparel.
Boot<br />
advanced fIt > 51<br />
adVanced fit technology liner > (continued)<br />
thermoforming machine > procedure<br />
Before using the machine for the first time, return the guarrantee card to your Customer Service<br />
Representative. Follow the instructions for the thermoforming machine closely and pay particular attention<br />
to the rules on safety.<br />
To guarantee good thermoforming, we have adapted a thermal sensor to our machines. If something is<br />
abnormal during the heating process, the machine will work alternately. If this is the case, contact the customer<br />
service in your country. Do not take the machine apart.<br />
this machine is for exclusive use with <strong>Salomon</strong> cuStoMfit liners. any other use is forbidden.<br />
preparing for use (fig. A-S)<br />
A<br />
1. Remove the machine from its<br />
box and place it on a flat surface.<br />
Verify that the voltage<br />
used is the same as indicated<br />
on the machine.<br />
2. Lift the hood.<br />
Starting the machine<br />
D<br />
Set the timer for 15 mins.<br />
Warning: For optimal results, it is<br />
important that:<br />
- the heating process lasts<br />
15 minutes. Using the machine<br />
for more than 15 mins can damage<br />
the liner.<br />
- operate the machine with both<br />
boots in place.<br />
putting the boot on<br />
1. When thermoforming, you<br />
should only use ski socks that<br />
have the following characteristics:<br />
- socks that go higher than<br />
the top of the boot,<br />
- socks with at least 45% wool.<br />
S<br />
3. Lift the nozzles using the handles<br />
provided.<br />
4. Close the boot’s buckles and<br />
slide the boots onto the nozzles.<br />
Make sure that the top<br />
edge of the boot touches the<br />
obturator.<br />
F<br />
Wearing normal, low-cut socks<br />
could cause skin reactions to<br />
the heating process.<br />
2. Remove the boots from the machine.<br />
3. Close the hood.<br />
4. The machine is now available<br />
for thermoforming another pair<br />
of boots.<br />
5. Open the boot buckles.<br />
6. The boots must be put on immediately<br />
following the end of<br />
the 15 min heating cycle.<br />
if you feel any discomfort<br />
whatsoever when stepping-in,<br />
take your boots off immediately.<br />
important: any insoles used<br />
other than the ones received<br />
in the boots at the time of<br />
purchase should be removed<br />
before the heating procedure<br />
begins. re-install them after<br />
heating to mold the liners.<br />
G<br />
Warning<br />
<strong>Salomon</strong> customfit liners should only be heated for molding<br />
using the <strong>Salomon</strong> customfit Machine. any other unit may<br />
cause injury by overheating.<br />
7. Close the buckles with medium<br />
pressure, not too tight. fig. D<br />
8. Close the strap more firmly.<br />
9. Tap the heel on the floor to<br />
make a good impression of the<br />
Achilles’ heel. fig. F<br />
10. Wait 10 min in a standing position.<br />
11. Remove the boots.<br />
practical advice<br />
› <strong>Salomon</strong> recommends that no<br />
CustomFit liner be thermoformed<br />
more than three times.<br />
› To optimize the results of the<br />
thermoforming process, it is<br />
recommended that you make<br />
several flex movements during<br />
5. After having read and understood<br />
the machine’s instructions,<br />
especially those on<br />
safety, you can now plug the<br />
machine in.<br />
the 10 minute cooling process<br />
to simulate the anklebone movements<br />
when skiing. fig. G<br />
› It is recommended to wait<br />
1/2 hour before skiing with the<br />
boots, to allow for complete stabilization<br />
of the thermoformed<br />
liner.<br />
drying with a machine<br />
When drying the CustomFit liners<br />
with a drying machine, it is important<br />
to respect the drying time<br />
recommended by the manufacturer<br />
and that the temperature not exceed<br />
40°c.
Boot<br />
cuStoM Shell technology<br />
custom Shell thermal forming<br />
S<br />
H<br />
advanced fIt > 52<br />
A new patented Kaprolene material has been inserted on the shell of the boot near the metatarsal area.<br />
Simply heat the shell, step in and allow the shell to form to the contours of the feet. This personalized fit<br />
gives unprecedented precision for improved on snow performance.<br />
customization procedure<br />
A<br />
G<br />
L<br />
We recommend the use of the Sidas<br />
bootfitting oven fig. A. Make sure the<br />
customer uses only ski socks which go<br />
higher than the top of the boot.<br />
1. Remove liners from shells.<br />
2. Put the shells in the oven with<br />
buckles open fig. S.<br />
:<br />
3. Close the door and start the<br />
machine, set the timer for 10<br />
minutes. Warning: Make sure<br />
to wear insulated gloves when<br />
removing boot shells. Do not allow<br />
customers to touch the boot,<br />
avoiding possible burns.<br />
4. Switch off the oven and remove the<br />
shells.<br />
5. Put liners back in.<br />
6. Help the customer to step in fig. D.<br />
recommendations for experienced Bootfitters<br />
You can use your regular heating tools<br />
though they would be less practical<br />
than the oven:<br />
• heating elements fig. K.<br />
• gun fig. L.<br />
• boiling water fig. :.<br />
Warning: Kaprolene has been created<br />
to be deformed by the foot’s natural<br />
pressure. Be very careful if you need<br />
to use a pushing machine on the<br />
Kaprolene areas and NEVER push<br />
on the sides areas where Kaprolene<br />
meets the PU shell.<br />
D<br />
J<br />
7. Close the boots with minimum<br />
tightening (first tooth of the buckle)<br />
and make sure the forefoot shell<br />
seals stay in the right position.<br />
Warning: Ask your customer to<br />
stand still. Avoid bending or walking<br />
with warmed shells.<br />
8. Make sure the shell has been<br />
fully deformed before starting<br />
the cooling process. (It takes<br />
approximately 2 min).<br />
F<br />
K<br />
9. Cool the boots: in cold water for 6<br />
minutes (level of water: above the<br />
seal) fig. F. Warning: Water level<br />
should not be higher than forefoot<br />
shell seals to avoid getting liners wet.<br />
- with cold packs for 6 minutes<br />
fig. G.<br />
- in snow for 6 minutes fig. H.<br />
- naturally for 20 minutes fig. J.<br />
10. Take boots off, the Custom Shell<br />
boot is ready.
Boot<br />
cuStoM Shell technology > (continued)<br />
custom Shell faQ<br />
can the shell change forms several<br />
times? As many times as you<br />
want! The wider the foot, the more<br />
the shell will expand. But it won’t<br />
come back…<br />
from what foot width will the<br />
custom Shell be useful? In size<br />
26, from last 100 or 102 mm, the<br />
customer will feel a real difference.<br />
The Custom Shell is also useful for<br />
thinner feet in order to reposition<br />
the foot even if the change is not<br />
measurable on the shell.<br />
What is the maximum width the<br />
shell can expand to? Up to 6 mm<br />
with the push of the foot only.<br />
What is the advantage compared<br />
to normal bootfitting? Here, it is<br />
the foot which changes the shell,<br />
there is no more risk of misinterpretation,<br />
the precision is perfect.<br />
Also, this process saves time (30<br />
min. to do everything & the customer<br />
leaves with his/her boots)<br />
and an easier manipulation (every<br />
KOTF can do it).<br />
Should the custom soles be done<br />
before or after? Mold the soles<br />
before. The customer should then<br />
step in the warmed Custom Shell<br />
with the insoles.<br />
Should other areas of the shell be<br />
changed before or after? A modification<br />
of the metatarsus’s area<br />
can affect the positioning of the<br />
foot. First, the Custom Shell should<br />
be complete. Then, the areas of the<br />
toes, ankles, and navicular bone...<br />
can be changed as usual, though<br />
avoid pushing on the borders of<br />
the Custom Shell insert.<br />
can i push in the custom Shell<br />
area with my bootfitting machine?<br />
Yes, but it is not recommended.<br />
Since the Custom Shell<br />
material has not been created to<br />
resist to a push that is superior the<br />
feet’s push, avoid the side areas of<br />
the insert.<br />
thermolight Quest pro pebax liner formatting > procedure<br />
1. Put on the client’s boots at<br />
room temperature. The client<br />
must have the sensation of<br />
tightness in the shell.<br />
2. Identify possible painful areas<br />
(pressure points)<br />
3. Protect those areas by applying<br />
cut foam pads (not included)<br />
directly on the foot, not the<br />
sock.<br />
- Be careful not to take off or<br />
move the pads when putting<br />
the socks back on.<br />
4. Put the Thermolight liner without<br />
insoles in the custom Shell<br />
oven for 10 minutes at 100°C<br />
max (preferably pre-heated)<br />
5. At the end of 10 minutes, add<br />
insoles (original, custom or<br />
orthopedic) in the liner and put<br />
them into the shell.<br />
- Take care to insert the right<br />
liner in right shell and vice<br />
versa (the liners aren’t<br />
marked but differentiated only<br />
by the shape of the sole!)<br />
advice: prepare one foot at a<br />
time (preserve the liner not yet<br />
fitted in the oven)<br />
6. Put on the client, taking care<br />
to push the client’s heel all the<br />
way down to the liner to correctly<br />
set the heel on the bottom<br />
and thus avoid creating<br />
bends.<br />
7. Tighten the Quick Lace<br />
8. Fasten the shell starting with<br />
the forefoot buckle and making<br />
sure to lock the backbone in the<br />
action position.<br />
9. Provide a clamping adapted to<br />
the morphology of the foot:<br />
- Strong (2nd, 3rd and 4th<br />
tooth) for a wide foot<br />
- Low (1st, 2nd and 3rd tooth)<br />
for a thiner foot<br />
repeat the same operation for<br />
the second liner<br />
10. Cool down 15 minutes at room<br />
temperature and in a natural<br />
standing position, without exaggerating<br />
the bending on the<br />
front.<br />
does the plastic retract the same<br />
as normal boots when cooled?<br />
Yes, but two times less than normal<br />
plastic: approximately 25%<br />
after the boots have been taken<br />
out (a shell pushed out 4mm could<br />
come back to 3 mm).<br />
What is the benefit of custom<br />
Shell versus the custom fit?<br />
Should you do it before or after?<br />
The work done on the shell must<br />
be done before. This will solve<br />
problems and last over time. The<br />
molding of the liner must be done<br />
after in order to put the finishing<br />
touches on the fit.<br />
how do i know when the plastic<br />
is warm enough? It is the same<br />
process as usual when done with a<br />
manual test.<br />
What is the ideal temperature to<br />
form the custom Shell? 80°C at<br />
core of the plastic.<br />
how many years of r&d did it<br />
take to develop the custom Shell<br />
technology? 3 years.<br />
advanced fIt > 53<br />
Which is the impact of the new<br />
material on the performance of<br />
the boot? There is no effect because<br />
the material has the same<br />
PU base as a normal boot. The<br />
boot has exactly the same behavior<br />
on snow. On the other hand, once<br />
a boot is fit with the Custom Shell,<br />
precision is increased.<br />
if a customer wants an injected<br />
liner, should it be done before or<br />
after? In general, injection is done<br />
before work on the shell.<br />
i usually put normal boots in the<br />
oven, how is custom Shell different?<br />
The normal plastic is going to<br />
change very little and comes back<br />
to the original position more often.<br />
The deformation is thus quite low.<br />
Why is custom Shell not used in<br />
World cup? In World Cup races,<br />
one person is dedicated to each<br />
racer; everything is done by hand<br />
and each pair is adapted to each<br />
discipline. Then you could say<br />
having Custom Shell is like having<br />
your own race technician!<br />
note: <strong>Salomon</strong> does not recommend the use of the Custom Fit machine (or any other similar machine) because<br />
it does not allow an acceptable and effective Thermolight liner process.
Boot<br />
SaloMon Boot technologieS<br />
tool free catches adjustment<br />
Upper catches are also adjustable, with or without tools, to adapt<br />
the volume of the upper cuff to your calves.<br />
- To move upper catches, turn<br />
them 90°, move them laterally<br />
(+ 15mm), then place them<br />
back to their horizontal position.<br />
- To move lower catches,<br />
loosen the screw with a 3mm<br />
Allen wrench, position the<br />
catches in the desired position<br />
(+/- 20mm) and tighten<br />
the screw.<br />
Buckle teeth adjustment<br />
Offers a greater range of lower<br />
leg adjustment (+/- 20 mm):<br />
- Loosen the screw with a 3<br />
mm Hexagonal Key.<br />
- Re-tighten the screw and<br />
buckle teeth in the new<br />
position.<br />
Micro Buckle adjustment<br />
1 2 3<br />
Fine tune the buckle closure by turning the part that grips the buckle teeth.<br />
extended lever Buckles<br />
Extended lever<br />
buckles require<br />
30% less effort<br />
when closing.<br />
Walkadin pads<br />
Walking is easy and safe, skiing<br />
is compatible with alpine DIN<br />
standards.<br />
Boot technologIes > 54<br />
canting adjustment (With lock)<br />
+2.5<br />
+1.5 +3.5<br />
The Canting is integrated into the<br />
shell for reliable transmission and<br />
protection. It allows alignment of<br />
the cuff to the skier’s lower leg<br />
shape.<br />
- The factory preset position for the<br />
canting is + 2,5°<br />
- First, loosen the internal and<br />
external Canting Lock with the<br />
Hexagonal Key n° 5.<br />
- To adjust inwards to + 1,5°<br />
(a knock kneed stance), turn the<br />
external adjuster one-half turn.*<br />
3d Buckle adjustment<br />
The 3D buckle adjustment allows the<br />
position of the instep buckle to be<br />
changed for personalised foot hold:<br />
- Unscrew the buckle with a 3 mm<br />
Hexagonal Key.<br />
- Position the buckle over the plastic<br />
lug on the shell.<br />
- Re-tighten in the alternate position.<br />
auto 3d Buckle adjustment<br />
Without using any tools, the Auto<br />
3D buckle adjustment modifies<br />
the position of the instep and/or<br />
lower leg buckle to personalize<br />
foothold:<br />
- To adjust externally to + 3,5°<br />
(a bow legged stance), turn the<br />
internal adjuster one-half turn.*<br />
- Re-tighten the canting lock.<br />
*note: Never turn both the internal<br />
and external adjustments as this will<br />
raise the whole cuff without adjusting<br />
the canting.<br />
a<br />
c<br />
- Lift the buckle up a<br />
- Hold the lock down b<br />
- Move the buckle to the desired<br />
position c<br />
- Release the lock d<br />
b<br />
d
Boot<br />
Boot conceptS<br />
ghost/pro Model<br />
19<br />
10<br />
18<br />
17<br />
16<br />
20<br />
technical deScription – ghoSt & pro Model<br />
Loop to tongue<br />
Shin pillow<br />
Quicklace<br />
Wide strap<br />
Leather finishing<br />
X3 / X3 laB<br />
SCS (<strong>Salomon</strong><br />
Cushioning System)<br />
Walkable sole<br />
2 densities heel<br />
cushioning system<br />
Boot concePts > ghost/sPk & ImPact > 55<br />
13<br />
15 14 21<br />
technical deScription – X3 laB<br />
World Cup Advanced<br />
Shell technology<br />
World Cup shell<br />
Last 95<br />
Racing Kit<br />
Pu either lower shell<br />
and cuff<br />
Flex 120 or 130<br />
My Custom Fit World<br />
Cup liner<br />
adjustments and personalization<br />
World cup claw strap<br />
- Increases cuff fastening: a more<br />
powerful fastening for a better envelopment<br />
than a traditional strap.<br />
- More reliable: it can’t open while<br />
flexing the boot (both before and<br />
during the curve).<br />
3<br />
A1<br />
PU lower shell and PP<br />
cuff<br />
Micro alu overshaped<br />
buckles<br />
Extra padded spoiler<br />
World Cup claw strap<br />
45mm<br />
Back bone<br />
Double dismantable<br />
canting<br />
Back bone<br />
- Increases the junction between<br />
cuff & shell for flex management<br />
in a forward position: entering the<br />
curve, increasing power on skis.<br />
- Provide support and power to<br />
skiers in a rear position while<br />
getting out of the curve (rebound<br />
effect): the more powerful the rebound<br />
the more back support you<br />
need to control your skis.<br />
12<br />
11<br />
10<br />
8<br />
9<br />
My CF PRO liner with<br />
faux fur<br />
Nailed strap<br />
Insole rubber grip<br />
Absorbing footboard<br />
4<br />
5<br />
6<br />
7<br />
PU lower shell<br />
Double dismountable<br />
canting<br />
Backbone<br />
Cuff hytrel by Dupont<br />
2<br />
4<br />
2<br />
3<br />
5<br />
A1<br />
My Custom Fit<br />
Performance liner<br />
Custom shell<br />
D<br />
A<br />
6
Boot<br />
Boot conceptS > (continued)<br />
X3 cS / instinct cS / X3 rc cS / X3 10 cS / X3 Jr pro / X3 Jr<br />
13<br />
6<br />
4<br />
G<br />
9<br />
2<br />
11<br />
technical deScription – X3 rc cS<br />
Racing Kit<br />
Flex 130<br />
World Cup advanced<br />
shell technology<br />
My CF Race Sensitive<br />
liner.<br />
Sensifit liner wings.<br />
concePts > falcon/InstInct/gun/scarlet > 56<br />
Lower shell and cuff<br />
Energyzer<br />
Canting adjustment.<br />
Canting Lock.<br />
World Cup claw<br />
strap.<br />
3D buckle.<br />
adjustments and personalization<br />
race Kit<br />
Shin plate (fig. A)<br />
Used to reinforce the forward support and<br />
stiffens the flex. The height and lateral<br />
position are adjustable.<br />
- Choose the forward or internal position<br />
and use a 5,5 mm drill bit to drill the 1st<br />
hole in the cuff where marked (the shin<br />
plate is marked by a cross inside the cuff<br />
of the boot).<br />
- Choose the desired height and attach the<br />
plate using the “T” insert and bolts provided.<br />
- Align the plate correctly and use as a guide<br />
to drill the 2nd hole and attach as shown.<br />
D<br />
J<br />
:<br />
K<br />
Custom Sole<br />
Adjustable buckle<br />
teeth<br />
Micro adjustable<br />
buckle<br />
Custom Shell<br />
Backbone<br />
4<br />
G<br />
1 12<br />
1<br />
A<br />
S<br />
D<br />
rear spoiler (fig. S)<br />
The rear spoiler (from the performance<br />
kit) increases rear support (with 3 height<br />
settings) and forward lean by + 2°.<br />
- Choose the desired height and attach<br />
using the screw provided, in the predrilled<br />
hole.<br />
delta h lift (fig. D)<br />
The 4 mm heel lift (from the performance<br />
kit) can be used to improve instep/heel<br />
hold and put the skiers weight forward<br />
for faster initiation. Remove the liner and<br />
position the wedge in the hole provided in<br />
the rear of the Custom Sole.<br />
2<br />
L<br />
technical deScription – X3 Jr pro<br />
World Cup advanced<br />
shell technology<br />
My CF Pro liner<br />
Sensifit liner wings.<br />
Lower shell and cuff<br />
Energyzer<br />
Softening the Boot<br />
Even if the flex is more progressive than<br />
with tradtional racing boots, it can be<br />
soften further more:<br />
reversible Method: Remove the canting<br />
lock screws. This reduces the flex by<br />
5-10 %. Place the plugs from the Racing<br />
kit into the screw holes on the outer cuff.<br />
non reversible Method: This involves<br />
cutting the ‘V’ in the top rear of the lower<br />
shell and should be performed by your<br />
specialized <strong>Salomon</strong> dealer.<br />
Canting adjustment.<br />
360° 35mm strap<br />
3D buckle.<br />
Adjustable buckle<br />
teeth<br />
D<br />
H<br />
K<br />
J<br />
Micro adjustable<br />
buckle<br />
additional featureS<br />
custom Sole Standard<br />
Buckle teeth adjustment<br />
Micro Buckle adjustment<br />
3d Buckle adjustment<br />
canting adjustment<br />
54 <strong>Salomon</strong> Boot Technologies<br />
60 Performance Accessories
Boot<br />
Boot conceptS > (continued)<br />
Mission rS / divine rS<br />
adjustments and personalization<br />
A S<br />
for a perfect fit<br />
Sensifit fig. A<br />
A soft material over the instep for<br />
improved envelopment and easier<br />
step-in.<br />
adjustable Women spoiler fig. S<br />
- To move the spoiler, turn the<br />
screw 180° with a 5mm Allen<br />
wrench.<br />
Biovent liner<br />
The very first breathable liner in<br />
a ski boot to keep feet warm all<br />
day. This technology helps regulate<br />
body temperature thanks to<br />
a multilayer construction inspired<br />
from apparel.<br />
Mission / divine<br />
adjustments and personalization<br />
romavable rear Spoiler<br />
You remove it by clipping<br />
additional featureS<br />
tool free catches adjustment<br />
two extended lever Buckles<br />
Micro Buckle adjustment<br />
54 <strong>Salomon</strong> Boot Technologies<br />
60 Performance Accessories<br />
technical deScription – MiSSion 6<br />
Sensifit liner wings<br />
Strap<br />
Tool free catch<br />
adjustment<br />
3D sensifit<br />
Pads<br />
Wings sole<br />
technology<br />
Micro adjustable<br />
buckle<br />
Boot concePts > mIssIon & dIvIne > 57<br />
additional featureS<br />
tool free catches adjustment<br />
two extended lever Buckles<br />
canting adjustment<br />
Micro Buckle adjustment<br />
54 <strong>Salomon</strong> Boot Technologies<br />
60 Performance Accessories<br />
Removable spoiler<br />
X Fit Fusion<br />
Advanced liner<br />
9<br />
7<br />
H<br />
technical deScription – MiSSion 12<br />
Loop on tongue<br />
Wide strap<br />
Tool free catch<br />
adjustment<br />
8<br />
7<br />
8<br />
9<br />
5<br />
5<br />
Spaceframe shell<br />
profile second skin<br />
last and shell<br />
Pads<br />
Canting<br />
1<br />
F G<br />
Micro adjustable<br />
buckles<br />
My Custom Fit Pro<br />
liner Biovent<br />
Dismantable flex rivet<br />
A<br />
H G<br />
2<br />
D<br />
S<br />
D<br />
F
Boot<br />
Boot conceptS > (continued)<br />
imapct / idol<br />
adjustments and personalization > procedure<br />
A S<br />
for a perfect fit<br />
Sensifit (fig. A)<br />
A soft material over the instep for<br />
improved envelopment and easier<br />
step-in.<br />
for a preciSe tranSMiSSion<br />
adjustable rear Spoiler (fig. S)<br />
Customisation of the rear support to<br />
suit the shape and size of the skier’s<br />
leg and increase the rear support:<br />
- Loosen the screw with a 5 mm<br />
Hexagonal Key,<br />
- Choose the height (the higher the<br />
spoiler, the stronger the rear support),<br />
- Tighten the screw.<br />
charm<br />
adjustments and personalization > procedure<br />
A<br />
D F<br />
WalK<br />
SKi<br />
adjustable rear spoiler fig. A<br />
Customize the rear support to suit<br />
the shape and size of your leg and<br />
increase the rear support:<br />
- Loosen the screw with a 5mm<br />
Allen wrench.<br />
- Choose the height (The higher<br />
the spoiler the stronger the<br />
rear support).<br />
- Tighten the screw.<br />
oversize Sensifit fig. S<br />
The Oversize Sensifit, designed<br />
with supple material, offers easy<br />
entry/exit and an optimum level<br />
of comfort.<br />
S<br />
Boot concePts > ImPact & charm > 58<br />
additional featureS<br />
Walkadin pads<br />
Buckle teeth adjustment<br />
3d Buckle adjustment<br />
Micro Buckle adjustment<br />
canting adjustment<br />
54 <strong>Salomon</strong> Boot Technologies<br />
60 Performance Accessories<br />
Ski/Walk adjustment fig. D<br />
The easy-to-use SKI/WALK button<br />
releases the cuff for relaxing<br />
and easy walking. (Push the button<br />
down for the WALK position)<br />
Step in strap fig. F<br />
The Step-in strap offers the possibility<br />
to put the boot on effortlessly,<br />
with only one hand.<br />
additional featureS<br />
Walkadin pads<br />
Buckle teeth adjustment<br />
Micro Buckle adjustment<br />
54 <strong>Salomon</strong> Boot Technologies<br />
60 Performance Accessories<br />
technical deScription – iMpact 10 cS<br />
7<br />
5<br />
8<br />
4<br />
10<br />
9<br />
8<br />
7<br />
Sensifit liner wings<br />
Wide strap<br />
Adjustable buckle<br />
teeth<br />
3D articulated buckle<br />
Walkadin pads<br />
6<br />
11<br />
technical deScription – charM 7<br />
Wide strap<br />
Tool free catch<br />
adjustment<br />
Walkadin pads<br />
5<br />
H 12 G<br />
Spaceframe shell<br />
profile second skin<br />
last and shell<br />
Lower shell and<br />
cuff energyzer<br />
Canting<br />
3<br />
Ski/walk position<br />
Micro adjustable<br />
buckle<br />
Warmest liner<br />
A<br />
Canting lock<br />
Micro adjustable<br />
buckle<br />
My CF Pro<br />
Custom Shell<br />
A<br />
S<br />
D<br />
F<br />
S<br />
Thermic prepared<br />
Auto calf adjustment
Boot<br />
Boot conceptS > (continued)<br />
Quest 12/Quest pro pebax<br />
7<br />
10<br />
2<br />
13<br />
9 12<br />
16<br />
8<br />
3 3<br />
4<br />
4<br />
5 6 1 11<br />
1<br />
technical deScription – QueSt 12 & QueSt pro peBaX<br />
Last 100<br />
Cushioning system<br />
(tongue and heel pad)<br />
Magnesium backbone<br />
a unique & patented ride & hike technology<br />
A<br />
D<br />
new Body positioning<br />
forward lean (fig. G)<br />
Quest 12 boots offer 15.1° forward<br />
lean, while Quest Pro Pebax offers<br />
13.5° forward lean. The result is<br />
better balance in powder and track<br />
up snow.<br />
Ride & Hike body<br />
postioning<br />
Alpine Touring pads<br />
S<br />
F<br />
15.1°<br />
Contagrip extended<br />
rubber sole<br />
My CustomFit Pro<br />
liner + Biovent<br />
G<br />
Boot concePts > Quest > 59<br />
Forward pressure<br />
plate<br />
Quicklace kit<br />
Racing spoiler<br />
alpine Back Support Management<br />
The magnesium backbone, technology<br />
from the X3 LAB (fig. A),<br />
provides strong back support,<br />
power transmission and progressive<br />
forward flex management<br />
when skiing down (fig. S).<br />
alpine forward flex Management<br />
The specific inner shell (V cut-out)<br />
(fig. D) guarantees a wide cuff<br />
opening when hiking or walking<br />
(fig. F). Combined with the inside<br />
part of the magnesium backbone,<br />
cuff opening (fig. H)<br />
Quest 12 boots have a 30° cuff<br />
opening, offering easier hiking due<br />
to a more natural leg positioning<br />
and a wide cuff opening on the<br />
back when walking.<br />
Touring Pads<br />
Quicklace<br />
Ultralight<br />
Thermoformable liner<br />
14<br />
15<br />
Waterproof gusset<br />
Pebax lower shell<br />
Polylight cuff<br />
contributes to back support and<br />
progressive forward flex.<br />
30°<br />
H
Boot<br />
Boot conceptS > (continued)<br />
Quest 12/Quest pro pebax (continued)<br />
Mountain pros<br />
Boot concepts<br />
ultralight skin shell (fig. A)<br />
Second skin shell.<br />
Women specificities<br />
• PP Women cuff<br />
• Women light back calf<br />
• Specific liner: my Customfit<br />
Comfort liner.<br />
Quicklace replacement Kit<br />
contagrip extended rubber shell<br />
(fig. S)<br />
Contagrip® extended rubber sole.<br />
Waterproof gusset<br />
to guarantee a perfect waterproofness.<br />
Boot concePts > Quest > 60<br />
interchangeable Sole pads<br />
• Switch from DIN (Alpine) to touring pads<br />
• Easy to remove & fully compatible with all the standard<br />
compliant bindings on the market<br />
• Contagrip® material with deep studs for a perfect<br />
arch grip in all walking conditions<br />
If you change the pads, you have to use bindings<br />
associated with the appropriate standard: ISO 5355<br />
(alpine standard) or ISO 9523 (touring standard).<br />
ultralight thermoformable liner<br />
• 280 g (for a size 26,5 boot)<br />
• Heat moldable for a perfect foothold<br />
S F<br />
A D<br />
upper Buckle Walk position<br />
hook: For a better walk position,<br />
you can catch the upper buckle in<br />
the first position (red one) (fig. D)<br />
adaptable leash: if needed, you<br />
can add a leash on your boots. A<br />
specific buckle has been added on<br />
the forefoot zone (fig. F)<br />
additional featureS<br />
tool free catches adjustment<br />
rear Spoiler<br />
54 <strong>Salomon</strong> Boot Technologies<br />
60 Performance Accessories
Boot<br />
Boot conceptS > (continued)<br />
Quest 12/Quest pro pebax (continued)<br />
procedure > Strap replacement<br />
A<br />
A<br />
S<br />
Strap replacement<br />
1. Remove the rear Perf hold to access rivets (fig. A)<br />
2. Drill rivets with a Ø 5.2 drill (fig. S)<br />
3. Assemble new strap + plate with inserts and screws M4 (fig. D-G)<br />
4. Attach the rear Perf hold (fig. H)<br />
procedure > cover replacement<br />
S<br />
remove the cover and toe buckle teeth<br />
1. Drill toe buckle teeth rivets with Ø 5.2 drill (fig. A)<br />
2. Drill cover rivets with Ø 5.2 drill (fig. S)<br />
reassemble the new cover + fuel racks<br />
3. Drill the buckle teeth shell + cover Ø 5.4 to put the M4 insert (fig. D-F)<br />
attach the cover and the buckle teeth with insert with M4 screw<br />
4. The insert must be flush with buckle teeth mounted on cover (fig. G)<br />
5. Mount the cover buckle teeth with M4 screws (fig. H)<br />
Backbone replacement<br />
Mounting kit (fig. A)<br />
1. Remove the damaged axis by cutting off the reveting part (fig. S)<br />
2. Place the 2 springs in their cavities (fig. D)<br />
3. Do not forget to put the steel pin before screw and nut (fig. F)<br />
4. Mount the new backbone (fig. G)<br />
Boot concePts > Quest > 61<br />
procedure > Backbone replacement<br />
A<br />
S D<br />
F<br />
D<br />
G<br />
D<br />
G<br />
F<br />
H<br />
F<br />
H<br />
G
Boot<br />
Boot conceptS > (continued)<br />
focus<br />
technical deScription – focuS rS<br />
PU materials to prevent<br />
scratches<br />
Aluminium buckles for<br />
lasting<br />
Liner: mesh tested and<br />
chosen to ensure long<br />
lasting comfort. Biovent:<br />
less time needed to dry<br />
liner on the shelves<br />
Symbio rental Model<br />
SyMBio 440<br />
Plastic buckles<br />
PU Shell<br />
Replaceable toe and heel pads<br />
repairs > procedure<br />
replacing the lower leg buckle<br />
tooth insert<br />
1. Remove the liner and open the<br />
cuff completely.<br />
2. Drill the rivet inside the shell.<br />
3. Remove the damaged buckle<br />
tooth insert and its rivet.<br />
4. Put a new buckle tooth insert in<br />
place and proceed as follows :<br />
using a t-nut<br />
a. Place the threaded insert in<br />
the rivet hole on the inside of<br />
the boot.<br />
Adjustable lower leg lever<br />
Thermic liner<br />
Bar code integrated to the liner<br />
adjustments and personalization > procedure<br />
A<br />
lower leg adjustment<br />
It is possible to change the lower<br />
leg adjustment according to the<br />
morphology of the skier’s lower<br />
leg.<br />
Soles: build to last and<br />
to avoid folding with<br />
textured effect (<strong>Salomon</strong><br />
patented) Kit<br />
Oversize tool free<br />
catch<br />
2 buckle fastening<br />
My AutoCustomShel<br />
liner + Biovent<br />
adjustments and personalization<br />
auto custom Shell: comfort solution technology<br />
• Directly derived from our Custom<br />
Shell technology<br />
• Auto Custom Shell is 100%<br />
comfort oriented, providing<br />
comfort benefits with no process<br />
• Last evolution from 104 to 108<br />
• Insert are derivated from PU,<br />
same durability<br />
Articulated sensift for<br />
step-in<br />
Auto Custom Shell<br />
technology<br />
Rental plate for<br />
barcode<br />
› adjusting the lower leg cable<br />
- Place the lower leg cable in the<br />
desired setting of the buckle<br />
teeth on the medial side of the<br />
boot. (fig. A)<br />
Longer or shorter cables are available<br />
from the spare parts catalog<br />
(page 70) to adapt to all shapes<br />
and sizes.<br />
additional featureS<br />
60 Performance Accessories<br />
b. Put the buckle into place and<br />
install the screw tightly. The<br />
prongs on the threaded insert<br />
should be completely imbedded<br />
into the cuff material.<br />
c. Loosen the screw.<br />
d. Put the washer into place.<br />
This will prevent the tip of the<br />
screw from going too far.<br />
e. Tighten completely.<br />
using a rivet. Use a rivet on the<br />
outside and a washer inside and<br />
proceed with riveting.<br />
Boot concePts > symBIo > 62<br />
3<br />
6<br />
6<br />
3 2<br />
3<br />
replacing the buckle and/or forefoot<br />
buckle teeth<br />
1. Remove the liner.<br />
2. Drill the rivets in the buckle or<br />
the damaged buckle teeth.<br />
3. Remove the damaged buckle or<br />
the buckle teeth and the rivet.<br />
Save the washer.<br />
4. Put in a new buckle or buckle<br />
teeth and attach with a rivet or<br />
T-nut.<br />
using a rivet. Use a new rivet<br />
and the original washer and proceed<br />
with riveting.<br />
5<br />
5<br />
4<br />
1<br />
A<br />
F<br />
S<br />
using a t-nut. Put the threaded<br />
insert into the rivet hole from the<br />
inside of the boot. Put the buckle<br />
in place and tighten completely.<br />
The prongs on the threaded insert<br />
should be completely imbedded<br />
in the material.<br />
to remove the liner<br />
Turn the clip on the inside of the<br />
liner 1/4 turn with a screwdriver.
Boot<br />
foot anatoMy and fit<br />
notions of anatomy<br />
A basic knowledge of anatomy of the foot is essential if you are going to understand and solve your customers’<br />
problems and needs since each foot is unique.<br />
the bones of the foot<br />
types of legs<br />
distortion of foot when weighted<br />
When the foot is weighted (standing<br />
position), it can change in size:<br />
- lengthwise, it can get 5 mm longer,<br />
- widthwise, it can get 12 mm wider.<br />
When the foot is flexed, we notice:<br />
- the circumference of the ankle increases<br />
about 2 mm,<br />
types of feet<br />
F<br />
G H<br />
J K<br />
foot anatomy & fIt > notIons of anatomy > 63<br />
a. posterior tarsus<br />
1. Calcaneus<br />
2. Talus (Astragalus)<br />
3. Trochlear surface<br />
B. anterior tarsus<br />
4. Navicular bone (Tarsal<br />
Scaphoid)<br />
5. Cuboid bone<br />
6. 3 cuneiform bones<br />
c. Metatarsus<br />
7. 5 metatarsal bones<br />
d. toes<br />
8. 14 phalanges<br />
- the axis between the talus (astragalus)<br />
and calcaneus becomes<br />
off-centered which increases the<br />
surface area at the base of the foot.<br />
Therefore, to be accurate, feet should<br />
be measured when the person is<br />
standing with his/her weight distributed<br />
on both feet and knees slightly<br />
flexed.<br />
Pronated Normal Supinated<br />
flat foot foot high-arched foot<br />
Normal knees. Varus knees. Valgus knees.<br />
Some people naturally have varus or<br />
valgus knees. The boot cuff follows<br />
the profile of the leg. Therefore, the<br />
boot sole forms an angle with the<br />
ground (i.e.: the ski is not flat).<br />
The ski boots can be adapted to the<br />
shape of the leg by canting the cuff.<br />
The canting adjustment by canting<br />
the cuff allows the boot to follow<br />
the morphology of the leg to keep<br />
skis flat<br />
A deeper analysis of the customer’s feet (fig. F) is necessary to observe<br />
the possible deformations that can become problem areas. <strong>Salomon</strong> has<br />
parts (page 70) at your disposal that will help you to easily adapt the<br />
boots to these deformations.<br />
high arches:<br />
The skier needs an arch support<br />
that can relieve pressure on ‘overloaded’<br />
areas.<br />
Arch supports can be attached to<br />
the footboards. (fig. G)<br />
Supinated or pronated feet:<br />
This is the deviation of the foot’s<br />
vertical axis towards the medial or<br />
lateral side, which can lead to problems<br />
in the areas of the anklebones,<br />
navicular bone or talus.<br />
To adapt to this deviation of the<br />
foot, it is possible to place wedges<br />
directly on the footboard.<br />
However, this wedge should only be<br />
used if the lateral articulation under<br />
the ankle bone is mobile. (fig. H)<br />
high instep:<br />
You can grind the footboard (Falcon<br />
and X Wave) to increase the volume.<br />
This sole is realized in grindable<br />
PU foam. To increase the<br />
volume of the boot or to change the<br />
position of the foot.<br />
Caution, grind on the top surface<br />
only. Grinding the base will effect<br />
the interface with the Chassis. A<br />
depth gauge is marked front and<br />
back for even grinding. (fig. J)<br />
low instep:<br />
The height and inclination of the<br />
footboard can be modified by<br />
adding:<br />
- heel lifts (fig. K)
Boot<br />
foot anatoMy and fit > Recommendations (continued)<br />
recommendations & performance accessories<br />
The modifications that can be made<br />
on the <strong>Salomon</strong> boots should be<br />
considered as the ‘final touch’ of<br />
personalization.<br />
Before undertaking this type of<br />
operation, it is important to observe<br />
certain basic rules:<br />
- Always proceed step by step,<br />
starting with temporary measures<br />
before going on to permanent<br />
changes.<br />
- If you decide to proceed with the<br />
permanent modifications as a<br />
last resort, they are entirely your<br />
responsibility.<br />
problems, causes & Solutions chart<br />
problems causes Solutions<br />
firSt MetatarSal preSSure<br />
(medial side of the forefoot)<br />
fifth MetatarSal preSSure<br />
(lateral side of the forefoot)<br />
anKleBone preSSure<br />
pain/pressure behind one or<br />
both ankle bones.<br />
foot anatomy & fIt > recommendatIons > 64<br />
Shell too narrow.<br />
Prominent first<br />
metatarsal.<br />
Shell (or liner) too<br />
narrow. Prominent<br />
fifth metatarsal.<br />
Prominent medial and<br />
lateral ankle bones.<br />
Heel shape.<br />
They require the proper tools and<br />
should be undertaken only for big<br />
problems and by experienced specialists.<br />
For example:<br />
- Stretching the shell.<br />
- Grinding the liner (not recommended<br />
for manufactured liners).<br />
- Grinding the shell.<br />
Solutions all products:<br />
› Stick adhesive foam around the first metatarsal on the medial side<br />
of the liner.<br />
› Stretch the shell locally with a heat gun* and other tools designed<br />
for this purpose (such as SIDAS) (except Symbio and Rear Entry).<br />
X Wave, ellipse, performa: Be careful not to overheat the Sensifit or<br />
instep gusset of the boot during the heating operation (there is a risk<br />
of deforming it due to how thin this part is).<br />
Solutions all products:<br />
› Remove the insole (increases volume).<br />
› Stick adhesive foam around the painful area to dissipate the pressure.<br />
› Stretch the shell locally using a heat gun* and other tools designed for<br />
this purpose (such as SIDAS) (except Symbio and Rear Entry).<br />
X Wave, performa and Verse: Be careful not to overheat the Sensifit<br />
or the instep gusset of the boot during the heating operation (there is<br />
a risk of deforming it due to how thin this part is).<br />
* caution: The boots whose lower shells aren’t made of Polyurethane (PU) must not be stretched with heat (there is a risk of damaging the material).<br />
important: Boots whose lower<br />
shell material is not made of<br />
Polyurethane (PU), should not be<br />
heated (risk of damaging the material).<br />
Solutions for falcon, X Wave, performa:<br />
Special precautions are required when stretching the shell:<br />
› heat* the inside and outside of the cuff and lower shell simultaneously (so that both will be<br />
at the same temperature despite their different thicknesses and layers),<br />
› place the stretching device on the inside, close the boot during the<br />
stretching operation, and proceed with very small successive degrees<br />
of stretching to avoid creating a space between the cuff and<br />
the shell.<br />
falcon and X Wave:<br />
Be careful not to heat the metal parts (there is a risk of damaging the<br />
plastic).<br />
Solutions for rear-entry models:<br />
› Remove the insole to increase the volume.<br />
› Stick a C-shaped foam pad in the area around the<br />
ankle bones (on the liner).<br />
› Remove some foam from the liner in the area<br />
around the ankle bones.<br />
› Add shims to blue heel envelopment plate.
Boot<br />
foot anatoMy and fit > Recommendations (continued)<br />
problems, causes & Solutions chart<br />
problems causes Solutions<br />
heel preSSure Lack of room in the<br />
boot. Prominent calcaneus<br />
(exostosis).<br />
heel MoVeMent Very narrow heel.<br />
Achilles tendon axis<br />
very hollow.<br />
Thin ankle.<br />
inSulation and nuMBneSS<br />
cold, numb feet.<br />
craMpS<br />
Muscle pain under the<br />
arch, in the calf, pressure<br />
points, irritations.<br />
Poor blood circulation<br />
caused by pressure<br />
on the blood vessels/<br />
nerves.<br />
Poor foothold<br />
distribution<br />
(especially with<br />
children).<br />
Pronounced arch,<br />
high instep or flat<br />
foot.<br />
Pronated foot.<br />
Thick lower leg.<br />
Shin Bite Lack of pressure<br />
distribution.<br />
foot anatomy & fIt > recommendatIons > 65<br />
Solutions all products:<br />
› Stick a chevron (foam pad in the form of an inverted V) above the<br />
calcaneus to push the foot forward in the shell and reduce the<br />
pressure on the heel.<br />
› It is possible to remove some PU from both sides of the Achilles<br />
tendon on the cuff (grinding) and/or on the lower shell<br />
(Falcon, X Wave, Ellipse and Performa).<br />
Solutions all products:<br />
› Stick a chevron above the calcaneus on the liner.<br />
› Stick an L-shaped piece of foam under each ankle bone (for better<br />
grip).<br />
› Add a shim to the top of the liner (forward position that pushes<br />
the foot backward in the boot and increases pressure on the<br />
heel).<br />
› Use a thicker insole.<br />
› Add a shim under the footboard.<br />
› Add heel lifts.<br />
Solutions all products:<br />
› Make sure the adjustments are not too tight.<br />
› Remove the insoles from the liners.<br />
› Add a small arch support and varus wedge (or a shim on the inside of the heel under<br />
the footboard from the performance series).<br />
› Grind the footboard.<br />
Solutions all products:<br />
› Add or remove the arch support.<br />
› Add an insole or propose a custom insole.<br />
› Remove all shims under the footboard.<br />
› Modify the angle of the forward lean to distribute the skier’s weight differently.<br />
› Grind the footboard.<br />
› Grinding the Custom Sole:<br />
To increase the volume of the boot or to change the position<br />
of the foot. Caution, grind on the top surface only.<br />
Grinding the base will affect the interface with the<br />
Chassis. A depth gauge is marked front and<br />
back for even grinding.<br />
falcon:<br />
› Add a shin wedge on the cuff (choose the mounting position according<br />
to the height of the skier).
helMet & pole<br />
Technical reference<br />
for the complete line<br />
of current <strong>Salomon</strong><br />
helmets and poles<br />
66
helMet & pole<br />
helMet technology<br />
helmet technical information<br />
Developed with a specialized sport trauma physician<br />
In order to meet consumer’s<br />
needs in terms of safety, head<br />
hold and comfort <strong>Salomon</strong> uses<br />
two construction technologies:<br />
Standard technology and In Mold<br />
technology. Both provide performance<br />
in terms of resistance,<br />
absorption, deflecting impact and<br />
resisting penetration.<br />
in Mold technology: an external<br />
PC layer molded together with<br />
the EPS cap to provide the best<br />
ratio lightness / resistance to the<br />
helmet.<br />
injected technology: an external<br />
cap made of ABS combined with<br />
an internal cap made of EPS.<br />
fit foams: All our models are<br />
benefiting from specific Fit foams<br />
disposed on the anatomical areas<br />
to increase head comfort.<br />
<strong>Salomon</strong> channelled all its experience<br />
for your protection and pleasure<br />
but don’t lose your head!<br />
Our helmets combine our recognized<br />
professionnalism and pure design to<br />
create protection for the senses.<br />
instructions for use and maintenance<br />
- iMportant: the helmet must always<br />
be fastened on the head (chin strap<br />
buckled under the chin).<br />
- Check the adjustment and the condition<br />
of your helmet before each use.<br />
- Always take care of your helmet,<br />
even when not using it. Store it away<br />
from any heat source and sunlight<br />
(since prolonged exposure to the<br />
sun weakens all plas tic materials,<br />
it is recommended to replace your<br />
helmet at least every 3 years). Let it<br />
dry in a ventilated area.<br />
- For cleaning the outside surface of the<br />
skull cap, use soap and water only.<br />
My perfect fit<br />
A<br />
- Do not use any type of gasoline<br />
products, solvents or any other<br />
chemical substances.<br />
- Do not modify the helmet in any way.<br />
Do not varnish it or add any coloring<br />
products.<br />
- After receiving an impact, the helmet<br />
may be damaged to the point that<br />
it is no longer adequate to protect<br />
the wearer’s head against further<br />
impacts. Even if the damage is not<br />
visible, it is necessary to replace the<br />
helmet.<br />
S<br />
D<br />
OSFA<br />
custom air System (fig. A):<br />
new adjustable system for a perfect<br />
fit.<br />
oSfa (fig. S) With this adjustment<br />
system the helmet is covering<br />
several sizes: one helmet for<br />
sizes 51-55cm and one helmet for<br />
sizes 55-58cm.<br />
Beanie convertible (fig. D)<br />
Women customization<br />
pimp My helmet<br />
Our comprehensive winter sport<br />
helmet range meets applicable helmet<br />
standards and uses the unique<br />
Advanced Fit Technology design for<br />
your comfort and performance.<br />
Be smart and protect your head<br />
in style.<br />
Standards<br />
examples of the main tests of norms:<br />
helmets don’t offer<br />
absolute protection, so<br />
ride within your limits<br />
and take care.<br />
roll off dynamic fastening<br />
impact test test device test<br />
covered areas Visibility<br />
measurement measurement<br />
all <strong>Salomon</strong> helmets respect the following standards :<br />
ce - en 1077<br />
(helmets for alpine skiers*) -<br />
tÜV certified.<br />
Sound System<br />
Warning: for use with <strong>Salomon</strong><br />
snowsports helmets only.<br />
Headphones used in snowsports<br />
may cause the skier/rider to not<br />
hear other skiers/riders. This can<br />
lead to an accident and possible<br />
injury or death. Always stay in<br />
control. Skiers/Riders downhill<br />
from you always have priority, so<br />
it's your priority to make sure you<br />
avoid them. Headphones will also<br />
restrict your ability to hear what<br />
your edge/edges are doing on the<br />
snow and may distract you. They<br />
helmet > 67<br />
!<br />
aStM f2040 (helmets for recreational*<br />
snow sports).<br />
* Non motorized winter sports<br />
may distract you from focusing on<br />
skiing or riding safely which may<br />
lead to less control.<br />
care and handling:<br />
The earpad sound system is built<br />
to handle cold, snowy conditions.<br />
However, this system is not waterproof.<br />
Do not submerge the<br />
Earpad or cord in water or any<br />
other liquid. Do not attempt to<br />
clean or to disinfect your helmet<br />
with the earpad sound system<br />
installed.
helMet & pole<br />
helMet technology > (continued)<br />
choosing the right size for your helmet<br />
YOUR SIZE Head perimeter (cm)<br />
adult WoMen<br />
Divine Origins Custom Air,<br />
Divine Custom Air, Icon Origins Custom Air,<br />
Poison Custom Air, Poison, Venom,<br />
Venom Audio CA Elyse Saugstad<br />
adult Men<br />
Equipe*, Valdez*, X-Wing Custom Air,<br />
Ranger Custom Air BT, Impact Custom Air,<br />
Ranger Custom Air, Patrol Custom Air, Patrol,<br />
Brigade Audio, Brigade Ghost Custom Air,<br />
Brigade Pro Model, Patrol CA Mike Douglas,<br />
Brigade Audio CA Cody Townsend<br />
* Size NOT available for Equipe, Valdez helmets<br />
adult WoMen oSfa SySteM:<br />
Icon Origins, Pearl Origins, Divine Origins<br />
adult Men oSfa SySteM:<br />
Ranger, Cruiser<br />
Junior<br />
*Equipe JR, Jib, Kiana, Patrol Junior<br />
OSFA System<br />
Zoom, Zoom Combo<br />
* Size ONLY available for Equipe JR (White Red)<br />
head Measurer use & Maintenance<br />
H J K L<br />
Warning:<br />
<strong>Salomon</strong> has developed a head<br />
mea sur er that will help you to better<br />
serve your customer by being<br />
able to recommend the helmet size<br />
that corresponds to the circumference<br />
of his/her head.<br />
This measurer can be used for all<br />
<strong>Salomon</strong> Alpine and In Line Skate<br />
helmets.<br />
Please remember that the size<br />
given by the measurer (centimeters)<br />
should be used only as an<br />
indication to help you orient your<br />
customer toward the proper size.<br />
The final selection of the appropriate<br />
size should be left to the customer.<br />
Using the measurer should never<br />
replace trying on the helmet.<br />
51 52 53 54 55 56 57 58 59 60 61 62<br />
JR (51-52)<br />
XXS (53-54) S (55-56) M (57-58)<br />
XXS (51-55)<br />
XS (54-55)<br />
S/M (55-58)<br />
XXS (53-54) S (55-56) M (57-58)<br />
The helmet is a safety product: it<br />
must be chosen in the size that is<br />
suitable to its user and be properly<br />
positioned on his/her head (the<br />
chin strap adjusted in the closed<br />
position) to ensure optimum protection,<br />
comfort and hold.<br />
recommendations for use:<br />
- Loosen the roller (a) to be able<br />
to place the measurer easily on<br />
the head.<br />
- Position the measurer on the<br />
head according to (fig. H),<br />
touching the brow (B) and the<br />
occipital bone (c).<br />
Important: Make sure the headband<br />
(d) does not compress<br />
the ears, which would affect the<br />
measurement.<br />
XS* (54-55) M (57-58) XL (60-61)<br />
S (55-56)<br />
L (58-59)<br />
XXS/S (53-56) M (57-59)<br />
XS/S (54-56)<br />
L (58-59)<br />
XXL (61-62)<br />
M (57-59) L (60-62)<br />
L/XXL (59-62)<br />
- Hold the measurer in this position<br />
and turn the roller (a) (rotate<br />
it clockwise).<br />
- Turn the roller until it disengages<br />
(fig. J).<br />
- Carefully remove the measurer<br />
from the head, pulling the rear<br />
upward, while maintaining pressure<br />
on the nose (fig. K).<br />
- Read the measurement on the<br />
graduated scale (e) in the window<br />
(fig. L).<br />
- Choose the helmet according to<br />
the size given by the measurer.<br />
- Try the helmet on. Switch sizes if<br />
there is a problem with the fit.<br />
<strong>Salomon</strong> has provided for stickers<br />
that can be put on the head measurer<br />
for a better understanding of<br />
how to use the roller.<br />
helmet > 68<br />
choosing your size (see table):<br />
The helmet is a safety product.<br />
To ensure optimal protection,<br />
comfort and head hold, the helmet<br />
must be chosen in the correct size.<br />
To choose the correct size, it is<br />
nec es sary to measure the cranial<br />
perime ter of the head in cm (from<br />
the fore head to the most prominent<br />
back part of the head).<br />
helmet adjustment:<br />
The helmet must be properdine<br />
positioned on, and adjusted to the<br />
user’s head to ensure maximum<br />
comfort and protection.<br />
A properly positioned helmet must<br />
not be too far forward or backwards<br />
on the user’s head ; the chin<br />
strap must always be properly<br />
adjusted and in the closed position.<br />
In case of children’s helmets, an<br />
adult should always check that the<br />
helmet is properly secured.<br />
Maintenance recommendations:<br />
To clean the measurer, you can use<br />
a cloth with soap and water.<br />
It is prohibited to use chemical<br />
products, hot water or pressurized<br />
water, gasoline, alcohol,<br />
detergents, solvents or aerosols<br />
that could permanently damage<br />
the plastic materials and erase the<br />
markings.<br />
Warning:<br />
<strong>Salomon</strong> does not cover any damage<br />
to the head measurer that is a<br />
result of transportation, storage or<br />
not abiding by the instructions for<br />
use or maintenance.
helMet & pole<br />
pole technonolgy<br />
pole technical information<br />
choosing a pole size<br />
- Turn the pole upside down with the tip pointing up,<br />
- Hold the pole right under the basket,<br />
- Your arm will form a right angle (90°) when you have<br />
the ideal size.<br />
Mounting the replaceable baskets > procedure<br />
<strong>Salomon</strong> has made 3 types of replaceable baskets available to you:<br />
1 2<br />
a) Mounting: at the same time,<br />
screw the basket on and push it<br />
towards the handle of the pole.<br />
fig. A. Removing: at the same<br />
time, unscrew the basket and<br />
pull it toward the tip of the pole.<br />
B) Screw the basket on completely<br />
until you hear four clicks (wear<br />
gloves as a precaution). fig. S<br />
pole Shaft Materials > technical features<br />
aluminium range<br />
- <strong>Salomon</strong> know-how in aluminium<br />
is proven with bindings, ILS<br />
and Mavic wheels.<br />
- According to this experience, we<br />
defined three levels of strength:<br />
aluminium technology<br />
by <strong>Salomon</strong><br />
HHHH<br />
al<br />
40% stronger<br />
al HHH<br />
15% stronger<br />
al HH<br />
Competitive strength/price ratio<br />
Maintenance recommendations<br />
Use a cloth with soap and water to clean the poles. It is prohibited to use<br />
chemicals, hot water or pressurized water, gasoline, alcohol, detergents,<br />
solvents or aerosols that can permanently damage the plastic materials<br />
and erase the cosmetics.<br />
Benefits of main technical features<br />
- Spaceframe shaft: specific 3D<br />
shapes (wing and AHT) for<br />
advanced performance: higher<br />
resistance and stiffness.<br />
- Bi-material grip:<br />
› hard part for precision,<br />
› soft part for comfort.<br />
- Racing grip: specifically designed<br />
for racers, a closer grip<br />
to the pole for higher precision.<br />
- Ultra light foam grip: the best<br />
grip if you need lightness and<br />
comfort with or without gloves.<br />
rental poles<br />
- Gripfit: the grip with the best fit<br />
and right shapes for less efforts.<br />
- NPS (No Problem Strap): dual<br />
side strap, easy to use and with<br />
improved comfort.<br />
- Interchangeable baskets: the big<br />
one fits off-pists and powder, the<br />
small one is more adapted for all<br />
other uses.<br />
- Carbide tip: bi-material tip for<br />
higher resistance and durability.<br />
- <strong>Salomon</strong> designed specific poles for rental adapted to a professional<br />
and intense use.<br />
- This warranty will not apply for damages resulting of rental use of poles<br />
that was not designed specifically for rental.<br />
composite range<br />
- We do our pole’s shafts the<br />
same way that golf companies<br />
do their own golf shafts.<br />
- We defined three levels of<br />
Carbon grade:<br />
carbon technology<br />
by <strong>Salomon</strong><br />
HHHH<br />
c<br />
80% of Carbon<br />
c HHH<br />
40% of Carbon<br />
c HH<br />
15% of Carbon<br />
Pole > 69
Spare partS<br />
Spare partS – contentS<br />
contents > 70<br />
alpine Binding 71<br />
SKiS 76<br />
poleS 76<br />
alpine BootS 76<br />
nordic 79<br />
SnoWBoard BoardS 81<br />
SnoWBoard BindingS 81<br />
SnoWBoard BootS 83<br />
footWear 84<br />
This catalogue is for product display only. <strong>Salomon</strong> reserves the right to modify or discontinue any product. Every product not available in all countries. SALOMON reserves<br />
the right to limit or to modify color and/or aesthetic versions of spare parts. These spare parts will nonetheless continue to be distributed in their original functions.<br />
All rights reserved. Any reproductions, partial or in full, are prohibited.<br />
(All prices in U.S. dollars. Prices are subject to change at anytime.)
Spare partS<br />
alpine Binding<br />
alPIne BIndIngs > 71<br />
1X2<br />
track<br />
Smartrak Prolink + 914<br />
Smartrak Prolink & Smartrak Control + Z12 TI • Z10 TI • 710 TI<br />
04-05 S912 TI SC • S810TI SC • S712 SC • S710 TI SC • S710 SC • C609 SC • C608 SC •<br />
78829401<br />
78829601<br />
$ 20.00<br />
$ 20.00<br />
1X2 C607 SC • C509 SC • 06 Z12 TI SC • Z12 SC • Z10 TI SC • Z10 SC • 710 SC • 609 SC • 608<br />
SC • 09 711 SC • L9 SC • L7 SC • L10 SC<br />
78378501 $ 9.00<br />
1X2<br />
04-05 S305 SC • 06 305 SC • 07 KRR TZ5 SC • NRR TZ5 SC • 08 NR TZ5 SC • FR TZ5 SC<br />
• 09 T5 SC<br />
78378701 $ 9.00<br />
adjustable toe Base plate<br />
S900 Eq SC 99 • SC 04+: All products •<br />
1X2<br />
IFT Free & fast 04+: All SC products<br />
001178<br />
1X2 HI 09+: All products starting with 09/10 range 10833301<br />
1X2 Z Speed all models: Lever adjustment 12027001<br />
Quadrax toe track<br />
S700 • S700 SR • S700 T • S700 TSR • S710 • S708 TSR • S710 SR • S711 SR • S710 Ti<br />
1X2<br />
• S711 Pa<br />
Z12 TI • Z10 • Z10 TI • Z10 FIS 20 • 710 • 610 • 609 • 609 SR • 608 • Smartrak Grip + Z12<br />
• Z10 • Z10 TI • 710 TI • 611 • 610 • 609 • 609 TI • WARNING CHANGE THE SCREW FOR:<br />
1X2 Z10 TI AXE + (788314) • 610 CP (000930) • 609 D+ (001101) • 607 (000896) • 607 SR (000896)<br />
Smartrak Prolink & Smartrak Control + Z12 TI • Z12 • Z10 • 711 • 710 • Z12 TI SC • Z12 SC<br />
• Z10 TI SC • Z10 SC • 609 SC • 710 SC • 608 SC • ITF: 711<br />
78379001<br />
78829701<br />
78829801<br />
1X2 07 Junior TZ 5 • TZ 5 SR • 08 LZ 7 • 09 T5 • T5 SR • L7 • L7 SR • L9 • L9 SR 54833901<br />
1X2 08 LZ 8 • LZ 9 10061901<br />
position indicator<br />
1X2 ITF Free & Fast SC 04+: All products 78385801<br />
central plate<br />
1X2 920 LAB • 916 LAB • 914 LAB • 920 ZZ LAB • 916 ZZ LAB • Z920 LAB SS • Z916 LAB SS 78576301<br />
1X2 920 LAB • 916 LAB • 914 LAB • 920 ZZ LAB • 916 ZZ LAB • Z920 LAB SS • Z916 LAB SS 78829901<br />
1X2<br />
Smartrak Prolink/Control + 914 • Z12 • Z10 • 711 78833601<br />
Smartrak Prolink/Smartrak Control + Z12 TI • Z10 TI • 710 TI 78833801<br />
Smartrak Grip + 914 • Z12 • Z10 • 611 • 610 • 609 78833901<br />
Smartrak Grip + 609 TI • 710 TI • Z10 TI 78834001<br />
Smartrak Rental 10056601<br />
Lightrak senior HL 10832901<br />
Lightrak senior JL 10833001<br />
heel guide or heel track housing<br />
1X2 C&S: All products 99- Except: Junior 001173<br />
1X2 04-05 S710 SR • C609 SR • C509 SR • 06 609 SR 268-348 mm: 78379501<br />
1X2 04-05 C305 SR • 06 305 • 06 TZ5SR 190-246 mm: 78379201<br />
1X2 SC Senior: All products 260-382 mm: 12030101<br />
1X2 04-05 C305 CS • 06 305 SC • 07 KRR TZ5 SC • NRR TZ5 SC • 08 NR TZ5 SC • FR TZ5 SC 216-304 mm: 78379301<br />
track<br />
1X2 Z Speed: Brake plate 12027101<br />
1X2 Flat Ti: All products 78389701<br />
1X2 Smartrak Ti: All products 24729201<br />
1X2<br />
Parts Count<br />
lever<br />
All C&S products • Kaikki C&S • Tuotteet • 99+ Except: Junior • Cosmic • Racing • 900 •<br />
850 • 700 • 725 • 600 • 509 • 400<br />
(All prices in U.S. dollars. Prices are subject to change at anytime.)<br />
how to read the tables<br />
04: year 230-308 mm: dimensions (T175): size ##### while quantites last ##### New<br />
78393901<br />
Reference<br />
$ 10.00<br />
$ 7.00<br />
$ 6.00<br />
$ 4.75<br />
$ 4.75<br />
$ 4.75<br />
$ 4.75<br />
$ 4.75<br />
$ 4.00<br />
$ 6.00<br />
$ 5.00<br />
$ 9.00<br />
$ 13.00<br />
$ 9.00<br />
$ 13.00<br />
$ 9.00<br />
$ 9.00<br />
$ 9.00<br />
$ 5.00<br />
$ 6.00<br />
$ 2.00<br />
$ 13.00<br />
$ 2.00<br />
$ 3.50<br />
$ 13.00<br />
$ 28.00<br />
$ 8.00
Spare partS<br />
V.i. Window<br />
alPIne BIndIngs > 72<br />
1X2 C305 • S305 • S 305 SC • C 305 SR (0,75-4,5) 78146601<br />
anti friction plate<br />
1X2 914 FIS 20 • 914 78830001<br />
1X2 Z12 TI • Z12 • Z12 TI SC • Z12 SC • Z10 TI SC • Z10 • 710 TI • 710 SC • 710 • 710 ITF 78830101<br />
1X2<br />
611 • 610 • 610 SC • 610 CP • 609 • 609 Ti/D+ • 609 SC • 608 • 608 SC 78830201<br />
607 • 607 SR 78830301<br />
1X2 914 LAB 78830401<br />
1X2<br />
All S914 models (except S914 T Fis 17) • S912 • S910 • S875 • S850 • S812 • 811 • S810<br />
• S900 Eq Poweraxe • S900 Eq AL Poweraxe S900 Eq Axe plus 99 • S900 TI • S900 Eq FIS<br />
• S900 Carbon 99 • S900 Eq AL 99 • S900 Eq SC 99 • S711 Ps • S711 • S711 Pi Sp • S710<br />
Pi Sp SR<br />
887608<br />
1X2 00-05 All C products • Except: C607 • C607 SR 888134<br />
1X2<br />
Quadrax 600 (except Q600 Equalizer) • Q675 • Q700 Synchro C • Q400 • Q300 • Q300 SR •<br />
Q300 Synchro C • Q300 mini • Q500 • Q600 • Q600 Drive Plus 99 • Q600 Poweraxe • Q500 SR<br />
• Q500 Drive Plus 99 • Q400 SR • Q500 Synchro C (Drive +) • Q725 Drive + • Q725 Poweraxe •<br />
Q575 • C509 sr • C509 • C407 SR • C407 • C305 Grom SR • C305 Grom • Mini Grom • C610<br />
000934<br />
1X2 S300 • S300 SC • S305 • S305 SC 05- 001134<br />
1X2 Universal AFD (adult & junior boots norms) for: 07 Junior TZ 5 • TZ 5 SR • TZ 5 S 54834001<br />
1X2 Junior Performance AFD (Junior boots norms only) for: 07 Junior TZ 5 • TZ 5 SR • TZ 5 SC 89267001<br />
1X2<br />
Universal AFD (adult & junior boots norms) for: 08 Junior TZ 5 • LZ 7 • LZ 8 • LZ 9<br />
09 Junior T 5 • L 7 • L 8 • L 9<br />
10056701<br />
1X2 07 STH 12 • 08 STH 14 54834101<br />
1X2 07 STH 16 54834201<br />
1X2 08 STH 14 Driver 10447501<br />
1X2 Z Speed all models 12027301<br />
$ 5.00<br />
$ 7.50<br />
$ 7.50<br />
$ 6.00<br />
$ 6.00<br />
$ 6.75<br />
$ 13.00<br />
$ 12.00<br />
$ 8.00<br />
$ 7.00<br />
$ 8.00<br />
$ 4.00<br />
$ 8.00<br />
$ 10.00<br />
toe housing<br />
Z12 TI • Z10 • Z10 TI • Z10 FIS 20 • Z10 TI AXE + • 710 • 610 CP • 610 • 609 D+ • 609 • 609<br />
SR • 608 • 607 • 607 SR • Smartrak Grip + Z12 • Z10 • Z10 TI • 710 TI • 611 • 610 • 609 •<br />
78856001 $ 10.00<br />
1X2<br />
609 TI • Smartrak Prolink & Smartrak Control + Z12 TI • Z12 • Z10 • 711 • 710<br />
SC: Z12 TI SC • Z12 SC • Z10 TI SC • Z10 SC • 609 SC • 710 SC • 608 SC • ITF: 711 • STH 12 78856101 $ 8.00<br />
Z 14 • STH 14 • Z 12 oversize • STH 12 oversize 10833201 $ 10.00<br />
Brake<br />
1X2 Junior SC: Q300 SC • S300 SC • S305 SC • 305 SC 06 887610<br />
1X2<br />
Junior SR: Q300 • Q300 SR • S300 • S305 • C305 SR • 305 SR 03-07 • 305 06 887611<br />
Junior mini: Q300 Mini • MiniGrom • 305 mini 06 887609<br />
1X2 Junior: TZ 5 • TZ 5 SR 07 54834301<br />
1X2 Junior: TZ 5 SC • TZ 5 Juniortrak 07 10055301<br />
1X2<br />
S920 LAB • S916 LAB • S914 LAB •<br />
920 ZZ LAB • 916 ZZ LAB •<br />
914 ZZ LAB • STH 16 • STH 14 Driver<br />
• STH 14 • STH 12 Oversize • STH 12 •<br />
Z14 LAB • Z12 LAB • Z Speed (all models)<br />
1X2 Other range models<br />
(All prices in U.S. dollars. Prices are subject to change at anytime.)<br />
L<br />
l<br />
DG = Double Grip<br />
R75 DG X 100: 78575401<br />
R80 DG X 100: 78575501<br />
R90 DG X 100: 78575701 R100 DG X 100: 78575801<br />
R115 DG X 100: 78575901<br />
R130 DG X 100: 78855701<br />
B75 DG X 100: 78574501<br />
B80 DG X 100: 78574801<br />
B85 DG X 100: 78574901<br />
B90 DG X 100: 78575001<br />
B100 DG X 100: 78575101<br />
B115 DG X 100: 78575201<br />
B130 DG X 100: 78830601<br />
C609 SC on Snowblade B85 G X 100: 78855801<br />
G = Grip<br />
B 85 G x 100<br />
R 100 DG x 100<br />
l L<br />
$ 6.00<br />
$ 7.00<br />
$ 12.00<br />
$ 10.00<br />
$ 10.00<br />
$ 12.00<br />
$ 10.00<br />
$ 15.00<br />
$ 15.00<br />
$ 25.00<br />
$ 25.00<br />
$ 25.00<br />
$ 15.00<br />
$ 15.00<br />
$ 15.00<br />
$ 25.00<br />
$ 25.00<br />
$ 25.00<br />
$ 25.00<br />
$ 15.00
Spare partS<br />
1X1<br />
alPIne BIndIngs > 73<br />
Jigs<br />
All Senior products<br />
56-99 mm: 001156<br />
80-123 mm: 001157<br />
$ 100.00<br />
$ 100.00<br />
Q300 • Q300mini • S300 • S305 • C305 • Mini Grom 56-99 mm: 78406101 $ 80.00<br />
TZ 5 Juniortrak 56-99 mm: 24729001 $ 100.00<br />
Synchro Center+Rental: Junior/Senior<br />
56-99 mm: 001003<br />
80-123 mm: 001040<br />
$ 100.00<br />
$ 100.00<br />
Z Speed: All models 70-116 mm: 11139301 $ 50.00<br />
tools<br />
1X1 Deflex/Hangl & Poweraxe Race GS: Drill bit Ø 4,6 X L 11,5 mm: 001121<br />
1X5 Drill bit<br />
Ø 3,6 X L 8 mm : 000814<br />
Ø 4,1 X L 8 mm: 000813<br />
Ø 4,1 X L 9,5 mm: 000893<br />
Ø 3,6 X L 9,5 mm: 000892<br />
1X1 Pilot: Torx bit for electric screwdriver Fein 25 mm: 887607<br />
1X1 Posidrive screwdriver 7 mm: 000862<br />
1X1 Adjustement tool 000902<br />
1X2 Pilot & Poweraxe Race GS / Hangl 00: Torx bit 25 mm: 887606<br />
1X100 Repair plugs 000846<br />
1X1 Special binding mounting glue 000811<br />
1X100 Plastic plugs<br />
Ø 4,5 mm: (white) 000819<br />
(black) 000818<br />
1X1 Tube of grease 000905<br />
1X2 Transparent demoboard + straps 001188<br />
plate Kit<br />
1X2 Cosmic & Z Axe plus 15 mm: 78491501<br />
1X2 Snowblade release 78497501<br />
(All prices in U.S. dollars. Prices are subject to change at anytime.)<br />
$ 40.00<br />
$ 78.00<br />
$ 78.00<br />
$ 78.00<br />
$ 78.00<br />
$ 16.00<br />
$ 14.00<br />
$ 20.00<br />
$ 16.00<br />
$ 16.00<br />
$ 10.00<br />
$ 3.50<br />
$ 5.00<br />
$ 20.00<br />
$ 20.00<br />
$ 34.00
Spare partS<br />
Référence<br />
Reference<br />
000834<br />
000836<br />
000899<br />
000900<br />
000908<br />
000957<br />
001004<br />
001018<br />
001085<br />
001087<br />
001099<br />
000829 10 x 13,5<br />
000830 10 x 15,0<br />
000832 10 x 23,0<br />
000894 10 x 11,8<br />
000895 8 x 13,0<br />
000896 9 x 15,0<br />
000897 10 x 18,8<br />
000909 9 x 10,0<br />
000910 10 x 16,5<br />
000911 9 x 18,0<br />
000912 9 x 29,0<br />
000930 9 x 16,5<br />
000958 9 x 12,5<br />
000960 9 x 27,0<br />
000961 9 x 8,5<br />
001057 9 x 19,5<br />
001058 9 x 32,5<br />
001082 9 x 21,0<br />
001083 9 x 25,5<br />
001086 10 x 19,5<br />
001100 9 x 24,0<br />
001101<br />
001102<br />
9 x 23,0<br />
001136 9 x 10,7<br />
001138 9 x 34,0<br />
78385901 8,8 x 14,35<br />
78831301 9 x 17,3<br />
78831401 9 x 26<br />
78832201 BN8 4 x 10<br />
78832801 8,8 x 12,7<br />
88813801 10 x 12<br />
88813901 10 x 20,5<br />
10115201 8,8 x 12,6<br />
L<br />
ø<br />
mm : Ø x L mm : Ø x L<br />
L<br />
Longueur • Length<br />
ø<br />
10 x 13,5<br />
10 x 20,5<br />
10 x 16,5<br />
10 x 23,2<br />
10 x 25,0<br />
10 x 27,5<br />
10 x 18,3<br />
10 x 21,3<br />
10 x 36,0<br />
10 x 29,0<br />
10 x 32,5<br />
10 x 34,0<br />
Screws (Together column number and reference # = screw positions)<br />
Voir tableaux pages suivantes pour les modèles correspondants<br />
See charts on following pages for the concerned models<br />
1 2 3 4 5 6 7 8 9 10 11 12 13 14 15 16 17<br />
001153 79491501<br />
001101<br />
000912<br />
001102<br />
001057<br />
001083<br />
78831501<br />
78831701<br />
78832001<br />
(All prices in U.S. dollars. 78832501 Prices are subject to change at anytime.)<br />
}<br />
787169 - 787170<br />
SMARTRAK CONTROL +<br />
Z12TI . Z10<br />
alPIne BIndIngs > 74<br />
e.g.: 17/ 000900<br />
78497501 SMARTRAK JUNIOR<br />
$ 13.00<br />
$ 13.00<br />
$ 8.00<br />
$ 14.00<br />
$ 15.00<br />
$ 14.00<br />
$ 15.00<br />
$ 15.00<br />
$ 10.00<br />
$ 10.00<br />
$ 10.00<br />
$ 12.00<br />
$ 8.00<br />
$ 10.00<br />
$ 13.00<br />
$ 10.00<br />
$ 10.00<br />
$ 10.00<br />
$ 13.00<br />
$ 14.00<br />
$ 13.00<br />
$ 15.00<br />
$ 14.00<br />
$ 12.00<br />
$ 15.00<br />
$ 13.00<br />
$ 15.00<br />
—<br />
$ 10.00<br />
$ 10.00<br />
$ 10.00<br />
$ 12.00<br />
$ 12.00<br />
$ 10.00<br />
$ 10.00<br />
$ 12.00<br />
$ 8.00<br />
$ 9.00<br />
$ 9.00<br />
$ 8.00<br />
$ 8.00<br />
$ 10.00<br />
$ 13.00<br />
$ 10.00
Spare partS<br />
alPIne BIndIngs > 75<br />
toe (prices and screw positions on page 74) col./ref.<br />
C305 Grom • C305 SR • Mini Grom • 305 SR • 305 • 305 mini 06 • Junior T 5 & T 5 SR 07 • L 7 • L 7 SR 08 2/ 000894<br />
S305 Grom 2/ 000958<br />
S810 Ti Pi Edge • S810 Pi Edge • S914 Fis • S912 Ti • S912 Fi • S912 • S910 Team • S810 • S810Ti • S914 Pi FR • S914 Fis 24 • S914 Fis 20 • S910 Fis 24 •<br />
S910 Fis 20 • S912 Ti Pi FR • S810 Ti Pi FR • S914 Pi Edge • S912 Ti Pi Edge • S912 Fis 20 • S812 Pi Edge • S910 Ti<br />
2/ 001057<br />
C610 • C509 • C509 SR • C608 SR • C608 • C608 Fis 20 • C608 Fis 17 • C710 • C609 Ti • C609 SR • C609 • 3/ 000930<br />
S710 • S708 T • S708 T SR • S710 SR • S711 SR • S710 Ti • S710 Pi FR 2/ 000911<br />
S711 • S711 Pi FR 4/ 001082<br />
Plaque Axe + 99+ S914 • S912 • S811 • S810 • S910 T • S810 Ti • S810 CP • S912 Ti • S810 SR 3/ 000912<br />
S710 Axe+ • S708T • S710 CP • S710 Ti CP • S711 CP 1/ 000960<br />
C610 Axe+ • C608 CP • C610 CP • C710 CP • C710 Ti CP 4/ 001083<br />
Plaque Drive+ 500 • 600 • C509 Drive+ • C609 Drive+ 4/ 001101<br />
S305 SC 8/ 000961 6/ 000958<br />
Junior T 5 SC 07 8/ 000961 9/ 000958 3/ 000894<br />
S912 Ti SC • 810 SC • S 810 Ti SC 3/ 000911 5/ 000909<br />
S710 SC • S711 SC • S712 SC • S710 Ti SC 6/ 000930 5/ 000909 6/ 001057<br />
C509 SC • C608 SC • C609 SC 6/ 000930 6/ 000911 5/ 000909<br />
LZ 8 SC 08 • L 7 &• L 9 SC 09 5/ 000909 12/ 000958 9/ 000829<br />
920 LAB • 916 LAB • 914 LAB • 920 ZZ LAB • 916 ZZ LAB • Z920 LAB SS • Z916 LAB SS 16/ 001101 16/ 001082<br />
Pilot S710 Cosmic 4/ 001082<br />
S920 • S916 • S914 Fis 17 • S920 Race • STH 16 07 4/ 000910 4/ 000911<br />
LZ 8 • LZ 9 08 • L 9 & L 10 09 7/ 000829<br />
C607 SR • C607 4/ 78385901<br />
S914 Fis 26,3 • S910 Fis 26,3 3/ 001101<br />
Z12 Ti SC • Z12 SC • Z10 Ti SC • Z10 SC • 710 SC • 609 SC • 608 SC 06 5/ 000909 6/ 000930 6/ 001057<br />
Z12 Ti • Z10 Ti • Z10 Fis 20 • 710 • 610 • 609 • 609 Ti • 609 SR 608 06 •<br />
Smartrak Grip+ 610, 611, 710 Ti, Z10 Ti, Z10, Z12, 609, 609 Ti 06 • Z14 08<br />
6/ 000930 6/ 78831301<br />
Z12 Ti AXE+ • 610 CP 06 2/ 000960 2/ 78831401<br />
609 D+ 06 1/ 001100 1/ 001101<br />
914 Fis 20 • 914 • Smartrak Grip + 914 06 1/ 000930 1/ 78831301<br />
Smartrak Prolink & Smartrak Control + 914, Z12 Ti, Z12, Z10 Ti, Z10, 711, 710 Ti 06 • Z14 08 1/ 78832201<br />
Smartrak Prolink + 914 06 1/ 78832801<br />
Smartrak Prolink & Smartrak Control + Z12 Ti, Z12, Z10 Ti, Z10, 711, 710 Ti 06 • Z14 08 2/ 10115201<br />
STH 12 07 • STH 14 • Z14 LAB 08 6/ 000930 6/ 000911<br />
STH 14 Driver 08 3/ 000911<br />
Brake (prices and screw positions on page 74) col./ref.<br />
Brake 5/ 000829<br />
heel (prices and screw positions on page 74) col./ref.<br />
Pilot Edge Loc SC: S912 Ti Pi Edge • S810 Ti Pi Edge 17/ 000830 17/ 000829 17/ 000900<br />
Pilot Free Ride Loc SC: S912 Ti Pi FR • S810 Ti Pi FR • S711 Pi FR 17/ 001086 5/ 000957<br />
C305 Grom • C305 SR • Mini Grom • 305 SR • 305 • 305 Mini 06 2/ 000834 2/ 000899<br />
S305 Grom 8/ 001004 11/ 001018<br />
S914 Fis 17 • 914 • Z12 TI • Z10 TI • Z10 • 710 • 610 • 609 • 608 06 • C608 Fis 17 • S710 • S608 • C610 • C509 • C608 • C710 • S710 Ti •<br />
C609 Ti • C609 • Z14 & Z12 08 • LZ 8 08 • LZ 9 08 • Z12++ 09 • L 9 & L 10 09<br />
11/ 000894 11/ 001004<br />
609 SR 06 • S710 SR • S711 SR • S708 T SR • C509 SR • C608 SR • C609 SR 1/ 000894 1/ 000836<br />
S912 Ti • S912 • S810 • S711 • S910 T • S810 TI • S914 Fis 24 • S910 Fis 24 3/ 000897 6/ 000957<br />
C608 Fis 20 • 914 Fis • S914 Pi FR • S912 Ti Pi FR • S810 Ti Pi FR • S914 Pi Edge • 914 FIS 20 • Z10 FIS 20 06 •<br />
S810 Ti Pi Edge • S810 Pi Edge • S912 Ti Pi Edge • S812 Pi Edge • S912 Fis 20 • S914 Fis 20 • S910 Fis 20<br />
11/ 000830 11/ 000900<br />
Plaque Axe + 99+ S850 • S914 • S912 • S811 • S810 • S710 • S711 CP • S912 Ti • Z10 TI AXE+ • 610 CP 06 •<br />
S608 T • C610 • S910 T • C608 CP • C610 CP • C710 CP • S710 CP • S810 CP • C710 Ti CP<br />
11/ 001101 11/ 001102<br />
Plaque Drive + • C509 Drive + • 609 D + 06 11/ 000911 11/ 000908<br />
S305 SC • 305 SC 06 6/ 000957 11/ 001099<br />
S850 SC (Drive+) • C608 SC • C609 SC • S912 Ti SC • S810 SC • S810 S • S712 S • S711 SC • S710 S • C509 SC • S810 Ti SC • All SC 02+ 9/ 001083 9/ 001102<br />
920 LAB • 916 LAB • 914 LAB • 920 ZZ LAB • 916 ZZ LAB • Z920 LAB SS • Z916 LAB SS 16/ 001100 16/ 001138 16/ 000897<br />
S920 • S916 • STH 12 & 16 07 • STH Driver 14 08 • STH 14 08 • Z14 LAB 08 • STH12++ 09 4/ 000897 4/ 000829 4/ 000912<br />
C607 SC 17/ 001100 17/ 001102<br />
C607 SR • 607 SR 06 • L7 SR 08 17/ 000909 17/ 001004<br />
C607 • 607 06 • L7 08 2/ 000899 2/ 000909<br />
S914 Fis 26,3 • S910 Fis 26,3 7/ 888139 7/ 001087<br />
Z12 TI SC • Z12 SC • Z10 TI SC • Z10 SC • 710 SC • 609 SC • 608 SC 06 • LZ8 SC 08 • L 9 & L 10 09 1/ 001085 2/ 001083<br />
Smartrak Prolink & Smartrak Control + 914 • Z12 TI • Z12 • Z10 TI • Z10 • 711 • 710 TI 06 • Z14 08 1/ 78832201<br />
Junior T 5 & T 5 SR 07 11/ 000896 2/ 000899<br />
Junior T 5 Juniortrak 07 11/ 000908 11/ 001101<br />
Junior T 5 SC 07 11/ 001099 11/ 000912
Spare partS<br />
SKiS<br />
poleS<br />
tips<br />
alPIne skIs > 76<br />
1X2 Verse 8500 00-03 • Verse 590 03 • X-Scream 700 01-02 • Crossmax 700 01-04 • Scleaver 790 03 • Scrambler 400 04 89249201<br />
1X2<br />
1X2<br />
1X2<br />
1X2<br />
1X2<br />
1X2<br />
1X2<br />
Crossmax 10 Pilot Rental 01-02 • Crossmax 8 Pilot Rental 01-03 • Crossmax 7 Pilot Rental 01-03 • Scleaver 7.9<br />
Pilot Rental 03 • Verse 10 Pilot Rental 01-03 • Crossmax7 TX Pilot Rental 03 • Verse 8 Pilot Rental 02 • Scream 10<br />
Pilot Rental 01-02<br />
Equipe SC • Equipe GC • Equipe 9GC • Demo 10 3V • Demo 10 2V • Demo9 • Demo8 • •Demo Lady • Crossmax V12<br />
• Crossmax V10 • Rush n°10 • Rush n°7 • Rush 700 • •Streetracer 10 • Streetrace r8 • Streetracer 7 • Streetracer 6,<br />
600, 800 05-06 • •Rush 6, 600, 800 05-06 • Equipe 10 T 3V 05-06 • Demo Lady 06<br />
Scrambler Hot • Scrambler 9 • Scrambler 8 • Scrambler 7 • Scrambler 6 • Scrambler 5 • Scrambler Custom •<br />
Scrambler 700 • Scrambler 400 • Siam n°10 • Siam n°7 • XW 5, 6, 8 • 400, 700 06 • XW Fury • Hurricane 06 •<br />
Siam n°5, 400 05-06 • Axess 06<br />
Crossmax 10 Pilot 03-04 • Crossmax 9 Pilot 04 • Crossmax 8 Pilot 04 • Teneighty 02-04 • Scream 10 Hot 03-04 •<br />
Scream 10 Xtra Hot 03-04<br />
Equipe GC • GC Race • GC Series • SC, SC Race, 3V • Streetracer 8, 10, 800, 80,8 TX, Sport • Demo X 2V, X 3V, XR, XT •<br />
Crossmax V8, V10, V12, V800 • 9000 replica 06 Equipe 3V, GC Series, GC Race, SC Race • Aero GT, X • Demo X3, XR, XT,<br />
GTX • Crossmax V8, V10, V800, W12 • XW Cyclone, Typhoon 07 Equipe GC, GC Series, SC Race, RC • Aero GT R, GT, XSI<br />
• Aeromax Ti, STi • Demo XR, XT • Crossmax V10 • Origins Amethyst, Amethyst 800 08<br />
XW 3, 4,4 Tx, 10 • Siam N3, N4, N8, N10, N 40, Flirt, Origins, Sinsation • XW Blast, Tornado, Sandstorm, Vector, AT,<br />
X Radiant 06 XW 4, 6, 800, X3, X7, Attack, Tx, STX, Vector, Tornado, Fury, Sandstorm, Storm • Jewel Amber, Crystal,<br />
Diadem, Opal, Origins, Pearl, Topaz - Demo lady 07 XW 4, 6, 8, 10, 500, 800, X7, X9, Fire, Cyclone, Hurricane •<br />
Origins Amber, Amber 500, Pearl, Ruby, Diadem, Crystal, Jade, Opal,Topaz • Demo lady 08<br />
Equipe 2V Race 07 • Demo X2, Ti, RT 07 • X Wing 500 07-08 • Aero Ti, S, RT, GTI, Ti Rental, S Rental 07 •<br />
Jewel Amber 500 07 • Instinct Fever 500 07 • Aeromax RT, SR, GTS 08<br />
89249301<br />
78570801<br />
78571001<br />
78325101<br />
78799401<br />
78799501<br />
24729101<br />
1X2 XW Fury 08 • XW Tornado, Tornado Ti 08-09 • Origin Diamond 09-10 • Enduro 10 10077101<br />
1X2<br />
XW Storm 09 • XW 8, 6, 4 09 • 8R, 6R 09 • Origin Opal, Topaz, Crystal, Amber, Diadem, Crystal R 5 09 •<br />
XW Typhoon, Hurricane, Twister 09<br />
10832701<br />
1X2 Czar, Lord, Dumont, Suspect, Threat, Lady, Mai Tai 08-10 • Shogun, Vamp, Geisha 09-10 • Knight 10 10879901<br />
1X2 XW Focus 10 12145601<br />
1X2 Select, Vital, Zen, Fresh Touch 10 • Powerline Daytona, 24 Speed, 24 Sport, 24 Sport R, GT Pro, GT Pro R 10 12145701<br />
edges (25cm)<br />
alpine BootS<br />
1X2 For all models S90190<br />
Base Material (50cm)<br />
1X1 For all models S90158<br />
1X2<br />
Baskets<br />
Carbon Poles: Rental Composite 06-10 • Element 08-10 • Element Vario 10 • Origins 08<br />
Aluminium poles: Origins 09-10<br />
08-10: Rental Anodized Adult, Artic, Artic Origins, Northpole, Divine Origins<br />
10853701<br />
1X2 09-10: Racer, Northpole Origins, F-One, Allium, X-Wing, Fury, Patrol, Brigade<br />
10: X-W, Mai Tai, Topaz<br />
10853901<br />
1X2<br />
09-10: Rental Anodized JR, Equipe Junior, X-Wing Junior<br />
10: Kitten<br />
10854001<br />
1X2 Strap Rental Adult 10854201<br />
Buckle tooth insert<br />
1X2 Xwave & Rush • Falcon & Instinct • Impact & Idol • X3 (collier/cuff) Collier / Cuff: 10809301<br />
1X2 Xwave & Rush • Falcon & Instinct • Impact & Idol • X3 Coque / Shell: 10817901<br />
1X2<br />
1/4 turn buckle: Performa & Irony • Xwave & Rush • Impact 880 & Idol 880 • Mission<br />
& Divine• Mission RS & Divine RS<br />
Collier / Cuff: 12006901<br />
1X2 Performa & Irony • Elios & Charm • Mission & Divine 99493501<br />
1X2 Focus • Quest • SPK • Ghost • Shogun • Poison Collier / Cuff: 12007001<br />
(All prices in U.S. dollars. Prices are subject to change at anytime.)<br />
$ 10.00<br />
$ 10.00<br />
$ 8.00<br />
$ 10.00<br />
$ 10.00<br />
$ 6.00<br />
$ 6.00<br />
$ 8.00<br />
$ 15.00<br />
$ 10.00<br />
$ 12.00<br />
$ 10.00<br />
$ 10.00<br />
$ 6.00<br />
$ 8.00<br />
$ 6.00<br />
$ 6.00<br />
$ 6.00<br />
$ 6.00<br />
$ 5.00<br />
$ 5.00<br />
$ 3.00<br />
$ 5.00<br />
$ 2.00
Spare partS<br />
Buckle (M* = Micro • V* = Vario)<br />
(All prices in U.S. dollars. Prices are subject to change at anytime.)<br />
Poles > 77<br />
M*<br />
1X2<br />
Alu: Ghost • Shogun • Poison • Pro Model • Kaos • Kreation • Kaïd • Keira • SPK S: 10818001 L: 10818101 $ 20.00<br />
M*<br />
1X2<br />
Alu: Course X3 • Falcon • Instinct • Impact • Idol • X Wave • Rush • Mission RS •<br />
Divine RS • Mission • Divine<br />
S: 10818201 M: 10818301 L: 10818401 $ 15.00<br />
M*<br />
1X2<br />
Alu: Quest<br />
S: 12007101 M: 12007201<br />
L: 12007301<br />
$ 7.50<br />
$ 8.00<br />
M*<br />
1X2<br />
Plastic: Mission • Divine • Mission RS • Divine RS • Charm • Performa S: 12007401 M: 12007501 L: 12007601 $ 3.00<br />
V*<br />
1X1<br />
Symbio: 500 • 440 S: 78396901 L: 78397001 $ 7.00<br />
Cable length: 540 mm / 22.0-25.5: 882844 $ 12.00<br />
V* Symbio<br />
Cable length: 560 mm / 26.0-30.0: 882845 $ 12.00<br />
Cable length: 580 mm / 78862701 $ 13.00<br />
S: 12007701 $ 3.00<br />
1X2 Plastic: T3 • T2 • X3 60 • Team<br />
L: 12007801 $ 3.00<br />
1X2 Quest Backbone 12009601<br />
1X2<br />
innerboot<br />
My Custom Fit Race:<br />
Falcon • Instinct • X3 JR<br />
1X2 Rental AutoCustom Shell: Focus • SPK<br />
1X2 Rental Thermic Fit Biovent: Quest<br />
1X2 Rental Thermic Fit: Performa (M&W)<br />
1X2 Rental Thermic Fit: Symbio<br />
1X2<br />
1X2<br />
1X2<br />
1X2<br />
1X2<br />
1X2<br />
1X2<br />
1X2<br />
1X2<br />
Thermic Fit:<br />
Performa T 3 • T 3 Rental • Kaïd • Keira<br />
Thermic Fit:<br />
Performa T 2 • T 2 Rental • Kaïd<br />
Thermic Fit:<br />
Impact JR<br />
My Custom Fit Pro:<br />
Falcon 100 • X3 JR 09<br />
My Custom Fit Performance:<br />
Impact Idol<br />
Rental Thermic Fit:<br />
Impact Idol<br />
XFit Fusion Advanced:<br />
Mission Divine<br />
XFit Fusion Advanced:<br />
Mission Divine<br />
Rental Thermic Fit:<br />
Mission RS & Divine RS<br />
23.5: 12001622 24.5: 12001624 25.5: 12001626<br />
26.5: 12001629 27.5: 12001631 28.5: 12001633<br />
$ 4.50<br />
$ 85.00<br />
22.5W: 12001756 23.5W: 12001722 24.5W: 12001724 25.5W: 12001726 $ 50.00<br />
26.5: 12001729 27.5: 12001731 28.5: 12001733<br />
29.5: 12001736 30.5: 12001738 31.5: 12001741<br />
$ 50.00<br />
24.5W: 12001824 25.5W: 12001826 26.5W: 12001829 $ 50.00<br />
27.5: 12001831 28.5: 12001833 29.5: 12001836<br />
$ 50.00<br />
22.0W: 78400219 23.5W: 78400222<br />
24.5W: 78400224 25.5W: 78400226<br />
$ 72.00<br />
26.5: 78399929 27.5: 78399931 28.5: 78399933<br />
29.5: 78399936 30.5: 78399938<br />
$ 72.00<br />
31.5: 78583741 32.5: 78583743 33.5: 78583745 $ 78.00<br />
22.0: 489681 23.5: 489683 24.5: 489685<br />
25.5: 489687 26.5: 489689 27.5: 489691<br />
28.5: 489693 29.5: 490429 30.5: 489695<br />
22.0: 12001919 23.5: 12001922 24.5: 12001924<br />
25.5: 12001926 26.5: 12001929<br />
18.0: 12002010 19.0: 12002012<br />
20.0: 12002054 21.0: 12002055<br />
22.0: 78399719 23.5: 78399722 24.5: 78399724<br />
25.5: 78399726 26.5: 78399729 27.5: 78399731<br />
22.0: 78862919 23.5: 78862922 24.5: 78862924<br />
25.5: 78862926 26.5: 78862929 27.5: 78862931<br />
$ 50.00<br />
$ 30.00<br />
$ 25.00<br />
$ 62.00<br />
$ 86.00<br />
22.0 W: 55472419 23.5 W: 55472422 24.5 W: 55472424 25.5 W: 55472426 $ 90.00<br />
26.5: 55472429 27.5: 55472431 28.5: 55472433<br />
29.5: 55472436 30.5: 55472438 31.5: 55472441<br />
$ 90.00<br />
22.0 W: 55472519 23.5 W: 55472522 24.5 W: 55472524 25.5 W: 55472526 $ 70.00<br />
26.5: 55472529 27.5: 55472531 28.5: 55472533<br />
29.5: 55472536 30.5: 55472538 31.5: 55472541<br />
$ 70.00<br />
22.0 W: 55472619 23.5 W: 55472622 24.5 W: 55472624 25.5 W: 55472626 $ 88.00<br />
26.5: 55472629 27.5: 55472631 28.5: 55472633<br />
29.5: 55472636 30.5: 55472638 31.5: 55472641<br />
22.0 W: 11105519 23.5 W: 11105522 24.5 W: 11105524 25.5 W: 11105526<br />
$ 88.00<br />
26.5: 11105529 27.5: 11105531 28.5: 11105533<br />
29.5: 11105536 30.5: 11105538 31.5: 11105541<br />
$ 60.00<br />
22.0 W: 10078319 23.5 W: 10078322 24.5 W: 10078324 25.5 W: 10078326 $ 80.00<br />
26.5: 10078429 27.5: 10078431 28.5: 10078433 29.5: 10078436<br />
30.5: 10078438 31.5: 10078441 32.5: 10078443 33.5: 10078445<br />
$ 88.00
Spare partS<br />
Bootfitting<br />
alPIne Boots > 78<br />
1X1 Heating machine U.S. & Canada: Z15620 $ 295.00<br />
1X1 Measurer 10877101<br />
$ 80.00<br />
Bootfitting<br />
1X2 Rental Insoles<br />
18.0: 10078610 19.0: 10078612 20.0: 10078654 21.0: 10078655<br />
22.0: 10078619 23.0-23.5: 10078621 24.0-24.5: 10078623 25.0-25.5: 10078625<br />
26.0-26.5: 10078628 27.0-27.5: 10078630 28.0-28.5: 10078632 29.0-29.5: 10078635<br />
30.0-30.5: 10078637 31.0-31.5: 10078639 32.0-32.5: 10078642 33.0-33.5: 10078644<br />
$ 5.50<br />
1X2 Therm-ic Insoles<br />
22.0: 55473119 23.0-23.5: 55473121 24.0-24.5: 55473123 25.0-25.5: 55473125<br />
26.0-26.5: 55473128 27.0-27.5: 55473130<br />
$ 15.00<br />
1X2 Footbed: Standard (black)<br />
24.0-24.5: 88164023 25.0-25.5: 88164025 26.0-26.5: 88164028<br />
27.0-27.5: 88164030 28.0-28.5: 88164032 29.0-29.5: 88164035<br />
$ 12.00<br />
1X2<br />
Footbed: Performa Prolink+Sport • Evolution<br />
2 • Verse • Ellipse • Performa<br />
22.0-23.5: 489965 24.0-25.5: 489966<br />
26.0-27.5: 489967 28.0-29.5: 489968<br />
30.0-33.5: 78592037<br />
$ 12.00<br />
$ 6.00<br />
1X4<br />
Sealing gaskets<br />
Mission, Divine<br />
22.0-27.5: 12002101 28.0-31.5: 12002201 $ 2.50<br />
1X4<br />
Sealing gaskets<br />
Impact Idol<br />
22.0-25.5: 55472301<br />
26.0-31.5: 55473001<br />
$ 8.00<br />
$ 8.00<br />
1X2 Lower leg strap 35 mm (black/red)<br />
22.0-25.5: 10078701<br />
26.0-33.5: 10078801<br />
$ 12.00<br />
1X8 Lateral cap Y/C (grey) 78591901 $ 5.00<br />
1X4<br />
innerboot adaptation / Bootfitting<br />
Course Ellipse: Canting rivet 78399001<br />
1X4 Course X2: Canting screw 78399101 $ 14.00<br />
1X4 X-Wave • Impact • Mission RS • Divine RS • Falcon • Instinct: Canting rivets 78399201 $ 8.00<br />
1X20 Toothed nut M4 & screw 10078901 $ 10.00<br />
1X10 Screw + insert (teeth + 3D plate) 12002301 $ 2.50<br />
1X2 Pre-cut foam sheet (4mm) 10079101 $ 35.00<br />
1X2<br />
Prolink Forward Lean Adjustment Wedge :<br />
(All products Course • Performa Prolink) (black)<br />
22.0-25.5: 882397<br />
26.0-30.0: 882398<br />
$ 7.00<br />
$ 7.00<br />
1X2 Prolink innerboot adaptation plate<br />
Bootsole + Screws<br />
24.0-25.5: 882399<br />
26.0-30.0: 882400<br />
$ 7.00<br />
$ 7.00<br />
1X2 Back: Performa • Evolution • Performa T3 • Symbio 440 05 • Elios • Charm 8 mm / 22.0-33.5: 487450 $ 6.00<br />
1X2<br />
Front: Performa • Evolution • Performa T3 • Symbio • Performa 04 •<br />
Verse 04 • Ellipse 04<br />
8 mm / 22.0-25.5: 489617<br />
8 mm / 26.0-33.5: 489618<br />
$ 8.00<br />
$ 8.00<br />
1X2<br />
Walkadin Back: Verse • Ellipse & Siam • Performa & Irony •<br />
Course 60 (22-26.5) • Impact • Idol • Mission • Divine<br />
12 mm / 22.0-33.5: 55473201 $ 8.00<br />
Walkadin Front: Ellipse & Siam • Performa & Irony • Symbio 440 05 •<br />
12 mm / 22.0-25.5: 53527601 $ 8.00<br />
1X2 Course 60 (22-26.5) • Impact • Idol • Mission • Divine • Mission RS • Divine RS •<br />
SPK • Elios • Charm<br />
12 mm / 26.0-33.5: 53527701 $ 8.00<br />
Alpine Pad Front: Quest (grey/black) 12002401 $ 4.00<br />
1X2<br />
Alpine Pad Back:<br />
Quest • Mission • Divine • Mission RS • Divine RS (black/grey)<br />
10079001 $ 15.00<br />
1X2<br />
Back: W-Wave (M&W) • Course XR Japon • Course GT • Course T • 1080 • 1080 Japon<br />
• Course 100 • 90 • 80 • 70<br />
881642 $ 5.00<br />
1X2 Evolution2 490353 $ 6.00<br />
1X2 Back: Team 3.0 • team 3.5 489763 $ 5.00<br />
1X2 Back: 12 Mini • 15 Mini 16.0-17.0: 488030 $ 4.00<br />
1X2 Front: Performa T2 • Performa T4 Small • Course 60 (18-21) 882381 $ 6.00<br />
1X2 Back: Performa T2 • Performa T4 Small • Course 60 (18-21) 882382 $ 6.00<br />
(All prices in U.S. dollars. Prices are subject to change at anytime.)<br />
$ 8.00
Spare partS<br />
nordic<br />
alPIne Boots > 79<br />
1X1<br />
laces<br />
Quickfit<br />
(see page 84: ref 86065701 Footwear)<br />
95 cm: 86065701<br />
1X10 Quickfit Holder 10108001<br />
1X2 Zip<br />
(black): 10108101<br />
(grey): 10108201<br />
1X2 Lace 10107201<br />
1X2 Strap Velcro 25823701<br />
$ 6.00<br />
$ 4.00<br />
$ 10.00<br />
$ 10.00<br />
$ 7.00<br />
1X5<br />
rivet<br />
Carbon Pro • Racing Skate 9 • Active 9 Skate • Vitane 9 Skate 10106801 $ 4.00<br />
1X5 861 • Active 8 Skate CL • Vitane 8 Skate CL • Equipe Combi 10109201 $ 4.00<br />
1X5 Nail Active 08 Black<br />
insoles<br />
12011801 $ 2.00<br />
9K: 25823652 10K: 25823608 11K: 25823610 12K: 25823612 13K: 25823654 $ 8.00<br />
1X2 Durafresh 5 mm<br />
Screw chart<br />
1: 25823616 2: 25823617 3: 25823656 4: 25823621 5: 25823623<br />
6: 25823625 7: 25823627 8: 25823629 9: 25823631 10: 25823633<br />
11: 25823635 12: 25823637 13: 25823639 14: 25823641<br />
$ 8.00<br />
1X100 Profil Equipe Junior Ø 6,3 / 14,5: 78859901 $ 19.00<br />
Profil Equipe Skate+Classic • Profil Active SC<br />
1X100<br />
SNS Propulse RC, SNS Propulse RC 2<br />
Ø 6,3 / 17,7: 890111 $ 14.00<br />
1X100 SNS X Adventure Raid<br />
SNS X Adventure Raid<br />
Pilot Equipe Skate • SNS X Adv Access • Profil Auto Men/ Women<br />
Pilot Sport Skate/Classic/ Women<br />
Ø 6,3 / 26: F872020 $ 14.00<br />
1X100 Plaque SPS Pilot Sport Skate/Classic/Women<br />
Pilot Equipe Classic<br />
Profil Equipe Skate - Profil Equipe Classic - Profil Active SC<br />
SNS Propulse RC, SNS Propulse RC 2<br />
Profil Auto JR<br />
Pilot Equipe Classic<br />
Ø 6,3 / 19,5: 890109 $ 13.00<br />
1X100 Profil Snow/Monster<br />
Pilot Sport Junior - Pilot Junior<br />
Profil Equipe JR<br />
Ø 6,3 / 14,5: 890112 $ 13.00<br />
Plaque SPS Pilot Junior Ø 6,3 / 12: 108797 $ 10.00<br />
1X50 Profil Auto Junior (Skis < 140) Ø 5,4 / 10: 000909 $ 13.00<br />
1X10 Vis Réglage / Adjustment screw • Equipe Classic Pilot<br />
pull tab<br />
55454101 $ 3.00<br />
1X10 Pilot Equipe Skate - Pilot Active Skate (yellow): 10106201 $ 12.00<br />
1X10<br />
plugs<br />
Pilot Equipe Skate • Profil Equipe Skate+Classic • Pilot Active Skate • Profil Auto (Men/<br />
women/Junior) • Profil Active SC • SNS X adventure Raid+Access<br />
cap<br />
890094<br />
1X10 Profil Equipe Classic • Profil Equipe skate • Profil Active SC 10102101<br />
1X1 Screw cap Pilot équipe Classic 55454201<br />
1X1 Screw cap Pilot sport 55454301<br />
(All prices in U.S. dollars. Prices are subject to change at anytime.)<br />
$ 6.00<br />
$ 4.00<br />
$ 6.00<br />
$ 3.00<br />
$ 3.00
Spare partS<br />
1X2<br />
1X2<br />
flexor<br />
Profil Equipe Skate<br />
skI nordIQue > 80<br />
115: (red) 10104201<br />
125: (red) 10104301<br />
Profil Equipe Classic 85: (yellow) 10102201<br />
Profil Active SC 105: (grey) 10105101<br />
Profil Auto Men 105: (black) 10104801<br />
Profil Auto Women 95: (grey) 10104901<br />
Profil Auto Junior Junior: (yellow) 10105001<br />
1X2 SNS X Adventure Raid 185: (grey) 10104401<br />
ridge plate<br />
1X2 Ridge Plate Pilot Skate 78846901<br />
1X2 Profil Equipe 78847201<br />
1X2 Ridge plate Profil Auto Universal 78847101<br />
1X1 S/E Plate Pilot Equipe Classic 55454001<br />
1X1 SPS Plate 25823501<br />
Steel link<br />
1X2 Steel link: Pilot 78847301<br />
Service products<br />
1X1 Jig • Pilot • Profil • BC • X Adventure 891000<br />
1X4 Reversible jig pads • Pilot • Profil • BC • X Adventure 10106401<br />
$ 5.00<br />
$ 5.00<br />
$ 5.00<br />
$ 5.00<br />
$ 5.00<br />
$ 5.00<br />
$ 5.00<br />
$ 5.00<br />
$ 10.00<br />
$ 10.00<br />
$ 10.00<br />
$ 18.00<br />
$ 5.00<br />
$ 8.00<br />
$ 65.00<br />
$ 15.00<br />
1X5 Drill bit - Profil Automatique Junior Ø 3,6 x L 8 mm: 000814 $ 78.00<br />
1X1 Drill bit Ø 3,6 x L 15 mm: 10105201 $ 30.00<br />
1X1 Special repair plug drill bit 10105301 $ 32.00<br />
1X100 Repair plugs 000846<br />
1X1 6 face posidrive bit 78504801<br />
Sticker Pilot Equipe 55453901<br />
(All prices in U.S. dollars. Prices are subject to change at anytime.)<br />
$ 16.00<br />
$ 16.00<br />
$ 5.00
Spare partS<br />
SnoWBoard BoardS<br />
Snowboard tip protector<br />
nordIc > 81<br />
1X1 Rental boards (black) 55473801<br />
SnoWBoard BindingS<br />
No spare parts for S PRO TEAM bindings<br />
1X2<br />
L+R<br />
1X2<br />
L+R<br />
1X2<br />
L+R<br />
1X2<br />
L+R<br />
1X2<br />
L+R<br />
transmission pads<br />
Base Pad all SP models (khaki/black) S: 55473954 M/L: 55473955<br />
Base Pad all SPX models (black) S: 78858454 M: 78858456 L: 78858458<br />
Base Pad all Force & Grace models (black) S: 78836255 L: 78836258<br />
Base Front Pad Slasher: all Slasher models, Arcade, Stella, Celeste, Patriot S: 10832254 M/L: 10832257<br />
Base Pad all Relay models (black) Black: S: 53527254 M: 53527256 L: 53527258<br />
1X2 Cover disc Pad + Screw for transfer base:<br />
Black: S: 10832554 M: 10832556 L: 10832558<br />
L+R Transfer models<br />
4x4 disks<br />
White: S: 10834254 M: 10834256 L: 10834258<br />
1X8 Screw + washers for disk - All Models (except 98 Rental) 88999301<br />
1X2 6 holes Disk IMS + Screws + Washers - All Models (except 98 Rental & Speedfit)<br />
Straps<br />
78855401<br />
1X2 Toe Strap - All Models + M4 Toolfree<br />
S: (black) 12023654 M: (black) 12023656 L: (black) 12023658<br />
S: (white) 12023754 M: (white) 12023756 L: (white) 12023758<br />
1X2 Toe Adjuster - All S and SP Models (black) S: 53527454 M/L: 53527457<br />
1X2 Toe Adjuster - All SPX, Force, Grace & Relay Models (black)<br />
S: (black) 78563554 M/L: (black) 78563557<br />
S: (white) 10134054 M/L: (white) 10134057<br />
1X2 Holding toe strap adjuster - All Relay and Slasher models (black) 78839301<br />
$ 8.00<br />
$ 8.00<br />
$ 30.00<br />
$ 10.00<br />
$ 4,00<br />
$ 18.00<br />
$ 4,00<br />
$ 4,00<br />
$ 5.00<br />
$ 8.00<br />
$ 10.00<br />
$ 10.00<br />
$ 3.50<br />
$ 4.00<br />
$ 2.50<br />
$ 3.00<br />
1X2 Holding toe strap adjuster - All Force and Grace models (white) 53527501 $ 5.00<br />
1X2 Toe Sawblade - All SP Models 06- (black) S/M: 78374919 L: 78374921 $ 5.00<br />
1X2 Toe Sawblade - All SP Models 06+ (black) S/M: 78837054 L: 78837057 $ 7.00<br />
1X2<br />
S/M: (black) 12023855 L: (black) 12023858<br />
Narrow Toe Sawblade 19 mm + Holding fast fit pin: All models with narrow buckle 10+<br />
S/M: (white) 12024055 L: (white) 12024058<br />
$ 2.00<br />
$ 2.00<br />
1X2 Toe Sawblade 24 mm + Holding fast fit: All Models 09- except SP models. (black)<br />
S/M: (black) 78837155 L: (black) 78837158<br />
S/M: (white) 10134155 L: (white) 10134158<br />
$ 12.00<br />
$ 2.50<br />
1X2 Alu TOE Buckle All Models 09- 78855301 $ 25.00<br />
1X2 Alu ANKLE Buckle All Models 09- 78836901<br />
1X2<br />
TOE ratchet viper for sawblade 19 mm<br />
width All Models 10+<br />
12024101<br />
1X2 ANKLE buckle viper & screw All Models 10+ 12024301<br />
1X2<br />
L+R<br />
1X2<br />
L+R<br />
1X2<br />
L+R<br />
1X2<br />
L+R<br />
1X2<br />
L+R<br />
Ankle Strap All Relay Models (black)<br />
Ankle Strap All Relay Models (white)<br />
Ankle Strap All models (SP, SPX, Grace). (black)<br />
Ankle Strap All models (SP, SPX, Grace). (white)<br />
Cored Out Ankle Strap<br />
All models except Relay.<br />
1X2 Ankle Sawblade + Ring + Toothed Nut M5 All Models<br />
(All prices in U.S. dollars. Prices are subject to change at anytime.)<br />
$ 28.00<br />
$ 7.00<br />
$ 7.00<br />
145 mm / S/M: 99494055 $ 25.00<br />
165 mm / L: 78560054 $ 33.00<br />
145 mm / S/M: 99494155 $ 25.00<br />
165 mm / L: 78838755 $ 40.00<br />
165 mm / S: 78560054 $ 33.00<br />
185 mm / M/L: 78560057 $ 33.00<br />
165 mm / S: 78838755 $ 40.00<br />
185 mm / M/L: 78838758 $ 40.00<br />
(black) 165 mm / S: 12024455 $ 10.00<br />
(black) 185 mm / M/L: 12024458 $ 10.00<br />
(white) 165 mm / S: 12024555 $ 10.00<br />
(white) 185 mm / M/L: 12024558 $ 10.00<br />
(black) 78839201 $ 4.00<br />
(white) 10131401 $ 2.50
Spare partS<br />
1X2 Ankle Adjustment Kit Ring + Toolfree Adjuster M4 + Tooth Nut All models<br />
snowBoard BIndIngs > 82<br />
(black) 12024601<br />
(white) 12024701<br />
1X2 Aesthetic Strap Washer + Strap Screw M5: Relay screw outside (white) 78839101<br />
1X2 Aesthetic Strap Nut + Strap Screw M5: Relay screw inside 99493801<br />
1X4<br />
Strap Kit (screw M5/nut M5/wascher M5) - (Toe/Ankle) All SP models 889905<br />
Strap Kit (screw M5/nut M5/wascher M5) - (Ankle) All SPX models 88999701<br />
1X4 Strap Kit (screw + nut) - (Ankle) All Force & Grace models . 78836801<br />
Spoilers • Highback<br />
1X2 Highback Rotation Screw: All Relay models 78839401<br />
1X2 Toolfree FWL Adjuster: All models (grey) 78837501<br />
1X1 Highback + FWL Adjuster + Screw: All W models except Relay (white) S/M: 78839755<br />
1X1 Highback + FWL Adjuster + Screw: All models except Relay S/M: 78839855 L: 78839858<br />
1X2 FWL Adjuster: Only Force model (grey) 99493901<br />
1X2 FWL Adjuster: All models 06- except Force & Relay (black) 78857701<br />
1X2 Length Base Adjustment Kit: All Force & Grace models (black) 78858001<br />
Rental • Speedfit / Fastec<br />
1X2 Disk: Speedfit & Fastec models 78333801 Aftermarket<br />
1X8 Screw 4X4 M6X20: Speedfit & Fastec models 78620501<br />
Rental • Speedfit<br />
1X2 Ankle Strap 78697201<br />
1X2 Aluminum Buckle + Screw M5 + Save nut M5 X 8 12025801<br />
1X2 Plastic Buckle + Screw M5 + Save nut M5 X 8 78619001<br />
1X2 Quick cricket: Tool free ankle strap adjustment 78619101<br />
1X2 TOE: Sawblade Fast Fit Tooth Straps 9,5 mm hole: 78619201<br />
1X2 ANKLE: Sawblade straps for bolt gard 05+ 9,5 mm hole: 78619301<br />
1X2 Holding Fast Fit: Toestrap snap support easy base 78619401<br />
1X2 Toestrap L/XL . (S/M couper 1 trou pour petite taille) 78619559<br />
1X2 Heelcup lever 78620601<br />
1X4 Highback screw + bush + nut M6 . 78620701<br />
1X2 Forward lean screw + washer + savenut M5 X 10 78620901<br />
1X1 Highback + FWL adjuster + screw 10- S/M: 78621101<br />
1X1 Highback Cored Out + FWL adjuster + screw 10+ L/XL, S/M: 12026601<br />
1X2 Forward lean adjuster HB + screw & nut M5 x 10 10- S/M: 78621301<br />
1X2 Forward lean adjuster HB + screw & nut M5 x 10 10- L/XL: 78621401<br />
1X2 Forward lean adjuster HB + screw & nut M5 x 10 10- L/XL, S/M: 12026901<br />
1X2<br />
L&R<br />
Scratchs + Springs + Covers + Levers + Screws 78840001<br />
1X6 Plug for base plate 12027401<br />
1X2<br />
L+R<br />
1X2<br />
L+R<br />
Front Pad + Screws S/M: 10834655 M/L: 10834658<br />
Rental • Fastec<br />
Kit Ankle strap Fastec 10835401<br />
1X2 Kit Toe strap Fastec 10835501<br />
1X2<br />
L+R<br />
1X2<br />
L+R<br />
1X2<br />
L+R<br />
1X2<br />
L+R<br />
Toe strap adjuster 10835601<br />
Ankle strap adjuster ( special nut, screw M5x8, safety washer,connection nut) 10835701<br />
ARS Autorelease buckles KIT ( M5x8 screw ,Buckle cam, Nut M5, safety washer) 10835801<br />
Scratchs + Springs + Covers + Levers + Screws S/M M/L: 10835955 L/XL: 10835957<br />
(All prices in U.S. dollars. Prices are subject to change at anytime.)<br />
$ 2.50<br />
$ 2.50<br />
$ 3.00<br />
$ 4.00<br />
$ 5.00<br />
$ 6.00<br />
$ 6.00<br />
$ 3.00<br />
$ 7.00<br />
$ 16.50<br />
$ 13.00<br />
$ 5.00<br />
$ 6.00<br />
$ 6.00<br />
$ 30.00<br />
$ 4.00<br />
$ 22.00<br />
$ 10.00<br />
$ 8.00<br />
$ 8.00<br />
$ 4.00<br />
$ 4.00<br />
$ 4.00<br />
$ 15.00<br />
$ 4.00<br />
$ 4.00<br />
$ 4.00<br />
$ 16.00<br />
$ 7.00<br />
$ 6.00<br />
$ 6.00<br />
$ 2.00<br />
$ 20.00<br />
$ 7.00<br />
$ 4,00<br />
$ 15,00<br />
$ 15,00<br />
$ 4,00<br />
$ 4,00<br />
$ 10,00<br />
$ 20,00
Spare partS<br />
SnoWBoard BootS<br />
1X2<br />
1X2<br />
liners<br />
FULL CUSTOM FIT Pro -<br />
All Models Except Talapus & F models<br />
CUSTOM FIT -<br />
All Models Except Talapus & F models<br />
inner Soles<br />
1X2 All models except Talapus<br />
23.0-23.5: 78835921 24.0-24.5: 78835923 25.0-25.5: 78835925<br />
26.0-26.5: 78835928 27.0-27.5: 78835930 28.0-28.5: 78835932 $ 122.00<br />
29.0-29.5: 78835935 30.0-30.5: 78835937<br />
23.0-23.5: 78836021 24.0-24.5: 78836023 25.0-25.5: 78836025<br />
26.0-26.5: 78836028 27.0-27.5: 78836030 28.0-28.5: 78836032<br />
29.0-29.5: 78836035 30.0-30.5: 78836037<br />
23.0: 78611721 23.5: 78611722 24.0: 78611723 24.5: 78611724<br />
25.0: 78611725 25.5: 78611726 26.0: 78611728 26.5: 78611729<br />
27.0: 78611730 27.5: 78611731 28.0: 78611732 28.5: 78611733<br />
29.0: 78611735 29.5: 78611736 30.0: 78611737 30.5: 78611738<br />
laces<br />
1X2 Power Lace handle (All models) with Power Lace 78396101<br />
1X2 Lace Pulley (All models) with SPL lace 10836201<br />
1X2 Combo closed + lace: for SPL models only 10836101<br />
1X2 Minicombo Main Part 09- All models except Kamooks and Talapus 99494501<br />
1X2 Minicombo Main Part 10+ All models except Kamooks and Talapus 12038601<br />
1X2 Power Lace Locker (All models) 78396201<br />
1X2 LINER Kevlar Lace Locker (All models) 78396301<br />
1X4 Open Top Hook Block / Crochet • All authentic models 08- Lace hook or Top Block 78396501<br />
1X4 Closed Bottom Hook Block / Crochet • All authentic models 08- Eyestack Block 78396601<br />
1X2 Open Eyestay block (Fusion models only) 19578501<br />
1X2 Closed Eyestay block (Fusion models only) 19578601<br />
1X8 Open Top Hook Block: All Authentic models 09+ 10837301<br />
1X4 Closed Eyestay / Bottom Hook Block: All Authentic models 09+ 10837101<br />
1X2 Metal hook 10837401<br />
1X2 Lace (all Power Lace models)<br />
(black) 25.5: 78396026 28.5: 78396733 31.5: 78396841<br />
(black) 225 cm / 31.5: 12038941<br />
(white) 225 cm / 31.5: 12039041<br />
(dark brown) 225 cm / 31.5: 12039141<br />
(red) 225 cm / 31.5: 12039241<br />
1X1 (All models) Liner kevlar lace (black) 25 m 78396401<br />
1X2 Big Speed Lace Locker + Lace 78836101<br />
1X2 Speed Lace Locker + Lace 88935501<br />
1X2 New combo («tongue lace locker with springs») 99494701<br />
1X2 BOA coiler reel • O6 (B521) All BOA models 06- 19578701<br />
1X2 BOA coiler reel • H2 (B779B) All BOA models 10+ 12038701<br />
1X2 BOA Lace cable • All BOA models 130 cm / 22.0-26.5: 19578801<br />
1X2 BOA Lace cable • All BOA models 10+ 140 cm / 27.0-31.5: 12039301<br />
(All prices in U.S. dollars. Prices are subject to change at anytime.)<br />
snowBoard BIndIngs > 83<br />
$ 74.00<br />
$ 11.00<br />
$ 8.00<br />
$ 3,00<br />
$ 2,00<br />
$ 7.00<br />
$ 2.00<br />
$ 5.00<br />
$ 5.00<br />
$ 5.00<br />
$ 5.00<br />
$ 4.00<br />
$ 4.00<br />
$ 4,00<br />
$ 4,00<br />
$ 2,00<br />
$ 2.00<br />
$ 2.00<br />
$ 2.00<br />
$ 2.00<br />
$ 2.00<br />
$ 17.00<br />
$ 10.00<br />
$ 2.50<br />
$ 4.00<br />
$ 40.00<br />
$ 18.00<br />
$ 14.00<br />
$ 4.00
Spare partS<br />
footWear<br />
footwear > 84<br />
1X2<br />
laces<br />
Mountain Lace (grey)<br />
1,60 m: 86065401 1,80 m: 86065501<br />
2,00 m: 86065601<br />
1X2<br />
Junior lace (black)<br />
Footwear lace<br />
1,00 m: 86065101<br />
(black) 1,30 m: 86065201 (grey) 1,30 m: 86065301<br />
1X2 Quick Lace Kit<br />
(black): 86065701<br />
(grey): 86065801<br />
1X2 Quick Lace Small Kit<br />
(black): 12012301<br />
(grey): 12012401<br />
Poulies • Lace Hooks & Loops<br />
1X10 Plastic (black) 86067301<br />
1X10 Lace Hook 86067401<br />
inner Soles<br />
1X2 EVA insoles decut & perforated<br />
1X2 Molded Felt Sockliner<br />
(All prices in U.S. dollars. Prices are subject to change at anytime.)<br />
3,5/4: 86065921 4,5/5: 86065923 5,5/6: 86065925 6,5/7: 86065927<br />
7,5/8: 86065929 8,5/9: 86065931 9,5/10: 86065933 10,5/11: 86065935<br />
11,5/12: 86065937 12,5/13: 86065939<br />
3,5: 86068220 4,0: 86068221 4,5: 86068222 5,0: 86068223 5,5: 86068224<br />
6,0: 86068225 6,5: 86068226 7,0: 86068227 7,5: 86068228 8,0: 86068229<br />
8,5: 86068230 9,0: 86068231 9,5: 86068232 10,0: 86068233 10,5: 86068234<br />
11,0: 86068235 11,5: 86068236 12,0: 86068237 12,5: 86068238<br />
13,0: 86068239<br />
$ 6.00<br />
$ 6.00<br />
$ 6.00<br />
$ 6.00<br />
$ 6.00<br />
$ 8.00<br />
$ 4.50<br />
$ 4.50<br />
$ 6.00<br />
$ 8.00<br />
$ 10.00<br />
$ 14.00
Warranty<br />
<strong>Salomon</strong> retail Binding limited Warranty<br />
replacement procedures<br />
Step one. Verify by customer receipt or production code that the defective<br />
component is under warranty. (Warranty claims should be handled through<br />
Authorized Dealers to ensure speed and accuracy of product replacement.<br />
Please do not refer a customer directly to <strong>Salomon</strong>.)<br />
Step two: Call customer service for return authorization number.<br />
(There is no longer an express warranty form.)<br />
Step three: Return the defective set to <strong>Salomon</strong> with the return authorization<br />
number clearly printed on the outside of the package. Return the entire set,<br />
unless otherwise instructed by customer service.<br />
Ship the package freight pre-paid to:<br />
uSa canada<br />
<strong>Salomon</strong> Service Center <strong>Salomon</strong> Canada Sports<br />
Building 5X, Bay 6 Division of Amer Sports Canada Inc.<br />
710 West Amidan Drive 3545 Thimens Blvd.<br />
Ogden, UT 84404 Saint-Laurent, Quebec H4R 1V5<br />
Upon a dealer’s request to Customer Service, a warranty replacement component<br />
can be shipped in advance to the dealer before it is inspected at <strong>Salomon</strong>’s<br />
Service Center. <strong>Salomon</strong> will invoice the dealer for the replacement component<br />
and issue a credit when the defective component is received and verified. If the<br />
defective component exchanged for the advance replacement is not received<br />
within 45 days from the issue of the Return Authorization Number, or proves<br />
not to be defective, no credit will be issued for the replacement product.<br />
Step four: <strong>Salomon</strong> will ship the replacement product to the dealer, surface<br />
freight pre-paid, after verification of the defect.<br />
<strong>Salomon</strong> Service center<br />
In the event an unusual situation is encountered or a technical question arises<br />
please call the <strong>Salomon</strong> Service Center at:<br />
uSa 1-800-654-2668<br />
can 1-800-361-3398 ext. 1142<br />
warranty > 85<br />
<strong>Salomon</strong> Retail Alpine Bindings are covered under warranty against defects in materials and manufacturing for a period of five years from their date of purchase to the<br />
original customer. In the absence of proof-of-purchase, this warranty period will be five years from date of manufacture of the product as indicated by production code. This<br />
warranty only covers the defective component, not the full pair or set, i.e., left toe piece, brake, right heel, etc. Abuse and normal wear are not covered by this warranty.<br />
<strong>Salomon</strong> alpine Skis, Snowblade & Boot Warranty<br />
<strong>Salomon</strong> alpine skis, Snowblade and<br />
boots are warranted for a period of<br />
2 years from date of original purchase.<br />
To determine the period covered by the<br />
warranty, the customer has to show the<br />
sales receipt.<br />
The <strong>Salomon</strong> Snowblade warranty can<br />
only function if the customer presents<br />
the Snowblade unit to the dealer as it<br />
was sold (ski and binding). If not, the<br />
warranty cannot be honored.<br />
<strong>Salomon</strong> pilot set warranty<br />
The skis are covered for 2 years from<br />
the date of original purchase.<br />
The bindings are covered by a 5 years<br />
warranty from the date of original<br />
purchase.<br />
Ski: if there is a problem that is<br />
covered by the warranty (breakage,<br />
pulled edge…) that occurs during the<br />
warranty period (2 years), <strong>Salomon</strong> will<br />
replace either the Ski + Binding unit<br />
or the Ski only at our discretion.<br />
Binding: if there is a problem that<br />
is covered by the <strong>Salomon</strong> warranty<br />
(breakage, binding pulled-out…) that<br />
occurs during the warranty period<br />
(5 years), <strong>Salomon</strong> will replace the<br />
Binding only, except if the damage concerns<br />
the brake or the AFD plate. In this<br />
case, <strong>Salomon</strong> will replace the defective<br />
part(s) with spare parts.<br />
<strong>Salomon</strong>’s only liability as regards this<br />
warranty will be to repair or replace the<br />
<strong>Salomon</strong> helmet & alpine pole Warranty<br />
<strong>Salomon</strong> helmets and poles are guaranteed<br />
against defects in materials and<br />
manufacturing for a period of one year<br />
from their date of purchase*.<br />
This warranty only covers the defective<br />
compo nents. Claims arising from improper<br />
storage of product, modification,<br />
abuse and normal wear are not covered<br />
by this warranty. This warranty applies<br />
only to products sold by an Authorized<br />
<strong>Salomon</strong> Dealer. For warranty service,<br />
present the defective helmet with the<br />
original sales receipt to your nearest<br />
Authorized <strong>Salomon</strong> Dealer.<br />
* This warranty may vary in some<br />
countries.<br />
Mechanical inspection failures<br />
Normal wear is expected with the use of a product. Should a component fail a<br />
mechanical inspection (measured release values that fall outside the “In-Use<br />
Range”) within its warranty period, include the following information with the<br />
returned component.<br />
• Description of inspection that the component failed.<br />
• Brand of test device and date of most recent calibration.<br />
• Skier Code and visual indicator setting.<br />
• Boot brand, model and sole length.<br />
• All measured release values and name of the technician.<br />
Every <strong>Salomon</strong> binding component is precision tested to assure its accuracy<br />
during manufacture. It is extremely rare that a component would be out of<br />
calibration unless there is visible damage. All bindings returned due to mechanical<br />
testing failures are inspected. No replacement product will be issued<br />
unless all required information is included with the product.<br />
product age Verification<br />
Verification that the product is within the warranty period can be made in<br />
the following two ways:<br />
1. Customer receipt indicating product was purchased within the last five years.<br />
2. Component production code* indicating manufacture of product within last five<br />
years.<br />
note<br />
* All <strong>Salomon</strong> binding components are stamped with a two- or three-digit code upon their<br />
final production to indicate month and year of production. Normally, codes are a letter<br />
followed by a number, with the letter indicating month of produc tion. Each number corresponds<br />
to the actual year of production, i.e., 3 would indicate 2003, 4 would indicate<br />
2004, etc. To simplify the warranty process, product age is determined by the year of<br />
production only. Retail bindings with a production code indicating that the bindings were<br />
manufac tured in 2006 (e.g., A6, M6) will be warranted until the end of the 2010/2011 ski<br />
season. Production codes are stamped in various places on all binding components.<br />
defective product with a model or pair<br />
within the limits of available stock.<br />
These warranties cover skis, Snowblade,<br />
bindings against manufacturing defects.<br />
However, these warranties do not<br />
cover damage resulting from transport,<br />
handling, storage, failure by the cli-<br />
ent to follow the instructions for use,<br />
modification of the product or normal<br />
wear and tear.<br />
In case of damage to a product caused<br />
by an accident or misuse, please consult<br />
<strong>Salomon</strong> Customer Service for advice<br />
on possible repair or replacement.<br />
Ski problems not covered by the warranty<br />
problems Solutions<br />
Bent skis Contact subsidiary for more information<br />
top surface Can be repaired<br />
tip protector Can be repaired with spare parts<br />
tail protector Cannot be repaired<br />
running surface Can be repaired<br />
Binding pull-out Can be repaired with inserts<br />
pulled edge Can be repaired<br />
For all other problems, contact the subsidiary Customer Service.<br />
<strong>Salomon</strong>’s only liability regarding this<br />
warranty will be to repair or replace the<br />
defective product with a model in an<br />
available version.<br />
Warning:<br />
The <strong>Salomon</strong> helmets are designed only<br />
for the following activities: ski, snowboard<br />
and skiboard (Snowblade®).<br />
They are not designed to be used on<br />
motorbikes or for other sports, mechanical<br />
or not.<br />
The Alpine <strong>Salomon</strong> poles are designed<br />
for cross country or downhill skiing only,<br />
except for the adjustable poles that can<br />
be used for downhill skiing and hiking.
<strong>Salomon</strong> u.S.a.<br />
2030 LINCOLN AvE.<br />
OGDEN, UT 84401 U.S.A.<br />
1 (800) 225-6850<br />
www.salomoncertification.com<br />
<strong>Salomon</strong> canada Sports<br />
2700 14Th AvE UNIT 1-4<br />
MARKhAM, ON L3R 0J1<br />
www.salomonhookup.ca<br />
<strong>Salomon</strong>Sports.com<br />
Printed in Canada