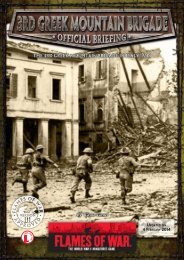
Frost's Perimeter - Flames of War
Frost's Perimeter - Flames of War
Frost's Perimeter - Flames of War

You also want an ePaper? Increase the reach of your titles
YUMPU automatically turns print PDFs into web optimized ePapers that Google loves.
Building the Campaign<br />
I wanted the campaign to give players the sense <strong>of</strong> the battle.<br />
British players have an initial advantage when they begin the<br />
game, with lots <strong>of</strong> platoons <strong>of</strong> paras at their disposal to hold<br />
the fort down. Meanwhile, the German player has to collect his<br />
force and keep the pressure on the British, hoping to reduce<br />
them before the final assault is made at the end <strong>of</strong> the campaign.<br />
Both players will have to manage their resources and prepare for<br />
the next assault.<br />
The battle was fought over five days, with four major battles. I<br />
chose to begin the campaign just as the first major attack was<br />
launched. I had considered starting it earlier, but when Frost<br />
arrived at the bridge, he was largely unopposed.<br />
I decided to start the campaign where the real action started,<br />
during the assault <strong>of</strong> SS-Kampfgruppe Brinkmann. Immediately<br />
following Brinkmann is the famous charge over the bridge by<br />
Viktor Graebner, as seen in the movie, A Bridge Too Far.<br />
After a brief pause in the fighting the campaign crashes into its<br />
third battle with Frost’s battalion versus Kampfgruppe Knaust.<br />
Then the last assaults are made in the final scenario, including<br />
Kampfgruppe Hummel as well as renewed attacks from<br />
Brinkmann and Knaust.<br />
The Forces<br />
The forces were relatively easy to assemble, thanks to the<br />
records kept on the perimeter force. I tried to include each<br />
and every British platoon on the table. However, I left most<br />
<strong>of</strong> B Company out as they were busy skirmishing in the west.<br />
Otherwise, the major units are all present.<br />
The German forces are representative <strong>of</strong> the troops present in<br />
the assaults that were launched. The quality <strong>of</strong> troops varies<br />
greatly, as the Kampgruppen in Arnhem were constructed, from<br />
a mixture <strong>of</strong> Waffen-SS,Heer and training units.<br />
During the campaign, the British player has to make do with<br />
the force they have been given. They have to be careful not to<br />
incur too many losses during the scenarios. Once a platoon has<br />
been knocked out, the British player cannot bring it back in<br />
subsequent scenarios, so it becomes very important to withdraw<br />
badly mauled platoons before they are destroyed.<br />
The German player, on the other hand, has access to<br />
reinforcements from outside the city, making sure their forces<br />
keep operating at full strength.<br />
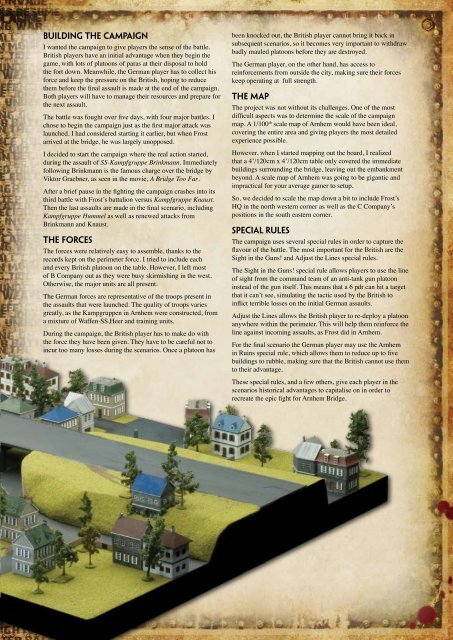
The Map<br />
The project was not without its challenges. One <strong>of</strong> the most<br />
difficult aspects was to determine the scale <strong>of</strong> the campaign<br />
map. A 1/100th scale map <strong>of</strong> Arnhem would have been ideal,<br />
covering the entire area and giving players the most detailed<br />
experience possible.<br />
However, when I started mapping out the board, I realized<br />
that a 4’/120cm x 4’/120cm table only covered the immediate<br />
buildings surrounding the bridge, leaving out the embankment<br />
beyond. A scale map <strong>of</strong> Arnhem was going to be gigantic and<br />
impractical for your average gamer to setup.<br />
So, we decided to scale the map down a bit to include Frost’s<br />
HQ in the north western corner as well as the C Company’s<br />
positions in the south eastern corner.<br />
Special Rules<br />
The campaign uses several special rules in order to capture the<br />
flavour <strong>of</strong> the battle. The most important for the British are the<br />
Sight in the Guns! and Adjust the Lines special rules.<br />
The Sight in the Guns! special rule allows players to use the line<br />
<strong>of</strong> sight from the command team <strong>of</strong> an anti-tank gun platoon<br />
instead <strong>of</strong> the gun itself. This means that a 6 pdr can hit a target<br />
that it can’t see, simulating the tactic used by the British to<br />
inflict terrible losses on the initial German assaults.<br />
Adjust the Lines allows the British player to re-deploy a platoon<br />
anywhere within the perimeter. This will help them reinforce the<br />
line against incoming assaults, as Frost did in Arnhem.<br />
For the final scenario the German player may use the Arnhem<br />
in Ruins special rule, which allows them to reduce up to five<br />
buildings to rubble, making sure that the British cannot use them<br />
to their advantage.<br />
These special rules, and a few others, give each player in the<br />
scenarios historical advantages to capitalise on in order to<br />
recreate the epic fight for Arnhem Bridge.