RLCM Drills (Book 1) - Country Rugby League
RLCM Drills (Book 1) - Country Rugby League
RLCM Drills (Book 1) - Country Rugby League

You also want an ePaper? Increase the reach of your titles
YUMPU automatically turns print PDFs into web optimized ePapers that Google loves.
<strong>Rugby</strong> <strong>League</strong> Coaching Manuals (<strong>RLCM</strong>) www.rlcm.com.au<br />
rlcm<br />
COACHING BOOKS<br />
Endorsed By<br />
RUGBY<br />
LEAGUE<br />
COACHING<br />
MANUALS<br />
Since 1993<br />
DRILLS<br />
BOOK<br />
1<br />
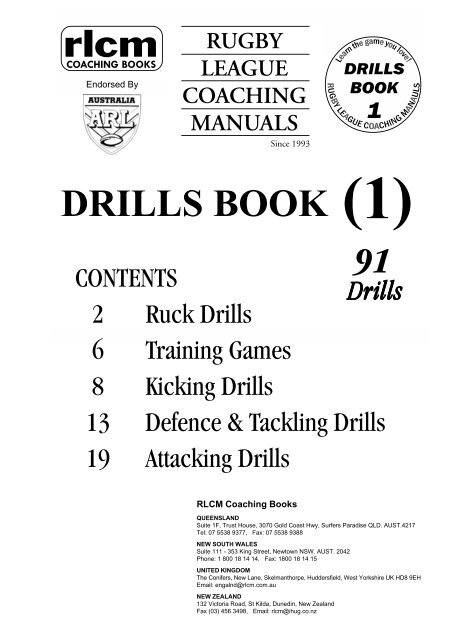
DRILLS BOOK (1)<br />
CONTENTS<br />
2 Ruck <strong>Drills</strong><br />
<strong>Rugby</strong> <strong>League</strong> Coaching Manuals (<strong>RLCM</strong>) www.rlcm.com.au<br />
6 Training Games<br />
8 Kicking <strong>Drills</strong><br />
13 Defence & Tackling <strong>Drills</strong><br />
19 Attacking <strong>Drills</strong><br />
<strong>RLCM</strong> Coaching <strong>Book</strong>s<br />
91<br />
<strong>Drills</strong><br />
<strong>Drills</strong><br />
QUEENSLAND<br />
Suite 1F, Trust House, 3070 Gold Coast Hwy, Surfers Paradise QLD. AUST.4217<br />
Tel: 07 5538 9377, Fax: 07 5538 9388<br />
NEW SOUTH WALES<br />
Suite 111 - 353 King Street, Newtown NSW. AUST. 2042<br />
Phone: 1 800 18 14 14, Fax: 1800 18 14 15<br />
UNITED KINGDOM<br />
The Conifers, New Lane, Skelmanthorpe, Huddersfield, West Yorkshire UK HD8 9EH<br />
Email: engalnd@rlcm.com.au<br />
NEW ZEALAND<br />
132 Victoria Road, St Kilda, Dunedin, New Zealand<br />
Fax (03) 456 3498, Email: rlcm@ihug.co.nz
<strong>Rugby</strong> <strong>League</strong> Coaching Manuals (<strong>RLCM</strong>) www.rlcm.com.au<br />
<strong>Drills</strong><br />
<strong>Drills</strong> SETTING: Open Space<br />
Groups of four players<br />
1 football per group<br />
Endorsed By<br />
D1<br />
<strong>Rugby</strong> <strong>League</strong> Coaching Manuals (<strong>RLCM</strong>) www.rlcm.com.au<br />
MARKER DEFENCE<br />
FOUR ON TWO<br />
Setting: - Channel 10 x 20m, 6 players,<br />
2 players are defenders, 4 are attackers.<br />
• Play the ball occurs in centre track<br />
• The ball is returned to the centre after each<br />
ruck.<br />
• The marker must chase to the receiver while<br />
the other holds to protect the middle.<br />
• Rotate roles<br />
• Attackers can vary their width and the dummy<br />
half can also run to challenge the middle<br />
Ruck<br />
A3<br />
RUGBY<br />
LEAGUE<br />
COACHING<br />
MANUALS<br />
Since 1993<br />
- Ruck <strong>Drills</strong><br />
- Training Games<br />
- Kicking <strong>Drills</strong><br />
- Defence & Tackling <strong>Drills</strong><br />
- Attacking <strong>Drills</strong><br />
rlcm<br />
COACHING BOOKS www.rlcm.com.au<br />
QUEENSLAND<br />
Suite 1F First Floor Trust House<br />
3070 Gold Coast Hwy<br />
Surfers Paradise QLD Aust 4217<br />
Tel: 07 5538 9377 Fax: 07 5538 9388<br />
A2<br />
A1<br />
D1<br />
D2<br />
NEW SOUTH WALES<br />
Suite 111 - 353 King Street<br />
Newtown NSW Aust 2042<br />
Tel: 1800 18 14 14<br />
Fax: 1800 18 14 15<br />
20m<br />
A4<br />
<strong>Book</strong><br />
1<br />
UNITED KINGDOM<br />
Conifers, Hew Lane,<br />
Skelmanthorpe, Huddersfield<br />
West Yorkshire UK HD8 9EH<br />
Email: rlcm@rlcm.com.au<br />
10m<br />
PLAY THE BALL (Fours)<br />
GUIDELINES:<br />
Player 1 plays the ball to P2 the acting half back. P2 passes<br />
to P3. D1 is the defence marker.<br />
Rotate the position of each player after each play the ball.<br />
Ensure proper technique in the play the ball.<br />
Marker can apply pressure to the play the ball.<br />
Player playing the ball should start from a tackled position<br />
on the ground.<br />
COACHING POINTS<br />
1. Tackled player (P1) to regain feet as quickly as possible.<br />
2. Football held securely.<br />
3. Football placed on ground correctly.<br />
4. Control of football with the foot.<br />
5. Good even roll of the ball back with foot.<br />
P1<br />
P2<br />
P3<br />
MARKER DEFENCE<br />
FOUR ON THREE<br />
Setting: - Channel 10 x 20m, 7 players,<br />
3 players are defenders, 4 are attackers.<br />
• Play the ball as in four on two<br />
• Include D3, no wraps or reverse passes for attack<br />
but players can use inside balls and dummy half runs<br />
to challenge the holding marker<br />
• Forces D2 and D3 to adjust to A2 and A3 while<br />
D1 controls the the middle.<br />
D3<br />
20m<br />
A2 A3<br />
A1<br />
A4<br />
D1<br />
D2<br />
10m<br />
Ruck<br />
Ruck
<strong>Rugby</strong> <strong>League</strong> Coaching Manuals (<strong>RLCM</strong>) www.rlcm.com.au<br />
MARKER DEFENCE<br />
FOUR ON FOUR<br />
Setting: - Channel 10 x 20m, 8 players,<br />
4 players are defenders, 4 are attackers.<br />
• Play the ball as in previous drills<br />
• Introduce D4<br />
• 'A' players can use all options in attack.<br />
• Tight spot defenders must move forward to the<br />
advantage line and nominate in defence.<br />
EMPHASISE: Communication, nomination, one<br />
marker holds and one chases, chase must be over the<br />
advantage line.<br />
Ruck<br />
ROLL/PLAY THE BALL DRILL<br />
Setting - Players form two teams 15m apart<br />
opposite each other.<br />
On coaches command<br />
• P1 from the Blue Team rolls the ball along the<br />
ground towards a member of the Gold Team.<br />
• Player B who falls on the ball securely, plays the ball<br />
correctly to Player A. Each of the other members of<br />
the Gold Team form a backline; the ball is passed<br />
from player A to C, D, E, then F.<br />
• Player F, upon reaching the marker, rolls the ball<br />
towards any member of the Blue Team.<br />
• Once retrieved, the ball is played correctly with<br />
another member of the team moving into acting<br />
halfback.<br />
• All other players position themselves in a backline<br />
formation and continue the drill along the same lines<br />
as the Gold Team.<br />
Blue Team<br />
Gold Team<br />
P3<br />
15m<br />
P4<br />
1 2 3 4 5 6<br />
A B C D E F<br />
<strong>Rugby</strong> <strong>League</strong> Coaching Manuals (<strong>RLCM</strong>) www.rlcm.com.au<br />
ROUND ROBIN PLAY THE BALL SQUARE DRILL<br />
• P1 who is positioned on the ground, rises to his<br />
feet and plays the ball to P2 who is directly behind Setting: - Grid 7m x 7m<br />
him (acting half back).<br />
• P1 plays the ball to P2 who passes to P3<br />
• P2 passes left to P3 who falls to the ground and<br />
raises to his feet to play the ball to P4.<br />
• P4 passes right to P5 who falls to the ground and<br />
then raises to his feet to play the ball to P6<br />
• P3 drops to the ground, regains his feet quickly and<br />
plays the ball to P1 who has taken his<br />
position behind P3, having run in a straight line to<br />
become acting half back.<br />
• P6 passes left to P7 who falls to the ground and<br />
then raises to his feet to play the ball to P8.<br />
• P1 then passes the bal to P4 who repeats the<br />
activity of P3, who now assumes the role of acting<br />
• P8 runs to the position held by P1 initially.<br />
half back.<br />
•<br />
•<br />
Each player, having completed his role moves<br />
to the position taken up by the next player in<br />
the drill.<br />
The drill is performed until P1 is back in his<br />
original position. P1<br />
• This procedure is repeated for a period of time.<br />
• The drill may be used competitively by allocating<br />
one point for each play the ball performed correctly.<br />
Three or four grids may be used competitively for<br />
further enjoyment.<br />
Ruck<br />
A2<br />
P3<br />
P4<br />
A1<br />
A4<br />
D1<br />
D2<br />
20m<br />
P7<br />
P8<br />
A3<br />
D3 D4<br />
P2<br />
P5<br />
P6<br />
10m<br />
P1<br />
P2<br />
P5<br />
Ruck<br />
Ruck
<strong>Rugby</strong> <strong>League</strong> Coaching Manuals (<strong>RLCM</strong>) www.rlcm.com.au<br />
SNAKES & LADDERS<br />
SETTING: Grid 15m X 5m<br />
8 Markers<br />
5 Players<br />
1 Football<br />
V<br />
<strong>Rugby</strong> <strong>League</strong> Coaching Manuals (<strong>RLCM</strong>) www.rlcm.com.au<br />
WARM-UP HANDLING DRILL<br />
SETTING: Grid 10m X 10m<br />
4 Group s of players<br />
1 - 2 Footballs<br />
Juniors<br />
Upwards<br />
P3<br />
Red<br />
Blue<br />
P2<br />
A<br />
10m<br />
(TECHNIQUE)<br />
B A C B D C E D<br />
GUIDELINES:<br />
• Player A starts and plays the ball to player B.<br />
• Player B runs out and around in front of player C.<br />
Player B then plays the ball.<br />
• Player C then runs out and around in front of player D.<br />
Player C then plays the ball.<br />
• Player D then runs out and around in front of player E.<br />
Player D then plays the ball.<br />
• Player E then runs around the side of the grid and runs<br />
out and around in front of player A. Player E then plays<br />
the ball to player A who begins the routine again.<br />
Ruck<br />
10m<br />
VARIOUS BALL HANDLING EXERCISES<br />
Start<br />
1. Player from group 1 commences running and passes<br />
off to P2 who times run from marker to accept an onside<br />
pass from P1, P2 - P3, P3 - P4 etc.<br />
2. Inside pass at each corner.<br />
3. On blue markers ball placed on ground, then picked<br />
up from ground by blue marker player and passed off<br />
at red marker.<br />
VARIATIONS: i) Introduce 2 footballs<br />
ii) Change direction of run<br />
Game<br />
V<br />
Blue<br />
Red<br />
P4<br />
P1<br />
V<br />
PLAY THE BALL RELAY<br />
SETTING:<br />
2 Markers<br />
4 Players<br />
1 Football<br />
GREAT VALUE<br />
<strong>RLCM</strong> <strong>RLCM</strong> 1-29<br />
1-29<br />
<strong>Drills</strong> <strong>Drills</strong> <strong>Book</strong>s <strong>Book</strong>s 1 1 & & 2<br />
2<br />
Coach Coach T TTalk<br />
T alk 1 1 & & & 2<br />
2<br />
Junior Junior Coaching Coaching 1<br />
1<br />
Receive Receive All<br />
All<br />
<strong>RLCM</strong> <strong>RLCM</strong> <strong>RLCM</strong> <strong>Book</strong>s<br />
<strong>Book</strong>s<br />
Pr Produced Pr oduced as as at<br />
at<br />
Mar March Mar ch 2003<br />
2003<br />
By purchasing the <strong>RLCM</strong><br />
CD you will be able to<br />
easily distribute coaching<br />
information to all coaches<br />
within your club, print<br />
multiple copies or single<br />
stories, save to disk, email<br />
to other coaches and<br />
assure this valuable<br />
coaching information will<br />
remain as a reference for<br />
future coaches of the club.<br />
Order Order your your CD CD Now<br />
Now<br />
A B<br />
GUIDELINES:<br />
• Distance between markers 1 - 2 metres<br />
• Player A plays the ball to player B.<br />
• Player B passes the ball off the ground to player C.<br />
• Player A runs behind player D.<br />
• Player C passes (standing) the ball back to player B.<br />
• Player B keeps ball and moves to player A's original<br />
position.<br />
• Player c runs to marker and takes up player B's original<br />
position.<br />
• Drill is repeated involving player B, C and D and so on...<br />
N.B. Change drill so that players are passing left to right.<br />
No 'baby passes'.<br />
CD<br />
rom<br />
RUGBY<br />
LEAGUE<br />
COACHING<br />
MANUALS<br />
Since 1993<br />
<strong>Drills</strong><br />
BOOK<br />
Junior<br />
Coaching<br />
www www.rlcm.com.au<br />
www .rlcm.com.au<br />
C<br />
D<br />
1.<br />
2.<br />
Ruck
<strong>Rugby</strong> <strong>League</strong> Coaching Manuals (<strong>RLCM</strong>) www.rlcm.com.au<br />
TAG GRIDIRON<br />
SETTING: • Grid 50m x 30m • 2 Equal teams of players<br />
• 6 Markers • 1 Football<br />
50 metres<br />
30 metres<br />
AIM - To score a 'Touchdown' by carrying the ball over<br />
the opponents 'Goal Line' or passing it to a team<br />
mate who is over the line.<br />
• The game is commenced with a kick off from the<br />
middle of the field.<br />
• The attacking team is allowed four 'plays' to score. A<br />
'play' is started with a tap kick.<br />
• All of the attacking team must commence from<br />
behind the ball at each play. The first pass must be<br />
backward after which off-side play is permitted and<br />
forward passes allowed.<br />
• A huddle is permitted for the attacking team, to<br />
commence each play.<br />
• Chip and grubber kicking is allowed.<br />
• The defensive team must line up 5 metres in front of the ball.<br />
• A play is complete when the ball carrier has been<br />
tagged with two hands, or the ball has been knocked<br />
backwards from a pass or kick and regathered.<br />
• The ball need not be recovered on the full, but must<br />
not be knocked on. knock-ons regathered from<br />
passes or kicks count as one 'play' and the game<br />
recommences from where the initial play started.<br />
BENEFITS OF GAME:<br />
• Team Work • Communication • Positioning • Passing<br />
Game<br />
SPEED TOUCH<br />
SETTING: • Grid 20m x 20m (approx. depending on players)<br />
• 2 Equal teams of players<br />
• 4 Markers • 1 Football<br />
20 metres<br />
GOAL LINE<br />
GOAL LINE<br />
BENEFITS OF GAME:<br />
• Defence • Passing Skills • Communication<br />
• Decision Making • Fitness<br />
20 metres<br />
AIM - Team is to score against other team without being<br />
touched (one touch per team before hand-over)<br />
• Teams line up on their own goal line to start game<br />
• Ball is placed in middle of grid<br />
• Teams run out and one picks up ball<br />
• Touch can either be a two handed touch, or full tackle<br />
• When the touch is made the ball is placed on the<br />
ground and both teams retire to their own goal line<br />
and then return to pick up the ball and continue game<br />
(hand-over) with a play the ball.<br />
• The team that was attacking now goes on defence.<br />
• Incorrect play the ball incurs a penalty which is a hand-over.<br />
• Other penalties are also a hand-over<br />
<strong>Rugby</strong> <strong>League</strong> Coaching Manuals (<strong>RLCM</strong>) www.rlcm.com.au<br />
CHALLENGE<br />
SETTING: • Grid 25m x 35m • 10 players (2 teams of 5)<br />
• 8 Markers • 1 Football • 5 Bump Pads<br />
AIM - Five attacking players attempt to score a try<br />
against five defenders in two lines, 3 and 2 as<br />
per diagram.<br />
• Defenders can only move laterally on their line<br />
• Attackers must use attacking flair and support to first<br />
of all get past 3 defenders and then continue to beat<br />
the next line of 2 defenders. First 3 defenders can<br />
turn and chase when attackers pass their line.<br />
• A tackle is effected by a two handed touch on attackers<br />
• Teams change and alternate attack and defence.<br />
• Points are awarded for tries, and deducted for<br />
negative plays that don't advance the attack.<br />
BENEFITS OF GAME:<br />
• Communication • Support Play<br />
• Develop Attack and Defence • Decision Making<br />
Game<br />
25 metres<br />
A A A A A<br />
D D D<br />
D D<br />
GOAL LINE<br />
10 metres<br />
10 metres<br />
15 metres<br />
TWO BALL LEAGUE<br />
SETTING: • Area 50m x 30m<br />
• 2 teams of equal numbers<br />
• 6 Markers • 2 Footballs<br />
50 metres<br />
Game<br />
30 metres<br />
• Rules are identical to the Laws of <strong>Rugby</strong> <strong>League</strong> except:<br />
No tackling, no kicking, no scrums, two footballs used.<br />
• The major difference in this game is that two<br />
footballs are used but only one at a time.<br />
• The game commences as normal with one football<br />
while the other ball is placed at one end as displayed.<br />
• The game continues until the coach blows the whistle.<br />
• On this signal, the ball that has been used becomes 'dead'<br />
and it must be automatically dropped to the ground.<br />
• The other ball becomes the 'live' ball and the first<br />
team to gain possession play on immediately toward<br />
their original line.<br />
• There is no pause or stoppage! Teams have to react quickly<br />
• The coach continues to blow his whistle at various<br />
times to change footballs.<br />
BENEFITS OF GAME:<br />
• Reforming positions • Reaction • Defence<br />
• Communication • Attack - Support play<br />
Game
<strong>Rugby</strong> <strong>League</strong> Coaching Manuals (<strong>RLCM</strong>) www.rlcm.com.au<br />
BATTLESHIPS<br />
SETTING: • Grid 10m x 10m<br />
• 2 Equal teams (Passes and Receivers)<br />
• 4 Markers • 8 Footballs<br />
10 metres<br />
10 metres<br />
P P P P<br />
Coach<br />
R R R R<br />
• Place objects inside grid e.g. tackle bag, hit shield,<br />
witches hat, marker, football etc.<br />
• Passers line up outside grid, they each complete 4<br />
passes to the right side and four passes to the left.<br />
• 4 players at back of grid (receivers) to act as ball<br />
retrievers who pick up ball with two hands, then carry<br />
it back and place at passers feet, then return to<br />
retrieve the next ball.<br />
• Passers attempt to hit objects, large objects (tackle<br />
bags) are removed from grid after being hit 3 times,<br />
medium objects (hit shields) removed after 2 hits and<br />
smaller objects removed after being hit once.<br />
• Team eliminating most objects wins game.<br />
VARIATION: Time limit on passes<br />
Vary the number of passes<br />
Game<br />
<strong>Rugby</strong> <strong>League</strong> Coaching Manuals (<strong>RLCM</strong>) www.rlcm.com.au<br />
LEAGUE HAND BALL<br />
SETTING: • Grid 15m x 10m (goal area 3 metres wide)<br />
• 2 Equal teams of players<br />
• 10 Markers • 1 Football<br />
15 metres<br />
GOAL GOAL 10m<br />
AIM - To pass the football between the opponents goal<br />
for a point<br />
• Game commences with a kick-off<br />
• Each team is allowed a goal keeper to guard the goal<br />
area, but no other players are allowed in this area<br />
• Players may run with the football and pass in any<br />
direction<br />
• Opposition players attempt to intercept a pass or<br />
knock the ball to the ground to force a change over<br />
• After each point is scored the game recommences<br />
with a place kick by the non scoring team<br />
BENEFITS OF GAME:<br />
• Passing • Communication<br />
• Decision Making • Space Awareness<br />
Game<br />
SPEED ATTACK<br />
SETTING: • Area up to full size field<br />
• 2 Equal teams of players<br />
• 2 Footballs<br />
N.B. The ball must<br />
not be kicked<br />
into touch.<br />
Fullback<br />
Fullback<br />
Kicker<br />
Kicker<br />
• Two opposing teams line up along halfway. Each<br />
team has a kicker and a fullback.<br />
• On a given signal from the coach, the balls are tapped<br />
on the ground and passed to the teams kicker who<br />
kicks downfield, away from the fullback.<br />
• When the fullback retrieves the ball, he must dive on<br />
the ball and wait until all of his team mates are onside<br />
before he plays the ball.<br />
• The ball is then played and it must be touched by all<br />
players, before reaching halfway.<br />
• The first team to place the ball on halfway scores a point<br />
• Game can be played to a set time or a number of points.<br />
BENEFITS OF GAME:<br />
• Passing • Communication • Fitness<br />
Game<br />
LEAGUE BALL<br />
SETTING: • Grid as per diagram<br />
• 8 - 10 players per team<br />
• 1 Football<br />
• The game is played along the lines of Baseball. The<br />
batting team can punt kick, grubber kick or drop kick<br />
the ball after having it passed to them by the Pitcher.<br />
The batter has 2 seconds before he must kick the ball.<br />
once three batters are out, the fielding team becomes<br />
the batters.<br />
• The ball must be kicked or passed in from the outfield.<br />
a fielder cannot run the ball in by himself but two players<br />
passing the ball together may run the ball in.<br />
Batters on 2, 3 and Home Base must be tagged before<br />
they are out.<br />
• On 1st base the baseman must have his foot on the<br />
base to run the batter out.<br />
• If the ball lands outside the Diamond on the full, then<br />
the batter gets another kick and the players on the bases<br />
aren't allowed to run.<br />
• If the ball is caught on the full the player is out and any<br />
players between bases must return to the base they<br />
were on. They can also be tagged out on the way back<br />
to base. (only after a catch)<br />
BENEFITS OF GAME:<br />
• Passing • Catching • Kicking • Running<br />
Game
<strong>Rugby</strong> <strong>League</strong> Coaching Manuals (<strong>RLCM</strong>) www.rlcm.com.au<br />
SCRAMBLE<br />
SETTING: • Grid 25m x 15m • 2 teams of equal numbers<br />
• 4 Markers • 1 Football<br />
• Players from each team are<br />
given a number from 1 to 4.<br />
• Team A - attackers, The<br />
coach calls out a number e.g.<br />
4, those players with the<br />
number do the following:<br />
Attackers (Team A)<br />
• All must run to the attacking<br />
line and touch the ground with<br />
one hand. One of these players<br />
picks up the ball. They then<br />
run down the corridor<br />
TEN PASSES<br />
SETTING: • Grid 15m x 15m<br />
• 2 Equal teams of players<br />
• 4 Markers • 1 Football<br />
• One team is given the ball and attempts to complete a<br />
set of passes (up to 10, nominated by coach)<br />
• Every set completed gains a point<br />
• The opposing team attempts to intercept or knock the<br />
ball down, gaining possession when the ball hits the<br />
ground or is intercepted<br />
• Player in possession can not move so his team mates<br />
must move around to support him and look for the pass<br />
• Passes must be <strong>Rugby</strong> <strong>League</strong> style<br />
BENEFITS OF GAME:<br />
• Passing • Decision Making<br />
• Space Awareness • Communication<br />
<strong>Rugby</strong> <strong>League</strong> Coaching Manuals (<strong>RLCM</strong>) www.rlcm.com.au<br />
J'OH'S ATTACK<br />
ROB THE NEST<br />
SETTING: • Grid 10m x 10m<br />
• Even number of players to each corner<br />
• 4 Markers • 7 or more Footballs<br />
40m<br />
1<br />
2<br />
3<br />
4<br />
25 m<br />
1<br />
2<br />
3<br />
4<br />
attempting to score a try over the line, by staying inside the<br />
corridor.<br />
Defenders (Team B)<br />
• All must run to the try line, touch the ground and run<br />
up the corridor preventing Team A scoring a try by<br />
two hand tagging or tackling a player in possesssion.<br />
Note<br />
• Team A players may pass the ball between themselves<br />
but it must not be passed forward.<br />
• Players from each side do not have to wait for all<br />
players in their team to get to the line to run. They<br />
may go at any time. As soon as players get tagged they<br />
return to their position and another number is called.<br />
• 1 point is awarded for a try • Roles are reversed<br />
BENEFITS OF GAME:<br />
• Communication • Passing • Defence • Attack<br />
Game<br />
Divide players into two teams.<br />
Two teams line up as indicated and oppose each other<br />
along the halfway zone. Each team has a kicker and a<br />
fullback and one football.<br />
On the coach's command the balls are tapped on the<br />
ground and passed to the team's kicker.<br />
The kicker then kicks the football down field away from<br />
the opposing fullback ensuring it lands in the opposition's<br />
half. When the ball has landed, all team members run to<br />
their line.<br />
The fullback must retrieve the ball by diving on it and then<br />
waiting until all of his team are onside before he gets to his<br />
feet and joins his team on the line.<br />
The ball is then passed to all players in a backline movement.<br />
The first team to place the ball in the halfway zone wins.<br />
The ball must not be kicked dead, all players except the<br />
fullback and kicker start on the line between the hats as<br />
indicated. The ball must not be passed forward or knocked<br />
on.<br />
Game<br />
1<br />
2<br />
3<br />
4<br />
10 metres<br />
Try Line<br />
Attacking Line<br />
1<br />
2<br />
3<br />
4<br />
1<br />
2<br />
3<br />
4<br />
1<br />
2<br />
3<br />
4<br />
20m<br />
3<br />
3<br />
2<br />
2<br />
1<br />
1<br />
15 metres<br />
10 metres<br />
• On command, one player from each team runs into<br />
the centre, picks up a ball and places it back at his<br />
corner.<br />
• He then tags the next player in his team who repeats<br />
• Player goes to the end of the line<br />
• When all footballs are taken from the centre, players<br />
may steal balls from other teams.<br />
• The first team to collect 3 balls at their corner wins.<br />
N.B. Only one player from each team may run into<br />
the grid at one time. Only one ball may be taken<br />
at any time.<br />
BENEFITS OF GAME:<br />
• Agility • Handling • Speed & Endurance<br />
• Decision Making<br />
15 metres<br />
1<br />
10 metres<br />
1<br />
2<br />
2<br />
3<br />
3<br />
Game<br />
Game
<strong>Rugby</strong> <strong>League</strong> Coaching Manuals (<strong>RLCM</strong>) www.rlcm.com.au<br />
KICK FAST BREAK<br />
SETTING: • Grid 32m x 15m<br />
• 2 Equal teams of players (A & B)<br />
• 8 Markers • 1 Football (more can be used)<br />
A<br />
B<br />
A<br />
15 metres 15 metres<br />
A<br />
B<br />
BENEFITS OF GAME:<br />
• Kicking technique • Catching<br />
• Communication • Positioning<br />
Kicking<br />
B<br />
B<br />
A<br />
2 metres<br />
NEUTRAL<br />
ZONE<br />
B<br />
A<br />
B<br />
A<br />
B A<br />
A<br />
B<br />
15 metres<br />
AIM - Players to kick football across the neutral zone<br />
to a team mate on the other side.<br />
• Teams of players are divided and placed, half of each<br />
team is placed on either side of the neutral zone.<br />
• One point is awarded for every successful kick caught.<br />
• Opposition players attempt to knock down or<br />
intercept the football before it is caught.<br />
VARIATION: Kick with non preferred foot<br />
Catch with one arm<br />
LEAGUE SOCCER<br />
SETTING: • Grid 20m x 30m<br />
• 2 Equal teams of players<br />
• 12 Markers • 1 Football<br />
30 metres<br />
• The game is based on rules of soccer, using a <strong>Rugby</strong><br />
<strong>League</strong> football<br />
• Football not to be kicked above shoulder height<br />
• No hands to touch ball (play the ball not the player)<br />
• Goals scored into goal area (3 metres wide)<br />
• Game can be played for a time limit, or nominated<br />
number of goals<br />
BENEFITS OF GAME:<br />
• Ball Control on ground & dribbling<br />
• Fitness • Communication<br />
• Team Work - co-operation between players<br />
<strong>Rugby</strong> <strong>League</strong> Coaching Manuals (<strong>RLCM</strong>) www.rlcm.com.au<br />
LANES KICKING<br />
SETTING: • Grid 25m x 20m<br />
• 2 teams of players (4 attackers v 3 defenders)<br />
• 6 Markers • 1 Football<br />
20 metres<br />
5 metres<br />
20 metres<br />
D D<br />
TRY LINE<br />
D<br />
DEAD BALL LINE<br />
AIM - To score tries through kicks<br />
• Attackers have 2 play the balls to score a try.<br />
• Each play the ball must contain a kick (grubber, chip).<br />
• Players can run from acting half back position or have<br />
one pass (Maximum).<br />
• Defenders must return to try line after first tackle to<br />
commence second play.<br />
• Competition by awarding a point for each success<br />
i.e. score a try to attackers, effect a tackle by defenders.<br />
VARIATION<br />
• Able to kick on either 1st or 2nd tackle<br />
i.e. run on the first, kick on the second (options)<br />
BENEFITS OF GAME:<br />
• Develop competition amongst players • Communication<br />
• Kicking Skills • Decision Making<br />
Kicking<br />
3 metres<br />
GOAL<br />
AREA<br />
B<br />
A<br />
B<br />
B<br />
A<br />
A A<br />
B<br />
A<br />
GOALIE<br />
SETTING: • Grid 25m x 15m<br />
• Uneven teams e.g. (3 on 2) or (4 on 3)<br />
• 10 Markers • 1 Football<br />
15 metres<br />
B<br />
25 metres<br />
20 metres<br />
• Each team nominates a goal keeper before play starts.<br />
• Defending team goal keeper drops back to protect goal.<br />
• Attacking team passes football amongst themselves,<br />
passes can be along ground or <strong>Rugby</strong> <strong>League</strong> style<br />
and in any direction.<br />
• Goals are scored by attackers passing or grubber<br />
kicking football past goalkeeper and through goals.<br />
• Change over occurs by dropped ball or two handed touch.<br />
N.B. - Defenders take turns as goal keeper<br />
A<br />
B<br />
A<br />
B<br />
B<br />
A<br />
GOAL<br />
AREA<br />
3 metres<br />
Kicking<br />
Kicking
<strong>Rugby</strong> <strong>League</strong> Coaching Manuals (<strong>RLCM</strong>) www.rlcm.com.au<br />
KICK FOR SUPPORT<br />
Aim Kicking for the support player who cleanly regathers<br />
the football.<br />
P1 chip kicks for P2 who regathers on the full and runs<br />
through to offload to P3. P3 then grubber kicks for P4<br />
who cleanly regathers the football from the ground and<br />
then runs through to offload to P1 who continues the drill.<br />
Once P1 has chip kicked he moves to the end of the line in<br />
the P2 position, once P3 has kicked he moves to the end<br />
of the line in the P4 position.<br />
As a variation another football can be added to speed the<br />
drill up.<br />
Kicking<br />
<strong>Rugby</strong> <strong>League</strong> Coaching Manuals (<strong>RLCM</strong>) www.rlcm.com.au<br />
1<br />
2<br />
P4<br />
P1<br />
10m<br />
KICK and CHASE<br />
Practice all kicking drills<br />
with left & right feet<br />
20 m<br />
In-goal<br />
Aim To successfully put a kick into the in-goal area, beat<br />
a defender to the football and ground the ball to score a<br />
try.<br />
Players 1 and 2 pass the ball back and forth. On the coaches<br />
command the ball carrier kicks (any nominated kick) to<br />
the try line and attempts to score a try by forcing the ball<br />
"in goal".<br />
The player without the ball becomes the defender and<br />
attempts to tag the other player of "kill" the ball.<br />
Kicking<br />
P2<br />
P3<br />
20m<br />
Repetition<br />
makes<br />
practice<br />
perfect<br />
GRUBBER BUSTER<br />
7<br />
1<br />
2<br />
3<br />
4<br />
5<br />
6<br />
7<br />
8<br />
Divide players into 2 teams giving each player a number.<br />
The coach calls out a number and the player from each<br />
team with that number runs forward and tries to gain possession<br />
of the football in order to return to his team. The<br />
successful player recovers the ball from the centre and<br />
passes it to any player in his team. That player then must<br />
immediately attempt to grubber kick the ball through the<br />
other team.<br />
The player unsuccessful of gaining possession can pressure<br />
the kicker while his team must attempt to catch the<br />
ball by remaining standing on the line. The drill continues<br />
until all numbers have been called.<br />
Kicking<br />
1<br />
NUMBER CATCH<br />
2<br />
9 5<br />
8<br />
6<br />
3<br />
4<br />
Neutral Zone<br />
40m<br />
Aim For the attacking team to sucessfully kick across<br />
the neutral zone and for the defender to catch the football<br />
on the full.<br />
Divide players into two teams. Each player is given a<br />
number.<br />
Teams are scattered throughout their own half, as indicated<br />
above. The player in possession of the football calls out<br />
any number then immediately kicks its over the neutral<br />
zone and into the opposition's half. The player with the<br />
nominated number must catch the ball. No other player<br />
can attempt to catch the ball. Teams must vary their number<br />
calls each time they kick.<br />
As a variation another football can be added.<br />
Kicking<br />
5<br />
1<br />
4<br />
1<br />
2<br />
3<br />
4<br />
5<br />
6<br />
7<br />
8<br />
3<br />
6<br />
8<br />
9<br />
7<br />
2<br />
20m
<strong>Rugby</strong> <strong>League</strong> Coaching Manuals (<strong>RLCM</strong>) www.rlcm.com.au<br />
KICK TENNIS<br />
Each team is scattered through their own half as shown in<br />
the above diagram.<br />
The ball is kicked by Team A into Team B's half. Their aim<br />
is to kick the ball making it land in Team B's half or force<br />
an error by a Team B player. If they succeed, a point is<br />
scored by Team A If the ball is caught, no points are<br />
awarded. The ball must clear the neutral zone - otherwise<br />
possession is forfeited.<br />
The ball is then kicked by Team B and the game continues<br />
in 'tennis' fashion. The first team to reach a predetermined<br />
score wins.<br />
When the ball is kicked, it must cross the neutral zone at<br />
shoulder height or above.<br />
Variations could be, adding two or more footballs. Instead<br />
of a scoring system, players making errors are elimated<br />
from the game, the team that loses all its players first loses<br />
the game. The player catching the football must pass it to<br />
another player who then kicks the football.<br />
Kicking<br />
NEUTRAL NEUTRAL ZONE<br />
ZONE<br />
TEAM A TEAM B<br />
20m<br />
CHANNEL KICK<br />
<strong>Rugby</strong> <strong>League</strong> Coaching Manuals (<strong>RLCM</strong>) www.rlcm.com.au<br />
KICK NETBALL<br />
20m<br />
Aim For team mates to get the football to the player<br />
standing in the in-goal area by kicking the football.<br />
Players are divided into two teams.<br />
Each team kicks the ball between its own members. The<br />
ball can be kicked in any direction. The object of the game<br />
is to kick the ball to the player who is standing in the<br />
oppositions in-goal. Only one player is allowed in the ingoal.<br />
If the ball is dropped, the other team gains possession.<br />
Players in possession of the ball must keep their back foot<br />
on the ground. Once the ball has been passed he is free to<br />
run anywhere in the field. (The game commences at one<br />
baseline. There are no set number of kicks needed, play<br />
continues if the ball is intercepted.)<br />
Kicking<br />
10m<br />
10m<br />
1<br />
2<br />
3<br />
20m<br />
Spend no longer than 10<br />
minutes on each drill<br />
Aim Players either kick, catch or recover the football<br />
and then pass to support while on the run.<br />
A grid is set up as in the above diagram.<br />
Player 1 runs then grubber kicks to player 2.<br />
Player 2 then chip kicks to player 3.<br />
Player 3 runs then passes to player 2.<br />
Player 2 runs then passes sto player 1.<br />
Player 4, 5 and 6 repeat drill. Perform this drill until all<br />
players have had an opportunity to grubber, chip and pass.<br />
GRUBBER OR CHIP<br />
THROUGH<br />
P1<br />
Aim Players are to complete a successful kick for<br />
themselves, regathering and then passing to support.<br />
P1 runs, grubber kicks through the four witches hats<br />
(positioned above), regathers and passes to P2 who repeats<br />
back to P3 who continues the drill.<br />
For variation the kick could be chip kick, a defender can<br />
be introduced or the kick could be for a partner.<br />
Junior<br />
Coaching<br />
20m<br />
4<br />
5<br />
6<br />
P2<br />
Kicking<br />
Enquire about the<br />
<strong>RLCM</strong> CD<br />
Coaching Manuals<br />
<strong>Drills</strong> <strong>Book</strong>s<br />
and a lot more...<br />
www.rlcm.com.au<br />
Kicking<br />
10m<br />
10m
<strong>Rugby</strong> <strong>League</strong> Coaching Manuals (<strong>RLCM</strong>) www.rlcm.com.au<br />
GRID ISLAND con’t<br />
coache command the players attempt to kick or pass to<br />
their team mates in the inside grid. These players must<br />
catch the football on the full and must not go outside the<br />
small grid. They must then return the ball to the players<br />
on the outside of the grid.<br />
Team A players are allowed to run around with the football<br />
but must hold the ball for any longer than five seconds.<br />
They may also pass the ball to another member of the<br />
team who is in a better position.<br />
Team B players are to run around and attempt to intercept<br />
or distract team A players.<br />
Once a ball has been dropped it is taken out of play and<br />
the drill continues with the remaining balls.<br />
Vary the size of the grid to suit your teams age & ability.<br />
RUGBY<br />
LEAGUE<br />
COACHING<br />
MANUALS<br />
Since 1993<br />
“I “I believe believe all all clubs clubs<br />
clubs<br />
and and coaches coaches at at all all<br />
all<br />
levels levels should should have<br />
have<br />
a a copy copy of of this<br />
this<br />
magazine magazine as as a<br />
a<br />
coaching coaching resource”<br />
resource”<br />
WAYNE BENNETT<br />
Endorsed By<br />
l Coaching Manuals l <strong>Drills</strong> <strong>Book</strong>s l Junior Coaching<br />
www www.rlcm.com.au<br />
www .rlcm.com.au<br />
<strong>Rugby</strong> <strong>League</strong> Coaching Manuals (<strong>RLCM</strong>) www.rlcm.com.au<br />
DRIBBLE BALL<br />
Aim To kick the football through the oppositions goal.<br />
Players are divided into 2 teams.<br />
Rules are similar to Soccer but a <strong>Rugby</strong> <strong>League</strong> football is<br />
used instead. The football is dribbled but players cannot<br />
touch the ball with their hands or arms with the exception<br />
of the two goal keepers.<br />
Kicking<br />
GRID ISLAND<br />
15m<br />
40m<br />
15m<br />
Aim Team A players to kick and pass the football<br />
to each other without it being intercepted or<br />
them being distracted by Team B players.<br />
Divide players into 2 teams.<br />
Two grids are set up as shown (1 small grid inside a large<br />
grid).<br />
Team A passes/kicks while Team B are defenders<br />
attempting to intercept ball or distract Team A players.<br />
Team A players are divided in to 2 groups, one on the<br />
outside of the large grid and one on the inside of small<br />
grid.<br />
The outside Team A players start with 4 footballs, on<br />
20m<br />
Kick<br />
Kicking<br />
1<br />
2<br />
KICK and CHASE<br />
Practice all kicking drills<br />
with left & right feet<br />
20 m<br />
In-goal<br />
Aim To successfully put a kick into the in-goal area, beat<br />
a defender to the football and ground the ball to score a<br />
try.<br />
Players 1 and 2 pass the ball back and forth. On the coaches<br />
command the ball carrier kicks (any nominated kick) to<br />
the try line and attempts to score a try by forcing the ball<br />
"in goal".<br />
The player without the ball becomes the defender and<br />
attempts to tag the other player of "kill" the ball.<br />
Kick
<strong>Rugby</strong> <strong>League</strong> Coaching Manuals (<strong>RLCM</strong>) www.rlcm.com.au<br />
KICK GOLF<br />
10m<br />
Players must try to hit the cone placed down field in the<br />
least amount of kicks.<br />
The first kick is a punt kick downfield. The second kick is a<br />
grubber kick from where the ball has stopped towards<br />
the cone. The third kick should be in close enough range<br />
for a short stab kick or dribble kick for the ball to hit the<br />
cone.<br />
Players keep kicking until they have hit the cone.<br />
Players may need to add another grubber if kicks have<br />
gone off target.<br />
Kicking<br />
60m<br />
4 3 2 1<br />
TARGET<br />
Aim To kick the football and have it land in the grid<br />
Each player has a football<br />
Grubber Kicks<br />
Players must grubber kick the ball for it to land in the<br />
square, 10 metres from the kicking marker.<br />
Punt Kick<br />
The grid is taken further away - to 20 metres from the<br />
kicking marker. Players punt kick the ball and on the first<br />
bounce the ball must bounce in the square.<br />
Drop / Chip Kick<br />
As above for the punt kick, however the player / coach is<br />
placed between the kicker and the grid. The ball must gain<br />
elevation, clearing the coach / player to land in the square<br />
on the full.<br />
Gear Required: Footballs, Witches Hats<br />
<strong>Rugby</strong> <strong>League</strong> Coaching Manuals (<strong>RLCM</strong>) www.rlcm.com.au<br />
FIND THE GAP<br />
D3<br />
P3<br />
20m<br />
Use your<br />
imagination<br />
to design a fun<br />
kick golf course<br />
using any variation<br />
of kicks and<br />
distances<br />
Aim To attack the defensive line, grubbering a kick through<br />
and the chaser regathers the football behind the line.<br />
Grid is set up as shown in diagram above with players on a<br />
three on three situation.<br />
P1 runs out, draws D1 and passes the ball to P2.<br />
P2 runs towards D2 drawing him and then grubber kicking<br />
or chip kicking through the gap for P3.<br />
P3 chases and regathers ball<br />
Players must alternate playing positions each time. Drill<br />
should be perfomed from both right and left sides.<br />
Vary the kick between P1, P2 and P3.<br />
Kicking<br />
D2<br />
P2<br />
D1<br />
P1<br />
10m<br />
Coach<br />
10m<br />
rlcm<br />
COACHING BOOKS<br />
Learn the game you love!<br />
RUGBY<br />
LEAGUE<br />
COACHING<br />
MANUALS<br />
Endorsed By<br />
Since 1993<br />
10m<br />
Kicking<br />
www www.rlcm.com.au<br />
www .rlcm.com.au
<strong>Rugby</strong> <strong>League</strong> Coaching Manuals (<strong>RLCM</strong>) www.rlcm.com.au<br />
NOMINATION & NUMBERING<br />
Setting: - Six attackers and five defenders, five of<br />
the attackers will hold hit pads whilst<br />
the sixth has a football.<br />
- Players spread out opposite each other<br />
in two lines about 10 metres apart.<br />
• Coach stands behind the defensive line where<br />
they cannot see him.<br />
• He directs the sideways movement of all the<br />
attacking players except A1, with the ball, either<br />
left or right by pointing.<br />
• A1 moves at random behind the attacking line.<br />
• When the coach puts his hand straight up in the air<br />
A1 must run forward through the gap in front of<br />
him, with the rest of the attacking line moving forward.<br />
• Defence must adjust to nominate and eliminate<br />
all players closest to the ball, thus leaving one<br />
attacker on the edge free.<br />
• Defence must nominate, ball carrier, runner, etc<br />
or call by name.<br />
<strong>Rugby</strong> <strong>League</strong> Coaching Manuals (<strong>RLCM</strong>) www.rlcm.com.au<br />
SMOTHER DRILL<br />
Setting: - Players working in pairs one carrying a<br />
hit pad, 5m apart.<br />
• Object is to cover the ball, i.e. pin bump pad to<br />
the ATTACKER.<br />
• Players in pairs, opposite each other and 5 metres<br />
distant. Walking Pace.<br />
• Object is for tackler to cover the ball and or pin<br />
the arms of the ball carrier.<br />
• Defender slightly off-centre of the attacker.<br />
• The front section of the tackler's shoulder<br />
makes contact with the attacker's chest region,<br />
shoulders and arms attempting to cover the ball<br />
and or pin the arms of the ball carrier.<br />
Variation - Increase pace/and or approved distance.<br />
- Remove pad and add the ball to attack<br />
5m<br />
10m<br />
Defence<br />
Defence<br />
A2 A3 A4 A5 A6<br />
D1 D2 D3 D4 D5<br />
A1<br />
P1 P2<br />
P3<br />
D1 D2<br />
D3<br />
P4<br />
D4<br />
DEFEND TWO ON THREE<br />
Setting: - Players in a 15 x 10 metre grid<br />
- Three defenders and four attackers<br />
• A1 and A2 must start within the 5m channel<br />
• D1 will start 5m from A1 and also within the 5m<br />
channel, while D2 and D3 will start 10m away<br />
• A1 must pass to A2 before A2 is allowed to leave<br />
the 5m channel<br />
• D1 can move as quickly as he wants, however D2<br />
and D3 can only move once D1 has moved<br />
• the object is to stop the A's from scoring<br />
5m<br />
5m<br />
FACE-UP DEFENCE<br />
Setting: - Corridor 20 x 15m, 4 markers,<br />
12 players, 1 football<br />
• 5 defenders are placed on the base line.<br />
• 7 attacking players are grouped at the opposite<br />
end of the grid.<br />
• The coach kicks the football to the A players.<br />
• On A players gathering the ball the defenders<br />
move forward to prevent A scoring.<br />
Progression:- A & D start with coaches call<br />
- D move down the grid in formation<br />
A follows approx. 10m behind<br />
- On coaches call, D turns and<br />
defends against A who attempts<br />
to score.<br />
15m<br />
D1<br />
A1 A2 A3 A4<br />
Attackers<br />
15m<br />
20m<br />
D2 D3<br />
Defence<br />
Defence<br />
Coach
<strong>Rugby</strong> <strong>League</strong> Coaching Manuals (<strong>RLCM</strong>) www.rlcm.com.au<br />
BEHIND TACKLE<br />
(TECHNIQUE)<br />
SETTING: Players in 2 teams<br />
Open space distance determined<br />
by age group<br />
1 Football<br />
4 Markers<br />
1.<br />
2.<br />
• Players form two equal lines behind markers A and B<br />
• On call players 1 and 2 run in a straight line<br />
• The coach chooses to pass to either player<br />
• The player who receives the ball attempts to score a<br />
try between markers C and D<br />
• The defending player attempts to tackle his opposite<br />
from behind.<br />
Defence<br />
A<br />
B<br />
1.<br />
2.<br />
Coach<br />
SIDE ON DEFENCE<br />
(TECHNIQUE)<br />
GUIDELINES:<br />
• Player B walks with ball in a direct line from marker 2<br />
to marker 3<br />
• Player A approaches from marker 1 and pushes player<br />
B with his left shoulder<br />
N.B. Player A has his arms pointing straight out like an<br />
aeroplane and aims to hit the thigh of player B<br />
VARIATION:<br />
• Player B runs from marker 3 to marker 2 so that A<br />
uses his right shoulder<br />
• Performed in the same manner as drill A except both<br />
player A and B are jogging not walking.<br />
• This time using the same basic drill player A effects a<br />
tackle on player B. Both players are jogging.<br />
Defence<br />
<strong>Rugby</strong> <strong>League</strong> Coaching Manuals (<strong>RLCM</strong>) www.rlcm.com.au<br />
SPRINT & SLIDE<br />
Players are lined up as above. Two tackle bags are<br />
positioned 10 metres from two players, whilst three bags<br />
are 15 - 20 metres from the other three players.<br />
All players must sprint to the tackle bags and run<br />
backwards, shuffling across to the marker. Sprint distances<br />
obviously vary in length between 10 metres (short) and<br />
15 - 20 metres (long).<br />
Defence<br />
1.<br />
C<br />
2.<br />
D<br />
3.<br />
2nd<br />
Marker<br />
1.<br />
A<br />
A<br />
B B<br />
THE POSTMAN<br />
1st<br />
Marker<br />
Low Tackle<br />
6m<br />
Coach<br />
Chest high<br />
Tackle<br />
Players perform double tackle on front bag.<br />
The coach rolls a ball to either the left or right markers.<br />
The players then chase and tackle the designated tackle<br />
bag, opposite the position of the football.<br />
2.<br />
1st<br />
Marker 2nd<br />
Marker<br />
Defence
<strong>Rugby</strong> <strong>League</strong> Coaching Manuals (<strong>RLCM</strong>) www.rlcm.com.au<br />
REACTION DRILL<br />
Setting: Six lines of players opposite six tackle bags.<br />
Start<br />
5m line<br />
3m line<br />
D1 D1 D1<br />
P1 P1 P1<br />
DRILL<br />
• Player P1 holds bag up in front. He moves bag left<br />
or right when the tackler D1 reaches the 5 metre mark.<br />
VARIATION<br />
• Reduce distance ie 5 metres to 3 metres etc<br />
Defence<br />
<strong>Rugby</strong> <strong>League</strong> Coaching Manuals (<strong>RLCM</strong>) www.rlcm.com.au<br />
SITUATIONAL DEFENCE<br />
Setting Next 4 <strong>Drills</strong>:<br />
Small groups of players work in 10m x 10m grids - The<br />
defence's role, after the ball has passed his opposite, is to<br />
take the inside position on the next, outside attacker (this<br />
can not occur under a wedging system)<br />
(a) Against Run Around<br />
D3 D2 D1<br />
A3<br />
A2<br />
DRILL ALTERNATIVE<br />
• A2 around A3 • A2 around A3<br />
• D3 takes A3 • D2 communicates to<br />
• D2 follows A2 D3 to take out A2<br />
• D1 fills in • D2 takes A3<br />
• D1 fills in<br />
Also use A1 around A3<br />
Defence<br />
A1<br />
6<br />
players<br />
3<br />
attackers<br />
3<br />
defenders<br />
LAST 15 DEFENCE DRILL<br />
Setting: Seven attackers on four defenders,<br />
grid 40m x 20m<br />
20m<br />
A1<br />
A2<br />
25m 15m<br />
A3<br />
D1 D2<br />
DRILL<br />
• Attackers attempt to score within the last 15m width<br />
of the field.<br />
• Defence must show the edge to the attackers<br />
• Last two defenders should work to shutdown the last<br />
four attackers on the edge.<br />
• The remaining two defenders should work in cover<br />
to ensure no inside balls are succesful<br />
A4<br />
D3<br />
A5 A6 A7<br />
SITUATIONAL DEFENCE<br />
(b) Against Reverse Pass (see run around)<br />
D3 D1<br />
A3<br />
A2<br />
A4<br />
D4<br />
D1<br />
A1<br />
Defence<br />
DRILL<br />
7 players - 4 attackers and 3 defenders<br />
ALTERNATIVE<br />
• A1 passes to A2 • A1 passes to A2 onto A3<br />
• A2 moves across field • A2 around A3<br />
• A2 REVERSES to A4 • A3 REVERSES to A4<br />
• D1 fills in • D3 stays with A2 (or A3)<br />
• D3 takes A3<br />
• D1 fills in on A4<br />
Defence
<strong>Rugby</strong> <strong>League</strong> Coaching Manuals (<strong>RLCM</strong>) www.rlcm.com.au<br />
SITUATIONAL DEFENCE<br />
(c) Against Scissor (angle)<br />
6 players - 3 attackers and 3 defenders<br />
DRILL<br />
• A1 passes to A2<br />
• Attacker (A2) drags D2 across toward D3<br />
• Attacker (A3) moves inside A2 when A2 commences<br />
to draw D3<br />
• A3 is taken by the Cover D1 or D3<br />
Defence<br />
D1<br />
A1<br />
D2 D3<br />
SITUATIONAL DEFENCE<br />
(d) Against Extra Man<br />
D3 D2 D1<br />
7 players - 4 attackers and 3 defenders<br />
DRILL<br />
• A1 passes to A2<br />
• D2 and D3 move up<br />
• A2 passes to A4<br />
• D2 must move up and out<br />
• D1 (or inside man) takes A2<br />
<strong>Rugby</strong> <strong>League</strong> Coaching Manuals (<strong>RLCM</strong>) www.rlcm.com.au<br />
NUMBERS TACKLING<br />
Divide your team into two<br />
equal groups, generally<br />
forwards ands backs. One<br />
group holds the tackle bags<br />
or pads, the other group<br />
form up in a circle inside and<br />
facing the bags. The bag that<br />
they are facing is their<br />
number 0 bag. In this<br />
diagram we are showing<br />
how the circle looks to<br />
tackler number 1.<br />
The coach calls commands such as "1 right", the players all<br />
have to move one bag to their right and tackle that bag.<br />
Then they move directly back and that bag then becomes<br />
their new 0 bag. The coach may then call "2 left" and the<br />
players move two bags to the left and make the tackle.<br />
Then move directly back with the bag tackled their new 0<br />
bag.<br />
Players must remember that once they move directly back,<br />
the bag just tackled becomes their new number 0 bag. It<br />
changes with each tackle. The players keep tackling until<br />
one or more players gets it wrong, they then pay a penalty<br />
(20 metre sprint) and they change roles with bag holders.<br />
Defence<br />
A2<br />
0.<br />
5.<br />
1.<br />
6.<br />
2.<br />
5.<br />
4.<br />
A3<br />
1.<br />
3.<br />
4.<br />
Coaches Command<br />
"2 Right"<br />
2.<br />
3.<br />
A3<br />
A4<br />
A2<br />
DOUBLE ZONE TAG<br />
30m to 40m<br />
Aim: Defensive adjustment and communication attacking<br />
development of space creation.<br />
Equipment: 8 markers (2 colours), 1 football, 12 to 16<br />
players, tag belts if available.<br />
Set Up: Playing area (using cross field markings) 30 metres<br />
wide by 30-40 metres long. Markers identifying "centre"<br />
or "double zone" area.<br />
Drill<br />
• Small sided game with rules as set by coach ie<br />
number of passes, allowable kicks etc.<br />
• Outside thirds of field player 'tagged' by single<br />
player.<br />
• 'Centre' third is the 'double-zone' where attacker<br />
must be tagged by two players (or both flags<br />
removed).<br />
• Scoring can be adjusted ie 3 points between 'double<br />
zone' markers, 1 point outside thirds.<br />
A1<br />
30m<br />
Defence<br />
Defence
<strong>Rugby</strong> <strong>League</strong> Coaching Manuals (<strong>RLCM</strong>) www.rlcm.com.au<br />
SHUT DOWN<br />
A1 A2<br />
A5 20m<br />
A3 A4<br />
F<br />
D1 D2<br />
s s s<br />
D3 D4 D5<br />
D6<br />
Aim: To develop vision and decision making skills of<br />
"middle" defensive players.<br />
Equipment: 4 markers, 1 football, 9 to 15 players<br />
Set Up: Set grid 20m x 10m. Place players at each end of<br />
grid with defenders having one extra.<br />
Drill<br />
• One attacker(A5) jogs behind line carrying football<br />
• On coaches signal (or players choice), he enters<br />
attack line and runs STRAIGHT.<br />
• Other attackers move up straight in support<br />
• Defenders must call BALL CARRIER with TWO<br />
players contacting ball carrier.<br />
• Defenders D1 to D5 (after shutting down ball)<br />
must next shut down CLOSEST support.<br />
• The FREE player (F) is shut down by cover defender.<br />
Defence<br />
20m<br />
<strong>Rugby</strong> <strong>League</strong> Coaching Manuals (<strong>RLCM</strong>) www.rlcm.com.au<br />
REACT & DEFEND<br />
Setting: Three attackers (A) on three defenders (D),<br />
grid 15m x 15m<br />
A<br />
D D D<br />
DRILL<br />
• Defenders jog down the grid<br />
• Followed by attackers about 5m behind<br />
• On coach's call defence turns and adjusts to the attack<br />
Advance to multi tackle 3 on 3<br />
Commence with 4D x 3A, 3D x 3A, 2D v 3A<br />
Defence<br />
A<br />
START<br />
A<br />
A<br />
DEFENCE NOMINATION<br />
Setting: Six attackers and five defenders. Each attacker<br />
has a hit pad, attackers in a line 5m away from<br />
the defenders.<br />
5m<br />
Attackers<br />
Defenders<br />
ONE ON ONE<br />
A1 A2 A3 A4 A5 A6<br />
D1 D2 D3 D4 D5<br />
Target<br />
Divide players into two lines 6 metres apart, nominate<br />
one line as attackers and the other defenders, place a target<br />
(old T-shirt) midway between the lines.<br />
The first defender comes forward with the ball and stands<br />
over the target. The defender passes the ball to the first<br />
attacker who must now score a try by placing the ball on<br />
the target.<br />
The defender must tackle the attacker to stop the try being<br />
scored. The coach must emphasise that the defender must<br />
make and maintain solid upper body contact with the<br />
attacker. In all cases the defender must try to wrap up the<br />
ball and try to roll the attacker on his back to slow down<br />
the play the ball. The drill can be modified by changing the<br />
starting location of the defenders and attackers.<br />
• The defender gains confidence by being in control of the<br />
drill, ie. the attacker must wait until the defender is ready<br />
and passes him the ball.<br />
• The defenders quickly learn that they must move forward<br />
off their line to successfully defend the target.<br />
Defence<br />
DRILL<br />
• Coach call left or right and the defenders move up in<br />
that direction, nominating by<br />
name the attacker they will engage.<br />
• Players engage the pad then move back changing<br />
place with another defender on the way back.<br />
• Emphasis nomination amongst defenders.<br />
• On returning emphasise communication amongst<br />
defenders.<br />
Defence
<strong>Rugby</strong> <strong>League</strong> Coaching Manuals (<strong>RLCM</strong>) www.rlcm.com.au<br />
Line 1<br />
FLOP<br />
Tackler No.1 hits the bag low, whilst tackler No.2 is the<br />
second player and hits the bag chest high.<br />
Players from line 1 will tackle 6 bags, whilst players from<br />
Line 2 will only tackle chest high on the allocated bag directly<br />
in front of them.<br />
Defence<br />
Line 2<br />
CLOCKWISE TACKLING<br />
2. 6.<br />
Tacklers position themselves in the centre of the drill,<br />
opposite a tackle bag. (As indicated)<br />
Each of the players perform a tackle on the bag in front of<br />
them.<br />
Players then run backwards to the centre of the drill,<br />
shuffling clockwise to position themselves in line with the<br />
next tackle bag, where they make the next tackle. The<br />
drill continues until all bags have been tackled.<br />
<strong>Rugby</strong> <strong>League</strong> Coaching Manuals (<strong>RLCM</strong>) www.rlcm.com.au<br />
DEFENSIVE LINE<br />
POSITIONING<br />
SETTING: Field Positions<br />
GAME SKILLS: Organisation, Communication<br />
Coach<br />
5 4 6 7 12 8<br />
9<br />
10 11 13 3 2<br />
1<br />
Rolls<br />
Ball<br />
• Players line up as a team in their appropriate defensive<br />
line positions (diagram is simply a suggestion).<br />
• Coach who starts with the ball rolls it anywhere on<br />
the field.<br />
• The defensive line advances and the two nearest<br />
defenders drop on the ball.<br />
• This represents a tackle.<br />
• Meanwhile the rest of the defensive line should<br />
reposition themselves accordingly<br />
• The fullback (1) should communicate with the line to<br />
ensure there are no obvious gaps.<br />
• The ball is then given back to the coach in a new position<br />
and the sequence commences again.<br />
N.B. Ensure that the coach varies the distance and angle<br />
of the roll.<br />
Defence<br />
3.<br />
DEFENCE LINE COMMUNICATION<br />
SETTING: Open space or<br />
suggested channel approx. 40m x 20m<br />
4 to 6 players; 10 markers<br />
P1<br />
P2<br />
P3<br />
P4<br />
10m<br />
Move up 2 markers<br />
Back 1 marker<br />
• 4 Players form a line at one end of channel.<br />
• Players at end of channel move up 2 marker distances<br />
• Then retreat back 1 marker by half turning to run back<br />
to line then turning to face front again.<br />
• Drill continues length of channel. (ie up 2 back 1)<br />
OBJECTIVE<br />
• Communication • Working together<br />
• Adjustment of defensive line • Speed of the line<br />
• Speed back to regroup line.<br />
(b) PROGRESSION<br />
P1<br />
P2<br />
P3<br />
P4<br />
1.<br />
10m<br />
Similar to (a) except players alternate start on either left<br />
or right side of channel compressed together. As they move<br />
forward players spread out to cover the full width of the<br />
channel. As they move back they adjust to compress the<br />
defensive line before moving forward again.<br />
Defence<br />
4.<br />
5.<br />
Defence<br />
20m<br />
20m
<strong>Rugby</strong> <strong>League</strong> Coaching Manuals (<strong>RLCM</strong>) www.rlcm.com.au<br />
PASSING KAMIKAZE DRILL<br />
SETTING: 4 Footballs, Groups of 4 players,<br />
4 markers<br />
GAME SKILLS: Passing, Evasion,<br />
Vision, Communication<br />
1.<br />
3.<br />
Under 12's<br />
Upwards<br />
4.<br />
Teams 1 and 2 commence jogging and passing, on reaching<br />
the halfway mark, teams 3 and 4 commence.<br />
On approaching, teams will avoid each other but continue<br />
to pass as they run between the on-coming team.<br />
2.<br />
15 Metres<br />
Attack<br />
<strong>Rugby</strong> <strong>League</strong> Coaching Manuals (<strong>RLCM</strong>) www.rlcm.com.au<br />
2 ON 2 with ANGLE<br />
Setting: 15m x 20m, 5 markers, 8-16 players,<br />
1 football<br />
A number of options exist in this practice<br />
• B runs across between D & C<br />
• Depending on response of D & C<br />
• A has the option to angle in or run the line<br />
• B can present<br />
(i) An outside pass to A<br />
(ii) A can cut in on B & receive a close pass<br />
(iii) A can angle behind C<br />
Rotation: D to C, C to A, A to B, B to D<br />
Attack<br />
A. WING<br />
D1<br />
B. CENTRE<br />
15m 15m<br />
D. WING<br />
C. DEF. CENTRE<br />
30 Metres<br />
ZIG ZAG RELAY<br />
SETTING: Groups of 6 players<br />
Distance will depend on age group<br />
6 Markers, 1 Football<br />
GAME SKILLS: Handling, Passing,<br />
Running with the ball<br />
1.<br />
3.<br />
5.<br />
6.<br />
The ball starts at Position 1. The ball is passed in Zig Zag<br />
fashion to Position 6. The player at 6 in possession of the<br />
ball runs to Position 1 while all other players shuffle to the<br />
next station.<br />
VARIATION: Player at Position 6 perform a Grubber<br />
or Chip kick while running to position 1.<br />
Attack<br />
3 ON 2 (A)<br />
Setting: - Grid10 x 10m,<br />
2 players are defenders, 3 are attackers.<br />
• Players line up behind cones in three columns.<br />
• On coaches command two nominated players<br />
sprint our around opposite cones and then become<br />
defenders.<br />
• Next two players fill in the attacking line.<br />
• The attacking line then attempts to beat the<br />
defenders with a 3 on 2 situation.<br />
EMPHASISE: Communication (attack and defence),<br />
drawing the man, no silly passes, start slow<br />
P3<br />
2.<br />
4.<br />
10m<br />
P2<br />
Mod Footy<br />
Upwards<br />
P1<br />
10m<br />
Coach<br />
Attack
<strong>Rugby</strong> <strong>League</strong> Coaching Manuals (<strong>RLCM</strong>) www.rlcm.com.au<br />
3 ON 2 (B)<br />
Setting: - Grid10 x 10m,<br />
2 players are defenders, 3 are attackers.<br />
• Players line up behind cones in columns of three as<br />
attackers and defenders at opposite ends of the grid<br />
• As attacking players move, coach commands one<br />
defender to stay out (nominate by name or number)<br />
• The attacking line then attempts to beat the<br />
defenders with a 3 on 2 situation.<br />
EMPHASISE: Communication (attack and defence),<br />
decision making, drawing the man, no silly passes, start<br />
slow<br />
10m<br />
Attack<br />
D3 D2<br />
D1<br />
A3 A2<br />
A1<br />
Defenders<br />
Attackers<br />
10m<br />
Coach<br />
<strong>Rugby</strong> <strong>League</strong> Coaching Manuals (<strong>RLCM</strong>) www.rlcm.com.au<br />
ROTATION<br />
Setting: - Players form two circles<br />
- Two players stand inside circles<br />
• Players in the inside cirlce run one way whilst<br />
players in the outside circle run in the opposite<br />
direction.<br />
• Two players in the middle make a pass:<br />
- To the players in the outside circle<br />
- Alternately to the inside and outside circle<br />
- To players in the outside circle with players in<br />
the inside circle attempting to knock down the<br />
passes<br />
Attack<br />
V<br />
V<br />
V<br />
V<br />
V<br />
V<br />
V<br />
V<br />
V<br />
V<br />
FIND THE GAP<br />
• 3 players using bump pads line up as indicated<br />
in the diagram<br />
• A gap of between 1 and 2 metres is proviuded<br />
between 'tacklers" A and B, and B and C<br />
• A fourth 'tackler", player D stands behind player<br />
B and moves across his own line to close one of<br />
the gaps as the ball carrier (P1) runs towards<br />
tackler B<br />
• Support players P2 and P3 receive a short pass<br />
from the ball carrier who has created a gap for<br />
these players by drawing the tacklers.<br />
• Tackler D attempts to stop the movement by<br />
closing the gap created by the ball carrier.<br />
D<br />
A B C<br />
P1<br />
P2 P3<br />
ARROWHEAD<br />
Setting: - Two equal lines of players aligned at<br />
right angles<br />
• Team 1 commmences the drill, running straight.<br />
• Team one commmences passing the ball at speed<br />
along their line.<br />
• After releasing the ball each player runs<br />
backwards to their starting position.<br />
• Player 1E off loads to player A in team 2.<br />
• Team 2 then speed passes, following the same<br />
procedure as Team 1.<br />
Note<br />
• Player 1E holds the position of 2A waiting for<br />
the next run, likewise player @e holds the<br />
original position of 1A.<br />
Attack<br />
The drill squad<br />
attempts to make 100<br />
passes. If the ball is<br />
dropped the drill<br />
recommmences.<br />
Attack
<strong>Rugby</strong> <strong>League</strong> Coaching Manuals (<strong>RLCM</strong>) www.rlcm.com.au<br />
<strong>Rugby</strong> <strong>League</strong> Coaching Manuals (<strong>RLCM</strong>) www.rlcm.com.au<br />
ANGLES<br />
Setting: Grid 10m x 10m, 4 markers, 8-16 players,<br />
1 football for each A player<br />
• A runs out and cuts across the grid to draw D so<br />
that D cannot take S<br />
• S moves out on a straight line, angles back to cut in<br />
behind A1.<br />
• S times hids run to occur when A has drawn D<br />
and runs as close to A as possible without being<br />
tackled by D<br />
Rotation: S to A,<br />
A to D,<br />
D to S<br />
Progression:<br />
Defender stands<br />
opposite, slightly<br />
inside of S<br />
Rotation:<br />
A to D2, D2 to S, S<br />
to D1, D1 to A<br />
Attack<br />
KICK AND PASS<br />
Setting: - Grid 20m x 20m<br />
- 2 equal teams of players<br />
- 1 football<br />
• One team is given the ball an attempts to keep<br />
possession for up to 10 passes or kicks.<br />
• Every set completed gains a point<br />
• The opposing team attempts to intercept or knock<br />
the ball down, gaining possession when it interupts<br />
the other teams set.<br />
• Player in possession may move around grid<br />
looking for best option.<br />
Emphasise: One handed pass, fending and passing,<br />
passing under pressure, grubber kicks, chip kicks.<br />
Attack<br />
20m<br />
D1<br />
20m<br />
A1 S1<br />
10m<br />
AGILITY POLES<br />
• Coach stands 5m in front of players holding pole.<br />
• As players run towards the pole the coach<br />
leans it either to the left or right.<br />
• Player then swerves to the opposite side of<br />
pole and runs around coach.<br />
PROGRESSION<br />
• Add a second pole wide of the first<br />
• P1 runs to the side the pole is leant<br />
• P1 thens passes a flat pass to P2 who must<br />
swerve to the left or right of his opposite pole.<br />
1.<br />
A1<br />
2.<br />
ATTACK DEVELOPMENT<br />
"OVERS"<br />
Setting: Grid 15m x 15m, 4 markers, 6-12 players,<br />
1-3 footballs<br />
• A1 runs curve line to D1 cutting across or over<br />
D1 drawing D2<br />
• A2 runs a wide line in support of A1 holding his<br />
line to stay outside of D2<br />
D1<br />
Progression: 3A v 3D<br />
A1<br />
15m<br />
D2<br />
A1 A2<br />
A2<br />
15m<br />
Attack<br />
Attack
<strong>Rugby</strong> <strong>League</strong> Coaching Manuals (<strong>RLCM</strong>) www.rlcm.com.au<br />
ATTACK DEVELOPMENT<br />
"UNDERS"<br />
Setting: Grid 15m x 15m, 4 markers, 6-12 players,<br />
1-3 footballs<br />
• A1 runs line to D1 inside shoulder drawing D1<br />
and passing to A2<br />
• A2 runs a wide line in support of A1 holding D2.<br />
• When A1 sets to pass A2 cuts "under" D2 into<br />
hole.<br />
15m<br />
Progression: 3A v 3D<br />
Attack<br />
<strong>Rugby</strong> <strong>League</strong> Coaching Manuals (<strong>RLCM</strong>) www.rlcm.com.au<br />
THREE ON THREE<br />
(SWITCH OVER)<br />
Setting: 4 Markers - 20m x 15m grid<br />
9 players - 3 as defenders<br />
3 spin pads (optional)<br />
Attacker and support players move to defenders. Attacker<br />
(A) 'draws' Defender (D) and passes 'under' to support<br />
player (S1) who has changed his angle to run under his<br />
nominating defender (D1). Once in possession of the<br />
football, (S1) changes angle to run 'over' and across his<br />
defender (D1) into space and to draw (D2). Support player<br />
(S2) receives a pass from (S1) and runs in space on the<br />
outside left vacant by the defender (D2).<br />
Attack<br />
D1<br />
20m<br />
D2<br />
A1 A2<br />
A S1 S2<br />
15m<br />
15m<br />
THREE ON THREE (UNDERS)<br />
Setting: 4 Markers - 20m x 15m grid<br />
9 players per grid - 3 as defenders<br />
3 spin pads (optional)<br />
Attacker (A) and support players move to defenders with<br />
attacker (A) drawing first defender (D) away from the<br />
support players (S1) who times his changing angle run into<br />
space receiving an on-side pass 'under' his defender (D1).<br />
S1 draws D1 then passes to S2, who has held his opposite<br />
player D2, inside by running a line on D2's outside shoulder,<br />
before timing his change of angle into space.<br />
A<br />
20m<br />
SPONTANEOUS SUPPORT<br />
Setting: Grid 10x 35m, 6 markers, 4 pads,<br />
8 players, 1 football<br />
• A players commence with the ball and attempt<br />
to break through the 2 defence padmen who<br />
can only move laterally.<br />
• D1 cover defends across the grid but only after<br />
A breaks the first line.<br />
• The second cover defender, D2, moves into the<br />
grid to cover after the A has beaten D1.<br />
• D3, the full-back, moves in to defend afetr A<br />
passes D2.<br />
• Beaten defensive players sprint to base line (by<br />
running outside grid)<br />
D1 and D2 can finish their tackles<br />
5m 10m 15m<br />
5m<br />
○ ○ ○ ○ ○ ○ ○ ○<br />
D1<br />
S1<br />
D D1 D2<br />
A S1 S2<br />
○ ○ ○ ○ ○ ○ ○<br />
D2<br />
15m<br />
Attack<br />
Attack
<strong>Rugby</strong> <strong>League</strong> Coaching Manuals (<strong>RLCM</strong>) www.rlcm.com.au<br />
SWERVE RELAY<br />
Use<br />
Hit Pads<br />
for variation<br />
SIDE STEP (TECHNIQUE)<br />
GAME SKILLS:<br />
• Sidestep<br />
• Speed<br />
• Hand Off Pass<br />
Step<br />
left or right<br />
on coaches<br />
command<br />
GUIDELINES:<br />
• Set up two sets of markers<br />
per diagram, with<br />
approxiametely 6 players<br />
per team, with 3 at each end.<br />
as<br />
• On a signal, the players with a ball run to the first<br />
•<br />
marker and sidestep to run to the second dome where<br />
they step again, either foot<br />
Players step again at the last marker and hand off the<br />
ball to the next player and so on until the relay is<br />
completed.<br />
NOTE<br />
• Many players will attempt to shuffle around markers<br />
rather than step. Keep correcting.<br />
• Young players may need to start with a simpler version<br />
to assure correct technique.<br />
Attack<br />
<strong>Rugby</strong> <strong>League</strong> Coaching Manuals (<strong>RLCM</strong>) www.rlcm.com.au<br />
HIT and SPIN<br />
SETTING: Open space<br />
2 Markers<br />
1 Bump shield (Hit pad)<br />
1 Football<br />
2.<br />
A<br />
GUIDELINES:<br />
• Player A starts running from marker 1 around marker<br />
2 and handing off to player B at marker 3.<br />
• Player B repeats the exercise in the opposite direction<br />
rounding marker 4 and handing off to player C at<br />
marker 1.<br />
• Once a player has run they must return to the end of<br />
the line.<br />
• The drill can be run as a relay race between two teams<br />
competing on different courses.<br />
• The cycle is reversed regularly to ensure right and left<br />
swerves are developed.<br />
• Keep drill as small as possible to reflect a game situation.<br />
VARIATION Hits pads on markers 2 and 4 to apply<br />
running pressure and promote running balance.<br />
Attack<br />
4. 8.<br />
3. 7.<br />
2. 6.<br />
1. 5.<br />
PASSING PAIRS<br />
No 1 runs with the ball in both hands and bursts onto the<br />
shield that is held at waist height by another player.<br />
He hits, spins and passes to support that has come with<br />
him on left. both players then retire behind their respective<br />
lines.<br />
Another pair of lines are set up similarly but pass in the<br />
opposite direction.<br />
Attack<br />
1.<br />
1.<br />
B<br />
4.<br />
2 on 1 EVASION<br />
SETTING: Grid 10m X 10m<br />
3 Players<br />
P1<br />
P2<br />
Three players to a grid 10m x 10m. player 1 passes to 2<br />
with plenty of room to move and he attempts to beat 3<br />
with a fend, swerve, side-step or change of pace. 3 attempts<br />
to tackle him although he is not allowed to start defending<br />
until the ball has left player 1's hands.<br />
N.B. While player 2 gets the ball early, player 3 must wait<br />
for the ball to leave player 1's hands before moving.<br />
P3<br />
Attack
<strong>Rugby</strong> <strong>League</strong> Coaching Manuals (<strong>RLCM</strong>) www.rlcm.com.au<br />
ATTACKING FROM SCRUMS<br />
1. USING AN EXTRA PLAYER<br />
The players introduced into the line most frequently are:<br />
(a) the fullback<br />
(b) A blind side attacker<br />
(c) The loose forward<br />
(a) THE FULLBACK<br />
He is able to time his run and select any option, and can<br />
join the line to the open side or blind, and in between any<br />
of the players. The art of a good attacking fullback is to<br />
arrive in a space before his opposite number. The fullback<br />
enters the line between the five eight and inside centre.<br />
Alternatives are to (i) enter the line in a catch-pass situation<br />
and create extra men out wide, or (ii) be used as a decoy.<br />
It is important for the blind side winger to cover behind<br />
from a scrummage.<br />
Attack<br />
2<br />
5<br />
1<br />
1<br />
7<br />
7<br />
6<br />
6<br />
3<br />
4<br />
4<br />
3<br />
5<br />
2<br />
<strong>Rugby</strong> <strong>League</strong> Coaching Manuals (<strong>RLCM</strong>) www.rlcm.com.au<br />
ATTACKING FROM SCRUMS<br />
1. USING AN EXTRA PLAYER<br />
(b) THE SHORT SIDE ATTACKER (continued)<br />
(ii) The blind side centre, A3, receives the ball on the<br />
open side from the scrum half. By slick handling<br />
the open side winger, A5, is given an overlap.<br />
5<br />
Attack<br />
2<br />
4<br />
3<br />
6<br />
6<br />
7<br />
1<br />
7<br />
3<br />
4<br />
5<br />
2<br />
ATTACKING FROM SCRUMS<br />
1. USING AN EXTRA PLAYER<br />
(b) THE SHORT SIDE ATTACKER<br />
An extra man can be introduced into the line by using a<br />
winger or centre from behind the blindside. The extra<br />
man can either loop round and try to break the line himself,<br />
or join the line early and try to create the gap for someone<br />
else.<br />
(i) The blind winger, A5 times his run, and arcs off<br />
the inside centre breaking the line himself.<br />
2<br />
5<br />
1<br />
7<br />
7<br />
6 3 4 5<br />
6 4<br />
3 2<br />
ATTACKING FROM SCRUMS<br />
1. USING AN EXTRA PLAYER<br />
(c) THE LOCK FORWARD<br />
The loose forward is perhaps the only other player who<br />
can enter the line from a scrummage and create an extra<br />
man.<br />
The scrum half carries the ball forward, and of loads to<br />
the loose forward on his inside, after first committing the<br />
defence.<br />
13<br />
7<br />
7<br />
Attack<br />
Attack
<strong>Rugby</strong> <strong>League</strong> Coaching Manuals (<strong>RLCM</strong>) www.rlcm.com.au<br />
ATTACKING FROM SCRUMS<br />
2. USING A PLAYER TWICE<br />
The five eight (A6) runs around both centres, while the<br />
fullback runs as a decoy between them. The aim is to move<br />
the ball wide to the five eight in space, after having brought<br />
the defensive full back into the line. The blind side winger<br />
covers for the full back<br />
2<br />
5<br />
Attack<br />
ATTACKING FROM SCRUMS<br />
3. CHANGING ANGLE OF ATTACK<br />
Ball is qiuckly passed to the inside centre (A4) via the half<br />
back (A7) and five eight. He runs at speed across field<br />
towrads outside centre, (D4), taking inside centre (D3)<br />
with him.<br />
Both centres are drawn towards A4 who makes a drop<br />
off pass to (A3).<br />
<strong>Rugby</strong> <strong>League</strong> Coaching Manuals (<strong>RLCM</strong>) www.rlcm.com.au<br />
ATTACKING FROM SCRUMS<br />
4. A KICK<br />
It is policy with some teams defending from a scrum to<br />
position their fullback in the defensive line.<br />
When this occurs the defenders have no last line of defence<br />
and are susceptible to a kick either through or over them.<br />
A1 stands in the line from the scrum, between A6 and A4.<br />
D1, moves up into his defensive line to mark him. On<br />
winning the scrum, A7 passes to A6, who carries the ball<br />
towards the opposition, committing them, but before being<br />
tackled chips over their heads.<br />
The rest of the team are onside, and chase the ball.<br />
In-Goal<br />
2 7<br />
5<br />
Attack<br />
7<br />
7<br />
7<br />
6 1 3 4 5<br />
6<br />
6<br />
6<br />
4<br />
3<br />
1<br />
1<br />
3<br />
4 5<br />
1 4 3 2<br />
2<br />
7<br />
7<br />
1<br />
6<br />
6<br />
1<br />
4<br />
3<br />
4 5<br />
3 2<br />
Attack<br />
ATTACKING FROM SCRUMS<br />
5. FIRST TACKLE FORWARD RUSH<br />
A back row which breaks quickly from a scrum can often<br />
attack from the first play the ball, before the opposition<br />
arrives.<br />
From the scrum, the five eight (A6) takes the ball hard<br />
into his opposite number. Once tackled he plays the ball<br />
as quickly as possible. The scrum half moves into acting<br />
half back, while the back three forwards (11, 12 and 13)<br />
loop around and attack on the first play.<br />
(i)<br />
(ii)<br />
2<br />
5<br />
7<br />
7<br />
13<br />
6<br />
12<br />
6<br />
6<br />
7<br />
6 3 4 5<br />
13<br />
4<br />
3 2<br />
3 4 5<br />
11<br />
4 3<br />
2<br />
Attack
<strong>Rugby</strong> <strong>League</strong> Coaching Manuals (<strong>RLCM</strong>) www.rlcm.com.au<br />
rlcm.com.au<br />
rlcm.com.au<br />
rlcm.com.au<br />
The publishers wish to thank the Australian <strong>Rugby</strong><br />
<strong>League</strong> and contributors for their assistance in<br />
compiling this publication.<br />
Publisher<br />
Gary Roberts<br />
rlcm@rlcm.com.au<br />
Research<br />
Keith Hookway<br />
keith@rlcm.com.au<br />
Editor<br />
Terry Prindable<br />
editorial@rlcm.com.au<br />
Endorsed By<br />
Queensland<br />
Suite 1F, Trust House<br />
3070 Gold Coast Hwy<br />
Surfers Paradise<br />
QLD AUST. 4217<br />
PO Box 259,<br />
Surfers Paradise<br />
QLD AUST. 4217<br />
Ph: (07) 5538 9377<br />
Fax: (07) 5538 9388<br />
DISCLAIMER<br />
The information in this<br />
publication is given in good<br />
faith and has been derived<br />
from sources believed to be<br />
reliable and accurate.<br />
New South Wales Locked Bag 18/111 However, neither Shamrock<br />
Suite 111<br />
Newtown<br />
<strong>Book</strong>s, nor any person<br />
353 King Street NSW AUST. 2042 involved in the preparation of<br />
Newtown<br />
NSW AUST. 2042<br />
Ph: 1800 18 14 14<br />
Fax: 1800 18 14 15<br />
this publication accept any<br />
form of liability whatsoever<br />
for its contents including<br />
UNITED KINGDOM<br />
advertisements, editorials,<br />
The Conifers, 1 New Lane,<br />
opinions, advice or<br />
Skelmanthorpe,<br />
information or for any<br />
<strong>Rugby</strong> <strong>League</strong> Huddersfield Coaching Manuals (<strong>RLCM</strong>) consequence for its use. www.rlcm.com.au<br />
West Yorkshire<br />
UK HD8 9EH<br />
Email: england@rlcm.com.au<br />
NEW ZEALAND<br />
132 Victoria Road,<br />
St Kilda, Dunedin,<br />
New Zealand<br />
Fax (03) 456 3498,<br />
Email: rlcm@ihug.co.nz<br />
Production<br />
Reagan Roberts<br />
reaganr@ozemail.com.au<br />
No part of this publication<br />
may be reproduced, stored<br />
in any retrieval system, or<br />
transmitted in any form or<br />
by any means electronic,<br />
mechanical, photocopying,<br />
recording or ink-jet printing<br />
without prior written<br />
permission of the<br />
publishers.<br />
Published by Senior Scene Pty Ltd<br />
T/A Shamrock School <strong>Book</strong>s<br />
ABN 82 050 409 268<br />
<strong>Rugby</strong> <strong>League</strong> Coaching Manuals<br />
ISSN 1446-3628