

Alexander Calder-Inspired Wire Sculpture - San Diego Museum of Art
Alexander Calder-Inspired Wire Sculpture - San Diego Museum of Art
Alexander Calder-Inspired Wire Sculpture - San Diego Museum of Art

You also want an ePaper? Increase the reach of your titles
YUMPU automatically turns print PDFs into web optimized ePapers that Google loves.
<strong>Alexander</strong> <strong>Calder</strong>-<strong>Inspired</strong> <strong>Wire</strong> <strong>Sculpture</strong><br />
Written by Amy Briere, <strong>Museum</strong> Educator<br />
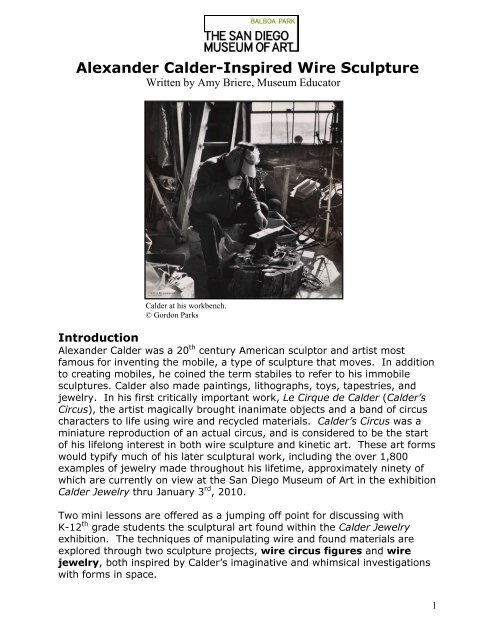
<strong>Calder</strong> at his workbench.<br />
© Gordon Parks<br />
Introduction<br />
<strong>Alexander</strong> <strong>Calder</strong> was a 20 th century American sculptor and artist most<br />
famous for inventing the mobile, a type <strong>of</strong> sculpture that moves. In addition<br />
to creating mobiles, he coined the term stabiles to refer to his immobile<br />
sculptures. <strong>Calder</strong> also made paintings, lithographs, toys, tapestries, and<br />
jewelry. In his first critically important work, Le Cirque de <strong>Calder</strong> (<strong>Calder</strong>’s<br />
Circus), the artist magically brought inanimate objects and a band <strong>of</strong> circus<br />
characters to life using wire and recycled materials. <strong>Calder</strong>’s Circus was a<br />
miniature reproduction <strong>of</strong> an actual circus, and is considered to be the start<br />
<strong>of</strong> his lifelong interest in both wire sculpture and kinetic art. These art forms<br />
would typify much <strong>of</strong> his later sculptural work, including the over 1,800<br />
examples <strong>of</strong> jewelry made throughout his lifetime, approximately ninety <strong>of</strong><br />
which are currently on view at the <strong>San</strong> <strong>Diego</strong> <strong>Museum</strong> <strong>of</strong> <strong>Art</strong> in the exhibition<br />
<strong>Calder</strong> Jewelry thru January 3 rd , 2010.<br />
Two mini lessons are <strong>of</strong>fered as a jumping <strong>of</strong>f point for discussing with<br />
K-12 th grade students the sculptural art found within the <strong>Calder</strong> Jewelry<br />
exhibition. The techniques <strong>of</strong> manipulating wire and found materials are<br />
explored through two sculpture projects, wire circus figures and wire<br />
jewelry, both inspired by <strong>Calder</strong>’s imaginative and whimsical investigations<br />
with forms in space.<br />
1
Pre-Lesson Information<br />
Objectives<br />
Students will . . .<br />
• learn about the life and work <strong>of</strong> the artist <strong>Alexander</strong> <strong>Calder</strong><br />
• create sculpture works inspired by the work <strong>of</strong> <strong>Alexander</strong> <strong>Calder</strong> as well as<br />
the work on display in <strong>Calder</strong> Jewelry<br />
• create a wire figure following a circus theme as a warm up activity and<br />
introduction to the work <strong>of</strong> <strong>Alexander</strong> <strong>Calder</strong><br />
• explore various techniques for bending and manipulating wire<br />
• reflect on the art they have created<br />
• present their works in a collaborative presentation<br />
<strong>Art</strong> Terms<br />
Abstract – A style <strong>of</strong> art that is not realistic. Abstract art usually contains bold<br />
colors and lines with geometric and organic shapes<br />
Form - An element <strong>of</strong> art, such as you would see in a sculpture that has three<br />
dimensions<br />
Geometric Shapes – Any regular shape or form consisting <strong>of</strong> measurable lines and<br />
angles or shapes from geometry; shapes with names<br />
Organic Shapes – Any shapes or forms that are irregular; suggestive <strong>of</strong> shapes or<br />
forms found in nature<br />
Space – The area around, between or within objects in an artwork; threedimensional<br />
space can be created with color, overlapping <strong>of</strong> objects and the amount<br />
<strong>of</strong> detail in the artwork<br />
Preparation<br />
1. If possible, plan a trip to the <strong>San</strong> <strong>Diego</strong> <strong>Museum</strong> <strong>of</strong> <strong>Art</strong> to view the exhibition<br />
<strong>Calder</strong> Jewelry.<br />
2. If teaching this lesson to more than one group <strong>of</strong> students, think about<br />
displaying unique student examples from the first group for students from<br />
later groups.<br />
3. Display photographs <strong>of</strong> <strong>Calder</strong>’s works for students to look at and be inspired<br />
by.<br />
4. Gather all materials from the materials list, including your own assortment <strong>of</strong><br />
found materials.<br />
5. Distribute materials onto the tables or desks.<br />
2
Tips for Working with <strong>Wire</strong><br />
Explore wire bending techniques prior to introducing the lesson, using online<br />
sources, books, or through play. Several <strong>of</strong> the following tips come from wire<br />
artist, Elizabeth Berrien’s online resource Teaching Innovative <strong>Wire</strong> <strong>Sculpture</strong>:<br />
http://www.wirelady.com/berrienwirehowtopage.html.<br />
Safety first. Loose wire can be a hazard for eyes. It is recommended that<br />
students first work with foot-long, pipe-cleaner lengths <strong>of</strong> wire. Especially at<br />
the beginning, students working with wire should be supervised closely to<br />
ensure that they handle it safely and with respect. Any student that waves a<br />
wire about should be gently shown the correct way to control it.<br />
Start with simple materials. Twisteez or plastic coated telephone wire is<br />
helpful for beginners. The different color strands helps the student see what<br />
is going on as they blend wires together.<br />
Include props. Hands are <strong>of</strong>ten the best tools for working with wire, but<br />
students may also enjoy alternatives such as pencils, markers, and other<br />
forms around which they might wrap the wire to create new shapes.<br />
Explore materials. If you have an assortment <strong>of</strong> different kinds <strong>of</strong> wire,<br />
encourage your students to try working with all <strong>of</strong> them.<br />
Note: Copper, including plastic coated telephone wire, is s<strong>of</strong>t and pliable.<br />
This may make it easier to shape. It may also make it a little harder to hold<br />
together as a structure.<br />
Play. Direct students to explore with the wire rather than suggesting that<br />
there is only one way to do it. Left to their own innate inventiveness, a class<br />
<strong>of</strong> 25 students given total creative rein may invent 25 new and different<br />
methods <strong>of</strong> assembling wire sculpture.<br />
Begin with a drawing. Some students may want to begin with a drawing,<br />
then lay their wire on it and push it around and shape it to conform to the<br />
image. Although <strong>Calder</strong> did sometimes sketch prior to creating his wire art<br />
works, be sure to monitor this process, as some students may have a difficult<br />
time translating a three-dimensional, balanced form from a 2-D sketch.<br />
Apply discoveries. More advanced students can ponder the structural<br />
aspects <strong>of</strong> wire sculpture - how many different ways can they attach the wire<br />
to itself, and how strong or weak are the results? What happens when they<br />
combine two or more different thickness or types <strong>of</strong> wire? Can a kinked wire<br />
be straightened again?<br />
Begin again. Remember: any time you're just not satisfied with what you<br />
make, it's okay to take it apart and start over.<br />
3
<strong>Wire</strong> Circus Figures<br />
<strong>Inspired</strong> by Le Cirque de <strong>Calder</strong> (<strong>Calder</strong>’s Circus), Whitney <strong>Museum</strong> <strong>of</strong> <strong>Art</strong>, New York<br />
Subject: Visual <strong>Art</strong><br />
Grades: Upper Elementary (adaptable to all grade levels)<br />
Medium: wire, felt, and string<br />
Project Time: approximately one hour from start to completion<br />
General Description<br />
In this project, students will make their own circus characters inspired by the wire<br />
figures and animals created by <strong>Alexander</strong> <strong>Calder</strong> in Le Cirque de <strong>Calder</strong>. Like<br />
<strong>Calder</strong>, students will bend, twist, and shape wire into forms and combine various<br />
other found materials without the use <strong>of</strong> glue or tape. Students will be encouraged<br />
to work collaboratively to act out their pieces following the art making activity.<br />
Materials<br />
o <strong>Wire</strong> (select one)<br />
aluminum/copper/brass wire (gage 18 – found in hardware stores)<br />
plastic coated wire (Twisteez <strong>Wire</strong> brand can be purchased through Nasco<br />
<strong>Art</strong> Supplies - http://www.enasco.com/ or coated telephone wire)<br />
pipe cleaners [safer option for younger students (K-2)]<br />
floral wire<br />
o Scissors (wire cutters should be used for 18 gage wire)<br />
o Felt and Fabric scraps<br />
o Yarn, string<br />
o Pencils and paper for sketching (optional)<br />
o Other found materials<br />
Reminder: No glue, staples, or welding materials are needed for this activity!<br />
4
Directions<br />
Motivation (10 minutes)<br />
o Show PowerPoint (or slides) <strong>of</strong> <strong>Alexander</strong> <strong>Calder</strong>’s wire sculptures from<br />
Le Cirque de <strong>Calder</strong> or show a clip from the video from the Whitney<br />
<strong>Museum</strong>’s exhibition "<strong>Alexander</strong> <strong>Calder</strong>: The Paris Years, 1926-1933" -<br />
available on You Tube http://www.youtube.com/watch?v=t6jwnu8Izy0<br />
o Read a biography for <strong>Alexander</strong> <strong>Calder</strong> and review as a class (an upper<br />
elementary-level biography is available on page 12 <strong>of</strong> this lesson plan).<br />
o Lead a gesture drawing activity to study various ways in which circus<br />
performers’ bodies might move (optional)<br />
Discussion (10 minutes)<br />
As a class, discuss why the circus may have inspired <strong>Calder</strong> in his own art<br />
making:<br />
After seeing the Ringling Brothers, Barnum & Bailey Circus in Paris in 1926,<br />
<strong>Calder</strong> made his circus <strong>of</strong> working miniature wire figures. It was not the<br />
tricks <strong>of</strong> the circus that interested <strong>Calder</strong>, but the dynamic movement <strong>of</strong><br />
bodies in space. The circus atmosphere may have also have appealed to<br />
<strong>Calder</strong>’s own free-spirited nature. As a trained engineer, <strong>Calder</strong> was familiar<br />
with the mechanics required to achieve balance when working with threedimensional<br />
forms and he used this knowledge to create his moving<br />
sculptures.<br />
Have students consider:<br />
o What are some <strong>of</strong> the different acts one might see at a circus?<br />
o What types <strong>of</strong> characters (lion tamer, clowns, elephants, etc) are they<br />
interested in making?<br />
o How can one suggest these characters with wire and other materials?<br />
<strong>Art</strong> Making (40 minutes)<br />
o Introduce the project. Having an example(s) on hand will help students<br />
better understand the project idea. These figures do not need to be<br />
realistic – no face details. They will be fairly abstract forms, suggestive<br />
and whimsical, like <strong>Calder</strong>’s own creations.<br />
5
<strong>Art</strong> Making continued. . .<br />
o Introduce the supplies to be used in this project – these should include<br />
only supplies which can be wired or attached to the figure without the use<br />
<strong>of</strong> glue.<br />
o Demonstrate ways to bend, cut, and coil wire and allow students to<br />
experiment with these and other techniques on their own.<br />
Note: Many students will enjoy the freedom <strong>of</strong> this activity, but may also<br />
get caught up in exploring the materials outside the circus theme.<br />
Encourage some initial “playtime,” so that students will have the<br />
opportunity to familiarize themselves with the materials and what they do<br />
prior to starting a more directed activity. Having visuals on the table may<br />
also help to inspire circus-themed projects.<br />
o Allow students to explore materials and create their characters.<br />
o For <strong>Calder</strong>, the act <strong>of</strong> performing the work was as vital as the figures<br />
themselves, so you may consider having students work collaboratively to<br />
act out their pieces following the art making activity. Have the students<br />
help with the arrangement <strong>of</strong> the circus characters for installation. Give<br />
them criteria for the grouping, dividing the characters into acts or stages.<br />
Adaptation Suggestions<br />
For Younger students (grades K-2)<br />
This lesson can be adjusted for younger elementary grades by using larger,<br />
more easily manipulated coated, wire material, such as pipe cleaners, and by<br />
allowing works to be larger in size, accommodating young students’<br />
developing motor skills.<br />
For Older students (grades 7-12)<br />
This lesson can be adjusted to fit the needs <strong>of</strong> middle school and high school<br />
students by including more in depth exploration with raw wire materials and<br />
various means <strong>of</strong> combining materials without glue (twisting, linking, sewing,<br />
etc.). If students are already familiar with wire bending and are looking to<br />
be challenged, encourage them to explore making their works kinetic through<br />
mechanized means similar to those utilized by <strong>Calder</strong> in his work.<br />
Special Needs Adaptations<br />
This lesson can be easily adapted to suit the needs <strong>of</strong> most learners with<br />
disabilities. For students with visual impairments, tactile activities are<br />
essential to learning and present throughout this lesson. For students with<br />
tactile sensitivity, limit their exposure to more irritating items (such as some<br />
fabrics and pipe cleaners). For students with limited motor skills, try using<br />
larger materials. Also consider group work, where students share the<br />
responsibility <strong>of</strong> designing the works and putting them together.<br />
6
<strong>Wire</strong> Jewelry<br />
<strong>Inspired</strong> by <strong>Calder</strong> Jewelry on view at The <strong>San</strong> <strong>Diego</strong> <strong>Museum</strong> <strong>of</strong> <strong>Art</strong> thru January 3, 2010<br />
Subject: Visual <strong>Art</strong><br />
Grades: Upper Elementary (adaptable to all grade levels)<br />
Medium: wire, beads, found materials<br />
Project Time: approximately one and a half hours from start to completion.<br />
General Description<br />
In this project, students will make wire jewelry forms inspired by the sculptural<br />
jewelry created by <strong>Alexander</strong> <strong>Calder</strong>. Like <strong>Calder</strong>, students will combine wire and<br />
various found materials, incorporating methods and motifs associated with <strong>Calder</strong>’s<br />
work, without the use <strong>of</strong> welding, soldering, or settings, to form three-dimensional<br />
wearable or non-wearable works <strong>of</strong> art. Students will be encouraged to present<br />
their work to the class following the art making activity.<br />
Materials<br />
o <strong>Wire</strong> (select one)<br />
Aluminum/copper/brass wire (gage 18 – found in hardware stores)<br />
plastic coated wire (Twisteez <strong>Wire</strong> brand can be purchased through Nasco<br />
<strong>Art</strong> Supplies - http://www.enasco.com/ or coated telephone wire)<br />
pipe cleaners (safer for younger students)<br />
floral wire<br />
o Scissors (for use with Twisteez or telephone wire)<br />
o <strong>Wire</strong> cutters (for use with aluminum, copper, and brass wire)<br />
o Needle nose pliers (for use with aluminum, copper, and brass wire)<br />
o Tissue paper or cloth scraps (for smoothing out wire safely)<br />
o Ring measure (can be found in most jewelry supply stores or online at Fire<br />
7
Mountain Gems and Beads http://www.firemountaingems.com) – a Crayola<br />
marker is an inexpensive alternative<br />
o Chasing hammer and anvil (can be found in most jewelry supply stores or<br />
online at Fire Mountain Gems and Beads http://www.firemountaingems.com)<br />
o Pencils and paper for sketching (optional)<br />
o Other found materials (yarn, string, beads, sea glass, etc.)<br />
o Goggles (optional)<br />
o Mirrors (optional)<br />
Directions<br />
Motivation (10 – 20 minutes)<br />
o If possible, plan a trip to the <strong>San</strong> <strong>Diego</strong> <strong>Museum</strong> <strong>of</strong> <strong>Art</strong> to view the<br />
exhibition <strong>Calder</strong> Jewelry.<br />
o Read a biography for <strong>Alexander</strong> <strong>Calder</strong> and review as a class (an upper<br />
elementary-level biography is available on page 12 <strong>of</strong> this lesson plan).<br />
o View the other work <strong>of</strong> <strong>Alexander</strong> <strong>Calder</strong>, including his circus characters,<br />
to explore connections between his jewelry designs and other work.<br />
Discussion (10 minutes)<br />
Briefly discuss the jewelry work <strong>of</strong> <strong>Alexander</strong> <strong>Calder</strong>.<br />
<strong>Alexander</strong> <strong>Calder</strong> created necklaces, bracelets, brooches, earrings and tiaras<br />
from brass, gold, and silver combined with non-precious material and found<br />
objects. Each <strong>of</strong> his works began as a piece <strong>of</strong> wire that he then hammered<br />
into shape, <strong>of</strong>ten a spiral. Each <strong>of</strong> his jewelry works stands alone as a one<strong>of</strong>-a-kind<br />
piece (<strong>Calder</strong> never duplicated his designs). He saw his jewelry<br />
objects as wearable sculpture, possessing the same three-dimensionality,<br />
line, and materials found in much <strong>of</strong> his other sculptural work.<br />
Discuss the jewelry designed and created by <strong>Alexander</strong> <strong>Calder</strong>:<br />
o What are some <strong>of</strong> the motifs that we see <strong>of</strong>ten (e.g. spiral – see<br />
page 14 <strong>of</strong> this lesson plan for other design ideas)?<br />
o Because <strong>Calder</strong> used cold processes when making and attaching his<br />
works, the pieces reveal his process (the artist’s hand). Looking<br />
carefully at examples <strong>of</strong> his jewelry art, how does it appear that he<br />
created each piece?<br />
o What can we learn about jewelry making and sculpture by looking<br />
at <strong>Calder</strong>’s works?<br />
8
<strong>Art</strong> Making (40 – 60 minutes)<br />
o Introduce the project. Having an example(s) on hand will help students<br />
better understand the project idea.<br />
o Introduce the supplies to be used in this project – these should include<br />
only supplies which can be wired or attached to the work without the use<br />
<strong>of</strong> glue.<br />
o Demonstrate ways to bend, cut, and coil wire as well as the jewelry<br />
making techniques recommended below and allow students to experiment<br />
with these and other techniques on their own.<br />
Techniques to try:<br />
Create a loop. Cut the length <strong>of</strong> wire that you’ll be working with. On<br />
one end, with round-nose pliers, make a simple loop by grasping the end<br />
<strong>of</strong> the wire (Fig. 1) in the pliers and wrapping the wire once around the<br />
outside <strong>of</strong> the pliers (Fig. 2).<br />
Fig. 1 Fig. 2<br />
Create a spiral.<br />
This was a key motif in <strong>Calder</strong>’s work. To create a spiral, begin with a<br />
loop. Hold the loop firmly in the middle <strong>of</strong> your pliers or fingers (if<br />
working with s<strong>of</strong>ter wire) (Fig. 3) and, with your finger, push the wire<br />
upward to wrap it around the first loop. Do this until you have the desired<br />
size, as many revolutions as desired (Fig. 4). When you have all the loops<br />
you need, if desired, bend the tail wire 90 degrees at the top <strong>of</strong> the spiral.<br />
Form a simple loop to attach to other items (Fig. 5).<br />
Fig. 3 Fig. 4 Fig. 5<br />
9
Create a Loop & Loop or Loop & Hook (for attaching two ends <strong>of</strong> wire)<br />
To attach two ends <strong>of</strong> wire together, one can either create a permanent<br />
bond, by creating one loop within another or a temporary attachment that<br />
can be made using a loop and hook. To create a hook, grasp the straight<br />
piece <strong>of</strong> wire with pliers (or fingers if working with s<strong>of</strong>ter wire), and form<br />
a hill shape (Fig. 6). Bend the hill shape over to form a hook (Fig. 7) and<br />
attach the hook to a pre-made loop shape (Fig. 8).<br />
Fig. 6 Fig. 7 Fig. 8<br />
Lash a stone or glass piece to an object.<br />
To attach large pieces <strong>of</strong> glass and rough cut stones <strong>Calder</strong> would <strong>of</strong>ten<br />
use wire to lash these objects to his pieces. To lash a piece <strong>of</strong> stone or<br />
glass, lay the wire over the object with equal amounts <strong>of</strong> wire hanging<br />
over each side (Fig. 9), and wrap the wire in varying directions around the<br />
object (Fig. 10), twisting the two wire ends together when done and<br />
cutting <strong>of</strong>f any excess wire.<br />
Wrap a ring.<br />
Fig. 9 Fig. 10<br />
Start with approximately three feet <strong>of</strong> wire for this project and place your<br />
wire around the ring measure or Crayola marker. To make the band <strong>of</strong><br />
your ring, you will leave about 6" <strong>of</strong> wire on one side, wrap the longer<br />
side around the ring measure about 3-4 times (Fig. 11). Twist the two<br />
wires around each other. Place the first stone on the longest wire and<br />
bring it down close to the band <strong>of</strong> the ring (Fig. 12). Wrap the wire<br />
around the stone and under the band, bring it back up. If you want to go<br />
around the stone again you can. At this point you need to be creative and<br />
make your own design. There really is not a wrong or right way.<br />
10
Wrap a ring continued. . .<br />
Continue to add additional stones at this point if you choose. Wrap around<br />
the stones and occasionally go under the band to add more strength.<br />
Once you are finished adding your stones, wrap the longer wire around<br />
the band 3-4 times, close to the setting. Cut the wire once you are happy<br />
with how it looks (Fig. 13).<br />
Fig. 11 Fig. 12 Fig. 13<br />
o Finish demonstrating the above techniques and then allow students to<br />
explore materials and create their pieces.<br />
o For <strong>Calder</strong>, the act <strong>of</strong> wearing the work was as vital as the works<br />
themselves, so you may consider having students display their art on<br />
themselves or other students following the art making activity, perhaps in<br />
the format <strong>of</strong> a fashion show or formal exhibition.<br />
Adaptation Suggestions<br />
For Younger students (grades K-2)<br />
This lesson can be adjusted for younger elementary grades by using larger, more<br />
easily manipulated coated, wire material, such as pipe cleaners, and by allowing<br />
works to be larger in size, accommodating young students’ developing motor skills.<br />
For Older students (grades 7-12)<br />
This lesson can be adjusted to fit the needs <strong>of</strong> middle school and high school<br />
students by including more in depth exploration with raw wire materials and various<br />
means <strong>of</strong> combining materials without glue (twisting, linking, sewing, etc.). If<br />
students are already familiar with wire bending and are looking to be challenged,<br />
encourage them to explore making their works kinetic through mechanized means<br />
similar to those utilized by <strong>Calder</strong> in his work.<br />
Special Needs Adaptations<br />
This lesson can be easily adapted to suit the needs <strong>of</strong> most learners with<br />
disabilities. For students with visual impairments, tactile activities are essential to<br />
learning and present throughout this lesson. For students with tactile sensitivity,<br />
limit their exposure to more irritating items (such as some fabrics and pipe<br />
cleaners). For students with limited motor skills, try using larger materials. Also<br />
consider group work, where students share the responsibility <strong>of</strong> designing the<br />
works and putting them together.<br />
11
Biography<br />
<strong>Alexander</strong> <strong>Calder</strong><br />
(1898-1976)<br />
Written by Branan Freeman, <strong>Museum</strong> Educator<br />
<strong>Alexander</strong> <strong>Calder</strong> was born on July 22, 1898. Both <strong>of</strong> his parents were artists.<br />
His father was a sculptor and his mother was a painter. They moved <strong>of</strong>ten because<br />
his father made art for people all over America, but in every house where they<br />
lived, little <strong>Alexander</strong> had his own workshop where he was encouraged to create. At<br />
age 11, he made his first two sculptures, a tiny dog and a duck, for his parents for<br />
Christmas gifts. By this age, he was already skilled at handling tools and metal<br />
sculpting materials.<br />
Even though he was a talented artist, he decided to study to be an engineer<br />
while at university. He liked inventing and operating machines and figuring out how<br />
to make things work. However, while at work aboard a ship one day, he saw an<br />
amazing sunrise on one side <strong>of</strong> the boat and a brilliant moon on the opposite side.<br />
He was so inspired by the beauty <strong>of</strong> nature that he decided to become an artist.<br />
One <strong>of</strong> his first jobs as an artist was working for a magazine sketching<br />
animals in the circus. This experience influenced much <strong>of</strong> his artwork for many<br />
years. He even sculpted a tiny circus <strong>of</strong> performers made from wire, leather and<br />
cloth and performed his Cirque <strong>Calder</strong> for friends and family. Soon he began to<br />
sculpt other things from this material, such as portraits <strong>of</strong> his friends and public<br />
figures <strong>of</strong> the day. Word traveled about the inventive artist, and in 1928 <strong>Calder</strong> was<br />
given his first solo gallery show in New York.<br />
In 1931, <strong>Calder</strong> created his first kinetic sculpture and gave form to an<br />
entirely new type <strong>of</strong> art. Kinetic sculpture is sculpture that moves. The first <strong>of</strong> these<br />
objects moved by systems <strong>of</strong> cranks and motors, and were called "mobiles.” <strong>Calder</strong><br />
later created sculptures that moved with wind currents. In addition, he created<br />
sculptures that stood still. They were called “stabiles.”<br />
“I think best in wire” - <strong>Alexander</strong> <strong>Calder</strong><br />
12
California Visual <strong>Art</strong>s Standards Addressed in this Lesson<br />
Grade Three<br />
1.1 Perceive and describe rhythm and movement in works <strong>of</strong> art and in the<br />
environment.<br />
1.5 Identify and describe elements <strong>of</strong> art in works <strong>of</strong> art, emphasizing line, color,<br />
shape/form, texture, space, and value.<br />
3.3 Distinguish and describe representational, abstract, and nonrepresentational<br />
works <strong>of</strong> art.<br />
3.4 Identify and describe objects <strong>of</strong> art from different parts <strong>of</strong> the world observed in<br />
visits to a museum or gallery<br />
4.3 Select an artist's work and, using appropriate vocabulary <strong>of</strong> art, explain its<br />
successful compositional and communicative qualities.<br />
Grade Four<br />
2.3 Use additive and subtractive methods processes in making simple sculptural<br />
forms<br />
3.1 Describe how art plays a role in reflecting life (e.g., in photography, quilts,<br />
architecture).<br />
4.1 Describe how using the language <strong>of</strong> the visual arts helps to clarify personal<br />
responses to works <strong>of</strong> art.<br />
4.2 Identify and describe how a person's own cultural context influences individual<br />
responses to works <strong>of</strong> art.<br />
4.3 Discuss how the subject and selection <strong>of</strong> media relate to the meaning or<br />
purpose <strong>of</strong> a work <strong>of</strong> art.<br />
4.5 Describe how the individual experiences <strong>of</strong> an artist may influence the<br />
development <strong>of</strong> specific works <strong>of</strong> art.<br />
5.4 Read biographies and stories about artists and summarize the readings in short<br />
reports, telling how the artists mirrored or affected their time period or culture.<br />
Grade Five<br />
1.1 Identify and describe the principles <strong>of</strong> design in visual compositions,<br />
emphasizing unity and harmony.<br />
1.2 Identify and describe characteristics <strong>of</strong> representational, abstract, and<br />
nonrepresentational works <strong>of</strong> art.<br />
1.3 Use their knowledge <strong>of</strong> all <strong>of</strong> the elements <strong>of</strong> art to describe similarities and<br />
differences in works <strong>of</strong> art and in the environment.<br />
2.4 Create an expressive abstract composition based on real objects.<br />
2.5 Assemble a found object sculpture that reflects unity and harmony and<br />
communicates a theme.<br />
3.2 Identify and compare works <strong>of</strong> art from various regions <strong>of</strong> the United States.<br />
13
<strong>Alexander</strong> <strong>Calder</strong> Jewelry – Simple and More Complex Forms<br />
Created by Deidra O’Flaherty, Docent, The <strong>San</strong> <strong>Diego</strong> <strong>Museum</strong> <strong>of</strong> <strong>Art</strong><br />
14