

Martin 242 Tuning Guide - Ullman Sails San Diego
Martin 242 Tuning Guide - Ullman Sails San Diego
Martin 242 Tuning Guide - Ullman Sails San Diego

Create successful ePaper yourself
Turn your PDF publications into a flip-book with our unique Google optimized e-Paper software.
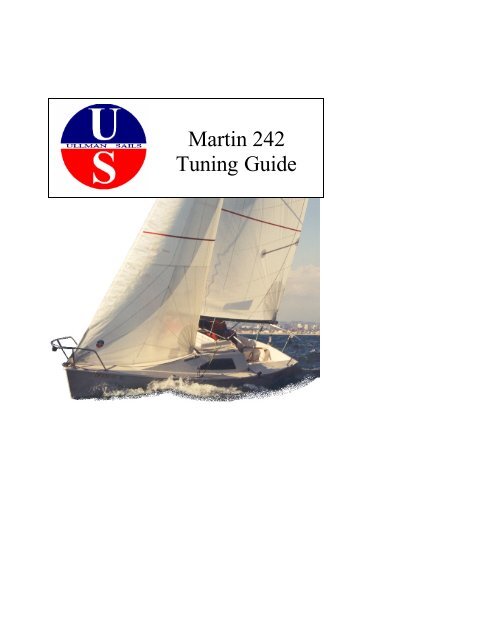
<strong>Martin</strong> <strong>242</strong><br />
<strong>Tuning</strong> <strong>Guide</strong>
The <strong>Martin</strong> <strong>242</strong><br />
The <strong>Martin</strong> is a relatively easy boat to sail and the fleet has taken steps to make<br />
the boats as even as possible.<br />
This tuning guide was written as a reference to help <strong>Martin</strong> <strong>242</strong> sailors easily<br />
achieve race ready trim and speed. It is intended as a reference for boats with<br />
<strong>Ullman</strong> <strong>Sails</strong>. We are pleased to share this information but do not assume that<br />
the setup and trim detailed will apply to sails from other sailmakers.<br />
One of the challenges of sailing is the ever changing conditions. The best way<br />
to adapt is to know your boat well enough to be able to identify when<br />
performance is good so you can reproduce optimum trim consistently<br />
throughout all racing conditions. The luxury of sailing in a One Design fleet is<br />
that optimum performance is more easily identified.<br />
If you have any questions or comments please contact us at the Newport Beach<br />
loft We will be happy to assist you and hear your tuning ideas.<br />
The <strong>Ullman</strong> <strong>Sails</strong> Team<br />
Bottom preparation??<br />
Rig Setup<br />
The forestay should be ___ as measured by……..<br />
The recommended roller furling unit is Harken #<br />
Shroud Tension<br />
All boats were measured and shroud tensions rec orded in March 2001 and the<br />
optimal trim numbers appear to be……..
Sailing Trim<br />
Weight: When sailing upwind on the <strong>Martin</strong> <strong>242</strong> it is<br />
important to keep as much crew weight as forward as<br />
possible. This helps keep the knuckle of the bow in the<br />
water to enable the hull to do it’s job. With the bow out<br />
of the water, the hull loses steerage and the bow gets<br />
pushed to leeward.<br />
Weight forward is especially critical with 4 people on board as the extra person<br />
will naturally force the center of the crew weight further aft in the cockpit.<br />
Initial Sail Trim Setup<br />
Jib: The objective is to set the jib up with<br />
maximum draft at about 40%. Wrinkles in<br />
the luff are OK, it is important to focus on the<br />
draft position. Pulling the jib downhaul tight<br />
will remove wrinkles and also pull the draft<br />
of the sail forward. As the boat becomes<br />
overpowered in the higher wind ranges, you<br />
should be approaching maximum jib<br />
downhaul tension with the draft well forward.<br />
Trimming the jib.<br />
It is very easy with a non overlapping jib to sheet it too tight thereby stalling<br />
the airflow off the leech of the sail. The leech telltale should be flowing fairly<br />
consistently (80+%) while sailing upwind. Sheeting tighter means sailing<br />
higher. However, a stalled telltale means stalled<br />
airflow which will result in the inability to build<br />
boatspeed. The key is to sail as high as possible<br />
while maintaining boatspeed.<br />
By adding tape to your spreaders ____” from the<br />
spreader tip, your jib trimmer is able to have a<br />
more accurate reference point for where optimum<br />
upwind trim is for those conditions.<br />
Ie “It’s flat water so let’s try trimming 1” inside<br />
the band”. The tape adds consistency to the<br />
trimming of the sail.
To depower the jib in heavier<br />
air, the downhaul should be<br />
on fairly hard, move the<br />
headsail car aft and ensure<br />
that there is enough twist as<br />
measured by your trim mark<br />
on the spreader for the<br />
helmsman to easily drive the<br />
boat under the conditions. A<br />
small change in jib sheet<br />
tension is a big change in<br />
leech tension and twist.<br />
Jib trim in 8-10 knots;<br />
Powerful draft with moderate luff<br />
wrinkles, straight leech, both tell tales<br />
flowing and leech telltale showing a clean<br />
exit of the air flow.<br />
Mainsail setup:<br />
The first step is to ensure that the main halyard is hoisted so that the headboard<br />
is up to the band at the top of the mast. It is a good idea to mark the main<br />
halyard somewhere at the deck level with a marker pen to indicate ‘full hoist’.<br />
Remember that new halyards often stretch, so ensure that the halyard is prestretched<br />
or is used several times before you make the mark.Light Air:<br />
There should be minimal or no cunningham in light air to keep the draft of the<br />
sail aft for power. Like the headsail, wrinkles are OK in light to moderate air<br />
(underpowered conditions). As you pull on the cunningham, luff wrinkles will<br />
disappear and the draft of the sail will be sucked forward, flattening the sail<br />
which will de-power the boat and help pointing. Draft position for power<br />
should be around 50%, moving forward to 40% or less as the boat becomes<br />
overpowered.<br />
The boom should be on centerline until the breeze builds to the point of being<br />
overpowered. It is important to remember that <strong>Martin</strong> <strong>242</strong>’s have relatively
long booms and clearly most<br />
of the boat’s power is<br />
generated by the mainsail.<br />
This means that it is necessary<br />
to drop the traveller quickly as<br />
the breeze builds because the<br />
boat will very quickly go from<br />
being short of power to being<br />
overpowered. Power or<br />
weather helm will be your key<br />
indicator for main trim.<br />
Draft around 50% for<br />
full power upwind
Traveller down approx 10”for speed<br />
Tight main leech for power<br />
Note the trim of the jib is consistent with the<br />
twist of the mainsail.<br />
Heavy Air<br />
The photo on the right clearly shows the boat is<br />
dumping power by having traveller down and the<br />
leech of the main well twisted. There is a reasonable<br />
sea condition also and twist creates a wider groove for<br />
the helmsman so they can steer to the waves. The<br />
tighter the leech is in overpowered conditions, the<br />
narrower the groove is for helming.<br />
In these conditions it is still important to play the<br />
traveller also. When boat speed is good and you have<br />
a stretch of flat water, traveller up a couple of inches.<br />
If you find yourself slamming waves and boatspeed<br />
dropping, traveller down to get the boat rolling again<br />
and find a trim mode that enables you to maintain<br />
boatspeed.<br />
In heavy air, it is important to have a lot of outhaul on,<br />
traveller down and then if the head of the sail needs<br />
de-powering, backstay on.
Downwind:<br />
For running conditions, the general rule of thumb is to fly the pole at a height<br />
that keeps the spinnakers at an even height off the<br />
water as shown in this photo. Ensure that you keep<br />
as much weight forward as possible until planing or<br />
surfing conditions. Keep the boat flat in most<br />
conditions. A few degrees of windward heel is OK<br />
when there is enough pressure and you are trying to<br />
‘dig’ to leeward.<br />
Light air:<br />
The spinnaker should fly as ‘naturally’ as possible,<br />
and tweakers should only be used in moderate air to<br />
take the ‘bounce’ out of the spinnaker in choppy<br />
water. In light air, tweakers should be off to get the<br />
clew to fly away from the boat as much as possible.<br />
Heavy air:<br />
In heavy air tweakers should be on to maintain control of the spinnaker by<br />
keeping it strapped down. Crew weight forward is not as<br />
important as boat handling and surfing, therefore you should<br />
position the crew weight where you feel the team is best<br />
able to do their jobs.<br />
Boom Vang:<br />
When running, a good rule is to trim the vang so that the 2nd<br />
batten is parallel with the boom.<br />
Mark Roundings:<br />
At the top mark, try to sneak or preset the after guy as much<br />
as possible as this will reduce the chance of having a twist or<br />
hourglass in the kite. Mark the topping lift so that you have<br />
a preset for the pole height under the prevailing conditions.<br />
If a pole is too low, the luff of the spinnaker will be tight and<br />
it will be hard to get the initial fill on the spinnaker and also<br />
harder to trim in general. Pole height is important for setting<br />
the kite at the top mark.
<strong>Martin</strong> <strong>242</strong> spinnaker panel layout.<br />
For color purposes only.