'Inst-455 1911 jig.pdf'. - Brownells
'Inst-455 1911 jig.pdf'. - Brownells
'Inst-455 1911 jig.pdf'. - Brownells
Create successful ePaper yourself
Turn your PDF publications into a flip-book with our unique Google optimized e-Paper software.
SAVE THESE INSTRUCTIONS IN YOUR BROWNELLS GUNSMITHS DATA RING BINDER<br />
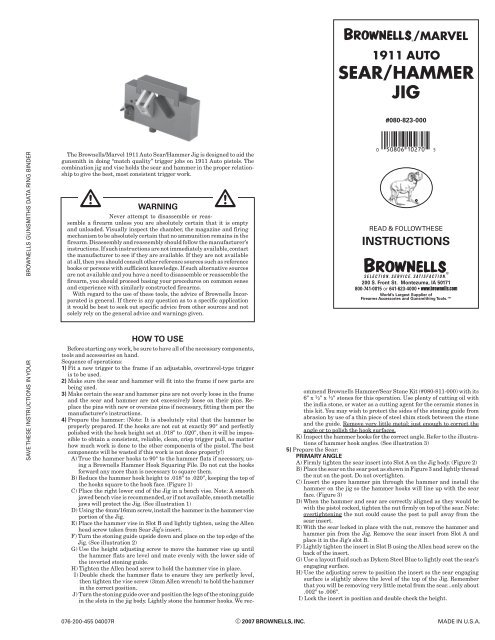
The <strong>Brownells</strong>/Marvel <strong>1911</strong> Auto Sear/Hammer Jig is designed to aid the<br />
gunsmith in doing “match quality” trigger jobs on <strong>1911</strong> Auto pistols. The<br />
combination <strong>jig</strong> and vise holds the sear and hammer in the proper relationship<br />
to give the best, most consistent trigger work.<br />
m WARNING m<br />
Never attempt to disassemble or reassemble<br />
a firearm unless you are absolutely certain that it is empty<br />
and unloaded. Visually inspect the chamber, the magazine and firing<br />
mechanism to be absolutely certain that no ammunition remains in the<br />
firearm. Disassembly and reassembly should follow the manufacturer’s<br />
instructions. If such instructions are not immediately available, contact<br />
the manufacturer to see if they are available. If they are not available<br />
at all, then you should consult other reference sources such as reference<br />
books or persons with sufficient knowledge. If such alternative sources<br />
are not available and you have a need to disassemble or reassemble the<br />
firearm, you should proceed basing your procedures on common sense<br />
and experience with similarly constructed firearms.<br />
With regard to the use of these tools, the advice of <strong>Brownells</strong> Incorporated<br />
is general. If there is any question as to a specific application<br />
it would be best to seek out specific advice from other sources and not<br />
solely rely on the general advice and warnings given.<br />
HOW TO USE<br />
Before starting any work, be sure to have all of the necessary components,<br />
tools and accessories on hand.<br />
Sequence of operations:<br />
1) Fit a new trigger to the frame if an adjustable, overtravel-type trigger<br />
is to be used.<br />
2) Make sure the sear and hammer will fit into the frame if new parts are<br />
being used.<br />
3) Make certain the sear and hammer pins are not overly loose in the frame<br />
and the sear and hammer are not excessively loose on their pins. Replace<br />
the pins with new or oversize pins if necessary, fitting them per the<br />
manufacturer’s instructions.<br />
4) Prepare the hammer: (Note: It is absolutely vital that the hammer be<br />
properly prepared. If the hooks are not cut at exactly 90° and perfectly<br />
polished with the hook height set at .018" to .020", then it will be impossible<br />
to obtain a consistent, reliable, clean, crisp trigger pull, no matter<br />
how much work is done to the other components of the pistol. The best<br />
components will be wasted if this work is not done properly!)<br />
A) True the hammer hooks to 90° to the hammer flats if necessary, using<br />
a <strong>Brownells</strong> Hammer Hook Squaring File. Do not cut the hooks<br />
forward any more than is necessary to square them.<br />
B) Reduce the hammer hook height to .018" to .020", keeping the top of<br />
the hooks square to the hook face. (Figure 1)<br />
C) Place the right lower end of the Jig in a bench vise. Note: A smooth<br />
jawed bench vise is recommended, or if not available, smooth metallic<br />
jaws will protect the Jig. (See illustration 1)<br />
D) Using the 4mm/16mm screw, install the hammer in the hammer vise<br />
portion of the Jig.<br />
E) Place the hammer vise in Slot B and lightly tighten, using the Allen<br />
head screw taken from Sear Jig’s insert.<br />
F) Turn the stoning guide upside down and place on the top edge of the<br />
Jig. (See illustration 2)<br />
G) Use the height adjusting screw to move the hammer vise up until<br />
the hammer flats are level and mate evenly with the lower side of<br />
the inverted stoning guide.<br />
H) Tighten the Allen head screw to hold the hammer vise in place.<br />
I) Double check the hammer flats to ensure they are perfectly level,<br />
then tighten the vise screw (3mm Allen wrench) to hold the hammer<br />
in the correct position.<br />
J) Turn the stoning guide over and position the legs of the stoning guide<br />
in the slots in the <strong>jig</strong> body. Lightly stone the hammer hooks. We rec-<br />
/MARVEL<br />
<strong>1911</strong> AUTO<br />
SEAR/HAMMER<br />
JIG<br />
U|xaFAIAGy10270pzY<br />
#080-823-000<br />
READ & FOLLOW THESE<br />
INSTRUCTIONS<br />
200 200 S. Front S. Front St. St. Montezuma, IA IA 50171 50171<br />
800-741-0015 or 641-623-4000 or 641-623-4000 • www.brownells.com<br />
• www.brownells.com<br />
World’s World’s Largest Largest Supplier Supplier of of<br />
Firearms Firearms Accessories Accessories and and Gunsmithing Gunsmithing Tools.<br />
Tools.<br />
ommend <strong>Brownells</strong> Hammer/Sear Stone Kit (#080-811-000) with its<br />
6" x 1 ⁄2" x 1 ⁄2" stones for this operation. Use plenty of cutting oil with<br />
the india stone, or water as a cutting agent for the ceramic stones in<br />
this kit. You may wish to protect the sides of the stoning guide from<br />
abrasion by use of a thin piece of steel shim stock between the stone<br />
and the guide. Remove very little metal; just enough to correct the<br />
angle or to polish the hook surfaces.<br />
K) Inspect the hammer hooks for the correct angle. Refer to the illustrations<br />
of hammer hook angles. (See illustration 3)<br />
5) Prepare the Sear:<br />
PRIMARY ANGLE<br />
A) Firmly tighten the sear insert into Slot A on the Jig body. (Figure 2)<br />
B) Place the sear on the sear post as shown in Figure 3 and lightly thread<br />
the nut on the post. Do not overtighten.<br />
C) Insert the spare hammer pin through the hammer and install the<br />
hammer on the <strong>jig</strong> so the hammer hooks will line up with the sear<br />
face. (Figure 3)<br />
D) When the hammer and sear are correctly aligned as they would be<br />
with the pistol cocked, tighten the nut firmly on top of the sear. Note:<br />
overtightening the nut could cause the post to pull away from the<br />
sear insert.<br />
E) With the sear locked in place with the nut, remove the hammer and<br />
hammer pin from the Jig. Remove the sear insert from Slot A and<br />
place it in the Jig’s slot B.<br />
F) Lightly tighten the insert in Slot B using the Allen head screw on the<br />
back of the insert.<br />
G) Use a layout fluid such as Dykem Steel Blue to lightly coat the sear’s<br />
engaging surface.<br />
H) Use the adjusting screw to position the insert so the sear engaging<br />
surface is slightly above the level of the top of the Jig. Remember<br />
that you will be removing very little metal from the sear...only about<br />
.002" to .006".<br />
I) Lock the insert in position and double check the height.<br />
076-200-<strong>455</strong> 04007R © 2007 BROWNELLS, INC. MADE IN U.S.A.
J) Stone across the top of the sear until the stone is level with the top of<br />
the Jig. (Figures 4 and 5)<br />
K) Remove the sear insert from slot B and repeat steps A through J,<br />
above. Use a finer grit stone than was used previously.<br />
SECONDARY ANGLE<br />
A) Remove the insert from slot B and place in slot C.<br />
B) Adjust the sear so the sear’s point is slightly above the level of the<br />
top of the Jig.<br />
C) Tighten in place using the Allen head screw on the back of the insert.<br />
D) Stone across the top of the sear point until the stone is level with the<br />
top of the Jig. (Figure 6)<br />
E) The finished sear should have approximately .020" engaging surface<br />
remaining on the primary angle after the secondary angle has been<br />
cut. (Figure 7)<br />
F) Apply layout fluid (Dykem) to the sear. Check the sear’s engagement<br />
with the hammer. We recommend using <strong>Brownells</strong> Trigger Adjustment<br />
Pins on the outside of the frame to check engagement. (Figures<br />
8 & 9)<br />
6) If the engagement checks out okay, test-assemble the sear and hammer<br />
in the frame and double check the engagement with all the related parts<br />
assembled, including any replacement springs.<br />
7) Perform any other work related to the action job.<br />
A) This is the proper point in the work sequence to fit new thumb or<br />
grip safeties.<br />
B) Deburr and polish the mainspring housing hole for the mainspring.<br />
Make sure the mainspring cap is polished and free to move within<br />
the mainspring housing. If desired, replace the mainspring housing<br />
with a lighter weight mainspring. (17 to 18lbs.)<br />
C) Lightly polish the surfaces that contact the sear and disconnector.<br />
Adjust the tension (bend) of the sear spring fingers.<br />
D) Colt Series 80 guns: Polish the flat surfaces and mating surfaces of<br />
the trigger bar lever, plunger and the firing pin plunger. Deburr the<br />
surfaces of the frame and slide were the Series 80 parts touch them.<br />
8) Reassemble the pistol and check all safeties for proper functioning.<br />
NOTE: After doing action work on an autoloading pistol, the existing<br />
safeties may need to be refitted. Be certain the thumb safety properly<br />
blocks the sear and the grip safety blocks the trigger when in the “en-<br />
gaged” position. In addition, the disconnector may need to be replaced or<br />
refitted, especially if the slide has been tightened. If your pistol is a Colt<br />
Series 80, be sure the firing pin lock safety features work properly to lock<br />
the firing pin rearward until the trigger is pulled. You may have to refit<br />
the existing parts or replace components of the firing pin lock system to<br />
ensure when the trigger is pulled, the firing pin block plunger is cammed<br />
out of engagement with the firing pin.<br />
TROUBLE SHOOTING<br />
A) Hammer Follows The Slide Forward:<br />
1) Use layout fluid (Dykem) on the hammer hooks with the sear and<br />
hammer in the frame to check if the sear is mating with only one hook.<br />
If it is, correct by lightly stoning and then polishing the engaging surface.<br />
Repeat until the sear bears evenly on both hammer hooks.<br />
2) Check the hammer hooks for the correct height and angle.<br />
3) Check the sear spring for correct shape and tension.<br />
4) Replace the steel trigger with a lighter aluminum or composite trigger.<br />
5) Review the instructions given for preparing the hammer and sear and<br />
double check that you have followed them.<br />
B) Heavy Trigger Pull or Creep:<br />
1) With the gun unloaded, burnish the hammer hooks by applying pressure<br />
to the back of the hammer in the full cock position while pulling<br />
the trigger until it release.<br />
2) It is possible the sear is too short from excessive stoning and/or tolerance<br />
stacking of the frame’s set up with minimal metal removal.<br />
4) See A), 1), 2) and 3) above.<br />
C) Trigger Pull Too Light:<br />
1) Decrease the sear’s secondary angle.<br />
2) See A), 1), 2) and 3) above.<br />
For additional information in action work on Colt <strong>1911</strong>-type pistols, we<br />
recommend Jerry Kuhnhausen’s book The Colt .45 Automatic, A Shop Manual.<br />
Valuable information can also be found in .45 Auto Custom Touches, by<br />
R. D. Nye. These books, as well as others by recognized authorities, can be<br />
obtained from <strong>Brownells</strong>, Inc.<br />
If you have any problems or need additional information, do not hesitate to<br />
contact our technical staff.<br />
MADE IN U.S.A. © 2007 BROWNELLS, INC 076-200-<strong>455</strong> 0407R
200 S. Front St. Montezuma, IA 50171<br />
800-741-0015 or 641-623-4000 • www.brownells.com<br />
World’s Largest Supplier of<br />
Firearms Accessories and Gunsmithing Tools.<br />
076-200-<strong>455</strong> 0407R © 2007 BROWNELLS, INC. MADE IN U.S.A.
200 S. Front St. Montezuma, IA 50171<br />
800-741-0015 or 641-623-4000<br />
www.brownells.com<br />
World’s Largest Supplier of Firearms Accessories and Gunsmithing Tools.<br />
MADE IN U.S.A. © 2007 BROWNELLS, INC 076-200-<strong>455</strong> 0407R


