How to Build Advanced Short Wave Receivers - The Listeners Guide
How to Build Advanced Short Wave Receivers - The Listeners Guide
How to Build Advanced Short Wave Receivers - The Listeners Guide

You also want an ePaper? Increase the reach of your titles
YUMPU automatically turns print PDFs into web optimized ePapers that Google loves.
<strong>How</strong> <strong>to</strong> <strong>Build</strong><br />
<strong>Advanced</strong> <strong>Short</strong><br />
<strong>Wave</strong> <strong>Receivers</strong><br />
R. A. PENFOLD<br />
1
HOW TO BUILD ADVANCED<br />
SHORT WAVE RECEIVERS
HOW TO BUILD ADVANCED<br />
SHORT WAVE RECEIVERS<br />
by<br />
R. A. PENFOLD<br />
BERNARDS (Publishers) LTD<br />
<strong>The</strong> Grampians<br />
Shepherds Bush Road<br />
London W6 7NF<br />
England
Although every care is taken with the preparation of this book,<br />
the publishers or author will not be responsible in, any way for<br />
any errors that might occur.<br />
@1977 BERNARDS (Publishers) LTD<br />
I.S.B.N. 0 900162 67 8<br />
First Published June 1977<br />
Printed and Manufactured in Great Britain by<br />
Hunt Barnard Printing Ltd.
CONTENTS<br />
Page<br />
CHAPTER ONE - ADVANCED S.W. RECEIVERS<br />
Superhet Principle . . . . . . . . . . . . . . . . . . . . . . . . . . . . . 7<br />
Drawbacks . . . . . . . . . . . . . . . . . . . . . . . . . . . . . . . . . . 12<br />
Basic S.W. Superhet Receiver . . . . . . . . . . . . . . . . . . . 15<br />
Padder Capaci<strong>to</strong>rs . . . . . . . . . . . . . . . . . . . . . . . . . . . . 20<br />
I.F. Stages . . . . . . . . . . . . . . . . . . . . . . . . . . . . . . . . . . 22<br />
A.G.C. Action . . . . . . . . . . . . . . . . . . . . . . . . . . . . . . . 23<br />
Audio Stages . . . . . . . . . . . . . . . . . . . . . . . . . . . . . . . . 23<br />
B.F.O . . . . . . . . . . . . . . . . . . . . . . . . . . . . . . . . . . . . . . 25<br />
General Points . . . . . . . . . . . . . . . . . . . . . . . . . . . . . . . 28<br />
Chassis & Panel . . . . . . . . . . . . . . . . . . . . . . . . . . . . . . 29<br />
Mixer Wiring . . . . . . . . . . . . . . . . . . . . . . . . . . . . . . . . 32<br />
I.F. Amplifler Wiring . . . . . . . . . . . . . . . . . . . . . . . . . . 34<br />
Audio Stages . . . . . . . . . . . . . . . . . . . . . . . . . . . . . . . . 36<br />
B.F.O. Unit . . . . . . . . . . . . . . . . . . . . . . . . . . . . . . . . . 39<br />
Alignment . . . . . . . . . . . . . . . . . . . . . . . . . . . . . . . . . . 39<br />
Using the Set . . . . . . . . . . . . . . . . . . . . . . . . . . . . . . . . 41<br />
CHAPTER TWO - MODULAR SUPERHET<br />
Image Rejection . . . . . . . . . . . . . . . . . . . . . . . . . . . . . . 44<br />
R.F. Amplifiers . . . . . . . . . . . . . . . . . . . . . . . . . . . . . . 48<br />
Jugfet Amplifier. . . . . . . . . . . . . . . . . . . . . . . . . . . . . . 50<br />
MOSFET Amplifier . . . . . . . . . . . . . . . . . . . . . . . . . . . 52<br />
Bandpass input . . . . . . . . . . . . . . . . . . . . . . . . . . . . . . 54<br />
Mixer/Osc. Stages . . . . . . . . . . . . . . . . . . . . . . . . . . . . 55<br />
Alternative Oscilla<strong>to</strong>r . . . . . . . . . . . . . . . . . . . . . . . . . 58<br />
I.F. Amplifier . . . . . . . . . . . . . . . . . . . . . . . . . . . . . . . . 60<br />
A.F. Amplifiers . . . . . . . . . . . . . . . . . . . . . . . . . . . . . . 62<br />
Class A Circuit . . . . . . . . . . . . . . . . . . . . . . . . . . . . . . . 65<br />
B.F.O . . . . . . . . . . . . . . . . . . . . . . . . . . . . . . . . . . . . . . 65<br />
F.E.T./Varicap B.F.O . . . . . . . . . . . . . . . . . . . . . . . . . . 67<br />
Adjustment . . . . . . . . . . . . . . . . . . . . . . . . . . . . . . . . . 70
CHAPTER THREE - DOUBLE CONVERSION RECEIVER<br />
Alternative System . . . . . . . . . . . . . . . . . . . . . . . . . . . 75<br />
2nd Mixer/Osc. Circuit . . . . . . . . . . . . . . . . . . . . . . . . 77<br />
Adjustments . . . . . . . . . . . . . . . . . . . . . . . . . . . . . . . . . 79<br />
Bandswitching . . . . . . . . . . . . . . . . . . . . . . . . . . . . . . . 80<br />
CHAPTER FOUR - ADD-ON CIRCUITS<br />
Q Multiplier . . . . . . . . . . . . . . . . . . . . . . . . . . . . . . . . . 87<br />
Adjustment . . . . . . . . . . . . . . . . . . . . . . . . . . . . . . . . . 90<br />
Crystal Filter . . . . . . . . . . . . . . . . . . . . . . . . . . . . . . . . 90<br />
Adjustment . . . . . . . . . . . . . . . . . . . . . . . . . . . . . . . . . 93<br />
Mechanical Filters . . . . . . . . . . . . . . . . . . . . . . . . . . . . 94<br />
‘S’ Meter . . . . . . . . . . . . . . . . . . . . . . . . . . . . . . . . . . . 94<br />
Adjustment . . . . . . . . . . . . . . . . . . . . . . . . . . . . . . . . . 96<br />
Noise Limiter . . . . . . . . . . . . . . . . . . . . . . . . . . . . . . . . 96<br />
C.W. Filter . . . . . . . . . . . . . . . . . . . . . . . . . . . . . . . . . . 99<br />
Variable Notch Filter . . . . . . . . . . . . . . . . . . . . . . . . . 101<br />
Product Detec<strong>to</strong>r . . . . . . . . . . . . . . . . . . . . . . . . . . . . 104<br />
Mains P.S.U. . . . . . . . . . . . . . . . . . . . . . . . . . . . . . . . 108<br />
Crystal Calibra<strong>to</strong>r . . . . . . . . . . . . . . . . . . . . . . . . . . . 110<br />
Using the Calibra<strong>to</strong>r . . . . . . . . . . . . . . . . . . . . . . . . . 111<br />
Preselec<strong>to</strong>r . . . . . . . . . . . . . . . . . . . . . . . . . . . . . . . . . 113<br />
Semiconduc<strong>to</strong>r Leadout Data . . . . . . . . . . . . . . . . . . 117<br />
Special Note for Overseas Readers . . . . . . . . . . . . . . 118
CHAPTER ONE<br />
ADVANCED S.W. RECEIVERS<br />
Although there is a tendency for short wave listeners and<br />
Radio Amateurs <strong>to</strong> use ready made equipment these days,<br />
greater satisfaction and enjoyment can be gained from the<br />
hobby by using home constructed equipment. Using ready<br />
made S.W. gear does not give any insight in<strong>to</strong> the way in<br />
which the apparatus functions, and by building ones own<br />
equipment it is virtually inevitable that a reasonable understanding<br />
of the techniques involved will be grasped. Such<br />
an understanding is very helpful when it comes <strong>to</strong> actually<br />
using a finished receiver, and it enables the opera<strong>to</strong>r <strong>to</strong><br />
obtain optium results from the set.<br />
<strong>The</strong> reason that commercially produced equipment has<br />
increased in popularity is probably largely due <strong>to</strong> the high<br />
standard of finish that is achieved. It must be admitted that<br />
it is difficult for the home construc<strong>to</strong>r <strong>to</strong> equal commercial<br />
standards in this respect, but if due care and attention is<br />
taken, it is possible <strong>to</strong> obtain a standard which. will satisfy<br />
even the most critical.<br />
As far as performance is concerned, there is absolutely no<br />
reason why a home constructed receiver should not have a<br />
level of performance which is at least equal <strong>to</strong> that of a<br />
commercially built receiver of similar complexity. Further.<br />
more, the home constructed receiver is likely <strong>to</strong> cost very<br />
much less than its ready made equivalent.<br />
Superhet Principle<br />
<strong>The</strong> receiver circuits which are featured in this book are all of<br />
the superheterodyne (usually abbreviated <strong>to</strong> superhet) type,<br />
7
and circuits of the simpler T.R.F. type will not be considered<br />
here. <strong>The</strong>se circuits do not really make good projects for those<br />
who have no or only very little experience of S.W. Receiver<br />
construction, with the exception of the first project that is<br />
described.<br />
Anyone who has tackled a simple T.R.F. S.W. receiver should<br />
be able <strong>to</strong> construct and align this set without <strong>to</strong>o much<br />
difficulty, and the primary reason for its inclusion is that it<br />
makes a good introduction <strong>to</strong> superhet designs.<br />
Once some experience has been gained with this set, the construc<strong>to</strong>r<br />
should be fully competent <strong>to</strong> go on and build any of<br />
the more advanced designs which are described in subsequent<br />
chapters of this book. Apart from providing a good introduction<br />
<strong>to</strong> S.W. superhets, this set also makes a very interesting<br />
project in its own right.<br />
Before going on <strong>to</strong> consider some practical circuits, some<br />
back ground information will be given. It must be stressed<br />
that while some of this is of purely an academic nature, some<br />
of this is really essential knowledge for anyone undertaking<br />
construction of a superhet receiver. This is particularly the<br />
case when it comes <strong>to</strong> the basic principle of the superhet.<br />
Having an understanding of the function of each stage of a<br />
superhet makes it easy <strong>to</strong> put <strong>to</strong>gether a practical circuit with<br />
confidence. Perhaps more importantly, it takes the guesswork<br />
out of aligning and using a finished receiver,<br />
A superhet differs from a straight or T.R.F. receiver in that in<br />
the case of the latter, all processing of the signal prior <strong>to</strong><br />
detection takes place at whatever frequency the signal happens<br />
<strong>to</strong> be at. In the case of a superhet the input signal is converted<br />
<strong>to</strong> an intermediate frequency (I.F.) where it is considerably<br />
amplified prior <strong>to</strong> detection. In a conventional superhet the<br />
I.F. is fixed, and no matter what the frequency of the input<br />
signal is, it is converted <strong>to</strong> the intermediate frequency using<br />
the heterodyne principle. It is from this that the name<br />
superhet is derived.<br />
8
A block diagram which illustrates the basic arrangement of a<br />
simple superhet is shown in Figure 1. <strong>The</strong> aerial signal is<br />
coupled <strong>to</strong> a tuned circuit which tunes the desired frequency<br />
and rejects all others. <strong>The</strong> selected signal is then coupled <strong>to</strong><br />
one input of a mixer, and the other input of the mixer is fed<br />
from an oscilla<strong>to</strong>r.<br />
<strong>The</strong>re will be four output signals from the mixer, and these<br />
are as follows:-<br />
1. <strong>The</strong> aerial signal.<br />
2. <strong>The</strong> oscilla<strong>to</strong>r signal.<br />
3. <strong>The</strong> sum of these two frequencies.<br />
4. <strong>The</strong> difference frequency of the two input signals.<br />
It will be apparent from this that two new frequencies are<br />
produced, apart from the original input frequencies. Either<br />
of these can be used <strong>to</strong> provide the I.F. signal, but conventionally<br />
it is the difference signal which is used.<br />
A simple mathematical example should help <strong>to</strong> clarify the<br />
function of the mixer and oscilla<strong>to</strong>r stages. Suppose that the<br />
receiver is required <strong>to</strong> tune over the range of 5 <strong>to</strong> 10MHZ,<br />
and that an intermediate frequency of 470kHZ is used (the<br />
standard intermediate frequency for British transis<strong>to</strong>rised<br />
superhets). In order <strong>to</strong> achieve this it is necessary <strong>to</strong> arrange<br />
the input tuned circuit <strong>to</strong> tune over a range of 5 - 10MHZ,<br />
with the oscilla<strong>to</strong>r tuning over a range of 5.47 <strong>to</strong> 10.47MHZ.<br />
In other words the oscilla<strong>to</strong>r is always .47MHZ (which is the<br />
same as 470kHZ) higher than the input signal frequency. It is<br />
not only necessary <strong>to</strong> have this relationship at band limits,<br />
but it must be maintained throughout the tuning range.<br />
Thus if the set is tuned <strong>to</strong> receive a signal at, say, 7.5MHZ,<br />
the oscilla<strong>to</strong>r will be at a frequency of 7.97MHZ. This produces<br />
the following four output frequencies from the mixer:<br />
1. 7.5MHZ.<br />
2. 7.97MHZ.<br />
3. 15.47MHZ (7.5 + 7.97MHZ).<br />
4. 470kHZ (7.97 - 7.5MHZ).<br />
10
It is obviously the last of these which is used as the I.F. signal,<br />
and the I.F. amplifier will reject the other three signals which<br />
are well outside its passband. <strong>The</strong> I.F. amplifier provides a<br />
considerable level of gain, and unlike a T.R.F. set, only a<br />
relatively low level of audio gain is required. <strong>The</strong> detec<strong>to</strong>r is<br />
a conventional diode type usually.<br />
At first sight the superhet may appear <strong>to</strong> be a rather overcomplicated<br />
setup which offers little advantage, if any, over a<br />
T.R.F. design. In fact this is not the case, and even a fairly<br />
simple superhet can usually out perform a good T.R.F. design.<br />
<strong>The</strong> reasons for this are quite straightforward. <strong>The</strong> two main<br />
requirements of a S.W. receiver are for high sensitivity and<br />
good selectivity. In order <strong>to</strong> obtain high sensitivity it is<br />
necessary <strong>to</strong> employ a high degree of R.F. amplification. In<br />
order <strong>to</strong> obtain good selectivity it is necessary <strong>to</strong> use several<br />
tuned circuits.<br />
This is rather difficult <strong>to</strong> achieve with a T.R.F. design since<br />
every tuned circuit will need a tuning capaci<strong>to</strong>r. This, coupled<br />
with the fairly high frequencies involved makes high gain<br />
rather difficult <strong>to</strong> achieve, as extensive screening would be<br />
required in order <strong>to</strong> eliminate stray feedback and the instability<br />
which would accompany it. Tuned circuits operating at<br />
frequencies in the region of tens of MHZ tend <strong>to</strong> have rather<br />
wide bandwidths, and so even by using a number of tuned<br />
circuits a very high degree of selectMty would not be<br />
obtained.<br />
<strong>The</strong>se difficulties are overcome by using the superhet<br />
technique. High gains are not involved at the signal frequency,<br />
since the purpose of the early stages of the set is merely <strong>to</strong><br />
convert the signal <strong>to</strong> the I.F., and not <strong>to</strong> provide any significant<br />
gain. Obtaining good stability is not, therefore, <strong>to</strong>o much<br />
of a problem. It is only necessary <strong>to</strong> use a twin gang tuning<br />
capaci<strong>to</strong>r, with one section being used for the tuning of the<br />
aerial tuned circuit, and the other one for the oscilla<strong>to</strong>r tuning.<br />
11
It is when we come <strong>to</strong> the I.F. amplifier that the main<br />
advantages of the superhet become apparent. <strong>The</strong> comparatively<br />
low frequency means that even using only a few tuned<br />
circuits results in quite good selectivity. It is a simple matter<br />
<strong>to</strong> achieve high gain and stability, this again being aided by<br />
the comparatively low frequency. It is necessary <strong>to</strong> screen the<br />
tuning coils and their tuning capaci<strong>to</strong>rs if a very high level of<br />
gain is used, but since this amplifier only operates at a single<br />
frequency, the tuning capacitance is provided by a fixed<br />
capaci<strong>to</strong>r. <strong>The</strong> coil and capaci<strong>to</strong>r can therefore be a single<br />
component which is contained in a metal screening can.<br />
Another advantage of having this single frequency amplifier<br />
is that a very high degree of selectivity can be obtained by the<br />
use of crystal, mechanical, or ceramic I.F. filters. A common<br />
fac<strong>to</strong>r <strong>to</strong> all three of these types of filter is that they can only<br />
be used at a single frequency. This makes them completely<br />
unsuitable for use with a T.R.F. receiver.<br />
Drawbacks<br />
As one would probably expect, the superhet is not without a<br />
few drawbacks. One minor one is that aerial signals at a<br />
frequency of 470kHZ can sometimes break through <strong>to</strong> the I.F.<br />
stages. <strong>How</strong>ever, this rarely causes any significant trouble,<br />
and it can be eliminated by using a wavetrap in the aerial lead.<br />
This merely consists of a simple L - C circuit which has a high<br />
impedance at and around the I.F., but which has a low impedance<br />
at other frequencies. Thus it does not hinder the S.W.<br />
aerial signals, but it blocks the interfering signals at the<br />
intermediate frequency.<br />
<strong>The</strong> main problem with superhets is what is known as the<br />
image signal or the image response. Superhet receivers actually<br />
operate on two frequencies at once, the main response and<br />
the image response. In our previous mathematical example the<br />
main response was 7.5MHZ, and was produced by an oscilla<strong>to</strong>r<br />
frequency of 7.97MHZ and an ordinary I.F. of 470kHZ.<br />
12
<strong>The</strong> 470kHZ I.F. signal was produced by the oscilla<strong>to</strong>r and<br />
aerial signals difference frequency (7.97 - 7.5 = 0.47MHZ). If<br />
an aerial signal at 8.44MHZ were <strong>to</strong> break through <strong>to</strong> the input<br />
of the mixer, this would also produce a 470kHZ I.F. signal<br />
(8.44MHZ - 7.97MHZ = 0.47MHZ). It is this signal which is<br />
the image response.<br />
As may already be apparent, the oscilla<strong>to</strong>r does not have <strong>to</strong> be<br />
above the aerial signal frequency, but it can be below the input<br />
signal frequency. In either case the difference between the two<br />
frequencies is equal <strong>to</strong> the I.F. It is the current convention that<br />
the oscilla<strong>to</strong>r frequency is the higher of the two however, and<br />
it is thus usually the case that the lower response is the main<br />
one while the higher response is the image one.<br />
Of course, although the superhet receives on two frequencies<br />
simultaneously, this is not <strong>to</strong> say that it is equally sensitive on<br />
each response. <strong>The</strong> purpose of the aerial tuned circuit is <strong>to</strong><br />
peak the main response and reject the image on. When using<br />
an ordinary I.F. of 470kHZ the responses are 940kHZ apart<br />
(twice the 470kHZ I.F.), and if only a single tuned circuit<br />
ahead of the mixer is used, the image response rejection will<br />
not be very high. This is simply because a single tuned circuit<br />
operating at frequencies of around 20 - 30MHZ has a fairly<br />
wide bandwidth, and if it is peaked at the main response it<br />
will still provide a fairly easy passage for any signal at the<br />
image response.<br />
Below about 20MHZ the bandwidth of a single tuned circuit<br />
is usually enough <strong>to</strong> give a reasonably high level of image<br />
rejection, but even at these frequencies things could be better.<br />
<strong>The</strong>refore, the basic arrangement of Figure 1 is often modified<br />
in various ways in order <strong>to</strong> give improved image rejection,<br />
and in order <strong>to</strong> improve other features of performance such as<br />
selectivity. This aspect will be covered in subsequent chapters,<br />
but the remainder of this chapter will be concerned with the<br />
circuit operation and construction of a simple S.W. superhet<br />
receiver based on the simple arrangement of Figure 1.<br />
13
This set obviously has its limitations, but it will nevertheless<br />
provide worldwide reception on both the amateur and commercial<br />
broadcast bands. Full constructional details will be<br />
provided, and it is well worth studying this section even if no<br />
attempt <strong>to</strong> construct the receiver is <strong>to</strong> be made, since the<br />
general method used for this set can be applied <strong>to</strong> the more<br />
complicated designs which are covered subsequently.<br />
As mentioned earlier, the set has been designed so that it is<br />
simple <strong>to</strong> construct and it should not prove <strong>to</strong> be <strong>to</strong>o difficult<br />
for anyone of limited experience. It provides a good and<br />
relatively inexpensive introduction <strong>to</strong> superhet designs, and it<br />
is strongly recommended that anyone who does not have any<br />
previous experience with superhet sets should tackle this<br />
design before attempting <strong>to</strong> construct any of the more advanced<br />
designs.<br />
Basic S.W. Superhet Receiver<br />
<strong>The</strong> block diagram of Figure 2 shows the various stages of the<br />
design, and it also gives details of the semiconduc<strong>to</strong>rs employed<br />
in each stage. <strong>The</strong>re is basically very little difference<br />
between this and the block diagram of Figure 1, but there are a<br />
few differences which will be discussed before proceeding<br />
further.<br />
<strong>The</strong> first difference is that separate mixer and oscilla<strong>to</strong>r stages<br />
are not used, but instead a single stage employing one transis<strong>to</strong>r<br />
is used <strong>to</strong> carry out both functions. This practice is not uncommon<br />
in simple superhet designs, and in fact many quite<br />
advanced receivers use precisely the same basic circuit that is<br />
utilized here.<br />
Another difference is the addition of a B.F.O. stage, and this<br />
is necessary <strong>to</strong> permit the proper reception of C.W. (morse)<br />
and S.S.B. (single sideband) signals. With a T.R.F. design of<br />
course, the detec<strong>to</strong>r can be used <strong>to</strong> provide a sort of B.F.O.<br />
action by adjusting it <strong>to</strong> beyond the threshold of oscillation.<br />
Superhet receivers usually employ an ordinary diode detec<strong>to</strong>r,<br />
15
and so this is not possible, and a separate oscilla<strong>to</strong>r stage is<br />
required.<br />
It is more convenient <strong>to</strong> inject the B.F.O. signal in<strong>to</strong> the I.F.<br />
stages rather than at the aerial, since the I.F. stages operate at<br />
a single frequency, and it is therefore only necessary for the<br />
B.F.O. <strong>to</strong> operate at a single frequency. Using the other<br />
method it would be necessary <strong>to</strong> use an extra gang on the<br />
tuning capaci<strong>to</strong>r so that the B.F.O. would always be at the<br />
input signal frequency.<br />
<strong>The</strong> third and final difference is the addition of an A.G.C.<br />
circuit. A.G.C. stands for ‘Au<strong>to</strong>matic Gain Control’, and<br />
sometimes the alternative term A.V.C. (Au<strong>to</strong>matic Volume<br />
Control) is used.<br />
<strong>The</strong>re are two main reasons for incorporating A.G.C. In<br />
receivers. <strong>The</strong> primary one is that there are verywide variations<br />
in the levels of received signals, with the strongest<br />
signals being something like 10,000 times the amplitude of<br />
the weakest signals which can be resolved. Having <strong>to</strong> continuously<br />
alter the gain of the circuit manually so that weak<br />
signals could be received, and <strong>to</strong> prevent overloading on<br />
strong signals, would soon become rather tedious. <strong>The</strong> purpose<br />
of the A.G.C. circuitry is <strong>to</strong> au<strong>to</strong>matically reduce the gain<br />
on strong signals so that a virtually constant output level is<br />
obtained without the need for manual adjustments. <strong>The</strong> second<br />
reason for including A.G.C. circuitry is that it makes station<br />
fading less apparent.<br />
As will be seen from Figure 2, the set uses just five semiconduc<strong>to</strong>r<br />
devices (three silicon transis<strong>to</strong>rs, one germanium<br />
diode, and one I.C.), but the set nonetheless achieves a fairly<br />
high level of performance. <strong>The</strong> I.C. audio stage provides an<br />
output power of about 500mW <strong>to</strong> an 8ohm speaker, and it can<br />
be used with any speaker impedance of 8ohms or more. Note<br />
however, that the higher the speaker impedance used, the<br />
lower the available output power. <strong>The</strong> set can also be used in<br />
conjunction with any normal type of earpiece or headphones.<br />
16
<strong>The</strong> set has a frequency coverage of approxImately 1.6 <strong>to</strong><br />
31MHZ in three bands, with the approximate frequency<br />
coverage of each band being as follows:-<br />
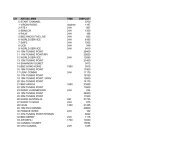
Range 3T 1.6 <strong>to</strong> 5.3MHZ.<br />
Range 4T 4.8 <strong>to</strong> 15MHZ.<br />
Range 5T 10 <strong>to</strong> 31MHZ.<br />
<strong>The</strong> range numbers quoted above are those used by the coil<br />
manufacturer (Denco). Plug in bandchanging is used for the<br />
sake of simplicity, although it would be possible <strong>to</strong> modify<br />
the unit for bandswitching. This is a general <strong>to</strong>pic which<br />
will be covered later.<br />
<strong>The</strong> Circuit<br />
<strong>The</strong> circuit diagram of the receiver, less the Audio and B.F.O.<br />
stages, appears in Figure 3. Looking at this in fairly broad<br />
terms, Tr1 is the basis of the mixer/oscilla<strong>to</strong>r stage, Tr2 is the<br />
basis of the I.F. amplifier, and D1 is the detec<strong>to</strong>r/A.G.C. diode.<br />
Looking at this in greater detail, the aerial signal is coupled <strong>to</strong><br />
VR1 which is an input attenua<strong>to</strong>r of the volume control type.<br />
This control is useful for the reception of S.S.B. signals,<br />
where the B.F.O. Is easily swamped by strong signals. <strong>The</strong><br />
output from the slider of VR1 is fed <strong>to</strong> the primary winding of<br />
the input transformer, T1.<br />
VC1, VC2, and the main winding of T1 form the aerial tuned<br />
circuit, with VC1 being the main tuning control, and VC2 the<br />
aerial trimmer. <strong>The</strong> aerial trimmer is included in order that<br />
the aerial tuned circuit can be kept peaked at the correct<br />
frequency. This avoids the need for proper alignment of the<br />
aerial and oscilla<strong>to</strong>r tuned circuits in the conventional manner,<br />
and it probably gives slightly improved results since there<br />
should never be any misalignment. It does have the slight<br />
disadvantage that there is an extra control <strong>to</strong> adjust, but this<br />
is not really a major drawback, and this arrangement is<br />
becoming increasingly popular.<br />
17
Tr1 is really used in two amplifying modes; as a common<br />
emitter amplifier as far as the aerial signal is concerned, and<br />
as a common base amplifier as far as the oscilla<strong>to</strong>r circuitry is<br />
concerned. <strong>The</strong> aerial signal is fed <strong>to</strong> the base of Tr1 via the<br />
low impedance coupling winding on T1. One end of this<br />
winding is earthed at R.F. by way of C2 while the other end<br />
couples direct <strong>to</strong> the base of Tr1.<br />
R1 and R2 form a potential divider which produce the bias<br />
voltage for Tr1. This voltage is fed <strong>to</strong> Tr1 base through the<br />
coupling winding on T1. R4 and C3 are the usual emitter bias<br />
resis<strong>to</strong>r and bypass capaci<strong>to</strong>r respectively. <strong>The</strong> amplified<br />
aerial signals appear in the collec<strong>to</strong>r circuit of Tr1.<br />
T2 is the oscilla<strong>to</strong>r coil, and the main winding of this, <strong>to</strong>gether<br />
with C6 and VC3, forms the oscilla<strong>to</strong>r tuned circuit. <strong>The</strong> two<br />
tuning capaci<strong>to</strong>rs (VC1 and VC3) are ganged so that they are<br />
operated simultaneously by the tuning knob.<br />
Padder Capaci<strong>to</strong>rs<br />
C4 and C5 are padder capaci<strong>to</strong>rs, and these, in effect, alter the<br />
value of the oscilla<strong>to</strong>r tuning capaci<strong>to</strong>r <strong>to</strong> the correct level. As<br />
was mentioned earlier, the oscilla<strong>to</strong>r operates at a higher<br />
frequency than the aerial tuned circuit. <strong>How</strong>ever, both tuned<br />
circuits have <strong>to</strong> cover an identical range of frequencies. For<br />
instance, if the receiver covers a range of 10 <strong>to</strong> 20MHZ and<br />
has an I.F. of 470kHZ, the aerial tuned circuit tunes 10 <strong>to</strong><br />
20MHZ while the oscilla<strong>to</strong>r tunes 10.47 <strong>to</strong> 20.47MHZ. In<br />
other words they both cover a range of 10MHZ.<br />
<strong>How</strong>ever, the oscilla<strong>to</strong>r operates at a higher band of frequencies<br />
than the aerial tuned circuit, and for this reason the<br />
oscilla<strong>to</strong>r tuning capacitance needs <strong>to</strong> be lower than the one<br />
for the aerial tuned circuit. Things are further complicated by<br />
the fact that at relatively low frequencies there is quite a wide<br />
difference between the input and oscilla<strong>to</strong>r frequencies, if one<br />
looks at the figures proportionately. For example, if a receiver<br />
20
is operating at 1MHZ and has a standard 470kHZ I.F., the<br />
oscilla<strong>to</strong>r frequency will be 1.47MHZ) which is almost 50%<br />
higher than the signal frequency.<br />
At higher frequencies percentage difference between the input<br />
and oscilla<strong>to</strong>r frequencies is very much less. As a result, this<br />
receiver (and any other general coverage superhet of this<br />
general type) requires a different value of tuning capaci<strong>to</strong>r for<br />
each range that is covered. On the L.F. bands the required<br />
oscilla<strong>to</strong>r tuning capacitance will be much smaller than that<br />
for the aerial tuned circuit, while on the H.F. bands there is no<br />
significance between the two values which are needed.<br />
<strong>The</strong> padder capaci<strong>to</strong>rs are, in effect, added in series with the<br />
oscilla<strong>to</strong>r tuning capaci<strong>to</strong>r, and their purpose is <strong>to</strong> reduce the<br />
capacitance swing of VC3 <strong>to</strong> the correct level. On Range 5<br />
there is not a very great difference between the oscilla<strong>to</strong>r and<br />
aerial frequencies, and so in this case the earthy end of the<br />
oscilla<strong>to</strong>r tuned winding is connected <strong>to</strong> chassis directly.<br />
<strong>The</strong> earthy end of the oscilla<strong>to</strong>r tuned winding connects <strong>to</strong> a<br />
different pin number on each of the three oscilla<strong>to</strong>r coils<br />
(which have a standard B9A valve type base). It connects <strong>to</strong><br />
pin 3 of the Range 3 coil, pin 4 of the Range 4 coil, and pin<br />
6 of the Range 5 coil. This is so that where plug in bandchanging<br />
is used, as it is here, by connecting the padder capaci<strong>to</strong>rs<br />
<strong>to</strong> the appropriate pins of the B9A coilholder for the oscilla<strong>to</strong>r<br />
coils, the correct padder is au<strong>to</strong>matically selected when an<br />
oscilla<strong>to</strong>r coil is plugged in. In the case of the Range 5 coil of<br />
course, there is no padder capaci<strong>to</strong>r, and pin 6 is simply<br />
earthed.<br />
As an oscilla<strong>to</strong>r, Tr1 operates as a simple inductive feedback<br />
common base circuit, with the collec<strong>to</strong>r <strong>to</strong> emitter feedback<br />
being provided by way of the two smaller windings on T2.<br />
At first sight it may appear as though the base of Tr1 is not in<br />
fact grounded, but as far as the oscilla<strong>to</strong>r signals are concerned,<br />
Tr1 base is in fact earthed through the coupling<br />
winding of T1 and through C2.<br />
21
<strong>The</strong> basic way in which this circuit provides the required<br />
mixing action is quite simple. <strong>The</strong> oscillations of Tr1 result in<br />
variations in collec<strong>to</strong>r current in sympathy with this signal.<br />
<strong>The</strong> gain of Tr1 varies with changes in collec<strong>to</strong>r current, and<br />
broadly speaking the gain rises and falls as the collec<strong>to</strong>r current<br />
rises and falls. Thus the oscillations modulate the aerial<br />
signal and the required mixing or heterodyning is produced,<br />
with the output appearing in the collec<strong>to</strong>r circuit of Tr1.<br />
I.F. Stages<br />
I.F.T.1 is a double tuned I.F. transformer, and this has its<br />
primary winding connected in the collec<strong>to</strong>r circuit of Tr1. It<br />
therefore receives the 470kHZ I.F. signal and passes it on <strong>to</strong><br />
the I.F. amplifier stage.<br />
Tr2 is the only active device which is used in the I.F. stage,<br />
and this is used as a high gain common emitter amplifier. It is<br />
biased by R5 and R6, and it receives this bias via part of the<br />
secondary winding of I.F.T.1. C7 earths the lower end of<br />
I.F.T.1 secondary.<br />
Some readers may be wondering why tappings are used on the<br />
tuned windlngs of the I.F.T.s. <strong>The</strong> reason for this is simply<br />
that the impedance involved with bipolar transis<strong>to</strong>rs are fairly<br />
low, and this would result in heavy damping of the high impedance<br />
tuned windings of the I.F.T.s if the connections were <strong>to</strong><br />
be made across the complete windlngs. This would also be<br />
rather inefficient. <strong>The</strong>refore the low impedance tappings on<br />
the I.F.T.s have <strong>to</strong> be used in order <strong>to</strong> obtain high levels of<br />
gain and selectivity.<br />
<strong>The</strong> output of Tr2 is developed across I.F.T.2 primary, and the<br />
untuned secondary winding of this I.F.T. feeds an ordinary<br />
diode detec<strong>to</strong>r which uses Di and C9. VR2 is the volume<br />
control.<br />
22
A.G.C. Action<br />
Apart from the demodulated audio signal, a D.C. signal is<br />
produced across VR2. This is generated from the smoothed<br />
R.F. half cycles which appear across VR2, and the amplitude<br />
of this D.C. potential is proportionate <strong>to</strong> the amplitude of<br />
the received signal. <strong>The</strong> polarity of D1 is such that this voltage<br />
is negative with respect <strong>to</strong> chassis. This is important, and<br />
unlike some simple receivers where the polarity of the detec<strong>to</strong>r<br />
diode is irrelevant, it is essential that D1 is connected with<br />
the polarity shown.<br />
<strong>The</strong> <strong>to</strong>p of VR2 is connected <strong>to</strong> the potential divider which is<br />
used <strong>to</strong> bias Tr2, by way of R7. As a result of this, when a<br />
strong signal is received the voltage at the <strong>to</strong>p of VR2 goes<br />
negative of chassis. As this voltage goes below chassis<br />
potential it tends <strong>to</strong> reduce the voltage at the junction of R5<br />
and R6. This is due <strong>to</strong> the coupling between these two points<br />
via R7.<br />
Thus the stronger the input signal the lower the bias voltage<br />
which is fed <strong>to</strong> Tr2. A lower bias voltage means reduced<br />
collec<strong>to</strong>r current, and hence also reduced gain. <strong>The</strong>refore the<br />
stronger the input signal the lower the I.F. gain. <strong>The</strong>refore a<br />
simple A.G.C. action is provided with full I.F. gain being<br />
produced on weak signals, and very little gain being produced<br />
at all on strong signals. Wide variations in the input signal<br />
amplitude produce only minor variations in the audio output<br />
level.<br />
Audio Stages<br />
An I.C. audio power amplifier forms the basis of the audio<br />
stages of the receiver, and this provides a high quality output<br />
which contains very little noise or dis<strong>to</strong>rtion.<br />
It is important that no R.F. signals should be allowed <strong>to</strong> break<br />
through in<strong>to</strong> the audio amplifier since this would almost certainly<br />
result in instability. A low pass filter is used at the input<br />
23
of the amplifier in order <strong>to</strong> ensure that no R.F. breakthrough<br />
does occur. This filter is formed by R8 and C10 of Figure 4,<br />
which is the complete circuit diagram of the audio stages of<br />
the receiver. C11 provides D.C. blocking at the input.<br />
Briefly looking at the functions of some of the other components,<br />
C14, C15, R12, C16, and C20 are all required in order<br />
<strong>to</strong> suppress various form of instability. R11 and Ci3 provide<br />
24
ootstrapping between the output and driver stages and this<br />
Increases the output drive of the circuit. R10 sets the voltage<br />
gain of the circuit, and C12 is included in series with it <strong>to</strong> provide<br />
D.C. blocking. R9 is used <strong>to</strong> bias the input transis<strong>to</strong>rs of<br />
the circuit. Finally, C17 is the output D.C. blocking capaci<strong>to</strong>r.<br />
S1 is the on/off switch for the entire receiver.<br />
B.F.O.<br />
<strong>The</strong> circuit diagram of the B.F.O. appears in Figure 5, and<br />
this is a simple Colpitts circuit. Tr3 is used as a common base<br />
amplifier and positive feedback is provided between its<br />
collec<strong>to</strong>r and emitter by way of C19.<br />
25
COMPONENTS (Figures 3, 4, and 5)<br />
Resis<strong>to</strong>rs. All are miniature ¼ or ¾ watt 5% types.<br />
R1 15k R9 68k<br />
R2 12k R10 56 ohms<br />
R3 220 ohms (see text) R11 150 ohms<br />
R4 2.7k R12 1.8 ohms<br />
R5 56k R13 39k<br />
R6 15k R14 33k<br />
R7 10k R15 1.8k<br />
R8 12k<br />
VR1 1k lin. carbon.<br />
VR2 5k log. carbon. with switch (S1).<br />
Capaci<strong>to</strong>rs<br />
C1 0.01mfd. ceramic.<br />
C2 0.015mfd. plastic foil or ceramic.<br />
C3 0.015mfd. plastic foil or ceramic.<br />
C4 1100pf (see text).<br />
C5 3000pf (see text).<br />
C6 22pf polystyrene or mica.<br />
C7 l0mfd. 10v.w. electrolytic.<br />
C8 100mfd. 10v.w. electrolytic.<br />
C9 0.0 lmfd. type C280.<br />
C10 5.6nf polystyrene.<br />
C11 47nf type C280.<br />
C12 100mfd. 10v.w. electrolytic.<br />
C13 100mfd. 10v.w. electrolytic.<br />
C14 330pf ceramic plate.<br />
C15 2200pf plastic foil.<br />
C16 0.lmfd. type C280.<br />
C17 220mfd. 6.3v.w.<br />
C18 0.015mfd. type C280.<br />
C19 0.015mfd. type C280.<br />
C20 330mfd. 10v.w. electrolytic.<br />
VC1/3 Jackson 365 + 365pf air spaced type 02.<br />
VC2 Jackson 50pf air spaced type C804.<br />
VC4 Jackson 15pf air spaced type C804.<br />
26
Induc<strong>to</strong>rs<br />
T1 Denco Blue Aerial coils for transis<strong>to</strong>r useage ranges<br />
3T, 4T, and 5T.<br />
T2 Denco Red Oscilla<strong>to</strong>r coils for transis<strong>to</strong>r useage<br />
ranges 3T, 4T, and 5T.<br />
I.F.T.1 Denco I.F.T.18/465kHZ.<br />
I.F.T.2 Denco I.F.T.14/470kHZ.<br />
I.F.T.3 Denco I.F.T.14/470kHZ.<br />
Semiconduc<strong>to</strong>rs<br />
Tr1 BF115.<br />
Tr2 BF184.<br />
Tr3 BC109.<br />
D1 OA91.<br />
I.C. TBA800.<br />
Miscellaneous<br />
18s.w.g. aluminium for chassis and panel.<br />
Two B9A valveholders.<br />
Plain 0.15in. matrix board and 0.1in. matrix stripboard.<br />
3.5m.m. open construction jack socket and two wander<br />
sockets.<br />
Five control knobs.<br />
PP6 battery and connec<strong>to</strong>rs <strong>to</strong> suit.<br />
Eagle 37m.m. 8:1 reduction tuning drive (type T501).<br />
Rotaty on/off switch (S2).<br />
Wire, solder, hardware, etc.<br />
27
VC4 enables the B.F.O. frequency <strong>to</strong> be adjusted slightly<br />
either side of the central intermediate frequency, so that upper<br />
and lower sideband signals can be satisfac<strong>to</strong>rily resolved.<br />
<strong>The</strong> output of the B.F.O. Is very loosely coupled <strong>to</strong> the I.F.<br />
amplifier by means of a capacitive coupling. This coupling<br />
merely consists of a length of insulated wire which is taken<br />
from Tr3 collec<strong>to</strong>r and placed near the I.F. amplifier<br />
circuitry. It is not advisable <strong>to</strong> use a more positive coupling<br />
since a high level of B.F.O. Injection would operate the A.G.C.<br />
circuitry and result in a reduction in sensitivity. Incidentally,<br />
it is because of this fairly low level of B.F.O. Injection that<br />
the set is easily overloaded by strong S.S.B. signals, and this<br />
is why it is necessary <strong>to</strong> include the input attenua<strong>to</strong>r control.<br />
Another reason for using a low level of B.F.O. injection is<br />
that using a higher level can often cause problems with<br />
microphony and instability.<br />
Of course, the B.F.O. is only needed if the set is <strong>to</strong> be used<br />
for amateur bands reception where C.W. and S.S.B. are the<br />
main transmitting modes in current use. If the construc<strong>to</strong>r<br />
is only interested in broadcast band reception, where A.M. is<br />
the only mode of transmission which is used, then all the<br />
B.F.O. circuitry should be omitted.<br />
General Points<br />
Finally, one or two minor points concerning the circuit will be<br />
considered. For example, the resis<strong>to</strong>r (R3) in the collec<strong>to</strong>r<br />
circuit of Tr1 may appear <strong>to</strong> serve no useful function; just the<br />
opposite in fact. <strong>The</strong> reason for its inclusion is that at the<br />
high frequency end of each band the circuit will tend <strong>to</strong> be a<br />
little lively with instability manifesting itself in the form of<br />
whistles as the set is tuned across stations.<br />
R3 is included <strong>to</strong> damp down this instability, and it will<br />
probably be necessary <strong>to</strong> experiment a little in order <strong>to</strong> find<br />
the optium value for this component. This aspect is fully<br />
dealt with later on.<br />
28
In common with many R.F. transis<strong>to</strong>rs, Tr1 and Tr2 have<br />
four leadout wires, the additional one being a shield<br />
connection. This merely connects <strong>to</strong> the metal case of the<br />
device, and when a transis<strong>to</strong>r having this extra leadout is used<br />
as an R.F. or I.F. amplifier it is usual <strong>to</strong> connect the shield <strong>to</strong><br />
earth. This can aid good stability. When such a device is used<br />
as an oscilla<strong>to</strong>r there is obviously little point in connecting<br />
the shield leadout <strong>to</strong> chassis. This is why the shield connection<br />
of Tr1 is not earthed, while that of Tr2 is earthed.<br />
<strong>The</strong> value of C7 may seem <strong>to</strong> be rather high for an earth<br />
return capaci<strong>to</strong>r operating at 470kHZ. <strong>How</strong>ever, it also plays<br />
a secondary role in that <strong>to</strong>gether with R7 it acts as a lowpass<br />
filter. <strong>The</strong>se two components thus allow the D.C. A.G.C.<br />
bias voltage <strong>to</strong> pass, but they block the audio signal present<br />
across VR2.<br />
C1, C8, and C20 are the supply decoupling capaci<strong>to</strong>rs for the<br />
mixer, I.F. amplifier, and A.F. amplifier stages respectively.<br />
<strong>The</strong>se are essential if feedback through the supply lines and<br />
consequent instability are <strong>to</strong> be avoided.<br />
Chassis and Panel<br />
<strong>The</strong> receiver is constructed using a home made chassis and<br />
front panel, and these are both constructed from 18 s.w.g.<br />
aluminium. Details of both the chassis and panel are<br />
provided in Figure 6.<br />
Most of the drilling and cutting is quite straightforward. <strong>The</strong><br />
three ¾in. (19m.m.) diameter cut outs are made using a chassis<br />
punch. When the two ¾in. diameter holes in the chassis<br />
have been made the positions of the two smaller holes for the<br />
coilholders are located using the coilholders themselves as<br />
templates. <strong>The</strong> coilholders are actually unskirted B9A valveholders,<br />
and they must be high quality types. <strong>The</strong> coilholders<br />
are orientated so that pins 1 and 9 are roughly <strong>to</strong>wards the<br />
front of the chassis. <strong>The</strong> smaller mounting holes are drilled<br />
29
for 6BA (or M3) clearance using a 3.3m.m. diameter twist<br />
drill. <strong>The</strong> two smaller mounting holes for the tuning drive are<br />
not drilled at this stage.<br />
<strong>The</strong>re are four small holes in the chassis which serve no<br />
apparent purpose, and these are merely where insulated leads<br />
will eventually pass through the chassis. <strong>The</strong>se should be<br />
about 3/16in. diameter and their precise positioning is not<br />
critical. It is advisable <strong>to</strong> fit them with small grommets, but<br />
this is not essential. <strong>The</strong> two mounting holes for VC1/3 are<br />
drilled for 4BA clearance using a 4m.m. diameter twist drill.<br />
When all the drilling has been completed the two flanges of<br />
the chassis are bent down at right angles. Aluminium is fairly<br />
soft and pliable, and by using a little ingenuity it should be<br />
possible <strong>to</strong> make these two folds even if no special equipment<br />
for this purpose is available.<br />
<strong>The</strong> chassis and panel are, in effect, bolted <strong>to</strong>gether by the<br />
mounting bushes and nuts of VR1, VR2, VC3, and the output<br />
socket. <strong>The</strong>n the two coilholders are mounted on the chassis,<br />
and a soldering is secured under one mounting nut of each<br />
bolder (see Figure 7). <strong>The</strong> tuning capaci<strong>to</strong>r is mounted by two<br />
short 4BA bolts which pass through the boles in the chassis<br />
and in<strong>to</strong> threaded holes in the underside of the capaci<strong>to</strong>r. It is<br />
important that these bolts should no more than fractionally<br />
penetrate through the base plate of the capaci<strong>to</strong>r, as if this<br />
should be allowed <strong>to</strong> happen, the mounting screws could<br />
damage the fixed vanes of the capaci<strong>to</strong>r. Either the mounting<br />
screws must be no more than about 5/16in. long, or washers<br />
must be used over them on the underside of the chassis in<br />
order <strong>to</strong> reduce their penetration <strong>to</strong> an acceptable level.<br />
When the tuning capaci<strong>to</strong>r has been mounted, the tuning drive<br />
can be placed in position and it can then be used as a template<br />
with which the positions of the two smaller mounting holes<br />
can be located. <strong>The</strong> chassis and panel assembly is then dismantled<br />
so that these two holes can be drilled <strong>to</strong> accept 6BA<br />
screws. It will also be necessary <strong>to</strong> carefully enlarge the two<br />
31
mounting holes in the tuning drive so that they will accept<br />
6BA screws. <strong>The</strong> chassis and panel are then reassembled and<br />
the tuning drive is mounted using a couple of ½in. 6BA<br />
screws with nuts. <strong>The</strong> tuning drive is supplied with a short<br />
screw which fits in<strong>to</strong> a threaded hole at the rear and <strong>to</strong>wards<br />
the <strong>to</strong>p of the drive. This mounting screw is not used here, and<br />
is discarded.<br />
Before tightening the screw which clamps the output of the<br />
drive <strong>to</strong> the spindle of the tuning capaci<strong>to</strong>r, adjust the drive<br />
<strong>to</strong> read ‘10’ and adjust the tuning capaci<strong>to</strong>r so that its two<br />
sets of vanes are fully meshed. <strong>The</strong> adjustment ranges of the<br />
two will then properly coincide.<br />
Mixer Wiring<br />
Point <strong>to</strong> point wiring is used in the construction of the mixer,<br />
and all this wiring is illustrated in Figure 7. This diagram also<br />
shows the other below chassis point <strong>to</strong> point wiring of the<br />
receiver.<br />
It is not essential <strong>to</strong> use point <strong>to</strong> point wiring when constructing<br />
the input circuitry of a S.W. superhet receiver, and plain<br />
matrix S.R.B.P. panels, p.c.b.s., etc. can be used. <strong>How</strong>ever, it<br />
is usually quicker and easier <strong>to</strong> use point <strong>to</strong> point wiring, and<br />
it has the advantage long connecting wires in parts of the<br />
circuit which handle R.F. signals are easily avoided. It should<br />
perhaps be pointed out that many component leads are shown<br />
as being left quite long in Figure 7 in order <strong>to</strong> aid the clarity<br />
of the diagram. In practice all leads are kept as short and<br />
direct as possible.<br />
Most of this wiring is quite simple and straightforward. When<br />
soldering in C2 and R2 it is probably easier if these two<br />
components are connected <strong>to</strong>gether before being soldered<br />
in<strong>to</strong> position. <strong>The</strong> same is also true in the case of R4 and C3.<br />
<strong>The</strong> two padder capaci<strong>to</strong>rs have rather unusual values, and<br />
some difficulty may be experienced in obtaining suitable<br />
32
components. One of the larger mall order component fims<br />
could probably supply suitable types, or alternatively these<br />
values can be made up by adding two components in parallel.<br />
For example, 1100pf can be made up from a 100pf and a<br />
l000pf capaci<strong>to</strong>r wired in parallel. Similarly the value of<br />
3000pf can be made up from two 1500pf components.<br />
Whether these capaci<strong>to</strong>rs are made up from two parallel connected<br />
components or single capaci<strong>to</strong>rs are used, they must in<br />
either case be good quality low <strong>to</strong>lerance types such as<br />
polystyrene or silvered mica capaci<strong>to</strong>rs.<br />
I.F. Amplifier Wiring<br />
<strong>The</strong> I.F. amplifier, detec<strong>to</strong>r, and A.G.C. circuitry is constructed<br />
on a plain 0.15in matrix S.R.B.P. panel having 15 x 14<br />
holes. Details of both the component layout and underside<br />
wiring of this panel are shown in Figure 8.<br />
When a board of the appropriate size has been cut out the<br />
two 6BA or M3 clearance mounting holes are drilled out. It it<br />
also necessary <strong>to</strong> enlarge the holes in<strong>to</strong> which the pins and<br />
mounting lugs of the two I.F.T.s fit. This can be done using<br />
a twist drill of about 2.5m.m. in diameter. I.F.T.l has two<br />
tuning cores, one of which can only be adjusted from below.<br />
It is therefore necessary <strong>to</strong> enlarge the appropriate hole in<br />
the board so that it is possible <strong>to</strong> gain access <strong>to</strong> this core.<br />
After the board has been prepared the various components<br />
are mounted and their lead out wires are bent flat against the<br />
underside of the panel. In the case of the I.F.T.s the mounting<br />
Iugs are bent inwards at right angles on the underside of the<br />
panel, and this should firmly secure the I.F.T.s. <strong>The</strong>n the wiring<br />
on the underside of the panel is completed. In one or two<br />
places the component leads will probably be found’ <strong>to</strong> be <strong>to</strong>o<br />
short, and it will be necessary <strong>to</strong> use approx. 22 s.w.g. tinned<br />
copper extension wires <strong>to</strong> bridge the gaps in the wiring.<br />
34
<strong>The</strong> panel is then used as a template with which the positions<br />
of the mounting holes in the chassis are located. <strong>The</strong> approximate<br />
position in which the panel is mounted is shown in<br />
Figure 6. Before finally bolting the board in place, wire it<br />
up <strong>to</strong> the rest of the unit. Spacers about 10mm. long are used<br />
over the mounting bolts, between the chassis and the board,<br />
so that the underside wiring is held clear of the metal chassis.<br />
It is a good idea <strong>to</strong> drill a hole in the chassis beneath I.F.T.1 so<br />
that its core can be adjusted from below the chassis. Alternatively,<br />
when it comes <strong>to</strong> carrying out the I.F. alignment the<br />
panel can be dismounted, and a temporary earth connection<br />
<strong>to</strong> the board can be made (the normal earth connection is<br />
made via a short lead which connects <strong>to</strong> a soldertag mounted<br />
on one of the mounting bolts of the board).<br />
Audio Stages<br />
<strong>The</strong> audio amplifier is constructed on a 0.1in. matrix stripboard<br />
which has 25 holes by 18 copper strips. Details of this<br />
panel appear in Figure 9.<br />
Start by cutting out a panel of the correct size and then drill<br />
out the two mounting holes. Next make the six breaks in the<br />
copper strips and then solder in all the components and link<br />
wires, with the I.C. being left until last.<br />
<strong>The</strong> TBA800 I.C. is contained in a sort of 16 pin quad in line<br />
package, but where pins 4, 5, 12, and 13 would normally be,<br />
the device has a couple of heat tabs instead. Thus the I.C.<br />
actually only has 12 pins.<br />
Normally the heat tabs would be soldered <strong>to</strong> an area of copper<br />
laminate on a p.c.b., with the copper then acting as a heatsink.<br />
<strong>How</strong>ever, here the device is used well below its maximum<br />
power rating of 5 watts, and so no heatsinking is required.<br />
<strong>The</strong> heat tabs should therefore be bent up out of the way, or<br />
even cut off al<strong>to</strong>gether.<br />
36
<strong>The</strong> completed panel is wired up <strong>to</strong> the rest of the unit before<br />
being mounted on the underside of the chassis in the<br />
approximate position shown in Figure 6. it is mounted in the<br />
same way as the I.F. amplifier panel.<br />
37
B.F.O. Unit<br />
This is constructed on a plain 0.15in. matrix panel having 14<br />
by 8 holes, and details of this panel <strong>to</strong>gether with details of<br />
the other B.F.O. wiring appear in Figure 10. <strong>The</strong> B.F.O. is<br />
built along very similar lines <strong>to</strong> the I.F. amplifier circuitry.<br />
A lead about 150m.m. long carries the B.F.O. output <strong>to</strong> the<br />
I.F. amplifier, but as was stated earlier, no direct connection<br />
<strong>to</strong> the I.F. amplifier is made. A very loose coupling is all that<br />
is required, and it is merely necessary <strong>to</strong> place the B.F.O.<br />
output lead near the I.F. amplifier panel. It is advisable <strong>to</strong><br />
tape this lead in place, rather than just leaving it <strong>to</strong> hang<br />
loose. Apart from anything else, this will provide a more<br />
stable B.F.O. signal.<br />
Alignment<br />
When initially testing the receiver it is best <strong>to</strong> use the Range<br />
4T coils as this range will almost invariably provide numerous<br />
strong signals. <strong>The</strong> Blue aerial coil plugs in<strong>to</strong> the front coil.<br />
holder and the Red oscilla<strong>to</strong>r coil plugs in<strong>to</strong> the rear one. With<br />
an aerial and a speaker (or headphones) connected <strong>to</strong> the set,<br />
VR1 fully advanced and VR2 well advanced, it should be<br />
possible <strong>to</strong> tune in several stations.<br />
For those who are unfamiliar with the Denco coil units it<br />
should perhaps be pointed out that as supplied they have their<br />
tuning cores virtually fully screwed down for packing purposes.<br />
In use the cores are unscrewed so that about 10m.m. of<br />
metal screwthread protrudes from the <strong>to</strong>p of each coil. When<br />
some stations are received it should be possible <strong>to</strong> adjust the<br />
core of T1 <strong>to</strong> peak these stations.<br />
Alignment of the set starts with the adjustment of the I.F.T.<br />
cores. Tune <strong>to</strong> a fairly weak but consistant station, and then<br />
adjust the I.F.T. cores <strong>to</strong> peak this station. Do not choose a<br />
strong station because the A.G.C. action of the receiver will<br />
39
make it difficult aurally <strong>to</strong> detect maximum signal strength.<br />
Use a proper trimming <strong>to</strong>ol when adjusting the I.F.T. cores as<br />
a wedge shaped <strong>to</strong>ol such as a small screwdriver blade could<br />
damage the cores. Tools not specifically designed for trimming<br />
applications also tend <strong>to</strong> have a detuning effect on the<br />
I.F.T.s as they are withdrawn from them. A suitable trimming<br />
<strong>to</strong>ol for use with the specified I.F.T.s is the Denco type TT5.<br />
Adjust the cores of I.F.T.2 first, then the upper core of<br />
I.F.T.1, and finally the lower core of I.F.T.1. Repeat this procedure<br />
a couple of times <strong>to</strong> ensure that the cores are all<br />
accurately peaked.<br />
Note that very little adjustment of these cores should be<br />
required as the I.F.T.s are prealigned. It is also worth noting<br />
that although I.F.T.1 has a nominal operating frequency of<br />
465kHZ while that of I.F.T.2 is 470kHZ, this difference is so<br />
small that in practice the two are perfectly compatible.<br />
Next the B.F.O. is aligned, and at the outset this is switched<br />
on by operating S2 and then VC4 is set at about half maximum<br />
capacitance. Tune the set accurately <strong>to</strong> a station and then<br />
adjust the core of I.F.T.3 until a loud whistle is heard from<br />
the speaker or headphones. It should be possible <strong>to</strong> alter the<br />
pitch of this <strong>to</strong>ne by adjusting the core of I.F.T.3, and this is<br />
given the setting which gives the lowest possible <strong>to</strong>ne. Adjusting<br />
VC4 either side of its central position should produce a<br />
rise in the pitch of the whistle.<br />
Do not be mislead by any fairly quiet whistling sounds which<br />
might be produced as the core of I.F.T.3 is adjusted, these can<br />
be caused by harmonics of the B.F.O. being picked up in the<br />
aerial circuitry of the set. <strong>The</strong>y are easily distinguished from<br />
the main B.F.O. signal being received by the I.F. circuitry,<br />
because the latter produces a much stronger signal pick up.<br />
Also, the main B.F.O. signal will be present whatever<br />
frequency the set is tuned <strong>to</strong>, whereas harmonics will only be<br />
received at certain settings of the tuning control.<br />
40
<strong>The</strong> R.F. alignment is very simple, and it is merely necessary.<br />
<strong>to</strong> tune <strong>to</strong> a station with VC1/3 at about half maximum<br />
capacitance, set VC2 at half capacitance, and then adjust the<br />
core of T1 <strong>to</strong> peak the received signal. This procedure must<br />
then be repeated with the other two sets of coils in circuit.<br />
It is quite possible that instability will occur at the high<br />
frequency end (VC1/3 vanes unmeshed) of one or more of<br />
the ranges. Unscrewing the core of T2 might help <strong>to</strong> eliminate<br />
this problem, but remember that if the core of T2 is adjusted<br />
it will then be necessary <strong>to</strong> readjust the core of T1. If this<br />
does not completely cure the instability it will be necessary <strong>to</strong><br />
increase the value of R3 slightly. <strong>The</strong> correct value is found<br />
by means of trial and error, and is the lowest value which will<br />
clear the trouble. Do not make this resis<strong>to</strong>r any higher in value<br />
than is really necessary, because this will unnecessarily reduce<br />
the level of performance obtained at the low frequency end<br />
of each band.<br />
Using <strong>The</strong> Set<br />
<strong>The</strong> receiver is quite easy <strong>to</strong> use, and in fact superhets are<br />
more simple <strong>to</strong> operate than T.R.F. designs. VC1/3 are the<br />
ordinary, tuning control, and VR2/S1 are a conventional<br />
combined volume and on/off control. VR1 is a sort of R.F.<br />
gain control, and it is normally left at maximum (adjusted<br />
fully clockwise). It may sometimes happen that an extremely<br />
strong A.M. signal will overload the detec<strong>to</strong>r and it will then<br />
be necessary <strong>to</strong> turn back VR1 in order <strong>to</strong> obtain a proper<br />
audio output. This will only happen very infrequently though,<br />
and only if a very efficient aerial is used. VC2 is the aerial<br />
trimmer, and this is always adjusted <strong>to</strong> peak received signals<br />
for maximum signal strength.<br />
For the reception of C.W. or S.S.B. signals the B.F.O. is<br />
switched in by means of S2. <strong>The</strong> setting of VC4 is not <strong>to</strong>o<br />
important when C.W. signals are being received, but for the<br />
reception of S.S.B. it should ideally be offset from its central<br />
position.<br />
41
For reception of upper sideband, which is used on the 20, 15,<br />
and 10 metre amateur bands, the vanes of VC4 should be<br />
almost fully meshed. <strong>The</strong>y should be almost fully unmeshed<br />
for reception of lower sideband signals. Lower sideband is<br />
used on the 160, 80, and 40 metre amateur bands.<br />
Strong S.S.B. signals will overload the set by swamping the<br />
B.F.O. signal, and this will result in a rather rough and dis<strong>to</strong>rted<br />
audio output. In extreme cases the audio signal will be<br />
virtually unintelligible. In order <strong>to</strong> resolve strong S.S.B.<br />
signals properly it will be necessary <strong>to</strong> turn back VR1 <strong>to</strong> a<br />
point where no overloading occurs.<br />
42
CHAPTER TWO<br />
MODULAR SUPERHET<br />
In the previous chapter the superhet principle was described,<br />
<strong>to</strong>gether with very complete details of the circuit operation<br />
and construction of a practical receiver. A sort of modular<br />
form of construction was used with the circuit being divided<br />
up in<strong>to</strong> four main sections (the mixer/oscilla<strong>to</strong>r, the I.F. amplifier/detec<strong>to</strong>r/A.G.C.,<br />
the audio amplifier, and the B.F.O.).<br />
This modular approach was purposely adopted for two reasons.<br />
Firstly it happens <strong>to</strong> be a very convenient form of construc~<br />
tion, and secondly it leads up <strong>to</strong> this chapter where a number<br />
of different superhet building blocks will be described. <strong>The</strong><br />
idea here is that the construc<strong>to</strong>r chooses the various building<br />
blocks which best suit his or her needs, and then assembles<br />
these <strong>to</strong> produce a complete receiver.<br />
This approach is perfectly feasible because superhet receivers<br />
tend <strong>to</strong> naturally break down in<strong>to</strong> such building blocks.<br />
Provided one does not stray from standardised parameters<br />
(470kHZ I.F.s, usual stage input and output impedances,<br />
output levels, etc.), no problems with incompatibility between<br />
building blocks will arise. <strong>The</strong>se building blocks have been<br />
designed so that they will fit <strong>to</strong>gether properly, without any<br />
problems of compatibility occuring. Such problems are<br />
unlikely <strong>to</strong> arrise anyway, and, for instance, the audio stages<br />
of virtually any superhet receiver could be substituted for<br />
those of the receiver described in the previous chapter with<br />
perfectly adequate results being obtained.<br />
Of course, it would not be a good idea <strong>to</strong> mix valve and semiconduc<strong>to</strong>r<br />
circuitry, and all the circuits in the book employ<br />
semiconduc<strong>to</strong>rs rather than valves. If one wants the ultimate<br />
in performance from the early stages of the set it is possible<br />
43
<strong>to</strong> make a good case in favour of using valves in these stages,<br />
with a beam deflection valve being used in the mixer stage.<br />
<strong>How</strong>ever, most people prefer the convenience of semiconduc<strong>to</strong>rs,<br />
which are easier <strong>to</strong> use and more readily available than<br />
special types of valve.<br />
It is probably true <strong>to</strong> say that there is not a great deal of<br />
difference between the performance obtained from the best<br />
valve and semiconduc<strong>to</strong>r devices anyway.<br />
Image Rejection<br />
<strong>The</strong> problem of image rejection was raised in the previous<br />
chapter, and it was pointed out that the basic superhet receiver<br />
which was described there had only a limited amount of image<br />
rejection at high frequencies. In more sophisticated receivers<br />
it is normal <strong>to</strong> take steps <strong>to</strong> increase the level of image rejection,<br />
and before going on <strong>to</strong> consider some practical circuits<br />
the methods of increasing image rejection will be discussed.<br />
<strong>The</strong>re are two basic ways of improving image rejection, either<br />
add more tuned circuits ahead of the mixer, or use a higher<br />
I.F. in previous eras the former was the method most often<br />
used in good quality communications receivers. <strong>The</strong>se often<br />
had two R.F. stages with a tuned circuit at the input <strong>to</strong> each<br />
one, plus a tuned circuit at the input <strong>to</strong> the mixer. This<br />
provides some three tuned circuits ahead of the mixer, and<br />
this gives a level of R.F. selectivity which provides excellent<br />
image rejection.<br />
Unfortunately there are drawbacks <strong>to</strong> this arrangement, one<br />
of which is the generous R.F. screening which is required in<br />
order <strong>to</strong> prevent instability. Another is that including the<br />
oscilla<strong>to</strong>r tuned circuit there are no less than four tuned<br />
circuits which must be maintained in good alignment if good<br />
results are <strong>to</strong> be procured from this arrangement<br />
Another problem, and perhaps the most major one, is that of<br />
cross-modulation which is a form of intermodulation. This<br />
44
dis<strong>to</strong>rtion inevItably results in any amplifier since a perfectly<br />
linear amplifier has yet <strong>to</strong> be invented. This dis<strong>to</strong>rtion can<br />
result in the modulation of one signal in the receivers R.F.<br />
passband being heard on the main signal which is being<br />
received, even though the two stations are well separated.<br />
It is from this that the term cross moduiatlon is derived.<br />
In a practical situation the results of cross modulation are<br />
never likely <strong>to</strong> be heard in this way, since the R.F. passband<br />
of a receiver is quite wide and the R.F. and mixer stages are<br />
likely <strong>to</strong> be handling dozens or even hundreds of stations.<br />
Cross modulation is much more likely <strong>to</strong> manifest itself in the<br />
form of a general increase in the background noise level. This<br />
is due <strong>to</strong> the fact that most S.W. signals consist of a complex<br />
and changing range of frequency components, and as the components<br />
of each signal react with the components of all the<br />
other signals in the receiver’s R.F. passband, a vast range of<br />
new signals are produced. Those that are converted by the<br />
mixer <strong>to</strong> frequencies which lie within the sets I.F. passband<br />
are heard as a jumble of noise at the output.<br />
<strong>The</strong> reason that cross modulation is such an important fac<strong>to</strong>r<br />
is simply that no matter how sensitive and selective the I.F.<br />
stages of a set are made, it will not be possible <strong>to</strong> copy weak<br />
signals if they are drowned in noise resulting from cross<br />
modulation. One might think that the old system of having<br />
three tuned circuits ahead of the mixer would give a good<br />
cross modulation performance by reducing the R.F. passband,<br />
and therefore reducing the number of signals handled by the<br />
input stages of the receiver.<br />
In practice this is not the way things work out, because the<br />
R.F. bandwidth of the set will still be fairly wide even if<br />
three tuned circuits are used, and in order <strong>to</strong> eliminate<br />
problems with cross modulation noise in this way it is<br />
necessary <strong>to</strong> have an R.F. bandwidth which is nearly as<br />
narrow as the I.F. bandwidth. This is not really a practical<br />
proposition in a receiver which is <strong>to</strong> cover more than a single<br />
frequency!<br />
45
Having two R.F. stages actively encourages cross modulation<br />
because there is inevitably a degree of dis<strong>to</strong>rtion in each of<br />
these amplifiers. Furthermore, the effect of these stages is <strong>to</strong><br />
increase the signal levels encountered in the input stages of<br />
the set, which results in higher levels of dis<strong>to</strong>rtion. This is<br />
particularly so by the time signals reach the mixer, as any<br />
really strong signals will have been boosted <strong>to</strong> a level which<br />
will drive the mixer outside its linear operating range. Severe<br />
cross modulation will then occur, making it impossible <strong>to</strong><br />
copy weak stations.<br />
<strong>The</strong> modem approach <strong>to</strong> minimising the problem of cross<br />
modulation is <strong>to</strong> use no R.F. stage, and a high frequency I.F.<br />
<strong>The</strong> two I.F.s most often used are 5.5MHZ and 9MHZ. <strong>The</strong>se<br />
produce an image signal which is 11MHZ and 18MHZ respectively<br />
away from the main response. Even a single tuned<br />
circuit ahead of the mixer will then provide good image rejection<br />
right up <strong>to</strong> the higher frequency limit of the S.W<br />
frequency spectrum.<br />
<strong>How</strong>ever, neither home constructed or commercially produced<br />
receivers of this type are frequently encountered in amateur<br />
circles. This is due <strong>to</strong> difficulties which exist with this arrangement,<br />
the most major one being that of obtaining good<br />
selectivity. I.F. transformers incorporate ordinary L - C tuned<br />
circuits, and at frequencies in the region of 5.5 <strong>to</strong> 9MHZ<br />
L - C circuits simply would not produce the high degree of<br />
selectivity that a good communications receiver must possess.<br />
In order <strong>to</strong> obtain the required level of selectivity from a high<br />
I.F. it is necessary <strong>to</strong> use a crystal filter, and these tend <strong>to</strong> be<br />
rather expensive if purchased ready made. A good crystal filter<br />
can cost more than the remainder of the parts for a receiver!<br />
It is possible <strong>to</strong> construct ones own filter, but obtaining suitable<br />
parts is likely <strong>to</strong> be something of a problem. Aligning<br />
the completed unit can also cause problems.<br />
An alternative <strong>to</strong> using a crystal I.F. filter is <strong>to</strong> use the double<br />
conversion approach. Here the output from the first I.F.<br />
amplifier is fed <strong>to</strong> a second mixer where the signal is heter-<br />
46
odyned <strong>to</strong> a conventional 470kHZ I.F. Thus the high first<br />
I.F. provides good image rejection while the low second I.F.<br />
provides good selectivity.<br />
This method is probably more common than the single<br />
conversion high I.F. one, but neither are as popular as the<br />
single conversion low I.F. type of receiver. This is the type of<br />
set that we will be concerned with in this chapter.<br />
A design of this type has <strong>to</strong> be something of a compromise,<br />
but this is not <strong>to</strong> say that a very high level of performance<br />
cannot be attained. <strong>The</strong> building blocks which are described<br />
in the following pages can be assembled <strong>to</strong> produce an<br />
excellent S.W. set. Whichever of the front ends the construc<strong>to</strong>r<br />
chooses (there are four alternatives) there will be two tuned<br />
circuits ahead of the mixer. <strong>The</strong> coils used in the front end<br />
circuits are modem ferrite cored types which have quite high<br />
Q values. <strong>The</strong>y therefore provide a fairly narrow R.F. passband,<br />
and thus also a quite high degree of image rejection<br />
even at frequencies in the 20 <strong>to</strong> 30MHZ region.<br />
Three of the front ends which are described are active units,<br />
and can provide a fairly high level of gain (20dB or more at<br />
most frequencies). All incorporate R.F. gain controls though,<br />
and the gain can be reduced <strong>to</strong> less than unity so that overloading<br />
of the mixer can be avoided. <strong>The</strong> remaining front<br />
end circuit is a passive type, and it does not therefore introduce<br />
any cross modulation directly, or by increasing the<br />
signal amplitude fed <strong>to</strong> the mixer.<br />
When using any S.W. superhet it is worth bearing in mind that<br />
obtaining the best possible aerial signal and using maximum<br />
R.F. gain does not necessarily provide the best results. For<br />
examples, some time ago the author bad a quite conventional<br />
valved communications receiver which invariably failed <strong>to</strong><br />
produce any stations at all on the 40 metre amateur band after<br />
dark. This band is noted for poor reception after dark due <strong>to</strong><br />
its very close proximity <strong>to</strong> the 41 metre broadcast band, with<br />
many broadcast stations encroaching in<strong>to</strong> the amateur band<br />
47
allocation. <strong>The</strong> very strong broadcast stations tend <strong>to</strong> cause<br />
severe cross modulation which obscures the comparatively<br />
weak amateur stations.<br />
<strong>The</strong> rather unlikely cure <strong>to</strong> the problem was <strong>to</strong> disconnect the<br />
aerial and then place the aerial plug close <strong>to</strong> its socket. This<br />
provided only a very loose coupling between the aerial and the<br />
receiver, but with the A.F. gain well advanced it was still<br />
possible <strong>to</strong> copy many stations, including some amateur ones.<br />
In fact, stations as far away as South America were copied.<br />
What was happening here is quite simple; although the<br />
strengths at which stations were received was being greatly<br />
diminished, the cross modulation was being reduced by an<br />
even greater amount. <strong>The</strong>refore, stations that were originally<br />
drowned in the cross modulation noise were brought above<br />
this noise level by attenuating the aerial signal. This feature is<br />
something that should be kept in mind when using any S.W.<br />
superhet receiver.<br />
Details of the various building blocks will now be given.<br />
Constructional information will not be provided since it is<br />
assumed that anyone undertaking construction of these<br />
circuits will have reached the stage where they can build<br />
practical units from a circuit diagram. <strong>The</strong> following chapter<br />
will describe some additional circuitry which can be used in<br />
conjunction with certain of these building blocks <strong>to</strong> provide a<br />
double conversion receiver. <strong>The</strong> final chapter will deal with<br />
add on circuits such as an ‘S’ Meter, A Multiplier, etc.<br />
R.F. Amplifiers<br />
<strong>The</strong> circuit diagram of an R.F. amplifier which employs a<br />
bipolar transis<strong>to</strong>r as its active element is shown in Figure 11.<br />
Operation of the circuit is quite simple with Tr1 being used is<br />
the common emitter amplifying mode. <strong>The</strong> potential divider<br />
formed by R1 and R2 provides the base bias voltage for Tr1,<br />
while R3 and VR1 form the emitter bias resistance. C3 is the<br />
48
usual emitter bypass capaci<strong>to</strong>r. VR1 enables the operating<br />
current of the stage <strong>to</strong> be varied, and hence it also controls<br />
the gain of the stage. Gain is at maximum with VR1 set for<br />
minimum resistance. R3 is a current limiting resis<strong>to</strong>r.<br />
49
<strong>The</strong> base of Tr1 is fed from the low impedance coupling winding<br />
on T1. via D.C. blocking capaci<strong>to</strong>r C2. VC1 is the tuning<br />
capaci<strong>to</strong>r for the R.F. stage. <strong>The</strong> output of the R.F. amplifier<br />
is coupled <strong>to</strong> the mixer stage by way of R.F. transformer T2.<br />
VC3 is the tuning capaci<strong>to</strong>r for the mixer tuned circuit and<br />
VC2 is a panel trimmer control which enables this tuned<br />
circuit <strong>to</strong> be kept in proper alignment.<br />
It is not recommended that VC1 should be ganged with VC3<br />
(which is ganged with the oscilla<strong>to</strong>r tuning capaci<strong>to</strong>r of<br />
course) because this makeslt necessary <strong>to</strong> have the R.F.<br />
amplifier circuitry and the mixer/oscilla<strong>to</strong>r circuitry in close<br />
proximity <strong>to</strong> one another. If this is done it becomes absolutely<br />
essential <strong>to</strong> screen off the R.F. amplifier circuitry in order <strong>to</strong><br />
obtain good stability. This is not as easy <strong>to</strong> accomplish as one<br />
might imagine.<br />
In the authors opinion it is far better <strong>to</strong> have VC1 as a separate<br />
component with the R.F. circuitry physically well spaced from<br />
the mixer/oscIlla<strong>to</strong>r circuitry. Screening then becomes unnecessary.<br />
Note that T2, VC2, and VC3 are only shown here<br />
<strong>to</strong> illustrate how the R.F. amplifier is connected <strong>to</strong> the mixer.<br />
<strong>The</strong>se are actually part of the mixer circuit, and are positioned<br />
close <strong>to</strong> the rest of the mixer circuitry. <strong>The</strong>se last two points<br />
are also relevant <strong>to</strong> the next two front end circuits which are<br />
described.<br />
T1 is a Denco Blue aerial coil for transis<strong>to</strong>r useage, and T2 is<br />
a Yellow R.P. coil for transis<strong>to</strong>r useage. <strong>The</strong> following front<br />
end circuits all employ the same two coil typed.<br />
Jugfet Amplifier<br />
<strong>The</strong> circuit diagram of an R.F. amplifier using a Jugfet<br />
(junction gate field effect transis<strong>to</strong>r) is shown in Figure 12.<br />
This has a similar performance <strong>to</strong> the bipolar R.F. amplifier<br />
circuit, but it provides a slightly lower noise level and has a<br />
better cross modulation performance.<br />
50
<strong>The</strong> gate terminal of Tr1 is bias by being tied <strong>to</strong> earth through<br />
the tuned winding of T1. <strong>The</strong>re is no need <strong>to</strong> use the low<br />
impedance coupling winding of T1 in this circuit since f.e.t.s<br />
have extremely high input impedances, and, the tuned circuit<br />
can therefore be coupled direct <strong>to</strong> the gate of Tr1.<br />
51
R1 and VR1 form the source bias resistance for Tr1, and C2<br />
is the source bypass capaci<strong>to</strong>r. VR1 enables the standing<br />
current through the stage <strong>to</strong> be varied, and it thus controls<br />
the gain of VR1. As was the case with the previous circuit,<br />
gain is at a maximum with VR1 adjusted for minimum<br />
resistance.<br />
R2 and C1 are a supply decoupling network.<br />
MOSFET Amplifier<br />
MOSFETs (Metal Oxide Semiconduc<strong>to</strong>r Field Effect Transis<strong>to</strong>ns)<br />
are somewhat more expensive than most other types of<br />
transis<strong>to</strong>r, but this additional expense is easily justified by<br />
their superior performance when compared with bipolar and<br />
Jugfet devices in R.F. applications. <strong>The</strong> circuit diagram of a<br />
MOSFET R.F. amplifier is shown in Figure 13. This provides<br />
a slightly higher level of gain than the previous two designs,<br />
and it has a lower noise level.<br />
Perhaps more importantly, it has a much better cross modulation<br />
performance, and MOSFETs are able <strong>to</strong> handle quite<br />
high signal amplitudes without producing high levels of<br />
dis<strong>to</strong>rtion.<br />
As was the case with the Jugfet R.F. amplifier, the high input<br />
impedance of the transis<strong>to</strong>r enables the aerial tuned circuit <strong>to</strong><br />
be directly coupled <strong>to</strong> the input gate. Tr1 is a dual gate<br />
MOSFET, and the input signal is coupled <strong>to</strong> the g1 terminal.<br />
<strong>The</strong> voltage gain at this terminal is determined by the g2<br />
potential of the device, and VR1 can be used <strong>to</strong> vary this<br />
voltage from zero <strong>to</strong> about 2 volts. <strong>The</strong> gain of Tr1 is at a<br />
minimum when the gate 2 voltage is zero, and at maximum<br />
when it is at a level of about 2 volts. VR1 thus acts as the<br />
R.F. gain control. C1 filters out any stray R.F. signals which<br />
might otherwise be picked up at the g2 terminal, and result<br />
in instability or loss of performance. It also minimises any<br />
noise spikes which are produced at VR1 slider as this control<br />
is adjusted.<br />
52
R2 and (2 are the source bias resis<strong>to</strong>r and bypass capaci<strong>to</strong>r<br />
respectively, and R3 and C3 are a supply decoupling network.<br />
MOSFETs have a reputation of being easily damaged by static<br />
charges due <strong>to</strong> their extremely high input impedances (which<br />
53
are usually something in the region of 1,000,000 Meg. ohms).<br />
<strong>The</strong> 40673 transis<strong>to</strong>r has integral protective diodes, and it is<br />
not therefore easily damaged in this way. It needs no more<br />
handling precautions than any normal semiconduc<strong>to</strong>r device.<br />
Bandpass input<br />
It is quite possible <strong>to</strong> use more than one tuned circuit before<br />
the mixer without using any amplifying stages in this part of<br />
the circuit. Such an arrangement is usually termed a bandpass<br />
circuit, and the circuit diagram of such an arrangement appears<br />
in Figure 14.<br />
Here the two R.F. transformers are merely coupled <strong>to</strong>gether<br />
by way of two low impedance windings. Of course, such an<br />
arrangement does not provide any gain, just the opposite in<br />
fact, and there is a significant loss through the input filter.<br />
<strong>How</strong>ever, this circuit produces no cross modulation of its<br />
own, and quite good results can be obtained using this<br />
arrangement.<br />
54
Mixer/Osc. Stages<br />
<strong>The</strong> mixer circuit which was used in the receiver which was<br />
described in the first chapter is simple and inexpensive, but as<br />
far as cross modulation performance is concerned it leaves a<br />
lot <strong>to</strong> be desired. As was stated in Chapter 1, the gain of the<br />
mixer transis<strong>to</strong>r varies with changes in operating current.<br />
As the oscilla<strong>to</strong>r signal swings positive and negative the<br />
operating current decreases and increases, and as it does so it<br />
therefore modulates the input signal and the desired mixing<br />
action is produced.<br />
<strong>The</strong> problem with this system is that the aerial signal also<br />
causes the operating current of the transis<strong>to</strong>r <strong>to</strong> vary in<br />
precisely the same way as the oscilla<strong>to</strong>r signal does. This<br />
results in changes in the gain of the transis<strong>to</strong>r which obviously<br />
causes dis<strong>to</strong>rtion, including intermodulation dis<strong>to</strong>rtion<br />
(of which cross modulation is a type). <strong>The</strong>re is no simple way<br />
of eliminating this dis<strong>to</strong>rtion, but even if there was there<br />
would be no point in doing so since if the dis<strong>to</strong>rtion is removed,<br />
so is the mixing action. This type of mixer thus has<br />
an inherently high cross modulation level.<br />
Dual gate MOSFETs make excellent R.F. amplifiers because,<br />
as was pointed out previously, they can handle high signal<br />
levels while producing only low dis<strong>to</strong>rtion levels. It was also<br />
explained that the gain of the device was controlled by the<br />
voltage at the g2 terminal.<br />
Dual gate MOSFETs make excellent mixers, as by coupling<br />
the aerial signal <strong>to</strong> the g1 terminal and the oscilla<strong>to</strong>r signal <strong>to</strong><br />
the g2 terminal, the oscilla<strong>to</strong>r will vary the gain of the device<br />
and thus modulate the aerial signal. A good mixing action is<br />
produced in this way.<br />
Only low levels of cross modulation are generated by a dual<br />
gate MOSFET mixer because the gain of the device does not<br />
vary greatly with variations in the aerial signal amplitude,<br />
only with. changes in the oscilla<strong>to</strong>r signal level.<br />
55
Since dual gate MOSFETs provide the basis of by far the best<br />
of simple mixer circuits, only this type of mixer will be considered<br />
here, there being little point in providing details of<br />
more complex designs of vastly inferior performance. <strong>The</strong><br />
circuit diagram of a simple MOSFET mixer is shown in<br />
Figure 15, and this also shows the circuit of the recommended<br />
oscilla<strong>to</strong>r circuit.<br />
<strong>The</strong> mixer tuned circuit is fed direct in<strong>to</strong> the g1 terminal of<br />
Tr1, and the tuned winding on the mixer transformer (T2)<br />
provides the uecessaiy D.C. path <strong>to</strong> earth for Tr1 g1. R1 and<br />
R2 form a simple potential divider which bias Tr1 g2 about<br />
1 volt positive. <strong>The</strong> oscilla<strong>to</strong>r signal is coupled <strong>to</strong> the g2<br />
terminal by way of C2, and by modulating the bias voltage<br />
this signal varies the gain of Tr1. R4 and C3 are the source<br />
bias resistance and bypass capaci<strong>to</strong>r. <strong>The</strong> output of the mixer<br />
Is taken from Tr1 drain, which connects <strong>to</strong> the first I.F.<br />
transformer of the I.F. amplifier. R3 and C1 are a supply<br />
decoupling network.<br />
<strong>The</strong> oscilla<strong>to</strong>r circuit may look a little familiar, and this is<br />
because it is basically the same circuit that was used in the<br />
mixcr/oxcilla<strong>to</strong>r stages of the receiver which was described<br />
in Chapter 1. As this stage is not coupled <strong>to</strong> the mixer transformer<br />
this time, the base bias network (R7 and R8) and earth<br />
return capaci<strong>to</strong>r (C8) are connected direct <strong>to</strong> Tr2 base.<br />
When used as a combined mixer/oscilla<strong>to</strong>r circuit it is necessary<br />
<strong>to</strong> select the circuit values <strong>to</strong> limit the amplitude of the<br />
oscillations, as otherwise instability is almost certain <strong>to</strong> occur.<br />
This is less of a problem when the circuit is used only as an<br />
oscilla<strong>to</strong>r, and the opposite was in fact found <strong>to</strong> be the case,<br />
with it being necessary <strong>to</strong> reduce the value of the emitter-base<br />
resis<strong>to</strong>r in order <strong>to</strong> increase the amplitude of the output signal<br />
<strong>to</strong> an acceptable level.<br />
It is not quite as simple <strong>to</strong> construct this mixen/osc. circuit<br />
using a point <strong>to</strong> point wining system as it was in the case of<br />
the mixen/osc. circuitry of the receiver described in chapter 1,<br />
57
ecause more component anchor points are required here, and<br />
there are only the same number of spare coilholder pins which<br />
can be used. Note that where some coil windings are unused,<br />
no connections should be made <strong>to</strong> the relevant pins of the<br />
coilholder. Thus, for example, no connections should be made<br />
<strong>to</strong> pins S and 7 of the coilholder for T2 (Figures 12 and 13).<br />
It is possible <strong>to</strong> solder some parts of the circuit <strong>to</strong>gether without<br />
using any anchor points, and so overcome this problem,<br />
but this is likely <strong>to</strong> give a rather flimsy assembly. This can<br />
result in stability of the oscilla<strong>to</strong>r frequency being affected<br />
by vibration, and it is not likely <strong>to</strong> provide adequate reliability.<br />
<strong>The</strong> method preferred by the author is <strong>to</strong> use point <strong>to</strong> point<br />
wiring with miniature tagstrips being mounted near the coilholders.<br />
<strong>The</strong> purpose of these tagstnips is <strong>to</strong> provide additional<br />
anchor points.<br />
Alternative Oscilla<strong>to</strong>r<br />
<strong>The</strong> oscilla<strong>to</strong>r circuit shown in Figure 15 is probably more<br />
stable (with regard <strong>to</strong> variations in frequency) than most<br />
people realise. It is unlikely that stability could be greatly<br />
increased without resorting <strong>to</strong> highly sophisticated circuitry,<br />
and this is really a complete subject in itself. Such things as<br />
frequency synthesisers are certainly beyond the scope of this<br />
book, and few construc<strong>to</strong>rs bother <strong>to</strong> go <strong>to</strong> such lengths<br />
anyway.<br />
One simple way of improving the stability of the circuit of<br />
Figure 15 is <strong>to</strong> connect a 7.5 volt zener diode in parallel with<br />
C1 (cathode <strong>to</strong> the negative supply). This will substantially<br />
reduce any variations in the output frequency due <strong>to</strong> changes<br />
in the supply voltage (due <strong>to</strong> battery ageing etc.). This modification<br />
will similarly aid the stability of the alternative<br />
oscilla<strong>to</strong>r circuit which appears in Figure 16.<br />
This employs a Jugfet in a simple common source inductive<br />
feedback oscilla<strong>to</strong>r. Only two of the windings on the oscilla<strong>to</strong>r<br />
58
transformer are used in this circuit. When the range 3 and 4<br />
coils are in circuit the tuned winding of the coil does not<br />
provide a D.C. path <strong>to</strong> earth for Tr2 gate due <strong>to</strong> the presence<br />
of the padder capaci<strong>to</strong>rs (C5 and C6). R5 has therefore been<br />
included <strong>to</strong> provide this D.C. path. <strong>The</strong> value of this resis<strong>to</strong>r<br />
is more critical than one might think, and if it is made <strong>to</strong>o<br />
low in value its shunting effect on the tuned circuit reduces<br />
the amplitude of the output signal, or oscillation ceases all<br />
<strong>to</strong>gether. On the other hand, if it is made <strong>to</strong>o high in value it<br />
59
is not able <strong>to</strong> drain away the negative charge which builds up<br />
on Tr2 gate. As a result, this charge takes Tr2 gate about a<br />
volt or so negative of the earth rail, and oscillation is then<br />
halted as the transis<strong>to</strong>r is cut off.<br />
This circuit would appear <strong>to</strong> be slightly more stable than the<br />
one of Figure 15, but it does have a slight disadvantage.<br />
This is that it is difficult <strong>to</strong> obtain a sufficiently high signal<br />
amplitude from the circuit. <strong>The</strong> signal level of Tr2 drain (the<br />
obvious signal take off point) is far <strong>to</strong>o low, and it is<br />
necessary <strong>to</strong> take the output from the tuned circuit instead.<br />
On ranges 3 and 4 the circuit has a performance which is very<br />
much the same as that of the circuit of Figure 15 with regard<br />
<strong>to</strong> sensitivity, but on range 5 results would appear <strong>to</strong> be<br />
slightly inferior. <strong>The</strong> reason for this is probably that on range<br />
5 the oscilla<strong>to</strong>r operates on the second harmonic and not on<br />
the fundamental. In other words the oscilla<strong>to</strong>r is actually<br />
operating at half the required frequency, and it is the second<br />
harmonic signal (which is at double the frequency of the<br />
fundamental) which is used as the oscilla<strong>to</strong>r signal. Because<br />
the f.e.t. circuit oscillates less violently than the bipolar one,<br />
It does not provide as much harmonic output, although the<br />
amplitudes of the fundamentals are very much the same.<br />
I.F. Amplifier<br />
If a simple I.F. amplifier is all that is required, the one<br />
described in Chapter 1 can be used. It is, however, more<br />
normal <strong>to</strong> use a two stage I.F. amplifier, and the circuit<br />
diagram of one of these appears in Figure 17. <strong>The</strong> fact that<br />
this circuit uses two transis<strong>to</strong>rs does not mean that it has<br />
something like one hundred times the gain (the gain that can<br />
be attained by a single 470kHZ I.F. amplifier) of the single<br />
transis<strong>to</strong>r circuit described earlier. Even when using a very<br />
carefully and well planned layout, the gain that can be obtained<br />
is limited by stay feedback over the circuit. If the gain<br />
60
is made <strong>to</strong>o high the level of stray pick up between the input<br />
and output of the circuit, will be sufficient <strong>to</strong> cause a high<br />
background noise level, or could even result in the I.F. stages<br />
breaking in<strong>to</strong> oscillation. This means that it is necessary <strong>to</strong><br />
use the two amplifying stages in the circuit of Figure 17 at<br />
something less than maximum obtainable gain in order <strong>to</strong><br />
maintain stability. On the other hand, the single stage of the<br />
circuit of Figure 3 can be used at just about maximum gain.<br />
Thus there is only a limited, but very worthwhile increase in<br />
performance provided by using an additional I.F. stage.<br />
Apart from increased gain, a second advantage of the two<br />
stage circuit is that it has an extra double tuned I.F. transformer,<br />
and this gives a significant increase in selectivity. I.F.T.l<br />
and I.F.T.2 are both Denco I.F.T.18/465kHZ units, and<br />
I.F.T.3 is a Denco I.F.T.14/470kHZ type.<br />
<strong>The</strong> circuit consists of two common emitter amplifier stages<br />
and diode detec<strong>to</strong>r D1. <strong>The</strong>re is an A.G.C. loop via R4.<br />
Basically this circuit operates in much the same manner as the<br />
one described in the previous chapter, but it has another stage<br />
of amplification in the form of Tr2.<br />
Although the circuit will perform very well with the values<br />
shown, it is possible <strong>to</strong> optimise gain by reducing the value of<br />
R3 slightly. <strong>The</strong> lowerin value this component is made, the<br />
higher the gain. <strong>How</strong>ever, as mentioned earlier, the gain cannot<br />
be increased indeflnately, because stray feedback will<br />
cause either excessive background noise or actual oscillation.<br />
R3 can therefore only be decreased in value <strong>to</strong> a point where<br />
neither of these are apparent, and no further.<br />
A.F. Amplifiers<br />
<strong>The</strong> A.F. amplifier circuit of Figure 4 works extremely well in<br />
this receiver. Another good I.C. audio amplifier circuit is<br />
shown in Figure 18, and this uses the popular LM380N I.C.<br />
62
This device requires very little in the way of discrete components,<br />
and it will work in some applications using only two<br />
discrete components. <strong>The</strong>se are the input and output D.C.<br />
blocking capaci<strong>to</strong>rs, which are C1 and C3 in Figure 18. in<br />
this particular application it is necessary <strong>to</strong> employ three other<br />
discrete components.<br />
In order <strong>to</strong> ensure stable operation of the device it is necessary<br />
<strong>to</strong> add a lowpass filter at the input so that no R.F. signal<br />
is fed in<strong>to</strong> the I.C. R1 and C2 form this filter. <strong>The</strong>y also restrict<br />
the upper frequency response of the circuit somewhat,<br />
and this gives a slightly improved signal <strong>to</strong> noise ratio. C4<br />
is a supply decoupling capaci<strong>to</strong>r, and this is required in<br />
order <strong>to</strong> prevent low frequency instability, or mo<strong>to</strong>r boating<br />
as it is sometimes called. S1 is the on/off switch for the<br />
entire receiver.<br />
This circuit will provide about 500mW. in<strong>to</strong> an 8 ohm<br />
impedance speaker, and it can be used with a higher<br />
impedance load if a reduction in maximum output power<br />
can be <strong>to</strong>lerated. It can also be used <strong>to</strong> drive virtually any<br />
type of headphones.<br />
63
<strong>The</strong> LM380N incorporates short circuit protection, and also<br />
has thermal shut down protection circuitry, although the latter<br />
is of little importance in this low power application. Incidentally,<br />
the TBA800 I.C. which is employed in the A.F. amplifier<br />
described previously has neither form of protection circuitry.<br />
however, it is used well within its ratings in the circuit of<br />
Figure 4, and it is highly unlikely that either short circuiting<br />
the output or overdriving the circuit would destroy the I.C.<br />
64
Class A Circuit<br />
If the user is primarily interested in headphone reception then<br />
the simple discrete low power Class A circuit of Figure 19<br />
should be satisfac<strong>to</strong>ry. This is a two stage transis<strong>to</strong>r circuit<br />
with both stages incorporating common emitter amplifiers.<br />
Tr1 is the preamplifier transis<strong>to</strong>r, and this has R3 as its<br />
collec<strong>to</strong>r load resis<strong>to</strong>r and R2 as its base bias resis<strong>to</strong>r. <strong>The</strong><br />
unbypassed emitter resis<strong>to</strong>r, R4, introduces a certain amount<br />
of negative feedback <strong>to</strong> the preamplifier, and this is necessary<br />
in order <strong>to</strong> reduce the otherwise excessive gain of the circuit.<br />
R1 and C2 form an R.F. filter, and aid the stability of the<br />
circuit. C1 is the input D.C. blocking capaci<strong>to</strong>r.<br />
<strong>The</strong> output stage is basically similar <strong>to</strong> the preamplifier, but<br />
no emitter resis<strong>to</strong>r is used, and it is operating at a higher<br />
power level. C4 is the output D.C. blocking capaci<strong>to</strong>r, and<br />
C5 is a supply decoupling component. S1 is the main on/off<br />
switch.<br />
This circuit can be used <strong>to</strong> feed any normal type of earpiece<br />
or headphones satisfac<strong>to</strong>rily, and if loudspeaker reception is<br />
required it can also be used <strong>to</strong> feed a high impedance L.S.<br />
This should preferably have an impedance of 40 ohms or<br />
more, although satisfac<strong>to</strong>ry results may be obtained using<br />
some lower impedance speaker units. <strong>The</strong> maximum output<br />
power is rather limited, and so the higher the efficiency of<br />
the speaker the better.<br />
B.F.O.<br />
<strong>The</strong> circuit diagram of a simple B.F.O. having a stabilised<br />
supply rail is shown in Figure 20. <strong>The</strong> use of a stabilised supply<br />
conveys two main advantages. Firstly it eliminates the<br />
long term drift that can occur as the battery voltage falls due<br />
<strong>to</strong> ageing. Secondly, it prevents modulation of the B.F.O. by<br />
changes in the supply voltage due <strong>to</strong> loading of the power<br />
65
supply by the audio amplifier. This is likely <strong>to</strong> be most<br />
noticeable when a Class B audio amplifier is used (such as the<br />
two I.C. designs described in this book), and when the battery<br />
is nearing exhaustion. This modulation results in a chirping<br />
effect on C.W. signals, and a similar effect is produced on<br />
S.S.B. signals. In the case of the former this is not <strong>to</strong>o serious,<br />
but in the case of the latter it can make it difficult <strong>to</strong> copy<br />
even quite strong and interference free stations. Increased<br />
supply decoupling is usually of little value in such cases, and<br />
use of a stabilised supply is likely <strong>to</strong> be far more effective.<br />
In the circuit of Figure 20 the supply rail is stabilised by<br />
means of a conventional zener shunt regula<strong>to</strong>r which uses R3<br />
66
and D1. C1 is an R.F. supply decoupling component. S1 is<br />
the B.F.O. on/off swttch.<br />
<strong>The</strong> oscilla<strong>to</strong>r circuit is a straightforward inductive feedback<br />
oscilla<strong>to</strong>r with Tr1 being used in the common emitter mode.<br />
R1 is included <strong>to</strong> reduce the level of positive feedback which<br />
is otherwise excessive, and results strong harmonics being<br />
produced, as well as numerous other spurious signals. VC1 is<br />
a B.F.O. tuning control, and a Jackson type C804 variable<br />
capaci<strong>to</strong>r is suitable for use here. <strong>The</strong> output from the B.F.O.<br />
is taken from Tr1 collec<strong>to</strong>r, and it should not be necessary<br />
<strong>to</strong> make any direct connection <strong>to</strong> the I.F. amplifier. A loose<br />
coupling of the type which was used in the receiver described<br />
in Chapter 1 is all that is really required.<br />
T1 is a Denco I.F. transformer type I.F.T.14/470kHZ, and it<br />
is essential that this component is connected with the correct<br />
phasing as otherwise the circuit will fail <strong>to</strong> oscillate. A small<br />
Information sheet is supplied with each Denco I.F.T., and the<br />
numbers next <strong>to</strong> the leadouts of T1 in Figure 20 correspond<br />
<strong>to</strong> those given on the base diagram of the data sheet which<br />
is provided with the.I.F.T. 14. It is therefore possible <strong>to</strong> ensure<br />
correct connection of this component by reference <strong>to</strong> Figure<br />
20 and the I.F.T.14 information sheet.<br />
F.E.T./Varicap. B.F.O.<br />
An alternative B.F.O. circuit is shown in Figure 21, and this<br />
rather unusual circuit uses a Jugfet in a common source<br />
inductive feedback circuit and has variable capacitance<br />
(varicap.) diode tuning.<br />
Again a stabilised supply rail is used, and this is really essential<br />
here since the B.F.O. is tuned by a voltage which is<br />
derived from the supply rail, and therefore, any changes in the<br />
supply voltage result in a comparatively large variation in the<br />
B.F.O. frequency. <strong>The</strong> supply is stabilised by a zener shunt<br />
regula<strong>to</strong>r which is identical <strong>to</strong> the one employed in the circuit<br />
of Figure 20.<br />
67
D2 is the tuning diode, and this is coupled <strong>to</strong> the tuned winding<br />
of T1 via C2.VR1 is the B.FO. tuning control, and a<br />
voltage which is variable from zero <strong>to</strong> the zener voltage is<br />
produced at the slider of this potentiometer. This tuning<br />
voltage is fed <strong>to</strong> the vanicap. diode via R1. Since the tuning<br />
voltage reverse biases D2, no significant current flows in R1,<br />
and it can therefore have a fairly high value. This is important,<br />
68
as a low value here would result in heavy loading of the tuned<br />
circuit, and this could prevent the circuit from oscillating.<br />
An advantage of this circuit over the one shown in Figure 20<br />
is that it has a lower harmonic output, and it therefore<br />
generates fewer spurious signals which will be picked up by<br />
the receiver’s front end circuitry. It is also a little more stable<br />
than the previous B.F.O. circuit.<br />
Although this circuit has a comparatively weak output, again<br />
only a.loose coupling <strong>to</strong> the I.F. amplifier will be required.<br />
As in the previous circuit, it is essential that T1 is connected<br />
with the correct phasing, and T1 is again a Denco I.F.T./14/<br />
470kHZ component.<br />
As many readers will have realised, the 1N4001 which is<br />
specified in the D2 position is not a varicap. diode, but is in<br />
fact a 1 Amp. power rectifier. This may seem <strong>to</strong> be rather<br />
unusual, but this choice of component is actually quite<br />
practical. Virtually any silicon diode or rectifier will work as<br />
a varicap. diode since these all develop a depletion layer<br />
when they are reversed biased. This depletion layer is the<br />
insulating layer which forms between the two silicon chips<br />
at the p - n junction, and it is this layer which prevents the<br />
diode from conducting when it is reversed biased. <strong>The</strong> thickness<br />
of the layer varies with the applied voltage, and it<br />
increases in depth with increased applied voltage.<br />
When a diode is used as a variable capacitance device it is the<br />
depletion layer which forms the dielectric of the capaci<strong>to</strong>r,<br />
and the two silicon chips which form the plates. Thus, increased<br />
reverse bias voltage results in a thickening of the dielectric,<br />
and therefore in a decrease in the devices capacitance.<br />
Proper varicap. diodes are manufactured <strong>to</strong> very close <strong>to</strong>lerances<br />
so that a certain capacitance, within certain specified limits,<br />
will be produced from a given reverse voltage.<strong>The</strong>y are also<br />
designed <strong>to</strong> operate at high frequencies. In this application the<br />
characteristics of the vadcap. diode are not critical, and the<br />
69
operating frequency is comparatively low. <strong>The</strong> main require.<br />
ment is for a fairly high capacitance swing from a rather<br />
limited tuning voltage range, and this is provided by the physically<br />
large junction of the 1N4001 rectifier at low cost.<br />
Adjustment<br />
<strong>The</strong> setting up procedure for this receiver is much the same<br />
regardless of which building blocks are used, and it is also<br />
very similar <strong>to</strong> the setting up of the receiver described in<br />
Chapter 1. It will therefore only be covered fairly briefly<br />
here. If the construc<strong>to</strong>r is uncertain about some point of<br />
detail, reference <strong>to</strong> the appropriate part of the previous<br />
chapter should clear up any problems.<br />
With an aerial and either phones or a speaker connected <strong>to</strong><br />
the appropriate sockets it should be possible <strong>to</strong> receive a<br />
few stations with the R.F., mixer, and oscilla<strong>to</strong>r coils given<br />
approximately the correct adjustment. This merely consists<br />
of unscrewing their cores so that about 10m.m. of metal<br />
thread protrudes from the <strong>to</strong>p of each coil.<br />
When a station has been located and accurately tuned in, the<br />
cores of the I.F. transformers can be peaked. A multimeter<br />
having a sensitivity of 20k/volt or more and set <strong>to</strong> a low D.C.<br />
volts range can be used as a tuning indica<strong>to</strong>r. This is connected<br />
across VR1 of Figure 17 with the negative lead <strong>to</strong> chassis<br />
and the I.F.T. cores are adjusted for mInimum meter reading.<br />
If the station is very strong, the voltage across the volume<br />
control will become negative with respect <strong>to</strong> chassis, and it<br />
will then be necessary <strong>to</strong> reverse the polarity of the test periods.<br />
<strong>The</strong> I.F.T. cores are then peaked for maximum meter reading.<br />
<strong>The</strong> core of the RF. coil is given any setting which enables<br />
the R.F. tuning control <strong>to</strong> peak stations at any setting of the<br />
tuning control. If it is well out of alignment it will not be<br />
possible <strong>to</strong> peak signals at one or other ends of the band, but<br />
it is quite possible that no adjustment will be required here.<br />
70
With the mixer trimmer control set at about half maximum<br />
capacitance and the set tuned <strong>to</strong> a station at roughly the<br />
centre of the tuning range, the mixer coil (F2) is adjusted <strong>to</strong><br />
peak the station.<br />
A multimeter can be used as a tuning indica<strong>to</strong>r for these R.F.<br />
adjustments in just the same way as it was for the I.F. adjustments.<br />
<strong>The</strong>se adjustments must, of course, be repeated for<br />
all three sets of coils. <strong>The</strong> metal thread which protrudes from<br />
the <strong>to</strong>p of each coil will accept 6BA nuts. When the correct<br />
settings for the coils have been found, a 6BA nut can be<br />
screwed down fairly tightly over this threaded portion so that<br />
the core is held in position and will not be accidentally moved<br />
during band changing. <strong>How</strong>ever, be careful not <strong>to</strong> upset the<br />
settings of the cores when adding these nuts.<br />
<strong>The</strong> B.F.O. is adjusted by tuning accurately <strong>to</strong> an A.M. station.<br />
and then setting the B.F.O. tuning control <strong>to</strong> a central<br />
position. <strong>The</strong>n the B.F.O. is switched in and the core of the<br />
B.F.O. transformer is adjusted <strong>to</strong> produce a whistle from the<br />
phones or speaker. This core is then carefully adjusted <strong>to</strong><br />
produce the lowest possible beat note at the output.<br />
This completes the setting up procedure and the set is then<br />
ready for use. It should perhaps be pointed out that if the<br />
passive front end is used, T1 should be regarded as the R.F.<br />
coil and T2 as the mixer coil. VC1 then becomes the R.F.<br />
tuning control, and VC2 the mixer trimmer control.<br />
<strong>The</strong> receiver is used in much the same way as that of the<br />
previous chapter. <strong>The</strong> main difference is that there is an<br />
additional tuning control in the form of the R.F. tuning one.<br />
This is always adjusted <strong>to</strong> peak received signals, and it will<br />
need readjustment each time the main tuning is significantly<br />
altered. Small adjustments of the tuning control will not<br />
necessitate any readjustment of the R.F. tuning control.<br />
71
CHAPTER THREE<br />
DOUBLE CONVERSION RECEIVER<br />
<strong>The</strong> double conversion approach has already been outlined in<br />
the previous chapter, and so the reason for using this type of<br />
circuit will not be discussed in detail here. <strong>The</strong> dual conversion<br />
receiver which is described here is based on the circuit<br />
modules which were detailed in Chapter 2. <strong>The</strong> only additional<br />
circuitry used in the double conversion receiver is an<br />
additional single transis<strong>to</strong>r stage.<br />
<strong>The</strong> block diagram of Figure 22 shows the early stages of the<br />
receiver. At the input of the set any of the front end circuits<br />
described in the previous chapter can be used, with no modifications<br />
whatever being required. Alternatively a simple passive<br />
input circuit using a single tuned circuit can be used, and<br />
the relevant circuit appears in Figure 23. This arrangement<br />
provides quite good image rejection since this receiver has a<br />
first intermediate frequency of 1.6MHZ. This gives an image<br />
signal which is some 3.2MHZ away from the main response,<br />
and so even a single tuned circuit provides sufficient attenuation<br />
of the image response. Of course, the front ends of<br />
Chapter 2, with their two tuned circuits, will provide superior<br />
image rejection for the additional circuitry and expense that is<br />
involved. This will however, be at the cost of decreased cross<br />
modulation perfor mance if one of the active front ends is<br />
used, or decreased sensitivity if the passive one is employed.<br />
<strong>The</strong> simple circuit, of Figure 23 is thus quite an attractive one<br />
from a practical viewpoint.<br />
<strong>The</strong>re is no basic change in the mixer or oscilla<strong>to</strong>r circuits, it is<br />
only necessary <strong>to</strong> change the oscilla<strong>to</strong>r coil <strong>to</strong> a colour coded<br />
‘White’ type and the values of the padder capaci<strong>to</strong>rs must be<br />
altered. <strong>The</strong> range 3 padder, which connects <strong>to</strong> pin 3, requires<br />
a value of 340pf, and the range 4 padder, which connects <strong>to</strong><br />
73
pin 4, has a value of 960pf. When a 465kHZ I.F. is used<br />
there is no need for a padder capaci<strong>to</strong>r on Range 5 and so the<br />
relevant coil pin (pin 6) is connected straight <strong>to</strong> earth. With<br />
the increased I.F. a padder becomes necessary and the required<br />
value is 2,000pf.<br />
<strong>The</strong> 1.6 MHZ I.F. merely consists of a 1.6MHZ I.F. transformer<br />
and no amplification is provided here. <strong>The</strong> reason for this is<br />
quite simple, and is merely that the I.F. gain of the rece-iver is<br />
already high enough, and any additional I.F. gain would be<br />
superfluous. It might even cause problems with overloading.<br />
Some readers might be wondering why an I.F. of 1.6MHZ has<br />
been chosen, particularly in view of the fact that the use of an<br />
I.F. in the region of 5 <strong>to</strong> 9MHZ was put forward in Chapter 2.<br />
An I.F. of 1.6MHZ is used because oscilla<strong>to</strong>r coils for this<br />
frequency and I.F. transformers for this frequency are readily<br />
available, whereas oscilla<strong>to</strong>r coils and I.F.T.s for high intermediate<br />
frequencies are not. It is possible <strong>to</strong> adapt coils and<br />
74
I.F.T.s which are intended for other frequencies <strong>to</strong> operate at<br />
the desired I.F., but this is not always entirely satisfac<strong>to</strong>ry, and<br />
is hardly justified when one considers the relatively modest<br />
increase in image rejection which is produced. In practice an<br />
I.F. of 1.6MHZ will provide good image rejection.<br />
<strong>The</strong> output of the 1.6MHZ I.F. stage is fed <strong>to</strong> the second mixer<br />
and oscilla<strong>to</strong>r circuits. This oscilla<strong>to</strong>r has a fixed frequency of<br />
2.07MHZ and it combines with the 1.6MHZ I.F. <strong>to</strong> produce a<br />
second I.F. of 470kHZ (2.07 - 1.6 = 0.47MHZ, or 470kHZ in<br />
other words). <strong>The</strong> output of the second mixer is then fed <strong>to</strong> a<br />
470kHZ I.F. amplifier, detec<strong>to</strong>r, A.G.C. circuit, etc. <strong>The</strong>se<br />
circuits are those described in the previous chapter.<br />
Basically then, this receiver is the same as the one of Chapter<br />
2, but the oscilla<strong>to</strong>r is slightly modified <strong>to</strong> produce an I.F. of<br />
1.6MHZ. This I.F. signal is selected by a passive I.F. circuit<br />
and then passed on <strong>to</strong> a second mlxerloscilla<strong>to</strong>r stage where it<br />
is converted <strong>to</strong> a conventional 465kHZ I.F. <strong>The</strong> subsequent<br />
stages of the receiver are exactly as before. Thus the high first<br />
I.F. gives good image rejection while the low second I.F. gives<br />
good selectivity. <strong>The</strong> sensitivity of the set is much the same as<br />
before, and it is actually increased slightly as the gain of the<br />
second mixer exceeds the losses through the 1.6MHZ I.F.<br />
stage.<br />
Alternative System<br />
It should perhaps be mentioned in passing that there is an<br />
alternative type of direct conversIon receiver where the first<br />
oscilla<strong>to</strong>r operates at a fixed frequency and the second oscilla<strong>to</strong>r<br />
is the tuneable one. This system is outlined in the block<br />
diagram which is shown in Figure 24.<br />
Usually with sets of this type the second oscilla<strong>to</strong>r has only<br />
a restricted tuning range so that each tuning range is rather<br />
limited, being perhaps only a few hundred kHZ wide. A few<br />
sets of this type have general coverage, but it is more usual<br />
<strong>to</strong> have several tuning ranges with each one centred on an<br />
amateur or broadcast band, and there ate consequently large<br />
gaps in the coverage of such a receiver.<br />
75
Sets of this type do have advantages, the primary one being<br />
that the first oscilla<strong>to</strong>r can be crystal controlled, and therefore<br />
excellent stability can be obtained. It is possible <strong>to</strong> use a<br />
crystal controlled second oscilla<strong>to</strong>r in a conventional double<br />
conversion set, but since the second oscilla<strong>to</strong>r is usually at a<br />
lower frequency than the first one this conveys comparatively<br />
little advantage.<br />
A set of this type will not be described here as it is beyond<br />
the scope of most home construc<strong>to</strong>rs. One problem is that for<br />
every tuning range that is covered a different crystal for the<br />
first oscilla<strong>to</strong>r is required. Even if suitable crystals could be<br />
obtained, they would probably be considered prohibitively<br />
expensive by most construc<strong>to</strong>rs. <strong>The</strong> tuning of the receiver is<br />
also rather complex since not only is it necessary <strong>to</strong> have a<br />
tuneable aerial tuned circuit and second oscilla<strong>to</strong>r, but the<br />
first I.F. must also be tuneable.<br />
2nd Mixer/Osc. Circuit<br />
<strong>The</strong> circuit diagram for the second mixer/oscilla<strong>to</strong>r and first<br />
I.F. stage appears in Figure 25. This circuit is of the same<br />
type as the mixer/oscilla<strong>to</strong>r circuit of the receiver which was<br />
described in Chapter 1. It may seem a little unusual <strong>to</strong> use a<br />
dual gate MOSFET first mixer and a bipolar second mixer<br />
when it has been stated earlier that the latter has a cross modulation<br />
performance which is much inferior <strong>to</strong> that of the<br />
former. In fact it is not, as cross modulation is far less of a<br />
problem with the second mixer when compared <strong>to</strong> the first<br />
mixer. <strong>The</strong> reason for this is that the I.F. transformer at the<br />
input <strong>to</strong> the second mixer has a comparatively narrow bandwidth.<br />
<strong>The</strong>refore only a fairly limited number of signals are<br />
presented <strong>to</strong> the second mixer, and cross modulation is that<br />
much less a problem as a consequence of this.<br />
T1 of Figure 24 is a Denco Red Oscilla<strong>to</strong>r Coil Range 2T, and<br />
this is intended for use as a M.W. oscilla<strong>to</strong>r coil. It is suitable<br />
for this application because 1.6MHZ lies at the high frequency<br />
end of the M.W. band, and so by adding a low value of tuning<br />
77
capacitance across the tuned winding of this coil it can be<br />
tuned <strong>to</strong> produce a 465kHZ output from a 1.6MHZ input.<br />
<strong>The</strong> supply voltage for the bias circuit for Tr1 is obtained from<br />
the main supply line via the decoupling network consisting of<br />
R6, R7, C3, and C5. <strong>The</strong> main supply for Tr1 is obtained from<br />
the I.F. amplifier circuit via the primary winding of the first<br />
465kHZ I.F. transformer.<br />
Adjustments<br />
Adjustment of this receiver is very much the same as the<br />
procedure used for the sets described in previous chapters.<br />
One very important difference is that it will probably not be<br />
possible <strong>to</strong> receive any signals at all until the second oscilla<strong>to</strong>r<br />
has been set <strong>to</strong> the correct frequency, or approximately the<br />
correct frequency. To do this the core of the second oscilla<strong>to</strong>r<br />
coil should be adjusted so that approximately 10m.m. of metal<br />
screw thread sticks out above the plastic coil former. <strong>The</strong>n it is<br />
a matter of trial and error with TC1 of Figure 24 being tried<br />
at various settings, and then the tuning control being adjusted<br />
in search of stations. Eventually a setting should be found<br />
where the set has a reasonable level of sensitivity.<br />
When this stage has been reached the tuning control should be<br />
adjusted in search of a fairly strong signal which seems <strong>to</strong><br />
have consistant signal strength. Alternatively the output from<br />
some form of signal genera<strong>to</strong>r (such as the calibration oscilla<strong>to</strong>r<br />
described in the next chapter) can be used. <strong>The</strong> latter is<br />
preferable as it provides a more reliable signal.<br />
It is then a matter of trial and error again with TCI being<br />
given various settings and then the tuning control being used<br />
<strong>to</strong> accurately tune in the test transmission or signal. <strong>The</strong> final<br />
setting for TC1 is the one which provides the strongest signal.<br />
TC1 cannot be peaked in the same way as an R.F. or I.F. tuned<br />
circuit because it affects the reception frequency, in much the<br />
same way as the first oscilla<strong>to</strong>r does.<br />
79
When this adjustment has been satisfac<strong>to</strong>rily completed the<br />
receiver is then adjusted in the normal manner.<br />
Finally, when all other adjustments have been completed, the<br />
1.6MHZ I.F. transformer is peaked. Make sure the set is very<br />
accurately tuned <strong>to</strong> the test signal before adjusting this component.<br />
It has two cores, and the form of construction is the<br />
same as that used for the 465kHZ double tuned I.F. transformers.<br />
Construction of the unit should present no real difficulties, but<br />
it is advisable <strong>to</strong> completely screen this part of the set from the<br />
other circuitry. <strong>The</strong> reason for doing this is simply that there is<br />
a certain amount of harmonic output from the second oscilla<strong>to</strong>r<br />
and these can be picked up.by the aerial circuitry unless<br />
suitable screening is used. Even the fundamental frequency of<br />
the second oscilla<strong>to</strong>r (2.07MHZ) lies within the frequency<br />
coverage of the set (Range 3T).<br />
One way of screening off the second mixer/osc. circuitry is <strong>to</strong><br />
build it in<strong>to</strong> a metal box within the main casing of the receiver.<br />
Diecast aluminium boxes are ideal for applications such as<br />
this where good screening properties are required. It is<br />
necessary <strong>to</strong> drill small holes in the box at strategic points so<br />
that it is possible <strong>to</strong> adjust the cores of the I.F.T. and also TC1.<br />
<strong>The</strong> positive supply rail can be taken in<strong>to</strong> the box via a lnf<br />
feed through ceramic capaci<strong>to</strong>r.<br />
Bandswitching<br />
It has been assumed so far that whether the construc<strong>to</strong>r is<br />
going <strong>to</strong> build the single or the double conversion receiver,<br />
plug in bandchanging will be used. <strong>How</strong>ever, many construc<strong>to</strong>rs<br />
would no doubt prefer <strong>to</strong> have the convenience of bandswitching<br />
even though this is more difficult <strong>to</strong> achieve than<br />
one might think.<br />
Fortunately it is not necessary <strong>to</strong> switch both sides of each coil<br />
winding, and it is only necessary <strong>to</strong> switch the non-earthy end,<br />
80
or ‘hot’ end as it is often called. <strong>The</strong> earthy or ‘cold’ ends are<br />
merely connected in parallel. Note that the cold end of a winding<br />
very often does not connect direct <strong>to</strong> earth, but is instead<br />
connected <strong>to</strong> earth via an earth return capaci<strong>to</strong>r. Occasionally<br />
neither end of a winding will be found <strong>to</strong> be earthed (such as<br />
the collec<strong>to</strong>r winding of T2 in Figure 3). Even in cases such as<br />
this it is only necessary <strong>to</strong> switch one side of the wiring.<br />
In deciding which end of a winding should be switched just<br />
follow this simple rule. If one end of a winding is earthed then<br />
put the switching in the other side, if one end of a winding is<br />
coupled <strong>to</strong> a terminal of a transis<strong>to</strong>r, it is this side of the winding<br />
which is switched. Thus the wavechanging for the circuit of<br />
Figure 3 would be as shown in the skele<strong>to</strong>n circuit of Figure 26.<br />
It is possible <strong>to</strong> slightly simplify the bandchanging by connecting<br />
the aerial coupling windings in series and not bothering<br />
with any switching at all in this part of the circuit. This<br />
will, however, result in a slight loss of efficiency.<br />
It is essential that a well planned layout is used as otherwise<br />
loss of performance, instability, and other problems are likely<br />
<strong>to</strong> result. Neat appearance and couvenience are of secondary<br />
importance, and short wiring is the main requirement.<br />
Rather than mount the coils in B9A holders it is probably<br />
better <strong>to</strong> chassis mount them. Each coil has a OBA plastic<br />
thread at the <strong>to</strong>p and is supplied with a plastic OBA nut. <strong>The</strong><br />
coils are thus easily mounted on the chassis or a mounting<br />
plate with only a single OBA mounting hole (¼in. or 6.5m.m.<br />
diameter drill) being required for each coil. <strong>The</strong> plastic thread<br />
is easily stripped from the former and so the mounting nut be<br />
taken beyond finger tightness. Another slight problem is that<br />
there is a tendency for the polystyrene coil former <strong>to</strong> melt if<br />
soldered connections are made direct <strong>to</strong> the pins of the coil.<br />
Soldered connections <strong>to</strong> these pins must therefore be completed<br />
quickly so as <strong>to</strong> avoid damaging the coils. On the other<br />
hand, make quite sure that no dry joints are produced and do<br />
not sacrifice the quality of the joint for the sake of speed.<br />
81
Note that shortness of wiring is more important on the higher<br />
frequency ranges than it is on the lower frequency ones. It is<br />
inevitable that the wiring <strong>to</strong> some coils will be longer than the<br />
wiring <strong>to</strong> others, and so the layout should be arranged in such<br />
a fashion that the shortest wiring connects <strong>to</strong> the Range 5T<br />
coil.<br />
Apart from the fact that long wires are likely <strong>to</strong> cause a greater<br />
loss of efficiency on Range 5T there is the additional problem<br />
that long leads in the wiring associated with the tuned windings<br />
will significantly increase the inductance of these windings.<br />
This can result in a loss of the extreme H.P. coverage of<br />
the receiver and it can also cause problems with alignment.<br />
If bandswitching is used it is possible <strong>to</strong> eliminate the mixer<br />
trimmer control by adding a 10/40pf (approx.) trimmer<br />
capaci<strong>to</strong>r across the tuned winding of each mixer coil. It is<br />
also necessary <strong>to</strong> remove the fixed capaci<strong>to</strong>r connected across<br />
the oscilla<strong>to</strong>r tuning capaci<strong>to</strong>r, and then add a 10/40pf trimmer<br />
across the tuned winding of each oscilla<strong>to</strong>r coil.<br />
With the aid of a signal genera<strong>to</strong>r the oscilla<strong>to</strong>r trimmer is<br />
adjusted <strong>to</strong> set the correct upper frequency limit of one tuning<br />
range. <strong>The</strong>n the core of that oscilla<strong>to</strong>r coil is adjusted <strong>to</strong><br />
produce the correct lower frequency limit on that tuning<br />
range. <strong>The</strong>n the trimmer is read <strong>to</strong> produce the proper<br />
limit of H.P. coverage once again, and this whole procedure<br />
is repeated several times until the correct coverage (or very<br />
nearly so) is obtained.<br />
<strong>The</strong>n the set is tuned <strong>to</strong> the high frequency end of the range<br />
and the mixer trimmer is adjusted <strong>to</strong> peak sensitivity. Next the<br />
set is tuned <strong>to</strong> the low frequency end of the range and the<br />
core of the mixer coil is adjusted <strong>to</strong> peak sensitivity. <strong>The</strong><br />
receiver is then returned <strong>to</strong> the high frequency end of the<br />
tuning range once again and the mixer trimmer is repeaked.<br />
This procedure is repeated several times until no further<br />
improvement in overall sensitivity can be obtained.<br />
84
All three ranges must be adjusted in this way.<br />
This system does not provide such good results as the use of<br />
a mixer trimmer control as the latter enables the mixer tuned<br />
circuit <strong>to</strong> always be perfectly peaked at any setting of the tuning<br />
control. <strong>How</strong>ever, any loss of performance will only be<br />
very small, and this system is more convenient since one of<br />
the tuning controls is eliminated.<br />
It is recommended that a separate wavechange switch is used<br />
for the R.F. amplifier circuitry in the same way that a separate<br />
tuning control is used, and for the same reasons. It is possible<br />
<strong>to</strong> use a single switch for bandchanging, but careful and<br />
extensive screening would be necessary.<br />
85
Blank page<br />
86
CHAPTER FOUR<br />
ADD-ON CIRCUITS<br />
This final chapter will deal with a number of add-on circuits<br />
which can be used <strong>to</strong> aid and improve reception using the<br />
receivers described in Chapters 2 and 3. Many of these<br />
circuits can be used with other receivers and are of general<br />
interest. A surprisingly large number of add-on circuits are<br />
provided, and no excuse is made for this fact. <strong>The</strong> receivers<br />
described in the two previous chapters are capable of extremely<br />
good results sand have high levels of performance,<br />
but results can, nevertheless, be greatly improved by some<br />
additional circuitry. Not all the circuits described here actually<br />
improve performance at all, and an example of such a circuit<br />
is the one for an ‘S’ Meter. Units such as this can be very<br />
useful though, and most S.W.Ls and amateurs would probably<br />
consider them a virtual necessity.<br />
Q Multiplier<br />
One area in which the receivers have a level of performance<br />
which leaves a lot <strong>to</strong> be desired is the degree of selectivity<br />
which they provide. Ideally a bandwidth of about 5 <strong>to</strong> 6kHZ is<br />
needed for A.M. reception, with a response which falls off<br />
very rapidly outside these limits. In order <strong>to</strong> achieve this level<br />
of selectivity using ordinary I.F. transformers it is necessary <strong>to</strong><br />
use an I.F. of even less than 465kHZ. Some designs use a<br />
triple conversion circuit with a final I.F. of only 100 or 85kHZ<br />
in order <strong>to</strong> obtain high selectivity, and excellent results on<br />
A.M. can be obtained in this way.<br />
<strong>How</strong>ever, for S.S.B. reception a bandwidth of only about<br />
2.5kHZ is required, and for C.W. reception the ideal bandwidth<br />
is even less. Modern receiver designs tend <strong>to</strong> use ordinary I.F.s<br />
87
with some form of I.F. filter rather than bother with the complication<br />
of an extra converter stage.<br />
<strong>The</strong> most sophisticated of modern receivers uses a different<br />
crystal filter for each mode of reception, and each filter has a<br />
response characteristic which is rnoulded <strong>to</strong> suit the appropriate<br />
mode. This method is beyond the scope of most amateur<br />
construc<strong>to</strong>rs, because of the high cost and complexity which<br />
is involved.<br />
Variable selectivity can be obtained by using quite a simple<br />
device known as a Q multiplier. This will not give a level of<br />
performance which equals a set of high quality crystal filters,<br />
but it will provide excellent results for very little outlay. <strong>The</strong><br />
circuit diagram of a Q multiplier is shown in Figure 27.<br />
A Q multiplier relies on the fact that an ideal tuned circuit has<br />
a very narrow bandwidth and a steep sided response. Practical<br />
tuned circuits fall well short of perfection though due <strong>to</strong> the<br />
88
esistance of the wire from which the coil is constructed. It is<br />
this resistance which introduces losses in<strong>to</strong> the coil and results<br />
in a widening of its bandwidth and a much more gradual fall<br />
off in the passband. <strong>The</strong> effectiveness of a coil is known as its<br />
Q, and the purpose of a Q multiplier is <strong>to</strong> boost the Q of an<br />
ordinary tuned circuit. By connecting this tuned circuit in the<br />
I.F. amplifier circuitry of a receiver a considerable improvement<br />
in selectivity can be obtained.<br />
<strong>The</strong> way in which a Q multiplier increases the Q of a coil is<br />
really very straightforward. <strong>The</strong> tuned circuit is connected at<br />
the output of an amplifier circuit, and some of the energy in<br />
the coil is coupled <strong>to</strong> the input of the amplilier. <strong>The</strong>re must<br />
be zero phase shift between the input <strong>to</strong> and output from the<br />
tuned circuit. <strong>The</strong> effect of the circuit then is that it tends <strong>to</strong><br />
compensate for the losses in the coil. <strong>The</strong> amount of feedback<br />
which is applied over the circuit is made variable so that the<br />
effective Q of the coil (and therefore the bandwidth of the<br />
receiver) can be altered. With little or no feedback used the<br />
selectivity of the receiver will be little affected by the Q multiplier.<br />
On the other hand, with the feedback adjusted so that<br />
all the losses in the coil are compensated for, a very high Q<br />
and thus also level of selectivity will be attained. Intermediate<br />
feedback levels will provide intermediate degrees of selectivity.<br />
<strong>The</strong>refore it is possible <strong>to</strong> adjust the selectivity <strong>to</strong> suit the<br />
reception mode.<br />
Note that if the level of feedback is overdone even slightly,<br />
the Q multiplier will break in<strong>to</strong> oscillation. Its effect will then<br />
be very much like switching in the B.F.O. and it will not<br />
provide the desired effect.<br />
In the circuit of Figure 27 Tr1 is used as a common source<br />
amplifier and it has the tuned circuit as its drain load. Positive<br />
feedback is applied <strong>to</strong> the gate of Tr1 via the secondary winding<br />
of T1 and VR1. <strong>The</strong> latter controls the amount of feedback<br />
and acts as the bandwidth control. T1 is a Denco<br />
I.F.T.14/470kHZ component.<br />
89
Adjustment<br />
When initially testing the circuit, accurately tune <strong>to</strong> a strong<br />
A.M. station before significantly advancing the level of feedback<br />
using VR1. When VR1 is well advanced the Q multiplier<br />
should begin <strong>to</strong> oscillate, and this will produce a beat note<br />
from the phones or speaker. With VR1 advanced just beyond<br />
the threshold of oscillation, adjust the core of T1 for zero<br />
beat. <strong>The</strong> unit is then in alignment with the I.F. amplifier,<br />
and it is ready for use.<br />
It should be found that a vast improvement in selectivity is<br />
obtained, and with the feedback level carefully set just below<br />
the threshold of oscillation the bandwidth should be so narrow<br />
that it is only suitable for proper reception of C.W.<br />
Crystal Filter<br />
Most crystal filter circuits are rather expensive <strong>to</strong> construct<br />
and difficult <strong>to</strong> align accurately, but the simple circuit which is<br />
shown in Figure 28 is quite easy <strong>to</strong> set up, and as only a single<br />
crystal is used it is comparatively inexpensive.<br />
<strong>The</strong> bandwidth obtained with this arrangement is just about<br />
adequate for A.M. reception, although it is really a little<br />
narrower than would ideally be used. For S.S.B. reception<br />
the bandwidth is perhaps a little wider than the ideal, but the<br />
bandwidth is a good compromise for these two reception<br />
modes. <strong>The</strong> passband is considerably wider than is really<br />
necessary for C.W. reception, but it is possible <strong>to</strong> overcome<br />
this by using an audio C.W. filter. Such a circuit will be<br />
described later.<br />
<strong>The</strong> crystal is the circuit element which provides the very sharp<br />
selectivity, and this is a piezo electric device which has two<br />
resonant frequencies. At the series nes6nant frequency the<br />
crystal has a very low impedance, and at the parallel resonant<br />
frequency it has a very high impedance. <strong>The</strong>se two frequencies<br />
90
are very close <strong>to</strong>gether, usually being something like a few<br />
hundred HZ <strong>to</strong> a couple of kHZ apart. <strong>The</strong> series resonant<br />
frequency is the lower of the two.<br />
This sudden transition from a low <strong>to</strong> a high impedance with<br />
only a very small increase in input frequency means that a<br />
crystal has an extremely high Q value. <strong>The</strong> Q of a crystal is<br />
usually something in the order of several thousand, whereas<br />
the Q of a tuned circuit in a conventional I.F.T. is normally<br />
something in the region of one hundred. This very high Q<br />
enables even a simple crystal filter <strong>to</strong> achieve a very narrow<br />
bandwidth having an extremely rapid roll-off outside the<br />
required passband. This filter therefore provides really<br />
excellent results.<br />
Basically the crystal is used in a form of bridge circuit, and<br />
the output of the bridge is fed <strong>to</strong> a simple common emitter<br />
amplifier. <strong>The</strong> purpose of the amplifier is <strong>to</strong> compensate for<br />
the losses through the filter proper. R1 is given a fairly high<br />
value so that this stage has only a fairly low level of gain and<br />
a low noise level. <strong>The</strong> level of gain can be increased, if<br />
required, by decreasing the value of R1 somewhat.<br />
91
I.F.T.1 is a Denco I.F.T.18/465kHZ type, and this needs <strong>to</strong> be<br />
modified slightly. This modification is necessary because a<br />
centre tapped secondary winding is needed, and <strong>to</strong> the best of<br />
the authors knowledge no suitable ready made component is<br />
available. <strong>The</strong> tapping on the secondary of the Denco I.F.T.18/<br />
465kHZ component is unsuitable as it is not a centre tap.<br />
This problem is overcome by removing the internal capaci<strong>to</strong>r<br />
connected across the secondary winding, and substituting two<br />
external series capaci<strong>to</strong>rs of twice the value. <strong>The</strong>se external<br />
capaci<strong>to</strong>rs are C1 and C2 of Figure 28. <strong>The</strong> combined capacitance<br />
of these two components is equal <strong>to</strong> that of the removed<br />
internal capaci<strong>to</strong>r, and so the resonant frequency of the<br />
secondary winding is not significantly altered. <strong>The</strong> junction<br />
of C1 and C2 forms a capacitive centre tap, and this is just<br />
as effective as using an inductive centre tap.<br />
<strong>The</strong> removed tuning capaci<strong>to</strong>r has a value of 400pf, and so<br />
each of the new capaci<strong>to</strong>rs requires a value of 800pf. It is<br />
unlikely that components of this value will be available, and<br />
so it will be necessary <strong>to</strong> use two capaci<strong>to</strong>rs wired in parallel<br />
<strong>to</strong> make up the required value. <strong>The</strong> author used a 470pf and a<br />
330pf capaci<strong>to</strong>r <strong>to</strong> make up this value. Use good quality close<br />
<strong>to</strong>lerance (preferably 2% or better) components.<br />
It is an easy matter <strong>to</strong> remove the screening can from the<br />
I.F.T. so that access <strong>to</strong> the capaci<strong>to</strong>r can be obtained. It is<br />
merely necessary <strong>to</strong> push outwards two small indentations at<br />
the base of the can. <strong>The</strong> screening can is then slipped off and<br />
the capaci<strong>to</strong>r is snipped out using a pair of wire clippers. <strong>The</strong><br />
capaci<strong>to</strong>r is mounted on the inside of the base of the I.F.T.,<br />
and care must be taken here as otherwise the leads <strong>to</strong> the<br />
secondary winding could easily be cut (but not so easily<br />
res<strong>to</strong>red). Also make sure that the right capaci<strong>to</strong>r is removed<br />
as there is an identical one connected across the primary<br />
winding. When this task has been completed the screening can<br />
is replaced.<br />
92
Adjustment<br />
Start with TC1 set at about half capacitance and then try <strong>to</strong><br />
tune a few stations on the receiver. It will probably be found<br />
that it is possible <strong>to</strong> tune each station twice, with the two<br />
tuning points being very closely spaced. This effect will be<br />
more noticeable if the unit is connected <strong>to</strong> an R.F. signal<br />
genera<strong>to</strong>r rather than an aerial, as there will then be only a<br />
single signal <strong>to</strong> tune <strong>to</strong>. One of these responses will be<br />
relatively broad, and will be affected by adjustment of the<br />
I.F.T. cores. <strong>The</strong> other will be much more sharp and will be<br />
unaffected by adjustments made <strong>to</strong> the I.F.Ts<br />
<strong>The</strong> cores of the I.F.T.s must be adjusted <strong>to</strong> move the broad<br />
response <strong>to</strong>wards the sharp one. When the two virtually<br />
coincide, accurately tune in the signal on the sharp response<br />
and then peak the I.F.T.s in the normal way.<br />
It may happen that the two responses virtually coincide without<br />
any adjustment being required. <strong>The</strong> set will then be found<br />
<strong>to</strong> have a rather unusual passband with two very closely<br />
spaced peaks. <strong>The</strong> response will have a sharp fall off on one<br />
side and a much more gradual attentuation curve at the other<br />
side. Tune the receiver <strong>to</strong> peak a signal in the response peak<br />
which is on the same side of the response as the rapid roll-off.<br />
<strong>The</strong> I.F.T. cores are then adjusted <strong>to</strong> peak this signal.<br />
It should perhaps be explained that the broad response is the<br />
one produced by the I.F.T.s, and the narrow one is the response<br />
produced by the crystal. Obviously, it is necessary <strong>to</strong> have the<br />
two responses coinciding for satisfac<strong>to</strong>ry results <strong>to</strong> be obtained.<br />
Adjustment of TC1 should be found <strong>to</strong> alter the shape of the<br />
response quite noticeably, although with some crystals it may<br />
be found <strong>to</strong> have little effect. This trimmer is given any setting<br />
which produces a reasonably symmetrical response.<br />
If a filter in/out switch is required, this can be achieved by<br />
connecting a S.P.S.T. switch across the crystal. When this<br />
93
switch is closed it short circuits the crystal and the response<br />
is then that produced by the I.F.T.s alone. When the switch<br />
is open the filter operates normally.<br />
It is not essential for the crystal <strong>to</strong> have an operating frequency<br />
of precisely 465kHZ, and anything from about 460<br />
<strong>to</strong> 470kHZ should be satisfac<strong>to</strong>ry. <strong>The</strong> author employed a<br />
468kHZ crystal in the pro<strong>to</strong>type.<br />
Mechanical Filters<br />
<strong>The</strong>re are currently available a number of mechanical and<br />
ceramic filters which can be used instead of either one or both<br />
of the double tuned I.F. transformers used in the receiver in<br />
order <strong>to</strong> produce increased selectivity. By using the narrow<br />
band versions of these filters it is possible <strong>to</strong> obtain quite a<br />
high degree of selectivity. One such filter is the Toko<br />
MFH-41T.<br />
‘S’ Meter<br />
An ‘S’ meter or signal strength meter is very useful as a<br />
source of comparative signal strengths, and it can also be used<br />
as a tuning meter. <strong>The</strong> circuit diagram of a ‘S’ meter unit for<br />
use with the I.F. Amplifier circuit of Figure 17 is shown in<br />
Figure 29.<br />
This circuit takes its output from the A.G.C. feedback loop of<br />
the I.F. amplifier, and so the input voltage decreases with<br />
increases in signal strengths of received transmissions. I.C.1 is<br />
used as a simple D.C. amplifier having a voltage gain of about<br />
4 times. <strong>The</strong> quiescent input voltage from the I.F. amplifier<br />
produces an output voltage from I.C.1 of about 6 volts. VR1<br />
is connected as part of a potential divider across the supply<br />
lines, and this is adjusted so that the voltage at its slider is<br />
equal <strong>to</strong> the output voltage of the I.C.<br />
94
<strong>The</strong> meter is a standard 1mA. type which <strong>to</strong>gether with R3<br />
forms a simple voltmeter circuit. When an input signal is<br />
present the A.G.C. voltage will reduce and this causes a larger<br />
voltage reduction at the output of LC.1. This causes the<br />
voltage at the negative terminal of the meter <strong>to</strong> be less than<br />
that at the positive one, and in consequence a positive deflection<br />
of the meter is produced.<br />
<strong>The</strong> A.G.C. voltage falls with increasing signal strength, and<br />
so the level of meter deflection is proporgonal <strong>to</strong> the signal<br />
strength of received signals.<br />
R1 and R2 are a negative feedback loop which set the voltage<br />
gain of I.C.1 at the required level. C1 is the compensation<br />
capaci<strong>to</strong>r forI.C.1 and C2 is a supply decoupling capaci<strong>to</strong>r.<br />
<strong>The</strong> input impedance of the CA3130T is in the order of 1.5<br />
million meg. ohms, and so it doss not significantly load the<br />
A.G.C. circuitry and no modification of the I.F. aniplifler<br />
is required.<br />
95
Adjustment<br />
Before switching on the set, adjust R3 <strong>to</strong> insert maximum<br />
resistance in<strong>to</strong> circuit and adjust VR1 so that virtually the full<br />
supply rail potential is present at its slider. Disconnect the<br />
aerial from the receiver and make sure that the meter is<br />
properly mechanically zeroed.<br />
When the receiver is switched on there should be an immediate<br />
positive indication on the meter. VR1 is then adjusted <strong>to</strong><br />
zero the meter. <strong>The</strong> aerial is then reconnected and the ‘S’<br />
meter is tested. It will probably be found that even the strongest<br />
signals produce only a relatively low meter reading. This is<br />
corrected by adjusting R3 for decreased resistance. This is<br />
given a final setting which produces virtually f.s.d. on extremely<br />
strong signals, but which does not produce readings<br />
off the end of the scale on the very strongest signals.<br />
Noise Limiter<br />
Noise spikes, which can be caused by man made and natural<br />
sources, can occasionally make it difficult <strong>to</strong> copy a signal<br />
properly. <strong>The</strong>re is no way of completely elliminating this<br />
problem, but it is possible <strong>to</strong> minimise it by using a noise<br />
limiter circuit. <strong>The</strong> circuit diagram of a simple noise limiter<br />
is shown in Figure 30, and this circuit is simply added in the<br />
audio output of the receiver.<br />
This really just consists of a simple clipping circuit with D1<br />
and D2 being used as low voltage (about 0.5 volt) zener<br />
diodes. R1 is the load resis<strong>to</strong>r for these. D1 clips <strong>to</strong> positive<br />
going output half cycles and D2 clips the negative going ones.<br />
In use the audio output level is adjusted so that the desired<br />
signal just about reaches the clipping level. <strong>The</strong>n any loud<br />
noise spikes which are received will be clipped at the output<br />
<strong>to</strong> a level which is no more than the peak level of the desired<br />
96
signal. This effect is illustrated in Figure 31. Thus, even if the<br />
noise spikes have an amplitude of one hundred times that of<br />
the required signal, at the output their levels are equal.<br />
Obviously only a limited improvement in intelligibility can be<br />
produced in this way, but the improvement is well worthwhile<br />
for the very small increase in cost and complexity which<br />
is imparted by the additional cirçuitry. It can be particularly<br />
useful for headphone listening where even occasional noise<br />
spikes can be very troublesome due <strong>to</strong> their almost deafening<br />
volume.<br />
S1 is the noise limiter on/off switch, and in the off position it<br />
simply bypasses the limiter circuitry, C1 is the output coupling<br />
capaci<strong>to</strong>r.<br />
<strong>The</strong>re is another form of noise reduction circuit known as a<br />
noise blanker, and although this is more effective than a noise<br />
limiter it is not very popular due <strong>to</strong> its greatly increased cost<br />
and complexity. For this reason a practical circuit will not be<br />
given here.<br />
Basically a noise blanker consists of a fairly insensitive receiver<br />
with a bandwidth which is extremely wide (usually several<br />
MHZ). Ordinary radio signals will not be received very strongly,<br />
97
ut noise spikes which are very strong and extend over a wide<br />
range of frequencies will be.<br />
<strong>The</strong> output of the receiver is used <strong>to</strong> mute the I.F. stages of the<br />
main set in the presence of a strong signal, and so the receiver<br />
is muted whenever a strong noise spike comes along. Thus the<br />
usual crack sound of a noise spike is not merely limited in<br />
amplitude, it is completely eliminated.<br />
98
C.W. Filter<br />
<strong>The</strong>oretically an infinitely narrow bandwidth is all that is<br />
needed for proper reception of C.W. signals since only a<br />
single reception frequency is involved. In practice though,<br />
even a bandwidth of a few HZ is imptactically narrow since<br />
tuning would then be so sharp as <strong>to</strong> be virtually an impossibility,<br />
and the stability of the set would need <strong>to</strong> be higher than<br />
can be attained in a practical situation. <strong>The</strong>refore a bandwidth<br />
of about 100HZ <strong>to</strong> about 600HZ is usually accepted as being<br />
the optium range for C.W. reception.<br />
It is not at all easy <strong>to</strong> achieve such a narrow bandwidth in the<br />
I.F. stages, although it can be done with expensive crystal<br />
filters, and a Q multiplier can come close <strong>to</strong> the optiurn bandwidth.<br />
<strong>How</strong>ever, a simple way of obtaining a narrow bandwidth<br />
for C.W. reception is <strong>to</strong> use an audio filter. <strong>The</strong> circuit diagram<br />
of Figure 32 shows such a unit, and this will allow frequencies<br />
at or close <strong>to</strong> 1.5kHZ <strong>to</strong> pass, and will reject other frequencies.<br />
It should perhaps be explained that this method of using an<br />
audio filter is not quite as effective as using an I.F. filter<br />
having the same bandwidth. <strong>The</strong> reason for this is simply that<br />
the audio filter has two responses, in effect anyway, since an<br />
I.F. signal either 1.5kHZ above or 1.5kHZ below the B.F.O.<br />
frequency will produce a 1.5kHZ audio output. <strong>How</strong>ever, very<br />
good results can be provided by an audio filter, and many<br />
highly sophisticated communications receivers incorporate<br />
such circuits.<br />
<strong>The</strong> one shown in Figure 32 is based on a T notch filter, or a<br />
twin T filter as it is sometimes alternatively known. <strong>The</strong><br />
components in this network are C1 <strong>to</strong> C4, and R1 <strong>to</strong> R3. A<br />
T notch filter gives a narrow rejection notch at (and near) <strong>to</strong><br />
its operating frequency, and allows other frequencies <strong>to</strong> pass.<br />
This is, of course, just the opposite of what is required here!<br />
<strong>The</strong>refore the filter has been connected <strong>to</strong> a simple common<br />
emitter amplifier using Tr1, and it is connected between the<br />
99
100
collec<strong>to</strong>r and base of this transis<strong>to</strong>r. <strong>The</strong>se two points are 180<br />
degrees out of phase, and negative feedback is provided<br />
through the T notch filter at frequencies which are permitted<br />
<strong>to</strong> pass. On the other hand, at and close <strong>to</strong> its operating<br />
frequency it will not provide a negative feedback path.<br />
Thus at most frequencies the circuit has only about unity voltage<br />
gain due <strong>to</strong> the large amount of negative feedback, but at<br />
the, operating frequency of the filter the amplifier has virtually<br />
its full gain (about 40dB.) due <strong>to</strong> the lack of feedback through<br />
the T notch filter..<br />
<strong>The</strong> full additional gain of the filter is not really required, and<br />
in fact it would almost certainly result in instability if no steps<br />
<strong>to</strong> reduce the gain were taken. <strong>The</strong>refore an attenua<strong>to</strong>r consisting<br />
of R7 and R8 has been added at the output of the<br />
filter.<br />
S1 is the filter on/off switch, and when it is in the ‘off’<br />
position it bypasses the filter. R4 and C1 are a supply decoupling<br />
network. C5 and C6 are D.C. blocking capaci<strong>to</strong>rs.<br />
Variable Notch Filter<br />
Probably the most frequent type of interference that is encountered<br />
on the S.W. bands is heterodynes caused by two<br />
A.M. stations on very close frequencies, or a heterodyne<br />
between an A.M. station and the B.F.O. of the set. It is<br />
possible <strong>to</strong> virtually eliminate this type of interference by<br />
using a variable notch filter.<br />
This type of filter allows most frequencies <strong>to</strong> pass, but blocks<br />
signals which lay close <strong>to</strong> or at its operating frequency. It is<br />
made ttmeable so that it can be adjusted <strong>to</strong> block an interfering<br />
heterodyne.<br />
<strong>The</strong> basic T notch filter used in the previous chapter may<br />
appear <strong>to</strong> be an obvious choice for use in this application but<br />
unfortunately it is not really suitable. <strong>The</strong> problem is that it<br />
101
would be necessary <strong>to</strong> have a three gang variable resis<strong>to</strong>r in<br />
order <strong>to</strong> make this filter tuneable, and a suitable component<br />
does not appear <strong>to</strong> be available. It is necessary <strong>to</strong> use an active<br />
filter, and the circuit diagram of a tuneable notch filter is<br />
shown in Figure 33.<br />
102
Tr1 is used as a phase splitter with two out of phase signals<br />
being produced at the collec<strong>to</strong>r and emitter. <strong>The</strong> collec<strong>to</strong>r<br />
output is fed <strong>to</strong> a phase shift network consisting of VR1a and<br />
C2 while the emitter output is fed <strong>to</strong> a phase shift network<br />
consisting of C3 and VR1b. At one frequency these signals<br />
will both undergo the same degree of phase shift. <strong>The</strong> outputs<br />
of the phase shift networks are mixed at the junction of the<br />
two potentiometer sliders, and so an input signal at the<br />
frequency where the two shifters produce the same phase<br />
change will be cancelled out <strong>to</strong> a large degree. At other frequencies<br />
little or no cancelling takes place. <strong>The</strong> circuit thus<br />
provides the required rejection notch.<br />
<strong>The</strong> filter is tuned by adjustment of VR1, and this provides a<br />
frequency range of approximately 100HZ <strong>to</strong> 5kHZ.<br />
Even though the filter is an active type, there is a substantial<br />
loss through it, and it needs <strong>to</strong> feed a high impedance in order<br />
for optium results <strong>to</strong> be obtained. Tr2 is used as a buffer<br />
amplifier at the output, and this provides a high load<br />
impedance for the filter and compensates for the filter losses.<br />
R8 and C5 are a supply decoupling network. C1 provides D.C.<br />
procking at the input <strong>to</strong> the filter. S1 is the filter in/out switch,<br />
and when it is in the ‘out’ position it simply bypasses the filter<br />
circuitry.<br />
Note that in order for best results <strong>to</strong> be obtained it is necessary<br />
<strong>to</strong> use 5% <strong>to</strong>lerance (or better) components in the C2 and C3<br />
positions. Incidentally, this also applies <strong>to</strong> the resis<strong>to</strong>rs and<br />
capaci<strong>to</strong>rs in the T notch network of the previous circuit.<br />
Good results should be obtained with the circuit as shown, but<br />
if R3 is replaced with a fixed 680 ohm resis<strong>to</strong>r and a 2.2k preset<br />
wired in series, it will then be possible <strong>to</strong> adjust the preset<br />
for optium rejection.<br />
Using the filter is extremely simple, and it is just a matter of<br />
adjusting VR1 <strong>to</strong> minimise any offending heterodyne.<br />
103
Product Detec<strong>to</strong>r<br />
Although quite good results on S.S.B. can be obtained using a<br />
B.F.O. loosely coupled in<strong>to</strong> the I.F. amplifier stages of the<br />
receiver, a higher quality output can be obtained by using a<br />
device known as a product detec<strong>to</strong>r. This type of circuit is also<br />
more convenient <strong>to</strong> use as it improves the sets immunity <strong>to</strong><br />
overloading on strong S.S.B. signals. Another problem with<br />
the loose coupling method of B.F.O. injection is that if the<br />
‘S’ meter circuit is fitted <strong>to</strong> the receiver, this circuit will not<br />
function properly in the C.W./S.S.B. mode. This is because the<br />
B.F.O. signal will cause a strong positive deflection on the<br />
meter. By using a screened B.RO. and product detec<strong>to</strong>r this<br />
can be overcome.<br />
<strong>The</strong> circuit diagram of a product detec<strong>to</strong>r plus a stabllised<br />
B.F.O. stage is shown in Figure 34. A product detec<strong>to</strong>r is a<br />
mixer circuit of the same type that is used in the frequency<br />
converter stage of a superheterodyne receiver. <strong>How</strong>ever,<br />
instead of converting the R.F. signal <strong>to</strong> the intermediate<br />
frequency, it converts the I.F. signal <strong>to</strong> an audio frequency.<br />
When a B.F.O. signal loosely coupled in<strong>to</strong> the I.F. stages is<br />
used for S.S.B. reception the audio quality usually leaves a lot<br />
<strong>to</strong> be desired. This is because not only is the B.F.O. signal<br />
reacting with the S.S.B. signal components <strong>to</strong> produce an audio<br />
output, but the sideband components are reacting with one<br />
another <strong>to</strong> produce an audio output. This signal can be clearly<br />
heard if the B.F.O. is switched off. This reaction between the<br />
sideband components is undesirable because the audio output it<br />
produces was not present in the modulation signal at the<br />
transmitter, and it is therefore a form of dis<strong>to</strong>rtion.<br />
By using a product detec<strong>to</strong>r this dis<strong>to</strong>rtion is largely eliminated<br />
since the audio output is produced by the B.F.O. reacting<br />
with the sideband components, and not by these components<br />
reacting with one another.In practice some reaction of<br />
this kind does occur, but only on a comparatively limited<br />
scale. If the B.F.O. is switched,out when a product detec<strong>to</strong>r is<br />
being used, very little output will be produced fjom an S.S.B.<br />
signal, or any other signal for that matter.<br />
104
105
Tr1 is used as a simple inductive feedback oscilla<strong>to</strong>r, and its<br />
supply rail potential is stabilised by R3 and D1. VC1 is the<br />
B.F.O. frequency control.<br />
Tr2 and Tr3 are the active devices used in the product detec<strong>to</strong>r.<br />
<strong>The</strong> B.F.O. signal is coupled <strong>to</strong> one input of the product<br />
detec<strong>to</strong>r via C3, and the I.F. output is fed in<strong>to</strong> the other input<br />
via C5.<br />
<strong>The</strong> product detec<strong>to</strong>r will not properly demodulate an A.M.<br />
transmission, and so it is necessary <strong>to</strong> incorporate switching<br />
from the ordinary diode detec<strong>to</strong>r <strong>to</strong> the product type, in the<br />
receiver. One way of doing this is shown in the circuit diagram<br />
of Figure 35.<br />
<strong>The</strong> circuit works normally when S1 is in the A.M. position,<br />
and neither the I.F. input or the audio output of the product<br />
detec<strong>to</strong>r are connected <strong>to</strong> the rest of the receiver. Also, S1d<br />
cuts the supply line <strong>to</strong> the B.F.O. and product detec<strong>to</strong>r<br />
circuits.<br />
In the C.W./S.S.B. position S1 connects the I.F. output <strong>to</strong> the<br />
relevant input of the product detec<strong>to</strong>r. Note however, that the<br />
I.F. output is still connected <strong>to</strong> the diode detec<strong>to</strong>r. S1c<br />
switches the volume control in<strong>to</strong> the output circuit of the<br />
product detec<strong>to</strong>r, and so it no longer forms the load for the<br />
diode detec<strong>to</strong>r. RX is switched in<strong>to</strong> circuit as the diode load<br />
resis<strong>to</strong>r in place of the volume control, and so the biasing of<br />
the I.F. amplifier is not significantly affected. Also, the A.G.C.<br />
circuitry will still function normally.<br />
If this circuitry is being added <strong>to</strong> a receiver other than one of<br />
those described in this book, there should be no real problems<br />
here provided the I.F. output circuitry is of a basically similar<br />
type. RX is given a value which is equal <strong>to</strong> that of the volume<br />
control.<br />
One important constructional point must be borne in mind,<br />
and that concerns the wiring around S1a. This must either be<br />
106
kept very short or should be screened as otherwise stray feedback<br />
oven the I.F. amplifier stages is likely <strong>to</strong> cause problems,<br />
and could easily result in this part of the set breaking in<strong>to</strong><br />
violent oscillation.<br />
107
<strong>The</strong> only adjustment which needs <strong>to</strong> be made <strong>to</strong> the finished<br />
unit is that <strong>to</strong> the core of T1 <strong>to</strong> align the B.F.O. This is carried<br />
out in the usual fashion. T1 is a Denco I.F.T.14/470kHZ<br />
component.<br />
Mains P.S.U.<br />
<strong>The</strong> receivers described in this book can be powered from a<br />
fairly large 9 volt battery, such as a PP6, PP7, PP9, or equivalents.<br />
This is likely <strong>to</strong> be rather expensive in the long term<br />
though, especially if a number of add-on circuits are incorporated<br />
in the receiver, since the current consumption of the set<br />
will be quite high. In the long term a mains P.S.U. is likely <strong>to</strong><br />
be a more economic proposition. <strong>The</strong> circuit diagram of a<br />
stabillsed mains power supply unit is shown in Figure 36.<br />
T1 is a mains transformer having a secondary voltage of 12V.<br />
and a current rating of 250mA. or more. Its output is fullwave<br />
rectified by the bridge rectifier consisting of D1 <strong>to</strong> D4.<br />
C1 smoothes the rough D.C. output of the rectifier network,<br />
and FS1 protects the circuit against accidental short circuits at<br />
the output.<br />
Tr1 is connected as a conventional emitter follower regula<strong>to</strong>r<br />
circuit, and as well as providing a well stabilised output this<br />
also contributes considerably <strong>to</strong> the smoothing of the output.<br />
In consequence there is a negligible amount of hum and noise.<br />
on the output voltage.<br />
Several constructional points should be carefully noted. <strong>The</strong><br />
magnetic field of the mains transformer can easily induce<br />
mains hum in<strong>to</strong> any wire which runs close <strong>to</strong> it. It can even<br />
induce mains hum in<strong>to</strong> the R.F. coils, and so it is a good idea<br />
<strong>to</strong> mount this component as far away from other components<br />
as possible.It is also advisable <strong>to</strong> keep the mains wiring away<br />
from any I.F. wiring, as this can also lead <strong>to</strong> a noticeable<br />
level of mains hum on the output signal. Any mains hum that<br />
is apparent will almost certainly have been caused by stray<br />
pick up as the level of hum on the output of the P.S.U. is not<br />
significant.<br />
108
Tr1 is a power transis<strong>to</strong>r and this is mounted on the metal<br />
chassis of the receiver which then acts as a heatsink. This<br />
component must be insulated from the chassis using the usual<br />
109
mica washer and plastic bush set. Use a continuity tester <strong>to</strong><br />
make absolutely sure that this insulation is effective as otherwise<br />
the output of the P.S.U. will be short circuited (the metal<br />
pad on the underside of the transis<strong>to</strong>r connects <strong>to</strong> its collec<strong>to</strong>r<br />
terminal).<br />
For reasons of safety, the receiver must be enclosed in a proper<br />
casing which leaves no mains wiring exposed, or within easy<br />
access. Also, whether an earth connection is used or not, the<br />
chassis of the receiver must be connected <strong>to</strong> the mains earth.<br />
Crystal Calibra<strong>to</strong>r<br />
Home constructed receivers are easier and more convenient <strong>to</strong><br />
use if they are equipped with a calibrated tuning dial. If a good<br />
quality wide range R.F. signal genera<strong>to</strong>r is available, this can<br />
be used <strong>to</strong> supply the calibration signal. An alternative, and<br />
probably more popular method of obtaining a calibration signal<br />
is <strong>to</strong> use a device known as a crystal calibration oscilla<strong>to</strong>r.<br />
This is an oscilla<strong>to</strong>r which operates on a single frequency, or<br />
perhaps on two or three frequencies, and has a strong harmonic<br />
output throughout the S.W. frequency spectrum. This<br />
type of circuit usually operates at a fundamental frequency of<br />
1MHZ, with a lower fundamental frequency available if<br />
required (usually 100kHZ). Thus such a unit can provide<br />
calibration signals in the form of 1MHZ and 100kHZ harmonics.<br />
<strong>The</strong> harmonics are merely signals produced at multiples of<br />
the fundamental frequency, and so a 1MHZ calibra<strong>to</strong>r will<br />
produce outputs at 2MHZ (second harmonic), 3MHZ (third<br />
harmonic), 4MHZ, etc. <strong>to</strong> beyond 30MHZ. It therefore<br />
enables the tuning dial of the receiver <strong>to</strong> be calibrated at<br />
1MHZ intervals throughout its tuning range. A 100kHZ<br />
calibration signal provides additional calibration points at<br />
100kHZ intervals throughout the tuning range of the receiver.<br />
Crystal calibra<strong>to</strong>rs sometimes have even lower fundamental<br />
frequencies, occasionally as low as 10kHZ, but for general<br />
coverage receivers such as those featured in this book,<br />
100kHZ is about the practical minimum unless an exceptionally<br />
good tuning drive and dial is fitted.<br />
110
<strong>The</strong> circuit diagram of a 1MHZ/100kHZ crystal calibration<br />
oscilla<strong>to</strong>r is shown in Figure 37. Tr1 and Tr2 form the basis of<br />
the oscilla<strong>to</strong>r circuit, and these are both used as common<br />
emitter amplifiers. <strong>The</strong> output of Tr1 is coupled <strong>to</strong> the input of<br />
Tr2 by way of C1. Tr2 collec<strong>to</strong>r and Tr1 base are therefore in<br />
phase, and any feedback between the two will be of the<br />
positive variety.<br />
<strong>The</strong> crystal and TC1 are connected between these two points,<br />
and a large amount of positive feedback will be produced at<br />
the series resonant frequency of the crystal where it exhibits<br />
a low impedance. <strong>The</strong> circuit thus oscillates violently at this<br />
frequency producing a high amplitude output which is rich<br />
in harmonics.<br />
Rather than use a separate crystal <strong>to</strong> provide a 100kHZ output<br />
signal, the output of the 1MHZ oscilla<strong>to</strong>r is instead fed <strong>to</strong> a<br />
CMOS decade counter/divider which divides the 1MHZ signal<br />
by ten so that a 100kHZ output is produced.<br />
Using <strong>The</strong> Calibra<strong>to</strong>r<br />
In order for maximum accuracy <strong>to</strong> be obtained it is necessary<br />
<strong>to</strong> adjust TC1 <strong>to</strong> trim the oscilla<strong>to</strong>r frequency <strong>to</strong> precisely<br />
1MHZ. One way of doing this is <strong>to</strong> connect a lead about<br />
500m.m. long <strong>to</strong> the 100kHZ output, and then place this lead<br />
close <strong>to</strong> the ferrite aerial of an operating radio which is tuned<br />
<strong>to</strong> B.B.C. Radio 2 on 200kHZ L.W. <strong>The</strong> second harmonic of<br />
the calibra<strong>to</strong>r will produce a heterodyne as it reacts with the<br />
200kHZ carrierwave of Radio 2, but this beat note will be at<br />
only a very low frequency (no more than a few tens of HZ).<br />
TC1 is adjusted <strong>to</strong> produce the lowest possible beat note. It<br />
should be possible <strong>to</strong> obtain an output of less than one pulse<br />
per second.<br />
It is worth noting that even if the calibra<strong>to</strong>r is not set up in<br />
This way, and TC1 is simply adjusted for about half maximum<br />
capacitance, the accuracy of the unit should still be greater<br />
than is really necessary.<br />
111
In use it is best <strong>to</strong> use the 1MHZ output <strong>to</strong> enable the 1MHZ<br />
intervals <strong>to</strong> be marked in before locating the 100kHZ calibration<br />
points. <strong>The</strong> output of the calibra<strong>to</strong>r is quite strong and<br />
112
there should be no need <strong>to</strong> couple it direct <strong>to</strong> the aerial<br />
terminal of the receiver. In fact this is not a good idea as it can<br />
easily lead <strong>to</strong> confusing results. It is a good idea <strong>to</strong> use only a<br />
loose coupling between the two units, and it is usually<br />
sufficient <strong>to</strong> connect a lead <strong>to</strong> the output of the calibra<strong>to</strong>r and<br />
then place this near the aerial terminal of the receiver. If a<br />
tighter coupling is required (as it might well be at high<br />
frequencies), then an insulated lead can be connected <strong>to</strong> both<br />
the output of the calibra<strong>to</strong>r and <strong>to</strong> the aerial terminal of the<br />
receiver. <strong>The</strong>se two loads are then twisted <strong>to</strong>gether <strong>to</strong> form a<br />
very low value capaci<strong>to</strong>r..<br />
On Range 5T it might be found rather difficult <strong>to</strong> identify one<br />
harmonic from another as they will be rather closely spaced.<br />
One way of achieving this is <strong>to</strong> tune the set <strong>to</strong> a signal of<br />
known or approximately known frequency. For example, if the<br />
set is tuned <strong>to</strong> an amateur station on the 20 metre amateur<br />
band (which extends from 14.0 - 14.35MHZ) and then<br />
coupled <strong>to</strong> the calibra<strong>to</strong>r, the first marker signal which will be<br />
received if the set is tuned lower in frequency must be the<br />
14th harmonic at 14.0MHZ. If the set is then tuned higher in<br />
frequency the 15th harmonic at 15MHZ will be received, then<br />
the 16th harmonIc at 16.0MHZ, and so on. In this way all the<br />
harmonics can be identified.<br />
Preselec<strong>to</strong>r<br />
A preselec<strong>to</strong>r is a tuned R.F. amplifier which is built as an<br />
entirely separate unit from the receiver. Apart from increasing<br />
the overall gain of a receiving set up it also provides a very<br />
useful improvement in image rejection when used in conjunction<br />
with a superhet receiver. <strong>The</strong> circuit diagram of a preselec<strong>to</strong>r<br />
which uses a encode arrangement appears in<br />
Figure 38.<br />
<strong>The</strong> aerial signal is coupled <strong>to</strong> the pnimaiy winding of T1, and<br />
the secondary winding couples in<strong>to</strong> the gl terminal of Tr1<br />
which is a dual gate MOSFET. <strong>The</strong> secondary winding of T1 is<br />
113
114
also the tuned winding, and VC1 is the tuning capaci<strong>to</strong>r. Trl is<br />
used as a common source amplifier, and R2 is its source bias<br />
resis<strong>to</strong>r. C2 is the bypass capaci<strong>to</strong>r for the source resis<strong>to</strong>r.<br />
VR1 controls the g2 potential of Tr1 and it thus operates as<br />
the R.F. gain control.<br />
Tr2 is a Jugfet, and it is used in the common gate mode. R3<br />
and R4 bias the gate <strong>to</strong> about half the supply rail potential<br />
and C3 is the earth return capaci<strong>to</strong>r for Tr2 gate. Since the<br />
gate of Tr2 is held at a fixed potential, as the drain of Tr1<br />
swings positive and negative it will take Tr2 source with it,<br />
and this results in a variation of the g - s voltage of Tr2. This<br />
results in Tr2 conducting more and less heavily as its source<br />
terminal goes positive and negative. This causes an amplified<br />
signal <strong>to</strong> be generated in the drain circuit of Tr2, and this<br />
signal is developed across L1.<br />
C4 provides D.C. blocking at the output and C5 is a supply<br />
decoupling capaci<strong>to</strong>r. S1 is an ordinary on/off switch.<br />
T1 is a Denco Dual Purpose (D.P.) coil, and as was the case<br />
with the SW. receivers described earlier, three coils are needed<br />
<strong>to</strong> cover the entire S.W. frequency spectrum. <strong>The</strong>se are ranges<br />
3, 4, and 5, and the coils are colour coded BLUE. L1 is a<br />
Repanco ferrite cored R.F. choke type CH4, although any<br />
similar R.F. choke is suitable.<br />
In use the output of the preselec<strong>to</strong>r is coupled <strong>to</strong> the aerial<br />
socket of the receiver via a screened (coaxial) cable which<br />
should be kept as short as possible so that losses here are<br />
minimised. <strong>The</strong> core of T1 is given a setting that enables VC1<br />
<strong>to</strong> peak received signals at any setting of the tuning control<br />
on the receiver. This adjustment must be made <strong>to</strong> each of the<br />
three coils.<br />
It has been assumed above that the receiver is a home made<br />
type using Denco coils, but, of course, the preselec<strong>to</strong>r can be<br />
used with just about any S.W. receiver. <strong>The</strong> cores of the three<br />
coils are then given any settings which do not result in there<br />
115
eing any gaps in the frequency coverage. <strong>The</strong>re is considerable<br />
overlap between the frequency coverage of adjacent<br />
ranges, and so the core settings are not particularly critical.<br />
It should perhaps be pointed out that there is one type of set<br />
which the unit cannot be used with, and that is sets of the old<br />
A.C./D.C. type which are mains powered and do not incorporate<br />
a mains isolation transformer. With this type of set the<br />
chassis is connected <strong>to</strong> one side of the mains, and since the<br />
chassis of the preselec<strong>to</strong>r and receiver are connected via the<br />
coaxial cables outer braiding, the chassis of the preselec<strong>to</strong>r<br />
would be at mains potential if it were used with a set of this<br />
type. <strong>The</strong>re would then be a danger of the user receiving a<br />
severe electric shock.<br />
<strong>The</strong> gain of the circuit is quite high, particularly on the I.F.<br />
bands, and so the R.F. galnccontrol should not simply be set<br />
at maximum and left there. This could easily result in the set<br />
being continually overloaded. What was said in Chapter 2<br />
about using internal R.F. amplifiers also pertains <strong>to</strong> the use<br />
of preselec<strong>to</strong>rs.<br />
116
117
SPECIAL NOTES FOR OVERSEAS READERS<br />
1. If you should experience any difficulty in obtaining<br />
“DENCO” coils locally, then these can always be<br />
ordered direct from the manufacturers whose address<br />
is shown below:-<br />
DENCO (Clac<strong>to</strong>n) LTD<br />
355-9 Old Road<br />
Clac<strong>to</strong>n-on-Sea<br />
Essex. C015 3RH<br />
England.<br />
Tel.: Clac<strong>to</strong>n 22807<br />
118
BERNARDS No 226<br />
<strong>How</strong> <strong>to</strong> <strong>Build</strong><br />
<strong>Advanced</strong> <strong>Short</strong><br />
<strong>Wave</strong> <strong>Receivers</strong><br />
+ Although many short wave listeners and radio<br />
amateurs use commercial equipment these days,<br />
greater satisfaction and enjoyment can be gained<br />
from the hobby by using home constructed<br />
equipment.<br />
+ Using ready made S.W gear does not give any<br />
insight in<strong>to</strong> the way the apparatus functions and by<br />
building one’s own equipment, it is virtually<br />
inevitable that a reasonable understanding of the<br />
techniques involved will be grasped. Obviously<br />
such an understanding is very helpful when it<br />
comes <strong>to</strong> actually using a finished receiver, and it<br />
should enable the opera<strong>to</strong>r <strong>to</strong> obtain optimum<br />
results from the set.<br />
+ In this book, Mr. R.A. Penfold gives full practical<br />
constructional details of a number of receivers<br />
which should have levels of performance at least<br />
equal <strong>to</strong> that of commercially built sets of similar<br />
complexity. Furthermore, the home constructed<br />
receiver is likely <strong>to</strong> cost very much less than it’s<br />
ready made equivalent.<br />
+ Also included are a number of add on circuits,<br />
such as, Q-Multiplier, S-Meter, Noise Limiter etc.<br />
which can be used <strong>to</strong> aid and improve reception<br />
when using the receivers.<br />
Cover design by the Nicholls Design Unit<br />
BERNARDS (Publishers) LTD<br />
<strong>The</strong> Grampians<br />
Shepherds Bush Road<br />
London W6 7NF<br />
England<br />
119