73 Amateur Radio Today - Free and Open Source Software
73 Amateur Radio Today - Free and Open Source Software
73 Amateur Radio Today - Free and Open Source Software
Create successful ePaper yourself
Turn your PDF publications into a flip-book with our unique Google optimized e-Paper software.
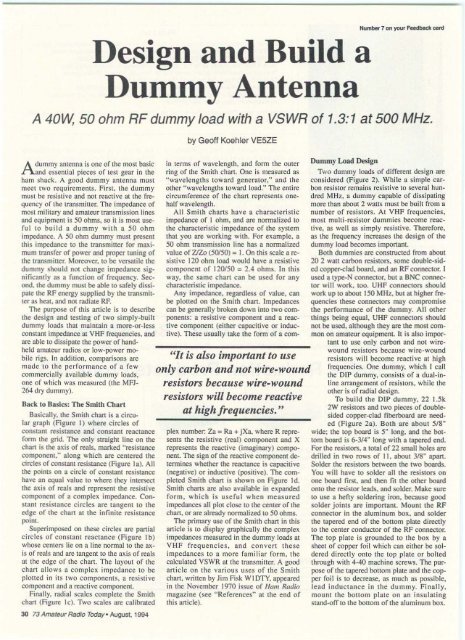
D esign <strong>and</strong> Build a<br />
D u m m y Antenna<br />
Number 7 on your Feedback ClIrd<br />
A 40Ltv, 50 ohm RF dummy load with a VSWR of 1.3:1 at 500 MHz.<br />
Adummy antenna is onc of the most basic<br />
<strong>and</strong> csscr uial pieces of test gear in the<br />
hum shac k. A good dummy antenna must<br />
meet two require ments. First. the d ummy<br />
must be resistive <strong>and</strong> not reactive at the Irequcncy<br />
of the transminer. The impedance o f<br />
most military <strong>and</strong> amateur transmission lines<br />
<strong>and</strong> equi pment is 50 ohms. so it is most usefu<br />
l to b uild a dummy with a 50 o h m<br />
impedance. A 50 ohm dummy must prese nt<br />
this impedance to the transmitter for maximum<br />
transfer of power <strong>and</strong> proper tuning of<br />
the transmitter. Moreover. to be versatile the<br />
dummy should not change impedance significantly<br />
as a function of frequency. Second.<br />
the dummy must be able to sa fely dissipate<br />
the RF energy supplied by the transmitter<br />
as heat. <strong>and</strong> not radiate RF.<br />
The purpose o f this article is to describe<br />
the desig n <strong>and</strong> testing of two si mply- built<br />
dummy loads that mai ntain a mere-or-tess<br />
consta nt impedance at VHF frequencies. <strong>and</strong><br />
arc able to dissipate the power of h<strong>and</strong>held<br />
amateur radi os or low-power mobile<br />
rigs. In addition. comparisons are<br />
made to the perfo rmance of a few<br />
commercia lly available dummy loads.<br />
one of which was measured (the MFJ -<br />
264 dry dummy).<br />
Hack to Basics: T he Smith Ch a rt<br />
Basicall y. the Smith chan is a circular<br />
graph (Figure I ) where ci rc les of<br />
constant resistance <strong>and</strong> consta nt reactance<br />
form the grid. The only straight line on the<br />
chan is the axis of reals, marked "resistance<br />
component:' along whi ch are centered the<br />
circles of constant resistance (Figure Ia). All<br />
the points on a circle of constant resistance<br />
have an equal value to where they intersect<br />
the axis of reals <strong>and</strong> represent the resistive<br />
co mponent of a complex impedance. Constant<br />
resistance ci rcle s are ta nge nt to the<br />
edge of the chart at the infinite resi stance<br />
poin t.<br />
Superimposed on these circles arc partial<br />
circles of consta nt reactance (Figure l b )<br />
whose ce nters lie on a line normal to the axis<br />
of rents <strong>and</strong> arc tangent to the axis of reals<br />
at the edge o f the chart. The layo ut o f the<br />
chart allows a comple x impedance 10 be<br />
plotted in its two components. a resi sti ve<br />
co mpo nent <strong>and</strong> a reactive component.<br />
Finally. radi al scales complete the Smith<br />
chan (Figure lc). Two scales arc calibrated<br />
30 <strong>73</strong> <strong>Amateur</strong> <strong>Radio</strong> <strong>Today</strong> · August. 1994<br />
by Geoff Koehler VE5ZE<br />
in terms of wavelength. <strong>and</strong> form the outer<br />
ring of the Smith chart. One is measured as<br />
" wavelengths toward gene rato r," <strong>and</strong> the<br />
ot her "wavelengths to ward load." The entire<br />
circumference o f the chart represents onehalf<br />
wavelength.<br />
All Smit h charts have a characteri stic<br />
impedance of I ohm. <strong>and</strong> are normalized to<br />
the characteristic impedance o f the system<br />
that you are working with. For example. a<br />
50 ohm transmission line has a normalized<br />
value of ZfZo (SQ(SO) = I. On this scale a resistive<br />
120 oh m load would have a resistive<br />
component of 120150 = 2.4 ohms. In this<br />
way. the same chart can be used fo r any<br />
characteristic impedance.<br />
Any impedance. regardless of value. can<br />
be ploned on the Smith chan. Impedances<br />
can be generally broken do wn into two co mponents:<br />
a resistive component <strong>and</strong> a reactive<br />
component (either capacitive or inductive).<br />
These usually take the form of a com-<br />
"It is also important to use<br />
only carbon <strong>and</strong> not wire-wound<br />
resistors because wire-wound<br />
resistors will become reactive<br />
at high frequencies."<br />
plex number: za = Ra -+ jXa. where R represems<br />
the resi stive (real) component <strong>and</strong> X<br />
represents the reacti ve (imagi nary) component.<br />
The sign of the reactive component determines<br />
whether the reactance is capacitive<br />
(negative) or inductive (posi tive). The completed<br />
Smith chan is shown on Figure Id.<br />
Smith charts are also available in exp<strong>and</strong>ed<br />
fo rm. whic h is use fu l when me a sure d<br />
impedances all plot close to the center o f the<br />
chart, or are already normalized to 50 ohms.<br />
The primary use of the Smith chan in this<br />
article is to display graphicall y the complex<br />
impedances measured in the dummy loads ar<br />
VHF fre q ue n c ie s. <strong>and</strong> convert t hese<br />
impedances to a more fa miliar form. the<br />
calculated VSWR at the transmitte r. A good<br />
a rticle o n the va ri ous uses of the S mith<br />
chart, written by Jim Fisk W I DTY. appeared<br />
in the November 1970 issue o f Ham <strong>Radio</strong><br />
magazine (see " References" at the end of<br />
this article).<br />
Dummy Load Design<br />
Two dummy loads of different design are<br />
considered (Figure 2). W hile a simple carbun<br />
resistor remains resistive to several hun <br />
dred MHz. a dummy capable of dissipating<br />
more than abou t 2 watts must be built from a<br />
number o f re sist ors. A t VHF freq uencies.<br />
most multi-resistor dummies become reactive.<br />
as well as simply resistive. Therefore.<br />
as the freq uency increases the design of the<br />
dummy load becomes important.<br />
Both dummies arc constructed from about<br />
20 2 watt carbon resistors. some double-s ided<br />
copper-clad board. <strong>and</strong> an Rf connector. I<br />
used a type-N connector. but a BNe connector<br />
will wo rk. too. UHF connecto rs shou ld<br />
work up to about 150 MHz. but at higher frequencies<br />
these connectors may compromise<br />
the performance of the d ummy. All other<br />
things being equal. UHF connectors should<br />
not be used. although they are the most cornmon<br />
on amateur equipment. It is also importa<br />
nt to use only carbon <strong>and</strong> not wirewound<br />
resistors because wire-wound<br />
resistors will become reactive al high<br />
frequencies. One dummy. which I call<br />
the DIP dummy. consists of a dual-inline<br />
arran gement of resistors. while the<br />
other is of radial design.<br />
To build the DIP dummy. 22 15 k<br />
2W resistors <strong>and</strong> two pieces o f doublesided<br />
copper-dad fiberboard are needed<br />
(F igure 2a). Both are about SISwide;<br />
the top board is S" long, <strong>and</strong> the bot<br />
10m board is 6-314" long with a tapered end.<br />
For the resistors. a tot al of 22 small holes are<br />
drilled in two rows o f I I. about 3/8- apart.<br />
Solder the resistors between the two boards.<br />
You will have to so lder all the resistors on<br />
one board first. <strong>and</strong> then fit the other board<br />
omo the resistor leads. <strong>and</strong> solder. Make sure<br />
to use a hefty soldering iron. because good<br />
so lder joints are important. Mount the RF<br />
connector in the alumin um box. <strong>and</strong> so lder<br />
the tapered end of the bottom plate directly<br />
to the center concucror of the RF connector.<br />
The top plate is grounded to the box by a<br />
sheet of copper foil w hich can ei ther be soldered<br />
direct ly onto the top plate or bo lted<br />
th rough with 4-40 machine screws. The purpose<br />
of the tapered bottom plate <strong>and</strong> the copper<br />
foil is to decrease. as much as possible.<br />
le ad induct ance in the d u mmy. Fin ally.<br />
mount the bottom p late o n an in su la ting<br />
st<strong>and</strong>-off to the bonom of the aluminum box .


