

Clack WS1 Install instructions - Discount Water Softeners
Clack WS1 Install instructions - Discount Water Softeners
Clack WS1 Install instructions - Discount Water Softeners

You also want an ePaper? Increase the reach of your titles
YUMPU automatically turns print PDFs into web optimized ePapers that Google loves.
sure you install your softener in line before your hot water heater to insure that you<br />
have full benefit of the softener system.<br />
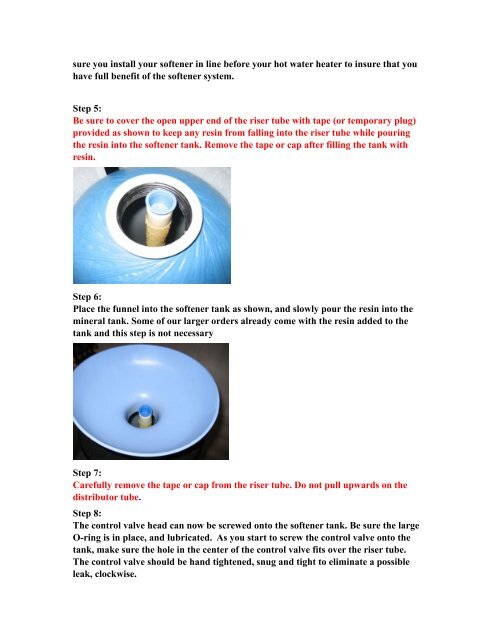
Step 5:<br />
Be sure to cover the open upper end of the riser tube with tape (or temporary plug)<br />
provided as shown to keep any resin from falling into the riser tube while pouring<br />
the resin into the softener tank. Remove the tape or cap after filling the tank with<br />
resin.<br />
Step 6:<br />
Place the funnel into the softener tank as shown, and slowly pour the resin into the<br />
mineral tank. Some of our larger orders already come with the resin added to the<br />
tank and this step is not necessary<br />
Step 7:<br />
Carefully remove the tape or cap from the riser tube. Do not pull upwards on the<br />
distributor tube.<br />
Step 8:<br />
The control valve head can now be screwed onto the softener tank. Be sure the large<br />
O-ring is in place, and lubricated. As you start to screw the control valve onto the<br />
tank, make sure the hole in the center of the control valve fits over the riser tube.<br />
The control valve should be hand tightened, snug and tight to eliminate a possible<br />
leak, clockwise.