building the hasegawa 1/32 scale p-47d - mike ashey productions ...
building the hasegawa 1/32 scale p-47d - mike ashey productions ...
building the hasegawa 1/32 scale p-47d - mike ashey productions ...
You also want an ePaper? Increase the reach of your titles
YUMPU automatically turns print PDFs into web optimized ePapers that Google loves.
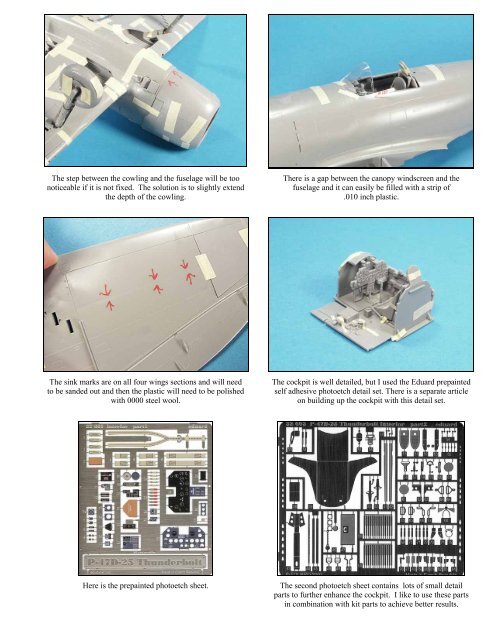
The step between <strong>the</strong> cowling and <strong>the</strong> fuselage will be too<br />
noticeable if it is not fixed. The solution is to slightly extend<br />
<strong>the</strong> depth of <strong>the</strong> cowling.<br />
The sink marks are on all four wings sections and will need<br />
to be sanded out and <strong>the</strong>n <strong>the</strong> plastic will need to be polished<br />
with 0000 steel wool.<br />
There is a gap between <strong>the</strong> canopy windscreen and <strong>the</strong><br />
fuselage and it can easily be filled with a strip of<br />
.010 inch plastic.<br />
The cockpit is well detailed, but I used <strong>the</strong> Eduard prepainted<br />
self adhesive photoetch detail set. There is a separate article<br />
on <strong>building</strong> up <strong>the</strong> cockpit with this detail set.<br />
Here is <strong>the</strong> prepainted photoetch sheet. The second photoetch sheet contains lots of small detail<br />
parts to fur<strong>the</strong>r enhance <strong>the</strong> cockpit. I like to use <strong>the</strong>se parts<br />
in combination with kit parts to achieve better results.


