AIRBRUSH TROUBLESHOOTING 101 - Badger Air-Brush Co.
AIRBRUSH TROUBLESHOOTING 101 - Badger Air-Brush Co.
AIRBRUSH TROUBLESHOOTING 101 - Badger Air-Brush Co.

You also want an ePaper? Increase the reach of your titles
YUMPU automatically turns print PDFs into web optimized ePapers that Google loves.
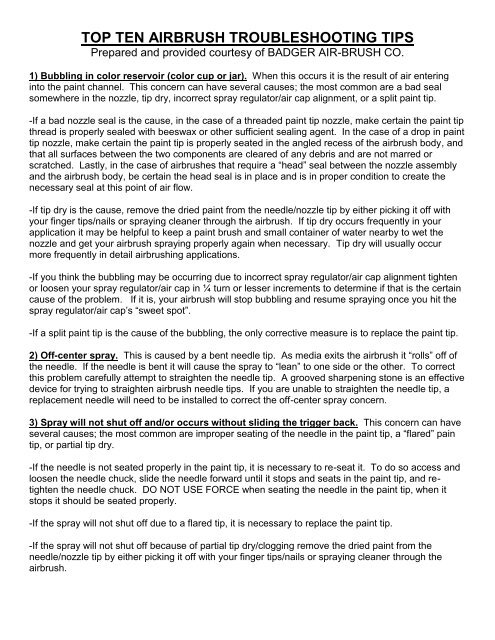
TOP TEN <strong>AIRBRUSH</strong> <strong>TROUBLESHOOTING</strong> TIPS<br />
Prepared and provided courtesy of BADGER AIR-BRUSH CO.<br />
1) Bubbling in color reservoir (color cup or jar). When this occurs it is the result of air entering<br />
into the paint channel. This concern can have several causes; the most common are a bad seal<br />
somewhere in the nozzle, tip dry, incorrect spray regulator/air cap alignment, or a split paint tip.<br />
-If a bad nozzle seal is the cause, in the case of a threaded paint tip nozzle, make certain the paint tip<br />
thread is properly sealed with beeswax or other sufficient sealing agent. In the case of a drop in paint<br />
tip nozzle, make certain the paint tip is properly seated in the angled recess of the airbrush body, and<br />
that all surfaces between the two components are cleared of any debris and are not marred or<br />
scratched. Lastly, in the case of airbrushes that require a “head” seal between the nozzle assembly<br />
and the airbrush body, be certain the head seal is in place and is in proper condition to create the<br />
necessary seal at this point of air flow.<br />
-If tip dry is the cause, remove the dried paint from the needle/nozzle tip by either picking it off with<br />
your finger tips/nails or spraying cleaner through the airbrush. If tip dry occurs frequently in your<br />
application it may be helpful to keep a paint brush and small container of water nearby to wet the<br />
nozzle and get your airbrush spraying properly again when necessary. Tip dry will usually occur<br />
more frequently in detail airbrushing applications.<br />
-If you think the bubbling may be occurring due to incorrect spray regulator/air cap alignment tighten<br />
or loosen your spray regulator/air cap in ¼ turn or lesser increments to determine if that is the certain<br />
cause of the problem. If it is, your airbrush will stop bubbling and resume spraying once you hit the<br />
spray regulator/air cap’s “sweet spot”.<br />
-If a split paint tip is the cause of the bubbling, the only corrective measure is to replace the paint tip.<br />
2) Off-center spray. This is caused by a bent needle tip. As media exits the airbrush it “rolls” off of<br />
the needle. If the needle is bent it will cause the spray to “lean” to one side or the other. To correct<br />
this problem carefully attempt to straighten the needle tip. A grooved sharpening stone is an effective<br />
device for trying to straighten airbrush needle tips. If you are unable to straighten the needle tip, a<br />
replacement needle will need to be installed to correct the off-center spray concern.<br />
3) Spray will not shut off and/or occurs without sliding the trigger back. This concern can have<br />
several causes; the most common are improper seating of the needle in the paint tip, a “flared” pain<br />
tip, or partial tip dry.<br />
-If the needle is not seated properly in the paint tip, it is necessary to re-seat it. To do so access and<br />
loosen the needle chuck, slide the needle forward until it stops and seats in the paint tip, and retighten<br />
the needle chuck. DO NOT USE FORCE when seating the needle in the paint tip, when it<br />
stops it should be seated properly.<br />
-If the spray will not shut off due to a flared tip, it is necessary to replace the paint tip.<br />
-If the spray will not shut off because of partial tip dry/clogging remove the dried paint from the<br />
needle/nozzle tip by either picking it off with your finger tips/nails or spraying cleaner through the<br />
airbrush.
4) Spray pattern pulsation. This concern can have several causes; the most common are a bad<br />
seal (usually one that cannot be trained to properly play well with other seals, LOL, just kidding – we<br />
do have a sense of humor though), inconsistent media viscosity (usually paint being too thick), or an<br />
inadequate or improperly performing air compressor.<br />
-A bad seal can occur anywhere air could potentially leak from while traveling from the air source<br />
through the airbrush. Although some low levels of air leakage are common, and may not adversely<br />
affect an airbrush’s spray performance, if you are experiencing a pulsation in your airbrush’s spray<br />
pattern, you should check all threaded parts and seals to ensure there is no excessive air leakage at<br />
any of these points. <strong>Air</strong>brushes that require a “head” seal between the nozzle assembly and the<br />
airbrush body may leak air, causing a pulsating spray, if the head seal is not properly in place. If this<br />
occurs it is advisable to reposition or replace the “head” seal. Additionally, many airbrushes have<br />
inner seals (inside of the airbrush body) that the needle passes through. These seals are designed to<br />
make sure paint is properly directed to the airbrush nozzle and does not flow to the rear of the<br />
airbrush. If the airbrush’s inner seal is broken, it can also cause a pulsating spray. To fix a bad inner<br />
seal it is necessary to replace it. In many instances this seal replacement is best done at the factory<br />
by the airbrush’s manufacturer. (This is a lifetime warranted part on <strong>Badger</strong> airbrushes). Lastly,<br />
although not likely to cause a pulsating spray, the hose connections at the airbrush and the air source<br />
should be properly sealed. This can usually be done effectively with the wrapping of Teflon<br />
“plumber’s” tape around the male threaded part.<br />
-If spray pulsation is caused by an inconsistent paint viscosity, the paint should be adjusted to proper<br />
spraying viscosity. It is also important to make sure that paint is properly blended so that pigment is<br />
evenly distributed through the paint to ensure spray consistency. The rule of thumb for preparing<br />
paints (or other materials) for airbrushing is to reduce them to the approximate visual viscosity of 2%<br />
milk. As starting paint viscosities often vary from color to color, even within a specific paint brand, it is<br />
best to avoid fixed thinning ratios. It is also best to vigorously mix/stir paint, rather than shaking it,<br />
before use. Mixing/stirring paint better blends pigment and base creating a more consistent paint<br />
from the top to the bottom of the bottle. Mixing/stirring paint also causes pigment to re-settle slower.<br />
-If paint pulsation is caused by an inadequate or improperly performing air compressor, it may be<br />
necessary to have the compressor repaired or replaced. Over time air compressors can incur<br />
diminished performance that can adversely affect their performance efficiency. This is especially<br />
noticeable with small “tankless” diaphragm compressors that can present pulsation of the diaphragm<br />
action in an airbrushes spray pattern if the compressor operates inefficiently.<br />
5) Grainy spray. This is caused by paint (or other media) not being properly reduced, meaning it is<br />
too thick to atomize properly, or not operating the airbrush at a high enough pressure.<br />
Paint (or other media) should be the viscosity equivalent of 2% milk to spray properly through an<br />
airbrush. Sparingly add the appropriate thinner to the paint (or other media) until it is the proper<br />
sprayable viscosity. Also check the needle tip and nozzle tip to make sure no tip dry has formed on<br />
the nozzle.<br />
A bottom feed airbrush should have at least 16 PSI (higher for heavier media) while spraying to<br />
operate properly. A gravity feed airbrush can be operated at spray pressures as low as 8 PSI. Check<br />
the pressure you are spraying at to be sure it is high enough for the type of airbrush you are using,<br />
and the type of media you are spraying.<br />
6) Buckling surface. This is caused if paint (or other media) is too thin or “runny” or applied too<br />
heavily on a thin porous substrate (usually a rag type paper). If working close to the surface take<br />
care not slide the airbrush trigger back too far releasing more paint than desired and over saturating<br />
the surface you’re spraying. You should only work close to the surface when wanting to do fine lines,
and only sliding the trigger back a little bit. If working with an extremely thin media apply it in fine<br />
coats, letting one coat dry before applying another. This will prevent over saturating your surface and<br />
give you greater control in developing your artwork to your desired end.<br />
7) Paint blobs at the ends of the stroke or barbell patterns. This is caused by sliding the trigger<br />
back before beginning your hand movement and stopping your hand movement before and not<br />
sliding your trigger forward to shut off paint flow before stopping your hand movement. This can only<br />
be remedied by being aware of your triggering and practicing proper triggering techniques. Practice,<br />
practice, practice. Creating a grid of dots (on a blank sheet) with your airbrush – then going back<br />
and connecting the dots, drawing figure eights, and/or simply writing your name with the airbrush all<br />
airbrushing exercises. Using your airbrush to color in coloring books is also a very helpful, skill<br />
developing, method of airbrush practice. Practice, practice, practice.<br />
8) Flared ends or curved stroke. This is caused by turning the wrist at the end of the airbrush<br />
stroke or arcing closer to the surface during the airbrush stroke. Unless these spray pattern effects<br />
are desired, it is important to maintain consistent parallel distance from the surface you are spraying<br />
through your entire airbrush stroke. This again is best corrected by practicing and developing your<br />
skill level and a comfort with how the airbrush works. Creating a grid of dots (on a blank sheet) with<br />
your airbrush – then going back and connecting the dots, drawing figure eights, and/or simply writing<br />
your name with the airbrush are all good airbrushing practice exercises. <strong>Co</strong>loring in a coloring book<br />
with your airbrush is also a helpful, skill developing, method of airbrush practice. To practice airbrush<br />
technique on three dimensional objects, paint items such as scratch plastic/metal, pop cans, empty<br />
plastic bottles, or other contoured items that are of little or no value.<br />
9) Centipede or spidering spray patterns. This is caused if paint (or other media) is too thin or<br />
“runny” or applied too heavily on a non-porous substrate (metals, plastics, etc.). If working close to<br />
the surface take care not slide the airbrush trigger back too far - releasing more paint than desired.<br />
On hard surfaces excess paint cannot be absorbed and will scatter over the surface in a centipede or<br />
spidering pattern. When wanting to do fine lines and working close to the surface you should only<br />
slide the trigger back a little bit to release a small amount of media. If working with an extremely thin<br />
media apply it in fine coats and let one coat dry before applying another to avoid a “scattering” effect<br />
when air (and additional paint) passes back through still wet paint. The probability of this undesired<br />
effect is increased if spraying your airbrush at too high of an air pressure, so check to make sure your<br />
air pressure is properly set for the type of airbrush you are using, the media you are spraying, and the<br />
type of surface you are finishing.<br />
10) Dot blotching or splattering at the start of end of spraying. This is caused by an incorrect<br />
triggering technique of stopping air flow (releasing downward trigger pressure) before turning off paint<br />
flow (sliding trigger/needle forward to close off paint tip). By turning air flow off before paint flow, paint<br />
goes around the needle and “floods” the nozzle. The result of this “flooding” is either one of two<br />
things. 1. As the needle returns forward upon releasing the trigger, it pushes the paint that has<br />
flooded the paint tip out in a burst or splatter of blotched dots. 2. If possibility 1 does not occur the<br />
“flooded” paint remains in the nozzle and is blown out in a burst or splatter of blotched dots when the<br />
trigger is depressed to resume airbrushing. This is another technique issue that can be prevented by<br />
learning and developing proper triggering technique. Remember to carefully slide the trigger back<br />
forward to stop paint flow, don’t let it “snap” back.<br />
The only thing that you cannot be taught is practice. The more you practice your airbrushing the<br />
greater your airbrush skills will become and the more your airbrushing confidence and enjoyment will<br />
increase. (See tip #8 above for a few recommended triggering practice techniques)<br />
www.<strong>Badger</strong><strong>Air</strong><strong>Brush</strong>.com