The Wreck of DKM Bismarck − A Marine Forensics Analysis 1 The ...
The Wreck of DKM Bismarck − A Marine Forensics Analysis 1 The ...
The Wreck of DKM Bismarck − A Marine Forensics Analysis 1 The ...

Create successful ePaper yourself
Turn your PDF publications into a flip-book with our unique Google optimized e-Paper software.
<strong>The</strong> <strong>Wreck</strong> <strong>of</strong> <strong>DKM</strong> <strong>Bismarck</strong> <strong>−</strong> A <strong>Marine</strong> <strong>Forensics</strong> <strong>Analysis</strong><br />
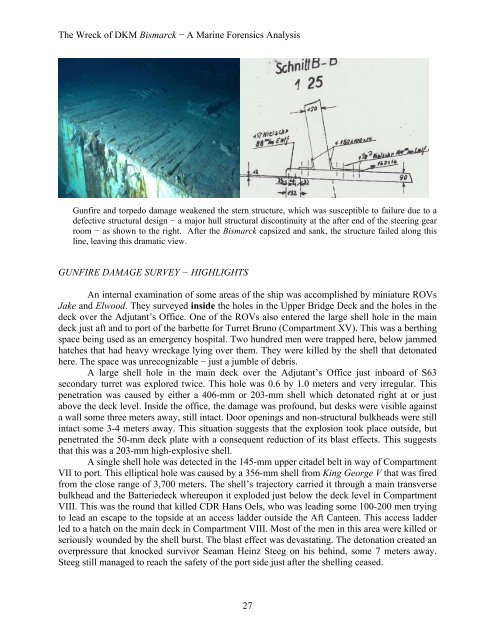
Gunfire and torpedo damage weakened the stern structure, which was susceptible to failure due to a<br />
defective structural design <strong>−</strong> a major hull structural discontinuity at the after end <strong>of</strong> the steering gear<br />
room <strong>−</strong> as shown to the right. After the <strong>Bismarck</strong> capsized and sank, the structure failed along this<br />
line, leaving this dramatic view.<br />
GUNFIRE DAMAGE SURVEY <strong>−</strong> HIGHLIGHTS<br />
An internal examination <strong>of</strong> some areas <strong>of</strong> the ship was accomplished by miniature ROVs<br />
Jake and Elwood. <strong>The</strong>y surveyed inside the holes in the Upper Bridge Deck and the holes in the<br />
deck over the Adjutant’s Office. One <strong>of</strong> the ROVs also entered the large shell hole in the main<br />
deck just aft and to port <strong>of</strong> the barbette for Turret Bruno (Compartment XV). This was a berthing<br />
space being used as an emergency hospital. Two hundred men were trapped here, below jammed<br />
hatches that had heavy wreckage lying over them. <strong>The</strong>y were killed by the shell that detonated<br />
here. <strong>The</strong> space was unrecognizable <strong>−</strong> just a jumble <strong>of</strong> debris.<br />
A large shell hole in the main deck over the Adjutant’s Office just inboard <strong>of</strong> S63<br />
secondary turret was explored twice. This hole was 0.6 by 1.0 meters and very irregular. This<br />
penetration was caused by either a 406-mm or 203-mm shell which detonated right at or just<br />
above the deck level. Inside the <strong>of</strong>fice, the damage was pr<strong>of</strong>ound, but desks were visible against<br />
a wall some three meters away, still intact. Door openings and non-structural bulkheads were still<br />
intact some 3-4 meters away. This situation suggests that the explosion took place outside, but<br />
penetrated the 50-mm deck plate with a consequent reduction <strong>of</strong> its blast effects. This suggests<br />
that this was a 203-mm high-explosive shell.<br />
A single shell hole was detected in the 145-mm upper citadel belt in way <strong>of</strong> Compartment<br />
VII to port. This elliptical hole was caused by a 356-mm shell from King George V that was fired<br />
from the close range <strong>of</strong> 3,700 meters. <strong>The</strong> shell’s trajectory carried it through a main transverse<br />
bulkhead and the Batteriedeck whereupon it exploded just below the deck level in Compartment<br />
VIII. This was the round that killed CDR Hans Oels, who was leading some 100-200 men trying<br />
to lead an escape to the topside at an access ladder outside the Aft Canteen. This access ladder<br />
led to a hatch on the main deck in Compartment VIII. Most <strong>of</strong> the men in this area were killed or<br />
seriously wounded by the shell burst. <strong>The</strong> blast effect was devastating. <strong>The</strong> detonation created an<br />
overpressure that knocked survivor Seaman Heinz Steeg on his behind, some 7 meters away.<br />
Steeg still managed to reach the safety <strong>of</strong> the port side just after the shelling ceased.<br />
27