Flamenco - Technical Manual - Tunstall GmbH
Flamenco - Technical Manual - Tunstall GmbH
Flamenco - Technical Manual - Tunstall GmbH

Create successful ePaper yourself
Turn your PDF publications into a flip-book with our unique Google optimized e-Paper software.
All the reassurance you need<br />
Nursecall: by <strong>Tunstall</strong><br />
<strong>Technical</strong><br />
<strong>Manual</strong>
The manual was prepared with due care, and all details were checked for their<br />
correctness. However, we cannot assume any responsibility form possible<br />
discrepancies or incomplete information.<br />
All rights to this documentation are reserved, in particular copyright and distribution<br />
rights. No part of this documentation may be reproduced in any form or processed,<br />
copied or distributed using electronic systems without the prior written consent by<br />
<strong>Tunstall</strong> <strong>GmbH</strong>.<br />
We reserve the right for implementing technical changes.<br />
<strong>Tunstall</strong> <strong>GmbH</strong>
Table of Contents<br />
1. Safety ................................... 3<br />
1.1 About this chapter ................................ 3<br />
1.2 Organisational measures .......................... 3<br />
1.3 Symbols used in this manual ...................... 4<br />
1.4 Intended use .................................... 4<br />
1.5 General safety rules .............................. 5<br />
1.6 <strong>Technical</strong> standards .............................. 6<br />
2. Necessary previous knowledge ............ 7<br />
2.1 System overview ................................. 7<br />
2.2 System structure ................................. 8<br />
2.3 Speech communication ........................... 9<br />
2.4 Wards and groups ................................ 10<br />
2.5 Cables / Wiring .................................. 11<br />
2.6 System limits .................................... 11<br />
2.7 Configuration / SystemOrganizer ................... 12<br />
3. Room types ............................. 13<br />
3.1 Patient / resident room ............................ 14<br />
3.2 Function room ................................... 25<br />
3.3 Ward bathroom .................................. 26<br />
3.4 Nurse station .................................... 28<br />
3.5 Corridor ........................................ 32<br />
4. Installation examples ..................... 33<br />
5. Installation work sequence ................ 39<br />
6. Defining the mounting positions ........... 41<br />
7. Installing the back boxes ................. 47<br />
8. Laying the cables ........................ 49<br />
8.1 Cable legend .................................... 49<br />
8.2 Electromagnetic compatibility (EMC) ................ 50<br />
8.3 Electric power supply cables (Ip) ................... 51<br />
8.4 Current demand ................................. 52<br />
8.5 Group bus OSYnet ............................... 54<br />
8.6 Room bus RAN .................................. 57<br />
9. Activating the power supply ............... 59<br />
9.1 Installing the power supply unit ..................... 59<br />
9.2 Check the current supply ..........................<br />
59<br />
<strong>Flamenco</strong> - <strong>Technical</strong> <strong>Manual</strong>, 10/11 (Rev. 5.0), 00 8812 60<br />
1
2<br />
10. Configure the OSY-ControlCenter ......... 61<br />
11. Voltage surge protection .................. 63<br />
11.1 SPD modules .................................... 64<br />
12. Functional checks ........................ 67<br />
12.1 Checking the room installation ..................... 68<br />
12.2 Checking the ward functions ....................... 72<br />
12.3 Checking the consoles ............................ 74<br />
12.4 Checking functions between wards ................. 74<br />
13. Spare parts .............................. 75<br />
14. Product leaflets .......................... 81<br />
14.1 Display equipment ............................... 85<br />
14.2 Switches ........................................ 95<br />
14.3 Room terminals .................................. 103<br />
14.4 Connection sockets .............................. 119<br />
14.5 Consoles ....................................... 129<br />
14.6 Interfaces in the room ............................ 135<br />
14.7 Interfaces in the group ............................ 147<br />
14.8 Accessories ..................................... 157<br />
14.9 System devices .................................. 161<br />
14.10 Power supply .................................... 169<br />
14.11 Installation ......................................<br />
191<br />
<strong>Flamenco</strong> - <strong>Technical</strong> <strong>Manual</strong>, 10/11 (Rev. 5.0), 00 8812 60
<strong>Flamenco</strong> - <strong>Technical</strong> <strong>Manual</strong>, 10/11 (Rev. 5.0), 00 8812 60<br />
1. Safety<br />
You are strongly advised to carefully study this chapter before starting to work<br />
at the nurse call system.<br />
1.1 About this chapter<br />
The <strong>Flamenco</strong> products have been designed and produced according to the<br />
latest state-of-the-art. Nevertheless, potentially dangerous situations may oc‐<br />
cur during installation, modification or de-installation of the system or of its com‐<br />
ponents if the executing persons on-site act in a non-professional manner, or<br />
if pertinent safety instructions are ignored. Non-compliance with general and<br />
special safety instructions may jeopardise the life and well-being of installation<br />
personnel or third persons, and such misbehaviour may lead to damage to sys‐<br />
tem components and other equipment.<br />
Information in this chapter is of general nature. Special and more detailed<br />
safety instructions are presented in the various chapters when safety-hazard‐<br />
ous work details or processes are described<br />
1.2 Organisational measures<br />
Electrical systems shall be installed, modified, serviced and maintained by au‐<br />
thorised specialists of the trade only. Among others, these are personnel from<br />
the local electric power companies and electricians who are listed on their<br />
roster. The registered electrician shall contact the power company to formally<br />
request the commissioning of any new electric installation. As such, electric in‐<br />
stallation personnel shall be responsible for the safety and correct function of<br />
the relevant electric systems.<br />
Commercial users of electric installations shall arrange for regular servicing<br />
and maintenance of the respective electric equipment. Users and operators<br />
shall observe the legal aspects as final responsibility rests with themselves.<br />
Any work at the electric system and installation must be executed by trained<br />
and authorised specialists of the trade.<br />
The technical manual addresses the specialists of the electric trade.<br />
Before starting any installation work, carefully study this manual - with particular<br />
attention to the chapter on “Safety”. Later on, i.e. while working at the system,<br />
it will be too late!<br />
Keep this manual and any further documents which you may need readily avail‐<br />
able during the installation work and whenever effecting any service or main‐<br />
tenance work at the system.<br />
3
1. Safety<br />
4<br />
Comply with all generally applicable laws as well as special rules and directives<br />
for accident prevention and environmental protection.<br />
All parts and any equipment used for the installation shall comply with the<br />
technical demands and criteria set forth by <strong>Tunstall</strong> <strong>GmbH</strong>. This is always ensu‐<br />
red when using original parts.<br />
1.3 Symbols used in this manual<br />
When studying this manual, you will come across a number of symbols which<br />
direct your attention to specific issues:<br />
WARNING ! This symbol refers to actions which may incur personal injuries<br />
(Danger to life or well-being).<br />
WARNING ! This symbols refers to actions which could endanger persons<br />
through electrical voltage or electrical current.<br />
Components sensitive to electrostatics ! This symbol indicates components<br />
which are sensitive to electrostatics. Avoid any contact with these components<br />
as this may induce damage to such component.<br />
CAUTION ! This symbol refers to actions which may incur damage to the sys‐<br />
tem or components due to electrical voltage or electrical current.<br />
NOTE ! Here you will find supplementary and otherwise useful information.<br />
In the text passages you will come across symbols which always have<br />
the same meaning:<br />
A square before the text means:<br />
“This is part of a listing.“.<br />
An filled-in circle in front of a text means:<br />
“This is what you have to do.”<br />
An open circle in front of a text means:<br />
“This is the result of an action.”<br />
1.4 Intended use<br />
All <strong>Flamenco</strong> products are designed for use in the nurse call system, and here<br />
again, only in the manner as described in this technical manual. Any other ap‐<br />
plication of use shall be considered as not authorised, and <strong>Tunstall</strong> <strong>GmbH</strong> will<br />
not accept any liability for damage resulting from any non-compliance with this<br />
rule.<br />
<strong>Flamenco</strong> - <strong>Technical</strong> <strong>Manual</strong>, 10/11 (Rev. 5.0), 00 8812 60
1.5 General safety rules<br />
<strong>Flamenco</strong> - <strong>Technical</strong> <strong>Manual</strong>, 10/11 (Rev. 5.0), 00 8812 60<br />
1. Safety<br />
Closely observe all safety instructions from this manual, pertinent national<br />
rules and directives for accident prevention as well as the owner's / user's<br />
internal rules and procedures for safety at work and while handling or oper‐<br />
ating the system.<br />
Avoid any safety-hazardous work methods.<br />
Before starting to work, personnel shall make themselves familiar with the<br />
working environment which includes a survey of obstacles in the working<br />
and operating area.<br />
Use only original fuses with the correct rating for the specific application.<br />
Only install and wire up the equipment in a de-energized state.<br />
If work details must be executed at installed components they must be free<br />
from residual voltage. Before working at such parts, use applicable instru‐<br />
ments to check the electric status.<br />
If work must be executed at electrically live components, a second person<br />
should act as a safety attendant who in case of an emergency can turn the<br />
main switch off.<br />
In case of any fault or malfunction, shut off the electrical power. Do not con‐<br />
tinue to work until the fault has been corrected.<br />
Protect all system components from direct wetness.<br />
The various components of the <strong>Flamenco</strong> system are fitted with elements<br />
sensitive to electrostatics. Any discharge of electrostatic energy may dam‐<br />
age such parts. Therefore, avoid any direct contact with these electrostatic‐<br />
ally sensitive components.<br />
For further information regarding the installation and functional check refer<br />
to German standard DIN VDE 0834.<br />
5
1. Safety<br />
1.6 <strong>Technical</strong> standards<br />
6<br />
Close observe the following standards which are applicable to nurse call sys‐<br />
tems:<br />
DIN VDE 0834-1 0834-1:2000-04: Call systems in hospitals, nursing homes<br />
and similar institutions - Part 1: Requirements for equipment, erection and<br />
operation<br />
DIN VDE 0834-2; VDE 0834-2:2000-04: Call systems in hospitals, nursing<br />
homes and similar institutions - Part 2: - Environmental conditions and elec‐<br />
tromagnetic compatibility<br />
ISO 11197: Medical supply units<br />
EN 60601-1: Medical electrical equipment - Part 1: General requirements<br />
for basic safety and essential performance<br />
EN 60601-1-1: Medical electrical equipment - Part 1: General safety re‐<br />
quirements for medical electrical systems<br />
EN 50081-1: Electromagnetic compatibility (EMC), basic specification for<br />
emitted interference<br />
EN 50082-1: Electromagnetic compatibility (EMC), basic specification for<br />
immunity to interference<br />
DIN VDE 0100: Rules for the installation of high-voltage systems with nom‐<br />
inal voltage up to 1000 V<br />
DIN VDE 0100-710: Erection of low-voltage installations - Requirements for<br />
special installations or locations Part 710: Medical locations<br />
EN 60950-1: Information technology equipment “Safety“ Part 1: General re‐<br />
quirements<br />
Also observe additional national rules for installations.<br />
<strong>Flamenco</strong> - <strong>Technical</strong> <strong>Manual</strong>, 10/11 (Rev. 5.0), 00 8812 60
2. Necessary previous knowledge<br />
2.1 System overview<br />
Ward 4 Ward 5<br />
Ward 2<br />
Ward 1<br />
Fig. 1: System overview<br />
<strong>Flamenco</strong> - <strong>Technical</strong> <strong>Manual</strong>, 10/11 (Rev. 5.0), 00 8812 60<br />
Ward 3<br />
OSY‐ControlCenter<br />
PS/DECT<br />
Telephony<br />
(DECT, VoIP, GSM)<br />
HIS<br />
...<br />
Control Centre<br />
7
2. Necessary previous knowledge<br />
2.2 System structure<br />
8<br />
PS<br />
DECT<br />
HIS<br />
...<br />
The nurse call system uses a bus system which comprises a group bus OSYnet<br />
and a room bus RAN. The group bus OSYnet links the individual rooms and po‐<br />
tential interfaces in the ward. The room bus RAN links the equipment and<br />
devices in the rooms themselves.<br />
The respective room terminal controls the room bus RAN and forms the<br />
connection between room bus RAN and group bus OSYnet: ComTerminal Fla‐<br />
menco, RoomTerminal <strong>Flamenco</strong>, ControlTerminal <strong>Flamenco</strong>, ControlTerminal<br />
with doorplate <strong>Flamenco</strong>.<br />
System control is realised in the OSY-ControlCenter which controls the data<br />
flow as well as all speech communication.<br />
If the OSY-ControlCenter should fail or break down, decentralised OSYnet-<br />
SafetyControllers can takeover the control of the basic nurse call functions.<br />
These controllers are fitted to ward's OSYnet group bus.<br />
Decentralised power supply units provide the electric power for the system.<br />
Number of units and their location depend on the specific demand for electric<br />
power. Power for the OSY-ControlCenter is also provided via an external power<br />
supply unit.<br />
Group 4<br />
Group 3<br />
OSYnet<br />
RAN RAN<br />
Room 1 Room 2<br />
OSYnet<br />
RAN RAN<br />
OSY-ControlCenter Room 1 Room 2<br />
Fig. 2: System structure<br />
Group 2<br />
Group 1<br />
<strong>Flamenco</strong> - <strong>Technical</strong> <strong>Manual</strong>, 10/11 (Rev. 5.0), 00 8812 60
2.3 Speech communication<br />
<strong>Flamenco</strong> - <strong>Technical</strong> <strong>Manual</strong>, 10/11 (Rev. 5.0), 00 8812 60<br />
2. Necessary previous knowledge<br />
Speech communication and data transmission are physically and logically se‐<br />
parated. Two speech paths are standard for each group. When designed in<br />
segments, each group will feature more than two speech paths, however, this<br />
arrangement requires special planning and installation.<br />
The system's speech line links the system-inherent speech units:<br />
ComTerminal, Patient handset, ComStation BUS , ComStation PC , ComStation CT ,<br />
ManagementCenter PC , ManagementCenter PC Push buttons as well as the an‐<br />
nouncement loudspeakers as separate units or integrated in the corridor dis‐<br />
plays.<br />
2.3.1 Non-system speech paths<br />
Aside from the speech communication within the nurse call system it‐<br />
self,speech communication may also be realised using other devices:<br />
ComStation TEL , patient telephone, cordless phone (DECT or GSM mobile) etc.<br />
The interfaces to the PBX are provided in the OSY-ControlCenter.<br />
These devices can be used as virtually fully equivalent with the system's<br />
speech communication devices. Their use may be exclusively or mixed with the<br />
other units. However, planning and realisation of such solutions require detailed<br />
know-how of the technology involved, the operational implementation and sub‐<br />
sequent functional and organisational procedures.<br />
For the installation refer to and observe the specific manufacturer's documents.<br />
DECT<br />
PBX<br />
OSY-ControlCenter<br />
Cordless phone<br />
Patient telephone<br />
9
2. Necessary previous knowledge<br />
2.4 Wards and groups<br />
10<br />
Ward 5<br />
Ward 3<br />
Ward 6<br />
Ward 4<br />
Ward 1 Ward 2<br />
Organisation of the<br />
hospital<br />
Group 3<br />
Group 2<br />
Group 1<br />
<strong>Flamenco</strong> technology<br />
Wards are the organisational entities in hospitals. Therefore, a ward is an entity<br />
also for the nurse call operation in <strong>Flamenco</strong> nurse call systems. However, the<br />
physical structure of <strong>Flamenco</strong> call systems is almost independent of this or‐<br />
ganisation.<br />
In the development of the <strong>Flamenco</strong> technology, the organisational structure<br />
of the wards was decoupled from the technical structure. Rather than the ward,<br />
the 'physical' group is an entity - technically speaking, that is. Each group is<br />
linked to a group bus OSYnet and is controlled from a control unit (acting as a<br />
building block of the central OSY-ControlCenter). One group may comprise<br />
several wards. And what is more, wards may be 'distributed' onto several<br />
groups.<br />
This group-oriented arrangement allows for a substantial reduction of the ne‐<br />
cessary control units. The number of these control units and groups, respect‐<br />
ively, is not determined by the number of wards but rather by the building struc‐<br />
ture and by the desired fail-safe rating.<br />
This independence from the physical structure is a considerable advantage as<br />
there is no need to always keep in mind the eventual organisational structure<br />
when planning for wiring and equipment for the installation. The system can be<br />
amended at any later date to meet new organisational structure, and this can<br />
be realised without dealing with the physical structure.<br />
Ward = Organisational entity<br />
Group = Physical entity<br />
<strong>Flamenco</strong> - <strong>Technical</strong> <strong>Manual</strong>, 10/11 (Rev. 5.0), 00 8812 60
2.5 Cables / Wiring<br />
<strong>Flamenco</strong> - <strong>Technical</strong> <strong>Manual</strong>, 10/11 (Rev. 5.0), 00 8812 60<br />
2. Necessary previous knowledge<br />
Data cables, e.g. CAT7 (22 AWG) or commercially available communication<br />
cables IY(ST)Y... can be used for group bus OSYnet.<br />
Power supply for all components is realised with a separate net (ring system),<br />
also with commercially available cables, e.g. NYM 2x2.5 mm 2 . On average, one<br />
power supply unit is required for every 25 rooms.<br />
The room bus RAN is also realised with commercially available communication<br />
cables IY(ST)Y...<br />
Maximum cable length for the group bus OSYnet is 700 m. In exceptional cir‐<br />
cumstances, it may be extended for another 700 m. In this case, an OSYnet-<br />
Gateway (order no. 77 4001 00) is required.<br />
2.6 System limits<br />
A physical group may comprise up to 110 bus users, as there are:<br />
ComTerminal <strong>Flamenco</strong><br />
RoomTerminal <strong>Flamenco</strong><br />
ControlTerminal <strong>Flamenco</strong><br />
ControlTerminal with doorplate <strong>Flamenco</strong><br />
ComStationCT <strong>Flamenco</strong><br />
Corridor display Alpha 16<br />
Corridor display Alpha 16, double-sided<br />
ComStationPC OSYlink-Door entry speaker<br />
OSYlink-Group lamp<br />
OSYlink-Universal<br />
OSYlink-Announcement<br />
OSYnet-SafetyController<br />
11
2. Necessary previous knowledge<br />
2.7 Configuration / SystemOrganizer<br />
12<br />
A special software, the SystemOrganizer (order no. 77 0750 00) is used to cent‐<br />
rally configure the complete nurse call system.<br />
The SystemOrganizer is applied for the whole system administration, from inital<br />
order processing via general definition and planning for the nurse call system<br />
to later customer service work on location or via partner. The comprehensive<br />
software also permits remote access to the system with the possibility for con‐<br />
figuration, servicing and fault analysis.<br />
Users are allocated to several user groups, and specific access rights can be<br />
defined for each group.<br />
Fig. 3: SystemOrganizer software<br />
<strong>Flamenco</strong> - <strong>Technical</strong> <strong>Manual</strong>, 10/11 (Rev. 5.0), 00 8812 60
<strong>Flamenco</strong> - <strong>Technical</strong> <strong>Manual</strong>, 10/11 (Rev. 5.0), 00 8812 60<br />
3. Room types<br />
The following pages present various types of rooms showing examples of the<br />
system and equipment installed.<br />
13
3. Room types<br />
3.1 Patient / resident room<br />
3.1.1 Patient / resident room with speech<br />
OSYnet + Ip OSYnet + Ip<br />
14<br />
77 0510 00<br />
Ie<br />
Entertainment<br />
In<br />
In<br />
77 0170 00<br />
Is<br />
Entertainment system by customer<br />
70 0113 00<br />
74 0747 00<br />
In<br />
74 0747 00<br />
70 0111 01<br />
In<br />
70 0115 01<br />
70 0424 00<br />
Entertainment<br />
Ie<br />
Entertainment<br />
Ie<br />
70 0434 00<br />
<strong>Flamenco</strong> - <strong>Technical</strong> <strong>Manual</strong>, 10/11 (Rev. 5.0), 00 8812 60<br />
Is
For each room<br />
For each bed<br />
In WC room<br />
<strong>Flamenco</strong> - <strong>Technical</strong> <strong>Manual</strong>, 10/11 (Rev. 5.0), 00 8812 60<br />
3. Room types<br />
ComTerminal <strong>Flamenco</strong> 77 0510 00<br />
Room lamp for display of all types of calls and presence states:<br />
e.g. Room lamp, 3 sections<br />
optional with additional individual indication for WC call /<br />
WC emergency call: e.g. Room lamp, 4 sections<br />
Connection socket combi or<br />
Connection socket combi, bedhead unit<br />
77 0170 00<br />
77 0170 10<br />
70 0424 00<br />
70 0434 00<br />
Patient handset 74 0747 00<br />
Where additional indication for WC call / WC emergency call is<br />
desired, e.g. as directional indicator in front of the WC:<br />
Room lamp code blue/cardiac alarm, WC<br />
77 0170 01<br />
Cancel button for WC call / WC emergency call<br />
e.g. Cancel switch/WC wp 70 0113 00<br />
There is a selection of call devices for use at or near wash<br />
basin, WC, shower, bath tub:<br />
Call switch/WC wp<br />
Pull cord call switch/WC wp<br />
Pneumatic call switch/WC<br />
In the seating area (optional)<br />
70 0111 01<br />
70 0115 01<br />
70 0106 01<br />
Call button, e.g. Call switch wp 70 0111 00<br />
Necessary accessories: Refer to table on page 47.<br />
Cable legend: Refer to page 49.<br />
15
3. Room types<br />
3.1.2 Patient / Resident room<br />
without speech, with ControlTerminal<br />
OSYnet + Ip OSYnet + Ip<br />
16<br />
In<br />
In<br />
70 0119 00<br />
In<br />
77 0550 00<br />
In<br />
70 0113 00<br />
70 0710 00<br />
70 0710 00<br />
In<br />
70 0111 01<br />
In<br />
70 0171 03<br />
70 0171 50<br />
70 0115 01<br />
<strong>Flamenco</strong> - <strong>Technical</strong> <strong>Manual</strong>, 10/11 (Rev. 5.0), 00 8812 60<br />
In
For each room<br />
For each bed<br />
In WC room<br />
<strong>Flamenco</strong> - <strong>Technical</strong> <strong>Manual</strong>, 10/11 (Rev. 5.0), 00 8812 60<br />
Options:<br />
ControlTerminal <strong>Flamenco</strong><br />
ControlTerminal with doorplate <strong>Flamenco</strong><br />
3. Room types<br />
77 0550 00<br />
77 0551 00<br />
ControlTerminal installation kit 77 0960 00<br />
ControlTerminal ConfigSet<br />
(only one required for the nurse call system)<br />
77 0920 00<br />
Staff presence combination with call tone, bedhead unit 70 0119 00<br />
Connection socket with call tone, bedhead unit or<br />
Connection socket with call tone, bedhead unit<br />
Options:<br />
Pear push switch incl. call and light switch, 2 m cable<br />
Pear push switch incl. call and light switch, 4 m cable<br />
Pear push switch incl. 2 call switches, 2 m cable<br />
Pear push switch incl. 2 call switches, 4 m cable<br />
70 0171 03<br />
70 0171 50<br />
70 0710 00<br />
70 0710 01<br />
70 0711 00<br />
70 0711 01<br />
Cancel button for WC call / WC emergency call<br />
e.g. Cancel switch/WC wp 70 0113 00<br />
There is a selection of call devices for use at or near wash<br />
basin, WC, shower, bath tub:<br />
Call switch/WC wp<br />
Pull cord call switch/WC wp<br />
Pneumatic call switch/WC<br />
In the seating area (optional)<br />
70 0111 01<br />
70 0115 01<br />
70 0106 01<br />
Call button, e.g. Call switch wp 70 0111 00<br />
Necessary accessories: Refer to table on page 47.<br />
Cable legend: Refer to page 49.<br />
17
3. Room types<br />
3.1.3 Patient / resident room<br />
without speech, with RoomTerminal<br />
18<br />
OSYnet + Ip OSYnet + Ip<br />
77 0520 00<br />
In<br />
In<br />
In<br />
77 0170 00<br />
70 0113 00<br />
70 0710 00<br />
70 0710 00<br />
In<br />
70 0111 01<br />
In<br />
70 0171 03<br />
70 0171 50<br />
70 0115 01<br />
<strong>Flamenco</strong> - <strong>Technical</strong> <strong>Manual</strong>, 10/11 (Rev. 5.0), 00 8812 60<br />
In
For each room<br />
For each bed<br />
In WC room<br />
<strong>Flamenco</strong> - <strong>Technical</strong> <strong>Manual</strong>, 10/11 (Rev. 5.0), 00 8812 60<br />
3. Room types<br />
RoomTerminal <strong>Flamenco</strong> 77 0520 00<br />
Room lamp for display of all types of calls and presence states:<br />
e.g. Room lamp, 3 sections<br />
optional with additional individual indication for WC call /<br />
WC emergency call: e.g. Room lamp, 4 sections<br />
Connection socket with call tone, bedhead unit or<br />
Connection socket with call tone, bedhead unit<br />
Options:<br />
Pear push switch incl. call and light switch, 2 m cable<br />
Pear push switch incl. call and light switch, 4 m cable<br />
Pear push switch incl. 2 call switches, 2 m cable<br />
Pear push switch incl. 2 call switches, 4 m cable<br />
Where additional indication for WC call / WC emergency call is<br />
desired, e.g. as directional indicator in front of the WC:<br />
Room lamp code blue/cardiac alarm, WC<br />
77 0170 00<br />
77 0170 10<br />
70 0171 03<br />
70 0171 50<br />
70 0710 00<br />
70 0710 01<br />
70 0711 00<br />
70 0711 01<br />
77 0170 01<br />
Cancel button for WC call / WC emergency call<br />
e.g. Cancel switch/WC wp 70 0113 00<br />
There is a selection of call devices for use at or near wash<br />
basin, WC, shower, bath tub:<br />
Call switch/WC wp<br />
Pull cord call switch/WC wp<br />
Pneumatic call switch/WC<br />
In the seating area (optional)<br />
70 0111 01<br />
70 0115 01<br />
70 0106 01<br />
Call button, e.g. Call switch wp 70 0111 00<br />
Necessary accessories: Refer to table on page 47.<br />
Cable legend: Refer to page 49.<br />
19
3. Room types<br />
3.1.4 Patient room: Light switching<br />
OSYnet + Ip OSYnet + Ip<br />
20<br />
Useable relays<br />
Entertainment<br />
Ie<br />
Room light<br />
Reading light<br />
Latching relay (electronic):<br />
ELTAKO, ES60-TX60-24VDC<br />
ELTAKO, ES75-100-12..24 VDC<br />
SCHIELE entrelec TX60-24V<br />
BIAIG electronics TX60-24V<br />
Latching relay (mechanical):<br />
ELTAKO, 1S9-24 VDC<br />
ELTAKO, S91-100-24 VDC<br />
Entertainment system by customer<br />
70 0424 00<br />
Entertainment<br />
Ie<br />
Is<br />
RAN<br />
Pulse duration 150 ms<br />
24 V d.c. voltage<br />
Switching relay (mechanical):<br />
ELTAKO, R12-100-24 VDC (for top-hat rail)<br />
ELTAKO, R91-100-24 VDC (surface mounting / back box)<br />
FINDER, 49.61-7024.4050<br />
Connection socket combi (70 0424 00): Room light and reading light<br />
Connection socket combi, bedhead unit (70 0734 00): Room light and reading<br />
light<br />
Connection socket with call tone, bedhead unit (70 0171 03): Room light or rea‐<br />
ding light<br />
Connection socket with call tone, bedhead unit Kanal (70 0171 50): Room light<br />
or reading light<br />
<strong>Flamenco</strong> - <strong>Technical</strong> <strong>Manual</strong>, 10/11 (Rev. 5.0), 00 8812 60
3.1.5 Patient room: TV connection<br />
3.1.5.1 Standard TV set (open TV tone)<br />
OSYnet + Ip OSYnet + Ip<br />
Entertainment<br />
Ie<br />
70 0424 00<br />
70 0860 00<br />
Entertainment<br />
RAN<br />
<strong>Flamenco</strong> - <strong>Technical</strong> <strong>Manual</strong>, 10/11 (Rev. 5.0), 00 8812 60<br />
In<br />
Ie<br />
Ia<br />
Data<br />
Entertainment system by customer<br />
74 0747 00<br />
00 0280 40<br />
70 0360 10<br />
70 0360 20<br />
3. Room types<br />
Infrared<br />
Connection socket combi (70 0424 00) und Connection socket combi, bed‐<br />
head unit (70 0434 00) allow TV control in combination with patient handset<br />
(74 0747 00) and the RAN interface TV (70 0860 00) and IR TV control module<br />
universal (70 0360 10).<br />
IR TV control module universal (70 0360 10) allows the control of standard TV<br />
sets using infrared signals. Additionally needed: Kit for IR TV control module<br />
(70 0360 20), Addressing plug for IR TV control module (70 0360 30) and onetime<br />
TV control module programming service (70 0360 50).<br />
Note: No tone transmission to patient handset.<br />
21
3. Room types<br />
3.1.5.2 Patient room: TV connection<br />
Standard TV set with tone transmission to Patient handset<br />
OSYnet + Ip OSYnet + Ip<br />
22<br />
Entertain−<br />
ment<br />
Ie<br />
Entertainment<br />
70 0424 50<br />
70 0860 00<br />
RAN<br />
In<br />
Ie<br />
Ia<br />
Data<br />
Entertainment system by customer<br />
Ton<br />
74 0747 00<br />
Ia2<br />
00 0280 40<br />
70 0360 11<br />
70 0360 21<br />
Scart<br />
Connection socket combi, TVL (70 0424 50) and connection socket combi, TVL<br />
bedhead unit (70 0434 50) allow TV control in combination with patient handset<br />
(74 0747 00), RAN interface TV (70 0860 00) and IR TV control module univer‐<br />
sal Audio (70 0360 11).<br />
Warning! These connections sockets are used only for this application.<br />
IR TV control module universal Audio allows the control and tone transmission<br />
from standard TV sets using infrared signals. Additionally needed: Kit for IR TV<br />
control module Audio (70 0360 21), Addressing plug for IR TV control module<br />
(70 0360 30) and one-time TV control module programming service (70 0360<br />
50).<br />
<strong>Flamenco</strong> - <strong>Technical</strong> <strong>Manual</strong>, 10/11 (Rev. 5.0), 00 8812 60<br />
IR
3.1.5.3 Patient room: TV connection<br />
Hospital LCD TV, Professional<br />
OSYnet + Ip OSYnet + Ip<br />
Entertainment<br />
Entertain−<br />
ment<br />
Ie<br />
70 0424 00<br />
70 0860 00<br />
<strong>Flamenco</strong> - <strong>Technical</strong> <strong>Manual</strong>, 10/11 (Rev. 5.0), 00 8812 60<br />
In<br />
Ie<br />
RAN<br />
Tone<br />
Ia<br />
Data<br />
Entertainment system by customer<br />
74 0747 00<br />
Ie<br />
00 0280 40<br />
74 7002 26 (26”)<br />
74 7002 32 (32”)<br />
70 0360 01<br />
3. Room types<br />
Connection socket combi (70 0424 00) and connection socket combi bedhead<br />
unit (70 0434 00) allow TV control in combination with patient handset (74 0747<br />
00) and RAN interface TV (70 0860 00). LCD TV sets are available in different<br />
sizes. Per TV set one TV control module for hospital TV (70 0360 01) is re‐<br />
quired.<br />
For the programming per project one TV programming module (74 7002 99) and<br />
the remote control PR 106 (74 7000 01) is required.<br />
The TV sets are prepared for standard VESA wall mounts. Three different<br />
wall mounts can be ordered from <strong>Tunstall</strong> (74 7002 80, 74 7002 81, 74 7002 82).<br />
23
3. Room types<br />
3.1.6 Patient room: Separate shower and WC<br />
OSYnet + Ip OSYnet + Ip<br />
Ie<br />
24<br />
77 0510 00<br />
Entertainment<br />
In<br />
Is<br />
7<br />
In<br />
70 0112 00<br />
In<br />
77 0170 01<br />
In In<br />
6<br />
77 0170 01<br />
77 0170 00<br />
0<br />
0<br />
74 0747 00<br />
74 0747 00<br />
Entertainment system by customer<br />
70 0113 00<br />
70 0113 00<br />
7<br />
In<br />
6<br />
0 = Channel number 0<br />
In<br />
70 0111 01<br />
70 0115 01<br />
7<br />
6 6<br />
70 0115 01<br />
Entertainment<br />
Ie<br />
70 0424 00<br />
Entertainment<br />
70 0434 00<br />
Separate call cancelling for each cubicle; collective room lamp (77 0170 00) in<br />
corridor and separate room lamps (77 0170 01) in room (channel encoding)<br />
with additional display for each cubicle. Maximum of 7 channels for each<br />
ComTerminal.<br />
Channel numbers 1 - 5 can be used as bed numbers 1 - 5.<br />
Ie<br />
<strong>Flamenco</strong> - <strong>Technical</strong> <strong>Manual</strong>, 10/11 (Rev. 5.0), 00 8812 60<br />
Is
3.2 Function room<br />
For each room<br />
<strong>Flamenco</strong> - <strong>Technical</strong> <strong>Manual</strong>, 10/11 (Rev. 5.0), 00 8812 60<br />
OSYnet + Ip OSYnet + Ip<br />
77 0510 00<br />
In<br />
77 0170 00<br />
3. Room types<br />
ComTerminal <strong>Flamenco</strong> 77 0510 00<br />
Room lamp for display of all types of calls and presence states:<br />
e.g. Room lamp, 3 sections 77 0170 00<br />
Necessary accessories: Refer to table on page 47.<br />
Cable legend: Refer to page 49.<br />
25
3. Room types<br />
3.3 Ward bathroom<br />
3.3.1 Ward bathroom with speech, with ComTerminal<br />
26<br />
70 0115 00<br />
70 0111 00<br />
In<br />
Pro Raum<br />
OSYnet + Ip OSYnet + Ip<br />
In<br />
77 0510 00<br />
In<br />
In<br />
77 0170 00<br />
70 0106 00<br />
In<br />
70 0111 00<br />
ComTerminal <strong>Flamenco</strong> 77 0510 00<br />
Room lamp for display of all types of calls and presence states:<br />
e.g. Room lamp, 3 sections 77 0170 00<br />
For each bath / WC<br />
Pull cord call switch wp, suitable for shower, WC<br />
Call switch wp, suitable for washbasin<br />
Pneumatic call switch, suitable for bath tubs<br />
Necessary accessories: Refer to table on page 47.<br />
Cable legend: Refer to page 49.<br />
70 0115 00<br />
70 0111 00<br />
70 0106 00<br />
<strong>Flamenco</strong> - <strong>Technical</strong> <strong>Manual</strong>, 10/11 (Rev. 5.0), 00 8812 60
<strong>Flamenco</strong> - <strong>Technical</strong> <strong>Manual</strong>, 10/11 (Rev. 5.0), 00 8812 60<br />
3. Room types<br />
3.3.2 Ward bathrom without speech, with ControlTerminal<br />
70 0115 00<br />
70 0111 00<br />
In<br />
For each room<br />
OSYnet + Ip OSYnet + Ip<br />
In<br />
In<br />
70 0119 00<br />
Options:<br />
ControlTerminal <strong>Flamenco</strong><br />
ControlTerminal with doorplate <strong>Flamenco</strong><br />
In<br />
77 0550 00<br />
70 0106 00<br />
In<br />
70 0111 00<br />
77 0550 00<br />
77 0551 00<br />
ControlTerminal installation kit 77 0960 00<br />
ControlTerminal ConfigSet<br />
(only one required for the nurse call system)<br />
77 0920 00<br />
Staff presence combination with call tone, bedhead unit 70 0119 00<br />
For each bath / WC<br />
Pull cord call switch wp, suitable for shower, WC<br />
Call switch wp, suitable for washbasin<br />
Pneumatic call switch, suitable for bath tubs<br />
Necessary accessories: Refer to table on page 47.<br />
Cable legend: Refer to page 49.<br />
70 0115 00<br />
70 0111 00<br />
70 0106 00<br />
27
3. Room types<br />
3.4 Nurse station<br />
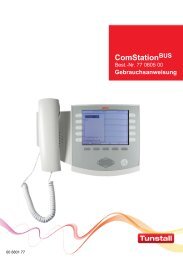
3.4.1 Ward console ComStation BUS<br />
28<br />
For each room<br />
OSYnet + Ip OSYnet + Ip<br />
77 0605 10<br />
In<br />
74 0452 30<br />
77 018210<br />
ComStation BUS 77 0605 10<br />
Connection socket ComStation 74 0452 30<br />
Room lamp Universal, 2 sections 77 0182 10<br />
Necessary accessories: Refer to table on page 47.<br />
Cable legend: Refer to page 49.<br />
<strong>Flamenco</strong> - <strong>Technical</strong> <strong>Manual</strong>, 10/11 (Rev. 5.0), 00 8812 60
3.4.2 Nurse station:<br />
Ward console ComStation CT <strong>Flamenco</strong><br />
77 0606 00<br />
For each room<br />
<strong>Flamenco</strong> - <strong>Technical</strong> <strong>Manual</strong>, 10/11 (Rev. 5.0), 00 8812 60<br />
OSYnet + Ip OSYnet + Ip<br />
In<br />
74 0452 30<br />
77 0170 00<br />
3. Room types<br />
ComStation CT <strong>Flamenco</strong> 77 0606 00<br />
Connection socket ComStation 74 0452 30<br />
Room lamp for display of all types of calls and presence<br />
states: e.g. Room lamp, 3 sections 77 0170 00<br />
Necessary accessories: Refer to table on page 47.<br />
Cable legend: Refer to page 49.<br />
29
3. Room types<br />
3.4.3 Nurse station: Ward console ComStation PC<br />
30<br />
77 0602 00<br />
+ 77 0790 00<br />
+ 77 0790 01<br />
or 77 0790 02<br />
For each room<br />
OSYnet + Ip OSYnet + Ip<br />
In<br />
77 0182 10<br />
74 0452 60A<br />
ComStation PC 77 0602 00<br />
Connection socket ComStation PC 74 0452 60A<br />
Room lamp Universal, 2 sections 77 0182 10<br />
PrimusGlobal + System setup and configuration 77 0790 00<br />
PrimusGlobal+ Project data up to 36 rooms<br />
Standard graphics<br />
or planview graphics<br />
77 0790 01<br />
77 0790 02<br />
<strong>Flamenco</strong> - <strong>Technical</strong> <strong>Manual</strong>, 10/11 (Rev. 5.0), 00 8812 60
3.4.4 Nurse station: Ward console ComStation TEL<br />
network on-site<br />
Ethernet 10/100 MBit<br />
AC<br />
DC<br />
For each room<br />
<strong>Flamenco</strong> - <strong>Technical</strong> <strong>Manual</strong>, 10/11 (Rev. 5.0), 00 8812 60<br />
OSYnet + Ip OSYnet + Ip<br />
77 0603 00<br />
In<br />
77 0510 00<br />
77 0170 00<br />
3. Room types<br />
ComStation TEL 77 0603 00<br />
For each room (if compliance with DIN VDE 0834 is required)<br />
ComTerminal <strong>Flamenco</strong> 77 0510 00<br />
Room lamp for display of all types of calls and presence states:<br />
e.g. Room lamp, 3 sections 77 0170 00<br />
Necessary accessories: Refer to table on page 47.<br />
Cable legend: Refer to page 49.<br />
31
3. Room types<br />
3.5 Corridor<br />
32<br />
Flurdisplay:<br />
OSYnet + Ip OSYnet + Ip<br />
77 01X0 00<br />
Group lamps, direction lamps:<br />
OSYnet + Ip OSYnet + Ip<br />
77 0802 00<br />
77 0111 02<br />
Door entry speaker:<br />
77 0112 02<br />
OSYnet + Ip OSYnet + Ip<br />
77 0801 00<br />
77 0350 00<br />
Loudspeaker with announcement interface:<br />
OSYnet + Ip OSYnet + Ip<br />
77 0804 00<br />
05 0024 00<br />
Devices or technical equipment from other makes:<br />
OSYnet + Ip OSYnet + Ip<br />
77 0803 00<br />
The corridor display Alpha 16, single-sided<br />
(77 0150 00) or Alpha 16, double-sided<br />
(77 0160 00) is directly connected to the group bus<br />
OSYnet.<br />
4 direction lamps (77 1102 00) or group lamps<br />
(77 1X02 00) for 4 wards can be connected to each<br />
OSYlink‐group lamp (77 0802 00).<br />
To each OSYlink-door entry speaker (77 0801 00)<br />
one door entry speaker (77 0350 00) can be<br />
connected.<br />
To each OSYlink-announcement (77 0804 00) a<br />
maximum of 5 loudspeakers with announcement<br />
interface (05 0024 00) can be connected<br />
Connection of devices or technical equipment from<br />
other makes via OSYlink-Universal (77 0803 00).<br />
For details refer to product leaflet of OSYlink-Uni‐<br />
versal.<br />
<strong>Flamenco</strong> - <strong>Technical</strong> <strong>Manual</strong>, 10/11 (Rev. 5.0), 00 8812 60
<strong>Flamenco</strong> - <strong>Technical</strong> <strong>Manual</strong>, 10/11 (Rev. 5.0), 00 8812 60<br />
4. Installation examples<br />
33
4. Installation examples<br />
230 V AC<br />
<strong>Flamenco</strong> Installation example 1<br />
34<br />
77 0510 00 77 0510 00 77 0510 00<br />
77 0510 00<br />
77 3400 00<br />
or<br />
77 3401 00<br />
24 V<br />
77 2100 00<br />
Ip<br />
77 0801 00<br />
OSYnet<br />
77 0802 00<br />
77 0111 02<br />
77 0112 02<br />
77 0350 00<br />
74 0452 30<br />
77 0550 00<br />
+ 77 0960 00<br />
OSYnet<br />
77 0510 00<br />
77 0510 00<br />
77 0510 00<br />
120 <br />
00 0040 76<br />
ComStation CT<br />
230 V AC<br />
77 0510 00 77 0510 00 77 0510 00<br />
77 0510 00<br />
77 3400 00<br />
or<br />
77 3401 00<br />
24 V<br />
230 V AC<br />
230 V AC für Netzwerk-Switch<br />
ManagementCenter<br />
77 2100 00<br />
77 3400 00<br />
or<br />
77 3401 00<br />
Ip<br />
230 V AC<br />
77 0803 00<br />
77 0802 00<br />
OSYnet<br />
77 0112 02<br />
24 V<br />
77 0550 00<br />
+ 77 0960 00<br />
120 <br />
00 0040 76<br />
Group 1<br />
Group 2<br />
Group 3<br />
Order no.: Product name:<br />
00 0040 76 120 Ohm resistor (bus termination)<br />
74 0452 30 Connection socket ComStation<br />
77 0111 02 Direction lamp<br />
77 0112 02 Group lamp, 2 sections<br />
77 0350 00 Door entry speaker<br />
77 0510 00 ComTerminal <strong>Flamenco</strong><br />
77 0550 00 ControlTerminal <strong>Flamenco</strong><br />
77 0606 00 ComStationCT <strong>Flamenco</strong><br />
77 0960 00 ControlTerminal installation kit<br />
77 0801 00 OSYlink-Door entry speaker<br />
77 0802 00 OSYlink-Group lamp<br />
77 0803 00 OSYlink-Universal<br />
77 2100 00 OSYnet-SafetyController<br />
77 3400 00 Power supply unit UPS<br />
77 3401 00 Power supply unit<br />
<strong>Flamenco</strong> - <strong>Technical</strong> <strong>Manual</strong>, 10/11 (Rev. 5.0), 00 8812 60<br />
74 0452 30<br />
OSYnet<br />
OSY-ControlCenter<br />
77 0510 00<br />
77 0510 00<br />
77 0510 00<br />
ComStation CT
230 V AC<br />
77 0510 00 77 0510 00<br />
77 0510 00<br />
77 0510 00<br />
77 3400 00<br />
or<br />
77 3401 00<br />
<strong>Flamenco</strong> Installation example 2<br />
24 V<br />
Ip<br />
<strong>Flamenco</strong> - <strong>Technical</strong> <strong>Manual</strong>, 10/11 (Rev. 5.0), 00 8812 60<br />
OSYnet<br />
77 0150 00 or 77 0160 00<br />
77 0510 00 77 0510 00<br />
77 0510 00 77 0510 00 77 0510 00<br />
74 0452 60A<br />
77 0510 00<br />
ComStationPC 77 0510 00 77 0510 00<br />
230 V<br />
77 0510 00<br />
120 <br />
00 0040 76<br />
Ip<br />
77 0150 00 or 77 0160 00<br />
OSYnet<br />
230 V AC<br />
77 0510 00<br />
77 0510 00 77 0510 00 77 0510 00<br />
77 4000 00<br />
77 3400 00<br />
or<br />
77 3401 00<br />
77 2100 00<br />
74 0452 60A<br />
24 V<br />
77 3400 00<br />
or<br />
77 3401 00<br />
24 V<br />
ComStationPC 77 0510 00 77 0510 00<br />
230 V<br />
77 0510 00<br />
230 V AC<br />
Ip<br />
230 V AC for<br />
network switch<br />
OSYnet<br />
230 V AC<br />
77 0150 00 or 77 0160 00<br />
4. Installation examples<br />
24 V<br />
77 3400 00<br />
or<br />
77 3401 00<br />
74 0452 60A<br />
120 <br />
00 0040 76<br />
OSY-ControlCenter<br />
ComStationPC 77 0510 00 77 0510 00 77 0510 00 77 0510 00<br />
230 V<br />
Order no.: Product name:<br />
00 0040 76 120 Ohm resistor (bus termination)<br />
77 0510 00 ComTerminal <strong>Flamenco</strong><br />
77 0150 00 Corridor display Alpha 16<br />
77 0160 00 Corridor display Alpha 16, double-sided<br />
77 2100 00 OSYnet-SafetyController<br />
77 3400 00 Power supply unit UPS<br />
77 3401 00 Power supply unit<br />
77 4000 00 OSYnet-Y-RepeaterOpto<br />
OSYnet<br />
Group 1<br />
Group 2<br />
Group 3<br />
35
4. Installation examples<br />
<strong>Flamenco</strong> Installation example 3<br />
36<br />
230 V AC<br />
77 0510 00 77 0510 00 77 0510 00 77 0510 00<br />
77 0510 00<br />
77 0510 00 77 0510 00 77 0510 00<br />
77 0510 00<br />
77 3400 00<br />
or<br />
77 3401 00<br />
24 V<br />
77 2100 00<br />
Ip<br />
OSYnet<br />
OSYnet<br />
77 4001 00<br />
77 0804 00<br />
77 0150 00 or 77 0160 00<br />
OSYnet<br />
05 0024 00<br />
74 0452 30<br />
74 0452 30<br />
120 <br />
00 0040 76<br />
77 0510 00<br />
77 0510 00<br />
77 0510 00 77 0510 00<br />
77 0510 00 77 0510 00 77 0510 00 77 0510 00<br />
77 0605 00<br />
77 0605 00<br />
230 V AC for network switch<br />
Order no.: Product name:<br />
00 0040 76 120 Ohm resistor (bus termination)<br />
05 0024 00 Loudspeaker with announcement interface<br />
74 0452 30 Connection socket ComStation<br />
77 0150 00 Corridor display Alpha 16<br />
77 0160 00 Corridor display Alpha 16, double-sided<br />
77 0510 00 ComTerminal <strong>Flamenco</strong><br />
77 0605 00 ComStationBUS 77 0804 00 OSYlink-Announcement<br />
77 2100 00 OSYnet-SafetyController<br />
77 3400 00 Power supply unit UPS<br />
77 3401 00 Power supply unit<br />
77 4001 00 OSYnet-Gateway<br />
230 V AC<br />
77 3400 00<br />
or<br />
77 3401 00<br />
24 V<br />
<strong>Flamenco</strong> - <strong>Technical</strong> <strong>Manual</strong>, 10/11 (Rev. 5.0), 00 8812 60<br />
OSY-ControlCenter<br />
Group 1<br />
Group 2<br />
Group 3<br />
Cable legend:<br />
OSYnet = Group bus OSYnet = e.g. IY(ST)Y 4x2x0,8<br />
Ip = Power cable = NYM 2x2,5 mm2 OSYnet
<strong>Flamenco</strong> without speech Installation example<br />
Station 1 Station 2<br />
230 V AC<br />
230 V AC<br />
Further rooms<br />
77 0520 00 77 0520 00 77 0520 00<br />
77 3400 00<br />
or<br />
77 3401 00<br />
Further rooms<br />
77 0520 00 77 0520 00<br />
77 0520 00<br />
24 V<br />
24 V<br />
77 3400 00<br />
or<br />
77 3401 00<br />
<strong>Flamenco</strong> - <strong>Technical</strong> <strong>Manual</strong>, 10/11 (Rev. 5.0), 00 8812 60<br />
77 2100 00<br />
Ip<br />
Ip<br />
OSYnet<br />
OSYnet<br />
77 4001 00<br />
77 0802 00<br />
77 0150 00 or 77 0160 00<br />
OSYnet<br />
77 0111 02<br />
77 0112 02<br />
74 0452 30<br />
77 0550 00<br />
+ 77 0960 00<br />
74 0452 30<br />
120 <br />
00 0040 76<br />
77 0520 00<br />
Further rooms<br />
Further rooms<br />
77 0606 00<br />
77 0520 00 77 0520 00 77 0520 00<br />
77 0606 00<br />
Order no.: Product name:<br />
00 0040 76 120 Ohm resistor (bus termination)<br />
74 0452 30 Connection socket ComStation<br />
77 0111 02 Direction lamp<br />
77 0112 02 Group lamp, 2 sections<br />
77 0150 00 Corridor display Alpha 16<br />
77 0160 00 Corridor display Alpha 16, double-sided<br />
77 0520 00 RoomTerminal <strong>Flamenco</strong><br />
77 0550 00 ControlTerminal <strong>Flamenco</strong><br />
77 0606 00 ComStationCT <strong>Flamenco</strong><br />
77 0802 00 OSYlink-Group lamp<br />
77 0960 00 ControlTerminal installation kit<br />
77 2100 00 OSYnet-SafetyController<br />
77 3400 00 Power supply unit UPS<br />
77 3401 00 Power supply unit<br />
77 4001 00 OSYnet-Gateway<br />
230 V AC for network switch<br />
230 V AC<br />
77 3400 00<br />
or<br />
77 3401 00<br />
4. Installation examples<br />
24 V<br />
OSY-ControlCenter<br />
Cable legend:<br />
OSYnet = Group bus OSYnet<br />
- without speech transmission e.g. IY(ST)Y 2x2x0,8<br />
- with preparation for speech transmission e.g. IY(ST)Y 4x2x0,8<br />
Group 1<br />
Group 2<br />
Group 3<br />
OSYnet<br />
Ip = Power cable = NYM 2x2,5 mm 2<br />
37
4. Installation examples<br />
38<br />
<strong>Flamenco</strong> - <strong>Technical</strong> <strong>Manual</strong>, 10/11 (Rev. 5.0), 00 8812 60
5. Installation work sequence<br />
Work step Description<br />
1. Defining the mounting positions Page 41 and the following.<br />
2. Installation of back boxes Page 47 and the following.<br />
3. Laying the cables Page 49 and the following.<br />
4. Mounting and connecting of devices Refer to chapter “Product<br />
leaflets“, page 81 and the<br />
following.<br />
5. Switching on and checking of power supply Page 59 and the following.<br />
6. Configuring the room terminals (ComTerminal<br />
<strong>Flamenco</strong>, RoomTerminal <strong>Flamenco</strong>, ControlTer‐<br />
minal <strong>Flamenco</strong>, ControlTerminal with doorplate<br />
<strong>Flamenco</strong>)<br />
7. Configuring OSY-ControlCenter<br />
(SystemOrganizer)<br />
<strong>Flamenco</strong> - <strong>Technical</strong> <strong>Manual</strong>, 10/11 (Rev. 5.0), 00 8812 60<br />
ComTerminal <strong>Flamenco</strong>,<br />
RoomTerminal <strong>Flamenco</strong>:<br />
Refer to chapter “Product<br />
leaflets“, page 81 and the<br />
following.<br />
ControlTerminal <strong>Flamenco</strong>,<br />
ControlTerminal with door‐<br />
plate <strong>Flamenco</strong>: Refer to<br />
online help included with<br />
the ControlTerminal Config‐<br />
Set (order no. 77 0920 00).<br />
Page 61 and the following.<br />
8. Connecting the OSY-ControlCenter Refer to chapter “Product<br />
leaflets“, page 81 and the<br />
following.<br />
9. Commissioning the OSY-ControlCenter Refer to chapter “Product<br />
leaflets“, page 81 and the<br />
following.<br />
10. Commissioning the ward console<br />
(ComStation BUS , ComStation PC , ComStation CT<br />
<strong>Flamenco</strong>)<br />
11. Connecting and commissioning the Management‐<br />
Center<br />
Refer to the documents<br />
delivered with the ward con‐<br />
sole.<br />
Refer to chapter “Product<br />
leaflets“, page 81 and the<br />
following.<br />
12. Functional check of the system Page 67 and the following.<br />
39
5. Installation work sequence<br />
40<br />
<strong>Flamenco</strong> - <strong>Technical</strong> <strong>Manual</strong>, 10/11 (Rev. 5.0), 00 8812 60
6. Defining the mounting positions<br />
6.1 General requirements<br />
All devices for the nurse call<br />
system<br />
<strong>Flamenco</strong> - <strong>Technical</strong> <strong>Manual</strong>, 10/11 (Rev. 5.0), 00 8812 60<br />
- Considering the different users, the process of raising a call<br />
must be simple and unambiguous, and a mix-up with other sys‐<br />
tem elements must be virtually impossible.<br />
- Damage or destruction from external effects which may occur<br />
during normal use (e.g. when moving beds) must be virtually<br />
impossible.<br />
- Must not be installed in rooms with harmfull influences to tele‐<br />
communications equipment.<br />
Devices with displays - Unobstructed view must be ensured (ComTerminal, ComSta‐<br />
tionCT ).<br />
- Not subject to direct sun radiation.<br />
Call switches, Call devices - Easy access and reach must be ensured.<br />
Presence buttons - Near the door.<br />
Optical signalling devices - Visual recognition must not be obscured by other stray light.<br />
Signal lamps, Corridor displays - Called or paged persons shall be directed via the shortest<br />
distance to the call location.<br />
Room lamps - Shall be easily allocated to the respective rooms.<br />
In WCs and wet rooms - Comply with specifications acc. to DIN VDE 0100!<br />
Power supply units,<br />
OSYlink modules,<br />
OSYnet-SafetyController,<br />
OSYnet‐Y‐RepeaterOpto,<br />
OSYnet‐Gateway<br />
Distributor cabinets for both<br />
nurse call system and mains<br />
power supply<br />
6.1.1 Mounting heights<br />
- Use in dry rooms only; if possible within distribution cabinets<br />
(not inside of patient or resident rooms).<br />
- Easy access at any time (access door at least 60 cm wide).<br />
- Heat transfer must not be blocked off.<br />
- When installed in switch cabinets, forced-air cooling may be<br />
required.<br />
- Considering the effective voltage drop, the power supply unit<br />
should be located close to the biggest users.<br />
- Fire hazard! Danger of fire in case of short-circuit. Therefore,<br />
ensure sufficient ventilation in distribution cabinets.<br />
- After removing the outer cover, the high-voltage part must still<br />
be protected.<br />
- Connection terminals for the nurse call system and those for<br />
the high-voltage installations must be clearly separated and<br />
designated as such, e.g. by way of design, shape, colour. In‐<br />
scriptions alone are not sufficient to preclude misuse.<br />
Prescribed mounting height acc. to DIN VDE 0834-1:2000:<br />
Mounting height above floor level:<br />
Device with control elements (with and without indicating lamps) 700 - 1500 mm<br />
Device with control elements with text display 1500 - 1700 mm<br />
Device in installation units 1600 - 1800 mm<br />
Signal lamps and large letter display 1500 - 2200 mm<br />
Distribution boxes 700 - 2200 mm<br />
41
6. Defining the mounting positions<br />
6.1.2 Raumterminals<br />
42<br />
120 mm<br />
120 mm<br />
170 mm<br />
1600 mm<br />
ComTerminal <strong>Flamenco</strong><br />
Order no.: 77 0510 00<br />
RoomTerminal <strong>Flamenco</strong><br />
Order no.: 77 0520 00<br />
Location in the room:<br />
The ComTerminal <strong>Flamenco</strong> has to be installed in an acousti‐<br />
cally convenient location, so that from all locations in the<br />
room a good speech connection over the ComTerminal<br />
<strong>Flamenco</strong> is possible.<br />
The RoomTerminal <strong>Flamenco</strong> should also be installed in an<br />
acoustically convenient location, so that a later upgrading to a<br />
Terminal with speech would be possible.<br />
Note: If the ComTerminal <strong>Flamenco</strong> or the RoomTerminal<br />
<strong>Flamenco</strong> is not installed in the entrance area, a separate<br />
staff presence switch (70 0112 00) has to be installed near<br />
the door.<br />
2 gang back box required.<br />
Note:<br />
At 2-gang back boxes at least 120 mm space (from the<br />
centre) must be provided for the ComTerminal <strong>Flamenco</strong> or<br />
RoomTerminal <strong>Flamenco</strong>.<br />
<strong>Flamenco</strong> - <strong>Technical</strong> <strong>Manual</strong>, 10/11 (Rev. 5.0), 00 8812 60
55 mm<br />
55 mm<br />
150 mm<br />
150 mm<br />
<strong>Flamenco</strong> - <strong>Technical</strong> <strong>Manual</strong>, 10/11 (Rev. 5.0), 00 8812 60<br />
ControlTerminal <strong>Flamenco</strong><br />
Order no.: 77 0550 00<br />
2-gang back box required.<br />
6. Defining the mounting positions<br />
ControlTerminal with doorplate <strong>Flamenco</strong><br />
Order no.: 77 0551 00<br />
2-gang back box required.<br />
Note: The back box is installed behind the lamp and not be‐<br />
hind the doorplate.<br />
43
6. Defining the mounting positions<br />
6.1.3 Room lamps<br />
55 mm<br />
110 mm<br />
55 mm<br />
44<br />
150 mm<br />
150 mm<br />
Room lamp<br />
Order no.: 77 0170 00, 77 0170 01, 77 0170 10, 77 0182 10<br />
1-gang back box required for each room lamp.<br />
Room lamp with doorplate<br />
Order no.: 77 0171 00, 77 0171 10<br />
1-gang back box required for each room lamp with doorplate.<br />
Note: The back box is installed behind the lamp and not be‐<br />
hind the doorplate.<br />
<strong>Flamenco</strong> - <strong>Technical</strong> <strong>Manual</strong>, 10/11 (Rev. 5.0), 00 8812 60
6.1.4 Switches<br />
ÀÀ<br />
ÀÀÀÀÀ<br />
ÀÀÀ<br />
Back box<br />
Switch<br />
150 mm<br />
91 mm<br />
1300 mm<br />
<strong>Flamenco</strong> - <strong>Technical</strong> <strong>Manual</strong>, 10/11 (Rev. 5.0), 00 8812 60<br />
Switches near the door<br />
1-gang back box required for each switch.<br />
91 mm raster spacing is mandatory!<br />
6. Defining the mounting positions<br />
300 mm Pull cord call switch in bathroom/WC<br />
(ceiling mounted)<br />
300 mm<br />
300 mm<br />
2250 mm<br />
2250 mm<br />
5 mm<br />
Order no.: 70 0115 00, 70 0115 01<br />
1-gang back box required.<br />
The pull cord grab may be not higher than 200 mm above the<br />
floor, so that people lying on the floor can reach the pull cord.<br />
Pull cord call switch in bathroom/WC<br />
(wall mounted)<br />
Order no.: 70 0115 00, 70 0115 01<br />
1-gang back box required.<br />
Pull cord switches in shower stalls have to be installed at<br />
least 200 mm above the highest possible position of the<br />
showerhead. The pull cord grab may be not higher than<br />
200 mm above the floor, so that people lying on the floor can<br />
reach the pull cord.<br />
Pneumatic call switch<br />
Order no.: 70 0106 00, 70 0106 01<br />
1-gang back box required.<br />
Back box solid wall, 1-gang: 17 0100 00<br />
Back box partition wall, 1-gang: 17 5100 00<br />
Note: The switch will be offset, i.e. the switch centre will be<br />
approx. 5 mm below the back box centre. In other words, in‐<br />
stall the back box 5 mm above the desired switch position.<br />
45
6. Defining the mounting positions<br />
6.1.5 Connection sockets<br />
46<br />
Bed 1 Bed 2<br />
100 mm<br />
Medical supply unit<br />
Bed 1 Bed 2<br />
Connection sockets<br />
Bed 1 Bed 2<br />
100 mm<br />
Medical supply unit<br />
Bed 1 Bed 2<br />
Connection sockets<br />
Connection socket combi<br />
(wall mounting)<br />
Order no.: 70 0424 00, 70 0424 50<br />
2-gang back box required.<br />
100 mm minimum spacing above floor level.<br />
Connection socket combi, bedhead unit<br />
(mounting in medical supply unit)<br />
Order no.: 70 0434 00, 70 0434 50<br />
Common practice is that the connection sockets are installed<br />
by the supplier of the medical supply units.<br />
Connection socket with call switch<br />
Order no.: 70 0171 03<br />
1-gang back box required.<br />
100 mm minimum spacing above floor level.<br />
Connection socket with call switch, bedhead<br />
unit (mounting in medical supply unit)<br />
Order no.: 70 0171 50<br />
Common practice is that the connection sockets are installed<br />
by the supplier of the medical supply units.<br />
<strong>Flamenco</strong> - <strong>Technical</strong> <strong>Manual</strong>, 10/11 (Rev. 5.0), 00 8812 60
7. Installing the back boxes<br />
Refer to the table of accessories to find the correct back boxes and connectors<br />
for each product.<br />
<strong>Flamenco</strong> - <strong>Technical</strong> <strong>Manual</strong>, 10/11 (Rev. 5.0), 00 8812 60<br />
Order no.<br />
Back boxes<br />
Solid wall Partition wall Connector<br />
1-gang<br />
17 0100 00<br />
2-gang<br />
17 0410 00<br />
1-gang<br />
17 5100 00<br />
2-gang<br />
17 5400 00<br />
Pneumatic call switch 70 0106 00 Centre offset Centre offset <br />
Pneumatic call<br />
switch/WC<br />
70 0106 01 Centre offset Centre offset<br />
Call switch 70 0111 00 <br />
Call switch/WC 70 0111 01 <br />
Staff presence wp 70 0112 00 <br />
Cancel switch/WC wp 70 0113 00 <br />
Code blue / Cardiac<br />
alarm switch wp<br />
70 0114 00 <br />
Pull cord call switch wp 70 0115 00 <br />
Pull cord call switch/WC<br />
wp<br />
Call switch/WC with<br />
cancel switch wp<br />
Call switch with privacy<br />
switch wp<br />
Staff presence combi‐<br />
nation with call tone wp<br />
Connection socket with<br />
call switch<br />
Connection socket with<br />
call switch, bedhead<br />
unit<br />
Cancel switch/WC mit<br />
call tone wp<br />
Connection socket<br />
combi, bedhead unit<br />
Connection socket combi,<br />
bedhead unit, TVL<br />
70 0115 01 <br />
70 0117 00 <br />
70 0118 00 <br />
70 0119 00 <br />
70 0171 03 70 0807 01<br />
70 0171 50 Installation in medical supply unit 00 0211 37<br />
70 0183 00 <br />
70 0434 00 Installation in medical supply unit<br />
70 0434 50 Installation in medical supply unit<br />
70 0807 00<br />
47
7. Installing the back boxes<br />
48<br />
Order no.<br />
Back box<br />
Solid wall Partition wall Connector<br />
1-gang<br />
17 0100 00<br />
2-gang<br />
17 0410 00<br />
1-gang<br />
17 0510 00<br />
2-gang<br />
17 0540 00<br />
Connection socket combi 70 0424 00 <br />
Connection socket<br />
combi, TVL<br />
Connection socket<br />
ComStation<br />
70 0424 50 <br />
74 0452 30 <br />
Connection socket<br />
ComStation PC 74 0452 60A <br />
Direction lamp 77 0111 02 <br />
Group lamp, 2 sections 77 0112 02 <br />
Group lamp, 3 sections 77 0113 02 <br />
Group lamp, 4 sections 77 0114 02 <br />
Room lamp, 3 sections 77 0170 00 <br />
Room lamp code blue/<br />
cardiac alarm, WC<br />
77 0170 01 <br />
Room lamp, 4 sections 77 0170 10 <br />
Room lamp, 3 sections,<br />
with doorplate<br />
Room lamp, 4 sections,<br />
with doorplate<br />
Room lamp Universal, 2<br />
sections<br />
77 0171 00 <br />
77 017110 <br />
77 0182 10 70 0807 07<br />
ComTerminal <strong>Flamenco</strong> 77 0510 00 <br />
RoomTerminal Fla‐<br />
menco<br />
ControlTerminal Fla‐<br />
menco<br />
ControlTerminal with<br />
doorplate <strong>Flamenco</strong><br />
OSYnet-Y-Repeater‐<br />
Opto<br />
Sound detector, wall<br />
mounted<br />
77 0520 00 <br />
77 0550 00 77 0960 00<br />
77 0551 00 77 0960 00<br />
77 4000 00 77 0950 00<br />
Z 0 0 8200 00 <br />
70 0807 00<br />
<strong>Flamenco</strong> - <strong>Technical</strong> <strong>Manual</strong>, 10/11 (Rev. 5.0), 00 8812 60
<strong>Flamenco</strong> - <strong>Technical</strong> <strong>Manual</strong>, 10/11 (Rev. 5.0), 00 8812 60<br />
8. Laying the cables<br />
When laying the cables, closely observe the current VDE rules.<br />
8.1 Cable legend<br />
To simplify the handling of installation plans, <strong>Tunstall</strong> <strong>GmbH</strong> has introduced an<br />
expanded cable legend. The cables are organised according to their applica‐<br />
tion areas. Relevant types of cables are allocated to specific application areas.<br />
These shall be considered as minimum requirements.<br />
Marking Designation Type of cable<br />
Ia General cables IY(ST)Y 2x2x0.8<br />
Ia2 General cables IY(ST)Y 2x2x0.6<br />
Ia3 General cables IY(ST)Y 3x2x0.6<br />
Ia4 General cables IY(ST)Y 4x2x0.6<br />
Ia5 General cables IY(ST)Y 4x2x0.8<br />
OSYnet Group bus OSYnet Recommended cables:<br />
CAT7 (22 AWG) with diameter Ø = 0.64 mm<br />
IY(ST)Y 4x2x0,8 with diameter Ø = 0.8 mm<br />
Ie Entertainment cables<br />
Optional cables:<br />
CAT5 (23 AWG) with diameter Ø = 0.57 mm<br />
CAT6 (23 AWG) with diameter Ø = 0.57 mm<br />
CAT7 (23 AWG) with diameter Ø = 0.57 mm<br />
IY(ST)Y 4x2x0,6 with diameter Ø = 0.6 mm<br />
2x IYY per channel<br />
or similar cables (1 double wire required for each<br />
programme)<br />
In Room bus RAN IY(ST)Y 2x2x0.8<br />
Ip Power cable NYM 2x2,5 mm2 Is Speech cable plus<br />
room bus RAN<br />
2x IY(ST)Y 2x2x0.8<br />
8.1.1 Colour coding<br />
German<br />
abbreviation<br />
English<br />
abbreviation Colour<br />
bl BU blue<br />
br BN brown<br />
ge YE yellow<br />
gn GN green<br />
gr GY grey<br />
or OG orange<br />
rt RD red<br />
sw BK black<br />
vi VT violet<br />
ws WH white<br />
49
8. Laying the cables<br />
8.2 Electromagnetic compatibility (EMC)<br />
50<br />
All electronic components of the nurse call system emission and sensibility val‐<br />
ues which are well within the prescribed parameters for electromagnetic com‐<br />
patibility (EMC). Nevertheless, interference with the nurse call system may oc‐<br />
cur in specific situations and due to insufficient interference suppression of<br />
fluorescent lamps - particularly in hospital installation units (medical supply<br />
units).<br />
Customers should make provisions which prevent such interference from ex‐<br />
ternal sources. In many cases, this type of external interference can be avoided<br />
by installing suppressor elements (varistor circuits). These varistor circuits are<br />
commercially available from the manufacturers. <strong>Tunstall</strong> offers a proven over‐<br />
voltage filter 230 V(70 0890 97).<br />
The EMC properties of the various electro medical supply units may differ to a<br />
great extent. Even two supply units of the same type may act and react with<br />
considerable difference if they are wired in different ways.<br />
Normally, call systems are widely distributed over the building, and their EMC<br />
behaviour is affected by the specific design and layout of the network.<br />
This situation should also be considered when effecting changes or amend‐<br />
ments to existing medical supply units.<br />
8.2.1 Cables for high-voltage installations and cables for<br />
other systems with dangerous voltage<br />
Power cables for the nurse call system must not be laid along with the cables<br />
of high-voltage installations or with cables of other systems of high-risk voltage<br />
in common cables, conduits or cable trays.<br />
Cables for the nurse call system and high-voltage cables must be placed at a<br />
minimum spacing of 30 cm.. For shorter distances of less than 10 m the spacing<br />
may be reduced to 10 cm.<br />
230 V / 400 V AC<br />
Spacing > 30 cm<br />
Cable for high-voltage system<br />
Cable for the nurse call system<br />
For laying nurse call system cables in medical supply units the regulations of<br />
ISO 11197:2004 have to be observed.<br />
<strong>Flamenco</strong> - <strong>Technical</strong> <strong>Manual</strong>, 10/11 (Rev. 5.0), 00 8812 60
8.3 Electric power supply cables (Ip)<br />
<strong>Flamenco</strong> - <strong>Technical</strong> <strong>Manual</strong>, 10/11 (Rev. 5.0), 00 8812 60<br />
8. Laying the cables<br />
Electric power for the system is provided with +24 V DC, which is generated by<br />
regulated, short-circuit proof power supply units.<br />
The power supply cable Ip is installed as a ring circuit. Cable lengths should be<br />
kept as short as possible to preclude larger voltage drops.<br />
Maximum voltage differential from the power supply unit to the farthest room<br />
being supplied via the ring circuit should not exceed 4 V.<br />
Where larger voltage drops are observed, another cable should be laid from the<br />
supply unit, or a cross linking within the +24 V ring circuit should be realised.<br />
If neither solution will solve the problem, a second power supply unit should be<br />
installed. Coupling of power supply units in parallel is not allowed.<br />
The power supply ring circuit should be made using cables of 2.5mm 2 cross<br />
section. Depending on the type of circuit, single core leads (NYA 2.5 mm 2 for<br />
+24V and 0V) or a common cable (NYM 2x2.5 mm 2 ) may be used.<br />
Fig. 4: NYM 2x2,5 mm 2<br />
NOTE ! When laying the cables, always select the shortest route to keep the<br />
resultant voltage drop as low as possible.<br />
Use of logic colour codes for the cables and/or specific laying techniques for<br />
the extra-low voltage cables shall eliminate the chance for mix-up with highvoltage<br />
cables. If you select to use cable material which is also used for high<br />
voltage circuits you should mark and designate these cables clearly and per‐<br />
manently.<br />
Comply with current rules and directives!<br />
51
8. Laying the cables<br />
8.4 Current demand<br />
52<br />
The table below was prepared to calculate the required current in the <strong>Flamenco</strong><br />
system. The values are average figures and may differ for individual applica‐<br />
tions. Total current consumption will vary according to the number of functions<br />
used at any one time.<br />
Additional current consumption<br />
05 0024 00 Loudspeaker with announc. interf. 80 mA<br />
11 5350 00 Telephone interface relay 10 mA<br />
70 xxxx xx Switches 10 mA<br />
70 0171 03 Connection socket with call switch 15 mA<br />
70 0171 50 Connection socket with call switch,<br />
bedhead unit<br />
21 mA While light button is pressed: max. 179 mA<br />
70 0360 10 IR TV control module universal 15 mA During data transmission:<br />
for a short time 35 mA<br />
70 0360 11 IR TV control module universal audio 15 mA During data transmission:<br />
for a short time 35 mA<br />
70 04x4 x0 Connection socket combi / combi,<br />
bedhead unit<br />
30 mA<br />
70 0790 00 Sound detector 16 mA<br />
70 08xx 00 RAN interfaces 20 mA<br />
70 0831 00 1‐channel radio receiver 35 mA<br />
74 0747 00 Patient handset 20 mA<br />
77 011x 02 Direction lamp / Group lamp 0 mA Each lighted section: 75 mA<br />
77 0150 00 Corridor display Alpha 16 Average current consumption: 300 mA<br />
77 0160 00 Corridor display Alpha 16, double-sided Average current consumption: 600 mA<br />
77 017x xx Room lamp or<br />
Room lamp with doorplate<br />
20 mA Each lighted section: 30 mA<br />
77 0182 10 Room lamp Universal, 2 sections 0 mA Each lighted section: 30 mA<br />
77 0350 00 Door entry speaker 30 mA During operation: 45 mA<br />
77 0510 00 ComTerminal <strong>Flamenco</strong> 115 mA Display backlight switched on + all LED: 40 mA<br />
77 0520 00 RoomTerminal <strong>Flamenco</strong> 52 mA Display backlight switched on + all LED: 40 mA<br />
77 055x 00 ControlTerminal <strong>Flamenco</strong> or<br />
ControlTerminal with doorplate <strong>Flamenco</strong><br />
42 mA Each lighted section: 30 mA<br />
77 0605 00 ComStationBUS 92 mA Display ON: 118 mA<br />
77 0606 00 ComStationCT <strong>Flamenco</strong> 115 mA Display backlight switched on + all LED: 40 mA<br />
77 0801 00 OSYlink‐Door entry speaker 53 mA<br />
77 0802 00 OSYlink‐Group lamp 26 mA<br />
77 0803 00 OSYlink‐Universal 35 mA<br />
77 0804 00 OSYlink‐Announcement 32 mA<br />
77 2100 00 OSYnet‐SafetyController 30 mA<br />
77 4000 00 OSYnet‐Y‐RepeaterOpto 60 mA<br />
77 4001 00 OSYnet‐Gateway 50 mA<br />
One power supply unit is required for each OSY-ControlCenter (Order no.<br />
77 2x0x 00).<br />
<strong>Flamenco</strong> - <strong>Technical</strong> <strong>Manual</strong>, 10/11 (Rev. 5.0), 00 8812 60
8.4.1 Standard basis for calculation<br />
<strong>Flamenco</strong> - <strong>Technical</strong> <strong>Manual</strong>, 10/11 (Rev. 5.0), 00 8812 60<br />
8. Laying the cables<br />
To calculate the required current, first add all standby current figures or the av‐<br />
erage current consumption, respectively.<br />
In a simplified manner, the additional current demand can be calculated as fol‐<br />
lows: You may assume that on the average 5 calls, 5 presence states and one<br />
speech connection are active at any one time.<br />
Current demand for each call = 100 mA<br />
Current demand for each presence state = 100 mA<br />
Current demand for each speech connection = 50 mA<br />
The power supply unit should not be loaded by more than 80% of its capacity.<br />
Maximum capacity for the power supply units is 12.5 A. The 80% permissible<br />
load, therefore, amounts to 10 A.<br />
8.4.2 Sample calculation for 25 two-bed rooms with WC<br />
Number Device<br />
Standby current:<br />
for each device for 25 rooms<br />
25 ComTerminal <strong>Flamenco</strong> 115 mA 2875 mA<br />
25 Room lamp, 3 sections 20 mA 500 mA<br />
25 Room lamp, code blue/cardiac<br />
alarm, WC<br />
20 mA 500 mA<br />
50 Connection socket, bedhead unit 30 mA 1500 mA<br />
50 Patient handset 20 mA 1000 mA<br />
50 Switch 10 mA 500 mA<br />
1 ComStation BUS 92 mA 92 mA<br />
1 OSYlink‐Group lamp 26 mA 26 mA<br />
1 Group lamp, 3 sections 0 mA 0 mA<br />
Number Function<br />
Sum (standby current consumption): 6993 mA<br />
Additional current:<br />
per function per ward<br />
5 active call 100 mA 500 mA<br />
5 active presence state 100 mA 500 mA<br />
1 active speech connection 50 mA 50 mA<br />
Sum (additional current consumption): 1050 mA<br />
Total<br />
(standby current consumption + additional current consumption):<br />
80% load on a power supply unit = 10 A (100% load = 12.5 A).<br />
8043 mA<br />
Result: 1 power supply unit is required for the above 25 two-bed rooms with WC.<br />
53
8. Laying the cables<br />
8.5 Group bus OSYnet<br />
54<br />
Lay all cables to the control unit OSY-ControlCenter. Use the locally available<br />
facilities (distributors, cable conduits).<br />
WARNING ! For the group bus OSYnet no stub lines may be installed. All devi‐<br />
ces must be directly connected to the bus.<br />
Cables for the nurse call system which run outside of the building must be fitted<br />
with an overvoltage protection acc. to DIN VDE 0845 at the position where they<br />
leave the building. This overvoltage protection will not be required if a galvanic<br />
disconnect point prevents the effect of harmful voltages.<br />
8.5.1 Useable cable types<br />
The following types of cables are recommended for the group bus OSYnet::<br />
CAT7 (22 AWG) with diameter Ø = 0.64 mm<br />
IY(ST)Y 4x2x0.8 with diameter Ø = 0.8 mm<br />
The following types of cables may be used optionally:<br />
CAT5 (23 AWG) with diameter Ø = 0.57 mm<br />
CAT6 (23 AWG) with diameter Ø = 0.57 mm<br />
CAT7 (23 AWG) with diameter Ø = 0.57 mm<br />
IY(ST)Y 4x2x0.6 with diameter Ø = 0.6 mm<br />
NOTE ! As alternative solutions, halogen-free variants as well as under ground<br />
cables can be used. Contact <strong>Tunstall</strong> <strong>GmbH</strong> when planning to use any other<br />
type of cable.<br />
Theses cables are twisted in pairs with the following design:<br />
<strong>Flamenco</strong> - <strong>Technical</strong> <strong>Manual</strong>, 10/11 (Rev. 5.0), 00 8812 60
8.5.2 Prescribed cable assignment<br />
CAT-7<br />
IY(ST)Y 4x2x0,8<br />
IY(ST)Y 4x2x0,6<br />
CAT-5<br />
CAT-6<br />
8.5.3 CCS 32 cable<br />
CCS 32<br />
<strong>Flamenco</strong> - <strong>Technical</strong> <strong>Manual</strong>, 10/11 (Rev. 5.0), 00 8812 60<br />
yellow<br />
white<br />
green<br />
white<br />
blue<br />
red<br />
brown<br />
white<br />
yellow<br />
white<br />
green<br />
white<br />
blue<br />
red<br />
brown<br />
white<br />
yellow<br />
white<br />
green<br />
white<br />
blue<br />
red<br />
brown<br />
white<br />
8. Laying the cables<br />
NF 2a<br />
NF 2b<br />
DG<br />
DG<br />
DH<br />
DL<br />
NF 1a<br />
NF 1b<br />
NF 2a<br />
NF 2b<br />
DG<br />
DG<br />
DH<br />
DL<br />
NF 1a<br />
NF 1b<br />
NF 2a<br />
NF 2b<br />
DG<br />
DG<br />
DH<br />
DL<br />
NF 1a<br />
NF 1b<br />
The system cable CC32 from <strong>Tunstall</strong> has been used in many earlier recondi‐<br />
tioning projects. The cable may be used, however, only one speech path will<br />
be available.<br />
*) The black conductor is not used.<br />
black*)<br />
shielding DG<br />
white DH<br />
blue DL<br />
brown NF 1a<br />
grey NF 1b<br />
55
8. Laying the cables<br />
8.5.4 Maximum permissible cable lengths for OSYnet<br />
56<br />
OSY-ControlCenter<br />
a + b = max. 700 m<br />
c + d + e = max. 700 m<br />
c<br />
max. 700 m<br />
max. 700 m<br />
a<br />
OSYnet‐Y‐RepeaterOpto<br />
OSYnet‐Gateway<br />
Group 1, Ward 1<br />
Group 2, Ward 2<br />
Group 3, Ward 3<br />
Group 3, Ward 4<br />
e<br />
max. 700 m<br />
Group 4, Ward 5<br />
Group 4, Ward 6<br />
Group 5, Ward 7<br />
= Bus termination<br />
at last bus user<br />
Where several wards are connected to one group bus, it may be necessary to<br />
split the group bus into two independent sections. The splitting is done using<br />
the OSYnet-Y-RepeaterOpto (Order No. 77 4000 00). One repeater can be<br />
used for each group.<br />
Where the max. cable length of 700 m will not suffice, the group bus can<br />
expanded for another 700 m using the OSYnet-Gateway (order no.<br />
77 4001 00). One Gateway can be used for each group.<br />
8.5.4.1 Bus termination<br />
The last device (e.g. a ComTerminal) at a bus cable must be fitted with a<br />
120 Ohm resistor (order no. 00 0040 76) between the connecting points DH and<br />
DL.<br />
d<br />
<strong>Flamenco</strong> - <strong>Technical</strong> <strong>Manual</strong>, 10/11 (Rev. 5.0), 00 8812 60<br />
b
8.6 Room bus RAN<br />
<strong>Flamenco</strong> - <strong>Technical</strong> <strong>Manual</strong>, 10/11 (Rev. 5.0), 00 8812 60<br />
8. Laying the cables<br />
The RAN (room area network) links all components in a room. For data transfer,<br />
3 conductors of IY(ST)Y 2x2x0.8 (Cable = In) are required<br />
+24V<br />
RAN<br />
0V<br />
R(ed) = +24 V<br />
Y(ellow) = RAN<br />
B(lack) = 0V<br />
Max. permissible cable length for RAN is 50 m.<br />
Max. permissible number of RAN users is 30.<br />
Devices for speech communication require an additional speech line (cable Is).<br />
All devices with RAN interface can be connected at random (star, bus or mesh<br />
network). Later expansion of the RAN can be realised from any device and inde‐<br />
pendent of the device's particular function. Only additional devices with speech<br />
communication require an extra speech line.<br />
For a better overview, split the various RAN connections into function groups.<br />
This type of arrangement is more service-friendly (Fig. 5 on page 58).<br />
The type of installation has no influence on the RAN functions.<br />
The voltage drop at each cable connection caused by a current of max. 60 mA<br />
must not exceed 0.3 V in relation to the voltage at the ComTerminal. Under nor‐<br />
mal condition, this value is achieved when a RAN user is connected to a cable<br />
of type In, which is longer than 50 m.<br />
8.6.1 Shielded cables for the room bus RAN (Is)<br />
CAUTION ! Insulate the protective screen or the blank shield wire up to the<br />
connecting point. Otherwise, a short circuit situation or crosstalk may occur.<br />
To ensure the protective screen function, all room bus cables for music or<br />
speech transmissions (shielded cables) may be stripped for a max. length of<br />
30 mm only.<br />
max. 30 mm<br />
57
8. Laying the cables<br />
58<br />
Fig. 5: RAN: Example for installation<br />
Not service-friendly<br />
confusing =<br />
poor installation<br />
Service friendly<br />
clear arranged =<br />
good installation<br />
<strong>Flamenco</strong> - <strong>Technical</strong> <strong>Manual</strong>, 10/11 (Rev. 5.0), 00 8812 60
9. Activating the power supply<br />
Prerequisite: Except the power supply unit, all cables are installed and all<br />
devices are connected in compliance with the enclosed product leaflets.<br />
Note: All product leaflets are presented in chapter “Product leaflets” starting on<br />
page 81.<br />
9.1 Installing the power supply unit<br />
Before connecting the power supply unit you must check the cables to the<br />
power supply unit for possible short circuits and earth interconnections.<br />
Install the power supply unit acc. to the installation instructions coming with the<br />
unit. This information is also shown in the chapter “Product leaflets” starting on<br />
page 81.<br />
9.2 Check the current supply<br />
The operating voltage for the whole system is +24 V DC. Electric current for the<br />
system components is supplied through power supply units.<br />
Execute the checks and tests as shown below:<br />
9.2.1 Check output voltage of the power supply unit<br />
Use a voltmeter to confirm the output voltage of +24 V.<br />
9.2.2 Check continuity of + 24 V ring circuit<br />
Disconnect one end of the ring circuit at the power supply unit. Switch the power<br />
supply unit on and measure the voltage at the open wires. If no voltage is meas‐<br />
ured, the ring circuit is not closed or one of the conductors (+24 V or 0 V) is inter‐<br />
rupted.<br />
Power supply<br />
unit<br />
1. room terminal<br />
1. room terminal<br />
<strong>Flamenco</strong> - <strong>Technical</strong> <strong>Manual</strong>, 10/11 (Rev. 5.0), 00 8812 60<br />
Ip<br />
Ip<br />
59
9. Activating the power supply<br />
9.2.3 Supply voltage to the room terminals<br />
60<br />
Activate 5 calls and 5 presence states for the ward which is to be checked. Use<br />
the worst location, i.e. the most distant location from the power supply unit.<br />
Test the voltage and determine the room terminal (ComTerminal <strong>Flamenco</strong>,<br />
RoomTerminal <strong>Flamenco</strong>, ControlTerminal <strong>Flamenco</strong> or ControlTerminal with<br />
doorplate <strong>Flamenco</strong>) with the lowest voltage. This point is considered as the<br />
electric centre of the ring circuit. Here, the voltage differential to the first room<br />
terminal as seen from the power supply unit must not be greater than 4 V.<br />
If you should read a lower value (i.e. a drop of more than 4 V) the voltage drop<br />
must be reduced by laying an additional cable from the power supply unit to the<br />
electric centre - or double the 0 V lead - if it is available.<br />
Power supply<br />
unit<br />
Ip<br />
Ip<br />
Electric<br />
centre<br />
9.2.4 Check voltage for group bus OSYnet<br />
If group bus OSYnet is correctly connected :<br />
voltage between DH and DG and<br />
voltage between DL and DG = approx. +2.5 V.<br />
9.2.5 Check voltage for RAN<br />
RAN voltage is o.k. when voltage between B (0V) and Y (RAN) is between<br />
+8.8 V and +9 V DC.<br />
If the voltage is outside of these parameters, these may be the reasons<br />
If voltage between B (0V) and Y (RAN) = 0 V<br />
a) Short circuit between B and Y<br />
b) Wire Y (RAN) is not connected to the connection socket.<br />
If voltage between B and Y = +12 V<br />
a) Wire B (0V) is not connected at one of the RAN users.<br />
b) One RAN user is defective.<br />
<strong>Flamenco</strong> - <strong>Technical</strong> <strong>Manual</strong>, 10/11 (Rev. 5.0), 00 8812 60
10. Configure the OSY-ControlCenter<br />
Before starting the operation of the nurse call system, the OSY-ControlCenter<br />
must be configured with the specific data of the relevant project. This configura‐<br />
tion is realised exclusively using the software 'SystemOrganizer'. Standard<br />
procedure is that the OSY-ControlCenter is configured at <strong>Tunstall</strong> before it is<br />
delivered. However, the configuration may also take place on-location in the<br />
hospital or via remote service mode.<br />
All project-specific data must be on hand when starting with the configuration<br />
process.<br />
Fig. 6: SystemOrganizer software<br />
10.1 Parameters to be configured<br />
Country-specific settings<br />
Designation for rooms, wards, buildings, etc.<br />
Setting of call types and system messages<br />
Parameters for call handling, e.g. call types, call categories, cancelling, pri‐<br />
vacy setting<br />
Organisational allocation of rooms (locations) to wards, work shifts, etc.<br />
Managing of mobile devices DECT / PS.<br />
...<br />
<strong>Flamenco</strong> - <strong>Technical</strong> <strong>Manual</strong>, 10/11 (Rev. 5.0), 00 8812 60<br />
61
10. Configure the OSY-ControlCenter<br />
10.1.1 Software requirements<br />
62<br />
Microsoft Windows 7, Windows XP or Windows 2000<br />
10/100 MBit LAN access<br />
The use of the SystemOrganizer is described in the online help for the software.<br />
<strong>Flamenco</strong> - <strong>Technical</strong> <strong>Manual</strong>, 10/11 (Rev. 5.0), 00 8812 60
11. Voltage surge protection<br />
The German standard DIN VDE 0834-1:2000-04 regulates that all cables of the<br />
nurse call system which are to emerge from the building shall be provided with<br />
voltage surge protection according to DIN VDE 0845 (VDE 0845) at the emer‐<br />
ging point.<br />
For the voltage surge protection you have especially to follow:<br />
VDE 0845-4-2: 2002-07; DIN EN 61663-2: Lightning protection -Telecommu‐<br />
nication lines - Part 2 Lines using metallic conductors (IEC 61663-2:2001).<br />
In the following the structure of the voltage surge protection is presented for<br />
cables of the <strong>Flamenco</strong> call system, which are laid between two buildings.<br />
NOTE ! For the described fine protection of the <strong>Flamenco</strong> call system it is<br />
provided that all measures for the coarse protection have been completed ac‐<br />
cording to the valid regulations. Otherwise the fine protection cannot work.<br />
The voltage surge protection has to be installed in the main building connection<br />
point. This should be installed directly where the cables enter the building.<br />
The voltage surge protection has to be installed in both buildings affected.<br />
WARNING ! By installing the described surge protection the maximum cable<br />
length for the OSYnet is reduced by 50 meters.<br />
NOTE ! To make sure a permanent protection of the <strong>Flamenco</strong> nurse call sys‐<br />
tem, the voltage surge protection devices have to be installed acc. to the manu‐<br />
facturer 's specifications.<br />
On the next pages the required voltage surge protection devices (SPD) are<br />
presented. Note: The shown SPD modules are just examples. SPD modules<br />
of other makes can be used as well.<br />
After the presentation of the SPD modules the construction of the surge protec‐<br />
tion is shown in a diagram.<br />
<strong>Flamenco</strong> - <strong>Technical</strong> <strong>Manual</strong>, 10/11 (Rev. 5.0), 00 8812 60<br />
63
11. Voltage surge protection<br />
11.1 SPD modules<br />
64<br />
Functions Order no.<br />
SPD module base part<br />
BXT BAS<br />
Base part, for use as feed-through terminal for<br />
supporting SPD modules for speech and data<br />
lines. Modules pluggable without interruption, for<br />
4 single wires or 2 double wires. Width 12 mm<br />
(2/3 TE).<br />
‐ Mounting on 35 mm top hat rail acc. to 60715<br />
‐ Connection cross section finely stranded:<br />
0.08 - 2.5 mm2<br />
‐ Earthing via 35 mm top hat rail acc. to<br />
EN 60715<br />
SPD module for speech and data wires<br />
BXT ML4 BD HF 5<br />
Combined Lightning Current and Surge Arrester‐<br />
Module SPD class TYPE 1 / P1 tested acc. to<br />
EN 61643-21 and energy-coordinated acc. to<br />
IEC 61643-22 for protection of 2 pairs of IT<br />
sytems. For use with high data transmission<br />
rates due to its low self impedance.<br />
‐ For plugging into base part type BXT BAS.<br />
‐ SPD monitoring system: LifeCheck<br />
‐ Max. continuous operating DC voltage: 6.0 V<br />
‐ Nominal current for 45 °C: 1.0 A<br />
‐ D1 Total lightning impulse current (10/350):<br />
10 kA<br />
‐ Series impedance per wire: 1.0 Ohm<br />
‐ Shock test : EN 60068-2-27 (Ea test)<br />
‐ Examination of vibration performance<br />
(sinuoidal): EN 60068-2-6 (Fc test)<br />
‐ Test for vibration performance (coincidental):<br />
EN 60068-2-64 (Fh test)<br />
77 4900 00<br />
77 4900 01<br />
unit: mm<br />
unit: mm<br />
<strong>Flamenco</strong> - <strong>Technical</strong> <strong>Manual</strong>, 10/11 (Rev. 5.0), 00 8812 60
Functions<br />
SPD module for network cables<br />
DPA M CLE RJ45B 48<br />
Surge arrester class E, fully shielded, tested acc.<br />
to EN 61643-21 for universal use acc. to<br />
EN 50173 up to 48 V DC for the protection of 4<br />
pairs of data network interfaces via RJ45 socket,<br />
for single application or application in 19 inch<br />
cabinets, space-saving, width 19 mm.<br />
‐ Max. continuous operating DC voltage: 48 V<br />
‐ Nominal current: 1 A<br />
‐ C2 Total nominal discharge current (8/20) line-<br />
PG: 10 kA<br />
‐ For mounting on 35 mm top hat rail acc. to<br />
EN 60715<br />
<strong>Flamenco</strong> - <strong>Technical</strong> <strong>Manual</strong>, 10/11 (Rev. 5.0), 00 8812 60<br />
Order no.<br />
77 4900 02<br />
11. Voltage surge protection<br />
unit: mm<br />
65
11. Voltage surge protection<br />
Building 2<br />
Building 1<br />
66<br />
ComStation TEL<br />
ComTerminals<br />
Group 1<br />
OSYlink‐<br />
modules<br />
NF1b'<br />
NF1a'<br />
NF1b<br />
NF1a<br />
Corridor displays<br />
Protected<br />
Base part<br />
Order no.<br />
77490000<br />
NF1b''<br />
NF1a''<br />
NF1b<br />
NF1a<br />
Voltage surge protection<br />
1 2 speech wires 2' 1'<br />
SPD module<br />
for speech and data wires<br />
Order no. 77490001<br />
3 4 *)<br />
4' 3'<br />
Protected<br />
Voltage surge protection<br />
1 2 speech wires 2' 1'<br />
SPD module<br />
for speech and data wires<br />
Order no. 77490001<br />
3 4 *)<br />
4' 3'<br />
NF2a'<br />
NF2b'<br />
NF2a<br />
NF2b<br />
Base part<br />
Order no.<br />
77490000<br />
DG'<br />
DH'<br />
DG<br />
DH<br />
NF2a''<br />
NF2b''<br />
NF2a<br />
NF2b<br />
Protected<br />
DG''<br />
DH''<br />
DG<br />
DH<br />
Base part<br />
Order no.<br />
77490000<br />
2' 1'<br />
Voltage surge protection<br />
data wires<br />
1 2<br />
DL'<br />
Voltage surge protection<br />
1 2<br />
data wires 2' 1'<br />
SPD module<br />
for speech and data wires<br />
Order no. 77490001<br />
3 4 *)<br />
4' 3'<br />
NC<br />
DL<br />
Protected<br />
SPD module<br />
for speech and data wires<br />
Order no. 77490001<br />
3 4 *)<br />
4' 3'<br />
NC<br />
Base part<br />
Order no.<br />
77490000<br />
DL''<br />
DL<br />
Voltage surge protection<br />
network cables<br />
SPD module<br />
for network cables<br />
Order no. 77490002<br />
Voltage surge protection<br />
for network cables<br />
SPD module<br />
for network cables<br />
Order no. 77490002<br />
*)<br />
*)<br />
Main building<br />
connection point 1<br />
Main building<br />
connection point 2<br />
*) Mounting on earthed top hat rail.<br />
OSY‐ControlCenter *) Mounting on earthed top hat rail.<br />
Cables guided through the earth.<br />
<strong>Flamenco</strong> - <strong>Technical</strong> <strong>Manual</strong>, 10/11 (Rev. 5.0), 00 8812 60
<strong>Flamenco</strong> - <strong>Technical</strong> <strong>Manual</strong>, 10/11 (Rev. 5.0), 00 8812 60<br />
12. Functional checks<br />
Check each room for possible faults<br />
Test light call function for each room<br />
Test functions between the rooms.<br />
Test the ward console<br />
Test mobile console<br />
Test central console<br />
Test functions between the wards<br />
NOTE ! National standards for nurse call systems in the relevant countries must<br />
be complied with.<br />
NOTE ! If the nurse call system shall comply with the German standard<br />
DIN VDE 0834, then all tests and checks must be executed as prescribed in<br />
this standard. Note: The tests and checks as prescribed by DIN VDE 0834 may<br />
go beyond the tests and checks as described in this manual.<br />
67
12. Functional checks<br />
12.1 Checking the room installation<br />
12.1.1 Checking every room for faults<br />
68<br />
ComTerminal <strong>Flamenco</strong> or RommTerminal <strong>Flamenco</strong>: Perform the test<br />
RAN, as prescribed in the product leaflet for the Terminal. The LEDs of all<br />
operational room devices will flash. After that call for the state in the display.<br />
If “OK“ is displayed, the number of operational room devices equals to the<br />
RAN number set at the Terminal.<br />
No fault may be indicated at any of these devices for the room:<br />
ComStationBUS , ComStationCT <strong>Flamenco</strong>, ComStationPC , Management‐<br />
CenterPC , OSYnet‐SafetyController (output for fault messages).<br />
Use the patient handset or the pear push switch to check for correct light<br />
switching.<br />
Use the patient handset to check for correct radio reception and TV sound.<br />
<strong>Flamenco</strong> - <strong>Technical</strong> <strong>Manual</strong>, 10/11 (Rev. 5.0), 00 8812 60
12.1.2 Check light call function for each room<br />
12.1.2.1 Check each room<br />
Press call button<br />
(red).<br />
Activate<br />
presence 1<br />
(green).<br />
Deactivate<br />
presence 1<br />
(green).<br />
Press call button<br />
(red).<br />
Activate<br />
presence 2<br />
(yellow).<br />
Deactivate<br />
presence 2<br />
(yellow).<br />
<strong>Flamenco</strong> - <strong>Technical</strong> <strong>Manual</strong>, 10/11 (Rev. 5.0), 00 8812 60<br />
12. Functional checks<br />
The following test is performed to check all call devices in the room:<br />
Start<br />
yes<br />
LED for<br />
call button (red)<br />
weak light.<br />
no<br />
LED for call button<br />
(red) bright.<br />
LED for call button<br />
(red)<br />
weak light.<br />
LED for call button<br />
(red) bright.<br />
LED for call button<br />
(red) weak light<br />
LED in presence<br />
button (green).<br />
is on<br />
LED in presence<br />
button (green)<br />
is off.<br />
LED in presence<br />
button (yellow)<br />
is on<br />
LED in<br />
presence button<br />
(yellow) is off.<br />
Correct the fault.<br />
Room lamp:<br />
Red flashing.<br />
Room lamp:<br />
Red is on.<br />
Green is on.<br />
Room lamp:<br />
Lights are off.<br />
Room lamp:<br />
Red flashing.<br />
Room lamp:<br />
Red is on.<br />
Yellow is on.<br />
Room lamp:<br />
Lights are off.<br />
69
12. Functional checks<br />
12.1.2.2 Check function from WCs en suite to room<br />
70<br />
Press WC call<br />
button (red).<br />
Press WC<br />
cancel button<br />
(grey).<br />
Press WC<br />
cancel button<br />
(grey) again.<br />
The following test is performed to check all call devices from WCs en suite to<br />
rooms:<br />
LED for WC call<br />
button (red) bright.<br />
LED for WC- call<br />
button (red)<br />
weak light.<br />
Start<br />
yes<br />
LED for WC call<br />
button (red)<br />
weak light.<br />
no<br />
LED for WC<br />
cancel button<br />
(grey) is on.<br />
LED for WC<br />
cancel button<br />
(grey) is off.<br />
Correct the fault.<br />
Room lamps<br />
77 0170 00<br />
77 0171 00:<br />
Red flashing.<br />
Room lamp<br />
77 0170 01:<br />
White flashing.<br />
Room lamps<br />
77 0170 10<br />
77 0171 10<br />
Red flashing +<br />
White flashing.<br />
Room lamps<br />
7 0170 00<br />
77 0171 00:<br />
Red is on.<br />
Room lamp<br />
77 0170 01:<br />
White is on.<br />
Room lamps<br />
77 0170 10<br />
77 0171 10<br />
Rot is in+<br />
White is on.<br />
Room lamps<br />
77 0170 00<br />
77 0171 00:<br />
Lights are off.<br />
Room lamp<br />
77 0170 01:<br />
Lights are off<br />
Room lamps<br />
77 0170 10<br />
77 0171 10<br />
Lights are off<br />
<strong>Flamenco</strong> - <strong>Technical</strong> <strong>Manual</strong>, 10/11 (Rev. 5.0), 00 8812 60
12.1.2.3 Testing of code blue / cardiac alarm<br />
Start<br />
Activate<br />
presence 1<br />
(green).<br />
Press code<br />
blue/cardiac alarm<br />
button (blue).<br />
Activate<br />
presence 2<br />
(yellow).<br />
Deactivate<br />
presence 2<br />
(yellow).<br />
Deactivate<br />
presence 1<br />
(green).<br />
<strong>Flamenco</strong> - <strong>Technical</strong> <strong>Manual</strong>, 10/11 (Rev. 5.0), 00 8812 60<br />
12. Functional checks<br />
The following test is performed for the code blue/cardiac alarm button at the<br />
ComTerminal (if available), at the RoomTerminal, and for all separate code blue/<br />
cardiac alarm switches:<br />
LED for code<br />
blue/cardiac alarm<br />
button (blue) is on.<br />
LED for code<br />
blue/cardiac alarm<br />
button (blue)<br />
weak light.<br />
LED for presence<br />
button 1 (green)<br />
is on.<br />
LED for<br />
presence button<br />
(yellow) is on.<br />
LED for<br />
presence button<br />
(yellow) is off.<br />
LED for<br />
presence button<br />
(green) is off.<br />
Room lamps<br />
77 0170 00<br />
77 0171 00<br />
77 0170 10<br />
77 0171 10:<br />
Green is on.<br />
Room lamps<br />
77 0170 00<br />
77 0171 00:<br />
77 0170 10<br />
77 0171 10<br />
Red flicker.<br />
Green is on.<br />
Room lamp<br />
77 0170 01:<br />
Blue flickers.<br />
Room lamps<br />
77 0170 00<br />
77 0171 00:<br />
77 0170 10<br />
77 0171 10<br />
Red is on.<br />
Green is on.<br />
Yellow is on<br />
Room lamp<br />
77 0170 01:<br />
Blue is on.<br />
Room lamps<br />
77 0170 00<br />
77 0171 00:<br />
77 0170 10<br />
77 0171 10<br />
Red is off.<br />
Green is on.<br />
Yellow is off.<br />
Room lamp<br />
77 0170 01:<br />
Lights are off.<br />
Room lamps<br />
77 0170 00<br />
77 0171 00<br />
77 0170 10<br />
77 0171 10:<br />
Lights are off.<br />
71
12. Functional checks<br />
12.2 Checking the ward functions<br />
12.2.1 Call forwarding<br />
72<br />
When a call is not answered within a programmed time frame, it will be for‐<br />
warded to all rooms with activated presence states. Forwarded calls are<br />
presented on the display at the ComTermina and at the RoomTerminal Fla‐<br />
menco, and a tone also signals such calls. Furthermore a call tone will sound<br />
at the staff presence combination with call tone wp (order no. 70 0119 00) as<br />
well as at the cancel switch/WC with call tone wp (order no. 70 0183 00).<br />
12.2.1.1 Rooms with ComTerminal <strong>Flamenco</strong><br />
Refer to the operating instructions for the ComTerminal <strong>Flamenco</strong> for details on<br />
the handling of forwarded calls.<br />
Check for each room:<br />
Is the call forwarding tone audible at the ComTerminal?<br />
Does the display of the ComTerminals show the correct room number?<br />
Can the call be answered? Can a speech connection be established to the<br />
call location?<br />
Can calls of call type “Call“ be cancelled from the remote position?<br />
12.2.1.2 Rooms with RoomTerminal <strong>Flamenco</strong><br />
Refer to the operating instructions for the ComTerminal <strong>Flamenco</strong> for details on<br />
the handling of forwarded calls.<br />
Check for each room:<br />
Is the call forwarding tone audible at the RoomTerminal?<br />
Does the display of the RoomTerminals show the correct room number?<br />
Can the call be acknowledged?<br />
12.2.1.3 Rooms with ControlTerminal <strong>Flamenco</strong><br />
Check for each room:<br />
Is the call forwarding tone audible at the staff presence combination with call<br />
tone wp (order no. 70 0119 00) and at the cancel switch/WC with call tone<br />
(order no. 70 0183 00)?<br />
12.2.2 Corridor display<br />
Check whether calls in the ward are correctly indicated at the corridor display.<br />
<strong>Flamenco</strong> - <strong>Technical</strong> <strong>Manual</strong>, 10/11 (Rev. 5.0), 00 8812 60
12.2.3 Direction lamps<br />
<strong>Flamenco</strong> - <strong>Technical</strong> <strong>Manual</strong>, 10/11 (Rev. 5.0), 00 8812 60<br />
12. Functional checks<br />
Check each direction lamp for the correct indication of the direction for the alloc‐<br />
ated rooms.<br />
12.2.4 Call devices<br />
Check whether calls from additional call devices (e.g. radio triggers and pear<br />
push switches) are indicated as desired.<br />
73
12. Functional checks<br />
12.3 Checking the consoles<br />
74<br />
Perform this test for all installed consoles: Ward consoles, mobile consoles,<br />
central consoles. For information on the correct operation and use of the con‐<br />
soles refer to the relevant operating instructions.<br />
Two persons are required for executing these checks. One person will handle<br />
the console, and the other person will proceed from one room to another.<br />
Check for each room:<br />
Is the room number correctly displayed?<br />
Do all types of calls arrive at the console and are they signalled in the appro‐<br />
priate manner (e.g. normal call, WC call, diagnostic call, emergency call 1,<br />
emergency call 2, WC call, WC emergency call, code blue / cardiac alarm)?<br />
Are bed numbers (channel numbers) correctly presented?<br />
Can calls be answered at the console?<br />
Can a speech connection be established with the console via voice devices<br />
(ComTerminal, patient handset)?<br />
Are presence states correctly displayed?<br />
Can announcements be broadcast from the console?<br />
NOTE ! If you note that a false bed number has been set at the connection<br />
socket combi bedhead unit, the medical supply unit must be opened in order<br />
to set the correct number (refer to documents on the medical supply unit).<br />
12.4 Checking functions between wards<br />
Check:<br />
Can ward coupling be activated at the ward console?<br />
Correct function of group lamps.<br />
<strong>Flamenco</strong> - <strong>Technical</strong> <strong>Manual</strong>, 10/11 (Rev. 5.0), 00 8812 60
<strong>Flamenco</strong> - <strong>Technical</strong> <strong>Manual</strong>, 10/11 (Rev. 5.0), 00 8812 60<br />
13. Spare parts<br />
Functions Order No.<br />
Terminating resistor 120 Ohm<br />
as bus terminating element in the final bus de‐<br />
vice.<br />
Fuse 1 A F<br />
e.g. for corridor display Alpha 16, corridor display<br />
Alpha 16, double-sided.<br />
Mains fuse, front plate (5 x 20) T 5.0 A<br />
e.g. for power supply unit and power supply unit<br />
UPS, power supply unit UPS 60.<br />
Output fuse, bottom 15 A FKS<br />
e.g. for power supply unit and power supply unit<br />
UPS, power supply unit UPS 60.<br />
Battery fuse, internal 20 A FKS<br />
e.g. for power supply unit UPS, battery set for<br />
UPS 60.<br />
Push-wire connector for junction boxes,<br />
5-pole<br />
e.g. for connection socket ComStation, Control‐<br />
Terminal <strong>Flamenco</strong>, ControlTerminal with door‐<br />
plate <strong>Flamenco</strong>.<br />
Wire cross-section: 0.5 - 2.5 mm2 Clamp for battery connection, 2 pole<br />
e.g. for power supply unit UPS 60.<br />
Screw connecting clamp, 6‐pole<br />
e.g. for OSYlink-Door entry speaker, OSY-Con‐<br />
trolCenter (data wires).<br />
00 0040 76<br />
00 0130 24<br />
00 0130 41<br />
00 0132 02<br />
00 0132 03<br />
00 0210 21<br />
00 0211 20<br />
00 0211 32<br />
75
13. Spare parts<br />
76<br />
Functions<br />
Screw connecting clamp, voltage supply,<br />
4‐pole<br />
e.g. for OSYlink-Door entry speaker, OSYlink-<br />
Group lamp, OSYlink-Announcement, OSYlink‐<br />
Universal and for OSY‐ControlCenter (DC/DC<br />
converter).<br />
Screw connecting clamp, 4‐pole<br />
e.g. for OSYlink-Door entry speaker, OSYlink-<br />
Group lamp, OSYlink-Announcement, OSYlink‐<br />
Universal, OSY-ControlCenter (audio wires).<br />
Screw connecting clamp, 5‐pole<br />
e.g. for connection socket with call switch bed‐<br />
head unit.<br />
Screw connecting clamp, 12‐pole<br />
e.g. for OSYlink‐Universal.<br />
Clamp for control and indicator outputs,<br />
7-pole<br />
for power supply unit and power supply unit<br />
UPS, power supply unit UPS 60.<br />
Clamp for mains connection, 3-pole<br />
for power supply unit and power supply unit<br />
UPS, power supply unit UPS 60.<br />
Clamp for 24 V connection, 4-pole<br />
for power supply unit and power supply unit<br />
UPS, power supply unit UPS 60.<br />
Order No.<br />
00 0211 33<br />
00 0211 36<br />
00 0211 37<br />
00 0211 38<br />
00 0211 39<br />
00 0211 40<br />
00 0211 41<br />
<strong>Flamenco</strong> - <strong>Technical</strong> <strong>Manual</strong>, 10/11 (Rev. 5.0), 00 8812 60
Functions<br />
Cage clamp, 10‐pole<br />
for OSY‐ControlCenter.<br />
Bridging contact EBP 2 - 5<br />
e.g. for ControlTerminal <strong>Flamenco</strong>, ControlTermi‐<br />
nal with doorplate <strong>Flamenco</strong>.<br />
Bridging contact EB 2 - 5 for control<br />
clamps “x“ and “y“<br />
for power supply unit UPS, power supply unit<br />
UPS 60.<br />
Plug-in screw terminal with fuse holder<br />
e.g. for corridor display Alpha 16, corridor display<br />
Alpha 16, double-sided.<br />
Rechargeable lead-gel batteries, Type<br />
BAT 24-7<br />
consisting of 2 batteries for power supply unit<br />
UPS, order no. 77 3400 00.<br />
Rechargeable lead-gel battery, Type BAT<br />
12-24<br />
Battery for battery set for UPS 60,<br />
order no. 77 3450 00<br />
LED module, red<br />
for group lamps, direction lamp.<br />
LED module, green<br />
for group lamps, direction lamp.<br />
<strong>Flamenco</strong> - <strong>Technical</strong> <strong>Manual</strong>, 10/11 (Rev. 5.0), 00 8812 60<br />
Order No.<br />
00 0211 44<br />
00 0220 52<br />
00 0223 56<br />
00 0224 81<br />
00 0648 85<br />
00 0648 87<br />
13 5200 00A<br />
13 5202 00A<br />
13. Spare parts<br />
77
13. Spare parts<br />
78<br />
Functions<br />
Connecting cable<br />
e.g. for connection socket with call switch or for<br />
connection socket with call switch bedhead unit<br />
for the connection of an external call device to<br />
the additional external call input.<br />
Connector, 3-pole<br />
for switches and room lamps.<br />
Connector, 4‐pole<br />
for connection socket with call switch.<br />
Fixing clamp<br />
for switches.<br />
Order No.<br />
50 0308 02<br />
70 0807 00<br />
70 0807 01<br />
70 0808 00<br />
Overvoltage protection circuit 70 0890 97<br />
<strong>Flamenco</strong> - <strong>Technical</strong> <strong>Manual</strong>, 10/11 (Rev. 5.0), 00 8812 60
Functions<br />
LED module, red<br />
for room lamps.<br />
LED module, yellow<br />
for room lamps.<br />
LED module, green<br />
for room lamps.<br />
LED module, white<br />
for room lamps.<br />
LED module, blue<br />
for room lamps.<br />
OSYnet connecting plug<br />
for OSYnet‐Y‐RepeaterOpto.<br />
<strong>Flamenco</strong> - <strong>Technical</strong> <strong>Manual</strong>, 10/11 (Rev. 5.0), 00 8812 60<br />
Order No.<br />
77 0190 00<br />
77 0190 01<br />
77 0190 02<br />
77 0190 03<br />
77 0190 04<br />
77 0950 00<br />
13. Spare parts<br />
79
13. Spare parts<br />
80<br />
<strong>Flamenco</strong> - <strong>Technical</strong> <strong>Manual</strong>, 10/11 (Rev. 5.0), 00 8812 60
<strong>Flamenco</strong> - <strong>Technical</strong> <strong>Manual</strong>, 10/11 (Rev. 5.0), 00 8812 60<br />
14. Product leaflets<br />
Each device is furnished with a product leaflet with information on mounting and<br />
connection details. In addition, we have collated the relevant product leaflets<br />
in this chapter of the technical manual.<br />
WARNING ! Do not install the power supply unit at this time. The mounting and<br />
installation of the various devices and equipment shall be executed with no<br />
electric power in the system. Otherwise there is the ever present danger of a<br />
short-circuit situation!<br />
NOTE ! Check that the order no. on the products is the same as the order no.<br />
on the installation plans. Example: Switches for WC call have the same housing<br />
as the switches for normal call, however, they are programmed differently.<br />
Order no. Product name Page<br />
Display equipment<br />
77 0112 02 Group lamp, 2 groups 86<br />
77 0113 02 Group lamp, 3 groups 86<br />
77 0114 02 Group lamp, 4 groups 86<br />
77 0150 00 Corridor display Alpha 16 87 - 88<br />
77 0160 00 Corridor display Alpha 16, double-sided 89 - 90<br />
77 0170 00 Room lamp, 3 sections 91<br />
77 0170 01 Room lamp code blue/cardiac alarm, WC 91<br />
77 0170 10 Room lamp, 4 sections 91<br />
77 0171 00 Room lamp, 3 sections, with doorplate 92<br />
77 0171 10 Room lamp, 4 sections, with doorplate 92<br />
77 0182 10<br />
Switches<br />
Room lamp Universal, 2 sections 93 - 94<br />
70 0106 00 Pneumatic call switch 96<br />
70 0106 01 Pneumatic call switch/WC 96<br />
70 0111 00 Call switch wp 97<br />
70 0111 01 Call switch/WC wp 97<br />
70 0112 00 Staff presence switch wp 98<br />
70 0113 00 Cancel switch/WC wp 98<br />
70 0114 00 Code blue / cardiac alarm switch wp 97<br />
70 0115 00 Pull cord call switch wp 99<br />
70 0115 01 Pull cord call switch/WC wp 99<br />
70 0117 00 Call switch/WC with cancel switch wp 100<br />
Page 81
14. Product leaflets<br />
Order no. Product name<br />
Page<br />
70 0118 00 Call switch with privacy switch wp 100<br />
70 0119 00 Staff presence combination with call tone<br />
wp<br />
101<br />
70 0183 00 Cancel switch/WC with call tone wp 101<br />
Room terminals<br />
77 0510 00 ComTerminal <strong>Flamenco</strong> 104 - 107<br />
77 0520 00 RoomTerminal <strong>Flamenco</strong> 108 - 111<br />
77 0550 00 ControlTerminal <strong>Flamenco</strong> 112 - 114<br />
77 0551 00 ControlTerminal with doorplate <strong>Flamenco</strong> 115 - 117<br />
Connection sockets<br />
70 0171 03 Connection socket with Call switch 120<br />
70 0171 50 Connection socket with Call switch, bed‐<br />
head unit<br />
121 - 122<br />
70 0424 00 Connection socket combi 123 - 124<br />
70 0434 00 Connection socket combi, bedhead unit 125 - 126<br />
74 0452 30 Connection socket ComStation 127 - 128<br />
Consoles<br />
77 0602 00 ComStationPC 130<br />
77 0606 00 ComStationCT <strong>Flamenco</strong> 131 - 132<br />
77 0610 00 ManagementCenter PC 133<br />
Interfaces in the room<br />
70 0360 10 IR TV control module universal 136 - 137<br />
70 0360 11 IR TV control module universal Audio 138 - 139<br />
70 0840 00 RAN interface normal call 140<br />
70 0841 00 RAN interface code blue / cardiac 140<br />
70 0842 00 RAN interface telephone call 141<br />
70 0860 00 RAN interface TV 142 - 143<br />
70 0880 00 RAN interface with speech 144<br />
11 5350 00 Telephone interface relay 145<br />
Interfaces in the group<br />
77 0801 00 OSYlink‐Door entry speaker 148 - 149<br />
77 0802 00 OSYlink‐Group lamp 150 - 151<br />
77 0803 00 OSYlink‐Universal 152 - 153<br />
77 0804 00 OSYlink‐Announcement 154 - 155<br />
Accessories<br />
70 0790 00 Sound detector 158<br />
70 0812 00 Diagnostic connection cable 159<br />
Page 82<br />
<strong>Flamenco</strong> - <strong>Technical</strong> <strong>Manual</strong>, 10/11 (Rev. 5.0), 00 8812 60
<strong>Flamenco</strong> - <strong>Technical</strong> <strong>Manual</strong>, 10/11 (Rev. 5.0), 00 8812 60<br />
14. Product leaflets<br />
Order no. Product name<br />
Page<br />
77 0901 00 Smoke detector 160<br />
System devices<br />
77 2x0x 00 OSY‐ControlCenter 162 - 165<br />
77 2100 00 OSYnet‐SafetyController 166 - 167<br />
Power supply<br />
77 3400 00 Power supply unit UPS 170 - 176<br />
77 3400 10 Power supply unit UPS 60 177 - 182<br />
77 3401 00 Power supply unit 183 - 185<br />
77 3450 00 Battery set for UPS 60 186 - 189<br />
Installation<br />
77 4000 00 OSYnet‐Y‐RepeaterOpto 192<br />
77 4001 00 OSYnet‐Gateway 193<br />
Page 83
14. Product leaflets<br />
Page 84<br />
<strong>Flamenco</strong> - <strong>Technical</strong> <strong>Manual</strong>, 10/11 (Rev. 5.0), 00 8812 60
14.1 Display equipment<br />
77 0112 02 Group lamp, 2 groups<br />
77 0113 02 Group lamp, 3 groups<br />
77 0114 02 Group lamp, 4 groups<br />
77 0150 00 Corridor display Alpha 16<br />
77 0160 00 Corridor display Alpha 16, double-sided<br />
77 0170 00 Room lamp, 3 sections<br />
77 0170 01 Room lamp Code blue / cardiac alarm, WC<br />
77 0170 10 Room lamp, 4 sections<br />
77 0171 00 Room lamp, 3 sections, with doorplate<br />
77 0171 10 Room lamp, 4 sections, with doorplate<br />
77 0182 10 Room lamp Universal, 2 sections<br />
<strong>Flamenco</strong> - <strong>Technical</strong> <strong>Manual</strong>, 10/11 (Rev. 5.0), 00 8812 60<br />
Page 85<br />
14. Product leaflets
<strong>Tunstall</strong> <strong>GmbH</strong>, Orkotten 66, D-48291 Telgte, www.tunstall.de<br />
Installationsanleitung D Installation Instructions GB<br />
Gruppenleuchte, 2‐teilig, Best.‐Nr. 77 0112 02<br />
Gruppenleuchte, 3‐teilig, Best.‐Nr. 77 0113 02<br />
Gruppenleuchte, 4‐teilig, Best.‐Nr. 77 0114 02<br />
Signalleuchte für mehrere Gruppen zur gruppenbezogenen Signalisierung von Rufen.<br />
(2-teilig: 2 Gruppen, 3-teilig: 3 Gruppen, 4-teilig: 4 Gruppen) Je Gruppe stehen zwei<br />
Einzelleuchtfelder (rot und grün) mit Anschlussmöglichkeiten zur Signalisierung von Rufen<br />
und Rufstatus zur Verfügung. Inkl. LED‐Module.<br />
Abmessungen (HxBxT) ohne Montagerahmen:<br />
2-teilig: 160 x 86 x 70 mm<br />
3-teilig: 240 x 86 x 70 mm<br />
4-teilig: 320 x 86 x 70 mm<br />
Betriebsstrom pro Leuchtfeld: 75 mA<br />
Hinweis! Die vollständige Installation des Systems ist im technischen<br />
Handbuch beschrieben.<br />
Einbaudose und Befestigungsschrauben für die Wandmontage nicht im Lieferumfang.<br />
Back box and fixing screws for wall mounting not included in delivery.<br />
77 0112 02<br />
Gruppenleuchte, 2‐teilig<br />
Group lamp, 2 groups<br />
00 8802 47, 09/11 (Rev. 2.0)<br />
LED‐Modul, rot / LED module, red<br />
LED‐Modul, grün / LED module, green<br />
77 0113 02<br />
Gruppenleuchte, 3‐teilig<br />
Group lamp, 3 groups<br />
Page 86<br />
Group lamp, 2 groups, order no. 77 0112 02<br />
Group lamp, 3 groups, order no. 77 0113 02<br />
Group lamp, 4 groups, order no. 77 0114 02<br />
Signal lamps for several groups for group related display of calls: 2 groups, 3 groups or 4<br />
groups. Two single sections (red and green) per group with connection possibilities for<br />
signalling of calls and call status incl. LED modules.<br />
Dimensions (HxWxD) without mountnig frame:<br />
2 groups: 160 x 86 x 70 mm<br />
3 groups: 240 x 86 x 70 mm<br />
4 groups: 320 x 86 x 70 mm<br />
Operating current per light section: 75 mA<br />
Note! The complete installation of the system is described in the technical<br />
manual.<br />
Plus‐Pol: Ruf (rot)<br />
positive terminal: call (red)<br />
Anschlüsse / Connections:<br />
Plus-Pol: Status (grün)<br />
positive terminal: status (green)<br />
Rotes Leuchtfeld: Ruf<br />
red light section: call<br />
Grünes Leuchtfeld: Status<br />
green light section: status<br />
77 0114 02<br />
Gruppenleuchte, 4‐teilig<br />
Group lamp, 4 groups<br />
Gemeinsamer Minus‐Pol<br />
collective negative terminal
<strong>Tunstall</strong> <strong>GmbH</strong>, Orkotten 66, D-48291 Telgte, www.tunstall.de<br />
Installationsanleitung D Installation Instructions GB<br />
Flurdisplay Alpha 16, Best.‐Nr. 77 0150 00<br />
Display zur alphanumerischen Anzeige von Rufen und allgemeinen Systeminformationen.<br />
16 Zeichen, alphanumerisch<br />
Automatische Anzeige als Laufschrift bei längeren Texten<br />
Tongeber zur Anzeige von nachgesendeten Rufen<br />
Lautsprecher z.B. für Durchsagen und Signaltöne<br />
Stromaufnahme: 300 mA (Durchschnitt)<br />
Hinweis! Die vollständige Installation des Systems ist im technischen<br />
Handbuch beschrieben.<br />
00 8802 43, 09/11 (Rev. 2.0)<br />
Corridor Display Alpha 16, order no. 77 0150 00<br />
Display for alphanumeric indication of calls and general system information.<br />
16 digits, alphanumeric<br />
Longer texts are automatically displayed as ticker<br />
Buzzer for signalling forwarded calls<br />
Loudspeaker, e.g. for announcements or signal tones<br />
Supply current: 300 mA (average)<br />
Adresse einstellen (1 - 110) Setting of address (1 - 110)<br />
Zum Einstellen der Adresse dienen die Codierschalter 1 bis 7 mit den Werten 1, 2, 4, 8, 16,<br />
32, 64. Entsprechenden Schalter auf ON stellen.<br />
Beispiele: Adresse 1 wird durch Einschalten des Codierschalters 1 eingestellt.<br />
Adresse 4 wird durch Einschalten des Codierschalters 3 eingestellt.<br />
Adresse 24 wird durch Addition gebildet: Schalter 4 und 5 auf ON stellen (8+16=24).<br />
Wenn die Adresse während des Betriebs geändert wird, muss anschließend ein Reset<br />
durchgeführt werden. Für den Reset Codierschalter 10 für eine Sekunde auf ON setzen.<br />
Note! The complete installation of the system is described in the technical<br />
manual.<br />
For setting the address please use the code switches 1 to 7 with the values 1, 2, 4, 8, 16, 32,<br />
64. Set the appropriate switch to ON.<br />
Examples: Address 1 is set by using the code switch 1. Address 4 is set by using the code<br />
switch 3. Address 24 is selected through addition: coding switch 4 and 5 (8 + 16 = 24).<br />
After the address is changed while system operation a reset has to be made. For the reset set<br />
code switch 10 for one second to ON.<br />
Montage Mounting<br />
Das Flurdisplay ist vorgesehen zur Montage in Fluren oder Diensträumen.<br />
The corridor display is designed for mounting in corridors or duty rooms.<br />
Das mitgelieferte Zubehör dient zur Deckenmontage.<br />
The standard accessory is used for ceiling mounting.<br />
785 mm<br />
Gesamtgewicht ca. 3 kg<br />
Total weight approx. 3 kg<br />
770 mm<br />
77 0150 00<br />
Flurdisplay Alpha 16<br />
Corridor Display Alpha 16<br />
570 mm<br />
1<br />
2<br />
4<br />
8<br />
16<br />
32<br />
64<br />
Test<br />
Reset<br />
Anschlussleitung von Rohrende<br />
bis Kabelende, ca. 750 mm<br />
Connection Cable from tube end<br />
up to cable end, approx. 750 mm<br />
Adresse<br />
Address<br />
Rohr Länge ca. 645 mm<br />
Tube length approx. 645 mm<br />
35<br />
Page 87<br />
A<br />
Das Seil durch die Hülse A der Öse<br />
schieben. Das Seil arretiert automatisch.<br />
Seil bis zur gewünschten Länge<br />
abschneiden. (Zum Lösen der<br />
Arretierung Hülse A eindrücken.)<br />
Slide the rope through the sleeve A of<br />
the eye. The rope is fixed automatically.<br />
Cut off the rope to the desired length.<br />
(For pulling out the rope press sleeve A.)
Anschlüsse D Connections GB<br />
Anschluss Connection<br />
Das Flurdisplay wird direkt an den Gruppenbus OSYnet angeschlossen. Die freien<br />
Drahtenden der Anschlussleitung dienen zum bauseitigen Anschluss.<br />
00 8802 43, 09/11 (Rev. 2.0)<br />
The corridor display is directly connected to the group bus OSYnet. Use the free wire ends of<br />
the connection cable for on site connection.<br />
Funktionstest Functional test<br />
Wenn das Flurdisplay angeschlossen ist, sollte ein Funktionstest durchgeführt werden. When the corridor display is connected, a functional test should be carried out.<br />
Zum Starten des Funktionstest Codierschalter 9 “Test” auf ON setzen.<br />
To start the functional test set code switch 9 “Test” to ON.<br />
Das Display durchläuft nun die im Folgenden beschriebenen Testschritte. Jeder Schritt The corridor display will run through the test steps described in the following table. Each<br />
dauert ca. 2 Sekunden.<br />
step takes approx. 2 seconds.<br />
Display zeigt: Test ok, wenn... Was wird getestet?<br />
Start Test<br />
<strong>Tunstall</strong> <strong>GmbH</strong><br />
Display Check<br />
0123456789abcdef<br />
Buzzer test<br />
Buzzer: low<br />
Buzzer: medium<br />
Buzzer: loud<br />
Buzzer OFF<br />
Speech relay 1 ON<br />
Speech relay 2 ON<br />
Speech relays OFF<br />
IIIIIIIIIIIIIIIIIIIIIIIIIIIIII<br />
(Anzeige in Laufschrift)<br />
To stop the test:<br />
DIP switch 9 -> OFF<br />
End of Test<br />
00:00 (Uhrzeit)<br />
Die 3 Texte werden<br />
nacheinander angezeigt.<br />
Funktionstest startet.<br />
Optische Anzeige.<br />
Tongeber-Test startet.<br />
Leiser Signalton ertönt. Tongeber‐Einstellung “leise”.<br />
Mittel-lauter Signalton ertönt. Tongeber-Einstellung “mittel”.<br />
Lauter Signalton ertönt. Tongeber-Einstellung “laut”.<br />
Tongeber wird ausgeschaltet.<br />
Leises Klicken eines Relais<br />
Sprechkanal 1 der Rufanlage.<br />
ist zu hören.<br />
Leises Klicken eines Relais<br />
ist zu hören.<br />
Klicken von Relais ist zu hören.<br />
Anzeige ohne “Löcher”.<br />
Löcher zeigen defekte LEDs an.<br />
Sprechkanal 2 der Rufanlage.<br />
Sprechkanäle werden geschlossen.<br />
Funktionsfähigkeit der LEDs.<br />
Zum Beenden des Tests den Codierschalter 9 auf OFF setzen.<br />
Test beendet.<br />
Wenn OSYnet angeschlossen: Anzeige der Systemuhrzeit.<br />
Sonst läuft die interne Uhr des Flurdisplays ab 00:00 Uhr.<br />
Anschlussleitung<br />
connection cable<br />
1<br />
2<br />
4<br />
8<br />
16<br />
32<br />
64<br />
Test<br />
Reset<br />
Adresse<br />
Address<br />
Display shows: Test ok, if... What is being tested?<br />
Start Test<br />
<strong>Tunstall</strong> <strong>GmbH</strong><br />
Display Check<br />
0123456789abcdef<br />
Buzzer test<br />
Buzzer: low<br />
Buzzer: medium<br />
Buzzer: loud<br />
Buzzer OFF<br />
Speech relay 1 ON<br />
Speech relay 2 ON<br />
Speech relays OFF<br />
IIIIIIIIIIIIIIIIIIIIIIIIIIIIII<br />
(displayed as ticker)<br />
To stop the test:<br />
DIP switch 9 -> OFF<br />
End of Test<br />
00:00 (time)<br />
schwarz/black: 0 V<br />
blau/blue: 0 V<br />
rot/red: 24 V<br />
braun/brown: NF 1a<br />
weiß/white: NF 1b<br />
grau/grey: NF 2a<br />
rosa/pink: NF 2b<br />
gelb/yellow: DL<br />
grün/green: DH<br />
violett/violet: DG<br />
The 3 texts are displayed one<br />
after the other.<br />
Functional test starts.<br />
Buzzer test starts.<br />
Optical display.<br />
Low signal tone sounds. Buzzer setting “low”.<br />
Medium signal tone sounds. Buzzer setting “medium”.<br />
Loud signal tone sounds. Buzzer setting “loud”.<br />
Low relay click can be heard.<br />
Buzzer is switched off.<br />
Speech channel 1 of system.<br />
Low relay click can be heard. Speech channel 2 of system.<br />
Relay click can be heard.<br />
Display without “holes”.<br />
Holes show defective LEDs.<br />
Speech channels are closed.<br />
LED function.<br />
To stop the test set code switch 9 to OFF.<br />
Test ended.<br />
If OSYnet is connected: System time is displayed.<br />
Otherwise internal clock of corridor display starts at 00:00 h.<br />
*) Steck‐Schraubklemme mit Si‐Halter (00 0224 81), Sicherung F1A (00 0130 24)<br />
*) Plug-in screw terminal with fuseholder (00 0224 81), Fuse F1A (00 0130 24)<br />
Page 88<br />
bauseitiger Anschluss<br />
on site connection<br />
Si * )<br />
77 0150 00<br />
Flurdisplay Alpha 16<br />
Corridor Display Alpha 16<br />
Ip<br />
Ip<br />
OSYnet<br />
OSYnet<br />
<strong>Tunstall</strong> <strong>GmbH</strong>, Orkotten 66, D-48291 Telgte, www.tunstall.de
<strong>Tunstall</strong> <strong>GmbH</strong>, Orkotten 66, D-48291 Telgte, www.tunstall.de<br />
Installationsanleitung D Installation Instructions GB<br />
Flurdisplay Alpha 16, doppelseitig, Best.‐Nr. 77 0160 00<br />
Doppelseitiges Display zur Anzeige von Rufen und allgem. Systeminformationen.<br />
16 Zeichen alphanumerisch<br />
Automatische Anzeige als Laufschrift bei längeren Texten<br />
Tongeber zur Anzeige von nachgesendeten Rufen<br />
Lautsprecher z.B. für Durchsagen und Signaltöne<br />
Stromaufnahme: 600 mA (Durchschnitt)<br />
Hinweis! Die vollständige Installation des Systems ist im technischen<br />
Handbuch beschrieben.<br />
00 8802 44, 09/11 (Rev. 2.0)<br />
Corridor Display Alpha 16, double‐sided, order no. 77 0160 00<br />
Double-sided display for indication of calls and general system information.<br />
16 digits, alphanumeric<br />
Longer texts are automatically displayed as ticker<br />
Tone generator for signalling forwarded calls<br />
Loudspeaker, e.g. for announcements or signal tones<br />
Supply current: 600 mA (average)<br />
Note! The complete installation of the system is described in the technical<br />
manual.<br />
Montage Mounting<br />
Das Flurdisplay ist vorgesehen zur Montage in Fluren oder Diensträumen.<br />
The corridor display is designed for mounting in corridors or duty rooms.<br />
Das mitgelieferte Zubehör dient zur Deckenmontage.<br />
The standard accessory is used for ceiling mounting.<br />
785 mm<br />
Gesamtgewicht ca. 6 kg<br />
total weight approx. 6 kg<br />
770 mm<br />
570 mm<br />
77 0160 00<br />
Flurdisplay Alpha 16, doppelseitig<br />
Corridor Display Alpha 16, double‐sided<br />
Anschlussleitung von Rohrende<br />
bis Kabelende, ca. 750 mm<br />
Connection Cable from tube end<br />
up to cable end, approx. 750 mm<br />
Option:<br />
Gewinkelte Montage für bessere Lesbarkeit<br />
Angled mounting for better readability<br />
Rohr Länge ca. 645 mm<br />
Tube length approx. 645 mm<br />
120 mm<br />
Page 89<br />
Gerade Montage<br />
Upright mounting<br />
A<br />
Das Seil durch die Hülse A der Öse schieben. Das<br />
Seil arretiert automatisch. Seil bis zur gewünschten<br />
Länge abschneiden. (Zum Lösen der Arretierung<br />
Hülse A eindrücken.)<br />
Slide the rope through the sleeve A of the eye. The<br />
rope is fixed automatically. Cut off the rope to the<br />
desired length.<br />
(For pulling out the rope press sleeve A)<br />
Die beiden unteren Schrauben in<br />
die anderen Löcher einschrauben.<br />
Srew the two bottom screws in<br />
the other holes.<br />
Gewinkelte Montage<br />
Angled mounting
Anschlüsse D Connections GB<br />
Anschluss Connection<br />
Das Flurdisplay wird direkt an den Gruppenbus OSYnet angeschlossen. Die freien<br />
Drahtenden der Anschlussleitung dienen zum bauseitigen Anschluss.<br />
Adresse einstellen (1 - 110) Setting of address (1 - 110)<br />
In einem der beiden Displays befindet sich hinter der seitlichen Schutzkappe ein 10‐teiliger<br />
Codierschalter. Zum Einstellen der Adresse dienen die Codierschalter 1 bis 7 mit den<br />
Werten 1, 2, 4, 8, 16, 32, 64. Entsprechenden Schalter auf ON stellen.<br />
Beispiele: Adresse 1 wird durch Einschalten des Codierschalters 1 eingestellt.<br />
Adresse 4 wird durch Einschalten des Codierschalters 3 eingestellt.<br />
Adresse 24 wird durch Addition gebildet: Schalter 4 und 5 auf ON stellen (8+16=24).<br />
Wenn die Adresse während des Betriebs geändert wird, muss anschließend ein Reset<br />
durchgeführt werden. Für den Reset Codierschalter 10 für eine Sekunde auf ON setzen.<br />
00 8802 44, 09/11 (Rev. 2.0)<br />
The corridor display is directly connected to the group bus OSYnet. Use the free wire ends of<br />
the connection cable for on site connection.<br />
Behind the protection cover at the side of one display there is a 10 part code switch. For setting<br />
the address please use the code switches 1 to 7 with the values 1, 2, 4, 8, 16, 32, 64. Set the<br />
appropriate switch to ON.<br />
Examples: Address 1 is set by using the code switch 1. Address 4 is set by using the code<br />
switch 3. Address 24 is selected through addition: coding switch 4 and 5 (8 + 16 = 24).<br />
After the address is changed while system operation a reset has to be made. For the reset set<br />
code switch 10 for one second to ON.<br />
Funktionstest Functional test<br />
Nach dem Anschließen des Flurdisplays sollte ein Funktionstest durchgeführt werden. After the corridor display has been connected, a functional test should be carried out.<br />
Zum Starten des Funktionstest Codierschalter 9 “Test” auf ON setzen.<br />
To start the functional test set code switch 9 “Test” to ON.<br />
Das Display durchläuft nun die im Folgenden beschriebenen Testschritte. Jeder Schritt The corridor display will run through the test steps described in the following table. Each<br />
dauert ca. 2 Sekunden. Sie müssen den Test zweimal durchführen, d.h. jeweils ein Display step takes approx. 2 seconds. You have to carry out the test twice, i.e. check each display<br />
beobachten.<br />
separately.<br />
Display zeigt: Test ok, wenn... Was wird getestet?<br />
Start Test<br />
<strong>Tunstall</strong> <strong>GmbH</strong><br />
Display Check<br />
0123456789abcdef<br />
Buzzer test<br />
Buzzer: low<br />
Buzzer: medium<br />
Buzzer: loud<br />
Buzzer OFF<br />
Speech relay 1 ON<br />
Speech relay 2 ON<br />
Speech relays OFF<br />
IIIIIIIIIIIIIIIIIIIIIIIIIIIIII<br />
(Anzeige in Laufschrift)<br />
To stop the test:<br />
DIP switch 9 -> OFF<br />
End of Test<br />
Die 3 Texte werden<br />
nacheinander angezeigt.<br />
Funktionstest startet.<br />
Optische Anzeige.<br />
Tongeber-Test startet.<br />
Leiser Signalton ertönt. Tongeber‐Einstellung “leise”.<br />
Mittel-lauter Signalton ertönt. Tongeber-Einstellung “mittel”.<br />
Lauter Signalton ertönt. Tongeber-Einstellung “laut”.<br />
Tongeber wird ausgeschaltet.<br />
Leises Klicken eines Relais<br />
Sprechkanal 1 der Rufanlage.<br />
ist zu hören. 1)<br />
Leises Klicken eines Relais<br />
ist zu hören. 1)<br />
Klicken von Relais<br />
ist zu hören. 1)<br />
Anzeige ohne “Löcher”.<br />
Löcher zeigen defekte LEDs an.<br />
Sprechkanal 2 der Rufanlage.<br />
Sprechkanäle werden geschlossen.<br />
Funktionsfähigkeit der LEDs.<br />
Zum Beenden des Tests den Codierschalter 9 auf OFF setzen.<br />
Test beendet.<br />
00:00 (Uhrzeit)<br />
Wenn OSYnet angeschlossen: Anzeige der Systemuhrzeit.<br />
Sonst läuft interne Uhr des Flurdisplays ab 00:00 Uhr.<br />
1) Die Relais für die beiden Sprechkanäle befinden sich nur in dem Display, in dem sich<br />
auch der Codierschalter befindet.<br />
Anschlussleitung<br />
connection cable<br />
schwarz/black: 0 V<br />
blau/blue: 0 V<br />
rot/red: 24 V<br />
braun/brown: NF 1a<br />
weiß/white: NF 1b<br />
grau/grey: NF 2a<br />
rosa/pink: NF 2b<br />
gelb/yellow: DL<br />
grün/green: DH<br />
violett/violet: DG<br />
Display shows: Test ok, if... What is being tested?<br />
Start Test<br />
<strong>Tunstall</strong> <strong>GmbH</strong><br />
Display Check<br />
0123456789abcdef<br />
Buzzer test<br />
Buzzer: low<br />
Buzzer: medium<br />
Buzzer: loud<br />
Buzzer OFF<br />
Speech relay 1 ON<br />
Speech relay 2 ON<br />
Speech relays OFF<br />
IIIIIIIIIIIIIIIIIIIIIIIIIIIIII<br />
(displayed as ticker)<br />
To stop the test:<br />
DIP switch 9 -> OFF<br />
End of Test<br />
The 3 texts are displayed one<br />
after the other.<br />
Functional test starts.<br />
Buzzer test starts.<br />
Optical display.<br />
Low signal tone sounds. Buzzer setting “low”.<br />
Medium signal tone sounds. Buzzer setting “medium”.<br />
Loud signal tone sounds. Buzzer setting “loud”.<br />
Buzzer is switched off.<br />
Low relay click can be heard. 1)<br />
Speech channel 1 of system.<br />
Low relay click can be heard. 1) Speech channel 2 of system.<br />
Relay click can be heard. 1)<br />
Display without “holes”.<br />
Holes show defective LEDs.<br />
Speech channels are closed.<br />
LED function.<br />
To stop the test set code switch 9 to OFF.<br />
Test ended.<br />
If OSYnet is connected: System time is displayed.<br />
00:00 (time)<br />
Otherwise internal clock of corridor display starts at 00:00 h.<br />
1) The relays for the speech channels are only in the display with the coding switch.<br />
*) Steck‐Schraubklemme mit Si‐Halter (00 0224 81) Sicherung F1A (00 0130 24)<br />
*) Plug-in screw terminal with fuseholder (00 0224 81) Fuse F1A (00 0130 24)<br />
1<br />
2<br />
4<br />
8<br />
16<br />
32<br />
64<br />
Test<br />
Reset<br />
Adresse<br />
Address<br />
bauseitiger Anschluss<br />
on site connection<br />
Si * )<br />
Page 90<br />
Ip<br />
Ip<br />
OSYnet<br />
OSYnet<br />
77 0160 00<br />
Flurdisplay Alpha 16, doppelseitig<br />
Corridor Display Alpha 16, double‐sided<br />
<strong>Tunstall</strong> <strong>GmbH</strong>, Orkotten 66, D-48291 Telgte, www.tunstall.de
<strong>Tunstall</strong> <strong>GmbH</strong>, Orkotten 66, D-48291 Telgte, www.tunstall.de<br />
Installationsanleitung D Installation Instructions GB<br />
Zimmerleuchte, 3-teilig, Best.‐Nr. 77 0170 00<br />
zur optischen Anzeige von allen Rufarten und Personalanwesenheiten. Wandmontage.<br />
Zimmerleuchte Alarm, WC, Best.‐Nr. 77 0170 01<br />
als Ergänzung zu Zimmerleuchte 77 0170 00 zur optischen Anzeige von Alarm‐ und/oder<br />
WC‐Rufen. Wandmontage wahlweise vor der Zimmertür neben Zimmerleuchte 77 0170 00<br />
zur eindeutigen Anzeige von WC‐ und/oder Alarmruf, oder Montage im Zimmer am<br />
WC‐Eingang, um die Richtung zum WC‐Ruf anzuzeigen.<br />
Zimmerleuchte, 4‐teilig, Best.‐Nr. 77 0170 10<br />
zur optischen Anzeige von allen Rufarten und Personalanwesenheiten sowie zusätzliche<br />
Anzeige für WC‐Ruf. Wandmontage<br />
Hinweis! Die vollständige Installation des Systems ist im technischen<br />
Handbuch beschrieben.<br />
Achtung! Die Leiterplatte und die LED‐Module sind mit elektrostatisch gefährdeten<br />
Bauteilen bestückt. Vermeiden Sie deshalb eine direkte Berührung.<br />
Montage Mounting<br />
1* Einbaudose<br />
2 Gehäuse‐Rückwand<br />
3* Anschlussklemme (70 0807 00)<br />
4 Leiterplatte mit LED‐Modulen<br />
00 8802 49, 08/06 (Rev. 1.0)<br />
5 Dekorrahmen<br />
6 Befestigungsschrauben<br />
7 Lichtkuppel mit Trenneinsatz<br />
* ist nicht im Lieferumfang enthalten.<br />
1. Gehäuse‐Rückwand 2 mit den Schrauben der Einbaudose an der Einbaudose 1<br />
festschrauben. Einbaurichtung beachten, siehe Markierung im Gehäuse.<br />
2. Angeschlossene Anschlussklemme 3 in die eingebaute Buchse der Leiterplatte 4<br />
stecken.<br />
3. Leiterplatte 4 in die Gehäuse‐Rückwand 2 einsetzen (erst oben, dann unten). Dabei die<br />
beiden Löcher unten in der Leiterplatte 4 auf die Arretierungsstifte der<br />
Gehäuse‐Rückwand 2 stecken.<br />
4. LED‐Module gemäß der folgenden Übersicht auf die Leiterplatte stecken.<br />
5. Dekorrahmen 5 mit den Befestigungsschrauben 6 auf die Gehäuse‐Rückwand 2<br />
schrauben.<br />
6. Lichtkuppel mit Trenneinsatz 7 auf den Dekorrahmen 5 drücken bis sie einrastet.<br />
Room lamp, 3 sections, order no. 77 0170 00<br />
for optical signalling of all call types and staff presences. Wall mounting.<br />
Room lamp code blue / cardiac alarm, WC, order no. 77 0170 01<br />
as complement to room lamp 77 0170 00 for optical signalling of code blue/cardiac alarm<br />
and/or WC calls. Wall mounting either in the corridor be-sides the room lamp 77 0170 00<br />
for explicit signalling of WC calls and/or code blue/cardiac alarm or it is installed besides<br />
the WC door in the patient room for displaying the direction to the WC call.<br />
Room lamp, 4 sections, order no. 77 0170 10<br />
for optical signalling of all call types and staff presences as well as additional display for<br />
WC call. Wall mounting.<br />
Note! The complete installation of the system is described in the technical<br />
manual.<br />
Attention! The printed circuit board and the LED modules include electrostatic<br />
sensitive components. Avoid touching.<br />
1* Back box<br />
2 Pattress<br />
3* Connector (70 0807 00)<br />
4 Printed circuit board (PCB) with LED modules<br />
Farben der LED‐Module LED module colours<br />
77 0170 00 77 0170 01 77 0170 10<br />
rot: Rufe<br />
blau: Alarmruf<br />
rot: Rufe<br />
grün: Personal 1 blau: Alarmruf<br />
grün: Personal 1<br />
gelb: Personal 2 weiß: WC‐Ruf<br />
gelb: Personal 2<br />
kein LED‐Modul kein LED‐Modul weiß: WC‐Ruf<br />
5 Decorative frame<br />
6 Fixing screws<br />
7 Light dome with insert module<br />
* not included with product delivery.<br />
1. Fit the pattress 2 with the back box screws to the back box 1. For the correct mounting<br />
direction refer to the markings in the pattress.<br />
2. Plug the pre-connected connector 3 into the socket on the PCB 4.<br />
3. Put the PCB 4 into the pattress 2 (first the top, then the bottom). The two holes on the<br />
base of the PCB must fit onto the fixing pins of the pattress 2.<br />
4. Plug the LED modules onto the PCB according to the following overview.<br />
5. Fit the decorative frame 5 with the fixing screws 6 onto the pattress 2.<br />
6. Press the light dome with the insert module 7 onto the decorative frame 5 until it locks in<br />
place.<br />
77 0170 00 77 0170 01 77 0170 10<br />
red: calls<br />
blue: code blue/cardiac alarm red: calls<br />
green: staff 1 blue: code blue/cardiac alarm green: staff 1<br />
yellow: staff 2 white: WC call<br />
yellow: staff 2<br />
no LED module no LED module<br />
white: WC call<br />
Anschluss Zimmerbus (RAN) ohne Sprechen Connection of room bus (RAN) without speech<br />
vom RAN-Teilnehmer<br />
B (lack) = 0V schwarz<br />
Y (ellow) = RAN gelb<br />
R (ed) = +24 V rot<br />
B<br />
Y<br />
R 70 0807 00<br />
from RAN user<br />
B (lack) = 0V<br />
Y (ellow) = RAN<br />
R (ed) = +24 V<br />
B<br />
Y<br />
R 70 0807 00<br />
Bei der Einstellung der RAN‐Anzahl am ComTerminal muss beachtet werden:<br />
Die Zimmerleuchte, 4-teilig, Best.‐Nr. 77 0170 10, entspricht zwei<br />
Zimmergeräten, d.h. ihre RAN‐Anzahl beträgt nicht 1 sondern 2.<br />
Kanalcodierung Channel coding<br />
Die Zimmerleuchten können zur Bildung von Funktionseinheiten verschiedenen Kanälen<br />
zugeordnet werden. Die Kanalnummern werden an einer markierten Stelle auf der<br />
Leiterplatte (P1, P2, P3) durch Trennen (Messer) bzw. Verbinden (Löten) eingestellt.<br />
Werkseitig ist immer die Kanalnummer 0 eingestellt.<br />
Die einzustellende Kanalnummer entnehmen Sie dem entsprechenden Installationsplan.<br />
Beispiel Kanalnummer 6:<br />
P2 und P3 trennen<br />
= 6<br />
= werkseitig verbunden<br />
= getrennt<br />
= Lötpunkt<br />
Zum Wiederverbinden<br />
getrennter Leitungen<br />
When setting the RAN number in the ComTerminal take into account:<br />
Room lamp, 4 sections, order no. 77 0170 10, is equivalent to two room<br />
devices, i.e. its RAN number is not 1 but 2.<br />
If functional units are requested, the room lamps have to be assigned to different channels.<br />
The channel number is configured at the position marked on the PCB (P1, P2, P3) by<br />
breaking the links (cutter) or reconnecting (solder). The product is pre‐set on channel 0.<br />
For the channel number to be set please refer to the installation plan.<br />
Example channel number 6:<br />
Break links P2 and P3<br />
= 6<br />
= pre-set link<br />
= broken link<br />
Demontage Dismantling<br />
Lichtkuppel von oben und unten leicht zusammendrücken und dann abziehen. Compress and pull off the light dome.<br />
77 0170 00<br />
Zimmerleuchte, 3‐teilig<br />
Room lamp, 3 sections<br />
77 0170 01<br />
Zimmerleuchte Alarm, WC<br />
Room lamp code blue /<br />
cardiac alarm, WC<br />
77 0170 10<br />
Zimmerleuchte, 4‐teilig<br />
Room lamp, 4 sections<br />
1<br />
2<br />
3<br />
OBEN<br />
TOP<br />
4<br />
5<br />
Page 91<br />
6<br />
6<br />
7<br />
P1 P2 P3<br />
Kanalnummer<br />
Channel number<br />
= Solder point<br />
to reconnect a broken link<br />
= 0<br />
= 1<br />
= 2<br />
= 3<br />
= 4<br />
= 5<br />
= 6<br />
= 7<br />
1.<br />
1.<br />
2.
<strong>Tunstall</strong> <strong>GmbH</strong>, Orkotten 66, D-48291 Telgte, www.tunstall.de<br />
Installationsanleitung D Installation Instructions GB<br />
Zimmerleuchte, 3-teilig, mit Türschild, Best.‐Nr. 77 0171 00<br />
zur optischen Anzeige von allen Rufarten und Personalanwesenheiten. Türschild als<br />
Beschriftungsfeld für die Raumbezeichnung. Wandmontage.<br />
Zimmerleuchte, 4-teilig, mit Türschild, Best.‐Nr. 77 0171 10<br />
wie 77 0171 00, jedoch zusätzlich Anzeige des WC‐Rufs.<br />
Hinweis! Die vollständige Installation des Systems ist im technischen<br />
Handbuch beschrieben.<br />
Achtung! Die Leiterplatte und die LED‐Module sind mit elektrostatisch gefährdeten<br />
Bauteilen bestückt. Vermeiden Sie deshalb eine direkte Berührung.<br />
Montage Mounting<br />
1* Einbaudose<br />
2 Gehäuse‐Rückwand<br />
3* Anschlussklemme (70 0807 00)<br />
4 Leiterplatte mit LED‐Modulen<br />
5 Dekorrahmen<br />
00 8802 54, 02/07 (Rev. 1.0)<br />
6 Befestigungsschrauben<br />
7 Lichtkuppel mit Trenneinsatz<br />
8* Namensschild (Höhe x Breite: 70 x 92 mm)<br />
9 Schutzabdeckung<br />
* ist nicht im Lieferumfang enthalten.<br />
1. Gehäuse‐Rückwand 2 mit den Schrauben der Einbaudose an der Einbaudose 1<br />
festschrauben. Einbaurichtung beachten, siehe Markierung im Gehäuse.<br />
2. Angeschlossene Anschlussklemme 3 in die eingebaute Buchse der Leiterplatte 4<br />
stecken.<br />
3. Leiterplatte 4 in die Gehäuse‐Rückwand 2 einsetzen (erst oben, dann unten). Dabei die<br />
beiden Löcher unten in der Leiterplatte 4 auf die Arretierungsstifte der<br />
Gehäuse‐Rückwand 2 stecken.<br />
4. LED‐Module gemäß der folgenden Übersicht auf die Leiterplatte stecken.<br />
5. Dekorrahmen 5 mit den Befestigungsschrauben 6 auf die Gehäuse‐Rückwand 2<br />
schrauben.<br />
6. Lichtkuppel mit Trenneinsatz 7 auf den Dekorrahmen 5 drücken bis sie einrastet.<br />
7. Namenschild 8 und Schutzabdeckung 9 einlegen.<br />
Room lamp, 3 sections, with doorplate, order no. 77 0171 00<br />
for optical signalling of all call types and staff presences. Doorplate as label field for room<br />
designation. Wall mounting.<br />
Room lamp, 4 sections, with doorplate, order no. 77 0171 10<br />
as 77 0171 00, but additionally with display for WC call.<br />
Note! The complete installation of the system is described in the technical<br />
manual.<br />
Attention! The printed circuit board and the LED modules include electrostatic<br />
sensitive components. Avoid touching.<br />
1* Back box<br />
6 Fixing screws<br />
2 Pattress<br />
7 Light dome with insert module<br />
3* Connector (70 0807 00)<br />
8* Label strip (HxW: 70 x 92 mm)<br />
4 Printed circuit board (PCB) with LED modules 9 Protection cover<br />
5 Decorative frame<br />
* not included with product delivery.<br />
1. Fit the pattress 2 with the back box screws to the back box 1. For the correct mounting<br />
direction refer to the markings in the pattress.<br />
2. Plug the pre-connected connector 3 into the socket on the PCB 4.<br />
3. Put the PCB 4 into the pattress 2 (first the top, then the bottom). The two holes on the<br />
base of the PCB must fit onto the fixing pins of the pattress 2.<br />
4. Plug the LED modules onto the PCB according to the following overview.<br />
5. Fit the decorative frame 5 with the fixing screws 6 onto the pattress 2.<br />
6. Press the light dome with the insert module 7 onto the decorative frame 5 until it locks in<br />
place.<br />
7. Insert the label strip 8 and the protection cover 9.<br />
Farben der LED‐Module LED module colours<br />
77 0171 00 77 0171 10<br />
77 0171 00 77 0171 10<br />
rot: Rufe<br />
rot: Rufe<br />
red: calls red: calls<br />
grün: Personal 1 grün: Personal 1<br />
green: staff 1 green: staff 1<br />
gelb: Personal 2 gelb: Personal 2<br />
yellow: staff 2 yellow: staff 2<br />
kein LED‐Modul weiß: WC‐Ruf<br />
no LED module white: WC call<br />
Anschluss Zimmerbus (RAN) ohne Sprechen Connection of room bus (RAN) without speech<br />
vom RAN-Teilnehmer<br />
B (lack) = 0V schwarz<br />
Y (ellow) = RAN gelb<br />
R (ed) = +24 V rot<br />
B<br />
Y<br />
R 70 0807 00<br />
from RAN user<br />
B (lack) = 0V<br />
Y (ellow) = RAN<br />
R (ed) = +24 V<br />
B<br />
Y<br />
R 70 0807 00<br />
Bei der Einstellung der RAN‐Anzahl am ComTerminal muss beachtet werden:<br />
Die Zimmerleuchte, 4-teilig, mit Türschild, Best.‐Nr. 77 0171 10, entspricht<br />
zwei Zimmergeräten, d.h. ihre RAN‐Anzahl beträgt nicht 1 sondern 2.<br />
Kanalcodierung Channel coding<br />
Die Zimmerleuchten können zur Bildung von Funktionseinheiten verschiedenen Kanälen<br />
zugeordnet werden. Die Kanalnummern werden an einer markierten Stelle auf der<br />
Leiterplatte (P1, P2, P3) durch Trennen (Messer) bzw. Verbinden (Löten) eingestellt.<br />
Werkseitig ist immer die Kanalnummer 0 eingestellt.<br />
Die einzustellende Kanalnummer entnehmen Sie dem entsprechenden Installationsplan.<br />
Beispiel Kanalnummer 6:<br />
P2 und P3 trennen<br />
= 6<br />
= werkseitig verbunden<br />
= getrennt<br />
= Lötpunkt<br />
Zum Wiederverbinden<br />
getrennter Leitungen<br />
When setting the RAN number in the ComTerminal take into account:<br />
Room lamp, 4 sections, with doorplate, order no. 77 0171 10, is equivalent to<br />
two room devices, i.e. its RAN number is not 1 but 2.<br />
If functional units are requested, the room lamps have to be assigned to different channels.<br />
The channel number is configured at the position marked on the PCB (P1, P2, P3) by<br />
breaking the links (cutter) or reconnecting (solder). The product is pre‐set on channel 0.<br />
For the channel number to be set please refer to the installation plan.<br />
Example channel number 6:<br />
Break links P2 and P3<br />
= 6<br />
= pre-set link<br />
= broken link<br />
Demontage Dismantling<br />
Lichtkuppel von oben und unten leicht zusammendrücken und dann abziehen. Compress and pull off the light dome.<br />
77 0171 00<br />
Zimmerleuchte, 3‐teilig, mit Türschild<br />
Room lamp, 3 sections, with doorplate<br />
77 0171 10<br />
Zimmerleuchte, 4‐teilig, mit Türschild<br />
Room lamp, 4 sections, with doorplate<br />
1<br />
2<br />
3<br />
OBEN<br />
TOP<br />
4<br />
5<br />
6<br />
6<br />
8<br />
Page 92<br />
9<br />
7<br />
P1 P2 P3<br />
Kanalnummer<br />
Channel number<br />
= Solder point<br />
to reconnect a broken link<br />
= 0<br />
= 1<br />
= 2<br />
= 3<br />
= 4<br />
= 5<br />
= 6<br />
= 7<br />
1.<br />
1.<br />
2.
<strong>Tunstall</strong> <strong>GmbH</strong>, Orkotten 66, D-48291 Telgte, www.tunstall.de<br />
Installationsanleitung D Installation Instructions GB<br />
Zimmerleuchte Universal, 3-teilig, Best.‐Nr. 77 0180 10<br />
zur optischen Anzeige von allen Rufarten und Personalanwesenheit 1 sowie zusätzliche<br />
Anzeige für WC‐Ruf. Wandmontage.<br />
Zimmerleuchte Universal, 4-teilig, Best.‐Nr. 77 0180 00<br />
wie 77 0180 10, jedoch zusätzlich mit Personalanwesenheit 2.<br />
Zimmerleuchte Universal, 2-teilig, Best.‐Nr. 77 0182 10<br />
zur optischen Anzeige von Personalanwesenheit 1 und von Telefonruf. Wandmontage.<br />
Zimmerleuchte Universal, 1-teilig, Best.‐Nr. 77 0182 50<br />
zur optischen Anzeige von allen Rufarten. Wandmontage.<br />
Achtung! Die LED‐Module sind mit elektrostatisch gefährdeten Bauteilen bestückt.<br />
Vermeiden Sie deshalb eine direkte Berührung.<br />
Montage Mounting<br />
1* Einbaudose<br />
2 Gehäuse‐Rückwand<br />
3* Anschlussklemme (70 0807 07)<br />
4 Leiterplatte mit LED‐Modulen<br />
00 8802 56, 10/11 (Rev. 2.0)<br />
5 Dekorrahmen<br />
6 Befestigungsschrauben<br />
7 Lichtkuppel mit Trenneinsatz<br />
* ist nicht im Lieferumfang enthalten.<br />
1. Gehäuse‐Rückwand 2 mit den Schrauben der Einbaudose an der Einbaudose 1<br />
festschrauben. Einbaurichtung beachten, siehe Markierung im Gehäuse.<br />
2. Angeschlossene Anschlussklemme 3 in die eingebaute Buchse der Leiterplatte 4<br />
stecken.<br />
3. Leiterplatte 4 in die Gehäuse‐Rückwand 2 einsetzen (erst oben, dann unten). Dabei die<br />
beiden Löcher unten in der Leiterplatte 4 auf die Arretierungsstifte der<br />
Gehäuse‐Rückwand 2 stecken.<br />
4. LED‐Module gemäß der folgenden Übersicht auf die Leiterplatte stecken.<br />
5. Dekorrahmen 5 mit den Befestigungsschrauben 6 auf die Gehäuse‐Rückwand 2<br />
schrauben.<br />
6. Lichtkuppel mit Trenneinsatz 7 auf den Dekorrahmen 5 drücken bis sie einrastet.<br />
Farben der LED‐Module LED module colours<br />
Anschlusspunkt<br />
L1<br />
L2<br />
L3<br />
L4<br />
Anschlusspunkt<br />
L1<br />
L2<br />
L3<br />
L4<br />
77 0180 10 77 0180 00<br />
rot: Rufe<br />
rot: Rufe<br />
grün: Personal 1 grün: Personal 1<br />
kein LED‐Modul gelb: Personal 2<br />
weiß: WC‐Ruf weiß: WC‐Ruf<br />
77 0182 10 77 0182 50<br />
kein LED‐Modul rot: Rufe<br />
grün: Personal 1 kein LED‐Modul<br />
weiß: Telefonruf kein LED‐Modul<br />
kein LED‐Modul<br />
kein LED‐Modul<br />
Demontage Dismantling<br />
Room lamp universal, 3 sections, order no. 77 0180 10<br />
for optical signalling of all call types and staff presence 1 as well as additional display for<br />
WC call. Wall mounting.<br />
Room lamp universal, 4 sections, order no. 77 0180 00<br />
as 77 0180 10, but additionally with staff presence 2.<br />
Room lamp universal, 2 sections, order no. 77 0182 10<br />
for optical signalling of staff presence 1 and telephone call. Wall mounting.<br />
Room lamp universal, 1 section, order no. 77 0182 50<br />
for optical signalling of all call types. Wall mounting.<br />
Attention! The LED modules include electrostatic sensitive components. Avoid<br />
touching.<br />
1* Back box<br />
5 Decorative frame<br />
2 Pattress<br />
6 Fixing screws<br />
3* Connector (70 0807 07)<br />
7 Light dome with insert module<br />
4 Printed circuit board (PCB) with LED modules * not included with product delivery.<br />
1. Fit the pattress 2 with the back box screws to the back box 1. For the correct mounting<br />
direction refer to the markings in the pattress.<br />
2. Plug the pre-connected connector 3 into the socket on the PCB 4.<br />
3. Put the PCB 4 into the pattress 2 (first the top, then the bottom). The two holes on the<br />
base of the PCB must fit onto the fixing pins of the pattress 2.<br />
4. Plug the LED modules onto the PCB according to the following overview.<br />
5. Fit the decorative frame 5 with the fixing screws 6 onto the pattress 2.<br />
6. Press the light dome with the insert module 7 onto the decorative frame 5 until it locks in<br />
place.<br />
Connector<br />
L1<br />
L2<br />
L3<br />
L4<br />
Connector<br />
Lichtkuppel von oben und unten leicht zusammendrücken und dann abziehen. Compress and pull off the light dome.<br />
77 0180 10<br />
Zimmerleuchte Universal , 3‐teilig<br />
Room lamp universal, 3 sections<br />
77 0180 00<br />
Zimmerleuchte Universal, 4‐teilig<br />
Room lamp universal, 4 sections<br />
77 0182 10<br />
Zimmerleuchte Universal , 2‐teilig<br />
Room lamp universal, 2 sections<br />
77 0182 50<br />
Zimmerleuchte Universal, 1‐teilig<br />
Room lamp universal, 1 section<br />
1<br />
2<br />
3<br />
4<br />
Page 93<br />
OBEN<br />
TOP<br />
5<br />
6<br />
L1<br />
L2<br />
L3<br />
L4<br />
6<br />
77 0180 10 77 0180 00<br />
red: calls red: calls<br />
green: staff 1 green: staff 1<br />
no LED module yellow: staff 2<br />
white: WC call white: WC call<br />
77 0182 10<br />
no LED module<br />
green: staff 1<br />
white: telephone call<br />
no LED module<br />
7<br />
77 0182 50<br />
red: calls<br />
no LED module<br />
no LED module<br />
no LED module<br />
1.<br />
1.<br />
2.
Anschlüsse D Connections GB<br />
77 0180 10<br />
System EccoLine L200, NewLine L200: System CCS:<br />
Terminal L200<br />
77 0180 00<br />
77 0182 10<br />
00 8802 56, 10/11 (Rev. 2.0)<br />
0V<br />
RL<br />
AWL<br />
WCL<br />
COM<br />
L1<br />
L2<br />
L3<br />
L4<br />
LB1<br />
LB2<br />
ComTerminal<br />
System CCS:<br />
3 0V<br />
2 AW<br />
ComTerminal<br />
System <strong>Flamenco</strong>, EccoLine mit Sprechen, EccoLine L200:<br />
System <strong>Flamenco</strong>, EccoLine with speech, EccoLine L200:<br />
Steckvorrichtung ComStation<br />
(Bestell‐Nr. 74 0452 30)<br />
mit Anschluss einer ComStation BUS ,<br />
EccoLine ComStation<br />
oder ComStation L200<br />
Connection socket ComStation<br />
(order no. 74 0452 30)<br />
with connection of a ComStation BUS ,<br />
EccoLine ComStation<br />
or ComStation L200<br />
77 0182 10<br />
77 0182 50<br />
COM<br />
L1<br />
L2<br />
L3<br />
L4<br />
LB1<br />
LB2<br />
System <strong>Flamenco</strong>:<br />
Telefonanschaltrelais<br />
(Bestell‐Nr. 11 5350 00)<br />
Telephone interface relay<br />
(order no. 11 5350 00)<br />
0V<br />
C<br />
S<br />
WL<br />
0V<br />
C<br />
S<br />
HS<br />
WL<br />
COM<br />
L1<br />
L2<br />
L3<br />
L4<br />
LB1<br />
LB2<br />
COM<br />
L1<br />
L2<br />
L3<br />
L4<br />
LB1<br />
LB2<br />
System CONCENTO PLUS / Concento:<br />
Terminal /<br />
Displaymodul /<br />
RAB /<br />
System <strong>Flamenco</strong>:<br />
Steckvorrichtung ComStation PC<br />
(Bestell‐Nr. 74 0452 60A)<br />
mit Anschluss einer ComStation PC<br />
Connection socket ComStation PC<br />
(order no. 74 0452 60A)<br />
with connection of a ComStation PC<br />
14<br />
A1<br />
System Communicall Connect:<br />
+24VDC AUX NO<br />
PiperTerminal<br />
mit 24VDC-Zusatzstromversorgung<br />
Speech module<br />
with 24VDC additional power supply<br />
Page 94<br />
0 V<br />
COM<br />
L1<br />
L2<br />
L3<br />
L4<br />
LB1<br />
LB2<br />
COM<br />
L1<br />
L2<br />
L3<br />
L4<br />
LB1<br />
LB2<br />
GND<br />
RL<br />
AW<br />
WL<br />
0 V<br />
2 AW<br />
COM<br />
L1<br />
L2<br />
L3<br />
L4<br />
LB1<br />
LB2<br />
COM<br />
L1<br />
L2<br />
L3<br />
L4<br />
LB1<br />
LB2<br />
<strong>Tunstall</strong> <strong>GmbH</strong>, Orkotten 66, D-48291 Telgte, www.tunstall.de
14.2 Switches<br />
70 0106 00 Pneumatic call switch<br />
70 0106 01 Pneumatic call switch/WC<br />
70 0111 00 Call switch wp<br />
70 0111 01 Call switch/WC wp<br />
70 0112 00 Staff presence switch wp<br />
70 0113 00 Cancel switch/WC wp<br />
70 0114 00 Code blue / cardiac alarm switch wp<br />
70 0115 00 Pull cord call switch wp<br />
70 0115 01 Pull cord call switch/WC wp<br />
70 0117 00 Call switch/WC with cancel switch wp<br />
70 0118 00 Call switch with privacy switch wp<br />
70 0119 00 Staff presence combination with call tone wp<br />
70 0183 00 Cancel switch/WC with call tone wp<br />
<strong>Flamenco</strong> - <strong>Technical</strong> <strong>Manual</strong>, 10/11 (Rev. 5.0), 00 8812 60<br />
Page 95<br />
14. Product leaflets
<strong>Tunstall</strong> <strong>GmbH</strong>, Orkotten 66, D-48291 Telgte, www.tunstall.de<br />
Installationsanleitung D Installation Instructions GB<br />
Pneumatischer Ruftaster, Best.‐Nr. 70 0106 00<br />
Taster zur Rufauslösung durch pneumatische Betätigung. Das integrierte Beruhigungslicht<br />
leuchtet auf, sobald ein Ruf ausgelöst wird. Vorzugsweise hergestellt für den Wandeinbau.<br />
Pneumatischer Ruftaster/WC, Best.‐Nr. 70 0106 01<br />
Wie Bestell‐Nr. 70 0106 00, jedoch für WC‐Ruf und WC‐Notruf.<br />
Hinweis! Die vollständige Installation des Systems ist im technischen Handbuch<br />
beschrieben.<br />
Achtung! Die Leiterplatte ist mit elektrostatisch gefährdeten Bauteilen bestückt.<br />
Vermeiden Sie deshalb eine direkte Berührung.<br />
Montage Mounting<br />
1* Einbaudose<br />
2 Klemmkralle<br />
3 Montagerahmen<br />
4* Anschlussklemme (70 0807 00)<br />
* ist nicht im Lieferumfang enthalten.<br />
00 8800 22, 09/11 (Rev. 3.1)<br />
5 Leiterplatte (vormontiert)<br />
6 Tastergehäuse<br />
7 Luftschlauch<br />
8 Gummiball<br />
1. Angeschlossene Anschlussklemme 4 durch den Montagerahmen 3 ziehen.<br />
2. - Einbaudose Mauerwerk: Den Montagerahmen 3 mit der Klemmkralle 2 an der<br />
Einbaudose 1 befestigen (Mittenversatz!).<br />
- Einbaudose Hohlwand: Montagerahmen 3 an den Schraubpunkten der Einbaudose 1<br />
verschrauben (Mittenversatz!)<br />
3. Anschlussklemme 4 in die eingebaute Buchse der Leiterplatte 5 stecken.<br />
4. Tastergehäuse 6 über den Montagerahmen 3 drücken und einrasten lassen.<br />
5. Falls erforderlich: Den Luftschlauch 7 auf die gewünschte Länge kürzen und den<br />
Gummiball 8 wieder aufstecken.<br />
Pneumatic call switch, order no. 70 0106 00<br />
One call button with pneumatic function for call activation, complete with integrate reassurance<br />
lamp. Suitable for wall mounting.<br />
Pneumatic call switch/WC, order no. 70 0106 01<br />
As 70 0106 00, but for WC rooms.<br />
Note! The complete installation of the system is described in the technical<br />
manual.<br />
Attention! The printed circuit board includes electrostatic sensitive components.<br />
Avoid touching.<br />
1* Back box<br />
2 Fixing clamp<br />
3 Mounting frame<br />
4* Connector (70 0807 00)<br />
* not included with product delivery.<br />
5 Printed circuit board PCB (pre‐mounted)<br />
6 Switch housing<br />
7 Air tube<br />
8 Rubber ball<br />
1. Pull the cable‐connected connector 4 through the mounting frame 3.<br />
2. - Back box for solid walls: Use the fixing clamp 2 to fix the mounting frame 3 to the back<br />
box 1 (centre offset!).<br />
- Back box for partition walls: Screw the mounting frame 3 to the screw points of the<br />
back box 1 (centre offset!).<br />
3. Plug the connector 4 into the socket on the PCB 5.<br />
4. Push and lock in the switch housing 6 onto the mounting frame 3.<br />
5. If necessary, shorten the air tube to length and refit the rubber ball.<br />
Anschluss Zimmerbus (RAN) ohne Sprechen Connection of room bus (RAN) without speech<br />
vom RAN-Teilnehmer<br />
B (lack) = 0V schwarz<br />
Y (ellow) = RAN gelb<br />
R (ed) = +24 V rot<br />
B<br />
Y<br />
R<br />
from RAN user<br />
B (lack) = 0V<br />
Y (ellow) = RAN<br />
R (ed) = +24 V<br />
B<br />
Y<br />
R<br />
Kanalcodierung Channel coding<br />
Die Ruftaster können zur Bildung von Funktionseinheiten verschiedenen Kanälen<br />
If functional units are requested, the switches have to be assigned to different channels.<br />
zugeordnet werden.<br />
The channel number is configured at the position marked on the PCB (P1, P2, P3) by<br />
Die Kanalnummern werden an einer markierten Stelle auf der Leiterplatte (P1, P2, P3) breaking the links (cutter) or reconnecting (solder). The product is pre‐set on channel 0.<br />
durch Trennen (Messer) bzw. Verbinden (Löten) eingestellt.<br />
Werkseitig ist immer die Kanalnummer 0 eingestellt.<br />
Die einzustellende Kanalnummer entnehmen Sie dem entsprechenden Installationsplan.<br />
For the channel number to be set please refer to the installation plan.<br />
Beispiel Kanal 6:<br />
Example channel number 6:<br />
P2 und P3 trennen<br />
= 6<br />
= Lötpunkt<br />
Zum Wiederverbinden<br />
getrennter Leitungen<br />
Break links P2 and P3<br />
= 6<br />
= Solder point<br />
to reconnect a broken link<br />
= werkseitig verbunden<br />
= pre-set link<br />
= getrennt<br />
= broken link<br />
Demontage Dismantling<br />
1. Schraubendreher an der Rastnase ansetzen und Tastergehäuse abhebeln.<br />
2. Anschlussklemme 4 abziehen.<br />
3. Schraube am Montagerahmen 3 lösen.<br />
1<br />
2<br />
3<br />
70 0106 00<br />
Pneumatischer Ruftaster<br />
Pneumatic call switch<br />
4<br />
5<br />
7<br />
8<br />
6<br />
1. Using a screw driver, prize the switch cover from above away from the mounting frame.<br />
2. Remove the connector 4.<br />
3. Unscrew the mounting frame 3.<br />
Einbaudose Hohlwand (17 5100 00),<br />
Mittenversatz:<br />
Back box partition wall (17 5100 00),<br />
Centre offset:<br />
Page 96<br />
1<br />
3<br />
P1 P2 P3<br />
Kanalnummer<br />
Channel number<br />
= 0<br />
= 1<br />
= 2<br />
= 3<br />
= 4<br />
= 5<br />
= 6<br />
= 7<br />
70 0106 01<br />
Pneumatischer Ruftaster/WC<br />
Pneumatic call switch/WC
<strong>Tunstall</strong> <strong>GmbH</strong>, Orkotten 66, D-48291 Telgte, www.tunstall.de<br />
Installationsanleitung D Installation Instructions GB<br />
Ruftaster wg, Best.‐Nr. 70 0111 00<br />
Zwei rote Ruftasten mit gleicher Funktion zum Auslösen von Normalrufen oder Notrufen.<br />
Ruftaster/WC wg, Best.‐Nr. 70 0111 01<br />
Zwei rote Ruftasten mit gleicher Funktion zum Auslösen von WC‐Rufen oder WC‐Notrufen.<br />
Alarmtaster wg, Best.‐Nr. 70 0114 00<br />
Zwei blaue Alarmtasten zum Auslösen von Alarmen durch das Personal. Vor der<br />
Alarmauslösung muss die Schutzklappe nach oben geklappt werden.<br />
Hinweis! Die vollständige Installation des Systems ist im technischen Handbuch<br />
beschrieben.<br />
Achtung! Die Leiterplatte ist mit elektrostatisch gefährdeten Bauteilen bestückt.<br />
Vermeiden Sie deshalb eine direkte Berührung.<br />
Montage Mounting<br />
1* Einbaudose<br />
2 Montagerahmen<br />
3* Anschlussklemme (70 0807 00)<br />
* ist nicht im Lieferumfang enthalten.<br />
00 8802 00, 09/11 (Rev. 3.1)<br />
4 Tastergehäuse mit Leiterplatte (vormontiert)<br />
5 Schutzklappe (nur beim Alarmtaster)<br />
6 Klemmkralle (bei fehlender Schraubmöglichkeit)<br />
1. Angeschlossene Anschlussklemme 3 durch den Montagerahmen 2 ziehen.<br />
2. Montagerahmen 2 an den Schraubpunkten der Einbaudose 1 verschrauben. Bei<br />
fehlender Schraubmöglichkeit dient die Klemmkralle 6 zur Befestigung des<br />
Montagerahmens. Klemmkralle nicht für Hohlwanddosen geeignet.<br />
3. Anschlussklemme 3 in die eingebaute Buchse der Leiterplatte im Tastergehäuse 4<br />
stecken.<br />
4. Tastergehäuse 4 über den Montagerahmen 2 drücken und einrasten lassen.<br />
5. Schutzklappe 5 (nur bei Alarmtaster) auf das Tastergehäuse setzen und an den oberen<br />
beiden Einkerbungen einrasten lassen.<br />
Call switch wp, order no. 70 0111 00<br />
Two red call buttons with identical function for raising normal calls or emergency calls.<br />
Call switch/WC wp, order no. 70 0111 01<br />
Two red call buttons with identical function for raising WC calls or WC emergency calls.<br />
Code blue/Cardiac alarm switch wp, order no. 70 0114 00<br />
Two blue code blue/cardiac alarm buttons with identical function for raising codes<br />
blue/cardiac alarms by the staff. Protection cover must be lift before pressing a button.<br />
Note! The complete installation of the system is described in the technical<br />
manual.<br />
Attention! The printed circuit board includes electrostatic sensitive components.<br />
Avoid touching.<br />
1* Back box<br />
2 Mounting frame<br />
3* Connector (70 0807 00)<br />
* not included with product delivery.<br />
4 Switch housing with pre‐installed printed circuit board<br />
5 Protection cover (Code blue/Cardiac alarm switch only)<br />
6 Fixing clamp (if screw fixing is not possible)<br />
1. Pull the cable‐connected connector 3 through the mounting frame 2.<br />
2. Screw the mounting frame 2 to the back box 1. If screw fixing is not possible, use the<br />
fixing clamp 6 to fix the mounting frame to the box. The fixing clamp cannot be used<br />
with back boxes for partition walls.<br />
3. Plug the connector 3 into the socket on the printed circuit board within the switch<br />
housing 4 .<br />
4. Push and lock in the switch housing 4 onto the mounting frame 2.<br />
5. Fit the protection cover 5 (only relevant to code blue/cardiac alarm switch) over the<br />
switch housing and lock in the upper notches.<br />
Anschluss Zimmerbus (RAN) ohne Sprechen Connection of room bus (RAN) without speech<br />
vom RAN-Teilnehmer<br />
B (lack) = 0V schwarz<br />
Y (ellow) = RAN gelb<br />
R (ed) = +24 V rot<br />
B<br />
Y<br />
R<br />
from RAN user<br />
B (lack) = 0V<br />
Y (ellow) = RAN<br />
R (ed) = +24 V<br />
B<br />
Y<br />
R<br />
Kanalcodierung Channel coding<br />
Nur wenn die Bildung von Funktionseinheiten gewünscht ist, müssen die Taster<br />
verschiedenen Kanälen zugeordnet werden. Hierzu muss die Leiterplatte im Tastergehäuse<br />
4 freigelegt werden.<br />
Zum Freilegen der Leiterplatte die Rasthaken der Kunststoffkappe einzeln vorsichtig<br />
lösen.<br />
Die Kanalnummern werden an einer markierten Stelle auf der Leiterplatte (P1, P2, P3)<br />
durch Trennen (Messer) bzw. Verbinden (Löten) eingestellt. Werkseitig ist immer die<br />
Kanalnummer 0 eingestellt.<br />
Die einzustellende Kanalnummer entnehmen Sie dem Installationsplan.<br />
Beispiel Kanalnummer 6:<br />
P2 und P3 trennen<br />
= 6<br />
= werkseitig verbunden<br />
= getrennt<br />
= Lötpunkt<br />
Zum Wiederverbinden<br />
getrennter Leitungen<br />
Only if functional units are requested, the switches have to be assigned to different<br />
channels. For this the printed circuit board (PCB) within the switch housing 4 must be<br />
exposed.<br />
To expose the PCB, carefully unlock each locking nose separately from the plastic<br />
cover.<br />
The channel number is configured at the position marked on the PCB (P1, P2, P3) by<br />
breaking the links (cutter) or reconnecting (solder). The product is pre‐set on channel 0.<br />
For the channel number to be set please refer to the installation plan.<br />
Example channel number 6:<br />
Break links P2 and P3<br />
= 6<br />
= pre-set link<br />
= broken link<br />
Demontage Dismantling<br />
1. Schraubendreher an einer der beiden Rastnasen ansetzen und Tastergehäuse<br />
abheben.<br />
2. Anschlussklemme 3 abziehen.<br />
3. Schrauben am Montagerahmen 2 lösen.<br />
1<br />
6<br />
70 0111 00<br />
Ruftaster wg<br />
Call switch wp<br />
2<br />
3<br />
4<br />
5<br />
= Solder point<br />
to reconnect a broken link<br />
1. Using a screw driver, prize the switch cover from above or below away from the<br />
mounting frame.<br />
2. Remove the connector 3.<br />
3. Unscrew the mounting frame 2 .<br />
P1 P2 P3<br />
= 0<br />
= 1<br />
= 2<br />
= 3<br />
= 4<br />
= 5<br />
= 6<br />
= 7<br />
Kanalnummer<br />
Channel number<br />
70 0111 01<br />
70 0114 00<br />
Ruftaster/WC wg<br />
Alarmtaster wg<br />
rot / red<br />
Call switch/WC wp<br />
rot / red<br />
Code blue/Cardiac alarm switch wp<br />
blau / blue<br />
Page 97
<strong>Tunstall</strong> <strong>GmbH</strong>, Orkotten 66, D-48291 Telgte, www.tunstall.de<br />
Installationsanleitung D Installation Instructions GB<br />
Anwesenheitstaster wg, Best.‐Nr. 70 0112 00<br />
Zwei verschiedene Anwesenheitstasten zum Ein‐ und Ausschalten der<br />
Personalanwesenheit von zwei verschiedenen Personalgruppen.<br />
Grün: Anwesenheit 1, Gelb: Anwesenheit 2<br />
Abstelltaster/WC wg, Best.‐Nr. 70 0113 00<br />
Zwei graue Abstelltasten mit gleicher Funktion zur lokalen Abstellung von WC‐Rufen oder<br />
WC‐Notrufen. Vorzugsweise zur Abstellung von Rufen aus WC‐Räumen, die<br />
Patientenzimmern zugeordnet sind.<br />
Hinweis! Die vollständige Installation des Systems ist im technischen<br />
Handbuch beschrieben.<br />
Achtung! Die Leiterplatte ist mit elektrostatisch gefährdeten Bauteilen bestückt.<br />
Vermeiden Sie deshalb eine direkte Berührung.<br />
Montage Mounting<br />
1* Einbaudose<br />
2 Montagerahmen<br />
3* Anschlussklemme (70 0807 00)<br />
00 8802 01, 09/11 (Rev. 3.1)<br />
4 Tastergehäuse mit Leiterplatte (vormontiert)<br />
5 Klemmkralle (bei fehlender Schraubmöglichkeit)<br />
* ist nicht im Lieferumfang enthalten.<br />
1. Angeschlossene Anschlussklemme 3 durch den Montagerahmen 2 ziehen.<br />
2. Montagerahmen 2 an den Schraubpunkten der Einbaudose 1 verschrauben. Bei<br />
fehlender Schraubmöglichkeit dient die Klemmkralle 5 zur Befestigung des<br />
Montagerahmens. Klemmkralle nicht für Hohlwanddosen geeignet.<br />
3. Anschlussklemme 3 in die eingebaute Buchse der Leiterplatte im Tastergehäuse 4<br />
stecken.<br />
4. Tastergehäuse 4 über den Montagerahmen 2 drücken und einrasten lassen.<br />
Staff presence switch wp, order no. 70 0112 00<br />
Two different presence buttons for activating and deactivating staff presence of two different<br />
staff groups.<br />
Green: Staff presence 1, Yellow: Staff presence two<br />
Cancel switch/WC wp, order no. 70 0113 00<br />
Two grey cancel buttons with identical function for locally cancelling WC calls or WC<br />
emergency calls. Preferably for calls from WC rooms en‐suite to a patient room.<br />
Note! The complete installation of the system is described in the technical<br />
manual.<br />
Attention! The printed circuit board includes electrostatic sensitive components.<br />
Avoid touching.<br />
1* Back box<br />
2 Mounting frame<br />
3* Connector (70 0807 00)<br />
4 Switch housing with pre‐installed printed circuit board<br />
5 Fixing clamp (if screw fixing is not possible)<br />
* not included with product delivery.<br />
1. Pull the cable‐connected connector 3 through the mounting frame 2.<br />
2. Screw the mounting frame 2 to the back box 1.<br />
If screw fixing is not possible, use the fixing clamp 5 to fix the mounting frame to the<br />
box. The fixing clamp cannot be used with back boxes for partition walls.<br />
3. Plug the connector 3 into the socket on the printed circuit board within the switch<br />
housing 4.<br />
4. Push and lock in the switch housing 4 onto the mounting frame 2.<br />
Anschluss Zimmerbus (RAN) ohne Sprechen Connection of room bus (RAN) without speech<br />
vom RAN-Teilnehmer<br />
B (lack) = 0V schwarz<br />
Y (ellow) = RAN gelb<br />
R (ed) = +24 V rot<br />
B<br />
Y<br />
R<br />
from RAN user<br />
B (lack) = 0V<br />
Y (ellow) = RAN<br />
R (ed) = +24 V<br />
B<br />
Y<br />
R<br />
Kanalcodierung Channel coding<br />
Nur wenn die Bildung von Funktionseinheiten gewünscht ist, müssen die Taster verschiede‐<br />
nen Kanälen zugeordnet werden. Hierzu muss die Leiterplatte im Tastergehäuse 4 freige‐<br />
legt werden.<br />
Zum Freilegen der Leiterplatte die Rasthaken der Kunststoffkappe einzeln vorsichtig<br />
lösen.<br />
Die Kanalnummern werden an einer markierten Stelle auf der Leiterplatte (P1, P2, P3)<br />
durch Trennen (Messer) bzw. Verbinden (Löten) eingestellt. Werkseitig ist immer die<br />
Kanalnummer 0 eingestellt.<br />
Die einzustellende Kanalnummer entnehmen Sie dem Installationsplan.<br />
Beispiel Kanalnummer 6:<br />
P2 und P3 trennen<br />
= 6<br />
= werkseitig verbunden<br />
= getrennt<br />
= Lötpunkt<br />
Zum Wiederverbinden<br />
getrennter Leitungen<br />
Only if functional units are requested, the switches have to be assigned to different<br />
channels. For this the printed circuit board (PCB) within the switch housing 4 must be<br />
exposed.<br />
To expose the PCB, carefully unlock each locking nose separately from the plastic<br />
cover.<br />
The channel number is configured at the position marked on the PCB (P1, P2, P3) by<br />
breaking the links (cutter) or reconnecting (solder). The product is pre‐set on channel 0.<br />
For the channel number to be set please refer to the installation plan.<br />
Example channel number 6:<br />
Break links P2 and P3<br />
= 6<br />
= pre-set link<br />
= broken link<br />
Demontage Dismantling<br />
1. Schraubendreher an einer der beiden Rastnasen ansetzen und Tastergehäuse<br />
abheben.<br />
2. Anschlussklemme 3 abziehen.<br />
3. Schrauben am Montagerahmen 2 lösen.<br />
1<br />
5<br />
70 0112 00<br />
Anwesenheitstaster wg<br />
Staff presence switch wp<br />
2<br />
3<br />
4<br />
grün / green<br />
gelb / yellow<br />
Page 98<br />
= Solder point<br />
to reconnect a broken link<br />
1. Using a screw driver, prize the switch cover from above or below away from the<br />
mounting frame.<br />
2. Remove the connector 3.<br />
3. Unscrew the mounting frame 2 .<br />
P1 P2 P3<br />
70 0113 00<br />
Abstelltaster/WC wg<br />
Cancel switch/WC wp<br />
= 0<br />
= 1<br />
= 2<br />
= 3<br />
= 4<br />
= 5<br />
= 6<br />
= 7<br />
Kanalnummer<br />
Channel number<br />
grau / grey
<strong>Tunstall</strong> <strong>GmbH</strong>, Orkotten 66, D-48291 Telgte, www.tunstall.de<br />
Installationsanleitung D Installation Instructions GB<br />
Rufzugtaster wg, Best.‐Nr. 70 0115 00<br />
Taster zur Rufauslösung durch Tast- oder Zugbetätigung.<br />
Rufzugtaster/WC wg, Best.‐Nr. 70 0115 01<br />
wie 70 0115 00, jedoch für WC-Rufe bzw. WC-Notrufe.<br />
Hinweis! Die vollständige Installation des Systems ist im technischen<br />
Handbuch beschrieben.<br />
Achtung! Die Leiterplatte ist mit elektrostatisch gefährdeten Bauteilen bestückt.<br />
Vermeiden Sie deshalb eine direkte Berührung.<br />
00 8802 04, 06/06 (Rev. 3.0)<br />
Pull cord call switch wp, order no. 70 0115 00<br />
One call button as well as a pull cord for raising a call.<br />
Pull cord call switch/WC wp, order no. 70 0115 01<br />
as 70 0115 00, but for WC calls or WC emergency calls.<br />
Note! The complete installation of the system is described in the technical<br />
manual.<br />
Attention! The printed circuit board includes electrostatic sensitive components.<br />
Avoid touching.<br />
Wandmontage / Deckenmontage Wall installation / Ceiling installation<br />
Wandmontage: siehe Abbildung A1.<br />
Wall installation: Refer to figure A1.<br />
Deckenmontage: ACHTUNG: Die Rufschnur muss von der Zugtaster‐Haube 6 in Richtung Ceiling installation: ATTENTION: The pull cord has to be pulled away from the pull cord<br />
des Tastergehäuses 5 gezogen werden. Eine andere Zugrichtung verhindert die<br />
switch bonnet 6 into the direction of the switch housing 5. Another pull direction prevents a<br />
Rufauslösung (Abbildung A3). Achten Sie deshalb darauf, dass die Zugtaster‐Haube von call activation (figure A3). Therefore pay attention, that the pull cord bonnet is turned away<br />
der Zugrichtung (z.B. Badewanne) abgewandt ist (Abbildung A2).<br />
from the pull direction (eg. bathtub) (figure A2).<br />
Wenn eine Raumwand in der Nähe ist, richten Sie die Zugtaster‐Haube 6 in Richtung der If a room wall is near, turn the pull cord switch bonnet 6 into the direction of the wall. Then<br />
Wand aus. Das Tastergehäuse 5 ist dann von der Wand abgewandt. Eine problemlose<br />
Rufauslösung ist gewährleistet.<br />
the switch housing 5 is turned away from the wall. A correct call activation is guaranteed.<br />
Montage Mounting<br />
1* Einbaudose<br />
2 Zugtaster-Basis<br />
3 Montagerahmen<br />
4* Anschlussklemme (70 0807 00)<br />
5 Tastergehäuse mit Leiterplatte (vormontiert)<br />
6 Zugtaster-Haube<br />
7 Rufschnur<br />
8 Rufgriff * nicht im Lieferumfang enthalten.<br />
1. Angeschlossene Anschlussklemme 4 durch die Zugtaster‐Basis 2 und den<br />
Montagerahmen 3 ziehen.<br />
Einbaurichtung von Zugtaster‐Basis und Montagerahmen beachten, siehe Abbildung B!<br />
2. Montagerahmen 3 auf die Zugtaster‐Basis 2 drücken.<br />
3. Zugtaster‐Basis 2 inkl. Montagerahmen 3 mit vier Schrauben und Dübeln an die Wand<br />
schrauben. Eine Befestigung in der Einbaudose ist nicht ausreichend!<br />
4. Anschlussklemme 4 in die eingebaute Buchse am Taster 5 stecken.<br />
5. Tastergehäuse 5 auf den Montagerahmen 3 drücken, bis es einrastet.<br />
Einbaurichtung beachten! Das heißt, Symbole korrekt orientieren.<br />
6. Die Zugtaster‐Haube 6 von oben auf den Taster schieben, bis sie einrastet.<br />
7. Die Rufschnur 7 auf die gewünschte Länge kürzen und im Rufgriff 8 neu verknoten.<br />
1* Back box<br />
2 Pull cord switch base<br />
3 Mounting frame<br />
4* Connector (70 0807 00)<br />
5 Switch housing with pre‐installed PCB<br />
6 Pull cord switch bonnet<br />
7 Pull cord<br />
8 Red cord grip * not included in product delivery.<br />
1. Pull the pre‐assembled connector 4 through the pull cord switch base 2 and the<br />
mounting frame 3. Take into account the correct orientation of the pull cord switch base<br />
and of the mounting frame as shown in figure B!<br />
2. Press the mounting frame 3 onto the pull cord switch base 2.<br />
3. Screw the pull cord switch base 2 incl. the mounting frame 3 on the wall using four<br />
screws and dowels. A fixing onto the back box is not stable enough!<br />
4. Plug the connector 4 into the socket on the switch housing 5.<br />
5. Push and lock in the switch housing 5 onto the mounting frame 3.<br />
Note the orientation! I.e. place the symbols in the correct direction.<br />
6. Push and lock the pull cord switch bonnet 6 from above onto the switch.<br />
7. If needed, shorten the cord 7 to length and fix the grip 8 by tying a knot accordingly.<br />
Anschluss Zimmerbus (RAN) ohne Sprechen Connection of room bus (RAN) without speech<br />
vom RAN-Teilnehmer<br />
B (lack) = 0V schwarz<br />
B<br />
Y (ellow) = RAN gelb<br />
Y<br />
R (ed) = +24 V rot<br />
R<br />
from RAN user<br />
Kanalcodierung Channel coding<br />
Nur wenn die Bildung von Funktionseinheiten gewünscht ist, müssen die Taster<br />
verschiedenen Kanälen zugeordnet werden. Hierzu muss die Leiterplatte im Tastergehäuse<br />
5 freigelegt werden. Zum Freilegen der Leiterplatte die Rasthaken der Kunststoffkappe<br />
einzeln vorsichtig lösen. Die Kanalnummern werden an einer markierten Stelle auf der<br />
Leiterplatte (P1, P2, P3) durch Trennen (Messer) bzw. Verbinden (Löten) eingestellt.<br />
Werkseitig ist immer die Kanalnummer 0 eingestellt.<br />
Die einzustellende Kanalnummer entnehmen Sie dem Installationsplan.<br />
Beispiel Kanalnummer 6:<br />
P2 und P3 trennen<br />
= 6<br />
= werkseitig verbunden<br />
= getrennt<br />
= Lötpunkt<br />
Zum Wiederverbinden<br />
getrennter Leitungen<br />
B(lack) = 0V<br />
Y(ellow) = RAN<br />
R(ed) = +24 V<br />
Only if functional units are requested, the call switches have to be assigned to different chan‐<br />
nels. For this the printed circuit board (PCB) within the switch housing 5 must be exposed. To<br />
expose the PCB, carefully unlock each locking nose separately from the plastic cover. The<br />
channel number is configured at the position marked on the PCB (P1, P2, P3) by breaking the<br />
links (cutter) or reconnecting (solder). The product is pre‐set on channel 0.<br />
For the channel number to be set, please refer to the appropriate installation drawing.<br />
Example channel number 6:<br />
Break links P2 and P3<br />
= 6<br />
= pre-set link<br />
= broken link<br />
B<br />
Y<br />
R<br />
= Solder point<br />
to reconnect a broken link<br />
Demontage Dismantling<br />
1. Zugtaster‐Haube 6 nach oben abschieben. Zum Lösen des Scharniers evtl. von unten 1. Remove up the pull cord switch bonnet 6. To release the hinges you may beat lateral<br />
seitlich gegen die Zugtaster‐Haube schlagen.<br />
from below against the pull cord switch bonnet.<br />
2. Tastergehäuse 5 mit Schraubendreher vom Montagerahmen 3 abhebeln.<br />
2. Using a screw driver, lift the switch housing 5 from the mounting frame 3.<br />
3. Anschlussklemme 4 abziehen.<br />
3. Remove the connector 4.<br />
4. Befestigungsschrauben von Montagerahmen 3 und Zugtaster‐Basis 2 lösen.<br />
4. Unscrew the fixing screws from the mounting frame 3 and the pull cord switch base 2.<br />
5. Montagerahmen 3 von Zugtaster‐Basis 2 abheben.<br />
5. Lift the mounting frame 3 from the pull cord switch base 2.<br />
Ï<br />
Ï<br />
Ï<br />
Ï<br />
ÏÏÏÏÏÏÏÏÏ<br />
6<br />
7<br />
5<br />
ÀÀ<br />
Ï ÀÀÀ ÀÀ<br />
ÀÀÀ<br />
A1 A2<br />
A3<br />
70 0115 00<br />
Rufzugtaster wg<br />
Pull cord call switch wp<br />
6 5<br />
7<br />
Verboten!<br />
Forbidden!<br />
70 0115 01<br />
Rufzugtaster/WC wg<br />
Pull cord call switch/WC wp<br />
1<br />
2<br />
6<br />
Page 99<br />
3<br />
5<br />
7<br />
4<br />
8<br />
P1 P2 P3<br />
0 =<br />
1 =<br />
2 =<br />
3 =<br />
4 =<br />
5 =<br />
6 =<br />
7 =<br />
Kanalnummer<br />
Channel number
<strong>Tunstall</strong> <strong>GmbH</strong>, Orkotten 66, D-48291 Telgte, www.tunstall.de<br />
Installationsanleitung D Installation Instructions GB<br />
Ruftaster/WC mit Abstelltaste wg, Best.‐Nr. 70 0117 00<br />
Rote Ruftaste und graue Abstelltaste zum Auslösen und Abstellen von WC-Rufen und<br />
WC-Notrufen. Ruftaste mit Beruhigungslicht und Findelicht.<br />
Ruftaster mit Privattaste wg, Best.‐Nr. 70 0118 00<br />
Rote Ruftaste mit Beruhigungslicht und Findelicht zur Rufauslösung. Graue Privattaste zur<br />
lokalen Schaltung der Mithörsperre.<br />
Hinweis! Die vollständige Installation des Systems ist im technischen<br />
Handbuch beschrieben.<br />
Achtung! Die Leiterplatte ist mit elektrostatisch gefährdeten Bauteilen bestückt.<br />
Vermeiden Sie deshalb eine direkte Berührung.<br />
00 8802 02, 09/11 (Rev. 3.1)<br />
Call switch/WC with cancel switch wp, order no. 70 0117 00<br />
Red call button and grey cancel button for raising and cancelling WC calls and WC<br />
emergency calls. Call button with reassurance light and location light.<br />
Call switch with privacy switch, order no. 70 0118 00<br />
Red call button with reassurance light and location light for raising calls. Grey privacy<br />
button for local switching of privacy.<br />
Note! The complete installation of the system is described in the technical<br />
manual.<br />
Attention! The printed circuit board includes electrostatic sensitive components.<br />
Avoid touching.<br />
Montage Mounting<br />
1* Einbaudose<br />
4 Tastergehäuse mit Leiterplatte (vormontiert) 1* Back box<br />
4 Switch housing with pre‐installed printed circuit board<br />
2 Montagerahmen<br />
5 Klemmkralle (bei fehlender Schraubmöglichkeit) 2 Mounting frame<br />
5 Fixing clamp (if screw fixing is not possible)<br />
3* Anschlussklemme (70 0807 00)<br />
3* Connector (70 0807 00)<br />
* ist nicht im Lieferumfang enthalten.<br />
* not included with product delivery.<br />
1. Angeschlossene Anschlussklemme 3 durch den Montagerahmen 2 ziehen.<br />
1. Pull the cable‐connected connector 3 through the mounting frame 2.<br />
2. Montagerahmen 2 an den Schraubpunkten der Einbaudose 1 verschrauben. Bei<br />
2. Screw the mounting frame 2 to the back box 1. If screw fixing is not possible, use the<br />
fehlender Schraubmöglichkeit dient die Klemmkralle 5 zur Befestigung des<br />
fixing clamp 5 to fix the mounting frame to the box. The fixing clamp cannot be used<br />
Montagerahmens. Klemmkralle nicht für Hohlwanddosen geeignet.<br />
with back boxes for partition walls.<br />
3. Anschlussklemme 3 in die eingebaute Buchse der Leiterplatte im Tastergehäuse 4 3. Plug the connector 3 into the socket on the printed circuit board within the switch<br />
stecken.<br />
housing 4.<br />
4. Tastergehäuse 4 über den Montagerahmen 2 drücken und einrasten lassen.<br />
4. Push and lock in the switch housing 4 onto the mounting frame 2.<br />
Anschluss Zimmerbus (RAN) ohne Sprechen Connection of room bus (RAN) without speech<br />
vom RAN-Teilnehmer<br />
B (lack) = 0V schwarz<br />
Y (ellow) = RAN gelb<br />
R (ed) = +24 V rot<br />
B<br />
Y<br />
R<br />
from RAN user<br />
B (lack) = 0V<br />
Y (ellow) = RAN<br />
R (ed) = +24 V<br />
B<br />
Y<br />
R<br />
Kanalcodierung Channel coding<br />
Nur wenn die Bildung von Funktionseinheiten gewünscht ist, müssen die Taster<br />
verschiedenen Kanälen zugeordnet werden. Hierzu muss die Leiterplatte im Tastergehäuse<br />
4 freigelegt werden.<br />
Zum Freilegen der Leiterplatte die Rasthaken der Kunststoffkappe einzeln vorsichtig<br />
lösen.<br />
Die Kanalnummern werden an einer markierten Stelle auf der Leiterplatte (P1, P2, P3)<br />
durch Trennen (Messer) bzw. Verbinden (Löten) eingestellt. Werkseitig ist immer die<br />
Kanalnummer 0 eingestellt.<br />
Die einzustellende Kanalnummer entnehmen Sie dem Installationsplan.<br />
Beispiel Kanalnummer 6:<br />
P2 und P3 trennen<br />
= 6<br />
= werkseitig verbunden<br />
= getrennt<br />
= Lötpunkt<br />
Zum Wiederverbinden<br />
getrennter Leitungen<br />
Only if functional units are requested, the switches have to be assigned to different<br />
channels. For this the printed circuit board (PCB) within the switch housing 4 must be<br />
exposed.<br />
To expose the PCB, carefully unlock each locking nose separately from the plastic<br />
cover.<br />
The channel number is configured at the position marked on the PCB (P1, P2, P3) by<br />
breaking the links (cutter) or reconnecting (solder). The product is pre‐set on channel 0.<br />
For the channel number to be set please refer to the installation plan.<br />
Example channel number 6:<br />
Break links P2 and P3<br />
= 6<br />
= pre-set link<br />
= broken link<br />
Demontage Dismantling<br />
1. Schraubendreher an einer der beiden Rastnasen ansetzen und Tastergehäuse<br />
abheben.<br />
2. Anschlussklemme 3 abziehen.<br />
3. Schrauben am Montagerahmen 2 lösen.<br />
1<br />
5<br />
70 0117 00<br />
Ruftaster/WC mit Abstelltaste wg<br />
Call switch/WC with cancel switch wp<br />
2<br />
3<br />
4<br />
rot / red<br />
grau / grey<br />
Page 100<br />
= Solder point<br />
to reconnect a broken link<br />
1. Using a screw driver, prize the switch cover from above or below away from the<br />
mounting frame.<br />
2. Remove the connector 3.<br />
3. Unscrew the mounting frame 2 .<br />
P1 P2 P3<br />
= 0<br />
= 1<br />
= 2<br />
= 3<br />
= 4<br />
= 5<br />
= 6<br />
= 7<br />
Kanalnummer<br />
Channel number<br />
70 0118 00<br />
Ruftaster mit Privattaste wg<br />
Call switch with privacy switch wp<br />
rot / red<br />
grau / grey
<strong>Tunstall</strong> <strong>GmbH</strong>, Orkotten 66, D-48291 Telgte, www.tunstall.de<br />
Installationsanleitung D Installation Instructions GB<br />
Anwesenheits‐Kombination mit Rufton wg, Best.‐Nr. 70 0119 00<br />
Grüne Anwesenheitstaste mit integriertem Erinnerungslicht zum Ein‐ und Ausschalten der<br />
Personalanwesenheit. Rote Ruftaste mit Beruhigungslicht und Findelicht zum Auslösen von<br />
Rufen. Signalgeber zur akustischen Signalisierung nachgesendeter Rufe.<br />
Abstelltaster/WC mit Rufton wg, Best.‐Nr. 70 0183 00<br />
Zwei graue Abstelltasten mit integriertem Erinnerungslicht zur lokalen Abstellung von<br />
WC‐Rufen und WC‐Notrufen. Signalgeber zur akustischen Signalisierung nachgesendeter<br />
Rufe. Vorzugsweise zur separaten Abstellung von Rufen aus WC-Räumen, die Patienten‐<br />
zimmern zugeordnet sind.<br />
Hinweis! Die vollständige Installation des Systems ist im technischen<br />
Handbuch beschrieben.<br />
Achtung! Die Leiterplatte ist mit elektrostatisch gefährdeten Bauteilen bestückt.<br />
Vermeiden Sie deshalb eine direkte Berührung.<br />
00 8802 03, 09/11 (Rev. 3.1)<br />
Staff presence combination with call tone wp, order no. 70 0119 00<br />
Green presence button with integrated reminder light for activating and deactivating of staff<br />
presence. Red call button with reassurance light and location light for raising calls. Tone<br />
generator for acoustic signalling of forwarded calls.<br />
Cancel switch/WC with call tone, order no. 70 0183 00<br />
Two grey cancel buttons with integrated reminder light for local cancelling of WC calls and<br />
WC emergency calls. Tone generator for acoustic signalling of forwarded calls. Preferably<br />
for cancelling of calls in WC rooms en-suite to a patient room.<br />
Note! The complete installation of the system is described in the technical<br />
manual.<br />
Attention! The printed circuit board includes electrostatic sensitive components.<br />
Avoid touching.<br />
Montage Mounting<br />
1* Einbaudose<br />
4 Tastergehäuse mit Leiterplatte (vormontiert) 1* Back box<br />
4 Switch housing with pre‐installed printed circuit board<br />
2 Montagerahmen<br />
5 Klemmkralle (bei fehlender Schraubmöglichkeit) 2 Mounting frame<br />
5 Fixing clamp (if screw fixing is not possible)<br />
3* Anschlussklemme (70 0807 00)<br />
3* Connector (70 0807 00)<br />
* ist nicht im Lieferumfang enthalten.<br />
* not included with product delivery.<br />
1. Angeschlossene Anschlussklemme 3 durch den Montagerahmen 2 ziehen.<br />
1. Pull the cable‐connected connector 3 through the mounting frame 2.<br />
2. Montagerahmen 2 an den Schraubpunkten der Einbaudose 1 verschrauben. Bei<br />
2. Screw the mounting frame 2 to the back box 1. If screw fixing is not possible, use the<br />
fehlender Schraubmöglichkeit dient die Klemmkralle 5 zur Befestigung des<br />
fixing clamp 5 to fix the mounting frame to the box. The fixing clamp cannot be used<br />
Montagerahmens. Klemmkralle nicht für Hohlwanddosen geeignet.<br />
with back boxes for partition walls.<br />
3. Anschlussklemme 3 in die eingebaute Buchse der Leiterplatte im Tastergehäuse 4 3. Plug the connector 3 into the socket on the printed circuit board within the switch<br />
stecken.<br />
housing 4.<br />
4. Tastergehäuse 4 über den Montagerahmen 2 drücken und einrasten lassen.<br />
4. Push and lock in the switch housing 4 onto the mounting frame 2.<br />
Anschluss Zimmerbus (RAN) ohne Sprechen Connection of room bus (RAN) without speech<br />
vom RAN-Teilnehmer<br />
B (lack) = 0V schwarz<br />
Y (ellow) = RAN gelb<br />
R (ed) = +24 V rot<br />
B<br />
Y<br />
R<br />
from RAN user<br />
B (lack) = 0V<br />
Y (ellow) = RAN<br />
R (ed) = +24 V<br />
B<br />
Y<br />
R<br />
Kanalcodierung Channel coding<br />
Nur wenn die Bildung von Funktionseinheiten gewünscht ist, müssen die Taster<br />
verschiedenen Kanälen zugeordnet werden. Hierzu muss die Leiterplatte im Tastergehäuse<br />
4 freigelegt werden.<br />
Zum Freilegen der Leiterplatte die Rasthaken der Kunststoffkappe einzeln vorsichtig<br />
lösen.<br />
Die Kanalnummern werden an einer markierten Stelle auf der Leiterplatte (P1, P2, P3)<br />
durch Trennen (Messer) bzw. Verbinden (Löten) eingestellt. Werkseitig ist immer die<br />
Kanalnummer 0 eingestellt.<br />
Die einzustellende Kanalnummer entnehmen Sie dem Installationsplan.<br />
Beispiel Kanalnummer 6:<br />
P2 und P3 trennen<br />
= 6<br />
= werkseitig verbunden<br />
= getrennt<br />
= Lötpunkt<br />
Zum Wiederverbinden<br />
getrennter Leitungen<br />
Only if functional units are requested, the switches have to be assigned to different<br />
channels. For this the printed circuit board (PCB) within the switch housing 4 must be<br />
exposed.<br />
To expose the PCB, carefully unlock each locking nose separately from the plastic<br />
cover.<br />
The channel number is configured at the position marked on the PCB (P1, P2, P3) by<br />
breaking the links (cutter) or reconnecting (solder). The product is pre‐set on channel 0.<br />
For the channel number to be set please refer to the installation plan.<br />
Example channel number 6:<br />
Break links P2 and P3<br />
= 6<br />
= pre-set link<br />
= broken link<br />
Demontage Dismantling<br />
1. Schraubendreher an einer der beiden Rastnasen ansetzen und Tastergehäuse<br />
abheben.<br />
2. Anschlussklemme 3 abziehen.<br />
3. Schrauben am Montagerahmen 2 lösen.<br />
1<br />
5<br />
2<br />
70 0119 00<br />
Anwesenheits-Kombination mit Rufton wg<br />
Staff presence combination with call tone wp<br />
3<br />
4<br />
= Solder point<br />
to reconnect a broken link<br />
1. Using a screw driver, prize the switch cover from above or below away from the<br />
mounting frame.<br />
2. Remove the connector 3.<br />
3. Unscrew the mounting frame 2 .<br />
P1 P2 P3<br />
= 0<br />
= 1<br />
= 2<br />
= 3<br />
= 4<br />
= 5<br />
= 6<br />
= 7<br />
Kanalnummer<br />
Channel number<br />
grün / green 70 0183 00<br />
Abstelltaster/WC mit Rufton wg<br />
rot / red grau / grey<br />
Cancel switch/WC with call tone wp<br />
Page 101
14. Product leaflets<br />
Page 102<br />
<strong>Flamenco</strong> - <strong>Technical</strong> <strong>Manual</strong>, 10/11 (Rev. 5.0), 00 8812 60
14.3 Room terminals<br />
77 0510 00 ComTerminal <strong>Flamenco</strong><br />
77 0520 00 RoomTerminal <strong>Flamenco</strong><br />
77 0550 00 ControlTerminal <strong>Flamenco</strong><br />
77 0551 00 ControlTerminal with doorplate <strong>Flamenco</strong><br />
<strong>Flamenco</strong> - <strong>Technical</strong> <strong>Manual</strong>, 10/11 (Rev. 5.0), 00 8812 60<br />
Page 103<br />
14. Product leaflets
<strong>Tunstall</strong> <strong>GmbH</strong>, Orkotten 66, D-48291 Telgte, www.tunstall.de<br />
Installationsanleitung D Installation Instructions GB<br />
ComTerminal <strong>Flamenco</strong>, Best.‐Nr. 77 0510 00<br />
Universelles Kommunikationsterminal in Gegensprechtechnik inkl. roter Ruftaste, blauer<br />
Alarmtaste, grüner Anwesenheitstaste (AW1), gelber Anwesenheitstaste (AW2),<br />
4 Funktionstasten mit situationsabhängiger Belegung, Mikrofon und Lautsprecher.<br />
120 mm<br />
120 mm<br />
Hinweis! Die vollständige Installation des Systems ist im technischen<br />
Handbuch beschrieben.<br />
Vorsicht! Die Leiterplatte ist mit elektrostatisch gefährdeten Bauteilen bestückt.<br />
Vermeiden Sie deshalb eine direkte Berührung.<br />
Vorsicht! Lassen Sie das Terminal‐Frontteil nicht auf eine harte Oberfläche fallen<br />
und setzen es auch nicht einem beträchtlichen Druck oder Stoß aus. Die<br />
Bedienfront des ComTerminals besteht aus Glas und kann brechen.<br />
Montage der Terminal‐Rückwand Mounting pattress<br />
00 8802 97, 09/09 (Rev. 1.3)<br />
Beachten Sie beim Setzen der Einbaudosen den Platzbedarf<br />
des ComTerminals. Vom Mittelpunkt der Dose muss nach oben<br />
und unten ein Platzbedarf von mindestens 120 mm vorgesehen<br />
werden.<br />
1. Anschlussleitungen durch den Ausbruch in der Terminal‐Rückwand 2 führen.<br />
2. Terminal‐Rückwand 2 mit den Schrauben 1 der Einbaudose auf der Einbaudose<br />
festschrauben. Vorsicht! Die 2 Leitungen 3 zu den Lautsprechern 4 nicht abziehen.<br />
Hinweis! Wenn die Montage auf einer Einbaudose nicht möglich ist, kann das ComTerminal<br />
mit Schrauben und Dübeln an der Wand befestigt werden, wobei dieselben Bohrungen in<br />
der Terminal‐Rückwand benutzt werden.<br />
Anschließend Anschlussleitungen von Gruppenbus OSYnet und Zimmerbus RAN am<br />
Anschlussfeld der Terminal‐Rückwand 2 gemäß dem Anschlussplan anschließen (siehe<br />
Seite “Anschlüsse”).<br />
ComTerminal <strong>Flamenco</strong>, order no. 77 0510 00<br />
Universal communication terminal with two-way speech communication, incl. red call<br />
button, blue code blue/cardiac alarm button, green presence button (staff 1), yellow<br />
presence button (staff 2), 4 function keys as soft keys, microphone and loudspeakers.<br />
120 mm<br />
120 mm<br />
Montage des Terminal‐Frontteils Mounting front panel<br />
1. Flachkabel 7 des Terminal‐Frontteils 6 in die zugehörige Buchse auf der<br />
Terminal‐Rückwand 2 stecken.<br />
2. Terminal-Frontteil 6 oben auf die Terminal-Rückwand 2 aufsetzen, so dass ein Scharnier<br />
8 entsteht. Anschließend das Terminal-Frontteil mit leichten Druck (Glasbruchgefahr!)<br />
auf die Terminal-Rückwand herunterdrücken, bis die Rastnase 9 einrastet. Dabei darauf<br />
achten, dass das Flachkabel 7 nicht eingeklemmt wird.<br />
3. Zur Sicherung kann eine Sicherungsschraube 10 unten in die Bohrung unterhalb der<br />
gelben Anwesenheitstaste eingeschraubt werden.<br />
Abschließend muss das ComTerminal konfiguriert werden (siehe S. “Konfigurationsanleitung”).<br />
Demontage Dismantling<br />
1. Falls eine Sicherungsschraube 10 unten am ComTerminal eingeschraubt ist, die<br />
Schraube lösen.<br />
2. Mit dem Schraubendreher Rastnase 9 vorsichtig nach oben drücken, bis sich das<br />
Terminal-Frontteil 6 löst.<br />
3. Das Terminal-Frontteil 6 nach unten abnehmen.<br />
4. Stecker des Flachkabels 7 von Terminal‐Rückwand 2 abziehen.<br />
5. Terminal‐Frontteil 6 geschützt ablegen. Vorsicht: Elektrostatisch gefährdete Bauteile!<br />
Vorsicht: Glas!<br />
1<br />
1* Vier Schrauben der Einbaudose<br />
2 Terminal‐Rückwand<br />
3 Zwei Anschlussleitungen<br />
zu den Lautsprechern<br />
4 Zwei Lautsprecher<br />
5* Einbaudose<br />
4<br />
3<br />
2<br />
6 Terminal‐Frontteil<br />
7 Flachkabel<br />
8 Scharnier<br />
9 Rastnase<br />
10 Sicherungsschraube (optional)<br />
* ist nicht im Lieferumfang enthalten<br />
5<br />
77 0510 00<br />
ComTerminal <strong>Flamenco</strong> ®<br />
9<br />
Page 104<br />
Note! The complete installation of the system is described in the technical<br />
manual.<br />
Caution! The printed circuit board includes electrostatic sensitive components.<br />
Avoid touching.<br />
Caution! The operating front cover of the ComTerminal is made of glass. Handle<br />
with care! The glass could break if it is dropped on a hard surface or receives a<br />
substantial impact.<br />
When installing the back box consider the space required for the<br />
complete ComTerminal. Measuring from the centre of the box, the<br />
available space must be at least 120 mm above and below.<br />
1. Insert the connection cables through the outlet in the pattress 2.<br />
2. Fix the pattress 2 using the back box screws 1 to the back box. Caution! Do not<br />
disconnect the wire connections 3 to the loudspeakers 4.<br />
Note! If mounting on a back box is not possible, the ComTerminal may be fixed to the wall<br />
with dowels and screws using the same holes in the pattress.<br />
Afterwards the connection cables to the group bus OSYnet and to the room bus RAN have<br />
to be connected to the connection field in the pattress 2 according to the connection plan<br />
(see page “Connections”).<br />
1. Plug the flat cable 7 of the front panel 6 into the appropriate socket on the connection<br />
field in the pattress 2.<br />
2. Place front panel 6 onto the top of the pattress 2 creating a hinge 8. Now press the front<br />
panel downwards onto the pattress with low pressing power (glass!) until the catch 9<br />
engages. Make sure that the flat cable 7 is not pinched.<br />
3. For improved security a security screw 10 can be fitted into the hole below the yellow<br />
presence button.<br />
Finally the ComTerminal has to be configured (see page “Configuration Instructions”).<br />
1. If a security screw 10 is fitted into the base of the ComTerminal, remove it.<br />
2. Use a screwdriver to push the catch 9 upwards until the front panel 6 looses.<br />
3. Remove the front panel 6.<br />
4. Disconnect the flat cable 7 from the pattress 2.<br />
5. Lay down the front panel 6 protected. Caution: Electrostatic sensitive components!<br />
Caution: Glass!<br />
1* Four back box screws<br />
2 Pattress<br />
3 Two connections to the two loudspeakers<br />
4 Two loudspeakers<br />
5* Back box<br />
205 mm<br />
110 mm<br />
7<br />
8<br />
Funktionstasten<br />
Function keys<br />
2<br />
6<br />
10<br />
8<br />
9<br />
6 Front panel<br />
7 Flat cable<br />
8 Hinge<br />
9 Catch<br />
10 Security screw (option)<br />
* not included<br />
2
Anschlüsse D Connections GB<br />
ComTerminal <strong>Flamenco</strong>, Best.‐Nr. 77 0510 00<br />
Wichtige Hinweise<br />
Leiterquerschnitte: 0,2 ‐ 2,5 mm 2<br />
Alle Leitungen für die Sprachübertragung (geschirmte Leitungen) dürfen maximal 30 mm<br />
abgemantelt werden, damit die Schirmfunktion erhalten bleibt.<br />
Zur Vermeidung von Kurzschlüssen den Beidraht (SCH‐B) isolieren.<br />
Schraubendreherklinge: 0,6 x 3,5 mm<br />
Abisolierlänge der Drähte: 6 mm<br />
Bei kleinen Leitungsquerschnitten mehrere Leiter pro Klemme möglich.<br />
Gruppenbus (OSYnet) Zimmerbus (RAN)<br />
Power<br />
Spannungsversorgung<br />
Kabel: NYM 2x2,5 mm 2<br />
Zimmerbus (RAN)<br />
mit Sprechen<br />
(max. 2 Anschlüsse)<br />
Kabel: CCS32‐Kabel<br />
00 8802 97, 09/09 (Rev. 1.3)<br />
+24 V<br />
0 V<br />
Zimmerbus (RAN) +24 V - Si<br />
mit Sprechen<br />
(max. 2 Anschlüsse)<br />
Kabel: 2x IY(ST)Y 2x2x0,8<br />
RAN<br />
0V<br />
0V<br />
RAN<br />
LS<br />
MIC<br />
SCH B<br />
Zimmerbus (RAN)<br />
ohne Sprechen<br />
+24 V - Si<br />
(max. 4 Anschlüsse) RAN<br />
Kabel: IY(ST)Y 2x2x0,8<br />
0V<br />
Gruppenbus OSYnet<br />
Kabel: CAT5‐Kabel<br />
Gruppenbus OSYnet<br />
Kabel: IY(ST)Y 4x2x0,8<br />
77 0510 00<br />
ComTerminal <strong>Flamenco</strong> ®<br />
LS<br />
MIC<br />
SCH B<br />
+24 V - Si<br />
D‐L<br />
D‐H<br />
D‐G<br />
NF 1a<br />
NF 1b<br />
NF 2a<br />
NF 2b<br />
D‐L<br />
D‐H<br />
D‐G<br />
NF 1a<br />
NF 1b<br />
NF 2a<br />
NF 2b<br />
}{<br />
rt<br />
ge<br />
sw<br />
ws<br />
ge<br />
ws<br />
sw<br />
rt<br />
br<br />
sw<br />
gr<br />
ws<br />
bl<br />
rt<br />
ge<br />
sw<br />
ws<br />
ws-bl<br />
bl<br />
ws-gn<br />
gn<br />
br<br />
ws-br<br />
or<br />
ws-or<br />
vom letzten Zimmer oder<br />
zum nächsten Zimmer<br />
zur Steckvorrichtung<br />
Kombi oder Kombi Kanal<br />
zur Steckvorrichtung<br />
Kombi oder Kombi Kanal<br />
vom RAN-Teilnehmer<br />
vom vorigen Zimmer<br />
oder zum nächsten Zimmer<br />
ComTerminal <strong>Flamenco</strong>, order no. 77 0510 00<br />
Important notes<br />
Wire cross‐sections: 0.2 - 2.5 mm 2<br />
All cables for speech transmission (shielded cables) may be only be stripped to a maxi‐<br />
mum of 30 mm to maintain the shielding function.<br />
Insulate the shield wire (SCH‐B) to prevent short circuiting.<br />
Screwdriver blade: 0.6 x 3.5 mm<br />
Strip wire to 6 mm.<br />
For smaller wire cross sections more than one wire may be inserted in one connection<br />
terminal.<br />
Power supply<br />
Cable: NYM 2x2.5 mm 2<br />
Room bus (RAN)<br />
with speech<br />
(max. 2 connections)<br />
Cable: 2x IY(ST)Y 2x2x0.8<br />
Room bus (RAN)<br />
with speech<br />
(max. 2 connections)<br />
Cable: CCS32‐Kabel<br />
Room bus (RAN)<br />
without speech<br />
(max. 4 connections)<br />
Cable: IY(ST)Y 2x2x0.8<br />
Group bus (OSYnet)<br />
Cable: CAT5 cable<br />
+24 V - Si<br />
RAN<br />
0V<br />
LS<br />
MIC<br />
SCH B<br />
+24 V - Si<br />
0V<br />
RAN<br />
LS<br />
MIC<br />
SCH B<br />
+24 V<br />
+24 V - Si<br />
RAN<br />
0V<br />
D‐L<br />
D‐H<br />
NF 1a<br />
NF 1b<br />
NF 2a<br />
NF 2b<br />
rt<br />
bl<br />
gn<br />
Group bus (OSYnet)<br />
Cable: IY(ST)Y 4x2x0.8<br />
D‐L<br />
D‐H<br />
ws<br />
vom vorigen Zimmer<br />
oder zum nächsten Zimmer<br />
D‐G<br />
br<br />
NF 1a<br />
ws<br />
NF 1b<br />
ge<br />
NF 2a<br />
ws NF 2b<br />
Anschlussfeld (Schraubklemmen)<br />
Connection field (screw clamps)<br />
Room bus (RAN) Power<br />
Group bus (OSYnet)<br />
Spannungs‐<br />
versorgung<br />
Power supply<br />
Gruppenbus<br />
Group bus<br />
OSYnet<br />
Zimmerbus<br />
Room bus<br />
RAN<br />
Lautsprecher‐Anschluss<br />
Connection to<br />
loudspeakers<br />
Page 105<br />
Nicht benutzen!<br />
Don't use!<br />
D‐G<br />
0 V<br />
}{<br />
brown<br />
black<br />
grey<br />
white<br />
blue<br />
shield<br />
red<br />
yellow<br />
black<br />
white<br />
white-blue<br />
blue<br />
white-green<br />
green<br />
brown<br />
white-brown<br />
orange<br />
white-orange<br />
red<br />
blue<br />
green<br />
white<br />
brown<br />
white<br />
yellow<br />
white<br />
red<br />
yellow<br />
black<br />
white<br />
yellow<br />
white<br />
black<br />
red<br />
from previous room<br />
or to next room<br />
to connection socket<br />
combi or<br />
combi, bedhead unit<br />
to connection socket<br />
combi or<br />
combi, bedhead unit<br />
from RAN user<br />
from previous room<br />
or to next room<br />
from previous room<br />
or to next room<br />
<strong>Tunstall</strong> <strong>GmbH</strong>, Orkotten 66, D-48291 Telgte, www.tunstall.de
<strong>Tunstall</strong> <strong>GmbH</strong>, Orkotten 66, D-48291 Telgte, www.tunstall.de<br />
Konfigurationsanleitung - Seite 1 D Configuration Instructions - Page 1 GB<br />
ComTerminal <strong>Flamenco</strong>, Best.‐Nr. 77 0510 00 ComTerminal <strong>Flamenco</strong>, order no. 77 0510 00<br />
1. Konfigurationsmenü starten 1. Start configuration menu<br />
Funktionstaste ganz links und Funktionstaste ganz rechts gleichzeitig so lange (3 Sek.)<br />
gedrückt halten, bis das Konfigurationsmenü im Display erscheint.<br />
Symbole im Konfigurationsmenü:<br />
= Kreistaste = Markierten Menüpunkt einstellen (und speichern)<br />
= Pfeiltaste nach oben = In der Liste nach oben wandern<br />
= Pfeiltaste nach unten = In der Liste nach unten wandern<br />
= Haustaste = Abbrechen, d.h. zur höheren Menüebene<br />
zurückkehren ohne zu speichern.<br />
00 8802 97, 09/09 (Rev. 1.3)<br />
Funktionstasten<br />
Menüpunkt Bedeutung<br />
Sprache Sprache der Displaytexte einstellen, z.B. Deutsch oder Englisch.<br />
Raumtyp Raumtyp einstellen, z.B. Patientenzimmer.<br />
RAN RAN Anzahl: Anzahl Zimmergeräte (= RAN Anzahl) einstellen.<br />
Test RAN: Test, ob Zimmergeräte funktionsbereit sind und korrekt am RAN<br />
angeschlossen sind.<br />
Status: Prüfung, ob eingestellte RAN Anzahl mit Anzahl funktionsbereiter<br />
Zimmergeräte übereinstimmt.<br />
Adresse Zimmer‐Adresse einstellen (1 bis 110 einstellbar)<br />
Reinigungszeit Sekunden einstellen, die benötigt werden um die Front des ComTerminals<br />
abzuwischen<br />
Kontrast Kontrast des ComTerminal‐Displays auf hoch oder niedrig einstellen<br />
Tastenton Ton bei Drücken der Tasten am ComTerminal ein‐ oder ausschalten<br />
Info Version der Software im ComTerminal anzeigen lassen.<br />
Audio Test Menüpunkt nur zur Verwendung durch <strong>Tunstall</strong>‐Techniker<br />
Tastenfunktion Funktion der Alarmtaste und der Anwesenheitstasten am ComTerminal<br />
ein‐ oder ausschalten (Ein = Standardeinstellung)<br />
Reset Verwendung nur durch <strong>Tunstall</strong>‐Techniker. (ComTerminal neu starten)<br />
Press the left and right function keys simultaneously (3 sec.) until the configuration<br />
menu is shown in the display.<br />
Function keys<br />
Symbols in the configuration menu:<br />
= Circle key = Set (and store) marked menu item<br />
= Upwards arrow key = Scroll upwards through the list<br />
= Downwards arrow key = Scroll downwards through the list<br />
= Home key = Cancel, go back to the higher menu level<br />
without storing<br />
Menu Item Meaning<br />
Language Selecting the user language (e.g. English or German).<br />
Room type Selecting the room type (e.g. Patient room).<br />
RAN RAN number: Setting of number of room devices (= RAN number).<br />
Test RAN: Test if room devices are ready to operate and if they are<br />
correctly connected to the RAN.<br />
Status: Check whether the stored RAN number is equal to the number<br />
of operational room devices.<br />
Address Setting of room address (1 until 110 available)<br />
Cleaning time Setting the time (seconds) how long it takes to clean (wipe) the front<br />
of the ComTerminal<br />
Contrast Setting the display contrast to “high” or “low”.<br />
Key sound Switching the key sound on or off (on = recommended)<br />
Info Displaying the ComTerminal's software version.<br />
Audio Test Function use only for <strong>Tunstall</strong> technicians.<br />
Key Function Switching on or of the function of Alarm Key, Presence Key 1 and<br />
Presence Key 2 (On = standard setting).<br />
Reset Function use only for <strong>Tunstall</strong> technicians. (Restart the ComTerminal)<br />
2. Zwingend erforderliche Einstellungen 2. Entering of necessary settings<br />
Sprache einstellen (wenn Menüpunkt vorhanden)<br />
Mit den Pfeiltasten “Sprache” markieren; dann Kreistaste drücken.<br />
Mit den Pfeiltasten gewünschte Sprache markieren: D = Deutsch, GB = Englisch, E =<br />
Spanisch, F = Französisch, NL = Niederländisch, I = Italienisch. “Selbstdefiniert” = eine<br />
weitere Sprache, wenn diese mit der SystemOrganizer‐Software hinterlegt wurde.<br />
Kreistaste drücken, um markierte Sprache zu speichern.<br />
Raumtyp einstellen<br />
Mit den Pfeiltasten “Raumtyp” markieren; dann Kreistaste drücken.<br />
Mit den Pfeiltasten gewünschten Raumtyp markieren:<br />
- Patientenzimmer<br />
- Patientenzimmer mit Abstelltaste für WC-Ruf im ComTerminal<br />
- Dienstzimmer (Notrufe werden als Normalrufe signalisiert)<br />
- Kinderzimmer (Keine Taste zum Einschalten der Mithörsperre im ComTerminal,<br />
Mithörsperre AUS)<br />
- Anschlussterminal (Tasten und Display im ComTerminal außer Betrieb)<br />
Kreistaste drücken, um markierten Raumtyp zu speichern.<br />
RAN Anzahl einstellen (0 - 30)<br />
RAN Anzahl = Anzahl Zimmergeräte (Taster, Steckvorrichtungen, Zimmerleuchten etc.), die<br />
am ComTerminal über RAN angeschlossen sind (Kein Birntaster, keine PBK Hand).<br />
Achtung, Ausnahme! Eine 4‐teilige Zimmerleuchte (Best.‐Nr. 77 0170 10 oder 77 0171 10)<br />
gilt als zwei Zimmergeräte.<br />
Mit den Pfeiltasten “RAN” markieren; dann Kreistaste drücken.<br />
Mit den Pfeiltasten “RAN Anzahl” markieren; dann Kreistaste drücken.<br />
Mit den Pfeiltasten RAN‐Anzahl des Zimmers markieren.<br />
Kreistaste drücken, um die markierte RAN‐Anzahl zu speichern.<br />
Zimmer-Adresse einstellen (1 - 110)<br />
Mit den Pfeiltasten “Adresse” markieren; dann Kreistaste drücken.<br />
Mit den Pfeiltasten gewünschte Adresse markieren.<br />
Kreistaste drücken, um die markierte Adresse zu speichern.<br />
Selecting the user language (if the menu item is available)<br />
Mark ”Language” using the arrow keys. Then press the circle key.<br />
Mark the desired language using the arrow keys: D = German; GB = English; E = Spa‐<br />
nish; F = French; NL = Dutch; I = Italian. “Custom” = another language, if this is stored<br />
using the SystemOrganizer software.<br />
Press the circle key to store the marked language.<br />
Selecting the room type<br />
Mark “Room type” using the arrow keys. Then press the circle key.<br />
Mark the desired room type using the arrow keys:<br />
- Patient room<br />
- Patient room with cancel key for WC call at ComTerminal<br />
- Staff room (emergency calls are signalled as normal calls)<br />
- Children's room (no key to switch the privacy function at ComTerminal, Privacy OFF)<br />
- Connection terminal (keys and display at ComTerminal non-operational)<br />
Press the circle key to store the marked room type.<br />
Setting of RAN number (0 - 30) (Room Area Network)<br />
RAN number = Number of devices in the room (switches, connection sockets, room lamps,<br />
etc.) which are connected to the ComTerminal via RAN. (No pear push switch, no patient<br />
handset). Attention, exception! One room lamp with 4 sections (order no. 77 0170 10 or 77<br />
0171 10) is equivalent to two room devices.<br />
Mark “RAN” using the arrow keys. Then press the circle key.<br />
Mark “RAN number” using the arrow keys. Then press the circle key.<br />
Mark the desired room number for the room using the arrow keys.<br />
Press the circle key to store the marked address.<br />
Setting of room address (1 - 110)<br />
Mark “Address” using the arrow keys. Then press the circle key.<br />
Mark the desired room address using the arrow keys.<br />
Press the circle key to store the marked address.<br />
2. Optionale Einstellungen (Teil 1) bei Bedarf vornehmen 2. Entering of optional settings (section 1)<br />
Reinigungszeit einstellen (10 – 30 Sekunden)<br />
Die Reinigungszeit legt fest, wie lange die Tasten des ComTerminals außer Funktion sind,<br />
nachdem die Taste Clean gedrückt wurde (Zeit zum Abwischen der Bedienfront).<br />
Mit den Pfeiltasten “Reinigungszeit” markieren; dann Kreistaste drücken.<br />
Mit den Pfeiltasten gewünschte Reinigungszeit (in Sekunden) markieren.<br />
Kreistaste drücken, um markierte Reinigungszeit zu speichern.<br />
Kontrast des ComTerminal‐Displays einstellen (hoch, niedrig)<br />
Je nach Umgebungslicht ist die Einstellung “hoch” oder “niedrig” besser lesbar.<br />
Mit den Pfeiltasten “Kontrast” markieren; dann Kreistaste drücken.<br />
Mit den Pfeiltasten “hoch” oder “niedrig” markieren.<br />
Kreistaste drücken, um markierten Kontrast zu speichern.<br />
Tastenton ausschalten / einschalten<br />
Auf Wunsch kann der Tastenton der ComTerminal‐Tasten ausgeschaltet werden. Die<br />
Einstellung “Tastenton Ein” wird jedoch empfohlen.<br />
Mit den Pfeiltasten “Tastenton” markieren; dann Kreistaste drücken.<br />
Mit den Pfeiltasten “Ein” oder “Aus” markieren.<br />
Kreistaste drücken, um die markierte Auswahl zu speichern.<br />
Page 106<br />
Setting of cleaning time (10 – 30 seconds)<br />
The cleaning time defines how long the ComTerminal keys are not operational after the<br />
Clean key has been pressed (time for wiping the front).<br />
Mark “Cleaning time” using the arrow keys. Then press the circle key.<br />
Mark the desired cleaning time using the arrow keys.<br />
Press the circle key to store the marked cleaning time.<br />
Setting of display contrast (high, low)<br />
Depending on the ambient light a high or low display contrast is better legible.<br />
Mark “Contrast” using the arrow keys. Then press the circle key.<br />
Mark “high” or “low” using the arrow keys.<br />
Press the circle key to store the marked selection.<br />
Switching the key sound off or on<br />
If required the ComTerminal key sound can be switched off. But the setting “Key sound On”<br />
is recommended.<br />
Mark “Key Sound” using the arrow keys. Then press the circle key.<br />
Mark “On” or “Off” using the arrow keys.<br />
Press the circle key to store the marked selection.
Konfigurationsanleitung - Seite 2 D Configuration Instructions - Page 2 GB<br />
ComTerminal <strong>Flamenco</strong>, Best.‐Nr. 77 0510 00 ComTerminal <strong>Flamenco</strong>, order no. 77 0510 00<br />
2. Optionale Einstellungen (Teil 2) bei Bedarf vornehmen 2. Entering of optional settings (section 2)<br />
Softwareversion anzeigen lassen<br />
Displaying the software version<br />
Mit den Pfeiltasten “Info” markieren; dann Kreistaste drücken.<br />
Mark “Info” using the arrow keys. Then press the circle key.<br />
Softwareversion des ComTerminals wird angezeigt.<br />
The ComTerminal's software version is displayed.<br />
Haustaste drücken um zum Menü zurückzukehren.<br />
Press the home key to return to the menu.<br />
Tastenfunktion ausschalten / einschalten<br />
In der Werkseinstellung des ComTerminal sind die Alarmtaste und beide AW‐Tasten (AW =<br />
Anwesenheit) funktionsbereit. In begründeten Ausnahmefällen ist es möglich die<br />
Tastenfunktion von diesen Tasten auszuschalten.<br />
AW‐Taste 2 (gelb)<br />
00 8802 97, 09/09 (Rev. 1.3)<br />
Alarmtaste (blaues Symbol)<br />
AW‐Taste 1 (grün)<br />
Mit den Pfeiltasten “Tastenfunktion” markieren; dann Kreistaste drücken.<br />
Mit den Pfeiltasten gewünschte Taste (Alarmtaste oder AW‐Taste) markieren;<br />
dann Kreistaste drücken.<br />
Mit den Pfeiltasten “Ein” oder “Aus” markieren.<br />
Kreistaste drücken, um die markierte Auswahl zu speichern.<br />
Achtung! Ausgeschaltete Tasten sind im Pflegebetrieb nicht verfügbar!<br />
Switching on or of the key function<br />
With the factory settings the alarm key and both presence keys are operational. In<br />
well‐founded exceptional cases you can switch of the key function for these keys.<br />
Presence Key 2 (yellow)<br />
3. Zimmerbus RAN prüfen 3. Checking room bus RAN<br />
Status<br />
Prüfung, ob eingestellte RAN Anzahl (siehe oben “RAN Anzahl einstellen”) mit Anzahl<br />
funktionsbereiter Zimmergeräte übereinstimmt.<br />
Mit den Pfeiltasten “RAN” markieren; dann Kreistaste drücken.<br />
Mit den Pfeiltasten “Status” markieren; dann Kreistaste drücken.<br />
Anzeige: OK: ComTerminal hat gemeldet, dass eingestellte RAN Anzahl gleich Anzahl<br />
funktionsbereiter Zimmergeräte ist.<br />
Anzeige: Fehler: ComTerminal hat gemeldet, dass eingestellte RAN Anzahl nicht gleich<br />
Anzahl funktionsbereiter Zimmergeräte ist.<br />
Zum Verlassen der Anzeige Haustaste drücken. Bei Fehler “Test RAN” durchführen.<br />
Test RAN<br />
Test, ob Zimmergeräte funktionsbereit und korrekt am RAN angeschlossen sind.<br />
Mit den Pfeiltasten “RAN” markieren; dann Kreistaste drücken.<br />
Test Starten: Mit den Pfeiltasten “Test RAN” markieren; dann Kreistaste drücken.<br />
Die LEDs aller angeschlossenen Zimmergeräte müssen blinken. (Geräte, die nicht<br />
blinken, sind falsch angeschlossen oder defekt. Defekte Geräte austauschen. Falsch<br />
angeschlossene Geräte korrekt anschließen)<br />
Prüfen, ob Anzahl angeschlossener Zimmergeräte gleich der eingestellten RAN Anzahl<br />
ist. Falls eingestellte RAN‐Anzahl falsch ist, diese nach dem RAN Test wie oben be‐<br />
schrieben einstellen.<br />
Test beenden: Haustaste drücken.<br />
Alarm Key (blue symbol)<br />
Presence Key 1 (green)<br />
Mark “Key Function” using the arrow keys. Then press the circle key.<br />
Mark the desired key (alarm key or presence key) using the arrow keys. Then<br />
press the circle key.<br />
Mark “On” or “Off” using the arrow keys.<br />
Press the circle key to store the marked address.<br />
Attention! Switched off keys are not available for nursing staff!<br />
4. Konfigurationsmenü verlassen 4. Exit the configuration menu<br />
Wenn keine Einstellungen mehr vorgenommen werden sollen und alle Tests beendet sind,<br />
müssen Sie das Konfigurationsmenü verlassen.<br />
Haustaste so oft drücken, bis die normale Betriebsanzeige angezeigt wird.<br />
Hinweis: Wenn drei Minuten keine Funktionstaste gedrückt wird, wird das<br />
Konfigurationsmenü automatisch verlassen.<br />
Status<br />
Check whether the stored RAN number (see above “Setting of RAN number”) is equal to the<br />
number of operational room devices.<br />
Mark “RAN” using the arrow keys. Then press the circle key.<br />
Mark “Status” using the arrow keys. Then press the circle key.<br />
Display: OK: ComTerminal has reported: Stored RAN number is equal to the number of<br />
operational room devices.<br />
Display: Error: ComTerminal has reported: Stored RAN number is not equal to the<br />
number of operational room devices.<br />
Press the home key to end. In case of an error carry out “Test RAN”.<br />
Test RAN<br />
Test if room devices are ready to operate and if they are correctly connected to the RAN.<br />
Check the correct setting of the RAN number.<br />
Mark “RAN” using the arrow keys. Then press the circle key.<br />
Test start: Mark “Test RAN” using the arrow keys. Then press the circle key.<br />
The LEDs of all connected room devices must flash. (Non-flashing devices are wrongly<br />
connected or defective. Replace defective devices. Correct any wrong connection)<br />
Compare the number of connected room devices with the stored RAN number. If the<br />
stored RAN number is not equal to the number of connected room devices, correct the<br />
RAN number setting after the RAN test as described above.<br />
End of test: Press the home key.<br />
When all settings are performed and all tests are finished, exit the configuration menu.<br />
During this procedure all settings are stored.<br />
Press home key until normal operation display appears.<br />
Note: If for a period of three minutes no function key is pressed, the system will leave the<br />
configuration menu.<br />
Page 107<br />
<strong>Tunstall</strong> <strong>GmbH</strong>, Orkotten 66, D-48291 Telgte, www.tunstall.de
<strong>Tunstall</strong> <strong>GmbH</strong>, Orkotten 66, D-48291 Telgte, www.tunstall.de<br />
Installationsanleitung D Installation Instructions GB<br />
ZimmerTerminal <strong>Flamenco</strong>, Best.‐Nr. 77 0520 00<br />
Terminal zum universellen Einsatz in Patientenzimmern, Dienstzimmern und allgemeinen<br />
Funktionsräumen, ohne Sprechkommunikation. Rote Ruftaste, blaue Alarmtaste, grüne<br />
Anwesenheitstaste (AW1), gelbe Anwesenheitstaste (AW2) und 4 Funktionstasten Das<br />
ZimmerTerminal steuert und überwacht alle Zimmerfunktionen gemäß DIN VDE 0834.<br />
Direkter Anschluss an den Gruppenbus (OSYnet) und den Zimmerbus (RAN).<br />
120 mm<br />
120 mm<br />
Hinweis! Die vollständige Installation des Systems ist im technischen<br />
Handbuch beschrieben.<br />
Vorsicht! Die Leiterplatte ist mit elektrostatisch gefährdeten Bauteilen bestückt.<br />
Vermeiden Sie deshalb eine direkte Berührung.<br />
Montage der Terminal‐Rückwand Mounting pattress<br />
00 8801 65, 05/10 (Rev. 1.0)<br />
Beachten Sie beim Setzen der Einbaudosen den Platzbedarf<br />
des ZimmerTerminals. Vom Mittelpunkt der Dose muss nach<br />
oben und unten ein Platzbedarf von mindestens 120 mm<br />
vorgesehen werden.<br />
1. Anschlussleitungen durch den Ausbruch in der Terminal‐Rückwand 2 führen.<br />
2. Terminal‐Rückwand 2 mit den Schrauben 1 der Einbaudose auf der Einbaudose<br />
festschrauben.<br />
Hinweis! Wenn die Montage auf einer Einbaudose nicht möglich ist, kann das<br />
ZimmerTerminal mit Schrauben und Dübeln an der Wand befestigt werden, wobei dieselben<br />
Bohrungen in der Terminal‐Rückwand benutzt werden.<br />
Anschließend Anschlussleitungen von Gruppenbus OSYnet, Zimmerbus RAN und<br />
Spannungsversorgung am Anschlussfeld der Terminal‐Rückwand 2 gemäß dem<br />
Anschlussplan anschließen (siehe Seite “Anschlüsse”).<br />
Room Terminal <strong>Flamenco</strong>, order no. 77 0520 00<br />
Room terminal designed for universal use in patient rooms, duty rooms and general<br />
function rooms, without speech communication. Red call button, blue code blue/cardiac<br />
alarm button, green presence button (staff 1), yellow presence button (staff 2) and 4<br />
function keys as soft keys. Control and monitoring of all room functions in compliance with<br />
DIN VDE 0834. Direct connection to the group bus (OSYnet) and the room bus (RAN).<br />
Note! The complete installation of the system is described in the technical<br />
manual.<br />
Caution! The printed circuit board includes electrostatic sensitive components.<br />
Avoid touching.<br />
120 mm<br />
120 mm<br />
Montage des Terminal‐Frontteils Mounting front panel<br />
1. Flachkabel 5 des Terminal‐Frontteils 4 in die zugehörige Buchse auf der<br />
Terminal‐Rückwand 2 stecken.<br />
2. Terminal-Frontteil 4 oben auf die Terminal-Rückwand 2 aufsetzen, so dass ein Scharnier<br />
6 entsteht. Anschließend das Terminal-Frontteil mit leichten Druck auf die<br />
Terminal-Rückwand herunterdrücken, bis die Rastnase 7 einrastet. Dabei darauf achten,<br />
dass das Flachkabel 5 nicht eingeklemmt wird.<br />
3. Zur Sicherung kann eine Sicherungsschraube 8 unten in die Bohrung unterhalb der<br />
gelben Anwesenheitstaste eingeschraubt werden.<br />
Abschließend muss das ZimmerTerminal konfiguriert werden (siehe S.<br />
“Konfigurationsanleitung”).<br />
Demontage Dismantling<br />
1. Falls eine Sicherungsschraube 8 unten am ZimmerTerminal eingeschraubt ist, die<br />
Schraube lösen.<br />
2. Mit dem Schraubendreher Rastnase 7 vorsichtig nach oben drücken, bis sich das<br />
Terminal-Frontteil 4 löst.<br />
3. Das Terminal-Frontteil 4 nach unten abnehmen.<br />
4. Stecker des Flachkabels 5 von Terminal‐Rückwand 2 abziehen.<br />
5. Terminal‐Frontteil 4 geschützt ablegen. Vorsicht: Elektrostatisch gefährdete Bauteile!<br />
1<br />
1* Vier Schrauben der Einbaudose<br />
2 Terminal‐Rückwand<br />
3* Einbaudose<br />
4 Terminal‐Frontteil<br />
2<br />
5 Flachkabel<br />
6 Scharnier<br />
7 Rastnase<br />
8 Sicherungsschraube (optional)<br />
* ist nicht im Lieferumfang enthalten<br />
77 0520 00<br />
ZimmerTerminal <strong>Flamenco</strong> ®<br />
Room Terminal <strong>Flamenco</strong> ®<br />
3<br />
4<br />
7<br />
Page 108<br />
When installing the back box consider the space required for the<br />
complete Room Terminal. Measuring from the centre of the box, the<br />
available space must be at least 120 mm above and below.<br />
1. Insert the connection cables through the outlet in the pattress 2.<br />
2. Fix the pattress 2 using the back box screws 1 to the back box.<br />
Note! If mounting on a back box is not possible, the Room Terminal may be fixed to the wall<br />
with dowels and screws using the same holes in the pattress.<br />
Afterwards the connection cables to the group bus OSYnet, to the room bus RAN and to the<br />
power supply have to be connected to the connection field in the pattress 2 according to the<br />
connection plan (see page “Connections”).<br />
1. Plug the flat cable 5 of the front panel 4 into the appropriate socket on the connection<br />
field in the pattress 2.<br />
2. Place front panel 4 onto the top of the pattress 2 creating a hinge 6. Now press the front<br />
panel downwards onto the pattress with low pressing power until the catch 7 engages.<br />
Make sure that the flat cable 5 is not pinched.<br />
3. For improved security a security screw 8 can be fitted into the hole below the yellow<br />
presence button.<br />
Finally the Room Terminal has to be configured (see page “Configuration Instructions”).<br />
1. If a security screw 8 is fitted into the base of the Room Terminal, remove it.<br />
2. Use a screwdriver to push the catch 7 upwards until the front panel 4 looses.<br />
3. Remove the front panel 4.<br />
4. Disconnect the flat cable 5 from the pattress 2.<br />
5. Lay down the front panel 4 protected. Caution: Electrostatic sensitive components!<br />
205 mm<br />
5<br />
6<br />
1* Four back box screws<br />
2 Pattress<br />
3* Back box<br />
4 Front panel<br />
110 mm<br />
Funktionstasten<br />
Function keys<br />
2<br />
4<br />
8<br />
6<br />
7<br />
5 Flat cable<br />
6 Hinge<br />
7 Catch<br />
8 Security screw (option)<br />
* not included<br />
2
Anschlüsse D Connections GB<br />
ZimmerTerminal <strong>Flamenco</strong>, Best.‐Nr. 77 0520 00<br />
Wichtige Hinweise<br />
Leiterquerschnitte: 0,2 ‐ 2,5 mm 2<br />
Schraubendreherklinge: 0,6 x 3,5 mm<br />
Abisolierlänge der Drähte: 6 mm<br />
Bei kleinen Leitungsquerschnitten mehrere Leiter pro Klemme möglich.<br />
Gruppenbus (OSYnet) Zimmerbus (RAN) Power<br />
Spannungsversorgung<br />
Kabel: NYM 2x2,5 mm 2<br />
Zimmerbus (RAN)<br />
ohne Sprechen<br />
(max. 4 Anschlüsse)<br />
Kabel: IY(ST)Y 2x2x0,8<br />
Gruppenbus OSYnet<br />
Kabel: CAT5‐Kabel<br />
Gruppenbus OSYnet<br />
Kabel: IY(ST)Y 4x2x0,8<br />
00 8801 65, 05/10 (Rev. 1.0)<br />
+24 V<br />
0 V<br />
+24 V - Si<br />
RAN<br />
0V<br />
D‐L<br />
D‐H<br />
D‐G<br />
NF 1a<br />
NF 1b<br />
NF 2a<br />
NF 2b<br />
D‐L<br />
D‐H<br />
D‐G<br />
NF 1a<br />
NF 1b<br />
NF 2a<br />
NF 2b<br />
rt<br />
ge<br />
sw<br />
ws<br />
ws-bl<br />
bl<br />
ws-gn<br />
gn<br />
br<br />
ws-br<br />
or<br />
ws-or<br />
vom letzten Zimmer oder<br />
zum nächsten Zimmer<br />
vom RAN-Teilnehmer<br />
vom vorigen Zimmer<br />
oder zum nächsten Zimmer<br />
Hinweis! Die Anschlüsse NF 1a, NF 1b, NF 2a und NF 2b sind in folgenden<br />
Installationen nicht erforderlich: Es sind keine ComTerminals (= Terminals mit<br />
Sprachübertragung) an diesem Gruppenbus OSYnet angeschlossen UND es<br />
sollen auch in Zukunft keine ComTerminals an diesen Gruppenbus OSYnet<br />
angeschlossen werden.<br />
77 0520 00<br />
ZimmerTerminal <strong>Flamenco</strong> ®<br />
Room Terminal <strong>Flamenco</strong> ®<br />
Room Terminal <strong>Flamenco</strong>, order no. 77 0520 00<br />
Important notes<br />
Wire cross‐sections: 0.2 - 2.5 mm 2<br />
Screwdriver blade: 0.6 x 3.5 mm<br />
Strip wire to 6 mm.<br />
For smaller wire cross sections more than one wire may be inserted in one connection<br />
terminal.<br />
Room bus (RAN) Power<br />
Group bus (OSYnet)<br />
Power supply<br />
Cable: NYM 2x2.5 mm 2<br />
Room bus (RAN)<br />
without speech<br />
(max. 4 connections)<br />
Cable: IY(ST)Y 2x2x0.8<br />
Group bus (OSYnet)<br />
Cable: CAT5 cable<br />
+24 V<br />
RAN<br />
0V<br />
D‐L<br />
D‐H<br />
NF 1a<br />
NF 1b<br />
NF 2a<br />
NF 2b<br />
rt<br />
bl<br />
gn<br />
Group bus (OSYnet)<br />
Cable: IY(ST)Y 4x2x0.8<br />
D‐L<br />
D‐H<br />
ws<br />
vom vorigen Zimmer<br />
oder zum nächsten Zimmer<br />
D‐G<br />
br<br />
NF 1a<br />
ws<br />
ge<br />
NF 1b<br />
NF 2a<br />
ws NF 2b<br />
Anschlussfeld (Schraubklemmen)<br />
Connection field (screw clamps)<br />
+24 V - Si<br />
D‐G<br />
0 V<br />
red<br />
yellow<br />
black<br />
white<br />
white-blue<br />
blue<br />
white-green<br />
green<br />
brown<br />
white-brown<br />
orange<br />
white-orange<br />
red<br />
blue<br />
green<br />
white<br />
brown<br />
white<br />
yellow<br />
white<br />
from previous room<br />
or to next room<br />
from RAN user<br />
from previous room<br />
or to next room<br />
from previous room<br />
or to next room<br />
Note! The connections NF 1a, NF 1b, NF 2a and NF 2b are not required in the<br />
following installations: There are no ComTerminals (= terminals with speech)<br />
connected to this group bus OSYnet AND there shall not be connected any<br />
ComTerminals to this group bus OSYnet in the future.<br />
Spannungs‐<br />
versorgung<br />
Power supply<br />
Gruppenbus<br />
Group bus<br />
OSYnet<br />
Zimmerbus<br />
Room bus<br />
RAN<br />
Page 109<br />
Nicht benutzen!<br />
Don't use!<br />
<strong>Tunstall</strong> <strong>GmbH</strong>, Orkotten 66, D-48291 Telgte, www.tunstall.de
<strong>Tunstall</strong> <strong>GmbH</strong>, Orkotten 66, D-48291 Telgte, www.tunstall.de<br />
Konfigurationsanleitung - Seite 1 D Configuration Instructions - Page 1 GB<br />
ZimmerTerminal <strong>Flamenco</strong>, Best.‐Nr. 77 0520 00 Room Terminal <strong>Flamenco</strong>, order no. 77 0520 00<br />
1. Konfigurationsmenü starten 1. Start configuration menu<br />
Funktionstaste ganz links und Funktionstaste ganz rechts gleichzeitig so lange (3 Sek.)<br />
gedrückt halten, bis das Konfigurationsmenü im Display erscheint.<br />
Symbole im Konfigurationsmenü:<br />
= Kreistaste = Markierten Menüpunkt einstellen (und speichern)<br />
= Pfeiltaste nach oben = In der Liste nach oben wandern<br />
= Pfeiltaste nach unten = In der Liste nach unten wandern<br />
= Haustaste = Abbrechen, d.h. zur höheren Menüebene<br />
zurückkehren ohne zu speichern.<br />
Menüpunkt Bedeutung<br />
Sprache Sprache der Displaytexte einstellen, z.B. Deutsch oder Englisch.<br />
Raumtyp Raumtyp einstellen, z.B. Patientenzimmer.<br />
RAN RAN Anzahl: Anzahl Zimmergeräte (= RAN Anzahl) einstellen.<br />
Test RAN: Test, ob Zimmergeräte funktionsbereit sind und korrekt am RAN<br />
angeschlossen sind.<br />
Status: Prüfung, ob eingestellte RAN Anzahl mit Anzahl funktionsbereiter<br />
Zimmergeräte übereinstimmt.<br />
Adresse Zimmer‐Adresse einstellen (1 bis 110 einstellbar)<br />
Kontrast Kontrast des ZimmerTerminal‐Displays auf hoch oder niedrig einstellen<br />
Tastenton Ton bei Drücken der Tasten am ZimmerTerminal ein‐ oder ausschalten<br />
Info Version der Software im ZimmerTerminal anzeigen lassen.<br />
Reset Verwendung nur durch <strong>Tunstall</strong>‐Techniker. (ZimmerTerminal neu starten)<br />
00 8801 65, 05/10 (Rev. 1.0)<br />
Funktionstasten<br />
Press the left and right function keys simultaneously (3 sec.) until the configuration<br />
menu is shown in the display.<br />
Function keys<br />
Symbols in the configuration menu:<br />
= Circle key = Set (and store) marked menu item<br />
= Upwards arrow key = Scroll upwards through the list<br />
= Downwards arrow key = Scroll downwards through the list<br />
= Home key = Cancel, go back to the higher menu level<br />
without storing<br />
Menu Item Meaning<br />
Language Selecting the user language (e.g. English or German).<br />
Room type Selecting the room type (e.g. Patient room).<br />
RAN RAN number: Setting of number of room devices (= RAN number).<br />
Test RAN: Test if room devices are ready to operate and if they are<br />
correctly connected to the RAN.<br />
Status: Check whether the stored RAN number is equal to the number<br />
of operational room devices.<br />
Address Setting of room address (1 until 110 available)<br />
Contrast Setting the display contrast to “high” or “low”.<br />
Key sound Switching the key sound on or off (on = recommended)<br />
Info Displaying the Room Terminal's software version.<br />
Reset Function use only for <strong>Tunstall</strong> technicians. (Restart the Room Terminal)<br />
2. Zwingend erforderliche Einstellungen 2. Entering of necessary settings<br />
Sprache einstellen (wenn Menüpunkt vorhanden)<br />
Mit den Pfeiltasten “Sprache” markieren; dann Kreistaste drücken.<br />
Mit den Pfeiltasten gewünschte Sprache markieren: D = Deutsch, GB = Englisch, E =<br />
Spanisch, F = Französisch, NL = Niederländisch, I = Italienisch. “Selbstdefiniert” = eine<br />
weitere Sprache, wenn diese mit der SystemOrganizer‐Software hinterlegt wurde.<br />
Kreistaste drücken, um markierte Sprache zu speichern.<br />
Raumtyp einstellen<br />
Mit den Pfeiltasten “Raumtyp” markieren; dann Kreistaste drücken.<br />
Mit den Pfeiltasten gewünschten Raumtyp markieren:<br />
- Patientenzimmer<br />
- Patientenzimmer mit Abstelltaste für WC-Ruf im ZimmerTerminal<br />
- Dienstzimmer (Notrufe werden als Normalrufe signalisiert)<br />
- Anschlussterminal (Tasten und Display im ZimmerTerminal außer Betrieb)<br />
Kreistaste drücken, um markierten Raumtyp zu speichern.<br />
RAN Anzahl einstellen (0 - 30)<br />
RAN Anzahl = Anzahl Zimmergeräte (Taster, Steckvorrichtungen, Zimmerleuchten etc.), die<br />
am ZimmerTerminal über RAN angeschlossen sind (Kein Birntaster).<br />
Achtung, Ausnahme! Eine 4‐teilige Zimmerleuchte (Best.‐Nr. 77 0170 10 oder 77 0171 10)<br />
gilt als zwei Zimmergeräte.<br />
Mit den Pfeiltasten “RAN” markieren; dann Kreistaste drücken.<br />
Mit den Pfeiltasten “RAN Anzahl” markieren; dann Kreistaste drücken.<br />
Mit den Pfeiltasten RAN‐Anzahl des Zimmers markieren.<br />
Kreistaste drücken, um die markierte RAN‐Anzahl zu speichern.<br />
Zimmer-Adresse einstellen (1 - 110)<br />
Mit den Pfeiltasten “Adresse” markieren; dann Kreistaste drücken.<br />
Mit den Pfeiltasten gewünschte Adresse markieren.<br />
Kreistaste drücken, um die markierte Adresse zu speichern.<br />
2. Optionale Einstellungen bei Bedarf vornehmen 2. Entering of optional settings<br />
Kontrast des ZimmerTerminal‐Displays einstellen (hoch, niedrig)<br />
Je nach Umgebungslicht ist die Einstellung “hoch” oder “niedrig” besser lesbar.<br />
Mit den Pfeiltasten “Kontrast” markieren; dann Kreistaste drücken.<br />
Mit den Pfeiltasten “hoch” oder “niedrig” markieren.<br />
Kreistaste drücken, um markierten Kontrast zu speichern.<br />
Tastenton ausschalten / einschalten<br />
Auf Wunsch kann der Tastenton der ZimmerTerminal‐Tasten ausgeschaltet werden. Die<br />
Einstellung “Tastenton Ein” wird jedoch empfohlen.<br />
Mit den Pfeiltasten “Tastenton” markieren; dann Kreistaste drücken.<br />
Mit den Pfeiltasten “Ein” oder “Aus” markieren.<br />
Kreistaste drücken, um die markierte Auswahl zu speichern.<br />
Softwareversion anzeigen lassen<br />
Mit den Pfeiltasten “Info” markieren; dann Kreistaste drücken.<br />
Softwareversion des ZimmerTerminals wird angezeigt.<br />
Haustaste drücken um zum Menü zurückzukehren.<br />
Page 110<br />
Selecting the user language (if the menu item is available)<br />
Mark ”Language” using the arrow keys. Then press the circle key.<br />
Mark the desired language using the arrow keys: D = German; GB = English; E = Spa‐<br />
nish; F = French; NL = Dutch; I = Italian. “Custom” = another language, if this is stored<br />
using the SystemOrganizer software.<br />
Press the circle key to store the marked language.<br />
Selecting the room type<br />
Mark “Room type” using the arrow keys. Then press the circle key.<br />
Mark the desired room type using the arrow keys:<br />
- Patient room<br />
- Patient room with cancel key for WC call at Room Terminal<br />
- Staff room (emergency calls are signalled as normal calls)<br />
- Connection terminal (keys and display at Room Terminal non-operational)<br />
Press the circle key to store the marked room type.<br />
Setting of RAN number (0 - 30) (Room Area Network)<br />
RAN number = Number of devices in the room (switches, connection sockets, room lamps,<br />
etc.) which are connected to the Room Terminal via RAN. (No pear push switcht). Attention,<br />
exception! One room lamp with 4 sections (order no. 77 0170 10 or 77 0171 10) is<br />
equivalent to two room devices.<br />
Mark “RAN” using the arrow keys. Then press the circle key.<br />
Mark “RAN number” using the arrow keys. Then press the circle key.<br />
Mark the desired room number for the room using the arrow keys.<br />
Press the circle key to store the marked address.<br />
Setting of room address (1 - 110)<br />
Mark “Address” using the arrow keys. Then press the circle key.<br />
Mark the desired room address using the arrow keys.<br />
Press the circle key to store the marked address.<br />
Setting of display contrast (high, low)<br />
Depending on the ambient light a high or low display contrast is better legible.<br />
Mark “Contrast” using the arrow keys. Then press the circle key.<br />
Mark “high” or “low” using the arrow keys.<br />
Press the circle key to store the marked selection.<br />
Switching the key sound off or on<br />
If required the Room Terminal key sound can be switched off. But the setting “Key sound<br />
On” is recommended.<br />
Mark “Key Sound” using the arrow keys. Then press the circle key.<br />
Mark “On” or “Off” using the arrow keys.<br />
Press the circle key to store the marked selection.<br />
Displaying the software version<br />
Mark “Info” using the arrow keys. Then press the circle key.<br />
The Room Terminal's software version is displayed.<br />
Press the home key to return to the menu.
Konfigurationsanleitung - Seite 2 D Configuration Instructions - Page 2 GB<br />
ZimmerTerminal <strong>Flamenco</strong>, Best.‐Nr. 77 0520 00 Room Terminal <strong>Flamenco</strong>, order no. 77 0520 00<br />
3. Zimmerbus RAN prüfen 3. Checking room bus RAN<br />
Status<br />
Prüfung, ob eingestellte RAN Anzahl (siehe oben “RAN Anzahl einstellen”) mit Anzahl<br />
funktionsbereiter Zimmergeräte übereinstimmt.<br />
Mit den Pfeiltasten “RAN” markieren; dann Kreistaste drücken.<br />
Mit den Pfeiltasten “Status” markieren; dann Kreistaste drücken.<br />
Anzeige: OK: ZimmerTerminal hat gemeldet, dass eingestellte RAN Anzahl gleich An‐<br />
zahl funktionsbereiter Zimmergeräte ist.<br />
Anzeige: Fehler: ZimmerTerminal hat gemeldet, dass eingestellte RAN Anzahl nicht<br />
gleich Anzahl funktionsbereiter Zimmergeräte ist.<br />
Zum Verlassen der Anzeige Haustaste drücken. Bei Fehler “Test RAN” durchführen.<br />
Test RAN<br />
Test, ob Zimmergeräte funktionsbereit und korrekt am RAN angeschlossen sind.<br />
Mit den Pfeiltasten “RAN” markieren; dann Kreistaste drücken.<br />
Test Starten: Mit den Pfeiltasten “Test RAN” markieren; dann Kreistaste drücken.<br />
Die LEDs aller angeschlossenen Zimmergeräte müssen blinken. (Geräte, die nicht<br />
blinken, sind falsch angeschlossen oder defekt. Defekte Geräte austauschen. Falsch<br />
angeschlossene Geräte korrekt anschließen)<br />
Prüfen, ob Anzahl angeschlossener Zimmergeräte gleich der eingestellten RAN Anzahl<br />
ist. Falls eingestellte RAN‐Anzahl falsch ist, diese nach dem RAN Test wie oben be‐<br />
schrieben einstellen.<br />
Test beenden: Haustaste drücken.<br />
4. Konfigurationsmenü verlassen 4. Exit the configuration menu<br />
Wenn keine Einstellungen mehr vorgenommen werden sollen und alle Tests beendet sind,<br />
müssen Sie das Konfigurationsmenü verlassen.<br />
Haustaste so oft drücken, bis die normale Betriebsanzeige angezeigt wird.<br />
Hinweis: Wenn drei Minuten keine Funktionstaste gedrückt wird, wird das<br />
Konfigurationsmenü automatisch verlassen.<br />
00 8801 65, 05/10 (Rev. 1.0)<br />
Status<br />
Check whether the stored RAN number (see above “Setting of RAN number”) is equal to the<br />
number of operational room devices.<br />
Mark “RAN” using the arrow keys. Then press the circle key.<br />
Mark “Status” using the arrow keys. Then press the circle key.<br />
Display: OK: Room Terminal has reported: Stored RAN number is equal to the number of<br />
operational room devices.<br />
Display: Error: Room Terminal has reported: Stored RAN number is not equal to the<br />
number of operational room devices.<br />
Press the home key to end. In case of an error carry out “Test RAN”.<br />
Test RAN<br />
Test if room devices are ready to operate and if they are correctly connected to the RAN.<br />
Check the correct setting of the RAN number.<br />
Mark “RAN” using the arrow keys. Then press the circle key.<br />
Test start: Mark “Test RAN” using the arrow keys. Then press the circle key.<br />
The LEDs of all connected room devices must flash. (Non-flashing devices are wrongly<br />
connected or defective. Replace defective devices. Correct any wrong connection)<br />
Compare the number of connected room devices with the stored RAN number. If the<br />
stored RAN number is not equal to the number of connected room devices, correct the<br />
RAN number setting after the RAN test as described above.<br />
End of test: Press the home key.<br />
When all settings are performed and all tests are finished, exit the configuration menu.<br />
During this procedure all settings are stored.<br />
Press home key until normal operation display appears.<br />
Note: If for a period of three minutes no function key is pressed, the system will leave the<br />
configuration menu.<br />
Page 111<br />
<strong>Tunstall</strong> <strong>GmbH</strong>, Orkotten 66, D-48291 Telgte, www.tunstall.de
<strong>Tunstall</strong> <strong>GmbH</strong>, Orkotten 66, D-48291 Telgte, www.tunstall.de<br />
Installationsanleitung D Installation Instructions GB<br />
ControlTerminal <strong>Flamenco</strong> ® , Best.‐Nr. 77 0550 00<br />
Das ControlTerminal steuert und überwacht alle Zimmerfunktionen gemäß DIN VDE 0834.<br />
Direkter Anschluss an den Gruppenbus (OSYnet) und den Zimmerbus (RAN).<br />
Außerdem Funktion als Zimmerleuchte zur optischen Anzeige von allen Rufarten und<br />
Personalanwesenheiten sowie zusätzliche Anzeige für WC‐Ruf. Wandmontage.<br />
Hinweis! Die vollständige Installation des Systems ist im technischen<br />
Handbuch beschrieben.<br />
Achtung! Die Leiterplatte und die LED‐Module sind mit elektrostatisch gefährdeten<br />
Bauteilen bestückt. Vermeiden Sie deshalb eine direkte Berührung.<br />
Montage mit Schraubbefestigung Mounting with screw fixing<br />
Sie können zwischen zwei Montage-Varianten wählen. In diesem Abschnitt A „Montage mit<br />
Schraubbefestigung“ ist beschrieben, wie Sie das ControlTerminal vollständig auf der<br />
Montageplatte festschrauben. Im Abschnitt C „Montage mit Steckbefestigung“ ist<br />
beschrieben, wie Sie das ControlTerminal nur über zwei Anschlussklemmen an der<br />
Montageplatte befestigen. Die Montage-Variante A dauert länger als C. Aber bei Variante A<br />
wird das ControlTerminal stabiler befestigt als bei C.<br />
1* Einbaudose<br />
2** Montageplatte mit Anschlussklemmen<br />
3* Vier Schrauben der Einbaudose<br />
4 Gehäuse‐Rückwand<br />
5** Zwei Befestigungsschrauben<br />
6 Leiterplatte<br />
7 Befestigungsschraube<br />
00 8801 75, 07/2010 (Rev. 1.0)<br />
8 4 LED-Module<br />
9 Dekorrahmen<br />
10 Zwei Befestigungsschrauben<br />
11 Lichtkuppel mit Trenneinsatz<br />
Separat bestellen:<br />
* Einbaudose (inkl. zwei Schrauben)<br />
** Montagekit, Bestell-Nr. 77 0960 00<br />
1. Leitungen gemäß Kapitel „Anschlüsse“ dieser Verpackungsbeilage an die<br />
Anschlussklemmen (Schraubklemmen) auf der Montageplatte 2 anschließen. Dabei<br />
zwei Einlegebrücken wie gezeigt einlegen.<br />
2. Montageplatte 2 mit den vier Schrauben der Einbaudose 3 an der Einbaudose 1<br />
festschrauben. Einbaurichtung beachten: Klemme für Spannungsversorgung oben.<br />
3. Gehäuse‐Rückwand 4 mit den beiden Befestigungsschrauben 5 auf der Montageplatte<br />
2 festschrauben.<br />
4. Leiterplatte 6 auf Anschlussklemmen aufdrücken und mit der Befestigungsschraube 7<br />
auf der Gehäuse-Rückwand 4 festschrauben.<br />
5. Die vier LED‐Module gemäß Abbildung B auf die Leiterplatte stecken.<br />
6. Dekorrahmen 9 mit den beiden Befestigungsschrauben 10 auf die Gehäuse‐Rückwand<br />
4 schrauben.<br />
7. Lichtkuppel mit Trenneinsatz 11 auf den Dekorrahmen 9 drücken, bis sie einrastet.<br />
1*<br />
2**<br />
3*<br />
3*<br />
4<br />
3*<br />
3*<br />
5**<br />
Montage mit Schraubbefestigung<br />
Mounting with screw fixing<br />
5**<br />
6<br />
7<br />
8<br />
9<br />
Control Terminal <strong>Flamenco</strong> ® , order no. 77 0550 00<br />
Control and monitoring of all room functions in compliance with DIN VDE 0834. Direct<br />
connection to the group bus (OSYnet) and the room bus (RAN).<br />
Furthermore optical signalling of all call types and staff presences as well as additional<br />
display for WC call. Wall mounting.<br />
Note! The complete installation of the system is described in the technical<br />
manual.<br />
Attention! The printed circuit board and the LED modules include electrostatic<br />
sensitive components. Avoid touching.<br />
You can choose between two mounting options. In this section A “Mounting with screw<br />
fixing“ is written, how you completely screw the Control Terminal to the mounting plate. In<br />
section C “Mounting with plug fixing“ is written, how you you fix the Control Terminal to the<br />
mounting plate only via two connectors. For mounting option A you need more time.<br />
Therefore the Control Terminal will be stronger fixed using option A.<br />
1* Back box<br />
2** Mounting plate with connectors<br />
3* Four back box fixing screws<br />
4 Pattress<br />
5** Two fixing screws<br />
6 Printed circuit board (PCB)<br />
7 One fixing screw<br />
8 4 LED modules<br />
9 Decorative frame<br />
10 Two fixing screws<br />
11 Light dome with insert module<br />
Order separately:<br />
* Back box (incl. two screws)<br />
** Mounting kit, order no. 77 0960 00<br />
1. Connect the connection wires according to chapter “Connections” of this product leaflet<br />
to the connectors (screw clamps) on the mounting plate 2. Thereby insert two insertion<br />
bridges as shown.<br />
2. Fit the mounting plate 2 to the back box 1 using the four back box screws 3. For the<br />
correct mounting direction the connector for power supply must be at the top.<br />
3. Fit the pattress 4 with the two fixing screws 5 to the mounting plate 2.<br />
4. Press the PCB 6 to the connectors and fit the PCB with the fixing screw 7 to the<br />
pattress 4.<br />
5. Plug the four LED modules onto the PCB according to the figure B.<br />
6. Fit the decorative frame 9 with the two fixing screws 10 onto the pattress 4.<br />
7. Press the light dome with the insert module 11 onto the decorative frame 9 until it locks<br />
in place.<br />
10<br />
77 0550 00<br />
ControlTerminal <strong>Flamenco</strong><br />
Control Terminal <strong>Flamenco</strong><br />
Page 112<br />
11<br />
10<br />
LED-Module<br />
LED modules<br />
rot: Rufe<br />
grün: Personal 1<br />
gelb: Personal 2<br />
weiß: WC‐Ruf<br />
red: Calls<br />
green: Staff 1<br />
yellow: Staff 2<br />
white: WC call
Installationsanleitung D Installation Instructions GB<br />
ControlTerminal <strong>Flamenco</strong> ® , Best.‐Nr. 77 0550 00<br />
Das ControlTerminal steuert und überwacht alle Zimmerfunktionen gemäß DIN VDE 0834.<br />
Direkter Anschluss an den Gruppenbus (OSYnet) und den Zimmerbus (RAN).<br />
Außerdem Funktion als Zimmerleuchte zur optischen Anzeige von allen Rufarten und<br />
Personalanwesenheiten sowie zusätzliche Anzeige für WC‐Ruf. Wandmontage.<br />
Hinweis! Die vollständige Installation des Systems ist im technischen<br />
Handbuch beschrieben.<br />
Achtung! Die Leiterplatte und die LED‐Module sind mit elektrostatisch gefährdeten<br />
Bauteilen bestückt. Vermeiden Sie deshalb eine direkte Berührung.<br />
Montage mit Steckbefestigung Mounting with plug fixing<br />
Sie können zwischen zwei Montage-Varianten wählen. In Abschnitt A „Montage mit<br />
Schraubbefestigung“ ist beschrieben, wie Sie das ControlTerminal vollständig auf der<br />
Montageplatte festschrauben. In diesem Abschnitt C „Montage mit Steckbefestigung“ ist<br />
beschrieben, wie Sie das ControlTerminal nur über zwei Anschlussklemmen an der<br />
Montageplatte befestigen. Die Montage-Variante A dauert länger als C. Aber bei Variante A<br />
wird das ControlTerminal stabiler befestigt als bei C.<br />
1* Einbaudose<br />
2** Montageplatte mit Anschlussklemmen<br />
3* Vier Schrauben der Einbaudose<br />
4 Gehäuse‐Rückwand<br />
5** Zwei Befestigungsschrauben<br />
6 Leiterplatte<br />
7 Befestigungsschraube<br />
00 8801 75, 07/2010 (Rev. 1.0)<br />
8 4 LED-Module<br />
9 Dekorrahmen<br />
10 Zwei Befestigungsschrauben<br />
11 Lichtkuppel mit Trenneinsatz<br />
Separat bestellen:<br />
* Einbaudose (inkl. vier Schrauben)<br />
** Montagekit, Bestell-Nr. 77 0960 00<br />
1. Leitungen gemäß Anschlussplan an die Anschlussklemmen (Schraubklemmen) auf der<br />
Montageplatte 2 anschließen. Dabei zwei Einlegebrücken gemäß Anschlussplan<br />
einlegen.<br />
2. Montageplatte 2 mit den vier Schrauben der Einbaudose 3 an der Einbaudose 1<br />
festschrauben. Einbaurichtung beachten: 4-polige Klemme für Spannungsversorgung<br />
oben.<br />
3. Gehäuse-Rückwand 4 mit eingebauter Leiterplatte 6 (mit Schraube 7 verschraubt) auf<br />
die Montageplatte 2 aufsetzen. Vorsichtig in der Mitte der Leiterplatte 7 drücken.<br />
Drücken Sie bis zum Anschlag, so dass Stecker und Buchsen der Anschlussklemmen<br />
sehr fest miteinander verbunden sind. Achtung! Schutzmaßnahmen gegen<br />
elektrostatische Entladungen beachten.<br />
4. Die vier LED‐Module 7 gemäß Abbildung B auf die Leiterplatte stecken.<br />
5. Dekorrahmen 9 mit den beiden Befestigungsschrauben 10 auf die Gehäuse‐Rückwand<br />
4 schrauben.<br />
6. Lichtkuppel mit Trenneinsatz 11 auf den Dekorrahmen 9 drücken, bis sie einrastet.<br />
1<br />
2<br />
3<br />
3<br />
4<br />
3<br />
3<br />
6<br />
Control Terminal <strong>Flamenco</strong> ® , order no. 77 0550 00<br />
Control and monitoring of all room functions in compliance with DIN VDE 0834. Direct<br />
connection to the group bus (OSYnet) and the room bus (RAN).<br />
Furthermore optical signalling of all call types and staff presences as well as additional<br />
display for WC call. Wall mounting.<br />
Note! The complete installation of the system is described in the technical<br />
manual.<br />
Attention! The printed circuit board and the LED modules include electrostatic<br />
sensitive components. Avoid touching.<br />
You can choose between two mounting options. In section A “Mounting with screw fixing“ is<br />
written, how you completely screw the Control Terminal to the mounting plate. In this<br />
section C “Mounting with plug fixing“ is written, how you you fix the Control Terminal to the<br />
mounting plate only via two connectors. For mounting option A you need more time.<br />
Therefore the Control Terminal will be stronger fixed using option A.<br />
1* Back box<br />
2** Mounting plate with connectors<br />
3* Four back box fixing screws<br />
4 Pattress<br />
5** Two fixing screws<br />
6 Printed circuit board (PCB)<br />
7 One fixing screw<br />
Montagevariante mit Steckbefestigung<br />
Mounting option with plug fixing<br />
7<br />
Demontage Dismantling<br />
Lichtkuppel von oben und unten leicht zusammendrücken und dann abziehen. Compress and pull off the light dome.<br />
8<br />
9<br />
10<br />
8 4 LED modules<br />
9 Decorative frame<br />
10 Two fixing screws<br />
11 Light dome with insert module<br />
Order separately:<br />
* Back box (incl. four screws)<br />
** Mounting kit, order no. 77 0960 00<br />
1. Connect the connection wires according to the connection plan to the connectors (screw<br />
clamps) on the mounting plate 2. Thereby insert two insertion bridges according to the<br />
connection plan.<br />
2. Fit the mounting plate 2 to the back box 1 using the four back box screws 3. For the<br />
correct mounting direction the 4 pole connector for power supply must be at the top.<br />
3. Place the pattress 4 with the pre-mounted PCB 7 (fixed with screw 6) onto the mounting<br />
plate 2. Press the centre of the PCB very carefully. Press up to the stop, so that plugs<br />
and sockets of the connectors are very firmly connected. Attention! Observe protection<br />
measures against electrostatic discharges.<br />
4. Plug the four LED modules 7 onto the PCB according to the figure B.<br />
5. Fit the decorative frame 9 with the two fixing screws 10 onto the pattress 4.<br />
6. Press the light dome with the insert module 11 onto the decorative frame 9 until it locks<br />
in place.<br />
11<br />
77 0550 00<br />
ControlTerminal <strong>Flamenco</strong> ®<br />
Control Terminal <strong>Flamenco</strong> ®<br />
Page 113<br />
10<br />
Demontage<br />
Dismantling<br />
1.<br />
1.<br />
2.<br />
<strong>Tunstall</strong> <strong>GmbH</strong>, Orkotten 66, D-48291 Telgte, www.tunstall.de
<strong>Tunstall</strong> <strong>GmbH</strong>, Orkotten 66, D-48291 Telgte, www.tunstall.de<br />
Anschlüsse D Connections GB<br />
ControlTerminal <strong>Flamenco</strong> ® , Best.‐Nr. 77 0550 00<br />
Wichtige Hinweise<br />
Leiterquerschnitte: 0,2 ‐ 2,5 mm 2<br />
Schraubendreherklinge: 0,6 x 3,5 mm<br />
Abisolierlänge der Drähte: 6 mm<br />
Bei kleinen Leitungsquerschnitten mehrere Leiter pro Klemme möglich.<br />
Gruppenbus (OSYnet) Zimmerbus (RAN) Stromversorg.<br />
Spannungsversorgung<br />
Kabel: NYM 2x2,5 mm 2<br />
Zimmerbus (RAN)<br />
ohne Sprechen<br />
(max. 4 Anschlüsse)<br />
Kabel: IY(ST)Y 2x2x0,8<br />
Gruppenbus OSYnet<br />
Kabel: CAT5‐Kabel<br />
(AWG 23)<br />
* siehe<br />
Hinweis<br />
unten!<br />
Gruppenbus OSYnet<br />
Kabel: IY(ST)Y 4x2x0,8<br />
* siehe<br />
Hinweis<br />
unten!<br />
00 8801 75, 07/2010 (Rev. 1.0)<br />
+24 V Einlegebrücke<br />
+24 V<br />
(00 0220 52)<br />
vom letzten Zimmer oder<br />
0 V<br />
Einlegebrücke zum nächsten Zimmer<br />
0 V (00 0220 52)<br />
+24 V RAN<br />
*<br />
RAN<br />
0V<br />
D‐L<br />
D‐H<br />
D‐G<br />
NF 1a<br />
NF 1b<br />
NF 2a<br />
NF 2b<br />
rt<br />
ge<br />
sw<br />
ws<br />
ws-bl<br />
bl<br />
ws-gn<br />
gn<br />
br<br />
ws-br<br />
or<br />
ws-or<br />
vom RAN-Teilnehmer<br />
vom vorigen Zimmer<br />
oder zum nächsten Zimmer<br />
Control Terminal <strong>Flamenco</strong> ® , order no. 77 0550 00<br />
Important notes<br />
Wire cross‐sections: 0.2 - 2.5 mm 2<br />
Screwdriver blade: 0.6 x 3.5 mm<br />
Strip wire to 6 mm.<br />
For smaller wire cross sections more than one wire may be inserted in one connection<br />
terminal.<br />
Power supply<br />
Cable: NYM 2x2.5 mm 2<br />
Room bus (RAN)<br />
without speech<br />
(max. 4 connections)<br />
Cable: IY(ST)Y 2x2x0.8<br />
Group bus (OSYnet)<br />
Cable: CAT5 cable<br />
(AWG 23)<br />
+24 V insertion bridge<br />
+24 V<br />
(00 0220 52)<br />
from previous room<br />
0 V<br />
insertion bridge or to next room<br />
0 V (00 0220 52)<br />
RAN<br />
0V<br />
D‐L<br />
D‐H<br />
NF 1a<br />
NF 1b<br />
* NF 2a<br />
NF 2b<br />
red<br />
yellow<br />
black<br />
white<br />
white-blue<br />
blue<br />
white-green<br />
green<br />
brown<br />
white-brown<br />
orange<br />
white-orange<br />
D‐L<br />
D‐H<br />
rt<br />
bl<br />
Group bus (OSYnet)<br />
Cable: IY(ST)Y 4x2x0.8<br />
D‐L<br />
D‐H<br />
red<br />
blue<br />
gn<br />
green<br />
D‐G<br />
ws<br />
vom vorigen Zimmer<br />
oder zum nächsten Zimmer<br />
D‐G white<br />
NF 1a<br />
br<br />
NF 1a brown<br />
*<br />
NF 1b<br />
NF 2a<br />
NF 2b<br />
ws<br />
ge<br />
ws<br />
* refer to<br />
Note<br />
below! *<br />
NF 1b<br />
NF 2a<br />
NF 2b<br />
white<br />
yellow<br />
white<br />
* Hinweis! Die Adern NF 1a, NF 1b, NF 2a und NF 2b sind nur am Gruppenbus<br />
OSYnet vorhanden, wenn am selben Gruppenbus auch ComTerminals (= Terminals<br />
mit Sprachübertragung) angeschlossen sind. Diese Adern werden an dem Con‐<br />
trolTerminal nicht angeschlossen. Sie müssen mit der Verbindungsdosenklemme<br />
(Bestell-Nr. 00 0210 21, Leitungsquerschnitt 0,5 - 2,5 mm 2 ) durchverbunden werden.<br />
Anschlussklemmen (Schraubklemmen)<br />
Connectors (screw clamps)<br />
4-polige Anschlussklemme<br />
4pole connector<br />
8-polige Anschlussklemme<br />
8 pole connector<br />
Einlegebrücke<br />
Insertion bridge<br />
0V RAN +24V<br />
RAN<br />
Zimmerbus<br />
Room bus<br />
RAN<br />
Room bus (RAN) Power<br />
Group bus (OSYnet)<br />
Spannungsversorgung<br />
Power supply<br />
+24 V +24 V 0 V 0 V<br />
DG<br />
DH<br />
DL<br />
Gruppenbus<br />
Group bus<br />
OSYnet<br />
77 0550 00<br />
ControlTerminal <strong>Flamenco</strong> ®<br />
Control Terminal <strong>Flamenco</strong> ®<br />
Page 114<br />
* refer to<br />
Note<br />
below!<br />
+24 V RAN<br />
D‐G<br />
from RAN user<br />
from previous room<br />
or to next room<br />
from previous room<br />
or to next room<br />
* Note! The wires NF 1a, NF 1b, NF 2a and NF 2b exist only at the group bus<br />
OSYnet, if ComTerminals (= terminals with speech) are connected to the same<br />
group bus. These wires are not connected to the Control Terminal. They have to<br />
be connected through using the push-wire connector (oder no. 00 0210 21, wire<br />
cross section 0.5 - 2.5 mm 2 ).<br />
Einlegebrücke<br />
Insertion bridge<br />
Nicht benutzen!<br />
Don't use!
<strong>Tunstall</strong> <strong>GmbH</strong>, Orkotten 66, D-48291 Telgte, www.tunstall.de<br />
Installationsanleitung D Installation Instructions GB<br />
ControlTerminal mit Türschild <strong>Flamenco</strong> ® , Best.‐Nr. 77 0551 00<br />
Das ControlTerminal steuert und überwacht alle Zimmerfunktionen gemäß DIN VDE 0834.<br />
Direkter Anschluss an den Gruppenbus (OSYnet) und den Zimmerbus (RAN).<br />
Außerdem Funktion als Zimmerleuchte zur optischen Anzeige von allen Rufarten und<br />
Personalanwesenheiten sowie zusätzliche Anzeige für WC‐Ruf. Türschild als<br />
Beschriftungsfeld für die Raumbezeichnung. Wandmontage.<br />
Hinweis! Die vollständige Installation des Systems ist im technischen<br />
Handbuch beschrieben.<br />
Achtung! Die Leiterplatte und die LED‐Module sind mit elektrostatisch gefährdeten<br />
Bauteilen bestückt. Vermeiden Sie deshalb eine direkte Berührung.<br />
Montage mit Schraubbefestigung Mounting with screw fixing<br />
Sie können zwischen zwei Montage-Varianten wählen. In diesem Abschnitt A „Montage mit<br />
Schraubbefestigung“ ist beschrieben, wie Sie das ControlTerminal vollständig auf der<br />
Montageplatte festschrauben. Im Abschnitt C „Montage mit Steckbefestigung“ ist<br />
beschrieben, wie Sie das ControlTerminal nur über zwei Anschlussklemmen an der<br />
Montageplatte befestigen. Die Montage-Variante A dauert länger als C. Aber bei Variante A<br />
wird das ControlTerminal stabiler befestigt als bei C.<br />
1* Einbaudose<br />
2** Montageplatte mit Anschlussklemmen<br />
3* Vier Schrauben der Einbaudose<br />
4 Gehäuse‐Rückwand<br />
5** Zwei Befestigungsschrauben<br />
6 Leiterplatte<br />
7 Befestigungsschraube<br />
00 8801 94, 03/2011 (Rev. 1.0)<br />
8 4 LED-Module<br />
9 Dekorrahmen<br />
10 Zwei Befestigungsschrauben<br />
11 Lichtkuppel mit Trenneinsatz<br />
12 Namensschild (Höhe x Breite: 70 x 92 mm)<br />
13 Schutzabdeckung<br />
Separat bestellen:<br />
* Einbaudose (inkl. zwei Schrauben)<br />
** Montagekit, Bestell-Nr. 77 0960 00<br />
1. Leitungen gemäß Kapitel „Anschlüsse“ dieser Verpackungsbeilage an die<br />
Anschlussklemmen (Schraubklemmen) auf der Montageplatte 2 anschließen. Dabei<br />
zwei Einlegebrücken wie gezeigt einlegen.<br />
2. Montageplatte 2 mit den vier Schrauben der Einbaudose 3 an der Einbaudose 1<br />
festschrauben. Einbaurichtung beachten: Klemme für Spannungsversorgung oben.<br />
3. Gehäuse‐Rückwand 4 mit den beiden Befestigungsschrauben 5 auf der Montageplatte<br />
2 festschrauben.<br />
4. Leiterplatte 6 auf Anschlussklemmen aufdrücken und mit der Befestigungsschraube 7<br />
auf der Gehäuse-Rückwand 4 festschrauben.<br />
5. Die vier LED‐Module gemäß Abbildung B auf die Leiterplatte stecken.<br />
6. Dekorrahmen 9 mit den beiden Befestigungsschrauben 10 auf die Gehäuse‐Rückwand<br />
4 schrauben.<br />
7. Lichtkuppel mit Trenneinsatz 11 auf den Dekorrahmen 9 drücken, bis sie einrastet.<br />
8. Namensschild 12 und Schutzabdeckung 13 einlegen.<br />
1*<br />
2**<br />
3*<br />
3*<br />
4<br />
3*<br />
3*<br />
5**<br />
Montage mit Schraubbefestigung<br />
Mounting with screw fixing<br />
5**<br />
6<br />
7<br />
8<br />
9<br />
10<br />
ControlTerminal with doorplate <strong>Flamenco</strong> ® , order no. 77 0551 00<br />
Control and monitoring of all room functions in compliance with DIN VDE 0834. Direct<br />
connection to the group bus (OSYnet) and the room bus (RAN).<br />
Furthermore optical signalling of all call types and staff presences as well as additional<br />
display for WC call. Doorplate as label field for room designation. Wall mounting.<br />
Note! The complete installation of the system is described in the technical<br />
manual.<br />
Attention! The printed circuit board and the LED modules include electrostatic<br />
sensitive components. Avoid touching.<br />
You can choose between two mounting options. In this section A “Mounting with screw<br />
fixing“ is written, how you completely screw the ControlTerminal to the mounting plate. In<br />
section C “Mounting with plug fixing“ is written, how you you fix the ControlTerminal to the<br />
mounting plate only via two connectors. For mounting option A you need more time.<br />
Therefore the ControlTerminal will be stronger fixed using option A.<br />
1* Back box<br />
2** Mounting plate with connectors<br />
3* Four back box fixing screws<br />
4 Pattress<br />
5** Two fixing screws<br />
6 Printed circuit board (PCB)<br />
7 One fixing screw<br />
8 4 LED modules<br />
9 Decorative frame<br />
10 Two fixing screws<br />
11 Light dome with insert module<br />
12 Label strip (hxw: 70 x 92 mm)<br />
13 Protection cover<br />
Order separately:<br />
* Back box (incl. two screws)<br />
** Mounting kit, order no. 77 0960 00<br />
1. Connect the connection wires according to chapter “Connections” of this product leaflet<br />
to the connectors (screw clamps) on the mounting plate 2. Thereby insert two insertion<br />
bridges as shown.<br />
2. Fit the mounting plate 2 to the back box 1 using the four back box screws 3. For the<br />
correct mounting direction the connector for power supply must be at the top.<br />
3. Fit the pattress 4 with the two fixing screws 5 to the mounting plate 2.<br />
4. Press the PCB 6 to the connectors and fit the PCB with the fixing screw 7 to the<br />
pattress 4.<br />
5. Plug the four LED modules onto the PCB according to the figure B.<br />
6. Fit the decorative frame 9 with the two fixing screws 10 onto the pattress 4.<br />
7. Press the light dome with the insert module 11 onto the decorative frame 9 until it locks<br />
in place.<br />
8. Insert the label strip 12 and the protection cover 13.<br />
10<br />
12<br />
77 0551 00<br />
ControlTerminal mit Türschild <strong>Flamenco</strong><br />
ControlTerminal with doorplate <strong>Flamenco</strong><br />
Page 115<br />
13<br />
11<br />
LED-Module<br />
LED modules<br />
rot: Rufe<br />
grün: Personal 1<br />
gelb: Personal 2<br />
weiß: WC‐Ruf<br />
red: Calls<br />
green: Staff 1<br />
yellow: Staff 2<br />
white: WC call
Installationsanleitung D Installation Instructions GB<br />
ControlTerminal <strong>Flamenco</strong> ® , Best.‐Nr. 77 0551 00<br />
Das ControlTerminal steuert und überwacht alle Zimmerfunktionen gemäß DIN VDE 0834.<br />
Direkter Anschluss an den Gruppenbus (OSYnet) und den Zimmerbus (RAN).<br />
Außerdem Funktion als Zimmerleuchte zur optischen Anzeige von allen Rufarten und<br />
Personalanwesenheiten sowie zusätzliche Anzeige für WC‐Ruf. Türschild als<br />
Beschriftungsfeld für die Raumbezeichnung. Wandmontage.<br />
Hinweis! Die vollständige Installation des Systems ist im technischen<br />
Handbuch beschrieben.<br />
Achtung! Die Leiterplatte und die LED‐Module sind mit elektrostatisch gefährdeten<br />
Bauteilen bestückt. Vermeiden Sie deshalb eine direkte Berührung.<br />
Montage mit Steckbefestigung Mounting with plug fixing<br />
Sie können zwischen zwei Montage-Varianten wählen. In Abschnitt A „Montage mit<br />
Schraubbefestigung“ ist beschrieben, wie Sie das ControlTerminal vollständig auf der<br />
Montageplatte festschrauben. In diesem Abschnitt C „Montage mit Steckbefestigung“ ist<br />
beschrieben, wie Sie das ControlTerminal nur über zwei Anschlussklemmen an der<br />
Montageplatte befestigen. Die Montage-Variante A dauert länger als C. Aber bei Variante A<br />
wird das ControlTerminal stabiler befestigt als bei C.<br />
1* Einbaudose<br />
2** Montageplatte mit Anschlussklemmen<br />
3* Vier Schrauben der Einbaudose<br />
4 Gehäuse‐Rückwand<br />
5** Zwei Befestigungsschrauben<br />
6 Leiterplatte<br />
7 Befestigungsschraube<br />
00 8801 94, 03/2011 (Rev. 1.0)<br />
8 4 LED-Module<br />
9 Dekorrahmen<br />
10 Zwei Befestigungsschrauben<br />
11 Lichtkuppel mit Trenneinsatz<br />
12 Namensschild (Höhe x Breite: 70 x 92 mm)<br />
13 Schutzabdeckung<br />
Separat bestellen:<br />
* Einbaudose (inkl. vier Schrauben)<br />
** Montagekit, Bestell-Nr. 77 0960 00<br />
1. Leitungen gemäß Anschlussplan an die Anschlussklemmen (Schraubklemmen) auf der<br />
Montageplatte 2 anschließen. Dabei zwei Einlegebrücken gemäß Anschlussplan<br />
einlegen.<br />
2. Montageplatte 2 mit den vier Schrauben der Einbaudose 3 an der Einbaudose 1<br />
festschrauben. Einbaurichtung beachten: 4-polige Klemme für Spannungsversorgung<br />
oben.<br />
3. Gehäuse-Rückwand 4 mit eingebauter Leiterplatte 6 (mit Schraube 7 verschraubt) auf<br />
die Montageplatte 2 aufsetzen. Vorsichtig in der Mitte der Leiterplatte 7 drücken.<br />
Drücken Sie bis zum Anschlag, so dass Stecker und Buchsen der Anschlussklemmen<br />
sehr fest miteinander verbunden sind. Achtung! Schutzmaßnahmen gegen<br />
elektrostatische Entladungen beachten.<br />
4. Die vier LED‐Module 7 gemäß Abbildung B auf die Leiterplatte stecken.<br />
5. Dekorrahmen 9 mit den beiden Befestigungsschrauben 10 auf die Gehäuse‐Rückwand<br />
4 schrauben.<br />
6. Lichtkuppel mit Trenneinsatz 11 auf den Dekorrahmen 9 drücken, bis sie einrastet.<br />
7. Namensschild 12 und Schutzabdeckung 13 einlegen.<br />
1<br />
2<br />
3<br />
3<br />
4<br />
3<br />
3<br />
6<br />
ControlTerminal <strong>Flamenco</strong> ® , order no. 77 0551 00<br />
Control and monitoring of all room functions in compliance with DIN VDE 0834. Direct<br />
connection to the group bus (OSYnet) and the room bus (RAN).<br />
Furthermore optical signalling of all call types and staff presences as well as additional<br />
display for WC call. Doorplate as label field for room designation. Wall mounting.<br />
Note! The complete installation of the system is described in the technical<br />
manual.<br />
Attention! The printed circuit board and the LED modules include electrostatic<br />
sensitive components. Avoid touching.<br />
You can choose between two mounting options. In section A “Mounting with screw fixing“ is<br />
written, how you completely screw the ControlTerminal to the mounting plate. In this<br />
section C “Mounting with plug fixing“ is written, how you you fix the ControlTerminal to the<br />
mounting plate only via two connectors. For mounting option A you need more time.<br />
Therefore the ControlTerminal will be stronger fixed using option A.<br />
1* Back box<br />
2** Mounting plate with connectors<br />
3* Four back box fixing screws<br />
4 Pattress<br />
5** Two fixing screws<br />
6 Printed circuit board (PCB)<br />
7 One fixing screw<br />
Montagevariante mit Steckbefestigung<br />
Mounting option with plug fixing<br />
7<br />
Demontage Dismantling<br />
Lichtkuppel von oben und unten leicht zusammendrücken und dann abziehen. Compress and pull off the light dome.<br />
8<br />
9<br />
10<br />
8 4 LED modules<br />
9 Decorative frame<br />
10 Two fixing screws<br />
11 Light dome with insert module<br />
12 Label strip (hxw: 70 x 92 mm)<br />
13 Protection cover<br />
Order separately:<br />
* Back box (incl. four screws)<br />
** Mounting kit, order no. 77 0960 00<br />
1. Connect the connection wires according to the connection plan to the connectors (screw<br />
clamps) on the mounting plate 2. Thereby insert two insertion bridges according to the<br />
connection plan.<br />
2. Fit the mounting plate 2 to the back box 1 using the four back box screws 3. For the<br />
correct mounting direction the 4 pole connector for power supply must be at the top.<br />
3. Place the pattress 4 with the pre-mounted PCB 7 (fixed with screw 6) onto the mounting<br />
plate 2. Press the centre of the PCB very carefully. Press up to the stop, so that plugs<br />
and sockets of the connectors are very firmly connected. Attention! Observe protection<br />
measures against electrostatic discharges.<br />
4. Plug the four LED modules 7 onto the PCB according to the figure B.<br />
5. Fit the decorative frame 9 with the two fixing screws 10 onto the pattress 4.<br />
6. Press the light dome with the insert module 11 onto the decorative frame 9 until it locks<br />
in place.<br />
7. Insert the label strip 12 and the protection cover 13.<br />
10<br />
12<br />
77 0551 00<br />
ControlTerminal mit Türschild <strong>Flamenco</strong><br />
ControlTerminal with doorplate <strong>Flamenco</strong><br />
Page 116<br />
13<br />
11<br />
Demontage<br />
Dismantling<br />
1.<br />
1.<br />
2.<br />
<strong>Tunstall</strong> <strong>GmbH</strong>, Orkotten 66, D-48291 Telgte, www.tunstall.de
<strong>Tunstall</strong> <strong>GmbH</strong>, Orkotten 66, D-48291 Telgte, www.tunstall.de<br />
Anschlüsse D Connections GB<br />
ControlTerminal mit Türschild <strong>Flamenco</strong> ® , Best.‐Nr. 77 0551 00<br />
Wichtige Hinweise<br />
Leiterquerschnitte: 0,2 ‐ 2,5 mm 2<br />
Schraubendreherklinge: 0,6 x 3,5 mm<br />
Abisolierlänge der Drähte: 6 mm<br />
Bei kleinen Leitungsquerschnitten mehrere Leiter pro Klemme möglich.<br />
Gruppenbus (OSYnet) Zimmerbus (RAN) Stromversorg.<br />
Spannungsversorgung<br />
Kabel: NYM 2x2,5 mm 2<br />
Zimmerbus (RAN)<br />
ohne Sprechen<br />
(max. 4 Anschlüsse)<br />
Kabel: IY(ST)Y 2x2x0,8<br />
Gruppenbus OSYnet<br />
Kabel: CAT5‐Kabel<br />
(AWG 23)<br />
* siehe<br />
Hinweis<br />
unten!<br />
Gruppenbus OSYnet<br />
Kabel: IY(ST)Y 4x2x0,8<br />
* siehe<br />
Hinweis<br />
unten!<br />
00 8801 94, 03/2011 (Rev. 1.0)<br />
+24 V Einlegebrücke<br />
+24 V<br />
(00 0220 52)<br />
vom letzten Zimmer oder<br />
0 V<br />
Einlegebrücke zum nächsten Zimmer<br />
0 V (00 0220 52)<br />
+24 V RAN<br />
*<br />
RAN<br />
0V<br />
D‐L<br />
D‐H<br />
D‐G<br />
NF 1a<br />
NF 1b<br />
NF 2a<br />
NF 2b<br />
rt<br />
ge<br />
sw<br />
ws<br />
ws-bl<br />
bl<br />
ws-gn<br />
gn<br />
br<br />
ws-br<br />
or<br />
ws-or<br />
vom RAN-Teilnehmer<br />
vom vorigen Zimmer<br />
oder zum nächsten Zimmer<br />
ControlTerminal with doorplate <strong>Flamenco</strong> ® , order no. 77 0551 00<br />
Important notes<br />
Wire cross‐sections: 0.2 - 2.5 mm 2<br />
Screwdriver blade: 0.6 x 3.5 mm<br />
Strip wire to 6 mm.<br />
For smaller wire cross sections more than one wire may be inserted in one connection<br />
terminal.<br />
Power supply<br />
Cable: NYM 2x2.5 mm 2<br />
Room bus (RAN)<br />
without speech<br />
(max. 4 connections)<br />
Cable: IY(ST)Y 2x2x0.8<br />
Group bus (OSYnet)<br />
Cable: CAT5 cable<br />
(AWG 23)<br />
+24 V insertion bridge<br />
+24 V<br />
(00 0220 52)<br />
from previous room<br />
0 V<br />
insertion bridge or to next room<br />
0 V (00 0220 52)<br />
RAN<br />
0V<br />
D‐L<br />
D‐H<br />
NF 1a<br />
NF 1b<br />
* NF 2a<br />
NF 2b<br />
red<br />
yellow<br />
black<br />
white<br />
white-blue<br />
blue<br />
white-green<br />
green<br />
brown<br />
white-brown<br />
orange<br />
white-orange<br />
D‐L<br />
D‐H<br />
rt<br />
bl<br />
Group bus (OSYnet)<br />
Cable: IY(ST)Y 4x2x0.8<br />
D‐L<br />
D‐H<br />
red<br />
blue<br />
gn<br />
green<br />
D‐G<br />
ws<br />
vom vorigen Zimmer<br />
oder zum nächsten Zimmer<br />
D‐G white<br />
NF 1a<br />
br<br />
NF 1a brown<br />
*<br />
NF 1b<br />
NF 2a<br />
NF 2b<br />
ws<br />
ge<br />
ws<br />
* refer to<br />
Note<br />
below! *<br />
NF 1b<br />
NF 2a<br />
NF 2b<br />
white<br />
yellow<br />
white<br />
* Hinweis! Die Adern NF 1a, NF 1b, NF 2a und NF 2b sind nur am Gruppenbus<br />
OSYnet vorhanden, wenn am selben Gruppenbus auch ComTerminals (= Terminals<br />
mit Sprachübertragung) angeschlossen sind. Diese Adern werden an dem Con‐<br />
trolTerminal nicht angeschlossen. Sie müssen mit der Verbindungsdosenklemme<br />
(Bestell-Nr. 00 0210 21, Leitungsquerschnitt 0,5 - 2,5 mm 2 ) durchverbunden werden.<br />
Anschlussklemmen (Schraubklemmen)<br />
Connectors (screw clamps)<br />
4-polige Anschlussklemme<br />
4 pole connector<br />
8-polige Anschlussklemme<br />
8 pole connector<br />
Einlegebrücke<br />
Insertion bridge<br />
0V RAN +24V<br />
RAN<br />
Zimmerbus<br />
Room bus<br />
RAN<br />
Room bus (RAN) Power<br />
Group bus (OSYnet)<br />
Spannungsversorgung<br />
Power supply<br />
+24 V +24 V 0 V 0 V<br />
DG<br />
DH<br />
DL<br />
Gruppenbus<br />
Group bus<br />
OSYnet<br />
77 0551 00<br />
ControlTerminal mit Türschild <strong>Flamenco</strong> ®<br />
ControlTerminal with doorplate <strong>Flamenco</strong> ®<br />
Page 117<br />
* refer to<br />
Note<br />
below!<br />
+24 V RAN<br />
D‐G<br />
from RAN user<br />
from previous room<br />
or to next room<br />
from previous room<br />
or to next room<br />
* Note! The wires NF 1a, NF 1b, NF 2a and NF 2b exist only at the group bus<br />
OSYnet, if ComTerminals (= terminals with speech) are connected to the same<br />
group bus. These wires are not connected to the ControlTerminal. They have to<br />
be connected through using the push-wire connector (oder no. 00 0210 21, wire<br />
cross section 0.5 - 2.5 mm 2 ).<br />
Einlegebrücke<br />
Insertion bridge<br />
Nicht benutzen!<br />
Don't use!
14. Product leaflets<br />
Page 118<br />
<strong>Flamenco</strong> - <strong>Technical</strong> <strong>Manual</strong>, 10/11 (Rev. 5.0), 00 8812 60
14.4 Connection sockets<br />
70 0171 03 Connection socket with call switch<br />
70 0171 50 Connection socket with call switch, bedhead unit<br />
70 0424 00 Connection socket combi<br />
70 0434 00 Connection socket combi, bedhead unit<br />
74 0452 30 Connection socket ComStation<br />
<strong>Flamenco</strong> - <strong>Technical</strong> <strong>Manual</strong>, 10/11 (Rev. 5.0), 00 8812 60<br />
Page 119<br />
14. Product leaflets
<strong>Tunstall</strong> <strong>GmbH</strong>, Orkotten 66, D-48291 Telgte, www.tunstall.de<br />
Installationsanleitung D Installation Instructions GB<br />
Steckvorrichtung mit Ruftaste, Best.‐Nr. 70 0171 03<br />
Steckvorrichtung mit zwei 8‐poligen Steckbuchsen zum Anschluss von Rufgeräten, wie z.B.<br />
Birntastern oder medizinischen Überwachungsgeräten. Der Anschluss für ein drittes<br />
Rufgerät (externer Ruftaster) erfolgt von der Rückseite mit einer speziellen<br />
Anschlussleitung.<br />
Hinweis! Die vollständige Installation des Systems ist im technischen<br />
Handbuch beschrieben.<br />
Achtung! Die Leiterplatte ist mit elektrostatisch gefährdeten Bauteilen bestückt.<br />
Vermeiden Sie deshalb eine direkte Berührung.<br />
Montage Mounting<br />
1* Einbaudose<br />
2* Anschlussklemme (70 0807 01)<br />
3 Montagerahmen mit Leiterplatte (vormontiert)<br />
* ist nicht im Lieferumfang enthalten.<br />
00 8800 79, 06/06 (Rev. 4.0)<br />
4 Abdeckung<br />
5 Klemmkralle (bei fehlender<br />
Schaubmöglichkeit)<br />
1. Anschlussklemme 2 in die eingebaute Buchse (grün) der Leiterplatte 3 stecken.<br />
2. Wenn gewünscht: Klemme der Anschlussleitung (50 0308 02) für das externe Rufgerät<br />
in die eingebaute Buchse (schwarz) auf der Leiterplatte 3 stecken.<br />
3. Montagerahmen 3 an den Schraubpunkten der Einbaudose 1 verschrauben. Bei<br />
fehlender Schraubmöglichkeit dient die Klemmkralle 5 zur Befestigung des<br />
Montagerahmens. Klemmkralle nicht für Hohlwanddosen geeignet.<br />
4. Abdeckung 4 über den Montagerahmen 3 drücken und einrasten lassen.<br />
Connection socket with call switch, order no. 70 0171 03<br />
Connection socket with two 8pole jacks for connection of call devices like pear push<br />
switches or medical monitoring devices. The connection for a third call device (external call<br />
switch) is made on the back side with a special connection cable.<br />
Note! The complete installation of the system is described in the technical<br />
manual.<br />
Attention! The printed circuit board includes electrostatic sensitive components.<br />
Avoid touching.<br />
1* Back box<br />
2* Connector (70 0807 01)<br />
3 Mounting frame with<br />
printed circuit board (pre‐mounted)<br />
Anschlüsse Connections<br />
Zum Anschluss als externe Rufgeräte dürfen nur Öffner‐Kontakte verwendet werden. Der<br />
Anschluss erfolgt über die Anschlussleitung, Best.Nr. 50 0308 02 (Länge: 50 cm).<br />
Die maximale Leitungslänge für den externen Rufanschluss beträgt 2,5 m.<br />
Bettennummer einstellen Setting the bed number<br />
Über den Programmierschalter 1, 2 und 3 der Leiterplatte kann die entsprechende<br />
Bettennummer eingestellt werden.<br />
*1 Achtung: Diagnostikruf nur in Verbindung mit eingestellter Bettennummer.<br />
Bei Bettennummer 6 kann kein Diagnostikruf verwendet werden.<br />
Demontage Dismantling<br />
1. Schraubendreher an einer der beiden Rastnasen ansetzen und Abdeckung abheben.<br />
2. Schrauben am Montagerahmen 3 lösen.<br />
3. Anschlussklemme 2 abziehen.<br />
1<br />
2<br />
Buchsen<br />
jacks<br />
3 Rückseite<br />
back side<br />
3<br />
50 0308 02<br />
4<br />
5<br />
externes Rufgerät<br />
external call device<br />
RAN + Licht<br />
RAN & light<br />
70 0171 03<br />
Steckvorrichtung mit Ruftaste<br />
Connection socket with call switch<br />
Page 120<br />
4 Cover<br />
5 Fixing clamp (if screw fixing is<br />
not possible)<br />
* not included in delivery.<br />
1. Plug the connector 2 into the green socket on the printed circuit board 3.<br />
2. If required: Plug the terminal of the connection cable (50 0308 02) for the external call<br />
device into the black socket on the printed circuit board 3.<br />
3. Fix the mounting frame 3 using the screwpoints of the back box 1. If screw fixing is not<br />
possible, use the fixing clamp 5 to fix the mounting frame to the box. The fixing clamp<br />
cannot be used with back boxes for partition walls.<br />
4. Fit the cover 4 over the mounting frame 3 and lock it.<br />
As external call devices only normally-closed contacts may be used. The external call<br />
device is connected via the special connection cable, order no. 50 0308 02 (length: 50 cm).<br />
The maximum cable length for the external call device is 2.5 m.<br />
The corresponding bed number can be specified by means of the coding switches 1, 2 and 3<br />
of the printed circuit board.<br />
*1 Attention: Diagnostic call only in combination with programmed bed number.<br />
With bed number 6 no diagnostic call can be used.<br />
1. Place the screwdriver in one of the two notches and take off the cover.<br />
2. Remove the screws at the mounting frame 3.<br />
3. Remove the connector 2.<br />
B(lack) = 0V schwarz<br />
vom RAN‐Teilnehmer<br />
Y(ellow) = RAN gelb<br />
from RAN user<br />
R(ed) = +24 V rot<br />
Lichtanschaltung / Light control L (ight) = Licht weiß<br />
B(lack) = 0V schwarz<br />
Impulsdauer / pulse duration<br />
150 ms, 24 V DC, max. 200 mA<br />
Anschluss externes Rufgerät:<br />
Connection external call device:<br />
Beruhigungslicht / reassurance light<br />
P3 P2 P1 PG NC<br />
ON<br />
+24V<br />
0V<br />
Rufeingang / call input<br />
1 2 3 4 5<br />
Werkseitige Einstellung<br />
PG = nicht verändern<br />
NC = nicht verwendet<br />
Factory setting<br />
PG = do not change<br />
NC = not used<br />
B<br />
Y<br />
R<br />
L<br />
= Bett / bed 1<br />
= Bett / bed 2<br />
= Bett / bed 3<br />
= Bett / bed 4<br />
= Bett / bed 5<br />
2<br />
= Bett / bed 6 *1
<strong>Tunstall</strong> <strong>GmbH</strong>, Orkotten 66, D-48291 Telgte, www.tunstall.de<br />
Installationsanleitung D Installation Instructions GB<br />
Steckvorrichtung mit Ruftaste, Kanal, Best.‐Nr. 70 0171 50<br />
Steckvorrichtung mit zwei 8‐poligen Steckbuchsen zum Anschluss von Rufgeräten, wie z.B.<br />
Birntastern oder medizinischen Überwachungsgeräten. Der Anschluss für ein zusätzliches,<br />
externes Rufgerät inkl. Findelicht und Beruhigungslicht erfolgt von der Rückseite mit einer<br />
speziellen Anschlussleitung. Zwei Schaltausgänge für Lichtschaltung. Einbau in<br />
medizinische Versorgungseinheit.<br />
Hinweis! Die vollständige Installation des Systems ist im technischen<br />
Handbuch beschrieben.<br />
Achtung! Die Leiterplatte ist mit elektrostatisch gefährdeten Bauteilen bestückt.<br />
Vermeiden Sie deshalb eine direkte Berührung.<br />
Elektromagnetische Verträglichkeit! Durch unzureichende Entstörung von Leuchtstoff‐<br />
lampen in medizinischen Versorgungseinheiten kann es zu Störungen der Rufanlage<br />
kommen. Unter Umständen lassen sich diese externen Störungen durch den Einbau von<br />
Entstörgliedern (Varistor‐Schaltungen) vermeiden. Die Varistor‐Schaltungen sind bei den<br />
Herstellern der medizinischen Versorgungseinheiten zu beziehen. <strong>Tunstall</strong> bietet hierfür das<br />
Überspannungsschutzfilter 230 V (Bestell‐Nr. 70 0890 97) an.<br />
Das EMV‐Verhalten von verschiedenen medizinischen Versorgungseinheiten kann sehr<br />
unterschiedlich sein. Sogar zwei Versorgungseinheiten des gleichen Typs können sich<br />
unterschiedlich verhalten, wenn sie unterschiedlich installiert wurden.<br />
In medizinischen Versorgungseinheiten gelten für die Verlegung der Leitungen der Rufan‐<br />
lage die Bestimmungen von DIN EN ISO 11197.<br />
Codierschalter einstellen Setting coding switches<br />
Bett-Nr.: Externes Rufgerät:<br />
= Bett 1<br />
= Bett 2<br />
= Bett 3<br />
= Bett 4<br />
= Bett 5<br />
= Bett 6 *1<br />
Codierschalter 4 muss immer in Position OFF stehen.<br />
*1 Achtung: Diagnostikrufe können nur verwendet werden, wenn ein Bett‐Nr. eingestellt<br />
ist. Bei Bett‐Nr. 6 kann kein Diagnostikruf verwendet werden.<br />
00 8801 81, 10/11 (Rev. 2.0)<br />
OFF<br />
Bett‐Nr. Externes Rufgerät<br />
= Kein externes Rufgerät angeschlossen.<br />
= Externes Rufgerät ist Schließer.<br />
= Externes Rufgerät ist Öffner.<br />
Montage Mounting<br />
Der Einbau der Steckvorrichtung in die medizinische Versorgungseinheit ist von der<br />
jeweiligen Ausführung der Versorgungseinheit abhängig. Der Einbau erfolgt durch den<br />
Hersteller der medizinischen Versorgungseinheit.<br />
Rückwärtige Montage: / Mounting from backside:<br />
Anschlussklemme, 5-polig (Best.-Nr. 00 0211 37)<br />
Connector, 5 pole (order no. 00 0211 37)<br />
RAN + Licht<br />
RAN & light<br />
Medizinische Versorgungseinheit<br />
Medical supply unit<br />
Externes Rufgerät<br />
External call device<br />
Verbindungsleitung (Best.‐Nr. 50 0308 02)<br />
Connection cable (order no. 50 0308 02)<br />
Steckvorrichtung mit Ruftaste Kanal<br />
Connection socket with call switch bedhead unit<br />
Connection socket with call switch, bedhead unit, order no. 70 0171 50<br />
Connection socket with two 8-pole sockets for connection of call devices like pear push<br />
switches or medical monitoring devices. The connection of an additional external call<br />
device incl. location light and reassurance light is made on the back side with a special<br />
connection cable. Two outputs for light control. Mounting in a medical supply unit.<br />
Note! The complete installation of the system is described in the technical<br />
manual.<br />
Attention! The printed circuit board includes electrostatic sensitive components.<br />
Avoid touching.<br />
Electromagnetic compatibility! Due to insufficient suppression at fluorescent lamps in<br />
medical supply units faults in the call system may occur. These external interferences<br />
possibly can be avoided by installing suppressor elements (varistor circuits). Varistor cir‐<br />
cuits are available from the manufacturers of the medical supply units. <strong>Tunstall</strong> offers a<br />
proven overvoltage filter 230 V (order no. 70 0890 97).<br />
Medical supply units may differ clearly in EMC behaviour. Even two supply units of the<br />
same type may differ, if the installation is different.<br />
When laying call system cables in medical supply units the regulations of European stand‐<br />
ard ISO 11197 have to be followed.<br />
Bed no.: External call device:<br />
= Bed 1<br />
= Bed 2<br />
= Bed 3<br />
= Bed 4<br />
OFF<br />
Bed no. External call device<br />
= No external call device connected.<br />
= Normally open contact.<br />
= Normally closed contact.<br />
= Bed 5<br />
= Bed 6 *1<br />
Coding switch 4 must always be set to OFF.<br />
*1 Attention: A diagnostic call can only be used, if a bed number is set.<br />
With bed number 6 no diagnostic call can be used.<br />
The mounting depends on the individual model of the medical supply unit. The connection<br />
socket is mounted by the manufacturer of the medical supply unit.<br />
Ruftaste<br />
Call button<br />
Steckbuchsen<br />
Sockets<br />
70 0171 50<br />
Steckvorrichtung mit Ruftaste, Kanal<br />
Connection socket with call switch, bedhead unit<br />
Page 121<br />
55 mm<br />
70,5 mm<br />
55 mm<br />
70,5 mm
Anschlüsse D Connections GB<br />
Zum Anschluss als externes Rufgerät darf ein Öffner‐ oder ein Schließer-Kontakt verwendet<br />
werden. Der Anschluss erfolgt über die Anschlussleitung, Best.-Nr. 50 0308 02 (Länge:<br />
50 cm). Die maximale Leitungslänge für den externen Rufanschluss beträgt 2,5 m.<br />
Anschlussklemme, 5-polig<br />
(Best.-Nr. 00 0211 37)<br />
RAN und Licht anschließen:<br />
00 8801 81, 10/11 (Rev. 2.0)<br />
0V schwarz<br />
vom RAN‐Teilnehmer RAN gelb<br />
+24V rot<br />
Lichtanschaltung 1<br />
Lichtanschaltung 2<br />
Die Impulsdauer (24 V DC, max. 200 mA) entspricht<br />
der Dauer des Tastendrucks.<br />
Externes Rufgerät als Öffner anschließen:<br />
Beruhigungslicht<br />
+24V<br />
Rufeingang<br />
Externes Rufgerät als Schließer (z.B. Siemens Mediset) anschließen:<br />
Beruhigungslicht<br />
+24V<br />
Rufeingang<br />
56kOhm<br />
RAN + Licht<br />
Externes Rufgerät<br />
Anschlussleitung<br />
(Best.‐Nr. 50 0308 02)<br />
links<br />
rechts<br />
Anschlussklemme<br />
Best.‐Nr. 00 0211 37<br />
links<br />
rechts<br />
Anschlussleitung<br />
Best.‐Nr. 50 0308 02<br />
links<br />
rechts<br />
Anschlussleitung<br />
Best.‐Nr. 50 0308 02<br />
As external call devices only normally-closed contacts may be used. The external call<br />
device is connected via the special connection cable, order no. 50 0308 02 (length: 50 cm).<br />
The maximum cable length for the external call device is 2.5 m.<br />
Connecting RAN and light:<br />
light control 1<br />
light control 2<br />
from RAN user<br />
0V black<br />
RAN yellow<br />
+24V red<br />
The pulse duration (24 V DC, 200 mA max.) is the<br />
same as the duration of depressing the button.<br />
call input<br />
Connecting external call device as normally open contact (e.g. Siemens Mediset):<br />
reassurance light<br />
+24V<br />
call input<br />
70 0171 50<br />
Steckvorrichtung mit Ruftaste, Kanal<br />
Connection socket with call switch, bedhead unit<br />
56kOhm<br />
left-hand<br />
right-hand<br />
Connector<br />
order no. 00 0211 37<br />
Connecting external call device as normally closed contact:<br />
left-hand<br />
reassurance light<br />
+24V<br />
Page 122<br />
Connector, 5 pole<br />
(order no. 00 0211 37)<br />
RAN & light<br />
External call device<br />
Connection cable<br />
(order no. 50 0308 02)<br />
right-hand<br />
Connecting cable<br />
order no. 50 0308 02<br />
left-hand<br />
right-hand<br />
Connecting cable<br />
order no. 50 0308 02<br />
<strong>Tunstall</strong> <strong>GmbH</strong>, Orkotten 66, D-48291 Telgte, www.tunstall.de
<strong>Tunstall</strong> <strong>GmbH</strong>, Orkotten 66, D-48291 Telgte, www.tunstall.de<br />
Installationsanleitung D Installation Instructions GB<br />
Steckvorrichtung Kombi, Best.‐Nr. 70 0424 00<br />
Kombinierte Steckvorrichtung mit zwei unterschiedlichen Steckbuchsen zum Anschluss<br />
von Bedien- und Rufgeräten. Vorgesehen zur Übertragung von Rufen, ELA-Programmen<br />
und zur Steuerung von 2 Relais zur Lichtschaltung. Vorzugsweise hergestellt für den<br />
Wandeinbau.<br />
Hinweis! Die vollständige Installation des Systems ist im technischen<br />
Handbuch beschrieben.<br />
Achtung! Die Leiterplatte ist mit elektrostatisch gefährdeten Bauteilen bestückt.<br />
Vermeiden Sie deshalb eine direkte Berührung.<br />
Montage Mounting<br />
1. Buchsenelement 1 in die Einbaudose stecken.<br />
2. Montagerahmen 2 zusammen mit dem Buchsenelement auf die Einbaudose schrauben.<br />
3. Beide Stecker 3 mit den Steckbuchsen verbinden (Stecker A in Buchse A, Stecker B in<br />
Buchse B).<br />
4. Abdeckplatte 4 auf den Montagerahmen 2 drücken.<br />
Anschluss Connection<br />
Verwendbare Leitungsquerschnitte: 0,55 - 1 mm Ø.<br />
Abgeschirmte Leitungen für LS, MIC bis auf max. 30 mm absetzen!<br />
Zur Vermeidung von Kurzschlüssen den Beidraht (SCH) isolieren.<br />
Nur einen Schaltdraht pro Klemme einstecken.<br />
Handhabung der Klemmen mit lötfreier Anschlusstechnik nach dem Steckklemmprinzip:<br />
1. Leiter 8 mm abisolieren.<br />
2. Abisolierten Leiter bis zum Anschlag in die Klemme stecken.<br />
3. Zum Lösen des Leiters einen Schraubendreher mit einer Klinge 2,5 x 0,4 mm oder 3,5 x<br />
0,5 mm in die Öffnung stecken und den Leiter herausziehen.<br />
Hinweis! Zum Anschluss des Schirmdrahts Schraubendreher in die Öffnung stecken und<br />
Federkontakt mit dem Schraubendreher geöffnet halten, während Sie die Schirmleitung<br />
einführen. Anschließend korrekte Kontaktbelegung prüfen durch Ziehen an der Leitung.<br />
TV<br />
In Verbindung mit der Anschaltung eines TV‐Geräts ist die Bedienung und der zur<br />
Verfügung stehende Funktionsumfang unterschiedlich und abhängig von dem verwendeten<br />
TV‐Gerät sowie der integrierten Steuerung. Genaue Einzelheiten der Anschaltung und der<br />
Funktionen sollten vor der Installation mit dem Auftraggeber geklärt werden.<br />
00 8800 74, 10/11 (Rev. 3.0)<br />
Connection socket combi, order no. 70 0424 00<br />
A combined connection socket with two different sockets for connection of patient units and<br />
call devices. Designed for transmission of calls, entertainment programmes and control of two<br />
relays for light switching. Suitable for wall mounting.<br />
Note! The complete installation of the system is described in the technical<br />
manual.<br />
Attention! The printed circuit board includes electrostatic sensitive components.<br />
Avoid touching.<br />
1. Fit the socket 1 into the back box.<br />
2. Screw the mounting frame 2 together with the socket onto the back box.<br />
3. Connect both plugs 3 with the sockets (A in A, B in B).<br />
4. Push the cover 4 onto the mounting frame 2.<br />
Useable wire gauges: 0.55 - 1 mm Ø<br />
Shielded wires for LS, MIC: Strip to max. 30 mm!<br />
Insulate the guide wire (SCH) to prevent short circuiting.<br />
Connect only one wire per terminal.<br />
Handling of terminals with solderless connection technique:<br />
1. Strip the wire (8 mm).<br />
2. Insert the stripped wire into the terminal until it stops.<br />
3. For detaching the wire insert a screw driver with a tip of 2.5 x 0.4 mm or 3.5 x 0.5 mm<br />
into the opening and pull out the wire.<br />
Note! For connecting the shield wire, use the screw driver to hold the spring contact open,<br />
while you are inserting the shield wire. Afterwards check for a firm wire contact by pulling at<br />
the wire.<br />
TV<br />
The available TV functions depend on the TV set in use.<br />
Before the final installation, technicians shall check with the ordering party for the project to<br />
clarify the details regarding the connection and the functions.<br />
Bettennummer und TV‐Option einstellen Setting bed number and TV option<br />
Bettennummer 1 bis 6 einstellen: Mit den Schaltern P3, P2, P1 wie in der Tabelle<br />
abgebildet einstellen. Beispiel.: Bettenummer 1 = P3 off, P2 off, P1 on .<br />
TV auf ON: Hörfunkbetrieb über Tuner im TV-System.<br />
TV auf OFF: Hörfunkbetrieb über ELA<br />
PG‐Schalter nicht verändern.<br />
*1 Achtung: Bei Bettennummer 6 kann kein Diagnostik-Ruf verwendet werden.<br />
4<br />
A<br />
3<br />
B<br />
2<br />
1<br />
P3 P2 P1<br />
1 off off on<br />
2 off on off<br />
3 off on on<br />
4 on off off<br />
5 on off on<br />
6 on on off<br />
*1<br />
70 0424 00<br />
Steckvorrichtung Kombi<br />
Connection socket combi<br />
Page 123<br />
Setting of bed numbers 1 to 6: Use switches P3, P2, P1 as shown in the table.<br />
Example: Bed number 1 = P3 OFF, P2 OFF, P1 ON<br />
TV to ON: Radio sound via tuner in TV system.<br />
TV to OFF: Radio sound via Entertainment (ELA).<br />
PG switches: Do not change.<br />
*1 Attention: With bed number 6 diagnostic call is not possible.<br />
ON<br />
OFF<br />
Obere oder rechte Seite<br />
top or right side<br />
A B<br />
1b<br />
1a<br />
2b<br />
2a<br />
3b<br />
3a<br />
4b<br />
4a<br />
5b<br />
5a<br />
10<br />
9<br />
8<br />
7<br />
6<br />
5<br />
4<br />
3<br />
2<br />
1<br />
1 2 3 4 5<br />
P3 P2 P1 PG TV<br />
1<br />
2<br />
3<br />
4<br />
5<br />
6<br />
7<br />
8<br />
9<br />
10<br />
11<br />
Schirmleitung<br />
shield wire<br />
Schraubendreher<br />
screw driver
ELA<br />
Zimmerbus (RAN)<br />
TV<br />
Licht<br />
Anschlüsse D Connections GB<br />
Zimmerbus (RAN)<br />
(max. 2 Anschlüsse)<br />
Kabel: 2x IY(ST)Y 2x2x0,8<br />
Zimmerbus (RAN)<br />
(max. 2 Anschlüsse)<br />
Kabel: CCS32‐Kabel<br />
TV‐Ton zum Bett<br />
00 8800 74, 10/11 (Rev. 3.0)<br />
ELA1a<br />
ELA1b<br />
ELA2a<br />
ELA2b<br />
ELA3a<br />
ELA3b<br />
ELA4a<br />
ELA4b<br />
ELA5a<br />
ELA5b<br />
24V<br />
RAN<br />
0V<br />
LS<br />
MIC<br />
SCH B<br />
Anschaltung Lichtrelais<br />
OV<br />
Leselicht LT 1<br />
Raumlicht LT 2<br />
24V<br />
0V<br />
RAN<br />
LS<br />
MIC<br />
SCH B<br />
}{<br />
}{<br />
}{<br />
}{<br />
}{<br />
}{<br />
ge<br />
ws<br />
rt<br />
ge<br />
sw<br />
ws<br />
ge<br />
ws<br />
sw<br />
rt<br />
br<br />
sw<br />
gr<br />
ws<br />
bl<br />
25 V<br />
ELA vom Zimmer<br />
}{<br />
paarig verseilt<br />
vom ComTerminal oder<br />
Steckvorrichtung Kombi<br />
Is<br />
vom ComTerminal oder<br />
Steckvorrichtung Kombi<br />
Is<br />
vom TV‐System<br />
25Veff, 3 KOhm, 200 mW pro Bett<br />
zum Relais Lichtschaltung<br />
Pulsdauer 150 ms,<br />
24 V DC, max. 200 mA<br />
Room bus (RAN)<br />
(max. 2 connections)<br />
Cable: 2x IY(ST)Y 2x2x0.8<br />
Room bus (RAN)<br />
(max. 2 connections)<br />
Cable: CCS32 cable<br />
24V<br />
RAN<br />
0V<br />
LS<br />
MIC<br />
SCH B<br />
24V<br />
0V<br />
RAN<br />
LS<br />
MIC<br />
SCH B<br />
OV<br />
reading light LT 1<br />
room light LT 2<br />
}{<br />
}{<br />
}{<br />
}{<br />
}{<br />
ELA1a<br />
ELA1b<br />
ELA2a<br />
ELA2b<br />
ELA3a<br />
25 V<br />
Ie<br />
ELA3b<br />
ELA4a<br />
Ie<br />
Entertainment from room<br />
ELA4b<br />
ELA5a<br />
}{<br />
ELA5b<br />
twisted pair<br />
Entertainment<br />
Room bus (RAN)<br />
TV<br />
Light<br />
Obere oder rechte Seite<br />
top or right side<br />
A B<br />
1b<br />
1a<br />
2b<br />
2a<br />
3b<br />
3a<br />
4b<br />
4a<br />
5b<br />
5a<br />
10<br />
9<br />
8<br />
7<br />
6<br />
5<br />
4<br />
3<br />
2<br />
1<br />
70 0424 00<br />
Steckvorrichtung Kombi<br />
Connection socket combi<br />
TV sound to the bed<br />
Connection of light relay<br />
1<br />
2<br />
3<br />
4<br />
5<br />
6<br />
7<br />
8<br />
9<br />
10<br />
11<br />
Page 124<br />
}{<br />
yellow<br />
white<br />
red<br />
yellow<br />
black<br />
white<br />
yellow<br />
white<br />
black<br />
red<br />
brown<br />
black<br />
grey<br />
white<br />
blue<br />
shield<br />
from ComTerminal<br />
or connection socket<br />
combi<br />
from ComTerminal<br />
or connection socket<br />
combi<br />
Is<br />
from TV system<br />
25Veff, 3 KOhm, 200 mW per bed<br />
to light switching relay<br />
pulse duration 150 ms,<br />
24 V DC, max. 200 mA<br />
Is<br />
<strong>Tunstall</strong> <strong>GmbH</strong>, Orkotten 66, D-48291 Telgte, www.tunstall.de
<strong>Tunstall</strong> <strong>GmbH</strong>, Orkotten 66, D-48291 Telgte, www.tunstall.de<br />
Installationsanleitung D Installation Instructions GB<br />
Steckvorrichtung Kombi Kanal, Best.‐Nr. 70 0434 00<br />
Kombinierte Steckvorrichtung mit zwei unterschiedlichen Steckbuchsen zum Anschluss<br />
von Bedien- und Rufgeräten. Vorgesehen zur Übertragung von Rufen, ELA-Programmen<br />
und zur Steuerung von 2 Relais zur Lichtschaltung.<br />
Vorzugsweise hergestellt für den Einbau in medizinische Versorgungseinheiten.<br />
Hinweis! Die vollständige Installation des Systems ist im technischen<br />
Handbuch beschrieben.<br />
Achtung! Die Leiterplatte ist mit elektrostatisch gefährdeten Bauteilen bestückt.<br />
Vermeiden Sie deshalb eine direkte Berührung.<br />
Elektromagnetische Verträglichkeit! Durch unzureichende Entstörung von Leuchtstofflam‐<br />
pen in medizinischen Versorgungseinheiten kann es zu Störungen der Rufanlage kommen.<br />
Unter Umständen lassen sich diese externen Störungen durch den Einbau von Entstörglie‐<br />
dern (Varistor‐Schaltungen) vermeiden. Die Varistor‐Schaltungen sind bei den Herstellern zu<br />
beziehen. <strong>Tunstall</strong> bietet hierfür das Überspannungsschutzfilter 230 V (70 0890 97) an.<br />
Das EMV‐Verhalten von verschiedenen medizinischen Versorgungseinheiten kann sehr<br />
unterschiedlich sein. Sogar zwei Versorgungseinheiten des gleichen Typs können sich<br />
unterschiedlich verhalten, wenn sie unterschiedlich installiert wurden.<br />
In medizinischen Versorgungseinheiten gelten für die Verlegung der Leitungen der Rufan‐<br />
lage die Bestimmungen von DIN EN ISO 11197.<br />
00 8800 75, 10/11 (Rev. 4.1)<br />
Connection socket combi bedhead unit, order no. 70 0434 00<br />
Combined connection socket with two different sockets for connection of patient handsets and<br />
other call devices. Designed for transmission of calls, entertainment programmes and control<br />
of two relays for light switching.<br />
Suitable for mounting in medical supply units.<br />
Note! The complete installation of the system is described in the technical<br />
manual.<br />
Attention! The printed circuit board includes electrostatic sensitive components.<br />
Avoid touching.<br />
Electromagnetic compatibility! Due to insufficient suppression at fluorescent lamps in<br />
medical supply units faults in the call system may occur. These external interferences<br />
possibly can be avoided by installing suppressor elements (varistor circuits). Varistor circuits<br />
are commercially available from electric/electronic suppliers. <strong>Tunstall</strong> offers a proven over‐<br />
voltage filter 230 V (order no. 70 0890 97).<br />
Medical supply units may differ clearly in EMC behaviour. Even two supply units of the same<br />
type may differ, if the installation is different.<br />
When laying call system cables in medical supply units the regulations of European stan‐<br />
dard ISO 11197 have to be followed.<br />
Steckvorrichtung einstellen Setting the connection socket<br />
Folgende Einstellungen müssen vor Einbau der Steckvorrichtung gemacht werden:<br />
Before mounting the connection socket please adjust as follows:<br />
1. Bettennummer einstellen<br />
1. Setting of bed numbers<br />
Bett-Nr. Jumper gesteckt:<br />
Bed no. jumper placed:<br />
Bett 1 P1<br />
Bed 1 P1<br />
Bett 2 P2<br />
Bed 2 P2<br />
Bett 3 P1, P2 (werkseitige Einstellung)<br />
Bed 3 P1, P2 (factory setting)<br />
Bett 4 P3<br />
Bed 4 P3<br />
Bett 5 P1, P3<br />
Bed 5 P1, P3<br />
Bett 6*) P2, P3<br />
Bed 6*) P2, P3<br />
*) Bei Bett-Nr. 6 kann kein Diagnostikruf verwendet werden.<br />
*) When using bed number 6 no diagnostic call can be used.<br />
2. Lichtoption<br />
2. Light option<br />
Jumper offen: Separate Ausgänge LT1 und LT2 für die Lichtrelais<br />
Jumper open: Separate outputs LT1 and LT2 for the light relays<br />
(Lichttasten separat)<br />
(light switches are separate).<br />
Jumper gesteckt: Ausgänge LT1 und LT2 sind verbunden (Lichttasten parallel).<br />
Jumper placed: Outputs LT1 and LT2 are connected (light switches are<br />
In diesem Fall nur ein Relais anschließen.<br />
parallel). In this case connect only one relay.<br />
3. TV‐Option<br />
3. TV option<br />
Jumper 1 gesteckt: Hörfunkbetrieb über ELA (werkseitige Einstellung).<br />
Jumper 1 placed: Radio via entertainment system (factory setting).<br />
Jumper 2 gesteckt: Hörfunkbetrieb über Tuner im TV‐System.<br />
Jumper 2 placed: Radio via tuner in TV system.<br />
4. TV-Tonkanal TV1 - TV4<br />
4. TV tone TV1 - TV4<br />
Für diese Einstellung werden immer 2 Jumper gesteckt.<br />
For this settings, always place 2 jumpers.<br />
Bei sternförmig verteiltem TV‐Ton wird der Tonkanal entsprechend der Bett‐Nummer<br />
Where star-type distribution of TV tone is provided, the tone channel is set in reference to<br />
eingestellt.<br />
the bed number.<br />
Bett-Nr. Jumper gesteckt:<br />
Bed no. Jumper placed:<br />
Bett 1 TV1<br />
Bed 1 TV1<br />
Bett 2 TV2<br />
Bed 2 TV2<br />
Bett 3 TV3<br />
Bed 3 TV3<br />
Bett 4 TV4<br />
Bed 4 TV4<br />
Bei parallel verteiltem TV-Ton wird der Tonkanal 1 gewählt.<br />
Where TV tone is parallel, select tone channel 1.<br />
TV-Ton<br />
TV-Ton<br />
Die verfügbaren TV-Funktionen hängen von dem verwendeten TV-Gerät ab. Einzelheiten The available TV functions depend on the TV set in use. Before the final installation,<br />
der Anschaltung und der Funktionen sollten vor der Installation mit dem Auftraggeber technicians shall check with the ordering party for the project to clarify the details regarding<br />
geklärt werden.<br />
the connection and the functions.<br />
Montage Mounting<br />
Der Einbau der Steckvorrichtung in die medizinische Versorgungseinheit ist von der<br />
jeweiligen Ausführung der Versorgungseinheit abhängig.<br />
1. Gehäuse der medizinischen Versorgungseinheit öffnen.<br />
2. Steckvorrichtung einsetzen.<br />
3. Das Flachbandkabel zum Anschluss an die mediz. Versorgungseinheit aufstecken.<br />
4. Bei vorhandenem Bettenlicht auch den Anschluss zum Lichtrelais aufstecken.<br />
5. Gehäuse der medizinischen Versorgungseinheit schließen.<br />
70 0434 00<br />
Steckvorrichtung Kombi Kanal<br />
Connection socket combi bedhead unit<br />
Page 125<br />
After the settings are made the connection socket is mounted into the medical supply unit.<br />
The mounting depends on the individual model of the medical supply unit.<br />
1. Open the housing of the medical supply unit.<br />
2. Put in the connection socket.<br />
3. Put on the flat band cable to the medical supply unit.<br />
4. If there is bedlight available put on also the connection to the light relay.<br />
5. Close the housing of the medical supply unit.<br />
Anschluss Leselicht<br />
Impulsdauer 150 ms,<br />
24 V Gleichspannung,<br />
max. 200 mA<br />
connection reading light<br />
pulse duration<br />
150 ms,<br />
24 V DC<br />
max. 200 mA<br />
+24 V<br />
OV<br />
LT1<br />
NC<br />
Bett‐Nummer<br />
bed number<br />
P3 P2 P1<br />
Lichtoption<br />
light option<br />
1 2<br />
Anschluss Versorgungseinheit<br />
connection supply unit<br />
TV1 TV2 TV3 TV4<br />
TV‐Option TV‐Tonkanal<br />
TV option<br />
TV tone channel
ELA<br />
Zimmerbus (RAN)<br />
TV<br />
Licht<br />
Anschlüsse am Anschlussfeld D Connections to connection field GB<br />
Zimmerbus (RAN)<br />
(max. 2 Anschlüsse)<br />
Kabel:<br />
2x IY(ST)Y 2x2x0,8<br />
Zimmerbus (RAN)<br />
(max. 2 Anschlüsse)<br />
Kabel:<br />
CCS32‐Kabel<br />
TV‐Ton zum Bett<br />
Anschaltung Lichtrelais<br />
70 0434 00<br />
Steckvorrichtung Kombi Kanal<br />
Connection socket combi bedhead unit<br />
00 8800 75, 10/11 (Rev. 4.1)<br />
24V<br />
RAN<br />
0V<br />
24V<br />
0V<br />
RAN<br />
LS<br />
MIC<br />
SCH B<br />
}{<br />
}{<br />
}{<br />
}{<br />
}{<br />
6 ELA1a<br />
6 ELA1a<br />
7 ELA1b<br />
7 ELA1b<br />
21 ELA2a<br />
21 ELA2a<br />
22 ELA2b<br />
22 ELA2b<br />
23 ELA3a<br />
Ie<br />
23 ELA3a<br />
24 ELA3b<br />
ELA vom Zimmer<br />
24 ELA3b<br />
25 ELA4a<br />
25 ELA4a<br />
26<br />
27<br />
28<br />
ELA4b<br />
ELA5a<br />
ELA5b<br />
}{<br />
paarig verseilt<br />
26<br />
27<br />
28<br />
ELA4b<br />
ELA5a<br />
ELA5b }{<br />
1<br />
11<br />
40<br />
37 LS<br />
36 MIC<br />
35 SCH B<br />
1<br />
40<br />
11<br />
37<br />
36<br />
35<br />
}{<br />
OV<br />
LT 2<br />
rt<br />
ge<br />
sw<br />
ws<br />
ge<br />
ws<br />
sw<br />
rt<br />
br<br />
sw<br />
gr<br />
ws<br />
bl<br />
vom ComTerminal<br />
vom ComTerminal<br />
Abgeschirmte Leitungen für LS, MIC dürfen<br />
maximal 30 mm abgemantelt werden!<br />
zum Relais Raumlicht<br />
Ia<br />
Pulsdauer 150 ms,<br />
24 V DC, max. 200 mA<br />
Entertainment<br />
Room bus (RAN)<br />
TV<br />
Light<br />
Romm bus (RAN)<br />
(max. 2 connections)<br />
Cable:<br />
2x IY(ST)Y 2x2x0.8<br />
Room bus (RAN)<br />
(max. 2 connections)<br />
Cable:<br />
CCS32‐Kabel<br />
Connection of light relay<br />
24V<br />
RAN<br />
0V<br />
LS<br />
MIC<br />
SCH B<br />
24V<br />
0V<br />
RAN<br />
LS<br />
MIC<br />
SCH B<br />
TV sound to the bed<br />
TV1a<br />
TV1b }{<br />
TV2a<br />
TV2b }{<br />
TV3a<br />
TV3b }{<br />
vom Fernsehsystem<br />
TV4a<br />
TV4b }{<br />
Ia<br />
4<br />
5<br />
4<br />
5<br />
TV1a<br />
TV1b }{<br />
31<br />
32<br />
31<br />
32<br />
TV2a<br />
TV2b }{<br />
29<br />
30<br />
29<br />
30<br />
TV3a<br />
TV3b }{<br />
33<br />
34 }{<br />
paarig verseilt<br />
33<br />
34<br />
TV4a<br />
TV4b }{<br />
39<br />
9<br />
Anschlussfeld Versorgungseinheit (Beispiel)<br />
Connection field supply unit (example)<br />
Flachkabel zu Steckvorrichtung<br />
Kombi Kanal<br />
Flat cable to connection<br />
socket combi bedhead unit<br />
40<br />
1<br />
Klemmennummern wie Flachkabel<br />
Terminal numbers as flat cable<br />
Is<br />
Is<br />
Page 126<br />
1<br />
11<br />
40<br />
37<br />
36<br />
35<br />
1<br />
40<br />
11<br />
37<br />
36<br />
35<br />
39<br />
9<br />
OV<br />
LT 2<br />
}{<br />
}{<br />
}{<br />
}{<br />
}{<br />
red<br />
yellow<br />
black<br />
white<br />
yellow<br />
white<br />
black<br />
red<br />
brown<br />
black<br />
grey<br />
white<br />
blue<br />
shield<br />
Ie<br />
Entertainment from room<br />
}{<br />
twisted pair<br />
from ComTerminal<br />
Is<br />
from ComTerminal<br />
Is<br />
Shielded wires for LS, MIC: strip to max. 30 mm!<br />
OV<br />
OV<br />
MIC<br />
TV4b<br />
TV2b<br />
TV3b<br />
ELA5b<br />
ELA4b<br />
ELA3b<br />
ELA2b<br />
OV<br />
OV<br />
OV<br />
FB3<br />
FB1<br />
OV<br />
OV<br />
ELA1a<br />
TV1a<br />
+24V<br />
40<br />
38<br />
36<br />
34<br />
32<br />
30<br />
28<br />
26<br />
24<br />
22<br />
20<br />
18<br />
16<br />
14<br />
12<br />
10<br />
8<br />
6<br />
4<br />
2<br />
OV<br />
LS<br />
SCHB<br />
TV4a<br />
TV2a<br />
TV3a<br />
ELA5a<br />
ELA4a<br />
ELA3a<br />
ELA2a<br />
OV<br />
OV<br />
FB4<br />
FB2<br />
RAN<br />
LT2<br />
ELA1b<br />
TV1b<br />
+24V<br />
+24V<br />
from TV system<br />
}{<br />
twisted pair<br />
to room light relay<br />
pulse duration 150 ms,<br />
24 V DC, max. 200 mA<br />
39<br />
37<br />
35<br />
33<br />
31<br />
29<br />
27<br />
25<br />
23<br />
21<br />
19<br />
17<br />
15<br />
13<br />
11<br />
9<br />
7<br />
5<br />
3<br />
1<br />
40<br />
39<br />
38<br />
20<br />
18<br />
3<br />
2<br />
1<br />
24 V Drahtbrücken / wire links − 0 V<br />
(unbedingt erforderlich)<br />
(absolutely required)<br />
Ia<br />
Ia<br />
<strong>Tunstall</strong> <strong>GmbH</strong>, Orkotten 66, D-48291 Telgte, www.tunstall.de
<strong>Tunstall</strong> <strong>GmbH</strong>, Orkotten 66, D-48291 Telgte, www.tunstall.de<br />
Installationsanleitung D Installation Instructions GB<br />
Steckvorrichtung ComStation, Best.‐Nr. 74 0452 30<br />
Datensteckdose zum Anschluss einer ComStationCT , einer ComStationBUS , eines<br />
Tischadapters für ComTerminal, einer EccoLine ComStation, einer ComStation L200 einer<br />
Concento Hauptabfrage, oder einer Abfragestelle 79... .<br />
Vorzugsweise hergestellt für den Wandeinbau.<br />
Passend für zweiteilige Einbaudose (Einbaudose nicht im Lieferumfang)<br />
15-polige Buchse als Datensteckdose.<br />
Vorbereitet für 15-poligen Stecker mit mechanischer Verriegelung.<br />
4 Steckklemmen zum Anschluss der 24 V Stromversorgung bis 2,5 mm2 .<br />
Anschlüsse als Steckklemmen für Massivdraht, ø 0,55 - 1 mm.<br />
Kontaktbelastung: max. 3 A<br />
Hinweis! Die vollständige Installation des Systems ist im technischen Handbuch<br />
beschrieben.<br />
Abmessungen / Dimensions: Montage / Mounting:<br />
00 8802 46, 10/11 (Rev. 6.1)<br />
152 mm<br />
81 mm<br />
ComStationCT <strong>Flamenco</strong>, Best.‐Nr. 77 0606 00<br />
ComStationCT <strong>Flamenco</strong>, order no. 77 0606 00<br />
ComStationCT , Best.‐Nr. 77 0601 00A (Produkt wurde ersetzt durch 77 0606 00)<br />
ComStationCT , order no. 77 0601 00A (Product was replaced by 77 0606 00)<br />
74 0452 30<br />
*<br />
Verbindungsdosenklemme, 5-polig (00 0210 21)<br />
Leitungsquerschnitt 0,5 - 2,5 mm2 push‐wire connector, 5 pole (00 0210 21)<br />
wire cross section: 0.5 - 2.5 mm2 74 0452 30<br />
Steckvorrichtung ComStation<br />
Connection socket ComStation<br />
0V<br />
+24V<br />
2<br />
11<br />
1<br />
9<br />
3<br />
4<br />
10<br />
9<br />
8<br />
7<br />
6<br />
7<br />
8<br />
1<br />
11<br />
2<br />
0V<br />
+24V<br />
Page 127<br />
Connection socket ComStation, order no. 74 0452 30<br />
Data socket for connection of a ComStationCT , a ComStationBUS , a desktop adapter for<br />
ComTerminal, an EccoLine ComStation, a ComStation L200, a Concento main console or a<br />
Call handling console 79... .<br />
Preferably made for wall mounting.<br />
Suitable for 2-gang back box (back box not included with delivery)<br />
15 pole socket as data socket<br />
Prepared for 15 pole plug with mechanical locking mechanism<br />
4 plug-in terminals up to 2.5 mm2 for connection of the 24 V supply voltage<br />
Connection as plug-in terminals for solid wire of ø 0.55 - 1 mm.<br />
Contact current: max. 3 A<br />
*<br />
Note! The complete installation of the system is described in the technical<br />
manual.<br />
0V<br />
+24V<br />
NF 1a<br />
NF 1b<br />
NF 2a<br />
NF 2b<br />
DL<br />
DH<br />
DG<br />
DG<br />
DG<br />
DG<br />
DH<br />
DL<br />
NF 2b<br />
NF 2a<br />
NF 1b<br />
NF 1a<br />
0V<br />
+24V<br />
0 V<br />
24V<br />
RAN<br />
Ip (Spannungsversorgung / power supply)<br />
OSYnet (Gruppenbus / group bus)<br />
OSYnet (Gruppenbus / group bus)<br />
Ip (Spannungsversorgung / power supply)<br />
RAN (Zimmerbus / room bus)
Anschlüsse D Connections GB<br />
ComStation BUS , Best.‐Nr. 77 0605 00<br />
ComStation BUS , order no. 77 0605 10<br />
74 0452 30<br />
*<br />
Verbindungsdosenklemme, 5-polig (00 0210 21)<br />
Leitungsquerschnitt 0,5 - 2,5 mm2 push‐wire connector, 5 pole (00 0210 21)<br />
wire cross section: 0.5 - 2.5 mm2 Verbindungsdosenklemme, 4-polig (00 0222 88)<br />
Leitungsdurchmesser: 0,6 - 0,8 mm<br />
**<br />
push‐wire connector, 4 pole (00 0222 88)<br />
wire diameter: 0.6 - 0.8 mm<br />
EccoLine ComStation, Best.‐Nr. 74 3200 00A<br />
EccoLine ComStation, order no. 74 3200 10A<br />
74 0452 30<br />
00 8802 46, 10/11 (Rev. 6.1)<br />
**<br />
+24V<br />
0V<br />
**<br />
11<br />
10<br />
9<br />
6<br />
8<br />
7<br />
+24V<br />
0V<br />
11<br />
10<br />
9<br />
6<br />
8<br />
7<br />
3<br />
1<br />
3<br />
2<br />
0V<br />
+24V<br />
11<br />
10<br />
3<br />
1<br />
3<br />
2<br />
7<br />
8<br />
6<br />
8<br />
7<br />
10<br />
11<br />
0V<br />
+24V<br />
*<br />
NF-a<br />
NF-b<br />
NF-SCH<br />
D-0V<br />
D-H<br />
D-L<br />
NF-a<br />
NF-b<br />
NF-SCH<br />
D-0V<br />
D-H<br />
D-L<br />
0V<br />
Beep<br />
0V<br />
AW<br />
0V<br />
Beep<br />
0V<br />
AW<br />
0V<br />
+24V<br />
NF 1a<br />
NF 1b<br />
NF 2a<br />
NF 2b<br />
DL<br />
DH<br />
DG<br />
DG<br />
DG<br />
DG<br />
DH<br />
DL<br />
Page 128<br />
NF 2b<br />
NF 2a<br />
NF 1b<br />
NF 1a<br />
0V<br />
+24V<br />
IY(St)Y 2x2x0,8<br />
IY(St)Y 2x2x0,8<br />
Ip (Spannungsversorgung / power supply)<br />
OSYnet (Gruppenbus / group bus)<br />
OSYnet (Gruppenbus / group bus)<br />
Ip (Spannungsversorgung / power supply)<br />
Summer (Best.-Nr. 00 0420 28), bei Bedarf<br />
Buzzer (order no. 00 0420 28), if required<br />
Zimmerleuchte Universal,<br />
Best.-Nr. 77 0182 10<br />
Room lamp Universal,<br />
order no. 77 0182 10<br />
Summer (Best.‐Nr. 00 0420 28), bei Bedarf<br />
Buzzer (Best.‐Nr. 00 0420 28), if required<br />
Zimmer‐Signalleuchte,<br />
Best.‐Nr. 10 1201 00<br />
Room signal lamp,<br />
order no. 10 1201 00<br />
<strong>Tunstall</strong> <strong>GmbH</strong>, Orkotten 66, D-48291 Telgte, www.tunstall.de
14.5 Consoles<br />
77 0602 00 ComStation PC<br />
77 0606 00 ComStation CT <strong>Flamenco</strong><br />
77 0610 00 ManagementCenter PC<br />
<strong>Flamenco</strong> - <strong>Technical</strong> <strong>Manual</strong>, 10/11 (Rev. 5.0), 00 8812 60<br />
Page 129<br />
14. Product leaflets
Page 130
<strong>Tunstall</strong> <strong>GmbH</strong>, Orkotten 66, D-48291 Telgte, www.tunstall.de<br />
Konfigurationsanleitung - Seite 1 - D Configuration Instructions - Page 1 - GB<br />
ComStation CT <strong>Flamenco</strong>, Best.‐Nr. 77 0606 00<br />
Terminal in Gegensprechtechnik, vorgesehen zur Tischaufstellung am Dienststützpunkt,<br />
inkl. roter Ruftaste, blauer Alarmtaste, grüner Anwesenheitstaste (AW1), gelber<br />
Anwesenheitstaste (AW2), 4 Funktionstasten mit situationsabhängiger Belegung, Mikrofon<br />
und Lautsprecher.<br />
Hinweis! Die vollständige Installation des Systems ist im technischen<br />
Handbuch beschrieben.<br />
Vorsicht! Lassen Sie die ComStation CT nicht auf eine harte Oberfläche fallen und<br />
setzen es auch nicht einem beträchtlichen Druck oder Stoß aus. Die Bedienfront der<br />
ComStation CT besteht aus Glas und kann brechen.<br />
1. Konfigurationsmenü starten 1. Start configuration menu<br />
Funktionstaste ganz links und Funktionstaste ganz rechts gleichzeitig so lange (3 Sek.)<br />
gedrückt halten, bis das Konfigurationsmenü im Display erscheint.<br />
Symbole im Konfigurationsmenü:<br />
= Kreistaste = Markierten Menüpunkt einstellen (und speichern)<br />
= Pfeiltaste nach oben = In der Liste nach oben wandern<br />
= Pfeiltaste nach unten = In der Liste nach unten wandern<br />
= Haustaste = Abbrechen, d.h. zur höheren Menüebene<br />
zurückkehren ohne zu speichern.<br />
Menüpunkt Bedeutung<br />
Sprache Sprache der Displaytexte einstellen, z.B. Deutsch oder Englisch.<br />
RAN RAN Anzahl: Anzahl Zimmergeräte (= RAN Anzahl) einstellen.<br />
Test RAN: Test, ob Zimmergeräte funktionsbereit sind und korrekt am RAN<br />
angeschlossen sind.<br />
Status: Prüfung, ob eingestellte RAN Anzahl mit Anzahl funktionsbereiter<br />
Zimmergeräte übereinstimmt.<br />
Adresse Zimmer‐Adresse einstellen (1 bis 110 einstellbar)<br />
Reinigungszeit Sekunden einstellen, die benötigt werden um die Front der ComStationCT abzuwischen<br />
Kontrast Kontrast des ComStationCT ‐Displays auf hoch oder niedrig einstellen<br />
Tastenton Ton bei Drücken der Tasten an der ComStationCT ein‐ oder ausschalten<br />
Störungston Lautstärke des Tons beim Auftreten von Störungen einstellen<br />
Info Version der Software in der ComStationCT anzeigen lassen.<br />
Audio Test Menüpunkt nur zur Verwendung durch <strong>Tunstall</strong>‐Techniker<br />
Tastenfunktion Funktion der Alarmtaste und der Anwesenheitstasten an der ComStationCT ein‐ oder ausschalten (Ein = Standardeinstellung)<br />
Reset Verwendung nur durch <strong>Tunstall</strong>‐Techniker. (ComStationCT neu starten)<br />
00 8801 74, 06/10 (Rev. 1.0)<br />
Funktionstasten<br />
ComStationCT <strong>Flamenco</strong>, order no. 77 0606 00<br />
Terminal with two-way speech communication, designed for desktop installation in the<br />
nurse station, incl. red call button, blue code blue/cardiac alarm button, green presence<br />
button (staff 1), yellow presence button (staff 2), 4 function keys as soft keys, microphone<br />
and loudspeakers.<br />
Note! The complete installation of the system is described in the technical<br />
manual.<br />
Caution! The operating front cover of the ComStation CT is made of glass. Handle<br />
with care! The glass could break if it is dropped on a hard surface or receives a<br />
substantial impact.<br />
Press the left and right function keys simultaneously (3 sec.) until the configuration<br />
menu is shown in the display.<br />
Function keys<br />
Symbols in the configuration menu:<br />
= Circle key = Set (and store) marked menu item<br />
= Upwards arrow key = Scroll upwards through the list<br />
= Downwards arrow key = Scroll downwards through the list<br />
= Home key = Cancel, go back to the higher menu level<br />
without storing<br />
Menu Item Meaning<br />
Language Selecting the user language (e.g. English or German).<br />
RAN RAN number: Setting of number of room devices (= RAN number).<br />
Test RAN: Test if room devices are ready to operate and if they are<br />
correctly connected to the RAN.<br />
Status: Check whether the stored RAN number is equal to the number<br />
of operational room devices.<br />
Address Setting of room address (1 until 110 available)<br />
Cleaning time Setting the time (seconds) how long it takes to clean (wipe) the front<br />
of the ComStationCT Contrast Setting the display contrast to “high” or “low”.<br />
Key sound Switching the key sound on or off (on = recommended)<br />
Fault tone Setting the fault tone volume to soft, medium, loud or off.<br />
Info Displaying the ComStation's software version.<br />
Audio Test Function use only for <strong>Tunstall</strong> technicians.<br />
Key Function Switching on or of the function of Alarm Key, Presence Key 1 and<br />
Presence Key 2 (On = standard setting).<br />
Reset Function use only for <strong>Tunstall</strong> technicians. (Restart the ComStationCT )<br />
2. Zwingend erforderliche Einstellungen 2. Entering of necessary settings<br />
Sprache einstellen (wenn Menüpunkt vorhanden)<br />
Mit den Pfeiltasten “Sprache” markieren; dann Kreistaste drücken.<br />
Mit den Pfeiltasten gewünschte Sprache markieren: D = Deutsch, GB = Englisch, E =<br />
Spanisch, F = Französisch, NL = Niederländisch, I = Italienisch. “Selbstdefiniert” = eine<br />
weitere Sprache, wenn diese mit der SystemOrganizer‐Software hinterlegt wurde.<br />
Kreistaste drücken, um markierte Sprache zu speichern.<br />
RAN Anzahl einstellen (0 - 30)<br />
RAN Anzahl = Anzahl Zimmergeräte (Taster, Steckvorrichtungen, Zimmerleuchten etc.), die<br />
über RAN angeschlossen sind (Kein Birntaster, keine PBK Hand).<br />
Achtung, Ausnahme! Eine 4‐teilige Zimmerleuchte (Best.‐Nr. 77 0170 10 oder 77 0171 10)<br />
gilt als zwei Zimmergeräte.<br />
Mit den Pfeiltasten “RAN” markieren; dann Kreistaste drücken.<br />
Mit den Pfeiltasten “RAN Anzahl” markieren; dann Kreistaste drücken.<br />
Mit den Pfeiltasten RAN‐Anzahl des Zimmers markieren.<br />
Kreistaste drücken, um die markierte RAN‐Anzahl zu speichern.<br />
Zimmer-Adresse einstellen (1 - 110)<br />
Mit den Pfeiltasten “Adresse” markieren; dann Kreistaste drücken.<br />
Mit den Pfeiltasten gewünschte Adresse markieren.<br />
Kreistaste drücken, um die markierte Adresse zu speichern.<br />
Reinigungszeit einstellen (10 – 30 Sekunden)<br />
Die Reinigungszeit legt fest, wie lange die Tasten der ComStationCT außer Funktion sind,<br />
nachdem die Taste Clean gedrückt wurde (Zeit zum Abwischen der Bedienfront).<br />
Mit den Pfeiltasten “Reinigungszeit” markieren; dann Kreistaste drücken.<br />
Mit den Pfeiltasten gewünschte Reinigungszeit (in Sekunden) markieren.<br />
Kreistaste drücken, um markierte Reinigungszeit zu speichern.<br />
77 0606 00<br />
ComStation CT <strong>Flamenco</strong> ®<br />
Page 131<br />
Selecting the user language (if the menu item is available)<br />
Mark ”Language” using the arrow keys. Then press the circle key.<br />
Mark the desired language using the arrow keys: D = German; GB = English; E = Span‐<br />
ish; F = French; NL = Dutch; I = Italian. “Custom” = another language, if this is stored<br />
using the SystemOrganizer software.<br />
Press the circle key to store the marked language.<br />
Setting of RAN number (0 - 30) (Room Area Network)<br />
RAN number = Number of devices in the room (switches, connection sockets, room lamps,<br />
etc.) which are connected via RAN. (No pear push switch, no patient handset). Attention,<br />
exception! One room lamp with 4 sections (order no. 77 0170 10 or 77 0171 10) is<br />
equivalent to two room devices.<br />
Mark “RAN” using the arrow keys. Then press the circle key.<br />
Mark “RAN number” using the arrow keys. Then press the circle key.<br />
Mark the desired room number for the room using the arrow keys.<br />
Press the circle key to store the marked address.<br />
Setting of room address (1 - 110)<br />
Mark “Address” using the arrow keys. Then press the circle key.<br />
Mark the desired room address using the arrow keys.<br />
Press the circle key to store the marked address.<br />
Setting of cleaning time (10 – 30 seconds)<br />
The cleaning time defines how long the ComStationCT keys are not operational after the<br />
Clean key has been pressed (time for wiping the front).<br />
Mark “Cleaning time” using the arrow keys. Then press the circle key.<br />
Mark the desired cleaning time using the arrow keys.<br />
Press the circle key to store the marked cleaning time.<br />
74 0452 30<br />
Steckvorrichtung ComStation<br />
Connection socket ComStation
Konfigurationsanleitung - Seite 2 - D Configuration Instructions - Page 2 - GB<br />
2. Optionale Einstellungen bei Bedarf vornehmen 2. Entering of optional settings<br />
Kontrast des ComStation CT ‐Displays einstellen (hoch, niedrig)<br />
Je nach Umgebungslicht ist die Einstellung “hoch” oder “niedrig” besser lesbar.<br />
Mit den Pfeiltasten “Kontrast” markieren; dann Kreistaste drücken.<br />
Mit den Pfeiltasten “hoch” oder “niedrig” markieren.<br />
Kreistaste drücken, um markierten Kontrast zu speichern.<br />
Tastenton ausschalten / einschalten<br />
Auf Wunsch kann der Tastenton der Tasten an der ComStationCT ausgeschaltet werden.<br />
Die Einstellung “Tastenton Ein” wird jedoch empfohlen.<br />
Mit den Pfeiltasten “Tastenton” markieren; dann Kreistaste drücken.<br />
Mit den Pfeiltasten “Ein” oder “Aus” markieren.<br />
Kreistaste drücken, um die markierte Auswahl zu speichern.<br />
Störungston leise, mittel, laut oder aus<br />
Warnung! Der Ton, der auf Störungen aufmerksam macht, darf nur dann ausgeschaltet<br />
werden, wenn sichergestellt ist, dass Störungen auf andere Art sicher angezeigt werden.<br />
Bei der Lautstärke des Störungstons kann gewählt werden zwischen leise, mittel und laut.<br />
Mit den Pfeiltasten “Störungston” markieren; dann Kreistaste drücken.<br />
Mit den Pfeiltasten “Leise”, „Mittel“, “Laut” oder „Aus“ markieren.<br />
Kreistaste drücken, um die markierte Auswahl zu speichern.<br />
Softwareversion anzeigen lassen<br />
Mit den Pfeiltasten “Info” markieren; dann Kreistaste drücken.<br />
Softwareversion der ComStationCT wird angezeigt.<br />
Haustaste drücken um zum Menü zurückzukehren.<br />
Tastenfunktion ausschalten / einschalten<br />
In der Werkseinstellung der ComStation CT sind die Alarmtaste und beide AW‐Tasten (AW =<br />
Anwesenheit) funktionsbereit. In begründeten Ausnahmefällen ist es möglich die<br />
Tastenfunktion von diesen Tasten auszuschalten.<br />
AW‐Taste 2 (gelb)<br />
00 8801 74, 06/10 (Rev. 1.0)<br />
Alarmtaste (blaues Symbol)<br />
AW‐Taste 1 (grün)<br />
Mit den Pfeiltasten “Tastenfunktion” markieren; dann Kreistaste drücken.<br />
Mit den Pfeiltasten gewünschte Taste (Alarmtaste oder AW‐Taste) markieren;<br />
dann Kreistaste drücken.<br />
Mit den Pfeiltasten “Ein” oder “Aus” markieren.<br />
Kreistaste drücken, um die markierte Auswahl zu speichern.<br />
Achtung! Ausgeschaltete Tasten sind im Pflegebetrieb nicht verfügbar!<br />
Setting of display contrast (high, low)<br />
Depending on the ambient light a high or low display contrast is better legible.<br />
Mark “Contrast” using the arrow keys. Then press the circle key.<br />
Mark “high” or “low” using the arrow keys.<br />
Press the circle key to store the marked selection.<br />
Switching the key sound off or on<br />
If required the ComStationCT key sound can be switched off. But the setting “Key sound On”<br />
is recommended.<br />
Mark “Key Sound” using the arrow keys. Then press the circle key.<br />
Mark “On” or “Off” using the arrow keys.<br />
Press the circle key to store the marked selection.<br />
Fault tone volume soft, medium, loud or off<br />
Warning! The tone that attracts attention for a fault may only be turned off, if it is made sure,<br />
that the attention is attracted in another way. The volume of the fault tone can be set to soft,<br />
medium or loud.<br />
Mark “Fault Tone” using the arrow keys. Then press the circle key.<br />
Mark “Soft“, “Medium“, “Loud“ or „Off“ using the arrow keys.<br />
Press the circle key to store the marked selection.<br />
Displaying the software version<br />
Mark “Info” using the arrow keys. Then press the circle key.<br />
The ComStation's software version is displayed.<br />
Press the home key to return to the menu.<br />
Switching on or of the key function<br />
With the factory settings the alarm key and both presence keys are operational. In<br />
well‐founded exceptional cases you can switch of the key function for these keys.<br />
Presence Key 2 (yellow)<br />
3. Zimmerbus RAN prüfen 3. Checking room bus RAN<br />
Status<br />
Prüfung, ob eingestellte RAN Anzahl (siehe oben “RAN Anzahl einstellen”) mit Anzahl<br />
funktionsbereiter Zimmergeräte übereinstimmt.<br />
Mit den Pfeiltasten “RAN” markieren; dann Kreistaste drücken.<br />
Mit den Pfeiltasten “Status” markieren; dann Kreistaste drücken.<br />
Anzeige: OK: ComStationCT hat gemeldet, dass eingestellte RAN Anzahl gleich Anzahl<br />
funktionsbereiter Zimmergeräte ist.<br />
Anzeige: Fehler: ComStationCT hat gemeldet, dass eingestellte RAN Anzahl nicht gleich<br />
Anzahl funktionsbereiter Zimmergeräte ist.<br />
Zum Verlassen der Anzeige Haustaste drücken. Bei Fehler “Test RAN” durchführen.<br />
Test RAN<br />
Test, ob Zimmergeräte funktionsbereit und korrekt am RAN angeschlossen sind.<br />
Mit den Pfeiltasten “RAN” markieren; dann Kreistaste drücken.<br />
Test Starten: Mit den Pfeiltasten “Test RAN” markieren; dann Kreistaste drücken.<br />
Die LEDs aller angeschlossenen Zimmergeräte müssen blinken. (Geräte, die nicht<br />
blinken, sind falsch angeschlossen oder defekt. Defekte Geräte austauschen. Falsch<br />
angeschlossene Geräte korrekt anschließen)<br />
Prüfen, ob Anzahl angeschlossener Zimmergeräte gleich der eingestellten RAN Anzahl<br />
ist. Falls eingestellte RAN‐Anzahl falsch ist, diese nach dem RAN Test wie oben be‐<br />
schrieben einstellen.<br />
Test beenden: Haustaste drücken.<br />
Alarm Key (blue symbol)<br />
Presence Key 1 (green)<br />
Mark “Key Function” using the arrow keys. Then press the circle key.<br />
Mark the desired key (alarm key or presence key) using the arrow keys. Then<br />
press the circle key.<br />
Mark “On” or “Off” using the arrow keys.<br />
Press the circle key to store the marked address.<br />
Attention! Switched off keys are not available for nursing staff!<br />
4. Konfigurationsmenü verlassen 4. Exit the configuration menu<br />
Wenn keine Einstellungen mehr vorgenommen werden sollen und alle Tests beendet sind,<br />
müssen Sie das Konfigurationsmenü verlassen.<br />
Haustaste so oft drücken, bis die normale Betriebsanzeige angezeigt wird.<br />
Hinweis: Wenn drei Minuten keine Funktionstaste gedrückt wird, wird das<br />
Konfigurationsmenü automatisch verlassen.<br />
77 0606 00<br />
ComStation CT <strong>Flamenco</strong> ®<br />
Status<br />
Check whether the stored RAN number (see above “Setting of RAN number”) is equal to the<br />
number of operational room devices.<br />
Mark “RAN” using the arrow keys. Then press the circle key.<br />
Mark “Status” using the arrow keys. Then press the circle key.<br />
Display: OK: ComStation CT has reported: Stored RAN number is equal to the number of<br />
operational room devices.<br />
Display: Error: ComStation CT has reported: Stored RAN number is not equal to the<br />
number of operational room devices.<br />
Press the home key to end. In case of an error carry out “Test RAN”.<br />
Test RAN<br />
Test if room devices are ready to operate and if they are correctly connected to the RAN.<br />
Check the correct setting of the RAN number.<br />
Mark “RAN” using the arrow keys. Then press the circle key.<br />
Test start: Mark “Test RAN” using the arrow keys. Then press the circle key.<br />
The LEDs of all connected room devices must flash. (Non-flashing devices are wrongly<br />
connected or defective. Replace defective devices. Correct any wrong connection)<br />
Compare the number of connected room devices with the stored RAN number. If the<br />
stored RAN number is not equal to the number of connected room devices, correct the<br />
RAN number setting after the RAN test as described above.<br />
End of test: Press the home key.<br />
When all settings are performed and all tests are finished, exit the configuration menu.<br />
During this procedure all settings are stored.<br />
Press home key until normal operation display appears.<br />
Note: If for a period of three minutes no function key is pressed, the system will leave the<br />
configuration menu.<br />
Page 132<br />
74 0452 30<br />
Steckvorrichtung ComStation<br />
Connection socket ComStation<br />
<strong>Tunstall</strong> <strong>GmbH</strong>, Orkotten 66, D-48291 Telgte, www.tunstall.de
Switch<br />
OSY-<br />
ControlCenter<br />
Power Supply<br />
Power Suply<br />
Netzgerät<br />
77340000<br />
+UPS/USV:<br />
77340100<br />
230V~<br />
ST26<br />
NFxxa<br />
NFxxb<br />
11<br />
12<br />
In<br />
*<br />
= Option<br />
NF-a 11<br />
NF-b 12<br />
77 0610 00<br />
In= IY(St)Y 2x2x0,8<br />
Netzwerk<br />
CONNECTION<br />
COMBINATION<br />
ANSCHL.KOMBINATION<br />
04870010<br />
LCD-Monitor<br />
PrimusGlobal<br />
+<br />
ManagementCenter<br />
77070000<br />
SPRECHSTELLE<br />
TUNSTALL <strong>GmbH</strong> CONNECTION PLAN ANSCHLUSSPLAN<br />
Aend.-I.<br />
Gez.<br />
Page Gepr. 133<br />
Telephone<br />
for teleservice<br />
Telefon für<br />
Fernwartung<br />
80431900<br />
00064028<br />
LIMITER<br />
SHARK<br />
2,5m<br />
2,5m<br />
Art der Aend. Datum Name<br />
09.07.08 WENDKER<br />
ISDN<br />
IOIOIB/COM2 RJ45<br />
SYSTEM COMPUTER<br />
Speech Unit<br />
50070500A<br />
ManagementCenter<br />
Order No.: / Best.-Nr.:<br />
77061000<br />
230V~<br />
230V~<br />
*<br />
230V~<br />
USV<br />
230V~<br />
21900000<br />
230V~<br />
PC<br />
Drawing No.: / Zeichn.Nr.:<br />
97 1 1048 4 0 7
14. Product leaflets<br />
Page 134<br />
<strong>Flamenco</strong> - <strong>Technical</strong> <strong>Manual</strong>, 10/11 (Rev. 5.0), 00 8812 60
14.6 Interfaces in the room<br />
70 0360 10 IR TV control module universal<br />
70 0360 11 IR TV control module universal Audio<br />
70 0840 00 RAN interface normal call<br />
70 0841 00 RAN interface code blue / cardiac alarm<br />
70 0842 00 RAN interface telephone call<br />
70 0860 00 RAN interface TV<br />
70 0880 00 RAN interface with speech<br />
11 5350 00 Telephone interface relay<br />
<strong>Flamenco</strong> - <strong>Technical</strong> <strong>Manual</strong>, 10/11 (Rev. 5.0), 00 8812 60<br />
Page 135<br />
14. Product leaflets
<strong>Tunstall</strong> <strong>GmbH</strong>, Orkotten 66, D-48291 Telgte, www.tunstall.de<br />
Installationsanleitung D Installation Instructions GB<br />
IR TV-Steuermodul universal, Best.‐Nr. 70 0360 10<br />
Schnittstelle zur Steuerung eines handelsüblichen TV‐Geräts mit Infrarot‐Signalen.<br />
Hinweis! Die vollständige Installation des Systems ist im technischen<br />
Handbuch beschrieben.<br />
Voraussetzungen Requirements<br />
Steckvorrichtung Kombi (70 0424 00) und Steckvorrichtung Kombi Kanal (70 0434 00) ermögli‐<br />
chen die TV‐Ansteuerung in Verbindung mit PBK Hand (74 0747 00), der RAN-Schnittstelle TV<br />
(70 0860 00) und IR TV-Steuermodul universal.<br />
IR TV-Steuermodul universal (70 0360 10) ermöglicht die Steuerung von handelsüblichen TV-<br />
Geräten mit Infrarot-Signalen. Zusätzlich erforderlich: Kabelsatz zum IR TV-Steuermodul<br />
(70 0360 20), Adressierstecker zum IR TV-Steuermodul (70 0360 30) und einmalig die Dienst‐<br />
leistung Programmierung TV-Steuermodul (70 0360 50).<br />
Hinweis: Eine Tonübertragung zur PBK Hand findet nicht statt.<br />
Programmierung Programming<br />
00 8802 84, 03/11 (Rev. 3.0)<br />
IR TV control module universal, order no. 70 0360 10<br />
Interface for control of a standard TV set using infrared signals.<br />
Note! The complete installation of the system is described in the technical manual.<br />
Connection socket Combi (70 0424 00) and connection socket Combi bedhead unit<br />
(70 0434 00) allow TV control in combination with patient handset (74 0747 00), RAN<br />
interface TV (70 0860 00) and IR TV control module universal (70 0360 10).<br />
IR TV control module universal (70 0360 10) allows the control of standard TV sets using<br />
infrared signals. Additionally needed: Kit for IR TV control module (70 0360 20), Addressing<br />
plug for IR TV control module (70 0360 30) and one‐time TV control module programming<br />
service (70 0360 50).<br />
Note: No tone transmission to patient handset.<br />
Das IR TV‐Steuermodul ist erst funktionsfähig, wenn der Steuercode des benutzten TV‐Ge‐ Before the IR TV control module can be used, the control code of the used TV type has to<br />
rätetyps programmiert ist. Diese Programmierung wird von <strong>Tunstall</strong> <strong>GmbH</strong> durchgeführt<br />
(Bestell‐Nr. 70 0360 50).<br />
be programmed. This programming is done by <strong>Tunstall</strong> <strong>GmbH</strong> (order no. 70 0360 50).<br />
Montage Mounting<br />
Befestigung an der Rückwand des TV‐Geräts z.B. mit Klebepads. Fixing on the back part of the TV set e.g. by using sticky pads.<br />
Betten zuordnen (Adressierung) Assigning beds (Addressing)<br />
In der Werkseinstellung wird das IR TV‐Steuermodul von allen angeschlossenen Patientenbe‐<br />
diengeräten (PBK) angesteuert. So ändern Sie die Einstellung:<br />
1. Um das IR TV‐Steuermodul in den Adressiermodus zu versetzen, stecken Sie den<br />
Adressierstecker (Bestell‐Nr. 70 0360 30) in die mittlere Buchse.<br />
Nach ca. 5 Sekunden wechselt das IR TV‐Steuermodul in den Adressiermodus.<br />
2. Drücken Sie nacheinander an allen PBKs, die dieses TV‐Gerät steuern sollen, die Taste<br />
”TV einschalten” bzw. ”TV‐Programm vorwärts”.<br />
3. Ziehen Sie den Adressierstecker wieder ab.<br />
Die Betten sind zugeordnet.<br />
Hinweis! Wenn der Adressierstecker gesteckt und wieder abgezogen wird, ohne dass eine<br />
PBK ausgelöst wird, werden die Befehle von allen angeschlossenen PBKs akzeptiert<br />
(Auslieferungszustand). Es gilt immer die zuletzt gelernte Einstellung.<br />
Entertainment<br />
ELA<br />
Ie<br />
70 0424 00<br />
70 0860 00<br />
RAN<br />
PBK Hand<br />
Patient handset<br />
74 0747 00<br />
Daten<br />
Data<br />
74 0747 00<br />
00 0280 40<br />
70 0360 10<br />
00 0280 40<br />
70 0360 10<br />
Page 136<br />
With factory settings the IR TV control module is controlled by all connected patient handsets.<br />
This is how you change this setting:<br />
1. Plug the addressing plug (order no. 70 0360 30) into the middle socket.<br />
After 5 seconds the IR TV control module changes to addressing mode.<br />
2. Press in succession the button ”TV on” / ”Programme +” at all patient units, which shall<br />
control the TV set.<br />
3. Disconnect the addressing plug.<br />
Thr beds are assigned.<br />
Note! If you press no button between plugging and disconnecting the addressing plug, the<br />
IR TV control module is controlled by all connected patient handsets (delivery state).<br />
Always the last learned setting is valid.<br />
70 0360 20<br />
IR<br />
Adressierstecker<br />
Addressing plug<br />
70 0360 30<br />
IR<br />
70 0360 10<br />
IR<br />
70 0360 10<br />
IR TV-Steuermodul universal<br />
IR TV control module universal
OSYnet + Ip<br />
OSYnet + Ip<br />
Anschlussplan (Beispiel) D Connection Diagram (example) GB<br />
Is<br />
47<br />
47<br />
00 8802 84, 03/11 (Rev. 3.0 )<br />
1 2<br />
34<br />
5<br />
67<br />
Bed 2 / Bett 2<br />
Bed 1 / Bett 1<br />
ComTerminal <strong>Flamenco</strong><br />
77 0510 00<br />
70 0360 10<br />
70 0360 10<br />
for mounting to 35 mm rail<br />
Montagefüße für<br />
Tragschiene 35 mm<br />
IR<br />
RJ 45 connection<br />
IR<br />
70 0360 20<br />
70 0360 20<br />
70 0360 20<br />
00 0280 39 surface / Aufputz<br />
00 0280 40 recesssed / Unterputz<br />
socket<br />
RJ 45 Dose<br />
2<br />
3<br />
7<br />
70 0360 20<br />
RJ 45 connection<br />
socket<br />
00 0280 39 surface / Aufputz<br />
00 0280 40 recesssed / Unterputz<br />
TV control signals / TV−Steuersignale<br />
3<br />
2<br />
3<br />
7<br />
RJ 45 Dose<br />
3<br />
7<br />
2<br />
6<br />
7<br />
3<br />
RJ 45<br />
Western socket<br />
Westernbuchse<br />
3<br />
TV control signals / TV−Steuersignale<br />
0V<br />
RAN<br />
+24V<br />
1 2 3 4 5 6 7 8<br />
70 0860 00<br />
+24V<br />
3<br />
1<br />
Uout+<br />
6<br />
2<br />
Uout−<br />
7<br />
3<br />
1 x per room RAN interface TV<br />
1 x pro Zimmer RAN-Schnittstelle TV<br />
8<br />
Connection 11<br />
field<br />
2<br />
Anschlussfeld<br />
The shielded cores for LS and MIC are a twisted pair<br />
and should be stripped to a maximum of 30 mm!<br />
Die abgeschirmte Leitungen für LS und MIC sind<br />
paarig verseilt und dürfen max. 30 mm abgemantelt<br />
werden.<br />
Connection field supply unit:<br />
Anschlussfeld Versorgungseinheit:<br />
Uout+<br />
Uout−<br />
+24V<br />
Page 137<br />
40<br />
39<br />
38<br />
Bed 1 / Bett 1<br />
Bed number:<br />
0V<br />
LS<br />
SCHB<br />
TV4a<br />
TV2a<br />
0V<br />
0V<br />
MIC<br />
TV4b<br />
TV2b<br />
74 0747 00<br />
Jumpers<br />
position<br />
Set<br />
jumper<br />
Bed<br />
number<br />
TV3a<br />
ELA5a<br />
ELA4a<br />
TV3b<br />
ELA5b<br />
ELA4b<br />
P3 P2 P1<br />
Bed 1 = P1<br />
Bed 2 = P2<br />
Bed 3 = P1, P2<br />
Bed 4 = P3<br />
Bed 5 = P1, P3<br />
Bed 6 = P2, P3<br />
20<br />
18<br />
39<br />
37<br />
35<br />
33<br />
31<br />
29<br />
27<br />
25<br />
23<br />
21<br />
19<br />
17<br />
15<br />
13<br />
11<br />
9<br />
7<br />
5<br />
3<br />
1<br />
ELA3a<br />
ELA2a<br />
0V<br />
0V<br />
ELA3b<br />
ELA2b<br />
0V<br />
0V<br />
Bed 2 / Bett 2<br />
74 0747 00<br />
Supply unit / Versorgungseinheit<br />
Factory setting<br />
24 V wire links / Drahtbrücken − 0 V<br />
(mandatory / unbedingt erforderlich)<br />
FB4<br />
FB2<br />
RAN<br />
0V<br />
FB3<br />
FB1<br />
LT2<br />
ELA1b<br />
TV1b<br />
0V<br />
0V<br />
ELA1a<br />
3<br />
2<br />
1<br />
+24V<br />
+24V<br />
40<br />
38<br />
36<br />
34<br />
32<br />
30<br />
28<br />
26<br />
24<br />
22<br />
20<br />
18<br />
16<br />
14<br />
12<br />
10<br />
8<br />
6<br />
4<br />
2<br />
Bettennummer:<br />
70 0434 00 70 0434 00<br />
Jumper Lage der<br />
steckt Jumper<br />
Betten<br />
Nummer<br />
Bett 1 = P1<br />
Bett 2 = P2<br />
Bett 3 = P1,P2<br />
Bett 4 = P3<br />
Bett 5 = P1,P3<br />
Bett 6 = P2,P3<br />
TV1a<br />
+24V<br />
P3 P2 P1<br />
Terminal numbers as flat cable<br />
Klemmennummern wie Flachkabel<br />
Notes:<br />
- Setting of bed numbers and other options are effected by placing jumpers in the<br />
appropriate positions at connection socket (70 0434 00).<br />
- When using bed number 6 no diagnostic call can be used.<br />
Hinweise:<br />
- Die Einstellung der Bettennummer und der anderen Optionen erfolgt durch Jumper<br />
auf der jeweiligen Steckvorrichtung (70 0434 00).<br />
- Bei Verwendung von Bettennummer 6 kann kein Diagnostikruf verwendet werden.<br />
Werkseinstellung<br />
<strong>Tunstall</strong> <strong>GmbH</strong>, Orkotten 66, D-48291 Telgte, www.tunstall.de
<strong>Tunstall</strong> <strong>GmbH</strong>, Orkotten 66, D-48291 Telgte, www.tunstall.de<br />
Installationsanleitung D Installation Instructions GB<br />
IR TV-Steuermodul universal Audio, Best.‐Nr. 70 0360 11<br />
Schnittstelle zur Steuerung eines handelsüblichen TV‐Geräts mit Infrarot‐Signalen.<br />
Integrierter Audioverstärker zur Ansteuerung eines Bediengeräts. Die Ausgangslautstärke<br />
kann mit einem Programmiergerät in definierten Grenzen geregelt werden. Beim Einsatz ist<br />
die Abstimmung der Audiopegel mit den eingesetzten Endgeräten zu beachten.<br />
Hinweis! Die vollständige Installation des Systems ist im technischen<br />
Handbuch beschrieben.<br />
Voraussetzungen Requirements<br />
Steckvorrichtung Kombi, TVL (70 0424 50) und Steckvorrichtung Kombi Kanal, TVL<br />
(70 0434 50) ermöglichen die TV‐Ansteuerung in Verbindung mit PBK Hand (74 0747 00),<br />
der RAN-Schnittstelle TV (70 0860 00) und dem IR TV-Steuermodul Audio (70 0360 11).<br />
Achtung! Bei den Steckvorrichtungen handelt es sich um Modelle, die nur für diese<br />
Anwendung benutzt werden.<br />
IR TV-Steuermodul universal Audio ermöglicht die Steuerung und Tonübertragung von<br />
handelsüblichen TV-Geräten mit Infrarot-Signalen. Zusätzlich erforderlich: Kabelsatz zum<br />
IR TV-Steuermodul Audio (70 0360 21), Adressierstecker zum IR TV-Steuermodul<br />
(70 0360 30) und einmalig die Dienstleistung Programmierung TV-Steuermodul<br />
(70 0360 50).<br />
Programmierung Programming<br />
Das IR TV‐Steuermodul ist erst funktionsfähig, wenn der Steuercode des benutzten<br />
TV‐Gerätetyps programmiert ist. Diese Programmierung wird von <strong>Tunstall</strong> <strong>GmbH</strong><br />
durchgeführt (Bestell‐Nr. 70 0360 50).<br />
Montage Mounting<br />
00 8802 85, 03/11 (Rev. 3.0)<br />
IR TV control module universal Audio, order no. 70 0360 11<br />
Interface for control of a standard TV set using infrared signals. Integrated audio amplifier<br />
for control of a patient handset. The output volume can be adjusted within definite limits<br />
using a programming tool. The audio levels have to be adapted to the patient handsets.<br />
Note! The complete installation of the system is described in the technical manual.<br />
Connection socket Combi, TVL (70 0424 50) and connection socket Combi, TVL bedhead<br />
unit (70 0434 50) allow TV control in combination with patient handset (74 0747 00), RAN<br />
interface TV (70 0860 00) and IR TV control module universal Audio (70 0360 11).<br />
Warning! These connections sockets are used only for this application.<br />
IR TV control module universal Audio allows the control and tone transmission from<br />
standard TV sets using infrared signals. Additionally needed: Kit for IR TV control module<br />
Audio (70 0360 21), Addressing plug for IR TV control module (70 0360 30) and one-time<br />
TV control module programming service (70 0360 50).<br />
Before the IR TV control module can be used, the control code of the used TV model has to<br />
be programmed. This programming is done by <strong>Tunstall</strong> <strong>GmbH</strong> (order no. 70 0360 50).<br />
Befestigung an der Rückwand des TV‐Geräts z.B. mit Klebepads. Fixing on the back part of the TV set e.g. by using sticky pads.<br />
Betten zuordnen (Adressierung) Assigning beds (Addressing)<br />
Im Auslieferungszustand wird das IR TV‐Steuermodul von allen angeschlossenen Patienten‐<br />
bediengeräten (PBK) angesteuert. So ändern Sie die Einstellung:<br />
1. Um das IR TV‐Steuermodul in den Adressiermodus zu versetzen, stecken Sie den<br />
Adressierstecker (Bestell‐Nr. 70 0360 30) in die zweite Buchse von links.<br />
Nach ca. 5 Sekunden wechselt das IR TV‐Steuermodul in den Adressiermodus.<br />
2. Drücken Sie nacheinander an allen PBKs, die dieses TV‐Gerät steuern sollen, die Taste<br />
”TV einschalten” bzw. ”TV‐Programm vorwärts”.<br />
3. Ziehen Sie den Adressierstecker wieder ab.<br />
Die Betten sind zugeordnet.<br />
Hinweis! Wenn der Adressierstecker gesteckt und wieder abgezogen wird, ohne dass eine<br />
PBK ausgelöst wird, werden die Befehle von allen angeschlossenen PBKs akzeptiert<br />
(Auslieferungszustand). Es gilt immer die zuletzt gelernte Einstellung.<br />
Entertainment<br />
ELA<br />
Ie<br />
70 0424 50<br />
RAN<br />
70 0860 00<br />
PBK Hand<br />
Patient handset<br />
74 0747 00<br />
Daten<br />
Data<br />
Ton<br />
Tone<br />
74 0747 00<br />
00 0280 40<br />
00 0280 40<br />
70 0360 11<br />
70 0360 11<br />
In delivery state the IR TV control module is controlled by all connected patient handsets. This<br />
is how you change this setting:<br />
1. Plug the addressing plug (order no. 70 0360 30) into the second socket from the left.<br />
After 5 seconds the IR TV control module changes to addressing mode.<br />
2. Press in succession the button ”TV on” / ”Programme +” at all patient units, which shall<br />
control the TV set.<br />
3. Disconnect the addressing plug.<br />
The beds are assigned.<br />
Note! If you press no button between plugging and disconnecting the addressing plug, the<br />
IR TV control module is controlled by all connected patient handsets (delivery state).<br />
Always the last learned setting is valid.<br />
70 0360 21<br />
SCART<br />
IR<br />
Adressierstecker<br />
Addressing plug<br />
70 0360 30<br />
Page 138<br />
Scart<br />
IR<br />
SCART<br />
70 0360 11<br />
IR<br />
70 0360 11<br />
IR TV-Steuermodul universal Audio<br />
IR TV control module universal Audio
OSYnet + Ip<br />
OSYnet + Ip<br />
Anschlussplan (Beispiel) D Connection Diagram (example) GB<br />
Is<br />
47<br />
47<br />
00 8802 85, 03/11 (Rev. 3.0)<br />
12 34<br />
5<br />
67<br />
Bed 2 / Bett 2<br />
Bed 1 / Bett 1<br />
ComTerminal <strong>Flamenco</strong><br />
77 0510 00<br />
70 0360 11<br />
70 0360 11<br />
for mounting to 35 mm rail<br />
Montagefüße für<br />
Tragschiene 35 mm<br />
70 0360 21 70 0360 21<br />
RJ 45 connection<br />
IR<br />
IR<br />
70 0360 21<br />
70 0360 21<br />
70 0360 21<br />
00 0280 39 surface / Aufputz<br />
00 0280 40 recesssed / Unterputz<br />
socket<br />
RJ 45 Dose<br />
2<br />
3<br />
7 1<br />
70 0360 21<br />
00 0280 39 surface / Aufputz RJ 45 connection<br />
00 0280 40 recesssed / Unterputz socket<br />
RJ 45 Dose<br />
2<br />
TV control signals / TV−Steuersignale<br />
3<br />
3<br />
7<br />
1<br />
6<br />
TV tone 1 / TV −Ton 1<br />
2<br />
6<br />
3<br />
7<br />
2<br />
TV tone 2 / TV−Ton 2<br />
2<br />
6<br />
7<br />
3<br />
TV tone 2 / TV−Ton 2<br />
2<br />
RJ 45<br />
Western socket<br />
Westernbuchse<br />
3<br />
70 0860 00<br />
1<br />
Uout+<br />
2<br />
3<br />
7 Uout−<br />
6<br />
3<br />
1 x per room RAN interface TV<br />
1 x pro Zimmer RAN-Schnittstelle TV<br />
+24V<br />
4<br />
5<br />
31<br />
32<br />
1<br />
6<br />
1<br />
6<br />
TV control signals / TV−Steuersignale<br />
1 2 3 4 5 6 7 8<br />
0V<br />
RAN<br />
+24V<br />
8<br />
11<br />
2<br />
Connection<br />
field<br />
Anschlussfeld<br />
TVb<br />
Uout−<br />
Uout+<br />
TVa<br />
The shielded cores for LS and MIC are a twisted pair and<br />
should be stripped to a maximum of 30 mm!<br />
Die abgeschirmte Leitungen für LS und MIC sind paarig<br />
verseilt und dürfen max. 30 mm abgemantelt werden.<br />
Connection field supply unit:<br />
Anschlussfeld Versorgungseinheit:<br />
+24V<br />
Page 139<br />
40<br />
39<br />
38<br />
Bed 1 / Bett 1<br />
TV tone channel:<br />
Bed number:<br />
0V<br />
LS<br />
SCHB<br />
TV4a<br />
TV2a<br />
0V<br />
0V<br />
MIC<br />
TV4b<br />
TV2b<br />
74 0747 00<br />
Jumpers<br />
position<br />
Jumpers<br />
position<br />
Set<br />
jumper<br />
Bed<br />
number<br />
70 0434 50<br />
TV3a<br />
ELA5a<br />
ELA4a<br />
TV3b<br />
ELA5b<br />
ELA4b<br />
− For stellate TV tone<br />
set as bed number<br />
− Where TV tone is parallel,<br />
select tone channel 1<br />
P3 P2 P1<br />
Bed 1 = P1<br />
Bed 2 = P2<br />
Bed 3 = P1, P2<br />
Bed 4 = P3<br />
Bed 5 = P1, P3<br />
Bed 6 = P2, P3<br />
20<br />
18<br />
39<br />
37<br />
35<br />
33<br />
31<br />
29<br />
27<br />
25<br />
23<br />
21<br />
19<br />
17<br />
15<br />
13<br />
11<br />
9<br />
7<br />
5<br />
3<br />
1<br />
ELA3a<br />
ELA2a<br />
0V<br />
0V<br />
ELA3b<br />
ELA2b<br />
0V<br />
0V<br />
Bed 2 / Bett 2<br />
74 0747 00<br />
Supply unit / Versorgungseinheit<br />
Factory setting<br />
24 V wire links / Drahtbrücken − 0 V<br />
(mandatory / unbedingt erforderlich)<br />
FB4<br />
FB2<br />
RAN<br />
0V<br />
FB3<br />
FB1<br />
LT2<br />
ELA1b<br />
TV1b<br />
0V<br />
0V<br />
ELA1a<br />
3<br />
2<br />
1<br />
+24V<br />
+24V<br />
40<br />
38<br />
36<br />
34<br />
32<br />
30<br />
28<br />
26<br />
24<br />
22<br />
20<br />
18<br />
16<br />
14<br />
12<br />
10<br />
8<br />
6<br />
4<br />
2<br />
TV-Tonkanal:<br />
Bettennummer:<br />
70 0434 50<br />
Jumper Lage der Lage der<br />
steckt Jumper<br />
Jumper<br />
Betten<br />
Nummer<br />
−Bei sternförmigen<br />
TV−Ton wie Betten−<br />
nummer einstellen.<br />
−Bei parallelem TV−Ton<br />
auf Tonkanal 1 einstellen.<br />
Bett 1 = P1<br />
Bett 2 = P2<br />
Bett 3 = P1,P2<br />
Bett 4 = P3<br />
Bett 5 = P1,P3<br />
Bett 6 = P2,P3<br />
TV1a<br />
+24V<br />
P3 P2 P1<br />
Terminal numbers as flat cable<br />
Klemmennummern wie Flachkabel<br />
Notes:<br />
- Setting of bed numbers and other options are effected by placing jumpers in the<br />
appropriate positions at connection socket (70 0434 00).<br />
- When using bed number 6 no diagnostic call can be used.<br />
Hinweise:<br />
- Die Einstellung der Bettennummer und der anderen Optionen erfolgt durch Jumper<br />
auf der jeweiligen Steckvorrichtung (70 0434 00).<br />
- Bei Verwendung von Bettennummer 6 kann kein Diagnostikruf verwendet werden.<br />
werkseitige Einstellung<br />
<strong>Tunstall</strong> <strong>GmbH</strong>, Orkotten 66, D-48291 Telgte, www.tunstall.de
<strong>Tunstall</strong> <strong>GmbH</strong>, Orkotten 66, D-48291 Telgte, www.tunstall.de<br />
Installationsanleitung D Installation Instructions GB<br />
RAN‐Schnittstelle Normalruf, Best.‐Nr. 70 0840 00<br />
Schnittstelle zur Verbindung von Rufgeräten mit dem Zimmerbus (RAN). Die Schnittstelle<br />
stellt einen Schalteingang für Normalruf und einen Ausgang als Finde- und Beruhigungs‐<br />
licht zur Verfügung. Über Codierschalter kann der Ruf mit einer Bettenkennung versehen<br />
werden.<br />
RAN‐Schnittstelle Normalruf mit automatischer Rufabstellung, Best.‐Nr. 70 0840 01<br />
wie 70 0840 00, jedoch mit automatischer Rufabstellung. Der Ruf wird automatisch<br />
abgestellt, wenn der Kontakt des angeschlossenen Rufgeräts wieder geöffnet wird.<br />
Achtung: Die RAN‐Schnittstelle, Bestell‐Nr. 70 0840 01, funktioniert erst, wenn eine<br />
Bettennummer eingestellt wurde, siehe B.<br />
RAN‐Schnittstelle Alarmruf, Best.‐Nr. 70 0841 00<br />
Schnittstelle zur Verbindung von Rufgeräten mit dem Zimmerbus (RAN). Die Schnittstelle<br />
stellt einen Schalteingang für Alarmruf und einen Ausgang als Finde- und Beruhigungslicht<br />
zur Verfügung.<br />
RAN‐Schnittstelle Alarmruf mit automatischer Rufabstellung, Best.‐Nr. 70 0841 01<br />
wie 70 0841 00, jedoch mit automatischer Rufabstellung. Der Ruf wird automatisch<br />
abgestellt, wenn der Kontakt des angeschlossenen Rufgeräts wieder geöffnet wird.<br />
Hinweis! Die vollständige Installation des Systems ist im technischen<br />
Handbuch beschrieben.<br />
Vorsicht! Die Leiterplatte ist mit elektrostatisch gefährdeten Bauteilen bestückt.<br />
Vermeiden Sie deshalb eine direkte Berührung.<br />
Vorsicht! Führen Sie die Installation nur im spannungsfreien Zustand aus. Sonst<br />
könnte die RAN‐Schnittstelle beschädigt werden.<br />
Montage Mounting<br />
Montage der RAN‐Schnittstellen mit den mitgelieferten Halterungen auf eine<br />
35 mm‐Z-Schiene oder in eine Einbaudose.<br />
Anschluss Connection<br />
Schaltausgang<br />
Uout = 24 V; Iout max. = 10 mA<br />
Findelichtfunktion<br />
IFL max. = 0,5 mA<br />
Externer Taster S1<br />
min. Schaltstrom: 0,1 mA, 5 V DC<br />
max. Leitungslänge an Punkt 4, 5, 6, 7 = 5 m<br />
00 8800 45, 09/11 (Rev. 7.0)<br />
RAN interface normal call, order no. 70 0840 00<br />
Interface for connection of call devices to the room bus (RAN). The interface has a<br />
switching input for normal calls and an output for location and reassurance light. The bed<br />
identification can be set by coding switches.<br />
RAN interface normal call with automatic call cancelling, order no. 70 0840 01<br />
as 70 0840 00, but with automatic call cancelling. The call is cancelled, when the contact of<br />
the connected call device is opened again.<br />
Attention: The RAN interface, order no. 70 0840 01, only works, after a bed number has<br />
been set, see B.<br />
RAN interface code blue / cardiac alarm, order no. 70 0841 00<br />
Interface for connection of call devices to the room bus (RAN). The interface has a<br />
switching input for codes blue / cardiac alarm and an output for location and reassurance<br />
light.<br />
RAN interface code blue/cardiac alarm with automatic call cancelling, order no. 70 0841 01<br />
as 70 0841 00, but with automatic call cancelling. The call is cancelled, when the contact of<br />
the connected call device is opened again.<br />
Note! The complete installation of the system is described in the technical<br />
manual.<br />
Caution! The printed circuit board includes electrostatic sensitive components.<br />
Avoid touching.<br />
Caution! During installation the power supply should be switched off to ensure<br />
zero-potential status. Otherwise, the RAN interface could be damaged.<br />
Mounting the RAN interface with the delivered mounts on a 35 mm Z-rail or in a back box.<br />
Switch output<br />
Uout = 24 V; Iout max. = 10 mA<br />
Location light function<br />
ILL max. = 0.5 mA<br />
External switch S1<br />
min. switching current: 0.1 mA, 5 V DC<br />
max. wiring length at point 4, 5, 6, 7 = 5 m<br />
Bettennummer einstellen (nur bei 70 0840 00, 70 0840 01) Setting bed number (only for 70 0841 00, 70 0841 01)<br />
An der RAN-Schnittstelle Normalruf mit automatischer Rufabstellung (70 0840 01) muss die<br />
entsprechende Bettennummer eingestellt werden. An der RAN-Schnittstelle Normalruf (70<br />
0840 00) kann die entsprechende Bettennummer eingestellt werden.<br />
Hierzu werden Codierschalter 1, 2 und 3 verwendet.<br />
*1 Achtung! Bei Bettennummer 6 im Zimmer kann kein Diagnostikruf verwendet werden.<br />
Hinweis: Wenn die Einstellung der Bettennummer geändert wurde, muss ein Reset für<br />
diese RAN‐Schnittstelle durchgeführt werden, d.h. 24 Volt ausschalten und anschließend<br />
wieder einschalten.<br />
RAN<br />
S 1<br />
70 0840 0X<br />
RAN-Schnittstelle Normalruf<br />
RAN interface normal call<br />
70 0840 00<br />
70 0840 01<br />
70 0841 00<br />
70 0841 01<br />
ON<br />
1 2 3 4 5<br />
Codierschalter 5:<br />
Funktion des Tasters<br />
ON = Öffner<br />
OFF = Schließer<br />
Coding switch 5:<br />
switch function<br />
ON = normally closed contact<br />
OFF = normally open contact<br />
Page 140<br />
At the RAN interface normal call with automatic call cancelling (70 0840 01) the corresponding<br />
bed number has to be set. At the RAN interface normal call (70 0840 00) the corresponding bed<br />
number can be set.<br />
For this, use the code switches 1, 2 and 3.<br />
*1 Attention: If there is bed number 6 in the room, a diagnostic call cannot be used.<br />
Note: After the bed number setting was changed, this RAN interface must be reset by switching<br />
off and on the 24 V power supply.<br />
Codierschalter<br />
Coding switches<br />
70 0840 00<br />
70 0840 01<br />
ON<br />
1 2 3 4 5<br />
70 0841 0X<br />
RAN-Schnittstelle Alarmruf<br />
RAN interface code blue / cardiac alarm<br />
Werkseinstellung:<br />
4 = OFF, nicht verändern!<br />
Factory setting:<br />
4 = OFF, do not change!<br />
Bett<br />
Bed<br />
= 0<br />
= 1<br />
= 2<br />
= 3<br />
= 4<br />
= 5<br />
= 6*1
Installationsanleitung D Installation Instructions GB<br />
RAN-Schnittstelle Telefonruf, Best.‐Nr. 70 0842 00<br />
Schnittstelle zur Verbindung eines Telefonanschaltrelais (Bestell‐Nr. 11 5350 00) oder eines<br />
Telefonkontaktes an den Zimmerbus (RAN).<br />
Hinweis! Die vollständige Installation des Systems ist im technischen<br />
Handbuch beschrieben.<br />
Vorsicht! Die Leiterplatte ist mit elektrostatisch gefährdeten Bauteilen bestückt.<br />
Vermeiden Sie deshalb eine direkte Berührung.<br />
Vorsicht! Führen Sie die Installation nur im spannungsfreien Zustand aus. Sonst<br />
könnte die RAN‐Schnittstelle beschädigt werden.<br />
Montage Mounting<br />
Montage der RAN‐Schnittstellen mit den mitgelieferten Halterungen auf eine<br />
35 mm‐Z-Schiene oder in eine Einbaudose.<br />
Anschluss Connection<br />
Anschlussfeld vom ComTerminal<br />
ComTerminal's connection field<br />
0V<br />
RAN<br />
+24V<br />
00 8800 45, 09/11 (Rev. 7.0)<br />
Zur Leitungsführung des Zimmerbus RAN<br />
lesen Sie das Technische Handbuch.<br />
For the arrangement of the room bus RAN<br />
please refer to the technical manual.<br />
0V<br />
1<br />
RAN<br />
2<br />
+24V<br />
3<br />
5<br />
4<br />
RAN interface telephone call, order no. 70 0842 00<br />
Interface for connection of a telephone interface relay (order no. 11 5350 00) to the room bus<br />
(RAN).<br />
Note! The complete installation of the system is described in the technical<br />
manual.<br />
Caution! The printed circuit board includes electrostatic sensitive components.<br />
Avoid touching.<br />
Caution! During installation the power supply should be switched off to ensure<br />
zero-potential status. Otherwise, the RAN interface could be damaged.<br />
Mounting the RAN interface with the delivered mounts on a 35 mm Z-rail or in a back box.<br />
11 5350 00<br />
Telefonanschaltrelais<br />
Telephone interface relais<br />
70 0842 00<br />
RAN‐Schnittstelle Telefonruf<br />
RAN interface telephone call<br />
70 0842 00<br />
RAN-Schnittstelle Telefonruf<br />
RAN interface telephone call<br />
Page 141<br />
Telefonnetz<br />
Telephone network<br />
77 0182 10<br />
Zimmerleuchte Universal<br />
Room lamp Universal<br />
weißes Leuchtfeld<br />
white light section<br />
<strong>Tunstall</strong> <strong>GmbH</strong>, Orkotten 66, D-48291 Telgte, www.tunstall.de
<strong>Tunstall</strong> <strong>GmbH</strong>, Orkotten 66, D-48291 Telgte, www.tunstall.de<br />
Installationsanleitung D Installation Instructions GB<br />
RAN-Schnittstelle TV, Best.‐Nr. 70 0860 00<br />
Schnittstelle zur Verbindung des Zimmerbus (RAN) und der Fernsehsteuerung.<br />
In Verbindung mit PBK Hand und Steckvorrichtung Kombi (70 0424 00) / Steckvorrichtung<br />
Kombi Kanal (70 0434 00) steht die Möglichkeit der Bedienung des Patientenfernsehens<br />
zur Verfügung.<br />
Die Schnittstelle überträgt alle erforderlichen Signale zur Bedienung für die Fernsehsteue‐<br />
rung.<br />
Hinweis! Dieser RAN-Teilnehmer muss nicht am Raumterminal (z.B. ComTerminal)<br />
angemeldet werden. Wenn eine RAN-Schnittstelle TV installiert wird, ändern Sie die<br />
Anzahl der RAN-Teilnehmer am Raumterminal nicht.<br />
Hinweis! Die vollständige Installation des Systems ist im technischen<br />
Handbuch beschrieben.<br />
Vorsicht! Die Leiterplatte ist mit elektrostatisch gefährdeten Bauteilen bestückt.<br />
Vermeiden Sie deshalb eine direkte Berührung.<br />
Vorsicht! Führen Sie die Installation nur im spannungsfreien Zustand aus. Sonst<br />
könnte die RAN‐Schnittstelle beschädigt werden.<br />
Montage Mounting<br />
00 8800 68, 03/11 (Rev. 5.0)<br />
RAN interface TV, order no. 70 0860 00<br />
Interface for connection of TV control to the room bus (RAN).<br />
With the patient handset plugged into the connection socket combi (70 0424 00) or connection<br />
socket comb bedhead unit (70 0434 00), the patient is able to control the TV.<br />
The interface transmits all of required signals to operate the TV control.<br />
Note! This RAN user has not to be registered at the room terminal (e.g. ComTerminal). If a<br />
RAN interface TV is installed, do not change the RAN number at the room terminal.<br />
Note! The complete installation of the system is described in the technical<br />
manual.<br />
Caution! The printed circuit board includes electrostatic sensitive components.<br />
Avoid touching.<br />
Caution! During installation the power supply should be switched off to ensure<br />
zero-potential status. Otherwise, the RAN interface could be damaged.<br />
Einbau in medizinische Versorgungseinheit oder in eine Einbaudose. Installation in the medical supply unit or a back box.<br />
Bettennummer einstellen Setting bed number<br />
Die Einstellung der Bettennummer und der anderen Optionen erfolgt durch Jumper auf der<br />
jeweiligen Steckvorrichtung (70 0434 00).<br />
Achtung! Bei Bettennummer 6 im Zimmer kann kein Diagnostikruf verwendet werden.<br />
47<br />
12 34<br />
5<br />
67<br />
47<br />
Montagefüße für Tragschiene 35 mm<br />
Mounts for mounting on 35 mm supporting rail<br />
70 0860 00<br />
RAN-Schnittstelle TV<br />
RAN interface TV<br />
Page 142<br />
Setting of bed numbers and other options are effected by placing jumpers in the appropriate<br />
positions at connection socket (70 0434 00).<br />
Attention: If there is bed number 6 in the room, a diagnostic call cannot be used.<br />
RAN<br />
zur TV-Steuereinheit<br />
to TV control unit<br />
Schaltausgang<br />
Output<br />
Uout = 24 V<br />
Iout max. = 10 mA<br />
Anschlusspunkte 6 und 7:<br />
max. Leitungslänge 12 m<br />
Connection points 6 and 7:<br />
max. cable length 12 m
Anschlussplan (Beispiel) D Connection Diagram (example) GB<br />
OSYnet + Ip<br />
OSYnet + Ip<br />
Is<br />
47<br />
47<br />
00 8800 68, 03/11 (Rev. 5.0)<br />
12 34<br />
5<br />
67<br />
Bed 2 / Bett 2<br />
77 0510 00<br />
ComTerminal <strong>Flamenco</strong><br />
Bed 1 / Bett 1<br />
TV control module<br />
TV-Steuermodul<br />
70 0360 01<br />
74 7002 26<br />
74 7002 32<br />
74 7002 42<br />
or / oder<br />
or / oder<br />
TV control module<br />
TV-Steuermodul<br />
70 0360 01<br />
74 7002 26<br />
or / oder 74 7002 32<br />
or / oder 74 7002 42<br />
for mounting to 35 mm rail<br />
Montagefüße für<br />
Tragschiene 35 mm<br />
RJ 45 connection<br />
socket<br />
RJ 45 Dose<br />
RJ 45 connection<br />
socket<br />
RJ 45 Dose<br />
00 0280 39 surface / Aufputz<br />
00 0280 40 recesssed / Unterputz<br />
00 0280 39 surface / Aufputz<br />
00 0280 40 recesssed / Unterputz<br />
3<br />
7 1<br />
TV control signals / TV−Steuersignale<br />
2<br />
3<br />
7<br />
1<br />
6<br />
TV tone 1 / TV −Ton 1<br />
2<br />
6<br />
3<br />
7<br />
TV tone 2 / TV−Ton 2<br />
2<br />
6<br />
7<br />
TV tone 2 / TV−Ton 2<br />
2<br />
RJ 45<br />
Western socket<br />
Westernbuchse<br />
2<br />
Uout+<br />
Uout−<br />
70 0860 00<br />
1<br />
6<br />
2<br />
7<br />
3<br />
1 x per room<br />
1 x pro Zimmer<br />
4<br />
5<br />
31<br />
32<br />
1<br />
6<br />
1<br />
6<br />
TV control signals / TV−Steuersignale<br />
0V<br />
RAN<br />
+24V<br />
8<br />
11<br />
2<br />
1 2 3 4 5 6 7 8<br />
The shielded cores for LS and MIC are a twisted pair and<br />
should be stripped to a maximum of 30 mm!<br />
Die abgeschirmte Leitungen für LS und MIC sind paarig<br />
verseilt und dürfen max. 30 mm abgemantelt werden.<br />
Connection<br />
field<br />
Anschlussfeld<br />
RAN interface TV<br />
RAN-Schnittstelle TV<br />
Connection field supply unit:<br />
Anschlussfeld Versorgungseinheit:<br />
Page 143<br />
40<br />
39<br />
38<br />
Bed 1 / Bett 1<br />
TV tone channel:<br />
Bed number:<br />
OV<br />
LS<br />
SCHB<br />
TV4a<br />
TV2a<br />
OV<br />
OV<br />
MIC<br />
TV4b<br />
TV2b<br />
74 0747 00<br />
Jumpers<br />
position<br />
Jumpers<br />
position<br />
Set<br />
jumper<br />
Bed<br />
number<br />
70 0434 00<br />
TV3a<br />
ELA5a<br />
ELA4a<br />
TV3b<br />
ELA5b<br />
ELA4b<br />
− For stellate TV tone<br />
set as bed number<br />
− Where TV tone is parallel,<br />
select tone channel 1<br />
P3 P2 P1<br />
Bed 1 = P1<br />
Bed 2 = P2<br />
Bed 3 = P1, P2<br />
Bed 4 = P3<br />
Bed 5 = P1, P3<br />
Bed 6 = P2, P3<br />
20<br />
18<br />
39<br />
37<br />
35<br />
33<br />
31<br />
29<br />
27<br />
25<br />
23<br />
21<br />
19<br />
17<br />
15<br />
13<br />
11<br />
9<br />
7<br />
5<br />
3<br />
1<br />
ELA3a<br />
ELA2a<br />
OV<br />
OV<br />
ELA3b<br />
ELA2b<br />
OV<br />
OV<br />
Bed 2 / Bett 2<br />
74 0747 00<br />
Supply unit / Versorgungseinheit<br />
Factory setting<br />
24 V wire links / Drahtbrücken − 0 V<br />
(manatory / unbedingt erforderlich)<br />
FB4<br />
FB2<br />
RAN<br />
OV<br />
FB3<br />
FB1<br />
70 0434 00<br />
LT2<br />
ELA1b<br />
TV1b<br />
OV<br />
OV<br />
ELA1a<br />
3<br />
2<br />
1<br />
+24V<br />
+24V<br />
40<br />
38<br />
36<br />
34<br />
32<br />
30<br />
28<br />
26<br />
24<br />
22<br />
20<br />
18<br />
16<br />
14<br />
12<br />
10<br />
8<br />
6<br />
4<br />
2<br />
TV-Tonkanal:<br />
Bettennummer:<br />
Jumper Lage der Lage der<br />
steckt Jumper<br />
Jumper<br />
Betten<br />
Nummer<br />
−Bei sternförmigen<br />
TV−Ton wie Betten−<br />
nummer einstellen.<br />
−Bei parallelem TV−Ton<br />
auf Tonkanal 1 einstellen.<br />
Bett 1 = P1<br />
Bett 2 = P2<br />
Bett 3 = P1,P2<br />
Bett 4 = P3<br />
Bett 5 = P1,P3<br />
Bett 6 = P2,P3<br />
TV1a<br />
+24V<br />
P3 P2 P1<br />
Terminal numbers as flat cable<br />
Klemmennummern wie Flachkabel<br />
Notes:<br />
- Setting of bed numbers and other options are effected by placing jumpers in the<br />
appropriate positions at connection socket (70 0434 00).<br />
- When using bed number 6 no diagnostic call can be used.<br />
Hinweise:<br />
- Die Einstellung der Bettennummer und der anderen Optionen erfolgt durch Jumper<br />
auf der jeweiligen Steckvorrichtung (70 0434 00).<br />
- Bei Verwendung von Bettennummer 6 kann kein Diagnostikruf verwendet werden.<br />
werkseitige Einstellung<br />
<strong>Tunstall</strong> <strong>GmbH</strong>, Orkotten 66, D-48291 Telgte, www.tunstall.de
<strong>Tunstall</strong> <strong>GmbH</strong>, Orkotten 66, D-48291 Telgte, www.tunstall.de<br />
Installationsanleitung D Installation Instructions GB<br />
RAN‐Schnittstelle mit Sprechen, Best.‐Nr. 70 0880 00<br />
Schnittstelle zum Anschluss eines Patiententerminals an den Zimmerbus (RAN).<br />
Hinweis! Die vollständige Installation des Systems ist im technischen<br />
Handbuch beschrieben.<br />
Vorsicht! Die Leiterplatte ist mit elektrostatisch gefährdeten Bauteilen bestückt.<br />
Vermeiden Sie deshalb eine direkte Berührung.<br />
Vorsicht! Führen Sie die Installation nur im spannungsfreien Zustand aus. Sonst<br />
könnte die RAN‐Schnittstelle beschädigt werden.<br />
Montage Mounting<br />
Die RAN-Schnittstelle wird in eine zweiteilige Einbaudose eingebaut oder mittels der zwei<br />
Halterungen auf einer 35 mm-Z-Schiene befestigt.<br />
MIC<br />
LS<br />
SCH<br />
0V<br />
+24V<br />
RAN<br />
Halterungen mounts<br />
Anschlüsse Connections<br />
Zimmerbus RAN<br />
0V<br />
00 8801 00, 01/09 (Rev. 5.0)<br />
MIC−IN<br />
LS−OUT<br />
MIC−GND<br />
0V<br />
+24V<br />
BL<br />
RT<br />
Interne Verbindung zur Steckvorrichtung<br />
z.B. MediSET GS<br />
Leitungslänge max. 5 m<br />
(Details siehe Installationsunterlagen des Herstellers)<br />
RAN interface with speech, order no. 70 0880 00<br />
Interface for connecting a patient terminal to the room bus (RAN).<br />
Note! The complete installation of the system is described in the technical<br />
manual.<br />
Caution! The printed circuit board includes electrostatic sensitive components.<br />
Avoid touching.<br />
Caution! During installation the power supply should be switched off to ensure<br />
zero-potential status. Otherwise, the RAN interface could be damaged.<br />
The RAN interface is mounted into a 2-gang back box or is fixed on a 35 mm Z rail by the two<br />
mounts.<br />
MIC<br />
LS<br />
SCH<br />
0V<br />
+24V<br />
RAN<br />
Room bus RAN<br />
0V<br />
. .<br />
MIC−IN<br />
LS−OUT<br />
MIC−GND<br />
0V<br />
+24V<br />
BL<br />
RT<br />
Internal connection to connection socket<br />
e.g. MediSET GS<br />
Cable length max. 5 m<br />
(For details refer to manufacturer's instructions)<br />
Bettennummer einstellen Setting the bed number<br />
Über die Jumper auf der Leiterplatte kann die entsprechende Bettennummer eingestellt<br />
werden. Hierzu werden Codierschalter 1, 2 und 3 verwendet.<br />
Use the jumpers on the board to set the appropriate bed number. Use code switches 1, 2, 3.<br />
= Bett 1<br />
= Bed 1<br />
= Bett 2<br />
= Bett 3<br />
= Bett 4<br />
= Bed 2<br />
= Bed 3<br />
= Bed 4<br />
= Bett 5<br />
= Bed 5<br />
= Bett 6 *1<br />
= Bed 6 *1<br />
*1 Achtung: Bei Bettennummer 6 kann kein Diagnostikruf verwendet werden. *1 Attention: Diagnostic call not possible with bed number 6.<br />
70 0880 00<br />
RAN-Schnittstelle mit Sprechen<br />
RAN interface with speech<br />
Page 144
<strong>Tunstall</strong> <strong>GmbH</strong>, Orkotten 66, D-48291 Telgte, www.tunstall.de<br />
Installationsanleitung D Installation Instructions GB<br />
Telefonanschaltrelais, Best.‐Nr. 11 5350 00<br />
zur Anschaltung von analogen Telefonen an eine Rufanlage, zur Weiterleitung von Anrufen<br />
als Telefonruf.<br />
Rufspannung: 32 - 80 V AC<br />
Stromversorgung: 5 - 40 V<br />
EIN-/AUS-Schalter<br />
Schaltausgang: Wechselkontakt<br />
Rufpausenüberbrückung einstellbar<br />
Schaltdauer des Ausgangskontakts einstellbar<br />
Abmessungen (HxBxT): 70 x 35 x 70 mm<br />
Montage auf 35 mm-Hutschiene<br />
Hinweis! Die vollständige Installation des Systems ist im Technischen Handbuch<br />
beschrieben.<br />
Montage Mounting<br />
1. Schalten Sie die Anlage spannungsfrei.<br />
2. Setzen Sie das Telefonanschaltrelais auf die Hutschiene und lassen es einrasten.<br />
3. Anschlüsse wie in der folgenden Abbildung gezeigt vornehmen.<br />
4. Anlage wieder in Betrieb nehmen.<br />
5. Schalten Sie das Telefonanschaltrelais ein, indem Sie den EIN/AUS-Schalter<br />
eindrücken.<br />
Anschlüsse Connections<br />
Anschlussfeld vom ComTerminal<br />
ComTerminal's connection field<br />
0V<br />
RAN<br />
+24V<br />
00 8801 70, 10/11 (Rev. 2.0)<br />
Zur Leitungsführung des Zimmerbus RAN<br />
lesen Sie das Technische Handbuch.<br />
For the arrangement of the room bus RAN<br />
please refer to the technical manual.<br />
0V<br />
1<br />
RAN<br />
2<br />
+24V<br />
3<br />
Telephone interface relay, order no. 11 5350 00<br />
for connecting analogues telephones to a nurse call system. A telephone call will be<br />
displayed as a call in the nurse call system.<br />
Call voltage: 32 - 80 V AC<br />
Power supply: 5 - 40 V<br />
ON/OFF switch (ON = EIN, OFF = AUS)<br />
Output: N/C, N/O contact<br />
Bridging of call intervalls can be set<br />
Power-on time can be set.<br />
Dimensions (HxWxD): 70 x 35 x 70 mm<br />
Mounting on a 35 mm top hat rail.<br />
5<br />
4<br />
Note! The complete installation of the system is described in the technical<br />
manual.<br />
1. Power down the equipment.<br />
2. Place the telephone interface relay on the top hat rail and click it into place.<br />
3. Connect as shown in the diagram below.<br />
4. Restart the equipment.<br />
5. Switch on the telephone interface relay by pressing down the ON/OFF switch.<br />
11 5350 00<br />
Telefonanschaltrelais<br />
Telephone interface relais<br />
70 0842 00<br />
RAN‐Schnittstelle Telefonruf<br />
RAN interface telephone call<br />
Telefonnetz<br />
Telephone network<br />
Potentiometer einstellen Potentiometer Setting<br />
Wenn das Telefonanschaltrealis eingeschaltet ist, wird der Schaltkontakt geschlossen,<br />
sobald die Telefonrufspannung anliegt. Wie lange der Schaltkontakt geschlossen bleibt,<br />
hängt davon ab, wie die beiden Potentiometer “Rufpausenüberbrückung“ und<br />
“Einschaltdauer“ eingestellt sind.<br />
Rufpausenunterdrückung einstellen<br />
Mit dem Potentiometer zur Rufpausenüberbrückung wird die Zeit festgelegt, die der<br />
Schaltkontakt länger geschlossen ist, als das Telefonanschaltrelais angesteuert wird. Der<br />
Einstellbereich ist linear geteilt und liegt zwischen 0 und 12 Sekunden. Ist die eingestellte<br />
Zeit größer als die Pause bei der Ansteuerung durch die Telefonrufspannung, so bedeutet<br />
dies, dass der Schaltkontakt ohne Unterbrechung geschlossen bleibt, bis die gesamte<br />
Ansteuerung abgebrochen wird (Ende des Rufes). Ist die eingestellte Zeit kleiner als die<br />
Ansteuerungspause, so ergibt sich die Schalt zeit des Kontaktes aus der<br />
Signalisierungszeit, verlängert um die eingestellte Überbrückungszeit.<br />
Einschaltdauer einstellen<br />
Mit dem Potentiometer für die Einschaltdauer kann die Zeit, in der der Schaltkontakt<br />
geschlossen ist, begrenzt werden. Der Einstellbereich ist nicht linear geteilt und liegt<br />
zwischen 0,25 und ca. 12 Sekunden. Wird das Potentiometer auf “Dauer“ gestellt, so<br />
bedeutet dies keine Begrenzung, d. h. der Schaltkontakt bleibt bis zum Ende der<br />
Ansteuerung geschlossen.<br />
11 5350 00<br />
Telefonanschaltrelais<br />
Telephone interface relay<br />
Page 145<br />
77 0182 10<br />
Zimmerleuchte Universal<br />
Room lamp Universal<br />
weißes Leuchtfeld<br />
white light section<br />
When the telephone interface relay is operational, the switching contact is closed as soon<br />
as the telephone signal voltage is applied. It depends on the setting of the two<br />
potentiometers “bridging of call intervals“ and “power-on time” how long the switching<br />
contact remains closed.<br />
Setting bridging of call intervals (“Rufpausenunterdrückung”)<br />
The potentiometer for the bridging of call intervals sets the period the switching contact<br />
remains closed longer than the telephone interface relay is actuated. The setting range is<br />
linear and lies between 0 and 12 seconds. If the selected time is longer than the actuation<br />
intervals by the telephone call voltage the switching contact remains closed without<br />
interruption until the actuation stops (end of call). If the selected time is shorter than the<br />
actuation interval the switching time of the contact results from the signal period plus the<br />
selected bridging time.<br />
Setting power-on time (“Einschaltdauer”)<br />
The potentiometer for power-on time setting allows to limit the time the switching contact<br />
remains closed. The setting range is not linear and lies between 0.25 and about 12<br />
seconds. If the potentiometer is set for permanent (“Dauer”) the switching contact is not<br />
limited and remains closed up to the end of actuation.
14. Product leaflets<br />
Page 146<br />
<strong>Flamenco</strong> - <strong>Technical</strong> <strong>Manual</strong>, 10/11 (Rev. 5.0), 00 8812 60
14.7 Interfaces in the group<br />
77 0801 00 OSYlink‐Door entry speaker<br />
77 0802 00 OSYlink‐Group lamp<br />
77 0803 00 OSYlink‐Universal<br />
77 0804 00 OSYlink‐Announcement<br />
<strong>Flamenco</strong> - <strong>Technical</strong> <strong>Manual</strong>, 10/11 (Rev. 5.0), 00 8812 60<br />
Page 147<br />
14. Product leaflets
<strong>Tunstall</strong> <strong>GmbH</strong>, Orkotten 66, D-48291 Telgte, www.tunstall.de<br />
Installationsanleitung D Installation Instructions GB<br />
OSYlink‐Türsprechstelle, Best.‐Nr. 77 0801 00<br />
Schnittstelle zum Anschluss einer Türsprechstelle, Bestell‐Nr. 77 0350 00, an den<br />
Gruppenbus (OSYnet).<br />
2‐Draht‐Anschluss zur Türsprechstelle (inkl. Daten und Sprache)<br />
Anschluss für Türöffner‐Transformator 12 V AC<br />
Eingang zur lokalen Ruflöschung in Verbindung mit einem separaten Taster (Schließer<br />
nach 24 V)<br />
Max. Stromaufnahme: 380 mA<br />
Hinweis! Die vollständige Installation des Systems ist im technischen<br />
Handbuch beschrieben.<br />
Achtung! Die Leiterplatte ist mit elektrostatisch gefährdeten Bauteilen bestückt.<br />
Vermeiden Sie deshalb eine direkte Berührung.<br />
00 8802 34, 06/06 (Rev. 1.0)<br />
OSYlink-Door Entry Speaker, order no. 77 0801 00<br />
Interface for connecting a door entry speaker, order no. 77 0350 00, to the group bus<br />
(OSYnet).<br />
2‐wire‐connection to the door entry speaker (including data and speech)<br />
Connection for door opener transformer 12 V AC<br />
Input for local call cancelling in combination with a separate switch (N/O contact to 24 V)<br />
Max. current consumption: 380 mA<br />
Note! The complete installation of the system is described in the technical<br />
manual.<br />
Attention! The printed circuit board includes electrostatic sensitive components.<br />
Avoid touching.<br />
Montage Mounting<br />
Wahlweise Montage auf Hutschiene oder Wandmontage<br />
Optionally mounting on supporting rail or wall mounting.<br />
A1: Montage auf Hutschiene (35 mm)<br />
A1: Mounting on supporting rail (35 mm)<br />
OSYlink 1 auf die Hutschiene 3 aufklipsen, bis es einrastet.<br />
Click the OSYlink 1 onto the supporting rail 3.<br />
A2: Wandmontage<br />
1. Die drei Befestigungsclips 2 soweit herausschieben, bis die Öffnungen für die<br />
Schrauben 4 frei liegen.<br />
2. OSYlink 1 an der Wand festschrauben.<br />
A2: Wall mounting<br />
1. Push out the three fixing clips 2 until the holes for the screws 4 appear.<br />
2. Screw the OSYlink 1 to the wall.<br />
Adresse einstellen (1 - 110) Setting of address (1 - 110)<br />
Zum Einstellen der Adresse auf der Leiterplatte dienen die Codierschalter 1 bis 7 mit den<br />
Werten 1, 2, 4, 8, 16, 32, 64. Entsprechenden Schalter auf ON stellen.<br />
Beispiele: Adresse 1 wird durch Einschalten des Codierschalters 1 eingestellt.<br />
Adresse 4 wird durch Einschalten des Codierschalters 3 eingestellt.<br />
Adresse 24 wird durch Addition gebildet: Schalter 4 und 5 auf ON stellen (8+16=24).<br />
Codierschalter 8 und 9 nicht verändern! Werkseitige Einstellung: OFF.<br />
Reset<br />
Um einen Hardware-Reset durchzuführen, den Codierschalter 10 für eine Sekunde auf ON<br />
und anschließend wieder auf OFF stellen. Ein Hardware-Reset muss durchgeführt werden,<br />
wenn eine Codierschalterstellung verändert wurde. Sonst werden die geänderten<br />
Einstellungen nicht übernommen.<br />
For setting the address on the printed circuit board please use the code switches 1 to 7 with<br />
the values 1, 2, 4, 8, 16, 32, 64. Set the appropriate switch to ON.<br />
Examples: Address 1 is set by using the code switch 1. Address 4 is set by code switch 3.<br />
Address 24 is selected through addition, coding switch 4 and 5 (8 + 16 = 24).<br />
Do not change code switches 8 and 9! Factory set: OFF.<br />
Reset<br />
To reset the OSYlink you have to set code switch 10 to ON for one second, then back to OFF.<br />
A reset has to be made, if a code switch setting has been changed. Otherwise the new setting<br />
will not be activated.<br />
ESD‐Schutzabdeckung (Best.‐Nr. 00 0276 53) ESD protection cover (order no. 00 0276 53)<br />
Nach dem Anschließen der Leitungen (siehe Rückseite) die ESD‐Schutzabdeckung<br />
aufsetzen. (ESD = Electro Static Discharge = Elektrostatische Entladung)<br />
After you have connected the cables (see reverse side), you have to put the ESD protection<br />
cover on the OSYlink. (ESD = Electro Static Discharge)<br />
Demontage von der Hutschiene Dismantling from supporting rail<br />
Einen Schraubendreher in die sichtbare Öffnung des schwarzen Befestigungsclips stecken<br />
und dann den Clip nach oben herausziehen, bis sich das OSYlink 1 von der Hutschiene 3<br />
löst.<br />
<br />
58 mm<br />
Montage auf Hutschiene<br />
Mounting on supporting rail<br />
2<br />
77 0801 00<br />
OSYlink‐Türsprechstelle<br />
OSYlink‐Door entry speaker<br />
3<br />
2 2<br />
1<br />
Rote Kontroll‐LED blinkt langsam<br />
(1 Sek. EIN / 1 Sek. AUS), wenn OSYlink<br />
ok ist. Sonst liegt eine Störung vor.<br />
Red control LED flashes slowly<br />
(1 sec ON, 1 sec OFF), if OSYlink is ok.<br />
Otherwise there is a fault. 1<br />
106 mm<br />
90 mm<br />
Page 148<br />
Put a screw driver into the visible hole of the black fixing clip. Then pull the clip upwards,<br />
until the OSYlink 1 comes loose from the supporting rail 3.<br />
<br />
ON<br />
Wandmontage<br />
Wall mounting<br />
4<br />
1 2 3 4 5 6<br />
2<br />
4<br />
8<br />
16<br />
Adresse<br />
Address<br />
7<br />
32<br />
64<br />
8 9 10<br />
Reset<br />
2<br />
2 2<br />
1<br />
ESD‐Schutzabdeckung<br />
ESD protection cover<br />
4<br />
4
Page 149
<strong>Tunstall</strong> <strong>GmbH</strong>, Orkotten 66, D-48291 Telgte, www.tunstall.de<br />
Installationsanleitung D Installation Instructions GB<br />
OSYlink‐Gruppenleuchte, Best.‐Nr. 77 0802 00<br />
Schnittstelle zum Anschluss von Gruppenleuchten an den Gruppenbus (OSYnet).<br />
Einsetzbar als Sammel- oder Richtungsanzeige. Raumzuordnung und Bildung von Gruppen<br />
möglich.<br />
4 x 2 potentialfreie Ausgänge zur Anschaltung von 4 Gruppenleuchten mit je 2 Leucht‐<br />
feldern<br />
Stromversorgung wählbar (Jumper) intern aus der Rufanlage oder extern<br />
Anzeige nach DIN VDE 0834, zentral konfigurierbar<br />
Zentrale, flexible Konfiguration der Blinkfolgen und Zuordnung der Teilnehmeradressen<br />
Max. Stromaufnahme: 26 mA + 60 mA je Ausgang<br />
Hinweis! Die vollständige Installation des Systems ist im technischen<br />
Handbuch beschrieben.<br />
Achtung! Die Leiterplatte ist mit elektrostatisch gefährdeten Bauteilen bestückt.<br />
Vermeiden Sie deshalb eine direkte Berührung.<br />
00 8802 35, 10/11 (Rev. 1.1)<br />
OSYlink-Group lamp, order no. 77 0802 00<br />
Interface for connecting group lamps to the group bus (OSYnet). Usable as collective or<br />
direction display. Room allocation and group forming possible.<br />
4 x 2 potential‐free outputs for connecting 4 group lamps, with two light sections each<br />
Power supply selectable (jumper) internal from the call system or external<br />
Display compliant with DIN VDE 0834, centrally configurable<br />
Central, flexible configuration of flash‐signal sequences and allocation of user addres‐<br />
ses<br />
Max. current consumption: 26 mA + 60 mA per output<br />
Note! The complete installation of the system is described in the technical manual.<br />
Attention! The printed circuit board includes electrostatic sensitive components.<br />
Avoid touching.<br />
Montage Mounting<br />
Wahlweise Montage auf Hutschiene oder Wandmontage<br />
Optionally mounting on supporting rail or wall mounting.<br />
A1: Montage auf Hutschiene (35 mm)<br />
A1: Mounting on supporting rail (35 mm)<br />
OSYlink 1 auf die Hutschiene 3 aufklipsen, bis es einrastet.<br />
Click the OSYlink 1 onto the supporting rail 3.<br />
A2: Wandmontage<br />
1. Die drei Befestigungsclips 2 soweit herausschieben, bis die Öffnungen für die<br />
Schrauben 4 frei liegen.<br />
2. OSYlink 1 an der Wand festschrauben.<br />
A2: Wall mounting<br />
1. Push out the three fixing clips 2 until the holes for the screws 4 appear.<br />
2. Screw the OSYlink 1 to the wall.<br />
Adresse einstellen (1 - 110) Setting of address (1 - 110)<br />
Zum Einstellen der Adresse auf der Leiterplatte dienen die Codierschalter 1 bis 7 mit den<br />
Werten 1, 2, 4, 8, 16, 32, 64. Entsprechenden Schalter auf ON stellen.<br />
Beispiele: Adresse 1 wird durch Einschalten des Codierschalters 1 eingestellt.<br />
Adresse 4 durch Einschalten des Codierschalters 3.<br />
Adresse 24 wird durch Addition gebildet: Schalter 4 und 5 auf ON stellen (8+16=24).<br />
Codierschalter 8 und 9 nicht verändern! Werkseitige Einstellung: OFF.<br />
Reset<br />
Um einen Hardware-Reset durchzuführen, den Codierschalter 10 für eine Sekunde auf ON<br />
und anschließend wieder auf OFF stellen. Ein Hardware-Reset muss durchgeführt werden,<br />
wenn eine Codierschalterstellung verändert wurde. Sonst werden die geänderten<br />
Einstellungen nicht übernommen.<br />
For setting the address on the printed circuit board please use the code switches 1 to 7 with<br />
the values 1, 2, 4, 8, 16, 32, 64. Set the appropriate switch to ON.<br />
Examples: Address 1 is set by using the code switch 1. Address 4 by the code switch 3.<br />
Address 24 is selected through addition, coding switch 4 and 5 (8 + 16 = 24).<br />
Do not change code switches 8 and 9! Factory set: OFF.<br />
Reset<br />
To reset the OSYlink you have to set code switch 10 to ON for one second, then back to OFF.<br />
A reset has to be made, if a code switch setting has been changed. Otherwise the new setting<br />
will not be activated.<br />
ESD‐Schutzabdeckung (Bestell‐Nr. 00 0276 53) ESD protection cover (order no. 00 276 53)<br />
Nach dem Anschließen der Leitungen (siehe Rückseite) die ESD‐Schutzabdeckung<br />
aufsetzen. (ESD = Electro Static Discharge = Elektrostatische Entladung)<br />
After you have connected the cables (see reverse side), you have to put the ESD protection<br />
cover on the OSYlink. (ESD = Electro Static Discharge)<br />
Demontage von der Hutschiene Dismantling from supporting rail<br />
Einen Schraubendreher in die sichtbare Öffnung des schwarzen Befestigungsclips stecken<br />
und dann den Clip nach oben herausziehen, bis sich das OSYlink 1 von der Hutschiene 3<br />
löst.<br />
<br />
Montage auf Hutschiene<br />
Mounting on supporting rail<br />
2<br />
58 mm<br />
77 0802 00<br />
OSYlink‐Gruppenleuchte<br />
OSYlink‐Group lamp<br />
3<br />
2 2<br />
1<br />
Rote Kontroll‐LED blinkt langsam<br />
(1 Sek. EIN / 1 Sek. AUS), wenn OSYlink<br />
ok ist. Sonst liegt eine Störung vor.<br />
Red control LED flashes slowly<br />
(1 sec ON, 1 sec OFF), if OSYlink is ok.<br />
Otherwise there is a fault.<br />
106 mm<br />
90 mm<br />
Page 150<br />
Put a screw driver into the visible hole of the black fixing clip. Then pull the clip upwards,<br />
until the OSYlink 1 comes loose from the supporting rail 3.<br />
<br />
ON<br />
Wandmontage<br />
Wall mounting<br />
4<br />
1 2 3 4 5 6<br />
1<br />
2<br />
4<br />
8<br />
16<br />
32<br />
64<br />
Adresse<br />
Address<br />
7<br />
8 9 10<br />
2<br />
2 2<br />
Reset<br />
1<br />
ESD‐Schutzabdeckung<br />
ESD protection cover<br />
4<br />
4
Page 151
<strong>Tunstall</strong> <strong>GmbH</strong>, Orkotten 66, D-48291 Telgte, www.tunstall.de<br />
Installationsanleitung D Installation Instructions GB<br />
OSYlink‐Universal, Best.‐Nr. 77 0803 00<br />
Schnittstelle zur Anschaltung von Fremdanlagen und/oder technischen Einrichtungen an<br />
den Gruppenbus (OSYnet). Max. Stromaufnahme: 900 mA.<br />
Hinweis! Die vollständige Installation des Systems ist im technischen<br />
Handbuch beschrieben.<br />
Achtung! Die Leiterplatte ist mit elektrostatisch gefährdeten Bauteilen bestückt.<br />
Vermeiden Sie deshalb eine direkte Berührung.<br />
00 8802 36, 10/10 (Rev. 2.0)<br />
OSYlink-Universal, order no. 77 0803 00<br />
Interface for connecting external systems and/or technical installations to the group bus<br />
(OSYnet). Max. current consumption: 900 mA<br />
Note! The complete installation of the system is described in the technical manual.<br />
Attention! The printed circuit board includes electrostatic sensitive components.<br />
Avoid touching.<br />
Montage Mounting<br />
Wahlweise Montage auf Hutschiene oder Wandmontage<br />
Optionally mounting on supporting rail or wall mounting.<br />
A1: Montage auf Hutschiene (35 mm)<br />
A1: Mounting on supporting rail (35 mm)<br />
OSYlink 1 auf die Hutschiene 3 aufklipsen, bis es einrastet.<br />
Click the OSYlink 1 onto the supporting rail 3.<br />
A2: Wandmontage<br />
1. Die drei Befestigungsclips 2 soweit herausschieben, bis die Öffnungen für die<br />
Schrauben 4 frei liegen.<br />
2. OSYlink 1 an der Wand festschrauben.<br />
A2: Wall mounting<br />
1. Push out the three fixing clips 2 until the holes for the screws 4 appear.<br />
2. Screw the OSYlink 1 to the wall.<br />
Adresse einstellen (1 - 110) Setting of address (1 - 110)<br />
Zum Einstellen der Adresse auf der Leiterplatte dienen die Codierschalter 1 bis 7 mit den<br />
Werten 1, 2, 4, 8, 16, 32, 64. Entsprechenden Schalter auf ON stellen.<br />
Beispiele: Adresse 1 wird durch Einschalten des Codierschalters 1 eingestellt.<br />
Adresse 4 durch Einschalten des Codierschalters 3.<br />
Adresse 24 wird durch Addition gebildet: Schalter 4 und 5 auf ON stellen (8+16=24).<br />
Codierschalter 8 und 9 nicht verändern! Werkseitige Einstellung: OFF.<br />
Reset<br />
Um einen Hardware-Reset durchzuführen, den Codierschalter 10 für eine Sekunde auf ON<br />
und anschließend wieder auf OFF stellen. Ein Hardware-Reset muss durchgeführt werden,<br />
wenn eine Codierschalterstellung verändert wurde. Sonst werden die geänderten<br />
Einstellungen nicht übernommen.<br />
For setting the address on the printed circuit board please use the code switches 1 to 7 with<br />
the values 1, 2, 4, 8, 16, 32, 64. Set the appropriate switch to ON.<br />
Examples: Address 1 is set by using the code switch 1. Address 4 by the code switch 3.<br />
Address 24 is selected through addition: coding switch 4 and 5 (8 + 16 = 24).<br />
Do not change code switches 8 and 9! Factory set: OFF.<br />
Reset<br />
To reset the OSYlink you have to set code switch 10 to ON for one second, then back to OFF.<br />
A reset has to be made, if a code switch setting has been changed. Otherwise the new setting<br />
will not be activated.<br />
ESD‐Schutzabdeckung (Bestell‐Nr. 00 0276 54) ESD protection cover (order no. 00 0276 54)<br />
Nach dem Anschließen der Leitungen (siehe Rückseite) die ESD‐Schutzabdeckung<br />
aufsetzen. (ESD = Electro Static Discharge = Elektrostatische Entladung)<br />
After you have connected the cables (see reverse side), you have to put the ESD protection<br />
cover on the OSYlink. (ESD = Electro Static Discharge)<br />
Demontage von der Hutschiene Dismantling from supporting rail<br />
Einen Schraubendreher in die sichtbare Öffnung des schwarzen Befestigungsclips stecken<br />
und dann den Clip nach oben herausziehen, bis sich OSYlink 1 von der Hutschiene 3 löst.<br />
58 mm<br />
77 0803 00<br />
OSYlink‐Universal<br />
<br />
Montage auf Hutschiene<br />
Mounting on supporting rail<br />
3<br />
2<br />
2 2<br />
160 mm<br />
1<br />
Rote Kontroll‐LED blinkt langsam<br />
(1 Sek. EIN / 1 Sek. AUS), wenn OSYlink<br />
ok ist. Sonst liegt eine Störung vor.<br />
Red control LED flashes slowly<br />
(1 sec ON, 1 sec OFF), if OSYlink is ok.<br />
Otherwise there is a fault.<br />
90 mm<br />
Page 152<br />
Put a screw driver into the visible hole of the black fixing clip. Then pull the clip upwards,<br />
until the OSYlink 1 comes loose from the supporting rail 3.<br />
4<br />
ON<br />
Wandmontage<br />
Wall mounting<br />
2<br />
1 2 3 4 5 6<br />
1<br />
2<br />
4<br />
8<br />
16<br />
32<br />
64<br />
Adresse<br />
Address<br />
7<br />
8 9 10<br />
Reset<br />
2<br />
1<br />
2<br />
ESD‐Schutzabdeckung<br />
ESD protection cover<br />
4<br />
4
Anschlüsse D Connections GB<br />
Ip Ip<br />
0 V<br />
OSYlink-Universal<br />
Order No. / Best.-Nr. 77 0803 00<br />
Rev.:<br />
Ser. No.:<br />
0 V<br />
IN 1<br />
4K7<br />
0 V<br />
00 8802 36, 10/11 (Rev. 3.0)<br />
+24 V<br />
+24 V<br />
NF 1a<br />
NF 1b<br />
OSYnet<br />
NF 2a<br />
NF 2b<br />
0 V<br />
IN 2<br />
0 V<br />
IN 3<br />
0 V<br />
IN 4<br />
0 V<br />
IN 5<br />
0 V<br />
IN 6<br />
4K7<br />
4K7<br />
4K7<br />
IN 1 - 4<br />
Monitored inputs<br />
Überwachte Schalteingänge<br />
0 V<br />
OSYnet<br />
DG<br />
IN 7<br />
IN 5 - 8<br />
Inputs<br />
Schalteingänge<br />
DL<br />
DH<br />
DG<br />
Jumper<br />
R_IN1: Jumper setzen, wenn IN 1 nicht benutzt.<br />
R_IN2: Jumper setzen, wenn IN 2 nicht benutzt.<br />
R_IN3: Jumper setzen, wenn IN 3 nicht benutzt.<br />
R_IN4: Jumper setzen, wenn IN 4 nicht benutzt.<br />
24V_OUT7: Jumper setzen, wenn Spannungsversorgung an OUT 7 intern.<br />
24V_OUT8: Jumper setzen, wenn Spannungsversorgung an OUT 8 intern.<br />
IN 7 Schalteingang - Ruf auslösen Schließerkontakt<br />
IN 8 Schalteingang - Ruf abstellen Schließerkontakt<br />
Funktion von IN 7: Kontakt geschlossen = Ruf auslösen<br />
Kontakt geöffnet = ohne Funktion<br />
Funktion von IN 8: Kontakt geschlossen = Ruf von IN7 abstellen<br />
Kontakt geöffnet = ohne Funktion<br />
0 V<br />
IN 8<br />
1<br />
2<br />
4<br />
8<br />
16<br />
32<br />
64<br />
NC<br />
Test<br />
Reset<br />
Address<br />
R_IN 1<br />
R_IN 2<br />
R_IN 3<br />
R_IN 4<br />
24V_OUT 7<br />
24V_OUT 8<br />
Jumpers, see below<br />
Jumper, siehe unten<br />
O C 8<br />
OUT 8<br />
C C 8<br />
C 8<br />
0 V<br />
O C 7<br />
OUT 7<br />
C C 7<br />
C 7<br />
OUT 7, 8<br />
Relay outputs with internal or<br />
external power supply<br />
(external power supply:<br />
24V AC or DC, max. 1A)<br />
Relais‐Ausgänge mit interner<br />
oder ext. Spannungsversorgung<br />
(extener Spannungsversorgung:<br />
24V AC oder DC, max. 1A)<br />
0 V<br />
OUT 1<br />
OUT 2<br />
0 V<br />
Jumpers<br />
R_IN1: Set jumper, if IN 1 is not used.<br />
R_IN2: Set jumper, if IN 2 is not used.<br />
R_IN3: Set jumper, if IN 3 is not used.<br />
R_IN4: Set jumper, if IN 4 is not used.<br />
24V_OUT7: Set jumper if internal 24 V is used for OUT 7.<br />
24V_OUT8: Set jumper if internal 24 V is used for OUT 8.<br />
OUT 3<br />
OUT 4<br />
0 V<br />
OUT 5<br />
OUT 1 - 5<br />
Solid state outputs 24V<br />
Elektronische<br />
Ausgänge 24V<br />
OUT 6<br />
OUT 6<br />
Solid state output 24V<br />
with location light feature<br />
Elektronischer Ausgang<br />
24V mit Findelicht‐Funktion<br />
IN 1 Überwachter Schalteingang - Ruf Schließerkontakt mit parallelem 4K7-Widerstand IN 1 Monitored input - Call<br />
Normally open contact with parallel 4K7 resistor<br />
IN 2 Überwachter Schalteingang - Notruf Schließerkontakt mit parallelem 4K7-Widerstand IN 2 Monitored input - Emergency call Normally open contact with parallel 4K7 resistor<br />
IN 3 Überwachter Schalteingang - AlarmrufSchließerkontakt<br />
mit parallelem 4K7-Widerstand IN 3 Monitored input- Alarm call<br />
Normally open contact with parallel 4K7 resistor<br />
IN 4 Überwachter Schalteingang - Ruf Schließerkontakt mit parallelem 4K7-Widerstand IN 4 Monitored input - Call<br />
Normally open contact with parallel 4K7 resistor<br />
Funktion von IN 1 - IN 4: Kontakt geschlossen = Rufmeldung frischer Ruf<br />
Function for IN 1 - IN 4: Contact closed = Call message Fresh call<br />
Kontakt geöffnet = Ausmeldung Ruf abgestellt<br />
Contact opened = Off message Call cancelled<br />
Quittierung möglich, frisch / abgefragt<br />
Acknowledgement possible, fresh / answered<br />
IN 5 Schalteingang - Sammeldurchsage (alle Stationen) Schließerkontakt IN 5 Input - Collective announcement (to all wards) Normally open contact<br />
IN 6 Schalteingang - Sammeldurchsage (alle Anwesenheiten) Schließerkontakt IN 6 Input - Collective announcement (to all staff) Normally open contact<br />
Funktion von IN 5 - IN 6: Kontakt geschlossen = Durchsage ausgelöst<br />
Function for IN 5 - IN 6: Contact closed = Announcement started<br />
Kontakt geöffnet = Durchsage beendet<br />
Contact opened = Announcement closed<br />
IN 7 Input - Raise call Normally open contact<br />
IN 8 Input - Cancel call Normally open contact<br />
Function for IN 7: Contact closed = Raise call<br />
Contact opened = no function<br />
Function for IN 8: Contact closed = Cancel call from IN7<br />
Contact opened = no function<br />
OUT 1 Sammelausgang Rufe Elektronischer Ausgang 24V<br />
OUT 1 Collective output Calls Solid state output 24V<br />
OUT 2 Sammelausgang Notrufe Elektronischer Ausgang 24V<br />
OUT 2 Collective output Emergency calls Solid state output 24V<br />
OUT 3 Sammelausgang Alarmrufe Elektronischer Ausgang 24V<br />
OUT 3 Collective output Alarm calls Solid state output 24V<br />
OUT 4 Schaltausgang frei konfigurierbar Elektronischer Ausgang 24V<br />
OUT 4 Output can be configured Solid state output 24V<br />
OUT 5 Schaltausgang frei konfigurierbar Elektronischer Ausgang 24V<br />
OUT 5 Output can be configured Solid state output 24V<br />
OUT 6 Schaltausgang frei konfigurierbar Elektron. Ausgang 24V mit Findelicht-Funktion OUT 6 Output can be configured Solid state output 24V with location light feature<br />
für Eingänge IN 1 bis IN 4.<br />
for inputs IN 1 up to IN 4.<br />
OUT 7 Schaltausgang frei konfigurierbar Wechselkontakt potentialfrei, interne 24V nutzbar OUT 7 Out. can be configured Change-over contact potential-free, internal 24V can be used<br />
OUT 8 Schaltausgang frei konfigurierbar Wechselkontakt potentialfrei, interne 24V nutzbar OUT 8 Out. can be configured Change-over contact potential-free, internal 24V can be used<br />
Konfiguration der Ausgänge in der Software SystemOrganizer.<br />
The outputs are configured using the SystemOrganizer software.<br />
Bei Stationszusammenschaltung zeigen die Ausgänge stationsübergreifend an.<br />
In case of ward coupling the outputs signal across wards.<br />
Page 153<br />
<strong>Tunstall</strong> <strong>GmbH</strong>, Orkotten 66, D-48291 Telgte, www.tunstall.de
<strong>Tunstall</strong> <strong>GmbH</strong>, Orkotten 66, D-48291 Telgte, www.tunstall.de<br />
Installationsanleitung D Installation Instructions GB<br />
OSYlink‐Durchsage, Best.‐Nr. 77 0804 00<br />
Schnittstelle zum Anschluss von Durchsagelautsprechern, Bestell‐Nr. 05 0024 00, an den<br />
Gruppenbus (OSYnet). Anschaltung als Einzelgerät oder in Gruppen.<br />
1 Audio‐Ausgang zur Ansteuerung von aktiven Lautsprechern (max. 5 Lautsprecher)<br />
1 potentialfreier Schaltausgang zur Steuerung der Zuschaltkennung<br />
Max. Stromaufnahme: 60 mA<br />
Hinweis! Die vollständige Installation des Systems ist im technischen<br />
Handbuch beschrieben.<br />
Achtung! Die Leiterplatte ist mit elektrostatisch gefährdeten Bauteilen bestückt.<br />
Vermeiden Sie deshalb eine direkte Berührung.<br />
00 8802 37, 06/06 (Rev. 1.0)<br />
OSYlink-Announcement, order no. 77 0804 00<br />
Interface for connecting announcement loudspeakers, order no. 05 0024 00, to the group<br />
bus (OSYnet). Connection of single devices or groups.<br />
1 audio output for driving active loudspeakers (max. 5 loudspeakers)<br />
1 potential‐free digital output for control of signalling the activity of the announcement<br />
system<br />
Max. current consumption: 60 mA<br />
Note! The complete installation of the system is described in the technical<br />
manual.<br />
Attention! The printed circuit board includes electrostatic sensitive components.<br />
Avoid touching.<br />
Montage Mounting<br />
Wahlweise Montage auf Hutschiene oder Wandmontage<br />
Optionally mounting on supporting rail or wall mounting.<br />
A1: Montage auf Hutschiene (35 mm)<br />
A1: Mounting on supporting rail (35 mm)<br />
OSYlink 1 auf die Hutschiene 3 aufklipsen, bis es einrastet.<br />
Click the OSYlink 1 onto the supporting rail 3.<br />
A2: Wandmontage<br />
1. Die drei Befestigungsclips 2 soweit herausschieben, bis die Öffnungen für die<br />
Schrauben 4 frei liegen.<br />
2. OSYlink 1 an der Wand festschrauben.<br />
A2: Wall mounting<br />
1. Push out the three fixing clips 2 until the holes for the screws 4 appear.<br />
2. Screw the OSYlink 1 to the wall.<br />
Adresse einstellen (1 - 110) Setting of address (1 - 110)<br />
Zum Einstellen der Adresse auf der Leiterplatte dienen die Codierschalter 1 bis 7 mit den<br />
Werten 1, 2, 4, 8, 16, 32, 64. Entsprechenden Schalter auf ON stellen.<br />
Beispiele: Adresse 1 wird durch Einschalten des Codierschalters 1 eingestellt.<br />
Adresse 4 durch Einschalten des Codierschalters 3.<br />
Adresse 24 wird durch Addition gebildet: Schalter 4 und 5 auf ON stellen (8+16=24).<br />
Codierschalter 8 und 9 nicht verändern! Werkseitige Einstellung: OFF.<br />
Reset<br />
Um einen Hardware-Reset durchzuführen, den Codierschalter 10 für eine Sekunde auf ON<br />
und anschließend wieder auf OFF stellen. Ein Hardware-Reset muss durchgeführt werden,<br />
wenn eine Codierschalterstellung verändert wurde. Sonst werden die geänderten<br />
Einstellungen nicht übernommen.<br />
For setting the address on the printed circuit board please use the code switches 1 to 7 with<br />
the values 1, 2, 4, 8, 16, 32, 64. Set the appropriate switch to ON.<br />
Examples: Address 1 is set by using the code switch 1. Address 4 by the code switch 3.<br />
Address 24 is selected through addition: coding switch 4 and 5 (8 + 16 = 24).<br />
Do not change code switches 8 and 9! Factory set: OFF.<br />
Reset<br />
To reset the OSYlink you have to set code switch 10 to ON for one second, then back to OFF.<br />
A reset has to be made, if a code switch setting has been changed. Otherwise the new setting<br />
will not be activated.<br />
ESD‐Schutzabdeckung (Bestell‐Nr. 00 0276 53) ESD protection cover (order no. 00 0276 53)<br />
Nach dem Anschließen der Leitungen (siehe Rückseite) die ESD‐Schutzabdeckung<br />
aufsetzen. (ESD = Electro Static Discharge = Elektrostatische Entladung)<br />
After you have connected the cables (see reverse side), you have to put the ESD protection<br />
cover on the OSYlink. (ESD = Electro Static Discharge)<br />
Demontage von der Hutschiene Dismantling from supporting rail<br />
Einen Schraubendreher in die sichtbare Öffnung des schwarzen Befestigungsclips stecken<br />
und dann den Clip nach oben herausziehen, bis sich das OSYlink 1 von der Hutschiene 3<br />
löst.<br />
<br />
Montage auf Hutschiene<br />
Mounting on supporting rail<br />
2<br />
58 mm<br />
77 0804 00<br />
OSYlink‐Durchsage<br />
OSYlink‐Announcement<br />
3<br />
2 2<br />
1<br />
Rote Kontroll‐LED blinkt langsam<br />
(1 Sek. EIN / 1 Sek. AUS), wenn OSYlink<br />
ok ist. Sonst liegt eine Störung vor.<br />
Red control LED flashes slowly<br />
(1 sec ON, 1 sec OFF), if OSYlink is ok.<br />
Otherwise there is a fault.<br />
106 mm<br />
90 mm<br />
Page 154<br />
Put a screw driver into the visible hole of the black fixing clip. Then pull the clip upwards,<br />
until the OSYlink 1 comes loose from the supporting rail 3.<br />
<br />
ON<br />
Wandmontage<br />
Wall mounting<br />
4<br />
1 2 3 4 5 6<br />
1<br />
2<br />
4<br />
8<br />
16<br />
32<br />
64<br />
Adresse<br />
Address<br />
7<br />
8 9 10<br />
2<br />
2 2<br />
Reset<br />
1<br />
ESD‐Schutzabdeckung<br />
ESD protection cover<br />
4<br />
4
Page 155
14. Product leaflets<br />
Page 156<br />
<strong>Flamenco</strong> - <strong>Technical</strong> <strong>Manual</strong>, 10/11 (Rev. 5.0), 00 8812 60
14.8 Accessories<br />
70 0790 00 Sound detector<br />
70 0812 00 Diagnostic connection cable<br />
77 0901 00 Smoke detector<br />
<strong>Flamenco</strong> - <strong>Technical</strong> <strong>Manual</strong>, 10/11 (Rev. 5.0), 00 8812 60<br />
Page 157<br />
14. Product leaflets
<strong>Tunstall</strong> <strong>GmbH</strong>, Orkotten 66, D-48291 Telgte, www.tunstall.de<br />
Installationsanleitung D Installation Instructions GB<br />
Schallwächter, Best.‐Nr. 70 0790 00<br />
Der Schallwächter dient zur akustischen Kontrolle von Räumen. Automatische Auslösung<br />
von Rufen durch laute Geräusche.<br />
Lautstärke und Zeitdauer der Geräusche, die einen Ruf auslösen sollen, können mit den<br />
Reglern ”Empfindlichkeit” 1 und ”Verzögerung” 2 eingestellt werden.<br />
Hinweis: Normale Gesprächslautstärke führt nicht zur Rufauslösung.<br />
Hinweis! Die vollständige Installation des Systems ist im technischen<br />
Handbuch beschrieben.<br />
Anschlussmöglichkeiten Connection possibilities<br />
Der Schallwächter kann an unterschiedliche Steckvorrichtungen und<br />
Patienten‐Bedienkombinationen der Firma <strong>Tunstall</strong> <strong>GmbH</strong> angeschlossen werden und dient<br />
zur akustischen Kontrolle von Räumen.<br />
Bedienungsanleitung User instructions<br />
Einschalten<br />
Durch einfaches Stecken des Mini-DIN-Steckers in die Steckbuchse für Rufgeräte wird das<br />
Gerät eingeschaltet und ist sofort betriebsbereit.<br />
Einstellungen<br />
1 Empfindlichkeit (Ansprechempfindlichkeit):<br />
Dieser Regler dient zur Einstellung der Lautstärke, ab der das Gerät einen Ruf auslöst.<br />
Schwellwertskala von 0 bis 9.<br />
Einstellung 9 = höchste Empfindlichkeit: geringe Geräusche lösen einen Ruf aus.<br />
2 Verzögerung:<br />
Dieser Regler dient zur Einstellung der zeitlichen Mindestdauer eines Geräusches, die zur<br />
Auslösung eines Rufes führt.<br />
Zeitskala: 0 bis 9 (Verzögerungszeit 0,5 - 6 s)<br />
Technische Daten <strong>Technical</strong> data<br />
Farbe<br />
hellgrau<br />
Material<br />
Kunststoff ABS<br />
Stromversorgung<br />
24 VDC / 16 mA Ruhestrom<br />
00 8800 23, 06/06 (Rev. 2.0)<br />
70 0790 00<br />
Schallwächter<br />
Sound detector<br />
Page 158<br />
Sound detector, order no. 70 0790 00<br />
Sound detector for acoustic monitoring of rooms. Automatic call activation in case of any<br />
noises.<br />
Sensitivity and time delay can be adjusted. So it can be adjusted which volume and noise<br />
duration shall activate a call.<br />
Note: Normal conversation will not activate a call.<br />
Note! The complete installation of the system is described in the technical<br />
manual.<br />
The sound detector can be connected to different connection sockets and patient bedside<br />
combinations from the company <strong>Tunstall</strong> <strong>GmbH</strong>.<br />
To switch on<br />
The device will be automatically switched on by plugging into the corresponding socket for<br />
call devices. It is immediately operational.<br />
Adjustments:<br />
1 Sensitivity (sensitivity of speaking):<br />
This regulator is used for adjusting the sensitivity of sound loudness level. A call will be<br />
activated above this level. Scale of threshold value 0 to 9.<br />
Adjustment 9 = highest sensitivity: a slight noise activates a call.<br />
2 Delay:<br />
This regulator is used for adjusting the minimum duration of sound, beyond which leads to<br />
call activation.<br />
Time scale: 0 to 9 (time of delay 0,5 to 6 s).<br />
Colour<br />
light grey<br />
Material<br />
Plastic ABS<br />
Power supply<br />
24 VDC / 16 mA standby current<br />
1<br />
2<br />
125 mm<br />
150 mm<br />
30 mm
<strong>Tunstall</strong> <strong>GmbH</strong>, Orkotten 66, D-48291 Telgte, www.tunstall.de<br />
Installationsanleitung D Installation Instructions GB<br />
Verbindungsleitung für Diagnostikgeräte, Best.‐Nr. 70 0812 00<br />
Verbindungsleitung zum Anschluss von elektromedizinischen Geräten an<br />
Steckvorrichtungen, Best.‐Nr. 70 xxxx xx.<br />
Hinweis! Die vollständige Installation des Systems ist im technischen Handbuch<br />
beschrieben.<br />
Anschluss an Steckvorrichtung 70 xxxx xx<br />
Connection to connection socket 70 xxxx xx<br />
5<br />
RL<br />
+24V<br />
2<br />
DIA<br />
7<br />
enspricht Zeichnungs-Nr./equivalent to drawing no. 70 1 0013 403, 28.04.1997<br />
8<br />
Rückmeldung bei Bedarf<br />
max. zul. Strom 10 mA<br />
Feedback on demand<br />
maximum allowable<br />
current 10 mA<br />
Adernfarben:<br />
1 = blau<br />
2 = rot<br />
3 =<br />
4 = weiß<br />
5 = orange<br />
6 = gelb<br />
7 = schwarz<br />
8 = grün<br />
4<br />
6<br />
3<br />
ABM<br />
Elektromedizinisches Gerät<br />
Electromedical Device<br />
Wire colours:<br />
1 = blue<br />
2 = red<br />
3 =<br />
4 = white<br />
5 = orange<br />
6 = yellow<br />
7 = black<br />
8 = green<br />
Drahtbrücke/wire link<br />
1<br />
0V<br />
potentialfreier Kontakt nach VDE<br />
potential-free contact<br />
according to VDE<br />
muss im Alarmfall öffnen<br />
must open in case of emergency<br />
70 0812 00<br />
Verbindungsleitung für Diagnostikgeräte<br />
Diagnostic connection cable<br />
Page 159<br />
Diagnostik connection cable, order no. 70 0812 00<br />
Cable for connection of electromedical devices to connection sockets, order no. 70 xxxx xx.<br />
Note! The complete installation of the system is described in the technical<br />
manual.<br />
Länge = 2m / length = 2 m<br />
Freie Drahtenden (30 mm), verzinnt<br />
Free wire ends (30 mm), tin-plated<br />
Achtung! Nicht benutzte Drahtenden müssen isoliert werden.<br />
Attention! Non used wire ends have to be insulated.
Anschlussplan für Rauchmelder, Best.−Nr.: 77 0901 00<br />
Connection plan for smoke detector, order no.: 77 0901 00<br />
Klemme im Relaismodul<br />
Clamp within the relay module<br />
Bornier dans le module relais<br />
Morsetto del modulo di relè<br />
Potenzialfreier Kontakt<br />
Potential-free contact<br />
Contact libre de potentiel<br />
Contatto libero da potenziale<br />
Anschluss an die Rufanlage<br />
Connection to the nurse call system<br />
Connexion au système d’appel<br />
Collegamento a sistema di chiamata<br />
77 0901 00, 07/2006<br />
Page 160
14.9 System devices<br />
77 2x0x 00 OSY‐ControlCenter<br />
77 2100 00 OSYnet‐SafetyController<br />
<strong>Flamenco</strong> - <strong>Technical</strong> <strong>Manual</strong>, 10/11 (Rev. 5.0), 00 8812 60<br />
Page 161<br />
14. Product leaflets
<strong>Tunstall</strong> <strong>GmbH</strong>, Orkotten 66, D-48291 Telgte, www.tunstall.de<br />
Installationsanleitung D Installation Instructions GB<br />
OSY‐ControlCenter, Best.‐Nr. 77 2000 00<br />
Das OSY-ControlCenter stellt alle Systemfunktionen der <strong>Flamenco</strong>-Rufanlage zur<br />
Verfügung. Es organisiert die Datenverteilung und den gesamten Sprechverkehr zwischen<br />
den einzelnen Teilnehmern. Das OSY-ControlCenter ist die zentrale Systemschnittstelle zur<br />
Ein- und Ausgabe von Daten, Sprechverbindungen und Systemmeldungen, jedoch auch die<br />
Schaltstelle für Fernzugriffe und Softwareupdates. Das OSY-ControlCenter ist modular<br />
aufgebaut und wird individuell entsprechend dem benötigten Leistungsumfang<br />
zusammengestellt. Die Anzahl der jeweils erforderlichen internen Komponenten ergibt sich<br />
aus der Gesamtanzahl der anzuschließenden Teilnehmer und der Anzahl der internen und<br />
externen Sprechverbindungen. Zusätzliche Schnittstellen zum Datenaustausch, z.B. KIS,<br />
Facility Management und Anbindungen an Telefonanlagen können integriert werden. Die<br />
Konfiguration des OSY‐ControlCenters erfolgt werkseitig.<br />
Versorgungsspannung OSY‐ControlCenter: 24 V DC<br />
Versorgungsspannung Netzwerk‐Switch: 230 V AC<br />
Max. Stromaufnahme OSY‐ControlCenter: 2,3 A<br />
Hinweis! Die vollständige Installation des Systems ist im technischen<br />
Handbuch beschrieben.<br />
00 8802 52, 01/09 (Rev. 2.0)<br />
OSY‐ControlCenter<br />
Anschlussfeld<br />
connection field<br />
OSY‐ControlCenter, order no. 77 2000 00<br />
The OSY-ControlCenter provides all system functions for the <strong>Flamenco</strong> nurse call system. It<br />
organises the data distribution and the whole speech traffic between the single users.<br />
Furthermore the OSY-ControlCenter represents the central system interface for incoming<br />
and outgoing data, speech connections and system messages as well as the switching<br />
point for remote accesses and software updates. The OSY-ControlCenter is modular<br />
constructed and is individually assembled according to the required performance. The<br />
number of required internal components results from the total number of users to be<br />
connected and the number of internal and external speech connections. Additional<br />
interfaces for data exchange, e.g. for HIS, facility management and connections to<br />
telephone systems can be integrated. The OSY‐ControlCenter is factory configured.<br />
Supply voltage for OSY‐ControlCenter: 24 V DC<br />
Supply voltage for network switch: 230 V AC<br />
Max. current consumption OSY‐ControlCenter: 2.3 A<br />
Kabeleinführung<br />
cable entrances<br />
Note! The complete installation of the system is described in the technical manual.<br />
Netzwerk‐Switch<br />
network switch<br />
Anschlussbuchsen für Netzwerk-Switch<br />
connection sockets for network switch<br />
Kontrollanzeigen (LED)<br />
control LEDs<br />
Netzwerk‐Switch anschließen Connection of network switch<br />
Je nach Ausstattung des OSY‐ControlCenters, weist dieses bis zu 6 RJ45‐Buchsen auf.<br />
Jede dieser Buchsen muss mit einer beliebigen RJ45‐Buchse im Netzwerk‐Switch<br />
verbunden werden. Es empfiehlt sich allerdings die folgende übersichtliche Anordnung:<br />
Netzwerk‐Switch<br />
network switch<br />
OSY‐ControlCenter<br />
RJ45‐Buchsen<br />
RJ45 sockets<br />
77 2000 00<br />
OSY‐ControlCenter<br />
Page 162<br />
Depending on its components the OSY‐ControlCenter may include a maximum of 6 RJ45<br />
sockets. Each socket has to be connected to an arbitrary RJ45 socket in the network<br />
switch. But the following clear arrangement is recommended:
Montage D Mounting GB<br />
Anforderungen an den Installationsort Installation location requirements<br />
Bedingt zugänglicher technischer Betriebsraum<br />
Trockener Raum (Max. Luftfeuchtigkeit 75% bei ca. 18 o C)<br />
Umgebungstemperatur 0 o bis 40 o C<br />
Das OSY‐ControlCenter muss jederzeit gut zugänglich sein (Revisionsgang 60 cm<br />
breit).<br />
Freiraum für die Kabeleinführung muss berücksichtigt werden.<br />
Belüftung Ventilation<br />
Die Wärmeabfuhr darf nicht behindert sein. Für eine ausreichende Luftzirkulation über und<br />
unter dem OSY‐ControlCenter muss deshalb gesorgt werden. Der Abstand über und unter<br />
dem OSY‐ControlCenter zu anderen Geräten oder zu Wänden muss mindestens 50 mm (im<br />
Montageschrank 3 HE) betragen. Die Lüftungsdurchlässe dürfen unter keinen Umständen<br />
abgedeckt sein. Beim Einbau in Schaltschränke muss gegebenenfalls durch Zwangslüftung<br />
die Verlustwärme abgeführt werden.<br />
77 2000 00<br />
OSY‐ControlCenter<br />
Gewicht ohne Kabel ca. 17 kg<br />
weight without cables approx. 17 kg<br />
00 8802 52, 01/09 (Rev. 2.0)<br />
Wandmontage / Wall mounting<br />
50<br />
Ø 12<br />
Ø 7<br />
Limited access location for technical equipment<br />
Dry location (max. relative humidity 75% at approx. 18 o C)<br />
Ambient temperatures between 0 o and 40 o C<br />
The OSY‐ControlCenter shall be readily accessible (access aisle 60 cm wide).<br />
Consider sufficient free space for cable entries.<br />
The heat transfer must not be blocked. The selected location must ensure sufficient air<br />
circulation above and below the OSY‐ControlCenter. Therefore, check for minimum<br />
distance of 50 mm (3 U in a rack) to walls, ceiling and other equipment. The venting ports<br />
must not be covered up. Where the OSY‐ControlCenter is installed in a 19‐inch rack,<br />
forced-air ventilation may be required.<br />
Einbau in 19 Zoll Montageschrank / Mounting in 19-inch rack<br />
77 2000 00<br />
OSY‐ControlCenter<br />
Page 163<br />
465,6<br />
482.6<br />
444<br />
25<br />
7 mm<br />
12 mm<br />
278.9 354.4<br />
291.5<br />
291.5<br />
Montagewinkel nach vorne umsetzen.<br />
Move mounting brackets to the front.<br />
<strong>Tunstall</strong> <strong>GmbH</strong>, Orkotten 66, D-48291 Telgte, www.tunstall.de
<strong>Tunstall</strong> <strong>GmbH</strong>, Orkotten 66, D-48291 Telgte, www.tunstall.de<br />
Anschlüsse D Connections GB<br />
Netzgerät USV 24 V DC (Bestell‐Nr. 77 3400 00)<br />
Power supply unit UPS 24 V DC (Order no. 77 3400 00)<br />
Gruppe 1 / Group 1<br />
Gruppe 2 / Group 2<br />
Gruppe 3 / Group 3<br />
Gruppe 4 / Group 4<br />
Gruppe 5 / Group 5<br />
Gruppe 6 / Group 6<br />
Gruppe 7 / Group 7<br />
Gruppe 8 / Group 8<br />
00 8802 52, 01/09 (Rev. 2.0)<br />
Anschluss werkseitig / pre-connected<br />
2 x 2.5 mm 2<br />
Störmeldeausgang, potentialfrei, Sammelausgang, Kontakt geschlossen bei Störung<br />
Fault message output, potential-free, collective output, contact closed in case of a fault<br />
Kontaktbelastbarkeit: 100 mA / 24 V<br />
contact load: max. 100 mA / 24 V<br />
Anschluss für Potentialausgleich auf Gewindebolzen im Gehäuse:<br />
Connection for potential equalisation on the threaded bolt in the housing:<br />
Gefahr! Bauseitiger Potentialausgleich erforderlich.<br />
Danger! Potential equalisation required.<br />
Interne Potentialausgleichsverbindung<br />
Internal potential equalisation connection<br />
Benutzung nur für <strong>Tunstall</strong>‐Techniker.<br />
Use only for <strong>Tunstall</strong> engineers.<br />
Daten Gruppe 1 / Data Group 1<br />
Daten Gruppe 2 / Data Group 2<br />
Daten Gruppe 3 / Data Group 3<br />
Daten Gruppe 4 / Data Group 4<br />
Daten Gruppe 5 / Data Group 5<br />
Daten Gruppe 6 / Data Group 6<br />
Daten Gruppe 7 / Data Group 7<br />
Daten Gruppe 8 / Data Group 8<br />
Sprechen Gruppe 1 / Speech Group 1<br />
Sprechen Gruppe 2 / Speech Group 2<br />
Sprechen Gruppe 3 / Speech Group 3<br />
Sprechen Gruppe 4 / Speech Group 4<br />
Sprechen Gruppe 5 / Speech Group 5<br />
Sprechen Gruppe 6 / Speech Group 6<br />
Sprechen Gruppe 7 / Speech Group 7<br />
Sprechen Gruppe 8 / Speech Group 8<br />
Nichts anschließen, wenn Telefonleitung 5, 6, 7 oder 8 benutzt wird.<br />
Sonst Verwendung für: Sprechen Gruppe 17 - 20.<br />
Don't connect, if telephone line 5, 6, 7 or 8 is used.<br />
Otherwise use for: Speech Group 17 - 20.<br />
Nichts anschließen, wenn Telefonleitung 1, 2, 3 oder 4 benutzt wird.<br />
Sonst Verwendung für: Sprechen Gruppe 21 - 24.<br />
Don't connect, if telephone line 1, 2, 3 or 4 is used.<br />
Otherwise use for: Speech Group 21 - 24.<br />
Telefonleitung 1 / Telephone Line 1<br />
Telefonleitung 3 / Telephone Line 3<br />
Telefonleitung 2 / Telephone Line 2<br />
Telefonleitung 4 / Telephone Line 4<br />
Telefonleitung 5 / Telephone Line 5<br />
Telefonleitung 7 / Telephone Line 7<br />
Telefonleitung 6 / Telephone Line 6<br />
Telefonleitung 8 / Telephone Line 8<br />
1<br />
1<br />
1<br />
1<br />
1<br />
1<br />
1<br />
1<br />
1<br />
1<br />
1<br />
1<br />
1<br />
1<br />
1<br />
Page 164<br />
DC/DC-<br />
Converter<br />
Power Supply<br />
DH3<br />
CTS2.A<br />
ST49<br />
ST50<br />
1<br />
1<br />
1<br />
1<br />
1<br />
1<br />
1<br />
1<br />
1<br />
1<br />
1<br />
C2 COM A<br />
ST37<br />
ST38<br />
ST32 C1<br />
ST33 C2 C1 COM A<br />
ST35 ST36<br />
C5<br />
ST39 ST40<br />
ST41<br />
ST42<br />
ST43<br />
ST44<br />
ST34<br />
C3<br />
C4<br />
C6<br />
OSYnet1 OSYnet2 OSYnet3 OSYnet4<br />
OSYnet5 OSYnet6 OSYnet7 OSYnet8<br />
OSYnet9 OSYnet<br />
10<br />
OSYnet<br />
11<br />
OSYnet<br />
12<br />
1<br />
0V +24V 0V +5V 0V 0V +24V +24V<br />
NF2b<br />
NF21b<br />
GND<br />
RESET<br />
DG1<br />
DH1<br />
DL1<br />
DG2<br />
DH2<br />
DL2<br />
DG3<br />
DL3<br />
DG4<br />
DH4<br />
DL4<br />
GND<br />
RxD1.A<br />
TxD1.A<br />
RTS1.A<br />
CTS1.A<br />
GND<br />
RxD2.A<br />
TxD2.A<br />
RTS2.A<br />
DG5<br />
DH5<br />
DL5<br />
DG6<br />
DH6<br />
DL6<br />
DG7<br />
DH7<br />
DL7<br />
DG8<br />
DH8<br />
DL8<br />
DG9<br />
DH9<br />
DL9<br />
DG10<br />
DH10<br />
DL10<br />
DG11<br />
DH11<br />
DL11<br />
DG12<br />
DH12<br />
DL12<br />
NF1a<br />
NF1b<br />
NF2a<br />
NF5a<br />
NF5b<br />
NF6a<br />
NF6b<br />
NF9a<br />
NF9b<br />
NF10a<br />
NF10b<br />
NF13a<br />
NF13b<br />
NF14a<br />
NF14b<br />
NF17a<br />
NF17b<br />
NF18a<br />
NF18b<br />
NF21a<br />
NF22a<br />
NF22b<br />
a1<br />
b1<br />
a2<br />
b2<br />
a5<br />
b5<br />
a6<br />
b6<br />
ST45<br />
ST46<br />
1<br />
1<br />
GND<br />
TxD1.1<br />
TxD1.2<br />
ST20<br />
CTS1.1<br />
GND<br />
CTS1.2<br />
GND<br />
TxD1.3<br />
ST21<br />
RxD1.3<br />
RTS1.3<br />
CTS1.3<br />
GND<br />
ST22<br />
GND<br />
RxD3.A<br />
TxD3.A<br />
RTS3.A<br />
CTS3.A<br />
GND<br />
RxD4.A<br />
TxD4.A<br />
RTS4.A<br />
CTS4.A<br />
ST23<br />
GND<br />
RxD5.A<br />
RTS5.A<br />
CTS5.A<br />
GND<br />
RxD6.A<br />
TxD6.A<br />
RTS6.A<br />
CTS6.A<br />
NF3a<br />
NF3b<br />
NF4a<br />
NF4b<br />
NF7a<br />
NF7b<br />
NF8a<br />
NF8b<br />
a3<br />
b3<br />
a4<br />
b4<br />
ST30<br />
ST31<br />
COM 1<br />
COM 2<br />
ST24<br />
ST25<br />
NF19a<br />
NF19b<br />
NF20a<br />
NF20b<br />
NF23a<br />
NF23b<br />
NF24a<br />
NF24b<br />
C3<br />
C4 COM A<br />
C5 COM A C6<br />
ST26<br />
NF11a<br />
NF11b<br />
NF12a<br />
NF12b<br />
NF15a<br />
NF15b<br />
NF16a<br />
NF16b<br />
a7<br />
b7<br />
a8<br />
b8<br />
RESET<br />
RxD1.1<br />
RTS1.1<br />
RxD1.2<br />
RTS1.2<br />
TxD5.A<br />
C1<br />
C1<br />
C1<br />
1<br />
COM 3<br />
COM A<br />
COM A<br />
ST27<br />
ST28<br />
ST29<br />
1<br />
1<br />
1<br />
1<br />
1 1<br />
GND<br />
RxD1.4<br />
TxD1.4<br />
RTS1.4<br />
DSR1.4<br />
DTR1.4<br />
RI1.4<br />
GND<br />
NC<br />
+5V<br />
NC<br />
+5V<br />
ST13<br />
CTS1. CTS1.4<br />
DCD1.4<br />
ST14<br />
USB+1<br />
USB-1<br />
NC<br />
+5V<br />
NC<br />
ST15<br />
USB+2<br />
USB-2<br />
ST16<br />
USB+3<br />
USB-3<br />
+5V<br />
ST17<br />
USB+4<br />
USB-4<br />
+5V<br />
NC<br />
ST18<br />
USB+5<br />
USB-5<br />
NC<br />
ST19<br />
USB+6<br />
USB-6<br />
+5V<br />
C1<br />
COM 4<br />
C1<br />
USB<br />
C2<br />
USB<br />
C3<br />
USB<br />
C4<br />
USB<br />
C5<br />
USB<br />
C6<br />
USB<br />
Prüfen Sie alle Leitungen auf Durchgang, Kurzschluss‐ und Erdschlussfreiheit.<br />
Wenn die Datenleitungen korrekt angeschlossen sind, beträgt die Spannung zwi‐<br />
schen DH und DG sowie die Spannung zwischen DL und DG ca. 2,5 V.<br />
Achtung! Bei dem folgende Plan handelt es sich um einen Standardanschlussplan.<br />
Beachten Sie die Abweichungen in Ihrem projektspezifischen Anschlussplan.<br />
Check all cables for continuity, short circuits and ground faults.<br />
When the data cables are correctly connected, the values are: voltage between<br />
DH and DG and voltage between DL and DG approx. 2.5 V.<br />
Attention! The following plan is a standard connection plan. Please follow the<br />
deviations in your project specific connection plan.<br />
77 2000 00<br />
OSY‐ControlCenter
Kontrollanzeigen (LED) D Control LEDs GB<br />
Die Kontrollanzeigen dienen <strong>Tunstall</strong>‐Technikern zur differenzierten Analyse von Störungen. The control LEDs help <strong>Tunstall</strong> engineers to analyze faults.<br />
00 8802 52, 01/09 (Rev. 2.0)<br />
Eine detailliertere Auswertung der Leuchtanzeigen ist nur durch <strong>Tunstall</strong>‐Techniker möglich.<br />
A more detailed interpretation of the control LEDs is possible for <strong>Tunstall</strong> engineers only.<br />
Reset‐Taster hinterer PC / Reset button for rear PC<br />
Kontroll‐LED*) hinterer PC / Control LED*) for rear PC<br />
Kontroll‐LED*) vorderer PC / Control LED*) for front PC<br />
Reset‐Taster vorderer PC / Reset button for front PC<br />
F: LED flackert (10 Hz) oder LED aus: Störung, LED flickering (10 Hz) or LED OFF: fault<br />
D: LED ein: Durchsageverstärker eingeschaltet<br />
D: LED ON: Announcement amplifier ON<br />
K/S: LED ein: Sprechverbindung eingeschaltet<br />
K/S: LED ON: Speech connection ON<br />
PC 5<br />
PC 5<br />
PC 6<br />
PC 6<br />
Bedeutung der LEDs für Telefonleitungen 1 - 8:<br />
Meaning of LEDs for telephone lines 1 - 8:<br />
1 Linie / Line<br />
2<br />
3<br />
4<br />
Durchsageverstärker / Announcement amplifier<br />
Klingelsignal / Ringing signal<br />
Schleifenspannung / Loop current<br />
Telefonleitung 1<br />
Telephone Line 1<br />
Telefonleitung 3<br />
Telephone Line 3<br />
Telefonleitung 2<br />
Telephone Line 2<br />
Telefonleitung 4<br />
Telephone Line 4<br />
Telefonleitung 5<br />
Telephone Line 5<br />
Telefonleitung 7<br />
Telephone Line 7<br />
Telefonleitung 6<br />
Telephone Line 6<br />
Telefonleitung 8<br />
Telephone Line 8<br />
LED 1 leuchtet: Sprechverbindung zwischen Telefonleitung und Rufanlage besteht.<br />
LED 2: leuchtet nie.<br />
LED 3 flackert: Es klingelt auf der Telefonleitung.<br />
LED 4 leuchtet: “Hörer ist abgehoben” auf der Telefonleitung.<br />
LED 1 is ON: Speech connection between the telephone line and nurse call system.<br />
LED 2: is always OFF.<br />
LED 3 flickering: Ringing signal on the telephone line.<br />
LED 4 is ON: Telephone off-hook<br />
PC 1<br />
PC 1<br />
PC 2<br />
PC 2<br />
PC 3<br />
PC 3<br />
PC 4<br />
PC 4<br />
*) Kontroll‐LED: 1sec Rot EIN / 1 sec Rot AUS = PC ok, sonst = PC Störung<br />
*) Control LED: 1sec Red ON / 1 sec Red OFF = PC ok, otherwise = PC fault<br />
Page 165<br />
<strong>Tunstall</strong> <strong>GmbH</strong>, Orkotten 66, D-48291 Telgte, www.tunstall.de
<strong>Tunstall</strong> <strong>GmbH</strong>, Orkotten 66, D-48291 Telgte, www.tunstall.de<br />
Installationsanleitung D Installation Instructions GB<br />
OSYnet‐SafetyController, Best.‐Nr. 77 2100 00<br />
Sicherheitscontroller zum direkten Anschluss an den Gruppenbus (OSYnet). Parallel<br />
einsetzbar zum OSY-ControlCenter, pro physikalische Gruppe. Vorgesehen als Redundanz<br />
zur Aufrechterhaltung der Systemfunktionen bei Ausfall des OSY-ControlCenters.<br />
Steuerung der Lichtruf-Grundfunktionen für eine physikalische Gruppe (DIN VDE 0834)<br />
Steuerung von Anzeigen an Zimmerleuchten und Displays<br />
Selbständige und automatische Umschaltung zwischen Normal- und Sicherheitsbetrieb<br />
1 potentialfreier Schaltausgang (Wechselkontakt) zur Anzeige der Betriebsart.<br />
1 potentialfreier Schaltausgang (Wechselkontakt) zur Anzeige von Störungen<br />
Schaltausgang: intern: 24 VDC/60 mA, extern: 24 VAC/1 A<br />
Max. Stromaufnahme: 230 mA<br />
Hinweis! Die vollständige Installation des Systems ist im technischen<br />
Handbuch beschrieben.<br />
Achtung! Die Leiterplatte ist mit elektrostatisch gefährdeten Bauteilen bestückt.<br />
Vermeiden Sie deshalb eine direkte Berührung.<br />
00 8802 39, 10/09 (Rev. 3.0)<br />
OSYnet‐SafetyController, order no. 77 2100 00<br />
Safety controller for direct connection to the group bus (OSYnet). Usable in parallel with<br />
OSY-ControlCenter, per physical group. Intended use as redundancy for maintaining the<br />
system operation in case of OSY-ControlCenter fail.<br />
Controlling the base light call functions of one physical group (DIN VDE 0834)<br />
Control of room lamps and displays<br />
Autonomous and automatic switching between normal and safety operation<br />
1 potential free digital output (change‐over contact) for signalling the operation mode<br />
1 potential free digital output (change‐over contact) for fault signalling<br />
Digital output: internal: 24 VDC/60 mA, external: 24 VAC/1 A<br />
Max. current consumption: 230 mA<br />
Note! The complete installation of the system is described in the technical manual.<br />
Attention! The printed circuit board includes electrostatic sensitive components.<br />
Avoid touching.<br />
Montage Mounting<br />
Montage auf Hutschiene oder Wandmontage im Technikraum der Station.<br />
Mounting on supporting rail or wall mounting in the electrical room of the ward.<br />
A1: Montage auf Hutschiene (35 mm)<br />
A1: Mounting on supporting rail (35 mm)<br />
OSYnet‐SafetyController 1 auf die Hutschiene 3 aufklipsen, bis er einrastet.<br />
Click the OSYnet‐SafetyController 1 onto the supporting rail 3.<br />
A2: Wandmontage<br />
1. Die drei Befestigungsclips 2 soweit herausschieben, bis die Öffnungen für die<br />
Schrauben 4 frei liegen.<br />
2. OSYnet‐SafetyController 1 an der Wand festschrauben.<br />
A2: Wall mounting<br />
1. Push out the three fixing clips 2 until the holes for the screws 4 appear.<br />
2. Screw the OSYnet‐SafetyController 1 to the wall.<br />
Adresse einstellen (126, 125) Setting of address (126, 125)<br />
Zum Einstellen der Adresse auf der Leiterplatte dienen die Codierschalter 1 bis 7 mit den<br />
Werten 1, 2, 4, 8, 16, 32, 64. Entsprechenden Schalter auf ON stellen.<br />
Am OSYnet‐SafetyController müssen Sie die Adresse 126 einstellen. Wenn Sie in der<br />
physikalischen Gruppe einen zweiten OSYnet‐SafetyController installieren, müssen Sie an<br />
diesem die Adresse 125 einstellen.<br />
Codierschalter 8 und 9 nicht verändern! Werkseitige Einstellung: OFF.<br />
Reset<br />
Um einen Hardware-Reset durchzuführen, den Codierschalter 10 für eine Sekunde auf ON<br />
und anschließend wieder auf OFF stellen. Ein Hardware-Reset muss durchgeführt werden,<br />
wenn eine Codierschalterstellung verändert wurde. Sonst werden die geänderten<br />
Einstellungen nicht übernommen.<br />
Kontroll‐LED (rot) Control LED (red)<br />
Leuchtet nicht:<br />
Langsames Blinken:<br />
( 1s EIN - 1 s AUS)<br />
Schnelles Blinken:<br />
(200 ms EIN - 200 ms AUS)<br />
OSYnet‐SafetyController<br />
ohne Spannungsversorgung oder defekt<br />
OSY‐ControlCenter steuert die Gruppe.<br />
OSYnet‐SafetyController betriebsbereit (standby)<br />
OSYnet-SafetyController steuert die Gruppe.<br />
Länger als 10 s Dauerlicht: OSYnet‐SafetyController nicht betriebsbereit.<br />
For setting the address on the printed circuit board please use the code switches 1 to 7 with<br />
the values 1, 2, 4, 8, 16, 32, 64. Set the appropriate switch to ON.<br />
At the OSYnet‐SafetyController you have to set address 126. If you install a second<br />
OSYnet‐SafetyController in the same physical group, you have to set address 125 at the<br />
second OSYnet‐SafetyController.<br />
Do not change code switches 8 and 9! Factory set: OFF.<br />
Reset<br />
To reset the OSYnet‐SafetyController you have to set code switch 10 to ON for one second,<br />
then back to OFF. A reset has to be made, if a code switch setting has been changed. Otherwise<br />
the new setting will not be activated.<br />
Light OFF:<br />
Flashing slowly:<br />
( 1s ON - 1 s OFF)<br />
Flashing quickly:<br />
(200 ms ON - 200 ms OFF)<br />
OSYnet‐SafetyController<br />
without power supply or defect<br />
OSY‐ControlCenter controls the group.<br />
OSYnet‐SafetyController ready-to-operate (standby)<br />
OSYnet-SafetyController controls the group.<br />
Light ON for more than 10 s: OSYnet‐SafetyController not ready to operate.<br />
ESD‐Schutzabdeckung (Bestell‐Nr. 00 0276 53) ESD protection cover (order no. 00 0276 53)<br />
Nach dem Anschließen der Leitungen (siehe Rückseite) die ESD‐Schutzabdeckung<br />
aufsetzen. (ESD = Electro Static Discharge = Elektrostatische Entladung)<br />
After you have connected the cables (see reverse side), you have to put the ESD protection<br />
cover on the OSYnet‐SafetyController. (ESD = Electro Static Discharge)<br />
Demontage von der Hutschiene Dismantling from supporting rail<br />
Einen Schraubendreher in die sichtbare Öffnung des schwarzen Befestigungsclips stecken<br />
und dann den Clip nach oben herausziehen, bis sich der OSYnet‐SafetyController 1 von der<br />
Hutschiene 3 löst.<br />
<br />
Montage auf Hutschiene<br />
Mounting on supporting rail<br />
Kontroll‐LED (rot)<br />
Control LED (red)<br />
77 2100 00<br />
OSYnet‐SafetyController<br />
3<br />
58 mm<br />
2<br />
2 2<br />
1<br />
106 mm<br />
Page 166<br />
Put a screw driver into the visible hole of the black fixing clip. Then pull the clip upwards,<br />
until the OSYnet‐SafetyController 1 comes loose from the supporting rail 3.<br />
<br />
90 mm<br />
Wandmontage<br />
Wall mounting<br />
4<br />
ON<br />
1 2 3 4 5 6<br />
1<br />
2<br />
4<br />
8<br />
16<br />
Adresse<br />
Address<br />
7<br />
32<br />
64<br />
2<br />
2 2<br />
8 9 10<br />
Reset<br />
125<br />
126<br />
1<br />
4<br />
ESD‐Schutzabdeckung<br />
ESD protection cover<br />
4
Anschlüsse D Connections GB<br />
00 8802 39, 10/09 (Rev. 3.0)<br />
Ip Ip OSYnet OSYnet<br />
0 V<br />
0 V<br />
+24 V<br />
Made in Germany<br />
Rev.:<br />
Ser. No.:<br />
24V_OUT 1/2<br />
OUT 1<br />
C 1 / 2<br />
OUT 2<br />
+24 V<br />
0 V<br />
Ausgang zur Anzeige<br />
der Betriebsart<br />
(Wechselkontakt)<br />
Output for signalling the<br />
operation mode<br />
(change‐over contact)<br />
24V_OUT 3/4<br />
NF 1a<br />
OUT 3<br />
NF 1b<br />
C 3 / 4<br />
NF 2a<br />
NF 2b<br />
OUT 4<br />
0 V<br />
DG<br />
DL<br />
DH<br />
DG<br />
1<br />
2<br />
4<br />
8<br />
16<br />
32<br />
64<br />
NC<br />
Test<br />
Reset<br />
Address<br />
OSYnet-SafetyController<br />
Order No. / Best.-Nr. 77 2100 00<br />
Ausgang zur Anzeige von<br />
Störungen<br />
(Wechselkontakt)<br />
Output for fault signalling<br />
(change‐over contact)<br />
No Function - Keine Funktion<br />
Ausgang zur Anzeige der Betriebsart<br />
OUT 1 geschlossen & OUT 2 offen = Normalbetrieb<br />
OUT 1 offen & OUT 2 geschlossen = Sicherheitsbetrieb (SafetyController steuert die Gruppe)<br />
Jumper OUT 1/2 gesteckt<br />
= Interne Spannungsversorgung (24V DC, max. 60 mA zur Ansteuerung eines Relais)<br />
Jumper OUT 1/2 nicht gesteckt = Externe Spannungsversorgung (24V AC oder DC, max. 1 A)<br />
Ausgang zur Anzeige von Störungen<br />
Störmeldungen von Gruppenbus-Teilnehmern<br />
OUT 3 geschlossen & OUT 4 offen = keine Störung<br />
OUT 3 offen & OUT 4 geschlossen = Störung!<br />
Jumper OUT 3/4 gesteckt<br />
= Interne Spannungsversorgung (24V DC, max. 60 mA zur Ansteuerung eines Relais)<br />
Jumper OUT 3/4 nicht gesteckt = Externe Spannungsversorgung (24V AC oder DC, max. 1 A)<br />
Output for signalling the operation mode<br />
OUT 1 closed & OUT 2 open = Normal operation<br />
OUT 1 open & OUT 2 closed = Safety operation (SafetyController controls the group)<br />
Jumper OUT 1/2 set = Internal power supply (24V DC, maximum 60 mA for triggering a relay)<br />
Jumper OUT 1/2 not set = External power supply (24V AC or DC, maximum 1 A)<br />
Output for fault signalling<br />
Faults of group bus users<br />
OUT 3 closed & OUT 4 open = no fault<br />
OUT 3 open & OUT 4 closed = Fault!<br />
Jumper OUT 3/4 set = Internal power supply (24V DC, maximum 60 mA for triggering a relay)<br />
Jumper OUT 3/4 not set = External power supply (24V AC or DC, maximum 1 A)<br />
Page 167
14. Product leaflets<br />
Page 168<br />
<strong>Flamenco</strong> - <strong>Technical</strong> <strong>Manual</strong>, 10/11 (Rev. 5.0), 00 8812 60
14.10 Power supply<br />
77 3400 00 Power supply unit UPS<br />
77 3400 10 Power supply unit UPS 60<br />
77 3401 00 Power supply unit<br />
77 3450 00 Battery set for UPS 60<br />
<strong>Flamenco</strong> - <strong>Technical</strong> <strong>Manual</strong>, 10/11 (Rev. 5.0), 00 8812 60<br />
Page 169<br />
14. Product leaflets
Power supply unit UPS, Order No. 77 3400 00<br />
The power supply unit UPS serves as a conventional power supply unit with integrated uninterrupted<br />
power supply module (UPS) in a common housing. Input voltage of 115 - 230 V AC is transformed into<br />
24 V DC, and the UPS feature ensures the supply of a connected DC user also in case of a mains<br />
power failure.<br />
When in the normal operating mode, i.e. mains power supply, the electronic module monitors the<br />
output voltage. Starting at a load current level of approx. 12.5 A DC, the output voltage is reduced<br />
while keeping a constant current load.<br />
This is a self-correcting output voltage feature, as the output voltage will be reactivated. Further to this,<br />
the output voltage is protected by a 15 A flat fuse "F2".<br />
If the mains input voltage fails or when it drops to less than 90 VAC, the two lead batteries in the unit<br />
will continue to supply the connected user without any interruption.<br />
To protect the batteries from going flat, circuit breakers will open when during the UPS mode the<br />
output voltage drops below to 19.5 V. When the mains supply voltage is active again, the system<br />
reverts to its normal operating mode.<br />
Roughly every 15 minutes, an integrated test circuitry performs a voltage check at the battery<br />
terminals, the connections and at the circuit breakers. Upon the return of the mains supply current, the<br />
battery is isolated from the outputs, and the internal charging module recharges the battery.<br />
Safety instructions<br />
1. Mounting<br />
• Non-compliance with the safety instruction or improper handling of the unit (e.g. skin<br />
contact with live components when the unit is open) can be extremely dangerous.<br />
• The power supply unit UPS should only be installed and operated by qualified<br />
specialists.<br />
• Before effecting any work at or with the unit, it must be isolated from any voltage<br />
(mains or battery).<br />
• Connection to the mains supply must be executed acc. to the valid national<br />
regulations (for Germany: VDE 0100 and VDE 0160).<br />
• Fuse or circuit breaker must be provided for safe isolation from the input (mains)<br />
current.<br />
• Overheating of the unit may occur when the values as shown in the technical data<br />
are exceeded. This may lead to permanent damage to the unit, and system safety is<br />
jeopardised.<br />
• Always watch for the safe isolation of AC and DC circuits!<br />
• Observe the general safety instructions for the handling of batteries! Sufficient<br />
ventilation must be provided to preclude the development of an explosive hydrogenair<br />
mixture!<br />
• If the power supply unit UPS will not be used for a longer time, first the batteries<br />
have to be fully charged. After that the power supply unit UPS has to be<br />
disconnected from mains supply and the battery fuse (under the left cover) has to be<br />
removed.<br />
The power supply unit UPS is designed for wall mounting. Bore holes are prepared at the housing for<br />
fixing the unit at the wall using the enclosed mounting material. A dimensional drawing is shown on<br />
the next page.<br />
Before mounting, check the condition of the wall itself.<br />
The power supply unit UPS weighs approx. 9 kg.<br />
The unit must be mounted such that the venting ports are at the top and bottom.<br />
© <strong>Tunstall</strong> <strong>GmbH</strong>, Orkotten 66, 48291 Telgte, Germany, www.tunstall.de, 00 8802 41, Rev. 3.1 (05/2008) English - 1<br />
Page 170
Power supply unit UPS, Order No. 77 3400 00<br />
The selected location must ensure sufficient air circulation above and below the unit. Therefore, check<br />
for minimum distance of 50 mm to walls, ceiling and other equipment. The venting ports must not be<br />
covered up. Insufficient air circulation may lead to damage to the power supply unit.<br />
Dimensional drawing:<br />
2. Connection<br />
The internal connection terminals are provided as screw/plug-in clamps.<br />
2.1 Mains connection<br />
You have to ensure, that the mains cable is disconnected from the AC supply voltage during the<br />
following procedure:<br />
1. Release 4 screws for the left cover and remove the cover to the front.<br />
Now, the terminal connection clamps are accessible.<br />
2. Direct the mains cable through the cable duct into the housing and connect to the appropriate<br />
terminal posts as designated in the unit.<br />
NOTE: To simplify this process, you may pull the input connector, connect the wires as shown and<br />
replace the plug in its socket.<br />
CAUTION ! Check for the correct and positive connection of the protective conductor.<br />
3. Secure the connecting cable against being pulled from the housing for example by fixing the<br />
installation cable with cable clamps.<br />
2.2 Output terminal clamps 24 V DC / 12.5 A<br />
The output voltage is generated via a primary pulse controller. This controller provides the output<br />
voltage of 24 V DC with 12.5 A current (for continuous operation considering all tolerance criteria).<br />
When in the normal operating mode, i.e. mains power supply, the electronic module monitors the<br />
output voltage. When the load current exceeds approx. 12.5 A, the output current is shut off (hicc-up<br />
mode) until the overload at the output terminal connections has been reduced.<br />
This is a self-correcting output voltage feature, as the output voltage will be reactivated. Further to this,<br />
the output voltage is protected by a 15 A flat fuse "F2".<br />
• The load shall be connected to the terminal clamps "+24V" and "0V" (provided 2 x).<br />
2.3 Control terminal clamps x + y<br />
The control terminal clamps "x" and "y" are used to prepare the unit for the uninterrupted power supply<br />
(UPS mode).<br />
English - 2 © <strong>Tunstall</strong> <strong>GmbH</strong>, Orkotten 66, 48291 Telgte, Germany, www.tunstall.de, 00 8802 41, Rev. 3.1 (05/2008)<br />
Page 171
Power supply unit UPS, Order No. 77 3400 00<br />
2.3.1 Preparing the UPS function by placing a bridge contact between "x" and "y"<br />
• Connect the control terminal clamps "x" and "y" using the enclosed bridging contact or via a<br />
potential-free 'make contact'. The current for the bridging contact is approx. 1 mA..<br />
2.3.2 LED and indicator outputs 1 - 5<br />
The five indicator outputs 1 – 5 at the 7-pole terminal block indicate the status of the unit via potentialfree<br />
solenoid contacts. The current load for these contacts is up to 125 V / 1.5 A / 60 VA.<br />
2.3.2.1 Green LED "Power" (mains supply mode and bridging contact between "x" and "y"<br />
closed)<br />
Only green LED "Power“ is on.<br />
Contacts 3 – 1 & 3 - 5 are closed.<br />
2.3.2.2 Amber LED "Battery active"<br />
Only amber LED "Battery active“ is on.<br />
Contacts 3 – 1 & 3 – 4 are closed.<br />
2.3.2.3 Red LED "Battery low"<br />
During mains failure<br />
Only amber LED "Battery active“ is on.<br />
Contacts 3 – 1 & 3 – 4 are closed.<br />
Amber LED "Battery active“ and red LED "Battery<br />
low“ are on.<br />
Contacts 3 – 2 & 3 – 4 are closed.<br />
All LEDs are off.<br />
Contacts 3 – 2 & 3 – 5 are closed.<br />
24 V voltage is available at the terminal clamp.<br />
Battery mode<br />
(when bridging contact between "x" and "y" is<br />
closed)<br />
The 24 V voltage at the terminal clamp is from the<br />
battery.<br />
The voltage at the terminal clamps depends on<br />
the relevant battery charge state.<br />
When the output voltage has dropped to<br />
approx. 19.5 V, the power supply unit will shut off<br />
(protection against totally flat battery)<br />
After the input voltage (115 - 230 Volt) has been reactivated again, the output clamps will be supplied<br />
with 24 V DC, and the batteries will be recharged automatically.<br />
2.3.2.4 Red LED "Output Failure Fuse F2" defective<br />
Green LED "Power“ and red LED "Output Failure<br />
Fuse F2" are on<br />
2.3.4 Battery test<br />
Green LED "Power“ is on and red LED "Battery<br />
low“ illuminates for 30 seconds every 15 minutes.<br />
Contact 3 – 2 is closed for 30 seconds every 15<br />
minutes.<br />
Output fuse F2 was removed or it is defective. No<br />
output voltage at the power supply terminal<br />
clamps.<br />
Battery capacity not sufficient for safe UPS<br />
operation.<br />
Batteries are automatically checked every 15<br />
minutes. If a battery fault is detected during this<br />
test, the indicating contact and the LED "Battery<br />
low" are activated for the approx. 30 sec. test<br />
period.<br />
The unit features an automatic battery load test. For this, the internal batteries' status is checked at<br />
regular intervals (approx. 15 minutes).<br />
This takes place by voltage measuring while simultaneously demanding a defined load current for a<br />
period of approx. 30 sec.<br />
© <strong>Tunstall</strong> <strong>GmbH</strong>, Orkotten 66, 48291 Telgte, Germany, www.tunstall.de, 00 8802 41, Rev. 3.1 (05/2008) English - 3<br />
Page 172
Power supply unit UPS, Order No. 77 3400 00<br />
If during this test the battery voltage should drop below approx. 21.5 V, the indicating contact (3 – 2 –<br />
1) "Battery low" is reversed and this shows that the battery capacity will not sustain a UPS operating<br />
mode.<br />
This warning will be indicated for the said test period of approx. 30 sec. or until the battery voltage has<br />
been increased to approx. 23 V . This may also take place when the battery voltage rises during a<br />
recharging process after previous discharging, e.g. in the course of UPS operation.<br />
This warning message is reset after the test phase and will be reactivated again during the next<br />
battery load test. This is the reason for the cyclic indication of the battery fault as described above.<br />
The battery load test is an effective instrument for checking the true battery state. A negative result,<br />
i.e. a warning message is issued, may be caused by one or more of the following :<br />
• Charge status too low.<br />
• Battery fuse has failed.<br />
• Battery not correctly connected.<br />
• Battery is defective.<br />
• Battery is too old, and must be replaced.<br />
3. Commissioning<br />
1. Insert the battery fuse between the batteries in the fuse holder (protection against total discharge<br />
during storage).<br />
2. Connect input and output terminal connections (refer to items 2.1 and 2.2).<br />
3. Switch on the input voltage (115 – 230 Volt).<br />
From now on, the connected nurse call system devices are supplied with 24 V DC.<br />
4. The green LED "Power" is on due to the voltage at the terminal clamps.<br />
If the red LED "Battery low“ is on, the UPS function is not yet active<br />
(Place the bridging contact x – y).<br />
5. Now the power supply unit UPS is fully operational.<br />
4. Shutting the power supply UPS off<br />
1. Shut off the input voltage (115 – 230 Volt).<br />
2. Remove the UPS function acc. to item 2.3.1 (Remove the bridging contact), otherwise the load for<br />
the user circuits will be supplied through the battery until the total discharge circuit disconnects the<br />
battery.<br />
5. Service<br />
To ensure the safe function of the system, batteries should be replaced every 3 years - depending on<br />
the ambient temperature (Refer to diagram 1, Item 6). After 3 – 5 years, the battery capacity has<br />
dropped to approx. 60%.<br />
6. Battery service life<br />
The power supply unit UPS comes with sealed, service-free and rechargeable led-gel batteries VRLA.<br />
According to the EUROBAT classification, these batteries have a useful service life of 5 – 7 years.<br />
This time, however, strongly depends on the relevant ambient temperature. (Up to 20 °C: 7 – 8 years<br />
as shown in diagram 1)<br />
English - 4 © <strong>Tunstall</strong> <strong>GmbH</strong>, Orkotten 66, 48291 Telgte, Germany, www.tunstall.de, 00 8802 41, Rev. 3.1 (05/2008)<br />
Page 173
Power supply unit UPS, Order No. 77 3400 00<br />
If the system will not be used for an extended period of time, the batteries should be fully charged to<br />
prevent a total discharge. (Refer to item 7 "Storage") After the charging process has been completed<br />
the power supply unit has to be disconnected from the mains supply and the battery fuse (under the<br />
left cover) has to be removed.<br />
Battery service life (years)<br />
Temperature<br />
Diagram 1: Battery service life in relation to ambient temperature<br />
6.1 Battery change<br />
Pb<br />
Lead batteries contain harmful toxic substances. Observe general and local safety<br />
directives when during handling and transport. For disposal, comply with local directives.<br />
Batteries bear the risk of excessive short-circuit currents. Never create any direct contact<br />
between the battery posts and or other conductive component parts. Therefore remove any<br />
wristband, watch, finger rings or other metal objects when working at the open power supply<br />
unit. Always use tools with standard isolating handles.<br />
Batteries may be replaced only by the same type of battery (2 x 12 V; 7 Ah). We recommend the use<br />
of the battery type BAT 24-7, <strong>Tunstall</strong> Order No. 00 0648 85. The use of other makes may create<br />
problems due to different connecting terminals or differing dimensions.<br />
1. Shut off mains supply to the power supply unit UPS !!!<br />
2. Release the 4 fastening screws for the left cover and remove the cover to the front.<br />
3. Confirm the position of the old battery and after its removal, install the new battery in the<br />
same manner.<br />
4. Make sure, the new battery is in the same position and check for the correct battery<br />
contacts. False connections may damage the power supply UPS !<br />
5. Check for the correct seating of the plastic cover for the batteries.<br />
6. Fix the battery position by securing it with the Velcro tape.<br />
7. Replace and close the housing.<br />
8. Perform a functional check of the power supply UPS!<br />
© <strong>Tunstall</strong> <strong>GmbH</strong>, Orkotten 66, 48291 Telgte, Germany, www.tunstall.de, 00 8802 41, Rev. 3.1 (05/2008) English - 5<br />
Page 174
Power supply unit UPS, Order No. 77 3400 00<br />
7. Storage<br />
If the power supply unit UPS will not be used for an extended period of time, the batteries must first<br />
be fully recharged to preclude battery damage due to total discharging. (Refer to item 6 Battery<br />
service life).<br />
For the charging process, the power supply unit UPS shall be connected to the mains supply for at<br />
least 4 hours, and the UPS function shall be activated by placing the bridging contact between "x“ and<br />
"y“. After the charging process has been completed the power supply unit has to be disconnected from<br />
the mains supply and the battery fuse (under the left cover) has to be removed.<br />
•<br />
8. Spare parts<br />
Spare part Order No.<br />
Rechargeable lead-gel battery, Type BAT 24-7 (2 ea. required) incl.<br />
plastic cover<br />
00 0648 85<br />
Battery fuse, internal 20 A FKS 00 0132 03<br />
Mains fuse, front plate (5 x 20) T 5.0 A 00 0130 41<br />
Output fuse, bottom 15 A FKS 00 0132 02<br />
Clamp for mains connection, 3-pole 00 0211 40<br />
Clamp for 24 V connection, 4-pole 00 0211 41<br />
Clamp for control and indicator outputs, 7-pole 00 0211 39<br />
Bridging contact EB 2 – 5 for control clamps "x“ and "y“ 00 0223 56<br />
English - 6 © <strong>Tunstall</strong> <strong>GmbH</strong>, Orkotten 66, 48291 Telgte, Germany, www.tunstall.de, 00 8802 41, Rev. 3.1 (05/2008)<br />
Page 175
9. <strong>Technical</strong> data<br />
Power supply unit UPS, Order No. 77 3400 00<br />
Power supply unit UPS<br />
Input<br />
Order No. 77 3400 00<br />
Nominal input voltage 115 – 230 V AC<br />
Input voltage range 90 – 264 V AC<br />
Input frequency 47 – 63 Hz<br />
Input current 4 A at 115 V AC / 2 A at 230 V AC<br />
Start-up current surge 22 A at 115 V AC / 44 A at 230 V AC, typical<br />
Power factor 0.95 at 230 V AC / 0.98 at 115 V AC for full load<br />
Efficiency<br />
Output<br />
88%, typical<br />
Nominal output current 12.5 A DC<br />
Output voltage 24 V DC +/- 2%<br />
Output voltage in battery mode 26,5 – 19,5 V DC, typical<br />
Calculated output power 288 W<br />
Rippling of nominal output current < 100 mVeff<br />
Battery capacity 7 Ah<br />
Charge current 700 mA, typical<br />
Bridging time at nominal current approx. 17 min.<br />
Overload protection < 14 A<br />
Overvoltage protection, power supply unit 26.7 – 32.4 V DC<br />
Overtemperature protection<br />
Battery voltage thresholds<br />
75 °C +/- 5°C (power diode)<br />
output voltage switched off, automatic re-engaging<br />
Switching threshold for UPS mode Ua < 22.5 V, typical<br />
Switching threshold for warning before battery<br />
shut-down<br />
21.5 V, typical<br />
Switching threshold for total discharge<br />
protection<br />
19.5 V, typical<br />
EMC CE-certified EN 55022 Class B; ENV 50204<br />
EN 61000-3-2, -3; EN 61000-4-2, -3, -4, -5, -6, -8, -11<br />
Safety EN 60950<br />
Output Safety low voltage, SELV<br />
Test voltage PRI – SEC 3 kV<br />
Protection class I<br />
Protection (safety)<br />
Safety devices<br />
IP 20<br />
Battery fuse, internal 20 A FKS<br />
Charging fuse, internal (5 x 20) T 4.0 A<br />
Mains fusing, front plate (5 x 20) T 5.0 A<br />
Output fusing, bottom of unit<br />
General<br />
15 A FKS<br />
Cooling convection, free air flow<br />
Permissible ambient temperature 0 ... +50 °C<br />
Storage temperature -25 ... + 60 °C<br />
MTBF 100,000 hours (no for batteries)<br />
Weight approx. 9 kg<br />
Dimensions (HxWxD) 244 x 325 x 178 mm<br />
Mounting Wall mounting<br />
Connecting clamps Screw / plug-in connections<br />
© <strong>Tunstall</strong> <strong>GmbH</strong>, Orkotten 66, 48291 Telgte, Germany, www.tunstall.de, 00 8802 41, Rev. 3.1 (05/2008) English - 7<br />
Page 176
Power supply unit UPS 60, Order No. 77 3400 10<br />
The power supply unit UPS 60 is a power supply unit and includes the electronics that builds up an<br />
uninterrupted power supply (UPS) in combination with battery set for UPS 60 (order no. 77 3450 00).<br />
Input voltage of 115 - 230 V AC is transformed into 24 V DC output voltage. The UPS feature ensures<br />
the supply of the connected DC users also in case of a mains power failure.<br />
If the mains input voltage fails or when it drops to less than 90 VAC, the two connected lead batteries<br />
will continue to supply the users without any interruption.<br />
To protect the batteries from going flat, circuit breakers will open when during the UPS mode the<br />
output voltage drops below to 19.5 V. When the mains supply voltage is active again, the system<br />
reverts to its normal operating mode.<br />
Roughly every 15 minutes, an integrated test circuitry performs a voltage check at the battery<br />
terminals, the connections and at the circuit breakers. Upon the return of the mains supply current, the<br />
battery is isolated from the outputs, and the internal charging module recharges the battery.<br />
Safety instructions<br />
1. Mounting<br />
• Non-compliance with the safety instruction or improper handling of the unit (e.g. skin<br />
contact with live components when the unit is open) can be extremely dangerous.<br />
• The power supply unit UPS 60 should only be installed and commissioned by<br />
qualified specialists.<br />
• Before effecting any work at or with the unit, it must be isolated from any voltage<br />
(mains or battery).<br />
• Connection to the mains supply must be executed acc. to the valid national<br />
regulations (for Germany: VDE 0100 and VDE 0160).<br />
• Fuse or circuit breaker must be provided for safe isolation from the input (mains)<br />
current.<br />
• Overheating of the unit may occur when the values as shown in the technical data<br />
are exceeded. This may lead to permanent damage to the unit, and system safety is<br />
jeopardised.<br />
• Always watch for the safe isolation of AC and DC circuits!<br />
• Observe the general safety instructions for the handling of batteries! Sufficient<br />
ventilation must be provided to preclude the development of an explosive hydrogenair<br />
mixture!<br />
• If the power supply unit UPS 60 will not be used for a longer time, first the batteries<br />
have to be fully charged. After that the power supply unit UPS 60 has to be<br />
disconnected from the mains supply. Furthermore the battery connection cable must<br />
be disconnected from the battery set for UPS 60 (see chapter 2.1). Alternatively the<br />
battery fuse in the battery set for UPS 60 can be removed.<br />
The power supply unit UPS 60 is designed for wall mounting. Bore holes are prepared at the housing<br />
for fixing the unit at the wall using the enclosed mounting material. A dimensional drawing is shown on<br />
the next page.<br />
Before mounting, check the condition of the wall itself.<br />
The power supply unit UPS 60 weighs approx. 4 kg.<br />
The unit must be mounted such that the venting ports are at the top and bottom.<br />
The selected location must ensure sufficient air circulation above and below the unit. Therefore, check<br />
for minimum distance of 50 mm to walls, ceiling and other equipment. The venting ports must not be<br />
covered up. Insufficient air circulation may lead to damage to the power supply unit.<br />
© <strong>Tunstall</strong> <strong>GmbH</strong>, Orkotten 66, 48291 Telgte, Germany, www.tunstall.de, 00 8802 81, Rev. 2.1 (05/2008) English - 1<br />
Page 177
Power supply unit UPS 60, Order No. 77 3400 10<br />
Dimensional drawing:<br />
2. Connection<br />
The internal connection terminals are provided as screw/plug-in clamps and cage clamp/plug-in<br />
clamps.<br />
2.1 Mains and battery connection<br />
You have to ensure, that the mains cable is disconnected from the AC supply voltage during the<br />
following procedure:<br />
1. Release 4 screws for the left cover and remove the cover to the front.<br />
Now, the terminal connection clamps for the mains connection are accessible.<br />
2. Direct the mains connecting cable through the right cable duct into the housing and connect to the<br />
mains terminal posts (3 pole) as designated in the housing.<br />
CAUTION ! Check for the correct and positive<br />
connection of the protective conductor.<br />
3. Secure the mains connecting cable against being pulled from the housing for example by fixing<br />
the installation cable with the screwed cable gland.<br />
4. Direct the battery connecting cable through the left smaller cable duct into the housing and<br />
connect to the battery terminal posts (2 pole) as designated in the housing<br />
CAUTION ! Check for the correct connection,<br />
orientation and locking with srews.<br />
5. Secure the battery connecting cable against being pulled from the housing for example by fixing<br />
the installation cable with the screwed cable gland.<br />
2.2 Output terminal clamps 24 V DC / 12.5 A<br />
The output voltage is generated via a primary pulse controller. This controller provides the output<br />
voltage of 24 V DC with 12.5 A current (for continuous operation considering all tolerance criteria).<br />
When in mains operation, the electronic module monitors the output voltage. When the load current<br />
exceeds approx. 12.5 A, the output voltage is reduced with keeping a constant current depending on<br />
the value of resistance of the connected overload.<br />
Further to this, the output current is limited by a 15 A flat fuse "F2". After the cause for the overload<br />
has been eliminated the output voltage reverts to the must value 24 V. It is a self reverting output<br />
voltage.<br />
English - 2 © <strong>Tunstall</strong> <strong>GmbH</strong>, Orkotten 66, 48291 Telgte, Germany, www.tunstall.de, 00 8802 81, Rev. 2.1 (05/2008)<br />
Page 178
Power supply unit UPS 60, Order No. 77 3400 10<br />
• The load shall be connected to the terminal clamps "+24V" and "0V" (provided 2 x).<br />
2.3 Control terminal clamps x + y<br />
The control terminal clamps "x" and "y" are used to prepare the unit for the uninterrupted power supply<br />
(UPS mode).<br />
2.3.1 Preparing the UPS function by placing a bridge contact between "x" and "y"<br />
• Connect the control terminal clamps "x" and "y" using the enclosed bridging contact or via a<br />
potential-free 'make contact'. The current for the bridging contact is approx. 1 mA..<br />
2.3.2 LED and indicator outputs 1 - 5<br />
The five indicator outputs 1 – 5 at the 7-pole terminal block indicate the status of the unit via potentialfree<br />
relay contacts. The current load for these contacts is up to 125 V / 1.5 A / 60 VA.<br />
2.3.2.1 Green LED "Power" (mains supply mode and bridging contact between "x" and "y"<br />
closed)<br />
Only green LED "Power“ is on.<br />
Contacts 3 – 1 & 3 - 5 are closed.<br />
2.3.2.2 Amber LED "Battery active"<br />
Only amber LED "Battery active“ is on.<br />
Contacts 3 – 1 & 3 – 4 are closed.<br />
2.3.2.3 Red LED "Battery low"<br />
During mains failure<br />
Only amber LED "Battery active“ is on.<br />
Contacts 3 – 1 & 3 – 4 are closed.<br />
Amber LED "Battery active“ and red LED "Battery<br />
low“ are on.<br />
Contacts 3 – 2 & 3 – 4 are closed.<br />
All LEDs are off.<br />
Contacts 3 – 2 & 3 – 5 are closed.<br />
24 V voltage is available at the terminal clamp.<br />
Battery mode<br />
(when bridging contact between "x" and "y" is<br />
closed)<br />
The 24 V voltage at the terminal clamp is from the<br />
battery.<br />
The voltage at the terminal clamps depends on<br />
the relevant battery charge state.<br />
When the output voltage has dropped to<br />
approx. 19.5 V, the power supply unit will shut off<br />
(protection against totally flat battery)<br />
After the input voltage (115 - 230 Volt) has been reactivated again, the output clamps will be supplied<br />
with 24 V DC, and the batteries will be recharged automatically.<br />
2.3.2.4 Red LED "Output Failure Fuse F2"<br />
Green LED "Power“ and red LED "Output Failure<br />
Fuse F2" are on<br />
2.3.4 Battery test<br />
Green LED "Power“ is on and red LED "Battery<br />
low“ illuminates for 30 seconds every 15 minutes.<br />
Contact 3 – 2 is closed for 30 seconds every 15<br />
minutes.<br />
Output fuse F2 was removed or it is defective. No<br />
output voltage at the power supply terminal<br />
clamps.<br />
Battery capacity not sufficient for safe UPS<br />
operation.<br />
Batteries are automatically checked every 15<br />
minutes. If a battery fault is detected during this<br />
test, the indicating contact and the LED "Battery<br />
low" are activated for the approx. 30 sec. test<br />
period.<br />
© <strong>Tunstall</strong> <strong>GmbH</strong>, Orkotten 66, 48291 Telgte, Germany, www.tunstall.de, 00 8802 81, Rev. 2.1 (05/2008) English - 3<br />
Page 179
Power supply unit UPS 60, Order No. 77 3400 10<br />
The unit features an automatic battery load test. For this, the connected batteries' status is checked at<br />
regular intervals (approx. 15 minutes).<br />
This takes place by voltage measuring while simultaneously demanding a defined load current for a<br />
period of approx. 30 sec.<br />
If during this test the battery voltage should drop below approx. 21.5 V, the indicating contact (3 – 2 –<br />
1) "Battery low" is reversed and this shows that the battery capacity will not sustain a UPS operating<br />
mode.<br />
This warning will be indicated for the said test period of approx. 30 sec. or until the battery voltage has<br />
been increased to approx. 23 V. This may also take place when the battery voltage rises during a<br />
recharging process after previous discharging, e.g. in the course of UPS operation.<br />
This warning message is reset after the test phase and will be reactivated again during the next<br />
battery load test. This is the reason for the cyclic indication of the battery fault as described above.<br />
The battery load test is an effective instrument for checking the true battery state. A negative result,<br />
i.e. a warning message is issued, may be caused by one or more of the following :<br />
• Charge status too low.<br />
• Battery fuse has failed.<br />
• Battery not correctly connected.<br />
• Battery is defective.<br />
• Battery is too old, and must be replaced.<br />
3. Commissioning<br />
1. Connect input, output and battery terminal connections (refer to items 2.1 and 2.2).<br />
2. Switch on the input voltage (115 – 230 Volt).<br />
From now on, the connected nurse call system devices are supplied with 24 V DC.<br />
3. The green LED "Power" is on due to the voltage at the terminal clamps.<br />
If the red LED "Battery low“ is on, the UPS function is not yet active<br />
(Place the bridging contact x – y).<br />
4. Now the power supply unit UPS is fully operational.<br />
4. Shutting the power supply UPS 60 off<br />
1. Shut off the input voltage (115 – 230 Volt).<br />
2. Remove the UPS function acc. to item 2.3.1 (Remove the bridging contact), otherwise the load for<br />
the user circuits will be supplied through the battery until the total discharge circuit disconnects the<br />
battery.<br />
5. Service<br />
To ensure the safe function of the system, batteries should be replaced every 3 years - depending on<br />
the ambient temperature (Refer to diagram 1, Item 6). After 3 – 5 years, the battery capacity has<br />
dropped to approx. 60%.<br />
6. Battery service life<br />
The batteries connected to the power supply unit UPS 60 are sealed, service-free and rechargeable<br />
lead-gel batteries VRLA. According to the EUROBAT classification, these batteries have a useful<br />
English - 4 © <strong>Tunstall</strong> <strong>GmbH</strong>, Orkotten 66, 48291 Telgte, Germany, www.tunstall.de, 00 8802 81, Rev. 2.1 (05/2008)<br />
Page 180
Power supply unit UPS 60, Order No. 77 3400 10<br />
service life of 5 – 7 years. This time, however, strongly depends on the relevant ambient temperature.<br />
(Up to 20 °C: 7 – 8 years as shown in diagram 1)<br />
If the system will not be used for an extended period of time, the batteries should be fully charged to<br />
prevent a total discharge. (Refer to item 7 "Storage") While the system is not used, the battery fuse<br />
has to be removed to prevent total discharge.<br />
Battery service life (years)<br />
Temperature<br />
Diagram 1: Battery service life in relation to ambient temperature<br />
6.1 Battery change<br />
Pb<br />
Lead-gel batteries contain harmful toxic substances. Observe valid safety directives when<br />
during handling and transport. For disposal, comply with local directives.<br />
Batteries bear the risk of excessive short-circuit currents. Never create any direct contact<br />
between the battery posts and or other conductive component parts. Therefore remove any<br />
wristband, watch, finger rings or other metal objects when working at the open unit. Always<br />
use tools with standard isolating handles.<br />
Batteries may be replaced only by the same type of battery (2 x 12 V; 24 Ah). We recommend the use<br />
of two batteries type BAT 12-24, <strong>Tunstall</strong> Order No. 00 0648 87. The use of other makes may create<br />
problems due to different connecting terminals or differing dimensions.<br />
1. Shut off mains supply to the power supply unit UPS 60 !!!<br />
2. Refer to the information for the battery set for UPS 60, order no. 77 3450 00.<br />
3. Perform a functional check of the power supply UPS 60!<br />
7. Storage<br />
If the power supply unit UPS 60 will not be used for an extended period of time, the connected<br />
batteries must first be fully recharged to preclude battery damage due to total discharging. (Refer to<br />
item 6 Battery service life).<br />
• For the charging process, the power supply unit UPS 60 shall be connected to the mains supply<br />
for at least 4 hours, and the UPS function shall be activated by placing the bridging contact<br />
between "x“ and "y“.<br />
• While the power supply unit UPS 60 is not used, the power supply unit UPS 60 must be<br />
disconnected from the batteries of battery set for UPS 60 to prevent total discharge.<br />
© <strong>Tunstall</strong> <strong>GmbH</strong>, Orkotten 66, 48291 Telgte, Germany, www.tunstall.de, 00 8802 81, Rev. 2.1 (05/2008) English - 5<br />
Page 181
Power supply unit UPS 60, Order No. 77 3400 10<br />
8. Spare parts<br />
Spare part Order No.<br />
Mains fuse, front plate (5 x 20) T 5.0 A 00 0130 41<br />
Output fuse, bottom 15 A FKS 00 0132 02<br />
Clamp for mains connection, 3-pole 00 0211 40<br />
Clamp for 24 V connection, 4-pole 00 0211 41<br />
Clamp for control and indicator outputs, 7-pole 00 0211 39<br />
Clamp for battery connection, 2 pole 00 0211 20<br />
Bridging contact EB 2 – 5 for control clamps "x“ and "y“ 00 0223 56<br />
9. <strong>Technical</strong> data<br />
Power supply unit UPS 60 Order No. 77 3400 10<br />
Input<br />
Nominal input voltage 115 – 230 V AC<br />
Input voltage range 90 – 264 V AC<br />
Input frequency 47 – 63 Hz<br />
Input current 5.5 A at 115 V AC / 3 A at 230 V AC<br />
Start-up current surge 22 A at 115 V AC / 44 A at 230 V AC, typical<br />
Power factor 0.95 at 230 V AC / 0.98 at 115 V AC for full load<br />
Efficiency 88%, typical<br />
Output<br />
Nominal output current 12.5 A DC<br />
Output voltage 24 V DC +/- 2%<br />
Output voltage in battery mode 26.5 – 19.5 V DC, typical<br />
Calculated output power 288 W<br />
Rippling of nominal output current < 100 mVeff<br />
Battery capacity to be connected 24 Ah<br />
Charge current 3.0 A, typical<br />
Bridging time at nominal current approx. 1 hour<br />
Overload protection < 14 A<br />
Overvoltage protection, power supply unit 26.7 – 32.4 V DC<br />
Overtemperature protection 75 °C +/- 5°C (power diode)<br />
output voltage switched off, automatic re-engaging<br />
Battery voltage thresholds<br />
Switching threshold for UPS mode Ua < 22.5 V, typical<br />
Switching threshold for warning before battery<br />
shut-down<br />
21.5 V, typical<br />
Switching threshold for total discharge<br />
protection<br />
19.5 V, typical<br />
EMC CE-certified EN 55022 Class B; ENV 50204<br />
EN 61000-3-2, -3; EN 61000-4-2, -3, -4, -5, -6, -8, -11<br />
Safety EN 60950<br />
Output Safety low voltage, SELV<br />
Test voltage PRI – SEC 3 kV<br />
Protection class I<br />
Ingress Protection<br />
Fuses<br />
IP 20<br />
Charging fuse, internal (5 x 20) T 4.0 A<br />
Mains fusing, front plate (5 x 20) T 5.0 A<br />
Output fusing, bottom of unit<br />
General<br />
15 A FKS<br />
Cooling convection, free air flow<br />
Permissible ambient temperature 0 ... +50 °C<br />
Storage temperature -25 ... + 60 °C<br />
MTBF 100,000 hours<br />
Weight approx. 4 kg<br />
Dimensions (HxWxD) 244 x 325 x 178 mm<br />
Mounting Wall mounting<br />
Connecting clamps Screw / cage clamp plug-in connections<br />
English - 6 © <strong>Tunstall</strong> <strong>GmbH</strong>, Orkotten 66, 48291 Telgte, Germany, www.tunstall.de, 00 8802 81, Rev. 2.1 (05/2008)<br />
Page 182
Power supply unit, Order No. 77 3401 00<br />
The power supply unit generates a 24 V DC output voltage using 115 - 230 V AC mains supply<br />
voltage. An integrated monitoring circuitry limits the output current to 12.5 A DC nearly. Two LEDs on<br />
the front face indicate the status at the output clamps.<br />
Safety instructions<br />
1. Mounting<br />
• Non-compliance with the safety instruction or improper handling of the unit (e.g. skin<br />
contact with live components when the unit is open) can be extremely dangerous.<br />
• The power supply unit should only be installed and operated by qualified specialists.<br />
• Connection to the mains supply must be executed acc. to the valid national<br />
regulations (for Germany: VDE 0100 and VDE 0160).<br />
• Fuse or circuit breaker must be provided for safe isolation from the input (mains)<br />
current.<br />
• Before effecting any work at or with the unit, it must be isolated from any voltage<br />
(mains or battery).<br />
• Overheating of the unit may occur when the values as shown in the technical data<br />
are exceeded. This may lead to permanent damage to the unit, and system safety is<br />
jeopardised.<br />
• Always watch for the safe isolation of AC and DC circuits!<br />
The power supply unit is designed for wall mounting. Bore holes are prepared at the housing for fixing<br />
the unit at the wall using the enclosed mounting material.<br />
Before mounting, check the condition of the wall itself. (Weight: approx. 2 kg)<br />
The unit must be mounted such that the venting ports are at the top and bottom. The selected location<br />
must ensure sufficient air circulation above and below the unit. Therefore, check for minimum distance<br />
of 50 mm to walls, ceiling and other equipment. The venting ports must not be covered up. Insufficient<br />
air circulation may lead to damage to the power supply unit.<br />
© <strong>Tunstall</strong> <strong>GmbH</strong>, Orkotten 66, 48291 Telgte, Germany, www.tunstall.de, 00 8802 42, Rev. 3.1 (05/2008) English - 1<br />
Page 183
Power supply unit, Order No. 77 3401 00<br />
2. Connection<br />
The internal connection terminals are provided as screw/plug-in clamps.<br />
2.1 Mains connection<br />
You have to ensure, that the mains cable is disconnected from the AC supply voltage during the<br />
following procedure:<br />
1. Release 4 screws of the left cover and remove the cover to the front.<br />
Now, the terminal connection clamps are accessible.<br />
2. Direct the mains cable through the cable duct into the housing and connect to the appropriate<br />
terminal posts as designated in the unit.<br />
NOTE: To simplify this process, you may pull the input connector, connect the wires as shown and<br />
replace the plug in its socket.<br />
CAUTION ! Check for the correct and positive connection of the protective conductor.<br />
3. Secure the connecting cable against being pulled from the housing for example by fixing the<br />
installation cable with cable clamps.<br />
2.2 Output terminal clamps 24 V DC / 12.5 A<br />
The output voltage is generated via a primary pulse controller. This controller provides the output<br />
voltage of 24 V DC with 12.5 A current (for continuous operation considering all tolerance criteria).<br />
When in the normal operating mode, i.e. mains power supply, the electronic module monitors the<br />
output voltage. Starting at a load current level of more than approx. 12.5 A DC, the output voltage is<br />
reduced while keeping a constant current load.<br />
This is a self-correcting output voltage feature, as the output voltage will be reactivated, if the overload<br />
current drops below its trigger value of approx. 12.5 A. Further to this, the output voltage is protected<br />
by a 15 A flat fuse "F2".<br />
• The load shall be connected to the terminal clamps "+24V" and "0V" (provided 2 x).<br />
2.3 LEDs at the front face<br />
2.3.1 Green LED "Power"<br />
Green LED "Power“ is on. 24 V voltage is available at the terminal clamps.<br />
2.3.2 Red LED "Output Failure Fuse F2"<br />
Red LED "Output Failure Fuse F2" and green<br />
LED “+24 V Power” are on.<br />
2.4 Indicator clamps (3, 4, 5)<br />
Output fuse failed or was removed. No voltage is<br />
available at the output clamps.<br />
The clamps 3, 4 and 5 are potential-free switching contacts for indicating the current operating state:<br />
Contact 3 – 4 closed.<br />
Green LED "Power“ is off.<br />
Contact 3 – 5 closed.<br />
Green LED "Power“ is on.<br />
No mains supply. No voltage available at the<br />
output clamps.<br />
24 V voltage is available at the terminal clamps.<br />
The indication "No mains power" may have several causes, e.g.:<br />
• No input voltage at the power supply unit.<br />
• When the load current exceeds approx. 12.5 A, the output current is reduced until the overload<br />
situation at the output clamps has been corrected.<br />
• Output fuse was removed or damaged. (Red LED "Output Failure Fuse F2“ is on)<br />
• "Mains Fuse F1“ missing or defective.<br />
English - 2 © <strong>Tunstall</strong> <strong>GmbH</strong>, Orkotten 66, 48291 Telgte, Germany, www.tunstall.de, 00 8802 42, Rev. 3.1 (05/2008)<br />
Page 184
3. Commissioning<br />
Power supply unit, Order No. 77 3401 00<br />
1. Connect input and output terminal connections. (Refer to items 2.1 and 2.2)<br />
2. Switch on the input voltage.<br />
From now on, the connected nurse call system devices are supplied with 24 V DC.<br />
The green LED "Power" is on due to the voltage at the terminal clamps.<br />
4. Spare parts<br />
Spare part Order No.<br />
Mains Fuse F1 (5 x 20) T 5,0 A 00 0130 41<br />
Output fuse F2 FKS 15 A 00 0132 02<br />
Clamp for input voltage, 3-pole 00 0211 40<br />
Clamp for 0 V and +24 V, 4-pole 00 0211 41<br />
Indicator clamp, 7-pole 00 0211 39<br />
5. <strong>Technical</strong> data<br />
Power supply unit<br />
Input<br />
Order No. 77 3401 00<br />
Nominal input voltage 115 – 230 V AC<br />
Input voltage range 90 – 264 V AC<br />
Input frequency 47 – 63 Hz<br />
Input current 4 A at 115 V AC / 2 A at 230 V AC<br />
Start-up current surge 22 A at 115 V AC / 44 A at 230 V AC, typical<br />
Power factor 0.95 at 230 V AC / 0.98 at 115 V AC under full load<br />
Efficiency<br />
Output<br />
88%, typical<br />
Nominal output current 12,5 A DC<br />
Output voltage 24 V DC +/- 2%<br />
Calculated output power 288 W<br />
Rippling of nominal output current < 100 mVeff<br />
Overload protection, power supply unit,<br />
internal<br />
< 14 A<br />
Overvoltage protection, power supply<br />
unit<br />
26.7 – 32.4 V DC, typical<br />
Overtemperature protection 75 °C +/- 5°C (power diode)<br />
output voltage switched off, automatic re-engaging<br />
EMC CE-certified EN 55022 Class B; ENV 50204<br />
EN 61000-3-2, -3; EN 61000-4-2, -3, -4, -5, -6, -8, -11<br />
Safety EN 60950<br />
Output Safety low voltage SELV<br />
Test voltage PRI – SEC 3 kV<br />
Protection class Class I<br />
Protection<br />
Safety devices<br />
IP 20<br />
Mains Fuse F1 (5 x 20) T 5.0 A<br />
Output fuse F2 FKS<br />
General<br />
15 A FKS<br />
Cooling Convection, free airflow<br />
Permissible ambient temperature 0 ... +50 °C<br />
Storage temperature -25 ... + 60 °C<br />
MTBF 100,000 hours<br />
Weight approx. 2 kg<br />
Dimensions (HxWxD) 244 x 325 x 178 mm<br />
Mounting Wall mounting<br />
Connecting clamps Screw / plug-in clamps<br />
© <strong>Tunstall</strong> <strong>GmbH</strong>, Orkotten 66, 48291 Telgte, Germany, www.tunstall.de, 00 8802 42, Rev. 3.1 (05/2008) English - 3<br />
Page 185
Battery Set for UPS 60, Order No. 77 3450 00<br />
The battery set for UPS 60 are rechargeable batteries (= accumulators) that build an uninterrupted<br />
power supply (UPS) in combination with the power supply unit UPS 60, order no. 77 3400 10.<br />
If the mains input voltage fails or when it drops to less than 90 VAC, the two lead-gel batteries will<br />
continue to supply the users connected to the power supply unit UPS 60 without any interruption.<br />
Safety instructions<br />
1. Mounting<br />
• The battery set may only be used together with the power supply unit UPS 60, order<br />
no. 77 3400 10. The safety instructions delivered with this power supply unit have to<br />
be observed as well.<br />
• The power supply unit UPS should only be installed and commissioned by qualified<br />
specialists.<br />
• Before effecting any work at or with the power supply unit UPS, it must be isolated<br />
from any input voltage and the battery fuse (located between the batteries) has to be<br />
removed.<br />
• Always watch for the safe isolation of AC and DC circuits!<br />
• Observe the general safety instructions for the handling of batteries! Sufficient<br />
ventilation must be provided to preclude the development of an explosive hydrogenair<br />
mixture!<br />
• If the battery set for UPS 60 will not be used for a longer time, first the batteries have<br />
to be fully charged. After that the batteries must be disconnected from the mains<br />
supply. This can be done by disconnecting the battery connection cable from the<br />
power supply unit UPS 60 (see chapter 2.). Alternatively the battery fuse can be<br />
removed.<br />
The battery set for UPS 60 is designed for wall mounting. Bore holes are prepared at the housing for<br />
fixing the unit at the wall – preferably under the power supply unit - using the enclosed mounting<br />
material. A dimensional drawing is shown on the next page.<br />
Before mounting, check the condition of the wall itself.<br />
The battery set for UPS 60 weighs approx. 25.2 kg.<br />
The unit must be mounted such that the venting ports are at the top and bottom.<br />
The selected location must ensure sufficient air circulation above and below the unit. Therefore, check<br />
for minimum distance of 50 mm to walls, ceiling and other equipment. The venting ports must not be<br />
covered up. Insufficient air circulation may lead to damage to the power supply unit.<br />
© <strong>Tunstall</strong> <strong>GmbH</strong>, Orkotten 66, 48291 Telgte, Germany, www.tunstall.de, 00 8802 82, Rev. 2.1 (05/2008) English - 1<br />
Page 186
Battery Set for UPS 60, Order No. 77 3450 00<br />
Dimensional drawing:<br />
2. Connection<br />
The connection terminals are provided as cage srew/plug-in clamps.<br />
1. Release 6 fastening screws for the cover and remove the cover to the front.<br />
Now, the terminal connection clamps are accessible.<br />
2. Direct the connection cable through the cable duct into the power supply unit and connect to the<br />
appropriate terminal posts as designated in the power supply unit.<br />
CAUTION! Check for the correct connection, orientation and screwing.<br />
3. Secure the connection cable against being pulled from the housing for example by fixing the<br />
installation cable with the screwed cable gland.<br />
2.1 Battery test<br />
The power supply unit features an automatic battery load test. The battery load test is an effective<br />
instrument for checking the true battery state. A negative result, i.e. a warning message is issued, may<br />
be caused by one or more of the following:<br />
• Charge status too low.<br />
• Battery fuse has failed.<br />
• Battery not correctly connected.<br />
• Battery is defective.<br />
• Battery is too old, and must be replaced.<br />
English - 2 © <strong>Tunstall</strong> <strong>GmbH</strong>, Orkotten 66, 48291 Telgte, Germany, www.tunstall.de, 00 8802 82, Rev. 2.1 (05/2008)<br />
Page 187
3. Service<br />
Battery Set for UPS 60, Order No. 77 3450 00<br />
To ensure the safe function of the system, batteries should be replaced every 3 years - depending on<br />
the ambient temperature (Refer to diagram 1, Item 4). After 3 – 5 years, the battery capacity has<br />
dropped to approx. 60%.<br />
4. Battery service life<br />
The battery set UPS 60 comes with sealed, service-free and rechargeable lead-gel batteries VRLA.<br />
According to the EUROBAT classification, these batteries have a useful service life of 5 – 7 years.<br />
This time, however, strongly depends on the relevant ambient temperature. (Up to 20 °C: 7 – 8 years<br />
as shown in diagram 1)<br />
If the system will not be used for an extended period of time, the batteries should be fully charged to<br />
prevent a total discharge. (Refer to item 5 "Storage") While the system is not used, the battery fuse<br />
(located between the two batteries) has to be removed to prevent total discharge. After the charging<br />
process has been completed, the battery set for UPS 60 has to be disconnected from the power<br />
supply unit UPS 60 by disconnecting the battery connection cable (see chapter 2.) or by removing the<br />
battery fuse.<br />
Battery service life (years)<br />
Temperature<br />
Diagram 1: Battery service life in relation to ambient temperature<br />
4.1 Battery change<br />
Pb<br />
Lead-gel batteries contain harmful toxic substances. Observe valid safety directives when<br />
during handling and transport. For disposal, comply with local directives.<br />
Batteries bear the risk of excessive short-circuit currents. Never create any direct contact<br />
between the battery posts and or other conductive component parts. Therefore remove any<br />
wristband, watch, finger rings or other metal objects when working at the open unit. Always<br />
use tools with standard isolating handles.<br />
Batteries may be replaced only by the same type of battery (2 x 12 V; 24 Ah). We recommend the use<br />
of the battery type BAT 12-24, <strong>Tunstall</strong> Order No. 00 0648 87. The use of other makes may create<br />
problems due to different connecting terminals or differing dimensions.<br />
1. Shut off mains supply to the power supply unit UPS !!!<br />
2. Release the 6 fastening screws for the cover and remove the cover to the front.<br />
3. Confirm the position of the old batteries and after their removal, install the new batteries<br />
in the same manner.<br />
4. Make sure, the new batteries are in the same position and check for the correct battery<br />
contacts. False connections may damage the power supply unit UPS !<br />
5. Put the rubber grommets back on the connection screws.<br />
6. Fix the battery position by securing it with the Velcro tape.<br />
© <strong>Tunstall</strong> <strong>GmbH</strong>, Orkotten 66, 48291 Telgte, Germany, www.tunstall.de, 00 8802 82, Rev. 2.1 (05/2008) English - 3<br />
Page 188
Battery Set for UPS 60, Order No. 77 3450 00<br />
5. Storage<br />
7. Replace and close the housing.<br />
8. Perform a functional check of the power supply UPS!<br />
If the battery set for UPS 60 will not be used for an extended period of time, the batteries must first be<br />
fully recharged by the power supply unit UPS to preclude battery damage due to total discharging.<br />
(Refer to item 4 Battery service life).<br />
• For the charging process, the power supply unit UPS shall be connected to the mains supply for at<br />
least 4 hours, and the UPS function shall be activated by placing the bridging contact between "x“<br />
and "y“.<br />
• While the system is not used, the battery fuse (located between the two batteries) has to be<br />
removed to prevent total discharge.<br />
6. Spare parts<br />
Spare part Order No.<br />
Rechargeable lead-gel battery, Type BAT 12-24 (2 batteries required) 00 0648 87<br />
Battery fuse, internal 20 A FKS 00 0132 03<br />
Clamp for battery connection, 2 pole 00 0211 20<br />
7. <strong>Technical</strong> data<br />
Battery Set for UPS 60 Order No. 77 3450 00<br />
Input<br />
Nominal input voltage 24 V DC<br />
Output<br />
Nominal output current 12.5 A DC<br />
Battery capacity 24 Ah<br />
Safety EN 60950<br />
Output Safety low voltage, SELV<br />
Protection class III<br />
Ingress Protection IP 20<br />
Fuses<br />
Battery fuse, internal 20 A FKS<br />
General<br />
Cooling convection, free air flow<br />
Permissible ambient temperature 0 ... +50 °C<br />
Storage temperature -20 ... + 50 °C<br />
Weight approx. 25.2 kg<br />
Dimensions (HxWxD) 244 x 450 x 178 mm<br />
Mounting Wall mounting<br />
Connecting clamps Screw / plug-in connections<br />
English - 4 © <strong>Tunstall</strong> <strong>GmbH</strong>, Orkotten 66, 48291 Telgte, Germany, www.tunstall.de, 00 8802 82, Rev. 2.1 (05/2008)<br />
Page 189
14. Product leaflets<br />
Page 190<br />
<strong>Flamenco</strong> - <strong>Technical</strong> <strong>Manual</strong>, 10/11 (Rev. 5.0), 00 8812 60
14.11 Installation<br />
77 4000 00 OSYnet‐Y‐RepeaterOpto<br />
77 4001 00 OSYnet‐Gateway<br />
<strong>Flamenco</strong> - <strong>Technical</strong> <strong>Manual</strong>, 10/11 (Rev. 5.0), 00 8812 60<br />
Page 191<br />
14. Product leaflets
<strong>Tunstall</strong> <strong>GmbH</strong>, Orkotten 66, D-48291 Telgte, www.tunstall.de<br />
Installationsanleitung D Installation Instructions GB<br />
OSYnet-Y-RepeaterOpto, Best.‐Nr. 77 4000 00<br />
Datenrepeater zur galvanischen Trennung des Gruppenbus (OSYnet). Vorgesehen zur<br />
Aufteilung und/oder Trennung des Gruppenbus OSYnet in 2 unabhängige Teilstrecken,<br />
Y-Verteilung. Einsetzbar einmal pro physikalischer Gruppe.<br />
Direkter Anschluss an den Gruppenbus (OSYnet) und dessen Teilstrecken.<br />
Hutschienenmontage 35 mm, anreihbar.<br />
Abmessungen (HxBxT): 85 x 25 x 83 mm<br />
Stromversorgung: 24 V DC (8 ... 30 V DC)<br />
Stromaufnahme (bei 20 °C): ca. 60 mA<br />
OSYnet‐Y‐RepeaterOpto<br />
Busteilnehmer<br />
z.B. OSYlink<br />
OSYnet Teil 2<br />
OSY‐ControlCenter<br />
00 8802 50, 10/11 (Rev. 3.0)<br />
2<br />
3<br />
1<br />
OSYnet Teil 3<br />
OSYnet Teil 1<br />
Gruppenbus OSYnet = Teil 2 + Teil 3 + Teil 1 = max. 700 m<br />
Hinweis! Die vollständige Installation des Systems ist im technischen<br />
Handbuch beschrieben.<br />
120 <br />
120 <br />
OSYnet-Y-RepeaterOpto, order no. 77 4000 00<br />
Data repeater for electrical isolation of the group bus (OSYnet). Intended for branching<br />
and/or isolation of the group bus OSYnet into 2 autonomous sections, Y-branching. One<br />
repeater can be used per physical group.<br />
Direct connection to the group bus (OSYnet) and its branch sections.<br />
Mounting on top‐hat rail (35 mm), several units can be mounted side‐by‐side.<br />
Dimensions (HxWxD): 85 x 25 x 83 mm<br />
Power supply: 24 V DC (8 ... 30 V DC)<br />
Current consumption (at 20 °C): approx. 60 mA<br />
OSYnet‐Y‐RepeaterOpto<br />
bus user<br />
eg. OSYlink<br />
OSYnet section 2<br />
OSY‐ControlCenter<br />
2<br />
3<br />
1<br />
OSYnet section 3<br />
OSYnet section 1<br />
Group bus OSYnet = section 2 + section 3 + section 1 = max. 700 m<br />
Note! The complete installation of the system is described in the technical<br />
manual.<br />
OSYnet‐Teilstrecken anschließen Connection of OSYnet sections<br />
Zum Schraubanschluss der OSYnet‐Teilstrecken benötigen Sie drei<br />
OSYnet‐Anschlussstecker , Best.‐Nr. 77 0950 00.<br />
Der Anschlusspunkt CAN Net 1 ist galvanisch von den anderen Teilen getrennt. Deshalb<br />
muss die Teilstrecke des OSYnet, die von den anderen galvanisch getrennt werden soll, an<br />
den Anschlusspunkt CAN Net 1 angeschlossen werden.<br />
Die PIN‐Belegungen entnehmen Sie der Abbildung A.<br />
Spannungsversorgung anschließen Connection of power supply<br />
Die Spannungsversorgung oben oder unten am OSYnet‐Y‐RepeaterOpto anschließen<br />
(Schraubanschluss).<br />
Achtung! Die Spannungsversorgung darf nicht “durchgeschliffen” werden. D.h. es ist nicht<br />
erlaubt die eine Seite als 24V‐Eingang und die andere Seite als 24V‐Ausgang zu<br />
verwenden, um z.B. weitere Geräte zu versorgen.<br />
Kontroll‐LEDs Control LEDs<br />
OSYnet Teil 1<br />
OSYnet section 1<br />
Spannungsversorgung<br />
power supply<br />
Kontroll‐LEDs<br />
control LEDs<br />
OSYnet Teil 2<br />
OSYnet section 2<br />
Spannungsversorgung<br />
power supply<br />
OSYnet Teil 3<br />
OSYnet section 3<br />
LED leuchtet, wenn alle Baugruppen im OSYnet‐Y‐Repeater<br />
außer für OSYnet Teil 1 mit Spannung versorgt sind<br />
LED leuchtet, wenn Baugruppe im OSYnet‐Y‐Repeater<br />
für OSYnet Teil 1 mit Spannung versorgt ist<br />
keine Funktion<br />
LED leuchtet bei Datenverkehr OSYnet Teil 3<br />
LED leuchtet bei Datenverkehr OSYnet Teil 2<br />
LED leuchtet bei Datenverkehr OSYnet Teil 1<br />
77 4000 00<br />
OSYnet‐Y‐RepeaterOpto<br />
Page 192<br />
For screw connection of the OSYnet sections you need three OSYnet connecting plugs,<br />
order no. 77 0950 00.<br />
Connection point CAN Net 1 is electrically isolated from the other parts. That's why the<br />
OSYnet section, that should be electrically isolated from the others, has to be connected to<br />
connection point CAN Net 1.<br />
For the pin assignment refer to the figure A.<br />
Connect the power supply cable to the connection clamp on the top or the bottom of the<br />
OSYnet‐Y‐RepeaterOpto (screw connection).<br />
Attention! The power supply may not be connected through. I.e. it is not allowed to use one<br />
connection clamp as 24 V input and the other connection clamp as 24 V output e.g. for<br />
supply of further devices.<br />
Pin 2: DL<br />
Pin 3: DG<br />
1 2 3 4 5<br />
6 7 8 9<br />
Pin 7: DH<br />
Pin 6: DG<br />
optional<br />
LED on, if all subassemblies in the OSYnet‐Y‐Repeater<br />
except for OSYnet section 1 are supplied with power.<br />
LED on, if subassembly in the OSYnet‐Y‐Repeater<br />
for OSYnet section 1 is supplied with power.<br />
no function<br />
LED on for data traffic OSYnet section 3<br />
LED on for data traffic OSYnet section 2<br />
LED on for data traffic OSYnet section 1<br />
Anschluss an Spannungsversorgung<br />
Connection to power supply<br />
Connect on the top or the bottom.<br />
Oben oder unten anschließen.<br />
+24 V<br />
0 V<br />
Externe Klemme<br />
External connector<br />
77 4000 00<br />
0 V<br />
+24 V<br />
120 <br />
120 <br />
0 V<br />
0 V<br />
+24 V<br />
77 4000 00<br />
0 V<br />
zu weiteren Verbrauchern<br />
to further current consumers<br />
Sicherungshalter (00 0130 18) mit<br />
Sicherungseinsatz (00 0130 17) und<br />
Feinsicherung 5 x 20 mm, T100mA<br />
Fuse holder (00 0130 18) with fuse insert<br />
(00 0130 17) and micro-fuse 5 x 20 mm,<br />
100 mA/slow-acting (00 0130 45)
<strong>Tunstall</strong> <strong>GmbH</strong>, Orkotten 66, D-48291 Telgte, www.tunstall.de<br />
Installationsanleitung D Installation Instructions GB<br />
OSYnet-Gateway, Best.‐Nr. 77 4001 00<br />
Aktives Gateway zur galvanischen Trennung des Gruppenbus OSYnet. Vorgesehen zur<br />
Verlängerung der max. Leitungslänge des Gruppenbus OSYnet um 700 m. Einsetzbar<br />
einmal pro physikalischer Gruppe.<br />
Direkter Anschluss an den Gruppenbus (OSYnet) und dessen Teilstrecken<br />
Hutschienenmontage 35 mm, anreihbar<br />
Abmessungen (HxBxT): 105 x 37 x 35 mm<br />
Stromversorgung: 24 V DC<br />
Max. Stromaufnahme (bei 20 °C): 50 mA<br />
OSY‐ControlCenter<br />
00 8802 51, 10/11 (Rev. 3.1)<br />
OSYnet‐Gateway<br />
OSYnet Teil 1 = max. 700 m OSYnet Teil 2 = max. 700 m<br />
Gruppenbus OSYnet = Teil 1 + Teil 2<br />
Hinweis! Die vollständige Installation des Systems ist im technischen<br />
Handbuch beschrieben.<br />
120 Ω<br />
OSYnet-Gateway, order no. 77 4001 00<br />
Active gateway for electrical isolation of the group bus (OSYnet). Intended for extension of<br />
the maximum cable length to additional 700 m. One gateway can be used per physical<br />
group.<br />
Direct connection to the group bus (OSYnet) and its branch sections<br />
Mounting on top‐hat rail (35 mm), several units can be mounted side‐by‐side<br />
Dimensions (HxWxD): 105 x 37 x 35 mm<br />
Power supply: 24 V DC<br />
Max. current consumption (at 20 °C): 50 mA<br />
OSY‐ControlCenter<br />
Anschlüsse Connections<br />
1 ) Si 200 mA/T<br />
+24V<br />
+24 V<br />
0V<br />
0 V<br />
DG<br />
OSYnet 1 OSYnet 2<br />
DH<br />
DL<br />
DG<br />
DH<br />
DL<br />
1 2 3 4 5 6 7 8<br />
+24V<br />
Ip Ip<br />
0V<br />
OSYnet Teil 1<br />
120 Ω 2 )<br />
Ip = Spannungsversorgung = NYM 2x2,5mm 2<br />
OSYnet Teil 2<br />
120 Ω 2 )<br />
1 ) Steck-Schraubklemme mit Si-Halter (00 0224 81), Sicherung 0,2 A Träge (00 0130 42)<br />
2 ) Hinweis! Zwischen den Anschlusspunkten DH und DL von OSYnet 1 sowie zwischen den<br />
Anschlusspunkten DH und DL von OSYnet 2 muss jeweils ein Abschlusswiderstand<br />
gesetzt werden (120 Ohm, Bestell‐Nr. 00 0040 76).<br />
OSYnet‐Gateway<br />
OSYnet section 1 = max. 700 m OSYnet section 2 = max. 700 m<br />
group bus OSYnet = section 1 + section 2<br />
Note! The complete installation of the system is described in the technical<br />
manual.<br />
1 ) Fuse 200 mA/T<br />
Kontroll‐LEDs Control LEDs<br />
Power<br />
OSYnet 1 Active<br />
OSYnet 2 Active<br />
LED leuchtet, wenn OSYnet‐Gateway mit Spannung<br />
versorgt wird.<br />
LED leuchtet bei Datenverkehr OSYnet Teil 1<br />
LED leuchtet bei Datenverkehr OSYnet Teil 2<br />
Nicht benutzen!<br />
Konfigurationsschnittstelle<br />
nur für <strong>Tunstall</strong> <strong>GmbH</strong><br />
Do not use!<br />
Configuration inferface for<br />
<strong>Tunstall</strong> <strong>GmbH</strong> only<br />
Kontroll‐LEDs<br />
control LEDs<br />
Anschlussklemmen<br />
Connecting clamps<br />
Page 193<br />
+24V<br />
+24 V<br />
0V<br />
0 V<br />
DG<br />
OSYnet 1 OSYnet 2<br />
DH<br />
DL<br />
DG<br />
DH<br />
DL<br />
1 2 3 4 5 6 7 8<br />
+24V<br />
Ip Ip<br />
0V<br />
OSYnet section1<br />
120 Ω 2 )<br />
OSYnet section 2<br />
120 Ω 2 )<br />
Ip = power supply = NYM 2x2,5mm2 1 ) Plug-in screw terminal with fuseholder (00 0224 81), fuse 0,2 A slow-acting (00 0130 42)<br />
2 ) Note! The connection points DH and DL of OSYnet 1 as well as DH and DL of OSYnet 2<br />
have to be connected by a terminating resistor (120 Ohm, order no. 00 0040 76) .<br />
Power<br />
OSYnet 1 Active<br />
OSYnet 2 Active<br />
77 4001 00<br />
OSYnet‐Gateway<br />
LED on, if OSYnet‐Gateway is supplied with power.<br />
LED on for data traffic OSYnet section 1<br />
LED on for data traffic OSYnet section 2<br />
120 Ω
14. Product leaflets<br />
Page 194<br />
<strong>Flamenco</strong> - <strong>Technical</strong> <strong>Manual</strong>, 10/11 (Rev. 5.0), 00 8812 60
Find all you want to know about the <strong>Flamenco</strong> ® nurse call system:<br />
<strong>Tunstall</strong> <strong>GmbH</strong> Orkotten 66 48291 Telgte Germany<br />
Telephone +49 25 04 7 01-0 Fax +49 25 04 7 01-4 99<br />
Or visit us on the Web at: www.tunstall.de info@tunstall.de<br />
<strong>Flamenco</strong> <strong>Technical</strong> <strong>Manual</strong> 00 8812 60<br />
<strong>Flamenco</strong> ® Data Sheet Catalogue<br />
<strong>Flamenco</strong> ® System Description<br />
Order No.: 00 8812 64<br />
<strong>Flamenco</strong> ® <strong>Technical</strong> <strong>Manual</strong><br />
Order No.: 00 8812 60<br />
<strong>Flamenco</strong> ® Instructions for Use<br />
The documents are ready for downloading from the <strong>Tunstall</strong> homepage:<br />
All the reassurance you need<br />
www.tunstall.de<br />
QUALITY<br />
MANAGEMENT<br />
SYSTEM<br />
DQS certified to<br />
DIN EN ISO 9001<br />
Reg. no. 56386<br />
Reg. no. 56386