
You also want an ePaper? Increase the reach of your titles
YUMPU automatically turns print PDFs into web optimized ePapers that Google loves.
Included<br />
Included you will find the following items:<br />
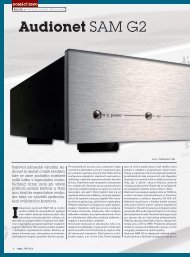
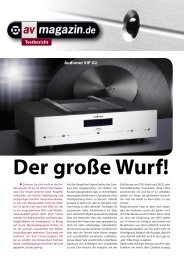
the universal CD, SACD and DVD transport system <strong>VIP</strong> <strong>G2</strong><br />
one low resonance stabilizer ('Puck') made of POM (black)<br />
the user's <strong>manual</strong> (that you are currently reading)<br />
one standard mains chord<br />
one DVD-AUDIO disc 'Hamamura Quintett - Retold'<br />
universal remote control SRC (in separate package)<br />
Transportation<br />
Important<br />
Please transport the <strong>VIP</strong> <strong>G2</strong> only within the included package.<br />
Use the plastic bag to prevent scratches on the housing.<br />
Never leave a CD/DVD/SACD disc or the stabilizer inside the <strong>VIP</strong> <strong>G2</strong> during<br />
transport. The sensitive mechanics could suffer damage.<br />
11
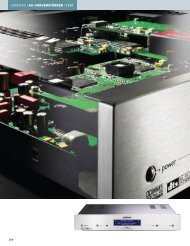
2 Overview of control elements<br />
2.1 Front panel<br />
5 Skip key 6 Play key<br />
1 Power key 2 Stop key 3 Display window<br />
12<br />
4 Remote control sensor<br />
5 Skip key<br />
Used to skip a chapter, title or track. Also, used for the<br />
page selection of a menu screen (for Video CD/ Super<br />
VCD. Holding down skip key during playback<br />
advances playback rapidly.<br />
6 Play key<br />
Starts or resumes playback.<br />
1 Power key<br />
Turns unit on or off (stand by)<br />
2 Stop key<br />
Stops playback<br />
3 Display window<br />
Indicates the current status of the unit<br />
4 Remote control sensor<br />
Receives signals from the romte control unit
7 Operational principles<br />
For this <strong>manual</strong> the following conventions of presentation are valid:<br />
- keys on the remote control: or Clear<br />
- items of on-screen menus: [2-Channel]<br />
- cursor keys to move cursor on the screen:<br />
- on-screen menu message: Pause<br />
- message in display window on front panel: LOADING<br />
7.1 How to use on-screen displays<br />
You can set preferences and perform advanced playback functions via various<br />
on-screen displays. On-screen displays are operated as described in the following:<br />
Move the cursor with the keys onto the element you would<br />
like to change/adjust.<br />
For elements like you change their<br />
settings by using while the element is selected.<br />
Elements of the type are used by positioning the cursor<br />
(white background bar) over the item you want to select. Confirm selection by<br />
pressing key .<br />
Numbers are entered using the numeric keys.<br />
Some functions only become effective after conforming a selection by pressing<br />
key .<br />
Note<br />
Through out this <strong>manual</strong> examples of display messages and screens are in the<br />
same language as this <strong>manual</strong>. In case you should have selected a different<br />
language for the screen menus all messages will be presented in the selected<br />
language. To change the language refer to section "OSD Language" on page<br />
91.<br />
25
CD-R/RW compatibility<br />
The <strong>VIP</strong> <strong>G2</strong> will play CD-R and CD-RW discs recorded in CD Audio or<br />
Video CD/Super VCD format, or as CD-ROM containing MP3 audio files.<br />
However, any other content may cause the disc not to play, or create<br />
noise/distortion in the output.<br />
This unit cannot record CD-R or CD-RW discs.<br />
Unfinalized CD-R/RW discs recorded as CD Audio can be played, but the<br />
full Table of Contents (playing time, etc.) will not be displayed.<br />
DVD-R/RW compatibility<br />
The <strong>VIP</strong> <strong>G2</strong> will play DVD-R/RW discs that were recorded using the DVD-<br />
Video format or Video Recording format.<br />
This unit cannot record DVD-R/RW discs.<br />
Unfinalized DVD-R/RW discs cannot be played in the <strong>VIP</strong> <strong>G2</strong>.<br />
PC created disc compatibility<br />
If you record a disc using a personal computer (PC), even if it is recorded in<br />
a "compatible format" as listed above, there will be cases in which the disc<br />
may not be playable in this machine due to the setting of the application<br />
software used to create the disc. In these particular instances, check with the<br />
user's <strong>manual</strong> the software you are using.<br />
Check the DVD-R/RW or CD-R/RW discs boxes for additional compatibility<br />
information.<br />
29
For DVD-Audio discs featuring browsable pictures (refer to glossary<br />
"Browsable pictures (DVD-Audio only)" on page Fehler! Textmarke nicht<br />
definiert.), press ◄◄ or ►► to view the previous/next picture.<br />
10.5 Looping a section of a disc<br />
The A-B Repeat function allows you to specify two points (A and B) within a<br />
track (DVD-Audio, CD and Video CD) or title (DVD-Video and DVD-RW) that<br />
form a loop which is played over and over.<br />
Important<br />
A-B Repeat is not available with SACDs, MP3s, Super VCDs or Video CDs<br />
in PBC mode, or while a DVD disc menu is being displayed.<br />
1. During playback, press Play Mode and select [A-B Repeat] from the<br />
list of functions on the left.<br />
2. Press Ent. or on [A (Start Point)] to set the loop start point.<br />
50
3. Press Ent. or on [B (End Point)] to set the loop start point.<br />
After pressing Ent. or playback jumps back to the start point and plays the<br />
loop.<br />
4. To resume normal playback, press Clear or select [Off] from the<br />
menu.<br />
10.6 Using repeat play<br />
There are various repeat play options, depending on the kind of disc loaded. It’s<br />
also possible to use repeat play together with program play to repeat the<br />
tracks/chapters in the program list (refer to "Creating a program list" on page<br />
55).<br />
Important<br />
Repeat play is not available with Video CD/Super VCDs in PBC mode, or<br />
while a DVD disc menu is being displayed.<br />
1. During playback, press Play Mode and select [Repeat] from the list<br />
of functions on the left.<br />
51
During random play, the ▐◄◄ and ►►▌ keys function a little differently to<br />
normal: ▐◄◄ returns to the beginning of the current track/chapter. You can't<br />
go back further than this. ►►▌ selects another track/chapter at random from<br />
those remaining.<br />
You can't use random play together with program or repeat play.<br />
10.8 Creating a program list<br />
This feature lets you program the play order of titles/ groups/ chapters/ folders/<br />
tracks on a disc.<br />
Important<br />
Program play is not available with DVD-RWs, Video CD/Super VCDs<br />
playing in PBC mode, or while a DVD disc menu is being displayed.<br />
1. Press Play Mode and select [Program] from the list of functions on<br />
the left.<br />
2. Select [Create/Edit] from the list of program options.<br />
55
10.9.1 Track repeat<br />
With the repeat function you can repeat a track of the disc or the complete disc in<br />
a loop.<br />
1. Press Repeat on the remote control once to activate the repeat track<br />
function.<br />
Initially the display reads:<br />
One moment later the display changes to:<br />
CD identifies the loaded disc type, 1 is the number of the track to be repeated,<br />
and R_TRK indicates that the "Repeat Track" function is active.<br />
2. To end the repeat function, press key Clear once or the key Repeat<br />
twice (with an MP3 disc running three times).<br />
10.9.2 Disc repeat<br />
1. Press key Repeat on the remote control twice to activate the disc repeat<br />
function.<br />
Initially the display reads:<br />
One moment later the display changes to:<br />
CD identifies the loaded disc type, 1 is the number of the track to be repeated,<br />
and R_DSC indicates that the "Repeat Disk" function is active.<br />
2. To end the repeat function, press key Clear or the key Repeat (with<br />
an MP3 disc running twice).<br />
Important<br />
If you playback a SACD, you can repeat a track as well as the complete<br />
selected area. Press key Repeat repeatedly to switch through the different<br />
repeat modes in the following order:<br />
61
2. Select a search mode.<br />
3. Use the number keys to enter a title, group, chapter, folder or track<br />
number, or a time.<br />
For a time search, enter the number of minutes and seconds into the currently<br />
playing title (DVD-Video/DVD-RW) you want playback to resume from.<br />
For example, press 4, 5, 0, 0, to have playback start from 45 minutes into the<br />
disc. For 1 hour, 20 minutes and 30 seconds, press 8, 0, 3, 0.<br />
Some DVD-Audio discs feature pages of browsable pictures. Enter the page<br />
number.<br />
4. Press Ent. or to start playback.<br />
Note<br />
You can only use time search with Video CDs und DVD-Video discs.<br />
The disc must be playing in order to use time search (except Video CD).<br />
Search functions are not available with Video CD in PBC mode. Start non-<br />
PBC playback by stopping playback, then pressing ►►▌, then ► (play).<br />
You can often select what you want to watch from a DVD disc menu. Refer<br />
also to section "DVD disc menus" on page 42.<br />
10.11 Switching subtitles<br />
Some DVD discs have subtitles in one or more languages; the disc box will usually<br />
tell you which subtitle languages are available. You can switch subtitle language<br />
during playback.<br />
66
1. Press SUBTITLE repeatedly to select subtitle option.<br />
While the above display is showing, you can also use the keys and Ent.<br />
or to select a subtitle language from a drop-down menu.<br />
Note<br />
Some discs only allow you to change subtitle language from the disc menu.<br />
Press Top Menu to access.<br />
To set the subtitle preferences, see section "Subtitle Language" on page 88.<br />
10.12 Switching the DVD audio language<br />
When playing a DVD disc recorded with dialog in two or more languages, you<br />
can switch audio language during playback.<br />
1. Press Audio repeatedly to select an audio language option.<br />
With some discs, while the above display is showing, you can also use the keys<br />
and Ent. or to select an audio language from a drop-down menu.<br />
67
If your AV receiver (or other connected component) has a build-in DTS decoder,<br />
set this to [DTS], otherwise set to [DTS > PCM]. DTS audio is converted to<br />
more compatible PCM audio). Check the <strong>manual</strong> that came with the other component<br />
if you're unsure whether it is DTS compatible.<br />
Note<br />
If you set to [DTS] with a non-DTS compatible amplifier, noise will be output<br />
when you play a DTS disc.<br />
This setting applies only to DTS audio on DVDs, DTS-CDs always output<br />
DTS digital audio as is regardless of this setting.<br />
13.1.3 Linear PCM Out<br />
Default setting: [Down Sample Off]<br />
Make sure this is always set to [Down Sample Off]. Setting to [Down Sample<br />
On] has no function. Please refer to section "Digital output formats" on<br />
page 133 to determine which sample rate is available at which digital output<br />
depending on the disc format and output mode.<br />
Note<br />
When an HDMI component is connected, the setting is automatically fixed at<br />
[Down Sample Off]. However, 88.1/96 kHz sources will still be downsampled<br />
to 44.1/48 kHz.<br />
82
The [RGB] setting in "AV Connector Out" below will automatically be<br />
switched off when the component video outputs are set to output progressivescan<br />
video.<br />
13.2.3 AV Connector Out<br />
Default setting: [Video] ‡ YUV Out<br />
You only need to make this setting if you connected the <strong>VIP</strong> <strong>G2</strong> to your TV using<br />
the YUV/RGB outputs.<br />
Important<br />
If you make a setting here that is incompatible with your TV, the TV may<br />
not display any picture at all. If this happens either switch everything off and<br />
reconnect to the TV using either a video cable or S-video cable (refer to section<br />
"Connections and options on the back panel" on page 128).<br />
Video – With this setting the YUV signal is available at the YUV/RGB output.<br />
S-Video – With this setting the YUV signal is available at the YUV/RGB<br />
output.<br />
RGB – With this setting the RGB signal is available at the YUV/RGB output.<br />
Important<br />
If Component Out is set to Progressive, you can't change option AV-<br />
Connector Out. In this case the YUV signals are always output at the<br />
YUV/RGB connector.<br />
85
13.2.4 S-Video Out<br />
Default setting: [S2]<br />
You only need to make this setting if you connected the <strong>VIP</strong> <strong>G2</strong> to your TV using<br />
an S-video cable.<br />
If you find that the picture is stretched or distorted on the default [S2] setting, try<br />
changing it to [S1].<br />
13.2.5 Still Picture<br />
Default setting: [Auto]<br />
The <strong>VIP</strong> <strong>G2</strong> uses one of two processes when displaying a still frame from a<br />
DVD disc. The default [Auto] setting automatically chooses the best setting each<br />
time.<br />
Field – produces a stable, generally shake-free image.<br />
Frame – produces a sharper image, but more prune to shake than field stills.<br />
86
13.5.1 Screen Saver<br />
Default setting: [Off]<br />
If a constant image is displayed on a conventional CRT-type TV or projectors<br />
using LCDs, it can "burn in" leaving a ghost image on the screen.<br />
Switch to [On] to make sure that a constant image is not displayed for a dangerously<br />
long time.<br />
13.6 Options<br />
13.6.1 Parental Lock<br />
Default setting: [Off]<br />
Default password: [none]<br />
Default Country Code: [us] (2119)<br />
Some DVD-Video discs feature a Parental Lock level. If your <strong>VIP</strong> <strong>G2</strong> is set to a<br />
lower level than the disc, the disc won't play. This gives you some control about<br />
what your children watch on your <strong>VIP</strong> <strong>G2</strong>.<br />
Some discs also support the Country Code feature. The <strong>VIP</strong> <strong>G2</strong> does not play<br />
certain scenes on these discs, depending on the Country Code you set.<br />
Before you can set the Parental Lock level or the Country Code you must register<br />
a password. As the password owner, you can change Parental Lock level or<br />
Country Code whenever you like. You can also change the password.<br />
Note<br />
Not all discs that you may consider inappropriate for your children use the<br />
Parental Lock feature. These discs will always play without requiring the<br />
password first.<br />
93
13.6.4 Setting/changing the Parental Lock level<br />
1. Select [Level Change].<br />
2. Use number keys to enter your password, then press Ent. or .<br />
3. Select a new level.<br />
Use the key to move the cursor left to lock more levels (more discs will require<br />
the password); use key to move cursor right to unlock levels. You can't<br />
lock level 1.<br />
4. Press Ent. or to set the new level and return to the [Options]<br />
menu screen.<br />
96
Select by code number: Use the key to move the cursor right then use the<br />
number keys to enter 4-digit country code (you can find the "Country Code<br />
list" on page 117).<br />
4. Press Ent. or to set the new Country Code and return to the [Options]<br />
menu screen.<br />
Note<br />
Changing the Country Code does not take effect until the next disc is loaded<br />
(or the current disc is reloaded).<br />
13.6.6 Bonus Group<br />
Some DVD-Audio discs have an extra "bonus" group that requires a 4-digit key<br />
number to access. See the disc packaging for details and the key number.<br />
When you play a DVD-Audio disc that has a bonus group, the key number input<br />
screen appears automatically. You can also access the same screen here.<br />
98
You can set the individual channel levels between –6 dB and +6 dB on 0.5 dB<br />
increments using the test tone output as a guide to set the correct levels. Adjust<br />
the levels until the output level from all channels sounds the same you’re your<br />
usual listening position.<br />
Note that [Audio Output Mode] (refer to page 106) must be set to [5.1<br />
Channel] in order to use the test tone.<br />
Automatic: Select [Auto] to start the test tone output. No sound will be heard<br />
from the subwoofer.<br />
As the test tone plays through each speaker in turn, it is highlighted on-screen.<br />
Use the keys to adjust the channel output level of the current speaker.<br />
Move the cursor left to exit the test tone sequence, or press Ent. or to save<br />
the settings and exit the [Channel level] setting screen.<br />
Manual: Use keys to move the cursor up/down to select a speaker.<br />
110
Place on a window sill or other place where the <strong>VIP</strong> <strong>G2</strong> will be exposed to<br />
direct sunlight.<br />
Use in an excessively dusty or damp environment.<br />
Place directly on top of an amplifier, or other component in your stereo system<br />
that becomes hot in use.<br />
Use near a television or monitor as you may experience interference— especially<br />
if the television uses an indoor antenna.<br />
Use in a kitchen or other room where the player may be exposed to smoke or<br />
steam.<br />
Use on a thick rug or carpet, or cover with cloth—this may prevent proper<br />
cooling of the unit.<br />
Place on an unstable surface, or one that is not large enough to support all<br />
four of the unit’s feet.<br />
14.1.7 Moving the player<br />
If you need to move the <strong>VIP</strong> <strong>G2</strong>, first press the power key on the front panel or<br />
on the remote control to turn off the <strong>VIP</strong> <strong>G2</strong>. Wait for --OFF-- to disappear<br />
from the display, then unplug the power cable. Never lift or move the unit<br />
during playback – discs rotate at a high speed and may be damaged.<br />
14.1.8 Power cable caution<br />
Handle the power cable by the plug part. Do not pull out the plug by tugging the<br />
cable, and never touch the power cable when your hands are wet, as this could<br />
cause a short circuit or electric shock. Do not place the unit, a piece of furniture,<br />
or other object on the power cable or pinch the cable in any other way. Never<br />
make a knot in the cable or tie it with other cables. The power cables should be<br />
routed so that they are not likely to be stepped on. A damaged power cable can<br />
cause a fire or give you an electric shock. Check the power cable once in a while.<br />
If you find it damaged, ask your nearest <strong>Audionet</strong> authorized dealer for a replacement.<br />
14.2 Screen sizes and disc formats<br />
DVD-Video discs come in several different screen aspect ratios, ranging from<br />
TV programs, which are generally 4:3, to CinemaScope widescreen movies, with<br />
an aspect ratio of up to about 7:3.<br />
Televisions, too, come in different aspect ratios; "standard" 4:3 and widescreen<br />
16:9.<br />
114
14.9 Glossary<br />
Analog audio<br />
An electrical signal that directly represents sound. Compare this to digital audio<br />
which can be an electrical signal, but is an indirect representation of sound. See<br />
also Digital audio.<br />
Aspect ratio<br />
The width of a TV screen relative to its height. Conventional TVs are 4:3 (in<br />
other words, the screen is almost square); widescreen models are 16:9 (the screen<br />
is almost twice as wide as it is high).<br />
Bonus group (DVD-Audio only)<br />
An "extra" group on some DVD-Audio discs that requires a key number to access.<br />
Browsable pictures (DVD-Audio only)<br />
A feature of some DVD-Audio discs in which the user can browse still pictures<br />
recorded on the disc as the audio is played. See also Slideshow.<br />
Digital audio<br />
An indirect representation of sound by numbers. During recording, the sound is<br />
measured at discrete intervals (44,100 times a second for CD audio) by an analog-to-digital<br />
converter, generating a stream of numbers. On playback, a digitalto-analog<br />
converter generates an analog signal based on these numbers. See also<br />
Sampling frequency and Analog audio.<br />
Using a maximum of 5.1 channels of audio, this high quality surround system is<br />
used in many of the finer movie theaters around the world. The on-screen display<br />
shows which channels are active, for example showing 3/2.1. The 3 being the<br />
two front channels and the center channel; the 2 being the surround channels, and<br />
the .1 being the LFE channel.<br />
119
Audio mix does not sound<br />
right or sounds incomplete (for<br />
example, inaudible dialog).<br />
Disc containing MP3 tracks<br />
won't play.<br />
Can't hear effect of TruSurround.<br />
The audio on a Super VCD<br />
disc is not output correctly.<br />
If the <strong>VIP</strong> <strong>G2</strong> is connected to a DTS compatible amplifier<br />
or decoder using a digital audio cable, check the<br />
amplifier settings, and that the cable is properly connected.<br />
Make sure that Audio Output Mode is set to<br />
2 Channel if you've connected to the stereo inputs on<br />
your amplifier or TV (refer to "Audio Output Mode" on<br />
page 106).<br />
The <strong>VIP</strong> <strong>G2</strong> is compatible with multisession discs, but<br />
only play sessions that are closed.<br />
If the message UNPLAYABLE is displayed when you try<br />
to play a disc/track, check the audio file formats (refer to<br />
"MP3 discs" on page 27).<br />
TruSurround does not work with CD, MP3, DVD-Audio,<br />
SACD or 96 kHz linear PCM DVD.<br />
The TruSurround effect is only output through the Analog<br />
LEFT 21 and RIGHT 24 audio outputs (refer to<br />
"Back panel" on page 13).<br />
Make sure that Audio Output Mode is set to<br />
2 Channel (refer to "Audio Output Mode" on page 106).<br />
The effectiveness of TruSurround varies with the disc.<br />
If the audio is switched to [2] when playing a Super VCD<br />
that contains only one stereo soundtrack, there may be no<br />
sound at all. Press Audio to change the soundtrack.<br />
126
14.10.3 HDMI troubleshooting<br />
Problem Remedy<br />
No HDMI audio output. The <strong>VIP</strong> <strong>G2</strong> has been designed to be compliant with HDMI (High<br />
Definition Multimedia Interface) Version 1.0. Depending on the<br />
component you have connected, unreliable signal transfers may result.<br />
You won't hear any sound from the HDMI output if the source<br />
component is only DVI/HDCP-compatible.<br />
It is not possible to output SACD or copy-controlled DVD –Audio<br />
CPPM sources from the HDMI connection.<br />
Make sure that you'd selected the <strong>VIP</strong> <strong>G2</strong> as the HDMI input in the<br />
settings for the component you're using. You may need to refer to<br />
the user's <strong>manual</strong> of the component.<br />
Check that the HDMI cable is connected properly and that the cable<br />
isn't damaged.<br />
Check that components connected using the HDMI interface are<br />
switched on and HDMI compatible. An HDMI connection can only<br />
be made with components compatible with both DVI and High<br />
Bandwidth Digital Content Protection (HDCP).<br />
No HDMI video output Make sure that you'd selected the <strong>VIP</strong> <strong>G2</strong> as the HDMI input in the<br />
settings for the component you're using. You may need to refer to<br />
the user's <strong>manual</strong> of the component.<br />
No multi-channel HDMI<br />
audio.<br />
A connected DVI component<br />
(with HDCP)<br />
doesn't work with the<br />
<strong>VIP</strong> <strong>G2</strong>.<br />
It is not possible to output SACD or copy-controlled DVD –Audio<br />
CPPM sources from the HDMI connection.<br />
Check that the HDMI cable is connected properly and that the cable<br />
isn't damaged.<br />
Check that components connected using the HDMI interface are<br />
switched on and HDMI compatible. An HDMI connection can only<br />
be made with components compatible with both DVI and High<br />
Bandwidth Digital Content Protection (HDCP).<br />
Make sure that the resolution on the <strong>VIP</strong> <strong>G2</strong> matches that of the<br />
component you have connected using HDMI (refer to "HDMI Settings"<br />
on page 102 to change the HDMI resolution).<br />
Make sure the Audio setting in the HDMI menu is set to [Auto]<br />
(refer to "HDMI Settings" on page 102 to change the audio setting).<br />
You can't hear multi-channel DVD-Audio using the HDMI interface.<br />
The signal will automatically be downmixed to stereo.<br />
The <strong>VIP</strong> <strong>G2</strong> has been designed to be compliant with HDMI (High<br />
Definition Multimedia Interface) Version 1.0. Depending on the<br />
component you have connected, using a DVI connection may result<br />
in unreliable signal transfers.<br />
127
17 Digital output OUT 2 (SPDIF)<br />
The digital audio signal is available at output OUT 2 in the SPDIF format<br />
depending on the position of switch 11.<br />
18 Digital output OUT 1 (SPDIF)<br />
The digital audio signal is available at output OUT 1 in the SPDIF format<br />
depending on the position of switch 11.<br />
19 Digital output DATA LINK<br />
The digital audio output DATA LINK is only for connecting the <strong>VIP</strong> <strong>G2</strong> to<br />
an <strong>Audionet</strong> pre amplifier with a DATA LINK input (for example, <strong>Audionet</strong><br />
MAP 1). The digital output signal depends on the position of switch 11.<br />
Important<br />
Switch 11 has to be either in position H bit or L bit to have a signal on the<br />
digital audio outputs. In position off, all digital audio outputs are switched<br />
off.<br />
For detailed information on output format of the digital audio outputs<br />
OUT 1 to 4 and DATA LINK please refer to section "Digital output formats"<br />
on page 133.<br />
15.4 Digital output formats<br />
In order to use digital audio outputs OUT 1 to 4 and DATA LINK of your<br />
<strong>VIP</strong> <strong>G2</strong>, switch 11 on the back panel has to be either in position H bit or L bit.<br />
In position L bit the <strong>VIP</strong> <strong>G2</strong> sends out the digital audio data in the LowBit<br />
mode, in position H bit correspondingly in the HighBit mode. In position off all<br />
digital audio outputs of the <strong>VIP</strong> <strong>G2</strong> are switched off.<br />
Please refer to the following tables to determine which digital output format at<br />
which sample rate and resolution is available at the digital audio outputs. The<br />
decision whether to use the HighBit or the LowBit mode depends on the kind of<br />
digital receiver unit your <strong>VIP</strong> <strong>G2</strong> is connected to.<br />
133
Bitstream<br />
Program<br />
(Dolby Digital,<br />
DTS, MPEG)<br />
44.1kHz / 16bit<br />
Stereo<br />
PCM<br />
48kHz / 24bit<br />
Stereo<br />
PCM / DVD-A<br />
48kHz / 24bit<br />
Multi-channel<br />
DVD-A<br />
88.2 / 96kHz / 24bit<br />
Stereo<br />
PCM / DVD-A<br />
88.2 / 96kHz / 24bit<br />
Multi-channel<br />
DVD-A<br />
176.4 / 192kHz /<br />
24bit<br />
Stereo<br />
DVD-A<br />
SACD<br />
Stereo<br />
SACD<br />
Multi-channel<br />
Note<br />
Digital Out 1<br />
SPDIF 17<br />
Bitstream<br />
(Dolby Digital,<br />
DTS, MPEG)<br />
192kHz / 24bit<br />
Stereo Upsampling<br />
DATA LINK 19<br />
<strong>Audionet</strong> High Bit Mode<br />
48kHz / 24bit<br />
Stereo<br />
PCM<br />
48kHz / 24bit<br />
Multi-channel<br />
<strong>Audionet</strong> High Bit Mode<br />
88.2 / 96kHz / 24bit<br />
Stereo<br />
PCM<br />
88.2 / 96kHz / 24bit<br />
Multi-channel<br />
<strong>Audionet</strong> High Bit Mode<br />
176.4 / 192kHz / 24bit<br />
Stereo<br />
<strong>Audionet</strong> High Bit Mode<br />
88.2kHz / 24bit<br />
Stereo<br />
<strong>Audionet</strong> High Bit Mode<br />
88.2kHz / 24bit<br />
Multi-channel (Downmix) *<br />
<strong>Audionet</strong> High Bit Mode<br />
Digital Out 2<br />
SPDIF 15<br />
Bitstream<br />
(Dolby Digital,<br />
DTS, MPEG)<br />
48kHz / 24bit<br />
Stereo<br />
PCM<br />
88.2 / 96kHz / 24bit<br />
Stereo<br />
PCM<br />
136<br />
Digital Out 3<br />
AES/EBU 16<br />
Bitstream<br />
(Dolby Digital,<br />
DTS, MPEG)<br />
NO OUTPUT<br />
*) depending on settings and selected audio track<br />
Digital Out 4<br />
SPDIF 13<br />
Bitstream<br />
(Dolby Digital,<br />
DTS, MPEG)<br />
44.1kHz / 16bit<br />
Stereo<br />
PCM<br />
NO OUTPUT NO OUTPUT<br />
NO OUTPUT NO OUTPUT<br />
NO OUTPUT NO OUTPUT<br />
NO OUTPUT NO OUTPUT<br />
NO OUTPUT NO OUTPUT<br />
NO OUTPUT NO OUTPUT<br />
NO OUTPUT NO OUTPUT<br />
The MAP V2.0 and MAP 1 will automatically recognize the <strong>Audionet</strong><br />
HighBit mode if connected correctly. If the second connection is missing the<br />
MAP will issue the error message: "HighBit Cable 2 Out of<br />
lock". In this case, please check if the cabling from the <strong>VIP</strong> <strong>G2</strong> to the MAP<br />
is correct.<br />
In HighBit mode, digital audio outputs OUT 3 16 and OUT 4 13 can be<br />
used to transmit bitstreams (Dolby Digital, DTS, MPEG).
15.5 About HDMI<br />
HDMI *1 (High Definition Multimedia Interface) supports both video and audio<br />
on a single digital connection for use with DVD players, DTV, set-top boxes,<br />
and other AV devices. HDMI was developed to provide the technologies of High<br />
Bandwidth Digital Content Protection (HDCP) as well as Digital Visual Interface<br />
(DVI) in one specification. HDCP is used to protect digital content transmitted<br />
and received by DVI-compliant displays.<br />
HDMI has the capability to support standard, enhanced, or high-definition video<br />
plus standard to multi-channel surround-sound audio. HDMI features include<br />
uncompressed digital video, a bandwidth of up to 5 gigabytes per second, one<br />
connector (instead of several cables and connectors), and communication between<br />
the AV source and AV devices such as DTVs.<br />
15.5.1 Connecting using HDMI<br />
If you have a HDMI or DVI-equipped monitor or display, you can connect it to<br />
the <strong>VIP</strong> <strong>G2</strong> using a commercially available HDMI cable. The HDMI connector<br />
outputs uncompressed digital video, as well as almost every kind of digital audio<br />
that the player is compatible with, including DVD-Video, DVD-Audio (see below<br />
for limitations), Video CD/Super VCD, CD and MP3.<br />
1 Use a HDMI cable to connect the HDMI OUT interconnect on the<br />
<strong>VIP</strong> <strong>G2</strong> to a HDMI interconnect on a HDMI-compatible monitor.<br />
The arrow on the cable connector body should be face up for correct alignment<br />
with connector HDMI OUT on the <strong>VIP</strong> <strong>G2</strong>.<br />
When you first switch on the <strong>VIP</strong> <strong>G2</strong>, you will see the HDMI settings menu appear<br />
on your monitor or display. From here you can select the resolution, aspect<br />
ratio and audio settings, as well as adjust the video presentation to your liking.<br />
For more on these settings see "HDMI Settings" on page 102.<br />
*1 Bei "HDMI", dem HDMI-Logo und "High Definition Multimedia Interface" handelt es sich um Warenzeichen<br />
bzw. eingetragene Warenzeichen von HDMI licensing LLC.<br />
137
15.6 USB/SPDIF digital audio input<br />
15.6.1 Connecting the computer the USB-Audio input<br />
With the USB Audio interface you can playback music and sound files from your<br />
computer (PC) using the sophisticated digital-to-analog converters of the <strong>VIP</strong> <strong>G2</strong><br />
instead of the soundcard of the PC. The <strong>VIP</strong> <strong>G2</strong> is integrated you’re your computer<br />
system as USB Audio device. The installation is done (mostly) automatically<br />
via Plug'n'Play, provided a correctly installed operating system.<br />
Note<br />
To use the USB Audio functions of the <strong>VIP</strong> <strong>G2</strong>, your computer requires to<br />
have Microsoft Windows 98SE, Windows ME, Windows 2000 Professional<br />
or Windows XP Home/Professional with the latest USB Audio<br />
drivers installed. For further information about the minimum system requirements<br />
please refer to the documentation of your Microsoft Windows<br />
version in use.<br />
1. Connect digital input USB/SPDIF-Audio 12 with a suitable USB cable<br />
(plug type A to plug type B) to a free USB port at your computer that is<br />
compatible with USB 1.1 or above and supports the Full Speed USB<br />
protocol.<br />
2. Start your computer, then switch on the <strong>VIP</strong> <strong>G2</strong>.<br />
The <strong>VIP</strong> <strong>G2</strong> is recognized as newly added hardware by your computer. Depending<br />
on the Microsoft Windows version installed on your system, it might occur<br />
that at the first connection of the <strong>VIP</strong> <strong>G2</strong> the operating system prompts you to<br />
install a driver for the new hardware. In this case let Windows choose the correct<br />
driver automatically and follow the installation dialog until it is finished.<br />
If necessary, Windows may prompt you to insert its installation CD/DVD.<br />
Pease have the disc ready.<br />
For further information about automatic hardware recognition, searching for<br />
and installing hardware drivers, please refer to the documentation of your<br />
operating system.<br />
USB Audio is an integral part of Microsoft Windows, so no further software<br />
installation is necessary. After installing the necessary hardware drivers the<br />
<strong>VIP</strong> <strong>G2</strong> will be automatically integrated into your computer system from<br />
now on and is ready to use after plugging in the USB cable.<br />
Microsoft Windows will setup the <strong>VIP</strong> <strong>G2</strong> automatically as standard device for<br />
sound playback. In case this is not done automatically due to your current system<br />
configuration, please set the corresponding option <strong>manual</strong>ly:<br />
139
3. Open up the "Sounds and Audio Devices" dialog of your Windows Settings<br />
menu. Click on the tag "Audio" and select "<strong>Audionet</strong> <strong>VIP</strong> <strong>G2</strong>"<br />
from the list of standard devices (see the following example):<br />
Now all music and sound files, that Microsoft Windows or your sound application<br />
is capable of processing, are played back with your <strong>VIP</strong> <strong>G2</strong>.<br />
Note<br />
<strong>Audionet</strong> <strong>VIP</strong> <strong>G2</strong><br />
Microsoft Windows converts every input format automatically into a stereo<br />
PCM signal with 44.1 or 48 kHz sampling frequency and 16 bits resolution.<br />
Which audio formats are played back depends on the capabilities of your<br />
Microsoft Windows system and/or your sound application only!<br />
All volume and balance settings of Microsoft Windows or your sound application<br />
will be still active. In case you hear no sound at all or the sound has<br />
low volume while playing back sound and music files with your <strong>VIP</strong> <strong>G2</strong>,<br />
please make sure that your volume settings of your Windows system are not<br />
muted or set to a low level.<br />
In case you like to check, if Microsoft Windows recognized your <strong>VIP</strong> <strong>G2</strong> correctly,<br />
please open up the Device Manager of your Windows system. You will<br />
find the <strong>VIP</strong> <strong>G2</strong> in the following 3 places in the list of devices::<br />
Sound, video and game controller → USB Audio Device<br />
Human Interface Devices → USB Human Interface Device<br />
Universal Serial Bus controllers → USB Composite Device<br />
The diagram on the following page gives an overview of an example list of entries<br />
in the Device Manager:<br />
140
15.7 Connecting the external power supply EPS<br />
To use the optional external power supply EPS (External Power Supply) with<br />
your <strong>VIP</strong> <strong>G2</strong> follow these steps:<br />
1. Make sure both <strong>VIP</strong> <strong>G2</strong> and EPS are switched off and disconnected<br />
from the mains.<br />
2. Connect the EPS with the included cable to input jack 20 on the back<br />
panel of the <strong>VIP</strong> <strong>G2</strong>. The shape of the plug prevents any wrong polarity.<br />
The small "nose" inside the plug has to face upwards. Now screw<br />
the ring of the plug onto the input jack 20.<br />
3. Connect both (!!) units <strong>VIP</strong> <strong>G2</strong> and EPS to mains.<br />
4. Switch on the EPS at the back panel first.<br />
5. Use key power at the front plate or key on the remote control to<br />
switch on the <strong>VIP</strong> <strong>G2</strong>. The <strong>VIP</strong> <strong>G2</strong> is now ready to use and gets its<br />
power from the external power supply.<br />
6. To switch off the <strong>VIP</strong> <strong>G2</strong> into standby, use key power on the front<br />
panel or key on the remote control.<br />
Important<br />
Never switch on or off the EPS on the its back panel while the <strong>VIP</strong> <strong>G2</strong> is<br />
switched on or during playback.<br />
For further information referring to the external power supply EPS please<br />
consult its user's <strong>manual</strong>.<br />
Tip<br />
Use a high quality mains cable (for example the <strong>Audionet</strong> APC) to connect<br />
the EPS to mains. The sound will improve.<br />
143
17 Recommended setup for 2-channel analog<br />
usage<br />
Digital Audio Out → Dolby Digital Out → Dolby Digital<br />
→ DTS Out → DTS Out<br />
→ Linear PCM Out → Down Sample Off<br />
→ MPEG Out → MPEG > PCM<br />
Video Output → TV Screen → 16:9 (Wide)<br />
→ Component Out → progressive<br />
→ AV Connector → RGB<br />
→ S-Video Out → S2<br />
→ Still Picture → Auto<br />
Language → Audio Language → English<br />
→ Subtitle Language → English<br />
→ Auto Language → On<br />
→ Subtitle Display → off<br />
Display → OSD Language → English<br />
→ On Screen Display → On<br />
→ Angle Indicator → On<br />
→ Backgoround → Logo<br />
→ Screen Saver → Off<br />
Options → Parental Lock → Off<br />
→ Bonus Group →<br />
→ Auto Disc Menu → On<br />
→ Group Playback → Single<br />
→ DVD Playback Mode → DVD-Audio<br />
→ SACD Playback → 2-ch Area<br />
→ HDMI Settings → ...<br />
→ CD Playback → PCM Playback<br />
→ DTS Downmix → Stereo<br />
Speakers → Audio Out → 2-ch<br />
→ Speaker Installation → ...<br />
→ Speaker Distances → ...<br />
→ Channel Level → Fix<br />
Note:<br />
Additional settings for best sound quality of 2-channel analog usage:<br />
If available, select 2-channel audio track on DVD-Video or DVD-Audio<br />
disks.<br />
In case you listen to music only, use switch 4 on the back panel of the<br />
<strong>VIP</strong> <strong>G2</strong> to shut down the video section (switch position off).<br />
Put switch 11 in position H bit to activate the HighBit Mode (even if you<br />
are using the analog outputs only!).<br />
145
19 Technical data<br />
Function Universal playback system for CD, DVD and SACD<br />
Laser system Semiconductor laser, 650nm and 780nm wave l<strong>eng</strong>th<br />
Standards CD, CD-R, CD-RW<br />
DVD-R, DVD+R, DVD-RW, DVD+RW<br />
Video CD, Super VCD<br />
DVD-Audio, DVD-Video<br />
SACD stereo and multi-channel<br />
Dolby Digital, DTS, DTS CD, MP3<br />
PAL/NTSC progressive, PAL/NTSC interlaced<br />
Converters Main channels: 192 kHz/24 bit, multibit delta-sigma<br />
Effect channels: 96 kHz/24 bit, multibit delta-sigma<br />
Sampling rates 32 kHz, 44.1 kHz, 48 kHz, 88.2 kHz, 96 kHz, 176.4 kHz, 192 kHz<br />
Video six 12 bit video DACs, 16x oversampling, 216MHz<br />
Audio bandwidth max. 0- 90.000 Hz (-3 dB)<br />
THD+N Main channels: typ. 116 dB (A-weighted) @ -60 dBFS<br />
SNR 116 dB<br />
Channel separation >130 dB @ 10 kHz<br />
147<br />
typ. 102 dB (A-weighted) @ 0 dBFS<br />
Effect channels: typ. 95 dB (A-weighted) @ -60 dBFS<br />
Audio outputs, analog 6 Cinch line, gold plated<br />
2 XLR symmetrical, gold plated<br />
Audio outputs, digital 2 Cinch, 75 Ohms, gold plated<br />
1 AES/EBU, 110 Ohms, gold plated<br />
1 <strong>Audionet</strong> HighBit-DataLink<br />
1 Optical (TOS Link)<br />
Audio input, digital 1 USB, connected for USB-Audio and SPDIF<br />
Video outputs, analog 1 YUV progressive & interlaced / RGB interlaced<br />
1 S-Video<br />
1 Composite-Video (CVBS/Sync)<br />
Video outputs, digital 1 HDMI 1.1 (DVI with HDCP compatible)<br />
External power supply 5 pin precision connector<br />
Output impedance 33 Ohms real<br />
Output voltage, analog 3.5 Veff