StarTech HDMI to ExpressCard HD Video Capture ... - CCL Computers
StarTech HDMI to ExpressCard HD Video Capture ... - CCL Computers
StarTech HDMI to ExpressCard HD Video Capture ... - CCL Computers

Create successful ePaper yourself
Turn your PDF publications into a flip-book with our unique Google optimized e-Paper software.
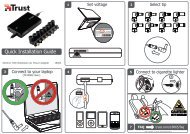
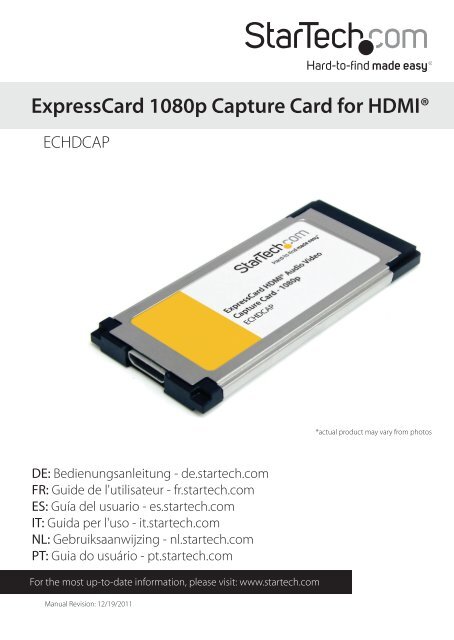
<strong>ExpressCard</strong> 1080p <strong>Capture</strong> Card for <strong><strong>HD</strong>MI</strong>®<br />
EC<strong>HD</strong>CAP<br />
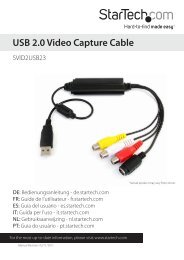
DE: Bedienungsanleitung - de.startech.com<br />
FR: Guide de l'utilisateur - fr.startech.com<br />
ES: Guía del usuario - es.startech.com<br />
IT: Guida per l'uso - it.startech.com<br />
NL: Gebruiksaanwijzing - nl.startech.com<br />
PT: Guia do usuário - pt.startech.com<br />
For the most up-<strong>to</strong>-date information, please visit: www.startech.com<br />
Manual Revision: 12/19/2011<br />
*actual product may vary from pho<strong>to</strong>s
FCC Compliance Statement<br />
This equipment has been tested and found <strong>to</strong> comply with the limits for a Class B digital<br />
device, pursuant <strong>to</strong> part 15 of the FCC Rules. These limits are designed <strong>to</strong> provide reasonable<br />
protection against harmful interference in a residential installation. This equipment generates,<br />
uses and can radiate radio frequency energy and, if not installed and used in accordance with<br />
the instructions, may cause harmful interference <strong>to</strong> radio communications. However, there<br />
is no guarantee that interference will not occur in a particular installation. If this equipment<br />
does cause harmful interference <strong>to</strong> radio or television reception, which can be determined by<br />
turning the equipment off and on, the user is encouraged <strong>to</strong> try <strong>to</strong> correct the interference by<br />
one or more of the following measures:<br />
• Reorient or relocate the receiving antenna.<br />
• Increase the separation between the equipment and receiver.<br />
• Connect the equipment in<strong>to</strong> an outlet on a circuit different from that <strong>to</strong> which the receiver<br />
is connected.<br />
• Consult the dealer or an experienced radio/TV technician for help.<br />
Use of Trademarks, Registered Trademarks, and other Protected Names and<br />
Symbols<br />
This manual may make reference <strong>to</strong> trademarks, registered trademarks, and other<br />
protected names and/or symbols of third-party companies not related in any way <strong>to</strong><br />
<strong>StarTech</strong>.com. Where they occur these references are for illustrative purposes only and do not<br />
represent an endorsement of a product or service by <strong>StarTech</strong>.com, or an endorsement of the<br />
product(s) <strong>to</strong> which this manual applies by the third-party company in question. Regardless<br />
of any direct acknowledgement elsewhere in the body of this document, <strong>StarTech</strong>.com hereby<br />
acknowledges that all trademarks, registered trademarks, service marks, and other protected<br />
names and/or symbols contained in this manual and related documents are the property of<br />
their respective holders.<br />
Instruction Manual
Table of Contents<br />
Introduction ............................................................................................1<br />
Packaging Contents ................................................................................................................................. 1<br />
System Requirements .............................................................................................................................. 1<br />
Installation ..............................................................................................2<br />
Hardware Installation .............................................................................................................................. 2<br />
Driver/Software Installation .................................................................................................................. 2<br />
How <strong>to</strong> Use ..............................................................................................3<br />
Stream Catcher........................................................................................................................................... 3<br />
Snapshot Files ...................................................................................................................................... 4<br />
Record Files ........................................................................................................................................... 4<br />
Schedule Recording ........................................................................................................................... 5<br />
Settings ................................................................................................................................................... 5<br />
Specifications ..........................................................................................7<br />
Technical Support ..................................................................................8<br />
Warranty Information ............................................................................8<br />
Instruction Manual<br />
i
Introduction<br />
The EC<strong>HD</strong>CAP <strong>ExpressCard</strong> <strong>Video</strong> <strong>Capture</strong> Card for <strong><strong>HD</strong>MI</strong>® (1080p) lets you capture<br />
high-definition video and audio from an <strong><strong>HD</strong>MI</strong> source <strong>to</strong> your lap<strong>to</strong>p computer<br />
through an <strong>ExpressCard</strong> expansion slot.<br />
Support for full 1080p video input, as well as <strong><strong>HD</strong>MI</strong> audio makes this <strong>HD</strong> capture card<br />
the perfect solution for creating digital copies of your videos for editing and compiling,<br />
or for simply recording video <strong>to</strong> your lap<strong>to</strong>p.<br />
This <strong>ExpressCard</strong>-based capture card supports NTSC and PAL systems, and includes an<br />
easy <strong>to</strong> use video capture software suite that enables you <strong>to</strong> record video or take still<br />
screenshots and save them <strong>to</strong> your lap<strong>to</strong>p/notebook computer.<br />
The lap<strong>to</strong>p capture card features a flushmount <strong>ExpressCard</strong> design that sits flush with<br />
the sides of the lap<strong>to</strong>p, creating a seamless add-on that can be left installed, even<br />
while on the move.<br />
Packaging Contents<br />
• 1 x <strong>ExpressCard</strong> <strong>Video</strong> <strong>Capture</strong> Card<br />
• 1 x <strong><strong>HD</strong>MI</strong> <strong>to</strong> Mini <strong><strong>HD</strong>MI</strong> Cable<br />
• 1 x Driver CD<br />
• 1 x Instruction Manual<br />
System Requirements<br />
• <strong>ExpressCard</strong> enabled computer system with available <strong>ExpressCard</strong> slot<br />
• <strong><strong>HD</strong>MI</strong> cable <strong>to</strong> connect video source<br />
• CPU: Intel® Core2® Quad Q9400 2.66 GHz or better<br />
• Memory : 512 MB<br />
• <strong>Video</strong> : 1024×768, DirectX® 9.0c Compatible Graphics Card<br />
• Microsoft® Windows® XP/ Vista/ 7 (32/64-bit), or Linux® kernel 2.6.14 or later<br />
Instruction Manual<br />
<strong><strong>HD</strong>MI</strong> type A connec<strong>to</strong>r<br />
1
Installation<br />
Instruction Manual<br />
WARNING! PCI Express cards, like all computer equipment, can be severely<br />
damaged by static electricity. Be sure that you are properly grounded before<br />
opening your computer case or <strong>to</strong>uching your PCI Express card. <strong>StarTech</strong>.com<br />
recommends that you wear an anti-static strap when installing any computer<br />
component. If an anti-static strap is unavailable, discharge yourself of any<br />
static electricity build-up by <strong>to</strong>uching a large grounded metal surface (such<br />
as the computer case) for several seconds. Also be careful <strong>to</strong> handle the PCI<br />
Express card by its edges and not the gold connec<strong>to</strong>rs.<br />
Hardware Installation<br />
The <strong>ExpressCard</strong> adapter will simply slide in<strong>to</strong> the <strong>ExpressCard</strong> slot on any compatible<br />
system. Push the card all the way in, until it ‘clicks’ and locks in<strong>to</strong> place. To eject the<br />
card, simply push the card further in<strong>to</strong> the slot until it clicks, and then release and it will<br />
then be au<strong>to</strong>matically ejected from the slot.<br />
NOTE: Some <strong>ExpressCard</strong>/54 slots do not firmly hold an <strong>ExpressCard</strong>/34 card, so a<br />
34mm <strong>to</strong> 54mm stabilizer bracket may be necessary (<strong>StarTech</strong>.com ID: ECBRACKET).<br />
Driver/Software Installation<br />
1. Upon starting Windows, if the “Found New Hardware” wizard appears on the screen,<br />
cancel/close the window and insert the included Driver CD in<strong>to</strong> the computer’s CD/<br />
DVD drive.<br />
2. Au<strong>to</strong>Play should au<strong>to</strong>matically prompt you <strong>to</strong> run “Setup.exe”. If not, open “My<br />
Computer” and double-click on the CD/DVD drive. Double-click the “Setup.exe”<br />
icon.<br />
3. Proceed through the Installation wizard.<br />
4. Complete the wizard and this should au<strong>to</strong>matically install all necessary drivers/<br />
software. An icon for “StreamCatcher” should now be on the desk<strong>to</strong>p.<br />
2
How <strong>to</strong> Use<br />
Connect the video/audio <strong><strong>HD</strong>MI</strong> source <strong>to</strong> the video capture card using the appropriate<br />
<strong><strong>HD</strong>MI</strong> cable.<br />
Stream Catcher<br />
Double-click the “StreamCatcher” icon on the desk<strong>to</strong>p <strong>to</strong> launch the video<br />
capture application. This will bring up the main menu screen that contains<br />
the video preview window and recording controls. Additional options and<br />
configurations can be accessed through the Main Menu.<br />
Initial Setup Note: If you have a video source connected, but are not able<br />
<strong>to</strong> view anything in the video window, go <strong>to</strong> the “Settings” section first, <strong>to</strong> make sure<br />
the “device” is configured properly. If using an <strong>HD</strong>CP protected video source (i.e. retail<br />
Blu-Ray movie), this will also result in no video preview/capture.<br />
Menu<br />
Record/S<strong>to</strong>p<br />
but<strong>to</strong>n<br />
Instruction Manual<br />
Snapshot<br />
but<strong>to</strong>n<br />
Volume Control<br />
3<br />
<strong>Video</strong><br />
Window<br />
*screenshots are for reference only<br />
Manually recording video can be done by simply pressing the “Record” but<strong>to</strong>n from the<br />
control menu along the bot<strong>to</strong>m of the Stream Catcher window. The frame around the<br />
video window will turn red, while recording. When you wish <strong>to</strong> s<strong>to</strong>p recording, press<br />
the “S<strong>to</strong>p” but<strong>to</strong>n. The “Snapshot” but<strong>to</strong>n allows of taking a screen capture of the video<br />
stream.
Snapshot Files<br />
Clicking this but<strong>to</strong>n will open the folder location where all of the snapshot files are<br />
saved in Windows.<br />
Record Files<br />
Clicking this but<strong>to</strong>n will open the folder location where all of the recorded video files<br />
are saved in Windows.<br />
Instruction Manual<br />
4
Schedule Recording<br />
The software can be setup <strong>to</strong> start recording at a specific time and date and occur once<br />
or multiple times. Setup the schedule and click the “Add” but<strong>to</strong>n <strong>to</strong> save it. Multiple<br />
schedules can be maintained at the same time. To remove a schedule, simply select it<br />
from the list, and click the “Delete” but<strong>to</strong>n.<br />
Settings<br />
The Settings menu is broken in<strong>to</strong> different sections for configuring various aspects of<br />
the software. System Settings contains configuration options for the user interface.<br />
Device Settings contains configuration options for the video capture hardware. <strong>Video</strong><br />
and audio input source (<strong><strong>HD</strong>MI</strong>, component, DVI/VGA), video system (NTSC/PAL), aspect<br />
ratio and video properties (sharpness, contrast, saturation, hue, brightness) can all be<br />
adjusted from this menu.<br />
Instruction Manual<br />
5
Record Settings contains settings related <strong>to</strong> video recording and snapshots. The<br />
location <strong>to</strong> save recorded video files as well as recording quality can be configured.<br />
The location <strong>to</strong> save the snapshot images and file format (JPG, BMP) are also set here.<br />
Instruction Manual<br />
6
Specifications<br />
Host Interface <strong>ExpressCard</strong><br />
Form Fac<strong>to</strong>r <strong>ExpressCard</strong>/34 (34mm)<br />
Chipset ID MStar MST3367CMK-LF-170<br />
External Connec<strong>to</strong>rs 1 x <strong><strong>HD</strong>MI</strong> type A female<br />
Audio Support Yes (Stereo)<br />
<strong>Video</strong> Systems NTSC-M, PAL-B/M/60<br />
<strong>Video</strong> Encoding H.264, MPEG-4<br />
Supported Resolutions<br />
Instruction Manual<br />
7<br />
TV: 480i/p, 576i/p, 720p, 1080i/p<br />
PC: 800 x 600, 1024 x 768, 1280 x 720,<br />
1280 x 1024, 1440 x 900, 1920 x 1080<br />
<strong>HD</strong>CP Compliant No<br />
Operating Temperature 0°C ~ 70°C (32°F ~ 158°F)<br />
Dimensions (LxWxH) 75.0mm x 34.0mm x 5.5mm<br />
Weight 30g<br />
Compatible Operating Systems<br />
Windows XP/ Vista/ 7 (32/64-bit),<br />
Linux kernel 2.6.14 or later
Technical Support<br />
<strong>StarTech</strong>.com’s lifetime technical support is an integral part of our commitment <strong>to</strong><br />
provide industry-leading solutions. If you ever need help with your product, visit<br />
www.startech.com/support and access our comprehensive selection of online <strong>to</strong>ols,<br />
documentation, and downloads.<br />
For the latest drivers/software, please visit www.startech.com/downloads<br />
Warranty Information<br />
This product is backed by a two year warranty.<br />
In addition, <strong>StarTech</strong>.com warrants its products against defects in materials<br />
and workmanship for the periods noted, following the initial date of purchase.<br />
During this period, the products may be returned for repair, or replacement with<br />
equivalent products at our discretion. The warranty covers parts and labor costs only.<br />
<strong>StarTech</strong>.com does not warrant its products from defects or damages arising from<br />
misuse, abuse, alteration, or normal wear and tear.<br />
Limitation of Liability<br />
In no event shall the liability of <strong>StarTech</strong>.com Ltd. and <strong>StarTech</strong>.com USA LLP (or their<br />
officers, direc<strong>to</strong>rs, employees or agents) for any damages (whether direct or indirect,<br />
special, punitive, incidental, consequential, or otherwise), loss of profits, loss of business,<br />
or any pecuniary loss, arising out of or related <strong>to</strong> the use of the product exceed the<br />
actual price paid for the product. Some states do not allow the exclusion or limitation<br />
of incidental or consequential damages. If such laws apply, the limitations or exclusions<br />
contained in this statement may not apply <strong>to</strong> you.<br />
Instruction Manual<br />
8
Hard-<strong>to</strong>-find made easy. At <strong>StarTech</strong>.com, that isn’t a slogan. It’s a promise.<br />
<strong>StarTech</strong>.com is your one-s<strong>to</strong>p source for every connectivity part you need. From<br />
the latest technology <strong>to</strong> legacy products — and all the parts that bridge the old and<br />
new — we can help you find the parts that connect your solutions.<br />
We make it easy <strong>to</strong> locate the parts, and we quickly deliver them wherever they need<br />
<strong>to</strong> go. Just talk <strong>to</strong> one of our tech advisors or visit our website. You’ll be connected <strong>to</strong><br />
the products you need in no time.<br />
Visit www.startech.com for complete information on all <strong>StarTech</strong>.com products and<br />
<strong>to</strong> access exclusive resources and time-saving <strong>to</strong>ols.<br />
<strong>StarTech</strong>.com is an ISO 9001 Registered manufacturer of connectivity and technology<br />
parts. <strong>StarTech</strong>.com was founded in 1985 and has operations in the United States,<br />
Canada, the United Kingdom and Taiwan servicing a worldwide market.