

Manual Evo 8.0 - PhotoBooth Digital Centre
Manual Evo 8.0 - PhotoBooth Digital Centre
Manual Evo 8.0 - PhotoBooth Digital Centre

Create successful ePaper yourself
Turn your PDF publications into a flip-book with our unique Google optimized e-Paper software.
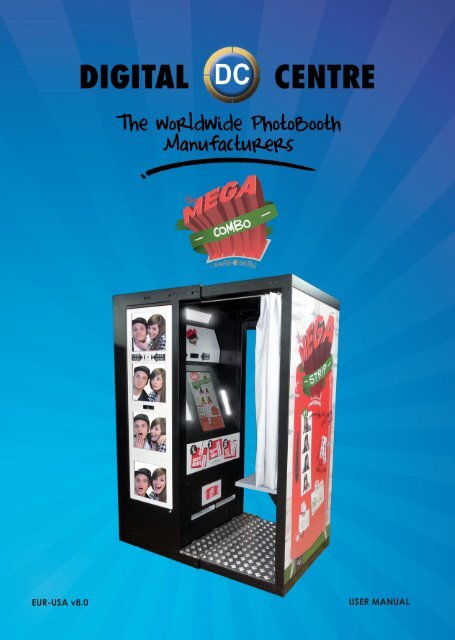
EUR-USA v<strong>8.0</strong> USER MANUAL
America:<br />
<strong>Digital</strong> <strong>Centre</strong> America, Inc.<br />
14271 SW 120th Street Unit #109<br />
USA, Miami, FL 33186<br />
Sales:<br />
Ph: +1.305.387.5005<br />
sales@dc-image.com<br />
Tech Support:<br />
Ph: +1.305.387.5115<br />
support@dc-image.com<br />
Europe:<br />
<strong>Digital</strong> <strong>Centre</strong><br />
Pol. Ind. Sant Isidre<br />
C/ Puigmal, 20-22 St. Fruitós<br />
08272, BARCELONA. Spain<br />
Ph: +34.938.748.158<br />
info@dc-image.com<br />
www.digital-centre.com<br />
2
Copyright and Trademarks<br />
This manual contains materials protected under International copyright Laws. All rights reserved.<br />
No part of this manual may be reproduced, transmitted or transcribed without the<br />
expressed written permission of the manufacturer and author of this manual.<br />
The information of the products in this manual is subject to change without prior notice and<br />
does not represent a commitment on the part of the vendor. Who assumes no liability or<br />
responsibility for any errors that appear in this manual.<br />
3
CONTENTS<br />
1. Safety Instructions---------------------------------------------------------------------7-8<br />
2. Specifications------------------------------------------------------------------------------9<br />
3.Unpacking· Installation------------------------ ------------------------------------10-11<br />
MEGA IN<br />
4.Features-------------------------------------------------------------------------------12<br />
4.1 Service Control Panel------------------------------------------------12<br />
4.2 Power Switch------------------------------------------------------------12<br />
5. Connections---------------------------------------------------------------------------13-19<br />
5.1 Control Board-----------------------------------------------------------13<br />
5.2 RJ45 (internet)----------------------------------------------------------14<br />
5.3 PC -------------------------------------------------------------------------15<br />
5.4 PC wiring ----------------------------------------------------------------16<br />
5.4.1 PC wiring to Control Board----------------------16<br />
5.5 Printer----------------------------------------------------------------------17<br />
5.6 General-------------------------------------------------------------------18<br />
5.7 Monitor ------------------------------------------------------------------19<br />
6.Printer----------------------------------------------------------------------------------20-28<br />
7.Playing--------------------------------------------------------------------------29-34<br />
8.Customized----------------------------------------------------------------------35-55<br />
8.1 Structure--------------------------------------------------------------35-36<br />
8.2 Logo-------------------------------------------------------------------37-38<br />
8.3 Welcome /Bye-----------------------------------------------------39-44<br />
8.4 Text---------------------------------------------------------------------45-46<br />
8.5 Music----------------------------------------------------------------------47<br />
8.6 Frames----------------------------------------------------------------48-53<br />
8.7 Advertising Photos------------------------------------------------54-55<br />
9.Uploading------------------------------------------------------------------------------56<br />
10.Downloading---------------------------------------------------------------------------58<br />
11.Setup menu-------------------------------------------------------------------------58-68<br />
11.1 Products & Price-------------------------------------------------------59<br />
11.1.1 Extra Copies------------------------------------------60<br />
11.2 Rentals---------------------------------------------------------------------61<br />
11.3 Customize----------------------------------------------------------61-68<br />
11.3.1Logo---------------------------------------------62<br />
11.3.2 Text------------------------------------------------------63<br />
11.3.3 Date----------------------------------------------------63<br />
11.3.4 Welcome /Bye--------------------------------------64<br />
11.3.5 Frames-------------------------------------------------65<br />
11.4 Options--------------------------------------------------------------66-67<br />
11.5 Camera------------------------------------------------------------------68<br />
4
12.Internet------------------------------------------------------------------------------69-71<br />
12.1 Player. Get your picture-----------------------------------------69-70<br />
12.2 Owner.Prepare USB-stick/Event----------------------------70-71<br />
13.Troubleshooting----------------------------------------------------------------72-88<br />
13.1 Uploading the logo--------------------------------------------75-76<br />
13.2 Hard Drive---------------------------------------------------------77-80<br />
13.3 Boot DVD--------------------------------------------------------------81<br />
13.4 Dongle Error----------------------------------------------------------82<br />
13.5 Camera Error---------------------------------------------------------83<br />
13.6 Touch Screen---------------------------------------------------------84<br />
13.7 Printer Error--------------------------------------------------------85-86<br />
13.8 No Signal---------------------------------------------------------------87<br />
13.9 Image Adjusting-----------------------------------------------------87<br />
13.10 Control Board Error-------------------------------------------------88<br />
MEGA OUT<br />
14.Features-------------------------------------------------------------------------------89<br />
14.1 Service Control Panel----------------------------------------------89<br />
14.2 Power Switch---------------------------------------------------------89<br />
15. Connections---------------------------------------------------------------------------90-96<br />
15.1 Control Board----------------------------------------------------------90<br />
15.2 RJ45 (internet)--------------------------------------------------------91<br />
15.3 PC-------------------------------------------------------------------------92<br />
15.4 PC Wiring --------------------------------------------------------------93<br />
15.5 General-----------------------------------------------------------------94<br />
15.6 Monitor ------------------------------------------------------------95-96<br />
1 .Playing--------------------------------------------------------------------------97-103<br />
17.Customized----------------------------------------------------------------------104-127<br />
17.1 Structure---------------------------------------------------------104-105<br />
17.2 Logo--------------------------------------------------------------106-107<br />
17.3 Welcome /Bye------------------------------------------------108-113<br />
17.4 Text----------------------------------------------------------------114-115<br />
17.5 Music-------------------------------------------------------------------116<br />
17.6 Frames-----------------------------------------------------------117-122<br />
17.7 Adverting Photos---------------------------------------------123-125<br />
18.Uploading------------------------------------------------------------------------------126<br />
19.Downloading-------------------------------------------------------------------------127<br />
20.Setup menu----------------------------------------------------------------------128-133<br />
20.1 Products & Price-----------------------------------------------------129<br />
5
20.2 Rentals-----------------------------------------------------------------130<br />
20.3 Customize--------------------------------------------------------130-133<br />
20.3.1 Logo--------------------------------------------------131<br />
20.3.2 Text----------------------------------------------------132<br />
20.3.3 Date--------------------------------------------------132<br />
20.3.4 Welcome/Bye-------------------------------------133<br />
20.3.5 Frames-----------------------------------------------133<br />
20.4 Options----------------------------------------------------------------134<br />
20.5 Camera----------------------------------------------------------------134<br />
21.Troubleshooting----------------------------------------------------------------135-148<br />
21.1 Uploading the logo------------------------------------------138-139<br />
21.2 Hard drive------------------------------------------------------140-143<br />
21.3 Boot DVD--------------------------------------------------------------144<br />
21.4 Dongle Error----------------------------------------------------------145<br />
21.5 Camera Error--------------------------------------------------------146<br />
21.6 Touch Screen--------------------------------------------------------147<br />
21.7 No Signal---------------------------------------------------------------147<br />
21.8 Control Board Error-------------------------------------------------148<br />
ADDITIONAL INFORMATION<br />
22.Control Board Diagrams----------------------------------------------------------149<br />
23.Decals-----------------------------------------------------------------------------150-151<br />
24.Spare Diagrams----------------------------------------------------------------152-154<br />
25.Parts List--------------------------------------------------------------------------- 155-161<br />
25.1 Mega IN---------------------------------------------------------155-157<br />
25.2 Mega OUT------------------------------------------------------158-161<br />
26.Notes------------------------------------------------------------------------------------- 162<br />
30.Annex 1: myphotocode.com Tutorial-----------------------------------163-184<br />
6
1-SAFETy INSTRUCTIONS<br />
The following directions must be followed carefully for safe use, to prevent personal<br />
injuries, and damage to the equipment.<br />
Please read this entire manual before initial use and store it in a convenient location<br />
for on easy access.<br />
WARNING: To ensure safe operation, observe specifications, notices and cautions in<br />
this document. <strong>Digital</strong> <strong>Centre</strong> Accepts no liability for damage or injuries from improper<br />
use of this product.<br />
WARNING: Prevent electrical shock and equipment damage. Before connecting or<br />
disconnecting cables and/or changing the paper, disconnect power cord from the<br />
A/C outlet.<br />
WARNING: Prevent shock hazard and damage. Only plug the power cord into a<br />
220 volts (110 volts for USA) grounded A/C outlet.<br />
WARNING: Do not touch exposed wires or moving parts such as power supply modules<br />
and the control board. Touching these parts could cause electric shock or other injury,<br />
data loss, and/or printer malfunction.<br />
WARNING: Only use Mitsubishi CK9046(DC) paper / ink ribbon set in the printer. Use of<br />
other paper / ink ribbon will cause software malfunction, poor image quality, and/or<br />
printer damage.<br />
WARNING: Do not touch the thermal print head, or head area of the printer. The print<br />
head operates at an extremely hot temperature. Touching it might cause burns or<br />
other injury.<br />
WARNING: Follow the directions in the Mitsubishi manual when cleaning the printhead.<br />
Do not use cotton, wool or other fabric swabs. The lint left behind poses a fire hazard.<br />
NOTICE: Read additional Warnings in Mitsubishi Printer <strong>Manual</strong>.<br />
WARNING: The printers are not interchangeable.<br />
DANGER: Tipping Hazard! Photo Booth may pose danger to small children<br />
and/or pets. Unplug the power cord from the A/C outlet immediately if the Photo<br />
Booth tips over.<br />
WARNING: Use only original parts from <strong>Digital</strong> <strong>Centre</strong>.<br />
Use only original parts from <strong>Digital</strong> <strong>Centre</strong>. Use only original parts for your photo<br />
booth from <strong>Digital</strong> <strong>Centre</strong>. Non original parts may compromise the use of the photo<br />
booth and may create a malfunction and cause serious damage. Using different<br />
components, changing wiring, or altering the photo booth in any fashion will void<br />
the warranty.<br />
<strong>Digital</strong> <strong>Centre</strong> is unable to assist any customer that has changed, modified, or altered<br />
the photo booth using non original parts. We cannot provide a guarantee or service<br />
for products that are not original parts from <strong>Digital</strong> <strong>Centre</strong>.<br />
7
Danger: Power Off the Photo Booth immediately if any of the following occurs:<br />
· Smoke<br />
· Unusual Odor<br />
· Unusual Noise<br />
· Water or other Liquids spill inside the Photo Booth<br />
· Physical Damage<br />
Danger: Do not place or store the Photo Booth in wet or extremely humid areas, in direct<br />
sunlight, near an open flame or heater, and/or swimming pools. Avoid Condensation.<br />
Danger: Operate the Photo Booth in locations with ambient temperatures of 5°C – 40°C<br />
(41°F – 104°F)<br />
Danger: Install the Photo Booth on a flat, even and, clean surface.<br />
Danger: Repairs should only be made by qualified technicians.<br />
WARNING: Indoor Use Only<br />
MAINTENANCE: Cleaning: Use only a clean, dry, soft cloth. If necessary use a damp cloth<br />
and/or neutral detergent. Do not use window cleaner or any other alkaline cleaners.<br />
8
196 cm / 77 inches<br />
145 cm / 57 inches<br />
Power Supply: Hz 110V<br />
AC 220V 50/60 (for EUR)<br />
Power Consumption: 260W<br />
Weight = 302 Kg / 666 lbs.<br />
2-SPECIFICATIONS<br />
85 cm / 33,5 inches<br />
Nominal fuse rating= 6 Amps<br />
Monitor: LCD Monitor Touch 22”<br />
(Mega IN)<br />
LCD Monitor 17”<br />
(Mega OUT)<br />
Printer: Mitsubishi CP9810 Dye<br />
Sublimation Photo Printer (Mega IN)<br />
Specifications may change at any time and without prior notice.<br />
145 cm / 57 inches 88 cm / 34 inches<br />
9
3-UNPACkING · INSTALLATION<br />
These are the accessories included with your new <strong>Digital</strong> <strong>Centre</strong> Photo Booth:<br />
Boot DVD (in)<br />
keys<br />
Warning: Movement of the photo booth requires assistance from two or more people.<br />
· Unwrap and remove all packaging materials. Remove screws and metal holding plates<br />
that attach the Photo Booth to the skid.<br />
· All major components of the Photo Booth are located under the seat. Access to the components<br />
is through the lower rear service door.<br />
· Access to the printer and the USB port of the computer is on the left side of the seat. Unlock<br />
and open this side service door and then remove the protective polystyrene foam<br />
block before first use.<br />
· The keys for the service door, service panel, manuals, and power cord are located in the<br />
picture chute on the right side of the Photo Booth.<br />
· Inspect the wiring harnesses for disconnected plugs.<br />
Power Cord<br />
Boot DVD (out)<br />
10
Plug the power cord into the<br />
socket underneath the Photo<br />
Booth. Slide the power switch to<br />
the “ON” position.<br />
Adjust the height of the four metal<br />
legs once the final location for<br />
the booth has been established.<br />
The metal legs are underneath<br />
the cabin next to the wheels.<br />
11
MEGA IN<br />
4-FEATURES<br />
4.1 SERVICE CONTROL PANEL<br />
1 2 3 4 5<br />
IN<br />
1. Volume Control lever<br />
2. Menu (Yellow Button): It enters setup Menu and allows<br />
options such as pricing, logos, camera adjustments,<br />
and features to be changed.<br />
3. Accounts (Black Button): It prints detailed vending report<br />
including number of prints available.<br />
4. Credit (Red Button)<br />
5. Coin Counter<br />
4.2 POWER SWITCh<br />
The Power Switch is located<br />
underneath the cabin. It contains<br />
a Fuse and a power cord socket.<br />
12
CONTROL BOARD (DC-EVO-V3.0)<br />
LEDS JP10<br />
Bill Acceptor<br />
JP7<br />
Coin<br />
counter JP1<br />
JP9<br />
Power 115V-USA<br />
or 230V-EUR<br />
CN1<br />
Fuse 1A<br />
F1<br />
5-CONNECTIONS<br />
5.1 CONTROL BOARD<br />
RS232. Serial Cable. From Control Board to PC.<br />
JP7. Bill Acceptor Cable. From Control Board to Bill Acceptor.<br />
CN1 Power Supply at 230 volts (115 volts for USA).<br />
Jack Stereo. From Control Board to PC<br />
F1. We need 1A fuse here to run the Control Board.<br />
JP3. Speakers. JP3 gives us the volume control.<br />
Control keybord<br />
Panel Cables<br />
JP6<br />
Coin Acceptor<br />
JP5<br />
Chip Atmel<br />
JP8<br />
Serial Cable<br />
to PC RS232<br />
Jack Stereo<br />
to PC<br />
POTEN R24<br />
Speaker JP3<br />
POTENT R24: We connect here the main cable from Control Board to<br />
Push Buttons + Speakers.<br />
13
OPTIONAL<br />
PRINTER<br />
5.2 RJ45 EThERNET (INTERNET)<br />
P.9 Cable RJ45 ethernet (internet)<br />
(Not included)<br />
P.9<br />
Internet connection<br />
· Check the distance between the internet<br />
connection and the position of your<br />
photobooth in the room.<br />
· Ensure you have a RJ45 ethernet cable<br />
that is long enough.<br />
· Pull out the back door<br />
· Take the cable (RJ45 ethernet) and plug it<br />
into the ethernet “hold” of your PC.<br />
WARNING:<br />
· The cable just can only be plugged into<br />
one position.<br />
P.9 Cable RJ45 ethernet<br />
(internet)<br />
PC<br />
MEGA IN<br />
MONITOR<br />
SCREEN 22”<br />
14
5.3 PC<br />
MEGA IN<br />
PC MEGA IN<br />
MONITOR<br />
SCREEN 22”<br />
15
P.10<br />
P.11<br />
P.9<br />
P.5<br />
5.4 PC WIRING<br />
P.7<br />
P.8<br />
P.6<br />
P.4<br />
P.1 Main Power Cable<br />
P.2 Serial Cable From PC to Control Board M/F. (56 cm - Inch 22,04)<br />
P.3 Jack Stereo Cable. (180 cm - Inch 70,87)<br />
P.4 VGA Cable From Touch Monitor to PC. (180 cm - Inch 70,87)<br />
P.5 Empty<br />
P.6 Empty<br />
P.7 Dongle USB Security and Software. MEGA IN<br />
P.8 USB Cable From Printer to PC AM/BM. (180 cm - Inch 70,87)<br />
P.9 Cable RJ45 ethernet (internet)<br />
P.10 USB Extension AM/AF From Camera to PC. (180 cm - Inch 70,87)<br />
P.11 USB Cable From PC to Touch Monitor. (180 cm - Inch 70,87)<br />
P.2<br />
5.4.1 PC WIRING TO CONTROL BOARD<br />
P.1<br />
P.3<br />
P.2<br />
P.1 Main Power Cable<br />
P.2 Serial Cable From PC to Control Board M/F. (56 cm - Inch 22,04)<br />
P.3 Jack Stereo Cable. (180 cm - Inch 70,87)<br />
P.1<br />
P.2<br />
P.1<br />
P.3<br />
16
5.5 PRINTER<br />
PRINTER WIRING<br />
P.1 Main Power Cable<br />
P.8 USB Cable From Printer to PC<br />
AM/BM. (180 cm - Inch 70,87)<br />
P.8<br />
P.1<br />
17
OPTIONAL<br />
PRINTER<br />
7<br />
9<br />
A<br />
8<br />
3<br />
COMPONENTS<br />
1. Printer Mitsubishi CP9810DW-DC<br />
2. HP-C2D PC. (MEGA IN)<br />
3. Control Board.<br />
4. Wood PC Base. MEGA (RAW)<br />
5. Wood Upright PC #2 Base.<br />
MEGA (RAW) (84,7x13 cm<br />
Inch 33,34x5,11)<br />
6. Right Printer Suport. (RAW METAL)<br />
7. Left Printer Suport. (RAW METAL)<br />
8. Transformer 2A 12V<br />
9. Cable From Control Board to<br />
Service Panel & Push Buttons<br />
+ 2 Speakers<br />
5.6 GENERAL<br />
PC WIRING<br />
P.11<br />
P.4<br />
P.1<br />
P.1 Main Power Cable<br />
P.4 VGA Cable From Touch<br />
Monitor to PC.<br />
(180 cm - Inch 70,87)<br />
P.11 USB Cable From Touch<br />
Monitor to PC.<br />
(180 cm - Inch 70,87)<br />
1<br />
6<br />
2<br />
4<br />
5<br />
GENERAL WIRING<br />
A. Service Control<br />
panel with 2 controls<br />
(IN&OUT).MEGA COMBO<br />
18
25<br />
16<br />
21<br />
23<br />
11<br />
10<br />
26<br />
20<br />
22<br />
15<br />
24<br />
18<br />
17<br />
5.7 MONITOR<br />
COMPONENTS PC WIRING<br />
10. LCD Touch Monitor 22”<br />
11. Full HD Camera<br />
12. Speakers 8 Ohm 5W<br />
(10 cm - Inch 3,94)<br />
13. Ballast 13W<br />
14. Ballast 36W<br />
15. Light Bulbs 9W<br />
16. Light Bulbs 36W<br />
17. Light Starter<br />
18. Lamp Holder 9W<br />
19. Lamp Holder 36W<br />
20. Lateral Light Body. (RAW METAL)<br />
21. Top Light Body. (RAW METAL)<br />
22. Lateral Light Diffuser Holder. (RAW METAL)<br />
23. Top Light Diffuser Holder. (RAW METAL)<br />
24. Lateral Light Plastic Diffuser (WHITE)<br />
(26,5x7x0,3 cm - Inch 10,43x2,76x0,12)<br />
25. Top Light Plastic Diffuser (WHITE)<br />
(52x9,5x0,3 cm - Inch 20,47x3,74x0,12)<br />
26. Top/Bottom Monitor 22” Holders. (RAW METAL)<br />
27. Right/Left Monitor 22” Holders. (RAW METAL)<br />
28. Fixing Camera Back Holder. (RAW METAL)<br />
P.11<br />
P.4<br />
P.1<br />
P.1 Main Power Cable<br />
P.4 VGA Cable From Touch Monitor to PC.<br />
(180 cm - Inch 70,87)<br />
P.11 USB Cable From Touch Monitor to PC.<br />
(180 cm - Inch 70,87)<br />
14<br />
19<br />
13<br />
28<br />
12<br />
27<br />
19
· Protective Measures<br />
6-PRINTER<br />
WARNING: The printers are not interchangeable<br />
This printer is designed to operate with Photo Booth systems. Do not remove any<br />
inside components. Do not try to repair or manipulate it. Before printing, install an<br />
Ink sheet and paper.<br />
Never insert any object into the unit.<br />
Foreign objects of any kind inserted into this unit is safety hazard and can cause<br />
extensive damage.<br />
Do not place anything on the digital color printer.<br />
Heavy objects placed on the digital color printer can cause damage or obstruct<br />
proper ventilation.<br />
Do not remove the cabinet.<br />
Touching internal parts is dangerous, and may lead to malfunction. Contact the<br />
sales dealer to carry out internal checks and adjustments. Before opening the<br />
cover for eliminating a jammed paper, etc ... , be sure to disconnect the power<br />
cord plug.<br />
When transporting the unit.<br />
When transporting the unit, remove the ink sheet and print paper from the unit.<br />
Be careful around print paper exit slot.<br />
Do not insert your hand or any material into the paper exit slot during printing.<br />
Do not touch the cutter blade inside the paper exit slot. Otherwise, your finger will<br />
be injured.<br />
Do not touch the thermal head.<br />
Do not touch the thermal head (located inside the unit).<br />
The thermal head is heated to a high temperature. This may cause injury.<br />
Ink sheet and paper print supply.<br />
Use only the ink sheet and paper supplied by <strong>Digital</strong> <strong>Centre</strong>, otherwise the Photo<br />
Booth system will not work, and <strong>Digital</strong> <strong>Centre</strong> does not assume any responsibility<br />
for damages or injuries.<br />
20
FRONT PANEL<br />
FEATURES & FUNCTIONS<br />
21
SIDE AND REAR PANEL<br />
BEFORE PRINTING<br />
1<br />
2<br />
Install the print paper to this unit. (See below.)<br />
Install the ink ribbon to this unit.<br />
INSTALLATION OF PRINT PAPER<br />
22
BEFORE OPERATION<br />
23
INSTALLATION OF INk RIBBON<br />
24
BEFORE OPERATION<br />
25
ERROR MESSAGES & COUNTERMEASURES<br />
26
CLEANING<br />
27
MEGA IN<br />
7-PLAyING<br />
DEMONSTRATION<br />
When there are no vends the machine enters<br />
in Demo Mode. Photo samples are displayed.<br />
Once money is inserted, you are<br />
taken to the credit screen.<br />
PRODUCT SCREEN<br />
You can choose among 4 different<br />
products.<br />
29
Photo ID<br />
Color and Black & White<br />
When the instructions conclude, you are given<br />
the option to choose “Color” or “Black<br />
& White” pictures.<br />
Shots<br />
4 Shots are taken.<br />
(3 Shots if you activate the logo)<br />
30
PRINTING<br />
The pictures are shown on the screen<br />
while strips are printing.<br />
Street Art<br />
STREET ART SELECTION<br />
Select one design.<br />
31
PRINTING<br />
The Street Art is shown on the screen<br />
while the picture is printing.<br />
PRINTING<br />
The pictures are shown on the screen<br />
while strips are printing.<br />
32
Get Framed<br />
FRAME SELECTION<br />
You con choose different frame options.<br />
Shots<br />
4 Shots are taken.<br />
33
PRINTING<br />
The pictures are shown on the screen<br />
while strips are printing.<br />
34
USB stick<br />
A<br />
PhotoIdUpload<br />
You must create<br />
this folder<br />
B<br />
PhotoIdEvents<br />
You must create<br />
this folder<br />
C<br />
PhotoIdDownload<br />
This folder is created<br />
automatically<br />
8-CUSTOMIZED<br />
8.1 STRUCTURE<br />
Logo<br />
Welcome Custom<br />
Bye Custom<br />
Text<br />
BGmusic<br />
Frames<br />
CustomShots<br />
Wedding<br />
1a,1b,1c,1d<br />
2a,2b,2c,2d<br />
...<br />
Myphotocode<br />
Shots<br />
shot0001a<br />
shot0001b<br />
shot0001c<br />
shot0001d<br />
.<br />
.<br />
Random<br />
Random<br />
1,2,3,4,5,6.....<br />
Header<br />
1<br />
1<br />
1<br />
AMEGJAB4MG.jpg<br />
(photo)<br />
.<br />
ANRTSZBMAB.wmv<br />
(video)<br />
.<br />
(photos)<br />
1<br />
2<br />
3<br />
1<br />
2<br />
3<br />
35
USB stick<br />
1· Necessary Materials:<br />
USB Stick with 2 GB of available space<br />
We recommend using a USB Stick with a led indicator<br />
USB STICk Off<br />
(LED desactivated)<br />
A<br />
PhotoIdUpload<br />
You must create<br />
this folder<br />
B<br />
PhotoIdEvents<br />
You must create<br />
this folder<br />
C<br />
PhotoIdDownload<br />
This folder is created<br />
automatically<br />
USB STICk On<br />
(LED activated)<br />
*PhotoIdUpload<br />
ld means ID not LD<br />
*PhotoIdEvents<br />
ld means ID not LD<br />
USB STICk Blinking<br />
(LED activated)<br />
36
A<br />
FOLDER<br />
PhotoIdUpload<br />
USB stick<br />
PhotoIdUpload<br />
You must create<br />
this folder<br />
Logo<br />
Frames<br />
1a,1b,1c,1d<br />
2a,2b,2c,2d<br />
...<br />
DIRECTIONS FOR UPLOADING ThE LOGO<br />
USB stick<br />
*PhotoIdUpload<br />
ld means ID not LD<br />
8.2 LOGO<br />
PhotoIdUpload<br />
You must create<br />
this folder<br />
1<br />
Welcome<br />
Bye<br />
Text<br />
BGmusic<br />
1· Necessary Materials:<br />
USB Stick with 2 GB of available space<br />
We recommend using a USB Stick with a led indicator<br />
Random<br />
Custom<br />
Custom<br />
Random<br />
Logo<br />
1<br />
2<br />
3<br />
1<br />
1<br />
1<br />
2<br />
3<br />
37
2-Create a folder on the USB stick and name it PhotoIdUpload<br />
3-Insert the logo that you want to use in the folder PhotoIdUpload<br />
4-Connect the USB Stick to the Photo Booth<br />
5-Go to Setup Menu (important) and confirm that logo is activated<br />
USB stick<br />
Height: 960 pixels<br />
Width: 1280 pixels<br />
Sample Logo<br />
Logo Characteristics:<br />
Name: Logo<br />
Size: width: 1280 pixels<br />
height: 960 pixels<br />
Resolution: 300dpi<br />
We recommend<br />
300dpi, but it will also<br />
work with less resolution.<br />
Format: JPG<br />
PhotoIdUpload<br />
You must create<br />
this folder<br />
Logo<br />
Not working? Please refer to section 13.1 for assistance.<br />
UPLOADING (see section 9)<br />
SET UP MENU (see section 11)<br />
38
A<br />
FOLDER<br />
PhotoIdUpload<br />
USB stick<br />
DIRECTIONS FOR UPLOADING WELCOME/ByE<br />
USB stick<br />
PhotoIdUpload<br />
You must create<br />
this folder<br />
PhotoIdUpload<br />
You must create<br />
this folder<br />
*PhotoIdUpload<br />
ld means ID not LD<br />
8.3 WELCOME/ByE<br />
Logo<br />
Welcome<br />
Bye<br />
Text<br />
BGmusic<br />
Frames<br />
Welcome<br />
Bye<br />
1a,1b,1c,1d<br />
2a,2b,2c,2d<br />
...<br />
Random<br />
Custom<br />
Custom<br />
Random<br />
Random<br />
Custom<br />
Custom<br />
Random<br />
1<br />
2<br />
3<br />
1<br />
1<br />
1<br />
2<br />
3<br />
1<br />
2<br />
3<br />
1<br />
1<br />
1<br />
2<br />
3<br />
2<br />
39
Welcome message (custom)<br />
You must create<br />
this folder<br />
Welcome<br />
Custom<br />
Sample Welcome<br />
Specifications:<br />
Name: 1<br />
Size: width: 1050 pixels<br />
height: 1680 pixels<br />
Resolution: 72dpi<br />
Format: JPG<br />
1<br />
The name of<br />
the image must be: 1<br />
1<br />
40
Bye message (custom)<br />
Bye<br />
You must create<br />
this folder<br />
Custom<br />
1<br />
Sample Bye<br />
Specifications:<br />
Name: 1<br />
Size: width: 1050 pixels<br />
height: 1680 pixels<br />
Resolution: 72dpi<br />
Format: JPG<br />
UPLOADING (see section 9)<br />
SET UP MENU (see section 11)<br />
The name of the image<br />
must be: 1<br />
1<br />
41
A<br />
FOLDER<br />
PhotoIdUpload<br />
USB stick<br />
USB stick<br />
PhotoIdUpload<br />
You must create<br />
this folder<br />
DIRECTIONS FOR UPLOADING WELCOME/ByE<br />
PhotoIdUpload<br />
You must create<br />
this folder<br />
*PhotoIdUpload<br />
ld means ID not LD<br />
Logo<br />
Welcome<br />
Bye<br />
Frames<br />
Welcome<br />
Bye<br />
Text<br />
BGmusic<br />
1a,1b,1c,1d<br />
2a,2b,2c,2d<br />
...<br />
Random<br />
Custom<br />
Custom<br />
Random<br />
Random<br />
Custom<br />
Custom<br />
Random<br />
1<br />
2<br />
3<br />
1<br />
1<br />
2<br />
3<br />
1<br />
1<br />
2<br />
3<br />
1<br />
1<br />
2<br />
3<br />
1<br />
2<br />
42
Welcome message random<br />
You must create<br />
this folder<br />
Welcome<br />
1<br />
Specifications:<br />
(1,2,3)<br />
Each one with following<br />
characteristics:<br />
Random<br />
1<br />
2<br />
3<br />
2 Samples Welcome random<br />
The names of<br />
the images must be:<br />
1,2,3<br />
2<br />
Name: 1<br />
Size: width: 1050 pixels<br />
height: 1680 pixels<br />
Resolution: 72dpi<br />
Format: JPG<br />
43
Bye<br />
You must create<br />
this folder<br />
Bye message random<br />
Random<br />
2 Samples Bye random<br />
The names of<br />
the images must be:<br />
1,2,3<br />
Each player will get a different Random goodBye screen.<br />
1<br />
Specifications:<br />
(1,2,3)<br />
Each one with following<br />
characteristics:<br />
1<br />
2<br />
3<br />
UPLOADING (see section 9)<br />
SET UP MENU (see section 11)<br />
2<br />
Name: 1<br />
Size: width: 1050 pixels<br />
height: 1680 pixels<br />
Resolution: 72dpi<br />
Format: JPG<br />
44
A<br />
FOLDER<br />
PhotoIdUpload<br />
USB stick<br />
USB stick<br />
*PhotoIdUpload<br />
ld means ID not LD<br />
PhotoIdUpload<br />
You must create<br />
this folder<br />
8.4 TExT<br />
Logo<br />
Frames<br />
1a,1b,1c,1d<br />
2a,2b,2c,2d<br />
...<br />
DIRECTIONS FOR UPLOADING Text<br />
PhotoIdUpload<br />
You must create<br />
this folder<br />
Welcome Custom<br />
Bye Custom<br />
Text<br />
3<br />
BGmusic<br />
Random<br />
Random<br />
Text<br />
Name: Text<br />
Format: txt<br />
1<br />
2<br />
3<br />
1<br />
1<br />
1<br />
2<br />
3<br />
45
All Text in this file is printed vertically on the<br />
left side of the photostrips.<br />
Sample: Rent your Booth (888). 888. 888<br />
UPLOADING (see section 9)<br />
SET UP MENU (see section 11)<br />
Rent your Booth (888). 888. 888<br />
46
A<br />
FOLDER<br />
PhotoIdUpload<br />
USB stick<br />
USB stick<br />
*PhotoIdUpload<br />
ld means ID not LD<br />
PhotoIdUpload<br />
You must create<br />
this folder<br />
8.5 MUSIC<br />
Logo<br />
Frames<br />
1a,1b,1c,1d<br />
2a,2b,2c,2d<br />
...<br />
DIRECTIONS FOR UPLOADING MUSIC<br />
PhotoIdUpload<br />
You must create<br />
this folder<br />
Welcome<br />
Bye<br />
Text<br />
BGmusic<br />
4<br />
BGmusic<br />
Name: BGmusic<br />
Format: mp3<br />
Random<br />
Custom<br />
Random<br />
Custom<br />
You can Upload any song to the <strong>PhotoBooth</strong>, the only<br />
thing you need to do is change the song’s name to<br />
“BGmusic”and save the file into the “PhotoIdUpload”<br />
folder<br />
UPLOADING (see section 9)<br />
SET UP MENU (see section 11)<br />
1<br />
2<br />
3<br />
1<br />
1<br />
2<br />
3<br />
1<br />
47
A<br />
FOLDER<br />
PhotoIdUpload<br />
USB stick<br />
PhotoIdUpload<br />
You must create<br />
this folder<br />
8.6 FRAMES<br />
Logo<br />
Welcome<br />
Bye<br />
Text<br />
BGmusic<br />
Frames<br />
1a,1b,1c,1d<br />
2a,2b,2c,2d<br />
...<br />
Random<br />
Custom<br />
Custom<br />
Random<br />
5<br />
FRAMES<br />
There are 3 screens with frames. Each<br />
screen contains 6 groups. That means,<br />
a total of 18 groups.Every group of 4<br />
frames will be printed together.<br />
If you want to customize one group (for<br />
example number 1), you need four images<br />
(frames) 1a, 1b, 1c & 1d”.<br />
1<br />
2<br />
3<br />
1<br />
1<br />
1<br />
2<br />
3<br />
48
To create a new framework we<br />
will create a file with the following<br />
characteristics.<br />
USB stick<br />
*PhotoIdUpload<br />
PhotoIdUpload<br />
You must create<br />
this folder<br />
SAMPLE<br />
Name: Check structure name<br />
Size: width: 1280 pixels<br />
height: 960 pixels<br />
Resolution: 300dpi<br />
We recommend 300dpi, but it<br />
will also work with less<br />
resolution<br />
Format: PNG<br />
It’s very important to save the file<br />
of the frames only in PNG format.<br />
Create your own customized<br />
frame. Inside of the blank area is<br />
where the camera will capture<br />
the image, and your customized<br />
frame will surround the image.<br />
DIRECTIONS FOR UPLOADING FRAMES<br />
ld means ID not LD<br />
Frames<br />
1a,1b,1c,1d<br />
2a,2b,2c,2d<br />
...<br />
49
PhotoIdUpload<br />
You must create<br />
this folder<br />
Screen1<br />
1a<br />
1b<br />
1c 1d<br />
4a 4b<br />
4c 4d<br />
Frames<br />
1a,1b,1c,1d<br />
2a,2b,2c,2d<br />
...<br />
2a 2b<br />
2c 2d<br />
5a 5b<br />
5c 5d<br />
1 Screen 1 (group 1)<br />
1b<br />
1c 1d<br />
1 2 3<br />
3a 3b<br />
3c 3d<br />
4 5 6<br />
1a<br />
6a 6b<br />
6c 6d<br />
50
Screen2<br />
7a 7b<br />
7c 7d<br />
10a 10b<br />
10c 10d<br />
Screen3<br />
7 8 9<br />
8a 8b<br />
8c 8d<br />
9a 9b<br />
9c 9d<br />
10 11 12<br />
11a 11b<br />
11c 11d<br />
12a 12b<br />
12c 12d<br />
13 14 15<br />
13a 13b<br />
13c 13d<br />
16 17 18<br />
16a 16b<br />
16c 16d<br />
14a 14b<br />
14c 14d<br />
17a 17b<br />
17c 17d<br />
15a 15b<br />
15c 15d<br />
18a 18b<br />
18c 18d<br />
51
Sample<br />
If you want to customize the group Nº1 follow this structure.<br />
PhotoIdUpload<br />
You must create<br />
this folder<br />
PhotoIdUpload<br />
You must create<br />
this folder<br />
Frames<br />
Frames<br />
1a,1b,1c,1d<br />
1a,1b,1c,1d<br />
1 Screen 1 (group 1)<br />
1a<br />
1b<br />
1c 1d<br />
1 Screen 1 (group 1)<br />
1a<br />
1b<br />
1c 1d<br />
52
Sample<br />
PhotoIdUpload<br />
You must create<br />
this folder<br />
PhotoIdUpload<br />
You must create<br />
this folder<br />
PhotoIdUpload<br />
You must create<br />
this folder<br />
If you want to customize the groups Nº1,2 & 3 follow this structure.<br />
1 Screen 1 (group 1)<br />
Frames<br />
Frames<br />
Frames<br />
1a,1b,1c,1d<br />
2a,2b,2c,2d<br />
3a,3b,3c,3d<br />
UPLOADING (see section 9)<br />
SET UP MENU (see section 11)<br />
1a<br />
1b<br />
1c 1d<br />
2 Screen 1 (group 2)<br />
2a<br />
2b<br />
2c 2d<br />
3 Screen 1 (group 3)<br />
3a<br />
3b<br />
3c 3d<br />
53
USB stick<br />
USB stick<br />
*PhotoIdEvents<br />
ld means ID not LD<br />
8.7 ADVERTISING PhOTOS<br />
B<br />
FOLDER PhotoIdEvents<br />
PhotoIdEvents<br />
PhotoIdEvents<br />
You must create<br />
this folder<br />
CustomShots<br />
CustomShots<br />
1,2,3,4,5,6.....<br />
DIRECTIONS FOR UPLOADING CUSTOMShOTS<br />
1<br />
1,2,3,4,5,6.....<br />
54
CUSTOMShots are the images (made previous to the event) that we want to show on the<br />
screens during the event. An example could be for a wedding were the bride wants to<br />
show pictures from when the couple first met etc, or a company event, where they want to<br />
display brand names or products.<br />
The CUSTOMShots are shown Random during the Demonstration Mode.<br />
Specifications:<br />
(1, 2, 3 & 4)<br />
Each one with following<br />
characteristics:<br />
Name: 1<br />
Size: width: 1280 pixels<br />
height: 960 pixels<br />
Resolution: 72dpi<br />
Format: JPG<br />
UPLOADING (see section 9)<br />
SET UP MENU (see section 11)<br />
Sample custom-<br />
1<br />
2<br />
3<br />
4<br />
· You can put as many pictures as<br />
you want.<br />
· The names of the images have<br />
to be: 1,2,3,4,5,6,7...<br />
55
PC IN<br />
USB<br />
STICk<br />
OPTIONAL<br />
PRINTER<br />
9-UPLOADING<br />
1-Switch ON the Photo booth<br />
2-Open the Photo slot door*<br />
3-Insert the USB Stick to the PC (HP<br />
C2D) (the usb connection is on the<br />
left side of the PC)<br />
4-Open the back door of<br />
your photobooth.<br />
5-Press the yellow button from the<br />
Service Control Panel, to access the<br />
Setup Menu.<br />
* you will need 1314 keys (included<br />
on your photobooth)<br />
6-Press the yellow button for the menu<br />
PRINTER<br />
SERVICE CONTROL PANEL<br />
IN<br />
56
USB stick<br />
C<br />
This folder is created<br />
automatically<br />
PhotoIdDownload<br />
10-DOWNLOADING<br />
FOLDER PhotoIdDownload<br />
Myphotocode<br />
Shots<br />
shot0001a<br />
shot0001b<br />
shot0001c<br />
shot0001d<br />
.<br />
.<br />
AMEGJAB4MG.jpg<br />
(photo)<br />
.<br />
ANRTSZBMAB.wmv<br />
(video)<br />
.<br />
(photos)<br />
If the logo is activated, you will have 3<br />
Shots for each print, the missing shot is<br />
going to be printed with the loaded logo.<br />
57
The setup menu is very useful for the owner of the Photo Booth. You can configure the<br />
Photo Booth depending on what kind of service you want to offer to your clients. You can<br />
control the time on the counters, check the prices, check the quality of the pictures look or<br />
consult for accounting purposes.<br />
To go to the setup menu while the Photo Booth is in Demo Mode, press the yellow button.<br />
· SETUP MENU SCREENShOOTS<br />
11-SETUP MENU<br />
1 2 3 4 5<br />
VOLUME MENU ACCOUNTS CREDIT COUNTER<br />
CONFIGURATION<br />
The configurable parameters are<br />
divided in 5 groups:<br />
· Products & Prices<br />
· Rentals<br />
· Customize<br />
· Options<br />
· Camera<br />
· Exit<br />
58
11.1 PRODUCTS & PRICES<br />
You can set the prices to the different<br />
products.<br />
SWITCh ON/OFF PRODUCT<br />
You can enable/disable the products<br />
that you want.<br />
yES /NO<br />
59
11.1.1 ExTRA COPIES<br />
You can turn on the option for extra copies<br />
Extra copies may choose one.<br />
You have 3 options<br />
· Mega strip (large size)<br />
· 2 strips (smaller size)<br />
· Single (4“x 6”)<br />
60
11.2 RENTALS<br />
Free Play: YES / NO<br />
Timer: YES / NO<br />
Start: 2012-X-X (Day) XX:XX(Hour)<br />
Finish: 2012-X-X (Day) XX:XX(Hour)<br />
Token: YES / NO<br />
11.3 CUSTOMIZE<br />
To set up the Logo, the Welcome and Bye<br />
screens, the Fun frames,the Print date and<br />
the Print Text.<br />
61
11.3.1 LOGO<br />
1-The menu is displayed on the screen.<br />
2-Select customize and activate the logo<br />
with the green check mark.<br />
(the logo will appear on the 3rd screen,<br />
if you can’t see your on the 3rd screen<br />
it means that the upload is not correct.<br />
3-Touch “X” EXIT. The Photobooth is<br />
ready to work<br />
*It’s very important that you use the exact specifications<br />
for the logo to work.<br />
Not working? Please refer to section 13.1 for assistance.<br />
62
11.3.2 TExT<br />
1-The menu is displayed on the screen<br />
2-Select customize and activate the<br />
Text the green check mark.<br />
3-Touch “X” EXIT.<br />
The Photobooth is ready to work<br />
11.3.3 DATE<br />
1-The menu is displayed on the screen<br />
2-Select customize and activate the<br />
Text the green check mark.<br />
3-Touch “X” EXIT.<br />
The Photobooth is ready to work<br />
63
11.3.4 WELCOME/ByE<br />
1-The menu is displayed on the screen.<br />
2-Enter to the customized menu and select welcome/ Bye screen and CUSTOM.<br />
3-Touch “X” EXIT. The Photobooth is ready to work.<br />
WELCOME SCREEN ByE SCREEN<br />
64
11.3.5 FRAMES<br />
1-The menu is displayed on<br />
the screen<br />
2-Enter to the customized menu<br />
and select GET FRAMES and<br />
CUSTOM<br />
3-Touch “X” EXIT. The Photobooth<br />
is ready to work<br />
65
11.4 OPTIONS<br />
Defines the parameters for some available features:<br />
Current Time: 2012-X-X (Day) XX:XX(Hour)<br />
Music on intro: YES /NO<br />
Show events Shots: Screesavers of photos already loaded by you. YES /NO<br />
Internet: Upload the session Shots to internet, Facebook and email (IMPORTANT: must be<br />
configurated) see section14. YES /NO<br />
Video message: Select this option to record a video (IMPORTANT: Internet must be activated).<br />
YES /NO<br />
Touch screen Calibrate: Press twice the yellow button to access to the Setup Menu.<br />
Automatically the menu is opened to calibrate the touch screen.<br />
66
Calibrate<br />
To calibrate the touch screen touch the points on the screen.<br />
67
11.5 CAMERA<br />
In the submenu CAMERA, the owner<br />
can set the camera zoom position<br />
and brightness.<br />
68
12.1 PLAyER.GET yOUR PICTURE<br />
12-INTERNET<br />
Instructions on how to post pictures on<br />
Facebook, send emails, or watch a<br />
video.<br />
1.You can find a code on the left of your<br />
photo.<br />
2.Use this code on the web page,<br />
www.Myphotocode.com<br />
MEGT4DDYPT<br />
MEGT4DDyPT<br />
www.Myphotocode.com<br />
MEGT4DDyPT<br />
Date: 03-04-13 VISIT : www.Myphotocode and put the code MEGT4DDYPT<br />
69
Problem<br />
The unit is switch ON, but it does not turn on, does not work<br />
3.A screen will appear where you can select the option that you want;<br />
-Send an email.<br />
-Watch a video.<br />
-Post a picture on Facebook.<br />
USERNAME<br />
PASSWORD<br />
WEDDING<br />
March 10, 2012<br />
12.2 OWNER. PREPARE USB-STICk/EVENT<br />
Do you want to customize logo, welcome, Bye, Text and music?<br />
Send an email to Myphotocode@dc-image.com<br />
You will receive your username and password to www.Myphotocode.com<br />
70
A<br />
B<br />
www.Myphotocode.com<br />
Prepare your USB Event<br />
A B<br />
Prepare your USB<br />
Manage your next event:<br />
Customize for your next event the following things:<br />
· Choose the photobooth model<br />
where the USB will be plugged in.<br />
· Upload your logo<br />
· Upload your Text (will be printed on a side of each print)<br />
· Upload the Background music (played during the game)<br />
· Customize your frames<br />
· Customize Welcome screen<br />
· Customize Bye Screen<br />
· Customize the top screen banner and the images<br />
on demo screen. *Strip photobooth only<br />
Event<br />
Create a new event:<br />
On this site you can create and manage your events.<br />
Allow your costumers to share the photos on a personal website specially<br />
created for the occasion.<br />
Manage your event schedule and customize your photobooth for each event.<br />
· Type the event name<br />
· Select the dates.you can do a single day event or multi-day<br />
event<br />
· Customize the background of Myphotocode.com<br />
· Choose who can view the photo Shots – everybody or just the<br />
owners of the photos<br />
(More information See section 27)<br />
71
· GENERAL PROBLEMS<br />
Problem<br />
The unit switch is ON, but it<br />
does not turn on<br />
Causes<br />
The unit is not plugged in.<br />
The voltage is incorrect.<br />
Overload: the fuse over the electric<br />
socket has been blown.<br />
Solutions<br />
Check if the unit is correctly<br />
connected to the electric ground.<br />
Check if the electric ground is<br />
receiving electricity.<br />
Be sure that the voltage is correct.<br />
Change the fuse.<br />
· MONITOR’S PROBLEMS<br />
Problem<br />
The monitor image looks darker or<br />
lighter<br />
Causes<br />
The monitor is not adjusted correctly.<br />
Solutions<br />
Readjust the monitor.<br />
13-TROUBLEShOOTING<br />
Problem<br />
The fluorescent does not turn on.<br />
Causes<br />
The fluorescent lights have been blown.<br />
The transformer has been blown.<br />
Solutions<br />
Replace the fluorescent lights<br />
(see above).<br />
Replace the transformer<br />
Problem<br />
The monitor image moves up and<br />
down<br />
Causes<br />
The monitor is not adjusted correctly.<br />
Solutions<br />
Readjust the monitor.<br />
72
· SOUND PROBLEMS<br />
Problem<br />
The sound does not work<br />
Causes<br />
The volume is not correct.<br />
The configuration menu has the sound set to OFF.<br />
Solutions<br />
Adjust the volume with the control placed below the test,<br />
free-play and start buttons.<br />
Change the sound configuration from the test menu<br />
(black button).<br />
· PRINTER PROBLEMS<br />
Problem<br />
The printer does not print any<br />
photos<br />
Causes<br />
The printer is disconnected.<br />
The printer is out of ink or paper.<br />
The paper or the ink sheet was not<br />
properly installed.<br />
Incorrect paper.<br />
USB/ LPT Atmel chip position is<br />
incorrect.<br />
Solutions<br />
Switch on the printer.<br />
Call the person in charge<br />
Correctly place the paper<br />
and the ink.<br />
Use only CK9550-DC type paper.<br />
· PC PROBLEMS<br />
Problem<br />
Install a brand new Control Board<br />
with Atmel chip and jumpers.<br />
Causes<br />
This problem is due to a hardware<br />
malfunction.<br />
Check the green Capture Board, as<br />
it is probably out or half way in.<br />
Problem<br />
The printer does not switch on<br />
Causes<br />
The printer is disconnected.<br />
The printer does not receive electric<br />
supply.<br />
Solutions<br />
Connect the printer.<br />
Be sure that the cable is correctly<br />
connected.<br />
Problem<br />
It prints one or more white lines<br />
Causes<br />
Thermal head is broken.<br />
Solutions<br />
Replace thermal head.<br />
Solutions<br />
Turn OFF the PC.<br />
Take out the Capture Board. And put<br />
it again (all the way in).<br />
Screw in tightly and check again that<br />
it is all the way in, and did not move<br />
little out during screwing.<br />
Turn ON the PB and check it.<br />
73
· WARNING<br />
· If you have any doubts or any problems with the unit and it’s performance,<br />
call a technician to solve the issue.<br />
Printer Cleaning.<br />
Check configuration.<br />
Monthly<br />
Glasses Cleaning. Weekly.<br />
Control Panel Check the functioning of<br />
all buttons<br />
Lights<br />
Check the functioning<br />
of all the lights and the<br />
fluorescent light.<br />
Monthly<br />
Monthly<br />
Sound Check the sound. Monthly<br />
Coin Acceptor<br />
Bill Acceptor<br />
Interior<br />
Exterior<br />
Clean and check the<br />
correct functioning Annually<br />
Cleaning Annually<br />
Cleaning Weekly<br />
74
PROBLEMS UPLOADING ThE LOGO:<br />
USB stick<br />
It’s recommended to use a USB drive with LED and 2GB of space.<br />
USB STICk Off<br />
(LED desactivated)<br />
13.1 UPLOADING ThE LOGO<br />
Possible causes:<br />
1-USB STICK is damaged<br />
2-The logo specifications/characteristics are not correct<br />
1-USB is damaged<br />
· Let’s make a test to see if it works at the computer.<br />
· Plug the USB STICK at the front of the PC (HP C2D), and go to Set Up Menu.<br />
Then exit the Menu.<br />
· Take a picture by choosing the product you want.<br />
· After the game, Remove the USB STICK.<br />
· Plug the USB STICK in your PC or LapTop.<br />
· Check if the USB STICK contents the PhotoIdDownload folder.<br />
· It should be 2 folders into the PhotoIdDownload and your picture should be there.<br />
· If your picture is not there, the USB STICK is not working properly.<br />
PhotoIdDownload<br />
USB STICk On<br />
(LED activated)<br />
Myphotocode<br />
Shots<br />
USB STICk Blinking<br />
(LED activated)<br />
75
2-The logo specifications/characteristics are not correct<br />
· Plug the USB Stick in your PC or Laptop.<br />
· Locate the logo, Placed on the logo and click the right button on<br />
your computer mouse to open properties.<br />
· The properties should be as follows.<br />
Logo specifications:<br />
Name: Logo<br />
Size: width: 1280 pixels<br />
height: 960 pixels<br />
Resolution: 300dpi<br />
We recommend 300dpi,<br />
but it will also work with<br />
less resolution.<br />
Format: JPG<br />
If it doesn’t working, consult a professional designer<br />
to assist in changing the logo.<br />
ADVANCED USERS:<br />
Use the following web site for suggestions;<br />
http://www.webresizer.com/<br />
Click the right button<br />
· Check the logo specifications<br />
LOGO<br />
Name: Logo<br />
Name:<br />
NOT LOGO.JPG<br />
76
hARD DRIVE ERROR<br />
13.2 hARD DRIVE<br />
This procedure is to check if the BIOS settings are correct for an Automatic<br />
BOOT-DVD.<br />
WARNING!!! This procedure is very dangerous and could cause a PC<br />
Malfunction. Please read it carefully and follow all steps one to one.<br />
1· Plug a Keyboard at the PC.<br />
2· Turn ON the PC (or the whole Photo Booth).<br />
3· When the ASRock screen appears, press “F10” several times until the “BIOS<br />
SETUP UTILITY” appears on the screen. If it does not come up, and the<br />
software continues uploading, then go back to the Step 2.<br />
4· With the Keyboard arrows, move up to<br />
the Storage Menu here we are going to<br />
check the following thing:<br />
· Device Configuration (step 5)<br />
· Boot Order (step 6)<br />
77
5· Once you are inside the “DEVICE Configuration” please check the following points:<br />
•“Hard disk” should be connected at SATA0<br />
•“CD-ROM” should be connected at SATA1<br />
If everything is OK, press ESC to return the Main menu.<br />
If Hard disk or CD-ROM or Both are not detected, we should check the PC connections.(Do<br />
this work with the PC unplugged from power).Go to step 8<br />
6· Once you are inside the “Boot Order” please check the following points:<br />
•“ATAPI CD-ROM”<br />
•“Hard Drive”<br />
If ATAPI CD-ROM or Hard Drive or Both are not detected, we should check the PC<br />
connections.(Do this work with the PC unplugged from power).Go to step 8<br />
78
7· With the Keyboard arrows, move right to the Advanced Menu here we are going to<br />
check the following thing:<br />
· Select Power-On Option and confirm that the “After Power Loss” is ON<br />
8· Unplug the PC from the power.<br />
9· Open the top cover ( there are 2 screws in the top back side of the PC)<br />
10· Check connections as follows:<br />
Please pull up the green arrows from the DVD ROM and from the Power supply and<br />
check the connection as it shows in the following pictures.<br />
IF The hard Disk is SATA + DVD SATA it will be like this:<br />
hARD DISk SATA<br />
POWER SATA<br />
79
SATA<br />
DVD SATA<br />
SATA<br />
DVD POWER<br />
11· If all connections are fine (as it appears in the pictures), then it is possible that the<br />
component, which is not detected at the “IDE CONFIGURATION” Menu, is physically<br />
damaged. Please contact <strong>Digital</strong> <strong>Centre</strong> for a new part.<br />
80
13.3 BOOT DVD<br />
To Update the Machine or change the software version, please follow these steps:<br />
1· Open the DVD Driver.<br />
2· Insert the “Boot DVD”.<br />
3· Plug Off the Machine.<br />
4· Plug On the Machine after 10 seconds.<br />
5· Wait while the restore program reinstalls the<br />
software (a progress bar appears on the screen).<br />
The time process is about 30 minutes<br />
6· A black screen appears when the process finishes.<br />
7· Extract the DVD disk.<br />
8· Plug Off the Machine.<br />
9· Plug On the Machine after 10 seconds.<br />
(In case that the Restore Program does not start automatically and<br />
shows the message “Extract the dvd” immediately, then go to the<br />
“Run the Restore Program <strong>Manual</strong>ly” (At the end of this <strong>Manual</strong>).<br />
CUSTOMIZED FRAMES:<br />
If you have customized frames and/or logos now is the time to upload.<br />
1· Install the “Customized Frames DVD” into the DVD driver (CD or USB too).<br />
2· Turn off the Machine.<br />
3· Turn on the Machine after 10 seconds.<br />
4· When the software is working in Demo, then go into the SETUP MENU, by<br />
pressing the Yellow button at the Setup Control Panel. It will read the customized<br />
frames and/or logos automatically before the software start.<br />
5· Be sure to select LOGO=YES and the correct frames and Wait for the Setup Menu<br />
save all changes. (Wait for the “Shut Down Please” message on the screen).<br />
6· When the software runs in Demo again, you can extract the DVD, CD or USB,<br />
and keep it to a safe place.<br />
The NEW FRAMES are now working; you can go to Setup Menu and adjust the<br />
Date at the correct position.<br />
81
If you switch on the Photo booth and the following message appears;<br />
“Sentinet HASP key not found (H0007)”, it means that the printer<br />
dongle is not well connected. The USB dongle must be connected on P.7<br />
(please see picture).<br />
P.7<br />
P.7 Dongle USB Security and Software. MEGA<br />
13.4 DONGLE ERROR<br />
82
When you take a picture and your screen appears black please check<br />
the USB connection from the camera. The USB must be connected on<br />
P.10 (please see picture).<br />
P.10<br />
13.5 CAMERA ERROR<br />
P.10 USB Extension AM/AF From Camera to PC. (180 cm - Inch 70,87)<br />
83
Lights ON<br />
P.1<br />
PC WIRING<br />
13.6 TOUCh SCREEN ERROR<br />
P.11<br />
P.4<br />
P.1<br />
P.1 Main Power Cable<br />
P.4 VGA Cable From Touch Monitor to PC.<br />
(180 cm - Inch 70,87)<br />
P.11 USB Cable From Touch Monitor to PC.<br />
(180 cm - Inch 70,87)<br />
Verify that all cables are correct.<br />
(P.1,P.4,P.11).All right if the LED is<br />
green<br />
84
13.7 PRINTER ERROR<br />
Problem<br />
When you take a picture and see<br />
this message Error “INVALID<br />
PRINTER” on the screen<br />
Error number 0:<br />
· The printer is disconnected.<br />
· Look at the PIN of the correct printer.<br />
“PIN”<br />
Error number 2:<br />
· The printer must be <strong>Digital</strong> centre<br />
Error number 3:<br />
· The paper or the ink sheet was not<br />
properly installed.<br />
85
The “Please Wait” error is very common. It<br />
looks like the PC freezes, but it isn’t. The problem<br />
is that the computer is waiting for the<br />
right components.<br />
When we turn on the Photo Booth, the computer<br />
shows the “Please Wait” screen while it<br />
checks the Control Board, the USB adapter<br />
and the Printer. If any of the components are<br />
not ok, the software doesn’t go ON.<br />
So, when we face this problem we have to<br />
check the 3 components. The procedure is<br />
as Follows:<br />
1· Check the Printer lights ON. Should be ON<br />
the following lights “POWER” and “READY”. If<br />
any other light, please fix it and Turn OFF and<br />
ON the Photo Booth.<br />
POWER<br />
Printer lights ON<br />
2· Check the Printer Connections. Power and USB, just 2 wires.<br />
USB<br />
printer<br />
Power<br />
READy<br />
3· Check the Control Board Serial Connection. (That is the common problem Point).<br />
(attached 2 pictures: Correct and Error “Please Wait”). This connection is very easy to lose<br />
during transport, or when we work at that area.<br />
86
The PC lights are ON?<br />
13.8 NO SIGNAL<br />
Lights are ON<br />
Check if the PC lights are ON.<br />
If the lights are on then it appears that the Photobooth is working but the monitor is not.<br />
Next steps:<br />
When you turn ON the Photobooth, can you see any message on the screen? (ex; manufacturer<br />
name, or “NO SIGNAL”)?<br />
If this is the case, the VGA cable is probably unplugged or damaged.<br />
But if nothing is on the screen (when you turn ON the Photobooth), please check if there<br />
is power to the Monitor. Power cable is probably unplugged from the monitor.<br />
13.9 IMAGE ADJUSTING<br />
If the image moves press the button<br />
“Auto” which is in the back of the screen<br />
AUTO<br />
87
The control Board is the green board located behind the PC. It doesn’t mean that the<br />
Control Board is bad; it could mean that the PC could not connect with the Control<br />
Board (because the Serial cable is not correctly connected).<br />
Check following points:<br />
1· Check the Control Board Serial Connection “P.2”. (That is the common problem point).(attach<br />
2 pictures: Correct and Error “Please Wait”). This connection is very easy to<br />
lose during transport, or when you work at that area.<br />
2· If all connections are good, then check that the Control Board Red LED is ON.<br />
3· If all the 2 points are OK, but still doesn’t work, please send the Control Board to<br />
<strong>Digital</strong> <strong>Centre</strong> (contact the Support Team before sending)<br />
P.2<br />
13.10 CONTROL BOARD ERROR<br />
P.2 Serial Cable From Control Board to PC. (56 cm - Inch 22,04)<br />
P.2<br />
Red LED is ON<br />
88
MEGA OUT<br />
14-FEATURES<br />
14.1 SERVICE CONTROL PANEL<br />
1 2 3 4 5<br />
OUT<br />
1. Volume Control lever<br />
2. Menu (Yellow Button): It enters setup Menu and allows<br />
options such as pricing, logos, camera adjustments,<br />
and features to be changed.<br />
3. Accounts (Black Button): It prints detailed vending report<br />
including number of prints available.<br />
4. Credit (Red Button)<br />
5. Coin Counter<br />
14.2 POWER SWITCh<br />
The Power Switch is located<br />
underneath the cabin. It contains<br />
a Fuse and a power cord socket.<br />
89
CONTROL BOARD (DC-EVO-V3.0)<br />
LEDS JP10<br />
Bill Acceptor<br />
JP7<br />
Coin<br />
counter JP1<br />
JP9<br />
Power 115V-USA<br />
or 230V-EU<br />
CN1<br />
Fuse 1A<br />
F1<br />
15-CONNECTIONS<br />
15.1 CONTROL BOARD<br />
RS232. Serial Cable. From Control Board to PC.<br />
JP7. Bill Acceptor Cable. From Control Board to Bill Acceptor.<br />
CN1 Power Supply at 230 volts (115 volts for USA).<br />
Jack Stereo. From Control Board to PC<br />
F1. We need 1A fuse here to run the Control Board.<br />
JP3. Speakers. JP3 gives us the volume control.<br />
Control keybord<br />
Panel Cables<br />
JP6<br />
Coin Acceptor<br />
JP5<br />
Chip Atmel<br />
JP8<br />
Serial Cable<br />
to PC RS232<br />
Jack Stereo<br />
to PC<br />
POTEN R24<br />
Speaker JP3<br />
POTENT R24: We connect here the main cable from Control Board to<br />
Push Buttons + Speakers.<br />
90
OPTIONAL<br />
PRINTER<br />
15.2 RJ45 EThERNET (INTERNET)<br />
P.9 Cable RJ45 ethernet (internet)<br />
(not included)<br />
P.9<br />
Internet connection<br />
· Check the distance between the internet<br />
connection and the position of your<br />
photobooth in the room.<br />
· Ensure you have a RJ45 ethernet cable<br />
that is long enough.<br />
· Pull out the back door<br />
· Take the cable (RJ45 ethernet) and plug it<br />
into the ethernet “hold” of your PC.<br />
WARNING:<br />
· The cable just can only be plugged into<br />
one position.<br />
P.9 Cable RJ45 ethernet<br />
(internet)<br />
PC<br />
MEGA OUT<br />
MONITOR<br />
SCREEN 17”<br />
91
MEGA OUT<br />
15.3 PC<br />
PC<br />
MEGA OUT<br />
4 MONITORS<br />
SCREEN 17”<br />
92
P.4<br />
15.4 PC WIRING<br />
P.1 P.2 P.3<br />
P.9<br />
P.5<br />
P.6<br />
P.10<br />
P.7<br />
P.8<br />
P.11<br />
P.1 Main Power Cable<br />
P.2 Serial Cable From PC to Control Board M/F. (56 cm - Inch 22,04)<br />
P.3 Jack Stereo Cable. (180 cm - Inch 70,87)<br />
P.4 VGA Cable From Touch Monitor to PC. (180 cm - Inch 70,87)<br />
P.5 Empty<br />
P.6 Empty<br />
P.7 Dongle USB Security and Software. MEGA OUT<br />
P.8 USB Cable From Printer to PC. (180 cm - Inch 70,87)<br />
P.9 Cable RJ45 ethernet (internet)<br />
P.10 USB Extension AM/AF From Camera to PC. (180 cm - Inch 70,87)<br />
P.11 USB Cable From Touch Monitor to PC. (180 cm - Inch 70,87)<br />
93
OPTIONAL<br />
PRINTER<br />
7<br />
9<br />
A<br />
8<br />
3<br />
COMPONENTS<br />
1. Printer Mitsubishi CP9810DW-DC<br />
2. HP-C2D PC. (MEGA OUT)<br />
3. Control Board.<br />
4. Wood PC Base. MEGA (RAW)<br />
5. Wood Upright PC #2 Base.<br />
MEGA (RAW) (84,7x13 cm<br />
Inch 33,34x5,11)<br />
6. Right Printer Suport. (RAW METAL)<br />
7. Left Printer Suport. (RAW METAL)<br />
8. Transformer 2A 12V<br />
9. Cable From Control Board to<br />
Service Panel & Push Buttons<br />
+ 2 Speakers<br />
15.5 GENERAL<br />
PC WIRING<br />
P.1 Main Power Cable<br />
P.4 VGA Cable From Touch<br />
Monitor to PC.<br />
(180 cm - Inch 70,87)<br />
P.11 USB Cable From Touch<br />
Monitor to PC.<br />
(180 cm - Inch 70,87)<br />
1<br />
6<br />
2<br />
4<br />
5<br />
GENERAL WIRING<br />
A. Service Control<br />
panel with 2 controls<br />
(IN&OUT).MEGA COMBO<br />
94
12<br />
13<br />
15<br />
16<br />
P.1<br />
15.6 MONITOR<br />
COMPONENTS PC WIRING<br />
12. Monitor 17’’ Holder.<br />
MEGA COMBO (RAW METAL)<br />
13. Tilting Camera Back Holder.<br />
(RAW METAL)<br />
14. HD Camera.<br />
15. LCD Monitor17”<br />
16. Touch Cable From<br />
Touchboard to USB PC & 12V<br />
Adaptor (200cm - Inch 78.74)<br />
17. Touch Cable From Touchboard<br />
to USB pc + 12V Adapter Together<br />
(225cm- Inch 88.58)<br />
P.1 Main Power Cable<br />
P.4 VGA Cable From Touch Monitor<br />
to PC. (180 cm - Inch 70,87)<br />
P.4<br />
14<br />
17<br />
P.4<br />
95
19<br />
18<br />
P.1 P.4<br />
COMPONENTS<br />
18. Monitor 17’’ Holder.<br />
MEGA COMBO (RAW METAL)<br />
19. LCD Monitor17”.<br />
PC WIRING<br />
P.1 Main Power Cable<br />
P.4 VGA Cable From Touch Monitor<br />
to PC. (180 cm - Inch 70,87)<br />
96
DEMONSTRATION<br />
When there are no vends the machine enters<br />
in Demo Mode. Photo samples are displayed.<br />
Once money is inserted, you are<br />
taken to the credit screen, then you can<br />
start.<br />
16-PLAyING<br />
LEGAL NOTICE<br />
By choosing accept, you understand<br />
and agree that your photograph is being<br />
transmitted via the internet and you are<br />
aware that this transmission is not private.<br />
<strong>Digital</strong> <strong>Centre</strong> America Inc. Will not be held<br />
liable for any photograph that did not<br />
reach its designated destination.<br />
(accept/decline)<br />
97
Type the email address where you want<br />
to send the picture.<br />
*The picture can only be sent via email,<br />
not printed.<br />
PRODUCT SCREEN<br />
You can choose among 6 different<br />
products.<br />
98
Photo ID<br />
Color and Black & White<br />
When the instructions conclude, you<br />
are given the option to choose<br />
“Color” or “Black & White” pictures.<br />
Shots<br />
4 Shots are taken.<br />
(3 Shots if you activate the logo)<br />
99
haircuts<br />
SELECT DESIRED LOOk<br />
You can choose different hairstyle options.<br />
Shots<br />
Align your face with the circle<br />
on the screen.<br />
Not bigger not smaller!<br />
100
hats<br />
FRAMES SELECTION<br />
You can choose different options.<br />
Shots<br />
Align your face with the circle<br />
on the screen.<br />
Not bigger not smaller!<br />
101
Street Art Get Framed<br />
Shots<br />
3 Shots are taken.<br />
(3 Shots if you activate the logo)<br />
FRAME SELECTION<br />
You can choose different hairstyle options.<br />
102
Shots<br />
4 Shots are taken.<br />
103
USB stick<br />
A<br />
PhotoIdUpload<br />
You must create<br />
this folder<br />
B<br />
PhotoIdEvents<br />
You must create<br />
this folder<br />
C<br />
PhotoIdDownload<br />
This folder is created<br />
automatically<br />
17-CUSTOMIZED<br />
17.1 STRUCTURE<br />
Logo<br />
Welcome<br />
Bye Custom<br />
Text<br />
BGmusic<br />
Frames<br />
CustomShots<br />
1a,1b,1c,1d<br />
2a,2b,2c,2d<br />
...<br />
Myphotocode<br />
Shots<br />
shot0001a<br />
shot0001b<br />
shot0001c<br />
shot0001d<br />
.<br />
.<br />
Custom<br />
Random<br />
Random<br />
1,2,3,4,5,6.....<br />
1a<br />
1b<br />
1c<br />
1d<br />
AMEGJAB4MG.jpg<br />
(photo)<br />
.<br />
ANRTSZBMAB.wmv<br />
(video)<br />
.<br />
(photos)<br />
1a<br />
1b<br />
1c<br />
1d<br />
1a<br />
1b<br />
1c<br />
1d<br />
1a<br />
1b<br />
1c<br />
1d<br />
2a<br />
2b<br />
2c<br />
2d<br />
2a<br />
2b<br />
2c<br />
2d<br />
3a<br />
3b<br />
3c<br />
3d<br />
3a<br />
3b<br />
3c<br />
3d<br />
104
USB stick<br />
1· Necessary Materials:<br />
USB Stick with 2 GB of available space<br />
We recommend using a USB Stick with a led indicator<br />
USB STICk Off<br />
(LED desactivated)<br />
A<br />
PhotoIdUpload<br />
You must create<br />
this folder<br />
B<br />
PhotoIdEvents<br />
You must create<br />
this folder<br />
C<br />
PhotoIdDownload<br />
This folder is created<br />
automatically<br />
USB STICk On<br />
(LED activated)<br />
*PhotoIdUpload<br />
ld means ID not LD<br />
*PhotoIdEvents<br />
ld means ID not LD<br />
USB STICk Blinking<br />
(LED activated)<br />
105
A<br />
USB stick<br />
FOLDER PhotoIdUpload<br />
PhotoIdUpload<br />
You must create<br />
this folder<br />
Logo<br />
Frames<br />
1a,1b,1c,1d<br />
2a,2b,2c,2d<br />
...<br />
DIRECTIONS FOR UPLOADING ThE LOGO<br />
USB stick<br />
*PhotoIdUpload<br />
ld means ID not LD<br />
17.2 LOGO<br />
PhotoIdUpload<br />
You must create<br />
this folder<br />
1<br />
Welcome<br />
Bye<br />
Text<br />
BGmusic<br />
1· Necessary Materials:<br />
USB Stick with 2 GB of available space<br />
We recommend using a USB Stick with a led indicator<br />
Custom<br />
Random<br />
Custom<br />
Random<br />
Logo<br />
1a<br />
1b<br />
1c<br />
1d<br />
1a<br />
1b<br />
1c<br />
1d<br />
1a<br />
1b<br />
1c<br />
1d<br />
1a<br />
1b<br />
1c<br />
1d<br />
2a<br />
2b<br />
2c<br />
2d<br />
2a<br />
2b<br />
2c<br />
2d<br />
3a<br />
3b<br />
3c<br />
3d<br />
3a<br />
3b<br />
3c<br />
3d<br />
106
2-Create a folder on the USB stick and name it PhotoIdUpload<br />
3-Insert the logo that you want to use in the folder PhotoIdUpload<br />
4-Connect the USB Stick to the Photo Booth<br />
5-Go to Setup Menu (important) and confirm that logo is activated<br />
Height: 600 pixels<br />
USB stick<br />
Width: 800 pixels<br />
Sample Logo<br />
Logo Characteristics:<br />
Name: Logo<br />
Size: width: 800 pixels<br />
height: 600 pixels<br />
Resolution: 300dpi<br />
We recommend<br />
300dpi, but it will also<br />
work with less resolution.<br />
Format: JPG<br />
PhotoIdUpload<br />
You must create<br />
this folder<br />
Not working? Please refer to section 23.1 for assistance.<br />
UPLOADING (see section 18)<br />
SET UP MENU (see section 20)<br />
Logo<br />
107
A<br />
FOLDER<br />
PhotoIdUpload<br />
USB stick<br />
USB stick<br />
PhotoIdUpload<br />
You must create<br />
this folder<br />
DIRECTIONS FOR UPLOADING WELCOME/ByE<br />
PhotoIdUpload<br />
You must create<br />
this folder<br />
*PhotoIdUpload<br />
ld means ID not LD<br />
17.3 WELCOME/ByE<br />
Logo<br />
Welcome<br />
Bye<br />
Text<br />
BGmusic<br />
Frames<br />
Welcome<br />
Bye<br />
1a,1b,1c,1d<br />
2a,2b,2c,2d<br />
...<br />
Custom<br />
Random<br />
Custom<br />
Random<br />
Custom<br />
Random<br />
Custom<br />
Random<br />
1a<br />
1b<br />
1c<br />
1d<br />
1a<br />
1b<br />
1c<br />
1d<br />
1a<br />
1b<br />
1c<br />
1d<br />
1a<br />
1b<br />
1c<br />
1d<br />
1a<br />
1b<br />
1c<br />
1d<br />
1a<br />
1b<br />
1c<br />
1d<br />
1a<br />
1b<br />
1c<br />
1d<br />
1a<br />
1b<br />
1c<br />
1d<br />
2a<br />
2b<br />
2c<br />
2d<br />
2a<br />
2b<br />
2c<br />
2d<br />
2<br />
2a<br />
2b<br />
2c<br />
2d<br />
2a<br />
2b<br />
2c<br />
2d<br />
3a<br />
3b<br />
3c<br />
3d<br />
3a<br />
3b<br />
3c<br />
3d<br />
3a<br />
3b<br />
3c<br />
3d<br />
3a<br />
3b<br />
3c<br />
3d<br />
108
Welcome message (custom)<br />
You must create<br />
this folder<br />
Welcome<br />
Sample Welcome<br />
Custom<br />
You must create<br />
this folder<br />
1a<br />
1b<br />
1c<br />
1d<br />
1a<br />
1b<br />
1c<br />
1d<br />
4 images<br />
The names of<br />
the images must<br />
be: 1a,1b,1c,1d<br />
Specifications:<br />
4 images<br />
(1a, 1b, 1c & 1d),<br />
Each one with following<br />
characteristics:<br />
Name: 1d<br />
Size: width: 800 pixels<br />
height: 600 pixels<br />
Resolution: 72dpi<br />
Format: JPG<br />
109
Bye message (custom)<br />
Bye<br />
You must create<br />
this folder<br />
Sample Bye<br />
Bye<br />
Custom<br />
1a<br />
1b<br />
1c<br />
1d<br />
1a<br />
1b<br />
1c<br />
1d<br />
UPLOADING (see section 18)<br />
SET UP MENU (see section 20)<br />
4 images<br />
The names of the images<br />
must be: 1a,1b,1c,1d<br />
Specifications:<br />
4 images<br />
(1a, 1b, 1c & 1d),<br />
Each one with following<br />
characteristics:<br />
Name: 1d<br />
Size: width: 800 pixels<br />
height: 600 pixels<br />
Resolution: 72dpi<br />
Format: JPG<br />
110
A<br />
FOLDER<br />
PhotoIdUpload<br />
USB stick<br />
USB stick<br />
PhotoIdUpload<br />
You must create<br />
this folder<br />
DIRECTIONS FOR UPLOADING WELCOME/ByE<br />
PhotoIdUpload<br />
You must create<br />
this folder<br />
*PhotoIdUpload<br />
ld means ID not LD<br />
Logo<br />
Welcome<br />
Bye<br />
Text<br />
BGmusic<br />
Frames<br />
Welcome<br />
Bye<br />
1a,1b,1c,1d<br />
2a,2b,2c,2d<br />
...<br />
Custom<br />
Random<br />
Custom<br />
Random<br />
Custom<br />
Random<br />
Custom<br />
Random<br />
1a<br />
1b<br />
1c<br />
1d<br />
1a<br />
1b<br />
1c<br />
1d<br />
1a<br />
1b<br />
1c<br />
1d<br />
1a<br />
1b<br />
1c<br />
1d<br />
1a<br />
1b<br />
1c<br />
1d<br />
2a<br />
2b<br />
2c<br />
2d<br />
2a<br />
2b<br />
2c<br />
2d<br />
1a<br />
1b<br />
1c<br />
1d<br />
1a<br />
1b<br />
1c<br />
1d<br />
1a<br />
1b<br />
1c<br />
1d<br />
3a<br />
3b<br />
3c<br />
3d<br />
3a<br />
3b<br />
3c<br />
3d<br />
2a<br />
2b<br />
2c<br />
2d<br />
2a<br />
2b<br />
2c<br />
2d<br />
2<br />
3a<br />
3b<br />
3c<br />
3d<br />
3a<br />
3b<br />
3c<br />
3d<br />
111
Welcome message random<br />
You must create<br />
this folder<br />
Welcome<br />
Specifications:<br />
(1a, 1b, 1c & 1d<br />
2a, 2b, 2c & 2d<br />
3a, 3b, 3c & 3d)<br />
Each one with following<br />
characteristics:<br />
Random<br />
1a<br />
1b<br />
1c<br />
1d<br />
2 Samples Welcome random<br />
1a<br />
1b<br />
1c<br />
1d<br />
2a<br />
2b<br />
2c<br />
2d<br />
3a<br />
3b<br />
3c<br />
3d<br />
HAPPY<br />
BIRTHDAY<br />
Name: 1d<br />
Size: width: 800 pixels<br />
height: 600 pixels<br />
Resolution: 72dpi<br />
Format: JPG<br />
The names of<br />
the images must be:<br />
1a,1b,1c,1d<br />
2a, 2b, 2c,2d<br />
3a, 3b, 3c,3d<br />
2a<br />
2b<br />
2c<br />
2d<br />
Each player will<br />
get a different<br />
Random<br />
Welcome screen.<br />
112
Bye message random<br />
Bye<br />
You must create<br />
this folder<br />
Specifications:<br />
(1a, 1b, 1c & 1d<br />
2a, 2b, 2c & 2d<br />
3a, 3b, 3c & 3d)<br />
Each one with following<br />
characteristics:<br />
Random<br />
1a<br />
1b<br />
1c<br />
1d<br />
2a<br />
2b<br />
2c<br />
2d<br />
2 Samples Bye random<br />
1a<br />
1b<br />
1c<br />
1d<br />
3a<br />
3b<br />
3c<br />
3d<br />
UPLOADING (see section 18)<br />
SET UP MENU (see section 20)<br />
HAPPY<br />
BIRTHDAY<br />
Name: 1d<br />
Size: width: 800 pixels<br />
height: 600 pixels<br />
Resolution: 72dpi<br />
Format: JPG<br />
The names of<br />
the images must be:<br />
1a,1b,1c,1d<br />
2a, 2b, 2c,2d<br />
3a, 3b, 3c,3d<br />
2a<br />
2b<br />
2c<br />
2d<br />
113
A<br />
FOLDER<br />
PhotoIdUpload<br />
USB stick<br />
PhotoIdUpload<br />
USB stick<br />
*PhotoIdUpload<br />
ld means ID not LD<br />
You must create<br />
this folder<br />
17.4 TExT<br />
Logo<br />
Welcome<br />
Bye<br />
Text<br />
Frames<br />
1a,1b,1c,1d<br />
2a,2b,2c,2d<br />
...<br />
DIRECTIONS FOR UPLOADING Text<br />
PhotoIdUpload<br />
You must create<br />
this folder<br />
3<br />
BGmusic<br />
Custom<br />
Random<br />
Custom<br />
Random<br />
Text<br />
Name: Text<br />
Format: txt<br />
1a<br />
1b<br />
1c<br />
1d<br />
1a<br />
1b<br />
1c<br />
1d<br />
1a<br />
1b<br />
1c<br />
1d<br />
1a<br />
1b<br />
1c<br />
1d<br />
2a<br />
2b<br />
2c<br />
2d<br />
2a<br />
2b<br />
2c<br />
2d<br />
3a<br />
3b<br />
3c<br />
3d<br />
3a<br />
3b<br />
3c<br />
3d<br />
114
All Text in this file is printed vertically on the<br />
left side of the photostrips.<br />
Sample: Rent your Booth (888). 888. 888<br />
UPLOADING (see section 18)<br />
SET UP MENU (see section 20)<br />
Rent your Booth (888). 888. 888<br />
115
A<br />
FOLDER<br />
PhotoIdUpload<br />
USB stick<br />
PhotoIdUpload<br />
USB stick<br />
*PhotoIdUpload<br />
ld means ID not LD<br />
You must create<br />
this folder<br />
17.5 MUSIC<br />
Logo<br />
Frames<br />
1a,1b,1c,1d<br />
2a,2b,2c,2d<br />
...<br />
DIRECTIONS FOR UPLOADING MUSIC<br />
PhotoIdUpload<br />
You must create<br />
this folder<br />
Welcome<br />
Bye<br />
Text<br />
BGmusic<br />
Custom<br />
Random<br />
Random<br />
BGmusic<br />
Name: BGmusic<br />
Format: mp3<br />
You can Upload any song to the <strong>PhotoBooth</strong>, the only<br />
thing you need to do is change the song’s name to<br />
“BGmusic”and save the file into the “PhotoIdUpload”<br />
folder<br />
UPLOADING (see section 18)<br />
SET UP MENU (see section 20)<br />
4<br />
Custom<br />
1a<br />
1b<br />
1c<br />
1d<br />
1a<br />
1b<br />
1c<br />
1d<br />
1a<br />
1b<br />
1c<br />
1d<br />
1a<br />
1b<br />
1c<br />
1d<br />
2a<br />
2b<br />
2c<br />
2d<br />
2a<br />
2b<br />
2c<br />
2d<br />
3a<br />
3b<br />
3c<br />
3d<br />
3a<br />
3b<br />
3c<br />
3d<br />
116
A<br />
FOLDER<br />
PhotoIdUpload<br />
USB stick<br />
PhotoIdUpload<br />
You must create<br />
this folder<br />
17.6 FRAMES<br />
Logo<br />
Welcome<br />
Bye<br />
Text<br />
BGmusic<br />
Frames<br />
FRAMES<br />
1a,1b,1c,1d<br />
2a,2b,2c,2d<br />
...<br />
Custom<br />
Random<br />
Custom<br />
Random<br />
5<br />
1a<br />
1b<br />
1c<br />
1d<br />
1a<br />
1b<br />
1c<br />
1d<br />
1a<br />
1b<br />
1c<br />
1d<br />
1a<br />
1b<br />
1c<br />
1d<br />
There are 3 screens with frames. Each<br />
screen contains 6 groups. That means, a<br />
total of 18 groups.Every group of 4 frames<br />
will be printed together.<br />
If you want to customize one group (for<br />
example number 1), you need four images<br />
(frames) 1a, 1b, 1c & 1d”.<br />
2a<br />
2b<br />
2c<br />
2d<br />
2a<br />
2b<br />
2c<br />
2d<br />
3a<br />
3b<br />
3c<br />
3d<br />
3a<br />
3b<br />
3c<br />
3d<br />
117
To create a new framework we<br />
will create a file with the following<br />
characteristics.<br />
USB stick<br />
*PhotoIdUpload<br />
ld means ID not LD<br />
PhotoIdUpload<br />
You must create<br />
this folder<br />
SAMPLE<br />
Name: Check structure name<br />
Size: width: 800 pixels<br />
height: 600 pixels<br />
Resolution: 300dpi<br />
We recommend 300dpi, but<br />
It will also work with less<br />
resolution.<br />
Format: PNG<br />
It’s very important to save the file<br />
of the frames only in PNG format.<br />
Create your own customized<br />
frame. Inside of the blank area is<br />
where the camera will capture<br />
the image, and your customized<br />
frame will surround the image.<br />
DIRECTIONS FOR UPLOADING FRAMES<br />
Frames<br />
1a,1b,1c,1d<br />
2a,2b,2c,2d<br />
...<br />
118
PhotoIdUpload<br />
You must create<br />
this folder<br />
Screen1<br />
1a<br />
1b<br />
1c 1d<br />
4a 4b<br />
4c 4d<br />
Frames<br />
1a,1b,1c,1d<br />
2a,2b,2c,2d<br />
...<br />
2a 2b<br />
2c 2d<br />
5a 5b<br />
5c 5d<br />
1 Screen 1 (group 1)<br />
1b<br />
1c 1d<br />
1 2 3<br />
3a 3b<br />
3c 3d<br />
4 5 6<br />
1a<br />
6a 6b<br />
6c 6d<br />
119
Screen2<br />
7a 7b<br />
7c 7d<br />
10a 10b<br />
10c 10d<br />
Screen3<br />
7 8 9<br />
8a 8b<br />
8c 8d<br />
9a 9b<br />
9c 9d<br />
10 11 12<br />
11a 11b<br />
11c 11d<br />
12a 12b<br />
12c 12d<br />
13 14 15<br />
13a 13b<br />
13c 13d<br />
16 17 18<br />
16a 16b<br />
16c 16d<br />
14a 14b<br />
14c 14d<br />
17a 17b<br />
17c 17d<br />
15a 15b<br />
15c 15d<br />
18a 18b<br />
18c 18d<br />
120
Sample<br />
If you want to customize the group Nº1 follow this structure.<br />
PhotoIdUpload<br />
You must create<br />
this folder<br />
PhotoIdUpload<br />
You must create<br />
this folder<br />
Frames<br />
Frames<br />
1a,1b,1c,1d<br />
1a,1b,1c,1d<br />
1 Screen 1 (group 1)<br />
1a<br />
1b<br />
1c 1d<br />
1 Screen 1 (group 1)<br />
1a<br />
1b<br />
1c 1d<br />
121
Sample<br />
PhotoIdUpload<br />
You must create<br />
this folder<br />
PhotoIdUpload<br />
You must create<br />
this folder<br />
PhotoIdUpload<br />
You must create<br />
this folder<br />
If you want to customize the groups Nº1,2 & 3 follow this structure.<br />
Frames<br />
Frames<br />
Frames<br />
1a,1b,1c,1d<br />
2a,2b,2c,2d<br />
3a,3b,3c,3d<br />
1 Screen 1 (group 1)<br />
1a<br />
1b<br />
1c 1d<br />
2 Screen 1 (group 2)<br />
2a<br />
2b<br />
2c 2d<br />
3 Screen 1 (group 3)<br />
3a<br />
UPLOADING (Go to number 18)<br />
SETUP MENU (Go to number 20)<br />
3b<br />
3c 3d<br />
122
USB stick<br />
USB stick<br />
*PhotoIdEvents<br />
B<br />
PhotoIdEvents<br />
PhotoIdEvents<br />
You must create<br />
this folder<br />
FOLDER PhotoIdEvents<br />
CustomShots<br />
CustomShots<br />
1,2,3,4,5,6.....<br />
DIRECTIONS FOR UPLOADING CUSTOMShOTS<br />
ld means ID not LD<br />
17.7 ADVERTISING PhOTOS<br />
1<br />
1,2,3,4,5,6.....<br />
123
CUSTOMShots are the images (made previous to the event) that we want to show on the<br />
screens during the event. An example could be for a wedding were the bride wants to<br />
show pictures from when the couple first met etc, or a company event, where they want to<br />
display brand names or products.<br />
The CUSTOMShots are shown Random during the Demonstration Mode.<br />
Sample CustomShots<br />
· You can put as many pictures as<br />
you want.<br />
· The names of the images have<br />
to be: 1,2,3,4,5,6,7...<br />
1<br />
2<br />
3<br />
4<br />
124
UPLOADING (see section 18)<br />
SET UP MENU (see section 20)<br />
Specifications:<br />
Name: 1<br />
Size: width: 800 pixels<br />
height: 600 pixels<br />
Resolution: 72dpi<br />
Format: JPG<br />
125
PC OUT<br />
USB<br />
STICk<br />
18-UPLOADING<br />
1-Switch ON the Photo booth<br />
2-Open the Photo slot door*<br />
3-Insert the USB Stick to the PC (HP<br />
C2D) (the usb connection is on the<br />
left side of the PC)<br />
4-Open the back door of<br />
your photobooth.<br />
5-Press the yellow button from the<br />
Service Control Panel, to access the<br />
Setup Menu.<br />
* you will need 1314 keys (included<br />
on your photobooth)<br />
6-Press the yellow button for the menu<br />
SERVICE<br />
CONTROL<br />
PANEL<br />
OUT<br />
126
USB stick<br />
C<br />
19-DOWNLOADING<br />
FOLDER PhotoIdDownload<br />
This folder is created<br />
automatically<br />
PhotoIdDownload<br />
Myphotocode<br />
Shots<br />
shot0001a<br />
shot0001b<br />
shot0001c<br />
shot0001d<br />
.<br />
.<br />
AMEGJAB4MG.jpg<br />
(photo)<br />
.<br />
ANRTSZBMAB.wmv<br />
(video)<br />
.<br />
(photos)<br />
If the logo is activated, you will have 3<br />
shoots for each print, with the loaded<br />
logo printing in the fourth frame.<br />
127
The setup menu is very useful for the owner of the Photo Booth. You can configure the<br />
Photo Booth depending on what kind of service you want to offer to your clients. You can<br />
control the timer, check the prices, adjust the camera settings or consult the accounting<br />
functions.<br />
To go to the setup menu while the Photo Booth is in Demo Mode, press the yellow button<br />
(Menu) from the Service Control panel inside the Photo Booth.<br />
· SETUP MENU SCREENShOOTS<br />
20-SETUP MENU<br />
VOLUME MENU ACCOUNTS CREDIT COUNTER<br />
SETUP MENU CONFIGURATION<br />
The configurable<br />
parameters are divided<br />
in 5 groups:<br />
· Products & Prices<br />
· Rentals<br />
· Customize<br />
· Options<br />
· Camera<br />
128
20.1 PRODUCTS & PRICES<br />
You can set the prices of the differents products.<br />
SWITCh ON/OFF PRODUCT<br />
You can enable/disable the products for each event.<br />
yES /NO<br />
129
20.2 RENTALS<br />
Free Play: YES<br />
Timer: YES / NO<br />
Start: 2012-X-X (Day) XX:XX(Hour)<br />
Finish: 2012-X-X (Day) XX:XX(Hour)<br />
Token: YES / NO<br />
20.3 CUSTOMIZE<br />
To set up the Logo, the Welcome and Bye screens, the Fun frames,<br />
the Print date and the Print Text.<br />
130
20.3.1 LOGO<br />
1-The menu is displayed on the screen.<br />
2-Select customize and activate the logo<br />
with the green check mark.<br />
(the logo will appear on the 3rd screen,<br />
if you can’t see your logo.<br />
it means that the upload is not correct.<br />
3-Touch “X” EXIT. The Photobooth is<br />
ready to work<br />
*It’s very important to follow the exact specifications to<br />
upload your logo.<br />
Not working? Please refer to section 21.1 for assistance.<br />
131
20.3.2 Text<br />
22.3.3 DATE<br />
1-The menu is displayed on the screen<br />
2-Select customize and activate the<br />
Text the green check mark.<br />
3-Touch “X” EXIT.<br />
The Photobooth is ready to work<br />
1-The menu is displayed on the screen<br />
2-Select customize and activate the<br />
Text the green check mark.<br />
3-Touch “X” EXIT.<br />
The Photobooth is ready to work<br />
132
20.3.4 WELCOME/ByE<br />
1-The menu is displayed on the screen<br />
2-Enter to the customized menu and select welcome/ Bye screen and CUSTOM<br />
3-Touch “X” EXIT. The Photobooth is ready to work<br />
WELCOME SCREEN ByE SCREEN<br />
20.3.5 FRAMES<br />
1-The menu is displayed on<br />
the screen<br />
2-Enter to the customized menu<br />
and select GET FRAMES and<br />
CUSTOM<br />
3-Touch “X” EXIT. The Photobooth<br />
is ready to work<br />
133
20.4 OPTIONS<br />
Defines the parameters for some available features:<br />
Current Time: 2012-X-X (Day) XX:XX(Hour)<br />
Music on intro: YES /NO<br />
Show events Shots: Screesavers of photos already loaded by you. YES /NO<br />
Internet: Upload the session Shots to internet, Facebook and email (IMPORTANT:<br />
must be configurated). YES /NO<br />
Touch screen Calibrate: Press twice the yellow button to access to the Setup<br />
Menu.<br />
Automatically the menu is opened to calibrate the touch screen.<br />
20.5 CAMERA<br />
In the submenu CAMERA, the owner can set the camera zoom position and<br />
brightness.<br />
134
· GENERAL PROBLEMS<br />
Problem<br />
The unit switch is ON, but it<br />
does not turn on<br />
Causes<br />
The unit is not plugged in.<br />
The voltage is incorrect.<br />
Overload: the fuse over the electric<br />
socket has been blown.<br />
Solutions<br />
Check if the unit is correctly<br />
connected to the electric ground.<br />
Check if the electric ground is<br />
receiving electricity.<br />
Be sure that the voltage is correct.<br />
Change the fuse.<br />
· MONITOR’S PROBLEMS<br />
Problem<br />
The monitor image looks darker or<br />
lighter<br />
Causes<br />
The monitor is not adjusted correctly.<br />
Solutions<br />
Readjust the monitor.<br />
21-TROUBLEShOOTING<br />
Problem<br />
The fluorescent does not turn on.<br />
Causes<br />
The fluorescent lights have been blown.<br />
The transformer has been blown.<br />
Solutions<br />
Replace the fluorescent lights<br />
(see above).<br />
Replace the transformer<br />
Problem<br />
The monitor image moves up and<br />
down<br />
Causes<br />
The monitor is not adjusted correctly.<br />
Solutions<br />
Readjust the monitor.<br />
135
· SOUND PROBLEMS<br />
Problem<br />
The sound does not work<br />
Causes<br />
The volume is not correct.<br />
The configuration menu has the sound set to OFF.<br />
Solutions<br />
Adjust the volume with the control placed below the test,<br />
free-play and start buttons.<br />
Change the sound configuration from the test menu<br />
(black button).<br />
· PC PROBLEMS<br />
Problem<br />
Install a brand new Control Board<br />
with Atmel chip and jumpers.<br />
Causes<br />
This problem is due to a hardware<br />
malfunction.<br />
Check the green Capture Board, as<br />
it is probably out or half way in.<br />
Solutions<br />
Turn OFF the PC.<br />
Take out the Capture Board. And put<br />
it again (all the way in).<br />
Screw in tightly and check again that<br />
it is all the way in, and did not move<br />
little out during screwing.<br />
Turn ON the PB and check it.<br />
· WARNING<br />
· If you have any doubts or any problems with the unit and it’s performance,<br />
call a technician to solve the issue.<br />
136
Glasses Cleaning. Weekly.<br />
Control Panel Check the functioning of<br />
all buttons<br />
Lights<br />
Check the functioning<br />
of all the lights and the<br />
fluorescent light.<br />
Monthly<br />
Monthly<br />
Sound Check the sound. Monthly<br />
Coin Acceptor<br />
Bill Acceptor<br />
Interior<br />
Exterior<br />
Clean and check the<br />
correct functioning Annually<br />
Cleaning Annually<br />
Cleaning Weekly<br />
137
USB stick<br />
It’s recommended to use a USB drive with LED and 2GB of space.<br />
USB STICk Off<br />
(LED desactivated)<br />
21.1 UPLOADING ThE LOGO<br />
PROBLEMS UPLOADING ThE LOGO:<br />
Possible causes:<br />
1-USB STICK is damaged<br />
2-The logo specifications/characteristics are not correct<br />
1-USB is damaged<br />
· Let’s make a test to see if it works at the computer.<br />
· Plug the USB STICK at the front of the PC (HP C2D), and go to Set Up Menu.<br />
Then exit the Menu.<br />
· Take a picture by choosing the product you want.<br />
· After the game, Remove the USB STICK.<br />
· Plug the USB STICK in your PC or LapTop.<br />
· Check if the USB STICK contents the PhotoIdDownload folder.<br />
· It should be 2 folders into the PhotoIdDownload and your picture should be there.<br />
· If your picture is not there, the USB STICK is not working properly.<br />
PhotoIdDownload<br />
USB STICk On<br />
(LED activated)<br />
Myphotocode<br />
Shots<br />
USB STICk Blinking<br />
(LED activated)<br />
138
2-The logo specifications/characteristics are not correct<br />
· Plug the USB Stick in your PC or Laptop.<br />
· Locate the logo, Placed on the logo and click the right button on<br />
your computer mouse to open properties.<br />
· The properties should be as follows.<br />
Logo specifications:<br />
Name: Logo<br />
Size: width: 800 pixels<br />
height: 600 pixels<br />
Resolution: 300dpi<br />
We recommend 300dpi, but it will<br />
also work with less resolution.<br />
Format: JPG<br />
Click the right button<br />
· Check the logo specifications<br />
LOGO<br />
Name: Logo<br />
Name:<br />
NOT LOGO.JPG<br />
If it doesn’t working, consult a professional designer to assist in changing the logo.<br />
ADVANCED USERS: Use the following web site for suggestions; http://www.webresizer.com/<br />
139
hARD DRIVE ERROR<br />
21.2 hARD DRIVE<br />
This procedure is to check if the BIOS settings are correct for an Automatic<br />
BOOT-DVD.<br />
WARNING!!! This procedure is very dangerous and could cause a PC<br />
Malfunction. Please read it carefully and follow all steps one by one.<br />
1· Plug in a Keyboard to the PC.<br />
2· Turn ON the PC (or the whole Photo Booth).<br />
3· When the ASRock screen appears, press “F10” several times until the “BIOS<br />
SETUP UTILITY” appears on the screen. If it does not come up, and the<br />
software continues uploading, then go back to the Step 2.<br />
4· With the Keyboard arrows, move up to<br />
the Storage Menu, here we are going to<br />
check the following thing:<br />
· Device Configuration (step 5)<br />
· Boot Order (step 6)<br />
140
5· Once you are inside the “DEVICE Configuration” please check the following points:<br />
•“Hard disk” should be connected at SATA0<br />
•“CD-ROM” should be connected at SATA1<br />
If everything is OK, press ESC to return the Main menu.<br />
If Hard disk or CD-ROM or Both are not detected, we should check the PC connections.(Do<br />
this work with the PC unplugged from power).Go to step 8<br />
6· Once you are inside the “Boot Order” please check the following points:<br />
•“ATAPI CD-ROM”<br />
•“Hard Drive”<br />
If ATAPI CD-ROM or Hard Drive or Both are not detected, we should check the PC<br />
connections.(Do this work with the PC unplugged from power).Go to step 8<br />
141
7· With the Keyboard arrows, move right to the Advanced Menu here we are going to<br />
check the following thing:<br />
· Select Power-On Option and confirm that the “After Power Loss” is ON<br />
8· Unplug the PC from the power.<br />
9· Open the top cover ( there are 2 screws in the top back side of the PC)<br />
10· Check connections as follows:<br />
Please pull up the green arrows from the DVD ROM and from the Power supply and<br />
check the connection as it shows in the following pictures.<br />
IF The hard Disk is SATA + DVD SATA it will be like this:<br />
hARD DISk SATA<br />
POWER SATA<br />
MATROx CARD<br />
142
SATA<br />
DVD SATA<br />
SATA<br />
DVD POWER<br />
11· If all connections are fine (as it appears in the pictures), then it is possible that the<br />
component, which is not detected at the “IDE CONFIGURATION” Menu, is physically<br />
damaged. Please contact <strong>Digital</strong> <strong>Centre</strong> for a new part.<br />
143
21.3 BOOT DVD<br />
To Update the Machine or change the software version, please follow these steps:<br />
1· Open the DVD Driver.<br />
2· Insert the “Boot DVD”.<br />
3· Plug Off the Machine.<br />
4· Plug On the Machine after 10 seconds.<br />
5· Wait while the restore program reinstalls the<br />
software (a progress bar appears on the screen).<br />
The time process is about 30 minutes<br />
6· A black screen appears when the process finishes.<br />
7· Extract the DVD disk.<br />
8· Plug Off the Machine.<br />
9· Plug On the Machine after 10 seconds.<br />
(In case that the Restore Program does not start automatically and<br />
shows the message “Extract the dvd” immediately, then go to the<br />
“Run the Restore Program <strong>Manual</strong>ly” (At the end of this <strong>Manual</strong>).<br />
CUSTOMIZED FRAMES:<br />
If you have customized frames and/or logos now is the time to upload.<br />
1· Install the “Customized Frames DVD” into the DVD driver (CD or USB too).<br />
2· Turn off the Machine.<br />
3· Turn on the Machine after 10 seconds.<br />
4· When the software is working in Demo, then go into the SETUP MENU, by<br />
pressing the Yellow button at the Setup Control Panel. It will read the customized<br />
frames and/or logos automatically before the software start.<br />
5· Be sure to select LOGO=YES and the correct frames and Wait for the Setup Menu<br />
save all changes. (Wait for the “Shut Down Please” message on the screen).<br />
6· When the software runs in Demo again, you can extract the DVD, CD or USB,<br />
and keep it to a safe place.<br />
The NEW FRAMES are now working; you can go to Setup Menu and adjust the<br />
Date at the correct position.<br />
144
21.4 DONGLE ERROR<br />
If you switch on the Photo booth and the following message appears;<br />
“Sentinet HASP key not found (H0007)”, it means that the printer<br />
dongle is not well connected. The USB dongle must be connected on P.7<br />
(please see picture).<br />
P.7<br />
P.7 Dongle USB Security and Software. MEGA OUT<br />
145
21.5 CAMERA ERROR<br />
When you take a picture and your screen appears black please check<br />
the USB connection from the camera. The USB must be connected on<br />
P.10 (please see picture).<br />
P.10<br />
P.10 USB Extension AM / AF From Camera to PC.<br />
(180 cm - Inch 70,87)<br />
146
21.6 TOUCh SCREEN ERROR<br />
If the power card is properly<br />
plugged then the LED is green.<br />
21.7 NO SIGNAL<br />
If the power card is properly<br />
plugged then the LED is blue.<br />
Lights are ON<br />
Check if the PC lights are ON.<br />
If the lights are on then it appears that the Photobooth is working but the monitor is not.<br />
Next steps:<br />
When you turn ON the Photobooth, can you see any message on the screen? (ex; manufacturer<br />
name, or “NO SIGNAL”)?<br />
If this is the case, the VGA cable is probably unplugged or damaged.<br />
But if nothing is on the screen (when you turn ON the Photobooth), please check if there<br />
is power to the Monitor. Power cable is probably unplugged from the monitor.<br />
.<br />
147
The control Board is the green board located behind the PC. It doesn’t mean that the<br />
Control Board is bad; it could mean that the PC could not connect with the Control<br />
Board (because the Serial cable is not correctly connected).<br />
Check following points:<br />
1· Check the Control Board Serial Connection “P.2”.(That is the common problem point).<br />
(attach 2 pictures: Correct and Error “Please Wait”). This connection is very easy to lose<br />
during transport, or when you work at that area.<br />
2· If all connections are good, then check that the Control Board Red LED is ON.<br />
3· If all the 2 points are OK, but still doesn’t work, please send the Control Board to <strong>Digital</strong><br />
<strong>Centre</strong> (contact the Support Team before sending)<br />
P.2<br />
21.8 CONTROL BOARD ERROR<br />
P.2 Serial Cable From Control Board to PC. (56 cm - Inch 22,04)<br />
Red LED is ON<br />
P.2 P.2 Serial Cable From Control<br />
Board to PC. (56 cm - Inch 22,04)<br />
3· If all the 2 points are OK, but still doesn’t work, please send the Control Board to <strong>Digital</strong><br />
<strong>Centre</strong> (contact the Support Team before send it)<br />
148
ADDITIONAL INFORMATION<br />
22.CONTROL BOARD DIAGRAMS<br />
149
1<br />
(DE3501)<br />
DECAL.<br />
MEGA #1<br />
Back Wall<br />
23-DECALS<br />
You can use images of 300 dpi to personalize the decals if needed.<br />
Save in a JPG format.<br />
The size cm (for EUR) inch (for USA) for each one must be:<br />
1-(DE3501) DECAL. MEGA #1 Back Wall (83,5x172 cm - Inch 32,9x67,7)<br />
2-(DE3502) DECAL. MEGA #2 Top Front Door (72,5x170 cm - Inch 28,5x67)<br />
3-(DE3503) DECAL. MEGA #3 Top Right Lateral (62x170 cm - Inch 24,4x67)<br />
4-No Bottom Left Lateral Door<br />
5-No Top Left Lateral<br />
6-(DE3506) DECAL. MEGA #6 Instructions (69,5x22 cm - Inch 27,4x8,7)<br />
7-(DE3507) DECAL. MEGA #7 Insert Money (25x15 cm - Inch 9,8x5,9)<br />
8-(DE3508) DECAL. MEGA #8 Top & camera (69x29,5 cm - Inch 27,2x11,6)<br />
(DE3508)<br />
DECAL. MEGA #8<br />
Top & Camera<br />
8<br />
7<br />
(DE3507)<br />
DECAL. MEGA #7<br />
Insert Money<br />
(DE3503)<br />
DECAL. MEGA #3<br />
Top Right Lateral<br />
3<br />
6<br />
(DE3506)<br />
DECAL.<br />
MEGA #6<br />
Instructions<br />
2<br />
(DE3502)<br />
DECAL.<br />
MEGA #2<br />
Top Front Door<br />
No Top<br />
Left Lateral<br />
5<br />
4<br />
No<br />
Bottom Left<br />
Lateral Door<br />
150
151
PL0010<br />
“LOOK HERE”#1 METHACRYLATE<br />
LEFT ARROW. (8X12 cm<br />
Inch 3,15X4,72)<br />
PL0009<br />
“LOOK HERE”#2 METHACRYLATE<br />
RIGHT ARROW. (6,5X11,2 cm<br />
Inch 2,56X4,41)<br />
ME3414<br />
TILTING CAMERA<br />
FRONT HOLDER. (WHITE)<br />
ME0001<br />
LOCK 1314<br />
ME3546<br />
CURTAIN’S<br />
RODS. MEGA<br />
WO3501 WOOD<br />
BOTTOM SEAT. MEGA<br />
(GREY)<br />
ME3515<br />
METAL BASE SEAT.<br />
MEGA (BLACK)<br />
ME3516<br />
FALLING ARM<br />
SEAT. MEGA (BLACK)<br />
PL0011<br />
“LOOK HERE”#2 METHACRYLATE<br />
LEFT ARROW. (6,5X11,2 cm<br />
Inch 2,56X4,41)<br />
SE3507<br />
LIGHT BULBS<br />
9W<br />
SE3504<br />
CURTAIN. MEGA<br />
(GREY) (80X110 cm<br />
Inch 31,50X43,3)<br />
ME3502<br />
INSIDE FALLING RAMP<br />
PHOTO. MEGA (GREY)<br />
24-SPARES DIAGRAMS<br />
ME3500<br />
MAIN BODY.<br />
MEGA (BLACK)<br />
DE3532<br />
RIGHT / LEFT BACK SIDE<br />
DECAL. MEGA(WHITE)<br />
(10X76 CM<br />
INCH 3,93X27,56)<br />
DE3531<br />
BACK WALL DECAL.<br />
MEGA (WHITE)<br />
(78,50X76 CM<br />
INCH 30,9X29,9)<br />
ME3526<br />
FLOOR. MEGA<br />
(ALUMINIUM)<br />
ME3527<br />
FLOOR LID. MEGA<br />
(ALUMINIUM)<br />
PL0008<br />
“LOOK HERE”#1 METHACRYLATE RIGHT<br />
ARROW. (8X12 cm - Inch 3,15X4,72)<br />
SE3506<br />
LIGHT BULBS 36W<br />
PL3500<br />
TOP LIGHT PLASTIC<br />
DIFFUSER. (WHITE)<br />
(52x9,5x0,3 cm<br />
Inch 20,47x3,74x0,12)<br />
ME3510<br />
FIXING CAMERA<br />
FRONT HOLDER<br />
(BLACK)<br />
PL3501<br />
LATERAL LIGHT PLASTIC<br />
DIFFUSER. (WHITE)<br />
(26,5x7x0,3 cm<br />
Inch 10,43x2,76x0,12)<br />
152
ME3535<br />
TOP LEFT COVER 3 MO-<br />
NITORS. MEGA COM-<br />
BO (BLACK) (44X104<br />
CM - INCH 17,3X41)<br />
ME3538<br />
TOP LEFT COVER<br />
FRAME 3 MONITORS.<br />
MEGA COMBO (WHI-<br />
TE) (42,5X10⁵ CM<br />
INCH 16,7X41,3)<br />
EL3600<br />
LCD TOUCH<br />
MONITOR 22”<br />
ME3539<br />
BOTTOM LEFT DOOR<br />
FRAME 1 MONITOR.<br />
MEGA COMBO<br />
(WHITE) (42,5X35 CM<br />
INCH 16,7X13,7)<br />
ME3537<br />
BOTTOM LEFT DOOR<br />
1 MONITOR. MEGA<br />
COMBO (BLACK)<br />
(44X34 CM - INCH<br />
17,3X13,3)<br />
GL2902<br />
SCREEN<br />
GLASS 17”<br />
GL3501<br />
TOUCH SREEN GLASS<br />
17”<br />
EL3514<br />
4 LCD<br />
MONITOR 17”<br />
GL2902<br />
SCREEN<br />
GLASS 17”<br />
GL2902<br />
SCREEN<br />
GLASS 17”<br />
ME3541<br />
COVER PLATE FOR<br />
BILL ACCEPTOR HOLE.<br />
MEGA COMBO (WHI-<br />
TE) (15X4 CM - INCH<br />
5.91X1.57)<br />
153
ME2930<br />
METAL LEG (16X80 MM<br />
INCH 0,06X0,315)<br />
PL0020<br />
POLYURETHANE WHEEL<br />
D-80 FIXING MECH.<br />
PL0019<br />
POLYURETHANE WHEEL<br />
D.100 ROTARY MECH.<br />
154
25.1 MEGA IN<br />
25 PARTS LIST<br />
CA0005 COIN READER CABLE ALBERICI<br />
CA0006 BILL READER CABLE ICT-DC. (92,5 cm - Inch 36,41)<br />
CA0007 BILL READER CABLE MEI-DC. 110V<br />
CA2900 MAIN POWER CABLE NG 1/2 (PC + PRINTER + TRAFO 12V + CONTROL BOARD)<br />
CA2901 MAIN POWER CABLE NG 2/2 (1 MONITOR + 2 LATERAL LIGHTS + 1 TOP LIGHT)<br />
CA2902 POWER CORD 110V - USA<br />
CA2910 CABLE FROM CONTROL BOARD TO SERVICE PANEL & PUSH BUTTONS + 2<br />
SPEAKERS<br />
CA2912 POWER CORD 230V - EUR<br />
CA3402 VGA CABLE M/M (180 cm - Inch 70,87)<br />
CA3407 USB EXTENSION AM/AF. (180 cm - Inch 70,87)<br />
CA3411 INTERNAL PC 12V DIVIDER<br />
CA3414 USB CABLE FROM PRINTER TO PC. AM/BM (180 cm - Inch 70,87)<br />
CA3416 JACK STEREO CABLE. (180 cm - Inch 70,87)<br />
CA3512 SERIAL CABLE FROM PC TO CONTROL BOARD M/F (56 cm - Inch 22,04)<br />
CA3802 MAIN POWER CABLE M/F 3T (86 cm - Inch 33,86)<br />
CO0001 COIN ACCEPTOR. (EUR)<br />
CO0002 COIN ACCEPTOR. (AUD)<br />
CO0003 COIN ACCEPTOR. (CAD)<br />
CO0007 ICT DOLLAR BILL ACCEPTOR 12V<br />
CO0009 ICT DOLLAR BILL ACCEPTOR SET<br />
(DBA+WIRE+12V DIVIDER+METAL BRACKET). (BLACK)<br />
CO0011 COIN ACCEPTOR SET (EUR) (COIN ACCEPTOR+FRONT ADAPTER+WIRE+METAL<br />
PLATE+METAL CASH BOX & WOOD SUPPORT). (BLACK)<br />
CO0012 COIN ACCEPTOR SET (AUD) (COIN ACCEPTOR+FRONT ADAPTER+WIRE+METAL<br />
PLATE+METAL CASH BOX & WOOD SUPPORT). (BLACK)<br />
CO0013 COIN ACCEPTOR SET (CAD) (COIN ACCEPTOR+FRONT<br />
ADAPTER+WIRE+METAL PLATE+METAL CASH BOX & WOOD SUPPORT). (BLACK)<br />
CO0023 COIN ACCEPTOR PLASTIC FRONT ADAPTER<br />
DE3501 DECAL. MEGA #1 - BACK WALL (83,5x172 cm - Inch 32,9x67,7)<br />
DE3502 DECAL. MEGA #2 - TOP FRONT (72,5x170 cm - Inch 28,5x67)<br />
DE3503 DECAL. MEGA #3 - TOP RIGHT LATERAL (62x170 cm - Inch 24,4x67)<br />
DE3504 DECAL. MEGA #4 - BOTTOM LEFT LATERAL (43x62 cm - Inch 16,8x24,2)<br />
DE3505 DECAL. MEGA #5 - TOP LEFT LATERAL (43x103 cm - Inch 16,8x40,2)<br />
DE3506 DECAL. MEGA #6 - INSTRUCTIONS (69,5x22 cm - Inch 27,4x8,7)<br />
DE3507 DECAL. MEGA #7 - INSERT MONEY (25x15 cm - Inch 9,8x5,9)<br />
DE3508 DECAL. MEGA #8 - TOP CAMERA (69x29,5 cm - Inch 27,2x11,6)<br />
DE3531 BACK WALL DECAL. MEGA (WHITE) (78,50x76 cm - Inch 30,9x29,9)<br />
DE3532 RIGHT / LEFT BACK SIDE DECAL. MEGA(WHITE) (10x76 cm - Inch 3,93x27,56)<br />
DE3800 SET DECALS. MEGA<br />
EL0001 EVO-ATMEL CHIP (only chip)<br />
EL3400 FULL HD CAMERA<br />
EL3401 CONTROL BOARD V3.0 EVO LED (110V)<br />
EL3402 CONTROL BOARD V3.0 EVO LED (220V)<br />
EL3403 EVO-ATMEL CHIP ON CONTROL BOARD WITH SOFTWARE EVO LED<br />
EL3406 FILTER 2 FUSES STANDARD 6A<br />
EL3408 FAN (2 UNITS 12V) TWIN<br />
EL3409 SERVICE CONTROL PANEL - MODEL 2<br />
EL3417 TRANSFORMER 2A 12V<br />
EL3503 LIGHT BULBS 36W/865<br />
EL3504 LIGHT BULBS 9 W/865<br />
EL3505 BALLAST 110V/36W<br />
155
EL3506 BALLAST 230V/36W<br />
EL3507 BALLAST 110V/13W<br />
EL3508 BALLAST 230V/13W<br />
EL3509 LAMP HOLDER 36W<br />
EL3510 LAMP HOLDER 9W<br />
EL3511 SPEAKERS 8 Ohm 5W. (10 cm - Inch 3,94)<br />
EL3513 LIGHT STARTER<br />
EL3600 LCD TOUCH MONITOR 22’’<br />
EL3602 TOUCH MONITOR 22” AC ADAPTER 100V/240V to 12V<br />
ME0001 LOCK 1314<br />
ME0002 KEY FOR LOCK 1314<br />
ME0004 COIN ACCEPTOR METAL PLATE (12,1x15,2 cm - Inch 4,76x5,98) (BLACK)<br />
ME0025 ICT METAL PLATE SUPPORT. (BLACK)<br />
ME0031 METAL CASH BOX<br />
ME2930 METAL LEG (16x80 mm - Inch 0,06x0,315)<br />
ME3132 COVER PLATE FOR BILL ACCEPTOR HOLE. (BLACK) (12x15 cm - Inch 4,72x5,91)<br />
ME3305 LATERAL LIGHT DIFFUSER HOLDER. RIGHT/LEFT NG (RAW METAL)<br />
ME3306 LATERAL LIGHT BODY. (RAW METAL)<br />
ME3313 TOP LIGHT DIFFUSER HOLDER. (RAW METAL)<br />
ME3314 TOP LIGHT BODY. (RAW METAL)<br />
ME3315 TOP / BOTTOM MONITOR 22’’ HOLDERS. (RAW METAL)<br />
ME3316 RIGHT / LEFT MONITOR 22’’ HOLDERS. (RAW METAL)<br />
ME3410 PC HP-C2D HOLDER. (RAW METAL)<br />
ME3500 MAIN BODY. MEGA (BLACK)<br />
ME3501 FRONT DOOR. MEGA (BLACK) (75x172 cm - Inch 29,5x67,7)<br />
ME3502 INSIDE FALLING RAMP PHOTO. MEGA (GREY)<br />
ME3507 RIGHT PRINTER SUPPORT. (RAW METAL)<br />
ME3508 LEFT PRINTER SUPPORT. (RAW METAL)<br />
ME3510 FIXING CAMERA FRONT HOLDER. (BLACK)<br />
ME3515 METAL BASE SEAT. MEGA (BLACK)<br />
ME3516 FALLING ARM SEAT. MEGA (BLACK)<br />
ME3523 BOTTOM LEFT LATERAL DOOR. MEGA (BLACK) (44x63 cm - Inch 17,3x24,8)<br />
ME3526 FLOOR. MEGA (ALUMINIUM)<br />
ME3527 FLOOR LID. MEGA (ALUMINIUM)<br />
ME3529 TOP LEFT LATERAL COVER. MEGA (BLACK) (44x104 cm - Inch 17,3x41)<br />
ME3545 RIGHT / LEFT CURTAIN ROD END TAP. (BLACK)<br />
ME3546 CURTAIN’S ROD. MEGA<br />
ME3608 FIXING CAMERA BACK HOLDER. (RAW METAL)<br />
PC0002 DONGLE USB SECURITY AND SOFTWARE. MEGA<br />
PC0004 RAM MEMORY MODULE. DDR2 5300 667 (512Mb)<br />
PC0005 HARD DRIVE SATA<br />
PC0006 DVD READER SATA<br />
PC0007 PC PROCESSOR HP-C2D<br />
PC0008 PC MOTHER BOARD HP-C2D<br />
PC0009 PC POWER SUPPLY HP-C2D<br />
PC0011 PC HP-C2D (WITHOUT VIDEO CARD 4 MONITORS)<br />
PC0013 PC BUTTON BATTERY 2032<br />
PL0008 “LOOK HERE” #1 METHACRYLATE RIGHT ARROW. (8x12 cm - Inch 3,15x4,72)<br />
PL0010 “LOOK HERE” #1 METHACRYLATE LEFT ARROW. (8x12 cm - Inch 3,15x4,72)<br />
PL0019 POLYURETHANE WHEEL D-100 ROTARY MECH.<br />
156
PL0020 POLYURETHANE WHEEL D-80 FIXING MECH.<br />
PL0030 LAMP CLIP SUPPORT FOR 36W BULB<br />
PL3500 TOP LIGHT PLASTIC DIFFUSER. (WHITE) (52x9,5x0,3 cm - Inch 20,47x3,74x0,12)<br />
PL3501 LATERAL LIGHT PLASTIC DIFFUSER. (WHITE)<br />
(26,5x7x0,3 cm - Inch 10,43x2,76x0,12)<br />
PR9810 PRINTER MITSUBISHI CP9810DW-DC<br />
SE3402 TRANSFORMER SOCKET PLASTIC BASE. (WHITE)<br />
SE3504 CURTAIN. MEGA (GREY) (80x110 cm - Inch 31,50x43,3)<br />
SE3820 SET 2 CURTAINS. MEGA (GREY) (80x110 cm - Inch 31,50x43,3)<br />
TO0002 ALLEN WRENCH<br />
WO0030 METAL CASH BOX WOOD SUPPORT. (18x7,3 cm - Inch 7,08x2,87)<br />
WO3500 WOOD PC BASE. MEGA (RAW)<br />
WO3501 WOOD BOTTOM SEAT. MEGA (GREY)<br />
WO3800 WOOD UPRIGHT PC #2 BASE. MEGA (RAW) (84,7x13 cm - Inch 33,34x5,11)<br />
CA3502 CABLE FROM OSD MENU PANEL TO TOUCH MONITOR GT.<br />
(120 cm - Inch 47,24)<br />
EL3601 OSD MENU CONTROL PANEL<br />
SC3422 PCB FOOT<br />
ME3533 PALLET ANCHORAGE. (RAW METAL)<br />
PK3800 CARDBOARD BOX PACK. MEGA (93x91x196 cm - Inch 36,61x35,83x77,17)<br />
PK3801 COVER CARDBOARD BOX PACK. MEGA<br />
(92x90x7,4 cm - Inch 36,22x35,43x2,91)<br />
PK3802 WOOD PALLET. MEGA (93x91 cm - Inch 36,61x35,83)<br />
PL0002 BOOT DVD PLASTIC HOLDER<br />
157
25.2 MEGA OUT<br />
CA0005 COIN READER CABLE ALBERICI<br />
CA0006 BILL READER CABLE ICT-DC. (92,5 cm - Inch 36,41)<br />
CA0007 BILL READER CABLE MEI-DC. 110V<br />
CA2900 MAIN POWER CABLE NG 1/2 (PC + PRINTER + TRAFO 12V + CONTROL<br />
BOARD)<br />
CA2901 MAIN POWER CABLE NG 2/2 (1 MONITOR + 2 LATERAL LIGHTS + 1 TOP LIGHT)<br />
CA2902 POWER CORD 110V - USA<br />
CA2910 CABLE FROM CONTROL BOARD TO SERVICE PANEL & PUSH BUTTONS + 2<br />
SPEAKERS<br />
CA2912 POWER CORD 230V - EUR<br />
CA3400 MAIN POWER CABLE (4 MONITORS + PC + PRINTER). STRIP<br />
CA3402 VGA CABLE M/M. (180 cm - Inch 70,87)<br />
CA3403 VGA CABLE M/M. (150 cm - Inch 59,06)<br />
CA3404 VGA CABLE M/M. (100 cm - Inch 39,37)<br />
CA3405 VGA CABLE M/M. (300 cm - Inch 86,61)<br />
CA3407 USB EXTENSION AM/AF. (180 cm - Inch 70,87)<br />
CA3409 VGA CABLE TO 4 MONITORS<br />
CA3411 INTERNAL PC 12V DIVIDER<br />
CA3412 TOUCH CABLE FROM TOUCHBOARD TO USB PC<br />
& 12V ADAPTOR (200cm - Inch 78.74)<br />
CA3413 TOUCH CABLE 12V ADAPTER (44cm - Inch 17.32)<br />
CA3414 USB CABLE FROM PRINTER TO PC. AM/BM (180 cm - Inch 70,87)<br />
CA3416 JACK STEREO CABLE. (180 cm - Inch 70,87)<br />
CA3418 TOUCH CABLE FROM TOUCHBOARD TO USB PC + 12V<br />
ADAPTOR TOGETHER (225cm - Inch 88.58)<br />
CA3512 SERIAL CABLE FROM PC TO CONTROL BOARD M/F (56 cm - Inch 22,04)<br />
CA3801 MAIN POWER DIVIDER CABLE. (180 cm - Inch 70,87)<br />
CO0001 COIN ACCEPTOR. (EUR)<br />
CO0002 COIN ACCEPTOR. (AUD)<br />
CO0003 COIN ACCEPTOR. (CAD)<br />
CO0007 ICT DOLLAR BILL ACCEPTOR 12V<br />
CO0009 ICT DOLLAR BILL ACCEPTOR SET<br />
(DBA+WIRE+12V DIVIDER+METAL BRACKET). (BLACK)<br />
CO0011 COIN ACCEPTOR SET (EUR) (COIN ACCEPTOR+FRONT<br />
ADAPTER+WIRE+METAL PLATE+METAL CASH<br />
BOX & WOOD SUPPORT). (BLACK)<br />
CO0012 COIN ACCEPTOR SET (AUD) (COIN ACCEPTOR+FRONT<br />
ADAPTER+WIRE+METAL PLATE+METAL CASH<br />
BOX & WOOD SUPPORT). (BLACK)<br />
CO0013 COIN ACCEPTOR SET (CAD) (COIN ACCEPTOR+FRONT<br />
ADAPTER+WIRE+METAL PLATE+METAL CASH<br />
BOX & WOOD SUPPORT). (BLACK)<br />
CO0023 COIN ACCEPTOR PLASTIC FRONT ADAPTER<br />
DE3500 SET DECALS. MEGA COMBO<br />
DE3501 DECAL. MEGA #1 - BACK WALL (83,5x172 cm - Inch 32,9x67,7)<br />
DE3502 DECAL. MEGA #2 - TOP FRONT DOOR (72,5x170 cm - Inch 28,5x67)<br />
DE3503 DECAL. MEGA #3 - LATERAL RIGHT TOP (62x170 cm - Inch 24,4x67)<br />
DE3506 DECAL. MEGA #6 - INSTRUCTIONS (69,5x22 cm - Inch 27,4x8,7)<br />
DE3507 DECAL. MEGA #7 - INSERT MONEY (25x15 cm - Inch 9,8x5,9)<br />
DE3508 DECAL. MEGA #8 - TOP CAMERA (69x29,5 cm - Inch 27,2x11,6)<br />
DE3531 BACK WALL DECAL. MEGA (WHITE) (78,50x76 cm - Inch 30,9x29,9)<br />
158
DE3532 RIGHT / LEFT BACK SIDE DECAL. MEGA (WHITE) (10x76 cm - Inch 3,93x27,56)<br />
EL0001 EVO-ATMEL CHIP (only chip)<br />
EL3400 FULL HD CAMERA<br />
EL3401 CONTROL BOARD V3.0 EVO LED (110V)<br />
EL3402 CONTROL BOARD V3.0 EVO LED (220V)<br />
EL3403 EVO-ATMEL CHIP ON CONTROL BOARD WITH SOFTWARE EVO LED<br />
EL3406 FILTER 2 FUSES STANDARD 6A<br />
EL3407 TOUCH BOARD<br />
EL3408 FAN (2 UNITS 12V) TWIN<br />
EL3410 SPEAKERS 1W. (7,5 cm - Inch 2,95)<br />
EL3417 TRANSFORMER 2A 12V<br />
EL3503 LIGHT BULBS 36W/865<br />
EL3504 LIGHT BULBS 9 W/865<br />
EL3505 BALLAST 110V/36W<br />
EL3506 BALLAST 230V/36W<br />
EL3507 BALLAST 110V/13W<br />
EL3508 BALLAST 230V/13W<br />
EL3509 LAMP HOLDER 36W<br />
EL3510 LAMP HOLDER 9W<br />
EL3511 SPEAKERS 8 Ohm 5W. (10 cm - Inch 3,94)<br />
EL3512 SERVICE CONTROL PANEL WITH 2 CONTROLS (IN & OUT). MEGA COMBO<br />
EL3513 LIGHT STARTER<br />
EL3514 LCD MONITOR 17”<br />
EL3600 LCD TOUCH MONITOR 22’’<br />
EL3602 TOUCH MONITOR 22” AC ADAPTER 100V/240V to 12V<br />
GL2902 SCREEN GLASS 17”<br />
GL3501 TOUCH SCREEN GLASS 17”<br />
ME0001 LOCK 1314<br />
ME0002 KEY FOR LOCK 1314<br />
ME0004 COIN ACCEPTOR METAL PLATE (12,1x15,2 cm - Inch 4,76x5,98) (BLACK)<br />
ME0025 ICT METAL PLATE SUPPORT. (BLACK)<br />
ME0031 METAL CASH BOX<br />
ME2930 METAL LEG (16x80 mm - Inch 0,06x0,315)<br />
ME3132 COVER PLATE FOR BILL ACCEPTOR HOLE. (BLACK) (12x15 cm - Inch 4,72x5,91)<br />
ME3305 LATERAL LIGHT DIFFUSER HOLDER. RIGHT/LEFT NG (RAW METAL)<br />
ME3306 LATERAL LIGHT BODY. (RAW METAL)<br />
ME3313 TOP LIGHT DIFFUSER HOLDER. (RAW METAL)<br />
ME3314 TOP LIGHT BODY. (RAW METAL)<br />
ME3315 TOP / BOTTOM MONITOR 22’’ HOLDERS. (RAW METAL)<br />
ME3316 RIGHT / LEFT MONITOR 22’’ HOLDERS. (RAW METAL)<br />
ME3410 PC HP-C2D HOLDER. (RAW METAL)<br />
ME3414 TILTING CAMERA FRONT HOLDER. (WHITE)<br />
ME3415 TILTING CAMERA BACK HOLDER. (RAW METAL)<br />
ME3420 EXPANSION BASE REFORCEMENT. (WHITE)<br />
ME3410 PC HP-C2D HOLDER. (RAW METAL)<br />
ME3414 TILTING CAMERA FRONT HOLDER. (WHITE)<br />
ME3415 TILTING CAMERA BACK HOLDER. (RAW METAL)<br />
ME3420 EXPANSION BASE REFORCEMENT. (WHITE)<br />
ME3500 MAIN BODY. MEGA (BLACK)<br />
ME3501 FRONT DOOR. MEGA (BLACK) (75x172 cm - Inch 29,5x67,7)<br />
ME3502 INSIDE FALLING RAMP PHOTO. MEGA (GREY)<br />
ME3503 MONITOR 17’’ HOLDER. MEGA COMBO (RAW METAL)<br />
159
ME3507 RIGHT PRINTER SUPPORT. (RAW METAL)<br />
ME3508 LEFT PRINTER SUPPORT. (RAW METAL)<br />
ME3510 FIXING CAMERA FRONT HOLDER. (BLACK)<br />
ME3515 METAL BASE SEAT. MEGA (BLACK)<br />
ME3516 FALLING ARM SEAT. MEGA (BLACK)<br />
ME3520 EXPANSION BASE REFORCEMENT. (BLACK)<br />
ME3526 FLOOR. MEGA (ALUMINIUM)<br />
ME3527 FLOOR LID. MEGA (ALUMINIUM)<br />
ME3535 TOP LEFT COVER 3 MONITORS. MEGA COMBO (BLACK)<br />
(44x104 cm - Inch 17,3x41)<br />
ME3537 BOTTOM LEFT DOOR 1 MONITOR. MEGA COMBO (BLACK)<br />
(44x34 cm - Inch 17,3x13,3)<br />
ME3538 TOP LEFT COVER FRAME 3 MONITORS. MEGA COMBO (WHITE)<br />
(42,5x105 cm - Inch 16,7x41,3)<br />
ME3539 BOTTOM LEFT DOOR FRAME 1 MONITOR. MEGA COMBO (WHITE)<br />
(42,5x35 cm - Inch 16,7x13,7)<br />
ME3541 COVER PLATE FOR BILL ACCEPTOR HOLE. MEGA COMBO (WHITE)<br />
(15x4 cm - Inch 5.91x1.57)<br />
ME3544 PC UPRIGHT HOLDER. MEGA COMBO (RAW METAL)<br />
ME3545 RIGHT / LEFT CURTAIN ROD END TAP. (BLACK)<br />
ME3546 CURTAIN’S ROD. MEGA<br />
ME3608 FIXING CAMERA BACK HOLDER. (RAW METAL)<br />
PC0002 DONGLE USB SECURITY AND SOFTWARE. MEGA<br />
PC0003 DONGLE USB SECURITY AND SOFTWARE. MEGA OUT<br />
PC0004 RAM MEMORY MODULE. DDR2 5300 667 (512Mb)<br />
PC0005 HARD DRIVE SATA<br />
PC0006 DVD READER SATA<br />
PC0007 PC PROCESSOR HP-C2D<br />
PC0008 PC MOTHER BOARD HP-C2D<br />
PC0009 PC POWER SUPPLY HP-C2D<br />
PC0011 PC HP-C2D (WITHOUT VIDEO CARD 4 MONITORS)<br />
PC0013 PC BUTTON BATTERY 2032<br />
PC0016 VIDEO CARD 4 MONITOR<br />
PL0008 “LOOK HERE” #1 METHACRYLATE RIGHT ARROW. (8x12 cm - Inch 3,15x4,72)<br />
PL0009 “LOOK HERE” #2 METHACRYLATE RIGHT ARROW.<br />
(6,5x11,2 cm - Inch 2,56x4,41)<br />
PL0010 “LOOK HERE” #1 METHACRYLATE LEFT ARROW. (8x12 cm - Inch 3,15x4,72)<br />
PL0011 “LOOK HERE” #2 METHACRYLATE LEFT ARROW. (6,5x11,2 cm - Inch 2,56x4,41)<br />
PL0019 POLYURETHANE WHEEL D-100 ROTARY MECH.<br />
PL0020 POLYURETHANE WHEEL D-80 FIXING MECH.<br />
PL0030 LAMP CLIP SUPPORT FOR 36W BULB<br />
PL3500 TOP LIGHT PLASTIC DIFFUSER. (WHITE) (52x9,5x0,3 cm - Inch 20,47x3,74x0,12)<br />
PL3501 LATERAL LIGHT PLASTIC DIFFUSER. (WHITE)<br />
(26,5x7x0,3 cm - Inch 10,43x2,76x0,12)<br />
PR9810 PRINTER MITSUBISHI CP9810DW-DC<br />
SE3402 TRANSFORMER SOCKET PLASTIC BASE. (WHITE)<br />
SE3504 CURTAIN. MEGA (GREY) (80x110 cm - Inch 31,50x43,3)<br />
SE3820 SET 2 CURTAINS. MEGA (GREY) (80x110 cm - Inch 31,50x43,3)<br />
TO0002 ALLEN WRENCH<br />
160
WO0030 CASH BOX WOOD SUPPORT. (18x7,3 cm - Inch 7,08x2,87)<br />
WO3500 WOOD PC BASE. MEGA (RAW)<br />
WO3501 WOOD BOTTOM SEAT. MEGA (GREY)<br />
WO3800 WOOD UPRIGHT PC #2 BASE. MEGA (RAW) (84,7x13 cm - Inch 33,34x5,11)<br />
CA3502 CABLE FROM OSD MENU PANEL TO TOUCH MONITOR GT.<br />
(120 cm - Inch 47,24)<br />
EL3601 OSD MENU CONTROL PANEL<br />
SC3422 PCB FOOT<br />
ME3533 PALLET ANCHORAGE. (RAW METAL)<br />
PK3800 CARDBOARD BOX PACK. MEGA (93x91x196 cm - Inch 36,61x35,83x77,17)<br />
PK3801 COVER CARDBOARD BOX PACK. MEGA<br />
(92x90x7,4 cm - Inch 36,22x35,43x2,91)<br />
PK3802 WOOD PALLET. MEGA (93x91 cm - Inch 36,61x35,83)<br />
PL0002 BOOT DVD PLASTIC HOLDER<br />
161
26-NOTES<br />
162
27-ANNEx 1: MyPhOTOCODE.COM TUTORIAL
CONTENTS<br />
1. Myphotocode.com---------------------------------------------------------------------165<br />
2. Manage your USB set up--------------------------------------------------------------166<br />
2.1 How to login--------------------------------------------------------------167-168<br />
2.2 Create a new USB set up----------------------------------------------169-170<br />
2.3 How to customize------------------------------------------------------170-175<br />
2.3.1 Logo---------------------------------------------------------------------170<br />
2.3.2 Text on a side of each print-------------------------------------171<br />
2.3.3 Background music-------------------------------------------------172<br />
2.3.4 Frames----------------------------------------------------------172 -173<br />
2.3.5 Welcome Screen--------------------------------------------------174<br />
2.3.6 Bye Screen-----------------------------------------------------------174<br />
2.3.7 Top Screen Banner------------------------------------------------175<br />
2.3.8 Custom images on demo screen-----------------------------175<br />
2.4 Download the USB set up---------------------------------------------------176<br />
3. Manage your online events--------------------------------------------------------177<br />
3.1 How to create an online event-------------------------------------------177<br />
3.2 Manage the online event---------------------------------------------178-183<br />
3.2.1 Photos--------------------------------------------------------------182-183<br />
3.2.2 Emails-------------------------------------------------------------------183<br />
3.2.3 Edit-----------------------------------------------------------------------183<br />
4. Warning------------------------------------------------------------------------------------184<br />
164
1-MyPhOTOCODE.COM<br />
MyPhotoCode.com is a website thinking for Owners and Customers.<br />
WhAT CAN ThE OWNER DOES ThROUGh OUR WEBSITE MyPhOTOCODE.COM?<br />
• Create an USB Set Ups for customize their Photo booth<br />
• Create an Online Event<br />
• Edit an event<br />
• Recover the event pictures<br />
• Upload and share your pictures on Facebook,<br />
twitter or send copies by e-mail<br />
WhAT A CUSTOMER CAN DOES ThROUGh OUR WEBSITE<br />
When the customer take’s a picture, you can see a code on the side.<br />
If you introduce this code in the website, you can recover any picture and share it<br />
through different social webs, and also, send copies by e-mail.<br />
165
2. MANAGE yOUR USB SET UP<br />
1. You need a username and password<br />
to access to MyPhotoCode.<br />
2. You need identify your Photo booth<br />
to get a username and password.<br />
3. To know the identification number,<br />
please, take a photo and send us the<br />
number that appears in the right side of<br />
the strip, to the following address:<br />
myphotocode@dc-image.com<br />
Then, we will send you the username<br />
and password, use them to login.<br />
166
2.1 hOW TO LOGIN<br />
1- Goes to http://myphotocode.com and click on RENTAL LOGIN, it is up in the right side<br />
2- Please, enter your username and password and click ENTER<br />
1<br />
2<br />
Typing your USERNAME<br />
Typing your PASSWORD<br />
3<br />
Click ENTER<br />
167
3- Here you can prepare the USB to customize our Photo Booth . Click on “USB Set Ups”<br />
4- Click on “Add New”<br />
Click ADD NEW<br />
Click on USB Set Ups<br />
168
1- Fill in the information :<br />
2.2 CREATE A NEW USB SET UP<br />
• Name: Choose a name for your USB, for example “Night Party” or “Luca’s wedding”.<br />
• Photo Booth: Open the list and selected your photo booth, click the arrow to see<br />
all the options.<br />
• Online event: You can link the USB with a created online event or created<br />
another! ( See section “3.1 how to create an online event” )<br />
• Save it!<br />
1<br />
2<br />
Typing a NAME<br />
Click on the arrow to<br />
see the box with all Photo<br />
booths. Select your Photo<br />
booth.<br />
169
2- When the USB has been created we can start to customize.<br />
Click on “Start editing its content”.<br />
2.3 hOW TO CUSTOMIZE<br />
You can customize the next parameters:<br />
2.3.1 Logo<br />
2.3.2 Text on a side of each print<br />
2.3.3 Background music<br />
2.3.4 Frames<br />
2.3.5 Welcome Screen<br />
2.3.6 Bye Screen<br />
2.3.7 Top Screen Banner (wedding version) *Only STRIP Photo booth<br />
2.3.8 Custom images on demo screen<br />
2.3.1 LOGO: image format .JPG to 300 dpi.<br />
Click here<br />
170
2.3.2 TExT: This is the text that will appear in every strip. You can write all that you want.<br />
Look down here and see example, the text appears in the right side along the strip.<br />
Example:<br />
171
2.3.3 BACkGROUND MUSIC: You can upload music . Maximum 5 MB. Must be mp3 format.<br />
Look down here and see example, the text appears in the right side along the strip.<br />
2.3.4 FRAMES: You have three options<br />
• None<br />
• Upload custom<br />
• Select premade frames from list<br />
• NONE: we don’t upload any new frame<br />
172
• UPLOAD CUSTOM: select 4 frames from our computer. The frames must be in .png format.<br />
• SELECT PREMADE FRAMES FROM LIST: we can choose frame from the list of myphotocode.<br />
You can see this frames before choose. You can see this frames before choose.<br />
Select one, and press SAVE.<br />
173
2.3.5 WELCOME SCREEN: There are 2 options:<br />
• Single<br />
• Random<br />
We can upload “Welcome” Images through our computer.<br />
Remember that Images must be in .jpg to 72 dpi.<br />
2.3.6 ByE SCREEN: We have 2 options again:<br />
• Single<br />
• Random<br />
We can upload “GoodBye” Images through our computer.<br />
Remember that Images must be in jpg to 72 dpi<br />
174
2.3.7 TOP SCREEN BANNER (WEDDING VERSION) *Only STRIP Photo booth<br />
2.3.8 CUSTOM IMAGES ON DEMO SCREEN<br />
175
2.4 DOWNLOAD ThE USB SET UP<br />
Download the USB Set Up: when you finish customizing, save the changes.<br />
Download the USB Set Up.<br />
Click on “Download the USB<br />
Set Up into a USB Drive”.<br />
It will appear a new window<br />
asking what want you do?<br />
Select Save and accept.<br />
a- Save the document ‘save-in-sub.zip” in the USB pen drive. Don’t change the document<br />
name when you save it.<br />
b- This is an compacted document, that you must decompress in the USB pend drive.<br />
c- When you finish the decompress, you’ll have 2 folders called “PhotoIdUpload” and “PhotoIdEvents”.<br />
d- Inside the USB you only must have these two folders: PhotoIdUpload i PhotoIdEvents.<br />
e- When we have our USB with these folders, connect the USB to the Photo Booth.<br />
IMPORTANT! : Enter in the configuration menu and go out to update the new changes and<br />
customizations.<br />
176
Click on Online Events Option.<br />
It will open a new window with a list about our events online.<br />
This list it’s empty because there isn’t any event created.<br />
3.1 hOW TO CREATE AN ONLINE EVENT<br />
Click on “Add New”<br />
3-MANAGE yOUR ONLINE EVENTS<br />
Click ADD NEW<br />
177
Edit the options:<br />
3.2 MANAGE ThE ONLINE EVENTS<br />
• Event title: Try a name to the event, for example: Night Party<br />
• Start Date: Indicate when it starts and how long is the event<br />
• Background: You can put on a different background to show in the event online, when<br />
some user take’s a picture and want to recover it, they only have to enter the code in the<br />
website Myphtocode. Instead the background of the web, they could see our personal<br />
background..<br />
• Private pictures:<br />
• If the event is a private event, when the users insert their code,<br />
they only will see their photos.<br />
• If the event isn’t private, when the user introduces the code,<br />
could see all the pictures of the event.<br />
• Single day event: Indicate if the event is for a single day<br />
•Available Online: If the user choose YES, the picture will be seen on the website, otherwise,<br />
the pictures won’t be seen online.<br />
178
Select Background: we can choose one of the predefined backgrounds or upload another one.<br />
If we upload a background it must be in .jpg or .png to 72 dpi. This image will be repeated.<br />
In case of we upload our logo<br />
179
At the moment to see the pictures, the logo, will be seen like this:<br />
When we finish the configuration, click on SAVE.<br />
We have already edited i created the online event!<br />
180
Select “Go back to Online Events<br />
Return to outset where the list was empty, but now we can see our new event<br />
Here you can see all the information about the event that we just created:<br />
• Date : The day of the appointment<br />
• Name: the name that we gave to the event<br />
• Photo booth: the photo booth model that will be used in the event. This section will<br />
be empty until the moment we take the first photo, then, the model will appear<br />
automatically.<br />
• Status: indicate if online option is activated<br />
• Photos: how many pictures has been taken<br />
• Video: how many videos has been recorded<br />
• Actions:<br />
3.2.1 Photos: can see the pictures from all the users<br />
3.2.2 Emails: can see the mail list where the users send the photos<br />
3.2.3 Edit: you can edit the event again<br />
181
3.2.1 Photos: you will see a new window with all the photos in a little size.<br />
If you click one of the small photos, this will be opened and some options appear. In this<br />
example, the user didn’t record any video, so the possible options are:<br />
• Post on Facebook<br />
• Send by email<br />
• Tweet photo<br />
182
But the options are different when the user records a video:<br />
• Watch the video<br />
• Post on Facebook<br />
• Send by email<br />
• Tweet photo<br />
3.2.2 Emails: Select the Button “ACTIONS > EMAIL” you will see an address list, here you could<br />
see the sending historial, every time that users share their photos by e-mail, the e-mail addresses<br />
will be registred in this list.<br />
3.2.3 Edit: See section “3.1 how to create an online event”<br />
183
WARNING!<br />
Remember, to get the photos, by Myphotocode.com, the photobooth must be<br />
connected to internet.<br />
If there isn’t connection to internet, you can save the photos in a empty USB memory in<br />
the computer.<br />
When the USB will be detect by the computer, will be create automatically a New Folder<br />
called PhotoIdDownload.<br />
Inside the PhotoIdDownload folder you will find 2 folders more, the first one called “Myphotocode”<br />
with your images and videos inside (just in case that you have recorded a video)<br />
and the second one called “Shots” with the individual shots.<br />
Once the event finish, you can take off the USB memory from de computer and use it in any<br />
other computer to see your images or videos.<br />
USB stick<br />
PhotoIdDownload<br />
4. WARNING<br />
Myphotocode<br />
Shots<br />
shot0001a<br />
shot0001b<br />
shot0001c<br />
shot0001d<br />
.<br />
.<br />
AMEGJAB4MG.jpg<br />
(photo)<br />
.<br />
ANRTSZBMAB.wmv<br />
(video)<br />
.<br />
If the logo is activated, you will have 3<br />
shoots for each print, with the loaded<br />
logo printing in the fourth frame.<br />
184