

Hyper 21 3-Port - CML Distribution
Hyper 21 3-Port - CML Distribution
Hyper 21 3-Port - CML Distribution

Create successful ePaper yourself
Turn your PDF publications into a flip-book with our unique Google optimized e-Paper software.
NITRO ENGINE INFORMATION<br />
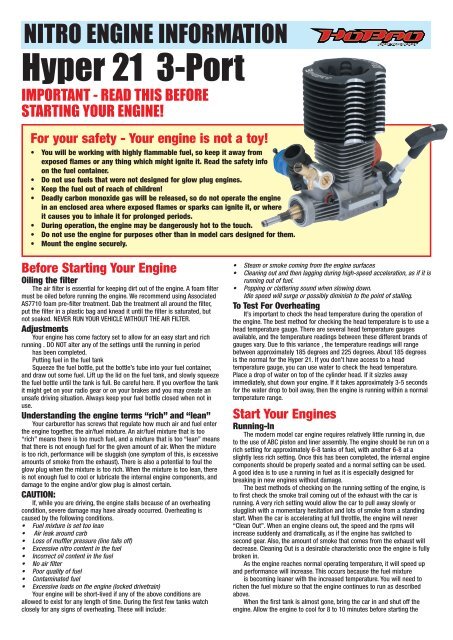
<strong>Hyper</strong> <strong>21</strong> 3-<strong>Port</strong><br />
IMPORTANT - READ THIS BEFORE<br />
STARTING YOUR ENGINE!<br />
For your safety - Your engine is not a toy!<br />
• You will be working with highly flammable fuel, so keep it away from<br />
exposed flames or any thing which might ignite it. Read the safety info<br />
on the fuel container.<br />
• Do not use fuels that were not designed for glow plug engines.<br />
• Keep the fuel out of reach of children!<br />
• Deadly carbon monoxide gas will be released, so do not operate the engine<br />
in an enclosed area where exposed flames or sparks can ignite it, or where<br />
it causes you to inhale it for prolonged periods.<br />
• During operation, the engine may be dangerously hot to the touch.<br />
• Do not use the engine for purposes other than in model cars designed for them.<br />
• Mount the engine securely.<br />
Before Starting Your Engine<br />
Oiling the filter<br />
The air filter is essential for keeping dirt out of the engine. A foam filter<br />
must be oiled before running the engine. We recommend using Associated<br />
AS7710 foam pre-filter treatment. Dab the treatment all around the filter,<br />
put the filter in a plastic bag and knead it until the filter is saturated, but<br />
not soaked. NEVER RUN YOUR VEHICLE WITHOUT THE AIR FILTER.<br />
Adjustments<br />
Your engine has come factory set to allow for an easy start and rich<br />
running . DO NOT alter any of the settings until the running in period<br />
has been completed.<br />
Putting fuel in the fuel tank<br />
Squeeze the fuel bottle, put the bottle’s tube into your fuel container,<br />
and draw out some fuel. Lift up the lid on the fuel tank, and slowly squeeze<br />
the fuel bottle until the tank is full. Be careful here. If you overflow the tank<br />
it might get on your radio gear or on your brakes and you may create an<br />
unsafe driving situation. Always keep your fuel bottle closed when not in<br />
use.<br />
Understanding the engine terms “rich” and “lean”<br />
Your carburettor has screws that regulate how much air and fuel enter<br />
the engine together, the air/fuel mixture. An air/fuel mixture that is too<br />
“rich” means there is too much fuel, and a mixture that is too “lean” means<br />
that there is not enough fuel for the given amount of air. When the mixture<br />
is too rich, performance will be sluggish (one symptom of this, is excessive<br />
amounts of smoke from the exhaust). There is also a potential to foul the<br />
glow plug when the mixture is too rich. When the mixture is too lean, there<br />
is not enough fuel to cool or lubricate the internal engine components, and<br />
damage to the engine and/or glow plug is almost certain.<br />
CAUTION:<br />
If, while you are driving, the engine stalls because of an overheating<br />
condition, severe damage may have already occurred. Overheating is<br />
caused by the following conditions.<br />
• Fuel mixture is set too lean<br />
• Air leak around carb<br />
• Loss of muffler pressure (line falls off)<br />
• Excessive nitro content in the fuel<br />
• Incorrect oil content in the fuel<br />
• No air filter<br />
• Poor quality of fuel<br />
• Contaminated fuel<br />
• Excessive loads on the engine (locked drivetrain)<br />
Your engine will be short-lived if any of the above conditions are<br />
allowed to exist for any length of time. During the first few tanks watch<br />
closely for any signs of overheating. These will include:<br />
• Steam or smoke coming from the engine surfaces<br />
• Cleaning out and then lagging during high-speed acceleration, as if it is<br />
running out of fuel.<br />
• Popping or clattering sound when slowing down.<br />
Idle speed will surge or possibly diminish to the point of stalling.<br />
To Test For Overheating<br />
It’s important to check the head temperature during the operation of<br />
the engine. The best method for checking the head temperature is to use a<br />
head temperature gauge. There are several head temperature gauges<br />
available, and the temperature readings between these different brands of<br />
gauges vary. Due to this variance , the temperature readings will range<br />
between approximately 185 degrees and 225 degrees. About 185 degrees<br />
is the normal for the <strong>Hyper</strong> <strong>21</strong>. If you don’t have access to a head<br />
temperature gauge, you can use water to check the head temperature.<br />
Place a drop of water on top of the cylinder head. If it sizzles away<br />
immediately, shut down your engine. If it takes approximately 3-5 seconds<br />
for the water drop to boil away, then the engine is running within a normal<br />
temperature range.<br />
Start Your Engines<br />
Running-In<br />
The modern model car engine requires relatively little running in, due<br />
to the use of ABC piston and liner assembly. The engine should be run on a<br />
rich setting for approximately 6-8 tanks of fuel, with another 6-8 at a<br />
slightly less rich setting. Once this has been completed, the internal engine<br />
components should be properly seated and a normal setting can be used.<br />
A good idea is to use a running in fuel as it is especially designed for<br />
breaking in new engines without damage.<br />
The best methods of checking on the running setting of the engine, is<br />
to first check the smoke trail coming out of the exhaust with the car is<br />
running. A very rich setting would allow the car to pull away slowly or<br />
slugglish with a momentary hesitation and lots of smoke from a standing<br />
start. When the car is accelerating at full throttle, the engine will never<br />
“Clean Out”. When an engine cleans out, the speed and the rpms will<br />
increase suddenly and dramatically, as if the engine has switched to<br />
second gear. Also, the amount of smoke that comes from the exhaust will<br />
decrease. Cleaning Out is a desirable characteristic once the engine is fully<br />
broken in.<br />
As the engine reaches normal operating temperature, it will speed up<br />
and performance will increase. This occurs because the fuel mixture<br />
is becoming leaner with the increased temperature. You will need to<br />
richen the fuel mixture so that the engine continues to run as described<br />
above.<br />
When the first tank is almost gone, bring the car in and shut off the<br />
engine. Allow the engine to cool for 8 to 10 minutes before starting the
engine up again. Add more fuel. Start it back up and run the second tank of<br />
fuel. Again allow the engine to cool before starting it up again.<br />
The key to breaking in your engine is patience. During the break in<br />
period , your engine may appear to malfunction with problems such as<br />
stalling, inconsistent performance, and fouling out glow plugs. Don’t give<br />
up. These are just a few things you may go through during the break in<br />
period. Just keep it running, apply the throttle on and off as smoothly as<br />
you can. Sudden bursts or quick releases of the throttle can stall your<br />
engine. Soon after break in your patience will pay off with a well running<br />
engine. The performance level of the<br />
engine will be limited by the “rich’ fuel mixture which you will use all<br />
during the break-in process. Once the engine is fully broken-in the mixture<br />
can be “leaned out,” and speed and acceleration will increase. Because of<br />
the rich fuel mixture and the wearing of the new parts, deposits will form<br />
on the glow plug causing it to fail. Expect to replace the glow plug during<br />
the break in period, and definitely when the engine is fully broken in and<br />
the fuel mixture is leaned out.<br />
Setting Engine for Normal<br />
Tuning High Speed<br />
As you approach the first 6-8 tanks running you can start to<br />
GRADUALLY adjust you engine for normal performance. PLEASE NOTE any<br />
adjustments need to be very small at 1/8th turn increments. You can then<br />
begin adjusting the fuel mixture to maximize performance for your driving<br />
needs. To lean turn the main fuel control needle in a clockwise direction.<br />
This will allow the car to pull away faster and more cleanly, without<br />
hesitation and increase the top speed. There should however still be a<br />
noticeable smoke trail.<br />
If the main needle is screwed in too far thus allowing the engine to run<br />
too lean, it will seem to run strong at first, but will bog, hesitate,<br />
or stall when running at high speed. The engine will also rapidly<br />
overheat when the setting is too lean. This is because fuel includes<br />
lubrication, and that lubrication is inadequate when the setting is too lean.<br />
CHECK THE ENGINE TEMPERATURE OFTEN AS YOU LEAN THE MIXTURE. DO<br />
NOT LET THE ENGINE OVERHEAT. You should always see smoke coming<br />
from the exhaust.<br />
At the optimum setting, the engine will clean out; have a strongsounding,<br />
high-pitched whine at full speed; and there will be a thin trail of<br />
whitish smoke coming from the exhaust. It is always better to set the<br />
engine a little rich rather than too lean.<br />
If the engine stalls on acceleration, begins to bog or slow down at full<br />
throttle, or if there is a reduction in exhaust smoke, then the engine is<br />
running too lean. Immediately turn the high speed mixture screw<br />
counterclockwise 1/4 of a turn and operate the car at medium speeds for 1<br />
to 2 minutes to allow the engine to cool.<br />
Tuning Low Speed<br />
The low-speed mixture affects how the engine will perform in the low<br />
to mid range rpms. Turning the<br />
low-speed needle clockwise will<br />
lean the mixture. As with the highspeed<br />
mixture, leaning the lowspeed<br />
mixture increases<br />
performance. Again, if the mixture<br />
here is set too lean, the engine<br />
may be starved for lubrication in<br />
the lowand mid-rpm ranges, thus<br />
causing overheating and<br />
excessive engine wear.<br />
Perform the following test to<br />
determine if the low speed<br />
mixture is set correctly. With the engine warm and running, allow it to idle<br />
for approximately 15 seconds. Now quickly apply throttle and note the<br />
performance. If the engine bogs, accelerates erratically, and a large puff of<br />
blue smokes emitted, then the low speed mixture is too rich. Turn the lowspeed<br />
screw clockwise 1/8 of a turn. If the engine speeds up for a moment<br />
then bogs, hesitates, or stalls,<br />
then the low speed mixture is too<br />
lean. Turn the screw<br />
counterclockwise 1/8 of a turn.<br />
Adjust the mixture screws in 1/8<br />
of a turn increments, wait 15<br />
seconds, and retest after each<br />
change. Adjust for the best<br />
acceleration without the car<br />
stalling.<br />
Care and Maintenance<br />
When you are finished racing<br />
IDLE<br />
ADJUSTMENT<br />
LOW SPEED<br />
ADJUSTMENT<br />
HIGH SPEED<br />
ADJUSTMENT<br />
for the day, drain the fuel tank. Afterwards, energize the<br />
glow plug with your glow plug starter and try to restart<br />
the engine in order to burn off any fuel that may<br />
remain inside the engine. Repeat this procedure<br />
until the engine fails to fire. Try to eject residue<br />
while the engine is still warm. Finally, inject some<br />
corrosion inhibiting oil, and rotate the engine to<br />
distribute the oil to all the working parts. Do not,<br />
however, inject the oil into the carburetor, for it may cause<br />
the O-rings inside to deteriorate. When cleaning the exterior of<br />
the engine, use WD-40. Do not use gasoline or any solvents<br />
that might damage the silicone fuel tubing.<br />
Cleaning the air filter. When the air filter starts to get dirty,<br />
do the following steps:<br />
Step 1. Clean the foam with fuel. Do this by pouring a little fuel<br />
in a small can and kneading the filter in the fuel. When<br />
it looks cleaner, then dispose of the fuel.<br />
Step 2. Dry the filter. Squeeze out the fuel with a paper towel<br />
until it’s dry.<br />
Step 3. Apply Associated’s #7710 Foam Pre-Filter Treatment to<br />
help keep the dirt out. Dab the treatment all around the<br />
filter, put the filter in a plastic sandwich bag, and knead it until the<br />
filter is saturated, but not soaked.<br />
Troubleshooting<br />
Glow Plug Problems<br />
The glow plug in your engine is an inexpensive consumable item which<br />
must be replaced periodically to maintain peak performance and starting<br />
ease. Most often, any starting problems or erratic performance can be<br />
traced back to the glow plug. The glow plug should also be checked if the<br />
engine’s acceleration and top speed performance suddenly becomes flat.<br />
The only sure way to test for a faulty glow plug is simply install a new one<br />
to see if the problem goes away. Remove the plug from the cylinder head<br />
with a 5/16” nut driver. Make sure there is no dirt or debris on top of the<br />
head which could fall into the engine. Do not loose the copper gasket<br />
which seals the glow plug. Touch the glow plug to the contacts of the glow<br />
plug starter. All of the coils should glow white. Sometimes the first few<br />
coils will not glow while the rest are bright, most likely indicating a bad<br />
plug. If the glow is dim orange, then the glow starter battery should be<br />
replaced or recharged.<br />
At the high rpm that the engines operate only a top quality plug will cut<br />
the mustard. Therefore we recommend the use of either McCoy MC9 or<br />
RB #6 plugs.<br />
Fuel Mixture<br />
The fuel mixture is the largest variable you have to control while<br />
operating your engine.<br />
Fuel brand, ambient temperature, and humidity all effect how your<br />
mixture should be set. If the engine runs great one day but runs rich or<br />
lean the next day, it is probably the result of a change in the air quality and<br />
temperature. This should be expected and adjusted for.<br />
Although there are many fuels on the market, very few are designed to<br />
perform and protect your engine at the likes of 35,000rpm that some of our<br />
engines can attain. It is with this fact in mind, and our own in house testing<br />
that we ONLY RECOMMEND the following fuels:<br />
Byron RACE Gen2, Byron RACE Gen2<br />
RTR and Model Technics Dynaglow.<br />
Keep between 10 and 20% nitromethene<br />
content for running and first use. The single<br />
most popular reason for engine failure or<br />
unreliability is poor or wrong fuel. These<br />
fuels have been tested with our engines<br />
and we are confident of their<br />
performance.<br />
OTHER FUELS MAY WORK<br />
WITH OTHER ENGINES BUT<br />
THE FUELS LISTED WORK BEST<br />
WITH THESE ENGINES. FAILURE<br />
TO KEEP TO THESE FUELS MAY<br />
RESULT IN DAMAGE OR<br />
REDUCED PERFORMANCE AND<br />
VOID ANY WARRANTY CLAIMS.
Pull Starter Hints<br />
The pull starter as fitted to most of the entry level engines is, if<br />
treated correctly, the easiest and most cost effective method of starting an<br />
engine. As with every silver lining, there is a cloud. The pullstart system is<br />
similar to that of a lawnmower to look at, but that is where the similarity<br />
ends. The pullstarter is susceptible to breaking if the engine is flooded or<br />
not lubricated enough. To ensure this does not happen, a few simple rules<br />
should be followed.<br />
1. Before attempting to start the engine from cold, remove the<br />
glowplug and then prime the engine with fuel. For cars with a primer<br />
button<br />
on the tank, press this until the fuel has travelled along the fuel pipe<br />
to the carburettor and then a further 10-20 presses. For cars without a<br />
primer on the tank, pull the pullstarter rapidly with your finger over the<br />
exhaust pipe outlet until the fuel has travelled to the carb, and then a<br />
further 10-20 times to lube the engine.<br />
2. Then turn the car upside down and pull the pullstarter rapidly until<br />
all the excess fuel has emptied onto the floor through the glowplug hole.<br />
Refit the plug ensuring the copper gasket washer is also refitted. Wind it<br />
all the way in and then re-wind 1 to 1.5 turns. This allows gases to escape<br />
thus lowering the engines initial compression.<br />
3. Start engine. The engine will run “lumpily” or stop after a few<br />
seconds so try and keep it running by blipping the throttle. Tighten the<br />
glowplug while the engine is running if possible. If the engine has stalled<br />
restart with the plug tightened.<br />
The above procedure hould always be followed from cold or if<br />
difficulty with starting is being experienced.<br />
Troubleshooting Quick Glance<br />
Description<br />
Engine will not start<br />
Starter will not pull<br />
Engine starts and<br />
then stalls<br />
Engine sluggish /<br />
poor performance<br />
Engine overheats<br />
Engine hesitates or<br />
stumbles<br />
Engine stalls instantly<br />
when throttle is fully<br />
opened from idle<br />
Engine stalls while<br />
driving around turns<br />
Problem<br />
Out of fuel<br />
Improper or contaminated fuel<br />
Glow starter not charged<br />
Glow plug bad<br />
Engine flooded<br />
Engine overheating<br />
Carburetor incorrectly adjusted<br />
Exhaust blocked<br />
Air cleaner blocked<br />
Engine is flooded<br />
Rope is jammed<br />
Engine seized<br />
Idle speed set too low<br />
Air bubbles in fuel line<br />
Glow plug is fouled<br />
Engine is overheated<br />
Insufficient fuel tank pressure<br />
Blockage at exhaust header fitting<br />
High-speed fuel mixture is too rich<br />
Leaking glow plug<br />
Fuel bad or contaminated<br />
Carburetor dirty or blocked<br />
Engine overheating<br />
Engine over geared for application<br />
Clutch slipping<br />
Bound up drive train<br />
High-speed fuel mixture is too lean<br />
Cooling air is being blocked<br />
Excessive nitro in the fuel<br />
Excessive load on the engine<br />
Low-speed mixture too lean<br />
High-speed mixture too lean<br />
Low-speed mixture too rich<br />
Engine overheated<br />
Air bubbles in fuel line<br />
Glow plug fouled<br />
Glow plug fouled<br />
Low-speed mixture too lean<br />
High-speed mixture too rich<br />
Fuel level is low<br />
Idle speed set too low<br />
Flooding of the Engine<br />
The most common cause of engine and pullstarter damage is from the<br />
‘flooding” of the engine or a hydro-locked. More accurately this is too<br />
much fuel inside the engines crankcase causing the piston to lock. The<br />
piston rises to the top of the combustion chamber and instead of<br />
compressing a gas i.e. fuel/air mixture it has to try and compress a liquid,<br />
fuel only, which isn’t possible. This puts massive strain on the piston,<br />
conrod and crankshaft as well as the starter. Invariably one component<br />
will fail, usually the conrod causing massive damage to the engines<br />
internals.<br />
To avoid flooding the engine, always start the engine from cold using<br />
the methods mentioned above and if at any time the engine becomes<br />
difficult to turn over with the pullstarter, then remove the glowplug and<br />
empty all excess fuel out and start again. The pullstarter assembly can<br />
only be damaged by a flooded engine, so if you break a pullstarter, this is<br />
a warning that your are flooding the engine.<br />
Cooling Problems<br />
Engine overheating is most often caused by running the engine too<br />
lean or because the cooling air for the cylinder head is blocked. If the<br />
mixture is too lean, simply allow the engine to cool, richen the mixture and<br />
try it again. Bodies must have holes cut in them to allow for cooling air to<br />
circulate over the surface of the cylinder head. On most bodies, it is a<br />
good idea to cut part of the wind-shield out and part of the back window<br />
to allow for additional cooling.<br />
Soloution<br />
Fill fuel tank<br />
Replace fuel<br />
Charge glow starter<br />
Replace glow plug, see “Glow Plug Problems”<br />
See “ flooding” section.<br />
Allow engine to cool, richen fuel mixture, check airflow<br />
Readjust carburetor<br />
Clean exhaust system<br />
Clean air filter<br />
Clear excess fuel, see “flooding” Section.<br />
Repair starter.<br />
Examine engine for damage.<br />
Increase idle speed.<br />
Check for holes in the fuel line.<br />
Replace glow plug, see “Glow Plug Problem” section.<br />
Allow engine to cool, richen fuel Mixture, check airflow<br />
Replace pressure hose- clear<br />
Check flow to and from the tank.<br />
Set high-speed mixture to a leaner setting<br />
Check glow plug gasket<br />
Replace fuel<br />
Clean Carburetor<br />
Stop the engine- find the cause<br />
Use a lower gear ratio<br />
Replace clutch shoes<br />
Find the bound item and repair<br />
Richen high-speed mixture<br />
Get air to the head<br />
Use fuel with lower nitro<br />
Check for bound up drive train<br />
Richen low-speed mixture<br />
Richen high-speed mixture.<br />
Lean low-speed mixture.<br />
Stop the engine and find the cause.<br />
Check for holes in fuel line.<br />
Test or replace plug<br />
Replace glow plug.<br />
Richen low-speed mixture.<br />
Lean high-speed mixture.<br />
Add fuel<br />
Increase idle speed.
Factory Settings for <strong>Hyper</strong> <strong>21</strong><br />
All new engines are assembled with what we will term ‘factory<br />
settings’. These settings should allow almost all engines to be started up<br />
and allow for minimal adjustment for running in purposes.<br />
Bearing this in mind, we are offering you the opportunity of readjusting<br />
to the ‘factory settings’ based on engines currently held in stock.<br />
Main Needle Valve (MNV)<br />
Screw down until resistance is met, and no further movement is apparent.<br />
RE-OPEN 3 FULL TURNS.<br />
Supply Fuel nozzle (SFN)<br />
This nozzle should not extend beyond the body it is screwed into.<br />
SET FLUSH WITH CARBURETTOR BODY END FACE.<br />
Throttle Adjustment Screw (TAS)<br />
Gently shut off carburettor sliding body and slowly re-open by means of<br />
adjusting screw.<br />
ADJUST SCREW UNTIL APPROX 1MM OF APERTURE APPEARS BETWEEN<br />
THE END OF THE THROTTLE BODY AND AIR INTAKE APERTURE.<br />
Sub Throttle Needle Valve (STNV)<br />
With adjustment screw setting in place, close off the throttle body against<br />
the screw. Very gently screw in the needle valve until it closes off the<br />
supply fuel nozzle (<strong>21</strong>059) and is prevented from re-opening by the entry<br />
of the needle valve into the centre hole of the fuel nozzle (work with great<br />
care with this one - we are only looking for minimal frictional contact<br />
between both parts).<br />
RE-OPEN VALV E 3.5 TURNS.<br />
Glossary of Carburettor Functions<br />
Main Needle Valve (High Speed)<br />
The main needle mixture screw controls how much fuel enters the engine<br />
during mid- to high-speed operation. The screw is turned clockwise to<br />
lean (less fuel) and anti-clockwise to richen (more fuel)<br />
Sub Throttle Valve (Low Speed)<br />
This screw meters the fuel at low speeds. The low-speed mixture screw is<br />
located in the end of the carburetor, inside the throttle arm.<br />
This screw controls how much fuel enters the engine at idle and low<br />
throttle. This adjustment will smooth the idle and improve the acceleration<br />
to mid speed. Make this adjustment with the throttle closed, after setting<br />
the idle. The screw is turned clockwise to lean (less fuel) and anticlockwise<br />
to richen (more fuel)<br />
Throttle Adjustment Screw<br />
The throttle adjustment screw regulates the throttle opening to control the<br />
idle speed. The screw is turned clockwise for a higher idle speed and anticlockwise<br />
for a lower idle speed.<br />
<strong>CML</strong> <strong>Distribution</strong>. Saxon House, Saxon Business Park, Hanbury Road, Bromsgrove, Worcestershire. B60 4AD. England<br />
Tel: +44 (0) 1527 575349 Fax: +44 (0) 1527 570536 E-mail: info@cmldistribution.co.uk Web site: www.cmldistribution.co.uk<br />
TAS<br />
MNV<br />
STNV


