C172 Maneuvers Guide - ELMENDORF AERO CLUB
C172 Maneuvers Guide - ELMENDORF AERO CLUB
C172 Maneuvers Guide - ELMENDORF AERO CLUB

Create successful ePaper yourself
Turn your PDF publications into a flip-book with our unique Google optimized e-Paper software.
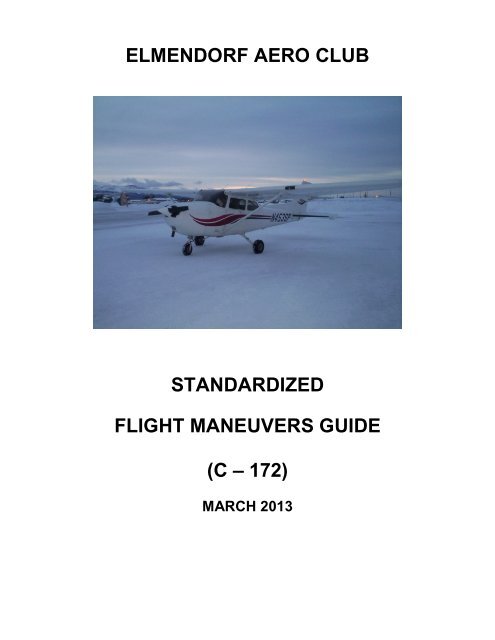
<strong>ELMENDORF</strong> <strong>AERO</strong> <strong>CLUB</strong><br />
STANDARDIZED<br />
FLIGHT MANEUVERS GUIDE<br />
(C – 172)<br />
MARCH 2013
TABLE OF CONTENTS<br />
Contents .................................................................... 2<br />
Purpose ..................................................................... 3<br />
Back to Basics ........................................................... 4<br />
Slow Flight................................................................. 5<br />
Power-Off Stall .......................................................... 6<br />
Power-On Stall .......................................................... 7<br />
Steep Turns............................................................... 8<br />
Chandelles ................................................................ 9<br />
Lazy Eights................................................................ 10<br />
Eights-on-Pylons ....................................................... 11<br />
Steep Spiral............................................................... 12<br />
Normal / Crosswind Takeoff and Climb .................... 13<br />
Normal / Crosswind Approach and Landing ............. 14<br />
Soft Field Takeoff and Climb ..................................... 15<br />
Soft Field Approach and Landing .............................. 16<br />
Maximum Performance Takeoff and Climb ............... 17<br />
Maximum Performance Approach and Landing ........ 18<br />
Normal Traffic Pattern ............................................... 19<br />
Power-Off 180 Degree<br />
Accuracy Approach and Landing .............................. 20<br />
Balked Landing (Go Around) ..................................... 22<br />
Key Figures for C-172R (180 HP) ............................. 23<br />
2
PURPOSE<br />
The purpose of this guide is to establish a standard for specific flight maneuvers.<br />
Applicable maneuvers from this guide will be used for all Initial/Annual Flight<br />
Evaluations, as well as students seeking a Private Pilot Certificate.<br />
Standardizing the way maneuvers are performed establishes a solid foundation of basic<br />
procedural skills and knowledge. This, coupled with experience gained over time, will<br />
enable any pilot to handle most unusual situations and emergencies in a more<br />
predictable fashion with a greater chance of a successful outcome.<br />
Flight instructors and students should find these standards helpful in preparation for any<br />
flight evaluation. Pilots with less than 200 flight hours are expected to be able to<br />
perform these maneuvers at the Private Pilot level. Pilots with 200 flight hours or more<br />
should be able to perform these maneuvers at the Commercial Pilot level.<br />
Chandelles, lazy eights, steep spirals, eights-on-pylons, and power-off 180 degree<br />
accuracy approach and landings are commercial maneuvers and will only be required<br />
for pilots with over 200 hours.<br />
This guide does not replace the practical test requirements for pilot certification or flight<br />
reviews. The specific airspeeds, power settings, and flap settings used in this guide are<br />
for a <strong>C172</strong>, with a 180 hp, fuel injected engine. The Key Figures at the end of this guide<br />
are based on a C-172R (180 HP) and are for training purposes only. They may differ<br />
slightly from other models of the C-172. Stalls, slow flight, chandelles, lazy 8’s, steep<br />
turns, and unusual attitudes) shall be performed at an altitude which allows for recovery<br />
no lower than 1500 feet AGL. Steep spirals and emergency procedures will be<br />
terminated at 500 feet AGL unless the aircraft is in a position to land.<br />
3
BACK TO BASICS<br />
1. Every maneuver begins and ends the same way: SLUF (Strait and Level<br />
Unaccelerated Flight – i.e.; cruise power, trimmed, on altitude and heading, and<br />
stabilized). That way, you know exactly when you are beginning the maneuver,<br />
and exactly when you are done.<br />
2. The recovery altitude is the altitude you are at when you are finished with the<br />
maneuver (i.e.; SLUF). It will probably be different than the altitude from which<br />
you started the maneuver. That being said, your instructor may want you to<br />
return to your original altitude after recovering from a power off stall.<br />
3. There is no requirement to establish a positive rate of climb when recovering<br />
from a stall in a fixed gear aircraft. (The PTS only requires a positive rate of<br />
climb prior to retracting the landing gear.) However, the aircraft should be in a<br />
pitch attitude that will result in a positive rate of climb at the end of the maneuver.<br />
4. To consistently raise or lower the flaps “incrementally,” use airspeeds that equate<br />
to something useful. Pattern airspeeds work well for extending the flaps and<br />
V-speeds work well for retracting them during a stall recovery or a go-around.<br />
5. Clearing turns will be accomplished by turning 90 degrees in each direction.<br />
6. The importance of proper trim techniques cannot be over emphasized. Trim<br />
constantly changes throughout the flight. Any change in power, pitch, bank,<br />
airspeed or weight/CG (fuel burn) requires a corresponding trim change. You<br />
should constantly strive to keep the aircraft trimmed “hands off.” A properly<br />
trimmed aircraft will allow you to do other things with your eyes and hands (e.g.<br />
surveillance, taking notes, inserting coordinates in the GPS) without having to<br />
constantly monitor altitude, airspeed and heading.<br />
7. The following maneuver descriptions are designed to produce standardized<br />
performance by each Pilot. Therefore, they should be considered procedural in<br />
nature. By performing each maneuver as described, you will consistently fly the<br />
aircraft (and think through the maneuver) the same way every time. This will<br />
develop a sound knowledge and flying skills base and allow you to handle any<br />
emergency or unusual flight situation in a predictable fashion based on a solid<br />
foundation of the basics.<br />
4
1. Clear the area using clearing turns.<br />
2. Fuel: BOTH - Mixture: FULL RICH<br />
SLOW FLIGHT<br />
3. Establish and announce altitude and heading.<br />
4. Power, approximately 1500 RPM<br />
5. Airspeed in flap operating range, extend flaps in 10-degree increments to desired<br />
setting. (85 KIAS – flaps 10; 75 KIAS – flaps 20; 65 KIAS – flaps 30)<br />
6. As airspeed diminishes, adjust power and pitch attitude to maintain level flight.<br />
7. Establish and maintain an airspeed at which any further increase in pitch, load<br />
factor, and/or reduction in power would result in an immediate stall.<br />
8. Recognize and announce the first aerodynamic indications of an oncoming stall<br />
(e.g., stall warning, mushy flight controls, buffeting).<br />
9. Perform coordinated turns, climbs, and descents as directed by the instructor.<br />
10. Recover to cruise flight by simultaneously applying maximum power, flaps 20.<br />
Adjust pitch attitude to maintain altitude. Retract flaps to 10 degrees at Vx, and<br />
full up at Vy. (The recovery is analogous to a Go-Around procedure.)<br />
5
1. Clear the area using clearing turns.<br />
2. Fuel: BOTH - Mixture: FULL RICH<br />
3. Power, approximately 1500 RPM<br />
POWER-OFF STALL<br />
4. Establish and announce altitude and heading.<br />
5. Airspeed in flap operating range, extend flaps in 10-degree increments to desired<br />
setting. (85 KIAS – flaps 10; 75 KIAS – flaps 20; 65 KIAS – flaps 30)<br />
6. When airspeed reaches approach speed of 60-65 KIAS, reduce power to idle.<br />
Establish a glide and trim at that speed while continuing to maintain heading<br />
unless instructor directs a turn.<br />
7. After establishing a stabilized descent, call out the altitude you have picked for<br />
the “simulated ground” and transition smoothly to a pitch attitude that will hold<br />
that altitude.<br />
8. Recognize and announce the first aerodynamic indications of an oncoming stall<br />
(e.g., stall warning horn, mushy controls, buffeting).<br />
9. Recognize and announce the stall, then promptly recover by simultaneously:<br />
A. Decreasing angle of attack (relaxing backpressure)<br />
B. Maintaining wings level using primarily rudder inputs.<br />
C. Applying full power, flaps 20.<br />
10. Adjust pitch to maintain attitude.<br />
11. Retract flaps to 10 degrees at Vx, and full up at Vy. Return to initial altitude at<br />
Vy. Return to cruise flight by setting cruise power, and trimming the aircraft to<br />
maintain altitude and heading.<br />
6
1. Clear the area using clearing turns.<br />
2. Fuel: BOTH - Mixture: FULL RICH<br />
3. Power, approximately 1500 RPM<br />
POWER-ON STALL<br />
4. Establish and announce altitude and heading.<br />
5. Slow to lift-off speed (60-65 KIAS), then simultaneously apply full power,<br />
carburetor heat cold, and establish a takeoff attitude.<br />
6. Transition smoothly from the takeoff attitude to the pitch attitude that will induce a<br />
stall. (Feet on the horizon or approximately 20 degrees nose high). (Max<br />
allowable pitch is 30 degrees).<br />
7. Establish desired bank angle (as directed by instructor). If a turn is used, 20degree<br />
max bank angle.<br />
8. Recognize and announce the first aerodynamic indications of the oncoming stall<br />
(e.g., stall warning horn, mushy aileron control, buffeting).<br />
9. Announce the stall (at the buffet); then promptly recover by simultaneously:<br />
A. Decreasing angle of attack (relaxing backpressure).<br />
B. Maintaining wings level using primarily rudder inputs.<br />
10. Maintain present altitude and accelerate to Vy.<br />
11. Return to cruise flight by setting cruise power and maintaining altitude, heading,<br />
and airspeed.<br />
7
1. Clear the area using clearing turns.<br />
STEEP TURNS<br />
2. Establish cruise flight (Power approximately 2200 RPM, Airspeed at or below VA,<br />
Trim for level hands-off flight.)<br />
3. Establish and announce altitude and heading. Determine a visual reference<br />
point (if practical).<br />
4. Smoothly roll into a 45 degree banked turn using coordinated ailerons and<br />
rudder. (50 degrees for pilots over 200 hours)<br />
5. Maintain a level turn by looking outside and “dragging the nose across the<br />
horizon.”<br />
6. Vary backpressure to maintain altitude, ailerons to maintain bank angle, rudder to<br />
maintain coordinated flight, and power to maintain airspeed.<br />
7. Approaching the visual reference point (within approximately 5-10 degrees of<br />
initial heading) transition smoothly back to straight and level flight using<br />
coordinated ailerons and rudder. Reduce backpressure to maintain altitude and<br />
power to maintain airspeed.<br />
8. Smoothly transition into a step turn in the opposite direction.<br />
9. After completion of the second 360 degree turn, return to cruise flight by setting<br />
cruise power and maintaining altitude, heading, and airspeed.<br />
8
1. Clear the area using clearing turns.<br />
CHANDELLES<br />
2. Establish cruise flight (Power approximately 2200 RPM, Airspeed at or below VA,<br />
Trim for level hands-off flight.)<br />
3. Establish and announce altitude and heading. Determine visual reference points<br />
and wind direction.<br />
4. Smoothly roll into the wind and establish a 30 degree bank.<br />
5. Apply full power while increasing backpressure to increase pitch to approximately<br />
5-10 degrees nose high.<br />
6. Maintain 30 degrees bank and continue to increase pitch until the 90 degree<br />
point (altitude is increasing, airspeed is decreasing).<br />
7. Gradually start rolling out bank at the 90 degree point while maintaining pitch.<br />
8. Complete the rollout to wings level at the 180 degree point. Airspeed should be<br />
approximately 1.2 VS.<br />
9. Momentarily hold airspeed without stalling.<br />
10. Resume straight and level flight while letting airspeed increase to cruise.<br />
11. Reduce power to cruise setting and maintain altitude, heading, and airspeed.<br />
9
1. Clear the area using clearing turns.<br />
LAZY EIGHTS<br />
2. Establish cruise flight (Power approximately 2200 RPM, Airspeed at or below VA,<br />
Trim for level hands-off flight.)<br />
3. Establish and announce altitude and heading. Determine visual reference points<br />
and wind direction. (Select a reference point abeam the wingtip.)<br />
4. Raise the nose above the horizon and begin a climb (approximately 5-10<br />
degrees nose high).<br />
5. Slowly roll in bank and enter a coordinated climbing turn.<br />
6. Pass the 45 degree point with maximum nose-up for the maneuver. (Bank is<br />
increasing through 15 degrees; speed is decreasing; pitch begins decreasing;<br />
bank angle continues to increase).<br />
7. Arrive at the 90 degree reference point with a maximum bank angle of 30<br />
degrees. (Pitch is momentarily level, then descending through the horizon; bank<br />
begins to decrease; speed begins to increase).<br />
8. Take note of the altitude and airspeed at the 90 degree point.<br />
9. Pass the 135 degree point with the lowest pitch attitude for the maneuver. (Bank<br />
is reducing through 15 degrees; speed continues to increase; pitch begins<br />
increasing; bank angle continues to decrease).<br />
10. At the 180 degree point the aircraft is momentarily level at the same altitude and<br />
airspeed as at entry.<br />
11. Smoothly roll bank in the opposite direction and reaccomplish the maneuver.<br />
12. Complete the rollout to wings level at the 180 degree point. Airspeed, altitude,<br />
and heading should be the same as at entry.<br />
13. Resume cruise flight after completing the maneuver.<br />
10
1. Clear the area using clearing turns.<br />
EIGHTS-ON-PYLONS<br />
2. Establish cruise flight at 800 feet AGL. (Power approximately 2200 RPM,<br />
Airspeed at or below VA, Trim for level hands-off flight.)<br />
3. Calculate pivotal altitude (ground speed in knots squared divided by 11.3).<br />
4. Select 2 pylons approximately ½ nm apart, perpendicular to the wind.<br />
NOTE: Fly over one of the 2 pylons, put the wingtip on the other pylon and<br />
note the bank angle on the attitude indicator. 20 degrees bank angle<br />
means the pylons are approximately ½ nm apart. If the bank angle is more<br />
than 20 degrees, the pylons are less than ½ nm apart. If the bank angle is<br />
less than 20 degrees, the pylons are more than ½ nm apart.<br />
5. Enter the maneuver by approaching the midpoint between the pylons diagonally,<br />
with the wind to your back.<br />
6. Just past the intended pylon, roll into a turn around that pylon (approximately 30<br />
to 40 degrees of bank) and place the wingtip on that pylon.<br />
7. Use ailerons to correct up and down movement and elevator (pivotal altitude) to<br />
correct fore and aft movement of the pylon on the wingtip.<br />
NOTE: If the pylon moves forward of the wingtip, apply forward elevator<br />
( i.e. descend to increase ground speed). If the pylon moves aft of the<br />
wingtip, apply aft elevator pressure (i.e. climb to decrease ground speed).<br />
Do not use rudder to maintain wingtip position on the pylon.<br />
8. Crossing the midpoint between the pylons, roll back to wings level.<br />
9. Just past the opposite pylon, roll into a turn around that pylon (approximately 30<br />
to 40 degrees of bank) and place the wingtip on that pylon.<br />
10. Use ailerons to correct up and down movement and elevator to correct fore and<br />
aft movement of the pylon on the wingtip.<br />
11. Complete the maneuver by crossing the midpoint between the pylons wings<br />
level, at the same altitude and airspeed at which the maneuver was entered.<br />
11
1. Clear the area using clearing turns.<br />
STEEP SPIRAL<br />
2. Establish cruise flight (Power approximately 2200 RPM, Airspeed at or below VA,<br />
Trim for level hands-off flight), at an altitude that will allow at least 3 descending<br />
360 degree turns.<br />
3. Select an appropriate landing area.<br />
4. While maneuvering to the intended landing area, slow the aircraft to best glide<br />
speed and configure for landing (up to full flaps may be used).<br />
5. Maintain altitude and trim for hands-off at best glide speed.<br />
6. Abeam the intended landing area, reduce power to idle, allow the nose to drop,<br />
and retrim for hands-off at best glide speed.<br />
7. Maintain a constant radius turn around the intended landing area by varying bank<br />
angle to correct for wind. (Normal 20-30 degrees of bank; Max 60 degrees).<br />
8. After the 3 rd 360 degree turn, execute a power off landing or go around, as<br />
applicable.<br />
NOTE: Clear the engine at least once during the maneuver.<br />
12
NORMAL / CROSSWIND TAKEOFF AND CLIMB<br />
1. Accomplish the before takeoff checklist.<br />
2. Align aircraft with runway centerline with ailerons fully deflected into the wind if<br />
crosswind is present.<br />
3. Smoothly apply full power and check instruments. Announce, “Engine<br />
instruments in the green, Airspeed alive.”<br />
4. As the aircraft accelerates, reduce aileron deflection as necessary and maintain<br />
runway alignment with rudder.<br />
5. At 55 KIAS, apply backpressure to establish Vy climb attitude.<br />
NOTE: If a significant crosswind exists, increase the rotation speed by one<br />
half the gust factor, not to exceed 10 knots. This holds the aircraft on the<br />
ground a little longer so that a smooth and definite liftoff can be made.<br />
6. As the aircraft lifts off, establish a crab into the wind; then level the wings.<br />
7. Maintain takeoff power, Vy, and a ground track along the extended runway<br />
centerline during climb out.<br />
8. Once clear of the pattern, establish a cruise climb speed of 80-90 KIAS.<br />
13
NORMAL / CROSSWIND APPROACH AND LANDING<br />
1. Accomplish the before landing checklist<br />
2. While flying the appropriate traffic pattern, assess the wind by the required wind<br />
correction angles and by the surface wind indicators. (Consider the use of<br />
reduced flap settings for landing, depending on the crosswind conditions.)<br />
3. Prior to 300 feet AGL on final approach, stabilize the aircraft with the final flap<br />
setting and crab angle. Maintain final approach airspeed of 65 KIAS with<br />
approximately 500 feet per minute rate of descent and 1500 RPM.<br />
NOTE: If gusty conditions are present, increase final approach speed by<br />
one half the gust factor, not to exceed 10 knots.<br />
4. Prior to the flare, establish and maintain a drift correction using the wing low<br />
(side-slip) method: opposite rudder to keep the aircraft’s longitudinal axis aligned<br />
with the runway centerline, aileron into the wind to control drift.<br />
NOTE: When to transition to the sideslip depends on pilot proficiency.<br />
Establishing the sideslip earlier on final (for low time pilots) allows for a<br />
more stabilized approach with maximum exposure to the control inputs<br />
needed for the touchdown.<br />
5. At the appropriate flare altitude, reduce power to idle and slow the descent by<br />
increasing pitch attitude. As the aircraft decelerates, increase aileron and rudder<br />
deflection to maintain the necessary sideslip. Allow the aircraft to touch down on<br />
the upwind main wheel first, followed by the downwind main wheel, then the nose<br />
wheel.<br />
6. Maintain backpressure on the yoke throughout the landing roll and continue to<br />
increase aileron deflection fully into the wind as the aircraft slows to taxi speed.<br />
14
SOFT FIELD TAKEOFF AND CLIMB<br />
1. Accomplish the before takeoff checklist.<br />
2. Prior to taxiing onto the takeoff surface, set the flaps to 10 degrees and apply full<br />
elevator backpressure.<br />
3. Taxi onto the takeoff surface at a speed consistent with safety. Avoid stopping on<br />
a soft surface.<br />
4. Smoothly apply full power and check instruments while adjusting the elevator to<br />
maintain minimum nose wheel pressure on takeoff surface. Announce ”Engine<br />
instruments in the green, Airspeed alive”.<br />
5. Lift off at the lowest possible airspeed, then reduce back pressure to lower the<br />
pitch attitude to remain in ground effect (one wingspan length) while the aircraft<br />
accelerates.<br />
6. Establish Vx or Vy pitch attitude as appropriate.<br />
7. Maintain takeoff power and a ground track along the extended runway centerline<br />
during climb out.<br />
8. Retract flaps when clear of any obstacles and continue climbing at Vy.<br />
NOTE: If a crosswind exists, apply the appropriate crosswind procedures<br />
as described in crosswind takeoff procedures and raise the flaps.<br />
15
SOFT FIELD APPROACH AND LANDING<br />
1. Accomplish the before landing checklist.<br />
2. Select the desired touchdown point and complete the appropriate traffic pattern.<br />
Extend downwind to allow sufficient time on final for establishing the desired<br />
descent profile.<br />
3. Stabilize the airplane on final approach at 55 KIAS (1.3 Vso). Descent rate<br />
should be approximately 500 feet per minute, flaps full down, and power<br />
approximately 1500 RPM.<br />
4. When the intended landing area is assured, reduce power toward idle. As you<br />
initiate the flare, increase power to break the descent rate of the aircraft just<br />
above the landing surface. Maintain pitch with elevator and control descent rate<br />
with power.<br />
5. Hold this power setting all the way through the flare and touchdown. As the main<br />
wheels touch, hold backpressure to prevent the nose wheel from touching. Once<br />
the aircraft is stabilized with the main wheels on the ground, smoothly reduce<br />
power as required while maintaining sufficient backpressure to hold the nose off<br />
the runway as long as possible. Adjust power according to the surface<br />
conditions.<br />
6. When the nose wheel settles to runway, maintain full elevator back pressure to<br />
minimize the weight on the nose wheel.<br />
NOTE: If a crosswind exists, apply the appropriate crosswind procedures<br />
as described in crosswind takeoff procedures.<br />
16
MAXIMUM PERFORMANCE TAKEOFF AND CLIMB<br />
(SHORT FIELD)<br />
1. Accomplish the before takeoff checklist.<br />
2. Set flaps as recommended by POH.<br />
3. Taxi into position at the end of the runway so that maximum runway is available<br />
for takeoff.<br />
4. Smoothly advance the throttle to full power. Check engine instruments and<br />
announce “Engine instruments in the green, Airspeed alive.”<br />
5. Rotate at 55 KIAS and establish Vx pitch attitude. After liftoff, establish and<br />
maintain Vx until well clear of real or simulated obstacles.<br />
6. Once all obstacles are cleared, lower the nose and accelerate to Vy. Raise the<br />
flaps upon reaching Vy then continue the climb to cruise altitude.<br />
NOTE: If crosswind exists, apply the appropriate crosswind procedures as<br />
described in crosswind takeoff procedures.<br />
17
MAXIMUM PERFORMANCE APPROACH AND LANDING<br />
(SHORT FIELD)<br />
1. Accomplish the before landing checklist.<br />
2. Select the desired touchdown point and complete the appropriate traffic pattern.<br />
Extend downwind to allow sufficient time on final for establishing the desired<br />
descent profile.<br />
3. Stabilize the airplane on final approach at 55 KIAS (1.3 Vso). Descent rate<br />
should be approximately 500 feet per minute, flaps full down, and power<br />
approximately 1500 RPM.<br />
4. Select an appropriate aim point situated approximately 100-200 feet short of the<br />
specified touchdown point and adjust power as necessary to avoid over- or<br />
undershooting that aim point. Precise airspeed control is essential for judging<br />
the descent profile.<br />
5. In the flare, reduce power to idle to land on (or slightly beyond) the specified<br />
touchdown point. Touch down at minimum control airspeed with no side drift,<br />
minimum float, and with the airplane’s longitudinal axis aligned with and over the<br />
runway center/landing path.<br />
6. Begin smoothly applying brakes immediately after touchdown. Retract the flaps<br />
while holding positive backpressure on the elevator. Continue applying full<br />
elevator backpressure and maximum braking (without skidding the tires) until the<br />
aircraft has slowed to normal taxi speed.<br />
NOTE: If crosswind exists, apply the appropriate crosswind procedures as<br />
described in crosswind takeoff procedures.<br />
18
NORMAL TRAFFIC PATTERN<br />
Accomplish the before landing checklist prior to entering the pattern.<br />
1. Entry: Enter traffic pattern from a 45 to downwind, at pattern altitude (1000 feet<br />
AGL), approximately 1900 RPM, and 85-95 KIAS.<br />
2. Abeam Touchdown Point: Pwr to 1500 RPM, Flaps to 10 degrees, Trim for<br />
500 feet per minute rate of descent (Approximately 85 KIAS).<br />
3. Turn to Base: 45 degrees to touchdown point (700 feet AGL), Flaps 20 degrees<br />
(Flaps, Turn, Talk), Retrim for 500 feet per minute rate of descent (Approximately<br />
75 KIAS).<br />
4. Turn to Final: 20 degrees to touchdown point (500 feet AGL), Flaps 30 degrees<br />
(Flaps, Turn, Talk). Roll out on final approximately ½ NM from touchdown, 300-<br />
400 feet AGL. Adjust pitch and power to maintain a stabilized approach at 65<br />
KIAS and 500 feet per minute rate of descent.<br />
5. Turn to Crosswind: Maintain climb at Vy with max continuous power until within<br />
300 feet below pattern altitude.<br />
6. Turn to Downwind: level off at pattern altitude, reduce power to approximately<br />
1900 RPM, Carb Heat on.<br />
19
POWER-OFF 180 DEGREE ACCURACY<br />
APPROACH AND LANDING<br />
1. Position the aircraft on a normal downwind and complete the before landing<br />
checklist.<br />
2. Determine projected ground track for a continuous turn to final (based on wind).<br />
3. Determine desired reference altitudes around the turn to final (based on field<br />
elevation).<br />
NOTE: As a general rule of thumb, divide the final turn into thirds. If the<br />
pattern altitude is 1000 feet AGL, plan on being approximately 700 feet AGL<br />
at the first 3 rd of the turn, 500 feet AGL at the second 3 rd of the turn, and<br />
rolling out on final at approximately 300 feet AGL and ¼ nm from the<br />
intended touchdown point. If you are above these projected altitudes, add<br />
more flaps or extend the ground track. If you are below these projected<br />
altitudes, shorten the ground track.<br />
4. Close the throttle abeam the intended touchdown point.<br />
5. Establish glide speed based on wind and projected ground track.<br />
6. Evaluate aircraft performance based on determined ground track and reference<br />
altitudes.<br />
7. Lower flaps as desired. (Consider delaying the last 10 degrees of flaps until<br />
landing is assured).<br />
8. Touchdown at or within 200 feet beyond the intended touchdown point, on<br />
centerline, with the aircraft aligned parallel to the runway.<br />
REFER TO THE FORCED LANDING PATTERN DIAGRAM ON THE FOLLOWING<br />
PAGE FOR PATTERN ENTRY IF YOU ARE NOT ALREADY AT LOW KEY<br />
20
BALKED LANDING (GO-AROUND)<br />
1. Smoothly apply full power and retract the flaps to 20 degrees. Establish a pitch<br />
attitude equivalent to Vy.<br />
(Warning: Jamming the throttle forward can cause the engine to falter or<br />
quit.)<br />
2. If obstacles are present, establish a Vx pitch attitude and maintain Vx until clear<br />
of obstacles (400’ AGL minimum).<br />
3. As the aircraft accelerates, retract flaps to 10 degrees at Vx and flaps up at Vy.<br />
Continue climb to pattern altitude.<br />
4. Side step to the right to keep conflicting runway traffic in sight.<br />
5. Announce the go-around on CTAF or to the Tower<br />
NOTE: The decision to execute a go around is no reason for<br />
embarrassment, but rather the manifestation of sound judgment.<br />
Welcome any opportunity to practice this vital maneuver!<br />
22
GENERAL:<br />
KEY FIGURES FOR C-172R (180 HP)<br />
MAX GROSS WEIGHT - 2550<br />
ENGINE - 4 CYL; 180 HP; LYCOMING<br />
PROPELLER - FIXED PITCH; 76” DIAMETER; Mc<br />
CAULEY<br />
FUEL - 56 GAL MAX; 53 GAL USABLE;<br />
100LL (BLUE); 110/130 (GREEN)<br />
OIL - 8 QT MAX; 5 QT MIN; SAE 20W50<br />
(SUMMER & WINTER)<br />
WING SPAN - 36’<br />
MIN TURN RADIUS - 27’ 5.5”<br />
ENGINE:<br />
MAX RPM - 2700<br />
NORMAL RANGE - 2100-2500<br />
WARM-UP - 800-1000<br />
OIL:<br />
MAX TEMP - 245F<br />
NORMAL RANGE - 100-245F<br />
MIN PRESSURE - 20 PSI<br />
MAX PRESSURE - 115 PSI<br />
NORMAL POWER - 50-90 PSI<br />
ACCELERATION:<br />
FLAPS UP - +3.8 TO -1.52G<br />
FLAPS DOWN - +3.0 TO 0G<br />
MAG CHECK (1800 RPM):<br />
MAX DROP - 150 RPM (FOR EITHER MAG)<br />
COMPARISON - +/- 50 RPM (BETWEEN MAGS)<br />
VACUUM CHECK (1800 RPM):<br />
ALLOWABLE RANGE - 4.5 TO 5.5 PSI<br />
23
ELECTRICAL SYSTEM:<br />
ALTERNATOR - 60 AMP<br />
BATTERY - 24V<br />
OVER VOLTAGE LIMIT - 31.5 VOLTS<br />
ELECTRICAL INSTRUMENTS:<br />
FUEL QUANTITY INDICATORS<br />
OIL TEMP<br />
COURSE DIRECTION INDICATOR (CDI)<br />
RADIO MAGNETIC INDICATOR (RMI)<br />
TURN COORDINATOR<br />
AMMETER<br />
ENGINE DRIVEN INSTRUMENTS<br />
ENGINE TACHOMETER (RPM)<br />
OIL PRESSURE<br />
VACUUM DRIVEN INSTRUMENTS:<br />
DIRECTION GYRO (DG)<br />
ATTITUDE SITUATION INDICATOR (ASI)<br />
PITOT STATIC DRIVEN INSTRUMENTS:<br />
AIRSPEED INDICATOR (AI)<br />
VERTICAL SPEED INDICATOR (VSI)<br />
ALTIMETER (ALT)<br />
INSTRUMENT GROUP CATEGORIES:<br />
POWER - RPM; OIL TEMP; OIL PRESS<br />
PERFORMANCE - AI; VSI; TURN COORDINATOR<br />
FLIGHT - ASI; ALT; DG; CDI; RMI<br />
WARNING - AMMETER; VACUUM GAGE; LOW<br />
VOLTAGE LIGHT; LOW VACUUM LIGHT<br />
24
KEY SPEEDS:<br />
VA - 105 BEST GLIDE - 68<br />
VNE - 163 FINAL APPROACH - 65 (FULL FLAPS)<br />
VNO - 129 MAX CROSS WIND - 15<br />
VFE - 85 HYDROPLANE - 55<br />
VS - 48 STALL WARNING - 5-10<br />
VSO - 40 KNOTS ABOVE THE STALL<br />
VX - 62<br />
VY - 74<br />
VR - 55<br />
CRUISE POWER SETTINGS (4000’; +7C [STD DAY])<br />
2300 RPM (54%); 102 KIAS; 7.7 GPH<br />
NORMAL PATTERN: (NO WIND, STANDARD DAY)<br />
PATTERN ENTRY - 1000 AGL; 1900 RPM; ARB HEAT; APPR0X 95 KIAS;<br />
TRIM<br />
ABEAM TOUCHDOWN - 1500 RPM; FLAPS 10; TRIM FOR 500 FPM DESC<br />
TURN TO BASE - 700 AGL; 45 DEGREE ANGLE-OFF; FLAPS 20; 500 FPM<br />
DESC<br />
TURN TO FINAL - ½ NM FROM TOUCHDOWN; 300-400 AGL; FLAPS 30<br />
DESCENT ON FINAL - 500 FPM (4.5 DEGREE G/S) @ 65 KIAS (NORM; N/F);<br />
55 KIAS (SHORT/SOFT)<br />
25