Mod. SUPER LIGHT VT1 9mt 4x1000W METAALJODIDEN Mod ...
Mod. SUPER LIGHT VT1 9mt 4x1000W METAALJODIDEN Mod ...
Mod. SUPER LIGHT VT1 9mt 4x1000W METAALJODIDEN Mod ...

You also want an ePaper? Increase the reach of your titles
YUMPU automatically turns print PDFs into web optimized ePapers that Google loves.
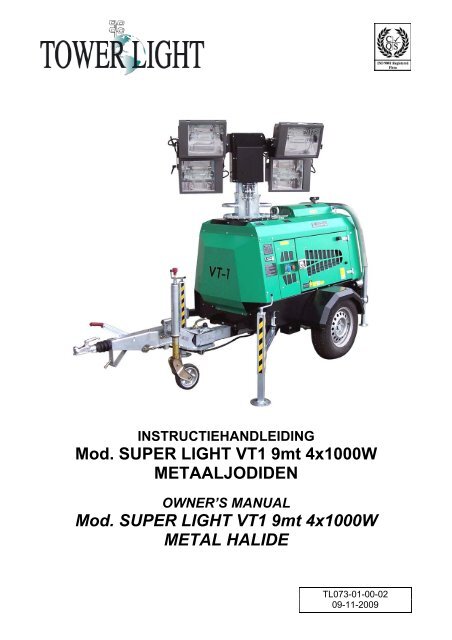
INSTRUCTIEHANDLEIDING<br />
<strong>Mod</strong>. <strong>SUPER</strong> <strong>LIGHT</strong> <strong>VT1</strong> <strong>9mt</strong> <strong>4x1000W</strong><br />
<strong>METAALJODIDEN</strong><br />
OWNER’S MANUAL<br />
<strong>Mod</strong>. <strong>SUPER</strong> <strong>LIGHT</strong> <strong>VT1</strong> <strong>9mt</strong> <strong>4x1000W</strong><br />
METAL HALIDE<br />
TL073-01-00-02<br />
09-11-2009
<strong>SUPER</strong> <strong>LIGHT</strong> <strong>VT1</strong> <strong>9mt</strong> <strong>4x1000W</strong> <strong>METAALJODIDEN</strong><br />
INHOUDSOPGAVE - INDEX<br />
1. EG-MARKERING - CE MARK ............................................................................................................. 5<br />
2. GEBRUIK EN ONDERHOUD - USE & MAINTENANCE .................................................................... 5<br />
3. ALGEMENE INFORMATIE - GENERAL INFORMATION .................................................................. 6<br />
3.1 DOCUMENTATIE BIJGELEVERD BIJ DE LICHTMAST - EQUIPMENT DOCUMENTATION OF THE<br />
<strong>LIGHT</strong>ING TOWER ............................................................................................................................. 6<br />
4. KWALITEITSCERTIFICAAT - QUALITY SYSTEM ............................................................................. 7<br />
5. CONFORMITEITVERKLARING EN TESTFICHE – DECLARATION OF CONFORMITY WITH<br />
CHECK LIST ........................................................................................................................................ 8<br />
6. VEILIGHEIDSSYMBOLEN - SAFETY SIGNS ..................................................................................... 9<br />
7. IN ACHT TE NEMEN VEILIGHEIDSNORMEN - SAFETY REGULATIONS TO OBSERVE ............ 11<br />
7.1 VOOR HET GEBRUIK VAN DE MACHINE – BEFORE THE USE OF MACHINE ............................ 11<br />
7.2 GEDURENDE HET ONDERHOUD - DURING THE MAINTENANCE .............................................. 12<br />
7.3 GEDURENDE DE TRANSPORTFASE – DURING THE TRANSPORT ........................................... 12<br />
8. ALGEMENE INFORMATIE OVER DE RISICO’S - GENERAL DANGER INFORMATION ............. 13<br />
8.1 GEVAAR VOOR BRANDWONDEN - DANGER OF BURN .............................................................. 13<br />
8.2 ELEKTROCUTIEGEVAAR - DANGER OF ELECTROCUTION ....................................................... 13<br />
8.3 GEVAAR VOOR BEKLEMD RAKEN - DANGER OF ENTANGLE ................................................... 13<br />
8.4 GEVAAR VOOR BRAND OF EXPLOSIE GEDURENDE HET BIJVULLEN - WARNING OF FIRE OR<br />
EXPLOSION DURING OPERATIONS OF REFUELLING ................................................................ 14<br />
8.5 GELUID - NOISE .............................................................................................................................. 14<br />
8.6 UITLAATGAS - EXHAUST GASES .................................................................................................. 14<br />
9. ALGEMENE BESCHRIJVING VAN DE MACHINE - GENERAL DESCRIPTION OF THE MACHINE<br />
............................................................................................................................................................ 15<br />
10. PERIODE VAN INACTIVITEIT - PERIOD OF INACTIVITY .............................................................. 15<br />
11. TECHNISCHE KENMERKEN - TECHNICAL SPECIFICATION ....................................................... 16<br />
11.1 GENERATOR – GENERATOR ........................................................................................................ 16<br />
11.2 MOTOR – ENGINE ........................................................................................................................... 16<br />
11.3 HYDRAULISCHE REGELEENHEID – HYDRAULIC GEAR BOX .................................................... 17<br />
11.3.1 ELEKTRISCHE MOTOR – ELECTRICAL MOTOR .................................................................. 17<br />
11.3.2 HYDRAULISCHE POMP – GEAR PUMP ................................................................................. 17<br />
11.3.3 ELEKTROKLEP – UNLOADING SOLENOID VALVE .............................................................. 17<br />
11.3.4 HYDRAULISCHE OLIE – HYDRAULIC FLUID ......................................................................... 17<br />
11.4 LICHTMAST – <strong>LIGHT</strong>ING TOWER .................................................................................................. 18<br />
11.5 SCHIJNWERPER – FLOOD<strong>LIGHT</strong> .................................................................................................. 19<br />
11.6 LAMP - LAMP.................................................................................................................................... 20<br />
12. DIAGRAM LICHTTECHNISCHE BEREKENING - <strong>LIGHT</strong>ING FOOT PRINT DIAGRAM ................ 21<br />
13. IDENTIFICATIE VAN DE EXTERNE COMPONENTEN - IDENTIFICATIONS OF THE EXTERNAL<br />
COMPONENTS .................................................................................................................................. 22<br />
13.1 SAMENSTELLING VAN DE LICHTMAST - <strong>LIGHT</strong>ING TOWER COMPOSITION ........................... 22<br />
13.2 EXTERN ELEKTRISCH PANEEL - EXTERNAL ELECTRICAL PANEL ........................................... 24<br />
13.3 BESCHERMPLAAT RADIATORDOP - RADIATOR CAP PROTECTION PLATE ............................ 26<br />
2 TL073-01-00-02<br />
09-11-2009
<strong>SUPER</strong> <strong>LIGHT</strong> <strong>VT1</strong> <strong>9mt</strong> <strong>4x1000W</strong> <strong>METAALJODIDEN</strong><br />
14. IDENTIFICATIE VAN DE INTERNE COMPONENTEN - IDENTIFICATION OF THE INNER<br />
COMPONENTS .................................................................................................................................. 27<br />
14.1 BESCHRIJVING VAN HET BESTURINGSPANEEL - COMMAND PANEL DESCRIPTION ............ 27<br />
14.2 HYDRAULISCHE REGELEENHEID - HYDRAULIC GEAR BOX ..................................................... 29<br />
14.2.1 NOODKNOP PAALDALING - LOWERING HANDLE BAR BRACKET IN CASE OF<br />
EMERGENCY ............................................................................................................................ 30<br />
14.3 ACCU - BATTERY ............................................................................................................................ 31<br />
14.4 BRANDSTOFTANK - FUEL TANK ................................................................................................... 32<br />
14.5 MOTOROLIEDOP - ENGINE OIL CAP ............................................................................................. 33<br />
14.6 POMP OLIEVERVERSING VAN DE MOTOR - CHANGE ENGINE OIL .......................................... 34<br />
15. GEBRUIKSINSTRUCTIES - OPERATING INSTRUCTIONS ............................................................ 35<br />
15.1 PLAATSING VAN DE LICHTMAST - <strong>LIGHT</strong>ING TOWER POSITIONING ....................................... 35<br />
15.2 AANSLUITING VAN DE ACCU - CONNECTING OF THE BATTERY .............................................. 35<br />
15.3 AARDAANSLUITING – EARTHING ................................................................................................. 35<br />
15.4 VOORBEREIDENDE CONTROLES - PRELIMINAR CHECKS ....................................................... 36<br />
15.5 KEUZESCHAKELAAR GENERATOR/NET – GENERATOR / MAIN SELECTOR ........................... 36<br />
15.6 MOTORSTART - ENGINE STARTING ............................................................................................. 37<br />
15.7 INLOOPTIJD - RUNNING IN ............................................................................................................ 37<br />
15.8 GEBRUIK VAN DE GROEP - USE OF MACHINE ............................................................................ 38<br />
15.9 STILSTAND VAN DE GROEP - STOPPING THE ENGINE .............................................................. 39<br />
15.10 ALARMEN GENERATORSET - GENERATOR ALARMS ................................................................ 39<br />
15.11 ADVIES - REMARKS ........................................................................................................................ 40<br />
15.12 GEBRUIK VAN DE LICHTMAST – USE OF THE <strong>LIGHT</strong>ING TOWER ............................................. 42<br />
16. ONDERHOUD VAN DE MOTOR - ENGINE MAINTENANCE .......................................................... 46<br />
16.1 VERVANGING VAN DE BRANDSTOFGROFFILTER - REPLACEMENT OF FUEL PRE-FILTER .. 48<br />
16.2 SCHOONMAAK VAN DE BRANDSTOFFILTERKAMER - CLEANING THE FUEL FILTER POT .... 49<br />
16.3 VERVANGING VAN HET FILTERPATROON VOOR BRANDSTOF - MOTOROLIE - FUEL FILTER<br />
CARTRIDGE REPLACEMENT ......................................................................................................... 50<br />
16.4 MOTOROLIE VOORZICHTIG! - ENGINE OIL .................................................................................. 51<br />
16.5 CONTROLE VAN HET MOTOROLIEPEIL EN BIJVULLEN - CHECKING LEVEL AND ADDING<br />
ENGINE OIL...................................................................................................................................... 51<br />
16.6 VERVERSING VAN DE MOTOROLIE EN HET FILTERPATROON - CHANGING ENGINE OIL AND<br />
REPLACING THE OIL FILTER CARTRIDGE ................................................................................... 52<br />
16.7 RADIATOR - RADIATOR .................................................................................................................. 54<br />
16.8 CONTROLE VAN HET KOELVLOEISTOFPEIL EN BIJVULLEN - CHECKING COOLANT LEVEL,<br />
ADDING COOLANT .......................................................................................................................... 55<br />
16.9 VERVERSING VAN DE KOELVLOEISTOF - CHANGING COOLANT ............................................. 57<br />
16.10 LUCHTFILTER - AIR CLEANER ....................................................................................................... 57<br />
17. ONDERHOUD VAN DE LICHTMAST - <strong>LIGHT</strong>ING TOWER MAINTENANCE ................................. 59<br />
17.1 SMEREN VAN DE LEISCHIJVEN – LUBRICATION OF THE ROLLERS ......................................... 59<br />
17.2 SMEREN VAN DE TELESCOPISCHE PALEN - LUBRICATION OF MAST SECTIONS ................. 59<br />
17.3 SMEREN VAN DE STEUNPOTEN – LUBRICATION OF STABILIZERS ......................................... 59<br />
17.4 CONTROLE VAN DE HYDRAULISCHE CILINDER – CHECK OF HYDRAULIC CYLINDER .......... 60<br />
17.5 CONTROLE VAN DE STALEN KABELS - CHECK OF STEEL CABLES ......................................... 60<br />
17.6 CONTROLE VAN DE HYDRAULISCHE KOPPELINGEN – CHECK OF HYDRAULIC<br />
CONNECTIONS ............................................................................................................................... 60<br />
18. VADEMECUM IN GEVAL VAN PROBLEMEN - TROUBLESHOOTING GUIDE ............................. 61<br />
18.1 VOORNAAMSTE AFWIJKINGEN - MAIN TROUBLES .................................................................... 61<br />
19. VERVANGING VAN DE LAMPEN EN HET GLAS VAN DE SCHIJNWERPER - REPLACE THE<br />
LAMP AND FLOOD<strong>LIGHT</strong> GLASS ................................................................................................... 69<br />
20. RESERVEONDERDELEN - PARTS LIST ......................................................................................... 70<br />
20.1 RESERVEONDERDELEN FRONTSTUK – COMMAND PANEL SPARE PARTS LIST ................... 70<br />
3 TL073-01-00-02<br />
09-11-2009
<strong>SUPER</strong> <strong>LIGHT</strong> <strong>VT1</strong> <strong>9mt</strong> <strong>4x1000W</strong> <strong>METAALJODIDEN</strong><br />
20.2 RESERVEONDERDELEN EENFASIGE HULPUITGANG - SINGLE PHASE AUSILIARY OUTLET<br />
SPARE PARTS LIST ........................................................................................................................ 72<br />
20.3 RESERVEONDERDELEN KEUZESCHAKELAAR GENERATOR / NET - SPARE PARTS LIST<br />
GENERATOR / MAIN SELECTOR ................................................................................................... 74<br />
20.4 RESERVEONDERDELEN HYDRAULISCHE COMPONENTEN - SPARE PARTS LIST HYDRAULIC<br />
PARTS .............................................................................................................................................. 76<br />
20.5 RESERVEONDERDELEN GRONDPLAAT - SPARE PARTS LIST FOR FRAME ........................... 80<br />
20.6 PARTS LIST POSTERIEURE STABILISATIE (OP AANVRAAG) - SPARE PARTS LIST REAR<br />
STABILIZERS (ON REQUEST) ............................................................................................................. 83<br />
20.7 RESERVEONDERDELEN CONSTRUCTIE - SPARE PARTS LIST FOR CARPENTRY ................ 84<br />
20.8 RESERVEONDERDELEN TELESCOPISCHE PAAL - SPARE PARTS LIST FOR TELESCOPIC<br />
MAST ................................................................................................................................................ 86<br />
20.9 RESERVEONDERDELEN SCHIJNWERPERGROEP - SPARE PARTS LIST FOR FLOOD<strong>LIGHT</strong>S<br />
GROUP ............................................................................................................................................. 88<br />
20.10 RESERVEONDERDELEN ALTERNATOR - SPARE PARTS LIST FOR ALTERNATOR ................ 90<br />
20.11 RESERVEONDERDELEN TWEEWIELGROEP EN HANDGREPEN VOOR TRAAG TRANSPORT<br />
(OP AANVRAAG) - SPARE PARTS LIST FOR WHEELS SIDE TRAILER WITH TOWING BAR (ON<br />
REQUEST) ........................................................................................................................................... 92<br />
20.12 RESERVEONDERDELEN VASTE WAGEN SNEL TRANSPORT (OP AANVRAAG) – TRAILER FOR<br />
FAST TOWING FIXED SPARE PARTS LIST (ON REQUEST) ............................................................. 93<br />
20.13 RESERVEONDERDELEN WAGEN MET HOOGTEAFSTELLING SNEL TRANSPORT (OP<br />
AANVRAAG) – TRAILER FOR FAST TOWING HEIGHT ADJUSTABLE SPARE PARTS LIST (ON<br />
REQUEST) ........................................................................................................................................... 94<br />
20.14 RESERVEONDERDELEN LABELS VOOR LICHTMAST - SPARE PARTS LIST FOR STICKERS<br />
FOR <strong>LIGHT</strong>ING TOWER .................................................................................................................. 95<br />
21. ELEKTRISCH SCHEMA EERSTE DEEL - WIRING DIAGRAM FIRST PART ................................. 97<br />
22. ELEKTRISCH SCHEMA EERSTE DEEL (VERSIE MET KEUZESCHAKELAAR) - WIRING<br />
DIAGRAM FIRST PART (VERSION WITH GENERATOR/MAIN SELECTOR) ............................... 98<br />
23. ELEKTRISCH SCHEMA TWEEDE DEEL - WIRING DIAGRAM SECOND PART .......................... 99<br />
24. SERVICECENTRA ITALIË - ITALIAN SERVICES CENTERS ...................................................... 100<br />
25. SERVICECENTRA BUITENLAND - FOREIGN COUNTRY SERVICES CENTERS ...................... 102<br />
26. GARANTIE - WARRANTY ............................................................................................................... 103<br />
4 TL073-01-00-02<br />
09-11-2009
<strong>SUPER</strong> <strong>LIGHT</strong> <strong>VT1</strong> <strong>9mt</strong> <strong>4x1000W</strong> <strong>METAALJODIDEN</strong><br />
1. EG-MARKERING - CE MARK<br />
De EG-markering (Europese Gemeenschap)<br />
bevestigt dat dit product conform is met de<br />
essentiële veiligheidsvereisten voorgeschreven<br />
door de Europese Richtlijnen.<br />
The CE mark (European Community) certifies<br />
that the product complies with essential<br />
safety requirements provided by the<br />
applicable Community Directives.<br />
2. GEBRUIK EN ONDERHOUD - USE & MAINTENANCE<br />
Vriendelijke klant, wij danken u voor de<br />
aankoop van ons product. Deze handleiding<br />
bevat alle nodige informatie voor het gebruik<br />
en het algemene onderhoud van de lichtmast.<br />
De verantwoordelijkheid voor een goede<br />
werking hangt af van de gevoeligheid van de<br />
bediener.<br />
Alvorens de machine te installeren en in elk<br />
geval voor elke werkzaamheid, moet u<br />
aandachtig deze instructie- en<br />
gebruikshandleiding lezen. Indien u iets<br />
aantreft dat niet perfect duidelijk of<br />
verstaanbaar is, neem dan onmiddellijk contact<br />
op met TOWER <strong>LIGHT</strong> S.r.l. via het nummer:<br />
Dear Customer, many thanks for the<br />
purchase of our product. In this manual are<br />
contained all the necessary informations for<br />
use and the general maintenance of the<br />
lighting tower.<br />
The responsibility of the good operation<br />
depends on the sensibility of the operator.<br />
Before install the machine and however<br />
before every operation, read carefully the<br />
following manual of instruction and use. If this<br />
manual were not perfectly clear or<br />
comprehensible, contacted directly TOWER<br />
<strong>LIGHT</strong> S.r.l. at the number:<br />
+39 0382 567011 +39 0382 567011<br />
De onderhavige handleiding is een integrerend<br />
deel van de machine en moet ze vanaf de<br />
inbedrijfstelling gedurende 10 jaar vergezellen,<br />
ook indien de machine aan iemand anders<br />
wordt gegeven of verkocht.<br />
Alle gegevens en foto’s in deze catalogus<br />
kunnen zonder voorafgaande kennisgeving<br />
gewijzigd worden.<br />
The present manual of instruction is<br />
integrating part of the machine and must<br />
follow the cycle of life of the machine for 10<br />
years from the putting in service, also in case<br />
of transfer of the same one to another user.<br />
All the specifications and pictures of the<br />
present catalogue are subject to<br />
modifications without prior notice.<br />
5 TL073-01-00-02<br />
09-11-2009
<strong>SUPER</strong> <strong>LIGHT</strong> <strong>VT1</strong> <strong>9mt</strong> <strong>4x1000W</strong> <strong>METAALJODIDEN</strong><br />
3. ALGEMENE INFORMATIE - GENERAL INFORMATION<br />
De lichtmast werd ontworpen, gebouwd en<br />
getest om te voldoen aan de van kracht zijnde<br />
Europese normen die de beperking van het<br />
elektrisch risico beogen en met inachtneming<br />
van de van kracht zijnde normen.<br />
TOWER <strong>LIGHT</strong> S.r.l. kan niet aansprakelijk<br />
gesteld worden voor schade te wijten aan<br />
wijzigingen aangebracht aan het product<br />
zonder uitdrukkelijke en schriftelijke<br />
goedkeuring.<br />
The lighting tower is designed, produced and<br />
tested to meet the European rule and to<br />
reduce at the minimum the electrical risks in<br />
compliance the actually laws.<br />
TOWER <strong>LIGHT</strong> S.r.l. declines every<br />
responsibility deriving from the<br />
modification of the product not explicitly<br />
authorized for enrolled.<br />
3.1 DOCUMENTATIE BIJGELEVERD BIJ DE LICHTMAST - EQUIPMENT DOCUMENTATION<br />
OF THE <strong>LIGHT</strong>ING TOWER<br />
Samen met de handleiding worden de<br />
volgende documenten geleverd:<br />
• Gebruik- en onderhoudshandleiding<br />
van de lichtmast (onderhavige<br />
handleiding).<br />
• Gebruik- en onderhoudshandleiding<br />
van de motor.<br />
• Gebruik- en onderhoudshandleiding<br />
van de alternator.<br />
Together at this manual we are supplying the<br />
following documents:<br />
• Instruction manual and use for the<br />
lighting tower (this manual).<br />
• Engine use and maintenance manual.<br />
• Alternator use and maintenance<br />
manual.<br />
• Testfiche van de lichtmast. • Check list for the lighting tower.<br />
• EG-conformiteitverklaring.<br />
Garantiecertificaat<br />
• CE Declaration of Conformity.<br />
Warranty certificate.<br />
6 TL073-01-00-02<br />
09-11-2009
<strong>SUPER</strong> <strong>LIGHT</strong> <strong>VT1</strong> <strong>9mt</strong> <strong>4x1000W</strong> <strong>METAALJODIDEN</strong><br />
4. KWALITEITSCERTIFICAAT - QUALITY SYSTEM<br />
Door de inspanningen die TOWER <strong>LIGHT</strong><br />
S.r.l. tot nu toe leverde om een hoge<br />
kwaliteitstandaard van het product en van de<br />
bedrijf- en beheerfases te behouden, verwierf<br />
TOWER <strong>LIGHT</strong> S.r.l. op 25 November 2002 de<br />
ISO certificatie 9001:2000 en in 2004 de<br />
VISION 2000 updating.<br />
TOWER <strong>LIGHT</strong> S.r.l. kan volledig<br />
onafhankelijk alle elementen in zijn eigen<br />
bedrijf ontwikkelen door elk onderdeel met<br />
spitstechnologie en machines met numerieke<br />
besturing te doorlichten, te ontwerpen en te<br />
produceren. Om zijn klanten een hoge<br />
kwalitatieve standaard te garanderen, wordt<br />
elk afgewerkt product afzonderlijk getest en<br />
voorzien van alle nodige documentatie voor<br />
een zelfstandig gebruik.<br />
De aandacht die wij steeds op onze klanten<br />
focusten, stelde ons in staat steeds<br />
innovatieve en gebruiksvriendelijke<br />
oplossingen aan te bieden. Dit is de reden<br />
waarom TOWER <strong>LIGHT</strong> S.r.l. marktleader<br />
werd in Europa.<br />
TOWER <strong>LIGHT</strong> S.r.l. garandeert zijn producten<br />
voor een periode van 12 maanden.<br />
To guarantee a high quality standard in the<br />
products and also in working and managerial<br />
practices, TOWER <strong>LIGHT</strong> S.r.l. in 25<br />
November 2002 obtained the Certification of<br />
Quality ISO 9001:2000 and in 2004 the<br />
update VISION 2000.<br />
TOWER <strong>LIGHT</strong> S.r.l. is able to develop inhouse<br />
all structures manufacturing every<br />
components, planning an producing it inside,<br />
with the most modern robotized an computer<br />
controlled machinery. To guarantee to our<br />
clients an extreme quality products, every<br />
product being tested singularly and equipped<br />
of all necessary documentation for use it in<br />
autonomy.<br />
Our staff is always careful with customers’<br />
need. TOWER <strong>LIGHT</strong> S.r.l. keeps on looking<br />
for new solution which protect our principle of<br />
easy employment and which make our<br />
factory the leader trade our mark in Europe.<br />
TOWER <strong>LIGHT</strong> S.r.l. guarantees own<br />
products for 12 months.<br />
7 TL073-01-00-02<br />
09-11-2009
<strong>SUPER</strong> <strong>LIGHT</strong> <strong>VT1</strong> <strong>9mt</strong> <strong>4x1000W</strong> <strong>METAALJODIDEN</strong><br />
5. CONFORMITEITVERKLARING EN TESTFICHE – DECLARATION OF<br />
CONFORMITY WITH CHECK LIST<br />
In de bijlage van de handleiding wordt de<br />
“Conformiteitverklaring” geleverd, een<br />
document dat certificeert dat de machine in uw<br />
bezit conform is met de van kracht zijnde EGrichtlijnen.<br />
Ook de “Testfiche” is aanwezig in de bijlage,<br />
waarin een reeks controles uitgevoerd bij het<br />
machinetesten worden gemeld.<br />
NB.: de tabellen worden enkel als informatief<br />
voorbeeld geleverd. Ze kunnen dus wijzigingen<br />
of verbeteringen ondergaan die de fabrikant<br />
zal toepassen zich houdend aan de van kracht<br />
zijnde wetgeving.<br />
Together at this manual it is supplied the<br />
“Declaration of conformity”, a document<br />
which attests the conformity of the machine in<br />
your possession to the EEC enforced<br />
directives.<br />
It is also attached the “Check list”, to the<br />
inside of which it is indicated a series of<br />
checks carried out at the moment of the<br />
machine’s check.<br />
N.B: the tables are a exclusive informative<br />
example, therefore they can endure<br />
modifications or modernizations that the<br />
manufacturer means to adopt in the respect<br />
of the enforced laws.<br />
8 TL073-01-00-02<br />
09-11-2009
<strong>SUPER</strong> <strong>LIGHT</strong> <strong>VT1</strong> <strong>9mt</strong> <strong>4x1000W</strong> <strong>METAALJODIDEN</strong><br />
6. VEILIGHEIDSSYMBOLEN - SAFETY SIGNS<br />
Deze symbolen verwittigen de gebruiker over<br />
eventuele gevaren die schade aan personen<br />
kunnen veroorzaken.<br />
Lees de betekenis en de<br />
voorzorgsmaatregelen in de handleiding.<br />
Gevaarsymbolen<br />
Danger signs<br />
These signs inform the user of any danger<br />
which may cause damages to persons.<br />
Read the precautions and meant described in<br />
this manual.<br />
Betekenis Meant<br />
• Lees de<br />
instructiehandleiding<br />
alvorens de machine in<br />
gebruik te nemen.<br />
• Opgepast gevaar voor<br />
elektrische ontladingen..<br />
• Raadpleeg de handleiding<br />
• Opgepast uitlaatgassen,<br />
schadelijk voor de<br />
gezondheid.<br />
• Hou u op een veilige<br />
afstand van de<br />
emissiezone.<br />
• Gevaar voor brandwonden.<br />
• Raak het uitlaatspruitstuk<br />
en de motor niet aan<br />
wanneer de machine in<br />
bedrijf is.<br />
• Gevaar: open niet wanneer<br />
de motor warm is.<br />
• Stop de motor alvorens bij<br />
te vullen.<br />
• Gebruik enkel dieselolie.<br />
• Read the instruction<br />
handbook before use the<br />
machine.<br />
• Danger of electric<br />
discharges.<br />
• Consult the manual.<br />
• Attention injurious exhaust<br />
gases for the health.<br />
• Maintain one sure distance<br />
from the emission zone.<br />
• Danger of burns.<br />
• Don’t touch the exhaust<br />
collector and the engine<br />
when the machine is in<br />
motion.<br />
• Danger: don’t open when<br />
the engine is hot<br />
• Stop the engine before<br />
refueling it.<br />
• Use only diesel fuel.<br />
9 TL073-01-00-02<br />
09-11-2009
<strong>SUPER</strong> <strong>LIGHT</strong> <strong>VT1</strong> <strong>9mt</strong> <strong>4x1000W</strong> <strong>METAALJODIDEN</strong><br />
Verbodsymbolen<br />
Prohibition signs<br />
Informatiesymbolen<br />
Information signs<br />
• Gevaar voor lekken van<br />
corrosieve stoffen.<br />
• Gevaar voor kneuzingen<br />
van de bovenste<br />
ledematen.<br />
• Danger possible spillage of<br />
corrosive substances<br />
• Danger of hand crush<br />
Betekenis Meant<br />
• Het is verboden<br />
bewegende onderdelen<br />
schoon te maken, te<br />
smeren en af te stellen.<br />
• Het is verboden brand met<br />
water te blussen. Gebruik<br />
enkel brandblusapparaten.<br />
• Het is verboden vrije<br />
vlammen te gebruiken.<br />
• It is prohibited to clean, to<br />
lubricate and to regulate<br />
organs in motion.<br />
• It is prohibited to extinguish<br />
fires with water, use only<br />
extinguishers<br />
• It is prohibited to use free<br />
flames<br />
Betekenis Meant<br />
• Duidt een hefpunt van de<br />
machine aan.<br />
• This sign indicates the<br />
position of a point of<br />
machine raising.<br />
10 TL073-01-00-02<br />
09-11-2009
<strong>SUPER</strong> <strong>LIGHT</strong> <strong>VT1</strong> <strong>9mt</strong> <strong>4x1000W</strong> <strong>METAALJODIDEN</strong><br />
7. IN ACHT TE NEMEN VEILIGHEIDSNORMEN - SAFETY<br />
REGULATIONS TO OBSERVE<br />
De fabrikant kan niet aansprakelijk gesteld<br />
worden voor eventuele schade aan<br />
personen en zaken ten gevolge van het niet<br />
in acht nemen van de veiligheidsnormen.<br />
The manufacturer is not responsible of<br />
any damage at things or person, in<br />
consequence at the inobservance of<br />
safety norms.<br />
7.1 VOOR HET GEBRUIK VAN DE MACHINE – BEFORE THE USE OF MACHINE<br />
• Wij adviseren beschermmiddelen te<br />
dragen, zoals handschoenen,<br />
•<br />
beschermende schoenen, oordoppen of<br />
oorkappen.<br />
U dient op de hoogte te zijn van de werking<br />
van alle commando’s van de lichtmast.<br />
• Het aangewezen personeel moet al het<br />
advies en de risico’s vermeld in deze<br />
handleiding gelezen hebben.<br />
• Verzeker u ervan dat de lichtmast niet<br />
gevoed is en er geen onderdelen in<br />
beweging zijn.<br />
• Laat niet toe dat onbevoegd personeel<br />
de lichtmast gebruikt.<br />
• Lees aandachtig de veiligheidslabels<br />
aangebracht op de machine.<br />
• Voer de aardaansluiting van de groep uit<br />
via de hiervoor bestemde klem.<br />
• De aardaansluiting van de groep moet<br />
uitgevoerd worden met een koperen draad<br />
met een doorsnede van minstens 6 mm².<br />
• De fabrikant kan niet aansprakelijk<br />
gesteld worden voor eventuele schade<br />
te wijten aan het nalaten van een<br />
aardaansluiting.<br />
• It is advised to wear protective clothes,<br />
gloves, safety shoes, stoppers for the<br />
acoustics protection.<br />
• It is recommended the correct<br />
acquaintance of operation for all the<br />
commands of the lighting tower.<br />
• It is recommended to the authorised staff<br />
to consultate all warnings and dangers<br />
described into this manual.<br />
• Ensure yourself that the lighting tower is<br />
not feeded and that there are not any<br />
parts in movements.<br />
• It is allowed the use of the lighting tower<br />
only at a qualified staff.<br />
• Read the segnaletic plates applied on the<br />
machine.<br />
• Connect the unit to the earth through the<br />
apposite clamp.<br />
• The unit must be connected to the earth<br />
using a copper cable with a minimum<br />
cross-section of 6 mm².<br />
• The manufacturer is not responsible<br />
for any damage caused by failure of<br />
earthing.<br />
11 TL073-01-00-02<br />
09-11-2009
<strong>SUPER</strong> <strong>LIGHT</strong> <strong>VT1</strong> <strong>9mt</strong> <strong>4x1000W</strong> <strong>METAALJODIDEN</strong><br />
7.2 GEDURENDE HET ONDERHOUD - DURING THE MAINTENANCE<br />
• Schakel voor elke onderhoudsingreep<br />
steeds de machine uit.<br />
• Het buitengewoon onderhoud moet steeds<br />
uitgevoerd<br />
personeel.<br />
worden door geautoriseerd<br />
• Alvorens vervangingen of onderhoud op de<br />
schijnwerpers uit te voeren, moet de<br />
voeding afgesloten worden en moet u<br />
wachten tot de lampen afkoelen.<br />
• Gebruik steeds de geschikte<br />
beschermmiddelen.<br />
• De vloeistof in de accu bevat zwavelzuur<br />
dat uiterst corrosief is en schadelijk voor de<br />
huid. Gebruik steeds beschermende<br />
handschoenen en wees bijzonder<br />
voorzichtig bij het vullen om overlopen te<br />
vermijden.<br />
• Het contact met de motorolie kan de huid<br />
schaden. Draag handschoenen alvorens de<br />
olie te gebruiken. Was u onmiddellijk<br />
indien de olie op de huid terecht komt.<br />
7.3 GEDURENDE DE TRANSPORTFASE – DURING THE TRANSPORT<br />
• Gebruik UITSLUITEND de voorziene<br />
hefpunten, indien aanwezig.<br />
• Indien een hefhaak aanwezig is, mag deze<br />
slechts gebruikt worden voor het tijdelijk<br />
heffen van de machine en niet om de<br />
machine lange tijd te laten hangen.<br />
• De fabrikant kan niet aansprakelijk gesteld<br />
worden voor eventuele schade veroorzaakt<br />
door nalatigheid gedurende de<br />
transportwerkzaamheden.<br />
• Turn always off the machine before any<br />
maintenance operation.<br />
• Extraordinary maintenance must always<br />
be carried out by authorized staff.<br />
• Before any maintenance operation on the<br />
floodlights, disconnect the feeding and<br />
wait the cooling of the lamps.<br />
• Use always dispositives of protection<br />
adapted to you.<br />
• The fluid of battery contains sulphuric acid<br />
which is extremely corrosive and harmful<br />
to the skin. Always wear protective gloves<br />
and be extremely careful to avoid spillage<br />
when pouring the acid.<br />
• Contact with engine oil can damage your<br />
skin. Put on gloves when using engine oil.<br />
If you come in contact with engine oil,<br />
wash it off immediately.<br />
• Use EXCLUSIVELY the predisposed<br />
point of raising, where present.<br />
• The raising hook, where present, must be<br />
exclusively used for the temporary raising<br />
and not for suspension in air of the<br />
machines for a long time.<br />
• The manufacturer is not responsible for<br />
any damage caused by negligence during<br />
transport operations.<br />
12 TL073-01-00-02<br />
09-11-2009
<strong>SUPER</strong> <strong>LIGHT</strong> <strong>VT1</strong> <strong>9mt</strong> <strong>4x1000W</strong> <strong>METAALJODIDEN</strong><br />
8. ALGEMENE INFORMATIE OVER DE RISICO’S - GENERAL DANGER<br />
INFORMATION<br />
8.1 GEVAAR VOOR BRANDWONDEN - DANGER OF BURN<br />
• Raak geen warme oppervlakken aan zoals<br />
knalpijpen en hun verlengstukken of het<br />
motorlichaam in bedrijf.<br />
• Raak de schijnwerpers niet aan wanneer<br />
ze ingeschakeld zijn.<br />
• Gebruik steeds de geschikte<br />
handschoenen.<br />
8.2 ELEKTROCUTIEGEVAAR - DANGER OF ELECTROCUTION<br />
• Raak geen onderdelen aan die onder<br />
spanning staan. Dit zou dodelijke schokken<br />
of zware brandwonden kunnen<br />
veroorzaken.<br />
• Raak de elektrische kabels niet aan<br />
wanneer de machine aan is.<br />
8.3 GEVAAR VOOR BEKLEMD RAKEN - DANGER OF ENTANGLE<br />
• Verwijder nooit de beschermingen op de<br />
draaiende delen, de luchtgaten en de<br />
riemen.<br />
• Voer nooit schoonmaak- en<br />
onderhoudswerkzaamheden<br />
bewegende onderdelen.<br />
uit op<br />
• Draag gepaste kleding gedurende het<br />
gebruik van de lichtmast.<br />
• Do not touch with the hands the hot<br />
surfaces, like silencers with relatives<br />
extension and engine body when it is in<br />
function.<br />
• Do not touch the floodlights when are<br />
lighted.<br />
• Use always gloves appropriate to you.<br />
• Do not touch parts in tension, it may<br />
causes mortal shock.<br />
• Do not touch the electric cables when the<br />
machine in function.<br />
• Do not remove the protections placed on<br />
the rotating parts, on the air intakes and<br />
over the belts.<br />
• Do not clean or execute maintenance<br />
operation on moving parts.<br />
• Use appropriate clothes during the use of<br />
the lighting tower.<br />
13 TL073-01-00-02<br />
09-11-2009
<strong>SUPER</strong> <strong>LIGHT</strong> <strong>VT1</strong> <strong>9mt</strong> <strong>4x1000W</strong> <strong>METAALJODIDEN</strong><br />
8.4 GEVAAR VOOR BRAND OF EXPLOSIE GEDURENDE HET BIJVULLEN - WARNING OF<br />
FIRE OR EXPLOSION DURING OPERATIONS OF REFUELLING<br />
• Doe steeds de motor uit alvorens brandstof<br />
bij te vullen.<br />
• Turn off the engine before refuelling<br />
operation.<br />
• Rook niet gedurende het tanken. • Do not smoke during the refuelling<br />
operation.<br />
• Het bijvullen moet zorgvuldig uitgevoerd<br />
worden zodat overlopen van de brandstof<br />
wordt vermeden.<br />
• Bij overlopen of morsen dient u de<br />
onderdelen af te drogen en schoon te<br />
maken.<br />
• Controleer of er geen brandstofverlies is en<br />
de buizen intact zijn.<br />
8.5 GELUID - NOISE<br />
• Gebruik oordoppen of oorkappen tegen<br />
lawaai.<br />
8.6 UITLAATGAS - EXHAUST GASES<br />
• Uitlaatgassen zijn schadelijk voor de<br />
gezondheid. Hou u op veilige afstand van<br />
de emissiezone.<br />
• Indien de generatorset van de lichtmast in<br />
een gesloten ruimte wordt gebruikt, moet u<br />
ervoor zorgen dat de uitlaatgassen naar<br />
buiten worden geleid.<br />
• The refuelling operation must be effected<br />
in way that not discharge the fuel from the<br />
tank.<br />
• In case of discharging of the fuel from the<br />
tank, dry and clean the parts.<br />
• Check that there isn’t any discharge of<br />
fuel and that the tubes are not damaged.<br />
• Use stoppers or caps for the acoustic<br />
protection from strong noises.<br />
• The exhaust gases are injurious for the<br />
health. Maintain a sure distance from the<br />
emission zone.<br />
• In case the generating set of the lighting<br />
tower came used in closed places, make<br />
sure that the exhaust gases can be<br />
disperded without impediments in the<br />
atmosphere.<br />
14 TL073-01-00-02<br />
09-11-2009
<strong>SUPER</strong> <strong>LIGHT</strong> <strong>VT1</strong> <strong>9mt</strong> <strong>4x1000W</strong> <strong>METAALJODIDEN</strong><br />
9. ALGEMENE BESCHRIJVING VAN DE MACHINE - GENERAL<br />
DESCRIPTION OF THE MACHINE<br />
De lichtmast <strong>SUPER</strong> <strong>LIGHT</strong> <strong>VT1</strong> werd<br />
ontworpen rekening houdend met 3<br />
fundamentele kenmerken:<br />
• beperkte afmetingen<br />
• hoge betrouwbaarheid<br />
• kwaliteit van het materiaal<br />
De gebruikte materialen garanderen uiterste<br />
stevigheid en een lange levensduur daar ze<br />
niet door roest kunnen aangetast worden. U<br />
hebt de mogelijkheid om de toren te dalen, wat<br />
bij verplaatsing en transport van fundamenteel<br />
belang is. De lichtmast kan volledig veilig door<br />
één bediener in bedrijf gesteld en gebruikt<br />
worden. De schijnwerpers en de lampen<br />
gebruikt op de lichtmast werden door<br />
topfabrikanten geleverd en volgens de regels<br />
van het vak bekabeld en zorgvuldig<br />
gecontroleerd.<br />
The lighting tower <strong>SUPER</strong> <strong>LIGHT</strong> <strong>VT1</strong> has<br />
been studied taking in consideration 3<br />
fundamental characteristics:<br />
• enough contained dimensions<br />
• high reliability<br />
• quality of the constructive materials<br />
The constructive materials in uses guarantee<br />
not only an extreme strength of the tower, but<br />
they are also synonymous of longevity, in fact<br />
these materials are protected against<br />
oxidation like rust. The possibility to lowering<br />
the tower is the fundamental factors in the<br />
field of the movement and the transports. The<br />
tower can be installed and used by a single<br />
operator in the maximum safety. The<br />
floodlights used on tower, complete with<br />
lamps, are made from the best producers in<br />
the world and carefully checked.<br />
10. PERIODE VAN INACTIVITEIT - PERIOD OF INACTIVITY<br />
Indien de machine gedurende een lange<br />
periode niet gebruikt wordt (meer dan een<br />
jaar), is het aangeraden motorolie,<br />
koelvloeistof en brandstof in de motor te laten<br />
om oxidatie te vermijden; ontkoppel ook de<br />
kabels van de accu. Wanneer de machine<br />
opnieuw in bedrijf wordt gesteld, moeten de<br />
vloeistoffen ververst worden, de accu moet<br />
aangesloten worden en de riemen, de<br />
leidingen, de rubberen koppelingen en hun<br />
dichtingen moeten gecontroleerd worden.<br />
Uiteindelijk moet tevens een visuele controle<br />
op de elektrische kabels uitgevoerd worden.<br />
If the machine has to be stopped for a long<br />
period (more than one year), we suggest to<br />
keep the oil, the fuel and the coolant to the<br />
inside of engine, in order to avoid oxidizing<br />
effects; we suggest to disconnect also the<br />
battery cables. When the machine turns to<br />
work again, the liquids must be replaced, the<br />
battery must be charged; the belts and their<br />
statem the pipes, the rubber hoses and their<br />
resistance must be checked and a visual<br />
inspections of the electric connections must<br />
be done.<br />
15 TL073-01-00-02<br />
09-11-2009
<strong>SUPER</strong> <strong>LIGHT</strong> <strong>VT1</strong> <strong>9mt</strong> <strong>4x1000W</strong> <strong>METAALJODIDEN</strong><br />
11. TECHNISCHE KENMERKEN - TECHNICAL SPECIFICATION<br />
11.1 GENERATOR – GENERATOR<br />
<strong>Mod</strong>el Synchroon<br />
Synchronous<br />
<strong>Mod</strong>el<br />
Eenfasige spanning 9 kVA - 230 V Single phase voltage<br />
Eenfasige hulpuitgang 3 kVA - 230 V Single phase auxiliary<br />
Frequentie 50 Hz Frequency<br />
Cos ϕ 0,8 Cos ϕ<br />
Isolatieklasse F Insulation class<br />
Beschermingsgraad IP 23 Mechanical protection<br />
11.2 MOTOR – ENGINE<br />
Motortype Kubota D1105-E Make/Type<br />
Aantal cilinders 3 Number of cylinders<br />
Cilinderinhoud 1123 cm 3 Displacement<br />
Vermogen 13,7 HP Power<br />
Snelheid 1500 r.p.m. Engine speed<br />
Afkoeling Water Cooling<br />
Brandstof Diesel Fuel<br />
Start Elektrisch- Electric Starting system<br />
Capaciteit oliecarter 5,1 l Oil sump capacity<br />
Capaciteit radiator 3,1 l Radiator capacity<br />
Specifiek verbruik 265 gr/kWh Specific fuel consumption<br />
Capaciteit brandstoftank 112 l Fuel tank capacity<br />
Zelfstandigheid met 50% lading 60 h ~ 50% average operating hours<br />
Geluidvermogen 90 Lwa Noise level<br />
Accu 12 V - 44 Ah Battery<br />
16 TL073-01-00-02<br />
09-11-2009
<strong>SUPER</strong> <strong>LIGHT</strong> <strong>VT1</strong> <strong>9mt</strong> <strong>4x1000W</strong> <strong>METAALJODIDEN</strong><br />
11.3 HYDRAULISCHE REGELEENHEID – HYDRAULIC GEAR BOX<br />
11.3.1 ELEKTRISCHE MOTOR – ELECTRICAL MOTOR<br />
Voeding 230 V 50 Hz Feeding<br />
Vermogen 0,55 kW Power<br />
Polen 4 Poles<br />
Laadfactor S1 Duty factor<br />
11.3.2 HYDRAULISCHE POMP – GEAR PUMP<br />
Cilinderinhoud 1,3 cm 3 Displacement<br />
Maximum druk 210 bar Maximum pressure<br />
Drukwaarde ingesteld door de<br />
fabrikant<br />
180 bar Factory setting pressure<br />
Noodstartsysteem Handleiding - Manual Emergency action system<br />
11.3.3 ELEKTROKLEP – UNLOADING SOLENOID VALVE<br />
Thermische isolatie van het spoel Class F – VDE0585 Coil thermal insulation<br />
Elektrische aansluiting DIN 43650-A / ISO 4400 Electric connection<br />
Beschermingsgraad IP 65 Protection degree<br />
Intermitterende werking ED 100% Coil duty cicle<br />
Spanning van het spoel 230 V 50-60 Hz ± 10% Coil voltage<br />
11.3.4 HYDRAULISCHE OLIE – HYDRAULIC FLUID<br />
Tankcapaciteit 5 l Reservoir capacity<br />
Olietype<br />
Viscositeit van de olie<br />
ISO/DIN 6743/4<br />
minerale olie - mineral oil<br />
15-100 mm 2 sec –<br />
ISO 3448<br />
Fluid type<br />
Fluid viscosity<br />
Temperatuur van de olie -15°C ÷ +80°C Fluid temperature<br />
Maximum contaminatieniveau van<br />
de olie<br />
Klasse 10 in<br />
overeenstemming met<br />
NAS 1638 met filter B 25<br />
> 75 – Class 10 in<br />
accordance with NAS<br />
1638 with filter B 25 > 75<br />
Fluid maximum contamination<br />
level<br />
17 TL073-01-00-02<br />
09-11-2009
<strong>SUPER</strong> <strong>LIGHT</strong> <strong>VT1</strong> <strong>9mt</strong> <strong>4x1000W</strong> <strong>METAALJODIDEN</strong><br />
11.4 LICHTMAST – <strong>LIGHT</strong>ING TOWER<br />
Maximum hoogte 9 mt Maximum height<br />
Heffen<br />
Hydraulisch -<br />
Hydraulic<br />
Raising<br />
Secties 7 Section<br />
Rotatie 340° Rotation Section<br />
Kabel voor dalen en stijgen<br />
Inox 133 draden -<br />
Inox 133 wires<br />
Raising and lowering cable<br />
Elektrische spiraalkabel 9G2,5 mmq Electrical coiled cable<br />
Elektrische kabel voor bekabeling<br />
van de schijnwerpers<br />
H07RN-F Electrical cable for the floodlights<br />
Breeksterkte van de kabel 1550 kg Maximum cable load<br />
Maximale stabiliteit bij wind 110 km/h Maximum wind stability<br />
Minimum afmeting met wielgroep en<br />
roer voor traag transport<br />
(Lu x La x H mm)<br />
Maximum afmeting met wielgroep en<br />
roer voor traag transport<br />
(Lu x La x H mm)<br />
3400 x 1580 x 2330<br />
3400 x 1850 x 9000<br />
Minimum dimension with group<br />
wheels and rudder for slow towing<br />
(L x W x H mm)<br />
Maximum dimension with group<br />
wheels and rudder for slow towing<br />
(L x W x H mm)<br />
Gewicht op basis 935 kg Weight on base<br />
Gewicht met wagen 1115 kg Weight with trailer<br />
18 TL073-01-00-02<br />
09-11-2009
<strong>SUPER</strong> <strong>LIGHT</strong> <strong>VT1</strong> <strong>9mt</strong> <strong>4x1000W</strong> <strong>METAALJODIDEN</strong><br />
11.5 SCHIJNWERPER – FLOOD<strong>LIGHT</strong><br />
Lamp<br />
Metaaljodide - Metal<br />
halide<br />
Lamp<br />
Vermogen 4x1000 W Power<br />
Beschermgraad IP 66 Degree of protection<br />
Constructiemateriaal lichaam<br />
Gegoten aluminium -<br />
Die-cast aluminium<br />
Constructiemateriaal lampfitting Keramiek - Ceramic<br />
Reflector<br />
Kabelklem<br />
Opening optische kamer<br />
Glanzend 99,85<br />
aluminiumo - Polished<br />
and anodized<br />
aluminium 99.85<br />
Roestvrij staal -<br />
Stainless steel<br />
Clips in roestvrij staal<br />
- Stainless steel clips<br />
Constructor material of the body<br />
Constructor material of<br />
lampholder<br />
Reflector<br />
Cable gland<br />
Optical case opening system<br />
Afmetingen (Lu x A x P mm) 404 x 260 x 328 Dimensions (L x H x D mm)<br />
De schijnwerper is voorzien van gehard glas<br />
en eeb pakking in silicone. De sluithaken en de<br />
externe schroeven zijn in roestvrij staal. Het<br />
lichaam werd gechromateerd met Alodine<br />
1200 en gecoat met polyesterpoeder voor<br />
extern gebruik om het tegen corrosie te<br />
beschermen. De eindlaag is grafietgrijs. De<br />
rand is voorzien van afvoeropeningen voor het<br />
water<br />
The floodlight is provided by tempered glass<br />
and silicone seals. Closing hooks and<br />
external nuts and bolts in stainless steel. The<br />
casing’s protection against corrosion is<br />
ensured by Alodine 1200 chromate treatment<br />
and polyester powder coating for outdoors in<br />
graphite grey finishing. The frame is<br />
equipped with special drains to prevent water<br />
from accumulating.<br />
19 TL073-01-00-02<br />
09-11-2009
<strong>SUPER</strong> <strong>LIGHT</strong> <strong>VT1</strong> <strong>9mt</strong> <strong>4x1000W</strong> <strong>METAALJODIDEN</strong><br />
11.6 LAMP - LAMP<br />
De metaaljodide lampen gebruikt voor de<br />
schijnwerpers van de lichtmast geven meer<br />
licht dan de traditionele halogeen lampen, zijn<br />
energiezuiniger en gaan veel langer mee;<br />
ongeveer 8000 uren.<br />
De metaaljodide lamp is een<br />
gasontladingslamp, een kunstmatige lichtbron<br />
waarin licht wordt gemaakt door een<br />
elektrische stroom door een geïoniseerd gas te<br />
sturen(van hier de naam). Het geïoniseerd gas<br />
zendt een elektromagnetische straling uit.<br />
De metaaljodide lampen zijn afkomstig van de<br />
hogedruknatriumlampen waarbij additieven<br />
werden gevoegd (thallium, indium, dysprosium,<br />
holmium, cesium, thulium) die zorgen voor een<br />
betere kleurweergave van de natriumlampen<br />
en die een zeer hoge kleurtemperatuur leveren<br />
(4000-5600 K). Door hun chromatische<br />
opbrengst zijn ze bijzonder geschikt voor wie<br />
een perfect wit licht nodig heeft. Om de lampen<br />
te starten, zijn speciale starters en injectors<br />
nodig die spanningsimpulsen tussen 0,75 en 5<br />
kV produceren. Om in de inschakelingsfase de<br />
volledige lichtopbrengst of helderheid te<br />
bereiken zijn enkele minuten nodig.<br />
Bij een toevallige uitschakeling is het<br />
noodzakelijk te wachten tot de lamp is<br />
afgekoeld (ongeveer 15 minuten) alvorens<br />
ze opnieuw kan ingeschakeld worden. De<br />
oorzaak ligt bij de overmatige spanning die<br />
nodig zou zijn voor de ontsteking wanneer<br />
de lamp nog warm is.<br />
The metal halide lamps used in the<br />
floodlights of the lighting tower allow to a<br />
greater lighting system regarding the<br />
traditional halogen lamps and concur to an<br />
inferior energetic consumption beyond to one<br />
duration much elevating of near 8000 hours.<br />
The metal halide lamp is a high intensity<br />
discharge lamp based on the emission of<br />
electromagnetic cancellation from part of a<br />
ionizated gas plasma. The ionization of the<br />
gas is obtained for means of a discharge<br />
electrical worker (from which the name)<br />
through the gas.<br />
The metal halide lamps derive from the high<br />
pressure sodium vapor lamps with the added<br />
of thallium, Indian, dysprosium, holmium,<br />
cesium, thulium, which they improve the yield<br />
of the colors of the sodium lamps, and give<br />
one temperature to their color much elevated<br />
(4000-5600) K. Their chromatic yield renders<br />
them particularly adapted where there is the<br />
necessity of having a light perfectly white. For<br />
being ignited they need of apposite igniters<br />
and injectors that produce impulses of<br />
tension between 0,75 and 5 kV and for the<br />
attainment of the full light flux, in phase of<br />
ignition, they are necessary few minutes.<br />
In case of accidental putting out it is<br />
necessary to wait the cooling of the lamp<br />
(about 15 minutes) before a new ignition,<br />
because of the high tension that would be<br />
necessary for a hot ignition.<br />
20 TL073-01-00-02<br />
09-11-2009
<strong>SUPER</strong> <strong>LIGHT</strong> <strong>VT1</strong> <strong>9mt</strong> <strong>4x1000W</strong> <strong>METAALJODIDEN</strong><br />
12. DIAGRAM LICHTTECHNISCHE BEREKENING - <strong>LIGHT</strong>ING FOOT<br />
PRINT DIAGRAM<br />
VERLICHTE ZONE – ILLUMINATED AREA<br />
4200 m²<br />
21 TL073-01-00-02<br />
09-11-2009
<strong>SUPER</strong> <strong>LIGHT</strong> <strong>VT1</strong> <strong>9mt</strong> <strong>4x1000W</strong> <strong>METAALJODIDEN</strong><br />
13. IDENTIFICATIE VAN DE EXTERNE COMPONENTEN -<br />
IDENTIFICATIONS OF THE EXTERNAL COMPONENTS<br />
13.1 SAMENSTELLING VAN DE LICHTMAST - <strong>LIGHT</strong>ING TOWER COMPOSITION<br />
3<br />
2<br />
1<br />
Pos.<br />
Items<br />
Beschrijving Description<br />
1 Handgrepen rotatie schijnwerpers Floodlights rotation handles<br />
2 Telescopische paal Telescopic mast<br />
3 Schijnwerpers Floodlights<br />
4 Pen blokkering rotatie van de schijnwerpers Floodlights blocking rotation pin<br />
5 Uitgang uitlaatgas Gas exhaust outlet<br />
6 Radiatordop Radiator cap<br />
7 Inspectieluik motor met besturingspaneel Engine inspection door with command<br />
panel<br />
8 Elektrisch paneel Electrical panel<br />
9 Borden voor transport middels heftruck Plate for transport through forklift<br />
22 TL073-01-00-02<br />
09-11-2009<br />
9<br />
4<br />
8<br />
5<br />
6<br />
7
<strong>SUPER</strong> <strong>LIGHT</strong> <strong>VT1</strong> <strong>9mt</strong> <strong>4x1000W</strong> <strong>METAALJODIDEN</strong><br />
12<br />
11<br />
10<br />
13<br />
16<br />
15<br />
Pos.<br />
Items<br />
Beschrijving Description<br />
10 Vaste steunpoten Fixed stabilizers<br />
11 Rooster luchtinlaat Air inlet grill<br />
12 Rooster luchtuitlaat Air outlet grill<br />
13 Hefhaak Lifting hook<br />
14 Uitschuifbare steunpoten Extractable stabilizers<br />
15 Wagen snel of traag transport (naargelang Undercarriage for fast or slow towing (on<br />
de opstelling)<br />
the ground of model)<br />
16 Inspectieluik motor Door engine inspection<br />
23 TL073-01-00-02<br />
09-11-2009<br />
14
<strong>SUPER</strong> <strong>LIGHT</strong> <strong>VT1</strong> <strong>9mt</strong> <strong>4x1000W</strong> <strong>METAALJODIDEN</strong><br />
13.2 EXTERN ELEKTRISCH PANEEL - EXTERNAL ELECTRICAL PANEL<br />
Pos.<br />
Items<br />
17 18 19<br />
Beschrijving Description<br />
17 Eenfasig stopcontact 230 V 16 A 2p+T EEC 230 V 16 A 2p+T EEC single phase<br />
socket<br />
18 Thermische schakelaar met drukknop 10 A<br />
bescherming stopcontact 230 V<br />
24 TL073-01-00-02<br />
09-11-2009<br />
20<br />
21<br />
22<br />
10 A push button circuit breaker control<br />
230 V socket<br />
19 Noodstop Emergency stop button<br />
20 Aardingsklem Earth clamp connection<br />
21 Keuzeschakelaar “Generator/0/Net” (*) “Generator/0/Main” selector (*)<br />
22 Eenfasige mannelijke stekker netingang 230 V 32 A 2p+E 90° EEC main inlet<br />
230 V 32 A 2p+T 90° CEE (*)<br />
single phase plug (*)<br />
(*) Enkel op aanvraag – Only on request
<strong>SUPER</strong> <strong>LIGHT</strong> <strong>VT1</strong> <strong>9mt</strong> <strong>4x1000W</strong> <strong>METAALJODIDEN</strong><br />
Het is mogelijk gelijktijdig de lichtmast en het<br />
eenfasig stopcontact 230 V 16 A (17) te<br />
gebruiken. Wij adviseren de gegevens gemeld<br />
op de typeplaat niet te overschrijden.<br />
Om het apparaat met de generator aan te<br />
sluiten, moet u stekkers gebruiken die geschikt<br />
zijn voor de stopcontacten en kabels die in<br />
optimale toestand verkeren.<br />
De minimum doorsnede van de aansluitkabels<br />
moet gekozen worden op basis van de<br />
spanning, het geïnstalleerd vermogen en de<br />
afstand tussen de bron en het apparaat.<br />
It is possible, at the same time, to use the<br />
lighting tower and to capture current from the<br />
single phase socket 230 V 16 A (17). It is<br />
recommended not to exceed the plate data.<br />
Connect up to the generator using plugs that<br />
fit the sockets and cables in excellent<br />
condition.<br />
The minimal section of connection cables<br />
must be choose in relationship to the voltage,<br />
to the installed power and to the distance<br />
between source and uses.<br />
25 TL073-01-00-02<br />
09-11-2009
<strong>SUPER</strong> <strong>LIGHT</strong> <strong>VT1</strong> <strong>9mt</strong> <strong>4x1000W</strong> <strong>METAALJODIDEN</strong><br />
13.3 BESCHERMPLAAT RADIATORDOP - RADIATOR CAP PROTECTION PLATE<br />
Pos.<br />
Items<br />
23<br />
23<br />
24<br />
Beschrijving Description<br />
Knop voor aanspanning beschermplaat<br />
radiatordop<br />
Tightening knob radiator cap protection<br />
plate<br />
24 Beschermplaat radiatordop Radiator cap protection plate<br />
Voor het bijvullen en het verversen van de<br />
koelvloeistof moet de knop losgeschroefd<br />
worden en de beschermplaat van de<br />
radiatordop verwijderd worden.<br />
Indien de koelvloeistoftank volledig wordt<br />
bijgevuld alvorens de motor in bedrijf te stellen,<br />
is dit voldoende voor een volledige werkdag;<br />
dus moet het koelvloeistofpeil voor elke<br />
inbedrijfstelling regelmatig gecheckt worden.<br />
Verwijder de radiatordop nooit wanneer de<br />
motor nog warm is, om persoonlijke letsels te<br />
vermijden. Eens de motor is afgekoeld, moet u<br />
de dop een weinig losschroeven tot hij bij de<br />
aanslag komt om de overmatige druk eerst te<br />
laten ontsnappen. Vervolgens kunt u hem<br />
volledig verwijderen.<br />
Indien de machine gedurende een lange<br />
periode niet zal gebruikt worden (meer dan<br />
een jaar) is het aangeraden koelvloeistof in de<br />
radiator te laten om oxidatie te vermijden.<br />
In order to fill up and replacement of the<br />
cooling unscrew the knob and remove the<br />
protection plate of the radiator cap.<br />
The coolant will last for one day’s work if filled<br />
all the way up before operation start;<br />
therefore check the coolant level before every<br />
operation.<br />
In order to avoid personal injury do not<br />
remove the radiator cap when the engine is<br />
hot. When the engine is cold, loose the cap<br />
slightly to the stop to relieve any excess of<br />
pressure before removing cap completely.<br />
If the machine has to be stopped for a long<br />
period (more than one year), we suggest to<br />
keep the coolant into the radiator in order to<br />
avoid oxidizing effects.<br />
26 TL073-01-00-02<br />
09-11-2009
<strong>SUPER</strong> <strong>LIGHT</strong> <strong>VT1</strong> <strong>9mt</strong> <strong>4x1000W</strong> <strong>METAALJODIDEN</strong><br />
14. IDENTIFICATIE VAN DE INTERNE COMPONENTEN - IDENTIFICATION<br />
OF THE INNER COMPONENTS<br />
14.1 BESCHRIJVING VAN HET BESTURINGSPANEEL - COMMAND PANEL DESCRIPTION<br />
35<br />
25 26 27 28 29<br />
34 33 32<br />
30<br />
31<br />
27 TL073-01-00-02<br />
09-11-2009
<strong>SUPER</strong> <strong>LIGHT</strong> <strong>VT1</strong> <strong>9mt</strong> <strong>4x1000W</strong> <strong>METAALJODIDEN</strong><br />
Pos.<br />
Items<br />
Beschrijving Description<br />
25 Meldlamp acculader Battery charge signal lamp<br />
26 Meldlamp lage druk van de olie Low oil pressure signal lamp<br />
27 Uurteller Hour meter<br />
28 Meldlamp hoge temperatuur van het water High water temperature signal lamp<br />
29 Meldlamp voorverwarming bougies Preheater signal lamp<br />
30 Sleutel start / stop Starting / stopping key<br />
31 Hendel stijging / daling paal Raising and lowering lever<br />
32 Identificatienummer Serial number<br />
33<br />
Schakelaar met thermische bescherming<br />
16 A voor inschakeling van de lampen<br />
16 A circuit breaker for lamps switch<br />
34 Differentiële automatische schakelaar 40 A 40 A automatic earth leakage relay<br />
35 Indicator brandstofpeil Fuel gauge – Monitor fuel level<br />
28 TL073-01-00-02<br />
09-11-2009
<strong>SUPER</strong> <strong>LIGHT</strong> <strong>VT1</strong> <strong>9mt</strong> <strong>4x1000W</strong> <strong>METAALJODIDEN</strong><br />
14.2 HYDRAULISCHE REGELEENHEID - HYDRAULIC GEAR BOX<br />
Pos.<br />
Items<br />
Beschrijving Description<br />
36 Motor hydraulische regeleenheid Engine hydraulic gear box<br />
37 Pen voor paaldaling bij nood Lowering pin in case of emergency<br />
38 Tankdop hydraulische olie Hydraulic oil tank cap<br />
39 Tank hydraulische olie Hydraulic oil tank<br />
Controleer regelmatig het peil van de<br />
hydraulische olie. De controle is eenvoudig<br />
daar de tank halfdoorzichtig is. Vul enkel bij<br />
wanneer het peil onder de helft daalt (totale<br />
tankcapaciteit 5 l).<br />
De controle moet uitgevoerd worden nadat de<br />
motor minstens 30 minuten werd uitgeschakeld<br />
en met de telescopische paal naar beneden.<br />
I Gebruik voor het bijvullen en verversen enkel<br />
hydraulische olie met hoge viscositeitindex,<br />
geschikt voor temperaturen tussen + 46°C en –<br />
46°C. Wij adviseren ”Shell Tellus Oils TX 46”.<br />
Het is voldoende 3 liter olie in de tank te doen.<br />
Gebruik steeds beschermende handschoenen<br />
gedurende de verversing van de olie en de<br />
controle van het oliepeil van de motor.<br />
36<br />
37<br />
38<br />
39<br />
Verify periodically the level of the hydraulic<br />
oil, the check is easy because the tank is<br />
transparent. Add the oil only if the level dips<br />
down under the half (total tank capacity 5 l).<br />
Such check must be do after at least 30<br />
minutes from the stop of the engine and with<br />
the telescopic mast lowered.<br />
In case of filling up or substitution use only<br />
hydraulic oils with a high index of viscosity<br />
and adapt to use for + 46°C to – 46°C<br />
temperatures. We advised the use of the oil<br />
“Shell Tellus Oils TX 46”. It is sufficient<br />
introduce in the tank about 3 l of oil.<br />
Use always protected gloves during the<br />
replacement and the check of the level of the<br />
motor oil.<br />
29 TL073-01-00-02<br />
09-11-2009
<strong>SUPER</strong> <strong>LIGHT</strong> <strong>VT1</strong> <strong>9mt</strong> <strong>4x1000W</strong> <strong>METAALJODIDEN</strong><br />
14.2.1 NOODKNOP PAALDALING - LOWERING HANDLE BAR BRACKET IN CASE OF<br />
EMERGENCY<br />
OPGEPAS !!! WARNING !!!<br />
Bij motorpech van de generator of van de<br />
hydraulische regeleenheid wanneer de paal<br />
naar boven is, kan de lichtmast naar beneden<br />
gehaald worden door de gekartelde pen (37)<br />
op de hydraulische regeleenheid tegen de<br />
wijzers van de klok in te draaien. Deze regelt<br />
manueel het vloeien van de olie in de cilinder.<br />
Wanneer de paal volledig naar beneden is,<br />
moet de pen in de oorspronkelijke stand<br />
geschroefd worden om vervolgens een correct<br />
gebruik van de machine te VERZEKEREN.<br />
Draairichting van de pen<br />
Way of rotation of the pin<br />
When the mast is raised, in case of the<br />
damage of the engine, it’s possible to came<br />
down the tower unscrewing in<br />
counterclockwise direction the particular pin<br />
(37) that regulated the manual flow of oil<br />
inside the cylinder. When the bracket is<br />
completely come down, is necessary to<br />
screwing the pin in the originally position to<br />
guarantee subsequently the correct use of<br />
the machine.<br />
37<br />
30 TL073-01-00-02<br />
09-11-2009
<strong>SUPER</strong> <strong>LIGHT</strong> <strong>VT1</strong> <strong>9mt</strong> <strong>4x1000W</strong> <strong>METAALJODIDEN</strong><br />
14.3 ACCU - BATTERY<br />
Pos.<br />
Items<br />
Beschrijving Description<br />
40 Batteria 44 Ah 12 V 44 Ah 12 V battery<br />
De machine wordt geleverd met ontkoppelde<br />
accu.<br />
Sluit de accu aan met de toegeruste kabels en<br />
let op de correcte polariteit.<br />
De vloeistof in de batterij bevat zwavelzuur,<br />
uiterst corrosief en schadelijk voor de huid.<br />
Gebruik steeds beschermende handschoenen<br />
en wees uiterst voorzichtig wanneer u de<br />
vloeistof overgiet. Let op voor overlopen.<br />
Indien de machine voor een lange tijd niet<br />
gebruikt wordt, is het aangeraden de accu te<br />
ontkoppelen.<br />
40<br />
The machine is supplied with the battery not<br />
connected.<br />
Connect the battery with cables already<br />
predisposed making attention the correct<br />
polarity.<br />
The battery fluid contains sulphuric acid<br />
which is extremely corrosive and harmful to<br />
the skin. Always wear protective gloves and<br />
be extremely careful to avoid spillage when<br />
pouring the acid.<br />
If the machine has to be stopped for a long<br />
period, we suggest to disconnect the battery.<br />
31 TL073-01-00-02<br />
09-11-2009
<strong>SUPER</strong> <strong>LIGHT</strong> <strong>VT1</strong> <strong>9mt</strong> <strong>4x1000W</strong> <strong>METAALJODIDEN</strong><br />
14.4 BRANDSTOFTANK - FUEL TANK<br />
Pos.<br />
Items<br />
Beschrijving Description<br />
41 Dop van de brandstoftank Fuel tank cap<br />
Vul de tank met dieselolie volgens de<br />
tankcapaciteit (112 L). De brandstofaanwijzer<br />
(35) bevindt zich op het besturingspaneel.<br />
Schakel steeds de motor uit alvorens brandstof<br />
te tanken.<br />
Voer deze werkzaamheid uit zonder dat de<br />
brandstoftank overloopt.<br />
Indien de machine voor een lange periode niet<br />
gebruikt wordt (meer dan een jaar) is het<br />
aangeraden brandstof in de tank te laten om<br />
oxidatie te vermijden.<br />
41<br />
Fill up the tank of diesel fuel respecting the<br />
tank capacity (lt. 112). The fuel reserve is<br />
indicated by the instrument (35) placed on<br />
the command panel.<br />
Turn always off the engine before any<br />
operation of refuelling.<br />
The operation of refuelling must be done in<br />
way that there isn’t any discharge of fuel from<br />
the tank.<br />
If the machine has to be stopped for a long<br />
period (more than one year), we suggest to<br />
keep the fuel in the tank, in order to avoid<br />
oxidizing effects.<br />
32 TL073-01-00-02<br />
09-11-2009
<strong>SUPER</strong> <strong>LIGHT</strong> <strong>VT1</strong> <strong>9mt</strong> <strong>4x1000W</strong> <strong>METAALJODIDEN</strong><br />
14.5 MOTOROLIEDOP - ENGINE OIL CAP<br />
Pos.<br />
Items<br />
Beschrijving Description<br />
42 Motoroliedop Engine oil cap<br />
43 Oliepeilstok Oil level indicator<br />
Controleer het oliepeil van de motor voor u<br />
hem start of nadat hij 5 minuten uitgeschakeld<br />
is.<br />
Giet de milieuverontreinigende vloeistoffen<br />
niet weg.<br />
Indien de machine voor een lange periode niet<br />
wordt gebruikt (meer dan een jaar) is het<br />
aangeraden de olie in de motor te laten om<br />
oxidatie te vermijden.<br />
42<br />
43<br />
Check the engine oil level before starting or<br />
more than five minutes after stopping.<br />
Do not discharge polluting liquids in the<br />
atmosphere.<br />
If the machine has to be stopped for a long<br />
period (more than one year), we suggest to<br />
keep the oil into the engine in order to avoid<br />
oxidizing effects.<br />
33 TL073-01-00-02<br />
09-11-2009
<strong>SUPER</strong> <strong>LIGHT</strong> <strong>VT1</strong> <strong>9mt</strong> <strong>4x1000W</strong> <strong>METAALJODIDEN</strong><br />
14.6 POMP OLIEVERVERSING VAN DE MOTOR - CHANGE ENGINE OIL<br />
44 45<br />
Pos.<br />
Items<br />
Beschrijving Description<br />
44 Olietankdop Engine oil drain cap<br />
45<br />
Manueel pompje om de olie uit de motor te<br />
zuigen.<br />
Manual pump for extracting the oil from<br />
the engine<br />
Voor de olieverversing van de motor werd een For the oil change it has been predisposed a<br />
manueel pompje voorzien.<br />
manual pump.<br />
Verwijder de dop (44) van het pompje en breng<br />
op het uiteinde een rubberen buis aan (niet<br />
bijgeleverd). Leid de buis uit het frame naar<br />
een bakje. Schroef de oliedop los en pomp de<br />
tank leeg.<br />
OPGEPAST: wanneer het pompje niet meer<br />
wordt gebruikt, moet de dop goed<br />
vastgeschroefd worden. Controleer voor<br />
elke motorstart de correcte aanspanning.<br />
Motorolie is schadelijk voor de huid. Draag<br />
handschoenen alvorens de olie te hanteren.<br />
Was u onmiddellijk indien u de olie aanraakt.<br />
Ververs de olie (vermogen oliecarter 5,1 l) na<br />
de eerste 50 bedrijfsuren, vervolgens om de<br />
200 uren.<br />
Giet de milieuverontreinigende vloeistoffen<br />
niet weg.<br />
Indien de machine voor een lange tijd niet<br />
gebruikt wordt (meer dan een jaar) is het<br />
aangeraden de olie in de motor te laten om<br />
oxidatie te vermijden.<br />
Remove the discharge cap (44) from the<br />
pump and apply a rubber hose (not supplied)<br />
to the top of it, place the hose out of the<br />
frame of the machine, introducing it in a small<br />
basin. Unscrew the oil cap and discharge the<br />
oil pumping it.<br />
WARNING: after using the pump, screw<br />
the cap very well and check anyway the<br />
correct tightening before each engine<br />
starting.<br />
Contact with engine oil can damage your<br />
skin. Put on gloves when using engine oil. If<br />
you come in contact with engine oil, wash it<br />
off immediately.<br />
Change oil (5,1 l oil sump capacity) after the<br />
initial 50 hours of operation and every 200<br />
hours thereafter.<br />
Do not discharge polluting liquids in the<br />
atmosphere.<br />
If the machine has to be stopped for a long<br />
period (more than one year), we suggest to<br />
keep the oil into the engine in order to avoid<br />
oxidizing effects.<br />
Meer dan – Up to 25° C SAE 30 - SAE 10W-30 - SAE 10W-40<br />
Tussen 0° C en 25° C<br />
Between 0° C and 25° C<br />
SAE 20 - SAE 10W-30 - SAE 10W-40<br />
Minder dan - Down to 0° C SAE 10W - SAE 10W-30 - SAE 10W-40<br />
34 TL073-01-00-02<br />
09-11-2009
<strong>SUPER</strong> <strong>LIGHT</strong> <strong>VT1</strong> <strong>9mt</strong> <strong>4x1000W</strong> <strong>METAALJODIDEN</strong><br />
15. GEBRUIKSINSTRUCTIES - OPERATING INSTRUCTIONS<br />
15.1 PLAATSING VAN DE LICHTMAST - <strong>LIGHT</strong>ING TOWER POSITIONING<br />
Plaats de lichtmast op een vlak oppervlak. Hij<br />
mag niet meer dan 10° hellen.<br />
Kies een open goed geventileerde plaats zodat<br />
de uitlaatgassen ver van de werkplaats terecht<br />
komen.<br />
Controleer dat er een volledige luchtverversing<br />
plaatsvindt en dat de uitgestoten warme lucht<br />
niet opnieuw in de groep terecht komt: Dit zou<br />
een gevaarlijke temperatuurstijging tot gevolg<br />
hebben.<br />
15.2 AANSLUITING VAN DE ACCU - CONNECTING OF THE BATTERY<br />
De machine wordt geleverd met ontkoppelde<br />
accu.<br />
Sluit de accu aan met de toegeruste kabels en<br />
let op de polariteit.<br />
15.3 AARDAANSLUITING – EARTHING<br />
Voer de aardaansluiting van de groep middels<br />
de klem (20) uit.<br />
De aardaansluiting van de groep moet<br />
uitgevoerd worden met een koperen draad met<br />
een doorsnede van minstens 6 mm².<br />
De fabrikant kan niet aansprakelijk gesteld<br />
worden voor eventuele schade te wijten aan<br />
het nalaten van een aardaansluiting.<br />
Place the lighting tower on a flat surface,<br />
taking care not to exceed 10° of inclination.<br />
Choose an open location and very ventilated<br />
taking care that the discharge of the exhaust<br />
gases happens far from the work-zone.<br />
Check that there is a complete change of air<br />
and the hot air expelled don’t circulate into<br />
the group in way that it’s caused a dangerous<br />
elevation of the temperature.<br />
The machine is supplied with the battery not<br />
connected.<br />
Connect the battery with cables already<br />
predisposed making attention to the exactly<br />
polarity.<br />
Connect the unit to the earth, through the<br />
clamp (20).<br />
The unit must be connected to earth using a<br />
copper cable with a minimum cross-section of<br />
6 mm².<br />
The manufacturer is not responsible for any<br />
damage caused by failure of the earthing.<br />
35 TL073-01-00-02<br />
09-11-2009
<strong>SUPER</strong> <strong>LIGHT</strong> <strong>VT1</strong> <strong>9mt</strong> <strong>4x1000W</strong> <strong>METAALJODIDEN</strong><br />
15.4 VOORBEREIDENDE CONTROLES - PRELIMINAR CHECKS<br />
Bij aankoop is de machine voorzien van<br />
motorolie, hydraulische olie en koelvloeistof in<br />
de radiator.<br />
Controleer vervolgens voor elk gebruik het peil<br />
van de vloeistoffen.<br />
Controleer of de thermische schakelaars (33)<br />
op het frontaal paneel op “OFF” staan.<br />
Verzeker u ervan dat er niets met het<br />
stopcontact 230 V 16 A (17) is aangesloten.<br />
Verzeker u ervan dat de noodstop (19)<br />
opnieuw werd ingesteld. Zo niet de knop met<br />
de wijzers van de klok meedraaien.<br />
At the moment of the purchase, the machine<br />
is supplied of engine oil, hydraulic oil and<br />
coolant in the radiator.<br />
Before every next use, verify the relative<br />
levels.<br />
Check that the circuit breakers (33) placed on<br />
the frontal board are in “OFF” position.<br />
Make sure that any load is connected to the<br />
plug 230 V 16 A (17)<br />
Make sure that the emergency stop button<br />
(19) is rearmed. If it doesn’t, turn the grip<br />
handle in clockwise direction.<br />
15.5 KEUZESCHAKELAAR GENERATOR/NET – GENERATOR / MAIN SELECTOR<br />
Het is tevens mogelijk de schijnwerpers aan<br />
boord van de machine via het elektrisch net<br />
230 V te voeden indien u dit aanvraagt.<br />
Sluit de mannelijke 230 V 32 A 2p+T EGstekker<br />
(22) aan met een stopcontact met<br />
identieke kenmerken.<br />
De minimum doorsnede van de aansluitkabels<br />
moet gekozen worden op basis van de<br />
spanning, het geïnstalleerd vermogen en de<br />
afstand tussen de bron en het apparaat.<br />
Om de machine met het elektrisch net te<br />
voeden, moet de keuzeschakelaar in de stand<br />
“Net” gezet worden (21).<br />
Om de machine met de generator te voeden,<br />
moet de keuzeschakelaar in de stand<br />
“Generator” gezet worden (21).<br />
On request it is possibile to feed the<br />
floodlights from the electric main 230V.<br />
Connect to the male plug 230 V 32 A 2p+T<br />
EEC (22) a socket with the same<br />
characteristics.<br />
The minimal section of connection cables<br />
must be choose in relationship on the<br />
tension, to the installed power and the<br />
distance between source and uses.<br />
In order to feed the lighting tower by the<br />
electrical main carry the selector (21) on<br />
“Main” position.<br />
In order to feed the lighting tower by the<br />
generator carry the selector (21) on<br />
“Generator” position.<br />
36 TL073-01-00-02<br />
09-11-2009
<strong>SUPER</strong> <strong>LIGHT</strong> <strong>VT1</strong> <strong>9mt</strong> <strong>4x1000W</strong> <strong>METAALJODIDEN</strong><br />
15.6 MOTORSTART - ENGINE STARTING<br />
De hoofdcommando’s van de lichtmast<br />
bevinden zich achter een deur met handgreep<br />
en veiligheidslot, zodat niet geautoriseerd<br />
personeel er niet bij kan.<br />
Plaats de startsleutel op (30) de eerste<br />
verschakeling om de bougies te laten<br />
opwarmen. De controlelamp (29) is aan.<br />
Wanneer de controlelamp (29) uit gaat, kunt u<br />
de motor starten door de startsleutel (30)<br />
helemaal naar rechts te draaien.<br />
Opmerking: Indien de motor niet opstart, moet<br />
u 10 seconden wachten, zet de sleutel in OFF<br />
en herhaal de handeling.<br />
Laat de motor ongeveer 5 minuten draaien<br />
zodat hij gelijkmatig opwarmt.<br />
De motor is ingesteld op de juiste<br />
motorsnelheid (1500 r.p.m.). Afstelling is dus<br />
overbodig.<br />
15.7 INLOOPTIJD - RUNNING IN<br />
Voor een goede inloop van de motor mag hij<br />
gedurende de eerste 50 bedrijfsuren niet meer<br />
dan 70% van het maximum vermogen<br />
absorberen,<br />
specificaties.<br />
aangeduid in de technische<br />
The principal commands of the lighting tower<br />
are placed inside a cabinet provided of a<br />
handle with safety lock to prevent that the<br />
unauthorised personal handlings the<br />
commands.<br />
Position the starting key (30) on the first step<br />
to avoid the glow plugs’ pre-heating, signal<br />
lamp (29) burnt. When the light (29) is off,<br />
start the engine by moving key (30)<br />
completely in clockwise direction.<br />
Note: If the engine falls to start, turn the key<br />
to the OFF position and wait 10 seconds<br />
before operating the starter again.<br />
Let the engine to run for about 5 minutes to<br />
warm it up.<br />
The engine is set at (1500 r.p.m.) therefore it<br />
is not necessary to make any adjustment.<br />
For the first 50 hours of operation of the<br />
machine do not employ more than 70% of the<br />
maximum power indicated in the technical<br />
specifications. In this way, a proper engine<br />
running in is guaranteed.<br />
37 TL073-01-00-02<br />
09-11-2009
<strong>SUPER</strong> <strong>LIGHT</strong> <strong>VT1</strong> <strong>9mt</strong> <strong>4x1000W</strong> <strong>METAALJODIDEN</strong><br />
15.8 GEBRUIK VAN DE GROEP - USE OF MACHINE<br />
Differentiële schakelaar.<br />
De machine is voorzien van een differentiële<br />
schakelaar (34) , die de gebruiker zal<br />
beschermen bij toevallig contact met onder<br />
spanning staande onderdelen of bij slechte<br />
werking van het isolatiesysteem van de<br />
aangesloten inrichtingen.<br />
Opgepast!<br />
Opdat de differentiële schakelaar correct zou<br />
werken, moet de machine geaard worden. De<br />
aardaansluiting moet conform zijn met de<br />
voorschriften van de C.E.I. 64-8 normen.<br />
Controleer regelmatig de werking van de<br />
automatische differentieel schakelaar (34) door<br />
op de “TEST” drukknop te drukken die zich op<br />
de voorzijde bevindt.<br />
Het is mogelijk gelijktijdig de lichtmast en de<br />
eenfasige stekker te gebruiken 230 V 16 A<br />
(17). Wij adviseren de gegevens op de<br />
typeplaat niet te overschrijden.<br />
Om het apparaat met de generator aan te<br />
sluiten, moet u stekkers gebruiken die geschikt<br />
zijn voor de stopcontacten en kabels die in<br />
optimale toestand verkeren.<br />
De minimum doorsnede van de aansluitkabels<br />
moet gekozen worden op basis van de<br />
spanning, het geïnstalleerd vermogen en de<br />
afstand tussen de bron en het apparaat.<br />
De uurteller duidt de bedrijfsuren van de motor<br />
aan. Hij treedt enkel in werking wanneer de<br />
motor gestart wordt. Hij kan dus geraadpleegd<br />
worden voor het regelmatig gewoon en<br />
buitengewoon onderhoud van de machine.<br />
Earth Leakage Circuit Breaker.<br />
The product is equipped with an Earth<br />
Leakage Circuit Breaker (ELCB) (34) which<br />
guarantees user protection against electric<br />
shocks due to unwanted contact with live<br />
parts of the circuit or insulation fault.<br />
Warning!<br />
In order to guarantee ELCB proper operation,<br />
the product must be connected to the earth.<br />
Earthing connection must conform to IEC 364<br />
standard.<br />
Verify periodically the operation of the earth<br />
leakage circuit breaker (34), by pressing the<br />
“TEST” button placed on the front panel.<br />
It is possible, at the same time, to use the<br />
lighting tower and to draw current from the<br />
single phase socket 230 V 16 A (17). It is<br />
recommended not to exceed the plate data.<br />
Connect up to the generator using plugs that<br />
fit the sockets and cables in excellent<br />
condition.<br />
The minimal section of connection cables<br />
must be choose in relationship on the<br />
tension, to the installed power and the<br />
distance between source and uses.<br />
The hour meter exclusively indicates the<br />
hours of working of the engine because it<br />
only works with the engine in motion. It could<br />
be a reference for the periodic ordinary and<br />
extraordinary maintenance of the machine.<br />
38 TL073-01-00-02<br />
09-11-2009
<strong>SUPER</strong> <strong>LIGHT</strong> <strong>VT1</strong> <strong>9mt</strong> <strong>4x1000W</strong> <strong>METAALJODIDEN</strong><br />
15.9 STILSTAND VAN DE GROEP - STOPPING THE ENGINE<br />
Verwijder de ingevoegde ladingen. Disconnect the loads.<br />
Doe middels de thermische schakelaars (33)<br />
alle lampen uit.<br />
Laat de motor in deze conditie 1 minuut<br />
draaien en draai vervolgens de sleutel in<br />
stopstand (30).<br />
Bij nood kan de generatorset gestopt worden<br />
door op de stopdrukknop te drukken (19).<br />
15.10 ALARMEN GENERATORSET - GENERATOR ALARMS<br />
De generatorset is voorzien van een<br />
veiligheidsinrichting DAS) waardoor de<br />
machine na ongeveer 20 seconden van de<br />
waarneming van een defect wordt gestopt. Dit<br />
wordt gemeld door de controlelampen op het<br />
besturingspaneel die gaan branden. Na<br />
eliminatie van het defect, zal een nieuwe start<br />
het geheugen van de inrichting nulstellen.<br />
Lage oliedruk. Low oil pressure.<br />
Wanneer de druk van de olie in de motor te<br />
laag is, gaat een controlelamp branden (26).<br />
Controleer het oliepeil van de motor.<br />
Switch off all the lamps through the circuit<br />
breakers (33).<br />
Wait that the engine works in these<br />
conditions for approximately 1 minute, then<br />
turn the starting key (30) to the stop position.<br />
In emergency case it is possible to stop the<br />
generating set by pressing the stop button<br />
(19).<br />
The generating set is equipped by a<br />
protection (DAS) that turn off the machine<br />
after 20 seconds from the survey of a failure,<br />
signalled visually by the signal lamps placed<br />
on the command panel. When the trouble is<br />
removed, a new starting will clear the<br />
memory of the DAS.<br />
When the engine oil pressure is too low, the<br />
light comes on (26). Check the engine oil<br />
level.<br />
Hoge temperatuur van het water. High water temperature.<br />
Bij een hoge watertemperatuur gaat een<br />
controlelamp branden (28). Controleer het<br />
waterpeil in de radiator.<br />
De accu laadt niet op. No battery charge.<br />
Wanneer de alternator de accu niet oplaadt of<br />
de accu de lading niet behoudt, gaat een<br />
controlelamp aan (25). Controleer de alternator<br />
en de accu.<br />
Brandstofreserve. Low fuel level.<br />
Wanneer de sonde waarneemt dat de<br />
brandstof in reserve is, zal de “DAS” de<br />
machine uitschakelen. Controleer regelmatig<br />
het brandstofpeil op het instrument (35) en vul<br />
de brandstoftank wanneer het peil laag is.<br />
When the engine water temperature is too<br />
high, the light comes on (28). Check the<br />
engine water level.<br />
When the alternator don’t not charge the<br />
battery or the battery does not hold loads, the<br />
light comes on (25). Check the alternator and<br />
the battery.<br />
When fuel level probe, the “DAS” switch off<br />
the machine. Periodically verify the fuel level<br />
by the monitor (35). Fill up the tank with the<br />
fuel level is low.<br />
39 TL073-01-00-02<br />
09-11-2009
<strong>SUPER</strong> <strong>LIGHT</strong> <strong>VT1</strong> <strong>9mt</strong> <strong>4x1000W</strong> <strong>METAALJODIDEN</strong><br />
15.11 ADVIES - REMARKS<br />
Het is van belang dat de bediener steeds elke<br />
eventuele afwijking te wijten aan slijtage of een<br />
defect in het oog houdt<br />
De lichtmast mag enkel gebruikt worden door<br />
bevoegd personeel, opmerkzaam voor<br />
eventuele structurele afwijkingen, gezien de<br />
grote omvang van de structuur.<br />
Wij adviseren bij elke gebruik steeds een<br />
algemene visuele controle uit te voeren.<br />
Controleer vooral de bewegende onderdelen<br />
en de componenten onderworpen aan slijtage.<br />
Een ervaren gebruiker zal nooit oponthoud in<br />
de nabijheid van de in bedrijf gestelde<br />
lichtmast toelaten.<br />
It is important that the operator will be always<br />
careful at every eventual disadvantage had at<br />
usury or breakdown.<br />
It is necessary that the use of the lighting<br />
tower will be effected from expert personnel,<br />
careful at eventual structural disadvantage,<br />
seen the size of the structure.<br />
It is advised to do always a visual check and<br />
general at every use, above all at those parts<br />
always in movement and subjected at usury.<br />
The expert user must not permit to anybody<br />
to stay near to the lighting tower, when it is in<br />
function.<br />
Laat steeds veel ruimte rond de lichtmast. Let always wide space round to the lighting<br />
tower.<br />
Wij adviseren de basis zo vlak mogelijk te It is recommended to place the base the most<br />
plaatsen om de afstelling van de steunpoten te possible in plan in order to facilitate the<br />
vereenvoudigen (raadpleeg de libellen op het regulation of the stabilizers (make reference<br />
frame) (Fig. 1).<br />
to the spirit level placed on the frame) (Fig.<br />
1).<br />
(Fig. 1)<br />
Bovendien adviseren we de structuur op een<br />
stabiele plaats te zetten. Controleer de<br />
vastheid van het terrein zodat de steunpoten<br />
op veilige wijze kunnen geplaatst worden.<br />
Trek de handrem indien de lichtmast voorzien<br />
is van een transportwagen.<br />
It is also recommended to place the structure<br />
in a stable place, verifying the consistence of<br />
the earth to allow a sure support to the<br />
stabilizers.<br />
Pull the hand brake if the tower is supplied of<br />
undercarriage for towing.<br />
40 TL073-01-00-02<br />
09-11-2009
<strong>SUPER</strong> <strong>LIGHT</strong> <strong>VT1</strong> <strong>9mt</strong> <strong>4x1000W</strong> <strong>METAALJODIDEN</strong><br />
Laat niet toe dat onbevoegd personeel de<br />
lichtmast gebruikt.<br />
Alvorens de lichtmast te gebruiken moet het<br />
aangewezen personeel al het advies en de<br />
risico’s vermeld in deze handleiding gelezen<br />
en begrepen hebben.<br />
De fabrikant kan niet aansprakelijk gesteld<br />
worden voor eventuele schade aan personen<br />
en zaken ten gevolge van het niet in acht<br />
nemen van de veiligheidsnormen.<br />
Controleer voor elke werkzaamheid dat de<br />
lichtmast uit is en er geen onderdelen in<br />
beweging zijn.<br />
Voor de elektrische aansluiting tussen de<br />
schijnwerpers en het besturingspaneel van de<br />
lichtmast werd een spiraalkabel 9G2,5 mmq<br />
gebruikt, ingevoegd in een cilinder:<br />
gebruiksvriendelijk en functioneel.<br />
De elektrische aansluitingen werden<br />
vereenvoudigd zodat de voorzijde kan<br />
verwijderd worden voor het onderhoud en de<br />
vervanging van beschadigde of defecte<br />
onderdelen. Bovendien is het mogelijk het<br />
kruisstuk van de lichtmast te verwijderen en te<br />
vervangen. Voor de elektrische aansluiting van<br />
de schijnwerpers werden dozen in pvc met<br />
beschermingsgraad IP56 voorzien.<br />
Indien de lichtmast gebruikt wordt bij slechte<br />
weersomstandigheden, bij te hoge of te lage<br />
temperaturen, moet u controleren of de<br />
spiraalkabel goed verschuift in de cilinder daar<br />
hij een tijdelijke structurele vervorming zou<br />
kunnen ondergaan.<br />
It is allowed the use of the lighting tower only<br />
at a qualified staff.<br />
Before to use the lighting tower it is<br />
recommended to the authorised staff to<br />
consultate all warnings and dangers<br />
described into this manual.<br />
The manufacturer is not responsible of<br />
any damage at things or person, in<br />
consequence at the inobservance of<br />
safety norms.<br />
Before any operation on the machine ensure<br />
yourself that the lighting tower is not feeded<br />
and that there are not any parts in movement.<br />
For the electrical connection between the<br />
floodlights and the command panel of the<br />
lighting tower it has been used a turn cable<br />
9G2,5 mmq placed to the inside of a cylinder<br />
that allows a comfortable sliding.<br />
The electrical connections are simplified so<br />
as to concur the uncoupling of the command<br />
panel for a check and an eventual<br />
maintenance or substitution of damages<br />
pieces. It is also possible to remove and to<br />
replace the cruise of the lighting tower. For<br />
the electrical connection of the floodlights we<br />
are previewed plastic boxes with degree of<br />
protection IP56.<br />
In case of use of the lighting tower in adverse<br />
acclimatizes situations, with too much low<br />
temperatures or high, take care to the turn<br />
cable and its normal sliding to the inside of<br />
the cylinder because the cable is subject to<br />
momentary structural deformation.<br />
41 TL073-01-00-02<br />
09-11-2009
<strong>SUPER</strong> <strong>LIGHT</strong> <strong>VT1</strong> <strong>9mt</strong> <strong>4x1000W</strong> <strong>METAALJODIDEN</strong><br />
15.12 GEBRUIK VAN DE LICHTMAST – USE OF THE <strong>LIGHT</strong>ING TOWER<br />
Hel manueel de schijnwerpers door de hendel<br />
op de steun van de schijnwerpers te lossen<br />
(Fig. 2-A).<br />
Tilt manually the floodlights unscrewing the<br />
lever (Fig. 2-A) placed on the support of the<br />
floodlight.<br />
Draai de schijnwerpers in functie van de Rotate the floodlights in the position you<br />
gewenste verlichting, door de stopmoer van de prefer, in function of the type of lighting you<br />
schijnwerpersteun los te draaien (Fig. 2-B). want to obtain, unscrewing the stop nut of the<br />
floodlight support. (Fig. 2-B)<br />
(Fig.2)<br />
2-B<br />
Verwijder de pennen uit hun zitting (Fig. 3) en<br />
trek de steunpoot manueel uit tot de pennen<br />
het uitschuiven van de buis beletten (Fig. 4).<br />
Controleer of de pennen zich in de<br />
respectievelijke blokkerende zittingen van de<br />
buizen voegen.<br />
Doe middels de bedieningsknop de steunpoten<br />
omlaag (Fig. 4-A).<br />
Release the pins from their hole (Fig. 3) and<br />
then proceed manually to the extraction of<br />
stabilizers until the pins lock the exit of the<br />
tubular (Fig. 4); check that the pins go into<br />
the respective seats of blocking of the<br />
tubular.<br />
Lower the stabilizers through the handle (Fig.<br />
4-A).<br />
(Fig. 3) (Fig. 4)<br />
4-A<br />
2-A<br />
42 TL073-01-00-02<br />
09-11-2009
<strong>SUPER</strong> <strong>LIGHT</strong> <strong>VT1</strong> <strong>9mt</strong> <strong>4x1000W</strong> <strong>METAALJODIDEN</strong><br />
Doe de achterste steunpoten omlaag door de<br />
hendel te lossen (Fig. 5).<br />
Raadpleeg de libellen voor de correcte<br />
stabiliteit van de structuur (Fig. 6).<br />
Lower rear stabilizers by loosening the<br />
blocking lever (Fig. 5).<br />
Make reference to the spirit level for the<br />
correct stability of the structure (Fig. 6).<br />
Opgepast!!! De lichtmast kan niet omhoog Warning!!! It is not possible to raise the<br />
indien alle steunpoten niet correct tower if all stabilizers are not correctly<br />
uitgeschoven zijn.<br />
extracted.<br />
(Fig. 5) (Fig. 6)<br />
Voor het gebruik moet u goed op de hoogte<br />
zijn van de werking van alle commando’s van<br />
de lichtmast.<br />
Start de motor zoals beschreven in het<br />
hoofdstuk “16 GEBRUIKSINSTRUCTIES”.<br />
Op het besturingspaneel bevindt zich de<br />
hendel waarmee de telescopische paal<br />
eenvoudig en gemakkelijk omhoog en omlaag<br />
kan geschoven worden (Fig. 7-A).<br />
Het bereik van de maximum hoogte wordt<br />
aangeduid door een rode strook op de basis<br />
van de paal.<br />
De lampen kunnen ingeschakeld worden<br />
middels de relatieve thermische schakelaars<br />
op het besturingspaneel van de lichtmast.<br />
Before use the machine it’s recommended<br />
the correct acquaintance on operation for all<br />
the commands of the lighting tower.<br />
Start the engine like described at the chapter<br />
“16 OPERATING INSTRUCTIONS”.<br />
On the command panel is placed the lever<br />
that allows to raise and to lower the<br />
telescopic mast in easy and comfortable way<br />
(Fig. 7-A).<br />
The attainment of the maximum height is<br />
evidenced by a red wrap placed on the base<br />
of the mast.<br />
Proceed to light the lamps through the<br />
relatives circuit breakers placed on the front<br />
panel of the lighting tower.<br />
43 TL073-01-00-02<br />
09-11-2009
<strong>SUPER</strong> <strong>LIGHT</strong> <strong>VT1</strong> <strong>9mt</strong> <strong>4x1000W</strong> <strong>METAALJODIDEN</strong><br />
Doe middels de schakelaar (Fig. 7-B) de<br />
eerste lamp aan en laat ze ongeveer 2 minuten<br />
opwarmen. Steek vervolgens middels hun<br />
respectievelijke schakelaars de andere lampen<br />
aan. Denk eraan tussen de inschakelingen<br />
steeds 2 minuten te wachten.<br />
Bij een accidentele uitschakeling is het<br />
noodzakelijk te wachten tot de lamp afkoelt<br />
(ong. 15 minuten) alvorens u ze opnieuw<br />
kunt inschakelen. De oorzaak ligt bij de<br />
overmatige spanning die nodig zou zijn<br />
voor de ontsteking wanneer de lamp nog<br />
warm is.<br />
(Fig. 7)<br />
Light the first lamp (Fig. 7-B) and allow 2<br />
minutes for it to warm up, then light the next<br />
lamps, remembering to allow each lamp to<br />
warm up for 2 minutes.<br />
7-A<br />
7-B<br />
In case of accidental putting out it is<br />
necessary to wait the cooling of the lamp<br />
(about 15 minutes) before a new lighting,<br />
because of the high tension that would be<br />
necessary for a hot ignition.<br />
44 TL073-01-00-02<br />
09-11-2009
<strong>SUPER</strong> <strong>LIGHT</strong> <strong>VT1</strong> <strong>9mt</strong> <strong>4x1000W</strong> <strong>METAALJODIDEN</strong><br />
Richt de lichtbundel door de paal in de<br />
gewenste stand te draaien. Er werden twee<br />
handgrepen voorzien om het draaien te<br />
vereenvoudigen (Fig. 8-A).<br />
Trek de blokkerende pen van de paal (Fig. 8-<br />
B) zodat hij kan draaien. U kunt hem opnieuw<br />
blokkeren door de pen in een van de<br />
verschillende hiervoor bestemde openingen<br />
van de ring in te voegen. Met de mechanische<br />
blokkering kan de rotatie op 340° gestopt<br />
worden.<br />
8-A<br />
OPGEPAST: het is strikt verboden de<br />
steunpoten te sluiten wanneer de lichtmast<br />
zich in verticale stand en op maximum<br />
hoogte bevindt.<br />
OPGEPAST: de lichtmast kan op max.<br />
hoogte weerstaan aan een windsterkte van<br />
110 km/u. In winderige zones moet u op uw<br />
hoede zijn en zo snel mogelijk de<br />
telescopische paal dalen.<br />
Indien de hydraulische regeleenheid of de<br />
motor van de generator defect is, kan de paal<br />
toch naar beneden. Raadpleeg hiervoor het<br />
hoofdstuk 14.2 HYDRAULISCHE<br />
REGELEENHEID”.<br />
(Fig. 8)<br />
Rotate the mast on the opportune way to<br />
place the lighting beam in the desiderate<br />
position. For simplify the rotation they are<br />
predisposed two handles (Fig. 8-A)<br />
Pull the locking pin of the mast (Fig. 8-B) in<br />
way to concur the rotation of it. The blocking<br />
happens re-inserting the pin in one of the<br />
many centers predisposed along the sping<br />
ring. The mechanical block concurs to stop<br />
the spin to 340°.<br />
8-B<br />
8-A<br />
WARNING: it is strictly prohibited to close<br />
the stabilizers when the lighting tower is<br />
in vertical position at the maximum height.<br />
WARNING: the lighting tower is<br />
prearranged to withstand 110 km/h wind at<br />
the maximum height. In case of using in<br />
windly places, be careful and lower timely<br />
the telescopic mast.<br />
In case of hydraulic gear box or generating<br />
set engine‘s failure, it is possible to lower the<br />
mast. Make reference to the chapter “14.2<br />
HYDRAULIC GEAR BOX”.<br />
45 TL073-01-00-02<br />
09-11-2009
<strong>SUPER</strong> <strong>LIGHT</strong> <strong>VT1</strong> <strong>9mt</strong> <strong>4x1000W</strong> <strong>METAALJODIDEN</strong><br />
16. ONDERHOUD VAN DE MOTOR - ENGINE MAINTENANCE<br />
Het is belangrijk dat de motor in perfecte<br />
conditie blijft. Wij adviseren dus de<br />
onderhoudsnormen van de motor strikt in acht<br />
te nemen. Raadpleeg hiervoor het hoofdstuk<br />
“ONDERHOUD” in de “HANDLEIDING VAN<br />
DE OPERATOR”. Zo zult u defecten en<br />
bijgevolg een vermogenbeperking van de<br />
generator voorkomen.<br />
In order to preserve the engine performance<br />
strongly suggests following the maintenance<br />
operations and the maintenance schedules<br />
reported in the engine “Operator’s manual” at<br />
chapter “MAINTENANCE”, in order to avoid<br />
troubles and a consequent power loss of<br />
generating set.<br />
PERIODICITEIT VAN HET ONDERHOUD SERVICE INTERVALS<br />
Intervallen<br />
Interval<br />
Elke 50 uren<br />
Every 50 hours<br />
Elke 100 uren<br />
Every 100 hours<br />
Elke 200 uren<br />
Every 200 hours<br />
Elke 500 uren<br />
Every 500 hours<br />
Elke 800 uren<br />
Every 800 hours<br />
Elke 1500 uren<br />
Every 1500 hours<br />
Elke 3000 uren<br />
Every 3000 hours<br />
Elk jaar<br />
Every year<br />
Om de 2 jaar<br />
Every 2 years<br />
Omschrijving<br />
Item<br />
Controle van de brandstofbuis en de klemring.<br />
Check of fuel pipes and clamp bands<br />
Vervanging van de brandstofgroffilter<br />
Replacement of fuel pre-filter<br />
Primo cambio dell’olio motore<br />
First change of engine oil<br />
Schoonmaak van het luchtfilterelement<br />
Cleaning of air cleaner element<br />
Schoonmaak van de brandstoffilter<br />
Cleaning of fuel filter<br />
Controle van het elektrolytpeil in de accu<br />
Check of battery electrolyte level<br />
Controle van de riemaanspanning van de ventilator<br />
Check of fan belt tightness<br />
Controle van de radiatorbuizen en de klemring<br />
Check of radiator hoses and clamp bands<br />
Vervanging van het oliefilterpatroon<br />
Replacement of oil filter cartridge<br />
Verversing van de motorolie<br />
Replacement of engine oil<br />
Controle van de buis voor luchtzuiging<br />
Check of intake air line<br />
Verwijdering van bezinksel uit de brandstoftank<br />
Removal of sediment in fuel tank<br />
Schoonmaak van de watermantel (interne zijde van de radiator)<br />
Cleaning of water jacket (radiator interior)<br />
Vervanging van de ventilatorriem<br />
Replacement of air cleaner element<br />
Controle klepspeling<br />
Check of valve clearance<br />
Controle van de druk in het brandstofinspuitstuk<br />
Check of fuel injection nozzle injection pressure<br />
Controle van de injectiepomp<br />
Check of injection pump<br />
Controle van de timer voor brandstofinjectie<br />
Check of fuel injection timer<br />
Vervanging van de kolevloeistof<br />
Replacement of air cleaner element<br />
Controle van de elektrische installatie<br />
Check of electric wiring<br />
Vervanging van de kolevloeistof<br />
Replacement of radiator coolant<br />
Vervanging van de radiatorbuis<br />
Replacement of radiator hose<br />
Vervanging van de buizen van de voedingsinstallatie<br />
Replacement of fuel pipes<br />
Vervanging van de buis voor luchtzuiging<br />
Replacement of intake air line<br />
46 TL073-01-00-02<br />
09-11-2009<br />
@<br />
*1 @<br />
@<br />
@<br />
*3 @<br />
*3 @<br />
*3 @<br />
*2 @<br />
*3 @<br />
*4 @
<strong>SUPER</strong> <strong>LIGHT</strong> <strong>VT1</strong> <strong>9mt</strong> <strong>4x1000W</strong> <strong>METAALJODIDEN</strong><br />
*1 Wanneer in een zeer stoffige<br />
werkomgeving wordt gehandeld, moet de<br />
luchtfilter vaker vervangen worden.<br />
*1 Air cleaner should be cleaned more often<br />
in dusty conditions than in normal<br />
conditions.<br />
*2 Na 6 schoonmaakwerkzaamheden. *2 After 6 times of cleaning.<br />
*3 Voor deze technische ingreep, dient u zich<br />
te wenden tot de Kubota concessionaris<br />
van uw zone.<br />
*3 Consult your local Kubota Dealer for this<br />
servive.<br />
*4 Vervang enkel indien noodzakelijk. *4 Replace only if necessary.<br />
@ In verband met de uitlaatgassen van<br />
Kubota zijn de hierboven aangeduide<br />
onderdelen volgens de EPA-richtlijnen<br />
(Environmental Protection Agency) van de<br />
Verenigde Naties kritische elementen. De<br />
eigenaar van de motor is verantwoordelijk<br />
voor de verplichte<br />
onderhoudswerkzaamheden van de motor,<br />
in overeenstemming met de hierboven<br />
geleverde instructies. Wij<br />
adviseren de gedetailleerde informatie<br />
ingesloten in het garantiecertificaat<br />
aandachtig te lezen.<br />
Vervolgens worden de gewone<br />
onderhoudswerkzaamheden van de motor<br />
gemeld. Voor verdere controles moet u het<br />
hoofdstuk “ONDERHOUD” in de “Handleiding<br />
van de Operator” van de motor raadplegen.<br />
De uurteller duidt uitsluitend de bedrijfsuren<br />
van de motor aan daar hij enkel werkt wanneer<br />
de motor is ingeschakeld. Hij kan<br />
geraadpleegd worden voor het regelmatige<br />
gewone en buitengewone onderhoud van de<br />
machine.<br />
@ The items listed above are registered as<br />
emission related critical parts by Kubota<br />
in the U.S. EPA nonroad emission<br />
regulation. As the engine owner, you are<br />
responsible for the performance of the<br />
required maintenance on the engine<br />
according to the above instruction.<br />
Please see the Warranty Statement in<br />
detail.<br />
We report here the operations of ordinary<br />
engine’s maintenance, for other operations<br />
make reference to “Owner’s manual” of the<br />
engine, chapter “MAINTENANCE”.<br />
The hour meter esclusively indicates the<br />
hours of working of the engine because it<br />
only works with the engine in motion. It could<br />
be a reference for the periodic ordinary and<br />
extraordinary maintenance of the machine.<br />
47 TL073-01-00-02<br />
09-11-2009
<strong>SUPER</strong> <strong>LIGHT</strong> <strong>VT1</strong> <strong>9mt</strong> <strong>4x1000W</strong> <strong>METAALJODIDEN</strong><br />
16.1 VERVANGING VAN DE BRANDSTOFGROFFILTER - REPLACEMENT OF FUEL PRE-<br />
FILTER<br />
Vervanging van de brandstofgroffilter elke 50<br />
bedrijfsuren.<br />
Handelingen: Operations:<br />
• Maak de twee klemringen van de buis los<br />
met behulp van een schroevendraaier.<br />
• Vervang de filter en neem hierbij de<br />
montagerichting in acht. Span de<br />
klemringen aan.<br />
Replace the fuel pre-filter with new one every<br />
50 operating hours or so.<br />
• Unloose the two clamps with a<br />
screwdriver.<br />
• Replace the filter respecting the sense of<br />
assembly and tighten the clamps.<br />
• Ledig indien nodig de injectiepomp. • Air-bleed the injection pump if necessary.<br />
1<br />
2<br />
(1) randstofgroffilter.<br />
FFuel pre-filter.<br />
(2) Klemringen.<br />
Clamp.<br />
48 TL073-01-00-02<br />
09-11-2009
<strong>SUPER</strong> <strong>LIGHT</strong> <strong>VT1</strong> <strong>9mt</strong> <strong>4x1000W</strong> <strong>METAALJODIDEN</strong><br />
16.2 SCHOONMAAK VAN DE BRANDSTOFFILTERKAMER - CLEANING THE FUEL FILTER<br />
POT<br />
Om de 100 bedrijfsuren moet de brandstoffilter<br />
schoongemaakt worden. Dit moet op een<br />
schone plaats gebeuren zodat indringen van<br />
stof vermeden wordt.<br />
Every 100 hours of operation, clean the fuel<br />
filter. And so on in a clean place to prevent<br />
dust intrusion.<br />
Handelingen: Operations:<br />
• Verwijder de bovenste dop en spoel het • Remove the top cap, and rinse the inside<br />
binnenste deel met dieselolie.<br />
with diesel fuel.<br />
• Verwijder het element en spoel met • Take out the element, and rinse it with<br />
dieselolie.<br />
diesel fuel.<br />
• Installeer na de schoonmaak opnieuw de • After cleaning, reinstall the fuel filter,<br />
brandstoffilter en let op dat er geen vuil of<br />
stof indringt.<br />
keeping out of dust and dirt.<br />
• Ledig de injectiepomp. • Air-bleed the injection pump.<br />
1<br />
BELANGRIJK: het indringen van stof of vuil<br />
kan een slechte werking van de injectiepomp<br />
en het inspuitstuk veroorzaken. Spoel<br />
regelmatig het carter van de brandstoffilter.<br />
(1) Carter van de brandstoffilter<br />
Fuel filter pot.<br />
(1)<br />
(2)<br />
(3)<br />
(4)<br />
(5)<br />
IMPORTANT: entrance of dust and dirt can<br />
cause a mulfunction of the fuel injection<br />
pump and the injection nozzle. Wash the fuel<br />
filter cup periodically.<br />
O-ring<br />
O-ring.<br />
Filterelement<br />
Filter element.<br />
Veer<br />
Spring.<br />
Filtercarter.<br />
Filter bowl.<br />
Schroefmoer.<br />
Screw ring.<br />
49 TL073-01-00-02<br />
09-11-2009
<strong>SUPER</strong> <strong>LIGHT</strong> <strong>VT1</strong> <strong>9mt</strong> <strong>4x1000W</strong> <strong>METAALJODIDEN</strong><br />
16.3 VERVANGING VAN HET FILTERPATROON VOOR BRANDSTOF - MOTOROLIE - FUEL<br />
FILTER CARTRIDGE REPLACEMENT<br />
Vervang het brandstoffilterpatroon om de 400<br />
bedrijfsuren.<br />
Handelingen: Operations:<br />
• Breng een dunne laag dieselolie aan op de<br />
pakking. Span vervolgens met de handen<br />
het filterpatroon goed aan.<br />
• Ontlucht vervolgens het systeem. • Finally vent the air.<br />
BELANGRIJK: Het brandstoffilterpatroon moet<br />
regelmatig vervangen worden zodat vermeden<br />
wordt dat de plunjer of het inspuitstuk van de<br />
injectiepomp voortijdig verslijt door het<br />
indringen van vuil in de brandstof.<br />
(1)<br />
(2)<br />
(3)<br />
(4)<br />
(5)<br />
Replace the fuel filter cartridge with new one<br />
every 400 operating hours or so.<br />
• Apply fuel oil thinly over the gasket and<br />
tighten the cartridge into position handtight.<br />
IMPORTANT: Replace the fuel filter cartridge<br />
periodically to prevent wear of the fuel<br />
injection pump plunger or the injection nozzle<br />
due to dirt in the fuel.<br />
Brandstoffilterpatroon.<br />
Fuel filter cartridge.<br />
Ontluchtingsschroef.<br />
Air vent plug.<br />
O-ring.<br />
O-ring.<br />
Buisbuigpunt.<br />
Pipe jont.<br />
Deksel.<br />
Cover.<br />
50 TL073-01-00-02<br />
09-11-2009
<strong>SUPER</strong> <strong>LIGHT</strong> <strong>VT1</strong> <strong>9mt</strong> <strong>4x1000W</strong> <strong>METAALJODIDEN</strong><br />
16.4 MOTOROLIE VOORZICHTIG! - ENGINE OIL<br />
• Doe de motor uit alvorens het oliepeil te<br />
controleren of het oliefilterpatroon te<br />
vervangen<br />
worden.<br />
zodat letsels vermeden<br />
• Contact met motorolie kan schadelijk<br />
zijn voor de huid. Draag steeds<br />
•<br />
handschoenen alvorens de olie te<br />
hanteren. Was u onmiddellijk indien u<br />
in contact komt met de olie.<br />
OPMERKING: Verzuim niet de motor te<br />
controleren en zet hem hiervoor vlak.<br />
Op een helling kan de oliehoeveelheid<br />
niet zorgvuldig gecontroleerd worden.<br />
• CAUTION: To avoid personal injury,<br />
be sure to stop the engine before<br />
checking the oil level, changing the oil<br />
and the oil filter cartridge.<br />
• Contact with engine oil can damage<br />
your skin. Put on gloves when using<br />
engine oil. If you come in contact with<br />
engine oil, wash it off immediately.<br />
• NOTE: Be sure to inspect the engine,<br />
locating it on a horizontal place. If<br />
placed on gradients, accurately, oil<br />
quantity may not be measured.<br />
16.5 CONTROLE VAN HET MOTOROLIEPEIL EN BIJVULLEN - CHECKING LEVEL AND<br />
ADDING ENGINE OIL<br />
Handelingen: Operations:<br />
• Controleer het oliepeil van de motor<br />
voor u hem start of na 5 minuten dat hij<br />
uitgeschakeld werd.<br />
• Trek de oliepeilstok uit, maak hem<br />
schoon en steek voeg hem weer in.<br />
• Trek hem weer uit en controleer het<br />
oliepeil.<br />
2<br />
1<br />
(1)<br />
(2)<br />
(A)<br />
• Check the engine oil level before<br />
starting or more than five minutes<br />
after stopping.<br />
• Detach the oil level gauge, wipe it<br />
clean and reinstall it.<br />
• Take the oil level gauge out again,<br />
and check the oil level.<br />
Vuldop.<br />
Oil filter plug.<br />
Oliepeilstok.<br />
Oil level gauge.<br />
I Het oliepeil van de motor is correct indien<br />
het binnen dit veld gelegen is.<br />
Engine oil level within this range is proper.<br />
51 TL073-01-00-02<br />
09-11-2009
<strong>SUPER</strong> <strong>LIGHT</strong> <strong>VT1</strong> <strong>9mt</strong> <strong>4x1000W</strong> <strong>METAALJODIDEN</strong><br />
• Indien het oliepeil te laag is, moet de<br />
oliedop verwijderd worden en moet u<br />
bijvullen tot het correcte peil wordt<br />
bereikt.<br />
• Wacht na het bijvullen meer dan 5<br />
minuten en controleer opnieuw het peil.<br />
Dit is de tijd nodig opdat de olie de<br />
oliecarter zou bereiken.<br />
• If the oil level is too low, remove the<br />
oil filter plug and add new oil to the<br />
prescribed level.<br />
• After adding oil, wait more than 5<br />
minutes and check the oil level again.<br />
It takes same time for the oil to come<br />
down to the oil pan.<br />
16.6 VERVERSING VAN DE MOTOROLIE EN HET FILTERPATROON - CHANGING ENGINE<br />
OIL AND REPLACING THE OIL FILTER CARTRIDGE<br />
1<br />
• VOORZICHTIG! Ververs de motorolie<br />
en het filterpatroon enkel met<br />
uitgeschakelde koude motor om<br />
brandwonden te vermijden.<br />
• Voor de verversing van de motorolie<br />
werd een manueel pompje voorzien.<br />
1<br />
2<br />
Handelingen: Operations:<br />
• Gebruik een bakje om de olie te<br />
verversen. Verwijder de dop van (1) het<br />
pompje (2) en pomp de olie. Het is<br />
gemakkelijker de olie af te tappen<br />
wanneer de motor lauw is en u verkrijgt<br />
een beter resultaat.<br />
• OPGEPAST: wanneer u met het<br />
pompje gedaan hebt, moet u de dop<br />
goed vastschroeven (controleer de<br />
aanspanning voor elke motorstart).<br />
(1)<br />
(2)<br />
• CAUTION: To avoid personal injury<br />
be sure to stop the engine before<br />
draining the engine oil and the oil filter<br />
cartridge and allow engine to cool<br />
down sufficiently; oil can be hot and<br />
can burn.<br />
• For change the engine oil, it was<br />
predisposed a manual pump.<br />
Olietankdop.<br />
Engine oil drain cap.<br />
Manueel pompje om de olie uit de motor te<br />
verwijderen.<br />
Manual pump in order to extract the oil from<br />
the engine<br />
• Take a container for the exaust oil,<br />
remove the discharge cap (1) from the<br />
pump (2) and pump out the oil. Drain<br />
oil easier and completely while the<br />
engine is tepid.<br />
• WARNING: after using the pump<br />
screw well the cap (control the<br />
tightening before each engine<br />
stating).<br />
52 TL073-01-00-02<br />
09-11-2009
<strong>SUPER</strong> <strong>LIGHT</strong> <strong>VT1</strong> <strong>9mt</strong> <strong>4x1000W</strong> <strong>METAALJODIDEN</strong><br />
1<br />
• Contact met motorolie kan schadelijk<br />
zijn voor de huid. Draag steeds<br />
handschoenen alvorens de olie te<br />
hanteren. Was u onmiddellijk indien u<br />
in contact komt met de olie.<br />
• Ververs de olie (5,1 l oliecarter) na de<br />
eerste 50 bedrijfsuren, vervolgens elke<br />
200 uren.<br />
• Giet geen milieuvervuilende<br />
vloeistoffen weg.<br />
• Verwijder het filterpatroon bij middel<br />
van een sleutel.<br />
1<br />
• Smeer lichtjes de pakking voor het<br />
nieuwe patroon.<br />
• Schroef het patroon handmatig vast.<br />
Wanneer de pakking in contact komt<br />
met het dichtende oppervlak, het<br />
patroon met de hand zoals het hoort<br />
vastschroeven. Gebruik geen sleutel<br />
daar het patroon te stevig zou vast<br />
geschroefd worden.<br />
• Vul bij met verse motorolie tot de<br />
bovenste limiet van de peilstok wordt<br />
bereikt.<br />
• Nadat het patroon werd vervangen,<br />
daalt het oliepeil gewoonlijk een beetje.<br />
Laat daarom de motor een tijdje<br />
draaien en controleer of er olie uit de<br />
pakking lekt alvorens het oliepeil te<br />
checken. Voeg indien noodzakelijk olie<br />
bij.<br />
2<br />
• Contact with engine oil can damage<br />
your skin. Put on gloves when using<br />
engine oil. If you come in contact with<br />
engine oil, wash it off immediately.<br />
• Change oil (5,1 l oil sump) after the<br />
initial 50 hours of operation and every<br />
200 hours thereafter.<br />
• Do not discharge the polluting<br />
liquids in the atmosphere.<br />
• Detach the old oil filter cartridge with a<br />
filter wrench.<br />
(1) Oliefilterpatroon.<br />
Oil filter cartridg.<br />
Verwijder met een sleutel voor filters (span<br />
manueel goed aan).<br />
Remove with a filter wrench (tighten with<br />
your hand).<br />
• Apply a film of oil to the gasket for the<br />
new cartridge.<br />
• Screw in the cartridge by hand. When<br />
the gasket contacts the seal surface,<br />
tighten the cartridge enough by hand.<br />
Because, if you tight the cartridge with<br />
wrench, it will be tightened too much.<br />
• Add new engine oil up to the upper<br />
limit of the oil level gauge.<br />
• After the new cartridge has been<br />
replaced, the engine oil level normally<br />
decreases a little. Thus, run the<br />
engine for a while and check oil leaks<br />
through the seal before checking the<br />
engine oil level. Add oil if necessary.<br />
53 TL073-01-00-02<br />
09-11-2009
<strong>SUPER</strong> <strong>LIGHT</strong> <strong>VT1</strong> <strong>9mt</strong> <strong>4x1000W</strong> <strong>METAALJODIDEN</strong><br />
Meer dan – Up to 25° C SAE 30 - SAE 10W-30 - SAE 10W-40<br />
Van 0° C tot 25° C<br />
Between 0° C and 25° C<br />
SAE 20 - SAE 10W-30 - SAE 10W-40<br />
Minder dan - Down to 0° C SAE 10W - SAE 10W-30 - SAE 10W-40<br />
• OPMERKING: Wrijf de olie volledig van<br />
de machine.<br />
16.7 RADIATOR - RADIATOR<br />
• Indien de koelvloeistoftank volledig<br />
wordt bijgevuld alvorens de motor in<br />
bedrijf te stellen, is dit voldoende voor<br />
een volledige werkdag; dus moet het<br />
koelvloeistofpeil voor elke<br />
inbedrijfstelling regelmatig gecheckt<br />
worden.<br />
ADVIES: WARNING:<br />
• Verwijder de radiatordop niet wanneer<br />
de motor warm is om verwondingen te<br />
vermijden. Schroef de dop een weinig<br />
open tot bij de begrenzing zodat de<br />
overmatige druk kan ontlast worden.<br />
Vervolgens kan hij volledig verwijderd<br />
worden.<br />
• Stop de motor niet abrupt. Schakel hem<br />
uit na ongeveer 5 minuten onbelast<br />
bedrijf.<br />
• Ga slechts tewerk na volledige<br />
afkoeling van motor en radiator (meer<br />
dan 30 minuten nadat hij werd<br />
•<br />
uitgeschakeld).<br />
Indien de machine voor een lange<br />
periode niet gebruikt zal worden (meer<br />
dan een jaar), is het aangeraden<br />
koelvloeistof in de radiator te laten om<br />
oxidatie te vermijden.<br />
• NOTE: Wipe off any oil sticking to the<br />
machine completely.<br />
• Coolant will last for one day’s work if<br />
filled all the way up before operation<br />
start. Make it a rule to check the<br />
coolant level before every operation.<br />
• To avoid personal injury do not<br />
remove the radiator cap when the<br />
engine is hot. Then loosen cap slightly<br />
to the stop to relieve any excess<br />
pressure before removing cap<br />
completely.<br />
• Do not stop the engine suddenly, stop<br />
it after about 5 minutes of unloaded<br />
idiling.<br />
• Work only after letting the engine and<br />
radiator cool off completely (more<br />
than 30 minutes after it has been<br />
stopped).<br />
• If the machine has to be stopped for a<br />
long period (more than one year), we<br />
suggest to keep the coolant into the<br />
radiator in order to avoid oxidizing<br />
effects.<br />
54 TL073-01-00-02<br />
09-11-2009
<strong>SUPER</strong> <strong>LIGHT</strong> <strong>VT1</strong> <strong>9mt</strong> <strong>4x1000W</strong> <strong>METAALJODIDEN</strong><br />
16.8 CONTROLE VAN HET KOELVLOEISTOFPEIL EN BIJVULLEN - CHECKING COOLANT<br />
LEVEL, ADDING COOLANT<br />
• Handelingen: • Operations:<br />
• Verwijder de radiatordop. Controleer of<br />
de koelvloeistof de vulopening bereikt.<br />
• De radiator is voorzien van een<br />
reservetank. Controleer het peil van de<br />
koelvloeistof in de tank. Indien het peil<br />
zich tussen “vol” en “laag” bevindt, is er<br />
genoeg koelvloeistof aanwezig voor<br />
een volledige werkdag..<br />
• Remove the radiator cap, and check<br />
to see that coolant reaches the supply<br />
port.<br />
(1) Radiatordop.<br />
Radiator pressure cap.<br />
(1)<br />
(A)<br />
(B)<br />
• If the radiator is provided with a<br />
reserve tank, check the coolant level<br />
of the reserve tank. When it is<br />
between the “FULL“ and “LOW”<br />
marks, the coolant will last for one<br />
day’s work.<br />
Reservetank.<br />
Reserve tank.<br />
Vol.<br />
Full.<br />
Laag.<br />
Low.<br />
55 TL073-01-00-02<br />
09-11-2009
<strong>SUPER</strong> <strong>LIGHT</strong> <strong>VT1</strong> <strong>9mt</strong> <strong>4x1000W</strong> <strong>METAALJODIDEN</strong><br />
• Wanneer het koelvloeistofpeil door<br />
evaporatie daalt, moet u enkel water<br />
bijvoegen tot “vol” wordt bereikt.<br />
• Controleer de twee kranen; een op de<br />
grondplaat en een op het onderste deel<br />
van de radiator.<br />
1<br />
BELANGRIJK: Indien u de radiatordop moet<br />
verwijderen, moet u de voorzorgsmaatregelen<br />
in acht nemen die hierboven werden vermeld<br />
en hem vervolgens opnieuw stevig<br />
vastschroeven.<br />
Om de reservetank te vullen moet steeds<br />
zuiver water gemengd met antivriesmiddel<br />
gebruikt worden.<br />
Bij waterlekken moet u de Kubota<br />
concessionaris raadplegen.<br />
Overschrijd nooit het peil “vol” wanneer u de<br />
reservetank vult.<br />
Verzeker u ervan dat u de radiatordop goed<br />
sluit. di avere chiuso bene il tappo del<br />
radiatore. Indien hij niet goed gesloten wordt<br />
kunt u koelvloeistof verliezen.<br />
(1)<br />
(A)<br />
(B)<br />
• When the coolant level drops due to<br />
evaporation, add water only up to the<br />
full level.<br />
• Check to see that two drain cocks;<br />
one is at the crankcase side and the<br />
other is at the lower part of the<br />
radiator as figures below.<br />
Reservetank.<br />
Reserve tank.<br />
Vol.<br />
Full.<br />
Laag.<br />
Low.<br />
(1) Kraan voor het aftappen van de<br />
koelvloeistof.<br />
Coolant drain cock.<br />
IMPORTANT: If the radiator cap has to be<br />
removed, follow the caution above and<br />
securely retighten the cap.<br />
Use clean water and anti-freeze to fill the<br />
reserve tank.<br />
If coolant should be leak, consult your local<br />
Kubota dealer.<br />
Do not refill reserve tank over the “FULL”<br />
level mark.<br />
Be sure to close the radiator cap securely. If<br />
the cap is loose or improperly closed, coolant<br />
may leak out and decrease quickly.<br />
56 TL073-01-00-02<br />
09-11-2009
<strong>SUPER</strong> <strong>LIGHT</strong> <strong>VT1</strong> <strong>9mt</strong> <strong>4x1000W</strong> <strong>METAALJODIDEN</strong><br />
16.9 VERVERSING VAN DE KOELVLOEISTOF - CHANGING COOLANT<br />
Handelingen: Operations:<br />
• Voor het aftappen van de koelvloeistof<br />
moet u steeds de twee kranen openen<br />
en gelijktijdig ook de radiatordop. Het<br />
water kan niet volledig afgevoerd<br />
worden indien de radiatordop gesloten<br />
blijft.<br />
• Verwijder de overloopbuis van de<br />
radiatordop om de reservetank af te<br />
tappen.<br />
• To drain coolant, always open both<br />
drain cocks and simultaneously open<br />
the radiator cap as well. With the<br />
radiator cap kept closed, a complete<br />
drain of water is impossible.<br />
• Remove the overflow pipe of the<br />
radiator pressure cap to drain the<br />
reserve tank.<br />
• Capaciteit van de radiator 3,1 l. • Radiator capacity 3,1 l<br />
OPGEPAST VOOR OVERVERHITTING PRECAUTION AT OVERHEATING<br />
Indien de temperatuur van de koelvloeistof het In the event the coolant temperature is nearly<br />
kookpunt nadert of overschrijdt (controlelamp or more than the boiling point (lamp (4)<br />
(4) aan op het besturingspaneel), zal de placed on the command panel), the engine’s<br />
automatische motorbeveiliging (DAS) na protection (DAS) turns off the engine after<br />
ongeveer 20 seconden de motor uitschakelen. about 20 seconds.<br />
Neem de volgende voorzorgsmaatregelen Take the following actions:<br />
• Open in geen enkel geval de motorkap<br />
of andere delen.<br />
• Indien stoom vrijkomt, moet u op veilige<br />
afstand van de motor blijven en ervoor<br />
zorgen dat niemand in de buurt komt.<br />
• Laat de motor afkoelen en controleer of<br />
er geen gevaar is voor brandwonden.<br />
Spoor de oorzaak van de oververhitting<br />
op en tref maatregelen. Raadpleeg<br />
hiervoor het hoofdstuk diagnostiek in<br />
de handleiding van de motor.<br />
16.10 LUCHTFILTER - AIR CLEANER<br />
Indien een droog luchtfilterelement gebruikt<br />
wordt in deze motor moet het nooit gesmeerd<br />
worden.<br />
• Bij normale bedrijfscondities moet de<br />
evacuatieklep een keer per week<br />
geopend worden. In een stoffige<br />
werkomgeving moet hij elke dag<br />
geopend worden zodat het stof en het<br />
vuil verwijderd kan worden.<br />
• Do not open the hood and any other<br />
part.<br />
• In case of steam blown out, keep<br />
yourself and others weel away from<br />
the engine.<br />
• Let the motor to cool and, checked<br />
that there gets no danger such as<br />
burn, get rid of the causes of<br />
overheating according to the manual,<br />
see “TROUBLESHOOTING” section.<br />
As the element of the air cleaner employed<br />
on this engine is a dry type never apply oil to<br />
it.<br />
• Open the evacuator valve once a<br />
week under ordinary conditions-or<br />
daily when used is in a dusty place-to<br />
get rid of large particles of dust and<br />
dirt.<br />
57 TL073-01-00-02<br />
09-11-2009
<strong>SUPER</strong> <strong>LIGHT</strong> <strong>VT1</strong> <strong>9mt</strong> <strong>4x1000W</strong> <strong>METAALJODIDEN</strong><br />
Handelingen: Operations:<br />
• Maak de binnenkant van de luchtfilter<br />
schoon met een doek indien vuil of<br />
vochtig.<br />
• Vermijd het element aan te raken tenzij<br />
voor de schoonmaak.<br />
• Indien het stof aan het element kleeft,<br />
kunt u perslucht gebruiken om het te<br />
verwijderen. Blaas van de binnenkant<br />
naar de buitenkant terwijl u het element<br />
draait. De druk van de perslucht moet<br />
lager zijn dan 686kPa (7kg/cm², 99psi).<br />
• Indien er kool of olie aankleeft, moet u<br />
het element 30 minuten<br />
onderdompelen in water met een<br />
reinigingsmiddel. Spoel vervolgens een<br />
paar keren en laat het op een verluchte<br />
plaats drogen.<br />
• Controleer met een zaklamp of de<br />
binnenkant niet werd beschadigd<br />
wanneer het element volledig droog is<br />
(volg de instructies op de label van het<br />
element).<br />
• Vervang elk jaar het element of om de<br />
6 schoonmaakbeurten.<br />
BELANGRIJK: Verzeker u ervan dat de<br />
vleugelschroef van het element tot in de<br />
aanslag is vastgeschroefd. Indien ze los zit kan<br />
stof en vuil opgezogen worden waardoor de<br />
cilinder en de afdichtingsring verslijten en<br />
bijgevolg zal het vermogen van de motor<br />
slinken.<br />
(1)<br />
(2)<br />
(3)<br />
(4)<br />
(5)<br />
• Wipe the inside air cleaner clean with<br />
cloth or the like if it is dirty or wet.<br />
• Avoid touching the element except<br />
when cleaning.<br />
• When dry dust adheres to the<br />
element, blow compressed air from<br />
the inside turning the element. The<br />
pressure of compressed air must be<br />
under 686kPa (7kg/cm², 99psi).<br />
• When carbon or oil adheres to the<br />
element, soak the element in<br />
detergent for 30 minutes then wash it<br />
several times in water, rinse with<br />
clean water and dry it naturally.<br />
• After element is fully dried, inspect<br />
inside of the element with a light and<br />
check if it is damaged or not.<br />
(referring to the instructions on the<br />
label attached to the element).<br />
• Replace the element every year or<br />
every six cleanings.<br />
Brandstoffilterpatroon.<br />
Fuel filter cartridge.<br />
Ontluchtingsschroef.<br />
Air vent plug.<br />
O-ring.<br />
O-ring.<br />
Buisbuigpunt.<br />
Pipe jont.<br />
Deksel.<br />
Cover.<br />
IMPORTANT: Make sure the wing bolt for the<br />
element is tight enough. If it is loose dust and<br />
dirt may be sucked, wearing down the<br />
cylinder liner and piston ring earlier and<br />
thereby resulting in poor power output.<br />
58 TL073-01-00-02<br />
09-11-2009
<strong>SUPER</strong> <strong>LIGHT</strong> <strong>VT1</strong> <strong>9mt</strong> <strong>4x1000W</strong> <strong>METAALJODIDEN</strong><br />
• AFVOERKLEP • EVACUATOR VALVE<br />
Bij normale bedrijfscondities moet de<br />
evacuatieklep een keer per week geopend<br />
worden. In een stoffige werkomgeving moet hij<br />
elke dag geopend worden zodat het stof en het<br />
vuil verwijderd kan worden.<br />
Open the evacuator valve once a week under<br />
ordinary conditions-or daily when used in a<br />
dusty place-to get rid of large particles of dust<br />
and dirt.<br />
17. ONDERHOUD VAN DE LICHTMAST - <strong>LIGHT</strong>ING TOWER<br />
MAINTENANCE<br />
Een regelmatige schoonmaak van de machine<br />
is aangeraden om ophoping van vuil te<br />
voorkomen dat de werking zou kunnen<br />
benadelen. De frequentie van deze handeling<br />
moet geraamd worden in functie van de plaats<br />
van gebruik.<br />
Voor de buitengewone<br />
onderhoudswerkzaamheden die niet werden<br />
vermeld, is de ingreep van vakkundig<br />
personeel nodig.<br />
We suggest a frequent cleaning of the<br />
machine in order to avoid the presence of dirt<br />
which can compromise the efficiency of the<br />
machine. The frequency of this operation<br />
tightly depends on the place where the<br />
machine is used.<br />
The extraordinary service operations not<br />
mentioned here above require the aid of<br />
specialized technicians.<br />
17.1 SMEREN VAN DE LEISCHIJVEN – LUBRICATION OF THE ROLLERS<br />
Gebruik voor het smeren van de leischijven vet<br />
geschikt voor lage temperaturen en zeer hoge<br />
snelheid. Wij adviseren SKF LGLT 2 te<br />
gebruiken, een eerste kwaliteitsproduct met<br />
lithium zeep en volledig synthetische basisolie.<br />
Indien een ander product wordt gebruikt, moet<br />
hoe dan ook de viscositeit van de basisolie<br />
overeenstemmen met.18 mm²/s a 40°C - 4,5<br />
mm²/s a 100°C.<br />
For the lubrication of the rollers, use a low<br />
temperatures and extremely high speed<br />
bearing grease. We recommend to use SKF<br />
LGLT 2 grease, a premium quality fully<br />
synthetic oil based grease using lithium soap.<br />
In case of use of an other product, the grease<br />
will must have a base oil viscosity equal to 18<br />
mm²/s at 40°C and to 4,5 mm²/s at 100°C.<br />
17.2 SMEREN VAN DE TELESCOPISCHE PALEN - LUBRICATION OF MAST SECTIONS<br />
Gebruik voor het smeren van de telescopische<br />
palen een spray type WD40. Breng aan op de<br />
metalen delen om gedurende het stijgen of<br />
dalen van de paal het verschuiven van de<br />
verschillende delen te vergemakkelijken. Bij<br />
frequent gebruik moet u dit om de 3 maanden<br />
doen.<br />
For the lubrication of the mast sections, we<br />
recommend to use a light lubricating oil like<br />
WD40. Spray it on the metal parts of the<br />
mast, in order to avoid squeaking and<br />
scrapping noises during the raising and the<br />
lowering operations. In case of frequent use,<br />
lubricate every three months.<br />
17.3 SMEREN VAN DE STEUNPOTEN – LUBRICATION OF STABILIZERS<br />
Smeer regelmatig de steunpoten met een<br />
compact vet dat tevens fungeert als glijmiddel.<br />
Gebruik een smeerspuit die u in de kleppen op<br />
de steunpoten invoegt (indien voorzien).<br />
Controleer of de steunpoten regelmatig<br />
verschuiven.<br />
Grease periodically the stabilizer using a<br />
dense grease adapted to sliding system sto<br />
apply through the apposite tool to insert in the<br />
valves placed on the stabilizer (if previewed).<br />
Verify if the movement of the stabilizer is<br />
correctly.<br />
59 TL073-01-00-02<br />
09-11-2009
<strong>SUPER</strong> <strong>LIGHT</strong> <strong>VT1</strong> <strong>9mt</strong> <strong>4x1000W</strong> <strong>METAALJODIDEN</strong><br />
17.4 CONTROLE VAN DE HYDRAULISCHE CILINDER – CHECK OF HYDRAULIC CYLINDER<br />
Controleer regelmatig de staat van de<br />
hydraulische stuwcilinder. Check of er geen<br />
sporen van slijtage, wrijving, barsten of<br />
corrosie aanwezig zijn.<br />
Verify periodically the conditions of the<br />
hydraulic pushing cylinder, controlling that<br />
there are not any usury traces, rubbing, leaks<br />
or corrosion.<br />
17.5 CONTROLE VAN DE STALEN KABELS - CHECK OF STEEL CABLES<br />
De stalen kabels voor het stijgen en dalen van<br />
de telescopische paal bestaan uit 133 draden.<br />
Controleer regelmatig hun staat en of het<br />
slepen in de leischijven perfect is. Check<br />
bovendien de schroefaanspanning van de<br />
stalen kabels. De stalen kabel moet minstens<br />
2 windingen op de trommel van de lier<br />
gewikkeld blijven wanneer de paal omlaag is.<br />
Indien dit niet zo is of indien de kabel sporen<br />
van slijtage vertoont, mag de lichtmast niet<br />
gebruikt worden en moet u onmiddellijk contact<br />
opnemen met de fabrikant.<br />
The steel cables are composed of 133 wires<br />
and they let the raising and lowering of the<br />
telescopic mast. It is periodically necessary to<br />
verify their conditions and their perfect<br />
dragging inside the pulleys. Control also the<br />
screws’ tightening that sustains the steel<br />
cables. The steel cable must remain wound<br />
round the drum at least twice when the mast<br />
is lowered. If it were not, or if the steel cable<br />
had to show usury signs, do not use the<br />
lighting tower and contact directly house<br />
manufacturer.<br />
17.6 CONTROLE VAN DE HYDRAULISCHE KOPPELINGEN – CHECK OF HYDRAULIC<br />
CONNECTIONS<br />
Controleer regelmatig de buisfittingen en de<br />
leidingen voor de hydraulische olie die van de<br />
tank naar de cilinder lopen. Controleer of de<br />
leidingen goed aangespannen zijn en ga na of<br />
er geen sporen van slijtage of inkepingen zijn.<br />
Check tevens of er geen lekken zijn.<br />
Verify periodically connections and hoses<br />
that transport the hydraulic oil from the tank<br />
to the cylinder, control the tightening of the<br />
hoses, verify eventual usury signs or cuts.<br />
Verify if there is a oil’s loss.<br />
60 TL073-01-00-02<br />
09-11-2009
<strong>SUPER</strong> <strong>LIGHT</strong> <strong>VT1</strong> <strong>9mt</strong> <strong>4x1000W</strong> <strong>METAALJODIDEN</strong><br />
18. VADEMECUM IN GEVAL VAN PROBLEMEN - TROUBLESHOOTING<br />
GUIDE<br />
Vervolgens worden de meest voorvallende<br />
afwijkingen vermeld die gedurende het gebruik<br />
van de lichtmast kunnen optreden samen met<br />
de mogelijke oplossingen.<br />
Indien de motor niet correct werkt, moet u de<br />
tabel raadplegen in het hoofdstuk “<br />
OPLOSSEN VAN DE DEFECTEN” in de<br />
“Handleiding van de Operator” van de motor.<br />
Op deze wijze kunt u de oorzaak van het<br />
defect bepalen en een oplossing vinden.<br />
18.1 VOORNAAMSTE AFWIJKINGEN - MAIN TROUBLES<br />
AFWIJKING ANOMALY<br />
• Wanneer de startsleutel op ON wordt<br />
gezet, gaat de controlelamp niet<br />
branden en de motorstarter treedt niet<br />
in werking.<br />
Listed below are the most common troubles<br />
that may occur during use of the lighting<br />
tower and possible remedies.<br />
If the engine did not have to work correctly,<br />
we suggest to follow the maintenance<br />
operations and the maintenance schedules<br />
reported in the engine “Operator’s manual” at<br />
chapter “MAINTENANCE”, in order to find<br />
and to eliminate the cause of the trouble.<br />
• Turning the starting key in ON<br />
position, no signal lamps ignites and<br />
the starting motor does not work.<br />
OORZAAK CAUSE<br />
De accu is ontkoppeld. The battery is disconnected.<br />
OPLOSSING REMEDY<br />
Open de deur en controleer de accu. Open the door and connect the battery.<br />
OORZAAK CAUSE<br />
De accu is ontladen. The battery is discharge.<br />
OPLOSSING REMEDY<br />
Laad hem op. Recharge the battery.<br />
OORZAAK CAUSE<br />
De accu is defect The battery is defective.<br />
OPLOSSING REMEDY<br />
Vervang hem. Replace the battery.<br />
OORZAAK CAUSE<br />
De startsleutel is defect. Steerg lock is failure.<br />
OPLOSSING REMEDY<br />
Vervang hem. Replace the steerg lock.<br />
61 TL073-01-00-02<br />
09-11-2009
<strong>SUPER</strong> <strong>LIGHT</strong> <strong>VT1</strong> <strong>9mt</strong> <strong>4x1000W</strong> <strong>METAALJODIDEN</strong><br />
OORZAAK CAUSE<br />
De motorstarter werkt niet. The starting motor does not work.<br />
OPLOSSING REMEDY<br />
Wend u tot een Kubota Servicecentrum voor<br />
een controle.<br />
Contact a Kubota assistance centre for a<br />
control.<br />
OORZAAK CAUSE<br />
De noodknop werd ingedrukt. The emergency stop button is pressed.<br />
OPLOSSING REMEDY<br />
Controleer of de stopdrukknop opnieuw werd<br />
ingesteld. Is dit niet zo, draai dan de knop met<br />
de wijzers van de klok mee.<br />
OORZAAK CAUSE<br />
Er zijn ontkoppelde kabels in de elektrische<br />
installatie.<br />
OPLOSSING REMEDY<br />
Voer een visuele controle op de elektrische<br />
installatie uit om de ontkoppelde kabels op te<br />
sporen (raadpleeg het elektrisch schema).<br />
Wend u eventueel rechtstreeks tot TOWER<br />
<strong>LIGHT</strong> S.r.l.<br />
AFWIJKING ANOMALY<br />
• De motorstarter draait maar de motor<br />
start niet.<br />
Check that the stop button is reamed. It if<br />
doesn’t, turn the grip handle in clockwise<br />
direction.<br />
There are many disconnected cables in the<br />
electrical system.<br />
Control visually the electrical system to find<br />
the disconnected cables (make reference to<br />
the wiring diagram), eventually contact<br />
directly TOWER <strong>LIGHT</strong> S.r.l.<br />
• The starting motor works but the<br />
engine does not start.<br />
OORZAAK CAUSE<br />
Gebrek aan brandstof is mogelijk. Possible lack of fuel in the tank.<br />
OPLOSSING REMEDY<br />
Tank bij. Refuel the machine.<br />
OORZAAK CAUSE<br />
De brandstoffilter is vuil Fuel filter dirty.<br />
OPLOSSING REMEDY<br />
Vervang hem. Replace the filter.<br />
OORZAAK CAUSE<br />
De brandstofpomp werkt niet. The fuel pump does not work.<br />
OPLOSSING REMEDY<br />
Check de elektrische aansluiting van de pomp<br />
en wend u eventueel tot een Kubota<br />
Servicecentrum voor een controle.<br />
Control the electrical connection of the pump<br />
and eventually contact a Kubota assistance<br />
centre for a control.<br />
62 TL073-01-00-02<br />
09-11-2009
<strong>SUPER</strong> <strong>LIGHT</strong> <strong>VT1</strong> <strong>9mt</strong> <strong>4x1000W</strong> <strong>METAALJODIDEN</strong><br />
AFWIJKING ANOMALY<br />
• Moeilijke motorstart, onvoldoende<br />
motorprestatie.<br />
• The starting of the engine is difficult<br />
and there is a insufficient rendering.<br />
OORZAAK CAUSE<br />
De luchtfilter is vuil. The element air cleaner is dirty.<br />
OPLOSSING REMEDY<br />
Reinig het element en vervang eventueel. Clean up the element and eventually replace<br />
it.<br />
OORZAAK CAUSE<br />
De injectiepomp is versleten. Injection pump wear.<br />
OPLOSSING REMEDY<br />
Gebruik geen brandstof van minder goede<br />
kwaliteit zodat slijtage van de pomp wordt<br />
vermeden.<br />
Do not use poor quality fuel as it will cause<br />
wear of the pump. Check the fuel injection<br />
pump element and replace it if necessary.<br />
OORZAAK CAUSE<br />
Oververhitting van de mobiele elementen. Overheating of moving parts.<br />
OPLOSSING REMEDY<br />
Controleer het smeersysteem. Check lubricating oil system.<br />
Controleer of de oliefilter goed werkt of Check to see if lubricating oil filter is working<br />
vervang hem.<br />
properly or replace it.<br />
AFWIJKING ANOMALY<br />
• Onstabiele stroomtoevoer. • Ouput voltage unstable.<br />
OORZAAK CAUSE<br />
Onregelmatige motorsnelheid. Irregular engine speed.<br />
OPLOSSING REMEDY<br />
De motor is ingesteld op de juiste<br />
motorsnelheid (1500 r.p.m.),. Wend u bij<br />
ontregeling rechtstreeks tot TOWER <strong>LIGHT</strong><br />
S.r.l.<br />
The engine is set at the exactly speed (1500<br />
r.p.m.), in case of unsetting contact directly<br />
TOWER <strong>LIGHT</strong> S.r.l.<br />
OORZAAK CAUSE<br />
De alternator is defect. The alternator is defective.<br />
OPLOSSING REMEDY<br />
Vervang hem en wend u eventueel<br />
rechtstreeks tot TOWER <strong>LIGHT</strong> S.r.l.<br />
Replace the alternator and eventually contact<br />
directly TOWER <strong>LIGHT</strong> S.r.l.<br />
63 TL073-01-00-02<br />
09-11-2009
<strong>SUPER</strong> <strong>LIGHT</strong> <strong>VT1</strong> <strong>9mt</strong> <strong>4x1000W</strong> <strong>METAALJODIDEN</strong><br />
AFWIJKING ANOMALY<br />
• De machine stopt en de meldlamp voor<br />
lage druk brandt.<br />
• The machine stops with the oil low<br />
pressure signal lamp ignited.<br />
OORZAAK CAUSE<br />
Laag oliepeil. The oil level is low.<br />
OPLOSSING REMEDY<br />
Controleer het peil en vul bij indien nodig. Verify the level and add oil if necessary.<br />
OORZAAK CAUSE<br />
De oliedrukregelaar is defect. The pressure switch is defective.<br />
OPLOSSING REMEDY<br />
Vervang hem. Replace the pressure switch.<br />
OORZAAK CAUSE<br />
Het beschermend “DAS” TP0401 paneel is The “DAS” TP0401 protection panel is<br />
defect.<br />
defective.<br />
OPLOSSING REMEDY<br />
Vervang het. Replace the panel.<br />
AFWIJKING ANOMALY<br />
• De machine stopt met de meldlamp • The machine stops with the high water<br />
voor hoge temperatuur van de<br />
temperature signal lamp ignited.<br />
koelvloeistof aan.<br />
OORZAAK CAUSE<br />
Het koelvloeistofpeil in de radiator is laag. The level of the coolant in the radiator is low.<br />
OPLOSSING REMEDY<br />
Controleer het peil en vul bij indien nodig. Verify the level and add coolant if necessary.<br />
OORZAAK CAUSE<br />
Rooster of ribben van de radiator verstopt. Radiator net or radiator fin clogged with dust.<br />
OPLOSSING REMEDY<br />
Maak het rooster en/of de ribben schoon. Clean net or fin carefully.<br />
OORZAAK CAUSE<br />
De ventilator van de radiator werkt niet. Radiator fan does not work.<br />
OPLOSSING REMEDY<br />
Controleer de ventilator. Control the fan.<br />
64 TL073-01-00-02<br />
09-11-2009
<strong>SUPER</strong> <strong>LIGHT</strong> <strong>VT1</strong> <strong>9mt</strong> <strong>4x1000W</strong> <strong>METAALJODIDEN</strong><br />
OORZAAK CAUSE<br />
Het beschermend “DAS” TP0401 paneel is<br />
defect.<br />
The protection panel “DAS” TP0401 is<br />
defective.<br />
OPLOSSING REMEDY<br />
Vervang het. Replace the panel.<br />
AFWIJKING ANOMALY<br />
• De machine stopt met de meldlamp van • The machine stops with the battery<br />
de acculader aan.<br />
charge signal lamp ignited.<br />
OORZAAK CAUSE<br />
De accu is defect. The battery is defective.<br />
OPLOSSING REMEDY<br />
Vervang de accu. Replace the battery.<br />
OORZAAK CAUSE<br />
De alternator van de motor is defect. The engine’s alternator is failure.<br />
OPLOSSING REMEDY<br />
Controleer en wend u eventueel tot een<br />
Kubota Servicecentrum.<br />
OORZAAK CAUSE<br />
Het beschermend “DAS” TP0401 paneel is<br />
defect.<br />
Control it and eventually contact a Kubota<br />
assistance centre.<br />
The protection panel “DAS” TP0401 is<br />
defective.<br />
OPLOSSING REMEDY<br />
Vervang het. Replace the panel.<br />
AFWIJKING ANOMALY<br />
• Na het tanken stijgt de aanwijzer van • After refuelling, the fuel level monitor<br />
het brandstofpeil niet.<br />
does not move.<br />
OORZAAK CAUSE<br />
Hij werkt niet. The fuel level monitor does not work.<br />
OPLOSSING REMEDY<br />
Controleer de aanwijzer en de relatieve<br />
elektrische aansluiting.<br />
Control the fuel level monitor and its relative<br />
electrical connection.<br />
OORZAAK CAUSE<br />
De dobber werkt niet. The floating does not work.<br />
OPLOSSING REMEDY<br />
Controleer de dobber en de relatieve<br />
elektrische aansluiting. Vervang eventueel de<br />
sonde indien ze geblokkeerd is.<br />
Control the floating and its relative electrical<br />
connection. If the sensor is blocked, eventually<br />
replace it.<br />
65 TL073-01-00-02<br />
09-11-2009
<strong>SUPER</strong> <strong>LIGHT</strong> <strong>VT1</strong> <strong>9mt</strong> <strong>4x1000W</strong> <strong>METAALJODIDEN</strong><br />
AFWIJKING ANOMALY<br />
• De motor draait maar de uurteller werkt<br />
niet.<br />
• With the engine in motion the hour<br />
meter does not work.<br />
OORZAAK CAUSE<br />
De uurteller werkt niet. The hour meter does not work.<br />
OPLOSSING REMEDY<br />
Controleer de uurteller en de relatieve<br />
elektrische aansluiting.<br />
AFWIJKING ANOMALY<br />
• De differentiële schakelaar schakelt om<br />
gedurende het gebruik van de machine.<br />
OORZAAK CAUSE<br />
Een stroomlek trad op gedurende het gebruik<br />
van het hulpstopcontact.<br />
OPLOSSING REMEDY<br />
Controleer de elektrische installatie<br />
stroomafwaarts van het hulpstopcontact.<br />
Controleer of de absorptiewaarden op de<br />
typeplaat niet overschreden werden.<br />
Control the hour meter and its relatives<br />
electrical connection.<br />
• The automatic earth leakage relay trips<br />
during the use of the machine.<br />
It has been a leak of current during the use of<br />
the auxiliary socket.<br />
Control the electrical system connected to the<br />
auxiliary socket, verify that no values of draw<br />
are not exceeds to you.<br />
OORZAAK CAUSE<br />
Elektrische verbindingen onderbroken. Electrical connections interrupted.<br />
OPLOSSING REMEDY<br />
Controleer de elektrische installatie en wend u<br />
eventueel rechtstreeks tot TOWER <strong>LIGHT</strong> S.r.l<br />
Control the external electrical system and<br />
contact eventually TOWER <strong>LIGHT</strong> S.r.l.<br />
OORZAAK CAUSE<br />
De aardaansluiting werd niet vakkundig Connection to Earth not correctly carried out.<br />
uitgevoerd.<br />
OPLOSSING REMEDY<br />
Controleer opnieuw de aardaansluiting. Control that the connection to Earth is adapted.<br />
AFWIJKING ANOMALY<br />
• De hendel voor stijging en daling van • The raising and lowering lever of the<br />
de telescopische paal werkt niet.<br />
telescopic mast does not work.<br />
OORZAAK CAUSE<br />
Defecte elektrische aansluiting. Defective electrical connection.<br />
OPLOSSING REMEDY<br />
Controleer de elektrische aansluiting. Control the electrical connection.<br />
66 TL073-01-00-02<br />
09-11-2009
<strong>SUPER</strong> <strong>LIGHT</strong> <strong>VT1</strong> <strong>9mt</strong> <strong>4x1000W</strong> <strong>METAALJODIDEN</strong><br />
OORZAAK CAUSE<br />
De hydraulische regeleenheid werkt niet. The hydraulic gear box does not work.<br />
OPLOSSING REMEDY<br />
Controleer of de automatische differentieel<br />
schakelaar opnieuw werd ingesteld.<br />
Controleer de elektrische installatie van de<br />
hydraulische regeleenheid.<br />
Controleer de olie in de hydraulische<br />
regeleenheid, vul bij indien nodig.<br />
Vervang de hydraulische regeleenheid en<br />
wend u hiervoor rechtstreeks tot TOWER<br />
<strong>LIGHT</strong> S.r.l.<br />
AFWIJKING ANOMALY<br />
• De hendel voor daling van de<br />
telescopische paal werkt niet.<br />
Control that the automatic earth leakage relay<br />
is armed, eventually rearmed it.<br />
Control that the electrical system of the<br />
hydraulic gear box.<br />
Control the oil inside the hydraulic gear box,<br />
add it if necessary.<br />
Replace the hydraulic gear box contacting<br />
directly TOWER <strong>LIGHT</strong> S.r.l.<br />
• The lowering telescopic mast lever<br />
does not work.<br />
OORZAAK CAUSE<br />
Defecte elektrische aansluiting. Defective electrical connection.<br />
OPLOSSING REMEDY<br />
Controleer de elektrische aansluiting. Control the electrical connection.<br />
OORZAAK CAUSE<br />
De hydraulische eenheid is defect. The hydraulic gear box is failure.<br />
OPLOSSING REMEDY<br />
Schroef de as los tegen de wijzers van de klok<br />
in en raadpleeg het hoofdstuk “14.2<br />
HYDRAULISCHE REGELEENHEID”. Op deze<br />
wijze gaat de paal naar beneden.<br />
Unscrewing the pin in counterclockwise<br />
direction, make reference to chapter “14.2<br />
HYDRAULIC GEAR BOX”, it is possible to<br />
lower the mast.<br />
AFWIJKING ANOMALY<br />
• Een of meerdere lampen gaan niet aan. • One or more lamps does not light.<br />
OORZAAK CAUSE<br />
De lampen zijn defect of stuk. Defective or failure lamps.<br />
OPLOSSING REMEDY<br />
Alvorens de lamp te vervangen adviseren wij<br />
een test uit te voeren door de lamp elders te<br />
monteren.<br />
Before replace the lamp, it is advisable to make<br />
a test, installing the lamp that it is presumed<br />
failure in a floodlight with lamp previously<br />
working.<br />
67 TL073-01-00-02<br />
09-11-2009
<strong>SUPER</strong> <strong>LIGHT</strong> <strong>VT1</strong> <strong>9mt</strong> <strong>4x1000W</strong> <strong>METAALJODIDEN</strong><br />
AFWIJKING ANOMALY<br />
• De lampen gaan niet aan. • The lamps fails to light.<br />
OORZAAK CAUSE<br />
De lampen werden toevallig uitgeschakeld. The lamps have been accidentally putted out.<br />
OPLOSSING REMEDY<br />
De lampen kunnen niet onmiddellijk weer<br />
ingeschakeld worden, er moet even gewacht<br />
worden (ongeveer 15 minuten).<br />
OORZAAK CAUSE<br />
De automatische differentiële schakelaar<br />
schakelde om.<br />
The lamps could not be relighted up, it is<br />
necessary to wait the cooling of the lamp<br />
(about 15 minutes)<br />
The automatic earth leakage relay has been<br />
tripped.<br />
OPLOSSING REMEDY<br />
Stel hem weer in. Rearme the automatic earth leakage relay.<br />
68 TL073-01-00-02<br />
09-11-2009
<strong>SUPER</strong> <strong>LIGHT</strong> <strong>VT1</strong> <strong>9mt</strong> <strong>4x1000W</strong> <strong>METAALJODIDEN</strong><br />
19. VERVANGING VAN DE LAMPEN EN HET GLAS VAN DE<br />
SCHIJNWERPER - REPLACE THE LAMP AND FLOOD<strong>LIGHT</strong> GLASS<br />
Bij vervanging van de lampen en het glas van<br />
de schijnwerper moet u als volgt te werk gaan:<br />
open middels een schroevendraaier de 4<br />
roestvrije haken van de schijnwerper (1) .<br />
Steek hem in de hiervoor bestemde openingen<br />
op de haken. De haken hebben hengsels die<br />
bij opening het frame steunen.<br />
NB.: De haken met hengsels van de 2<br />
onderste schijnwerpers bevinden zich<br />
bovenaan. Het deksel zal dus met de handen<br />
ondersteunt moeten worden bij vervanging van<br />
de lamp.<br />
Wij adviseren het gebruik van de lamp<br />
NARVA-G.L.E. NACHROMA NCT 1000 W 230<br />
V. Indien een lamp van een andere fabrikant<br />
wordt gebruikt, is het noodzakelijk dat ze over<br />
de volgende kenmerken beschikt:<br />
Lamptype: metaaljodide<br />
Aansluiting: E40<br />
Nominaal vermogen: 1000 W<br />
Spanning lamp: 230 V – 50 Hz<br />
Stroom lamp: 9,5 ÷ 10,5 A<br />
In case of replacement of the lamps or the<br />
floodlight’s glass, open the floodlight through<br />
the 4 stainless steel hooks (1), inserting a<br />
screwdriver in the appropriate slots<br />
previewed on the hooks. The hooks are with<br />
hingle to support the frame when opened.<br />
Replace the lamp or the glass. Close the<br />
floodlight’s glass being careful to position<br />
correctly the hooks in their seat.<br />
N.B.: in the 2 inferior floodlights the hooks<br />
that support the frame when opened are<br />
situated on the superior side, therefore it is<br />
necessary to sustain manually the cover<br />
during the operations of lamp’s replacing.<br />
The use of the NARVA-G.L.E. NACHROMA<br />
NCT 1000 W 230 V lamp is recommended. If<br />
a lamp by a different manufacturer is used,<br />
the same shall necessarily meet the<br />
requirements here below:<br />
Type of lamp: metal halide<br />
Base: E40<br />
Nominal power: 1000 W<br />
Nominal voltage: 230 V – 50 Hz<br />
Operating current: 9,5 ÷ 10,5 A<br />
1<br />
69 TL073-01-00-02<br />
09-11-2009<br />
1
<strong>SUPER</strong> <strong>LIGHT</strong> <strong>VT1</strong> <strong>9mt</strong> <strong>4x1000W</strong> <strong>METAALJODIDEN</strong><br />
20. RESERVEONDERDELEN - PARTS LIST<br />
20.1 RESERVEONDERDELEN FRONTSTUK – COMMAND PANEL SPARE PARTS LIST<br />
70 TL073-01-00-02<br />
09-11-2009
<strong>SUPER</strong> <strong>LIGHT</strong> <strong>VT1</strong> <strong>9mt</strong> <strong>4x1000W</strong> <strong>METAALJODIDEN</strong><br />
Stand Code<br />
Omschrijving Denomination<br />
Items Code<br />
1 7234 Isolerend omhulsel thermische<br />
schakelaars<br />
Circuit breakers protection<br />
2 9597 Steunplaat thermische<br />
schakelaars<br />
Circuit breakers support plate<br />
3 6239 Tweepolige automatische<br />
differentiële schakelaar 40 A<br />
40 A automatic earth leakage relay<br />
4 7303 Hendelcontact Contact for lever<br />
5 7302 Manuele hendel stijging - daling - Raising-lowering manual lever<br />
6 11144 Aanwijzer brandstofreserve Monitor fuel level<br />
7 10198 Frontale aluminium plaat met<br />
serigrafie<br />
Aluminium front plate<br />
8 - Startsleutel<br />
Starting key<br />
(detail van de Kubota motor)<br />
(Kubota engine part)<br />
9 6205 Meldlamp acculader Battery charge signal lamp<br />
10 6184 Houder vrouwelijke 2-weg AMPaansluiting<br />
Female 2 ways faston holder<br />
11 6204 Meldlamp lage druk olie Low oil pressure signal lamp<br />
12 6805 Uurteller 230V 50Hz 230 V 50 Hz hour meter<br />
13 6203 Meldlamp hoge temperatuur water Water temperature signal lamp<br />
14 6206 Meldlamp voorverwarming Preheater signal lamp<br />
15 8027 Elektronisch paneel DAS TP0401 TP0401 DAS electronic panel<br />
16 6175 Zekering 8 A 8A fuse<br />
17 6193 Verplaatsbare zekeringhouder Fuse holder<br />
18 6908 Basis 6 polig 6 poles terminal board<br />
19 - Luminescentiemeldlamp (detail<br />
Lamp timer<br />
van de Kubota motor)<br />
(Kubota engine part)<br />
20 9596 Kast besturingspaneel Control panel box<br />
21 6096 Steun elektronisch paneel Electronic panel support<br />
22 1064 Klem Z16 Z16 clamp<br />
23 6241 Klem Z6-1 Z6-1 clamp<br />
24 6238 AMP box Faston box<br />
25 6247 Mannelijke 11-weg AMP-houder Male 11 ways faston holder<br />
26 6246 Vrouwelijke 11-weg AMP-houder Female 11 ways faston holder<br />
27 6921 Relais 12 V 12 V relay<br />
28 7806-200 Omega Steun Support<br />
29 7108 Eenpolige thermische schakelaar<br />
16 A<br />
16 A 1 pole circuit breaker<br />
71 TL073-01-00-02<br />
09-11-2009
<strong>SUPER</strong> <strong>LIGHT</strong> <strong>VT1</strong> <strong>9mt</strong> <strong>4x1000W</strong> <strong>METAALJODIDEN</strong><br />
20.2 RESERVEONDERDELEN EENFASIGE HULPUITGANG - SINGLE PHASE AUSILIARY<br />
OUTLET SPARE PARTS LIST<br />
72 TL073-01-00-02<br />
09-11-2009
<strong>SUPER</strong> <strong>LIGHT</strong> <strong>VT1</strong> <strong>9mt</strong> <strong>4x1000W</strong> <strong>METAALJODIDEN</strong><br />
Stand Code<br />
Omschrijving Denomination<br />
Items Code<br />
1 6725 Rubberen bescherming voor<br />
thermische schakelaar<br />
Rubber circuit breaker protection<br />
2 6726 Moer voor thermische schakelaar Ring for circuit breaker<br />
3 8669 Thermische drukknopschakelaar<br />
10 A<br />
10 A push button circuit breaker<br />
4 9909 Schild voor links paneel Left panel protection<br />
5 9864-2 Deksel box frontstuk Cover box front plate<br />
6 1061 Kabelmantel gas Ø 16 ½ Ø 16 ½ gas sheath-clamp<br />
7 9864-1 Box geassembleerd frontstuk Box front plate assembled<br />
8 6189 Contact voor stopdrukknop Contact for emergency stop button<br />
9 6188 Noodknop Emergency stop button<br />
10 6840 Aardingsklem Earth clamp connection<br />
11 6803 Eenfasig stopcontact 230 V 16 A 230 V 16 A 2p+T EEC single<br />
2p+T CEE<br />
phase socket<br />
12 6118 Contrast voor slot Lock plate<br />
13 9591 Zijdelings paneel Side panel<br />
73 TL073-01-00-02<br />
09-11-2009
<strong>SUPER</strong> <strong>LIGHT</strong> <strong>VT1</strong> <strong>9mt</strong> <strong>4x1000W</strong> <strong>METAALJODIDEN</strong><br />
20.3 RESERVEONDERDELEN KEUZESCHAKELAAR GENERATOR / NET - SPARE PARTS<br />
LIST GENERATOR / MAIN SELECTOR<br />
74 TL073-01-00-02<br />
09-11-2009
<strong>SUPER</strong> <strong>LIGHT</strong> <strong>VT1</strong> <strong>9mt</strong> <strong>4x1000W</strong> <strong>METAALJODIDEN</strong><br />
Stand Code<br />
Omschrijving Denomination<br />
Items Code<br />
1 6803 Eenfasig stopcontact 230 V 16 A 230 V 16 A 2p+T EEC single<br />
2p+T CEE<br />
phase socket<br />
2 6725 Rubberen bescherming voor<br />
thermische schakelaar<br />
Rubber circuit breaker protection<br />
3 6726 Moer voor thermische schakelaar Ring for circuit breaker<br />
4 8669 Thermische drukknopschakelaar<br />
10 A<br />
10 A push button circuit breaker<br />
5 6188 Noodknop Emergency stop button<br />
6 6189 Contact voor stopdrukknop Contact for emergency stop button<br />
7 6840 Aardingsklem Earth clamp connection<br />
8 7790 Kabelmantel PG21 PG21 press sheath<br />
9 10578 Beschermingskast Protection box<br />
10 10864 Frontale plaat Front plate<br />
11 7323 Keuzeschakelaar “Generator/0/Net “Generator/0/Main” selector<br />
12 7372 Mannelijke eenfasige stekker 230 V 16 A 2p+T 90° EEC single<br />
230 V 32 A 2p+T 90° CEE<br />
phase plug<br />
13 6118 Contrast voor slot Contrast for lock<br />
14 10577 Zijdelings paneel Side panel<br />
75 TL073-01-00-02<br />
09-11-2009
<strong>SUPER</strong> <strong>LIGHT</strong> <strong>VT1</strong> <strong>9mt</strong> <strong>4x1000W</strong> <strong>METAALJODIDEN</strong><br />
20.4 RESERVEONDERDELEN HYDRAULISCHE COMPONENTEN - SPARE PARTS LIST<br />
HYDRAULIC PARTS<br />
76 TL073-01-00-02<br />
09-11-2009
<strong>SUPER</strong> <strong>LIGHT</strong> <strong>VT1</strong> <strong>9mt</strong> <strong>4x1000W</strong> <strong>METAALJODIDEN</strong><br />
Stand Code<br />
Omschrijving Denomination<br />
Items Code<br />
1-2-4-5-6-7 10193 Volledige hydraulische<br />
regeleenheid<br />
Hydraulic gear box assembled<br />
1 7283 Elektrische motor 0,55 Hp 0,55 Hp electrical engine<br />
2 7468-2 Condensator 25 µF 25 µF capacitor<br />
3 9900 Steun hydraulische regeleenheid Hydraulic gerar box support<br />
4 7700 Veiligheidsklep VUBA-01 VUBA-01 safety valve<br />
5 10359 Tank hydraulische olie Hydraulic oil tank<br />
6 7468-3 Elektroklep Solenoid valve<br />
7 10360 Dop hydraulische olietank Hydraulic oil tank cap<br />
77 TL073-01-00-02<br />
09-11-2009
<strong>SUPER</strong> <strong>LIGHT</strong> <strong>VT1</strong> <strong>9mt</strong> <strong>4x1000W</strong> <strong>METAALJODIDEN</strong><br />
78 TL073-01-00-02<br />
09-11-2009
<strong>SUPER</strong> <strong>LIGHT</strong> <strong>VT1</strong> <strong>9mt</strong> <strong>4x1000W</strong> <strong>METAALJODIDEN</strong><br />
Stand Code<br />
Omschrijving Denomination<br />
Items Code<br />
1 10360 Dop hydraulische olietank Hydraulic oil tank cap<br />
2 7468-3 Elektroklep Solenoid valve<br />
3 XB14-80 Kit motorkoppeling Coupling engine kit<br />
4 02B 0,55 AC Elektrische motor met Electrical engine with capacitor<br />
S-4P80B<br />
condensator<br />
5 7468-2 Condensator 25 µF 25 µF capacitor<br />
6 A1J Condensator Base unit with antireturn valve<br />
7 A/210 Condensator Valve of maximum pressure<br />
8 G113 Pomp Pump<br />
9 10359 Tank hydraulische olie Hydraulic oil tank<br />
79 TL073-01-00-02<br />
09-11-2009
<strong>SUPER</strong> <strong>LIGHT</strong> <strong>VT1</strong> <strong>9mt</strong> <strong>4x1000W</strong> <strong>METAALJODIDEN</strong><br />
20.5 RESERVEONDERDELEN GRONDPLAAT - SPARE PARTS LIST FOR FRAME<br />
80 TL073-01-00-02<br />
09-11-2009
<strong>SUPER</strong> <strong>LIGHT</strong> <strong>VT1</strong> <strong>9mt</strong> <strong>4x1000W</strong> <strong>METAALJODIDEN</strong><br />
Stand Code<br />
Omschrijving Denomination<br />
Items Code<br />
1 1061 Kabelmantel Ø 16 ½ gas Ø 16 ½ gas sheath-clamp<br />
2 10196 Kast brug reactors Ballast box<br />
3 10286 Reactor met gemarkeerde kabels<br />
5-1<br />
Ballast with 5-1 cables<br />
4 9599-Z Reactorsteunen Ballast support<br />
5 10287 Reactor met gemarkeerde kabels<br />
6-2<br />
Ballast with 6-2 cables<br />
6 10192 Reactorhouder Ballast stopper<br />
7 1064 Strook Z16 Z16 clamp<br />
8 6241 Strook Z6-1 Z6-1 clamp<br />
9 10289 Reactor met gemarkeerde kabels<br />
8-4<br />
Ballast 8-4 cables<br />
10 10288 Reactor met gemarkeerde kabels<br />
7-3<br />
Ballast 7-3 cables<br />
11 10195 Kast voor reactors Ballast box<br />
12 7531 Strook 15/15 15/15 clamp<br />
13 9586-SX Linkse langsligger voor het heffen Left plate hook<br />
14 9586-DX Rechtse langsligger voor het<br />
heffen<br />
Right plate hook<br />
15 8028 Brandstoffilter Fuel pre-filter<br />
16 9261 Support brandstoffilter Fuel filter support<br />
17 8161 Spacer schijf vaststelling<br />
alternator<br />
Spacer for engine<br />
18 6103 Hulphoeken voor afstelling Plate of register<br />
19 9233-SX Motor linkse voet Left engine support<br />
20 9233-DX Motor rechtse voet Right engine support<br />
21 6105 Steun oliepompje Oil drain pump support<br />
22 7125 Oliepomje olieaftap Oil drain pump<br />
23 6115 Antitriller 60x50 60x50 shock absorber<br />
24 6146 Buis voor olieaftap Oil drain pipe<br />
25 10969 Onderste radiatorsteun Radiator support<br />
26 6153 Blauwe klembedekking voor accu Blu cover for battery<br />
27 6886 Negatieve klem voor accu Battery negative terminal<br />
28 7127 Blauwe klembedekking voor accu Red cover for battery<br />
29 6885 Positieve klem voor accu Battery positive terminal<br />
30 6832 Dwarsdrager accu Battry bracket<br />
31 7112 Hendel accu Battery tie-rod<br />
32 6884 Accu 12 V 44 Ah 12 V 44 Ah battery<br />
33 10580 Brandstofdobber Fuel level<br />
34 6906 Brandstoftankdop Fuel tank cap<br />
35 9585 Brandstoftank Fuel tank<br />
36 9919 Tanksluitplaat Fuel tank cover<br />
37 8024 Pakking voor tanksluitplaat Gasket for plate fuel tank<br />
38 9584 Grondplaat Base<br />
39 10086 Bord voor heffen met heftruck Plate for forklift<br />
40 10266 Afvoerdop 1” 1” drain cap<br />
41 6229 Steunvoet Support foot<br />
81 TL073-01-00-02<br />
09-11-2009
<strong>SUPER</strong> <strong>LIGHT</strong> <strong>VT1</strong> <strong>9mt</strong> <strong>4x1000W</strong> <strong>METAALJODIDEN</strong><br />
Stand Code<br />
Omschrijving Denomination<br />
Items Code<br />
42 7507 Voetklem en -hendel Clamp for foot<br />
43 6249 Dop voor voetsteun Support foot cap<br />
44 9595 Spatbord Fender<br />
45 10284 Bord voor heffen met heftruck Plate for forklift<br />
46 7654 Grendel Closing look pin<br />
47 7881 Buis voor steunpoot Tubular for stabilizer<br />
48 7880-Z Steunpoot Stabilizer<br />
82 TL073-01-00-02<br />
09-11-2009
<strong>SUPER</strong> <strong>LIGHT</strong> <strong>VT1</strong> <strong>9mt</strong> <strong>4x1000W</strong> <strong>METAALJODIDEN</strong><br />
20.6 PARTS LIST POSTERIEURE STABILISATIE (op aanvraag) - SPARE PARTS LIST REAR<br />
STABILIZERS (on request)<br />
Stand Code<br />
Omschrijving Denomination<br />
Items Code<br />
1 9905-Z Steunpoot Rear squared stabilizer<br />
2 8761 Locking stabilizer Stabilizer locking<br />
83 TL073-01-00-02<br />
09-11-2009
<strong>SUPER</strong> <strong>LIGHT</strong> <strong>VT1</strong> <strong>9mt</strong> <strong>4x1000W</strong> <strong>METAALJODIDEN</strong><br />
20.7 RESERVEONDERDELEN CONSTRUCTIE - SPARE PARTS LIST FOR CARPENTRY<br />
84 TL073-01-00-02<br />
09-11-2009
<strong>SUPER</strong> <strong>LIGHT</strong> <strong>VT1</strong> <strong>9mt</strong> <strong>4x1000W</strong> <strong>METAALJODIDEN</strong><br />
Stand Code<br />
Omschrijving Denomination<br />
Items Code<br />
1 9908 Schild rechterpaneel Right panel protection<br />
2 9591-2 Rechtse zijdelings paneel Right side panel<br />
3 7237 Libel Spirit level<br />
4 9589 Bovenste paneel Top panel<br />
5 9858 Paalgeleidende schijf Mast guide flange<br />
6 9859 Voorste flens Front flange<br />
7 9860 Achterste flens Rear flange<br />
8 8178 Grendel Lock pin<br />
9 9901-2Z Paalgeleidende schijf Mast guide flange<br />
10 9901-1Z Paalgeleidende schijf met<br />
begrenzer<br />
Mast guide flange with blocking<br />
11 6237 Hefhaak Hook<br />
12 9594 Deksel geluiddemper Silencer cover<br />
13 7324 Spatbord geluiddemper Rain cover for silencer<br />
14 7863 Flenspakking Packing for flange<br />
15 6008 Geluiddemper Silencer<br />
16 6007 Flexibel verlengstuk geluiddemper Silencer flexible extension<br />
17 9593 Bak voor geluiddemper Silencer box<br />
18 9592-DX Rechtse zijdelingse deur Right side door<br />
19 9907-DX Schild voor rechtse deur Right door protection<br />
20 7669 Knop voor deksel radiatordop Radiator cover knob<br />
21 9590 Deksel radiatordop Radiator cover<br />
22 9601 Rooster radiatorsluiting Radiating grill closing<br />
23 9588 Rugstuk afwerkingsprofiel Back fairing<br />
24 7046 Antitriller Ø 40x40 Ø 40x40 shock absorber<br />
25 6432 Scharnier Hinge<br />
26 9907-SX Schild voor linkse deur Left door protection<br />
27 9592-SX Linkse zijdelingse deur Left side door<br />
28 6201 Handgreep met slot Handle with lock<br />
29 9587 Kopstuk afwerkingsprofiel Head fairing<br />
30 9895 Luchtinlaat (voor neutrale versie ) Air inlet box<br />
(for neutral version)<br />
30 9895-1 Luchtinlaat<br />
Air inlet box<br />
(voor Tower Light versie)<br />
(for tower light version)<br />
30 9895-2 Luchtinlaat<br />
Air inlet box<br />
(voor speedy versie)<br />
(for speedy version)<br />
85 TL073-01-00-02<br />
09-11-2009
<strong>SUPER</strong> <strong>LIGHT</strong> <strong>VT1</strong> <strong>9mt</strong> <strong>4x1000W</strong> <strong>METAALJODIDEN</strong><br />
20.8 RESERVEONDERDELEN TELESCOPISCHE PAAL - SPARE PARTS LIST FOR<br />
TELESCOPIC MAST<br />
86 TL073-01-00-02<br />
09-11-2009
<strong>SUPER</strong> <strong>LIGHT</strong> <strong>VT1</strong> <strong>9mt</strong> <strong>4x1000W</strong> <strong>METAALJODIDEN</strong><br />
Stand Code<br />
Omschrijving Denomination<br />
Items Code<br />
1 11277-12 Opleggerkoppeling Thrust<br />
2 6231 Onderste as voor hydraulische<br />
cilinder<br />
Hydraulic cylinder lower pin<br />
3 7792 Buis hydraulische cilinder Hydraulic cylinder tube<br />
4 9560 Hydraulische cilinder Hydraulic cylinder<br />
5 11357 Paal (1° deel) 1° section mast<br />
6 9542 Paal (2° deel) 2° section mast<br />
7 6230 Bovenste as voor hydraulische<br />
cilinder<br />
Hydraulic cylinder top pin<br />
8 9543 Paal (3° deel) 3° section mast<br />
9 10389 Stalen kabel (l 1400 Ø 5) Steel cable (l 140 Ø 5)<br />
10 9544 Paal (4° deel) 4° section mast<br />
11 9553 Wiel voor stalen kabel Ø 60 Ø 60 wheel for steel cable<br />
12 9554 Wiel voor stalen kabel Ø 62 Ø 62 wheel for steel cable<br />
13 10390 Stalen kabel (l 1415 Ø 5) Steel cable (l 1415 Ø 5)<br />
14 9548 Paal (8° deel) 8° section mast<br />
15 9547 Paal (7° deel) 7° section mast<br />
16 9546 Paal (6° deel) 6° section mast<br />
17 9545 Paal (5° deel) 5° section mast<br />
18 10281 Schroef T.E. 8.8 10x50 T.E. 8.8 10x50<br />
19 10388 Stalen kabel (l 1385 Ø 5) Steel cable (l 1385 Ø 5)<br />
20 10387 Stalen kabel (l 1460 Ø 5) Steel cable (l 1460 Ø 5)<br />
21 6228 Wiel voor stalen kabel Ø 58 Ø 58 wheel for steel cable<br />
22 6261 Nylon staafje Nylon bar<br />
23 10188 Kabelgeleider Tube duides cable<br />
24 7531 Strook 15/15 15/15 clamp<br />
25 7523 Spiraalkabel 9x2,5 mm 9x2,5 mm turn cable<br />
26 10386 Stalen kabel (l 1440 Ø 5) Steel cable (l 1440 Ø 5)<br />
27 10391 Stalen kabel (l 1430 Ø 5) Steel cable (l 1430 Ø 5)<br />
28 10392 Stalen kabel (l 1455 Ø 5) Steel cable (l 1455 Ø 5)<br />
87 TL073-01-00-02<br />
09-11-2009
<strong>SUPER</strong> <strong>LIGHT</strong> <strong>VT1</strong> <strong>9mt</strong> <strong>4x1000W</strong> <strong>METAALJODIDEN</strong><br />
20.9 RESERVEONDERDELEN SCHIJNWERPERGROEP - SPARE PARTS LIST FOR<br />
FLOOD<strong>LIGHT</strong>S GROUP<br />
88 TL073-01-00-02<br />
09-11-2009
<strong>SUPER</strong> <strong>LIGHT</strong> <strong>VT1</strong> <strong>9mt</strong> <strong>4x1000W</strong> <strong>METAALJODIDEN</strong><br />
Stand Code<br />
Omschrijving Denomination<br />
Items Code<br />
1 6028 Schijnwerpersteun Floodlights support<br />
2 6028 Schijnwerpersteun Floodlights support<br />
3 6032 Kabelafscherming Ropes protection<br />
4 10169Z Onderste steun bovenste<br />
schijnwerper<br />
Lower support floodlights<br />
5 10168Z Onderste top bovenste<br />
schijnwerper<br />
Upper support floodlights<br />
6 7739 Doos met elektrische contacten<br />
(compleet)<br />
Electric box complete<br />
7 7282 Aansteker 1000 W 1000 W igniter<br />
8 9940 Afscherming spiraalkabel Turn cable cover<br />
9 6241 Strook Z6-1 Z6-1 clamp<br />
10 7126 Strook Z10-1 Z10-1 clamp<br />
11 7531 Strook 15/15 15/15 clamp<br />
12 7020 Afstandstrook bevestiging<br />
spiraalkabel<br />
Spacer for fixing turn cable<br />
13 6029 Bevestiging lampsteun Lighting support plate<br />
14 10255 Dop Cap<br />
15 7217 Hendel Hand lever<br />
16 10139 Schijnwerper met glas Floodlight with glass<br />
17 7266 Lamp metaaljodide 1000 W 1000 W metal halide lamp<br />
18 10428 Glas schijnwerper Glass for floodlight<br />
89 TL073-01-00-02<br />
09-11-2009
<strong>SUPER</strong> <strong>LIGHT</strong> <strong>VT1</strong> <strong>9mt</strong> <strong>4x1000W</strong> <strong>METAALJODIDEN</strong><br />
20.10 RESERVEONDERDELEN ALTERNATOR - SPARE PARTS LIST FOR ALTERNATOR<br />
90 TL073-01-00-02<br />
09-11-2009
<strong>SUPER</strong> <strong>LIGHT</strong> <strong>VT1</strong> <strong>9mt</strong> <strong>4x1000W</strong> <strong>METAALJODIDEN</strong><br />
Stand Code<br />
Omschrijving Denomination<br />
Items Code<br />
- 7833 Alternator Linz E1C13S/4 E1C13S/4 Linz alternator complete<br />
1 7833-1 Geraamte met alternator Frame with alternator<br />
2 7833-2 Draaiende inductor Rotatine inductor<br />
3 7833-3 Achterste schild Rear shild<br />
4 7833-4 Achterste Voorzijde sae 5 Sae 5 front cover<br />
6 7833-6 Doos van basis Terminal box<br />
7 7833-7 Doosafdekking basis Terminal box cover<br />
8 7833-8 Achterste beschermkap Rear cover<br />
9 7833-9 Achterste dop Rear plug<br />
10 7833-10 Ventilator Fan<br />
11 7833-11 Achterste lager Rear bearing<br />
13 7833-13 Draaiende diode Diode<br />
18 7833-18 Klemmenbord 4 polen 4 stud terminal board<br />
23 7833-23 Condensator 40 µF 40 µF capacitor<br />
37 7833-37 Naaf Coupling hub<br />
38 7833-38 Sae schijf Sae coupling disc plate<br />
39 7833-39 Bescherming MD35 schild MD35 front cover protection<br />
52 7833-52 Plaat condensators Capacitors base<br />
91 TL073-01-00-02<br />
09-11-2009
<strong>SUPER</strong> <strong>LIGHT</strong> <strong>VT1</strong> <strong>9mt</strong> <strong>4x1000W</strong> <strong>METAALJODIDEN</strong><br />
20.11 RESERVEONDERDELEN TWEEWIELGROEP EN HANDGREPEN VOOR TRAAG<br />
TRANSPORT (op aanvraag) - SPARE PARTS LIST FOR WHEELS SIDE TRAILER<br />
WITH TOWING BAR (on request)<br />
Stand Code<br />
Omschrijving Denomination<br />
Items Code<br />
1 7784-1 Trekstang Rudder<br />
2 7103/A Steunvoet Foot<br />
3 10794 Aandrijfas Axle<br />
4 7696 Wiel 5 pinnen 5 pins wheel<br />
92 TL073-01-00-02<br />
09-11-2009
<strong>SUPER</strong> <strong>LIGHT</strong> <strong>VT1</strong> <strong>9mt</strong> <strong>4x1000W</strong> <strong>METAALJODIDEN</strong><br />
20.12 RESERVEONDERDELEN VASTE WAGEN SNEL TRANSPORT (op aanvraag) –<br />
TRAILER FOR FAST TOWING FIXED SPARE PARTS LIST (on request)<br />
1 2 3 4 5 6<br />
Stand Code<br />
Omschrijving Denomination<br />
Items Code<br />
1 8781 Vaste wagen snel transport Trailer for fast towing fixed<br />
compleet (met bolvormige<br />
koppelkop)<br />
(coupling head to ball hitch)<br />
1 7917 Carrello traino veloce fisso Trailer for fast towing fixed<br />
completo (met oogkoppelkop) (coupling head to eyelet hitch )<br />
2 7919 Witte retroflector White catadiotor<br />
3 7918 Gele retroflector Yellow catadiotor<br />
4 7921 Links achterlicht Left rear light<br />
5 10087 Lichtsteun Plate for lights<br />
6 7920 Rechts achterlicht Right rear light<br />
7 7922 Achterlichtbekabeling met stekker Plug and wiring lights complete<br />
8 10557 Adaptor 13/7 pin 13/7 pin adapter<br />
93 TL073-01-00-02<br />
09-11-2009<br />
7<br />
8
<strong>SUPER</strong> <strong>LIGHT</strong> <strong>VT1</strong> <strong>9mt</strong> <strong>4x1000W</strong> <strong>METAALJODIDEN</strong><br />
20.13 RESERVEONDERDELEN WAGEN MET HOOGTEAFSTELLING SNEL TRANSPORT<br />
(op aanvraag) – TRAILER FOR FAST TOWING HEIGHT ADJUSTABLE SPARE PARTS<br />
LIST (on request)<br />
1 2 3 4 5 6<br />
Stand Code<br />
Omschrijving Denomination<br />
Items Code<br />
1 9192 Wagen met hoogteafstelling snel Trailer for fast towing height<br />
transport compleet (met<br />
adjustable<br />
bolvormige koppelkop)<br />
(coupling head to ball hitch)<br />
1 8160 Wagen met hoogteafstelling snel Trailer for fast towing height<br />
transport compleet (met<br />
adjustable<br />
oogkoppelkop)<br />
(coupling head to eyelet hitch )<br />
2 7919 Witte retroflector White catadiotor<br />
3 7918 geel Yellow catadiotor<br />
4 7921 Links achterlicht Left rear light<br />
5 10087 Lichtsteun Plate for lights<br />
6 7920 rechts Right rear light<br />
7 7922 Achterlichtbekabeling met stekker Plug and wiring lights complete<br />
8 10557 Adaptor 13/7 pin 13/7 pin adapter<br />
94 TL073-01-00-02<br />
09-11-2009<br />
8<br />
7
<strong>SUPER</strong> <strong>LIGHT</strong> <strong>VT1</strong> <strong>9mt</strong> <strong>4x1000W</strong> <strong>METAALJODIDEN</strong><br />
20.14 RESERVEONDERDELEN LABELS VOOR LICHTMAST - SPARE PARTS LIST FOR<br />
STICKERS FOR <strong>LIGHT</strong>ING TOWER<br />
Label<br />
Sticker<br />
Code<br />
Code<br />
10178<br />
10182<br />
10179<br />
10181<br />
10180<br />
10185<br />
10183<br />
10184<br />
6844<br />
7767<br />
10230<br />
95 TL073-01-00-02<br />
09-11-2009
<strong>SUPER</strong> <strong>LIGHT</strong> <strong>VT1</strong> <strong>9mt</strong> <strong>4x1000W</strong> <strong>METAALJODIDEN</strong><br />
STROOMONDER<br />
BREKER<br />
10 A<br />
NOOD<br />
STOP<br />
DIESEL OLIE TANK DOP<br />
OPEN DE DEUR<br />
STOP PUNT<br />
TER VOORKOMING<br />
MAST ROTATIE<br />
HETE UITLAAT<br />
RADIATEUR DOP<br />
MAX. WIND SNELHEID<br />
110 Km/h<br />
BEDIENINGSINSTRUCTIES<br />
Zorg ervoor dat de machine op een vlakke ondergrond is geplaatst,<br />
en verzeker u ervan dat de uithouders uitgeschoven en vastgezet zijn.<br />
VOORDAT DE MACHINE WORDT GESTART<br />
Controleer motorolie, water en brandstofnivo, en vul dit aan, indien nodig,<br />
tot het voorgeschreven nivo.<br />
Laat de machine eerst voorgloeien alvorens te starten.<br />
Laat machine 5 minuten draaien alvorens volledig te belasten.<br />
AANSTURING VERLICHTING<br />
Schakel de aardlekschakelaars in<br />
Schakel daarna de lampen aan, met een tussenpose van twee<br />
minuten per lamp.<br />
Laat iedere lamp 2 minuten opwarmen voordat de volgende wordt ingeschakeld.<br />
UITSCHAKELEN VERLICHTING<br />
Schakel alle lampen uit dmv hun schakelaars.<br />
Laat, om schade te voorkomen, de lampen 15 minuten afkoelen alvorens<br />
ze wederom te ontsteken.<br />
Laat de motor afkoelen en schakel het contact uit.<br />
ATTENTION!<br />
In case of replacement of the lamps use:<br />
Lamp: NARVA-G.L.E. NACHROMA NCT 1000 W<br />
or similar with the following characteristics:<br />
Type of lamp: METAL HALIDE<br />
Base: E40<br />
Nominal power: 1000W<br />
Lamp voltage: 240V - 50 Hz<br />
Lamp current: 9,5 ÷ 10,5 A<br />
DIESEL MOTOR AANGEDREVEN<br />
L WA<br />
Super Light <strong>VT1</strong> 90<br />
G<br />
1~<br />
Type SuperLight <strong>VT1</strong><br />
G Engine Kubota<br />
Stator Linz<br />
V 230 I Hz 50<br />
KVA 9 COS 0,8<br />
RPM 1500 I.CL. F IP 23<br />
Dimensions L x W x H 3200 x 1580 x 2330 mm<br />
Weight 1115 Kg<br />
TOWER <strong>LIGHT</strong> S.r.l.<br />
TLIA - 2000<br />
Z A 9 V T 1 A 0 0 0 8 H 7 7 0 0 0<br />
1300<br />
1-<br />
1300<br />
Kg.<br />
2-<br />
Kg.<br />
3-<br />
Kg.<br />
100<br />
Kg.<br />
Type: <strong>VT1</strong> variant A<br />
10229<br />
9280<br />
6236-NL<br />
6084-NL<br />
6085-NL<br />
6086-NL<br />
6087-NL<br />
6091-NL<br />
7163-NL<br />
9937<br />
(English text)<br />
6088-NL<br />
10300-GB<br />
(English text)<br />
7254<br />
96 TL073-01-00-02<br />
09-11-2009
<strong>SUPER</strong> <strong>LIGHT</strong> <strong>VT1</strong> <strong>9mt</strong> <strong>4x1000W</strong> <strong>METAALJODIDEN</strong><br />
21. ELEKTRISCH SCHEMA EERSTE DEEL - WIRING DIAGRAM FIRST<br />
PART<br />
97 TL073-01-00-02<br />
09-11-2009
<strong>SUPER</strong> <strong>LIGHT</strong> <strong>VT1</strong> <strong>9mt</strong> <strong>4x1000W</strong> <strong>METAALJODIDEN</strong><br />
22. ELEKTRISCH SCHEMA EERSTE DEEL (VERSIE MET<br />
KEUZESCHAKELAAR) - WIRING DIAGRAM FIRST PART (VERSION<br />
WITH GENERATOR/MAIN SELECTOR)<br />
98 TL073-01-00-02<br />
09-11-2009
<strong>SUPER</strong> <strong>LIGHT</strong> <strong>VT1</strong> <strong>9mt</strong> <strong>4x1000W</strong> <strong>METAALJODIDEN</strong><br />
23. ELEKTRISCH SCHEMA TWEEDE DEEL - WIRING DIAGRAM<br />
SECOND PART<br />
99 TL073-01-00-02<br />
09-11-2009
<strong>SUPER</strong> <strong>LIGHT</strong> <strong>VT1</strong> <strong>9mt</strong> <strong>4x1000W</strong> <strong>METAALJODIDEN</strong><br />
24. SERVICECENTRA ITALIË - ITALIAN SERVICES CENTERS<br />
ASSISTENTIE<br />
ASSISTANCE<br />
ADRES<br />
ADDRESS<br />
STAD<br />
CITY<br />
TELEFOON<br />
PHONE<br />
VALLE D’AOSTA<br />
Off. Elettromeccanica<br />
Menegolo<br />
Località Plan Felinaz, 63 - 11020 Charvensod (AO) 0165/44144 0165/232539<br />
O.r.m.e.<br />
PIEMONTE<br />
Fr. Chez Fornelle, 11 - 11020 Arnad (AO) 0125/966108 0125/966108<br />
RG Electrix s.n.c. di<br />
Riboldazzi & C.<br />
via Indipendenza 9 - 20064 Carpignano Sesia (NO) 0321/825740 0321/825912<br />
R.I.M.E.M. s.n.c via L. Da Vinci 141 - 10095 Grugliasco (TO) 011/4117972 011/4117972<br />
Tecnocontrolli via Circonvallazione 186 - 10026 Santena (TO) 011/9492460 011/9492494<br />
G.B. Elettrotecnica.<br />
Industriale s.n.c.<br />
Cantone Cerretto 2 – 15040 S. Maria del Tempio (AL) 0142/75562 0142/70649<br />
LIGURIA<br />
Electromotors Via Oldoini 4 – 19122 La Spezia 0187/711386 0187/704360<br />
Lanteri via San Francesco 135 - 18011 Arma di Taggia (IM) 0184/448646 0184/448646<br />
LOMBARDIA<br />
Ghirardello Carlo Antonio via Castronno 1 - 21040 Morazzone (VA) 0332/464114 -<br />
0332/461109<br />
0332/462402<br />
Luciano Miotto via Mazzini, 41 - 22036 Erba (CO) 031/641673 031/641673<br />
Imp. Elettrici Clivati Umberto<br />
s.a.s.<br />
via Emilia 1 - 24052 Azzano S. Paolo (BG) 035/310130 035/4595945<br />
Carnevali Ivo<br />
Elettromeccanica<br />
via G. di Vittorio 31 Z.I. - 46045 Marmirolo (MN) 0376/466809 0376/299511<br />
Elettroriparazione Pezzaglia via dei Transiti 4 - 20123 Milano 02/2840381 02/26116863<br />
I.C.I.A.M.s.n.c. via Valeriana, 87 - 23016 Fraz. Piussogno - Cercino 0342/681132 0342/681132<br />
F.lli Bracchi s.n.c. via Edison 21 - 25050 Provaglio d’Iseo (BS) 030-9883424 030/9882968<br />
C.R.E. via Lentumi 2B - 25047 Boario Terme (BS) 0364/530699 -<br />
TRIVENETO<br />
Elettromeccanica Trevigiana<br />
s.n.c.<br />
via Sile 33 – 31057 Silea (TV) 0422/360515 0422/360515<br />
Barison C. off. Elettrotec.<br />
Macchine Elettriche<br />
via Stazione 42 - 30030 Ballò di Mirano (VE) 041/436057 041/436057<br />
Centro Saldatura s.n.c. via Volta 16 - 35030 Sarmeola di Rubano (PD) 049/635544 049/8977250<br />
Z.R. s.r.l. via dell’Acetosella 3 - 30175 Marghera (VE) 041/5381681 041/5386733<br />
Nuova Elettromeccanica<br />
coop.<br />
a.r.l.<br />
via Travnik 13 - 34147 S. Dorligo D. Valle (TS) 040/820120 040/825997<br />
Tecno Service Romanelli via Gorizia 4 - 33010 Udine 0432/571596 0432/570034<br />
Monfredini Fausto & C s.n.c. Via Fabbrica 86 – 38079 Tione Di Trento (TN) 0465/322247 0465/328043<br />
Molinaro Guerrino & Figlio<br />
s.n.c.<br />
via Susan 90 - 33038 S. Daniele Cimano (UD) 0432/957738 0432/954926<br />
EMILIA ROMAGNA<br />
Casadio Vezio & C. s.n.c. via della Fiera 107/B - 47037 Rimini 0541/770283 0541/77083<br />
F.lli Cesari s.n.c. via dei Caligari 4 - 40129 Bologna 051/322221 051/4189595<br />
Elettr. Lottici Maurizio & C.<br />
s.n.c.<br />
via Martinella 100 - 43100 Alberi (PR) 0521/649703 0521/649703<br />
R.E.A.M. s.n.c. via del Bagatto 7 (ex zona Eridania) Pontelagoscuro (FE) 0532/796283 0532/797322<br />
TOSCANA<br />
L.e.m. Art s.n.c. via di Ripoli 258/A - 50126 Firenze 055/6530343 055/6820682<br />
Oimer di Carnovale M. s.n.c. via Lamarmora 11 - 57122 Livorno 0586/881392 0586/889681<br />
Officina Autoelettrica<br />
Grossetana<br />
via Napoli 2/6 - 58100 Grosseto 0564/24505 0564/24891<br />
(SO)<br />
100 TL073-01-00-02<br />
09-11-2009<br />
FAX
<strong>SUPER</strong> <strong>LIGHT</strong> <strong>VT1</strong> <strong>9mt</strong> <strong>4x1000W</strong> <strong>METAALJODIDEN</strong><br />
ASSISTENTIE<br />
ASSISTANCE<br />
UMBRIA<br />
Elettromeccanica Masciolini<br />
s.n.c.<br />
ADRES<br />
ADDRESS<br />
STAD<br />
CITY<br />
viale Europa 7 - 06080 Ospedalicchio di Bastia<br />
Umbra (PG)<br />
TELEFOON<br />
PHONE<br />
101 TL073-01-00-02<br />
09-11-2009<br />
FAX<br />
075/8011505 075/8011411<br />
LAZIO<br />
Elettromeccanica Alto Lazio<br />
87 s.r.l.<br />
Zona Industriale Sanguetta - 01038 Soriano Nel Cimino (VT) 0761/759579 0761/748613<br />
Elettromeccanica Magliana via Idrovore della Magliana 31 -<br />
Roma 06/6573282 06/6537806<br />
00148<br />
Picca s.n.c. Via Luigi Zappetta 6/8 – 00173 Roma 06/7234665 06/7234665<br />
Moscatelli G. Carlo via Edison 12 - 0016 Monterotondo Solo (ROMA) 06/9060707 06/9060707<br />
MARCHE<br />
Edison Elettrotecnica s.n.c. via Veronese 11 - 60019 Senigallia (AN) 071/668302 071/6611076<br />
Elettropneumatica Assenti<br />
s.n.c.<br />
via Pontida 22 - 63100 Porto d’Ascoli (AP) 0735/656428 0735/658230<br />
ABRUZZO e MOLISE<br />
Elettromeccanica Rocco<br />
Denaroso<br />
Via Colombo 2 - 65010 Villanova di Cepegatti (PE) 085/9771349 085/9771349<br />
CAMPANIA<br />
Elettromeccanica Rega s.n.c. Via Mulitiello 15 - 80040 Striano (NA) 081/8276655 081/8654675<br />
Meg s.a.s. via A. Vespucci loc. Scontrafata -<br />
84090<br />
Pontecagnano (SA) 089/382158 089/382158<br />
Progress s.a.s.<br />
PUGLIA<br />
via Comunale Tierzo 9 - 80147 Ponticelli (NA) 081/5614250 081/5614383<br />
Aurora Sergio via L. Azzarita .68 – 70056 Molfetta (BA) 080/3735651 080/3735651<br />
Nuova Elettromeccanica<br />
Gagliano dal 1974 di Romano<br />
Tommaso<br />
via Di Procina 22 – 71100 Foggia 0881/727112 0881/721380<br />
BASILICATA<br />
Elettromeccanica Lograno<br />
s.a.s.<br />
via del Commercio - zona PAIP 2 -<br />
75100<br />
Matera 0835/263665 0835/389346<br />
CALABRIA<br />
Elettromeccanica Marrara<br />
s.r.l.<br />
via Padova Z.I. Torre Lupo - 89129 Reggio Calabria 0965/590140 0965/590140<br />
Gigliotti e Masdeo s.n.c. via Guido d’Osso - 87100 Cosenza 0984/390965 0984/390965<br />
SICILIA<br />
Licari Francesco via Tolmezzo 11 - 95100 Catania 095/533400 095/533400<br />
Elettromeccanica Sebastiano<br />
Oddo<br />
Via Asmara – 98076 Sant’Agata di Militello (ME) 0941/701171 0941/723066<br />
Emerif<br />
SARDEGNA<br />
via Bandida 23 - 90121 Palermo 091/6221421 091/6221837<br />
S.A.E.L. Sarda via Nervi ang. Via Natta Z.I.. Casic<br />
Cagliari 070/212061 – 070/286636<br />
Elettromeccanica<br />
Elmas – 09122<br />
070/240697<br />
Dejana Piero Z.I. Olbia Settore 2 - 07026 Olbia (SS) 0789/58409 0789/58409
<strong>SUPER</strong> <strong>LIGHT</strong> <strong>VT1</strong> <strong>9mt</strong> <strong>4x1000W</strong> <strong>METAALJODIDEN</strong><br />
25. SERVICECENTRA BUITENLAND - FOREIGN COUNTRY SERVICES<br />
CENTERS<br />
ASSISTENTIE<br />
ASSISTANCE<br />
DEUTSCHLAND<br />
ADRES<br />
ADDRESS<br />
SCHICK g.m.b.h. Am Funkturm 8,<br />
66482<br />
SWEDEN<br />
SATEMA AB S Nissastigen 15,<br />
333 32<br />
NORWAY / FINLAND<br />
SATEMA AS Enebakkveien 127 PB,<br />
21<br />
ALGERIE<br />
STAD<br />
CITY<br />
TELEFOON<br />
PHONE<br />
FAX WEB – E.MAIL<br />
Zweibrucken 0049/633297150 0049/6332971511 www.schickgmbh.de<br />
Smålandsstenar 0046(0)37131310 0046(0)37131390 www.satema.se<br />
Manglerud 0612<br />
Oslo<br />
0047/22579300 0047/22579301 www.satema.no<br />
SARL GMI ALGERIE Cité Cherif n.152 Chlef 00213/27772713 00213/27770513 www.gmigroupe.com<br />
groupemialgerie<br />
@yahoo.fr<br />
102 TL073-01-00-02<br />
09-11-2009
<strong>SUPER</strong> <strong>LIGHT</strong> <strong>VT1</strong> <strong>9mt</strong> <strong>4x1000W</strong> <strong>METAALJODIDEN</strong><br />
26. GARANTIE - WARRANTY<br />
TOWER <strong>LIGHT</strong> S.r.l. garandeert haar<br />
producten 12 maanden (twaalf) vanaf de<br />
leveringsdatum bij de eindgebruiker, op<br />
voorwaarde dat ze niet werden gewijzigd<br />
TOWER <strong>LIGHT</strong> S.r.l. verbindt zich ertoe<br />
gedurende deze periode in de landen waar<br />
een dienstorganisatie aanwezig is, de<br />
onderdelen die beschadigd werden als gevolg<br />
van een fabrieksfout, defect materiaal, slechte<br />
bewerking en/of montage in haar<br />
geautoriseerde werkplaatsen te vervangen of<br />
te repareren.<br />
De keuze om een reparatie uit te voeren of<br />
beschadigde onderdelen te vervangen moet<br />
overgelaten worden aan het deskundig oordeel<br />
en onweerlegbaar criterium van TOWER<br />
<strong>LIGHT</strong> S.r.l. of van de geautoriseerde<br />
werkplaatsen.<br />
In de rest van de wereld zal de garantie<br />
bestaan uit het gratis leveren van de<br />
onderdelen ter vervanging van de niet meer<br />
bruikbare componenten met een erkende<br />
fabrieksfout. De garantie wordt toegepast<br />
nadat de beschadigde onderdelen door<br />
TOWER <strong>LIGHT</strong> S.r.l. onderzocht werden. De<br />
reis- en verplaatsonkosten vallen ten laste van<br />
de klant, alsook de verpakking- en<br />
transportonkosten, zowel van de defecte<br />
onderdelen als van de nieuwe onderdelen. In<br />
geen enkel geval kan de koper de ontbinding<br />
van het contract of een schadevergoeding<br />
eisen omdat hij de machine niet kan gebruiken.<br />
De onderhavige garantie is niet geldig voor de<br />
startaccu’s en de diesel- of benzinemotors<br />
gemonteerd op de apparatuur TOWER <strong>LIGHT</strong><br />
S.r.l. Hiervoor is de fabrikant rechtstreeks<br />
aansprakelijk:<br />
De garantie wordt van rechtswege ontbonden<br />
wanneer:<br />
- de klant geen gehoor heeft gegeven aan de<br />
contractuele betalingsverplichtingen.<br />
- de verzegelingen aangebracht in de fabriek<br />
werden verwijderd.<br />
- demontages, reparaties of wijzigingen werden<br />
uitgevoerd door personeel dat niet tot het<br />
servicenet van TOWER <strong>LIGHT</strong> S.r.l. behoort<br />
- de apparatuur onvoorzichtig of achteloos werd<br />
gebruikt.<br />
TOWER <strong>LIGHT</strong> S.r.l. guarantees its products,<br />
provided that not modified, for a period of 12<br />
(twelve) months from the delivery date to the<br />
customer.<br />
Within the aforesaid terms, in the countries<br />
where it exists an assistance organization,<br />
TOWER <strong>LIGHT</strong> S.r.l. is engaged to replace or<br />
to repair damaged pieces cause origin defect,<br />
working and/or assembly for means of the<br />
own authorized workshops.<br />
The choice if to execute a repair or to replace<br />
a damages pieces it is to judgment of the<br />
TOWER <strong>LIGHT</strong> S.r.l. or the authorized<br />
workshops.<br />
The guarantee in the rest of the world<br />
consists exclusively in the free supply of<br />
pieces revealed more usable for not<br />
assessed origin defect. The guarantee is<br />
applied after a examination of the materials<br />
damaged by the. The guarantee is applied<br />
after a examination of the materials damaged<br />
by the. The guarantee is applied after a<br />
examination of the materials damaged by the<br />
TOWER <strong>LIGHT</strong> S.r.l. Expenses of travel and<br />
transfer of the staff assigned to the repairs in<br />
guarantee are to client cargo, like the<br />
expenses for pack and transport of defective<br />
or replaced pieces.<br />
The present guarantee does not apply on the<br />
starting batteries and on diesel/gasoline<br />
motors mounted on equipment TOWER<br />
<strong>LIGHT</strong> S.r.l., for which the manufacturer<br />
takes part directly.<br />
The guarantee comes to stop when:<br />
- the contractual customer has not complied<br />
the payment obligation<br />
- the manufacturer’s seals has been tempered.<br />
- repairs or modifications have been carried<br />
out from staff not pertaining to the network of<br />
attendance TOWER <strong>LIGHT</strong> S.r.l.<br />
- the machine has been used in incautious or<br />
negligent way.<br />
103 TL073-01-00-02<br />
09-11-2009
<strong>SUPER</strong> <strong>LIGHT</strong> <strong>VT1</strong> <strong>9mt</strong> <strong>4x1000W</strong> <strong>METAALJODIDEN</strong><br />
Tower Light S.r.l.<br />
Via Stazione, 3 bis<br />
27030 Villanova d’Ardenghi (PV)<br />
ITALY<br />
Tel.: +39 0382 567011<br />
Fax:+39 0382 400247<br />
Web site:<br />
http://www.towerlight.it<br />
E-mail:<br />
info@towerlight.it<br />
104 TL073-01-00-02<br />
09-11-2009