You also want an ePaper? Increase the reach of your titles
YUMPU automatically turns print PDFs into web optimized ePapers that Google loves.
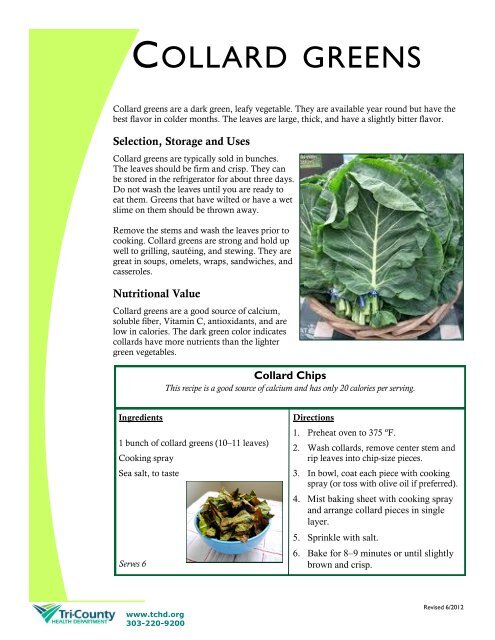
<strong>COLLARD</strong> <strong>GREENS</strong><br />
Collard greens are a dark green, leafy vegetable. They are available year round but have the<br />
best flavor in colder months. The leaves are large, thick, and have a slightly bitter flavor.<br />
Selection, Storage and Uses<br />
Collard greens are typically sold in bunches.<br />
The leaves should be firm and crisp. They can<br />
be stored in the refrigerator for about three days.<br />
Do not wash the leaves until you are ready to<br />
eat them. Greens that have wilted or have a wet<br />
slime on them should be thrown away.<br />
Remove the stems and wash the leaves prior to<br />
cooking. Collard greens are strong and hold up<br />
well to grilling, sautéing, and stewing. They are<br />
great in soups, omelets, wraps, sandwiches, and<br />
casseroles.<br />
Nutritional Value<br />
Collard greens are a good source of calcium,<br />
soluble fiber, Vitamin C, antioxidants, and are<br />
low in calories. The dark green color indicates<br />
collards have more nutrients than the lighter<br />
green vegetables.<br />
Ingredients<br />
www.tchd.org<br />
303-220-9200<br />
Collard Chips<br />
This recipe is a good source of calcium and has only 20 calories per serving.<br />
1 bunch of collard greens (10–11 leaves)<br />
Cooking spray<br />
Sea salt, to taste<br />
Serves 6<br />
Directions<br />
1. Preheat oven to 375 ºF.<br />
2. Wash collards, remove center stem and<br />
rip leaves into chip-size pieces.<br />
3. In bowl, coat each piece with cooking<br />
spray (or toss with olive oil if preferred).<br />
4. Mist baking sheet with cooking spray<br />
and arrange collard pieces in single<br />
layer.<br />
5. Sprinkle with salt.<br />
6. Bake for 8–9 minutes or until slightly<br />
brown and crisp.<br />
Revised 6/2012
www.tchd.org<br />
303-220-9200<br />
Collard Greens<br />
Las hojas de la berza o “collard greens” es una hortaliza de hojas verdes oscuras. Se pueden<br />
encontrar todo el año, pero tienen mejor sabor en los meses fríos. Las hojas son grandes,<br />
gruesas y tienen un sabor ligeramente amargo.<br />
Selección, almacenamiento y usos<br />
Las hojas de la berza se venden típicamente en<br />
racimos. Las hojas deben ser firmes y crujientes.<br />
Se pueden guardar en el refrigerador por<br />
aproximadamente tres días. No lave las hojas<br />
hasta que esté listo para prepararlas. Las hojas<br />
que se han marchitado o tienen una mucosidad<br />
húmeda deben ser desechadas.<br />
Remueva los tallos y lave las hojas antes de<br />
cocinarlas. Las hojas son fuertes y se cocinan<br />
bien a la parrilla, salteadas y en guisos. Son<br />
buenas para agregar a las sopas, tortillas de<br />
huevo u omelet, burritos, emparedados y los<br />
platillos en bandeja para hornear.<br />
Valor Nutricional<br />
Las hojas de la berza son una buena fuente de<br />
calcio, fibra soluble, vitamina C, antioxidantes y<br />
son bajas en calorías. El color verde oscuro<br />
indica que la col tiene más nutrientes que los<br />
vegetales verdes claros.<br />
Ingredientes<br />
Totopos de Berza<br />
Esta receta es una buena fuente de calcio y tiene sólo 20 calorías por porción.<br />
1 racimo de hojas de la berza (10–11 hojas)<br />
Aceite en aerosol<br />
Sal de mar, al gusto<br />
Sirve 6<br />
Preparación<br />
1. Precalentar el horno a 375 º F.<br />
2. Lave las hojas de la berza, remueva el tallo<br />
del centro y corte las hojas en pedazos<br />
del tamaño de totopos o “chips”.<br />
3. En un recipiente, cubra cada pieza con<br />
aceite en aerosol (o si prefiere, mezcle<br />
con el aceite de oliva).<br />
4. Rociar una bandeja para hornear con aceite<br />
en aerosol y acomodar las piezas de la<br />
berza en una sola capa.<br />
5. Espolvorear con sal.<br />
6. Hornee por 8–9 minutos o hasta que estén<br />
ligeramente doradas y crujientes.<br />
Revised 6/2012


