6712FR Refrigerated Sampler - Equipco
6712FR Refrigerated Sampler - Equipco
6712FR Refrigerated Sampler - Equipco

You also want an ePaper? Increase the reach of your titles
YUMPU automatically turns print PDFs into web optimized ePapers that Google loves.
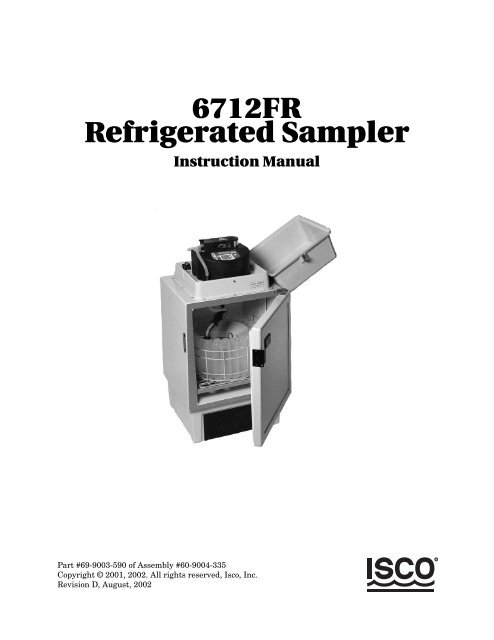
<strong>6712FR</strong><br />
<strong>Refrigerated</strong> <strong>Sampler</strong><br />
Instruction Manual<br />
Part #69-9003-590 of Assembly #60-9004-335<br />
Copyright © 2001, 2002. All rights reserved, Isco, Inc.<br />
Revision D, August, 2002
Foreword<br />
This instruction manual is designed to help you gain a thorough understanding of the<br />
operation of the equipment. Isco recommends that you read this manual completely<br />
before placing the equipment in service.<br />
Although Isco designs reliability into all equipment, there is always the possibility of a<br />
malfunction. This manual may help in diagnosing and repairing the malfunction.<br />
If the problem persists, call or email the Isco Customer Service Department for assistance.<br />
Contact information is provided below. Simple difficulties can often be diagnosed<br />
over the phone. If it is necessary to return the equipment to the factory for<br />
service, please follow the shipping instructions provided by the Customer Service<br />
Department, including the use of the Return Authorization Number specified. Be<br />
sure to include a note describing the malfunction. This will aid in the prompt<br />
repair and return of the equipment.<br />
Isco welcomes suggestions that would improve the information presented in this manual<br />
or enhance the operation of the equipment itself.<br />
Contact Information<br />
Phone: (800) 228-4373 (USA, Canada, Mexico)<br />
(402) 464-0231 (Outside North America)<br />
Repair Service: (800) 775-2965 (Analytical and Process<br />
Monitoring Instruments)<br />
(800) 228-4373 (<strong>Sampler</strong>s and Flow Meters)<br />
Fax: (402) 465-3022<br />
Email address: info@isco.com<br />
Website: www.isco.com<br />
Return equipment to: 4700 Superior Street, Lincoln, NE 68504-1398<br />
Other correspondence: P.O. Box 82531, Lincoln, NE 68501-2531
The Model <strong>6712FR</strong> <strong>Refrigerated</strong> <strong>Sampler</strong> is a “definite<br />
purpose” device, intended for use only with<br />
compatible Isco equipment. Do not use this product<br />
with any other manufacturers’ equipment, or<br />
for any other purpose. Use for any purpose not<br />
described in this manual could cause personal<br />
injury or property damage.<br />
Electrical Requirements<br />
The refrigerator is available in both 120 V and<br />
230 V configurations. The required operating<br />
voltage for the refrigerator is listed on the Identification<br />
and Serial Number label, placed on the<br />
inside of the sample compartment door.<br />
Refrigerators configured for 120 V operation are<br />
equipped with a North American NEMA 5-15P<br />
plug and is intended for use only with 120 V , 60<br />
Hz. The power source should be rated for 20<br />
ampere service.<br />
Refrigerators configured for 230 V operation are<br />
equipped with a Continental European CEE 7/7<br />
plug and is intended for use only with 230 V , 50/<br />
60 Hz. The power source should be rated for 16<br />
ampere service.<br />
Refrigerators in either configuration provide 12.5<br />
V at 5 amperes for the sampler controller. This<br />
output is from the two-pin military-type connector<br />
on the cord on top of the refrigerator. This output is<br />
intended for 6700 Series <strong>Sampler</strong> controllers only.<br />
The icons on the Model <strong>6712FR</strong> <strong>Refrigerated</strong> <strong>Sampler</strong><br />
and those found within this instruction manual<br />
alert the user of known hazards. The icons are<br />
described below.<br />
This icon identifies a general hazard.<br />
Refer to the instruction manual for more<br />
information.<br />
This icon indicates the risk of electrical<br />
shock. Refer to the instruction manual<br />
for more information.<br />
<strong>6712FR</strong> <strong>Refrigerated</strong> <strong>Sampler</strong><br />
SAFETY SUMMARY<br />
SAFETY SYMBOLS AND HAZARD ALERTS<br />
The refrigerator must be installed near a<br />
suitable power outlet. Never use an<br />
extension cord.<br />
The power outlet must be visible and easily<br />
accessible. Unplugging the refrigerator<br />
is the only means of disconnecting power.<br />
To minimize the risk of electrical shock,<br />
the refrigerator must be connected to an<br />
outlet with an electrical ground contact.<br />
The power source must be a dedicated<br />
circuit. The line must not power any<br />
other devices.<br />
Never operate the refrigerator with the<br />
lower front or rear panels removed.<br />
Never operate the refrigerator in an<br />
explosive atmosphere.<br />
Do not locate the refrigerator where the<br />
lower compartment could become submerged.<br />
Do not lift or carry the refrigerator. Use<br />
an appliance carrying device.<br />
Fuses must be replaced with the required<br />
size, current, voltage, and blow-time specifications.<br />
Refer to the Replacement Parts<br />
Listing for the correct part number.<br />
The instruction manual identifies the hazardous<br />
condition and any steps necessary to correct the<br />
condition. The manual presents this information in<br />
one of two ways:<br />
CAUTION<br />
Cautions identify a potential hazard, which if not<br />
avoided, may result in minor or moderate injury. This<br />
category can also warn you of unsafe practices, or<br />
conditions that may cause property damage.<br />
WARNING<br />
Warnings identify a potentially hazardous condition,<br />
which if not avoided, could result in death or<br />
serious injury.
<strong>6712FR</strong> <strong>Refrigerated</strong> <strong>Sampler</strong><br />
RECAPITULATIF DES MESURES DE SECURITE<br />
L'échantillon réfrigéré modèle <strong>6712FR</strong> est un appareil<br />
"à but défini", qui doit être utilisé uniquement<br />
avec du matériel compatible Isco. Ne pas utiliser ce<br />
produit avec le matériel d'autres fabricants ou à<br />
d’autres fins. Son usage à d’autres fins que celles<br />
indiquées dans ce manuel pourrait provoquer des<br />
accidents corporels ou des dégâts matériels.<br />
Conditions électriques requises<br />
Le réfrigérateur est disponible en 120 V et 230<br />
V . Le voltage nécessaire à son fonctionnement<br />
est indiqué sur l'étiquette d'identification et de<br />
numéro de série qui se trouve à l'intérieur de la<br />
porte du compartiment de l'échantillon.<br />
Les réfrigérateurs configurés pour du 120 V sont<br />
équipés d'une prise NEMA 5-15p américaine, et<br />
doivent fonctionner exclusivement avec du courant<br />
de 120 V , 60 Hz. L'alimentation électrique doit<br />
être réglée sur 20 ampères.<br />
Les réfrigérateurs configurés pour du 230 V sont<br />
équipés d'une prise CEE 7/7 européenne, et doivent<br />
être utilisés exclusivement avec du courant de 230<br />
V , 50/60 Hz. L'alimentation électrique doit être<br />
réglée sur 16 ampères.<br />
Les réfrigérateurs des deux configurations fournissent<br />
du courant de 12.5 V à 5 ampères au contrôleur<br />
de l’échantillon. Ce courant est alimenté par<br />
le connecteur de type militaire à deux prises qui se<br />
trouve sur le fil au-dessus du réfrigérateur. Cette<br />
production de courant est destinée exclusivement<br />
aux contrôleurs d’échantillons de la série 6700.<br />
Le réfrigérateur doit être installé à proximité<br />
d'une prise de courant murale appropriée.<br />
Ne jamais se servir de rallonge.<br />
La prise de courant doit être visible et facile<br />
d'accès. La seule façon d'éteindre le<br />
réfrigérateur est de le débrancher.<br />
Pour diminuer le risque de choc électrique,<br />
le réfrigérateur doit être branché<br />
dans une prise de courant équipée d’une<br />
fiche de terre.<br />
L'alimentation électrique doit provenir<br />
d'un circuit unique. Le circuit ne doit alimenter<br />
aucun autre appareil.<br />
Ne jamais faire fonctionner le réfrigérateur<br />
quand les panneaux inférieur de<br />
devant ou de derrière sont enlevés.<br />
Ne jamais faire fonctionner le réfrigérateur<br />
dans un environnement explosif.<br />
Veuillez placer l'appareil de façon à ce<br />
que la partie inférieure dugroupe frigorifique<br />
ne risque pas d'être immergée.<br />
Ne pas soulever ou porter le réfrigérateur.<br />
Utiliser un appareil prévu pour le<br />
transport des gros appareils électriques.<br />
Les fusibles doivent être remplacés par<br />
d'autres de mêmes taille, courant, voltage<br />
et puissance. Consulter la liste des<br />
pièces de rechange pour obtenir le bon<br />
numéro de pièce.<br />
SYMBOLES DE SECURITE ET SIGNAUX DE DANGER<br />
Les icônes placées sur l'échantillon réfrigéré<br />
modèle <strong>6712FR</strong> ainsi que celles trouvées dans ce<br />
manuel d’instructions avertissent l’utilisateur des<br />
dangers connus. Ces icônes sont définies cidessous.<br />
Cette icône représente un danger<br />
d'ordre général. Consultez le manuel<br />
d’instructions pour de plus amples informations.<br />
Cette icône indique le risque de choc<br />
électrique. Consultez le manuel<br />
d’instructions pour de plus amples informations.<br />
Le manuel d’instructions décrit chaque situation<br />
dangereuse ainsi que les mesures à prendre pour<br />
la rectifier. Le manuel présente ces renseignements<br />
de deux façons:<br />
ATTENTION<br />
"Attention" indique un danger potentiel qui, s'il n'est<br />
pas évité, pourrait provoquer des blessures plus ou<br />
moins graves. Cette catégorie sert également à<br />
informer l’utilisateur des actions ou conditions qui<br />
pourraient provoquer des dégâts matériels.<br />
AVERTISSEMENT<br />
"Avertissement" indique la présence de circonstances<br />
qui pourraient être très dangereuses<br />
pouvant, si elles ne sont pas évitées, provoquer<br />
des blessures graves ou même la mort.
Il campionatore refrigerato <strong>6712FR</strong> è<br />
un’apparecchiatura "per scopo specifico", destinata ad<br />
essere utilizzata esclusivamente con apparecchiature<br />
compatibili Isco. Non utilizzare il prodotto con<br />
apparecchiature di terzi né per scopi diversi da quello<br />
previsto. L’uso dell’apparecchiatura per scopi diversi<br />
da quello previsto nel presente manuale potrebbe<br />
provocare lesioni a persone e danni a cose.<br />
Alimentazione<br />
Il refrigeratore è disponibile in versione a 120 V e<br />
230 V . La tensione d’alimentazione richiesta è<br />
riportata sulla targhetta d’identificazione e del<br />
numero di matricola, che si trova all’interno dello<br />
sportello del vano portacampioni.<br />
I refrigeratori in versione 120 V sono dotati di<br />
spina a norme nordamericane NEMA 5-15P e sono<br />
previsti esclusivamente per funzionare a 120 V -<br />
60 Hz. La corrente d’alimentazione dev’essere a 20<br />
ampère.<br />
I refrigeratori in versione 230 V sono dotati di<br />
spina a norme europee CEE 7/7 e sono previsti<br />
esclusivamente per funzionare a 230 V - 50/60 Hz.<br />
La corrente d’alimentazione dev’essere di 16 ampère.<br />
I refrigeratori in entrambe le versioni forniscono<br />
tensione a 12,5 V - 5 ampère al dispositivo di<br />
comando del campionatore. L’uscita utilizza il<br />
connettore di tipo militare a due contatti applicato<br />
al cavo che si trova sulla parte superiore del<br />
refrigeratore. Questa uscita è prevista<br />
esclusivamente per dispositivo di comando dei<br />
campionatori serie 6700.<br />
<strong>6712FR</strong> <strong>Refrigerated</strong> <strong>Sampler</strong><br />
Sicurezza<br />
Simboli di sicurezza ed avvertenze di pericolo<br />
I simboli riportati sul campionatore refrigerato<br />
modello <strong>6712FR</strong> e quelli che si trovano nel presente<br />
manuale d’istruzioni mettono in guardia l’utilizzatore<br />
contro i pericoli conosciuti. Segue la spiegazione<br />
dei simboli.<br />
Questo simbolo rappresenta pericolo<br />
generico. Per ulteriori informazioni consultare<br />
il manuale d’istruzioni.<br />
Questo simbolo rappresenta pericolo di<br />
folgorazioni. Per ulteriori informazioni<br />
consultare il manuale d’istruzioni.<br />
Il refrigeratore dev’essere installato<br />
accanto ad un’idonea presa di corrente. E’<br />
vietato usare prolunghe.<br />
La presa d’alimentazione dev’essere visibile<br />
e facilmente accessibile. Infatti l’unico<br />
modo per disattivare il refrigeratore è scollegarlo<br />
dalla rete.<br />
Per ridurre il rischio di folgorazioni, il<br />
refrigeratore dev’essere collegato ad una<br />
presa dotata di messa a terra.<br />
L’alimentazione dev’essere fornita<br />
attraverso un circuito separato, che non<br />
deve alimentare altre apparecchiature.<br />
Non far funzionare il refrigeratore senza i<br />
pannelli anteriore inferiore e posteriore.<br />
Non utilizzare il refrigeratore in atmosfere<br />
esplosive.<br />
Non installare il frigorifero dove la parte<br />
inferione possa essere sommersa.<br />
Non sollevare né trasportare il refrigeratore.<br />
Servirsi di un dispositivo per il<br />
trasporto di apparecchiature.<br />
I fusibili devono essere sostituiti con altri<br />
con le stesse caratteristiche di formato,<br />
corrente, tensione e tempo d’intervento.<br />
Per il codice di ordinazione consultare<br />
l’elenco ricambi.<br />
Nel manuale d’istruzioni sono descritte le condizioni<br />
di pericolo e le misure da adottare per evitarle. Nel<br />
manuale queste informazioni sono presentate in<br />
uno dei due modi seguenti:<br />
AVVERTENZA<br />
Avvertenza indica un pericolo potenziale che, se non<br />
viene evitato, può comportare lesioni secondarie o<br />
modeste. Può inoltre servire a segnalare all’operatore<br />
abitudini pericolose o condizioni che possono<br />
provocare danni a cose.<br />
ATTENZIONE<br />
Attenzione indica una condizione potenzialmente<br />
pericolosa che, se non evitata, può provocare<br />
gravi lesioni, morte compresa.
Der gekühlte Probenehmer (<strong>Refrigerated</strong> <strong>Sampler</strong>)<br />
Modell <strong>6712FR</strong> ist ein Gerät für einen bestimmten<br />
Zweck, das nur mit kompatiblen Isco Geräten<br />
verwendet werden darf. Es darf nicht mit Geräten<br />
anderer Hersteller oder für andere Zwecke verwendet<br />
werden. Verwendung für andere als in diesem<br />
Handbuch beschriebene Zwecke kann Verletzung von<br />
Personen oder Beschädigung des Geräts zur Folge<br />
haben.<br />
Elektrische Anforderungen<br />
Der Kühlschrank ist in zwei Konfigurationen (120<br />
V und 230 V ) erhältlich. Die erforderliche<br />
Betriebsspannung für den Kühlschrank ist auf dem<br />
Kenn- und Seriennummernetikett innen an der<br />
Probefachtür vermerkt.<br />
Kühlschränke mit der 120 V Konfiguration sind<br />
mit einem in Nordamerika üblichen NEMA 5-15P<br />
Stecker ausgerüstet und nur zur Verwendung mit<br />
120 V , 60 Hz bestimmt. Die Stromquelle sollte für<br />
20-Ampere-Betrieb ausgelegt sein.<br />
Kühlschränke mit der 230 V Konfiguration sind mit<br />
einem kontinental-europäischen CEE 7/7-Stecker ausgerüstet<br />
und nur zur Verwendung mit 230 V , 50/60<br />
Hz bestimmt. Die Stromquelle sollte für 16-Ampere-<br />
Betrieb ausgelegt sein.<br />
Kühlschränke beider Konfigurationen liefern 12,5<br />
V bei 5 Ampere für den Probenehmer-Controller.<br />
Diese Ausgabe stammt vom zweipoligen Anschluß am<br />
Kabel oben am Kühlschrank. Diese Ausgabe ist nur<br />
für die Probenehmer-Controller der Serie 6700<br />
bestimmt.<br />
<strong>6712FR</strong> <strong>Refrigerated</strong> <strong>Sampler</strong><br />
Zusammenfassung: Sicherheit<br />
Sicherheitssymbole und Gefahrenhinweise<br />
Die Symbole auf dem gekühlten Probenehmer Modell<br />
<strong>6712FR</strong> und die in dieser Anleitung aufgeführten<br />
Symbole machen auf bekannte Gefahren<br />
aufmerksam. Diese Symbole werden nachstehend<br />
beschrieben.<br />
Dieses Symbol kennzeichnet eine<br />
allgemeine Gefahrenquelle.<br />
Weiterführende Informationen sind im<br />
Benutzerhandbuch enthalten.<br />
Dieses Symbol zeigt die Gefahr eines<br />
Elektroschocks an. Weitere Informationen<br />
sind im Benutzerhandbuch zu finden.<br />
Der Kühlschrank muß in der Nähe einer<br />
geeigneten Steckdose aufgestellt werden.<br />
Es darf kein Verlängerungskabel<br />
verwendet werden.<br />
Die Steckdose muß sichtbar und leicht<br />
zugänglich sein. Der Kühlschrank kann nur<br />
durch Herausziehen des Netzkabels<br />
ausgeschaltet werden.<br />
Um die Gefahr von Elektroschocks zu<br />
vermindern, muß der Kühlschrank an einer<br />
geerdeten Steckdose angeschlossen werden.<br />
Die Stromquelle muß ein dedizierter<br />
Stromkreis sein, d.h. die Leitung darf keine<br />
anderen Geräte mit Strom versorgen.<br />
Der Kühlschrank darf niemals betrieben<br />
werden, wenn die unteren Frontplatten<br />
(vorne oder hinten) entfernt sind.<br />
Der Kühlschrank darf nicht in einer<br />
Umgebung, wo Explosionsgefahr besteht,<br />
betrieben werden.<br />
Kuehlgeraet so aufstellen, dass in den<br />
unteren teil kein wasser eintreten kann.<br />
Der Kühlschrank darf nicht angehoben oder<br />
getragen werden, sondern nur mit einem<br />
Gerät zum Transport von Instrumenten oder<br />
Geräten fortbewegt werden.<br />
Bei Erneuerung der Sicherungen sind die<br />
vorgeschriebene Größe, Stromstärke,<br />
Spannung und Durchbrennspezifikationen<br />
einzuhalten. Die entsprechende<br />
Ersatzteilnummer ist der Ersatzteilliste zu<br />
entnehmen.<br />
Das Benutzerhandbuch kennzeichnet die<br />
Gefahrenbedingung und mögliche erforderliche Schritte<br />
zur Behebung dieser Bedingung. In diesem Handbuch<br />
wird eine der zwei Gefahrenkategorien verwendet:<br />
VORSICHTSHINWEIS<br />
Vorsichtshinweise kennzeichnen eine potentielle<br />
Gefahr, die leichte oder mäßige Verletzungen zur Folge<br />
haben kann, wenn sie nicht vermieden wird. Diese<br />
Kategorie kann den Benutzer auch auf gefährliche<br />
Handhabung oder Bedingungen, die Beschädigungen<br />
verursachen können, aufmerksam machen.<br />
WARNING<br />
Warnungen kennzeichnen eine potentiell gefährliche<br />
Bedingung, die den Tod oder schwere Verletzungen zur<br />
Folge haben kann, wenn sie nicht vermieden wird.
El modelo <strong>6712FR</strong> <strong>Refrigerated</strong> <strong>Sampler</strong> es un<br />
dispositivo con un "propósito definido", que se puede<br />
utilizar solamente con equipos compatibles Isco. No<br />
use este producto con cualquier otro equipo de otros<br />
fabricantes o para cualquier otro propósito. El uso de<br />
este producto para cualquier otro propósito que no sea<br />
el descrito en este manual, puede ocasionar daños<br />
personales o daños al producto.<br />
Requisitos eléctricos<br />
El refrigerador se encuentra disponible en las<br />
configuraciones 120 V y 230 V . El voltaje<br />
requerido para su funcionamiento se encuentra<br />
listado en la etiqueta de Identificación y en el<br />
Número de serie ubicado dentro de la puerta del<br />
compartimiento de muestra.<br />
Los refrigeradores configurados para que funcionen<br />
en 120 V están equipados con un enchufe<br />
norteamericano NEMA 5-15P y solamente pueden ser<br />
utilizados con 120 V , 60 Hz. La fuente de corriente<br />
eléctrica debe ser clasificada para un servicio de 20<br />
amperios.<br />
Los refrigeradores configurados para que funcionen en<br />
230 V están equipados con un enchufe Continental<br />
europeo CEE 7/7 y solamente pueden ser utilizados<br />
con 230 V , /60 Hz. La fuente de corriente eléctrica<br />
debe ser clasificada para un servicio de 16 amperios.<br />
Los refrigeradores, en cualquiera de las configuraciones,<br />
proporcionan 12.5 V a 5 amperios para el controlador<br />
de muestra. Esta salida proviene del conector de tipo<br />
militar de dos clavijas del cable en la parte superior del<br />
refrigerador. Esta salida solamente sirve para los<br />
controladores 6700 Series <strong>Sampler</strong>.<br />
Los iconos en el modelo <strong>6712FR</strong> del <strong>Refrigerated</strong><br />
<strong>Sampler</strong> y aquéllos que se encuentran en este manual<br />
de instrucciones alertan al usuario de peligros<br />
conocidos. A continuación se describen los iconos.<br />
Este icono identifica un peligro general.<br />
Haga referencia al manual de<br />
instrucciones para más información al<br />
respecto.<br />
Este icono indica el riesgo de una descarga<br />
eléctrica. Haga referencia al manual de<br />
instrucciones para más información al<br />
respecto.<br />
<strong>6712FR</strong> <strong>Refrigerated</strong> <strong>Sampler</strong><br />
Resumen de seguridad<br />
Símbolos de seguridad y advertencias<br />
El refrigerador debe ser instalado cerca de<br />
un tomacorriente accesible. Nunca utilice<br />
un cordón de extensión.<br />
El tomacorriente debe estar visible y<br />
accesible. La única manera de desconectar<br />
la corriente eléctrica es desenchufando el<br />
refrigerador.<br />
Para minimizar el riesgo de una descarga<br />
eléctrica, el refrigerador debe estar<br />
conectado a un tomacorriente con contacto<br />
a tierra eléctrico.<br />
La fuente de corriente eléctrica debe ser un<br />
circuito dedicado. La línea no debe<br />
transmitir corriente eléctrica a cualquier<br />
otro dispositivo.<br />
No utilice el refrigerador si se han quitado<br />
los paneles inferiores frontales o<br />
posteriores.<br />
No haga funcionar el refrigerador en<br />
ambientes con sustancias explosivas.<br />
No poner el refrigerador en un lugar en el<br />
que el compartimento inferior pueda quedar<br />
sumergido.<br />
No levante o mueva el refrigerador sin<br />
utilizar un dispositivo especial para<br />
transportar aparatos eléctricos.<br />
Se deben reemplazar los fusibles siguiendo<br />
las especificaciones requeridas de tamaño,<br />
corriente, voltaje y tiempo de utilidad. Haga<br />
referencia a la Lista de repuestos para el<br />
número correcto del repuesto.<br />
El manual de instrucciones identifica los peligros y<br />
los pasos necesarios para evitarlos. El manual<br />
presenta esta información en una de las dos<br />
siguientes maneras:<br />
PRECAUCION<br />
Las precauciones identifican un posible peligro, que al<br />
no ser evitado, puede resultar en daños menores. Esta<br />
categoría puede también advertirle del uso negligente<br />
o de las condiciones que pueden ocasionar daños al<br />
refrigerador.<br />
ADVERTENCIA<br />
Las advertencias identifican una condición<br />
potencialmente peligrosa, que al no ser evitada, puede<br />
resultar en daños muy serios u ocasionar la muerte.
<strong>6712FR</strong> <strong>Refrigerated</strong> <strong>Sampler</strong>
<strong>6712FR</strong> <strong>Refrigerated</strong> <strong>Sampler</strong><br />
Section 1 Introduction<br />
Table of Contents<br />
1.1 About This Manual . . . . . . . . . . . . . . . . . . . . . . . . . . . . . . . . . . . . . . . . . . . . . . . . . . 1-1<br />
1.2 About 700 Series Modules. . . . . . . . . . . . . . . . . . . . . . . . . . . . . . . . . . . . . . . . . . . . . 1-2<br />
1.3 SDI-12 Sondes . . . . . . . . . . . . . . . . . . . . . . . . . . . . . . . . . . . . . . . . . . . . . . . . . . . . . . 1-2<br />
1.4 Memory to Store Monitoring Data . . . . . . . . . . . . . . . . . . . . . . . . . . . . . . . . . . . . . . 1-2<br />
1.5 Pump Requirements . . . . . . . . . . . . . . . . . . . . . . . . . . . . . . . . . . . . . . . . . . . . . . . . . 1-2<br />
Section 2 Installation/Preparation<br />
2.1 Preparing the <strong>Sampler</strong> . . . . . . . . . . . . . . . . . . . . . . . . . . . . . . . . . . . . . . . . . . . . . . . 2-1<br />
2.1.1 Installing the Distributor Shaft Extension . . . . . . . . . . . . . . . . . . . . . . . . . 2-1<br />
2.1.2 Mounting the Controller . . . . . . . . . . . . . . . . . . . . . . . . . . . . . . . . . . . . . . . . 2-1<br />
2.1.3 Installing the Distributor Arm and Discharge Tube . . . . . . . . . . . . . . . . . . 2-2<br />
2.2 Installing Bottle Kits . . . . . . . . . . . . . . . . . . . . . . . . . . . . . . . . . . . . . . . . . . . . . . . . 2-3<br />
2.2.1 Installing Racks . . . . . . . . . . . . . . . . . . . . . . . . . . . . . . . . . . . . . . . . . . . . . . . 2-4<br />
2.2.2 Removing Racks . . . . . . . . . . . . . . . . . . . . . . . . . . . . . . . . . . . . . . . . . . . . . . . 2-6<br />
2.2.3 Installing Composite Bottles . . . . . . . . . . . . . . . . . . . . . . . . . . . . . . . . . . . . . 2-6<br />
2.3 Suction Line. . . . . . . . . . . . . . . . . . . . . . . . . . . . . . . . . . . . . . . . . . . . . . . . . . . . . . . . 2-6<br />
2.3.1 Guidelines for Measuring and Cutting the Suction Line . . . . . . . . . . . . . . 2-6<br />
2.3.2 Attaching Suction Line to Pump Tube . . . . . . . . . . . . . . . . . . . . . . . . . . . . . 2-6<br />
2.4 Strainers . . . . . . . . . . . . . . . . . . . . . . . . . . . . . . . . . . . . . . . . . . . . . . . . . . . . . . . . . . 2-7<br />
2.4.1 Debris Deflector . . . . . . . . . . . . . . . . . . . . . . . . . . . . . . . . . . . . . . . . . . . . . . . 2-7<br />
2.4.2 Alternative to Strainers . . . . . . . . . . . . . . . . . . . . . . . . . . . . . . . . . . . . . . . . . 2-7<br />
2.5 How Does the <strong>Sampler</strong> Work? . . . . . . . . . . . . . . . . . . . . . . . . . . . . . . . . . . . . . . . . . 2-8<br />
2.5.1 Measuring Sample Volume . . . . . . . . . . . . . . . . . . . . . . . . . . . . . . . . . . . . . . 2-9<br />
2.6 Installing the <strong>Sampler</strong> . . . . . . . . . . . . . . . . . . . . . . . . . . . . . . . . . . . . . . . . . . . . . . . 2-9<br />
2.6.1 Tips for Routing Suction Line . . . . . . . . . . . . . . . . . . . . . . . . . . . . . . . . . . . 2-10<br />
2.6.2 Intake Placement . . . . . . . . . . . . . . . . . . . . . . . . . . . . . . . . . . . . . . . . . . . . . 2-10<br />
2.6.3 Positioning a <strong>Sampler</strong> . . . . . . . . . . . . . . . . . . . . . . . . . . . . . . . . . . . . . . . . . 2-10<br />
2.7 Connecting External Instruments . . . . . . . . . . . . . . . . . . . . . . . . . . . . . . . . . . . . . 2-11<br />
2.7.1 Flow Meter Connector . . . . . . . . . . . . . . . . . . . . . . . . . . . . . . . . . . . . . . . . . 2-11<br />
2.7.2 Rain Gauge Connector . . . . . . . . . . . . . . . . . . . . . . . . . . . . . . . . . . . . . . . . . 2-11<br />
2.8 Locking the <strong>Sampler</strong> . . . . . . . . . . . . . . . . . . . . . . . . . . . . . . . . . . . . . . . . . . . . . . . . 2-12<br />
2.9 Servicing the <strong>Sampler</strong>. . . . . . . . . . . . . . . . . . . . . . . . . . . . . . . . . . . . . . . . . . . . . . . 2-12<br />
Section 3 Getting Started<br />
3.1 Initial Operation . . . . . . . . . . . . . . . . . . . . . . . . . . . . . . . . . . . . . . . . . . . . . . . . . . . . 3-1<br />
3.1.1 Selecting a Language . . . . . . . . . . . . . . . . . . . . . . . . . . . . . . . . . . . . . . . . . . . 3-3<br />
3.2 Using Menus and Entering Numbers . . . . . . . . . . . . . . . . . . . . . . . . . . . . . . . . . . . 3-3<br />
3.2.1 Selecting Menu Options . . . . . . . . . . . . . . . . . . . . . . . . . . . . . . . . . . . . . . . . 3-3<br />
3.2.2 Entering Numbers . . . . . . . . . . . . . . . . . . . . . . . . . . . . . . . . . . . . . . . . . . . . . 3-3<br />
3.3 Quick View Screens. . . . . . . . . . . . . . . . . . . . . . . . . . . . . . . . . . . . . . . . . . . . . . . . . . 3-3<br />
3.3.1 Paging Through Quick View Screens . . . . . . . . . . . . . . . . . . . . . . . . . . . . . . 3-4<br />
3.3.2 Changing Settings in a Quick View Screen . . . . . . . . . . . . . . . . . . . . . . . . . 3-4<br />
3.4 Clock and Calendar. . . . . . . . . . . . . . . . . . . . . . . . . . . . . . . . . . . . . . . . . . . . . . . . . . 3-5<br />
3.4.1 Setting the Clock and Calendar . . . . . . . . . . . . . . . . . . . . . . . . . . . . . . . . . . 3-5<br />
3.4.2 Menu Screens: Clock Start Times . . . . . . . . . . . . . . . . . . . . . . . . . . . . . . . . . 3-6<br />
3.5 Menu Screens: Site Descriptions and Program Names . . . . . . . . . . . . . . . . . . . . . 3-6<br />
3.6 Messages . . . . . . . . . . . . . . . . . . . . . . . . . . . . . . . . . . . . . . . . . . . . . . . . . . . . . . . . . . 3-7<br />
i
6712 Portable <strong>Sampler</strong><br />
Table of Contents<br />
ii<br />
3.6.1 Information Messages . . . . . . . . . . . . . . . . . . . . . . . . . . . . . . . . . . . . . . . . . . 3-8<br />
3.6.2 Help Notes . . . . . . . . . . . . . . . . . . . . . . . . . . . . . . . . . . . . . . . . . . . . . . . . . . . 3-8<br />
3.6.3 Warning Messages . . . . . . . . . . . . . . . . . . . . . . . . . . . . . . . . . . . . . . . . . . . . . 3-9<br />
3.6.4 Operation Messages . . . . . . . . . . . . . . . . . . . . . . . . . . . . . . . . . . . . . . . . . . . . 3-9<br />
3.7 Menu Trees . . . . . . . . . . . . . . . . . . . . . . . . . . . . . . . . . . . . . . . . . . . . . . . . . . . . . . . . 3-9<br />
Section 4 Standard Programming<br />
4.1 Switching Between Standard and Extended Modes . . . . . . . . . . . . . . . . . . . . . . . . 4-1<br />
4.2 Language Selection, Units of Length . . . . . . . . . . . . . . . . . . . . . . . . . . . . . . . . . . . . 4-1<br />
4.3 Programming Examples . . . . . . . . . . . . . . . . . . . . . . . . . . . . . . . . . . . . . . . . . . . . . . 4-2<br />
4.4 Pacing. . . . . . . . . . . . . . . . . . . . . . . . . . . . . . . . . . . . . . . . . . . . . . . . . . . . . . . . . . . . . 4-5<br />
4.4.1 Trigger Pacing . . . . . . . . . . . . . . . . . . . . . . . . . . . . . . . . . . . . . . . . . . . . . . . . 4-5<br />
4.5 Distribution . . . . . . . . . . . . . . . . . . . . . . . . . . . . . . . . . . . . . . . . . . . . . . . . . . . . . . . . 4-6<br />
4.5.1 Sequential . . . . . . . . . . . . . . . . . . . . . . . . . . . . . . . . . . . . . . . . . . . . . . . . . . . 4-6<br />
4.5.2 Bottles Per Sample . . . . . . . . . . . . . . . . . . . . . . . . . . . . . . . . . . . . . . . . . . . . 4-6<br />
4.5.3 Samples Per Bottle . . . . . . . . . . . . . . . . . . . . . . . . . . . . . . . . . . . . . . . . . . . . 4-6<br />
4.5.4 Composite . . . . . . . . . . . . . . . . . . . . . . . . . . . . . . . . . . . . . . . . . . . . . . . . . . . . 4-6<br />
4.5.5 Continuous Sampling . . . . . . . . . . . . . . . . . . . . . . . . . . . . . . . . . . . . . . . . . . 4-6<br />
4.6 Start Times . . . . . . . . . . . . . . . . . . . . . . . . . . . . . . . . . . . . . . . . . . . . . . . . . . . . . . . . 4-8<br />
4.6.1 How Do Start Times Work? . . . . . . . . . . . . . . . . . . . . . . . . . . . . . . . . . . . . . . 4-8<br />
4.6.2 <strong>Sampler</strong> Enable/Disable . . . . . . . . . . . . . . . . . . . . . . . . . . . . . . . . . . . . . . . . 4-9<br />
4.7 Running Programs . . . . . . . . . . . . . . . . . . . . . . . . . . . . . . . . . . . . . . . . . . . . . . . . . 4-10<br />
4.7.1 Run Time Screens . . . . . . . . . . . . . . . . . . . . . . . . . . . . . . . . . . . . . . . . . . . . 4-10<br />
4.7.2 Module Readings . . . . . . . . . . . . . . . . . . . . . . . . . . . . . . . . . . . . . . . . . . . . . 4-11<br />
4.8 Interrupting a Running Program. . . . . . . . . . . . . . . . . . . . . . . . . . . . . . . . . . . . . . 4-11<br />
4.8.1 Stop Program . . . . . . . . . . . . . . . . . . . . . . . . . . . . . . . . . . . . . . . . . . . . . . . . 4-12<br />
4.8.2 Resume Program . . . . . . . . . . . . . . . . . . . . . . . . . . . . . . . . . . . . . . . . . . . . . 4-12<br />
4.8.3 View Data . . . . . . . . . . . . . . . . . . . . . . . . . . . . . . . . . . . . . . . . . . . . . . . . . . . 4-12<br />
4.8.4 Grab Sample . . . . . . . . . . . . . . . . . . . . . . . . . . . . . . . . . . . . . . . . . . . . . . . . 4-12<br />
4.8.5 Pump Tube Alarm . . . . . . . . . . . . . . . . . . . . . . . . . . . . . . . . . . . . . . . . . . . . 4-12<br />
4.8.6 Calibrate Volume . . . . . . . . . . . . . . . . . . . . . . . . . . . . . . . . . . . . . . . . . . . . . 4-12<br />
4.8.7 Cal/Adj Parameters . . . . . . . . . . . . . . . . . . . . . . . . . . . . . . . . . . . . . . . . . . . 4-12<br />
4.8.8 Adjust Pacing . . . . . . . . . . . . . . . . . . . . . . . . . . . . . . . . . . . . . . . . . . . . . . . . 4-13<br />
4.8.9 Adjust Volume . . . . . . . . . . . . . . . . . . . . . . . . . . . . . . . . . . . . . . . . . . . . . . . 4-13<br />
4.8.10 Power Used . . . . . . . . . . . . . . . . . . . . . . . . . . . . . . . . . . . . . . . . . . . . . . . . 4-13<br />
4.9 Other Functions . . . . . . . . . . . . . . . . . . . . . . . . . . . . . . . . . . . . . . . . . . . . . . . . . . . 4-13<br />
4.10 Manual Functions . . . . . . . . . . . . . . . . . . . . . . . . . . . . . . . . . . . . . . . . . . . . . . . . . 4-13<br />
4.11 Grab Samples . . . . . . . . . . . . . . . . . . . . . . . . . . . . . . . . . . . . . . . . . . . . . . . . . . . . 4-14<br />
4.12 Calibrate Volume . . . . . . . . . . . . . . . . . . . . . . . . . . . . . . . . . . . . . . . . . . . . . . . . . 4-15<br />
4.12.1 Calibration Tips . . . . . . . . . . . . . . . . . . . . . . . . . . . . . . . . . . . . . . . . . . . . . 4-15<br />
4.13 Operating the Pump . . . . . . . . . . . . . . . . . . . . . . . . . . . . . . . . . . . . . . . . . . . . . . . 4-16<br />
4.14 Moving the Distributor Arm. . . . . . . . . . . . . . . . . . . . . . . . . . . . . . . . . . . . . . . . . 4-16<br />
4.15 Reports. . . . . . . . . . . . . . . . . . . . . . . . . . . . . . . . . . . . . . . . . . . . . . . . . . . . . . . . . . 4-16<br />
4.15.1 Collecting Reports . . . . . . . . . . . . . . . . . . . . . . . . . . . . . . . . . . . . . . . . . . . 4-17<br />
4.15.2 Viewing the Data . . . . . . . . . . . . . . . . . . . . . . . . . . . . . . . . . . . . . . . . . . . . 4-17<br />
4.15.3 Configuring Reports . . . . . . . . . . . . . . . . . . . . . . . . . . . . . . . . . . . . . . . . . . 4-18<br />
4.15.4 Sampling Results Report . . . . . . . . . . . . . . . . . . . . . . . . . . . . . . . . . . . . . . 4-18<br />
4.15.5 Combined Results Report . . . . . . . . . . . . . . . . . . . . . . . . . . . . . . . . . . . . . 4-19<br />
4.15.6 Summary Report . . . . . . . . . . . . . . . . . . . . . . . . . . . . . . . . . . . . . . . . . . . . 4-19<br />
4.16 System IDs. . . . . . . . . . . . . . . . . . . . . . . . . . . . . . . . . . . . . . . . . . . . . . . . . . . . . . . 4-26<br />
4.17 Programming for 700 Series Modules . . . . . . . . . . . . . . . . . . . . . . . . . . . . . . . . . 4-26<br />
Section 5 Extended Programming<br />
5.1 Extended and Standard Mode . . . . . . . . . . . . . . . . . . . . . . . . . . . . . . . . . . . . . . . . . 5-1<br />
5.2 One-Part and Two-Part Programs . . . . . . . . . . . . . . . . . . . . . . . . . . . . . . . . . . . . . . 5-1<br />
5.3 Storage For Extended Programs . . . . . . . . . . . . . . . . . . . . . . . . . . . . . . . . . . . . . . . 5-2
6712 Portable <strong>Sampler</strong><br />
Table of Contents<br />
5.3.1 Selecting a Stored Program . . . . . . . . . . . . . . . . . . . . . . . . . . . . . . . . . . . . . . 5-2<br />
5.4 Programming for 700 series Modules. . . . . . . . . . . . . . . . . . . . . . . . . . . . . . . . . . . . 5-4<br />
5.5 Programming SDI-12 Sondes . . . . . . . . . . . . . . . . . . . . . . . . . . . . . . . . . . . . . . . . . . 5-4<br />
5.6 Programming Examples . . . . . . . . . . . . . . . . . . . . . . . . . . . . . . . . . . . . . . . . . . . . . . 5-4<br />
5.6.1 Storm Water Runoff Sampling . . . . . . . . . . . . . . . . . . . . . . . . . . . . . . . . . . . 5-5<br />
5.7 Suction Head . . . . . . . . . . . . . . . . . . . . . . . . . . . . . . . . . . . . . . . . . . . . . . . . . . . . . . 5-12<br />
5.8 Rinses and Retries. . . . . . . . . . . . . . . . . . . . . . . . . . . . . . . . . . . . . . . . . . . . . . . . . . 5-12<br />
5.9 Pacing. . . . . . . . . . . . . . . . . . . . . . . . . . . . . . . . . . . . . . . . . . . . . . . . . . . . . . . . . . . . 5-12<br />
5.9.1 Event Pacing . . . . . . . . . . . . . . . . . . . . . . . . . . . . . . . . . . . . . . . . . . . . . . . . 5-13<br />
5.9.2 Event Paced Sampling . . . . . . . . . . . . . . . . . . . . . . . . . . . . . . . . . . . . . . . . . 5-13<br />
5.9.3 Nonuniform Time Pacing . . . . . . . . . . . . . . . . . . . . . . . . . . . . . . . . . . . . . . 5-15<br />
5.9.4 Nonuniform Clock Time Pacing . . . . . . . . . . . . . . . . . . . . . . . . . . . . . . . . . 5-15<br />
5.9.5 Nonuniform Interval Pacing . . . . . . . . . . . . . . . . . . . . . . . . . . . . . . . . . . . . 5-15<br />
5.9.6 Random Interval Pacing . . . . . . . . . . . . . . . . . . . . . . . . . . . . . . . . . . . . . . . 5-15<br />
5.10 Distribution . . . . . . . . . . . . . . . . . . . . . . . . . . . . . . . . . . . . . . . . . . . . . . . . . . . . . . 5-16<br />
5.10.1 Sequential . . . . . . . . . . . . . . . . . . . . . . . . . . . . . . . . . . . . . . . . . . . . . . . . . 5-16<br />
5.10.2 Bottles Per Sample . . . . . . . . . . . . . . . . . . . . . . . . . . . . . . . . . . . . . . . . . . 5-16<br />
5.10.3 Samples Per Bottle . . . . . . . . . . . . . . . . . . . . . . . . . . . . . . . . . . . . . . . . . . 5-16<br />
5.10.4 Composite . . . . . . . . . . . . . . . . . . . . . . . . . . . . . . . . . . . . . . . . . . . . . . . . . . 5-16<br />
5.10.5 Multiple Bottle Compositing . . . . . . . . . . . . . . . . . . . . . . . . . . . . . . . . . . . 5-16<br />
5.10.6 Time Switching . . . . . . . . . . . . . . . . . . . . . . . . . . . . . . . . . . . . . . . . . . . . . 5-16<br />
5.10.7 Continuous Sampling . . . . . . . . . . . . . . . . . . . . . . . . . . . . . . . . . . . . . . . . 5-17<br />
5.11 <strong>Sampler</strong> Enable . . . . . . . . . . . . . . . . . . . . . . . . . . . . . . . . . . . . . . . . . . . . . . . . . . . 5-19<br />
5.11.1 <strong>Sampler</strong> Enable . . . . . . . . . . . . . . . . . . . . . . . . . . . . . . . . . . . . . . . . . . . . . 5-20<br />
5.12 <strong>Sampler</strong> Enable Responses. . . . . . . . . . . . . . . . . . . . . . . . . . . . . . . . . . . . . . . . . . 5-21<br />
5.12.1 Once Enabled Stay Enabled . . . . . . . . . . . . . . . . . . . . . . . . . . . . . . . . . . . 5-21<br />
5.12.2 Repeatable Enable . . . . . . . . . . . . . . . . . . . . . . . . . . . . . . . . . . . . . . . . . . . 5-21<br />
5.12.3 Sample at Enable or Disable . . . . . . . . . . . . . . . . . . . . . . . . . . . . . . . . . . . 5-21<br />
5.12.4 Delay To Start Of Sampling . . . . . . . . . . . . . . . . . . . . . . . . . . . . . . . . . . . 5-21<br />
5.12.5 “Dry Period” Option . . . . . . . . . . . . . . . . . . . . . . . . . . . . . . . . . . . . . . . . . . 5-22<br />
5.12.6 Resetting the Sample Interval at Enable . . . . . . . . . . . . . . . . . . . . . . . . . 5-22<br />
5.13 Pauses/Resumes . . . . . . . . . . . . . . . . . . . . . . . . . . . . . . . . . . . . . . . . . . . . . . . . . . 5-23<br />
5.14 Running Programs . . . . . . . . . . . . . . . . . . . . . . . . . . . . . . . . . . . . . . . . . . . . . . . . 5-23<br />
5.14.1 Run Time Screens . . . . . . . . . . . . . . . . . . . . . . . . . . . . . . . . . . . . . . . . . . . 5-23<br />
5.14.2 Interrupting a Running Program . . . . . . . . . . . . . . . . . . . . . . . . . . . . . . . 5-23<br />
5.15 Sampling Reports . . . . . . . . . . . . . . . . . . . . . . . . . . . . . . . . . . . . . . . . . . . . . . . . . 5-24<br />
5.16 Other Functions . . . . . . . . . . . . . . . . . . . . . . . . . . . . . . . . . . . . . . . . . . . . . . . . . . 5-24<br />
5.17 Software Options. . . . . . . . . . . . . . . . . . . . . . . . . . . . . . . . . . . . . . . . . . . . . . . . . . 5-24<br />
5.17.1 Liquid Detector Enable/Disable . . . . . . . . . . . . . . . . . . . . . . . . . . . . . . . . 5-24<br />
5.17.2 Programming Style . . . . . . . . . . . . . . . . . . . . . . . . . . . . . . . . . . . . . . . . . . 5-24<br />
5.17.3 Measurement Interval . . . . . . . . . . . . . . . . . . . . . . . . . . . . . . . . . . . . . . . . 5-25<br />
5.17.4 Dual <strong>Sampler</strong> Mode . . . . . . . . . . . . . . . . . . . . . . . . . . . . . . . . . . . . . . . . . . 5-25<br />
5.17.5 Pre-sample and Post-sample<br />
Purge Counts . . . . . . . . . . . . . . . . . . . . . . . . . . . . . . . . . . . . . . . . . . . . . . . . 5-27<br />
5.17.6 Serial Output . . . . . . . . . . . . . . . . . . . . . . . . . . . . . . . . . . . . . . . . . . . . . . . 5-27<br />
5.18 Hardware Setup . . . . . . . . . . . . . . . . . . . . . . . . . . . . . . . . . . . . . . . . . . . . . . . . . . 5-30<br />
5.18.1 SDI-12 Sonde Setup . . . . . . . . . . . . . . . . . . . . . . . . . . . . . . . . . . . . . . . . . . 5-30<br />
5.18.2 Rain Gauge Setup . . . . . . . . . . . . . . . . . . . . . . . . . . . . . . . . . . . . . . . . . . . 5-30<br />
5.18.3 I/O Pin Programming . . . . . . . . . . . . . . . . . . . . . . . . . . . . . . . . . . . . . . . . 5-31<br />
5.18.4 Refrigerator Temperature . . . . . . . . . . . . . . . . . . . . . . . . . . . . . . . . . . . . . 5-31<br />
5.18.5 Analog Output . . . . . . . . . . . . . . . . . . . . . . . . . . . . . . . . . . . . . . . . . . . . . . 5-31<br />
5.18.6 Dialout Alarms . . . . . . . . . . . . . . . . . . . . . . . . . . . . . . . . . . . . . . . . . . . . . . 5-32<br />
5.18.7 Pager Numbers . . . . . . . . . . . . . . . . . . . . . . . . . . . . . . . . . . . . . . . . . . . . . 5-33<br />
5.19 Memory . . . . . . . . . . . . . . . . . . . . . . . . . . . . . . . . . . . . . . . . . . . . . . . . . . . . . . . . . 5-33<br />
5.20 Pressurized Lines . . . . . . . . . . . . . . . . . . . . . . . . . . . . . . . . . . . . . . . . . . . . . . . . . 5-34<br />
5.21 Command Driven Operation. . . . . . . . . . . . . . . . . . . . . . . . . . . . . . . . . . . . . . . . . 5-35<br />
5.22 Command Driven <strong>Sampler</strong> Responses . . . . . . . . . . . . . . . . . . . . . . . . . . . . . . . . . 5-36<br />
iii
6712 Portable <strong>Sampler</strong><br />
Table of Contents<br />
iv<br />
Section 6 SDI-12 Sondes<br />
6.1 SDI-12 Data Parameters . . . . . . . . . . . . . . . . . . . . . . . . . . . . . . . . . . . . . . . . . . . . . 6-1<br />
6.2 Scanning For Sondes. . . . . . . . . . . . . . . . . . . . . . . . . . . . . . . . . . . . . . . . . . . . . . . . . 6-2<br />
6.3 Isco Ready Sondes . . . . . . . . . . . . . . . . . . . . . . . . . . . . . . . . . . . . . . . . . . . . . . . . . . . 6-3<br />
6.4 Other SDI-12 Sondes. . . . . . . . . . . . . . . . . . . . . . . . . . . . . . . . . . . . . . . . . . . . . . . . . 6-3<br />
6.5 Sonde Setup - Storing Parameter Data . . . . . . . . . . . . . . . . . . . . . . . . . . . . . . . . . . 6-4<br />
6.6 Sonde Calibration and Validation . . . . . . . . . . . . . . . . . . . . . . . . . . . . . . . . . . . . . . 6-5<br />
6.6.1 The Calibration Screens . . . . . . . . . . . . . . . . . . . . . . . . . . . . . . . . . . . . . . . . 6-6<br />
6.6.2 The Validation Screen . . . . . . . . . . . . . . . . . . . . . . . . . . . . . . . . . . . . . . . . . . 6-6<br />
6.7 Disconnecting Sondes . . . . . . . . . . . . . . . . . . . . . . . . . . . . . . . . . . . . . . . . . . . . . . . . 6-7<br />
Section 7 Maintenance<br />
7.1 Maintenance Checklist . . . . . . . . . . . . . . . . . . . . . . . . . . . . . . . . . . . . . . . . . . . . . . . 7-1<br />
7.2 Cleaning Guidelines . . . . . . . . . . . . . . . . . . . . . . . . . . . . . . . . . . . . . . . . . . . . . . . . . 7-1<br />
7.2.1 Refrigerator . . . . . . . . . . . . . . . . . . . . . . . . . . . . . . . . . . . . . . . . . . . . . . . . . . 7-1<br />
7.2.2 Controller . . . . . . . . . . . . . . . . . . . . . . . . . . . . . . . . . . . . . . . . . . . . . . . . . . . . 7-1<br />
7.2.3 Sample Bottles . . . . . . . . . . . . . . . . . . . . . . . . . . . . . . . . . . . . . . . . . . . . . . . . 7-2<br />
7.2.4 Suction Line, Pump Tube, and Discharge Tube . . . . . . . . . . . . . . . . . . . . . . 7-2<br />
7.2.5 Strainer . . . . . . . . . . . . . . . . . . . . . . . . . . . . . . . . . . . . . . . . . . . . . . . . . . . . . 7-2<br />
7.2.6 Air Filter . . . . . . . . . . . . . . . . . . . . . . . . . . . . . . . . . . . . . . . . . . . . . . . . . . . . . 7-2<br />
7.2.7 Condenser . . . . . . . . . . . . . . . . . . . . . . . . . . . . . . . . . . . . . . . . . . . . . . . . . . . . 7-2<br />
7.3 Cleaning Protocols for Priority Pollutants. . . . . . . . . . . . . . . . . . . . . . . . . . . . . . . . 7-2<br />
7.3.1 Isco Glass Sample Bottles . . . . . . . . . . . . . . . . . . . . . . . . . . . . . . . . . . . . . . . 7-3<br />
7.3.2 Vinyl Suction Line . . . . . . . . . . . . . . . . . . . . . . . . . . . . . . . . . . . . . . . . . . . . . 7-3<br />
7.3.3 Teflon Suction Line . . . . . . . . . . . . . . . . . . . . . . . . . . . . . . . . . . . . . . . . . . . . 7-3<br />
7.3.4 Isco Pump Tube . . . . . . . . . . . . . . . . . . . . . . . . . . . . . . . . . . . . . . . . . . . . . . . 7-3<br />
7.4 Maintenance Screens . . . . . . . . . . . . . . . . . . . . . . . . . . . . . . . . . . . . . . . . . . . . . . . . 7-3<br />
7.4.1 Set Clock . . . . . . . . . . . . . . . . . . . . . . . . . . . . . . . . . . . . . . . . . . . . . . . . . . . . . 7-4<br />
7.4.2 Pump Tube Alarm . . . . . . . . . . . . . . . . . . . . . . . . . . . . . . . . . . . . . . . . . . . . . 7-4<br />
7.4.3 Internal Battery Warning . . . . . . . . . . . . . . . . . . . . . . . . . . . . . . . . . . . . . . . 7-5<br />
7.4.4 Diagnostics . . . . . . . . . . . . . . . . . . . . . . . . . . . . . . . . . . . . . . . . . . . . . . . . . . . 7-6<br />
7.5 Replacing the Pump Tube. . . . . . . . . . . . . . . . . . . . . . . . . . . . . . . . . . . . . . . . . . . . . 7-8<br />
7.6 Opening the Controller Case . . . . . . . . . . . . . . . . . . . . . . . . . . . . . . . . . . . . . . . . . 7-10<br />
7.7 Recharging the Desiccant . . . . . . . . . . . . . . . . . . . . . . . . . . . . . . . . . . . . . . . . . . . . 7-11<br />
7.7.1 How To Recharge The Desiccant . . . . . . . . . . . . . . . . . . . . . . . . . . . . . . . . 7-11<br />
7.8 Replacing the Internal Battery . . . . . . . . . . . . . . . . . . . . . . . . . . . . . . . . . . . . . . . 7-13<br />
7.9 Error Messages . . . . . . . . . . . . . . . . . . . . . . . . . . . . . . . . . . . . . . . . . . . . . . . . . . . . 7-14<br />
7.10 Warning Messages . . . . . . . . . . . . . . . . . . . . . . . . . . . . . . . . . . . . . . . . . . . . . . . . 7-15<br />
7.11 Servicing the Refrigerator . . . . . . . . . . . . . . . . . . . . . . . . . . . . . . . . . . . . . . . . . . 7-15<br />
7.11.1 Electrical System . . . . . . . . . . . . . . . . . . . . . . . . . . . . . . . . . . . . . . . . . . . . 7-15<br />
7.11.2 Refrigeration System . . . . . . . . . . . . . . . . . . . . . . . . . . . . . . . . . . . . . . . . . 7-18<br />
Section 8 Software Options<br />
8.1 Program Lock . . . . . . . . . . . . . . . . . . . . . . . . . . . . . . . . . . . . . . . . . . . . . . . . . . . . . . 8-1<br />
8.2 Remote Access . . . . . . . . . . . . . . . . . . . . . . . . . . . . . . . . . . . . . . . . . . . . . . . . . . . . . . 8-2<br />
8.2.1 Telephone Commands . . . . . . . . . . . . . . . . . . . . . . . . . . . . . . . . . . . . . . . . . . 8-2<br />
8.2.2 Computer Menu Commands . . . . . . . . . . . . . . . . . . . . . . . . . . . . . . . . . . . . . 8-3<br />
Appendix A Menu Flowcharts<br />
Appendix B Material Safety Data Sheets
Appendix C General Safety Procedures<br />
6712 Portable <strong>Sampler</strong><br />
Table of Contents<br />
C.1 Hazards . . . . . . . . . . . . . . . . . . . . . . . . . . . . . . . . . . . . . . . . . . . . . . . . . . . . . . . . . . . C-1<br />
C.1.1 Adverse Atmosphere . . . . . . . . . . . . . . . . . . . . . . . . . . . . . . . . . . . . . . . . . . . C-1<br />
C.1.2 Deteriorated Rungs . . . . . . . . . . . . . . . . . . . . . . . . . . . . . . . . . . . . . . . . . . . . C-1<br />
C.1.3 Traffic . . . . . . . . . . . . . . . . . . . . . . . . . . . . . . . . . . . . . . . . . . . . . . . . . . . . . . . C-1<br />
C.1.4 Falling Objects . . . . . . . . . . . . . . . . . . . . . . . . . . . . . . . . . . . . . . . . . . . . . . . C-1<br />
C.1.5 Sharp Edges . . . . . . . . . . . . . . . . . . . . . . . . . . . . . . . . . . . . . . . . . . . . . . . . . . C-2<br />
C.1.6 Lifting Injuries . . . . . . . . . . . . . . . . . . . . . . . . . . . . . . . . . . . . . . . . . . . . . . . C-2<br />
C.2 Planning . . . . . . . . . . . . . . . . . . . . . . . . . . . . . . . . . . . . . . . . . . . . . . . . . . . . . . . . . . C-2<br />
C.3 Adverse Atmospheres . . . . . . . . . . . . . . . . . . . . . . . . . . . . . . . . . . . . . . . . . . . . . . . . C-2<br />
C.4 Entering Manholes . . . . . . . . . . . . . . . . . . . . . . . . . . . . . . . . . . . . . . . . . . . . . . . . . . C-2<br />
C.4.1 Traffic Protection . . . . . . . . . . . . . . . . . . . . . . . . . . . . . . . . . . . . . . . . . . . . . . C-3<br />
C.4.2 Removing the Covers . . . . . . . . . . . . . . . . . . . . . . . . . . . . . . . . . . . . . . . . . . C-3<br />
C.4.3 Other Precautions . . . . . . . . . . . . . . . . . . . . . . . . . . . . . . . . . . . . . . . . . . . . . C-3<br />
C.4.4 Emergencies . . . . . . . . . . . . . . . . . . . . . . . . . . . . . . . . . . . . . . . . . . . . . . . . . C-3<br />
C.4.5 Field Equipment . . . . . . . . . . . . . . . . . . . . . . . . . . . . . . . . . . . . . . . . . . . . . . C-3<br />
C.4.6 Lethal Atmospheres in Sewers . . . . . . . . . . . . . . . . . . . . . . . . . . . . . . . . . . . C-4<br />
Appendix D Replacement Parts<br />
Appendix E Accessories List<br />
E.1 Order Information . . . . . . . . . . . . . . . . . . . . . . . . . . . . . . . . . . . . . . . . . . . . . . . . . . E-1<br />
E.2 <strong>Sampler</strong>s . . . . . . . . . . . . . . . . . . . . . . . . . . . . . . . . . . . . . . . . . . . . . . . . . . . . . . . . . . E-1<br />
E.3 Bottle Kits . . . . . . . . . . . . . . . . . . . . . . . . . . . . . . . . . . . . . . . . . . . . . . . . . . . . . . . . . E-1<br />
E.4 Bottle Racks, Retaining Rings, Discharge Tubes, Distributor Arm . . . . . . . . . . . E-2<br />
E.5 Bulk Sets of Bottles with Lids . . . . . . . . . . . . . . . . . . . . . . . . . . . . . . . . . . . . . . . . . E-2<br />
E.6 Pump Tubes, Suction Line, Strainers . . . . . . . . . . . . . . . . . . . . . . . . . . . . . . . . . . . E-3<br />
E.7 Data Collection Devices and Cables . . . . . . . . . . . . . . . . . . . . . . . . . . . . . . . . . . . . E-3<br />
E.8 12-Volt Power Sources . . . . . . . . . . . . . . . . . . . . . . . . . . . . . . . . . . . . . . . . . . . . . . . E-3<br />
E.9 Modules, Rain Gauges, & Interfacing Instruments . . . . . . . . . . . . . . . . . . . . . . . . E-4<br />
E.10 SDI-12 Data Acquisition Connect Cables . . . . . . . . . . . . . . . . . . . . . . . . . . . . . . . E-4<br />
List of Illustrations<br />
2-1 Mounting the Controller . . . . . . . . . . . . . . . . . . . . . . . . . . . . . . . . . . . . . . . . . . . . . 2-2<br />
2-2 Installing the Bottle Racks . . . . . . . . . . . . . . . . . . . . . . . . . . . . . . . . . . . . . . . . . . . 2-4<br />
2-3 Installing the 24-bottle, 12-bottle, and 8-bottle Kits . . . . . . . . . . . . . . . . . . . . . . . 2-5<br />
2-4 Installing the 2-bottle Kit . . . . . . . . . . . . . . . . . . . . . . . . . . . . . . . . . . . . . . . . . . . . 2-5<br />
2-5 Identifying the <strong>Sampler</strong> Components . . . . . . . . . . . . . . . . . . . . . . . . . . . . . . . . . . . 2-9<br />
3-1 Menu Tree for Standard Programming . . . . . . . . . . . . . . . . . . . . . . . . . . . . . . . . . 3-10<br />
4-1 Sample Distribution . . . . . . . . . . . . . . . . . . . . . . . . . . . . . . . . . . . . . . . . . . . . . . . . . 4-7<br />
4-2 Start Time Diagram . . . . . . . . . . . . . . . . . . . . . . . . . . . . . . . . . . . . . . . . . . . . . . . . . 4-9<br />
4-3 Running a Program . . . . . . . . . . . . . . . . . . . . . . . . . . . . . . . . . . . . . . . . . . . . . . . . 4-10<br />
4-4 Taking a grab sample . . . . . . . . . . . . . . . . . . . . . . . . . . . . . . . . . . . . . . . . . . . . . . 4-14<br />
4-5 Report: Program Settings . . . . . . . . . . . . . . . . . . . . . . . . . . . . . . . . . . . . . . . . . . . 4-21<br />
4-6 Report: Sampling Results . . . . . . . . . . . . . . . . . . . . . . . . . . . . . . . . . . . . . . . . . . . 4-22<br />
4-7 Report: Combined Results . . . . . . . . . . . . . . . . . . . . . . . . . . . . . . . . . . . . . . . . . . . 4-23<br />
4-8 Report: Combined Results (continued) . . . . . . . . . . . . . . . . . . . . . . . . . . . . . . . . . 4-24<br />
4-9 Report: Summary . . . . . . . . . . . . . . . . . . . . . . . . . . . . . . . . . . . . . . . . . . . . . . . . . . 4-25<br />
5-1 Sample Distribution . . . . . . . . . . . . . . . . . . . . . . . . . . . . . . . . . . . . . . . . . . . . . . . . 5-18<br />
5-2 Start Time Diagram for <strong>Sampler</strong> Enable Settings . . . . . . . . . . . . . . . . . . . . . . . . 5-19<br />
5-3 Event Mark Timing Diagram . . . . . . . . . . . . . . . . . . . . . . . . . . . . . . . . . . . . . . . . 5-27<br />
6-1 SDI-12 Sonde Parameters . . . . . . . . . . . . . . . . . . . . . . . . . . . . . . . . . . . . . . . . . . . . 6-2<br />
7-1 Removing and Replacing the Pump Tube . . . . . . . . . . . . . . . . . . . . . . . . . . . . . . . . 7-9<br />
7-2 Placing the Pump Tube in the Liquid Detector . . . . . . . . . . . . . . . . . . . . . . . . . . 7-10<br />
v
6712 Portable <strong>Sampler</strong><br />
Table of Contents<br />
vi<br />
7-3 Opening the Controller . . . . . . . . . . . . . . . . . . . . . . . . . . . . . . . . . . . . . . . . . . . . . 7-12<br />
7-4 Main Circuit Board Connections . . . . . . . . . . . . . . . . . . . . . . . . . . . . . . . . . . . . . . 7-12<br />
7-5 Rear View of the <strong>6712FR</strong> . . . . . . . . . . . . . . . . . . . . . . . . . . . . . . . . . . . . . . . . . . . . 7-15<br />
7-6 Thermostat Logic Circuit Board . . . . . . . . . . . . . . . . . . . . . . . . . . . . . . . . . . . . . 7-16<br />
7-7 Control Box Wiring . . . . . . . . . . . . . . . . . . . . . . . . . . . . . . . . . . . . . . . . . . . . . . . . 7-16<br />
7-8 Control Box Connections . . . . . . . . . . . . . . . . . . . . . . . . . . . . . . . . . . . . . . . . . . . 7-16<br />
7-9 Refrigeration System Schematic . . . . . . . . . . . . . . . . . . . . . . . . . . . . . . . . . . . . . . 7-18<br />
8-1 Password Protected Functions . . . . . . . . . . . . . . . . . . . . . . . . . . . . . . . . . . . . . . . . 8-2<br />
A-1 6712 Menu Tree for Standard Programming . . . . . . . . . . . . . . . . . . . . . . . . . . . . . A-1<br />
A-2 Standard Programming: Programming Screens . . . . . . . . . . . . . . . . . . . . . . . . . . A-2<br />
A-3 Standard and Extended Programming: Start Times . . . . . . . . . . . . . . . . . . . . . . . A-3<br />
A-4 Standard Programming: Quick View; Programming Screens . . . . . . . . . . . . . . . . A-4<br />
A-5 Standard Programming: Quick View; Start Times . . . . . . . . . . . . . . . . . . . . . . . . A-5<br />
A-6 View Report . . . . . . . . . . . . . . . . . . . . . . . . . . . . . . . . . . . . . . . . . . . . . . . . . . . . . . . A-6<br />
A-7 Maintenance Screens . . . . . . . . . . . . . . . . . . . . . . . . . . . . . . . . . . . . . . . . . . . . . . . . A-7<br />
A-8 Manual Functions Screens . . . . . . . . . . . . . . . . . . . . . . . . . . . . . . . . . . . . . . . . . . . A-8<br />
A-9 Extended Programming: Programming Screens . . . . . . . . . . . . . . . . . . . . . . . . . . A-9<br />
A-10 Extended Programming: Equipment Setup . . . . . . . . . . . . . . . . . . . . . . . . . . . . A-10<br />
A-11 Extended Programming: Pacing and Distribution . . . . . . . . . . . . . . . . . . . . . . A-11<br />
A-12 Extended Programming: Event Conditions . . . . . . . . . . . . . . . . . . . . . . . . . . . . A-12<br />
A-13 Extended Programming: Programmed <strong>Sampler</strong> Enable . . . . . . . . . . . . . . . . . . A-13<br />
A-14 Extended Programming: Quick View; Programming Screens . . . . . . . . . . . . . A-14<br />
A-15 Extended Programming: Quick View; Equipment Set-Up . . . . . . . . . . . . . . . . A-15<br />
A-16 Extended Programming: Quick View; Pacing and Distribution . . . . . . . . . . . . A-16<br />
A-17 Extended Programming: Quick View; Programmed <strong>Sampler</strong> Enable . . . . . . . A-17<br />
A-18 Extended Programming: Normal View; Software Options . . . . . . . . . . . . . . . . A-18<br />
A-19 Extended Programming: QuickView; Software Options . . . . . . . . . . . . . . . . . . A-19<br />
A-20 Extended Programming: Normal View; Hardware . . . . . . . . . . . . . . . . . . . . . . A-20<br />
A-21 Extended Programming: Quick View; Hardware . . . . . . . . . . . . . . . . . . . . . . . A-21<br />
A-22 Analog Output and Dialout Screens . . . . . . . . . . . . . . . . . . . . . . . . . . . . . . . . . . A-22<br />
A-23 Analog Output and Dialout Quick View Screens . . . . . . . . . . . . . . . . . . . . . . . . A-22<br />
A-24 SDI-12 Sonde Screens . . . . . . . . . . . . . . . . . . . . . . . . . . . . . . . . . . . . . . . . . . . . . A-23<br />
List of Tables<br />
1-1 <strong>6712FR</strong> <strong>Sampler</strong> Features . . . . . . . . . . . . . . . . . . . . . . . . . . . . . . . . . . . . . . . . . . . . 1-3<br />
1-2 <strong>6712FR</strong> <strong>Sampler</strong> Construction Materials . . . . . . . . . . . . . . . . . . . . . . . . . . . . . . . . 1-7<br />
1-3 Technical Specifications for the <strong>6712FR</strong> <strong>Refrigerated</strong> <strong>Sampler</strong> . . . . . . . . . . . . . . 1-8<br />
1-4 Connector Specifications . . . . . . . . . . . . . . . . . . . . . . . . . . . . . . . . . . . . . . . . . . . . 1-14<br />
2-1 Distributor Arm Positions and Discharge Tube Lengths for Bottle Kits . . . . . . . 2-3<br />
2-2 Selecting the Right Strainer . . . . . . . . . . . . . . . . . . . . . . . . . . . . . . . . . . . . . . . . . . 2-8<br />
2-3 Connecting Isco Instruments to the <strong>Sampler</strong> . . . . . . . . . . . . . . . . . . . . . . . . . . . . 2-12<br />
3-1 About the Keypad . . . . . . . . . . . . . . . . . . . . . . . . . . . . . . . . . . . . . . . . . . . . . . . . . . . 3-2<br />
4-1 Standard Program: Sample Every 15 Minutes, One Sample Per Bottle . . . . . . . 4-2<br />
4-2 Standard Program: Flow-Paced Sampling, Two Bottles Per Sample . . . . . . . . . . 4-3<br />
4-3 Reports: Program Events, Source Codes, and Error Codes . . . . . . . . . . . . . . . . . 4-19<br />
4-4 Programming Example With 730 Module Installed . . . . . . . . . . . . . . . . . . . . . . . 4-27<br />
4-5 Programming Example With 750 Module Installed . . . . . . . . . . . . . . . . . . . . . . . 4-29<br />
5-1 Selecting a Stored Extended Program . . . . . . . . . . . . . . . . . . . . . . . . . . . . . . . . . . 5-3<br />
5-2 Storm Water Runoff Sampling . . . . . . . . . . . . . . . . . . . . . . . . . . . . . . . . . . . . . . . . 5-6<br />
5-3 Event Paced Sampling . . . . . . . . . . . . . . . . . . . . . . . . . . . . . . . . . . . . . . . . . . . . . . 5-13<br />
5-4 <strong>Sampler</strong> Enable . . . . . . . . . . . . . . . . . . . . . . . . . . . . . . . . . . . . . . . . . . . . . . . . . . . 5-20<br />
5-5 Serial Data Codes . . . . . . . . . . . . . . . . . . . . . . . . . . . . . . . . . . . . . . . . . . . . . . . . . . 5-28<br />
7-1 Setting the Clock and Calendar . . . . . . . . . . . . . . . . . . . . . . . . . . . . . . . . . . . . . . . 7-4<br />
7-2 Resetting the Pump Counter . . . . . . . . . . . . . . . . . . . . . . . . . . . . . . . . . . . . . . . . . . 7-5<br />
7-3 Checking and Replacing the Internal Battery . . . . . . . . . . . . . . . . . . . . . . . . . . . . 7-6<br />
8-1 6712 Remote Commands . . . . . . . . . . . . . . . . . . . . . . . . . . . . . . . . . . . . . . . . . . . . . 8-3<br />
C-1 Hazardous Gases . . . . . . . . . . . . . . . . . . . . . . . . . . . . . . . . . . . . . . . . . . . . . . . . . . . C-6
6712 Portable <strong>Sampler</strong><br />
Table of Contents<br />
vii
6712 Portable <strong>Sampler</strong><br />
Table of Contents<br />
viii
6712 Controller<br />
<strong>6712FR</strong> <strong>Refrigerated</strong> <strong>Sampler</strong><br />
Section 1 Introduction<br />
The <strong>6712FR</strong> <strong>Refrigerated</strong> <strong>Sampler</strong> is an integral part of Isco’s<br />
comprehensive sampling system. The system includes the<br />
<strong>6712FR</strong> and 6712SR <strong>Refrigerated</strong> <strong>Sampler</strong>s, the 6712 Compact<br />
<strong>Sampler</strong>, and the 6712 Standard <strong>Sampler</strong>.<br />
The <strong>6712FR</strong> is ideally suited for permanent installation in a wide<br />
variety of indoor and outdoor environments. Constructed from<br />
durable, corrosion resistant materials, the <strong>6712FR</strong> withstands<br />
the hostile environments of industrial and municipal monitoring<br />
sites. However, do not install in locations where the refrigerator’s<br />
lower compartment could become submerged.<br />
The <strong>6712FR</strong> accepts a variety of sequential and composite bottle<br />
kits. Like all samplers in the 6712 series, it is compatible with a<br />
variety of Isco instruments.<br />
1.1 About This Manual This manual contains the information you will need to install,<br />
program, operate, and maintain a <strong>6712FR</strong> refrigerated sampler.<br />
There are eight sections and five appendices:<br />
Section 1, Introduction lists the features and specifications<br />
of the <strong>6712FR</strong> refrigerated sampler.<br />
Section 2, Installation/Preparation steps you through<br />
installing the sampler and preparing it for use.<br />
Section 3, Getting Started describes features that are common<br />
to both standard and extended programming modes.<br />
Section 4, Standard Programming shows how to program<br />
your sampler using standard programming mode.<br />
Section 5, Extended Programming shows how to program<br />
your sampler using extended programming mode.<br />
Section 6, SDI-12 Sondes provides information on setting<br />
up sondes to work with the <strong>6712FR</strong>.<br />
Section 7, Maintenance covers the basic maintenance<br />
required to keep your sampler in top operating condition.<br />
Section 8, Software Options explains specialized software<br />
features that can be enabled for use.<br />
The appendices are:<br />
• Appendix A, Menu Flowcharts<br />
Appendix B, Material Safety Data Sheets<br />
Appendix C, General Safety Procedures<br />
Appendix D, Replacement Parts<br />
Appendix E, Accessories List<br />
1-1
<strong>6712FR</strong> <strong>Refrigerated</strong> <strong>Sampler</strong><br />
Section 1 Introduction<br />
1-2<br />
1.2 About 700 Series<br />
Modules<br />
The bay on the controller’s side accepts any of Isco’s 700 Series<br />
Modules. The 700 Series includes:<br />
701 pH Parameter Module for monitoring pH and temperature.<br />
710 Ultrasonic Module for monitoring a flow stream’s<br />
level and flow rate with an ultrasonic level sensor.<br />
720 Submerged Probe Module for monitoring a flow<br />
stream’s level and flow rate with a submerged probe.<br />
730 Bubbler Flow Module for monitoring a flow stream’s<br />
level and flow rate with a bubbler system.<br />
750 Area Velocity Module for monitoring a flow stream’s<br />
level, velocity, and flow rate.<br />
780 4-20mA Input Module for interfacing to non-Isco<br />
devices with 4 to 20 milliampere output signals.<br />
The modules are optional accessories, and are not required for<br />
operation. However, the modules offer a number of advantages:<br />
they are an economical way to combine flow-rate or parameter<br />
monitoring with sampling, and you can program the samplers<br />
and modules as a single unit. Finally, the samplers store the<br />
readings in memory.<br />
1.3 SDI-12 Sondes As an option, the sampler accepts up to 16 parameters from up to<br />
ten sensors with SDI-12 addresses from 0 - 9 (refer to SDI-12<br />
Sonde Readings, page 1-10, for specific parameters).<br />
1.4 Memory to Store<br />
Monitoring Data<br />
The data parameters used by the sensing device (sonde) and<br />
recording device (sampler) must match. Certain vendors’ sondes<br />
have enhanced commands that facilitate “plug and play” setup.<br />
These Isco Ready sondes can tell the <strong>6712FR</strong> what values they<br />
have, their order, and units of measure. Other sondes can be<br />
used, but require manual setup to identify proper data types for<br />
each data value reported.<br />
The samplers contain enough memory to store five sampling programs,<br />
sampling data, Isco 700 Series Module readings, and<br />
SDI-12 parameter readings. You can view the readings on your<br />
sampler’s display.<br />
You can also retrieve the readings and reports so the information<br />
can be processed on a personal computer. Readings and reports<br />
may be collected with a computer running Isco’s Flowlink software.<br />
Flowlink can download the information through a direct<br />
connection, a modem connection (when the sampler is equipped<br />
with the optional dial-out modem), or from a 581 Rapid Transfer<br />
Device (RTD). The RTD is a quick and simple way to transfer the<br />
data from the field to your computer. Reports are easily collected<br />
with Isco’s Samplink software.<br />
1.5 Pump Requirements The pump also requires a pump tube made specifically for the<br />
6712 and 6700 Series samplers. These pump tubes are easily recognized<br />
by their blue alignment collars. The 6712 pump tubing is<br />
the same as that for Isco’s 6700 Series samplers, but different
<strong>6712FR</strong> <strong>Refrigerated</strong> <strong>Sampler</strong><br />
Section 1 Introduction<br />
from Isco’s earlier model samplers, such as the 3700 Series.<br />
Other types of pump tubing will not work in the <strong>6712FR</strong>.<br />
Refer to Replacing the Pump Tube on page 7-8.<br />
Table 1-1 <strong>6712FR</strong> <strong>Sampler</strong> Features<br />
GENERAL FEATURES<br />
Top Cover Protects pump, power source, and controller.<br />
Lockable latches.<br />
Controller Only<br />
(does not include<br />
refrigerator)<br />
Contains a rechargeable desiccant to prevent moisture damage to the<br />
electronics, pump, and distributor systems.<br />
Control panel sloped 15 degrees for easy reading.<br />
Keys labeled with large, vivid icons.<br />
80-character display (4 lines by 20 columns).<br />
Display has selectable backlight:<br />
Always on or always off.<br />
Timed, switching off when keypad is inactive for 60 seconds.<br />
Memory for program and data storage.<br />
Flash memory for easy software upgrades.<br />
NEMA 4X and 6 (IP67) ratings.<br />
Refrigerator The <strong>6712FR</strong> requires 120 volts AC, 60 Hz, or optional 230 volts Ac, 50 Hz. A<br />
built-in 12 volt DC power converter powers the controller.<br />
The power supply and solid state thermostat are sealed inside the<br />
refrigerator’s base. However, electrical connections for the fan and<br />
compressor are not sealed.<br />
A forced air condensing coil and front ventilation let you place the unit close<br />
to a wall or in a corner.<br />
The oversized wrap-around evaporator plate cools the sampling<br />
compartment quickly and efficiently. Heaters on the plate let the sampler<br />
continue to operate in cold temperatures. The evaporator plate is<br />
self-defrosting.<br />
Food-grade ABS plastic interior will not support bacterial growth or leach<br />
plasticizers into the sample.<br />
Adjustable<br />
Distributor Arm<br />
Discharge Tube and Support<br />
Spring<br />
Composite Tube Guide for<br />
Composite Sampling<br />
Compatible<br />
Isco Products<br />
A single distributor arm adjusts quickly to fit all bottle kits. Easily removed<br />
for composite sampling.<br />
Routes sample liquid from pump tube, through distributor arm to sample bottle.<br />
Keeps discharge tube in place over composite bottles.<br />
581 Rapid Transfer Device 1640 Liquid Level Actuator<br />
674 Rain Gauge 3200 Series Flow Meters<br />
700 Series Modules 4100 Series Flow Loggers<br />
SDI-12 Sondes 4200 Series Flow Meters<br />
Refrigerator Temperature Sensor Flowlink 4, Samplink<br />
1-3
<strong>6712FR</strong> <strong>Refrigerated</strong> <strong>Sampler</strong><br />
Section 1 Introduction<br />
Real-Time Displays As the sampler runs a sampling program, it displays the program’s status.<br />
The status display may include such information as the time of the next<br />
sample, the number of the next bottle, or whether the sampler is disabled or<br />
stopped. If the sampler encounters an error while running the program, it<br />
displays a message alerting you to the problem.<br />
Programming for Modules Program the modules from the sampler’s control panel. The module’s<br />
program settings become part of the sampling program.<br />
Setup for SDI-12 Sondes Calibrate and program SDI-12 sondes from the sampler’s control panel. The<br />
program settings become part of the sampling program. See Section 6.<br />
Memory for Stored Programs<br />
and Readings<br />
1-4<br />
Table 1-1 <strong>6712FR</strong> <strong>Sampler</strong> Features (Continued)<br />
512 kilobytes of battery-backed RAM (Random Access Memory), to store:<br />
Five sampling programs.<br />
A sampling report from the most recently run program. It records as many as<br />
1000 sampling events; events can be the program start time, enable time,<br />
sample event information, etc.<br />
700 Series module readings. The readings can be: level, flow rate, velocity, pH,<br />
temperature, or the data collected by the 4-20 mA module.<br />
Rain gauge and refrigerator temperature readings.<br />
SDI-12 sonde readings.<br />
Five Reports Available The Program Settings report, listing current program settings.<br />
The Sampling Results report, listing the events occurring during the program.<br />
The Combined Results report, combining sampling events with readings from a<br />
rain gauge, module, or SDI -12 sonde.<br />
The Module Summary report, summarizing flow rate or parameter readings.<br />
The Rainfall Summary report, listing a summary of rainfall readings.<br />
Serial Data Output ASCII data output from the interrogator port.<br />
Units of Measure A variety of metric and English units of measure for length, flow rate, flow<br />
volume, and temperature.<br />
External <strong>Sampler</strong> Enable Isco flow meters and flow loggers have a programmable sampler enable<br />
feature that lets them send an electronic signal to a <strong>6712FR</strong> that enables<br />
(starts) or disables (stops) a running sampling program.<br />
Dual <strong>Sampler</strong> Mode Dual <strong>Sampler</strong> Mode operates two samplers.<br />
Command Driven Operation Operate sampler functions using RS-232 communications.<br />
Warning Messages Pump Tube Warning. The <strong>6712FR</strong> displays a warning to inspect the tube.<br />
Internal Battery Warning. The <strong>6712FR</strong> displays a warning when it is time to<br />
replace the internal battery. The internal battery preserves stored data when<br />
the <strong>6712FR</strong> is without external power.<br />
Optional Dialout Modem The 6712 controller can be ordered with a factory-installed 2400 baud dialout<br />
modem. With the modem you can:<br />
connect to the sampler and download data using Flowlink software.<br />
program the sampler to call a contact list when an “alarm” condition exists.<br />
use the optional Remote Commands to control the sampler’s operation from a<br />
remote location. See Section 8.<br />
On-Line Help Notes When programming the sampler, press the [?] (Help) key for a brief help note.<br />
All help topics appear in the index.
<strong>6712FR</strong> <strong>Refrigerated</strong> <strong>Sampler</strong><br />
Section 1 Introduction<br />
Two Programming Levels Standard programming lets you set up typical sampling programs quickly.<br />
Extended programming includes all features available in standard<br />
programming plus additional features.<br />
SAMPLE DELIVERY SYSTEM FEATURES<br />
Peristaltic Pump Benefits: Liquid moves continuously under pumped flow. The pump has no<br />
metering chambers or gravity fed internal tubing to trap sediment or residual<br />
liquid. Sample liquid contacts only the strainer, suction line, tube coupling,<br />
pump tube, bulkhead fitting, and sample bottles.<br />
LD90 Liquid Detector Non wetted Detection: Sample liquid never touches the detector.<br />
Two Line Purges in Sampling<br />
Cycle<br />
The sampling cycle always includes a pre-sample purge and post-sample<br />
purge that clears the suction line of residual liquid.<br />
Easy Grab Samples Simply disconnect the pump tube from the bulkhead fitting on the center<br />
section, and place the pump tube over your sample container.<br />
Vinyl and Teflon ®<br />
Suction Lines<br />
3 /8-inch ID (Inside Diameter) vinyl line.<br />
3 /8-inch ID Teflon ® lined with polyethylene jacket.<br />
STANDARD PROGRAMMING FEATURES<br />
Pacing Uniform Time Pacing: Sampling at regular time intervals.<br />
Flow Pacing: Sampling at regular flow-volume intervals.<br />
Distribution Methods Composite: Samples deposited in a single large bottle.<br />
Sequential: Only one sample placed in each bottle.<br />
Samples Per Bottle: Multiple samples placed in each bottle.<br />
Bottles Per Sample: One sample deposited in multiple bottles.<br />
Three Flexible<br />
Start-Time Settings<br />
Option for a Continuous<br />
Running Program<br />
Table 1-1 <strong>6712FR</strong> <strong>Sampler</strong> Features (Continued)<br />
Start Immediately: Starts the sampling program immediately.<br />
Delayed Start: Starts the sampling program after a user-definable delay<br />
of 1 to 999 minutes.<br />
Clock Time: Starts the sampling program at a user-definable time on one<br />
or more days of the week.<br />
Continuous Sampling: When sample bottles are regularly replaced, the<br />
sample distribution can restart with the first bottle set after the last bottle<br />
set is filled, without interrupting the running program.<br />
EXTENDED PROGRAMMING FEATURES<br />
Pacing Uniform Time Pacing: Sampling at regular time intervals.<br />
Nonuniform Time Pacing: Sampling at irregular time intervals.<br />
Random Interval Pacing: Sampling at unique random time intervals<br />
generated by the controller.<br />
Flow Pacing: Sampling at regular flow-volume intervals.<br />
Event Pacing: Sampling each time a user-definable event occurs.<br />
1-5
<strong>6712FR</strong> <strong>Refrigerated</strong> <strong>Sampler</strong><br />
Section 1 Introduction<br />
Flow Proportional<br />
Sample Volumes<br />
1-6<br />
Allows for sample sizes to be based on flow. (This option is available only with<br />
uniform time pacing.)<br />
Distribution Methods Composite: Samples deposited in a single large bottle.<br />
Sequential: Only one sample placed in each bottle.<br />
Samples Per Bottle: Multiple samples placed in each bottle<br />
Bottles Per Sample: One sample deposited in multiple bottles<br />
Multiple Bottle Compositing: A combination of samples per bottle and<br />
bottles per sample distribution methods.<br />
Time Switched Bottles or Bottle sets: Control the sample distribution<br />
using clock times.<br />
Programmable <strong>Sampler</strong><br />
Enable<br />
A <strong>6712FR</strong> sampler can be programmed to enable or disable a running<br />
sampling program when readings received from a connected rain gauge,<br />
module, or SDI-12 Sonde meet certain conditions.<br />
Pauses and Resumes Create intermittent sampling schedules.<br />
Two-Part Programming Two-part programming lets you set up a sampling program that divides the<br />
bottles into two groups, filling each group according to separate pacing,<br />
distribution, sampler enable, and pause and resume settings. This is ideal for<br />
storm-water run-off sampling.<br />
Auto Suction Head or Fixed<br />
Suction Head<br />
The suction head, is the vertical distance from the flow stream to the liquid<br />
detector. Extended programming has two settings.<br />
Auto-Suction Head: The head is automatically determined.<br />
Fixed Suction Head: A user-definable measurement for the head.<br />
Suction Line Rinses Program setting for the number of times (0 to 3) that the 6712 rinses the<br />
suction line before drawing a sample.<br />
Sampling Retries Program setting for the number of times (0 to 3) that the 6712 attempts to<br />
sample if it fails to deliver the entire sample volume.<br />
Three Flexible<br />
Start Time Settings<br />
Option for a Continuous<br />
Running Program<br />
Table 1-1 <strong>6712FR</strong> <strong>Sampler</strong> Features (Continued)<br />
Run Immediately: Starts the sampling program immediately.<br />
Delayed Start: Starts the sampling program after a user-definable delay<br />
of 1 to 999 minutes.<br />
Clock Time: Starts the sampling program at a user-definable time on one<br />
or more days of the week.<br />
Continuous Sampling: When sample bottles are regularly replaced, the<br />
sample distribution can restart with the first bottle set after the last bottle<br />
set is filled, without interrupting the running program.
Table 1-2 <strong>6712FR</strong> <strong>Sampler</strong> Construction Materials<br />
ITEM MATERIAL<br />
Top Cover and<br />
Refrigerator Body<br />
<strong>6712FR</strong> <strong>Refrigerated</strong> <strong>Sampler</strong><br />
Section 1 Introduction<br />
Fiberglass reinforced plastic with ultraviolet-resistant gel coat.<br />
Plastic Retaining Rings ABS (Acrylonitrile Butadiene Styrene) plastic<br />
Controller Case<br />
Distributor Arm<br />
Distributor Arm Nut<br />
Pump Rollers<br />
Control Panel<br />
Connector Labels<br />
Distributor Shaft<br />
Pump Shaft<br />
Pump Paddles<br />
Pump Band<br />
Bulkhead Fitting<br />
Latches<br />
Metal Retaining Rings<br />
Refrigeration Tubing<br />
Protection<br />
Noryl ®<br />
Delrin ®<br />
Polyester<br />
Stainless steel<br />
Protected with polyester tubing or phenolic resin.<br />
Condenser Protection Powder coated with polyester.<br />
Evaporator Protection Powder coated with food-grade epoxy.<br />
Refrigerant R134a (1,1,1,2-tetrafluoroethane CH2FCF3)<br />
Insulation Polyurethane<br />
Amphenol Connectors Cadmium Plated Aluminum<br />
1-7
<strong>6712FR</strong> <strong>Refrigerated</strong> <strong>Sampler</strong><br />
Section 1 Introduction<br />
1-8<br />
Table 1-3 Technical Specifications for the <strong>6712FR</strong> <strong>Refrigerated</strong> <strong>Sampler</strong><br />
General Notes:<br />
1. All weights may vary ±1 lb (± 1 /2 kg).<br />
2. All dimensions may vary ± 1 /4 inch (±0.64 cm).<br />
3. Sample delivery specifications valid for the following conditions and ranges, unless otherwise stated: 75°F (24°C)<br />
ambient, sample liquid–tap water at 50 to 80°F (10 to 27°C), sample volumes from 50 ml to 1000 ml, suction line<br />
lengths of 25 ft (7.6 m) or less, suction heads from 1 to 20 ft (0.3 to 6.1 m), atmospheric pressure between 29.92 and<br />
31.89 inHg (760 and 810 mmHg), and a power source of an Isco High Capacity Power Pack at 12.5 volts DC no load<br />
output.<br />
6712 CONTROLLER, PUMP, AND TUBING: MECHANICAL SPECIFICATIONS<br />
Weight of Controller: Controller only: 13.0 lbs (5.9 kg)<br />
With pump tube: 13.2 lbs (6.0 kg)<br />
Weight of Nickel Cadmium<br />
Battery:<br />
4.3 lbs (2.0 kg)<br />
Weight of Lead Acid Battery: 5.7 lbs (2.6 kg)<br />
Weight of Power Pack: 6.0 lbs (2.7 kg)<br />
Weight of Battery Backed<br />
Power Pack:<br />
6.6 lbs (3.0 kg)<br />
Controller Dimensions: Length: 10.3 in (26.0 cm)<br />
Width: 12.5 in (31.7 cm)<br />
Height: 10 in (25.4 cm)<br />
Temperature Ranges: Operational: -20°F to 120°F (-29°C to 49°C)<br />
Storage: 0°F to 140°F (-18°C to 60°C)<br />
Maximum Altitude: 2,000 Meters<br />
Installation Category: II<br />
Pollution Degree: 2<br />
Humidity: 95% RH Maximum<br />
Enclosure: NEMA 4X and 6 Pump: IP17 Enclosure: IP67<br />
Typical Delivered<br />
Volume Accuracy:<br />
(The ability to deliver the programmed sample volume.)<br />
±10 ml or ±10% of programmed value, whichever is greater.<br />
Typical Repeatability: (The ability to repeat the delivered volume for a set of samples collected<br />
under the same conditions.)<br />
±5 ml or ±5% of the average of the maximum and minimum sample volume<br />
in a sample set, whichever is greater, at lifts up to 25 feet.<br />
Typical Pump Flow Rate and<br />
Line Transport Velocity:<br />
Suction Head Flow Rate Line Transport Velocity<br />
3 feet 3.9 liters per minute 3.0 ft/s (0.91 m/s)<br />
5 feet 3.9 liters per minute 3.0 ft/s (0.90 m/s)<br />
10 feet 3.7 liters per minute 2.9 ft/s (0.87 m/s)<br />
15 feet 3.6 liters per minute 2.7 ft/s (0.83 m/s)<br />
20 feet 3.3 liters per minute 2.5 ft/s (0.77 m/s)<br />
23 feet 3.1 liters per minute 2.3 ft/s (0.71 m/s)<br />
25 feet 2.8 liters per minute 2.2 ft/s (0.66 m/s)<br />
Maximum Suction Head: (The maximum suction head is the vertical height at which a sample can be taken.)<br />
28 ft (8.5 m) at 30 inHg (762 mmHg)
<strong>6712FR</strong> <strong>Refrigerated</strong> <strong>Sampler</strong><br />
Section 1 Introduction<br />
Table 1-3 Technical Specifications for the <strong>6712FR</strong> <strong>Refrigerated</strong> <strong>Sampler</strong> (Continued)<br />
Pump Tube Life: Tube life may vary depending on the abrasiveness of the sample liquid.<br />
Recommended maximum 1,000,000 pump counts. This equates to 912<br />
standard samples. A standard sample is 200 ml at 5 ft (1.5 m) suction head<br />
using a 10 ft (3 m) vinyl suction line.<br />
6712 CONTROLLER: ELECTRICAL SPECIFICATIONS<br />
Controller Internal Battery: 5 years minimum (maintains internal logic, program settings & stored data)<br />
Real Time Clock Accuracy: 1 minute per month<br />
Program Memory: Nonvolatile programmable Flash.<br />
Can be field updated via interrogator connector.<br />
<strong>Sampler</strong> Power Requirements: Nominal: 12 volts DC supplied by the refrigerator<br />
Operational: 11 to 13 Volts DC<br />
Absolute Maximum: 14.4 Volts DC<br />
Power Pack Requirements: 120VAC ±12VAC, 60 Hz., 1.0 Amp.<br />
Use only Isco-made power packs<br />
certified by UL. (P/N 60-1684-088) Note: This is the only version certified by UL. The line cord (mains<br />
connect cable) is the “Disconnect Device.”<br />
<strong>Sampler</strong> Standby Current at 12 volts DC:<br />
<strong>Sampler</strong> Only: 11 mA average<br />
<strong>Sampler</strong> with pH Module: 26 mA average<br />
<strong>Sampler</strong> with Ultrasonic Module: 35 mA average<br />
<strong>Sampler</strong> with Submerged Probe Module: 27 mA average<br />
<strong>Sampler</strong> with Bubbler Module: 49 mA average<br />
<strong>Sampler</strong> with Area Velocity Module: 171 mA average<br />
<strong>Sampler</strong> with 4-20 mA Module: 17 mA average<br />
(This is without backlight. Add 220 ±20 mA when backlight is on.)<br />
<strong>Sampler</strong> Only<br />
Operating Current:<br />
Approximately 30 mA based on 200 ml sample every hour, 10 ft (3 m) suction<br />
line, and 5 ft (1.5 m) suction head.<br />
Isco External Battery Capacity: Number of Complete Standard Sampling Routines<br />
Nickel-Cadmium Battery Lead-Acid Battery<br />
<strong>Sampler</strong> Only: 7 9<br />
<strong>Sampler</strong> with pH Module: 6 9<br />
<strong>Sampler</strong> with Ultrasonic Module: 6 9<br />
<strong>Sampler</strong> with Submerged Probe Module: 6 9<br />
<strong>Sampler</strong> with Bubbler Module: 3 5<br />
<strong>Sampler</strong> with Area Velocity Module: 5 6<br />
<strong>Sampler</strong> with 4-20 mA Module: 6 9<br />
A Standard Sampling Routine is a 200 ml sample taken every hour in 24 bottle mode, with a 10 foot (3 m) vinyl<br />
suction line at 5 feet (1.5 m) of head. The module is set to take a reading every 10 minutes.<br />
Flow Meter<br />
Signal Requirement:<br />
5 to 15 volt DC pulse or isolated contact closure of at least 25 millisecond<br />
duration. (4 - 20 mA or pulse duration signal may be converted with optional<br />
interface unit.)<br />
1-9
<strong>6712FR</strong> <strong>Refrigerated</strong> <strong>Sampler</strong><br />
Section 1 Introduction<br />
Table 1-3 Technical Specifications for the <strong>6712FR</strong> <strong>Refrigerated</strong> <strong>Sampler</strong> (Continued)<br />
1-10<br />
6712 CONTROLLER: SOFTWARE SPECIFICATIONS<br />
Suction Line: Programmable 3 to 99 ft (1 to 30 m) lengths of:<br />
3 /8" (0.95 cm) I.D. Vinyl<br />
3 /8" (0.95 cm) I.D. Teflon ® -lined with polyethylene jacket<br />
Sample Frequency: From 1 minute to 99 hours and 59 minutes in 1 minute increments<br />
between consecutive samples.<br />
Nonuniform times in minute intervals or clock time<br />
Random time intervals between consecutive samples<br />
From 1 to 9,999 flow pulses in single-pulse intervals<br />
Flow paced in volume with attachable flow module<br />
Rainfall Reading Units: Inches or millimeters<br />
Module Readings: pH 8 bits representing pH 0.1 pH storage resolution<br />
16 bits representing temp. 0.1° C storage resolution<br />
Ultrasonic 16 bits representing level 0.0001 m storage resolution<br />
Submerged Probe 16 bits representing level 0.0001 m storage resolution<br />
Bubbler 16 bits representing level 0.0001 m storage resolution<br />
Area Velocity 16 bits representing level 0.0001 m storage resolution<br />
16 bits representing velocity 0.001 ft/s storage resolution<br />
4–20 mA 16 bits representing percent<br />
32 bits representing flow<br />
0.1% storage resolution<br />
SDI-12 Sonde Readings: Parameter Range Resolution Storage Bytes<br />
Temperature -40 - 100 °C 0.1 °C 2<br />
Conductivity 0 - 100 mS/cm 0.01 mS/cm 2<br />
Specific Conductance 0 - 100 mS/cm 0.01 mS/cm 2<br />
Total Dissolved Solids 0 - 90 g/l 0.01 g/l 2<br />
Salinity 0 - 70 ppt 0.1 ppt 2<br />
Dissolved Oxygen 0 - 20 mg/l 0.1 mg/l 1<br />
pH 0 - 14 0.1 1<br />
ORP -999 - 999 mv 0.1 mv 2<br />
Level 0 - 6.5279 m 0.0001 m 2<br />
Ammonium-Nitrogen 0 - 200 mgN/l 0.1 mgN/l 2<br />
Ammonia-Nitrogen 0 - 200 mgN/l 0.1 mgN/l 2<br />
Nitrate-Nitrogen 0 - 200mgN/l 0.1 mgN/l 2<br />
Turbidity 0 - 5000 NTU 0.1 NTU 2<br />
Chloride 0 - 1000 mg/l 0.1 mg/l 2<br />
Chlorophyll 0-400 ug/l 0.1 ug/l 2<br />
Other -99999.0-99999.0 0.0001 4
<strong>6712FR</strong> <strong>Refrigerated</strong> <strong>Sampler</strong><br />
Section 1 Introduction<br />
Table 1-3 Technical Specifications for the <strong>6712FR</strong> <strong>Refrigerated</strong> <strong>Sampler</strong> (Continued)<br />
Module Reading Conversions: Level and 4–20 mA readings converted to flow rate units:<br />
gallons per second gallons per minute<br />
million gallons per day cubic feet per second<br />
cubic meters per second cubic meters per hour<br />
cubic meters per day liters per second<br />
Velocity units:<br />
feet per second meters per second<br />
Totalized flow units:<br />
gallons million gallons<br />
cubic feet cubic meters<br />
liters<br />
Devices supported in flow conversion:<br />
Weirs: V-notch; 22.5, 30, 45, 60, 90, and 120 degrees<br />
Rectangular; with and without end contractions<br />
Cipoletti.<br />
Flumes:Parshall; 1", 2", 3", 6", 9", 1.5', 2', 3', 4', 5', 6', 8', 10', 12'<br />
Palmer-Bowlus; 4", 6", 8", 12", 15", 18", 21", 24", 27", 30", 48"<br />
Trapezoidal; LG 60 V, 2" 45 WSC, 12" 45 SRCRC<br />
H; 0.5', 0.75', 1', 1.5', 2', 2.5', 3', 4.5'<br />
Manning Formula: Round, U-channel, Rectangular, Trapezoidal<br />
Area Velocity: Round, U-channel, Rectangular, Trapezoidal<br />
Data Points: 50 level-flow rate points, 50 level-area points<br />
Refrigerator Temperature<br />
Sensor<br />
Optional sensor and 5 ft (1.55 m) cable to record temperature readings.<br />
Intended for use with fiberglass refrigerated (FR) samplers.<br />
Range: -40.0 °C to 100 °C<br />
Accuracy specification: ±0.3 °C over a range of 0.0 to 10.0 °C.<br />
Reading data is 2 bytes, with a storage resolution of 0.1 °C.<br />
<strong>6712FR</strong> REFRIGERATED SAMPLER: PHYSICAL SPECIFICATIONS<br />
Dimensions: Height: Top cover closed: 49.25 in (125 cm)<br />
Top cover open: 59.25 in (150.5 cm)<br />
Width: 26 in (66 cm)<br />
Depth: 26 in (66 cm)<br />
Bottle Configurations: 24 wedge polypropylene bottles, 1,000 ml<br />
24 round glass bottles, 350 ml<br />
12 wedge polyethylene bottles, 2.5 liters<br />
8 round polyethylene bottles, 2.0 liters<br />
8 round glass bottles, 1.8 liters<br />
2 rectangular polyethylene bottles, 7.5 liters (2 gal)<br />
2 round glass bottles, 9.4 liters (2.5 gal)<br />
1 round polyethylene bottle, 9.4 liters (2.5 gal)<br />
1 round glass bottle, 9.4 liters (2.5 gal)<br />
1 round polyethylene bottle, 15 liters (4 gal)<br />
1 round polyethylene bottle, 20.5 liters (5.5 gal)<br />
1 round glass bottle, 18.5 liters (5.0 gal)<br />
Dry Weight: 145 lbs (66 kg) Refrigerator only, no controller or bottle configuration<br />
160 lbs (73 kg) Includes refrigerator, controller, top cover, center<br />
section, tub, pump tube, distributor shaft extension, distributor arm<br />
and nut, and discharge tube for the 24 plastic bottle configuration.<br />
1-11
<strong>6712FR</strong> <strong>Refrigerated</strong> <strong>Sampler</strong><br />
Section 1 Introduction<br />
Table 1-3 Technical Specifications for the <strong>6712FR</strong> <strong>Refrigerated</strong> <strong>Sampler</strong> (Continued)<br />
Dry Weight With: 24 plastic bottles, rack, hold down, no caps 175 lbs(79 kg)<br />
24 glass bottles, rack, expander ring, no caps 195 lbs(88 kg)<br />
12 plastic bottles, rack, hold down, no caps 175 lbs(79 kg)<br />
8 plastic bottles, rack, adaptor, no caps 170 lbs(77 kg)<br />
8 glass bottles, rack, adaptor, no caps 180 lbs(82 kg)<br />
2 plastic bottles, rack, no caps 175 lbs(79 kg)<br />
2 glass bottles, rack, no caps 165 lbs(75 kg)<br />
1-9.4 l plastic bottle and cap, no distributor arm or nut165 lbs(75 kg)<br />
1-9.4 l glass bottle and cap, no distributor arm or nut 170 lbs(77 kg)<br />
1-15.0 l plastic bottle and cap, no distributor arm or nut165 lbs(75<br />
kg)<br />
1-20.5 l plastic bottle and cap, no distributor arm or nut165 lbs(75<br />
kg)<br />
1-18.5 l glass bottle and cap, no distributor arm or nut 170 lbs(77 kg)<br />
Filled Bottle Weight: 24 plastic bottles 101 lbs(46 kg)<br />
24 glass bottles 104 lbs(48 kg)<br />
12 plastic bottles 89 lbs (41 kg)<br />
12 glass bottles 95 lbs (43 kg)<br />
8 plastic bottles 84 lbs (38 kg)<br />
8 glass bottles 90 lbs (41 kg)<br />
4 plastic bottles 98 lbs (45 kg)<br />
4 glass bottles 104 lbs(48 kg)<br />
1 plastic bottle 90 lbs (41 kg)<br />
1 glass bottle 94 lbs (43 kg)<br />
Average Thermal<br />
Resistance Factor:<br />
Recovery time 5 minutes<br />
1-12<br />
R-16<br />
The average R-value for a complete FR refrigerator not running<br />
Recovery time is the time for the internal air temperature to return to 39°F (4°C) after the door has<br />
been opened for one minute. The empty refrigerator is running and set at 39°F (4°C). The door is<br />
opened at least 4 minutes after the compressor has turned on. Ambient air temperature is 75°F<br />
(24°C).<br />
Thermostat Set point range: 32° to 46°F (0° to 8°C)<br />
Set point accuracy: ±1.8°F (±1°C) at 39°F (4°C)<br />
[With an ambient air temperature of 75°F (24°C)]<br />
Temperature Ranges Operational: -20° to 120°F (-29° to 49°C)<br />
Storage: 0° to 140°F (-18° to 60°C)<br />
Environment Rain and spray resistant, but not watertight. Do not install in<br />
locations where the refrigerator’s lower compartment could become<br />
submerged.<br />
Electrical Power Requirements: 120 Volts, 60 Hz 230 Volts, 50 Hz<br />
(optional)<br />
Running current: 3.5 amp 1.75 amp<br />
Starting current: 17 amp 8.5 amp<br />
Stalled Compressor current:21 amp 10.5 amp<br />
(maximum)
Heater Capacity 60 watts<br />
Compressor 1/5 HP (150W) Tecumseh compressor<br />
<strong>6712FR</strong> <strong>Refrigerated</strong> <strong>Sampler</strong><br />
Section 1 Introduction<br />
Table 1-3 Technical Specifications for the <strong>6712FR</strong> <strong>Refrigerated</strong> <strong>Sampler</strong> (Continued)<br />
Compressor Protection Temperature safety cutout that will disengage the compressor if the<br />
compressor reaches 221°F (105°C)<br />
Refrigerant R134a, 7.5 ounce (0.21 kg) charge<br />
Pressure High side: 165 to 215 psig (1.14 to 1.48 MPa)<br />
Low side: 2 to 10 psig (13.8 to 69 kPa)<br />
1-13
<strong>6712FR</strong> <strong>Refrigerated</strong> <strong>Sampler</strong><br />
Section 1 Introduction<br />
1-14<br />
Table 1-4 Connector Specifications<br />
CONNECTOR ICON PIN-LOCATION DIAGRAM PIN FUNCTION<br />
POWER SOURCE 2-PIN MALE, SEALED A Ground<br />
B +12 volts DC<br />
RAIN GAUGE 9-PIN FEMALE, SEALED<br />
A +12 volts DC<br />
B Ground<br />
C Programmable I/O1 pin<br />
D Rain gauge input<br />
E Not Connected<br />
F SDI-12 Data<br />
G Not Connected<br />
H Programmable I/O2 pin<br />
I Programmable I/O3 pin<br />
INTERROGATOR 6-PIN FEMALE, SEALED A Switched +12 volts DC<br />
B Ground<br />
C Connection Sense<br />
D Transmit<br />
E Receive<br />
F NC<br />
FLOW METER 6-PIN MALE, SEALED A +12 volts DC<br />
B Ground<br />
C Flow Pulses In<br />
D Bottle Number Out<br />
Dual <strong>Sampler</strong> Out<br />
E Event Mark Out<br />
F Inhibit In<br />
MODULE<br />
(IN MODULE BAY)<br />
A B<br />
E<br />
A D<br />
F I H<br />
B C<br />
G<br />
D<br />
A<br />
C<br />
E<br />
B<br />
F<br />
B<br />
F<br />
C<br />
E<br />
D<br />
A<br />
8-PIN MALE, SEALED 1 NC<br />
2 +12 volts DC<br />
3 Ground<br />
8<br />
4 Module Sense<br />
2<br />
3<br />
1<br />
7<br />
6<br />
5<br />
6<br />
Receive<br />
Transmit<br />
4 5<br />
7 Clock<br />
8 Control
<strong>6712FR</strong> <strong>Refrigerated</strong> <strong>Sampler</strong><br />
Section 2 Installation/Preparation<br />
2.1 Preparing the <strong>Sampler</strong> The <strong>6712FR</strong> is shipped to you with the controller mounted on the<br />
refrigerator and a distributor shaft extension installed. Use Figure<br />
2-1 for reference when removing the controller. You must<br />
remove the controller when:<br />
2.1.1 Installing the<br />
Distributor Shaft<br />
Extension<br />
2.1.2 Mounting the<br />
Controller<br />
The internal desiccant needs recharging, the internal battery<br />
needs to be replaced or when the controller needs<br />
repair.<br />
You install a different bottle kit.<br />
Each bottle kit has its own extension so that the distributor arm<br />
is positioned at the right distance above the bottles. You must<br />
remove the controller to replace the extension.<br />
1. Install the extension before mounting the controller on the<br />
refrigerator.<br />
2. Select the extension of the correct length for the bottle kit,<br />
and screw it on the distributor shaft. Secure it with the set<br />
screw. See Figure 2-1.<br />
BE SURE THE SET SCREW IS TIGHTENED INTO THE<br />
DISTRIBUTOR SHAFT’S KEY. YOU MAY HAVE TO<br />
LOOSEN THE EXTENSION SLIGHTLY AND ADJUST ITS<br />
POSITION.<br />
1. Install the four mounting rods into the bosses on the bottom<br />
of the case.<br />
2. Fit the mounting rods through the four holes drilled in the<br />
top of the refrigerator.<br />
3. Slip a washer on each rod and secure the controller by<br />
tightening the wing nuts.<br />
4. Install the distributor arm and discharge tube.<br />
5. Thread the stop arm into the hole in the side of the extension.<br />
Be sure the stop arm is directly above the distributor<br />
arm.<br />
6. Connect the power cable to the controller.<br />
2-1
<strong>6712FR</strong> <strong>Refrigerated</strong> <strong>Sampler</strong><br />
Section 2 Installation/Preparation<br />
Figure 2-1 Mounting the Controller<br />
2-2<br />
1/4-20 Set Screw<br />
Flat Washer<br />
Multiple-Bottle Sampling<br />
Distributor arm<br />
Nut<br />
2.1.3 Installing the<br />
Distributor Arm and<br />
Discharge Tube<br />
Distributor Arm<br />
Mounting Rod<br />
Distributor Shaft<br />
Extension<br />
Wing Nut<br />
Stop Arm<br />
Distributor arm<br />
Assembly<br />
Composite Sampling<br />
End of discharge tube<br />
below neck of bottle.<br />
Mounting Rod<br />
Flat Washer<br />
Wing Nut<br />
The distributor arm is adjustable so that you can position the<br />
discharge tube over the bottles of each kit. Each bottle kit also<br />
uses a discharge tube of a specific length. Table 2-1 lists the correct<br />
discharge tube lengths for each bottle kit. If you are using<br />
bulk tubing to cut your own tubes, cut the ends of the tube<br />
square, not at an angle, and cut the length accurately.<br />
The two-piece distributor arm has four positions, marked on the<br />
underside with the letters A, B, C, and D. Adjust the arm to the<br />
correct position for the bottle kit being used. Table 2-1 shows the<br />
correct position for each kit. Thread the discharge tube through<br />
the spring and arm so that the tube protrudes from the arm 1 /16<br />
to 1 /8 inch. If too much tube protrudes from the arm it can catch<br />
on bottles and jam the distributor arm.<br />
Attach the arm to the distributor shaft extension. Secure the arm<br />
to the extension with the black plastic nut. Slide the free end of<br />
the discharge tube onto the bulkhead fitting. After installing the<br />
distributor arm and discharge tube, run the distributor to each<br />
bottle position to ensure proper installation.
<strong>6712FR</strong> <strong>Refrigerated</strong> <strong>Sampler</strong><br />
Section 2 Installation/Preparation<br />
Table 2-1 Distributor Arm Positions and Discharge Tube Lengths for Bottle Kits<br />
24-Bottle Kits<br />
1000-milliliter polypropylene bottles<br />
350-milliliter glass bottles<br />
Distributor Arm Position: D<br />
Discharge Tube: 60-9003-279<br />
Discharge Tube Length: 20 inches (50.8 cm)<br />
Distributor Shaft: 60-9003-273<br />
Distributor Shaft Extension: 811 /16 inches (22.0 cm)<br />
12-Bottle Kits<br />
2.5 liter polyethylene bottles<br />
Distributor Arm Position: D<br />
Discharge Tube: 60-9003-279<br />
Discharge Tube Length: 20 inches (50.8 cm)<br />
Distributor Shaft: 60-9003-273<br />
Distributor Shaft Extension: 811 /16 inches (22.0 cm)<br />
8-Bottle Kits<br />
1.8 liter glass bottles<br />
2.0 liter polyethylene bottles<br />
Distributor Arm Position: B<br />
Discharge Tube: 60-9003-279<br />
Discharge Tube Length: 20 inches (50.8 cm)<br />
Distributor Shaft: 60-9003-274<br />
Distributor Shaft Extension: 101 /2 inches (26.7 cm)<br />
2-Bottle Kits<br />
9.4 liter (21 /2 gallon) glass bottles<br />
7.5 liter (2 gallon) polyethylene bottles<br />
Distributor Arm Position: A<br />
Discharge Tube: 60-9003-283<br />
Discharge Tube Length: 16 inches (40.6 cm)<br />
Distributor Shaft: 60-9003-275<br />
Distributor Shaft Extension: 6 inches (15.2 cm)<br />
Composite Bottles Discharge Tube Discharge Tube Length<br />
9.4 liter (21/2 gallon) glass bottle 60-9003-262 171/4 in (43.8 cm)<br />
9.4 liter (21 /2 gallon) polyethylene bottle 60-9003-262 171 /4 in (43.8 cm)<br />
15.0 liter (4 gallon) polyethylene bottle 60-9003-264 161 /2 in (41.9 cm)<br />
18.5 liter (5 gallon) glass bottle 60-9003-266 153/4 in (40 cm)<br />
20.0 liter (51 /2 gallon) polyethylene bottle 60-9003-266 153 /4 in (40 cm)<br />
2.2 Installing Bottle Kits Isco ships the refrigerator from the factory with the sample bottles<br />
in place. When using the sampler for the first time, you will<br />
only need to remove the bottle lids. When installing cleaned bottles<br />
or a new kit, keep these guidelines in mind:<br />
Do not mix glass and plastic bottles together.<br />
Install all bottles to insure that they remain in place.<br />
2-3
<strong>6712FR</strong> <strong>Refrigerated</strong> <strong>Sampler</strong><br />
Section 2 Installation/Preparation<br />
2-4<br />
Align the racks correctly. If the racks are misaligned, the<br />
sampler may miss the bottle mouth, or the sampler will<br />
deposit samples in the “wrong” bottle.<br />
Each time you change from one size bottle to another, you must<br />
adjust the length of the distributor arm, install a discharge tube<br />
of the correct length, and possibly install a different distributor<br />
shaft extension.<br />
Each time you install a bottle kit, check the program settings for<br />
the number of bottles and bottle volumes. Also rotate the distributor<br />
arm to each bottle position to ensure the arm is correctly<br />
positioned over each bottle. Use the controller to move the arm.<br />
2.2.1 Installing Racks Install the bottle rack with bottles by sliding it into the cooling<br />
compartment until the rack drops over the two semicircular<br />
ramps which hold it in place (Figure 2-2).<br />
The five posts and two ramps which position the rack under the<br />
distributor arm are adjusted at the factory. When you change<br />
bottle kits, you may need to readjust the stops and ramps and<br />
install a different distributor arm extension. Figures 2-3 and 2-4<br />
show you how to install the bottle kits.<br />
Check the kit’s alignment by rotating the distributor arm. Do<br />
not rotate the distributor manually. Moving the arm manually<br />
damages the distributor drive. If you see any misalignment,<br />
adjust the posts and ramps until the discharge tube at the<br />
end of the arm stops over each bottle.<br />
24-Bottle Kit<br />
1000-milliliter polypropylene bottles.<br />
Figure 2-2 Installing the Bottle Racks<br />
2-Bottle Kit<br />
(Requires a locating base.)
Install the distributor shaft extension.<br />
Use the 8 11 /16-inch extension for the 12and<br />
24-bottle kits. Use the 101 /2-inch extension<br />
for the 8-bottle kit. The instructions<br />
on page 2-1 show you how to remove<br />
the controller and replace the extensions<br />
for each bottle kit.<br />
Next, adjust the distributor arm to position<br />
D for the 12-bottle and 24-bottle kits, or to<br />
position B for the 8-bottle kit. Install the<br />
arm and stop. See Installing the Distributor<br />
Arm and Discharge Tube on page 2-2.<br />
Slide the rack, with bottles installed onto<br />
the mounting plate. Adjust the stops and<br />
ramps on the plate so that the rack is centered<br />
and held firmly on the plate.<br />
Finally, position the arm over each bottle.<br />
If the arm does not stop over each bottle,<br />
readjust the rack.<br />
NEVER MANUALLY ROTATE<br />
THE DISTRIBUTOR ARM.<br />
Figure 2-3 Installing the 24-bottle, 12-bottle, and 8-bottle Kits<br />
Install the distributor-shaft extension.<br />
Use the 5 1 /4-inch extension for the 2-bottle<br />
kit. The instructions on page 2-1 show you<br />
how to remove the controller and replace<br />
the extensions for each bottle kit.<br />
Next, replace the controller, and adjust the<br />
distributor arm to position A. Install the<br />
arm and stop. See Installing the Distributor<br />
Arm and Discharge Tube on page 2-2.<br />
Install over the mounting plate at the bottom<br />
of the refrigerator, the locating base<br />
which holds the 2 1 /2-gallon glass or 2 gallon<br />
polyethylene bottles.<br />
Begin by loosening the ramps. Move them<br />
toward the front of the compartment so<br />
that they will fit under the ridge of the locating<br />
base. (You can also remove them<br />
completely.)<br />
Remove the two front stops, and align the<br />
holes on the sides of the locating base<br />
with the holes for the stops in the mounting<br />
plate. Secure the base by replacing<br />
the stops.<br />
Install the bottles, and position the arm<br />
over each bottle.<br />
NEVER MANUALLY ROTATE<br />
THE DISTRIBUTOR ARM.<br />
Figure 2-4 Installing the 2-bottle Kit<br />
<strong>6712FR</strong> <strong>Refrigerated</strong> <strong>Sampler</strong><br />
Section 2 Installation/Preparation<br />
Stop<br />
(1 of 5)<br />
Secure the base<br />
with these stops.<br />
Ramps<br />
Ramps located under locating base.<br />
Pull them to the front or remove them.<br />
2-5
<strong>6712FR</strong> <strong>Refrigerated</strong> <strong>Sampler</strong><br />
Section 2 Installation/Preparation<br />
2-6<br />
2.2.2 Removing Racks Before removing the rack, place the lids on the bottles so the<br />
samples do not spill. Remove the bottle rack by lifting the front<br />
edge of the rack slightly to disengage it from the two ramps.<br />
Then, pull it straight out of the refrigerator. Be careful not to<br />
catch the distributor arm against the bottles.<br />
2.2.3 Installing Composite<br />
Bottles<br />
Remove the distributor arm and discharge tube. Remove the distributor<br />
arm stop. If using the two bottle locating base, remove it.<br />
Slide the composite bottle discharge tube on the bulkhead fitting.<br />
Composite bottle kits have two lids, one with a hole drilled in the<br />
center. Screw the lid with the hole in it on the bottle, and place<br />
the bottle in the center of the mounting plate.<br />
Thread the discharge tube through the hole in the lid. Always<br />
use the lid to retain the discharge tube. It prevents the sampler<br />
from spraying liquid inside the sample compartment instead of<br />
the bottle.<br />
2.3 Suction Line The suction line is the tubing from the sampling point to the<br />
pump intake. The <strong>6712FR</strong> uses a 3 /8-inch ID suction line of<br />
lengths 3 to 99 feet. Isco offers vinyl or Teflon® suction lines. The<br />
Teflon® tubing has a polyethylene jacket to protect it from kinks<br />
and abrasions.<br />
The vinyl line contains a very low parts-per-million level of phenols.<br />
If phenol content affects your sample analysis, use the<br />
Teflon suction line.<br />
When installing the sampler, be sure the vertical distance<br />
between the liquid level and the pump is as small as possible.<br />
2.3.1 Guidelines for<br />
Measuring and Cutting<br />
the Suction Line<br />
2.3.2 Attaching Suction Line<br />
to Pump Tube<br />
Attaching Suction Line<br />
Tube Coupling<br />
Cut the line to the desired length but use the shortest<br />
length feasible for the installation.<br />
Cut the line in 1 foot increments. For instance, 4 feet, not<br />
31 /2. If using metric units of measure, cut the line in increments<br />
of 0.1 meter. Do not include the length of the<br />
strainer in the measurement.<br />
Attach the vinyl suction line to the pump tube with the tube coupling.<br />
Use the black clamp for the pump tube and the white<br />
clamp for the suction line. Attach the line and tube to the coupling<br />
by pushing them onto each end of the coupling. Then<br />
tighten the clamps by squeezing the finger pads together. Loosen<br />
a clamp by twisting it until its teeth disengage.<br />
Attach the Teflon® suction line to the pump tube by inserting the<br />
line into the tube and secure with a suitable clamp.
<strong>6712FR</strong> <strong>Refrigerated</strong> <strong>Sampler</strong><br />
Section 2 Installation/Preparation<br />
2.4 Strainers Isco offers four strainers that help prevent solids from clogging<br />
the suction line:<br />
Stainless steel strainer for priority pollutant sampling<br />
Polypropylene strainer for routine sampling conditions<br />
CPVC strainer for acidic liquid sources<br />
Stainless steel low-flow strainer<br />
To select the right strainer for your application, see Table 2-2.<br />
2.4.1 Debris Deflector A debris deflector prevents debris from accumulating on the hose<br />
clamp that attaches the strainer to the suction line.<br />
2.4.2 Alternative to Strainers When sampling from high velocity streams with heavy suspended<br />
solids, some field investigations suggest that more representative<br />
samples are obtained without the strainer. Consider<br />
attaching a short piece of thin walled aluminum tubing to the<br />
end of the suction line; anchor the tubing so that the inlet opens<br />
upstream. The aluminum tubing’s thin wall will not disturb the<br />
flow stream, and most sample analyses disregard aluminum<br />
ions. Under most conditions, the pre-sample purge removes any<br />
debris over the tubing entrance.<br />
Attaching the Debris Deflector<br />
2-7
<strong>6712FR</strong> <strong>Refrigerated</strong> <strong>Sampler</strong><br />
Section 2 Installation/Preparation<br />
2-8<br />
2.5 How Does the <strong>Sampler</strong><br />
Work?<br />
Table 2-2 Selecting the Right Strainer<br />
STRAINER DIMENSIONS APPLICATION MAXIMUM DEPTH<br />
Stainless Steel<br />
Polypropylene<br />
CPVC<br />
Stainless Steel<br />
Low-Flow<br />
.430<br />
diameter<br />
.430<br />
diameter<br />
.430<br />
diameter<br />
23/32<br />
23/32<br />
23/32<br />
1<br />
.430<br />
diameter<br />
9-9/32<br />
9-5/8<br />
11-1/4<br />
7<br />
1-1/8<br />
diameter<br />
1-1/4<br />
diameter<br />
1-1/4<br />
diameter<br />
1.0<br />
diameter<br />
1.0<br />
diameter<br />
9/16<br />
diameter<br />
1-5/8<br />
diameter<br />
Prioritypollutant<br />
sampling.<br />
Routine<br />
applications.<br />
Highly acidic<br />
liquids.<br />
Very low flow<br />
stream depths.<br />
Vinyl Line:<br />
22 feet.<br />
Teflon Line:<br />
15 feet.<br />
Vinyl Line:<br />
11 feet.<br />
Vinyl Line:<br />
4 feet.<br />
Vinyl Line:<br />
7 feet.<br />
Note<br />
The suction lines will float when filled with air during the purge cycles and when depths exceed the<br />
listed ratings. Secure the suction lines when sampling at depths exceeding the maximum ratings. All<br />
strainer dimensions are in inches. Teflon suction line is compatible only with the 1 inch diameter, stainless<br />
steel strainer.<br />
When the sampler takes a sample, it draws liquid through the<br />
strainer and suction line to the pump tube. The liquid flows<br />
through the pump tube and past the liquid detector, which<br />
senses the liquid. From the detector, the liquid follows the pump<br />
tube through the pump to the bulkhead fitting and then through<br />
the discharge tube to the sample bottle.<br />
A typical sampling cycle consists of:<br />
1. The sampler moves the distributor arm over the bottle that<br />
is to receive the sample.<br />
2. The pump reverses for the pre-sample purge.<br />
3. The pump direction changes, filling the suction line.<br />
4. When the detector senses liquid, the sampler begins measuring<br />
the sample.<br />
5. After depositing the sample, the pump again reverses for<br />
the post-sample purge.
a. Controller.<br />
b. Peristaltic pump.<br />
c. Liquid Detector.<br />
d. Strainer<br />
e. Suction line<br />
f. Stainless Steel Coupling<br />
g. A pump tube routed from the<br />
liquid detector’s intake port<br />
through the pump, out the<br />
detector’s discharge port, and<br />
over the side of the controller to<br />
a bulkhead fitting.<br />
h. Bulkhead fitting.<br />
i. Discharge tube running from the<br />
bulkhead through the spring<br />
and distributor arm.<br />
j. Distributor arm and spring.<br />
<strong>6712FR</strong> <strong>Refrigerated</strong> <strong>Sampler</strong><br />
Section 2 Installation/Preparation<br />
Sampling cycles vary somewhat according to program settings<br />
for distribution. The sampler can move the distributor arm clockwise<br />
and counterclockwise, making a number of distribution<br />
methods possible. (In this manual, the words “sample event”<br />
refer to a full sampling cycle for any distribution.)<br />
Figure 2-5 Identifying the <strong>Sampler</strong> Components<br />
Other variations include extended-program settings for suction-line<br />
rinses and sampling retries. A sampler running a program<br />
with line rinses completes the pre-sample purge and then<br />
rinses the line. The suction line is purged after each rinse. When<br />
programmed for sampling retries, the sampler will attempt to<br />
pump a sample again if it fails on previous attempts.<br />
2.5.1 Measuring Sample<br />
Volume<br />
d<br />
e<br />
“Sample volume” refers to the amount of liquid delivered into a<br />
bottle. The volume is determined by the programmed value. The<br />
volume is dependent on the volume per revolution of the pump,<br />
which is dependent on the suction head. The <strong>6712FR</strong> delivers the<br />
sample by counting the pump revolutions and automatically<br />
compensating for the suction head.<br />
2.6 Installing the <strong>Sampler</strong> The following segment briefly describes initial sampler installation.<br />
h<br />
f<br />
j<br />
g<br />
i<br />
CAUTION<br />
Tests indicate that the pump produces sound levels in excess<br />
of 85db at one meter. Prolonged exposure to this sound could<br />
result in hearing loss and requires the use of protective ear<br />
plugs.<br />
c<br />
b<br />
a<br />
2-9
<strong>6712FR</strong> <strong>Refrigerated</strong> <strong>Sampler</strong><br />
Section 2 Installation/Preparation<br />
2-10<br />
2.6.1 Tips for Routing<br />
Suction Line<br />
CAUTION<br />
When using the <strong>6712FR</strong> sampler with a 750 or 710 module,<br />
transmitters such as cell phones or walkie talkies must not be<br />
operated within 3 meters of the sampler. If water level readings<br />
are fluctuating due to TV/radio station transmitter towers in the<br />
area, the sampler must be relocated.<br />
WARNING<br />
The <strong>6712FR</strong> samplers have not been approved for use in<br />
hazardous locations as defined by the National Electrical<br />
Code.<br />
WARNING<br />
If you must enter a manhole or other dangerous location to<br />
install the sampler, observe standard safety precautions.<br />
Refer to Appendix C for a discussion of safety<br />
considerations.<br />
Route the line so that it runs continuously downhill from the<br />
sampler to the liquid source. This helps drain the line during<br />
pre-sample and post-sample purges. When the sampler is used in<br />
below freezing temperatures, there is a risk of the suction line<br />
being frozen. A suitably warm sampling source can usually prevent<br />
this, provided there are no loops in the suction line. Some<br />
situations may require more protective measures, such as insulation<br />
of the suction line, or heat tape. Thoroughly draining the<br />
suction line minimizes the possibility of frozen liquid clogging<br />
the line.<br />
2.6.2 Intake Placement For representative samples, place the intake in the main current<br />
of the flow stream, not in an eddy or at the edge of flow. Placing<br />
an intake at the bottom may produce samples with excess heavy<br />
solids and no floating materials, while placement at the top may<br />
produce the opposite conditions.<br />
2.6.3 Positioning a <strong>Sampler</strong> Place the refrigerator on a relatively flat, horizontal surface.<br />
Placing the refrigerator on a steep incline may cause the sample<br />
to miss the bottle mouth.<br />
When installing the sampler, be sure the vertical distance<br />
between the level of the liquid and the pump is as small as possible.<br />
CAUTION<br />
The refrigerator’s lower compartment is not watertight. Do not<br />
install in a location where the refrigerator’s lower compartment<br />
could become submerged.
2.7 Connecting External<br />
Instruments<br />
<strong>6712FR</strong> <strong>Refrigerated</strong> <strong>Sampler</strong><br />
Section 2 Installation/Preparation<br />
The <strong>6712FR</strong> sampler can be used in conjunction with several<br />
types of external instruments.<br />
2.7.1 Flow Meter Connector Connect the sampler to Isco flow meters, flow loggers, or 1640<br />
Liquid Level Actuators by attaching their connect cable to the<br />
Flow Meter Connector. Plug the line cord into an AC power outlet.<br />
Be sure it is connected to 120 volts AC (optional 230 volts<br />
AC). When using the sampler with an external instrument,<br />
remember these guidelines:<br />
Both the sampler and the flow instrument must be on and<br />
running a program.<br />
If using a flow meter or flow logger for flow pacing, the<br />
sampler and the flow instrument must both run programs<br />
with flow pacing settings.<br />
If using a flow meter or flow logger for trigger pacing, the<br />
sampler must run a program with flow pacing settings,<br />
and the flow instrument must run a program with trigger<br />
pacing settings.<br />
When the sampler runs an event-paced program, it disregards<br />
pacing pulses from a flow meter or flow logger. However,<br />
the sampler continues to monitor for enable signals.<br />
2.7.2 Rain Gauge Connector Connect the rain gauge, SDI-12 Sonde, or Refrigerator Temperature<br />
Sensor connect cables to the nine-pin Rain Gauge Connector.<br />
When connecting a rain gauge and an SDI-12 Sonde, or rain<br />
gauge and a Refrigerator Temperature Sensor, use the appropriate<br />
Y-connect cable. See the Accessories appendix at the end of<br />
this manual.<br />
WARNING<br />
Most Isco flow meters are not certified for use in hazardous<br />
locations as defined by the National Electrical Code.<br />
Contact your Isco representative for your equipment’s<br />
status. Never operate equipment in hazardous locations<br />
that has not been certified as safe for such use. Refer to<br />
Appendix C in the back of this manual for more safety<br />
information.<br />
Note<br />
Select Extended Programming to use the SDI-12 sonde. (See<br />
Switching Between Standard and Extended Modes on page<br />
4-1.)<br />
Note<br />
Update the Hardware Setup whenever you add or remove an<br />
SDI-12 sonde. (See Section 6.) In extended programming, rain<br />
gauge and SDI-12 sonde readings are only available if they are<br />
selected in the Hardware Setup.<br />
2-11
<strong>6712FR</strong> <strong>Refrigerated</strong> <strong>Sampler</strong><br />
Section 2 Installation/Preparation<br />
2.8 Locking the <strong>Sampler</strong> The refrigerator is equipped with a lockable latch for the top<br />
cover and a lockable catch for the door handle. To lock the refrigerator,<br />
use two padlocks, one for the top cover and one for the<br />
door.<br />
2.9 Servicing the <strong>Sampler</strong> Servicing the sampler includes:<br />
2-12<br />
Table 2-3 Connecting Isco Instruments to the <strong>Sampler</strong><br />
CONNECTOR ICON CONNECT THESE INSTRUMENTS:<br />
Power Source 12 volt power source<br />
Rain Gauge<br />
Interrogator<br />
Flow Meter<br />
674 Rain Gauge<br />
Programmable I/O Pins (pins C, H, and I)<br />
SDI-12 Sonde<br />
Refrigerator Temperature Sensor<br />
581 RTD (Rapid Transfer Device)<br />
IBM PC or compatible computer running FLOWLINK or SAMPLINK<br />
External Modem<br />
External Data Logger/Controller<br />
1640 Liquid Level Actuator<br />
3000 Series Flow Meters<br />
4100 Series Flow Loggers<br />
4200 Series Flow Meters<br />
Master/Slave <strong>Sampler</strong><br />
Pulse Duration Input Interface<br />
4-20 mA Input Interface<br />
Collecting the filled sample bottles and replacing them<br />
with clean bottles;<br />
Collecting the data recorded by the sampler during the<br />
program.<br />
<strong>Sampler</strong>s are usually serviced after they complete a sampling<br />
program. When working up a service schedule, you will need to<br />
estimate the program completion time. You should also be familiar<br />
with the program’s settings for the start time or if the sampler<br />
is programmed for continuous sampling.<br />
Continuous sampling is controlled by the distribution setting<br />
entered at the “RUN CONTINUOUSLY?” screen. A “YES”<br />
response directs the sampler to reset the distribution sequence<br />
and continue the countdown to the next sample event. Appropriate<br />
service intervals will prevent overfilled bottles.
<strong>6712FR</strong> <strong>Refrigerated</strong> <strong>Sampler</strong><br />
Section 3 Getting Started<br />
Before programming the <strong>6712FR</strong>, you should become familiar<br />
with its keys and how to use the screens.<br />
The <strong>6712FR</strong> <strong>Sampler</strong> has two sets of programming modes. The<br />
first mode, Standard Programming, lets you set up typical<br />
sampling programs easily and efficiently. The second mode,<br />
Extended Programming, lets you create sophisticated programs<br />
for complex sampling applications.<br />
All of the sampling features available in standard programming<br />
mode are available in extended programming mode. However,<br />
extended programming provides many additional features.<br />
Standard and extended programming features are explained in<br />
separate sections. This section focuses on some basic features<br />
that are common to both programming modes, such as using the<br />
menus and setting the clock.<br />
3.1 Initial Operation Turn the sampler on by pressing the On/Off key. It is labeled<br />
with this icon: . The start-up screen appears first.<br />
6712 Front Panel<br />
6712 SAMPLER<br />
STANDARD PROGRAMMING<br />
For HELP at any<br />
screen press ? key.<br />
It remains on the display for about eight seconds or until you<br />
press a key. It tells you the type of programming screens the sampler<br />
is currently using — standard or extended — and gives you<br />
a tip about the on-line help. The main menu screen, shown below,<br />
appears next.<br />
RUN<br />
PROGRAM<br />
VIEW REPORT<br />
OTHER FUNCTIONS<br />
(If a module is attached, a different screen may appear first. See<br />
the module manual for more information.)<br />
The sampler is programmed at the factory so that the standard<br />
programming screens appear when you first turn the sampler on.<br />
You can switch between programming modes by typing in a<br />
numerical command at the main menu:<br />
At the main menu type 6712.2 to show the extended programming<br />
screens.<br />
At the main menu type 6712.1 to show the standard programming<br />
screens.<br />
The sampler will continue to use the program mode you selected,<br />
even if the sampler is turned off and on again, until you manually<br />
switch to the other programming mode.<br />
3-1
<strong>6712FR</strong> <strong>Refrigerated</strong> <strong>Sampler</strong><br />
Section 3 Getting Started<br />
KEY NAME FUNCTION<br />
3-2<br />
With the display backlight activated, the screen will glow for several<br />
seconds following your last keystroke.<br />
If you press a key and the screen text does not change, it is probably<br />
because the keystroke turned the backlight on, instead of<br />
performing its function. Simply press the same key again.<br />
Table 3-1 About the Keypad<br />
On-Off Turns sampler on or off.<br />
Stop<br />
Stops the pump or distributor. Pauses a running sampling program.<br />
In programming screens, returns to a previous screen.<br />
Enter Accepts a menu choice or number entry and goes to next screen.<br />
Help In programming screens, displays a brief help message.<br />
Down-Right<br />
Arrow<br />
Selects the menu option right or below the current choice.<br />
Up-Left Arrow Selects the menu option left or above the current choice.<br />
Numbers Types a number.<br />
Decimal Point Types a decimal point.<br />
Pump<br />
Reverse<br />
Pump<br />
Forward<br />
Press when at the main menu to run the pump in reverse.<br />
Press when at the main menu to run the pump forward.
<strong>6712FR</strong> <strong>Refrigerated</strong> <strong>Sampler</strong><br />
Section 3 Getting Started<br />
3.1.1 Selecting a Language You have the option of having screens display in English or<br />
another language. The default is English. At the main menu,<br />
type 6712.8:<br />
3.2 Using Menus and<br />
Entering Numbers<br />
The Main Menu<br />
RUN<br />
PROGRAM<br />
VIEW REPORT<br />
OTHER FUNCTIONS<br />
3.2.1 Selecting Menu<br />
Options<br />
Use the arrow keys to move between the choices (languages other than<br />
those shown above could appear on your unit). When the language<br />
choice you want is blinking, press ↵(Enter). The ↵ (Enter) key<br />
always accepts the blinking option.<br />
A menu is a list of options. The main menu has four options:<br />
RUN<br />
PROGRAM<br />
VIEW REPORT<br />
OTHER FUNCTIONS<br />
The options identify the operations that can be performed from<br />
the menu. For example, to run the sampling program, select<br />
RUN; to modify the program, select PROGRAM.<br />
In menu screens, one menu option always blinks.<br />
Press ↵ when the blinking option is the one you want; it<br />
will accept your choice and go to the next screen.<br />
Select a different option by pressing an arrow key until<br />
the option you want blinks. Then press ↵.<br />
3.2.2 Entering Numbers Number-entry screens prompt you to enter a value. An example<br />
is shown to the left.<br />
SUCTION LINE LENGTH<br />
IS __ ft<br />
(3-99)<br />
Type the length of the<br />
suction line. Acceptable<br />
values are shown between<br />
the parentheses. Press ↵ to<br />
accept the number.<br />
ENGLISH<br />
SPANISH<br />
To enter a number:<br />
Press the number keys to type the number. Then, press ↵. As<br />
soon as you press ↵, the sampler saves your number and moves<br />
to the next screen. In some screens, you can use the . (Decimal<br />
Point) key in a number.<br />
Some screens display the range of acceptable numbers between<br />
parentheses. If an entry is too low or high, the controller beeps<br />
and erases the entry. Type a new number and continue.<br />
3.3 Quick View Screens Quick View screens are a special type of menu screen. They show<br />
the current program settings and let you move quickly through<br />
the program. You must change the programming style to QUICK<br />
VIEW/CHANGE to see the quick view screens, as shown below:<br />
3-3
<strong>6712FR</strong> <strong>Refrigerated</strong> <strong>Sampler</strong><br />
Section 3 Getting Started<br />
3-4<br />
3.3.1 Paging Through Quick<br />
View Screens<br />
3.3.2 Changing Settings in a<br />
Quick Quick View View Screens Screen in<br />
Standard Programming<br />
RUN<br />
PROGRAM<br />
VIEW REPORT<br />
OTHER FUNCTIONS<br />
↑<br />
To see the Quick View<br />
screens, select PROGRAM.<br />
SITE DESCRIPTION:<br />
“SITE 29 “<br />
Use the keypad’s arrow key<br />
to select ↓ for the next quick<br />
view screen. When ↓ is<br />
blinking, press ↵.<br />
Use the keypad’s arrow key<br />
to select ↑ for the previous<br />
quick view screen. When ↑<br />
is blinking, press ↵.<br />
Use the keypad’s arrow key<br />
to select the program<br />
setting. When the setting is<br />
blinking, press ↵ to display<br />
the screen used to change<br />
the setting.<br />
Press Stop for the main<br />
menu.<br />
All quick view screens work<br />
the same way.<br />
↓<br />
1<br />
2<br />
3<br />
RUN<br />
PROGRAM<br />
VIEW REPORT<br />
OTHER FUNCTIONS<br />
MAINTENANCE<br />
MANUAL FUNCTIONS<br />
PROGRAMMING STYLE<br />
PROGRAMMING STYLE<br />
NORMAL<br />
QUICK VIEW/CHANGE<br />
Select OTHER FUNCTIONS.<br />
Select PROGRAMMING STYLE.<br />
Select QUICK VIEW/CHANGE.<br />
The arrows in the corners of each quick view screen are menu<br />
options that let you move from one quick view screen to another.<br />
Select the up arrow ( ↑ ) to go to the previous screen.<br />
Select the down arrow ( ↓ ) to go to the next screen.<br />
Press Stop to return to the main menu.<br />
Because the forward arrow is always blinking when the screen<br />
appears, you can simply press ↵ to go to the next quick view<br />
screen, making it easy to page through the screens.<br />
Although the quick view screens offer you a quick way to see the<br />
program settings, they also provide you with a way to change settings.<br />
Using quick view screens to change settings is sometimes a<br />
faster way to change a program because you can go quickly to the<br />
setting or settings that needs updating.<br />
To change the program settings in a quick view screen:<br />
Press an arrow until the setting blinks. Press ↵. The 6712 then<br />
displays the screen used to change the setting.<br />
The Quick View screens below shows you how to change the sample<br />
volume. Begin by paging through the quick view screens until<br />
you see the screen containing the sample volume setting:<br />
↑ 200 ml SAMPLES<br />
Press the arrow key until<br />
200 ml SAMPLES blinks. Then<br />
press ↵.<br />
SAMPLE VOLUME:<br />
250 ml (10-1000)<br />
Type the new sample volume<br />
and press ↵.<br />
↑<br />
250 ml SAMPLES<br />
↓<br />
↓
<strong>6712FR</strong> <strong>Refrigerated</strong> <strong>Sampler</strong><br />
Section 3 Getting Started<br />
When you change a setting, the sampler stores the new settings<br />
and returns to the updated quick view screen. You can repeat<br />
this process until all settings shown in the quick view screens<br />
have been changed. When you are done, select the screen’s forward<br />
arrow to move to the next quick view screen, or press Stop<br />
to return to the main menu.<br />
3.4 Clock and Calendar You may have to set the internal clock or calendar. The samplers<br />
are shipped with their clocks set to U.S. Central Standard time.<br />
If your sampler operates in a different time zone, you will have to<br />
Entering Times and Dates<br />
ENTER TIME AND DATE:<br />
HH:MM DD-MON-YY<br />
__:__ __-__-__<br />
Move from one field to<br />
another by pressing the<br />
arrow keys.<br />
Change a setting in a field<br />
by typing a number. Press ↵<br />
to accept the new setting.<br />
3.4.1 Setting the Clock and<br />
Calendar<br />
reset the clock. The example below shows you how to find the<br />
time and date screen.<br />
When setting the clock and calendar, use a 24-hour clock for<br />
times and the day-month-year format for dates. The illustration<br />
at the left shows blanks for each position that accepts an entry.<br />
The positions are called fields. When this screen appears on your<br />
sampler, the fields will contain the sampler’s current settings for<br />
the time and date.<br />
To move from one field to another without changing the<br />
setting, press the arrow keys. Use this technique when<br />
you want to change only one or two settings.<br />
Change the setting by typing a new number. Press ↵ to<br />
accept the new setting.<br />
For example, to enter 2:00 p.m. (2:00 p.m is 14:00 on a 24-hour<br />
clock), type 14. Press ↵. Next, type 0 (zero) for the minutes, and<br />
press ↵. To enter a date, such as January 22, 2001, type: 22 ↵<br />
01 ↵ 01 ↵ .<br />
1<br />
2<br />
3<br />
4<br />
5<br />
RUN<br />
PROGRAM<br />
VIEW REPORT<br />
OTHER FUNCTIONS<br />
MAINTENANCE<br />
MANUAL FUNCTIONS<br />
PROGRAMMING STYLE<br />
SET CLOCK<br />
PUMP TUBE ALARM<br />
INTERNAL BATTERY<br />
DIAGNOSTICS<br />
ENTER TIME AND DATE:<br />
HH:MM DD-MON-YY<br />
14:00 22-JAN-01<br />
SET CLOCK<br />
PUMP TUBE ALARM<br />
INTERNAL BATTERY<br />
DIAGNOSTICS<br />
Select OTHER FUNCTIONS.<br />
Select MAINTENANCE.<br />
Select SET CLOCK.<br />
Enter the time and date.<br />
Press Stop to return to the main<br />
menu.<br />
3-5
<strong>6712FR</strong> <strong>Refrigerated</strong> <strong>Sampler</strong><br />
Section 3 Getting Started<br />
3-6<br />
3.4.2 Menu Screens: Clock<br />
Start Times<br />
3.5 Menu Screens: Site<br />
Descriptions and<br />
Program Names<br />
There are three start time settings you can use in a sampling<br />
program. This section discusses only one of these settings, the<br />
clock start time. A clock start time lets you set up a sampling program<br />
that starts at the same time on one or more days of the<br />
week. For example, you may want to begin sampling at 6:00 a.m.<br />
on Monday through Friday (refer to the screen below).<br />
To select a day or days from the menu:<br />
1. Press an arrow key until the cursor is on the correct day. Then,<br />
press ↵.<br />
2. Repeat these steps until each day you want is blinking.<br />
3. Press an arrow until DONE blinks. Press ↵.<br />
To remove days from the list:<br />
1. Press an arrow key until the cursor is on the day you want to<br />
remove. Press ↵ to deselect it.<br />
2. When finished, select DONE and press ↵<br />
NO DELAY TO START<br />
DELAYED START<br />
CLOCK TIME<br />
Select CLOCK TIME.<br />
FIRST SAMPLE AT:<br />
06:00<br />
Type the time of day and<br />
press ↵.<br />
SELECT DAYS:<br />
SU MO TU WE TH FR SA<br />
DONE<br />
Press an arrow key until the<br />
cursor is on the correct day.<br />
Then, press ↵. To remove a<br />
day, move the cursor to it<br />
and press ↵ to deselect it.<br />
Repeat these steps<br />
until each day you want<br />
is blinking.<br />
Press an arrow until DONE<br />
blinks. Press ↵.<br />
Using the Clock<br />
Start Time Menu<br />
The sampler has two text-entry menus, one for site description<br />
and another for an extended-program name. They work in the<br />
same way. A site description is commonly a number, address, or<br />
other short note that helps identify the monitoring site.<br />
Extended programming has a similar screen that lets you enter<br />
program names for stored programs.<br />
The example to the lower left shows how to change the site<br />
description from FACTORY01 to SITE 29. Line 1 contains text
Changing the Site Name<br />
SITE: “FACTORY01”<br />
ABCDEFGHIJKLMNOPQRST<br />
UVWXYZ-& “0123456789<br />
BACK-UP DONE<br />
SITE: “SACTORY01”<br />
ABCDEFGHIJKLMNOPQRST<br />
UVWXYZ-& “0123456789<br />
BACK-UP DONE<br />
Press the Down-Right arrow<br />
until the S on line 2 blinks.<br />
Then, press ↵.<br />
SITE: “SICTORY051”<br />
ABCDEFGHIJKLMNOPQRST<br />
UVWXYZ-& “0123456789<br />
BACK-UP DONE<br />
Press the Up-Left arrow<br />
until the I blinks. Press ↵.<br />
Continue pressing arrow<br />
keys to select T, E, and<br />
space. Press ↵ after<br />
selecting each character.<br />
SITE: “SITE 29_ ”<br />
ABCDEFGHIJKLMNOPQRST<br />
UVWXYZ-&_"0123456789<br />
BACK-UP DONE<br />
Press 29 on the keypad, then<br />
Up-Left until space blinks.<br />
Press ↵.<br />
SITE: “SITE 29 ”<br />
ABCDEFGHIJKLMNOPQRST<br />
UVWXYZ-&_"0123456789<br />
BACK-UP DONE<br />
Press the Down-Right arrow<br />
until DONE blinks. Press ↵.<br />
<strong>6712FR</strong> <strong>Refrigerated</strong> <strong>Sampler</strong><br />
Section 3 Getting Started<br />
between two quotation marks. Lines 2 and 3 contain the menu<br />
options — numbers, letters, and punctuation marks — used to<br />
spell out the description. In line 3, the space between the ampersand<br />
(&) and the double quotes (") is a space character. Line 4<br />
contains two additional options:<br />
BACK-UP, an option that moves the cursor on the text<br />
line to the left one character.<br />
DONE, an option that tells the sampler to save the text.<br />
The cursor is the blinking rectangle that identifies the current<br />
field. When the screen first appears, the cursor blinks on the first<br />
character of the text in line 1. The matching character in line 2 or<br />
3 also blinks.<br />
When you press ↵, the cursor on line 1 moves to the right one<br />
position, and, at the same time, the sampler blinks on the matching<br />
character on lines 2 or 3.<br />
To change any character in the text line:<br />
1. Press the left or right arrow until the replacement character<br />
on lines 2 or 3 blinks.<br />
2. Press ↵. The replacement character will appear on the first<br />
line, and the cursor will move to the next character.<br />
Repeat steps 1 and 2 until the text in the top line is complete.<br />
3. Finish the entry by selecting DONE. Then, press ↵.<br />
Some additional tips for using the text-entry menus:<br />
Hold an arrow key down for faster movement.<br />
If your description uses all ten spaces in the text line, the<br />
sampler automatically moves to the next screen as soon as<br />
you add the tenth character.<br />
You can enter numbers by pressing the number keys.<br />
Erase characters by replacing them with a space character.<br />
Select the BACK-UP option to move the cursor to the left.<br />
To leave the menu before completing the entry, press Stop.<br />
The sampler will display this menu:<br />
SAVE CHANGES?<br />
YES NO<br />
Select YES to save any changes made. Select NO to leave<br />
the original description (or program name) unchanged.<br />
3.6 Messages The sampler has four sets of messages that supplement the programming<br />
screens. Information messages tell you about programming<br />
status. Help Notes are brief comments associated<br />
with programming screens describing the setting or offering<br />
assistance. Warning messages tell you something is different<br />
than Isco’s standard. Operation messages report the sampler’s<br />
status as it runs a program.<br />
3-7
<strong>6712FR</strong> <strong>Refrigerated</strong> <strong>Sampler</strong><br />
Section 3 Getting Started<br />
3-8<br />
3.6.1 Information Messages These are brief messages about the programming status, such as<br />
“ ‘ROM’ PASSED TEST” or the status message that displays<br />
when you first start up the sampler. Information messages are<br />
displayed for four seconds, unless they are terminated by pressing<br />
any key on the keypad.<br />
3.6.2 Help Notes To see a Help note:<br />
1. Press the ? (Help) key.<br />
2. When the note requires several screens, the word “more”<br />
appears in the lower-right corner. Press ↵ for the next note.<br />
3. Move back and forth between screens by pressing the arrow<br />
keys.<br />
4. Press Stop at any time to return to the programming screen.<br />
Most help notes refer to a related section in this manual. Screens<br />
that require extensive explanation have notes that contain only a<br />
reference to the manual. Sections mentioned in the notes appear<br />
in the index and the table of contents.<br />
SUCTION LINE LENGTH<br />
IS 7 ft<br />
(3-99)<br />
Press ? (Help).<br />
Enter the length of<br />
suction line only,<br />
excluding strainer<br />
and pump tube. <br />
Press ↵ or Down-Right to<br />
see the next screen.<br />
Press Stop to return to the<br />
programming screen.<br />
See “Installing<br />
Suction Line” in<br />
your manual.<br />
<br />
Press ↵ or Down-Right to<br />
see the next screen.<br />
Press Up-Left to see the<br />
previous screen.<br />
Press Stop to return to the<br />
programming screen.<br />
Press the red STOP<br />
key to exit HELP.<br />
Press Up-Right to see the<br />
previous notes.<br />
Press Stop to return to the<br />
programming screen.<br />
Using Help Notes<br />
Although this example<br />
shows the help notes that<br />
are associated with the<br />
suction-line length screen,<br />
you can use the same<br />
technique to see help notes<br />
for other screens.
<strong>6712FR</strong> <strong>Refrigerated</strong> <strong>Sampler</strong><br />
Section 3 Getting Started<br />
3.6.3 Warning Messages Warning messages appear when the sampler determines something<br />
is out of the ordinary. For example, the following warning<br />
appears when you type a number that is larger than the standard<br />
bottle volume:<br />
BOTTLE VOLUME IS<br />
3500 ml (300-30000)<br />
WARNING!<br />
STANDARD BOTTLE<br />
VOLUME EXCEEDED!<br />
The 6712 does accept nonstandard volumes because you might<br />
use a nonstandard container occasionally. For a list of recommended<br />
volumes for Isco bottles press the ? (Help) key at the<br />
“Bottle Volume Is” screen, or refer to the Technical Specifications.<br />
The 6712 uses the bottle and sample-volume settings to determine<br />
the maximum number of samples that can be deposited<br />
without overfilling the bottles. Entering a volume that exceeds<br />
the standard volume may cause the sampler to overfill the bottle.<br />
3.6.4 Operation Messages An operation message reports the sampler’s status as it runs a<br />
program. An example is shown below.<br />
PROGRAM WILL START<br />
AT 06:00 TU 20-FEB<br />
05:56:22 TU 20-FEB<br />
3.7 Menu Trees Selecting a menu option will take you to a number-entry screen<br />
or another menu screen. The screens are organized in a branching<br />
structure that resembles a tree. Refer to Figure 3-1 for a simple<br />
chart of the menu tree for standard programming. The<br />
standard programming structure is different — much simpler —<br />
than the extended programming structure. Charts that show you<br />
most of the sampler’s screens appear in Appendix A, Flowcharts.<br />
The entire structure changes a little when a module is attached<br />
because the sampler adds a set of screens for a module as soon as<br />
it detects the module’s presence. The manuals for each module<br />
contain menu trees for its programming screens.<br />
3-9
<strong>6712FR</strong> <strong>Refrigerated</strong> <strong>Sampler</strong><br />
Section 3 Getting Started<br />
Figure 3-1 Menu Tree for Standard Programming<br />
3-10<br />
RUN<br />
PROGRAM<br />
VIEW REPORT<br />
OTHER FUNCTIONS<br />
VIEW DATA<br />
PRINT DATA<br />
SYSTEM IDs<br />
CONFIGURE REPORTS<br />
MAINTENANCE<br />
MANUAL FUNCTIONS<br />
PROGRAMMING STYLE<br />
PROGRAMMING STYLE:<br />
NORMAL<br />
QUICK VIEW/CHANGE<br />
See Running Programs on page 4-10<br />
See the screen charts in Appendix A.<br />
See Reports on page 4-16.<br />
SET CLOCK<br />
SET PUMP TUBE ALARM<br />
INTERNAL BATTERY<br />
DIAGNOSTICS<br />
See Figure A-8, Manual Functions<br />
Screens, on page A-8.
4.1 Switching Between<br />
Standard and<br />
Extended Modes<br />
4.2 Language Selection,<br />
Units of Length<br />
<strong>6712FR</strong> <strong>Refrigerated</strong> <strong>Sampler</strong><br />
Section 4 Standard Programming<br />
The <strong>6712FR</strong> <strong>Sampler</strong> has two sets of programming screens. The<br />
first set, called standard programming screens, lets you set up<br />
typical sampling programs easily and efficiently. The second set,<br />
extended programming screens, lets you create sophisticated<br />
programs for complex sampling applications.<br />
All of the sampling features available within the standard programming<br />
screens are available in extended programming. However,<br />
extended programming provides several additional features<br />
which are discussed in the next section. Menu flowcharts for both<br />
sets of programming screens are in Appendix A.<br />
Factory default settings cause the sampler to begin in standard<br />
programming mode the first time you turn it on. The start-up<br />
screen tells you which programming mode the sampler is currently<br />
using. You can switch between programming modes by<br />
entering a numerical command at the main menu:<br />
At the main menu, type 6712.1 to enter standard programming<br />
mode.<br />
At the main menu, type 6712.2 to enter extended programming<br />
mode.<br />
RUN<br />
PROGRAM<br />
VIEW REPORT<br />
OTHER FUNCTIONS<br />
Main Menu<br />
You have the option of displaying screens in English or Spanish<br />
(or possibly another language). The default is English. At the<br />
main menu, type 6712.8 to display:<br />
ENGLISH<br />
SPANISH<br />
Use the arrow key to move between the two choices. When the<br />
desired choice is blinking, press ↵.<br />
If you select the English option, you will advance to a second<br />
screen that asks you to select your units of length:<br />
SELECT UNITS FOR<br />
LENGTH:<br />
ft m<br />
4-1
<strong>6712FR</strong> <strong>Refrigerated</strong> <strong>Sampler</strong><br />
Section 4 Standard Programming<br />
1<br />
2<br />
3<br />
4<br />
5<br />
6<br />
7<br />
8<br />
9<br />
10<br />
4-2<br />
4.3 Programming<br />
Examples<br />
Use the arrow key to move between the two choices, feet or<br />
meters. When the desired choice is blinking, press ↵. The default<br />
unit of length for the Spanish option is meters.<br />
The following table is an example of time-paced sampling. Further<br />
details about some of the menu items are provided in later<br />
sections.<br />
Table 4-1 Standard Program: Sample Every 15 Minutes, One Sample Per Bottle<br />
6712 SAMPLER<br />
STANDARD PROGRAMMING<br />
For HELP at any<br />
screen press ? key.<br />
RUN<br />
PROGRAM<br />
VIEW REPORT<br />
OTHER FUNCTIONS<br />
SITE DESCRIPTION:<br />
“FACTORY051“<br />
CHANGE?<br />
YES NO<br />
NUMBER OF BOTTLES:<br />
1 2 4 8 12 24<br />
BOTTLE VOLUME IS<br />
1000 ml (300-30000)<br />
SUCTION LINE LENGTH<br />
IS 10 ft<br />
(3-99)<br />
TIME PACED<br />
FLOW PACED<br />
TIME BETWEEN<br />
SAMPLE EVENTS<br />
0 HOURS, 15 MINUTES<br />
SEQUENTIAL<br />
BOTTLES/SAMPLE<br />
SAMPLES/BOTTLE<br />
RUN CONTINUOUSLY?<br />
YES NO<br />
Turn the sampler on by pressing the On/Off key. Press ↵.<br />
This screen disappears on its own after 8 seconds.<br />
The option PROGRAM will be blinking. Press ↵.<br />
The option NO will be blinking. Press ↵.<br />
For the purposes of this example, it isn’t necessary to change the description.<br />
Select the number of bottles in your bottle kit by pressing either arrow key<br />
until the correct number blinks. Press ↵. For this example, select 24.<br />
Type the volume for the bottles in your kit. For this example, 1000 is correct,<br />
so simply press ↵.<br />
Type the length of the suction line, then press ↵.<br />
If you change the length, the sampler will display a message,<br />
“PLEASE WAIT!. . . GENERATING PUMP TABLES.”<br />
Because this example requires samples every 15 minutes, select TIME<br />
PACED by pressing an arrow until the option TIME PACED blinks. Then,<br />
press ↵.<br />
Type 0 for hours and press ↵. Type 15 for minutes and press ↵.<br />
Tip: Move back and forth between hours and minutes by pressing an arrow<br />
key.<br />
Because this program requires one sample in each bottle, select<br />
SEQUENTIAL by pressing an arrow until the option SEQUENTIAL blinks.<br />
Then, press ↵.<br />
For this example, select NO by pressing an arrow until the option blinks.<br />
Then, press ↵. Selecting YES allows the program to run indefinitely by<br />
repeating the sample distribution. Continuous sampling assumes that filled<br />
bottles are replaced with empty bottles at regular service intervals.
11<br />
12<br />
13<br />
14<br />
15<br />
1<br />
2<br />
3<br />
SAMPLE VOLUME:<br />
200 ml (10-1000)<br />
NO DELAY TO START<br />
DELAYED START<br />
CLOCK TIME<br />
FIRST SAMPLE<br />
AFTER A<br />
5 MINUTE DELAY<br />
(1-999)<br />
<strong>6712FR</strong> <strong>Refrigerated</strong> <strong>Sampler</strong><br />
Section 4 Standard Programming<br />
Table 4-1 Standard Program: Sample Every 15 Minutes, One Sample Per Bottle (Continued)<br />
PROGRAMMING COMPLETE<br />
RUN THIS PROGRAM<br />
NOW?<br />
YES NO<br />
RUN<br />
PROGRAM<br />
VIEW REPORT<br />
OTHER FUNCTIONS<br />
Type the volume of the sample you want deposited in each bottle. Then,<br />
press ↵.<br />
For this example, select DELAYED START by pressing an arrow until the<br />
option blinks. Then, press ↵.<br />
Type the delay period you want between the time you run the program and<br />
the time the sampler takes the first sample. Then, press ↵.<br />
Run the program immediately by selecting YES. Select NO if you want to<br />
run the program later by selecting RUN from the main menu. Press ↵ after<br />
making your choice. In this example, NO is selected.<br />
Run the program by selecting RUN and pressing ↵.<br />
The following table is an example of flow-paced sampling.<br />
Program type: Standard<br />
Site description: SITE 29<br />
Bottle kit: 24, 1000 milliliter bottles<br />
Suction line length: 7 feet<br />
Pacing: Flow pacing, every two pulses<br />
Distribution: 2 bottles per sample<br />
Sample Volume: 250 milliliters<br />
Start time: Clock Time, 6:00 a.m. on Monday, Wednesday,<br />
Friday<br />
Module: No module installed<br />
Table 4-2 Standard Program: Flow-Paced Sampling, Two Bottles Per Sample<br />
6712 SAMPLER<br />
STANDARD PROGRAMMING<br />
For HELP at any<br />
screen press ? key.<br />
RUN<br />
PROGRAM<br />
VIEW REPORT<br />
OTHER FUNCTIONS<br />
SITE DESCRIPTION:<br />
“FACTORY051“<br />
CHANGE?<br />
YES NO<br />
Select PROGRAM.<br />
Select NO.<br />
4-3
<strong>6712FR</strong> <strong>Refrigerated</strong> <strong>Sampler</strong><br />
Section 4 Standard Programming<br />
4<br />
5<br />
6<br />
7<br />
8<br />
9<br />
10<br />
11<br />
12<br />
13<br />
14<br />
15<br />
4-4<br />
Table 4-2 Standard Program: Flow-Paced Sampling, Two Bottles Per Sample (Continued)<br />
NUMBER OF BOTTLES:<br />
1 2 4 8 12 24<br />
BOTTLE VOLUME IS<br />
1000 ml (300-30000)<br />
SUCTION LINE LENGTH<br />
IS 10 ft<br />
(3-99)<br />
TIME PACED<br />
FLOW PACED<br />
FLOW BETWEEN<br />
SAMPLE EVENTS:<br />
2 PULSES (1-9999)<br />
SEQUENTIAL<br />
BOTTLES/SAMPLE<br />
SAMPLES/BOTTLE<br />
RUN CONTINUOUSLY?<br />
YES NO<br />
1 BOTTLES PER<br />
SAMPLE EVENT (1-24)<br />
NO DELAY TO START<br />
DELAYED START<br />
CLOCK TIME<br />
START FLOW COUNT AT:<br />
00:00<br />
SELECT DAYS:<br />
SU MO TU WE TH FR SA<br />
DONE<br />
PROGRAMMING COMPLETE<br />
RUN THIS PROGRAM<br />
NOW?<br />
YES NO<br />
Select 24.<br />
Enter 1000.<br />
Enter 7.<br />
Select FLOW PACED.<br />
Enter the number of pulses between sample events.<br />
Select BOTTLES/SAMPLE.<br />
For this example, select NO by pressing an arrow until the option blinks.<br />
Then, press ↵. Selecting YES allows the program to run indefinitely by<br />
repeating the sample distribution. Continuous sampling assumes that filled<br />
bottles are replaced with empty bottles at regular service intervals.<br />
Enter 2.<br />
Select CLOCK TIME.<br />
Enter 6, then enter 0.<br />
This is the time at which the sampler will start the pacing countdown.<br />
Select MO, WE, and FR.<br />
Use the arrow keys and ↵ to select the days. When the correct days are<br />
blinking, select DONE and press ↵.<br />
Select NO.
<strong>6712FR</strong> <strong>Refrigerated</strong> <strong>Sampler</strong><br />
Section 4 Standard Programming<br />
4.4 Pacing Sample pacing is the rate at which the sampler takes samples.<br />
Standard Time Pacing and<br />
Flow Pacing Screens for<br />
<strong>Sampler</strong>s without Flow<br />
Modules<br />
TIME PACED<br />
FLOW PACED<br />
When programming, you will<br />
be asked to select time or flow<br />
paced sampling. Depending<br />
upon your choice, you will see<br />
one of the following screens:<br />
TIME BETWEEN<br />
SAMPLE EVENTS:<br />
__ HOURS, __ MINUTES<br />
FLOW BETWEEN<br />
SAMPLE EVENTS:<br />
____ PULSES (1-9999)<br />
Flow Pacing Screen for<br />
<strong>Sampler</strong>s with Flow Modules<br />
FLOW BETWEEN<br />
SAMPLE EVENTS:<br />
____ Mgal<br />
(0.001 -99999)<br />
Depending on the type of pacing you select, the rate is controlled<br />
by the sampler’s internal clock or by inputs received from connected<br />
instruments.<br />
Standard programming provides time pacing and flow pacing<br />
(refer to Step 7 in the previous two programming examples). In<br />
time-paced sampling, the interval between samples is a constant<br />
time interval. When you program the sampler for time pacing,<br />
the sampler prompts you to enter the time between sample<br />
events in hours and minutes. Time paced programs always take<br />
a sample at the start time.<br />
Flow paced sampling requires a flow meter, flow logger, or a module.<br />
A flow meter or flow logger paces a sampler by sending an<br />
electronic signal to the sampler after measuring a specified volume<br />
of liquid. Because each pulse represents a volume interval,<br />
flow pacing rates are proportional to the volume of water flowing<br />
through the channel.<br />
When you program the sampler for flow pacing and are using a<br />
flow meter or flow logger, the sampler prompts you to enter the<br />
interval between sample events in pulses. The sampler initiates<br />
a sample event when the set number of pulses is received. Programs<br />
that are flow paced do not take a sample at the start time.<br />
The flow pacing screens change when you attach a flow module<br />
(see example to the left). Because the sampler is more closely<br />
integrated with the modules, the standard flow pacing screen<br />
prompts you for the flow volume between sample events instead<br />
of pulses between events. The flow volume units displayed are<br />
what you had previously programmed.<br />
4.4.1 Trigger Pacing Isco 4200 Series Flow Meters and 4100 Series Flow Loggers send<br />
pulses for trigger pacing. The flow meter or flow logger sends<br />
pulses at two different time intervals when trigger pacing a sampler.<br />
Trigger pacing, for example, lets you sample less frequently<br />
when the trigger condition — a condition based on level, flow, or<br />
rainfall — remains below a set point. The intervals are determined<br />
by the flow instrument’s program settings for trigger pacing.<br />
When conditions change and readings pass the set point, triggering<br />
the new rate, you can sample more frequently. Or, when the<br />
trigger condition is a clock setting, the instrument changes the<br />
pacing interval according to the time of day. Using a clock trigger<br />
condition, for instance, the flow meter or flow logger can pace the<br />
sampler slowly at night and more frequently during the day. (For<br />
more information about trigger pacing, see your flow meter or<br />
FLOWLINK manual.)<br />
The flow meter or flow logger sends the same pulse for both flow<br />
and trigger pacing, and the sampler cannot distinguish between<br />
them. Therefore, to program a sampler for trigger pacing, simply<br />
program it for flow pacing.<br />
4-5
<strong>6712FR</strong> <strong>Refrigerated</strong> <strong>Sampler</strong><br />
Section 4 Standard Programming<br />
4-6<br />
4.5 Distribution Distribution describes how the sampler is to deposit samples. A<br />
sample is the volume of liquid deposited in a bottle. A sample<br />
event includes the full sampling cycle and may deposit a sample<br />
into more than one bottle.<br />
In standard programming, you can program the sampler for<br />
these different distribution methods:<br />
Sequential<br />
Bottles Per Sample<br />
Samples Per Bottle<br />
Composite<br />
4.5.1 Sequential In sequential distribution, the sampler deposits one sample in<br />
each bottle. A sequential sample represents a “snapshot” of the<br />
flow stream at a point in time.<br />
4.5.2 Bottles Per Sample In bottles per sample distribution, the sampler deposits a sample<br />
in each of a set of bottles. A bottle set includes at least two bottles<br />
but may include all bottles. Use bottles per sample when the volume<br />
to be collected is larger than the amount one bottle can hold<br />
or when you need identical samples.<br />
4.5.3 Samples Per Bottle In samples per bottle distribution, the sampler deposits samples<br />
from several sample events in a single bottle before moving to the<br />
next bottle. Use samples per bottle distribution to collect a series<br />
of small composite samples.<br />
4.5.4 Composite For single bottle configurations, samples per bottle distribution<br />
is known as composite sampling. A composite sample represents<br />
an average of the flow stream’s characteristics during the sampling<br />
period.<br />
4.5.5 Continuous Sampling Sample programs can be run indefinitely by selecting “YES” at<br />
the “RUN CONTINUOUSLY?” screen. Continuous sampling<br />
resets the distribution when the distribution sequence is complete.<br />
That is, when the last bottle/set is reached, the next bottle/set<br />
is the first bottle/set. All pacing modes except RANDOM<br />
are supported.<br />
When running a program continuously, the bottles must be serviced<br />
at regular intervals to prevent overfilling the bottles. The<br />
sampler assumes that the next bottle/set is empty and ready to<br />
receive samples.<br />
The figure on the next page steps through the programming<br />
screens for sequential, bottles per sample, and samples per bottle<br />
distribution.
Sequential<br />
1 2 3 4 5 6<br />
STANDARD<br />
PROGRAMMING<br />
DISTRIBUTION:<br />
SEQUENTIAL<br />
Each bottle receives one sample from one sample event.<br />
Bottles-per-Sample<br />
1 1 2 2 3 3<br />
STANDARD<br />
PROGRAMMING<br />
DISTRIBUTION:<br />
2 BOTTLES/SAMPLE<br />
Multiple bottles receive a sample from one sample event.<br />
Samples-per-Bottle<br />
2 4 6 8<br />
1 3 5 7<br />
STANDARD<br />
PROGRAMMING<br />
DISTRIBUTION:<br />
2 SAMPLES/BOT TLE<br />
Each bottle receives a sample from multiple sample events.<br />
Figure 4-1 Sample Distribution<br />
SEQUENTIAL<br />
BOTTLES/SAMPLE<br />
SAMPLES/BOT TLE<br />
SEQUENTIAL<br />
BOTTLES/SAMPLE<br />
SAMPLES/BOT TLE<br />
SEQUENTIAL<br />
BOTTLES/SAMPLE<br />
SAMPLES/BOT TLE<br />
<strong>6712FR</strong> <strong>Refrigerated</strong> <strong>Sampler</strong><br />
Section 4 Standard Programming<br />
RUN CONTINUOUSLY?<br />
YES NO<br />
2 BOTTLES PER<br />
SAMPLES EVENT (1-24)<br />
2 SAMPLES PER<br />
BOTTLE (1-50)<br />
RUN CONTINUOUSLY?<br />
YES NO<br />
RUN CONTINUOUSLY?<br />
YES NO<br />
4-7
<strong>6712FR</strong> <strong>Refrigerated</strong> <strong>Sampler</strong><br />
Section 4 Standard Programming<br />
4-8<br />
4.6 Start Times It is important to understand the difference between the time at<br />
which you run a program and the program’s start time. Running<br />
a program simply means selecting RUN from the sampler’s main<br />
menu. The start time is the time at which the sampler begins the<br />
program’s first sample interval countdown. The start time is controlled<br />
by your selections from the start time screens.<br />
4.6.1 How Do Start Times<br />
Work?<br />
1<br />
2<br />
3<br />
Delayed Start Screen<br />
NO DELAY TO START<br />
DELAYED START<br />
CLOCK TIME<br />
Select DELAYED START.<br />
FIRST SAMPLE<br />
AFTER A<br />
___MINUTE DELAY<br />
(1-999)<br />
Enter the number of minutes<br />
to delay the countdown<br />
to the first sample.<br />
START FLOW COUNT<br />
AFTER A<br />
__MINUTE DELAY<br />
(1-999)<br />
The sampler uses this<br />
screen for flow paced programs.<br />
Each program contains start-time settings that tell the sampler<br />
when to begin the program. When programming the sampler, you<br />
can select one of three start time options: NO DELAY TO START,<br />
DELAYED START, or CLOCK TIME.<br />
Select NO DELAY TO START when you want the sampler<br />
to start as soon as you select RUN.<br />
Select DELAYED START when you want the sampler to<br />
delay from 1 to 999 minutes before starting the program.<br />
Select CLOCK TIME when you want the sampler to begin<br />
the program at a specific time on at least one day of the<br />
week.<br />
As soon as you select RUN from the main menu, the sampler<br />
checks the program’s start time settings. With a “DELAYED<br />
START” setting, the sampler starts a countdown to the start<br />
time. The period between the time you select RUN and the start<br />
time you’ve specified in the program is called the “delay to start<br />
time.”<br />
When you run a program with “CLOCK TIME” settings, the sampler<br />
also starts a countdown to start time until the day of week<br />
and clock times are met.<br />
The sampler may not collect a sample at the start time. The sampler<br />
must be enabled, and the pacing selected must call for a<br />
sample at start. In any event, the sampler checks the pacing settings<br />
and begins the pacing-interval countdown.<br />
4<br />
5<br />
6<br />
Clock Start Time Menu<br />
NO DELAY TO START<br />
DELAYED START<br />
CLOCK TIME<br />
Select CLOCK TIME.<br />
FIRST SAMPLE AT<br />
06:00<br />
Enter the time of day.<br />
SELECT DAYS:<br />
SU MO TU WE TH FR SA<br />
DONE<br />
Press an arrow key until<br />
the cursor is on the correct<br />
day. Press↵.<br />
Repeat until each day<br />
you want is blinking.<br />
Press an arrow until<br />
DONE blinks. Press ↵.
4.6.2 <strong>Sampler</strong><br />
Enable/Disable<br />
Figure 4-2 Start Time Diagram<br />
<strong>Sampler</strong> enabled at<br />
start time<br />
<strong>Sampler</strong> disabled at<br />
start time by<br />
signal from pin F<br />
<strong>6712FR</strong> <strong>Refrigerated</strong> <strong>Sampler</strong><br />
Section 4 Standard Programming<br />
Isco flow meters and flow loggers have a programmable sampler-enable<br />
feature that lets them enable (start) or disable (stop)<br />
a program according to certain monitored conditions. For example<br />
these conditions can be level, flow rate, pH, temperature, percent,<br />
rainfall, I/O; or a combination of two conditions.<br />
The Model 1640 Liquid Level Actuator can also be used, as well<br />
as any other instrument that can ground the input to pin F.<br />
Grounding the input disables the sampler.<br />
The sampler disregards disable signals during the delay to start<br />
time. However, when the sampler detects a disable signal at the<br />
start time, it suspends the program until it is enabled. The diagram<br />
in Figure 4-2 shows the sampler’s responses.<br />
A sample event at the start time<br />
occurs for time-paced programs.<br />
A sample is not taken at start time<br />
if the sampler is disabled. No samples<br />
are taken while disabled.<br />
4-9
<strong>6712FR</strong> <strong>Refrigerated</strong> <strong>Sampler</strong><br />
Section 4 Standard Programming<br />
4.7 Running Programs To run a program, select RUN from the main menu. You may also<br />
select YES at the RUN THIS PROGRAM NOW? screen at the<br />
end of the programming screens.<br />
4-10<br />
4.7.1 Run Time Screens While running a sampling program the sampler displays a variety<br />
of messages that report the program’s status. For example, if<br />
the sampler has not yet reached the programmed start time, it<br />
displays the scheduled start time as well as the current time.<br />
Once the program reaches the start time, you can determine the<br />
time of the next sample, the next bottle to receive a sample, sample<br />
distribution, and other information. Other messages appear<br />
while the sampler runs through a sampling cycle and takes a<br />
sample. When the sampler needs to report multiple messages, it<br />
alternates them, displaying each for one to three seconds.<br />
PROGRAMMING COMPLETE<br />
RUN THIS PROGRAM<br />
NOW?<br />
YES NO<br />
OR<br />
RUN<br />
PROGRAM<br />
VIEW REPORT<br />
OTHER FUNCTIONS<br />
Figure 4-3 Running a Program<br />
Multiple Bottles<br />
Single Bottle<br />
RUN DISPLAYS<br />
If RUN had been previously Stopped<br />
and no programming changes were made.<br />
ENTER START BOTTLE:<br />
__ (1–MAX)<br />
PLEASE WAIT!<br />
...TESTING<br />
DISTRIBUTOR SYSTEM<br />
PROGRAM WILL START<br />
AT 06:00 MO 17–OCT<br />
05:52:22 MO 17–OCT<br />
PURGING<br />
SUCTION LINE<br />
PUMPING 250 ml<br />
RINSING<br />
SUCTION LINE<br />
SAMPLE 2<br />
IN 00:14:29<br />
For the first run using<br />
a 24-bottle base.<br />
If applicable<br />
FATAL ERROR<br />
NO DISTRIBUTOR ARM!<br />
If applicable<br />
OPERATION ERROR<br />
DISTRIBUTOR JAMMED
<strong>6712FR</strong> <strong>Refrigerated</strong> <strong>Sampler</strong><br />
Section 4 Standard Programming<br />
4.7.2 Module Readings <strong>Sampler</strong>s with an attached module display the module’s readings:<br />
pH and temperature for the pH module; percentage or flow<br />
rate for the 4-20 mA module; level, flow-rate, and flow volume<br />
readings for the flow modules; level, velocity, flow-rate, and positive<br />
flow volume readings for the area velocity module. Some<br />
module screens will alternate with the sampler screens.<br />
BOTTLE 2<br />
IN 00:12:00<br />
***** gpm 5.73 ft<br />
00001457600 gal<br />
4.8 Interrupting a<br />
Running Program<br />
BOTTLE 2<br />
IN 00:14:39<br />
150 gpm 0.82 ft<br />
00001438200 gal<br />
The Module readings are updated:<br />
Every second when displaying the reading during programming.<br />
Every minute otherwise.<br />
An * (asterisk) appears next to the reading if the module was<br />
unable to take a reading. If an asterisk appears, the reading displayed<br />
is the last available reading. Flow rates will be reported<br />
as zero flow if the error persists for more than five minutes (for a<br />
level or velocity reading that flow is calculated from).<br />
If an entire reading is filled with asterisks, the value exceeds the<br />
number of characters that can be displayed. The sampler stores<br />
the actual reading in memory, so it may be collected later.<br />
For those programs that have delayed or scheduled start times,<br />
the readings will be displayed while waiting for the start time.<br />
Keep in mind that any totalizer values will be reset at the start<br />
time. Module and sonde readings are also displayed after a program<br />
is complete, until a key is pressed.<br />
It is not necessary to run a program to view module or sonde<br />
readings. Real time data can be viewed on the display by selecting<br />
“VIEW REPORT” from the main menu.<br />
You can interrupt a sampling program by pressing the Stop key<br />
while the sampler is waiting for the next sample event. Pressing<br />
Stop places the sampler into Manual Paused operation and<br />
records a manual pause in the sample event log.<br />
In this state, the sampler allows you to access several functions.<br />
You can modify the program, reset alarms, take a grab sample,<br />
etc., without adversely affecting the running program. Modifying<br />
the program is limited to adjusting the pacing intervals, enable<br />
conditions and sample volume. The basic program structure,<br />
such as the type of pacing, can not be changed.<br />
While in the manual paused state, the sampling program continues<br />
to operate as normal, with the exception of taking samples. If<br />
a sample was to be taken, it is skipped. The sampler records<br />
“sample skipped” in the sample event log and continues to operate<br />
as normal.<br />
4-11
<strong>6712FR</strong> <strong>Refrigerated</strong> <strong>Sampler</strong><br />
Section 4 Standard Programming<br />
4-12<br />
The manual paused state displays a scrolling menu with several<br />
options (see example below). Use the Arrow keys to scroll<br />
through the manual paused options and the ↵ key to make a<br />
selection. Return to the running program by selecting resume<br />
program or pressing the Stop key. If you do not make a selection,<br />
the sampler automatically resumes the original sampling program<br />
five minutes after the last key was pressed.<br />
←<br />
STOP PROGRAM<br />
RESUME PROGRAM<br />
VIEW DATA<br />
GRAB SAMPLE →<br />
Manual Paused Screen<br />
4.8.1 Stop Program This option terminates the running program and records program<br />
stopped in the sample event log. The program cannot be<br />
resumed.<br />
4.8.2 Resume Program Selecting this option will cause the sampler to exit the manual<br />
paused state and return to normal program operation. A manual<br />
resume event will be logged.<br />
4.8.3 View Data This option allows you to view the data recorded by the sampler.<br />
See Reports on page 4-16 for more information.<br />
4.8.4 Grab Sample When selected, you will be asked to enter the volume to be<br />
pumped. A sample will then be taken as if it is to be placed into a<br />
container outside the sampler. Do this by removing the pump tubing<br />
from the bulkhead fitting. See Grab Samples on page 4-14. A<br />
grab sample event will be logged.<br />
4.8.5 Pump Tube Alarm If the pump tube is changed, this option should be selected to<br />
reset the pump counts on the counter. This will remove the<br />
“WARNING: REPLACE PUMP TUBING” message that may<br />
appear while the program is running. A pump tube replaced message<br />
is logged. See Replacing The Pump Tube in Section 7, Maintenance.<br />
4.8.6 Calibrate Volume When selected, you will be asked to enter the volume to be<br />
pumped. A sample will then be taken as if it is to be placed into a<br />
container outside the sampler base. Do this by removing the<br />
pump tubing from the bulkhead fitting.<br />
After the sample has been pumped, you will then be asked to<br />
enter the amount actually delivered. Once you have entered the<br />
delivered volume and accepted the calibration, a volume delivered<br />
event will be logged.<br />
4.8.7 Cal/Adj Parameters When the sampler is configured for operation with a module, this<br />
option becomes available. Selecting this option will display the<br />
appropriate level adjustment screens and/or the calibration<br />
screens. If the level is adjusted, an adjusted level event is logged.<br />
If a parameter is calibrated, an appropriate event is logged.<br />
Calibrating a parameter probe will temporarily “turn off” the<br />
partition data storage and the sample enable/disable functions.<br />
These functions are disabled during the calibration and for five
<strong>6712FR</strong> <strong>Refrigerated</strong> <strong>Sampler</strong><br />
Section 4 Standard Programming<br />
minutes after the program is resumed. During this time, parameter<br />
data normally collected at the data storage interval will be<br />
logged as a 252 error message.<br />
4.8.8 Adjust Pacing This option is available when the running program is paced by<br />
Time, Flow Pulses or Flow Volume. If you select this option, you<br />
are asked to enter a new pacing interval. The sampler logs an<br />
interval changed event.<br />
The original pacing interval continues to count down until you<br />
return the sampler to the running program (select resume program).<br />
If the new pacing interval is less than the original count<br />
remaining, the new interval is used.<br />
If the original count remaining is less than the new pacing interval,<br />
the original count will continue to count down to the next<br />
sample event. Subsequent samples are then paced by the new<br />
interval.<br />
4.8.9 Adjust Volume Select this option to change the sample volume within the limits<br />
of the currently programmed sample distribution. If you change<br />
a sample volume, a volume changed event is logged.<br />
4.8.10 Power Used The <strong>6712FR</strong> has a “fuel gauge” that gives an indication of power<br />
usage. The controller keeps track of how much power has been<br />
consumed since the last time it lost power. If the controller is<br />
powered by an external battery, this fuel gauge can help you estimate<br />
the condition of the battery.<br />
Keep in mind that the sampler has no idea as to how much<br />
charge was originally stored in the battery (or even if a battery is<br />
being used), and therefore has no idea as to the remaining capacity<br />
of its power source.<br />
4.9 Other Functions In Standard Programming, the “Other Functions” menu screen<br />
Other Functions Menu<br />
RUN PROGRAM<br />
VIEW REPORT<br />
OTHER FUNCTIONS<br />
Select OTHER FUNCTIONS.<br />
MAINTENANCE<br />
MANUAL FUNCTIONS<br />
PROGRAMMING STYLE<br />
includes options for:<br />
Maintenance (see Section 7).<br />
Manual Functions (see below).<br />
Programming Style (see Section 3).<br />
4.10 Manual Functions The manual functions programming screens let you:<br />
Take grab samples.<br />
Calibrate sample volumes.<br />
Operate the pump manually.<br />
Move the distributor arm.<br />
4-13
<strong>6712FR</strong> <strong>Refrigerated</strong> <strong>Sampler</strong><br />
Section 4 Standard Programming<br />
4.11 Grab Samples Grab samples let you take a single sample on demand, collecting<br />
the sample in an external container (Figure 4-4). Keep in mind:<br />
1<br />
2<br />
3<br />
4<br />
5<br />
6<br />
7<br />
4-14<br />
Taking a Grab Sample<br />
GRAB SAMPLE<br />
CALIBRATE VOLUME<br />
OPERATE PUMP<br />
MOVE DISTRIBUTOR<br />
Select GRAB SAMPLE<br />
SAMPLE VOLUME:<br />
___ ml (10-9990)<br />
Enter the desired volume<br />
GRAB SAMPLE<br />
PRESS ↵ WHEN READY!<br />
PURGING<br />
SUCTION LINE<br />
PUMPING 200 ml<br />
PURGING<br />
SUCTION LINE<br />
GRAB SAMPLE<br />
CALIBRATE VOLUME<br />
OPERATE PUMP<br />
MOVE DISTRIBUTOR<br />
Press STOP to return to<br />
main menu.<br />
When the sampler delivers a grab sample, it runs through a complete<br />
sampling cycle, using the current settings for volume and<br />
for line rinses or retries. If it is a two-part program, the sampler<br />
uses the settings for part A.<br />
To take a grab sample while the sampler is running a program,<br />
you must interrupt the program by pressing the Stop key.<br />
Restart the program by running it again.<br />
To take a grab sample:<br />
1. Disconnect the pump tube from the bulkhead fitting.<br />
2. Place the end of the tube over a collection container.<br />
3. Follow the steps in Taking a Grab Sample at left.<br />
4. Reconnect the pump tube to the bulkhead fitting.<br />
Figure 4-4 Taking a grab sample
<strong>6712FR</strong> <strong>Refrigerated</strong> <strong>Sampler</strong><br />
Section 4 Standard Programming<br />
4.12 Calibrate Volume The sampler delivers accurate sample volumes without calibration.<br />
If you find that sample volumes vary significantly from the<br />
programmed values, first check the suction line for proper installation.<br />
Be sure it slopes continuously downhill to the liquid<br />
source and drains completely after each sampling cycle. Then,<br />
compare the actual length of the suction line to the suction line<br />
length settings in the program to see that they match. Also check<br />
the pump tube for excessive wear and replace it if necessary.<br />
Calibrating Sample Volumes<br />
4.12.1 Calibration Tips<br />
You may want to calibrate when:<br />
A new pump tube is installed. Run the pump for five minutes<br />
before calibrating.<br />
The sample source is above the sampler.<br />
Sampling from pressurized lines (15 PSI Maximum).<br />
For the best results, calibrate the sampler after it’s<br />
1<br />
RUN<br />
PROGRAM<br />
VIEW REPORT<br />
OTHER FUNCTIONS<br />
installed on site.<br />
Use a graduated cylinder for volume measurement.<br />
Select OTHER FUNCTIONS The sampler clears the previous calibration setting when<br />
you reinitialize the sampler.<br />
2<br />
MAINTENANCE<br />
MANUAL FUNCTIONS<br />
MODULE<br />
HARDWARE<br />
You cannot calibrate while the sampler is running a program.<br />
Select MANUAL FUNCTIONS When the sampler delivers the sample, it runs through a<br />
complete sampling cycle, using the current settings for<br />
3<br />
GRAB SAMPLE<br />
CALIBRATE VOLUME<br />
OPERATE PUMP<br />
volume line rinses and retries. If it is a two part program,<br />
the sampler uses the volume setting for part A.<br />
MOVE DISTRIBUTOR<br />
To calibrate:<br />
Select CALIBRATE VOLUME<br />
1. Disconnect the pump tube from the bulkhead fitting.<br />
4<br />
SAMPLE VOLUME:<br />
___ ml (100-9990)<br />
2. Place the end of the tube over a collection container.<br />
3. Follow the steps in Calibrating Sample Volumes in the margin.<br />
Enter the desired volume 4. Reconnect the pump tube to the bulkhead fitting.<br />
5<br />
6<br />
7<br />
8<br />
CALIBRATE VOLUME<br />
PRESS ↵ WHEN READY!<br />
PURGING<br />
SUCTION LINE<br />
PUMPING 200 ml<br />
PURGING<br />
SUCTION LINE<br />
9<br />
10<br />
VOLUME DELIVERED:<br />
____ml<br />
Measure the volume delivered<br />
and enter the amount here.<br />
200 ml<br />
ARE YOU SURE?<br />
YES NO<br />
This screen appears when the<br />
amount you entered in step 9<br />
was more than twice, or less<br />
than half, the programmed<br />
volume.<br />
Select YES when the volume<br />
delivered matches the volume<br />
displayed on this screen.<br />
Select NO to enter the volume<br />
delivered.<br />
4-15
<strong>6712FR</strong> <strong>Refrigerated</strong> <strong>Sampler</strong><br />
Section 4 Standard Programming<br />
4.13 Operating the Pump You can manually operate the sampler’s pump in the forward or<br />
reverse direction. You can do this to test the pump, draw a large<br />
4-16<br />
Operating the Pump<br />
GRAB SAMPLE<br />
CALIBRATE VOLUME<br />
OPERATE PUMP<br />
MOVE DISTRIBUTOR<br />
SELECT DIRECTION<br />
PUMP FORWARD<br />
PUMP REVERSE<br />
PURGING. . .<br />
PRESS THE RED ‘STOP’<br />
KEY WHEN DONE<br />
PURGED _____COUNTS<br />
4.14 Moving the<br />
Distributor Arm<br />
Moving the Distributor<br />
Arm<br />
GRAB SAMPLE<br />
CALIBRATE VOLUME<br />
OPERATE PUMP<br />
MOVE DISTRIBUTOR<br />
Select MOVE<br />
DISTRIBUTOR<br />
GO TO BOTTLE ____<br />
(1-MAX)<br />
Enter the bottle number<br />
to which you want to<br />
move the distributor<br />
NOW AT BOTTLE ____<br />
sample, or purge the suction line.<br />
When you run the pump manually, the sampler reports the number<br />
of pump counts during the pump’s operation. Use this feature<br />
to obtain an estimate of the pump counts required to purge a<br />
nonstandard suction line.<br />
You can also manually run the pump from the main menu. Press<br />
the “1” key and then ↵ to run the pump in reverse. Press the “3”<br />
key and then ↵ to run the pump forward.<br />
CAUTION<br />
Tests indicate that the pump produces sound levels in excess<br />
of 85db at one meter. PROLONGED EXPOSURE TO THIS<br />
SOUND LEVEL COULD RESULT IN HEARING LOSS AND<br />
REQUIRES THE USE OF PROTECTIVE EAR PLUGS.<br />
The sampler lets you reposition the distributor arm. Use this feature<br />
to verify a bottle location when installing a bottle kit. You<br />
cannot move the distributor arm while the sampler is running a<br />
program.<br />
Always use the steps shown to the left in the margin.<br />
CAUTION<br />
DO NOT rotate the distributor arm manually; this will severely<br />
damage the distributor drive gears.<br />
4.15 Reports The 6712 records a variety of data while running a sampling program.<br />
It uses the data to produce four reports:<br />
Interrogator<br />
The Program Settings report, listing the program settings.<br />
The Sampling Results report, listing the program settings,<br />
time of samples and other program events.
<strong>6712FR</strong> <strong>Refrigerated</strong> <strong>Sampler</strong><br />
Section 4 Standard Programming<br />
The Combined Results report, combining the sample<br />
event times with rainfall or module data.<br />
The Summary report, listing daily summaries of data collected.<br />
The Summary report may be rainfall and/or module<br />
data.<br />
The sampler stores the data for each report in memory where<br />
they remain until you select RUN. Selecting RUN clears the<br />
memory so that it can store the data from the next program.<br />
4.15.1 Collecting Reports There are a number of ways to collect the reports:<br />
View reports (program settings, sampling results, and abbreviated<br />
summary reports) on the sampler’s display.<br />
Collect the reports (except for summary reports) with an Isco 581<br />
RTD and use a computer running flowlink or samplink to transfer<br />
the reports from the RTD to a file on the computer.<br />
Collect the reports (except for summary reports) with an IBM PC<br />
or compatible computer running flowlink.<br />
581 RTD<br />
Collect the reports with and IBM PC or compatible computer<br />
running samplink.<br />
4.15.2 Viewing the Data Because the display area is small, the data on the reports will be<br />
displayed a little differently from the data that is transferred to<br />
and viewed on your computer.<br />
For the Sampling Report, the sampler displays each program<br />
event, one at a time.<br />
1<br />
2<br />
3<br />
4<br />
Viewing Data<br />
RUN<br />
PROGRAM<br />
VIEW REPORT<br />
OTHER FUCTIONS<br />
Select VIEW REPORT.<br />
VIEW DATA<br />
SYSTEM IDs<br />
CONFIGURE REPORTS<br />
Select VIEW DATA.<br />
SELECT DATA TO VIEW:<br />
SAMPLING REPORT<br />
MODULE DATA<br />
RAINFALL DATA<br />
Select a report or data type.<br />
VIEW:<br />
DAILY SUMMARY<br />
CURRENT READINGS<br />
Select DAILY SUMMARY to view<br />
the stored data, or CURRENT<br />
READINGS to view real-time<br />
data.<br />
For the Module and Rainfall Data reports, it displays<br />
daily summaries, instead of the full reports available with<br />
the rtd, Flowlink, or Samplink.<br />
If you select sampling report or rainfall (step 3 in Viewing Data,<br />
shown in the margin), the sampler begins displaying the report<br />
data. The sampler advances automatically through the report<br />
items, displaying each item briefly. While the sampler advances<br />
automatically through the displays:<br />
Stop the automatic displays by pressing Stop once. Then,<br />
use the arrow keys to move manually through the report.<br />
Return to the main menu by pressing Stop twice.<br />
At the end of the report, the sampler leaves the last item displayed<br />
until you press:<br />
the arrow keys to move forward or backward manually<br />
through the report.<br />
Stop to return to the main menu.<br />
↵ to start the automatic displays again.<br />
If you select module data in step 3, the sampler displays the<br />
screen shown in step 4. Select the daily summary option and the<br />
sampler displays the stored data just as the Sampling Report<br />
was described above. Selecting the current readings option<br />
causes the sampler to display real-time readings. When there are<br />
multiple screens, they will be displayed alternately. You can<br />
4-17
<strong>6712FR</strong> <strong>Refrigerated</strong> <strong>Sampler</strong><br />
Section 4 Standard Programming<br />
1<br />
2<br />
3<br />
4-18<br />
quickly advance through the screens by pressing an arrow key or<br />
↵. Pressing Stop exits the Current Readings mode.<br />
4.15.3 Configuring Reports The Configure Reports option lets you specify which of the Sampling<br />
Reports will be included in any output request. Each sampler<br />
is shipped with the option flowlink report selected.<br />
RUN<br />
PROGRAM<br />
VIEW REPORT<br />
OTHER FUCTIONS<br />
Select VIEW REPORT.<br />
VIEW DATA<br />
PRINT DATA<br />
SYSTEM IDs<br />
CONFIGURE REPORTS<br />
Select CONFIGURE REPORTS<br />
SAMPLINK REPORT<br />
FLOWLINK REPORT<br />
CUSTOM REPORT<br />
ALL REPORTS<br />
Select the option that matches<br />
your data collection software,<br />
or tailor the output according<br />
to the reports needed.<br />
4.15.4 Sampling Results<br />
Report<br />
The samplink report and flowlink report options allow you to tailor<br />
the output to the Isco software used to collect the reports. The<br />
samplink report option provides the Sampling Reports, but disables<br />
the output of the detailed partition data.<br />
flowlink report provides the Sampling Reports and the detailed<br />
partition data. Selecting the flowlink report option enables the<br />
output of the detailed partition data so flowlink can add the data<br />
to the site’s database file.<br />
When you are familiar with the available Sampling Reports, you<br />
may want to specify an output containing only the specific data<br />
you require. The custom report option will allow selection of each<br />
printed report and of detailed data. Data collection time, printout<br />
length, and storage space may be optimized using this option.<br />
As the sampler runs a program, it records the program’s events.<br />
Program events include such items as sample events, program<br />
enables and disables, power losses, and so on. Table 4-3 lists each<br />
event with a short description. You can view the report by following<br />
the steps in Viewing the Data on page 4-17 or print the log as<br />
the Sampling Results report.<br />
In the printed version of the report, sample-event entries include<br />
the time of the event as well as the sample and bottle numbers.<br />
The sample column contains the sample number deposited into<br />
the bottle. This information reflects the distribution selected for<br />
the program.<br />
The letters in the Source columns are codes for the cause of the<br />
event. The letters in the Error column are codes for the causes of<br />
missed samples. The source and error codes appear with explanations<br />
at the end of the report. A list of codes appears in Table<br />
4-3.<br />
The last column in the Sampling Results report records the<br />
pump counts for the sample event. Large variations in pump<br />
counts from event to event indicate fluctuating heads, a relocated<br />
suction line, or a temporarily clogged strainer.
4.15.5 Combined Results<br />
Report<br />
<strong>6712FR</strong> <strong>Refrigerated</strong> <strong>Sampler</strong><br />
Section 4 Standard Programming<br />
At the time of each sample event, the sampler records the readings<br />
from each connected module, rain gauge, or SDI-12 sonde.<br />
The Combined Results Report presents the event time, sample<br />
and bottle number, and the respective readings from the device.<br />
For flow modules, the readings are level and flow rate. For the<br />
pH module, the readings are temperature and pH. For the rain<br />
gauge and SDI-12 Sonde, the readings vary according to the<br />
selections enabled during the hardware setup in extended programming.<br />
When recording four or more sonde parameters, the<br />
Combined Results report will exceed the standard 40 character<br />
width. To read the additional columns, the data must be collected<br />
with Flowlink 4 for Windows software.<br />
4.15.6 Summary Report This report summarizes the rain gauge or module data. The<br />
types of readings are the same as those available to the Combined<br />
reports. The sampler compiles the data to present a daily<br />
total, the day’s average, maximum, and minimum reading, and a<br />
listing of hourly averages. The sampler then graphs the day’s<br />
readings.<br />
Table 4-3 Reports: Program Events, Source Codes, and Error Codes<br />
* Indicates events and codes that occur in Standard Programming<br />
Program Events (listed in the order that they most likely would occur)<br />
*PROGRAM RUN The sampler ran the sampling program.<br />
*PROGRAM STARTED The sampler started the sampling program.<br />
*PROGRAM ENABLED (DISABLED) The sampler was enabled or disabled according to program settings or an external instrument.<br />
‘A’/’B’ ENABLED (DISABLED) Program part ‘A’ or ‘B’ was enabled or disabled according to the program’s settings.<br />
SAMPLE A sample was taken as programmed. (See Source Codes and Error Codes in this table.)<br />
*SAMPLE SWITCH TIME A sample was taken at programmed switch time.<br />
*PROGRAM DONE The sampler finished the sampling program.<br />
‘A’/’B’ DONE The sampler finished program part ‘A’ or ‘B’.<br />
*MANUAL PAUSE Stop was pressed during the program to enter the Manual Paused state.<br />
*PROGRAM STOPPED You selected Stop from the manual paused options, terminating the program.<br />
*GRAB SAMPLE A grab sample was taken while in the Manual Paused state.<br />
PUMP TUBE REPLACED The pump tube alarm was reset while in the Manual Paused state.<br />
CALIBRATE VOLUME The volume was calibrated.<br />
CALIBRATE SDI PARAMETER An SDI-12 sonde or module parameter was calibrated.<br />
*ADJUSTED PACING The pacing interval was changed while in the Manual Paused state.<br />
*VOLUME CHANGED Sample volume was changed while in the Manual Paused state.<br />
ADJUST ENABLE <strong>Sampler</strong> enable thresholds were changed while in the Manual Paused state.<br />
RESET RAIN HISTORY The rain history was reset.<br />
ADJUST SUCTION HEAD The suction head was changed while in the Manual Paused state.<br />
*MANUAL RESUME The resume program option was selected from the Manual Paused state.<br />
PROGRAM PAUSED (RESUMED) The program reached a programmed pause or resume time.<br />
‘A’/’B’ PAUSED (RESUMED) Program part ‘A’ or ’B’ reached a programmed pause or resume time.<br />
*POWER FAILED The power source was disconnected.<br />
*POWER RESTORED The power source was reconnected.<br />
ALARM OCCURRED An alarm occurred.<br />
ALARM ACKNOWLEDGED An alarm was acknowledged.<br />
*MISSED PASSWORD The password was missed.<br />
4-19
<strong>6712FR</strong> <strong>Refrigerated</strong> <strong>Sampler</strong><br />
Section 4 Standard Programming<br />
(THE SOURCE AND ERROR CODES LISTED BELOW REFER TO WHY A SAMPLE WAS TAKEN AND WHAT HAPPENED WHILE IT WAS BEING TAKEN.)<br />
Source Codes<br />
*C CALIBRATE SAMPLE Sample volume delivered during calibration.<br />
*D DISABLE Sample event at disable time.<br />
*E ENABLE Sample event at enable time.<br />
EV EVENT Event-paced sample event.<br />
*F FLOW Flow-paced sample event.<br />
*G GRAB SAMPLE Sample volume delivered as a grab sample.<br />
M COMMAND DRIVEN SAMPLE A command driven sample.<br />
PH PHONE COMMAND Phone command sample.<br />
R RESUME Sample event at resume time.<br />
*S START Sample event at start time.<br />
SW SWITCH TIME Sample event at switch time.<br />
TO TIME OVERRIDE Sample event at bottle-switch time.<br />
*T TIME Time-paced sample event.<br />
Error Codes<br />
*DJ DISTRIBUTOR JAMMED The distributor jammed.<br />
*IP SAMPLE IN PROGRESS Sample in progress when report was printing.<br />
*L PUMP LATCH OPEN Unable to take sample because the pump band was opened.<br />
*ND NO DISTRIBUTOR ARM There is no distributor arm or the stop is damaged.<br />
*NL NO LIQUID DETECTED The sampler was unable to detect liquid.<br />
LF NOT ENOUGH FLOW Not enough flow for the minimum sample volume entered for samples with volumes<br />
proportional to flow.<br />
*NM NO MORE LIQUID After the sampler detected liquid and while the sample was being taken, the liquid detector<br />
stopped detecting liquid.<br />
M BOTTLE FULL The composite bottle is full.<br />
*O SAMPLER SHUT OFF The sampler was turned off with the On-Off key during the sample event.<br />
OV PROBABLE OVERFLOW The sampler was directed to take a sample that would not fit into the bottle. Occurs for flow<br />
paced, time override programs only.<br />
*P POWER FAILED The power supply failed during the sample event. Note: Power failures during five consecutive<br />
sample events results in a LOW BATTERY shut-down.<br />
*PJ PUMP JAMMED The pump jammed.<br />
*SK SAMPLE SKIPPED Sample not taken.<br />
*US USER STOPPED You pressed the Stop key during the sample event.<br />
4-20<br />
Table 4-3 Reports: Program Events, Source Codes, and Error Codes (Continued)<br />
Figures 4-5, 4-6, 4-7, 4-8, and 4-9 show examples of reports configured<br />
to show program settings, sampling results, combined<br />
results, and a summary report.
SAMPLER ID# 3687447734 06:32 19-DEC-02<br />
Hardware: A0 Software: 1.02<br />
*********** PROGRAM SETTINGS ***********<br />
----------<br />
SITE DESCRIPTION:<br />
"FACTORY051"<br />
----------<br />
UNITS SELECTED:<br />
FLOW RATE: cfs<br />
FLOW VOLUME: Mgal<br />
----------<br />
BUBBLER MODULE:<br />
WEIR<br />
90<br />
V-NOTCH<br />
----------<br />
24, 1000 ml BTLS<br />
10 ft SUCTION LINE<br />
----------<br />
PACING:<br />
TIME, EVERY<br />
0 HOURS, 15 MINUTES<br />
----------<br />
DISTRIBUTION:<br />
SEQUENTIAL<br />
----------<br />
200 ml SAMPLES<br />
----------<br />
5 MINUTE DELAY TO<br />
FIRST SAMPLE<br />
----------------------------------------<br />
Figure 4-5 Report: Program Settings<br />
<strong>6712FR</strong> <strong>Refrigerated</strong> <strong>Sampler</strong><br />
Section 4 Standard Programming<br />
4-21
<strong>6712FR</strong> <strong>Refrigerated</strong> <strong>Sampler</strong><br />
Section 4 Standard Programming<br />
Figure 4-6 Report: Sampling Results<br />
4-22<br />
SAMPLER ID# 3687447734 06:32 19-DEC-02<br />
Hardware: A0 Software: 1.02<br />
*********** SAMPLING RESULTS ***********<br />
SITE: FACTORY051<br />
Program Started at 15:03 WE 18-DEC-02<br />
Nominal Sample Volume = 200 ml<br />
COUNT<br />
TO<br />
SAMPLE BOTTLE TIME SOURCE ERROR LIQUID<br />
------- ------ ---- -- -- ------<br />
15:03 PGM ENABLED<br />
1,1 1 15:03 S 250<br />
1,1 2 15:18 T 247<br />
1,1 3 15:33 T 247<br />
1,1 4 15:48 T 249<br />
1,1 5 16:03 T 247<br />
1,1 6 16:18 T 247<br />
1,1 7 16:33 T 247<br />
1,1 8 16:48 T 248<br />
1,1 9 17:03 T 237<br />
1,1 10 17:18 T 236<br />
1,1 11 17:33 T 237<br />
1,1 12 17:48 T 241<br />
1,1 13 18:03 T 238<br />
1,1 14 18:18 T 236<br />
1,1 15 18:33 T 237<br />
1,1 16 18:48 T 236<br />
1,1 17 19:03 T 242<br />
1,1 18 19:18 T 237<br />
1,1 19 19:33 T 235<br />
1,1 20 19:48 T 238<br />
1,1 21 20:03 T 237<br />
1,1 22 20:18 T 237<br />
1,1 23 20:33 T 236<br />
1,1 24 20:48 T 230<br />
20:48 PGM DONE 19-DEC<br />
SOURCE S ==> START<br />
SOURCE T ==> TIME<br />
----------------------------------------
SAMPLER ID# 3687447734 06:32 19-DEC-02<br />
Hardware: A0 Software: 1.02<br />
BUBBLER MODULE: 2215419583<br />
Hardware: A00000 Software: 1.07<br />
*********** COMBINED RESULTS ***********<br />
SITE: FACTORY051<br />
Program Started at 15:03 WE 18-DEC-02<br />
Nominal Sample Volume = 200 ml<br />
FLOW TOTAL<br />
LEVEL RATE FLOW<br />
SAMPLE BOTTLE TIME ft cfs Mgal<br />
------- ------ ---- ----- ----- -------------<br />
1,1 1 15:03 0.009 2.495 000000.000<br />
1,1 2 15:18 0.012 2.576 000000.017<br />
1,1 3 15:33 0.012 2.666 000000.035<br />
1,1 4 15:48 0.012 2.773 000000.053<br />
1,1 5 16:03 0.012 2.773 000000.072<br />
1,1 6 16:18 0.012 2.798 000000.091<br />
1,1 7 16:33 0.012 2.798 000000.109<br />
1,1 8 16:48 0.012 2.798 000000.128<br />
1,1 9 17:03 0.012 2.751 000000.147<br />
1,1 10 17:18 0.012 2.773 000000.166<br />
1,1 11 17:33 0.009 2.798 000000.185<br />
1,1 12 17:48 0.012 3.728 000000.207<br />
1,1 13 18:03 0.012 3.728 000000.232<br />
1,1 14 18:18 0.012 3.728 000000.257<br />
1,1 15 18:33 0.009 3.728 000000.282<br />
1,1 16 18:48 0.012 5.273 000000.317<br />
1,1 17 19:03 0.012 5.239 000000.353<br />
1,1 18 19:18 0.012 6.651 000000.397<br />
1,1 19 19:33 0.009 6.651 000000.442<br />
1,1 20 19:48 0.009 6.651 000000.486<br />
1,1 21 20:03 0.012 6.651 000000.531<br />
1,1 22 20:18 0.012 6.651 000000.576<br />
1,1 23 20:33 0.009 3.404 000000.612<br />
1,1 24 20:48 0.012 3.425 000000.634<br />
-----------------------------------------------<br />
Figure 4-7 Report: Combined Results<br />
<strong>6712FR</strong> <strong>Refrigerated</strong> <strong>Sampler</strong><br />
Section 4 Standard Programming<br />
4-23
<strong>6712FR</strong> <strong>Refrigerated</strong> <strong>Sampler</strong><br />
Section 4 Standard Programming<br />
Figure 4-8 Report: Combined Results (continued)<br />
4-24<br />
SAMPLER ID# 3687447734 06:32 19-DEC-02<br />
Hardware: A0 Software: 1.02<br />
*********** COMBINED RESULTS ***********<br />
SITE: FACTORY051<br />
Program Started at 15:03 WE 18-DEC-02<br />
Nominal Sample Volume = 200 ml<br />
FR-TEMP<br />
SAMPLE BOTTLE TIME C<br />
------- ------ ---- ----<br />
NO FR-TEMPERATURE<br />
----------------------------------------<br />
SAMPLER ID# 3687447734 06:32 19-DEC-02<br />
Hardware: A0 Software: 0.01.0127<br />
*********** COMBINED RESULTS ***********<br />
SITE: FACTORY051<br />
Program Started at 15:03 WE 18-DEC-02<br />
Nominal Sample Volume = 200 ml<br />
SAMPLE BOTTLE TIME<br />
------- ------ ----------- ------ ----<br />
NO RAIN GAUGE<br />
----------------------------------------<br />
SAMPLER ID# 3687447734 06:32 19-DEC-02<br />
Hardware: A0 Software: 0.01.0127<br />
SDI-12 DATA<br />
*********** COMBINED RESULTS ***********<br />
SITE: FACTORY051<br />
Program Started at 15:03 WE 18-DEC-02<br />
Nominal Sample Volume = 200 ml<br />
NO SDI-12 SONDE<br />
----------------------------------------
Figure 4-9 Report: Summary<br />
SAMPLER ID# 3687447734 16:41 20-DEC-02<br />
Hardware: A0 Software: 1.02<br />
BUBBLER MODULE: 2215419583<br />
Hardware: A00000 Software: 1.07<br />
SITE: FACTORY051<br />
Summary Report for 19-DEC-02 (TH)<br />
Day's Flow: 000000.054 Mgal<br />
Average Flow Rate: 0.4437 cfs<br />
07:20 Minimum Flow Rate: 0.0237 cfs<br />
13:25 Maximum Flow Rate: 7.0207 cfs<br />
Hourly Average Flow Rate:<br />
00:00-01:00: NO DATA<br />
01:00-02:00: NO DATA<br />
02:00-03:00: NO DATA<br />
03:00-04:00: NO DATA<br />
04:00-05:00: NO DATA<br />
05:00-06:00: NO DATA<br />
06:00-07:00: NO DATA<br />
07:00-08:00: NO DATA<br />
08:00-09:00: 2.519 cfs<br />
09:00-10:00: 2.747 cfs<br />
10:00-11:00: 2.791 cfs<br />
11:00-12:00: 3.456 cfs<br />
12:00-13:00: 5.385 cfs<br />
13:00-14:00: 6.651 cfs<br />
14:00-15:00: 2.591 cfs<br />
15:00-16:00: 1.593 cfs<br />
16:00-17:00: NO DATA<br />
17:00-18:00: NO DATA<br />
18:00-19:00: NO DATA<br />
19:00-20:00: NO DATA<br />
20:00-21:00: NO DATA<br />
21:00-22:00: NO DATA<br />
22:00-23:00: NO DATA<br />
23:00-24:00: NO DATA<br />
*---+---+---+---+---+---+*<br />
8.00 + +<br />
I I<br />
I I<br />
I # I<br />
I # I<br />
6.00 + # +<br />
I # I<br />
I ## I<br />
I ## I<br />
I ## I<br />
4.00 + ## +<br />
I ### I<br />
I ### I<br />
I ##### I<br />
I ####### I<br />
2.00 + ####### +<br />
I ####### I<br />
I ######## I<br />
I ######## I<br />
I ######## I<br />
0.00 + ######## +<br />
*---+---+---+---+---+---+*<br />
Hour Ending: 08: 16: 24:<br />
Units are 'cfs'<br />
<strong>6712FR</strong> <strong>Refrigerated</strong> <strong>Sampler</strong><br />
Section 4 Standard Programming<br />
4-25
<strong>6712FR</strong> <strong>Refrigerated</strong> <strong>Sampler</strong><br />
Section 4 Standard Programming<br />
4.16 System IDs In addition to viewing report data and configuring reports, the<br />
View Report option on the main menu lets you view system identification<br />
information.<br />
4.17 Programming for 700<br />
Series Modules<br />
4-26<br />
System IDs<br />
RUN<br />
PROGRAM<br />
VIEW REPORT<br />
OTHER FUNCTIONS<br />
Select VIEW REPORT.<br />
VIEW DATA<br />
SYSTEM IDs<br />
CONFIGURE REPORTS<br />
Select SYSTEM IDs.<br />
SAMPLER<br />
6712 ID __________<br />
HARDWARE: __<br />
SOFTWARE: __<br />
Displayed briefly<br />
The sampler reports the sampler model number, ID (identification<br />
number), and software version number as system identification<br />
notes. The sampler also reports the same information for an<br />
attached module.<br />
The model and ID numbers remain unchanged through the life of<br />
the sampler. The ID numbers appear on the sampler’s reports<br />
and in files created by flowlink and samplink when they interrogate<br />
the sampler. The software packages use the ID number to<br />
make sure that data from different samplers is not combined in<br />
the same file.<br />
The software version number changes when your sampler’s software<br />
is updated.<br />
The system will also list any software options that you have activated<br />
on your unit. These specialized software options are available<br />
for purchase from Isco and are discussed in Section 8.<br />
[MODULE TYPE]<br />
[MODEL #] ID: __________<br />
HARDWARE: __<br />
SOFTWARE: __<br />
Displayed briefly<br />
SOFTWARE OPTIONS<br />
[Options List]<br />
Press STOP to return to the<br />
main menu.<br />
The bay on the controller’s side accepts any of Isco’s 700 Series<br />
Modules. These modules are optional accessories that are not<br />
required for operation of the <strong>6712FR</strong>. However, the modules offer<br />
an economical way to combine flow-rate or parameter monitoring<br />
with sampling.<br />
The programming of these modules is integrated with the programming<br />
of the sampler, so attachment of a module will cause<br />
different screens to be displayed, depending on the type of module<br />
and the selections you make while programming.<br />
Two modules that are commonly used are the 730 Bubbler Module,<br />
which monitors a flow stream’s level and flow rate, and the<br />
750 Area Velocity Module for monitoring a flow stream’s level,
1<br />
2<br />
3<br />
4<br />
5<br />
6<br />
7<br />
8<br />
<strong>6712FR</strong> <strong>Refrigerated</strong> <strong>Sampler</strong><br />
Section 4 Standard Programming<br />
velocity, and flow rate. The following sets of screens give you an<br />
example of what screens you might see while programming the<br />
sampler and module. Refer to Table 4-1 (which does not have a<br />
module attached) at the beginning of this section to compare the<br />
sequence of screen displays.<br />
CAUTION<br />
Most Isco accessories and interfacing equipment are not certified<br />
for us in hazardous locations as defined by the National<br />
Electrical Code. Check applicable guidelines, codes, and regulations<br />
of federal, state, city, and county agencies. Refer to<br />
Appendix C in the back of this manual for more safety information.<br />
Table 4-4 Programming Example With 730 Module Installed<br />
MODULE INSERTED---<br />
DOWNLOAD DATA NOW<br />
OR LOSE ALL DATA!<br />
DONE<br />
6712 SAMPLER<br />
STANDARD PROGRAMMING<br />
For HELP at any<br />
screen press ? key.<br />
RUN<br />
PROGRAM<br />
VIEW REPORT<br />
OTHER FUNCTIONS<br />
SITE DESCRIPTION:<br />
“FACTORY051“<br />
CHANGE?<br />
YES NO<br />
SELECT UNITS FOR<br />
FLOW RATE:<br />
cfs gps gpm Mgd<br />
lps m3s m3h m3d<br />
SELECT UNITS FOR<br />
FLOW VOLUME:<br />
cf gal Mgal<br />
m3 lit<br />
PROGRAM MODULE?<br />
YES NO<br />
MODE OF OPERATION:<br />
FLOWMETER<br />
LEVEL ONLY<br />
With the sampler off, insert the module in the bay on the controller.<br />
Turn the sampler on by pressing the On/Off key. Press ↵.<br />
Download stored data, if you want to keep it. Pressing DONE erases it and<br />
advances to the next screen.<br />
This screen will now appear for 8 seconds.<br />
The option PROGRAM will be blinking. Press ↵.<br />
The option NO will be blinking. Press ↵.<br />
For the purposes of this example, it isn’t necessary to change the description.<br />
Select the desired units for the flow rate. For this example, choose cfs.<br />
Press ↵.<br />
Select the desired units for the flow volume. For this example, choose Mgal.<br />
Press ↵.<br />
Select YES to program the module.<br />
If you choose Flowmeter, proceed to screen #9 below.<br />
If you choose LEVEL ONLY, proceed to screen #12.<br />
4-27
<strong>6712FR</strong> <strong>Refrigerated</strong> <strong>Sampler</strong><br />
Section 4 Standard Programming<br />
9<br />
10<br />
11<br />
12<br />
13<br />
14<br />
15<br />
16<br />
17a<br />
17b<br />
18<br />
19<br />
20<br />
4-28<br />
Table 4-4 Programming Example With 730 Module Installed (Continued)<br />
FLOW CONVERSION:<br />
WEIR FLUME<br />
DATA POINTS<br />
MANNING FLOW-INSERT<br />
V-NOTCH<br />
RECTANGULAR<br />
CIPOLLETTI<br />
V-NOTCH WEIR ANGLE:<br />
120 90 60<br />
45 30 22.5<br />
CURRENT LEVEL IS<br />
__.__ ft<br />
ADJUST LEVEL TO<br />
__.__ ft<br />
NUMBER OF BOTTLES:<br />
1 2 4 8 12 24<br />
BOTTLE VOLUME IS<br />
1000 ml (300-30000)<br />
SUCTION LINE LENGTH<br />
IS 10 ft<br />
(3-99)<br />
TIME PACED<br />
FLOW PACED<br />
FLOW BETWEEN<br />
SAMPLE EVENTS:<br />
0.075 Mgal<br />
(0.001 - 99999)<br />
FLOW BETWEEN<br />
SAMPLE EVENTS:<br />
2 PULSES (1-9999)<br />
SEQUENTIAL<br />
BOTTLES/SAMPLE<br />
SAMPLES/BOTTLE<br />
2 BOTTLES PER<br />
SAMPLE EVENT (1-24)<br />
RUN CONTINUOUSLY?<br />
YES NO<br />
When you select Flowmeter, you will have several options for performing the<br />
flow conversion.<br />
For this example, choose Weir. Press ↵.<br />
For this example, choose V-Notch. Press ↵.<br />
For this example, choose a Weir angle of 90. Press ↵.<br />
The current level will be displayed. Enter an adjustment if needed. If the<br />
adjustment is different by more than 0.50 ft, you will be prompted “ARE YOU<br />
SURE? YES NO” Choose NO to re-enter; select YES if correct. Press ↵.<br />
Select the number of bottles in your bottle kit by pressing either arrow key<br />
until the correct number blinks. Press ↵. For this example, select 24.<br />
Type the volume for the bottles in your kit. For this example, 1000 is correct,<br />
so simply press ↵.<br />
Type the length of the suction line, then press ↵.<br />
If you change the length, the sampler will display a message,<br />
“PLEASE WAIT!. . . GENERATING PUMP TABLES.”<br />
Select FLOW PACED.<br />
If the module is being used as a flowmeter, you will see screen #17a.<br />
If the module is being used for level only, you will see screen #17b.<br />
If the module is being used as a flowmeter, choose the amount of flow<br />
between sample events.<br />
If the module is being used for level only, enter the number of pulses<br />
between sample events.<br />
Select BOTTLES/SAMPLE.<br />
Enter 2.<br />
Select NO.
21<br />
22<br />
23<br />
24<br />
25<br />
1<br />
2<br />
3<br />
4<br />
5<br />
6<br />
SAMPLE VOLUME:<br />
250 ml (10-1000)<br />
NO DELAY TO START<br />
DELAYED START<br />
CLOCK TIME<br />
START FLOW COUNT AT:<br />
06:00<br />
SELECT DAYS:<br />
SU MO TU WE TH FR SA<br />
DONE<br />
PROGRAMMING COMPLETE<br />
RUN THIS PROGRAM<br />
NOW?<br />
YES NO<br />
Enter 250.<br />
Select CLOCK TIME.<br />
Enter 6, then enter 0.<br />
<strong>6712FR</strong> <strong>Refrigerated</strong> <strong>Sampler</strong><br />
Section 4 Standard Programming<br />
Table 4-4 Programming Example With 730 Module Installed (Continued)<br />
This is the time at which the sampler will start the pacing countdown.<br />
Select MO, WE, and FR.<br />
Use the arrow keys and ↵ to select MO, WE, and FR. When the correct days<br />
are blinking, select DONE and press ↵.<br />
Select NO.<br />
Table 4-5 Programming Example With 750 Module Installed<br />
MODULE INSERTED---<br />
DOWNLOAD DATA NOW<br />
OR LOSE ALL DATA!<br />
DONE<br />
6712 SAMPLER<br />
STANDARD PROGRAMMING<br />
For HELP at any<br />
screen press ? key.<br />
RUN<br />
PROGRAM<br />
VIEW REPORT<br />
OTHER FUNCTIONS<br />
SITE DESCRIPTION:<br />
“FACTORY051“<br />
CHANGE?<br />
YES NO<br />
SELECT UNITS FOR<br />
FLOW RATE:<br />
cfs gps gpm Mgd<br />
lps m3s m3h m3d<br />
SELECT UNITS FOR<br />
FLOW VOLUME:<br />
cf gal Mgal<br />
m3 lit<br />
With the sampler off, insert the module in the bay on the controller.<br />
Turn the sampler on by pressing the On/Off key. Press ↵. Download stored<br />
data, if you want to keep it. Pressing DONE erases it and advances to the<br />
next screen.<br />
This screen will now appear for 8 seconds.<br />
The option PROGRAM will be blinking. Press ↵.<br />
The option NO will be blinking. Press ↵.<br />
For the purposes of this example, it isn’t necessary to change the description.<br />
Select the desired units for the flow rate. For this example, choose cfs.<br />
Press ↵.<br />
Select the desired units for the flow volume. For this example, choose Mgal.<br />
Press ↵.<br />
4-29
<strong>6712FR</strong> <strong>Refrigerated</strong> <strong>Sampler</strong><br />
Section 4 Standard Programming<br />
7<br />
8<br />
9<br />
10<br />
11<br />
12<br />
13<br />
14<br />
15<br />
16<br />
17<br />
4-30<br />
Table 4-5 Programming Example With 750 Module Installed (Continued)<br />
SELECT UNITS FOR<br />
VELOCITY:<br />
fps mps<br />
PROGRAM MODULE?<br />
YES NO<br />
MODE OF OPERATION:<br />
FLOWMETER<br />
LEVEL AND VELOCITY<br />
FLOW CALCULATION:<br />
AREA * VELOCITY<br />
LEVEL TO FLOW RATE<br />
LEVEL TO AREA:<br />
CHANNEL SHAPE<br />
DATA POINTS<br />
ROUND PIPE<br />
U-CHANNEL<br />
RECTANGULAR CHANNEL<br />
TRAPEZOIDAL CHANNEL<br />
ROUND PIPE<br />
DIAMETER = 2.00 ft<br />
CURRENT LEVEL IS<br />
__.__ ft<br />
ADJUST LEVEL TO<br />
__.__ ft<br />
ZERO LEVEL OFFSET:<br />
_.___ ft<br />
MAXIMUM DEPTH FOR<br />
VELOCITY MEASUREMENT<br />
2” 3” 4”<br />
NUMBER OF BOTTLES:<br />
1 2 4 8 12 24<br />
Select the desired units for the flow velocity. For this example, choose fps.<br />
Press ↵.<br />
Select YES to program the module.<br />
The 750 can have two different modes of operation: Flowmeter or Level and<br />
Velocity.<br />
For this example, choose Flowmeter. Press ↵.<br />
When you select Flowmeter, you will have two options for performing the<br />
flow conversion: Area * Velocity or Level to Flow Rate.<br />
For this example, choose Area * Velocity. Press ↵.<br />
For this example, choose Channel Shape. Press ↵.<br />
For the channel shape, select Round Pipe. Press ↵.<br />
Enter the diameter of the round pipe. Press ↵.<br />
The current level will be displayed. Enter an adjustment if needed. If the<br />
adjustment is different by more than 0.50 ft, you will be prompted “ARE YOU<br />
SURE? YES NO” Choose NO to re-enter; select YES if correct. Press ↵.<br />
Enter the amount of zero level offset. Press ↵.<br />
(This screen is applicable for standard-sized probes only.)<br />
Select the maximum depth for the velocity measurement. Press ↵.<br />
Select the number of bottles in your bottle kit by pressing either arrow key<br />
until the correct number blinks. Press ↵.<br />
From this point forward, the screens will be the same as in Table 4-2.
5.1 Extended and<br />
Standard Mode<br />
5.2 One-Part and<br />
Two-Part Programs<br />
<strong>6712FR</strong> <strong>Refrigerated</strong> <strong>Sampler</strong><br />
Section 5 Extended Programming<br />
The <strong>6712FR</strong> <strong>Sampler</strong> has two sets of programming screens. The<br />
first set, called standard programming screens, lets you set up<br />
typical sampling programs easily and efficiently. The second set,<br />
extended programming screens, lets you create sophisticated<br />
programs for complex sampling applications.<br />
All of the sampling features available with standard programming<br />
screens, discussed in Section 4, are available with extended<br />
programming screens. However, the extended screens provide<br />
several additional features and some screen display differences<br />
which are discussed in this section. The menu flowcharts for both<br />
sets of programming screens are in Appendix A, Menu Flowcharts.<br />
Note<br />
This section assumes that you have read, and are familiar<br />
with, the instructions in Section 4, Standard Programming!<br />
The sampler is shipped with factory default settings in standard<br />
programming mode when you first turn the sampler on. The<br />
start-up screen tells you which programming mode the sampler<br />
is currently using. You can switch between programming modes<br />
by entering a numerical command at the main menu:<br />
At the main menu type 6712.2 to enter extended programming<br />
mode.<br />
At the main menu type 6712.1 to enter standard programming<br />
mode.<br />
RUN “EXTENDED 1”<br />
PROGRAM<br />
VIEW REPORT<br />
OTHER FUNCTIONS<br />
Main Menu for Extended<br />
Extended programming lets you set up a “one-part” program or a<br />
“two-part” program. One-part programs let you fill all bottles of<br />
the tub with one set of pacing, distribution, and enable settings.<br />
Two-part programs add an additional set of extended pacing, distribution,<br />
and enable screens to the sampling program. Each set<br />
of screens is called a program part. The program parts are simply<br />
called part ‘A’ and part ‘B’. Both parts share the program settings<br />
for suction-line length, suction head, and rinses and retries. They<br />
also share one start-time setting.<br />
Each part has its own group of bottles. Because settings for each<br />
part are independent of each other, the sampler, when running a<br />
5-1
<strong>6712FR</strong> <strong>Refrigerated</strong> <strong>Sampler</strong><br />
Section 5 Extended Programming<br />
5-2<br />
5.3 Storage For Extended<br />
Programs<br />
5.3.1 Selecting a Stored<br />
Program<br />
two-part program, fills each bottle group as if they were being<br />
filled by two different programs. Two-part programs finish when<br />
both parts are done.<br />
Two-part programming is ideal for sampling storm events. Many<br />
storm-water run-off monitoring permits require a first-flush grab<br />
sample within the first 30 minutes of the storm event and<br />
flow-paced samples during the remainder of the event. With a<br />
two-part program, you can set up part ‘A’ for the first-flush sample<br />
and part ‘B’ for the remainder. Table 5-2 shows a<br />
storm-water sampling program.<br />
The sampler stores five sampling programs: one standard and<br />
four extended. Program storage eliminates the need to reprogram<br />
the sampler with frequently used settings. This feature is<br />
especially useful for complex extended programs such as<br />
two-part programs or programs with many nonuniform-time settings.<br />
Isco ships the sampler to you with factory programs that you can<br />
modify to suit your own needs. All four extended programs are<br />
identical to each other.<br />
The stored programs will also save your 700 Series Module program<br />
settings and any sampler enable conditions using rain<br />
gauge data or SDI-12 sonde parameters. These program settings<br />
remain as long as you do not change the type of module, or<br />
change the rain gauge or SDI-12 Hardware Setup.<br />
When the sampler is in extended programming mode, it always<br />
has one current and three noncurrent programs, each occupying<br />
a permanent location in memory. The first time you access the<br />
extended mode, the current program is “EXTENDED 1,” one of<br />
the factory extended programs. The name of the current<br />
extended program appears in quotations on the first line of the<br />
main menu.<br />
The factory programs are named “EXTENDED 1,” “EXTENDED<br />
2,” “EXTENDED 3,” and “EXTENDED 4." You can rename them<br />
with more descriptive names, making them easier to identify.<br />
The program name is one of the extended program’s settings.<br />
After selecting a stored program, review the settings with the<br />
quick view screens. Each sampling program stores all the settings<br />
required by the sampler to run a program. These settings<br />
include the bottle-kit information (number of bottles and the bottle<br />
volume), the suction-line length, the site description, start<br />
times, and so on.<br />
If you use the same program at two sites — each requiring different<br />
bottle configurations, suction line lengths, or other details —<br />
always check these settings before running a program. You may<br />
need to make minor changes to the program to make sure the<br />
settings match your equipment.<br />
The current program is the program you see when you select<br />
PROGRAM from the main menu and page through the program-
1<br />
2<br />
3<br />
4<br />
5<br />
6<br />
7<br />
6712 SAMPLER,<br />
EXTENDED PROGRAMMING<br />
For HELP at any<br />
screen, press ? key.<br />
RUN “EXTENDED 1”<br />
PROGRAM<br />
VIEW REPORT<br />
OTHER FUNCTIONS<br />
PROGRAM NAME:<br />
"EXTENDED 1"<br />
SITE DESCRIPTION:<br />
"______"<br />
SELECT NEW PROGRAM<br />
CHANGE PROGRAM NAME<br />
“EXTENDED 1”<br />
“EXTENDED 2”<br />
“EXTENDED 3”<br />
“EXTENDED 4”<br />
PROGRAMMING COMPLETE<br />
RUN THIS PROGRAM<br />
NOW?<br />
YES NO<br />
RUN “EXTENDED 2”<br />
PROGRAM<br />
VIEW REPORT<br />
OTHER FUNCTIONS<br />
<strong>6712FR</strong> <strong>Refrigerated</strong> <strong>Sampler</strong><br />
Section 5 Extended Programming<br />
ming screens. It is the program the sampler uses when you select<br />
RUN from the main menu.<br />
You cannot delete programs, but you can modify them as often as<br />
necessary. To run a program with different settings without losing<br />
the settings in your current program, select a stored program<br />
and modify its settings.<br />
For example, assume you have been running the current program,<br />
named “EXTENDED 1,” at site A for several weeks. This<br />
program contains all the settings you need for site A, and you<br />
don’t want to lose those settings.<br />
Nevertheless, you need another program because you want to<br />
move the sampler to site B, so you select “EXTENDED 2” and<br />
modify it for site B. The settings in “EXTENDED 1” are preserved<br />
automatically. When you return the sampler to site A, you<br />
won’t need to reprogram the sampler. Merely select “EXTENDED<br />
1” again, double-check the program settings, and run the program.<br />
To select an extended program, follow the steps in Table<br />
5-1.<br />
Table 5-1 Selecting a Stored Extended Program<br />
Press the On/Off key to turn the sampler on. Press ↵ to clear the start-up<br />
message.<br />
If the words “STANDARD PROGRAMMING” appear on the second line of<br />
the start-up message, the sampler is using the standard programming<br />
screens. To see the extended screens, type 6712.2 at the main menu shown<br />
in step 2.<br />
Select PROGRAM from the main menu.<br />
Select PROGRAM NAME: "EXTENDED 1" from the quick view menu.<br />
Select SELECT NEW PROGRAM to change the program.<br />
You can go through QUICK VIEW screens quickly by pressing ↵ at each<br />
screen. You can also change settings in quick view screens; see Changing<br />
Settings in a Quick View Screen on page 3-4.<br />
Select the name of the extended program you want to use.<br />
Each program’s name appears on the same line. If you inadvertently give<br />
two programs identical names, you can still identify them by their location<br />
on the screen.<br />
To run the program immediately, select YES. To run the program later,<br />
select NO.<br />
5-3
<strong>6712FR</strong> <strong>Refrigerated</strong> <strong>Sampler</strong><br />
Section 5 Extended Programming<br />
5-4<br />
5.4 Programming for 700<br />
series Modules<br />
5.5 Programming SDI-12<br />
Sondes<br />
5.6 Programming<br />
Examples<br />
The bay on the controller’s side accepts any of Isco’s 700 Series<br />
Modules. These optional accessories are not required to operate<br />
the <strong>6712FR</strong>. However, the modules offer an economical way to<br />
combine flow-rate or parameter monitoring with sampling.<br />
The programming of these modules is integrated with the programming<br />
of the sampler, so attachment of a module will cause<br />
different screens to be displayed, depending on the type of module<br />
and the selections you make while programming.<br />
Two modules that are commonly used are the 730 Bubbler Module,<br />
which monitors a flow stream’s level and flow rate, and the<br />
750 Area Velocity Module for monitoring a flow stream’s level,<br />
velocity, and flow rate. Section 4 contains two examples of programming<br />
for modules. Module programming is the same in<br />
Extended as it was in Standard programming.<br />
As an option, the <strong>6712FR</strong> accepts up to 16 parameters from up to<br />
ten sensors with SDI-12 addresses from 0 - 9. The data parameters<br />
used by the sonde and sampler must match. Certain vendors’<br />
sondes, such as Hydrolab and YSI, have enhanced<br />
commands that facilitate “plug and play” setup. These Isco Ready<br />
sondes can tell the <strong>6712FR</strong> what values they have, their order,<br />
and units of measure. Other sondes can be used, but require<br />
manual setup to identify proper data types for each data value<br />
reported.<br />
For more information about programming SDI-12 sondes, refer to<br />
Section 6.<br />
In addition to the features available with standard programming,<br />
and discussed in Section 4, extended programming offers:<br />
Nonuniform time pacing<br />
Random interval pacing<br />
Event pacing<br />
Multiple bottle compositing<br />
Time switched bottles or bottle sets<br />
Programmable sampler enable<br />
Pauses and resumes<br />
Two-part programming<br />
Automatic or user-defined suction head<br />
Suction line rinses<br />
Sampling retries<br />
This manual provides several programming examples. Some,<br />
demonstrating simple tasks, appear in the margins. Others, demonstrating<br />
more complex tasks, appear as examples. Table 5-2 on<br />
the following pages steps you through a storm water runoff sampling<br />
using extended programming.
5.6.1 Storm Water Runoff<br />
Sampling<br />
<strong>6712FR</strong> <strong>Refrigerated</strong> <strong>Sampler</strong><br />
Section 5 Extended Programming<br />
Storm water runoff sampling is an ideal application for two-part<br />
programming. Typical monitoring permits require that a series<br />
of timed samples be taken during the initial portion of the storm<br />
event, followed by flow paced samples during the remainder of<br />
the event.<br />
This example assumes that a Rain Gauge and a Bubbler Flow<br />
Module are connected to the sampler.<br />
Note<br />
To enable the Bubbler Module programming screens, insert<br />
the module before turning on the sampler<br />
Using a 24-bottle kit, it divides the bottles into two groups, with<br />
six bottles assigned to part ‘A’ and 18 to part ‘B.’ The sampler will<br />
begin taking samples after being enabled according to programmable<br />
enable controls; that is, when the rain gauge detects 0.15<br />
inches of rainfall in 30 minutes, and the module detects a flow<br />
stream level of more than 0.25 feet. Because both program parts<br />
use the same enable settings, the sampler will enable both parts<br />
at the same time. A list of settings for the program follow:<br />
Program type: Extended.<br />
Program name: STORM.<br />
Site description: SITE 54.<br />
Units: Length – Ft, Flow Rate – gpm, Flow Volume – gal<br />
Mode of Operation: Flowmeter, Flow-Insert, Round, 12"<br />
Bottle kit: 24, 1000-milliliter bottles.<br />
Suction-line length: 5 feet.<br />
Suction head: Auto suction head.<br />
Line rinses: None.<br />
Sampling retries: None.<br />
Part ‘A’ and ‘B’ bottle assignments: Bottles 1 - 6 to part ‘A’,<br />
bottles 7 - 24 to part ‘B’.<br />
Part ‘A’ pacing: Time pacing, sampling every 5 minutes.<br />
Part ‘A’ distribution: Sequential, 1 sample per bottle.<br />
Part ‘A’ sample volume: 800 milliliters.<br />
Part ‘A’ enable: At least 0.15 inches of rainfall in 30 minutes<br />
and a flow stream level of more than 0.25 feet; once<br />
enabled, stay enabled, sample taken when the sampler is<br />
enabled.<br />
Part ‘A’ pause and resumes: None.<br />
Part ‘B’ pacing: Flow pacing, sampling every 2,500 gallons.<br />
Part ‘B’ distribution: Sequential, 1 sample per bottle.<br />
Part ‘B’ sample volume: 500 milliliters.<br />
Part ‘B’ enable: At least 0.15 inches of rainfall in 30 minutes<br />
and a flow stream level of more than 0.25 feet; once<br />
5-5
<strong>6712FR</strong> <strong>Refrigerated</strong> <strong>Sampler</strong><br />
Section 5 Extended Programming<br />
1<br />
2<br />
3<br />
4<br />
5<br />
6<br />
7<br />
8<br />
9<br />
10<br />
5-6<br />
6712 SAMPLER<br />
EXTENDED PROGRAMMING<br />
For HELP at any<br />
screen press ? key.<br />
RUN “EXTENDED 1”<br />
PROGRAM<br />
VIEW REPORT<br />
OTHER FUNCTIONS<br />
PROGRAM NAME:<br />
“EXTENDED 1 “<br />
CHANGE?<br />
YES NO<br />
SELECT NEW PROGRAM<br />
CHANGE PROGRAM NAME<br />
NAME: “STORM ”<br />
ABCDEFGHIJKLMNOPQRST<br />
UVWXYZ-& 0123456789<br />
BACK-UP DONE<br />
SITE: DESCRIPTION<br />
“FACTORY051“<br />
CHANGE?<br />
YES NO<br />
SITE: “SITE 54 ”<br />
ABCDEFGHIJKLMNOPQRST<br />
UVWXYZ-& 0123456789<br />
BACK-UP DONE<br />
SELECT UNITS FOR<br />
LENGTH:<br />
ft m<br />
SELECT UNITS FOR<br />
FLOW RATE<br />
cfs gps gpm Mgd<br />
lps m3s m3h m3d<br />
SELECT UNITS FOR<br />
FLOW VOLUME<br />
cf gal Mgal<br />
m3 lit<br />
enabled, stay enabled, no sample taken when the sampler<br />
is enabled; first sample taken 20 minutes after the sampler<br />
is enabled.<br />
Part ‘B’ pause and resumes: None.<br />
Start time: Delayed start of 1 minute.<br />
730 Bubbler Module: Installed<br />
Table 5-2 Storm Water Runoff Sampling<br />
This screen will appear briefly.<br />
Select PROGRAM.<br />
Note: If the start-up screen displayed “STANDARD PROGRAMMING”, type<br />
6712.2 at this menu before selecting PROGRAM.<br />
Select YES.<br />
Note: If the quick view screen shows up, press STOP then select OTHER<br />
FUNCTIONS, SOFTWARE OPTIONS, QUICKVIEW/CHANGE, NORMAL.<br />
Then press STOP and go back to step 2.<br />
Select CHANGE PROGRAM NAME.<br />
Enter the word “STORM” for the program name.<br />
Select YES.<br />
Enter “SITE 54” for the site description.<br />
Select ft.<br />
Select gpm.<br />
Select gal.
11<br />
12<br />
13<br />
14<br />
15<br />
16<br />
17<br />
18<br />
19<br />
20<br />
21<br />
22<br />
PROGRAM MODULE?<br />
YES NO<br />
MODE OF OPERATION<br />
FLOWMETER<br />
LEVEL ONLY<br />
FLOW CONVERSION<br />
WEIR FLUME<br />
DATA POINTS<br />
MANNING FLOW-INSERT<br />
WEIR/ORIFICE TYPE<br />
V-NOTCH<br />
ROUND<br />
FLOW INSERT SIZE:<br />
6" 8" 10" 12"<br />
NEW MODULE SETUP--<br />
DOWNLOAD DATA NOW<br />
OR LOSE ALL DATA!<br />
DONE<br />
CURRENT LEVEL IS<br />
___.___ ft.<br />
ADJUST LEVEL TO<br />
___.___ ft.<br />
DATA STORAGE<br />
INTERVAL IN MINUTES<br />
1 2 5<br />
10 15 30<br />
NUMBER OF BOTTLES:<br />
1 2 4 8 12 24<br />
BOTTLE VOLUME IS<br />
1000 ml (300-30000)<br />
SUCTION LINE LENGTH<br />
IS 5 ft<br />
(3-99)<br />
AUTO SUCTION HEAD<br />
ENTER HEAD<br />
Table 5-2 Storm Water Runoff Sampling (Continued)<br />
Select YES<br />
Select FLOWMETER<br />
Select FLOW-INSERT.<br />
Select ROUND.<br />
Select 12.<br />
<strong>6712FR</strong> <strong>Refrigerated</strong> <strong>Sampler</strong><br />
Section 5 Extended Programming<br />
Select DONE.<br />
Note: Partition memory status message will be displayed briefly.<br />
Press ENTER.<br />
Select 5. (If the data storage interval is different from the current program,<br />
you will be informed that the storage interval has changed, and that the<br />
stored data will be lost. Download stored data (if desired) and select DONE.<br />
Select 24.<br />
Enter 1000.<br />
Enter 5. The 6712 calculates new pump tables.<br />
Select AUTO SUCTION HEAD.<br />
5-7
<strong>6712FR</strong> <strong>Refrigerated</strong> <strong>Sampler</strong><br />
Section 5 Extended Programming<br />
23<br />
24<br />
25<br />
26<br />
27<br />
28<br />
29<br />
30<br />
31<br />
32<br />
33<br />
34<br />
5-8<br />
0 RINSE CYCLES<br />
(0-3)<br />
RETRY UP TO 0 TIMES<br />
WHEN SAMPLING<br />
(0-3)<br />
ONE-PART PROGRAM<br />
TWO-PART PROGRAM<br />
24 BOTTLES AVAILABLE<br />
ASSIGN BOTTLES<br />
1 THRU 6 TO<br />
PART ‘A’ (1-23)<br />
UNIFORM TIME PACED<br />
FLOW PACED<br />
EVENT PACED<br />
NONUNIFORM TIME<br />
TIME BETWEEN<br />
SAMPLE EVENTS:<br />
0 HOURS, 5 MINUTES<br />
1 BOTTLES PER<br />
SAMPLE EVENT (1- 6)<br />
SWITCH BOTTLES ON:<br />
NUMBER OF SAMPLES<br />
TIME<br />
SWITCH BOTTLES EVERY<br />
1 SAMPLES (1-50)<br />
RUN CONTINUOUSLY?<br />
YES NO<br />
DO YOU WANT<br />
SAMPLE VOLUMES<br />
DEPENDENT ON FLOW?<br />
YES NO<br />
SAMPLE VOLUME<br />
200 ml (10-1000)<br />
Table 5-2 Storm Water Runoff Sampling (Continued)<br />
Enter 0.<br />
Enter 0.<br />
Select TWO-PART PROGRAM.<br />
Enter 6.<br />
Screen will say "Beginning Part A" before proceeding with screen 27.<br />
Select UNIFORM TIME PACED.<br />
Enter 0 for hours, 5 for minutes.<br />
Enter 1.<br />
Select NUMBER OF SAMPLES.<br />
Enter 1.<br />
Select NO.<br />
Select NO.<br />
Enter 800.
35<br />
36<br />
37<br />
38<br />
39<br />
40<br />
41<br />
42<br />
43<br />
44<br />
45<br />
46<br />
47<br />
ENABLE:<br />
RAIN LEVEL FLOW<br />
NONE<br />
ENABLE: RAIN<br />
AND OR DONE<br />
ENABLE: RAIN AND<br />
LEVEL FLOW NONE<br />
“RAIN” SET POINT:<br />
0.15 INCHES PER<br />
__HOURS, __MINUTES<br />
ENABLED WHEN:<br />
ABOVE SET POINT<br />
BELOW SET POINT<br />
RESET RAIN HISTORY?<br />
YES NO<br />
“LEVEL” CONDITION:<br />
SET POINT<br />
RANGE<br />
RATE OF CHANGE<br />
“LEVEL” SET POINT<br />
0.25 ft<br />
(0.001-30.000)<br />
ENABLED WHEN:<br />
ABOVE SET POINT<br />
BELOW SET POINT<br />
ONCE ENABLED,<br />
STAY ENABLED?<br />
YES NO<br />
SAMPLE AT ENABLE?<br />
YES NO<br />
PAUSE RESUME<br />
1. HH:MM DD HH:MM DD<br />
2. HH:MM DD HH:MM DD<br />
CLEAR DONE<br />
UNIFORM TIME PACED<br />
FLOW PACED<br />
EVENT PACED<br />
NONUNIFORM TIME<br />
Table 5-2 Storm Water Runoff Sampling (Continued)<br />
<strong>6712FR</strong> <strong>Refrigerated</strong> <strong>Sampler</strong><br />
Section 5 Extended Programming<br />
Select RAIN.<br />
Note: All valid enable options will appear here, so your screen may differ.<br />
Select AND.<br />
Select LEVEL.<br />
Enter 0.15 for inches, then enter 30 minutes.<br />
Select ABOVE SET POINT.<br />
Select YES.<br />
Select SET POINT.<br />
Enter 0.25.<br />
Select ABOVE SET POINT.<br />
Select YES.<br />
Select YES.<br />
Select DONE.<br />
Screen will say “End of Part A” then “Beginning Part B.”<br />
Select FLOW PACED.<br />
5-9
<strong>6712FR</strong> <strong>Refrigerated</strong> <strong>Sampler</strong><br />
Section 5 Extended Programming<br />
48<br />
49<br />
50<br />
51<br />
52<br />
53<br />
54<br />
55<br />
56<br />
57<br />
58<br />
59<br />
60<br />
5-10<br />
PACED BY:<br />
FLOW PULSES<br />
FLOW MODULE VOLUME<br />
FLOW BETWEEN<br />
SAMPLE EVENTS:<br />
2500 gal<br />
(0.001-99999)<br />
SAMPLE AT START?<br />
YES NO<br />
1 BOTTLES PER<br />
SAMPLE EVENT (1- 18)<br />
SWITCH BOTTLES ON:<br />
NUMBER OF SAMPLES<br />
TIME<br />
SWITCH BOTTLES EVERY<br />
1 SAMPLES (1- 50)<br />
RUN CONTINUOUSLY?<br />
YES NO<br />
SAMPLE VOLUME:<br />
200 ml (10-1000)<br />
ENABLE:<br />
RAIN LEVEL FLOW<br />
‘A’ DONE NONE<br />
ENABLE: RAIN<br />
AND OR DONE<br />
ENABLE: RAIN AND<br />
LEVEL FLOW ‘A’ DONE<br />
DONE<br />
“RAIN” SET POINT:<br />
0.15 INCHES PER<br />
__HOURS, __MINUTES<br />
ENABLED WHEN:<br />
ABOVE SET POINT<br />
BELOW SET POINT<br />
Table 5-2 Storm Water Runoff Sampling (Continued)<br />
Select FLOW MODULE VOLUME.<br />
Enter 2500.<br />
Select YES. This will cause the first sample to be taken 20 minutes (the<br />
delay to start of sampling specified in Step 67) after the enable for Part B.<br />
Enter 1.<br />
Select NUMBER OF SAMPLES.<br />
Enter 1.<br />
Select NO.<br />
Enter 500.<br />
Select RAIN.<br />
Select AND.<br />
Select LEVEL.<br />
Enter 0.15 for inches, then enter 30 minutes.<br />
Select ABOVE SET POINT.
61<br />
62<br />
63<br />
64<br />
65<br />
66<br />
67<br />
68<br />
69<br />
70<br />
71<br />
RESET RAIN HISTORY?<br />
YES NO<br />
“LEVEL” CONDITION:<br />
SET POINT<br />
RANGE<br />
RATE OF CHANGE<br />
“LEVEL” SET POINT<br />
0.25 ft<br />
(0.100-30.000)<br />
ONCE ENABLED,<br />
STAY ENABLED?<br />
YES NO<br />
SAMPLE AT ENABLE?<br />
YES NO<br />
START OF SAMPLING<br />
AFTER A<br />
15 MINUTE DELAY<br />
(1-999)<br />
PAUSE RESUME<br />
1. HH:MM DD HH:MM DD<br />
2. HH:MM DD HH:MM DD<br />
CLEAR DONE<br />
NO DELAY TO START<br />
DELAYED START<br />
CLOCK TIME<br />
START “STORM”<br />
AFTER A 72 HOUR<br />
“DRY” PERIOD?<br />
YES NO<br />
START “STORM”<br />
AFTER A<br />
1 MINUTE DELAY<br />
(1-999)<br />
PROGRAMMING COMPLETE<br />
RUN THIS PROGRAM<br />
NOW?<br />
YES NO<br />
Table 5-2 Storm Water Runoff Sampling (Continued)<br />
Select YES.<br />
Select SET POINT.<br />
Enter 0.25.<br />
Select YES.<br />
Select NO.<br />
Enter 20.<br />
Select DONE.<br />
Screen will say “End of Part B.”<br />
Select DELAYED START.<br />
<strong>6712FR</strong> <strong>Refrigerated</strong> <strong>Sampler</strong><br />
Section 5 Extended Programming<br />
Select NO. (Option for samplers using a 0.01 inch tip rain gauge. See Dry<br />
Period Option, described on page 5-22.)<br />
Enter 1.<br />
Select NO.<br />
5-11
<strong>6712FR</strong> <strong>Refrigerated</strong> <strong>Sampler</strong><br />
Section 5 Extended Programming<br />
5-12<br />
The above example presented several screens that are not available<br />
in standard programming. Descriptions of features available<br />
in extended programming follow.<br />
5.7 Suction Head Suction head is the vertical distance between the surface of the<br />
liquid source and the sampler’s pump. At each sample event, the<br />
sampler determines the suction head automatically.<br />
In extended programming, you can manually enter the suction<br />
head if you want. Select ENTER HEAD only when the head<br />
remains stable and you can measure it accurately.<br />
5.8 Rinses and Retries Rinses and retries are extended programming features. You can<br />
Screens for Line Rinses<br />
and Sampling Retries<br />
__RINSE CYCLES<br />
(0-3)<br />
RETRY UP TO __ TIMES<br />
WHEN SAMPLING<br />
(0-3)<br />
Extended Screen for<br />
Suction Head Settings<br />
AUTO SUCTION HEAD<br />
ENTER HEAD<br />
If you choose AUTO SUCTION<br />
HEAD, the head will be<br />
determined for you. If you<br />
select ENTER HEAD, the screen<br />
below will be displayed so you<br />
can enter the suction head.<br />
SUCTION HEAD OF<br />
___ ft<br />
(min - max)<br />
program the sampler to rinse the suction line automatically. During<br />
a line rinse cycle, the sampler draws liquid through the line<br />
to the liquid detector. As soon as it detects liquid, the sampler<br />
reverses the pump to purge the line.<br />
The sampling retries feature lets you set the number of times,<br />
from 0 to 3, that the sampler tries to detect liquid in the line<br />
before skipping the sample.<br />
5.9 Pacing Sample pacing is the rate at which the sampler takes samples.<br />
Depending on the type of pacing you select, the rate is controlled<br />
by the sampler’s internal clock or by inputs received from connected<br />
instruments.<br />
Extended Pacing Screen<br />
UNIFORM TIME PACE<br />
FLOW PACED<br />
EVENT PACED<br />
NONUNIFORM TIME<br />
Standard programming provides time pacing and flow pacing,<br />
which are described in Section 4. Extended programming provides<br />
additional pacing types, so its pacing screen (see example<br />
in margin) has four items listed instead of two.<br />
“Uniform time” pacing is identical to “time” pacing in standard<br />
programming. “Flow paced” is the same for both types of programming.<br />
Event paced and nonuniform time pacing are<br />
described below.
1<br />
2<br />
<strong>6712FR</strong> <strong>Refrigerated</strong> <strong>Sampler</strong><br />
Section 5 Extended Programming<br />
5.9.1 Event Pacing To program the sampler for event pacing, select event paced.<br />
Refer to Table 5-3 for an example of event paced sampling that<br />
uses three event conditions.<br />
Up to fourteen event conditions can be defined (for two-part programs,<br />
up to fourteen event conditions can be defined for each<br />
part). An event will occur when any of the programmed event<br />
conditions becomes true. Each time an event occurs, the sampler<br />
takes one sample, placing it in one bottle.<br />
If you have programmed multiple conditions, and more than one<br />
condition comes true at the same time (within your measurement<br />
interval), one sample will be taken and all conditions that caused<br />
the event will be noted on reports.<br />
Although you can combine flow pacing and all time pacing types<br />
with any distribution, event paced programs by definition use<br />
only sequential distribution. The sampler finishes an event<br />
paced program after depositing a sample in each bottle.<br />
Table 5-3 uses rate of change for the event condition (see step<br />
7). This feature enables the event condition under specific circumstances.<br />
In the example below, a rate of change is set so that if the level<br />
rises more than one foot in a two hour time period, the event condition<br />
would be enabled and a sample taken.<br />
In determining if the rise occurs in this example, the sampler<br />
looks back at the previous two hour time period to see if there is a<br />
rise of more than one foot between any valley (low point) or peak<br />
(high point) within that time period.<br />
Once the condition becomes true (a rise of more than one foot is<br />
noted), the event condition is enabled. It will not be enabled<br />
again unless the condition becomes false, and then true again,<br />
within the two hour time window.<br />
In event pacing, up to three different rate of change event conditions<br />
can be programmed (for two-part programs, a total of six<br />
rate of change event conditions can be defined, three for each<br />
part).<br />
5.9.2 Event Paced Sampling This example uses a sampler with an attached 730 Bubbler Flow<br />
Module, Rain Gauge, and an SDI-12 sonde at address 5 with four<br />
parameters.<br />
UNIFORM TIME PACED<br />
FLOW PACED<br />
EVENT PACED<br />
NONUNIFORM TIME<br />
EVENT01:<br />
RAIN LEVEL FLOW<br />
TEMP5 pH5 SP_CO5<br />
DO5 DONE<br />
Table 5-3 Event Paced Sampling<br />
Select EVENT PACED.<br />
Select the parameters that will trigger the event. Use the arrow keys to<br />
move through the parameters.<br />
To define the first event for this example, select LEVEL.<br />
5-13
<strong>6712FR</strong> <strong>Refrigerated</strong> <strong>Sampler</strong><br />
Section 5 Extended Programming<br />
3<br />
4<br />
5<br />
6<br />
7<br />
8<br />
9<br />
10<br />
11<br />
12<br />
13<br />
14<br />
15<br />
5-14<br />
“LEVEL” CONDITION:<br />
SET POINT<br />
RANGE<br />
RATE OF CHANGE<br />
“LEVEL” SET POINT:<br />
1.000 ft<br />
( 0.001 - 30.00)<br />
ENABLED WHEN:<br />
ABOVE SET POINT<br />
BELOW SET POINT<br />
EVENT02:<br />
RAIN LEVEL FLOW<br />
TEMP5 pH5 SP_CO5<br />
DO5 DONE<br />
“LEVEL” CONDITION:<br />
SET POINT<br />
RANGE<br />
RATE OF CHANGE<br />
CONDITION IS TRUE<br />
WHEN “LEVEL”<br />
RISES FALLS<br />
“LEVEL” RISES<br />
1.000 ft<br />
__HOURS, __MINUTES<br />
EVENT03:<br />
RAIN LEVEL FLOW<br />
TEMP5 pH5 SP_CO5<br />
DO5 DONE<br />
“pH5” CONDITION:<br />
SET POINT<br />
RANGE<br />
RATE OF CHANGE<br />
“pHx” RANGE:<br />
LOWER: 4.00<br />
UPPER: 10.00<br />
( 0.00 - 14.00)<br />
ENABLED WHEN:<br />
INSIDE RANGE<br />
OUTSIDE RANGE<br />
EVENT04:<br />
RAIN LEVEL FLOW<br />
TEMP5 pH5 SP_CO5<br />
DO5 DONE<br />
PACING:<br />
EVENT PACED<br />
3 EVENT CONDITIONS<br />
Table 5-3 Event Paced Sampling (Continued)<br />
Choose SET POINT.<br />
Enter a set point of 1 foot.<br />
Select ABOVE SET POINT.<br />
Select LEVEL again.<br />
Choose RATE OF CHANGE.<br />
Choose RISES.<br />
This will enable the event condition if a rise occurs within the time frame<br />
and above the amount specified in screen #9.<br />
Enter 1 ft and press ↵.<br />
Then enter 2 hours.<br />
Select pH.<br />
Select RANGE.<br />
Enter 4 for the lower range and 10 for the upper range.<br />
Choose INSIDE RANGE.<br />
You will not be entering a fourth event condition, so use the arrow keys to<br />
scroll down, and then select DONE.<br />
Proceed with the rest of the programming steps.
5.9.3 Nonuniform Time<br />
Pacing<br />
5.9.4 Nonuniform Clock<br />
Time Pacing<br />
5.9.5 Nonuniform Interval<br />
Pacing<br />
5.9.6 Random Interval<br />
Pacing<br />
1<br />
2<br />
Time Pacing Screens<br />
NONUNIFORM TIME:<br />
CLOCK TIMES<br />
INTERVALS IN MINUTES<br />
RANDOM INTERVALS<br />
CLOCK TIMES<br />
TAKE SAMPLES AT:<br />
1. START TIME<br />
2. HH:MM<br />
3. HH:MM<br />
INTERVALS IN MINUTES<br />
FIRST SAMPLE AT<br />
START TIME,<br />
3<br />
THEN . . .<br />
4<br />
5<br />
QUANTITY AT INTERVAL<br />
1. __ AT ___ MIN<br />
2. __ AT ___ MIN<br />
3. __ AT ___ MIN<br />
RANDOM INTERVALS<br />
PROGRAM RUN TIME:<br />
__ HOURS, __ MINUTES<br />
<strong>6712FR</strong> <strong>Refrigerated</strong> <strong>Sampler</strong><br />
Section 5 Extended Programming<br />
The extended time pacing options are uniform time and nonuniform<br />
time. “Uniform time” pacing is identical to “time” pacing in<br />
standard programming. Nonuniform time pacing uses an irregular<br />
interval between sample events; each interval is individually<br />
programmable. There are three types of nonuniform time pacing:<br />
Nonuniform clock time pacing.<br />
Nonuniform interval pacing.<br />
Random interval pacing.<br />
For clock time pacing, enter specific times for each sample event<br />
(see screen 2). You can enter as many as 99 clock times, but the<br />
interval between times cannot be greater than 24 hours.<br />
(Remember to use a 24-hour clock when entering times.) The<br />
sampler takes a sample at the start time.<br />
For nonuniform interval pacing, enter the number of sample<br />
events spaced at intervals of minutes: 12 samples at 5 minute<br />
intervals, 6 samples at 10 minute intervals, and so on. The sampler<br />
accepts as many as 99 nonuniform interval entries. The<br />
sampler takes a sample at start time.<br />
To program the sampler for random interval pacing, enter the<br />
length of time you want to sample. The run time is the only random<br />
programming setting you’ll need to enter because the sampler<br />
derives the number of sample events required for the<br />
program from the distribution settings. (You can combine random<br />
pacing with any distribution.) Each time you run the program,<br />
the sampler generates a new set of random intervals. This<br />
makes each sample event unpredictable from run to run.<br />
In both nonuniform clock time pacing and nonuniform interval<br />
pacing, the sampler takes a sample at the start time. For random<br />
pacing, however, it takes the first sample at the end of the first<br />
interval, not at the start time.<br />
5-15
<strong>6712FR</strong> <strong>Refrigerated</strong> <strong>Sampler</strong><br />
Section 5 Extended Programming<br />
5.10 Distribution Distribution describes how the sampler is to deposit samples. A<br />
sample is the volume of liquid deposited in a bottle. A sample<br />
event includes the full sampling cycle and may deposit a sample<br />
into more than one bottle. You can program the sampler for five<br />
distribution methods:<br />
5-16<br />
Sequential<br />
Bottles per sample<br />
Samples per bottle<br />
Composite<br />
Multiple Bottle Compositing<br />
5.10.1 Sequential In sequential distribution, the sampler deposits one sample in<br />
each bottle. A sequential sample represents a “snapshot” of the<br />
flow stream at a point in time.<br />
5.10.2 Bottles Per Sample In bottles per sample distribution, the sampler deposits a sample<br />
in each of a set of bottles. A bottle set includes at least two bottles<br />
but may include all bottles. Use bottles per sample when the volume<br />
to be collected is larger than the amount one bottle can hold<br />
or when you need identical samples.<br />
5.10.3 Samples Per Bottle In samples per bottle distribution, the sampler deposits samples<br />
from several sample events in a single bottle before moving to the<br />
next bottle. Use samples per bottle distribution to collect a series<br />
of small composite samples.<br />
5.10.4 Composite For single bottle configurations, samples per bottle distribution<br />
is known as composite sampling. A composite sample represents<br />
an average of the flow stream’s characteristics during the sampling<br />
period.<br />
5.10.5 Multiple Bottle<br />
Compositing<br />
Multiple bottle compositing is a combination of bottles-per-sample<br />
and samples-per-bottle. At each sample event, the sampler<br />
deposits a sample into a set of bottles. It moves to a new bottle<br />
set only after each bottle of the first set contains the programmed<br />
number of samples. Use multiple-bottle compositing to collect<br />
identical sets of composite samples or a composite sample that is<br />
larger than the capacity of a single bottle. Multiple bottle compositing<br />
is available only in extended programming.<br />
5.10.6 Time Switching In extended programming, the sampler offers an additional distribution<br />
feature, time switching. This feature determines when<br />
the sampler fills the next bottle or bottle set, and may be used<br />
with time-paced or flow-paced sample programs. Time switching<br />
distribution occurs at regular intervals (as programmed in<br />
screen 3 in the margin). The switch times are relative to the programmed<br />
“FIRST SWITCH TIME” (screen 4).<br />
Switch times occur regardless of the state of the sampler. Be<br />
aware that the sampler may leave empty bottles if it becomes disabled.<br />
Pause and resumes are an exception; the sampler will not<br />
switch bottles during a pause if the current bottle is empty.
1<br />
2<br />
Time Switched<br />
Distribution<br />
2 BOTTLES PER<br />
SAMPLE EVENT (1-max)<br />
Enter the number of bottles<br />
that should receive samples<br />
at each sample event.<br />
SWITCH BOTTLES ON:<br />
NUMBER OF SAMPLES<br />
TIME<br />
Select TIME.<br />
<strong>6712FR</strong> <strong>Refrigerated</strong> <strong>Sampler</strong><br />
Section 5 Extended Programming<br />
If the program settings instruct the sampler to take a sample at<br />
the start time, the sampler also draws a sample at the switch<br />
time. When this occurs, the pacing will also be reset at the switch<br />
time.<br />
Time switching is normally used with flow-paced programs that<br />
do not take a sample at start. These programs will place a sample<br />
in the current bottle if it is empty at the switch time, and<br />
then move to the next bottle/set. Pacing intervals are reset at<br />
every switch time.<br />
When you use the time switching feature, the volume in each bottle<br />
or bottle set may vary. Sample volumes that would exceed the<br />
bottle capacity are not taken and a “PROBABLE OVERFILL”<br />
message is logged.<br />
5.10.7 Continuous Sampling Sample programs can be run indefinitely by selecting “YES” at<br />
the “RUN CONTINUOUSLY?” screen. Continuous sampling<br />
resets the distribution when the distribution sequence is complete.<br />
That is, when the last bottle/set is reached, the next bottle/set<br />
is the first bottle/set. All pacing modes except RANDOM<br />
are supported.<br />
When running a program continuously, the bottles must be serviced<br />
at regular intervals to prevent overfilling the bottles. The<br />
sampler assumes that the next bottle/set is empty and ready to<br />
receive samples. If you are using this feature with two-part programming,<br />
keep in mind that the parts will most likely reset at<br />
different intervals.<br />
3<br />
4<br />
SWITCH BOTTLES EVERY<br />
__ HOURS, __ MINUTES<br />
Enter the time between<br />
bottle switches.<br />
FIRST SWITCH TIME<br />
AT: __:__<br />
Enter the first bottle<br />
switch time.<br />
5-17
<strong>6712FR</strong> <strong>Refrigerated</strong> <strong>Sampler</strong><br />
Section 5 Extended Programming<br />
Sequential<br />
1 2 3 4 5 6<br />
Bottles-per-Sample<br />
1 1 2 2 3 3<br />
Samples-per-Bottle<br />
2 4 6 8<br />
1 3 5 7<br />
Multiple Bottle Compositing<br />
3 3 6 6<br />
2 2 5 5 8 8<br />
1 1 4 4 7 7<br />
Time Switched (Flow-paced, No sample at start)<br />
Start Time Time<br />
Override<br />
Figure 5-1 Sample Distribution<br />
5-18<br />
2<br />
1<br />
TO<br />
6<br />
5<br />
4<br />
8<br />
7<br />
EXTENDED<br />
PROGRAMMING<br />
DISTRIBUTION:<br />
SEQUENTIAL 1 BOTTLES PER<br />
SAMPLE EVENT (1-24)<br />
Each bottle receives one sample from one sample event.<br />
EXTENDED<br />
PROGRAMMING<br />
DISTRIBUTION:<br />
2 BOTTLES/SAMPLE 2 BOTTLES PER<br />
SAMPLES EVENT (1-24)<br />
EXTENDED<br />
PROGRAMMING<br />
ONLY<br />
DISTRIBUTION:<br />
1 BOTTLES/SAMPLE<br />
SWITCH AT 13:00<br />
THEN EVERY 1:00<br />
SWITCH BOTTLES ON:<br />
NUMBER OF SAMPLES<br />
TIME<br />
Multiple bottles receive a sample from one sample event.<br />
EXTENDED<br />
PROGRAMMING<br />
DISTRIBUTION:<br />
2 SAMPLES/BOT TLE 1 BOTTLES PER<br />
SAMPLE EVENT (1-24)<br />
DISTRIBUTION:<br />
2 BOTTLES/SAMPLE<br />
3 SAMPLES/BOT TLE<br />
SWITCH BOTTLES ON:<br />
NUMBER OF SAMPLES<br />
TIME<br />
Each bottle receives a sample from multiple sample events.<br />
EXTENDED<br />
PROGRAMMING<br />
ONLY<br />
2 BOTTLES PER<br />
SAMPLE EVENT (1-24)<br />
SWITCH BOTTLES ON:<br />
NUMBER OF SAMPLES<br />
TIME<br />
SWITCH BOTTLES ON:<br />
NUMBER OF SAMPLES<br />
TIME<br />
1 BOTTLES PER<br />
SAMPLE EVENT (1-24)<br />
SWITCH BOTTLES EVERY<br />
RUN CONTINUOUSLY?<br />
1 SAMPLES (1-50) YES NO<br />
SWITCH SETS EVERY<br />
RUN CONTINUOUSLY?<br />
1 SAMPLES (1-50) YES NO<br />
SWITCH BOTTLES EVERY<br />
RUN CONTINUOUSLY?<br />
___ SAMPLES (1-50) YES NO<br />
SWITCH BOTTLES EVERY<br />
RUN CONTINUOUSLY?<br />
3 SAMPLES (1-50) YES NO<br />
SWITCH BOTTLES ON:<br />
NUMBER OF SAMPLES<br />
TIME<br />
SWITCH BOTTLES EVERY<br />
1 HOURS, 0 MINUTES<br />
FIRST SWITCH TIME<br />
AT: 13:00
<strong>6712FR</strong> <strong>Refrigerated</strong> <strong>Sampler</strong><br />
Section 5 Extended Programming<br />
5.11 <strong>Sampler</strong> Enable Certain external instruments can enable (start) or disable (stop)<br />
a sampler by sending a signal to pin F of the sampler’s flow<br />
meter connector. Isco flow meters, flow loggers, and the Model<br />
1640 Liquid Level Actuator have a programmable sampler-enable<br />
feature that lets them enable or disable the sampler.<br />
You can define the condition (such as level, flow rate, pH, temperature,<br />
percent, rainfall, and I/O) or combination of conditions<br />
that need to be true in order to enable the sampler. Refer to Figure<br />
12 in Appendix A for details on programming sampler<br />
enables.<br />
<strong>Sampler</strong> enabled at<br />
start time<br />
<strong>Sampler</strong> disabled at<br />
start time by<br />
signal from pin F<br />
Figure 5-2 Start Time Diagram for <strong>Sampler</strong> Enable Settings<br />
When the sampler detects that it is disabled at start time, it suspends<br />
the program until it is enabled. Once enabled, the sampler<br />
collects a sample only when programmed to take a sample at the<br />
enable time. The diagram in Figure 5-2 shows the sampler’s<br />
response when enabled or disabled at the start time.<br />
A sample event at the start time<br />
always occurs for time-paced programs<br />
(except for random). For flow-paced<br />
programs, it occurs when the program<br />
requires a sample at start time.<br />
A sample event at enable time occurs<br />
only when the program requires a<br />
sample at enable.<br />
5-19
<strong>6712FR</strong> <strong>Refrigerated</strong> <strong>Sampler</strong><br />
Section 5 Extended Programming<br />
1<br />
2<br />
3<br />
4<br />
5<br />
6<br />
7<br />
8<br />
9<br />
10<br />
11<br />
5-20<br />
5.11.1 <strong>Sampler</strong> Enable This example uses a sampler with an attached 730 Bubbler Flow Module,<br />
Rain Gauge and an SDI-12 sonde at address 5 with four parameters.<br />
ENABLE:<br />
NONE PROGRAMMED<br />
ENABLE:<br />
RAIN LEVEL FLOW<br />
TEMP5 pH5 SP_CO5<br />
DO5 NONE<br />
ENABLE: RAIN<br />
AND OR DONE<br />
ENABLE: RAIN AND<br />
LEVEL FLOW TEMP5<br />
pH5 SP_CO5<br />
DO5 DONE<br />
“RAIN” SET POINT:<br />
.5 INCHES PER<br />
__HOURS, __MINUTES<br />
ENABLED WHEN:<br />
ABOVE SET POINT<br />
BELOW SET POINT<br />
RESET RAIN HISTORY?<br />
YES NO<br />
“LEVEL” CONDITION<br />
SET POINT<br />
RANGE<br />
RATE OF CHANGE<br />
“LEVEL” SET POINT:<br />
+1 ft<br />
( 0.001 - 30.00)<br />
ENABLED WHEN:<br />
ABOVE SET POINT<br />
BELOW SET POINT<br />
ENABLE:<br />
RAIN >0.50” / 2:00<br />
AND<br />
LEVEL >1.000 ft<br />
Table 5-4 <strong>Sampler</strong> Enable<br />
In this example, you will be enabling the sampler if it rains .5” in 2 hours<br />
and the level goes above 1 foot.<br />
Select RAIN.<br />
Choose AND.<br />
Select LEVEL.<br />
Enter .5 for the inches of rain. Press ↵<br />
.<br />
Enter 2 HOURS.<br />
Select ABOVE SET POINT.<br />
Select YES.<br />
Select SET POINT.<br />
Enter 1 foot.<br />
Select ABOVE SET POINT.<br />
Your enable conditions will be summarized on the display.<br />
If correct, press ↵ to continue.<br />
If necessary, make changes to the enable conditions.
5.12 <strong>Sampler</strong> Enable<br />
Responses<br />
5.12.1 Once Enabled Stay<br />
Enabled<br />
<strong>6712FR</strong> <strong>Refrigerated</strong> <strong>Sampler</strong><br />
Section 5 Extended Programming<br />
In addition to programming enable conditions, extended programming<br />
lets you control the sampler’s response to its enable<br />
state. You can:<br />
Stay enabled after the first enable.<br />
Set up a repeatable enable.<br />
Take a sample at enable or disable.<br />
Delay the start of sampling after the enable.<br />
Reset the sampling interval countdown each time the<br />
sampler is enabled.<br />
Control the sampling interval countdown while disabled.<br />
Enable Part B of a two-part program when Part A is done.<br />
For certain monitoring programs, you may want the sampler to<br />
continue to sample, even though the conditions that enabled the<br />
sampler no longer exist. When you use the ONCE ENABLED,<br />
STAY ENABLED feature, after becoming enabled the sampler<br />
takes samples until it reaches the end of its program.<br />
5.12.2 Repeatable Enable After enabling the sampler, the enabling instrument (or instruments)<br />
continues to monitor the conditions and disables the sampler<br />
when the conditions are no longer satisfied. If re-enabled,<br />
the sampler resumes the sampling program.<br />
5.12.3 Sample at Enable or<br />
Disable<br />
5.12.4 Delay To Start Of<br />
Sampling<br />
ONCE ENABLED,<br />
STAY ENABLED?<br />
YES NO<br />
Note<br />
Repeatable enable is called “sampler latching” in flow meters,<br />
flow loggers, and FLOWLINK. Latching a sampler produces<br />
the same results as selecting YES; the difference is that the<br />
external instrument controls the latching.<br />
You have the option of directing the sampler to take a sample as<br />
soon as it receives the enable and/or disable signal. If you program<br />
the sampler to stay enabled and choose to take a sample at<br />
enable, the sample interval will be reset at the enable time. Samples<br />
at disable do not affect the sample intervals. Standard programs<br />
do not take a sample at the enable time.<br />
SAMPLE AT ENABLE?<br />
YES NO<br />
If you have selected ONCE ENABLED STAY ENABLED and<br />
have chosen to not sample at the enable, you have the opportu-<br />
5-21
<strong>6712FR</strong> <strong>Refrigerated</strong> <strong>Sampler</strong><br />
Section 5 Extended Programming<br />
5-22<br />
nity to suspend the start of sampling. This choice is useful for<br />
storm programs that require a flow-paced sample taken after the<br />
initial grab sample.<br />
5.12.5 “Dry Period” Option For samplers used with a 0.01 inch tip rain gauge, you can cause<br />
the sampler to wait for a “dry” period of under 0.10 inches of rain<br />
over a 72-hour period before running the program. At RUN time,<br />
the sampler asks if you want to restart the 72-hour period. Select<br />
this choice if you want the sampler to disregard any “dry” period<br />
that took place prior to the program start. The sampler will wait<br />
for up to one year for the “dry” period to occur.<br />
5.12.6 Resetting the Sample<br />
Interval at Enable<br />
RESET SAMPLE<br />
INTERVAL AT ENABLE?<br />
YES NO<br />
If you answer “NO” to the above<br />
screen, you will see:<br />
CONTINUE COUNTDOWN<br />
WHILE DISABLED?<br />
YES NO<br />
START SAMPLING<br />
AFTER A<br />
___ MINUTE DELAY<br />
(1-999)<br />
START “EXTENDED 1”<br />
AFTER A 72 HOUR<br />
“DRY” PERIOD?<br />
YES NO<br />
You may want the pacing countdown to start over each time the<br />
sampler becomes enabled. To accomplish this, select “YES” when<br />
asked if you want to reset the sample interval at enable. The next<br />
sample event will occur at the end of a full interval. Furthermore,<br />
if the sampler is enabled several times during the program,<br />
it resets the countdown each time.<br />
Use the reset-interval feature carefully. For example, avoid resetting<br />
the interval when you sample with uniform-time pacing and<br />
want to take samples at specific times.<br />
The effects of resetting the interval can be seen in this example:<br />
A sampler has been programmed to sample every 15 minutes and<br />
to reset the interval when enabled. It receives an enable signal at<br />
10:03 and takes a sample. After resetting the interval, the sampler<br />
takes subsequent samples at 10:18 (not 10:15), 10:33 (not<br />
10:30), and so on.<br />
If you select “NO” when asked if you want to reset the sample<br />
interval at enable, you will be asked if you want to continue the<br />
countdown while disabled. You can have the sampler continue<br />
the countdown, repeating it as often as necessary while the sampler<br />
is disabled, or you may suspend the countdown while disabled,<br />
resuming the countdown as the sampler is enabled. The<br />
standard program allows the countdown to continue while disabled.
<strong>6712FR</strong> <strong>Refrigerated</strong> <strong>Sampler</strong><br />
Section 5 Extended Programming<br />
5.13 Pauses/Resumes Pause and resume settings, available in extended programming,<br />
create an intermittent sampling schedule. A program with<br />
Pause and Resume<br />
Screens<br />
Flowcharts containing the pause<br />
and resume screen appear in<br />
Appendix A.<br />
PAUSE RESUME<br />
1. 17:00 MO 08:00 TU<br />
2. 17:00 TU 08:00 WE<br />
CLEAR DONE<br />
SAMPLE AT RESUME?<br />
YES NO<br />
pauses and resumes begins sampling at its programmed start<br />
time, continuing until the first pause time and day of the week. It<br />
then suspends sampling until the first resume time, when it<br />
begins sampling again. If the start time falls within a pause<br />
period, the sampler will not begin sampling until the next<br />
resume time. Pause and resumes repeat weekly.<br />
You can enter up to nine pairs of pause and resume times. The<br />
pause and resume times shown as examples to the left suspend<br />
the program between 5:00 p.m. Monday and 8:00 a.m. on Tuesday<br />
and between 5:00 p.m. Tuesday and 8:00 a.m. on Wednesday.<br />
If the start time is Monday at 8:00 a.m., the sampler takes samples<br />
between 8:00 a.m. and 5:00 p.m. Monday; between 8:00 a.m.<br />
and 5:00 p.m. Tuesday; and, continues after 8:00 a.m. Wednesday.<br />
To remove pause and resume settings from a program, select<br />
CLEAR.<br />
A sampler running a pause/resume program resets the pacing<br />
interval at each resume time. You can program the sampler to<br />
take a sample at resume times (see screen at left).<br />
5.14 Running Programs To run an extended program, select run from the main menu.<br />
You may also select YES at the RUN THIS PROGRAM NOW?<br />
screen at the end of the programming screens.<br />
Extended programs scheduled to start at a clock time will not<br />
start until the programmed clock time on or after the first valid<br />
date.<br />
Note that if you have recently calibrated a parameter probe, the<br />
sampler may delay the start and display “PLEASE WAIT” until<br />
valid readings are expected from the probe. The delay accounts<br />
for the time typically required to install the probe, and lasts for<br />
five minutes after you complete the calibration.<br />
5.14.1 Run Time Screens Run time screens, which report the program’s status while running<br />
a program, are explained in Section 4.<br />
5.14.2 Interrupting a<br />
Running Program<br />
Interrupting a running program is also explained in Section 4.<br />
The scrolling menu that appears during the manual paused state<br />
can have two extra options when using extended programming:<br />
Adjust Enable<br />
This option is available for extended sampling programs that<br />
have programmed enable conditions. Selecting this option allows<br />
you to change the set-points or ranges for the enable conditions.<br />
The sampler displays all of the programming screens that define<br />
the thresholds of the programmed enables. You cannot change<br />
the type of enables used or the way they are combined.<br />
If rain is an enabling condition, you also have the option of resetting<br />
the rain history.<br />
Adjust Suction Head<br />
If you have chosen to manually enter the suction head, and are in<br />
the manual paused state, the scrolling menu will have an option<br />
5-23
<strong>6712FR</strong> <strong>Refrigerated</strong> <strong>Sampler</strong><br />
Section 5 Extended Programming<br />
5-24<br />
to adjust the suction head. If you make changes to the suction<br />
head value, the sampler logs a changed suction head event.<br />
5.15 Sampling Reports The 6712 records a variety of data while running a sampling program.<br />
Sample reports can be found in Section 4.<br />
Section 4, Table 4-3 contains a list of source codes and program<br />
events that may be recorded when using either standard or<br />
extended programming.<br />
5.16 Other Functions In extended programming, the “Other Functions” menu screen<br />
includes options for:<br />
RUN “PROGRAM NAME”<br />
PROGRAM<br />
VIEW REPORT<br />
OTHER FUNCTIONS<br />
Select OTHER FUNCTIONS.<br />
MAINTENANCE<br />
MANUAL FUNCTIONS<br />
SOFTWARE OPTIONS<br />
HARDWARE<br />
Maintenance (see Section 7)<br />
Manual Functions (see Section 4)<br />
Software Options.<br />
Hardware<br />
5.17 Software Options The software option screens allow you to set up a number of different<br />
software options:<br />
5.17.1 Liquid Detector<br />
Enable/Disable<br />
USE LIQUID DETECTOR?<br />
YES NO<br />
Liquid Detector Enable Display Backlighting<br />
Normal/Quick View Screens Event Marks<br />
Measurement Interval Pump Purge Counts<br />
Dual <strong>Sampler</strong> Mode Serial Output<br />
Full Bottle Detection Interrogator Connect Power<br />
Under some conditions (pressurized lines, sampling foam), a<br />
more repeatable sample volume may be delivered by disabling<br />
the liquid detector. Selecting NO will turn the Liquid Detector<br />
off.<br />
If the Liquid Detector is off:<br />
you must enter the SUCTION HEAD,<br />
no RINSES or RETRIES will be available,<br />
you will not be able to CALIBRATE SAMPLE volumes,<br />
the RESULTS report will read a COUNT TO LIQUID of<br />
0,<br />
a complete purge will occur between samples when using<br />
multiple bottles-per-sample distribution.<br />
5.17.2 Programming Style The sampler has two different styles of programming screens:<br />
normal and quick view. These are both explained in Section 3.<br />
When you are in extended programming, the default style is<br />
Quick View, which allows you to move more quickly through the<br />
screens.
<strong>6712FR</strong> <strong>Refrigerated</strong> <strong>Sampler</strong><br />
Section 5 Extended Programming<br />
If you prefer a step-by-step display for the screens, switch to the<br />
Normal setting.<br />
5.17.3 Measurement Interval If using a 700 Series module or SDI-12 Sonde parameter for<br />
enabling, the sampler will request a Measurement Interval. The<br />
Measurement Interval allows the sampler to compare the param-<br />
Measurement Interval<br />
MEASUREMENT INTERVAL<br />
5 15 30 SECONDS<br />
1 2 5 MINUTES<br />
STORAGE INTERVAL<br />
eter to the enabling conditions at a rate faster than the Data<br />
Storage interval. If the Measurement Interval is equal to or<br />
greater than the Data Storage interval, the parameter will be<br />
checked at the rate of Data Storage interval.<br />
Normally, there are two considerations when selecting the Measurement<br />
Interval: power consumption and duration of the<br />
enabling event. This setting for battery powered samplers will<br />
require some degree of balance between the need to conserve<br />
power yet detect the enabling event before it has passed.<br />
5.17.4 Dual <strong>Sampler</strong> Mode Dual <strong>Sampler</strong> Mode lets you operate two samplers as a pair. The<br />
primary sampler disables the secondary one until the primary<br />
sampler completes its sampling program. The samplers then<br />
reverse roles with the second sampler becoming the primary one.<br />
Dual <strong>Sampler</strong> Mode<br />
DUAL SAMPLER MODE?<br />
YES NO<br />
Select YES to put the sampler<br />
in the dual sampler mode.<br />
When you no longer need<br />
dual samplers, return to this<br />
screen to turn the feature off.<br />
Bottle Full Detect<br />
BOTTLE FULL DETECT?<br />
YES NO<br />
Setting Up Dual <strong>Sampler</strong>s<br />
1. Turn on the dual sampler mode in both samplers.<br />
2. Install the samplers.<br />
3. Connect the samplers with the Dual <strong>Sampler</strong> Mode Interconnect<br />
Cable by attaching the cable to the sampler’s flow-meter<br />
connectors. If your installation includes a flow meter or flow logger,<br />
use the Dual <strong>Sampler</strong> Mode to Flow Meter Cable instead.<br />
4. Decide which sampler is to be the primary sampler; the primary<br />
sampler should be the sampler with the program you want<br />
to run first.<br />
5. Turn the primary sampler on and run its sampling program by<br />
selecting RUN. After at least 5 seconds, turn the secondary sampler<br />
on and select RUN from its main menu.<br />
How Does It Work?<br />
The primary sampler sends a disable signal out its flow meter<br />
connector. The secondary sampler receiving the signal is held disabled<br />
until the primary sampler completes its program.<br />
When using a flow meter or flow logger a Dual <strong>Sampler</strong> Mode to<br />
Flow Meter cable must be used. This cable is constructed so that<br />
the pacing instrument receives only the event marks. Therefore,<br />
a connected flow meter will not receive a bottle number signal,<br />
nor will it be able to control the sampler inhibit.<br />
Bottle Full Detection<br />
The sampler can detect a full bottle condition when collecting<br />
samples in a single bottle (composite sampling). When the sampler<br />
detects a full bottle, it stops the sampling routine.<br />
A BOTTLE FULL condition will also stop a sampling routine<br />
that is set to RUN CONTINUOUSLY.<br />
The Bottle Full Detect screen allows you to enable or disable this<br />
feature. Selecting “YES” enables the sampler to detect a full bot-<br />
5-25
<strong>6712FR</strong> <strong>Refrigerated</strong> <strong>Sampler</strong><br />
Section 5 Extended Programming<br />
5-26<br />
Adjusting the Display<br />
Backlighting<br />
BACKLIGHT ALWAYS OFF<br />
TIMED BACKLIGHT<br />
CONTINUOUS BACKLIGHT<br />
Event Marks<br />
EVENT MARK SENT FOR:<br />
EVERY SAMPLE<br />
COMPLETE SAMPLES<br />
tle and stop the sampling routine. Selecting “NO” disables this<br />
feature. The Bottle Full Detect setting is part of the sampling<br />
program. Because it is a program setting, full bottle detection can<br />
be enabled or disabled for each of the four extended programs. If<br />
the Bottle Full Detect setting is critical to your sampling program,<br />
always check this Software setting after you select a different<br />
Extended Program.<br />
This feature relies on a post-purge after each sample. When<br />
using the Bottle Full Detect, make sure that post-sample purges<br />
greater than 100 are used.<br />
Bottle Full Detect is always disabled in the Standard Programming<br />
mode.<br />
Display Backlighting<br />
The display has a backlight that is adjustable so that the backlight<br />
is always off, timed or always on.<br />
In the timed backlight mode the sampler turns the backlight off<br />
after detecting no key strokes within 60 seconds. Any keystroke<br />
(except ON-OFF) turns the backlighting on again. In this mode<br />
the backlight must be on before the sampler accepts a menu<br />
choice or number entry. If you press a key and a screen does not<br />
respond, it is because the keystroke turned the backlight on.<br />
It is recommended that you use either BACKLIGHT ALWAYS<br />
OFF or TIMED BACKLIGHT when using a battery.<br />
Event Marks<br />
The sampler generates an event mark at each sample event,<br />
sending it through the flow meter connector to a connected<br />
instrument. The event mark may also control an external device;<br />
a connected solenoid relay, for example. When using the event<br />
mark for a data logger or to control external devices, you may<br />
need to adjust the mark by changing the factory settings.<br />
The event mark is adjustable through the software setup screens.<br />
You can set up the sampler to generate an event mark for<br />
EVERY SAMPLE or for COMPLETE SAMPLES.<br />
If you select COMPLETE SAMPLES, the sampler sends a<br />
three-second pulse only after it successfully collects a sample.<br />
The sampler will not send an event mark if an error occurs, such<br />
as “No Liquid Detected.”<br />
If you select EVERY SAMPLE, the sampler will send an event<br />
mark every time a sample is initiated. The event mark signal can<br />
be a:<br />
3-second pulse at the beginning of the pre-sample purge.<br />
3-second pulse at the beginning of forward pumping only,<br />
marking the time the sampler deposited the sample.<br />
Variable duration pulse generated during the pump cycle,<br />
from the beginning of the pre-sample purge to the end of<br />
the postsample purge.<br />
Variable duration pulse generated only during forward<br />
pumping.<br />
Figure 5-3 shows event mark timing diagrams.
Pulse at Beginning of<br />
Presample Purge<br />
Pulse at Beginning of<br />
Forward Pumping<br />
Variable Duration Pulse<br />
During Entire Pump<br />
Variable Duration Pulse<br />
During Forward<br />
Pumping<br />
Figure 5-3 Event Mark Timing Diagram<br />
5.17.5 Pre-sample and<br />
Post-sample<br />
Purge Counts<br />
Using the Purge-Count<br />
screens<br />
<strong>6712FR</strong> <strong>Refrigerated</strong> <strong>Sampler</strong><br />
Section 5 Extended Programming<br />
Bottle Number<br />
Concurrent with the event mark, the sampler also sends a bottle<br />
number signal. The bottle number signal is a series of pulses.<br />
The number of pulses sent represents the bottle currently accepting<br />
a sample (see Figure 5-3).<br />
Presample Purge Rinse Cycle Pump Volume 1 Pump Volume 2 Pump Volume 3 Postsample Purge<br />
This diagram shows the pulses sent for a bottles-per-sample distribution scheme<br />
PRE-SAMPLE PURGE:<br />
____COUNTS<br />
(10-9999)<br />
POST-SAMPLE PURGE:<br />
DEPENDENT ON HEAD<br />
FIXED COUNT<br />
POST-SAMPLE PURGE:<br />
____COUNTS<br />
(10-9999)<br />
Event Mark<br />
Bottle Number<br />
Event Mark<br />
Bottle Number<br />
Event Mark<br />
Bottle Number<br />
Event Mark<br />
Bottle Number<br />
The pre-sample purge is when the pump runs in reverse clearing<br />
the strainer of any debris before taking a sample. The pre-sample<br />
purge is set at 200 pump counts. After the sample is taken a<br />
post-sample purge occurs to clear the liquid from the suction line.<br />
The duration of the post-sample purge is determined by the<br />
length of the suction line to maximize the battery life. The preand<br />
post-sample purge can also be manually set.<br />
5.17.6 Serial Output Serial ASCII data can be output through the controller’s interrogator<br />
port. The output frequency is user-selectable: every 15 seconds,<br />
every minute, every 5 minutes, every 15 minutes, or by<br />
command.<br />
To receive serial data as a periodic output:<br />
5-27
<strong>6712FR</strong> <strong>Refrigerated</strong> <strong>Sampler</strong><br />
Section 5 Extended Programming<br />
5-28<br />
Programming the serial<br />
output<br />
PERIODIC<br />
SERIAL OUTPUT?<br />
YES NO<br />
PORT SETTINGS:<br />
9600N81 4800N81<br />
2400N81 1200N81<br />
SERIAL OUTPUT EVERY:<br />
15 SEC 1 MIN<br />
5 MIN 15 MIN<br />
1. Select YES at screen asking if you want periodic serial output.<br />
2. Select the appropriate baud rate setting in screen . Note<br />
that at all baud rates the data is sent with no parity, eight<br />
data bits, and one stop bit. If you have difficulty with the<br />
connection, try a slower baud rate.<br />
3. Select the desired output interval in screen.<br />
4. Connect to the 6712 controller’s interrogator connector<br />
using a standard interrogator cable.<br />
To receive serial data by command:<br />
1. Select NO at the screen asking for periodic serial output .<br />
2. Connect your computer to the 6712 controller’s interrogator<br />
connector with a standard interrogator cable, P/N<br />
60-2544-040 (25 pin) or 60-2544-044 (9 pin).<br />
3. Configure your communications software for a baud rate<br />
no higher than 19,200 kb, no parity, 8 data bits, and 1 stop<br />
bit.<br />
4. From the computer’s keyboard, type “?” repeatedly until<br />
the 6712 controller determines the baud rate. Once the<br />
baud rate is known, the 6712 returns an identification banner.<br />
This banner indicates that the connection is working<br />
properly.<br />
5. Type DATA each time the data string is desired.<br />
The serial data is in comma-separated-value format. Only the<br />
values that the sampler is set up to measure will be output in the<br />
data string. The string is terminated with a . To read<br />
the data in the string, refer to Table 5-5. This serial data can also<br />
be accessed from a remote location using the optional dial-out<br />
modem (see Section 8 Software Options).<br />
Note<br />
Connecting either the serial output or the standard interrogator<br />
cable to the 6712 disables the optional dial-out modem, if<br />
installed. The interrogator cable must be disconnected before<br />
you can use the modem.<br />
Table 5-5 Serial Data Codes<br />
Identifier Parameter Units<br />
B? 1 Bottle number and time days since 1-Jan 1900<br />
CR Current day’s rain<br />
CS 2<br />
tips (rolls over every 256<br />
tips)<br />
Checksum unsigned long<br />
DE Description 6712 <strong>Sampler</strong><br />
FL Flow cubic meters per second<br />
ID Unit specific identifier 10 digit unsigned long<br />
LE Level meters
MO Model 6712<br />
<strong>6712FR</strong> <strong>Refrigerated</strong> <strong>Sampler</strong><br />
Section 5 Extended Programming<br />
PE Percent percent of full scale<br />
PH pH none<br />
PR Previous day’s rain<br />
RA Rain<br />
Table 5-5 Serial Data Codes (Continued)<br />
Identifier Parameter Units<br />
tips (rolls over every 256<br />
tips)<br />
tips (rolls over every 256<br />
tips)<br />
RTE Refrigerator Temperature degrees celsius<br />
SS <strong>Sampler</strong> enable state logical<br />
TE Temperature degrees celsius<br />
TI Current time days since 1-Jan-1900<br />
VE Velocity meters per second<br />
VO Volume cubic meters<br />
VSI Velocity signal strength percent<br />
VSP Velocity spectrum strength percent<br />
CO a 3 Conductivity milliseimens per centimeter<br />
DO a Dissolved oxygen milligrams per liter<br />
PH a pH none<br />
SA a Salinity parts per thousand<br />
SP a Specific Conductance milliseimens per centimeter<br />
TD a Total Dissolved Solids grams per liter<br />
TE a Temperature degrees Celsius<br />
OR a Oxidation reduction potential millivolts<br />
LE a Level meters<br />
MM a Ammonium-nitrogen milligrams nitrogen per liter<br />
MA a Ammonia-nitrogen milligrams nitrogen per liter<br />
NI a Nitrate-Nitrogen milligrams nitrogen per liter<br />
TB a Turbidity nephelometric turbidity units<br />
CL a Chloride milligrams per liter<br />
CP a Chlorophyll micrograms per liter<br />
FL a Flow rate cubic meters per second<br />
VO a Flow volume cubic meters<br />
5-29
<strong>6712FR</strong> <strong>Refrigerated</strong> <strong>Sampler</strong><br />
Section 5 Extended Programming<br />
5.18 Hardware Setup The hardware setup screens make adjustments to the sampler’s<br />
Selecting Hardware Setup<br />
5-30<br />
RUN “PROGRAM NAME”<br />
PROGRAM<br />
VIEW REPORT<br />
OTHER FUNCTIONS<br />
Select Other Functions<br />
MAINTENANCE<br />
MANUAL FUNCTIONS<br />
PROGRAMMING STYLE<br />
HARDWARE<br />
Select Hardware<br />
Table 5-5 Serial Data Codes (Continued)<br />
Identifier Parameter Units<br />
4<br />
xxDa Other data not listed above<br />
The three most recent samples will have entries as B?. The “?”<br />
will be the first bottle number in the set. If the sample is a grab<br />
sample, it will be shown as B0.<br />
An “a” in the identifier indicates an SDI-12 address.<br />
“xx” matches the data label for the SDI-12 parameter.<br />
The checksum does not include the checksum, carriage return,<br />
and linefeed.<br />
The string is terminated with .<br />
hardware-based features:<br />
5.18.1 SDI-12 Sonde Setup The 6712 supports SDI-12 sondes. For more information on setting<br />
up sondes, refer to Section 6.<br />
5.18.2 Rain Gauge Setup With standard programming, the sampler does not record rain<br />
gauge readings. However, with extended programming, recording<br />
the rain gauge readings and the rain enable option can be<br />
DO YOU HAVE A<br />
RAIN GAuGE CONNECTED?<br />
YES NO<br />
Select YES.<br />
RAIN GAUGE:<br />
0.01 inch TIP<br />
0.1 mm TIP<br />
The rain gauges are set up to<br />
tip on either .01 inch or .1 mm.<br />
Select the desired tip.<br />
Rain Gauge Setup Analog Outputs<br />
SDI-12 Sonde Setup Dialout Alarms<br />
I/O Pin Programming<br />
turned on or off. Enter the hardware setup and follow the screens<br />
to the left in the margin.<br />
When asked if you have a rain gauge connected, select YES to<br />
record the rain gauge readings and add RAIN as a sampler<br />
enable option. Select the appropriate tip for the rain gauge. The<br />
sampler will then create a rain memory partition and update the<br />
available sampler enable conditions.<br />
Select NO to disable the readings and the sampler enable option.<br />
When you select NO, the sampler removes the rain memory partition,<br />
leaving the memory space available for other reading<br />
types.
<strong>6712FR</strong> <strong>Refrigerated</strong> <strong>Sampler</strong><br />
Section 5 Extended Programming<br />
5.18.3 I/O Pin Programming Pins C, H, and I on the Rain Gauge Connector are user-configured<br />
as I/O1, I/O2, and I/O3 (Input/Output pins) respectively.<br />
Each pin can be either an input for sampler enabling, or an output<br />
for alarms.<br />
5.18.4 Refrigerator<br />
Temperature<br />
Note<br />
The state of the I/O lines is not defined when the sampler is<br />
OFF.<br />
The enable input requires a pulse signal of 5 to 15 volts. Isco<br />
offers optional interface modules for converting from a 4-20 mA<br />
analog or pulse duration signal .<br />
The alarm output can be set for any RUNNING PROGRAM or<br />
RUN ERROR state. In addition, the CONDITIONS output can<br />
report alarm conditions using the parameters the <strong>6712FR</strong> is configured<br />
to measure. You can set thresholds for one or two conditions<br />
and the CONDITIONS output can then trigger alarms<br />
when the measured parameters exceed the threshold.<br />
The alarm output requires an alarm interface module. Isco offers<br />
a module designed to provide one, two, or three contact closures.<br />
The alarm module can interface the sampler with a large number<br />
of non-Isco devices. For more information about the alarm module,<br />
contact your Isco sales representative.<br />
Isco offers a temperature sensor intended for use with the<br />
<strong>6712FR</strong> <strong>Refrigerated</strong> <strong>Sampler</strong>. The optional sensor connects to<br />
the Rain Gauge port and uses I/O3 to transmit its temperature<br />
readings to the <strong>6712FR</strong>.<br />
Note<br />
If alarms are being used, the temperature sensor is simply<br />
plugged into the panel mount on the one- or two-alarm output<br />
module. Because the temperature sensor uses I/O3, it cannot<br />
be used with a three-alarm output module.<br />
To configure an attached temperature sensor, select “FR-TEMP”<br />
as the input for I/O3. The <strong>6712FR</strong> will display the NEW HARD-<br />
WARE SETUP screen. Select DONE and the <strong>6712FR</strong> reconfigures<br />
its memory partitions to record the temperature readings.<br />
Temperature readings are updated approximately every 2.5 seconds.<br />
The readings are stored as FR-TEMP readings at the data<br />
storage interval. You can retrieve a history of temperature readings<br />
through the <strong>6712FR</strong>’s reports. The temperature data also<br />
can be used as a sampler enable condition.<br />
5.18.5 Analog Output Isco offers multiple analog outputs as a factory installed option.<br />
The number of isolated outputs can vary from one to three and is<br />
specified at order time. The option is installed inside the controller<br />
and includes a six-pin connector to interface with external<br />
devices.<br />
5-31
<strong>6712FR</strong> <strong>Refrigerated</strong> <strong>Sampler</strong><br />
Section 5 Extended Programming<br />
5-32<br />
The analog outputs can be programmed for either 0-to-20 mA or<br />
4-to-20 mA operation. With the exception of rain, any parameter<br />
that the <strong>6712FR</strong> sampler is currently measuring can be used to<br />
control any (or all) of the analog output channels. Programming<br />
the outputs requires parameter levels at each end of the analog<br />
range and then assumes a linear relationship between those<br />
points. MANUAL CONTROL of each output is also available.<br />
Flowcharts for analog output screens appear in Appendix A.<br />
5.18.6 Dialout Alarms Dialout alarms require the sampler to be equipped with the factory-installed<br />
2400 baud talking modem. The dialout alarm<br />
allows the sampler to notify a contact list when an “alarm” condition<br />
exists (is true).<br />
Dialout Alarms<br />
DIALOUT NUMBERS:<br />
1.<br />
2.<br />
3.<br />
Enter the applicable phone<br />
numbers.<br />
To enter extended characters<br />
or a pager number, press the<br />
decimal point on the keypad<br />
to display the following<br />
screen:<br />
SELECT CODE:<br />
, # * PAGER<br />
If “PAGER” is selected, a “P”<br />
will be displayed in front of<br />
the applicable dialout<br />
number to indicate the<br />
number belongs to a pager.<br />
At the transition to the true state, any programmed I/O output<br />
can cause the sampler to warn of the alarm condition. As many<br />
as three telephone numbers can be entered. The sampler tries<br />
each telephone number in succession until the alarm is acknowledged.<br />
For each alarm condition, the sampler will attempt each<br />
telephone number entered a maximum of five times.<br />
When the call is answered, the sampler’s talking modem<br />
announces the alarm condition and the sampler’s three-digit ID<br />
number. To acknowledge the call, press the (star) key, and the<br />
three-digit ID number on your phone. The sampler will reply<br />
with an acknowledgment when the keyed entry is correct.<br />
A record of alarms and acknowledgements is available in the<br />
Sampling Report. When the sampler detects the alarm condition,<br />
it records the type of alarm and the time it occurred. Acknowledgements<br />
are a separate Sampling Report entry, recording the<br />
time and telephone number that responded to the call.<br />
As mentioned previously, as many as three telephone numbers<br />
may be entered. Modems with serial numbers 199E00000 and<br />
greater can dial up to 25 digits. Enter numbers using the<br />
numeric keys on the 6712 keypad. When entering telephone<br />
numbers longer than 17 digits, the display will scroll.<br />
Extended characters, the Comma (,), Pound (#), and Star (*), also<br />
may be included in the 25 digits. To enter an extended character,<br />
press the Decimal Point key on the 6712 keypad. The 6712 displays<br />
a screen used to select and enter the extended characters.<br />
Each comma entered will cause the modem to pause for two seconds<br />
before proceeding with the remaining digits.<br />
Phone numbers that are no longer needed can be removed.<br />
Advance the cursor to the end of the telephone number and then<br />
press the Left Arrow key to erase the preceding character. If the<br />
cursor is not at the end of the telephone number, the Left Arrow<br />
key will only shift the cursor without erasing any characters.<br />
Dialout telephone and pager numbers are included in the Program<br />
Settings Report.<br />
*
<strong>6712FR</strong> <strong>Refrigerated</strong> <strong>Sampler</strong><br />
Section 5 Extended Programming<br />
5.18.7 Pager Numbers The extended character screen contains a pager option that designates<br />
the phone number as a pager. When programmed as a<br />
pager number, an identification string will be sent seven times<br />
after the pager number is dialed, with a three second delay<br />
between strings.<br />
An example identification string would be “828-1”, meaning<br />
“Alarm condition #1 exists at sampler 828”. If more than one<br />
alarm condition exists, the string would read similar to “828-1-3.<br />
5.19 Memory The 6712 <strong>Sampler</strong> contains 512 kilobytes of battery backed RAM<br />
(Random Access Memory) that stores:<br />
Five sampling programs<br />
The sampling results from the most recent program<br />
The rainfall data collected from rain gauges<br />
The data from a refrigerator temperature sensor<br />
The data collected from a 700 Series module<br />
Parameter data collected from an SDI-12 Sonde<br />
Calculated flow information from the current flow module<br />
The sampling results memory stores up to approximately 1004<br />
events (the actual number is dependent on the number of SDI-12<br />
parameters). The program run and start time information is<br />
logged as four events. These four entries are held for the duration<br />
of the program. The remaining 1000 are for logging sample<br />
events, program events, and errors from the currently running<br />
program. If the running program exceeds 1000 events, the data<br />
will “roll over.” That is, the sampler will replace the oldest stored<br />
event with the newest event. When using an SDI-12 sonde, the<br />
sampler logs additional entries at each sample event.<br />
Module, sonde, refrigerator temperature, and rain gauge readings<br />
are stored in memory partitions. The storage capacity<br />
depends on the reading types, the number of bytes per reading,<br />
and the data storage interval.<br />
The sampler clears the sampling results memory when the site<br />
description changes. It is important to collect the sampling<br />
results before changing the site description – the data can not be<br />
retrieved afterwards. Keep in mind that the description may<br />
change when selecting an extended program.<br />
The partition data is cleared when the sampler automatically<br />
creates and sizes the memory partitions. This occurs when you:<br />
Select a new program with a different storage interval<br />
Change the Data Storage Interval in the current program<br />
Change the programming mode<br />
Install a new 700 Series Module<br />
Change 700 Series Module mode of operation<br />
Add or remove a rain gauge with the Hardware Setup<br />
Add or remove a refrigerator temperature sensor as I/O3<br />
5-33
<strong>6712FR</strong> <strong>Refrigerated</strong> <strong>Sampler</strong><br />
Section 5 Extended Programming<br />
5-34<br />
Add or remove a SDI-12 sonde parameter with the Hardware<br />
Setup<br />
Reinitialize the sampler<br />
The stored data is lost as the sampler reformats its memory. As a<br />
precaution, before clearing the memory, the sampler display will<br />
show the following message:<br />
INTERVAL CHANGED --<br />
DOWNLOAD DATA NOW<br />
OR LOSE ALL DATA!<br />
DONE<br />
If you want to keep the stored data, download it before proceeding.<br />
When DONE is selected, the sampler clears the stored data<br />
and reformats the memory partitions. The sampler then displays<br />
the new capacity of the partition memory.<br />
PARTITION MEMORY<br />
WILL LAST 13 DAYS<br />
If the duration is too short, try changing the data storage interval<br />
or eliminating unnecessary reading types in the Hardware or<br />
Module Setup. For example, a sampler configured with a 730<br />
Bubbler Module and a rain gauge storing data at a one-minute<br />
interval, creates level and rainfall partitions that hold 100 days<br />
of readings. Changing the storage interval to two minutes<br />
extends the storage capacity to 201 days.<br />
The sampler does not have to be running a program to store<br />
readings. When the sampler is on, it stores readings at the<br />
selected data storage interval. Once the partition is filled, the<br />
readings roll over.<br />
When the sampler is running a program, the partitions become<br />
“triggered” by the programmed start time or the first enable<br />
time, whichever is later. A triggered partition continues to log<br />
readings at the selected interval, but will not replace any readings<br />
taken after the trigger event. The sampler fills the partition<br />
and then stops recording to preserve the data. The first reading<br />
preserved in a full partition is one hour before the trigger event.<br />
A full partition can be reset by starting another program or<br />
changing storage parameters.<br />
If you need continuous readings for analysis, be sure to collect<br />
the readings before the partition fills or rolls over to avoid gaps<br />
in the data.<br />
5.20 Pressurized Lines The sampler can obtain samples from pressurized lines, as long<br />
as the line pressure remains below 15 PSI (pounds per square<br />
inch). Pressures greater than 15 PSI may prevent the sampler<br />
from purging the suction line; moreover, extreme pressures can<br />
force liquid past the pump, even when the pump is not running.
5.21 Command Driven<br />
Operation<br />
<strong>6712FR</strong> <strong>Refrigerated</strong> <strong>Sampler</strong><br />
Section 5 Extended Programming<br />
For more consistent sample volumes from lines under constant<br />
pressure, calibrate the samples. Isco does not recommend sampling<br />
from pressurized lines.<br />
The 6712 controller can be used as a slave to an external controller.<br />
The external controller is responsible for determining when<br />
to take a sample, how much volume to pump, and where to put<br />
the sample. The external controller directly interfaces to the<br />
sampler via an RS-232 communications port at 2,400-19,200<br />
baud, 8 data bits, no parity, and 1 stop bit. A comma-separated-value<br />
protocol is used by the external controller to make<br />
requests, and by the sampler to report results. Use a standard<br />
computer connect cable (see Appendix E) to connect the sampler’s<br />
interrogator port and the external controller.<br />
For information on serial data codes and their meanings, refer to<br />
Table 5-5 Serial Data Codes in this section.<br />
The 6712 <strong>Sampler</strong> will respond to three commands: Turn <strong>Sampler</strong><br />
On, GET STATUS, and TAKE SAMPLE. All commands<br />
must include the instruction set. The checksum value is optional.<br />
The available commands are:<br />
1. Turn <strong>Sampler</strong> On: STS,2,CS,582<br />
“582” is the byte-by-byte sum of the ASCII values in the<br />
string “STS, 1,CS”.<br />
“” is a carriage return signifying the end of the command.<br />
If the sampler is OFF, this command will turn it ON<br />
before returning status info.<br />
2. Get Status: STS,1,CS,581<br />
“STS,1” instructs the sampler to return the current status.<br />
“CS,581” is the optional checksum value. The byte-by-byte<br />
sum of the ASCII values in the string “STS,1,CS” is 581.<br />
“” is a carriage return signifying the end of the command.<br />
3. Take Sample: BTL,2,SVO,100,CS,1039<br />
The TAKE SAMPLE command is only valid if the sampler is<br />
WAITING TO SAMPLE.<br />
“BTL,2” instructs the sampler to place the sample in bottle<br />
2.<br />
“SVO,100” instructs the sampler to take a 100 ml sample.<br />
“CS,1039” is the optional checksum value. The<br />
byte-by-byte sum of the ASCII values in the string<br />
“BTL,2,SVO,100,CS,” is 1039.<br />
“” is a carriage return signifying the end of the command.<br />
5-35
<strong>6712FR</strong> <strong>Refrigerated</strong> <strong>Sampler</strong><br />
Section 5 Extended Programming<br />
5.22 Command Driven<br />
<strong>Sampler</strong> Responses<br />
5-36<br />
The 6712 <strong>Sampler</strong>’s response string is the same for each of the<br />
three commands. A sample response string is shown below:<br />
MO,6712,ID,2424741493,TI,35523.50000,STS,1,STI,35523.4187<br />
5,BTL,2,SVO,100,SOR,0,CS,xxxx<br />
Note that the sampler’s response is a series of alphabetical and<br />
numerical pairs. The alphabetical characters are headings that<br />
describe the following numerical value or code. A complete<br />
description of each pair is listed below.<br />
MO,6712, is the model number of the sampler.<br />
ID,2424741493, is the sampler’s unique identification number.<br />
TI,35523.50000, is the sampler’s current time.<br />
STS,1, is the sampler’s current status. The possible states are:<br />
1 = WAITING TO SAMPLE.<br />
4 = POWER FAILED (for short time after power is restored).<br />
5 = PUMP JAMMED (must be resolved before continuing).<br />
6 = DISTRIBUTOR JAMMED (must be resolved before continuing).<br />
9 = SAMPLER OFF.<br />
12 = SAMPLE IN PROGRESS.<br />
20 = INVALID COMMAND.<br />
identifier code is not supported.<br />
bottle requested is not in current configuration<br />
sample volume requested is outside its range (10 - 9990<br />
ml)<br />
day (Set_Time) must be 5 digits and more recent than<br />
1977<br />
21 = CHECKSUM MISMATCH.<br />
22 = INVALID BOTTLE. (bottle requested is not in the<br />
current configuration)<br />
23 = VOLUME OUT OF RANGE. ( the sample volume<br />
requested is outside its range (10-9990 ml)<br />
STI,35523.41875, is the most recent sample time.<br />
BTL,2, is the bottle receiving the most recent sample.<br />
SVO,100, is the most recent sample’s volume.<br />
SOR,0, is the results of attempting the most recent sample. The<br />
possible results are:<br />
0 = SAMPLE OK.<br />
1 = NO LIQUID FOUND.<br />
2 = LIQUID LOST (not enough liquid to satisfy requirements.)<br />
3 = USER STOPPED (using the Stop Key).<br />
4 = POWER FAILED.<br />
5 = PUMP JAMMED.<br />
6 = DISTRIBUTOR JAMMED.
<strong>6712FR</strong> <strong>Refrigerated</strong> <strong>Sampler</strong><br />
Section 5 Extended Programming<br />
8 = PUMP LATCH OPEN.<br />
9 = SAMPLER SHUT OFF (while sampling).<br />
11 = NO DISTRIBUTOR.<br />
12 = SAMPLE IN PROGRESS.<br />
CS,xxxx is the byte-by-byte sum of the entire string “MO,...,CS,”<br />
For commands that are not understood (INVALID COMMAND<br />
or CHECKSUM MISMATCH) or when no samples have been<br />
taken, the most recent bottle information is left off the response<br />
string.<br />
5-37
<strong>6712FR</strong> <strong>Refrigerated</strong> <strong>Sampler</strong><br />
Section 5 Extended Programming<br />
5-38
6.1 SDI-12 Data<br />
Parameters<br />
<strong>6712FR</strong> <strong>Refrigerated</strong> <strong>Sampler</strong><br />
Section 6 SDI-12 Sondes<br />
In order to provide you with the flexibility to use the water<br />
parameter sensors that best meet your needs, Isco has implemented<br />
support for SDI-12 protocol. Support of this standard<br />
allows you to use SDI-12 compatible devices in conjunction with<br />
your <strong>6712FR</strong> sampler in Extended Programming mode.<br />
The <strong>6712FR</strong> <strong>Sampler</strong> can accept up to 16 parameters from up to<br />
ten sensors with SDI-12 addresses from 0 - 9 (refer to chart in<br />
Figure 6-1). This data can be used in different ways. Data can be<br />
logged at user selectable time intervals for later download and<br />
processing by Isco’s Flowlink program. You can set up sampling<br />
programs that will be enabled to run only if conditions<br />
based on parameters monitored by the connected SDI-12 devices<br />
are met. The sampler can also be programmed to take samples<br />
each time certain parameter limits are exceeded.<br />
The data parameters used by the sensing device (sonde) and<br />
recording device (sampler) must match. Otherwise, the equipment<br />
could record the data values for one parameter as<br />
another’s, such as reporting a pH value as being temperature.<br />
Certain vendors’ sondes (such as Hydrolab and YSI) have<br />
enhanced commands that facilitate “plug and play” setup. These<br />
Isco Ready sondes can tell the <strong>6712FR</strong> what values they have,<br />
their order, and units of measure.<br />
Other SDI-12 compatible sondes can be used, but require manual<br />
setup to identify proper data types for each data value reported.<br />
This section shows you how to set up both Isco Ready and other<br />
SDI-12 sondes for use with the <strong>6712FR</strong>.<br />
WARNING<br />
SDI-12 Sondes have not been approved for use in<br />
hazardous locations as defined by the National Electrical<br />
Code.<br />
CAUTION<br />
Before you install any sonde, you must take the proper safety<br />
precautions. Refer to Appendix C in the back of this manual.<br />
Additional safety considerations may be required. Check applicable<br />
guidelines, codes, and regulations of federal, state, city,<br />
and county agencies.<br />
6-1
<strong>6712FR</strong> <strong>Refrigerated</strong> <strong>Sampler</strong><br />
Section 6 SDI-12 Sondes<br />
SDI-12 Sonde Data Units: Parameter Range Resolution Storage Bytes<br />
Temperature -40 - 100 °C 0.1 °C 2<br />
Conductivity 0 - 100 mS/cm 0.01 mS/cm 2<br />
Specific Conductance 0 - 100 mS/cm 0.01 mS/cm 2<br />
Total Dissolved Solids 0 - 90 g/l 0.01 g/l 2<br />
Salinity 0 - 70 ppt 0.1 ppt 2<br />
Dissolved Oxygen 0 - 20 mg/l 0.1 mg/l 1<br />
pH 0 - 14 0.1 1<br />
ORP -999 - 999 mv 0.1 mv 2<br />
Level 0 - 6.5279 m 0.0001 m 2<br />
Ammonium-Nitrogen 0 - 200 mgN/l 0.1 mgN/l 2<br />
Ammonia-Nitrogen 0 - 200 mgN/l 0.1 mgN/l 2<br />
Nitrate-Nitrogen 0 - 200mgN/l 0.1 mgN/l 2<br />
Turbidity 0 - 5000 NTU 0.1 NTU 2<br />
Chloride 0 - 1000 mg/l 0.1 mg/l 2<br />
Chlorophyll 0-400 ug/l 0.1 ug/l 2<br />
Other -99999.0-99999.0 0.0001 4<br />
Figure 6-1 SDI-12 Sonde Parameters<br />
6-2<br />
6.2 Scanning For Sondes You must be in Extended Programming to use a sonde with the<br />
<strong>6712FR</strong>. The sampler can automatically scan for the presence of<br />
sondes if you enable that option:<br />
From the main menu, select OTHER FUNCTIONS.<br />
Select HARDWARE.<br />
As you press ↵ to move through the hardware screens,<br />
you will see one that looks like the following:<br />
NO SDI-12 SONDE<br />
↑<br />
AUTO SDI-12 SCAN OFF<br />
↓<br />
Select “NO SDI-12 SONDE” to scan for sondes. If one is found,<br />
you can set it up, and the “AUTO SDI-12 SCAN” option will be<br />
switched to yes.<br />
Select the “AUTO SDI-12 SCAN” option to manually turn on (or<br />
off) automatic scanning for sondes when the sampler is turned<br />
on.<br />
If a sonde has already been connected and set up, the hardware<br />
screen will instead display a screen similar to the following:<br />
↑<br />
SDI-12 DATA:<br />
TEMP0 pH0 SD_CO0<br />
SAL0 05DATA0 DO0<br />
ORP0 LEVEL0 09DATA0<br />
↓
1<br />
2<br />
<strong>6712FR</strong> <strong>Refrigerated</strong> <strong>Sampler</strong><br />
Section 6 SDI-12 Sondes<br />
Press the arrow keys until “SDI-12 DATA” is blinking, then press<br />
↵. You will see the screen below:<br />
Select “SCAN SDI-12 SONDES” and press ↵. The system will<br />
scan to see what sondes are connected. If it detects a different<br />
sonde, it will indicate so, and advance to the setup screens.<br />
6.3 Isco Ready Sondes If the <strong>6712FR</strong> scans for sondes and finds one that is Isco Ready, it<br />
will automatically recognize the sonde’s data types and units.<br />
You can then use Hardware options to setup the definitions for<br />
Connecting an Isco Ready<br />
Sonde<br />
SELECT ADDRESS OF<br />
SONDE TO SETUP:<br />
__ __ DONE<br />
Select the address you want<br />
to set up.<br />
Company Model<br />
Optional Information<br />
SONDE AT ADDRESS __<br />
HAS __ DATA VALUES<br />
Wait a few seconds for the<br />
above display to<br />
disappear, or press ↵.<br />
You will then be asked if you<br />
want to store the parameter<br />
data. Refer to “SONDE SETUP<br />
- STORING PARAMETER DATA”<br />
on page 6-4.<br />
↑ NO SDI-12 SONDE<br />
SETUP KNOWN SONDES<br />
SCAN SDI-12 SONDES<br />
↓<br />
data storage and calibrate the sonde.<br />
Even with an Isco Ready sonde, the <strong>6712FR</strong> may find a parameter<br />
that is not on its list of supported parameters (Figure 6-1). It<br />
can still work with such a parameter. Such a parameter will be<br />
identified as something like “05DATA1” and you will have to<br />
mentally associate the appropriate data type with that label.<br />
However, once such data is brought into Flowlink, data sets<br />
can be manually changed so that reports show the appropriate<br />
labels.<br />
6.4 Other SDI-12 Sondes If you have connected an SDI-12 sonde that is not Isco Ready, you<br />
will need to define the sonde’s data values.<br />
When you select the address of the sonde you want to set up (see<br />
screens in the margin), the company model and other information<br />
will be displayed along with the number of data values the<br />
sonde has.<br />
When you advance to the next screen (see #3 below), the data<br />
types will be listed as “OTHER” because you have not defined<br />
them yet. Move between the data types using the arrow keys.<br />
Select one to change by pressing ↵.<br />
A list of possible parameters will be displayed (see #4 below). Use<br />
the arrow keys to move through the options. When the one you<br />
want is blinking, press ↵. Repeat the process until you have<br />
defined all of the data parameters for your sonde.<br />
Use the arrow key to move to “DONE” and press ↵. You will then<br />
be asked if you want to store the parameter data.<br />
6-3
<strong>6712FR</strong> <strong>Refrigerated</strong> <strong>Sampler</strong><br />
Section 6 SDI-12 Sondes<br />
6-4<br />
3<br />
4<br />
5<br />
6<br />
Connecting Other SDI-12<br />
Sondes<br />
SELECT ADDRESS OF<br />
SONDE TO SETUP:<br />
__ __ DONE<br />
Select the address of the<br />
sonde you want to set up.<br />
Company Model<br />
Optional Information<br />
SONDE AT ADDRESS __<br />
HAS __ DATA VALUES<br />
You can wait a few seconds,<br />
or press ↵ to advance to the<br />
next screen:<br />
DATA FROM SONDE __<br />
1 = OTHER<br />
2 = OTHER<br />
3 = OTHER ---><br />
Press an arrow key until the<br />
cursor is on the data you<br />
want to identify. Then, press<br />
↵. A scrolling screen listing<br />
possible parameters will<br />
appear.<br />
SONDE ___ , DATA 1:<br />
<br />
6.5 Sonde Setup - Storing<br />
Parameter Data<br />
7<br />
8<br />
Make your selection and<br />
press ↵.<br />
DATA FROM SONDE __<br />
<br />
Repeat the process until you<br />
have defined all the data.<br />
Press “DONE” when finished.<br />
DATA FROM SONDE __<br />
6.6 Sonde Calibration and<br />
Validation<br />
<strong>6712FR</strong> <strong>Refrigerated</strong> <strong>Sampler</strong><br />
Section 6 SDI-12 Sondes<br />
To access the setup option in the Hardware menu, select Other<br />
Function from the main menu, then choose Hardware. Advance<br />
through the screens until you see one that displays SDI-12<br />
DATA. Select this screen to display the following:<br />
NO SDI-12 SONDE<br />
SETUP KNOWN SONDES<br />
SCAN SDI-12 SONDES<br />
Select “SETUP KNOWN SONDES” and then indicate the<br />
address of the sonde you want to setup. A screen containing the<br />
sonde model and number of data values will appear briefly. Then<br />
you will be asked to verify, parameter by parameter, what data<br />
you want to store. The screens will look similar to the one below:<br />
SONDE 5, STORE<br />
TEMPERATURE DATA?<br />
YES NO<br />
LABEL IS: TEMP5<br />
Indicate if you want to store the data for that particular parameter<br />
and then advance through the rest of the parameter screens.<br />
Once you have defined your data storage options, select “DONE.”<br />
You will be prompted that you have entered a new hardware<br />
setup and asked if you want to erase the stored data. Indicate<br />
“YES” or “NO.” A partition memory status message will be displayed<br />
and (if a parameter exists that can be calibrated) you will<br />
then advance to the calibration screen (refer to “SONDE CALI-<br />
BRATION AND VALIDATION” on this page). If you do not want<br />
to calibrate or validate, select “DONE” to return to the Hardware<br />
Options screens.<br />
It is recommended that calibration of your sonde be done<br />
in the lab, according to manufacturer’s recommendations.<br />
However, for your convenience, the <strong>6712FR</strong> allows for field calibration<br />
of pH, Dissolved Oxygen (DO), and Oxidation Reduction<br />
Potential (ORP).<br />
Field calibrations are stored in the sampler, NOT the sonde, and<br />
are used to modify readings from the sonde until a new sonde is<br />
connected. When a sonde is moved to another sampler, it will<br />
retain calibration constants set in the lab, but will not retain any<br />
that were set in the field.<br />
Although field calibration is limited to three parameters, you can<br />
validate any of the available parameters. Validation allows you<br />
to immerse the sonde in a known solution, note the readings, and<br />
see if the sonde is functioning properly. The validation process<br />
does not modify any readings like calibration does; it merely<br />
alerts you to inaccurate ones.<br />
No data will be stored, nor will enable conditions be updated,<br />
while calibrations or validations are being performed.<br />
6-5
<strong>6712FR</strong> <strong>Refrigerated</strong> <strong>Sampler</strong><br />
Section 6 SDI-12 Sondes<br />
6-6<br />
6.6.1 The Calibration<br />
Screens<br />
To access the calibration screens from the main menu, select<br />
Other Functions, Hardware. Advance through the screens until<br />
you see one that displays “SDI-12 DATA.” Select this screen to<br />
display the following:<br />
NO SDI-12 SONDE<br />
SETUP KNOWN SONDES<br />
SCAN SDI-12 SONDES<br />
Select “SETUP KNOWN SONDES” and then select “DONE.” You<br />
will see a screen similar to the following that will list the parameters<br />
you can calibrate.<br />
SELECT PARAMETER<br />
TO CALIBRATE:<br />
pH5 DO5 ORP5 DONE<br />
The sonde’s address will appear after the parameter (such as<br />
pH0 and pH5). If you have multiple sondes attached, use the<br />
arrow key to select the correct one to calibrate.<br />
Depending upon the parameter you selected, a series of screens<br />
will be displayed to step you through the calibration process.<br />
pH - You will be given the choice of three different pH<br />
solutions: 4.00, 7.00, and 10.00. After making your selection,<br />
rinse the probe and place in the pH buffer. If the<br />
reading is off by more than 0.5 pH units, you will asked to<br />
verify if the reading is correct.<br />
DO - For dissolved oxygen, you can choose between two<br />
methods: DO Standard and Saturation. The saturation<br />
method requires a temperature reading between 0.0° and<br />
47.0° C. You will also need to enter your altitude and barometric<br />
pressure.<br />
ORP - You will asked to enter the value of your calibration<br />
standard.<br />
When calibration is complete, select “DONE” to proceed to the<br />
validation screen. If you do not want to validate any parameters,<br />
select “DONE” again to return to the Hardware options screens.<br />
6.6.2 The Validation Screen The validation screen appears after you select “DONE” on the<br />
calibration screen. It will be similar to the screen shown below.<br />
SELECT PARAMETER<br />
TO VALIDATE:<br />
<br />
Use the arrow keys to select the desired parameter to<br />
validate. Any parameter can be validated. You will be prompted<br />
to place the probe in your validation standard. When stable,
<strong>6712FR</strong> <strong>Refrigerated</strong> <strong>Sampler</strong><br />
Section 6 SDI-12 Sondes<br />
press ↵. The reading will be displayed at the bottom of the<br />
screen.<br />
When you are done validating, select “DONE” to return to the<br />
Hardware options screens.<br />
6.7 Disconnecting Sondes When you have disconnected all sondes, and have interrogated<br />
the sampler for all its data, you can indicate that there is no<br />
SDI-12 sonde.<br />
From the main menu, select Other Functions, Hardware.<br />
Advance through the screens until you see one that displays<br />
“SDI-12 DATA.” Select this screen to display the following:<br />
NO SDI-12 SONDE<br />
SETUP KNOWN SONDES<br />
SCAN SDI-12 SONDES<br />
Select “NO SDI-12 SONDE.” You will advised that you have a<br />
new hardware setup:<br />
NEW HARDWARE SETUP--<br />
DOWNLOAD DATA NOW<br />
OR LOSE ALL DATA!<br />
DONE<br />
If you have collected all the data, select “DONE.” A partition<br />
memory message will be displayed briefly, and you will be<br />
returned to the Hardware options screens.<br />
If you do not have a sonde attached, you may want to turn off<br />
automatic scanning for sondes. This will eliminate the time<br />
taken to scan for sondes whenever the sampler is turned on.<br />
6-7
<strong>6712FR</strong> <strong>Refrigerated</strong> <strong>Sampler</strong><br />
Section 6 SDI-12 Sondes<br />
6-8
7.1 Maintenance<br />
Checklist<br />
7.2 Cleaning Guidelines<br />
<strong>6712FR</strong> <strong>Refrigerated</strong> <strong>Sampler</strong><br />
Section 7 Maintenance<br />
This section describes how to maintain and troubleshoot your<br />
<strong>6712FR</strong> sampler. If you think your unit requires repair, or if you<br />
have questions concerning its operation or maintenance, contact<br />
Isco’s Technical Service Department:<br />
Phone: (800) 228-4373<br />
(402) 464-0231<br />
FAX: (402) 465-3022<br />
E-mail: service @isco.com<br />
Clean the condenser coil annually.<br />
Clean the refrigerator’s air filter every 3 months.<br />
Clean the refrigerator interior and exterior periodically.<br />
Inspect the pump tube for wear. Replace it if necessary.<br />
Clean the pump tubing housing.<br />
Change the suction line if necessary.<br />
Clean the bottles, suction line, strainer and pump tube.<br />
Check the humidity indicator.<br />
When the battery warning appears on the display, replace<br />
the controller’s internal battery.<br />
7.2.1 Refrigerator The refrigerator’s exterior may be periodically cleaned with<br />
soapy water using a sponge or nonmetallic brush to keep it free<br />
of corrosive solutions, grease, oil, etc. After cleaning, it hsould be<br />
wiped dry. Automotive wax may be applied to the interior and<br />
exterior surfaces to make them easier to clean and more resistant<br />
to corrosion. Do not direct a hose spray toward the underside<br />
or into the front grill of the refrigerator. The vacuum formed<br />
plastic refrigerator interior may also be cleaned with soap and<br />
water as necessary.<br />
Because the refrigerator uses a forced-air system, dust and<br />
debris will collect on the condensor coil and surrounding areas. If<br />
the refrigerator is not cleaned periodically, damage due to overheated<br />
components may result.<br />
7.2.2 Controller When necessary, clean the controller with warm soapy water. To<br />
prevent moisture damage, always cap the connectors at the back<br />
of the controller tightly. Keep the controller power cable connected,<br />
or replace the protective cap (shipped with the sampler)<br />
over the power source connector.<br />
7-1
<strong>6712FR</strong> <strong>Refrigerated</strong> <strong>Sampler</strong><br />
Section 7 Maintenance<br />
7-2<br />
Make sure the pump drain hole (located on the bottom<br />
right-hand side of the pump, beneath the pump band) is open<br />
and free of debris or buildup.<br />
7.2.3 Sample Bottles The sample bottles have a wide mouth to facilitate cleaning.<br />
Wash them with a brush and soapy water, or use a dishwasher.<br />
You can autoclave the glass bottles.<br />
7.2.4 Suction Line, Pump<br />
Tube, and Discharge<br />
Tube<br />
Clean the suction line, pump tube, and discharge tube by placing<br />
the end of the suction line in a cleaning solution and pumping it<br />
through the delivery system. Rinse with clean water. If these<br />
items are severely contaminated, discard them. For critical sampling<br />
applications, refer to Cleaning Protocols for Priority Pollutants<br />
on the next page.<br />
7.2.5 Strainer Clean the strainer with a brush and soapy water.<br />
7.2.6 Air Filter The air filter prevents dust, lint, and other debris from circulating<br />
around the cooling system. Clean the filter about every 3<br />
months; more frequently under severe operating conditions.<br />
To remove the filter:<br />
1. Disconnect power from the refrigerator.<br />
2. Remove the screws securing the refrigerator’s grille. (See<br />
Appendix D Replacement Parts.)<br />
3. Remove the grille and filter.<br />
4. Steam clean the filter or wash it in hot, soapy water. After<br />
washing, treat the filter with a standard filter coat.<br />
7.2.7 Condenser Clean the condenser and surrounding areas annually; more frequently<br />
under severe operating conditions.<br />
1. Disconnect power from the refrigerator.<br />
2. Remove refrigerator’s back panel. (See Appendix D,<br />
Replacement Parts).<br />
3. Vacuum the fan, compressor, and surrounding areas.<br />
4. Check the fan for freedom of movement. If the fan and fan<br />
motor do not rotate freely, replace the motor. (You cannot<br />
oil the sealed fan motor bearings.)<br />
5. Remove the front grille and filter. Vacuum the condenser<br />
coil and surrounding areas.<br />
6. Clean the filter before replacing it.<br />
7. Replace the back panel and front grille.<br />
7.3 Cleaning Protocols for<br />
Priority Pollutants<br />
Clean sampling equipment is essential for valid laboratory analysis.<br />
Isco recommends that you develop cleaning protocols in consultation<br />
with a laboratory analyst when designing the<br />
monitoring program. For example, to clean sample bottles, suction<br />
line, and pump tubes, Lair (1974) suggests these protocols<br />
used by USEPA Region IV Surveillance and Analysis field personnel<br />
engaged in NPDES compliance monitoring. The protocols<br />
are based on U.S. Environmental Protection Agency Publications
7.3.1 Isco Glass Sample<br />
Bottles<br />
<strong>6712FR</strong> <strong>Refrigerated</strong> <strong>Sampler</strong><br />
Section 7 Maintenance<br />
EPA-600/4-77-039 (Sampling of Water and Wastewater by Dr.<br />
Phillip E. Shelley).<br />
1. One spectro-grade acetone rinse.<br />
2. Dishwasher cycle (wash and tap water rinse, no detergent).<br />
3. Acid wash with at least 20 percent hydrochloric acid.<br />
4. Dishwasher cycle (wash and tap water rinse, no detergent).<br />
5. Replace in covered Isco tubs.<br />
7.3.2 Vinyl Suction Line 1. Use new suction line for each new sampling setup, therefore,<br />
no cleaning is required.<br />
2. Use Teflon suction line when sampling for organic compounds.<br />
7.3.3 Teflon Suction Line 1. Rinse twice with spectro-grade acetone.<br />
2. Rinse thoroughly with hot tap water using a brush, if possible,<br />
to remove particulate matter and surface film.<br />
3. Rinse thoroughly three times with tap water.<br />
4. Acid wash with at least 20 percent hydrochloric acid.<br />
5. Rinse thoroughly three times with tap water.<br />
6. Rinse thoroughly three times with distilled water.<br />
7. Rinse thoroughly with petroleum ether and dry by pulling air<br />
through the line.<br />
8. Dry overnight in a warm oven (use an oven temperature of<br />
lower than 150° F), if possible.<br />
9. Cap ends with aluminum foil.<br />
7.3.4 Isco Pump Tube 1. Rinse by pumping hot tap water through the tube for at least 2<br />
minutes.<br />
2. Acid wash the tube by pumping at least a 20 percent solution<br />
of hydrochloric acid through the tube for at least 2 minutes.<br />
3. Rinse by pumping hot tap water through the tube for at least 2<br />
minutes.<br />
4. Rinse by pumping distilled water through the tube for at least<br />
2 minutes.<br />
Note<br />
For critical sampling applications, consider replacing the suction<br />
line, pump tube, and discharge tube. Replacement eliminates<br />
the possibility of any cross contamination from previous<br />
sampling sites.<br />
7.4 Maintenance Screens When you select OTHER FUNCTIONS from the main menu, and<br />
then selectMaintenance, the following screen will be displayed:<br />
SET CLOCK<br />
PUMP TUBE ALARM<br />
INTERNAL BATTERY<br />
DIAGNOSTICS<br />
7-3
<strong>6712FR</strong> <strong>Refrigerated</strong> <strong>Sampler</strong><br />
Section 7 Maintenance<br />
7-4<br />
Using these options, you can set the sampler’s time and date, set<br />
the number of pump counts for the pump tube warning, reset the<br />
battery warning for the internal battery, and run a set of diagnostic<br />
tests for troubleshooting purposes.<br />
7.4.1 Set Clock Isco ships samplers from the factory with the clocks set to the<br />
correct Central Standard Time. Reset the clock when installing<br />
Entering Times and Dates<br />
the sampler in a different time zone, for daylight savings time, or<br />
when needed.<br />
ENTER TIME AND DATE:<br />
HH:MM DD-MON-YY<br />
__:__ __-__-__<br />
Move from one field to<br />
another by pressing the<br />
arrow keys.<br />
Change a setting in a field<br />
by typing a number. Press ↵<br />
to accept the new setting.<br />
When setting the clock and calendar, use a 24-hour clock for<br />
times and the day-month-year format for dates. The illustration<br />
at the left shows blanks for each position that accepts an entry.<br />
The positions are called fields. When this screen appears on your<br />
sampler, the fields will contain the sampler’s current settings for<br />
the time and date.<br />
To move from one field to another without changing the<br />
setting, press the arrow keys. Use this technique when<br />
you want to change only one or two settings.<br />
Change the setting by typing a new number. Press ↵ to<br />
accept the new setting.<br />
For example, to enter 2:00 p.m. (2:00 p.m is 14:00 on a 24-hour<br />
clock), type 14. Press ↵. Next, type 0 (zero) for the minutes, and<br />
press ↵. To enter a date, such as January 22, 2001, type: 22 ↵<br />
01 ↵ 01 ↵ .<br />
1<br />
2<br />
3<br />
4<br />
5<br />
Table 7-1 Setting the Clock and Calendar<br />
RUN<br />
PROGRAM<br />
VIEW REPORT<br />
OTHER FUNCTIONS<br />
MAINTENANCE<br />
MANUAL FUNCTIONS<br />
PROGRAMMING STYLE<br />
SET CLOCK<br />
PUMP TUBE ALARM<br />
INTERNAL BATTERY<br />
DIAGNOSTICS<br />
ENTER TIME AND DATE:<br />
HH:MM DD-MON-YY<br />
14:00 22-JAN-01<br />
SET CLOCK<br />
PUMP TUBE ALARM<br />
INTERNAL BATTERY<br />
DIAGNOSTICS<br />
Select OTHER FUNCTIONS.<br />
Select MAINTENANCE.<br />
Select SET CLOCK.<br />
Enter the time and date.<br />
Press STOP to return to the main<br />
menu.<br />
7.4.2 Pump Tube Alarm The sampler tracks the pump counts in both the forward and<br />
reverse cycles with a resettable counter. When the counter<br />
reaches the default count of 1,000,000 or the count you have<br />
entered, the sampler displays a message, “WARNING!
1<br />
2<br />
3<br />
4<br />
5<br />
6<br />
7<br />
RUN<br />
PROGRAM<br />
VIEW REPORT<br />
OTHER FUNCTIONS<br />
MAINTENANCE<br />
MANUAL FUNCTIONS<br />
PROGRAMMING STYLE<br />
HARDWARE<br />
SET CLOCK<br />
PUMP TUBE ALARM<br />
INTERNAL BATTERY<br />
DIAGNOSTICS<br />
1024000 PUMP COUNTS,<br />
WARNING AT 1000000<br />
1024000 PUMP COUNTS,<br />
RESET PUMP COUNTER?<br />
YES NO<br />
WARNING AT 1000000<br />
PUMP COUNTS<br />
(1 - 99)00000)<br />
SET CLOCK<br />
PUMP TUBE ALARM<br />
INTERNAL BATTERY<br />
DIAGNOSTICS<br />
7.4.3 Internal Battery<br />
Warning<br />
<strong>6712FR</strong> <strong>Refrigerated</strong> <strong>Sampler</strong><br />
Section 7 Maintenance<br />
REPLACE PUMP TUBE.” The message appears each time you<br />
turn the sampler on or run a program until you reset the counter.<br />
After replacing the pump tube (see page 7-8), reset the count to<br />
zero so the sampler can begin tallying the pump counts for the<br />
new tube. Replacing the pump tube does not reset the counter.<br />
Experience may suggest a significantly different pump tube life.<br />
You can change the alarm count to represent the pump tube life<br />
for your application. The example below shows how to set the<br />
alarm count and reset the pump counts.<br />
Table 7-2 Resetting the Pump Counter<br />
Select OTHER FUNCTIONS.<br />
Select MAINTENANCE.<br />
Select PUMP TUBE ALARM.<br />
The sampler displays this screen briefly to give you the current pump-count<br />
information. The first line shows you the pump counts tallied since the<br />
counter was last reset. The second line shows the current alarm setting.<br />
To reset the counter to zero, select YES. Always reset the counter after<br />
replacing a pump tube. Select NO when merely checking the current count.<br />
If necessary, change the pump-count alarm setting by typing the first two<br />
digits of the new setting. The sampler accepts entries between 1 and 99. For<br />
example, to increase the count to 1,500,000, enter 15.<br />
Press STOP to return to the main menu.<br />
A lithium battery housed inside the controller maintains power<br />
to the sampler’s memory when the controller is disconnected<br />
from a power source. If it discharges completely, the sampler will<br />
lose all program settings and all data stored in memory when the<br />
external power source is disconnected. The battery requires<br />
replacement every five years. The sampler displays a warning<br />
within one month of its expected life to alert you to the battery’s<br />
impending expiration. The warning appears each time you turn<br />
the sampler on until you reset the alarm. When you reset the<br />
alarm, the sampler resets the warning to a date 59 months from<br />
the current date.<br />
7-5
<strong>6712FR</strong> <strong>Refrigerated</strong> <strong>Sampler</strong><br />
Section 7 Maintenance<br />
1<br />
2<br />
3<br />
4<br />
5<br />
6<br />
7-6<br />
RUN<br />
PROGRAM<br />
VIEW REPORT<br />
OTHER FUNCTIONS<br />
MAINTENANCE<br />
MANUAL FUNCTIONS<br />
PROGRAMMING STYLE<br />
HARDWARE<br />
SET CLOCK<br />
PUMP TUBE ALARM<br />
INTERNAL BATTERY<br />
DIAGNOSTICS<br />
WARNING!<br />
REPLACE INTERNAL<br />
BATTERY BEFORE<br />
17-OCT-97<br />
DID YOU REPLACE THE<br />
INTERNAL BATTERY?<br />
YES NO<br />
SET CLOCK<br />
PUMP TUBE ALARM<br />
INTERNAL BATTERY<br />
DIAGNOSTICS<br />
Table 7-3 Checking and Replacing the Internal Battery<br />
Select OTHER FUNCTIONS.<br />
Select MAINTENANCE.<br />
Select INTERNAL BATTERY.<br />
The sampler displays this screen briefly to show you the expiration date.<br />
After replacing the battery, select YES. Select NO only if checking the<br />
expiration date.<br />
Resetting the alarm directs the sampler to calculate a new expiration date,<br />
five years in the future. If you reset the alarm without replacing the battery,<br />
the sampler will not be able to alert you to the battery’s impending<br />
expiration.<br />
Press STOP to return to the main menu.<br />
7.4.4 Diagnostics The sampler has several self-diagnostic tests that check the<br />
memory (both the RAM and ROM), pump, and the distributor<br />
arm position. It also contains screens that let you reset the sampler’s<br />
program settings and memory to factory settings.<br />
You do not need to run the diagnostic tests on a routine basis.<br />
The diagnostic tests are a troubleshooting tool; Isco’s Customer<br />
Service department staff may ask you to run these tests when<br />
they work with you in diagnosing problems with your sampler.<br />
Access the diagnostic screens by selecting Other Functions from<br />
the main menu, then Maintenance, and Diagnostics. The unit<br />
will automatically test the memory and display; you can choose<br />
whether it tests the pump and distributor, and whether it reinitializes<br />
the unit to its original factory settings.<br />
Memory Test<br />
Screens 1 and 2 at left show you the diagnostic tests for the unit’s<br />
memory. If either screen shows you a message saying that the<br />
memory failed the test, contact Isco’s Customer Service.<br />
Display Test<br />
Screen 3 shows you the display test. You should see the test pattern<br />
illustrated in the screen. If the pattern does not match the<br />
illustration, the display or its circuitry require repair.
1<br />
2<br />
3<br />
4<br />
5<br />
6<br />
7<br />
Diagnostics Screens<br />
PLEASE WAIT!<br />
. . . ‘RAM’ PASSED TEST<br />
PLEASE WAIT!<br />
. . . ‘ROM’ PASSED TEST<br />
If RAM or ROM fails the test,<br />
the sampler will report that<br />
‘RAM’ (or ’ROM’) FAILED<br />
TEST. Contact Isco’s Customer<br />
Service for assistance.<br />
ABCDEFGHIJKLMNOPQRST<br />
ABCDEFGHIJKLMNOPQRST<br />
ABCDEFGHIJKLMNOPQRST<br />
ABCDEFGHIJKLMNOPQRST<br />
TEST PUMP?<br />
YES NO<br />
PUMPING . . .<br />
PUMPING . . .<br />
ON/OFF RATIO = _.__<br />
PURGING . . .<br />
<strong>6712FR</strong> <strong>Refrigerated</strong> <strong>Sampler</strong><br />
Section 7 Maintenance<br />
Pump Test<br />
Screen 4 lets you start the pump test by selecting YES. As the<br />
sampler runs the test, it first runs the pump forward for a short<br />
period. Next, it displays an ON/OFF ratio number. After displaying<br />
the forward pumping ratio, the sampler reverses the pump to<br />
obtain a purge ratio. The acceptable range is between 0.80 and<br />
1.25. If either ratio is outside the acceptable range, the pump<br />
requires repair. You do not need to pump liquid while running<br />
the test, and you can run the test with or without a tube in the<br />
pump.<br />
CAUTION<br />
Tests indicate that the pump produces sound levels in excess<br />
of 85db at one meter. Prolonged exposure to this sound level<br />
could result in hearing loss and requires the use of protective<br />
ear plugs.<br />
Distributor Test<br />
The distributor test is provided for factory personnel to verify the<br />
distributor’s position as it rotates through the 24 positions.<br />
(screens 9 through 11). The distributor arm flexes slightly when<br />
it contacts the stop, and the sampler measures this flexure. The<br />
sampler uses this measurement to position the arm accurately<br />
over each bottle.<br />
Reinitialize Controller<br />
The sampler allows you to reset all the program settings to the<br />
settings shipped with the sampler (screen 12). Reinitializing also<br />
clears the memory that stores the sampler’s event log and module<br />
data. Use this option cautiously.<br />
8<br />
9<br />
10<br />
11<br />
12<br />
PURGING . . .<br />
ON/OFF RATIO = _.__<br />
TEST DISTRIBUTOR<br />
YES NO<br />
FINDING ARM FLEXURE<br />
NOW AT BOTTLE __<br />
RE-INITIALIZE?<br />
YES NO<br />
7-7
<strong>6712FR</strong> <strong>Refrigerated</strong> <strong>Sampler</strong><br />
Section 7 Maintenance<br />
7-8<br />
7.5 Replacing the Pump<br />
Tube<br />
Replace the pump tube only with Isco’s 6712 pump tubing.<br />
Other pump tubes will not work. The 6712 pump tubing is<br />
easily recognized by the blue alignment collars.<br />
Improper pump tubes include those made for Isco’s other samplers<br />
(3700, GLS, etc.) and tubing from non-Isco vendors. Also<br />
note that the discharge tube is not the same as the pump tube.<br />
You could experience several problems if you install the wrong<br />
pump tubing:<br />
The sampler will not pump the liquid.<br />
Pump jams<br />
Inaccurate sample volumes<br />
Faulty liquid detection<br />
Inspect the pump tube periodically. Replace the tube when it<br />
cracks or appears worn. Inspect the tube frequently when the<br />
sample liquid contains a high percentage of suspended or abrasive<br />
solids.<br />
Checklist For Replacing Pump Tube:<br />
1. Disconnect power from the sampler.<br />
2. Loosen the liquid detector’s cover by unscrewing the black<br />
knob on top of the detector. Unlatch the pump band. (The band is<br />
the rounded metal band that holds the tube in the pump.)<br />
3. Pull the tube away from the bulkhead fitting. Pull it from the<br />
pump and detector.<br />
4. Clean the pump rollers and the inside of the pump band.<br />
5. Thread the new tubing through the pump so that the tube follows<br />
its natural curve around the pump rollers. You may need to<br />
move the pump rollers to make the installation easier.<br />
6. The blue collars on the tube help align the tube in the detector<br />
and pump. Align the tube by placing the collars in the grooves<br />
inside the liquid detector.<br />
7. Close the detector’s cover and tighten the black knob. Close<br />
the pump strap and latch it.<br />
8. Reset the pump-tube counter. (See example in table 7-2.)<br />
9. Take a “dry” grab sample to test the tube installation.<br />
WARNING<br />
The pump’s safety lock prevents the sampler from running<br />
the pump when the pump band is open. DO NOT tamper<br />
with the safety mechanism. The pump is extremely<br />
powerful. The pump rollers can injure you severely if the<br />
sampler activates the pump while you are working on it or<br />
inside it. Disconnect power from the sampler before<br />
replacing the pump tube.
Figure 7-1 Removing and Replacing the Pump Tube<br />
<strong>6712FR</strong> <strong>Refrigerated</strong> <strong>Sampler</strong><br />
Section 7 Maintenance<br />
Note<br />
To extend the pump-tube life:<br />
Always use Isco pump tubes.<br />
Install the tube properly, aligning the blue collars correctly in<br />
the liquid detector’s grooves.<br />
Follow the natural curve of the tube when wrapping the tube<br />
around the pump rollers.<br />
Minimize the line rinses and sampling retries in the sampling<br />
programs<br />
Use the shortest possible suction line.<br />
Conditions that shorten tube life:<br />
Improper installation.<br />
Abrasive materials suspended in sample liquid.<br />
Frequent line rinses.<br />
Long purge cycles, such as those used with long suction<br />
lines.<br />
7-9
<strong>6712FR</strong> <strong>Refrigerated</strong> <strong>Sampler</strong><br />
Section 7 Maintenance<br />
Figure 7-2 Placing the Pump Tube in the Liquid Detector<br />
7.6 Opening the<br />
Controller Case<br />
7-10<br />
You will need to open the controller case to gain access to:<br />
The desiccant bag that dries the controller’s interior<br />
The battery that provides backup power to the controller<br />
CAUTION<br />
The circuit boards can be damaged from a discharge of static<br />
electricity. Always use an antistatic mat when opening the controller<br />
to protect the circuit boards.<br />
To open the case:<br />
1. Pull the discharge tube and pump tube away from the bulkhead<br />
fitting.<br />
2. Remove the distributor arm by unscrewing the nut that<br />
attaches the arm to the distributor shaft. DO NOT ROTATE<br />
THE DISTRIBUTOR ARM MANUALLY; THIS WILL<br />
SEVERELY DAMAGE THE DISTRIBUTOR DRIVE<br />
GEARS.<br />
3. Remove the controller from the refrigerator.<br />
4. Open the case by removing the 11 screws that attach the case<br />
bottom to the case top.
7.7 Recharging the<br />
Desiccant<br />
7.7.1 How To Recharge The<br />
Desiccant<br />
<strong>6712FR</strong> <strong>Refrigerated</strong> <strong>Sampler</strong><br />
Section 7 Maintenance<br />
Note<br />
The case top and bottom fit together with a sealed<br />
tongue-and-groove joint. Any damage — nicks or cuts — to<br />
the tongue, groove, or sealing gasket prevent the case from<br />
sealing completely when you close it. Use extreme care when<br />
opening the case to avoid damaging the joining surfaces.<br />
Refer to Figure 7-3 for the location of the desiccant box. To gain<br />
access to the main circuit board and battery, remove the two distributor<br />
connectors and the EMI shield.<br />
The 6712 <strong>Sampler</strong>s use a desiccant bag inside the controller case<br />
to prevent moisture damage to its electronic components.<br />
Follow the instructions in Opening the Controller Case on page<br />
7-10 to open the controller. Remove the bag from the cardboard<br />
box at the front of the case.<br />
Do not put the cardboard box in the oven. You should recharge<br />
the desiccant when the area marked “30” on the paper humidity<br />
indicator turns pink.<br />
Place a sheet of brown paper on a flat metal sheet. You can use a<br />
brown grocery bag and a typical cookie sheet. Place only the bags<br />
on the sheet. Do not stack the bags on top of each other or allow<br />
them to touch. Place in a vented, circulating forced air, convection<br />
oven in a well ventilated room. Allow two inches of air space<br />
between the top of the bags and the next metal tray above the<br />
bags. Keep the tray a minimum of 16 inches from heating element.<br />
Heat the bags at a temperature of 240° to 250°F (116° to<br />
121°C) for 12 to 16 hours. At the end of the time period, the bags<br />
should be immediately removed and placed in an air tight container<br />
for cooling. The desiccant will be recharged to approximately<br />
80 to 90% of its previous capacity. After repeated<br />
recharging, the desiccant bag may require replacement.<br />
Some bags will have the temperature and time for recharging the<br />
desiccant printed on the bag. If they differ, use the temperature<br />
and time printed on the bag.<br />
CAUTION<br />
Desiccant may produce irritating fumes when heated. Observe<br />
the following precautions:<br />
Use a vented oven in a well ventilated room.<br />
Do not remain in the room while recharging is taking place.<br />
Use the recommended temperature.<br />
There have been reports of irritating fumes coming from the<br />
desiccant during reactivation. While our attempts to duplicate<br />
the problem have been unsuccessful, we still urge you to use<br />
caution.<br />
Material Safety Data Sheets are provided in Appendix B.<br />
7-11
<strong>6712FR</strong> <strong>Refrigerated</strong> <strong>Sampler</strong><br />
Section 7 Maintenance<br />
Figure 7-3 Opening the Controller<br />
Figure 7-4 Main Circuit Board Connections<br />
7-12<br />
EMI Shield<br />
Desiccant Box<br />
Battery<br />
Keypad Connector<br />
Distributor Connectors<br />
Module Connector<br />
Liquid Detector<br />
Connector Connector Board<br />
Connector<br />
Pump Count<br />
Connector
7.8 Replacing the Internal<br />
Battery<br />
Battery Warning Display<br />
WARNING!<br />
REPLACE INTERNAL<br />
BATTERY BEFORE<br />
17-OCT-06<br />
<strong>6712FR</strong> <strong>Refrigerated</strong> <strong>Sampler</strong><br />
Section 7 Maintenance<br />
A lithium battery housed inside the controller maintains power<br />
to the sampler’s memory when the controller is disconnected<br />
from a power source. If it discharges completely, the sampler will<br />
lose all program settings and all data stored in memory when the<br />
external power source is disconnected. The battery requires<br />
replacement every five years. The sampler displays a warning<br />
(see example at left) within one month of its expected life to alert<br />
you to the battery’s impending expiration. The warning appears<br />
each time you turn the sampler on until you reset the alarm.<br />
When you reset the alarm, the sampler resets the warning to a<br />
date 59 months from the current date.<br />
While replacing the battery, it is likely that the stored readings<br />
will be lost and your program will revert to the default program.<br />
Before proceeding, retrieve the stored data and record your program<br />
settings.<br />
Note<br />
Isco recommends you replace the battery every five years, as<br />
soon as the battery warning appears. To insure that the<br />
replacement meets Isco’s specifications, use only Isco<br />
replacement batteries. (See Appendix D, Replacement Parts.)<br />
To replace the internal battery:<br />
1. Open the controller case. Separate the case bottom and top by<br />
removing the two distributor connectors.<br />
2. Lift the desiccant box from the case.<br />
3. Remove the EMI shield and grounding straps by loosening the<br />
five 1 /4-inch stop nuts.<br />
4. Disconnect the module, liquid detector, and pump count connectors<br />
from the main circuit board.<br />
5. Remove the three screws and the 1 /4-inch stud attaching the<br />
main circuit board to the case.<br />
6. Detach the main circuit board from the keypad connector by<br />
pulling gently upward on the edges of the board next to the connector.<br />
Pull the main board up until the keypad connector is<br />
almost even with the edge of the case. Next, detach the main circuit<br />
board from the connector board.<br />
7. De-solder the lithium battery, using care to prevent damage to<br />
the circuit board. Insert the replacement battery and solder it in<br />
place.<br />
Note<br />
Poor soldering techniques can easily damage a printed circuit<br />
board. The battery should be replaced by a skilled technician.<br />
WARNING<br />
Danger of explosion if lithium battery is incorrectly<br />
replaced. Replace with the same type, ensuring correct<br />
polarity. Do not dispose of used lithium battery in fire.<br />
7-13
<strong>6712FR</strong> <strong>Refrigerated</strong> <strong>Sampler</strong><br />
Section 7 Maintenance<br />
7-14<br />
8. Reconnect the main circuit board to the connector board before<br />
reconnecting it to the keypad. Replace the 1 /4-inch stud and the<br />
three screws, and reconnect the module, liquid detector, and<br />
pump count connectors.<br />
9. Replace the EMI shield and grounding straps. Reconnect the<br />
two distributor connectors.<br />
10. Ensure that all connections and hardware are secure.<br />
Replace the desiccant and close the case.<br />
11. Reset the battery alarm.<br />
7.9 Error Messages If the sampler detects an error that prevents it from taking a<br />
sample or continuing the program, it displays an error message.<br />
Error Messages<br />
ERRORS HAVE OCCURED<br />
DURING PROGRAM<br />
FATAL ERROR<br />
NO DISTRIBUTOR ARM<br />
There are messages for the following conditions:<br />
PUMP JAMMED<br />
DISTRIBUTOR JAMMED<br />
PROBABLE OVERFLOW<br />
POWER FAILED<br />
LOW BATTERY<br />
USER STOPPED<br />
NO DISTRIBUTOR ARM<br />
OPERATION ERROR:<br />
PUMP JAMMED<br />
NO LIQUID DETECTED<br />
NO MORE LIQUID<br />
PUMP LATCH OPEN<br />
SAMPLER SHUT OFF<br />
BOTTLE FULL<br />
SAMPLE IN PROGRESS<br />
Since the sampler may encounter more than one error during a<br />
program, it does not display the messages continuously. Instead,<br />
it records each error and the time it occurred in the Sampling<br />
Results and Combined Results report. It alerts you to the<br />
recorded errors by displaying the message, “ERRORS HAVE<br />
OCCURRED DURING PROGRAM.”<br />
If the sampler detects a low battery condition, it stops the running<br />
program and displays the “LOW BATTERY” error message.<br />
A low battery condition exists when five consecutive sample<br />
events have resulted in a POWER FAILED error message.<br />
Fatal Error<br />
The Fatal Error message will only show up if you are using a<br />
multiple bottle configuration and the distributor system fails.<br />
Failing the test can indicate any of the following conditions:<br />
The distributor arm is not attached to the sampler.<br />
The distributor-arm stop inside the center section is missing<br />
or broken.<br />
The distributor drive mechanism inside the controller is<br />
malfunctioning.
<strong>6712FR</strong> <strong>Refrigerated</strong> <strong>Sampler</strong><br />
Section 7 Maintenance<br />
7.10 Warning Messages Occasionally, the sampler displays a warning message to alert<br />
you to a potential problem. There are two warnings. The first<br />
WARNING: REPLACE<br />
PUMP TUBE<br />
WARNING!<br />
REPLACE INTERNAL<br />
BATTERY BEFORE<br />
5-FEB-06<br />
7.11 Servicing the<br />
Refrigerator<br />
warning, “REPLACE PUMP TUBE,” reminds you to check the<br />
condition of the pump tube. The second warning reminds you<br />
that the internal battery is near expiration and should be<br />
replaced. Instructions regarding the pump tube and the internal<br />
battery can be found elsewhere in this section.<br />
Before servicing the refrigerator, disconnect it from power. This<br />
precaution will protect you from the possibility of electric shock<br />
when working with the refrigerator.<br />
7.11.1 Electrical System Access the electrical and refrigeration components by removing<br />
the nine screws on the back of the refrigerator (See Appendix D,<br />
Replacement Parts).<br />
WARNING<br />
Removing the front or back panel exposes electrical and<br />
mechanical hazards. Disconnect the power before<br />
performing any service activities. Troubleshooting and<br />
repair activities should be performed by a qualified<br />
refrigeration technician.<br />
The temperature control box assembly, which houses the thermostat<br />
logic circuit board, the transformer, and the solid state relay,<br />
is located on the left-hand side of the refrigerator base as shown<br />
in Figure 7-5. Access to these components can be gained by<br />
removing the four screws securing the lid of the temperature control<br />
box. See Figure 7-6.<br />
You can remove the temperature control box from the refrigerator<br />
by removing the screws from its mounting plate and disconnecting<br />
the wires from the backside of the box. See Figures 7-7<br />
and 7-8.<br />
Temperature<br />
Control Box<br />
Assembly<br />
Drip Pan<br />
Figure 7-5Rear View of the <strong>6712FR</strong><br />
7-15
<strong>6712FR</strong> <strong>Refrigerated</strong> <strong>Sampler</strong><br />
Section 7 Maintenance<br />
7-16<br />
LEDs<br />
Figure 7-6 Thermostat Logic Circuit Board<br />
Figure 7-7 Control Box Wiring<br />
Figure 7-8 Control Box Connections<br />
The ambient air sensor samples the air temperature outside the<br />
refrigerator. It is located in the temperature assembly located on<br />
the right of the refrigerator grille. If the ambient temperature is<br />
cold, three heaters will be turned on by the circuitry.
<strong>6712FR</strong> <strong>Refrigerated</strong> <strong>Sampler</strong><br />
Section 7 Maintenance<br />
Two of the heaters are located on the sides of the evaporator<br />
plate inside the refrigerator and one heater is located on the compressor.<br />
The fuse, F2, is included on the supply side of the heaters to prevent<br />
an electrical hazard in the event of a fault in either heater.<br />
Refer to Appendix D Replacement Parts List for replacement<br />
fuse part numbers.<br />
The heaters prevent the sample from freezing when the outside<br />
air temperature falls below freezing. The compressor will cycle<br />
approximately the same amount of times at cold temperatures as<br />
at room temperatures.<br />
The ambient air temperature signal comes from the sensor into<br />
the circuit board. The signal is then sent to an oscillator. Depending<br />
on the temperature, the voltage will vary. This varies the<br />
duty cycle of the oscillator, which in turn, varies the duty cycle of<br />
the heaters. This circuitry is linear; at 65 ° F the heaters will<br />
begin to come on and at -35 ° F the heaters will be on continuously.<br />
When the heaters are on, the internal heat LED indicator will be<br />
lit.<br />
The internal temperature sensor is a thermistor that samples<br />
the internal air temperature of the refrigerator. It is mounted at<br />
the top of the refrigerator's interior. The internal temperature<br />
signal comes from the sensor, through the plug in the thermostat/wiring<br />
housing assembly, and into the board. The setting on<br />
the temperature control knob comes from the potentiometer,<br />
through the plug in the thermostat/wiring housing assembly and<br />
into the board. If the interior of the refrigerator is warmer than<br />
the temperature control potentiometer setting, the internal temperature<br />
LED indicator will be lit. The temperature control<br />
potentiometer is located in the thermostat/wiring housing assembly.<br />
The evaporator temperature sensor is mounted on the front of<br />
the evaporator plate. The signal from the sensor comes through<br />
the connector in the thermostat/wiring housing assembly and<br />
into the circuit board. The evaporator temperature LED indicator<br />
will be lit if the evaporator temperature is warm (and all the<br />
frost has been melted).<br />
The operation of the compressor and the compressor run LED<br />
indicator is determined by the temperature control potentiometer<br />
setting, the internal refrigerator temperature, and the evaporator<br />
temperature.<br />
It is not recommended that the user attempt any calibration<br />
adjustments.<br />
Below is the operation of a compressor cycle assuming that the<br />
compressor is already running.<br />
As the compressor runs, the temperature of the evaporator will<br />
fall below 32 ° F (0 ° C) and the evaporator temperature indicator,<br />
located on the circuit board, will go out. The internal temperature<br />
and the compressor run indicators will both be lit. The compressor<br />
will continue running until the internal air temperature<br />
of the refrigerator reaches the temperature set on the tempera-<br />
7-17
<strong>6712FR</strong> <strong>Refrigerated</strong> <strong>Sampler</strong><br />
Section 7 Maintenance<br />
7-18<br />
ture control knob. Once this temperature is reached the internal<br />
temperature indicator will go off, the compressor run indicator<br />
will go off, and the compressor will shut off. After the compressor<br />
shuts off, the refrigerator melts the frost that accumulated on<br />
the evaporator while the compressor was running. Once the<br />
evaporator temperature has warmed to the calibrated temperature<br />
(approximately 2 ° C) the evaporator temperature LED indicator<br />
will turn on.<br />
When the refrigerator's internal temperature gets warmer than<br />
the temperature setting, the internal temperature indicator will<br />
light. When both the evaporator temperature and the internal<br />
temperature indicators are lit, a signal is sent to the solid state<br />
relay. This activates the refrigerator's compressor and turns on<br />
the compressor run indicator. The compressor will continue to<br />
run until the internal temperature indicator goes out.<br />
If a problem with the circuitry is suspected, remember that the<br />
compressor shuts off when the internal temperature sensor<br />
reaches the setting on the temperature control knob. But, to turn<br />
the compressor on, both the internal temperature sensor and the<br />
evaporator temperature sensor must be warm. The compressor/fan<br />
solid state relay may be replaced but do not attempt to<br />
replace any other components. Otherwise, the calibration of<br />
the circuitry will be disturbed. It is suggested that the entire<br />
board be replaced or the board be returned to the factory for<br />
repair.<br />
7.11.2 Refrigeration System The refrigeration system is shown schematically in Figure 7-9.<br />
The charge capacity of the system is 7.5 oz of R-134a refrigerant.<br />
Condenser Coil<br />
Compressor<br />
Figure 7-9 Refrigeration System Schematic<br />
CAUTION<br />
All refrigeration repair work must be performed by a qualified<br />
refrigeration technician.<br />
Always purge the system with nitrogen. NEVER USE AIR to<br />
purge the system.<br />
Always recover the refrigerant.<br />
When recharging, do not leave a line tap in the refrigeration<br />
system because of possible corrosion or leakage problems.<br />
Capillary Tube<br />
Evaporator Plate
<strong>6712FR</strong> <strong>Refrigerated</strong> <strong>Sampler</strong><br />
Section 7 Maintenance<br />
Equipped with external overtemperature and overload protection,<br />
the compressor may fail to start immediately when power is<br />
momentarily interrupted or when the thermostat setting is<br />
changed. The overload relay normally trips repeatedly until the<br />
refrigerant pressure equalizes. This does not indicate a malfunction.<br />
7-19
<strong>6712FR</strong> <strong>Refrigerated</strong> <strong>Sampler</strong><br />
Section 7 Maintenance<br />
7-20
<strong>6712FR</strong> <strong>Refrigerated</strong> <strong>Sampler</strong><br />
Section 8 Software Options<br />
The 6712 <strong>Sampler</strong>’s software includes specialized software<br />
options that can be purchased individually from Isco.<br />
Once activated, the purchased option is always available, even if<br />
the software is upgraded at a later time. These options must<br />
be installed at the factory. Consult the factory for further<br />
details.<br />
The software options include:<br />
Program Lock (P/N 60-9003-532) - Secure access to the<br />
sampler’s program settings.<br />
Remote Commands (P/N 60-9003-531) - Remotely control<br />
the sampler from a touch-tone telephone or computer.<br />
To view which software options have been activated, select VIEW<br />
REPORT>SYSTEM IDs. A software options screen will list a<br />
code for each active option.<br />
8.1 Program Lock The Program Lock adds password security to the 6712 sampling<br />
programs. With this option activated, a user-selected password<br />
(up to five digits) must be entered before any program changes or<br />
Program Lock<br />
PROGRAM LOCK DISABLED<br />
ENABLE PROGRAM LOCK?<br />
YES NO<br />
CHANGE PASSWORD TO<br />
----------<br />
REENTER NEW PASSWORD<br />
---------<br />
Code Software Option<br />
1108 Program Lock<br />
1109 Remote Commands<br />
run time modifications can be made. Run time modifications<br />
include accessing the Manual Pause menu options and shutting<br />
off the sampler. You will still be able to run the current program,<br />
view reports, and interrogate the sampler without the knowledge<br />
of the password.<br />
If three consecutive attempts to enter the password fail, a five<br />
minute “time-out” will follow in which most keys are deactivated.<br />
The user-selected password defaults to “6712” and may be<br />
changed in the Software options that are available in the<br />
Extended Program mode (see example at left). While the password<br />
may only be changed in the Extended Program mode, the<br />
program lock works for both Standard and Extended programs.<br />
Should you forget your password, a key code can be obtained<br />
from Isco’s Customer Support department for a nominal fee.<br />
8-1
<strong>6712FR</strong> <strong>Refrigerated</strong> <strong>Sampler</strong><br />
Section 8 Software Options<br />
Figure 8-1 Password Protected Functions<br />
8-2<br />
From Standby<br />
RUN<br />
PROGRAM<br />
VIEW REPORT<br />
OTHER FUNCTIONS<br />
While Running a Program<br />
ENTER PASSWORD:<br />
____<br />
VIEW DATA<br />
SYSTEM IDs<br />
CONFIGURE REPORTS<br />
ENTER PASSWORD:<br />
____<br />
SAMPLE 3<br />
Stop Key<br />
IN 00:03:26 ENTER PASSWORD:<br />
____<br />
On/Off Key<br />
ENTER PASSWORD:<br />
____<br />
Programming<br />
Screens<br />
ENTER PASSWORD:<br />
____<br />
MAINTENANCE<br />
MANUAL FUNCTIONS<br />
PROGRAMMING STYLE<br />
STOP PROGRAM<br />
RESUME PROGRAM<br />
VIEW DATA<br />
GRAB SAMPLE<br />
SAMPLINK REPORT<br />
FLOWLINK REPORT<br />
CUSTOM REPORT<br />
ALL REPORTS<br />
8.2 Remote Access Several commands are available to control the sampler’s operation<br />
from a remote location. Remote commands require the sampler<br />
to be equipped with the factory-installed 2400 baud talking<br />
modem.<br />
8.2.1 Telephone Commands After connecting to the sampler from a touch-tone telephone,<br />
command numbers may be entered from the telephone’s keypad,<br />
followed by the<br />
Table 8-1.<br />
# (pound) button. The commands are listed in<br />
To use telephone commands:<br />
1. Dial the sampler’s telephone number. When the sampler<br />
connects, it answers with “Isco <strong>Sampler</strong> Site [number].” If<br />
the sampler does not receive a command in five seconds, it<br />
assumes that a computer modem has called and initiates<br />
the modem connect sequence. If this occurs you must hang<br />
up and try again.<br />
2. Enter the command. For example, to run program 1, press<br />
1 # .<br />
3. If the command is valid for its current state of operation,<br />
the sampler responds with “[command number], please<br />
acknowledge.” If the command is not valid the sampler<br />
responds with the command number followed by three<br />
quick beeps. Enter a valid command.<br />
4. Acknowledge the valid command by pressing the number.<br />
For the example, press 1<br />
.
8.2.2 Computer Menu<br />
Commands<br />
Phone<br />
Command<br />
0 #<br />
1 #<br />
2 #<br />
3 #<br />
4 #<br />
Menu<br />
Command<br />
0 or START<br />
1 or RUN1<br />
2 or RUN2<br />
3 or RUN3<br />
4 or RUN4<br />
<strong>6712FR</strong> <strong>Refrigerated</strong> <strong>Sampler</strong><br />
Section 8 Software Options<br />
5. If the number is incorrect, the sampler responds with your<br />
entry followed by three quick beeps. You must re-enter the<br />
command (step 2).<br />
6. After the command is confirmed, the sampler replies with<br />
“[command number] acknowledge” and executes the command.<br />
To enter additional commands, repeat steps two through five.<br />
The sampler will hang up after ten seconds of quiet time.<br />
Commands can be entered from a remote location using a computer.<br />
The commands are listed in Table 8-1.<br />
To use the computer commands:<br />
Using a software interface program, connect to the sampler<br />
modem. Press “?” until the sampler returns its banner string. A<br />
“>” (caret) prompt will appear on the screen.<br />
To access the menu, type MENU at the “>” prompt and press<br />
ENTER. The screen will return a list of the available options.<br />
Type the desired command(s), confirming with ENTER.<br />
If a text report is desired, type REPORT at the “>” prompt and<br />
press ENTER. A report may include Program Settings, Sampling<br />
Results, and Combined Reports for Modules, FR-Temperature,<br />
Rain, and SDI-12 Sondes.<br />
To receive current parameter readings in the form of ASCII data,<br />
type DATA at the “>” prompt. The data is in comma-separated<br />
value format. The data string contains only the values that the<br />
sampler is programmed to measure. For a complete list of the<br />
serial data codes, see Table 5-5 Serial Data Codes in Section 5.<br />
Table 8-1 6712 Remote Commands<br />
Description<br />
This command will start immediately any program that has been run and is<br />
currently waiting to start.<br />
This command will load Program 1 as the sampler’s current Extended program,<br />
reset partition if the storage interval has been changed, and run the<br />
program. RUN1 is valid when the sampler is in standby, or when it is waiting<br />
for a start command. RUN1 will also run the current program while in Standard<br />
programming.<br />
These commands will load the selected program number as the sampler’s<br />
current Extended program, reset partition data if the storage interval has<br />
changed, and run the program. They are valid when the sampler is in<br />
standby, or when it is waiting for a start command. The commands are available<br />
for Extended programming only.<br />
8-3
<strong>6712FR</strong> <strong>Refrigerated</strong> <strong>Sampler</strong><br />
Section 8 Software Options<br />
8-4<br />
Phone<br />
Command<br />
5 #<br />
6 #<br />
7 #<br />
Menu<br />
Command<br />
5 or DISABLE<br />
6 or ENABLE<br />
7 or<br />
TAKE_SAMPLE<br />
ST or STATUS<br />
SD or<br />
SCREEN_DUMP<br />
P or PAUSE<br />
Table 8-1 6712 Remote Commands (Continued)<br />
Description<br />
This command is similar in functionality to a pin F low signal (a signal typically<br />
used to enable or disable the sampler from a flow meter). At run time,<br />
the sampler starts with the phone enable in the enabled state. PHONE DIS-<br />
ABLE is valid while a program is running. If successful, a display of<br />
REMOTE ENABLE IS FALSE will be returned. Command #6 must be used<br />
to re-enable.<br />
This command is used to re-enable a phone-disabled sampler. PHONE<br />
ENABLE is valid while a program is running. If successful, a display of<br />
REMOTE ENABLE IS TRUE will be returned.<br />
This command causes the sampler currently running a program to take a<br />
sample. The sample will count as one of the program’s samples and is<br />
placed in the current bottle (Part A’s current bottle when using two-part programming).<br />
TAKE_SAMPLE is valid while the program is running, after the<br />
start time, but not while in the MANUAL PAUSE screens. If successful, a<br />
response similar to PUMPING XXML SAMPLE INTO BOTTLE ## will be<br />
returned. If not, a response similar to NO SAMPLE, PROGRAM WAITING<br />
START will be returned.<br />
This command causes the sampler to return its status information and current<br />
parameter data.<br />
This command causes the sampler to return the information currently displayed<br />
on the sampler’s screen. The remote screen follows the sampler’s<br />
display as the information is updated. This mode can be used to observe<br />
from a remote location while the sampler is programmed on-site.<br />
This command causes a sampler currently running a program to enter the<br />
MANUAL PAUSE menu. While you are connected in this mode, the sampler<br />
keypad becomes disabled, and your computer’s keypad will be redirected to<br />
simulate the sampler keypad. The following keys will be activated:<br />
, decimal point, and number keys.<br />
, S, or s = STOP.<br />
, L or l, and U or u = Left/Up arrows.<br />
R or r, and D or d = Right/Down arrows.<br />
NOTE: The computer’s terminal emulation should be set to VT100 to<br />
achieve the desired text enhancements.
RUN<br />
PROGRAM<br />
VIEW REPORT<br />
OTHER FUNCTIONS<br />
Stop Key<br />
POWER USED:<br />
CURRENT: _._ amp-hr<br />
PREVIOUS: _._ amp-hr<br />
MAINTENANCE<br />
MANUAL FUNCTIONS<br />
PROGRAMMING STYLE<br />
6712 Portable <strong>Sampler</strong><br />
Appendix A Menu Flowcharts<br />
Note A<br />
Note A:<br />
Menu access can be controlled with the optional<br />
Program Lock. See Section 8.<br />
Note A<br />
Figure A-1 6712 Menu Tree for Standard Programming<br />
PROGRAMMING STYLE:<br />
NORMAL<br />
QUICK VIEW/CHANGE<br />
See Running Programs and Run Time<br />
Screens on page 4-10<br />
See the charts on pages A-2 through A-19.<br />
See View Report on page A-6.<br />
See Maintenance Screens on page A-7.<br />
See Manual Functions Screens, on<br />
page A-8.<br />
A-1
6712 Portable <strong>Sampler</strong><br />
Appendix A Menu Flowcharts<br />
Figure A-2 Standard Programming: Programming Screens<br />
A-2<br />
RUN<br />
PROGRAM<br />
VIEW REPORT<br />
OTHER FUNCTIONS<br />
SITE DESCRIPTION:<br />
"FACTORY"<br />
CHANGE?<br />
YES NO<br />
NO<br />
SELECT UNITS FOR<br />
FLOW RATE:<br />
cfs gps gpm Mgd<br />
lps m3s m3h m3d<br />
NUMBER OF BOTTLES:<br />
1 2 4 8 12 24<br />
SAMPLE VOLUME:<br />
____ ml (10-max)<br />
YES<br />
SITE: __________<br />
ABCDEFGHIJKLMNOPQRST<br />
UVWXYZ -&"0123456789<br />
BACK-UP DONE<br />
DONE<br />
BOTTLE VOLUME IS<br />
_____ ml (300-30000)<br />
If<br />
STOP key<br />
pressed.<br />
Programming screens shown are for a 730 Bubbler Flow<br />
Module. Screens for other modules may vary.<br />
TIME BETWEEN<br />
SAMPLE EVENTS<br />
__ HOURS, __ MINUTES<br />
1 bottle<br />
SELECT UNITS FOR<br />
FLOW VOLUME:<br />
cf gal Mgal<br />
m3 lit<br />
(if 1, 2, 4, or 8 bottles)<br />
BOTTLE VOLUME IS<br />
_____ lit (0.3-100.0)<br />
Multi-bottle<br />
(if 12 or 24 bottles)<br />
SEQUENTIAL<br />
BOTTLES/SAMPLE<br />
SAMPLES/BOTTLE<br />
RUN CONTINUOUSLY?<br />
YES NO<br />
Yes<br />
No<br />
SAVE CHANGES?<br />
YES NO<br />
If applicable<br />
PROGRAM MODULE?<br />
YES NO<br />
SUCTION LINE LENGTH<br />
IS __ ft<br />
(3-99)<br />
TIME PACED<br />
FLOW PACED<br />
___ BOTTLES PER<br />
SAMPLE EVENT (1-max)<br />
___ SAMPLES PER<br />
BOTTLE (1-max)<br />
TAKE ___ SAMPLES<br />
(1-999)<br />
YES<br />
See Figure A-3: Standard and Extended<br />
Programming: Start Times, on page A-3.<br />
Programming screens for a 700<br />
Series module. Refer to<br />
Module’s manual.<br />
If applicable<br />
NEW MODULE SETUP--<br />
DOWNLOAD DATA NOW<br />
OR LOSE ALL DATA!<br />
DONE<br />
FLOW BETWEEN<br />
SAMPLE EVENTS<br />
0.075 Mgal<br />
(0.001-99999)<br />
RUN CONTINUOUSLY?<br />
YES NO
Continued from Figure A-2: Standard<br />
Programming: Programming Screens, page A-2.<br />
NO DELAY TO START<br />
DELAYED START<br />
CLOCK TIME<br />
See Note A.<br />
PROGRAMMING COMPLETE<br />
RUN THIS PROGRAM<br />
NOW?<br />
YES NO<br />
NO<br />
RUN<br />
PROGRAM<br />
VIEW REPORT<br />
OTHER FUNCTIONS<br />
See Note E.<br />
YES<br />
Notes<br />
See Notes B & C.<br />
FIRST SAMPLE<br />
AFTER A<br />
___ MINUTE DELAY<br />
(1-999)<br />
FIRST SAMPLE AT:<br />
HH:MM<br />
SELECT DAYS:<br />
SU MO TU WE TH FR SA<br />
DONE<br />
FIRST VALID DAY<br />
IS __-___<br />
Figure A-3 Standard and Extended Programming: Start Times<br />
See Note D.<br />
See Run Time Screens on page 4-10.<br />
A. The WAIT FOR PHONE CALL option appears when using<br />
the optional Telephone Commands. See Section 8.<br />
B. Appears for<br />
standard<br />
flow-paced programs.<br />
C. Appears for extended<br />
programs.<br />
D. Appears for standard<br />
flow-paced programs.<br />
E. Main menu for<br />
extended<br />
programming.<br />
START FLOW COUNT<br />
AFTER A<br />
___ MINUTE DELAY<br />
(1-999)<br />
START "EXTENDED 1"<br />
AFTER A<br />
___ MINUTE DELAY<br />
(1-999)<br />
START FLOW COUNT AT<br />
HH:MM<br />
RUN "EXTENDED 1"<br />
PROGRAM<br />
VIEW REPORT<br />
OTHER FUNCTIONS<br />
6712 Portable <strong>Sampler</strong><br />
Appendix A Menu Flowcharts<br />
AT LEAST ONE DAY<br />
MUST BE SELECTED!<br />
DONE<br />
(Extended Programming Only)<br />
A-3
6712 Portable <strong>Sampler</strong><br />
Appendix A Menu Flowcharts<br />
Figure A-4 Standard Programming: Quick View; Programming Screens<br />
A-4<br />
SITE DESCRIPTION:<br />
"FACTORY "<br />
If applicable<br />
UNITS SELECTED<br />
FLOW RATE: cfs<br />
FLOW VOLUME: Mgal<br />
If applicable<br />
BUBBLER MODULE<br />
WEIR<br />
90<br />
V-NOTCH<br />
__, _____ml BOTTLES<br />
__ ft SUCTION LINE<br />
PACING:<br />
TIME, EVERY<br />
__ HOURS, __ MINUTES<br />
DISTRIBUTION:<br />
BOTTLES/SAMPLE<br />
RUN CONTINUOUSLY<br />
200 ml SAMPLES<br />
Multi-Bottle<br />
1 Bottle<br />
SITE: __________<br />
ABCDEFGHIJKLMNOPQRST<br />
UVWXYZ -&"0123456789<br />
BACK-UP DONE<br />
SELECT UNITS FOR<br />
FLOW RATE:<br />
cfs gps gpm Mgd<br />
lps m3s m3h m3d<br />
NUMBER OF BOTTLES:<br />
1 2 4 8 12 24<br />
SUCTION LINE LENGTH<br />
IS __ ft<br />
(3-99)<br />
TIME PACED<br />
FLOW PACED<br />
SEQUENTIAL<br />
BOTTLES/SAMPLE<br />
SAMPLES/BOTTLE<br />
RUN CONTINUOUSLY?<br />
YES NO<br />
SAMPLE VOLUME:<br />
___ ml (10-max)<br />
Continued on Figure A-5: Standard<br />
Programming: Quick View; Start Times, on<br />
page A- 5.<br />
Programming screens for a<br />
730 Series Module. Refer<br />
to Module’s manual.<br />
If<br />
STOP key<br />
pressed.<br />
No<br />
SAVE CHANGES?<br />
YES NO<br />
Units Selected screens are for a 730 Bubbler Flow Module.<br />
Screens for other modules may vary.<br />
SELECT UNITS FOR<br />
FLOW VOLUME:<br />
cf gal Mgal<br />
m3 lit<br />
BOTTLE VOLUME IS<br />
_____ ml (300-30000)<br />
TIME BETWEEN<br />
SAMPLE EVENTS<br />
__ HOURS, __ MINUTES<br />
FLOW BETWEEN<br />
SAMPLE EVENTS<br />
0.075 Mgal<br />
(0.001 - 99999)<br />
__ BOTTLES PER<br />
SAMPLE EVENT (1-max)<br />
__ SAMPLES PER<br />
BOTTLE (1-max)<br />
TAKE ___ SAMPLES<br />
(1-max)<br />
MUST BE SELECTED!<br />
If applicable<br />
NEW MODULE SETUP--<br />
DOWNLOAD DATA NOW<br />
OR LOSE ALL DATA!<br />
DONE<br />
RUN CONTINUOUSLY?<br />
YES NO
Continued from Figure A-4: Standard<br />
Programming: Quick View; Programming<br />
Screens, on page A-4.<br />
NO DELAY TO START<br />
PROGRAMMING COMPLETE<br />
RUN THIS PROGRAM<br />
NOW?<br />
YES NO<br />
NO<br />
RUN<br />
PROGRAM<br />
VIEW REPORT<br />
OTHER FUNCTIONS<br />
YES<br />
NO DELAY TO START<br />
DELAYED START<br />
CLOCK TIME<br />
WAIT FOR PHONE CALL<br />
Note A.<br />
FIRST SAMPLE AT:<br />
HH:MM<br />
SELECT DAY(S):<br />
SU MO TU WE TH FR SA<br />
DONE<br />
FIRST SAMPLE: HH:MM<br />
MO TH<br />
Note A.<br />
The WAIT FOR PHONE CALL option appears when using the<br />
optional Telephone Commands. See Section 8.<br />
Figure A-5 Standard Programming: Quick View; Start Times<br />
FIRST SAMPLE<br />
AFTER A<br />
___ MINUTE DELAY<br />
(1-999)<br />
See Run Time Screens on page 4-10.<br />
6712 Portable <strong>Sampler</strong><br />
Appendix A Menu Flowcharts<br />
If applicable<br />
AT LEAST ONE DAY<br />
MUST BE SELECTED!<br />
DONE<br />
A-5
6712 Portable <strong>Sampler</strong><br />
Appendix A Menu Flowcharts<br />
Figure A-6 View Report<br />
A-6<br />
RUN<br />
PROGRAM<br />
VIEW REPORT<br />
OTHER FUNCTIONS<br />
VIEW DATA<br />
SYSTEM IDs<br />
CONFIGURE REPORT<br />
Note A<br />
No valid options<br />
Note A:<br />
Menu access can be controlled with the optional<br />
Program Lock. See Section 8.<br />
Note B:<br />
1108 - Program Lock<br />
1109 - Phone Commands<br />
NO DATA<br />
TO DISPLAY<br />
SELECT DATA TO VIEW:<br />
SAMPLING REPORT<br />
MODULE FR-TEMP<br />
RAIN SDI-12<br />
SAMPLER<br />
6712 ID:1234567890<br />
HARDWARE: B0<br />
SOFTWARE: 1.00<br />
SAMPLINK REPORT<br />
FLOWLINK REPORT<br />
CUSTOM REPORT<br />
ALL REPORTS<br />
VIEW:<br />
DAILY SUMMARY<br />
CURRENT READINGS<br />
Note B<br />
SOFTWARE OPTIONS:<br />
NONE<br />
When applicable<br />
ULTRASONIC MODULE:<br />
0710 ID:1234567890<br />
HARDWARE: A1<br />
SOFTWARE: 1.00<br />
REPORTS FOR SAMPLER:<br />
PROGRAM SETTINGS<br />
SAMPLING RESULTS<br />
BOTH NONE<br />
When applicable<br />
REPORTS FOR MODULE:<br />
DAILY SUMMARY<br />
COMBINED RESULTS<br />
BOTH NONE<br />
When applicable<br />
REPORTS FOR FR-TEMP:<br />
DAILY SUMMARY<br />
COMBINED RESULTS<br />
BOTH NONE<br />
When applicable<br />
REPORTS FOR RAIN:<br />
DAILY SUMMARY<br />
COMBINED RESULTS<br />
BOTH NONE<br />
When applicable<br />
DO YOU WANT<br />
COMBINED RESULTS<br />
FOR SDI-12 DATA?<br />
YES NO<br />
INCLUDE DETAIL DATA<br />
FOR FLOWLINK AND<br />
TEXTLINK PROGRAMS?<br />
YES NO<br />
pH MODULE<br />
VIEW:<br />
pH DATA<br />
TEMPERATURE DATA<br />
Valid Options Will Be Shown; Screens Will Vary Depending on Devices Attached<br />
SDI-12 SONDE<br />
SOFTWARE:<br />
When applicable
RUN<br />
PROGRAM<br />
VIEW REPORT<br />
OTHER FUNCTIONS<br />
MAINTENANCE<br />
MANUAL FUNCTIONS<br />
PROGRAMMING STYLE<br />
See Note A.<br />
SET CLOCK<br />
PUMP TUBE ALARM<br />
INTERNAL BATTERY<br />
DIAGNOSTICS<br />
PLEASE WAIT!<br />
. . . TESTING 'RAM'<br />
'RAM' PASSED TEST<br />
PLEASE WAIT!<br />
. . .TESTING 'ROM'<br />
'ROM' PASSED TEST<br />
ABCDEFGHIJKLMNOPQRST<br />
ABCDEFGHIJKLMNOPQRST<br />
ABCDEFGHIJKLMNOPQRST<br />
ABCDEFGHIJKLMNOPQRST<br />
Note<br />
A. The standard programming<br />
maintenance screen is shown.<br />
Extended programming has<br />
SOFTWARE and HARWARE options<br />
Figure A-7 Maintenance Screens<br />
ENTER TIME AND DATE:<br />
HH:MM DD-MON-YY<br />
__:__ __-__-__<br />
TEST PUMP?<br />
YES NO<br />
YES<br />
PUMPING . . .<br />
PUMPING . . .<br />
ON/OFF RATIO= _.__<br />
PURGING . . .<br />
PURGING . . .<br />
ON/OFF RATIO= _.__<br />
NO<br />
REPLACE INTERNAL<br />
BATTERY BEFORE<br />
__-__-__<br />
DID YOU REPLACE THE<br />
INTERNAL BATTERY?<br />
YES NO<br />
TEST DISTRIBUTOR?<br />
YES NO<br />
YES<br />
FINDING ARM FLEXURE<br />
NOW AT BOTTLE __<br />
DISTRIBUTOR SYSTEM<br />
ARM FLEXURE=__<br />
6712 Portable <strong>Sampler</strong><br />
Appendix A Menu Flowcharts<br />
________ PUMP COUNTS,<br />
WARNING AT _______.<br />
______ PUMP COUNTS,<br />
RESET PUMP COUNTER?<br />
YES NO<br />
NO<br />
WARNING AT __00000<br />
PUMP COUNTS<br />
(1-99)00000<br />
RE-INITIALIZE?<br />
YES NO<br />
YES<br />
DEFAULT SETTINGS?. . .<br />
ARE YOU SURE?<br />
YES NO<br />
A-7
6712 Portable <strong>Sampler</strong><br />
Appendix A Menu Flowcharts<br />
Figure A-8 Manual Functions Screens<br />
A-8<br />
RUN<br />
PROGRAM<br />
VIEW REPORT<br />
OTHER FUNCTIONS<br />
MAINTENANCE<br />
MANUAL FUNCTIONS<br />
PROGRAMMING STYLE<br />
GRAB SAMPLE<br />
CALIBRATE VOLUME<br />
OPERATE PUMP<br />
MOVE DISTRIBUTOR<br />
GO TO BOTTLE __<br />
(1-max)<br />
NOW AT BOTTLE __<br />
SAMPLE VOLUME:<br />
____ml (10-9990)<br />
SAMPLE VOLUME:<br />
____ml (100-9990)<br />
SELECT DIRECTION:<br />
PUMP FORWARD<br />
PUMP REVERSE<br />
GRAB SAMPLE<br />
PRESS ↵ WHEN READY!<br />
CALIBRATE VOLUME<br />
PRESS ↵ WHEN READY!<br />
VOLUME DELIVERED:<br />
_____ ml<br />
_____ ml!<br />
ARE YOU SURE?<br />
YES NO<br />
PUMPING...<br />
PRESS THE RED 'STOP'<br />
KEY WHEN DONE!<br />
PUMPED _____ COUNTS<br />
PURGING...<br />
PRESS THE RED 'STOP'<br />
KEY WHEN DONE!<br />
PURGED _____ COUNTS
RUN "EXTENDED 1"<br />
PROGRAM<br />
VIEW REPORT<br />
OTHER FUNCTIONS<br />
PROGRAM NAME:<br />
"ISCO 6700 "<br />
CHANGE?<br />
YES NO<br />
NO<br />
SITE DESCRIPTION:<br />
"FACTORY "<br />
CHANGE?<br />
YES NO<br />
NO<br />
SELECT UNITS FOR<br />
LENGTH:<br />
ft m<br />
SELECT UNITS FOR<br />
FLOW RATE:<br />
cfs gps gpm Mgd<br />
lps m3s m3h m3d<br />
SELECT UNITS FOR<br />
FLOW VOLUME:<br />
cf gal Mgal<br />
m3 lit<br />
PROGRAM MODULE?<br />
YES NO<br />
YES<br />
YES<br />
YES<br />
See Figure A-10:Extended Programming:<br />
Equipment Setup, on page A-10.<br />
"EXTENDED 1"<br />
"EXTENDED 2"<br />
"EXTENDED 3"<br />
"EXTENDED 4"<br />
See Figure A-11:Extended Programming:<br />
Pacing and Distribution, on page A-11.<br />
SELECT NEW PROGRAM<br />
CHANGE PROGRAM NAME<br />
SITE: __________<br />
ABCDEFGHIJKLMNOPQRST<br />
UVWXYZ -&"0123456789<br />
BACK-UP DONE<br />
See Figure A-12: Extended Programming:<br />
Programmed <strong>Sampler</strong> Enable, on page A-12.<br />
If<br />
STOP key<br />
pressed.<br />
Units Selected screens are for a 730 Bubbler<br />
Flow Module. Screens for other modules may vary.<br />
See Figure A-5: Standard and Extended<br />
Programming: Start Times, on page A-5.<br />
Programming screens for a 700 Series<br />
Module. Refer to the Module’s manual.<br />
Figure A-9 Extended Programming: Programming Screens<br />
NAME: __________<br />
ABCDEFGHIJKLMNOPQRST<br />
UVWXYZ -&"0123456789<br />
BACK-UP DONE<br />
SAVE CHANGES?<br />
YES NO<br />
6712 Portable <strong>Sampler</strong><br />
Appendix A Menu Flowcharts<br />
If<br />
STOP key<br />
pressed.<br />
SAVE CHANGES?<br />
YES NO<br />
If applicable<br />
NEW MODULE SETUP--<br />
DOWNLOAD DATA NOW<br />
OR LOSE ALL DATA!<br />
DONE<br />
A-9
6712 Portable <strong>Sampler</strong><br />
Appendix A Menu Flowcharts<br />
Figure A-10 Extended Programming: Equipment Setup<br />
A-10<br />
Continued from Figure A-9: Extended<br />
Programming: Programming Screens, on<br />
page A-9.<br />
NUMBER OF BOTTLES:<br />
1 2 4 8 12 24<br />
BOTTLE VOLUME IS<br />
_____ ml (300-30000)<br />
SUCTION LINE LENGTH<br />
IS __ ft<br />
(3-99)<br />
AUTO SUCTION HEAD<br />
ENTER HEAD<br />
_ RINSE CYCLES<br />
(0-3)<br />
RETRY UP TO _ TIMES<br />
WHEN SAMPLING<br />
(0-3)<br />
ONE-PART PROGRAM<br />
TWO-PART PROGRAM<br />
See Figure A-11: Extended Programming:<br />
Pacing and Distribution, on page A- 11.<br />
SUCTION HEAD OF<br />
__ ft<br />
(min-max)<br />
__ BOTTLES AVAILABLE<br />
ASSIGN BOTTLES<br />
1 THRU __ TO<br />
PART 'A' (1-max)
Continued from Figure A-10: Extended<br />
Programming: Equipment Setup, on page A-10.<br />
See Note A.<br />
See Figure A-12:<br />
Event Conditions<br />
UNIFORM TIME PACED<br />
FLOW PACED<br />
EVENT PACED<br />
NONUNIFORM TIME<br />
DO YOU WANT TO<br />
RUN CONTINUOUSLY?<br />
YES NO<br />
NONUNIFORM TIME:<br />
CLOCK TIMES<br />
INTERVALS IN MINUTES<br />
RANDOM INTERVALS<br />
PROGRAM RUN TIME:<br />
__ HOURS, __ MINUTES<br />
__ BOTTLES PER<br />
SAMPLE EVENT (1-max)<br />
Multi-bottle<br />
1 bottle<br />
Uniform Time Paced Only<br />
All other pacing<br />
RUN CONTINUOUSLY?<br />
YES NO<br />
Yes<br />
FIRST SAMPLE AT<br />
START TIME,<br />
THEN ...<br />
QUANTITY AT INTERVAL<br />
1. __ AT ___ MIN<br />
2. __ AT ___ MIN<br />
3. __ AT ___ MIN<br />
PACED BY:<br />
FLOW PULSES<br />
FLOW MODULE VOLUME<br />
TAKE SAMPLES AT:<br />
1. START TIME<br />
2. HH:MM<br />
3. HH:MM<br />
SWITCH BOTTLES ON:<br />
NUMBER OF SAMPLES<br />
TIME<br />
SWITCH BOTTLES EVERY<br />
__ HOURS, __ MINUTES<br />
TAKE ___ SAMPLES<br />
(1-999)<br />
Figure A-11 Extended Programming: Pacing and Distribution<br />
No<br />
DO YOU WANT<br />
SAMPLE VOLUMES<br />
DEPENDENT ON FLOW?<br />
YES NO<br />
SAMPLE VOLUME:<br />
___ ml (10-max)<br />
See Figure A-13: Extended Programming:<br />
Programmed <strong>Sampler</strong> Enable, on page A-13.<br />
No<br />
Yes<br />
FLOW PULSES<br />
FLOW MODULE VOLUME<br />
6712 Portable <strong>Sampler</strong><br />
Appendix A Menu Flowcharts<br />
FLOW BETWEEN<br />
SAMPLE EVENTS:<br />
____ PULSES (1-9999)<br />
SAMPLE AT START?<br />
YES NO<br />
FIRST SWITCH TIME<br />
AT __:__<br />
Notes<br />
A. Event-paced programs always<br />
use sequential distribution.<br />
TIME BETWEEN<br />
SAMPLE EVENTS:<br />
__ HOURS, __ MINUTES<br />
SWITCH BOTTLES EVERY<br />
___ SAMPLES (1-max)<br />
RUN CONTINUOUSLY?<br />
YES NO<br />
SAMPLE VOLUME:<br />
10 ML FOR EVERY<br />
___ PULSES<br />
A-11
Repeat until<br />
conditions<br />
are set or<br />
until DONE<br />
6712 Portable <strong>Sampler</strong><br />
Appendix A Menu Flowcharts<br />
Figure A-12 Extended Programming: Event Conditions<br />
A-12<br />
ENABLED WHEN:<br />
I/O ENABLE IS HIGH<br />
I/O ENABLE IS LOW<br />
All valid event options will be shown.<br />
EVENT:<br />
RAIN LEVEL FLOW<br />
pHx TEMPx CONDx<br />
TDSx DOx NONE<br />
I/O RAIN OTHER OPTIONS<br />
"RAIN" SET POINT:<br />
__.__ INCHES PER<br />
__HOURS, __MINUTES<br />
ENABLED WHEN:<br />
ABOVE SET POINT<br />
BELOW SET POINT<br />
RESET RAIN HISTORY?<br />
YES NO<br />
Continued from Figure A-11: Extended<br />
Programming: Pacing and Distribution.<br />
"LEVEL" RISES<br />
_._ ft.<br />
__HOURS, __MINUTES<br />
"LEVEL" CONDITION:<br />
SET POINT<br />
RANGE<br />
RATE OF CHANGE<br />
CONDITION IS TRUE<br />
WHEN "LEVEL"<br />
RISES FALLS<br />
"LEVEL" FALLS<br />
_._ ft.<br />
__HOURS, __MINUTES<br />
NO EVENT PARAMETERS<br />
CURRENTLY AVAILABLE<br />
"LEVEL" RANGE:<br />
LOWER:_.__ft<br />
UPPER:_.__ft<br />
(0.001-30.000)<br />
ENABLED WHEN:<br />
INSIDE RANGE<br />
OUTSIDE RANGE<br />
"LEVEL" SET POINT:<br />
_.__ft<br />
(0.001-30.000)<br />
ENABLED WHEN:<br />
ABOVE SET POINT<br />
BELOW SET POINT
Continued from Figure A-11: Extended<br />
Programming: Pacing and Distribution, page A-11.<br />
'A' DONE<br />
RAIN<br />
"RAIN" SET POINT:<br />
__.__ INCHES PER<br />
__HOURS, __MINUTES<br />
ENABLED WHEN:<br />
ABOVE SET POINT<br />
BELOW SET POINT<br />
RESET RAIN HISTORY?<br />
YES NO<br />
Repeat<br />
See Note B<br />
NONE<br />
PAUSE RESUME<br />
1.HH:MM DD HH:MM DD<br />
2.HH:MM DD HH:MM DD<br />
CLEAR DONE<br />
See Note A.<br />
ENABLE:<br />
I/O RAIN LEVEL<br />
FLOW TEMPx CONDx<br />
TDSx DOx NONE<br />
REPEAT<br />
FOR<br />
SECOND<br />
TYPE<br />
ONCE ENABLED,<br />
STAY ENABLED?<br />
YES NO<br />
See Figure a-5: Standard and Extended<br />
Programming: Start Times, on page A-5.<br />
All except<br />
NONE<br />
ENABLED WHEN:<br />
I/O ENABLE IS HIGH<br />
I/O ENABLE IS LOW<br />
If applicable If applicable<br />
No<br />
Ye s<br />
If applicable<br />
PAUSE & RESUMES<br />
MUST BE ENTERED<br />
IN PAIRS!<br />
SAMPLE AT DISABLE?<br />
YES NO<br />
SAMPLE AT ENABLE?<br />
YES NO<br />
START OF SAMPLING<br />
AFTER A<br />
___ MINUTE DELAY<br />
(0-999)<br />
ENABLE: RAIN<br />
AND OR DONE<br />
"LEVEL" RANGE:<br />
LOWER:_.__ft<br />
UPPER:_.__ft<br />
(0.001-30.000)<br />
ENABLED WHEN:<br />
INSIDE RANGE<br />
OUTSIDE RANGE<br />
SAMPLE AT RESUME?<br />
YES NO<br />
Figure A-13 Extended Programming: Programmed <strong>Sampler</strong> Enable<br />
'A' Done and I/O are not options for I/O Conditions<br />
DONE<br />
AND<br />
or OR<br />
6712 Portable <strong>Sampler</strong><br />
Appendix A Menu Flowcharts<br />
SAMPLE AT ENABLE?<br />
YES NO<br />
RESET SAMPLE<br />
INTERVAL AT ENABLE?<br />
YES NO<br />
See Note A.<br />
ENABLE: RAIN AND<br />
I/O LEVEL FLOW<br />
TEMPx CONDx TDSx<br />
DOx DONE<br />
I/O All except I/O, Rain, and 'A' Done<br />
CHECK ENABLE EVERY<br />
0.5 1 2 5<br />
10 15 30<br />
MINUTES<br />
Ye s<br />
Notes<br />
Continued from Figure A-21: Extended<br />
Programming: Hardware Screens, on page A-21.<br />
No<br />
"LEVEL" CONDITION:<br />
SET POINT<br />
RANGE<br />
RATE OF CHANGE<br />
CONDITION IS TRUE<br />
WHEN "LEVEL"<br />
RISES FALLS<br />
"LEVEL" RISES<br />
_.__ft<br />
__HOURS, __MINUTES<br />
Ye s<br />
No<br />
"LEVEL" SET POINT:<br />
_.__ft<br />
(0.001-30.000)<br />
ENABLED WHEN:<br />
ABOVE SET POINT<br />
BELOW SET POINT<br />
CONTINUE COUNTDOWN<br />
WHILE DISABLED?<br />
YES NO<br />
A. All valid enable options will be shown. Enable options may include:<br />
LEVEL, FLOW, pH, TEMP, PERCENT, VEL, RAIN, I/O, 'A'DONE<br />
FR-TEMP, TEMPx, CONDx, SP_COx, TDSx, SALx, DOx,<br />
pHx, ORPx, LEVELx, NH4x, NH3x, NO3x, TURBx, Clx,<br />
FLOWx<br />
B. YES = Latched or Stay Enabled<br />
NO = Repeatable Enable<br />
A-13
6712 Portable <strong>Sampler</strong><br />
Appendix A Menu Flowcharts<br />
Figure A-14 Extended Programming: Quick View; Programming Screens<br />
A-14<br />
RUN "EXTENDED 1"<br />
PROGRAM<br />
VIEW REPORT<br />
OTHER FUNCTIONS<br />
PROGRAM NAME:<br />
"EXTENDED 1"<br />
SITE DESCRIPTIONS:<br />
"FACTORY "<br />
UNITS SELECTED:<br />
LENGTH: ft<br />
UNITS SELECTED:<br />
FLOWRATE: cfs<br />
FLOW VOLUME: Mgal<br />
BUBBLER MODULE:<br />
WEIR<br />
90o If applicable<br />
V-NOTCH<br />
May ask for level, offset, etc.<br />
Series of screens will vary,<br />
depending upon module.<br />
__ MINUTE<br />
DATA INTERVAL<br />
SELECT NEW PROGRAM<br />
CHANGE PROGRAM NAME<br />
NAME: __________<br />
ABCDEFGHIJKLMNOPQRST<br />
UVWXYZ -&"0123456789<br />
BACK-UP DONE<br />
SELECT UNITS FOR<br />
FLOW RATE:<br />
cfs gps gpm Mgd<br />
lps m3s m3h m3d<br />
SELECT UNITS FOR<br />
FLOW VOLUME:<br />
cf gal Mgal<br />
m3 lit<br />
DATA STORAGE<br />
INTERVAL IN MINUTES:<br />
1 2 5<br />
10 15 30<br />
See Figure A-15: Extended Programming:<br />
Quick View; Equipment Set-Up, on page A-15.<br />
See Figure A-16: Extended Programming: Quick<br />
View; Pacing and Distribution, on page A-16.<br />
See Figure A-17: Extended Programming:<br />
Quick View; Programmed <strong>Sampler</strong> Enable, on<br />
page A-17.<br />
See Figure A-5: Standard Programming:<br />
Quick View; Start Times, on page A- 5.<br />
"EXTENDED 1"<br />
"EXTENDED 2"<br />
"EXTENDED 3"<br />
"EXTENDED 4"<br />
NAME: __________<br />
ABCDEFGHIJKLMNOPQRST<br />
UVWXYZ -&"0123456789<br />
BACK-UP DONE<br />
SAVE CHANGES?<br />
YES NO<br />
Programming screens for a 700 Series<br />
Modules. Refer to the Module’s manual.<br />
If applicable<br />
INTERVAL CHANGED--<br />
DOWNLOAD DATA NOW<br />
OR LOSE ALL DATA!<br />
DONE<br />
If applicable<br />
SAVE CHANGES?<br />
YES NO<br />
NEW MODULE SETUP--<br />
DOWNLOAD DATA NOW<br />
OR LOSE ALL DATA!<br />
DONE
Continued from Figure A-14: Quick View;<br />
Programming Screens on page A-14.<br />
__,____ ml BOTTLES<br />
__ ft SUCTION LINE<br />
AUTO SUCTION HEAD<br />
_ RINSES, _RETRIES<br />
ONE PART PROGRAM<br />
_ RINSE CYCLES<br />
(0-3)<br />
RETRY UP TO _ TIMES<br />
WHEN SAMPLING<br />
(0-3)<br />
ONE-PART PROGRAM<br />
TWO-PART PROGRAM<br />
See Figure A-16: Extended Programming: Quick<br />
View; Pacing and Distribution, page A-16.<br />
SUCTION LINE LENGTH<br />
IS __ ft<br />
(3-99)<br />
When Liquid Detector is on<br />
AUTO SUCTION HEAD<br />
ENTER HEAD<br />
__ BOTTLES AVAILABLE<br />
ASSIGN BOTTLES<br />
1 THRU __ TO<br />
PART 'A' (1-max)<br />
Figure A-15 Extended Programming: Quick View; Equipment Set-Up<br />
6712 Portable <strong>Sampler</strong><br />
Appendix A Menu Flowcharts<br />
NUMBER OF BOTTLES:<br />
1 2 4 8 12 24<br />
BOTTLE VOLUME IS<br />
_____ ml (300-30000)<br />
SUCTION HEAD OF<br />
IS __ ft<br />
(min-max)<br />
A-15
6712 Portable <strong>Sampler</strong><br />
Appendix A Menu Flowcharts<br />
PACING:<br />
TIME, EVERY<br />
__ HOURS, __ MINUTES<br />
Figure A-16 Extended Programming: Quick View; Pacing and Distribution<br />
A-16<br />
Continued from Figure A-15: Extended<br />
Programming: Quick View; Equipment<br />
Set-Up, on page A-15.<br />
DISTRIBUTION:<br />
__ BOTTLES/SAMPLE<br />
___ SAMPLES/BOTTLE<br />
RUN CONTINUOUSLY<br />
VOLUME<br />
____ ml SAMPLES<br />
UNIFORM TIME PACED<br />
FLOW PACED<br />
EVENT PACED<br />
NONUNIFORM TIME<br />
NONUNIFORM TIME:<br />
CLOCK TIMES<br />
INTERVALS IN MINUTES<br />
RANDOM INTERVALS<br />
PROGRAM RUN TIME:<br />
__ HOURS, __ MINUTES<br />
__ BOTTLES PER<br />
SAMPLE EVENT (1-max)<br />
Multi-bottle<br />
1 bottle<br />
RUN CONTINUOUSLY?<br />
YES NO<br />
Uniform Time Paced Only<br />
DO YOU WANT<br />
SAMPLE VOLUMES<br />
DEPENDENT ON FLOW?<br />
YES NO<br />
See Figure A-17: Extended Programming: Quick<br />
View; Programmed <strong>Sampler</strong> Enable, on<br />
page A-17.<br />
FIRST SAMPLE AT<br />
START TIME,<br />
THEN ...<br />
SWITCH BOTTLES EVERY<br />
__ HOURS, __ MINUTES<br />
No<br />
No<br />
Yes<br />
TIME BETWEEN<br />
SAMPLE EVENTS:<br />
__ HOURS, __ MINUTES<br />
PACED BY:<br />
FLOW PULSES<br />
FLOW MODULE VOLUME<br />
TAKE SAMPLES AT:<br />
1. START TIME<br />
2. HH:MM<br />
3. HH:MM<br />
SWITCH BOTTLES ON:<br />
NUMBER OF SAMPLES<br />
TIME<br />
TAKE ___ SAMPLES<br />
(1-999)<br />
SAMPLE VOLUME:<br />
10 ML FOR EVERY<br />
___ PULSES (1-9999)<br />
SAMPLE VOLUME:<br />
___ ml (10-max)<br />
QUANTITY AT INTERVAL<br />
1. __ AT ___ MIN<br />
2. __ AT ___ MIN<br />
3. __ AT ___ MIN<br />
FIRST SWITCH TIME<br />
AT __:__<br />
FLOW BETWEEN<br />
SAMPLE EVENTS:<br />
____ PULSES (1-9999)<br />
SAMPLE AT START?<br />
YES NO<br />
SWITCH BOTTLES EVERY<br />
___ SAMPLES (1-max)<br />
RUN CONTINUOUSLY?<br />
YES NO<br />
MINIMUM<br />
SAMPLE VOLUME:<br />
___ ml (10 - max)
Continued from Figure A-16: Extended<br />
Programming: Quick View; Pacing and<br />
Distribution, on page A-16.<br />
'A' ENABLE:<br />
RAIN>0.11"/12:00<br />
AND<br />
0.500
6712 Portable <strong>Sampler</strong><br />
Appendix A Menu Flowcharts<br />
Figure A-18 Extended Programming: Normal View; Software Options<br />
A-18<br />
RUN "ISCO 6712 "<br />
PROGRAM<br />
VIEW REPORT<br />
OTHER FUNCTIONS<br />
USE LIQUID DETECTOR?<br />
YES NO<br />
BACKLIGHT ALWAYS OFF<br />
TIMED BACKLIGHT<br />
CONTINUOUS BACKLIGHT<br />
EVENT MARK SENT FOR:<br />
EVERY SAMPLE<br />
COMPLETE SAMPLES<br />
PRE-SAMPLE PURGE:<br />
__ COUNTS<br />
(10-9999)<br />
POST-SAMPLE PURGE:<br />
DEPENDENT ON HEAD<br />
FIXED COUNT<br />
PERIODIC<br />
SERIAL OUTPUT?<br />
YES NO<br />
POWER ON OFF<br />
1. _:_ _:_<br />
2. _:_ _:_<br />
CLEAR DONE<br />
YES<br />
MAINTENANCE<br />
MANUAL FUNCTIONS<br />
SOFTWARE OPTIONS<br />
HARDWARE<br />
PROGRAMMING STYLE:<br />
NORMAL<br />
QUICK VIEW/CHANGE<br />
BOTTLE FULL DETECT?<br />
YES NO<br />
EVENT MARK DURATION:<br />
3 SECONDS<br />
WHILE PUMPTING<br />
POST-SAMPLE PURGE:<br />
___ COUNTS<br />
(10-9999)<br />
PORT SETTINGS:<br />
9600n81 4800n81<br />
2400n81 1200n81<br />
POWER ON/OFF TIMES<br />
CANNOT SPAN<br />
MORE THANONE DAY!<br />
POWER ON/OFF TIMES<br />
MUST BE ENTERED<br />
IN PAIRS!<br />
MEASUREMENT INTERVAL<br />
5 15 30 SECONDS<br />
1 2 5 MINUTES<br />
STORAGE INTERVAL<br />
DUAL SAMPLER MODE?<br />
YES NO<br />
AT THE BEGINNING OF:<br />
INITIAL PURGE<br />
FORWARD PUMPING<br />
DURING:<br />
ENTIRE PUMP CYCLE<br />
FORWARD PUMPING<br />
SERIAL OUTPUT EVERY:<br />
15 SEC 1 MIN<br />
5 MIN 15 MIN
RUN "ISCO 6712 "<br />
PROGRAM<br />
VIEW REPORT<br />
OTHER FUNCTIONS<br />
LIQUID DETECT ON<br />
QUICK VIEW/CHANGE<br />
TAKE MEASUREMENTS<br />
EVERY __ MINUTES<br />
DUAL SAMPLER ON<br />
BTL FULL DECTECT OFF<br />
TIMED BACKLIGHT<br />
EVENT MARK SENT<br />
WHILE<br />
PUMPING FORWARD<br />
PUMP COUNTS FOR<br />
EACH PURGE CYCLE:<br />
__ PRE-SAMPLE<br />
__ POST-SAMPLE<br />
SERIAL OUTPUT<br />
EVERY __ MINUTES<br />
INTERROGATOR<br />
CONNECTOR<br />
POWER ALWAYS ON<br />
MAINTENANCE<br />
MANUAL FUNCTIONS<br />
SOFTWARE OPTIONS<br />
HARDWARE<br />
PROGRAMMING STYLE:<br />
NORMAL<br />
QUICK IVEW/CHANGE<br />
MEASUREMENT INTERVAL<br />
5 15 30 SECONDS<br />
1 2 5 MINUTES<br />
STORAGE INTERVAL<br />
DUAL SAMPLER MODE?<br />
YES NO<br />
EVENT MARK SENT FOR:<br />
EVERY SAMPLE<br />
COMPLETE SAMPLES<br />
PRE-SAMPLE PURGE:<br />
___ COUNTS<br />
(10-9999)<br />
POST-SAMPLE PURGE:<br />
DEPENDENT ON HEAD<br />
FIXED COUNT<br />
PERIODIC<br />
SERIAL OUTPUT?<br />
YES NO<br />
POWER ON OFF<br />
1. _:_ _:_<br />
2. _:_ _:_<br />
CLEAR DONE<br />
BOTTLE FULL DETECT?<br />
YES NO<br />
Figure A-19 Extended Programming: QuickView; Software Options<br />
USE LIQUID DETECTOR?<br />
YES NO<br />
EVENT MARK DURATION:<br />
3 SECONDS<br />
WHILE PUMPTING<br />
POST-SAMPLE PURGE:<br />
___ COUNTS<br />
(10-9999)<br />
PORT SETTINGS:<br />
9600n81 4800n81<br />
2400n81 1200n81<br />
POWER ON/OFF TIMES<br />
CANNOT SPAN<br />
MORE THAN ONE DAY!<br />
POWER ON/OFF TIMES<br />
MUST BE ENTERED<br />
IN PAIRS!<br />
6712 Portable <strong>Sampler</strong><br />
Appendix A Menu Flowcharts<br />
BACKLIGHT ALWAYS OFF<br />
TIMED BACKLIGHT<br />
CONTINUOUS BACKLIGHT<br />
AT THE BEGINNING OF:<br />
INITIAL PURGE<br />
FORWARD PUMPING<br />
DURING:<br />
ENTIRE PUMP CYCLE<br />
FORWARD PUMPING<br />
SERIAL OUTPUT EVERY:<br />
15 SEC 1 MIN<br />
5 MIN 15 MIN<br />
A-19
6712 Portable <strong>Sampler</strong><br />
Appendix A Menu Flowcharts<br />
Figure A-20 Extended Programming: Normal View; Hardware<br />
A-20<br />
RUN "EXTENDED 1"<br />
PROGRAM<br />
VIEW REPORT<br />
OTHER FUNCTIONS<br />
If applicable<br />
NEW HARDWARE SETUP--<br />
DOWNLOAD DATA NOW<br />
OR LOSE ALL DATA!<br />
DONE<br />
DONE<br />
SCAN SDI-12 SONDES<br />
AT TURN-ON TIME?<br />
YES NO<br />
See Note A.<br />
SET I/Ox:<br />
NONE<br />
PGM ENABLED<br />
-> 'A' ENABLED<br />
-> 'B' ENABLED<br />
-> PROGRAM DONE<br />
-> 'A' DONE<br />
-> 'B' DONE<br />
-> RUN ERROR<br />
-> FLOW THRU<br />
-> CONDITIONS<br />
YES<br />
See Analog Output and Dialout Screens,<br />
on page A-22.<br />
MAINTENANCE<br />
MANUAL FUNCTIONS<br />
SOFTWARE OPTIONS<br />
HARDWARE<br />
PLEASE WAIT!<br />
NEW HARDWARE SETUP--<br />
DOWNLOAD DATA NOW<br />
OR LOSE ALL DATA!<br />
DONE<br />
RUN FLOW THRU PUMP<br />
___SECONDS BEFORE<br />
TAKING READINGS<br />
(0-120)<br />
DO YOU HAVE A<br />
RAIN GAUGE ATTACHED?<br />
YES NO<br />
PARTITION MEMORY<br />
WILL LAST __ DAYS<br />
If scan finds sonde, see flowchart 24: SDI-<br />
12 Sonde Screens, on page A-24.<br />
See Figure A-13: Extended Programming:<br />
Programmed <strong>Sampler</strong> Enable, on page A-13.<br />
YES<br />
RAIN GAUGE<br />
0.01 inch TIP<br />
0.1mm TIP<br />
Notes<br />
A. denotes output signal.
RUN "ISCO 6712 "<br />
PROGRAM<br />
VIEW REPORT<br />
OTHER FUNCTIONS<br />
MAINTENANCE<br />
MANUAL FUNCTIONS<br />
SOFTWARE OPTIONS<br />
HARDWARE<br />
NO SDI-12 SONDE<br />
AUTO SDI-12 SCAN ON<br />
0.01 inch TIP<br />
RAIN GAUGE<br />
I/O1=I/O ENABLE<br />
I/O2=PGM RUNNING<br />
I/O3=PROGRAM DONE See Note A.<br />
SET I/Ox:<br />
NONE<br />
PGM ENABLED<br />
-> 'A' ENABLED<br />
-> 'B' ENABLED<br />
-> PROGRAM DONE<br />
-> 'A' DONE<br />
-> 'B' DONE<br />
-> RUN ERROR<br />
-> FLOW THRU<br />
-> CONDITIONS<br />
See Figure A-23: Analog Output and Dialout<br />
Quick View Screens.<br />
Figure A-21 Extended Programming: Quick View; Hardware<br />
DO YOU HAVE A<br />
RAIN GAUGE ATTACHED?<br />
YES NO<br />
NO<br />
See Figure A-24: SDI-12 Sonde Screens,<br />
on page A-23.<br />
SCAN SDI-12 SONDES<br />
AT TURN-ON TIME?<br />
YES NO<br />
Notes<br />
NEW HARDWARE SETUP--<br />
DOWNLOAD DATA NOW<br />
OR LOSE ALL DATA!<br />
DONE<br />
RUN FLOW THRU PUMP<br />
___SECONDS BEFORE<br />
TAKING READINGS<br />
(0-120)<br />
A. denotes output signal.<br />
6712 Portable <strong>Sampler</strong><br />
Appendix A Menu Flowcharts<br />
YES<br />
See Figure A-17: Extended Programming:<br />
Quick View; Programmed <strong>Sampler</strong> Enable.<br />
RAIN GAUGE<br />
0.01 inch TIP<br />
0.1mm TIP<br />
If applicable<br />
NEW HARDWARE SETUP--<br />
DOWNLOAD DATA NOW<br />
OR LOSE ALL DATA!<br />
DONE<br />
A-21
6712 Portable <strong>Sampler</strong><br />
Appendix A Menu Flowcharts<br />
Figure A-22 Analog Output and Dialout Screens<br />
Figure A-23 Analog Output and Dialout Quick View Screens<br />
A-22<br />
See Figure A-20: Extended<br />
Programming: Hardware, page A-20<br />
If applicable<br />
See Note A<br />
ANALOG OUTPUT<br />
HARDWARE HAS NOT<br />
BEEN INSTALLED!<br />
If applicable<br />
I/Ox=1,2<br />
See Note B<br />
DIALOUT WHEN I/Ox<br />
BECOMES TRUE?<br />
YES NO<br />
I/Ox=3<br />
1.<br />
2.<br />
3.<br />
SETUP<br />
MANUAL CONTROL<br />
DIALOUT NUMBERS:<br />
__ MINUTE<br />
DELAY BETWEEN CALLS<br />
(0-99)<br />
See Figure A-21: Extended Programming:<br />
Quick View; Hardware, page A-21<br />
If applicable<br />
See Note<br />
ANALOG OUTPUT<br />
HARDWARE HAS NOT<br />
BEEN INSTALLED!<br />
_ ANALOG OUTPUTS<br />
DIALOUT EACH TIME<br />
I/Ox<br />
BECOMES TRUE<br />
SETUP<br />
MANUAL CONTROL<br />
If applicable<br />
See Note B<br />
DIALOUT WHEN I/Ox<br />
BECOMES TRUE?<br />
YES NO<br />
I/Ox=1,2<br />
I/Ox<br />
=3<br />
Notes<br />
A. Factory installed option. Requires B1 hardware or newer.<br />
B. Requires factory-installed Dialout Modem and B2 hardware or newer.<br />
SET ANALOG OUTPUT _<br />
TO __.__ mA<br />
DONE<br />
When DECIMAL POINT key is pressed<br />
SELECT CODE:<br />
, # * PAGER<br />
SET ANALOG OUTPUT _<br />
TO __.__ mA<br />
DONE<br />
Notes<br />
Repeat for each channel<br />
ANALOG OUPUT _:<br />
LEVEL VELOCITY<br />
FLOW NONE<br />
ANALOG OUTPUT _:<br />
0-TO-20 mA<br />
4-TO-20 mA<br />
ANALOG OUTPUT _:<br />
0 mA AT _.__ fps<br />
20 mA AT _.__ fps<br />
(0.000-9999)<br />
A. Factory installed option. Requires B1 hardware or newer.<br />
B. Requires factory-installed Dialout Modem and B2 hardware or newer.<br />
1.<br />
2.<br />
3.<br />
DIALOUT NUMBERS:<br />
__ MINUTE<br />
DELAY BETWEEN CALLS<br />
(0-99)<br />
ANALOG OUPUT _:<br />
LEVEL VELOCITY<br />
FLOW NONE<br />
ANALOG OUTPUT _:<br />
0-TO-20 mA<br />
4-TO-20 mA<br />
ANALOG OUTPUT _:<br />
0 mA AT _.__ fps<br />
20 mA AT _.__ fps<br />
(0.000-9999)<br />
Repeat for each channel<br />
When DECIMAL POINT key is pressed<br />
SELECT CODE:<br />
, # * PAGER
NO SDI-12 SONDE<br />
SETUP KNOWN SONDES<br />
AUTO SDI-12 SCAN ON<br />
SELECT ADDRESS OF<br />
SONDE TO SETUP:<br />
__ __ DONE<br />
Company Model<br />
Optional Information<br />
SONDE AT ADDRESS _<br />
HAS _ DATA VALUES<br />
Enough partitions available<br />
to store all this sonde's data<br />
SONDE _, STORE<br />
ALL PARAMETER DATA?<br />
YES NO<br />
Figure A-24 SDI-12 Sonde Screens<br />
SCAN<br />
PLEASE WAIT!<br />
LOOKING FOR<br />
SDI-12 SONDES<br />
__ SONDE(S) FOUND<br />
Not enough partitions available<br />
to store all this done's data<br />
NO<br />
NEW HARDWARE SETUP<br />
DOWNLOAD DATA NOW<br />
OR LOSE ALL DATA!<br />
DONE<br />
SONDE _, STORE<br />
TEMPERATURE DATA?<br />
YES NO<br />
LABEL IS: TEMP_<br />
DATA FROM SONDE _<br />
1 = OTHER<br />
2 = OTHER<br />
3 = OTHER<br />
Isco Ready Sondes<br />
Data Types Known DATA FROM SONDE _<br />
4 = OTHER<br />
5 = OTHER<br />
DONE<br />
PARTITION MEMORY<br />
WILL LAST __ DAYS<br />
Other SDI-12 Sondes<br />
Proceed to calibration/validation screens<br />
and rest of Hardware screens.<br />
6712 Portable <strong>Sampler</strong><br />
Appendix A Menu Flowcharts<br />
ENTER key<br />
SONDE _, DATA xx<br />
pH<br />
DO<br />
LEVEL<br />
A-23
6712 Portable <strong>Sampler</strong><br />
Appendix A Menu Flowcharts<br />
A-24
<strong>6712FR</strong> <strong>Refrigerated</strong> <strong>Sampler</strong><br />
Appendix B Material Safety Data Sheets<br />
Material Safety Data Sheet Indicating Silica Gel<br />
*Optional Indicating Silica Gel<br />
Identity (Trade Name as Used on Label)<br />
Manufacturer<br />
:<br />
MULTISORB TECHNOLOGIES, INC.<br />
(formerly Multiform Desiccants, Inc.)<br />
MSDS Number* : M75<br />
Address: 325 Harlem Road<br />
Buffalo, NY 14224<br />
CAS Number* :<br />
Phone Number (For Information): 716/824-8900 Date Prepared: July 6, 2000<br />
Emergency Phone<br />
Number:<br />
716/824-8900 Prepared By* : G.E. McKedy<br />
Section 1 - Material Identification and Information<br />
Components - Chemical Name & Common Names<br />
(Hazardous Components 1% or greater; Carcinogens 0.1% or<br />
greater)<br />
%* OSHA<br />
PEL<br />
Silica Gel SiO2 98.0 6mg/m 3<br />
(total dust)<br />
Cobalt Chloride >2.0 0.05mg/m 3<br />
Non-Hazardous Ingredients<br />
TOTAL 100<br />
Section 2 - Physical/Chemical Characteristics<br />
(TWA cobalt<br />
metal dust &<br />
fume)<br />
ACGIH<br />
TLV<br />
10mg/m 3<br />
(total dust)<br />
.05mg/m 3<br />
(Cobalt, TWA)<br />
Boiling<br />
N/A Specific Gravity<br />
2.1<br />
Point<br />
(H20 = 1)<br />
Vapor Pressure<br />
N/A Melting<br />
N/A<br />
(mm Hg and Temperature<br />
Point<br />
Vapor<br />
N/A Evaporation Rate<br />
N/A<br />
Density<br />
(Air =1)<br />
(__________=1)<br />
Solubility Insoluble, but will adsorb moisture. Water Not reactive, but will adsorb moisture.<br />
in Water<br />
Reactive<br />
Appearance<br />
and Odor<br />
Purple crystals, no odor.<br />
Section 3 - Fire and Explosion Hazard Data<br />
OTHER LIMITS<br />
RECOMMENDE<br />
D<br />
Flash Point and<br />
N/A Auto-Ignition<br />
N/A Flammability Limits in N/A LEL UEL<br />
Methods Used<br />
Temperature<br />
Air % by Volume<br />
Extinguisher<br />
Media<br />
Dry chemical, carbon dioxide and foam can be used.<br />
Special Fire<br />
Water will generate heat due to the silica gel which will adsorb water and liberate heat.<br />
Fighting Procedures<br />
Unusual Fire and When exposed to water, the silica gel can get hot enough to reach the boiling point of water. Flooding with<br />
Explosion Hazards water will reduce the temperature to safe limits.<br />
Section 4 - Reactivity Hazard Data<br />
STABILITY<br />
Stable<br />
Unstable<br />
Incompatibility<br />
(Materials to Avoid)<br />
Hazardous<br />
Decomposition<br />
Products<br />
Conditions<br />
To Avoid<br />
Water.<br />
HAZARDOUS POLYMERIZATION<br />
May Occur<br />
Moisture and high humidity environments.<br />
Carbon dioxide, carbon monoxide, water<br />
Conditions<br />
To Avoid<br />
None.<br />
B-1
<strong>6712FR</strong> <strong>Refrigerated</strong> <strong>Sampler</strong><br />
Appendix B Material Safety Data Sheets<br />
Will Not Occur<br />
Section 5 - Health Hazard Data<br />
*Optional Indicating Silica Gel<br />
B-2<br />
Page 2<br />
PRIMARY ROUTES Inhalation Ingestion<br />
CARCINOGEN NTP OSHA<br />
OF ENTRY Skin Absorption Not Hazardous LISTED IN IARC Monograph Not Listed<br />
HEALTH HAZARDS Acute May cause eye, skin and mucous membrane irritation.<br />
Chronic Prolonged inhalation may cause lung damage.<br />
Signs and Symptoms<br />
of Exposure<br />
Drying and irritation.<br />
Medical Conditions<br />
Asthma.<br />
Generally Aggravated by Exposure<br />
EMERGENCY FIRST AID PROCEDURES - Seek medical assistance for further treatment, observation and support if necessary.<br />
Eye Contact Flush with water for at least 15 minutes.<br />
Skin<br />
Contact<br />
Wash affected area with soap and water.<br />
Inhalation Remove affected person to fresh air.<br />
Ingestion Drink at least 2 glasses of water.<br />
Section 6 - Control and Protective Measures<br />
Respiratory Protection<br />
(Specify Type)<br />
Use NIOSH approved dust mask or respirator.<br />
Protective<br />
Gloves<br />
Light cotton gloves. Eye Protection Safety glasses.<br />
VENTILATION<br />
TO BE USED<br />
Local Exhaust<br />
Other (Specify)<br />
Mechanical (General) Special<br />
Other Protective<br />
Clothing and Equipment<br />
None.<br />
Hygienic Work<br />
Practices<br />
Avoid raising dust. Avoid contact with skin, eyes and clothing.<br />
Section 7 - Precautions for Safe Handling and Use/Leak Procedures<br />
Steps to be Taken if Material Sweep or vacuum up and place the spilled material in a waste disposal container. Avoid raising dust.<br />
Is<br />
Spilled Or Released<br />
Waste Disposal Dispose in an approved landfill according to federal, state and local regulations.<br />
Methods<br />
Precautions to be Cover promptly to avoid blowing dust. Wash after handling.<br />
Taken<br />
In Handling and<br />
Storage<br />
Other Precautions and/or Special Keep in sealed containers away from moisture. The silica gel will readily adsorb moisture.<br />
Hazards
101 Christine Drive<br />
Belen, New Mexico 87002<br />
Phone: (505) 864-6691<br />
Fax: (505) 861-2355<br />
MATERIAL SAFETY DATA SHEET -- September 28, 1998<br />
SORB-IT ®<br />
Packaged Desiccant<br />
<strong>6712FR</strong> <strong>Refrigerated</strong> <strong>Sampler</strong><br />
Appendix B Material Safety Data Sheets<br />
ISO 9002<br />
SECTION I -- PRODUCT IDENTIFICATION<br />
Trade Name and Synonyms: Silica Gel, Synthetic Amorphous Silica,<br />
Silicon, Dioxide<br />
Chemical Family: Synthetic Amorphous Silica<br />
Formula: SiO2.x H2O<br />
SECTION II -- HAZARDOUS INGREDIENTS<br />
Components in the Solid Mixture<br />
COMPONENT CAS No % ACGIH/TLV (PPM) OSHA-(PEL)<br />
Amorphous 63231-67-4 >99 PEL - 20 (RESPIRABLE), LIMIT – NONE,<br />
Silica<br />
TLV – 5<br />
HAZARD -<br />
IRRITANT<br />
˝<br />
Synthetic amorphous silica is not to be confused with crystalline silica such as quartz,<br />
cristobalite or tridymite or with diatomaceous earth or other naturally occurring forms of<br />
amorphous silica that frequently contain crystalline forms.<br />
This product is in granular form and packed in bags for use as a desiccant. Therefore, no<br />
exposure to the product is anticipated under normal use of this product. Avoid inhaling<br />
desiccant dust.<br />
SECTION III -- PHYSICAL DATA<br />
Appearance and Odor: White granules; odorless.<br />
Melting Point: >1600 Deg C; >2900 Deg F<br />
Solubility in Water: Insoluble.<br />
Bulk Density: >40 lbs./cu. ft.<br />
Percent Volatile by Weight @ 1750 Deg F:
<strong>6712FR</strong> <strong>Refrigerated</strong> <strong>Sampler</strong><br />
Appendix B Material Safety Data Sheets<br />
B-4<br />
101 Christine Drive<br />
Belen, New Mexico 87002<br />
Phone: (505) 864-6691<br />
Fax: (505) 861-2355<br />
ISO 9002<br />
MATERIAL SAFETY DATA SHEET -- September 28, 1998<br />
SORB-IT ®<br />
Packaged Desiccant<br />
SECTION IV -- FIRE EXPLOSION DATA<br />
Fire and Explosion Hazard - Negligible fire and explosion hazard when exposed to heat<br />
or flame by reaction with incompatible substances.<br />
Flash Point - Nonflammable.<br />
Firefighting Media - Dry chemical, water spray, or foam. For larger fires, use water spray<br />
fog or foam.<br />
Firefighting - Nonflammable solids, liquids, or gases: Cool containers that are exposed<br />
to flames with water from the side until well after fire is out. For massive fire in enclosed<br />
area, use unmanned hose holder or monitor nozzles; if this is impossible, withdraw from<br />
area and let fire burn. Withdraw immediately in case of rising sound from venting safety<br />
device or any discoloration of the tank due to fire.<br />
SECTION V -- HEALTH HAZARD DATA<br />
Health hazards may arise from inhalation, ingestion, and/or contact with the skin and/or<br />
eyes. Ingestion may result in damage to throat and esophagus and/or gastrointestinal<br />
disorders. Inhalation may cause burning to the upper respiratory tract and/or temporary or<br />
permanent lung damage. Prolonged or repeated contact with the skin, in absence of<br />
proper hygiene, may cause dryness, irritation, and/or dermatitis. Contact with eye tissue<br />
may result in irritation, burns, or conjunctivitis.<br />
First Aid (Inhalation) - Remove to fresh air immediately. If breathing has stopped, give<br />
artificial respiration. Keep affected person warm and at rest. Get medical attention<br />
immediately.<br />
First Aid (Ingestion) - If large amounts have been ingested, give emetics to cause<br />
vomiting. Stomach siphon may be applied as well. Milk and fatty acids should be<br />
avoided. Get medical attention immediately.<br />
First Aid (Eyes) - Wash eyes immediately and carefully for 30 minutes with running water.
101 Christine Drive<br />
Belen, New Mexico 87002<br />
Phone: (505) 864-6691<br />
Fax: (505) 861-2355<br />
<strong>6712FR</strong> <strong>Refrigerated</strong> <strong>Sampler</strong><br />
Appendix B Material Safety Data Sheets<br />
ISO 9002<br />
MATERIAL SAFETY DATA SHEET -- September 28, 1998<br />
SORB-IT ®<br />
Packaged Desiccant<br />
NOTE TO PHYSICIAN: This product is a desiccant and generates heat as it adsorbs<br />
water. The used product can contain material of hazardous nature. Identify that material<br />
and treat accordingly.<br />
SECTION VI -- REACTIVITY DATA<br />
Reactivity - Silica gel is stable under normal temperatures and pressures in sealed<br />
containers. Moisture can cause a rise in temperature which may result in a burn.<br />
SECTION VII --SPILL OR LEAK PROCEDURES<br />
Notify safety personnel of spills or leaks. Clean-up personnel need protection against<br />
inhalation of dusts or fumes. Eye protection is required. Vacuuming and/or wet methods<br />
of cleanup are preferred. Place in appropriate containers for disposal, keeping airborne<br />
particulates at a minimum.<br />
SECTION VIII -- SPECIAL PROTECTION INFORMATION<br />
Respiratory Protection - Provide a NIOSH/MSHA jointly approved respirator in the<br />
absence of proper environmental control. Contact your safety equipment supplier for<br />
proper mask type.<br />
Ventilation - Provide general and/or local exhaust ventilation to keep exposures below<br />
the TLV. Ventilation used must be designed to prevent spots of dust accumulation or<br />
recycling of dusts.<br />
Protective Clothing - Wear protective clothing, including long sleeves and gloves, to<br />
prevent repeated or prolonged skin contact.<br />
Eye Protection - Chemical splash goggles designed in compliance with OSHA<br />
regulations are recommended. Consult your safety equipment supplier.<br />
B-5
<strong>6712FR</strong> <strong>Refrigerated</strong> <strong>Sampler</strong><br />
Appendix B Material Safety Data Sheets<br />
101 Christine Drive<br />
Belen, New Mexico 87002<br />
Phone: (505) 864-6691<br />
Fax: (505) 861-2355<br />
B-6<br />
ISO 9002<br />
MATERIAL SAFETY DATA SHEET -- September 28, 1998<br />
SORB-IT ®<br />
Packaged Desiccant<br />
SECTION IX -- SPECIAL PRECAUTIONS<br />
Avoid breathing dust and prolonged contact with skin. Silica gel dust causes eye irritation<br />
and breathing dust may be harmful.<br />
* No Information Available<br />
HMIS (Hazardous Materials Identification System) for this product is as<br />
follows:<br />
Health Hazard 0<br />
Flammability 0<br />
Reactivity 0<br />
Personal Protection HMIS assigns choice of personal protective equipment to the<br />
customer, as the raw material supplier is unfamiliar with the<br />
condition of use.<br />
The information contained herein is based upon data considered true and accurate. However, United Desiccants makes no warranties<br />
expressed or implied, as to the accuracy or adequacy of the information contained herein or the results to be obtained from the use<br />
thereof. This information is offered solely for the user's consideration, investigation and verification. Since the use and conditions of<br />
use of this information and the material described herein are not within the control of United Desiccants, United Desiccants assumes no<br />
responsibility for injury to the user or third persons. The material described herein is sold only pursuant to United Desiccants' Terms<br />
and Conditions of Sale, including those limiting warranties and remedies contained therein. It is the responsibility of the user to<br />
determine whether any use of the data and information is in accordance with applicable federal, state or local laws and regulations.
<strong>6712FR</strong> <strong>Refrigerated</strong> <strong>Sampler</strong><br />
Appendix B Material Safety Data Sheets<br />
B-7
<strong>6712FR</strong> <strong>Refrigerated</strong> <strong>Sampler</strong><br />
Appendix B Material Safety Data Sheets<br />
B-8
<strong>6712FR</strong> <strong>Refrigerated</strong> <strong>Sampler</strong><br />
Appendix B Material Safety Data Sheets<br />
B-9
<strong>6712FR</strong> <strong>Refrigerated</strong> <strong>Sampler</strong><br />
Appendix B Material Safety Data Sheets<br />
B-10
<strong>6712FR</strong> <strong>Refrigerated</strong> <strong>Sampler</strong><br />
Appendix B Material Safety Data Sheets<br />
B-11
<strong>6712FR</strong> <strong>Refrigerated</strong> <strong>Sampler</strong><br />
Appendix B Material Safety Data Sheets<br />
B-12
<strong>6712FR</strong> <strong>Refrigerated</strong> <strong>Sampler</strong><br />
Appendix C General Safety Procedures<br />
The safety of the personnel who use the <strong>6712FR</strong> is a critical consideration.<br />
The following procedures, applicable to working in<br />
and around manholes and sewers, are those used by Black &<br />
Veatch, a respected consulting firm, and are published here by<br />
their permission.<br />
Field personnel must keep safety uppermost in their minds at all<br />
times. When working above ground, rules of common sense and<br />
safety prevail. However, when entering manholes, strict safety<br />
procedures must be observed. Failure to do so could jeopardize<br />
not only your own life, but also the lives of other crew members.<br />
WARNING<br />
The 6712 samplers have not been approved for use in<br />
hazardous locations as defined by the National Electrical<br />
Code.<br />
CAUTION<br />
Before you install any sampler, you must take the proper<br />
safety precautions. The following discussion of safety procedures<br />
offers only general guidelines. Each situation in which<br />
you install a sampler varies. You must take into account the<br />
individual circumstances of each installation.<br />
Additional safety considerations, other than those discussed<br />
here, may be required. Check applicable guidelines, codes, and<br />
regulations of federal, state, city, and county agencies.<br />
C.1 Hazards There are many hazards connected with entering manholes.<br />
Some of the most common hazards are:<br />
C.1.1 Adverse Atmosphere The manhole may contain flammable or poisonous gases or the<br />
atmosphere may be deficient in oxygen. Forced ventilation may<br />
be necessary.<br />
C.1.2 Deteriorated Rungs Manhole steps may be corroded and not strong enough to support<br />
a man. It may be difficult to inspect the rungs because of poor<br />
lighting.<br />
C.1.3 Traffic Whenever manholes are located in the traveled way, barricades<br />
and warning devices are essential to direct traffic away from an<br />
open manhole.<br />
C.1.4 Falling Objects Items placed near the manhole opening may fall and injure a<br />
worker in the manhole. All loose items should be kept away from<br />
the manhole opening. This applies to hand tools as well as<br />
stones, gravel and other objects.<br />
C-1
<strong>6712FR</strong> <strong>Refrigerated</strong> <strong>Sampler</strong><br />
Appendix C General Safety Procedures<br />
C.1.5 Sharp Edges Sharp edges of items in or near a manhole may cause cuts or<br />
bruises.<br />
C.1.6 Lifting Injuries Unless proper tools are used to remove manhole covers, back<br />
injuries or injuries to hands or feet may result.<br />
C.2 Planning Advance planning should include arrangements for test equipment,<br />
tools, ventilating equipment, protective clothing, traffic<br />
warning devices, ladders, safety harness, and adequate number of<br />
personnel. Hasty actions may result in serious injuries. Time<br />
spent in the manhole should be kept to a minimum.<br />
C.3 Adverse Atmospheres [Refer to the table of Hazardous Gases at the end of this appendix.]<br />
Before workers enter a manhole, tests should be made for<br />
explosive atmosphere, presence of hydrogen sulfide, and oxygen<br />
deficiency. Combustible or toxic vapors may be heavier than air,<br />
so the tests on the atmosphere must be run at least 3 /4 of the way<br />
down the manhole.<br />
Whenever adverse atmosphere is encountered, forced ventilation<br />
must be used to create safe conditions. After the ventilating<br />
equipment has been operated for a few minutes, the atmosphere<br />
in the manhole should be retested before anyone enters the manhole.<br />
When explosive conditions are encountered, the ventilating<br />
blower should be placed upwind to prevent igniting any gas that<br />
is emerging from the opening. When a gasoline engine blower is<br />
used, it must be located so that exhaust fumes cannot enter the<br />
manhole.<br />
If testing equipment is not available, the manhole should be<br />
assumed to contain an unsafe atmosphere and forced ventilation<br />
must be provided. It should never be assumed that a manhole is<br />
safe just because there is no odor or the manhole has been<br />
entered previously.<br />
C.4 Entering Manholes Since the top of the manhole is usually flush with the surrounding<br />
surface, there may not be anything for the person who is<br />
entering the manhole to grab on to steady himself. Persons who<br />
are entering manholes should not be permitted to carry anything<br />
in their hands as they enter the manhole, to ensure that their<br />
hands will be free to hold on or grab if they slip. A good method<br />
for entering a manhole is to sit on the surface facing the manhole<br />
steps or ladder, with the feet in the hole and the arms straddling<br />
the opening for support. As the body slides forward and downward,<br />
the feet can engage a rung, and the back can rest against<br />
the opposite side of the opening. If there is any doubt about the<br />
soundness of the manhole steps, a portable ladder should be<br />
used.<br />
C-2<br />
A person should never enter a manhole unless he is wearing personal<br />
safety equipment, including a safety harness and a hard<br />
hat. Two persons should be stationed at the surface continuously<br />
while anyone is working inside a manhole, to lift him out if he is<br />
overcome or injured. One man cannot lift an unconscious man<br />
out of a manhole.
<strong>6712FR</strong> <strong>Refrigerated</strong> <strong>Sampler</strong><br />
Appendix C General Safety Procedures<br />
The persons stationed at the surface should also function as<br />
guards to keep people and vehicles away from the manhole opening.<br />
To avoid a serious injury, a person should not be lifted out of<br />
manhole by his arm unless it is a dire emergency.<br />
“When more than one person must enter a manhole, the first person<br />
should reach the bottom and step off the ladder before the<br />
next one starts down. When two men climb at the same time, the<br />
upper one can cause the lower one to fall by slipping or stepping<br />
on his fingers.<br />
C.4.1 Traffic Protection In addition to traffic cones, markers, warning signs, and barricades,<br />
a vehicle or a heavy piece of equipment should be placed<br />
between the working area and oncoming traffic. Flashing warning<br />
signals should be used to alert drivers and pedestrians.<br />
Orange safety vests should be worn by personnel stationed at the<br />
surface when the manhole is located in a vehicular traffic area.<br />
C.4.2 Removing the Covers Manhole covers should be removed with a properly designed<br />
hook. Use of a pick ax, screwdriver, or small pry bar may result<br />
in injury. A suitable tool can be made from 3/4-inch round or hex<br />
stock. Two inches of one end should be bent at a right angle and<br />
the other end should be formed into a D-handle wide enough to<br />
accommodate both hands. Even with this tool, care must be exercised<br />
to prevent the cover from being dropped on the toes. The<br />
2-inch projection should be inserted into one of the holes in the<br />
cover, the handle grasped with both hands, and the cover lifted<br />
by straightening the legs which have been slightly bent at the<br />
knees.<br />
C.4.3 Other Precautions Other precautions which should be taken when entering a manhole<br />
are:<br />
Wear a hard hat.<br />
Wear coveralls or removable outer garment that can be readily<br />
removed when the work is completed.<br />
Wear boots or nonsparking safety shoes.<br />
Wear rubberized or waterproof gloves.<br />
Wear a safety harness with a stout rope attached.<br />
Do not smoke.<br />
Avoid touching yourself above the collar until you have<br />
cleaned your hands.<br />
C.4.4 Emergencies Every member of the crew should be instructed on procedures to<br />
be followed in cases of an emergency. It is the duty of each crew<br />
chief to have a list of emergency phone numbers, including the<br />
nearest hospital and ambulance service, police precinct, fire station,<br />
and rescue or general emergency number.<br />
C.4.5 Field Equipment The following equipment should be available for use:<br />
Blowers Gloves<br />
Breathing apparatus Hard Hats<br />
Coverall Harnesses<br />
First aid kits Manhole irons<br />
Emergency flashers Pick axes<br />
C-3
<strong>6712FR</strong> <strong>Refrigerated</strong> <strong>Sampler</strong><br />
Appendix C General Safety Procedures<br />
C.4.6 Lethal Atmospheres in<br />
Sewers<br />
C-4<br />
Flashlight Rain slickers<br />
Mirror Ropes<br />
Gas detectors Safety vests<br />
Gas masks Traffic cones<br />
Waders”<br />
The following is an article written by Dr. Richard D. Pomeroy,<br />
and published in the October 1980 issue of “Deeds & Data” of the<br />
WPCF. Dr. Pomeroy is particularly well known for his studies,<br />
over a period of nearly 50 years, in the field of the control of<br />
hydrogen sulfide and other odors in sewers and treatment plants.<br />
He has personally worked in a great many functioning sewers. In<br />
the earlier years he did so, he admits, with little knowledge of<br />
the grave hazards to which he exposed himself.<br />
“It is gratifying that the subject of hazards to people working in<br />
sewers is receiving much more attention than in past years, and<br />
good safety procedures are prescribed in various publications on<br />
this subject. It is essential that people know and use correct procedures.<br />
“It is less important to know just what the hazardous components<br />
of sewer atmospheres are, as safety precautions should in<br />
general be broadly applicable, but there should be a reasonable<br />
understanding of this subject. It is disturbing to see statements<br />
in print that do not reflect true conditions.<br />
“One of the most common errors is the assumption that people<br />
have died from a lack of oxygen. The human body is able to function<br />
very well with substantially reduced oxygen concentrations.<br />
No one worries about going to Santa Fe, New Mexico, (elev. 2,100<br />
meters), where the partial pressure of oxygen is equal to 16.2% (a<br />
normal atmosphere is about 21%) oxygen. “When first going<br />
there, a person may experience a little ‘shortness of breath’ following<br />
exercise.<br />
“People in good health are not afraid to drive over the high<br />
passes in the Rocky Mountains. At Loveland Pass, oxygen pressure<br />
is 13.2% of a normal atmosphere. At the top of Mt. Whitney,<br />
oxygen is equal to 12.2%t. Many hikers go there, and to higher<br />
peaks as well. After adequate acclimation, they may climb to the<br />
top of Mt. Everest, where oxygen is equal to only 6.7%.<br />
“The lowest oxygen concentrations that I have observed in a<br />
sewer atmosphere was 13 percent. It was in a sealed chamber,<br />
near sea level, upstream from an inverted siphon on a metropolitan<br />
trunk. A man would be foolish to enter the chamber. Without<br />
ventilation, he might die, but not from lack of oxygen.<br />
“It seems unlikely that anyone has ever died in a sewer from suffocation,<br />
that is, a lack of oxygen. Deaths have often been attributed<br />
to asphyxiation.’ This is a word which, according to the<br />
dictionary, is used to mean death from an atmosphere that does<br />
not support life. The word has sometimes been misinterpreted as<br />
meaning suffocation, which is only one kind of asphyxiation.<br />
“In nearly all cases of death in sewers, the real killer is hydrogen<br />
sulfide. It is important that this fact be recognized. Many cities<br />
diligently test for explosive gases, which is very important, and<br />
they may measure the oxygen concentration which usually is<br />
unimportant, but they rarely measure H2S. Death has occurred
<strong>6712FR</strong> <strong>Refrigerated</strong> <strong>Sampler</strong><br />
Appendix C General Safety Procedures<br />
where it is unlikely that there was any measurable reduction in<br />
the oxygen concentration. Waste water containing 2 mg per liter<br />
of dissolved sulfide, and at a pH of 7.0, can produce, in a chamber<br />
with high turbulence, a concentration of 300 PPM H2S, in the<br />
air. This is considered to be a lethal concentration. Many people<br />
have died from H2S, not only in sewers and industries, but also<br />
from swamps and from hot springs. In one resort area, at least<br />
five persons died from H2S poisoning before the people were<br />
ready to admit that H2S is not a therapeutic agent. Hardly a<br />
year passes in the US. without a sewer fatality from H2S as well<br />
as deaths elsewhere in the world.<br />
“The presence of H2S in a sewer atmosphere is easily determined.<br />
A bellows-and-ampoule type of tester is very satisfactory<br />
for the purpose, even though it is only crudely quantitative.<br />
When using a tester of this type, do not bring the air to the<br />
ampoule by way of a tube, as this may change the H2S concentration.<br />
Hang the ampoule in the air to be tested, with a suction<br />
tube to the bulb or bellows.<br />
“Lead acetate paper is very useful as a qualitative indicator. It<br />
cannot be used to estimate the amount of sulfide, but it will<br />
quickly turn black in an atmosphere containing only a tenth of a<br />
lethal concentration.<br />
“Electrodes or other similar electrical indicating devices for H2S<br />
in air have been marketed. Some of them are known to be unreliable,<br />
and we know of none that have proved dependable. Do not<br />
use one unless you check it at frequent intervals against air containing<br />
known H2S concentrations. A supposed safety device<br />
that is unreliable is worse than none at all.<br />
“Remember that the nose fails, too, when it comes to sensing<br />
dangerous concentrations of H2S. “Various other toxic gases have been mentioned in some publications.<br />
It is unlikely that any person has been asphyxiated in a<br />
sewer by any of those other gases, except possibly chlorine. The<br />
vapor of gasoline and other hydrocarbons is sometimes present in<br />
amounts that could cause discomfort and illness, but under that<br />
condition, the explosion hazard would be far more serious. The<br />
explosimeter tests, as well as the sense of smell, would warn of<br />
the danger. Pipelines in chemical plants might contain any number<br />
of harmful vapors. They, too, are sensed by smell and explosimeter<br />
tests if they get into the public sewer. Such occurrences<br />
are rare.<br />
“The attempt to instill a sense of urgency about real hazards is<br />
diluted if a man is told to give attention to a long list of things<br />
that in fact are irrelevant.<br />
“Be very careful to avoid high H2S concentrations, flammable<br />
atmospheres, and hazards of physical injuries. Remember that<br />
much H2S may be released by the stirring up of sludge in the<br />
bottom of a structure. Obey your senses in respect to irritating<br />
gases, such as chlorine (unconsciousness comes suddenly from<br />
breathing too much). Be cautious about strange odors. Do not<br />
determine percent oxygen in the air. There is a danger that the<br />
result will influence a man's thinking about the seriousness of<br />
C-5
<strong>6712FR</strong> <strong>Refrigerated</strong> <strong>Sampler</strong><br />
Appendix C General Safety Procedures<br />
C-6<br />
Gas Chemical<br />
Formula<br />
Common<br />
Properties<br />
Ammonia NH 3 Irritant and poisonous.<br />
Colorless with<br />
characteristic odor.<br />
Benzene C 6 H 6 Irritant, colorless<br />
anesthetic<br />
Carbon<br />
Bisulfide<br />
Carbon<br />
Dioxide<br />
Carbon<br />
Monoxide<br />
Carbon<br />
Tetra-<br />
Chloride<br />
CS 2<br />
CO 2<br />
Nearly odorless<br />
when pure, colorless,<br />
anesthetic.<br />
Poisonous.<br />
Asphyxiant, Colorless,<br />
odorless. When<br />
breathed in large<br />
quantities, may cause<br />
acid taste. Non-flammable.<br />
Not generally<br />
present in dangerous<br />
amounts unless an<br />
oxygen deficiency<br />
exists.<br />
CO Chemical asphyxiant.<br />
Colorless, odorless,<br />
tasteless.<br />
Flammable.<br />
Poisonous.<br />
Specific<br />
Gravity or<br />
Vapor<br />
Density<br />
Air = 1<br />
the real hazards. Most important, use ample ventilation, and do<br />
not enter a potentially hazardous structure except in a good<br />
safety harness with two men at the top who can lift you out.”<br />
Table C-1 Hazardous Gases<br />
Physiological<br />
Effect*<br />
0.60 Causes throat and<br />
eye irritation at<br />
0.05%, coughing<br />
at 0.17%. Short<br />
exposure at 0.5%<br />
to 1% fatal.<br />
2.77 Slight symptoms<br />
after several hours<br />
exposure at 0.16% to<br />
0.32%. 2% rapidly fatal.<br />
2.64 Very poisonous,<br />
irritating, vomiting,<br />
convulsions, psychic<br />
disturbance.<br />
1.53 Cannot be endured at<br />
10% more than a few<br />
minutes, even if subject<br />
is at rest and oxygen<br />
content is normal.<br />
Acts on respiratory<br />
nerves.<br />
0.97 Combines with hemoglobin<br />
of blood.<br />
Unconsciousness in 30<br />
min. at 0.2% to 0.25%.<br />
Fatal in 4 hours at<br />
0.1%. Headache in few<br />
hours at 0.02%.<br />
CCl 4 Heavy, ethereal odor. 5.3 Intestinal upset, loss of<br />
consciousness, possible<br />
renal damage, respiratory<br />
failure.<br />
Chlorine Cl 2 Irritant. Yellow-green<br />
color. Choking odor<br />
detectable in very low<br />
concentrations. Nonflammable.<br />
Formaldehyde<br />
Gasoline C 5 H 12<br />
to<br />
C 9 H 20<br />
CH 2 O Colorless, pungent suffocating<br />
odor.<br />
Volatile solvent.<br />
Colorless. Odor noticeable<br />
at 0.03%. Flammable.<br />
2.49 Irritates respiratory<br />
tract. Kills most animals<br />
in a very short<br />
time at 0.1%.<br />
Max<br />
Safe<br />
60 Min.<br />
Exposure<br />
ppm<br />
300<br />
to<br />
500<br />
3,000<br />
to<br />
5,000<br />
Max.<br />
Safe<br />
8 Hour<br />
Exposure<br />
ppm<br />
Explosive<br />
Range<br />
(% by vol.<br />
in air.)<br />
Limits<br />
lower/upper<br />
Likely<br />
Location<br />
of<br />
Highest<br />
Concentration<br />
85 16 25 Near top.<br />
Concentrates<br />
in closed upper<br />
spaces<br />
Most<br />
Common<br />
Sources<br />
Sewers, chemical<br />
feed rooms.<br />
25 1.3 7.1 At bottom. Industrial<br />
wastes,<br />
varnish, solvents.<br />
Simplest and<br />
Cheapest<br />
Safe Method<br />
of Testing<br />
Detectable<br />
odor at low<br />
concentrations<br />
Combustible<br />
gas indicator<br />
— 15 1.3 44.0 At bottom An insecticide Combustible<br />
gas indicator<br />
40,000<br />
to<br />
60,000<br />
5,000 — — At bottom;<br />
when heated<br />
may stratify<br />
at points<br />
above bottom.<br />
400 50 12.5 74.0 Near top, especially<br />
if present<br />
with illuminating<br />
gas.<br />
1,000<br />
to<br />
1,500<br />
Products of<br />
combustion,<br />
sewer gas,<br />
sludge. Also<br />
issues from carbonaceous<br />
strata.<br />
Manufactured<br />
gas, flue gas,<br />
products of<br />
combustion,<br />
motor exhausts.<br />
Fires of almost<br />
any kind.<br />
100 — — At bottom. Industrial<br />
wastes,<br />
solvent, cleaning<br />
4 1 — — At bottom. Chlorine cylinder<br />
and feed line<br />
leaks.<br />
1.07 Irritating to the nose. — 10 7.0 73.0 Near bottom. Incomplete<br />
combustion of<br />
organics. Common<br />
air pollutant,<br />
fungicide.<br />
3.0<br />
to<br />
4.0<br />
Anesthetic effects<br />
when inhaled. Rapidly<br />
fatal at 2.4%. Dangerous<br />
for short exposure<br />
at 1.1 to 2.2%.<br />
4,000<br />
to<br />
7,000<br />
1,000 1.3 6.0 At bottom. Service stations,<br />
garages, storage<br />
tanks, houses.<br />
Oxygen<br />
deficiency<br />
indicator<br />
CO ampoules.<br />
Detectable odor<br />
at low concentrations.<br />
Detectable odor<br />
at low concentrations.<br />
Detectable odor.<br />
1. Combustible<br />
gas indicator.<br />
2. Oxygen<br />
deficiency<br />
indicator.**
Hydrogen H 2 Simple asphyxiant.<br />
Colorless, odorless,<br />
tasteless. Flammable<br />
Hydrogen<br />
Cyanide<br />
Gas Chemical<br />
Formula<br />
HydrogenSulfide<br />
HCN Faint odor of bitter<br />
almonds.<br />
Colorless gas<br />
Common<br />
Properties<br />
H 2 S Irritant and poisonous<br />
volatile compound.<br />
Rotten egg odor in<br />
small concentrations.<br />
Exposure for 2 to 15<br />
min. at 0.01% impairs<br />
sense of smell. Odor<br />
not evident at high<br />
concentrations. Colorless.<br />
Flammable.<br />
Methane CH 4 Simple asphyxiant.<br />
Colorless, odorless,<br />
tasteless, flammable.<br />
Nitrogen N 2 Simple asphyxiant.<br />
Colorless, tasteless.<br />
Non-flammable. Principal<br />
constituent of air.<br />
(about 79%).<br />
Nitrogen<br />
Oxides<br />
NO<br />
N 2 O<br />
NO 2<br />
Colorless<br />
Colorless,<br />
sweet odor.<br />
Reddish-brown.<br />
Irritating odor.<br />
Deadly poison<br />
Oxygen O 2 Colorless, odorless,<br />
tasteless. Supports<br />
combustion.<br />
Ozone O 3 Irritant and poisonous.<br />
Strong electrical<br />
odor. Strong oxidizer.<br />
Colorless. At 1 ppm,<br />
strong sulfur-like odor.<br />
Sludge<br />
Gas<br />
—*** Mostly a simple<br />
asphyxiant. May be<br />
practically odorless,<br />
tasteless.<br />
Table C-1 Hazardous Gases (Continued)<br />
0.07 Acts mechanically to<br />
deprive tissues of oxygen.<br />
Does not support<br />
life.<br />
0.93 Slight symptoms<br />
appear upon exposure<br />
to 0.002% to 0.004%.<br />
0.3% rapidly fatal.<br />
Specific<br />
Gravity or<br />
Vapor<br />
Density<br />
Air = 1<br />
Physiological<br />
Effect*<br />
1.19 Impairs sense of smell,<br />
rapidly as concentration<br />
increases. Death<br />
in few minutes at 0.2%.<br />
Exposure to 0.07 to<br />
0.1% rapidly causes<br />
acute poisoning. Paralyzes<br />
respiratory center.<br />
0.55 Acts mechanically to<br />
deprive tissues of oxygen.<br />
Does not support<br />
life.<br />
<strong>6712FR</strong> <strong>Refrigerated</strong> <strong>Sampler</strong><br />
Appendix C General Safety Procedures<br />
— — 4.0 74.0 At top. Manufactured<br />
gas, sludge<br />
digestion tank<br />
gas, electrolysis<br />
of water. Rarely<br />
from rock strata.<br />
— 10 6.0 40.0 Near top. Insecticide and<br />
rodenticide.<br />
Max<br />
Safe<br />
60 Min.<br />
Exposure<br />
ppm<br />
200<br />
to<br />
300<br />
Probably<br />
no limit,<br />
provided<br />
oxygen<br />
percent-age<br />
is sufficient<br />
for<br />
life.<br />
Max.<br />
Safe<br />
8 Hour<br />
Exposure<br />
ppm<br />
20 4.3<br />
Explosive<br />
Range<br />
(% by vol.<br />
in air.)<br />
Limits<br />
lower/upper<br />
45.0<br />
Likely<br />
Location<br />
of<br />
Highest<br />
Concentration<br />
Near bottom,<br />
but may be<br />
above bottom<br />
if air is heated<br />
and highly<br />
humid.<br />
— 5.0 15.0 At top, increasing<br />
to certain<br />
depth.<br />
0.97 Physiologically inert. — — — — Near top, but<br />
may be found<br />
near bottom.<br />
1.04<br />
1.53<br />
1.58<br />
60 to 150 ppm cause<br />
irritation and coughing.<br />
Asphyxiant.<br />
100 ppm dangerous.<br />
200 ppm fatal.<br />
1.11 Normal air contains<br />
20.8% of O 2 . Man can<br />
tolerate down to 12%.<br />
Minimum safe 8 hour<br />
exposure, 14 to 16%.<br />
Below 10%, dangerous<br />
to life. Below 5 to 7%<br />
probably fatal.<br />
1.66 Max. naturally occurring<br />
level is 0.04 ppm.<br />
0.05 ppm causes irritation<br />
of eyes and nose. 1<br />
to 10 ppm causes<br />
headache, nausea; can<br />
cause coma. Symptoms<br />
similar to radiation<br />
damage.<br />
Variable Will not support life. No data. Would<br />
vary widely with<br />
composition.<br />
Most<br />
Common<br />
Sources<br />
Coal gas, petroleum,<br />
sewer gas.<br />
Fumes from<br />
blasting under<br />
some conditions.<br />
Sludge gas.<br />
Natural gas,<br />
sludge gas, manufactured<br />
gas,<br />
sewer gas. Strata<br />
of sedimentary<br />
origin. In<br />
swamps or<br />
marshes.<br />
Sewer gas.<br />
sludge gas. Also<br />
issues from<br />
some rock strata.<br />
50 10 — — Near bottom. Industrial<br />
wastes.<br />
Common air<br />
pollutant.<br />
— — — — Variable at different<br />
levels.<br />
Oxygen depletion<br />
from poor<br />
ventilation and<br />
absorption, or<br />
chemical consumption<br />
of oxygen.<br />
0.08 0.04 — — Near bottom. Where ozone is<br />
used for disinfection.<br />
5.3 19.3 Near top of<br />
structure.<br />
From digestion<br />
of sludge.<br />
Combustible gas<br />
indicator.<br />
Detector tube<br />
Simplest and<br />
Cheapest<br />
Safe Method<br />
of Testing<br />
1. H 2 S Ampoule.<br />
2. 5% by weight<br />
lead acetate<br />
solution.<br />
1. Combustible<br />
gas indicator<br />
2. Oxygen deficiency<br />
indicator.<br />
Oxygen<br />
deficiency<br />
indicator.<br />
NO 2 detector<br />
tube.<br />
Oxygen deficiency<br />
indicator.<br />
Detectable odor<br />
at 0.015 ppm.<br />
See components.<br />
C-7
<strong>6712FR</strong> <strong>Refrigerated</strong> <strong>Sampler</strong><br />
Appendix C General Safety Procedures<br />
Sulfur<br />
Dioxide<br />
C-8<br />
SO 2<br />
Toluene C 5 H 12<br />
to<br />
C 9 H 20<br />
Colorless, pungent<br />
odor. Suffocating, corrosive,<br />
poisonous,<br />
non-flammable.<br />
Colorless, benzene-like<br />
odor.<br />
Turpentine C 10 H 16 Colorless, Characteristic<br />
odor.<br />
2.26 Inflammation of the<br />
eyes. 400 to 500 ppm<br />
immediately fatal.<br />
3.14 At 200-500 ppm, headache,<br />
nausea, bad taste,<br />
lassitude.<br />
4.84 Eye irritation. Headache,<br />
dizziness, nausea,<br />
irritation of the<br />
kidneys.<br />
Xylene C 8 H 10 Colorless, flammable 3.66 Narcotic in high concentrations.<br />
less toxic<br />
than benzene.<br />
Table C-1 Hazardous Gases (Continued)<br />
50<br />
to<br />
100<br />
10 — — At bottom, can<br />
combine with<br />
water to form<br />
sulfurous acid.<br />
Industrial waste,<br />
combustion,<br />
common air pollutant.<br />
Detectable taste<br />
and odor at low<br />
concentration.<br />
200 100 1.27 7.0 At bottom. Solvent. Combustible gas<br />
indicator.<br />
— 100 At bottom. Solvent, used in<br />
paint.<br />
1. Detectable<br />
odor at low<br />
concentrations.<br />
2.Combustible<br />
gas indicator.<br />
— 100 1.1 7.0 At bottom. Solvent Combustible gas<br />
indicator.<br />
* Percentages shown represent volume of gas in air.<br />
** For concentration over 0.3%.<br />
***Mostly methane and carbon dioxide with small amounts of hydrogen, nitrogen, hydrogen sulfide, and oxygen; occasionally traces of carbon monoxide.
MODEL <strong>6712FR</strong><br />
REFRIGERATOR ASSEMBLY<br />
DWG 60-9002-056<br />
<strong>6712FR</strong> <strong>Refrigerated</strong> <strong>Sampler</strong><br />
Appendix D Replacement Parts<br />
D-9
<strong>6712FR</strong> <strong>Refrigerated</strong> <strong>Sampler</strong><br />
Appendix D Replacement Parts<br />
D-10
MODEL <strong>6712FR</strong><br />
REFRIGERATOR ASSEMBLY<br />
DWG 60-9002-056<br />
<strong>6712FR</strong> <strong>Refrigerated</strong> <strong>Sampler</strong><br />
Appendix D Replacement Parts<br />
D-11
<strong>6712FR</strong> <strong>Refrigerated</strong> <strong>Sampler</strong><br />
Appendix D Replacement Parts<br />
D-12
MODEL 6712<br />
CONTROLLER - OUTSIDE<br />
DWG 60-9002-058<br />
<strong>6712FR</strong> <strong>Refrigerated</strong> <strong>Sampler</strong><br />
Appendix D Replacement Parts<br />
D-13
<strong>6712FR</strong> <strong>Refrigerated</strong> <strong>Sampler</strong><br />
Appendix D Replacement Parts<br />
D-14
MODEL 6712<br />
CONTROLLER - INSIDE<br />
DWG 60-9002-058<br />
<strong>6712FR</strong> <strong>Refrigerated</strong> <strong>Sampler</strong><br />
Appendix D Replacement Parts<br />
D-15
<strong>6712FR</strong> <strong>Refrigerated</strong> <strong>Sampler</strong><br />
Appendix D Replacement Parts<br />
D-16<br />
***<br />
***<br />
Caution: Danger of explosion if lithium battery is incorrectly<br />
replaced. Replace with the same type, ensuring correct polarity.<br />
Do not dispose of lithium battery in fire.
MODEL 6712<br />
PUMP GEAR CASE<br />
ASSEMBLY<br />
DWG 60-9002-058<br />
<strong>6712FR</strong> <strong>Refrigerated</strong> <strong>Sampler</strong><br />
Appendix D Replacement Parts<br />
D-17
<strong>6712FR</strong> <strong>Refrigerated</strong> <strong>Sampler</strong><br />
Appendix D Replacement Parts<br />
D-18
<strong>6712FR</strong> <strong>Refrigerated</strong> <strong>Sampler</strong><br />
Appendix E Accessories List<br />
E.1 Order Information Prices available on request. Additional items appear in Appendix<br />
D, Replacement Parts. Many other items are available. To order<br />
any item, contact your sales representative or the factory. Note<br />
that the part name listed on your order acknowledgment and<br />
invoice may be different than the item name listed here. When<br />
examining these documents, use the part number for reference.<br />
Isco, Inc.<br />
P.O. Box 82531<br />
Lincoln, NE 68501<br />
Telephone Within U.S.A.<br />
Toll free: (800) 228-4373<br />
Outside U.S.A:(402) 464-0231<br />
Fax: (402) 465-3022<br />
E.2 <strong>Sampler</strong>s<br />
<strong>6712FR</strong> <strong>Refrigerated</strong> <strong>Sampler</strong> 120V . . . . . . . . . . . . . . . . . . . . . . . . . . . . . . . . . . . . . . . . . . . . . . . . . . . . .68-6710-072<br />
(Includes controller, distributor arm, instruction manual and pocket guide.)<br />
<strong>6712FR</strong> <strong>Refrigerated</strong> <strong>Sampler</strong> 230V . . . . . . . . . . . . . . . . . . . . . . . . . . . . . . . . . . . . . . . . . . . . . . . . . . . . .68-6710-073<br />
(Includes controller, distributor arm, instruction manual and pocket guide.)<br />
<strong>6712FR</strong> <strong>Refrigerated</strong> <strong>Sampler</strong> 120V with Temperature Logger. . . . . . . . . . . . . . . . . . . . . . . . . . . . . . . .68-6710-144<br />
(Includes controller, distributor arm, instruction manual and pocket guide.)<br />
<strong>6712FR</strong> <strong>Refrigerated</strong> <strong>Sampler</strong> 230V with Temperature Logger. . . . . . . . . . . . . . . . . . . . . . . . . . . . . . . .68-6710-145<br />
(Includes controller, distributor arm, instruction manual and pocket guide.)<br />
6712 <strong>Sampler</strong> Controller. . . . . . . . . . . . . . . . . . . . . . . . . . . . . . . . . . . . . . . . . . . . . . . . . . . . . . . . . . . . . . .68-6710-074<br />
(Includes 2 Pump Tubes.)<br />
6712 <strong>Sampler</strong>s Pocket Guide . . . . . . . . . . . . . . . . . . . . . . . . . . . . . . . . . . . . . . . . . . . . . . . . . . . . . . . . . . .60-9003-589<br />
<strong>6712FR</strong> <strong>Refrigerated</strong> <strong>Sampler</strong> Instruction Manual . . . . . . . . . . . . . . . . . . . . . . . . . . . . . . . . . .60-9003-590<br />
E.3 Bottle Kits<br />
24-Bottle Kit (350-milliliter glass bottles) . . . . . . . . . . . . . . . . . . . . . . . . . . . . . . . . . . . . . . . . . . . . . . . . .68-6700-033<br />
(Includes bottles; bottle rack; configuration kit; and two discharge tubes).<br />
24-Bottle Kit (1,000-milliliter polypropylene bottles) . . . . . . . . . . . . . . . . . . . . . . . . . . . . . . . . . . . . . . . .68-6700-032<br />
(Includes bottles; bottle rack; configuration kit; and two discharge tubes).<br />
12-Bottle Kit (2.5-liter polyethylene bottles) . . . . . . . . . . . . . . . . . . . . . . . . . . . . . . . . . . . . . . . . . . . . . . .68-6700-058<br />
(Includes bottles; bottle rack; configuration kit; and two discharge tubes).<br />
8-Bottle Kit (1.8-liter glass bottles) . . . . . . . . . . . . . . . . . . . . . . . . . . . . . . . . . . . . . . . . . . . . . . . . . . . . . .68-6700-035<br />
(Includes bottles; bottle rack; configuration kit; and two discharge tubes).<br />
8-Bottle Kit (2.0-liter polyethylene bottles) . . . . . . . . . . . . . . . . . . . . . . . . . . . . . . . . . . . . . . . . . . . . . . . .68-6700-034<br />
(Includes bottles; bottle rack; configuration kit; and two discharge tubes).<br />
2-Bottle Kit (7.5-liter polyethylene bottle) . . . . . . . . . . . . . . . . . . . . . . . . . . . . . . . . . . . . . . . . . . . . . . . . .68-6700-036<br />
(Includes bottles, configuration kit and two discharge tubes).<br />
2-Bottle Kit (9.4-liter glass bottles) . . . . . . . . . . . . . . . . . . . . . . . . . . . . . . . . . . . . . . . . . . . . . . . . . . . . . .68-6700-037<br />
(Includes bottles; configuration kit and two discharge tubes).<br />
1-Bottle Kit (9.4-liter polyethylene bottle) . . . . . . . . . . . . . . . . . . . . . . . . . . . . . . . . . . . . . . . . . . . . . . . . .68-6700-038<br />
(Includes bottle; configuration kit; one unlined lid; 2 lids and two discharge tubes).<br />
E-1
<strong>6712FR</strong> <strong>Refrigerated</strong> <strong>Sampler</strong><br />
Appendix E Accessories List<br />
1-Bottle Kit (9.4-liter glass bottle) . . . . . . . . . . . . . . . . . . . . . . . . . . . . . . . . . . . . . . . . . . . . . . . . . . . . . . .68-6700-039<br />
(Includes bottle; configuration kit; 2 lids and two discharge tubes).<br />
1-Bottle Kit (15.0-liter polyethylene bottle) . . . . . . . . . . . . . . . . . . . . . . . . . . . . . . . . . . . . . . . . . . . . . . . .68-6700-040<br />
(Includes bottle; configuration kit; 2 lids and two discharge tubes).<br />
1-Bottle Kit (18.5-liter glass bottle) . . . . . . . . . . . . . . . . . . . . . . . . . . . . . . . . . . . . . . . . . . . . . . . . . . . . . .68-6700-042<br />
(Includes bottle; configuration kit; 2 lids and two discharge tubes).<br />
1-Bottle Kit (20.5-liter polyethylene bottle) . . . . . . . . . . . . . . . . . . . . . . . . . . . . . . . . . . . . . . . . . . . . . . . .68-6700-041<br />
(Includes bottle; configuration kit; 2 lids and two discharge tubes).<br />
E.4 Bottle Racks,<br />
Retaining Rings,<br />
Discharge Tubes,<br />
Distributor Arm<br />
Bottle Rack for 24-Bottle Kit (350-milliliter Glass Bottles and 8-Bottle Kits) . . . . . . . . . . . . . . . . . . . .60-2744-008<br />
Bottle Rack for 24-Bottle Kit (1,000-milliliter Polypropylene Bottles). . . . . . . . . . . . . . . . . . . . . . . . . . .60-2744-007<br />
Bottle Rack for 12-Bottle Kit . . . . . . . . . . . . . . . . . . . . . . . . . . . . . . . . . . . . . . . . . . . . . . . . . . . . . . . . . . .60-9004-151<br />
Retaining Ring for 24-Bottle Kit (350-milliliter Glass Bottles) . . . . . . . . . . . . . . . . . . . . . . . . . . . . . . . .60-2724-020<br />
Retaining Ring for 24-Bottle Kit (1,000-milliliter Polypropylene Bottles). . . . . . . . . . . . . . . . . . . . . . . .60-3703-058<br />
Retaining Ring for 12-Bottle Kit. . . . . . . . . . . . . . . . . . . . . . . . . . . . . . . . . . . . . . . . . . . . . . . . . . . . . . . . .60-2903-127<br />
8-Bottle Adaptor for 8-Bottle Rack. . . . . . . . . . . . . . . . . . . . . . . . . . . . . . . . . . . . . . . . . . . . . . . . . . . . . . .60-2743-024<br />
Bottle Locating Base for 6700FR 2-Bottle Kits . . . . . . . . . . . . . . . . . . . . . . . . . . . . . . . . . . . . . . . . . . . .60-2723-102<br />
Discharge Tube for 8-Bottle, 12-Bottle, and 24-Bottle Kits . . . . . . . . . . . . . . . . . . . . . . . . . . . . . . . . . . .60-9003-279<br />
Discharge Tube for 2-Bottle Kits . . . . . . . . . . . . . . . . . . . . . . . . . . . . . . . . . . . . . . . . . . . . . . . . . . . . . . . .60-9003-283<br />
Discharge Tube for 1-Bottle Kit (9.4-liter Polyethylene Bottle and<br />
9400-milliliter Glass Bottle). . . . . . . . . . . . . . . . . . . . . . . . . . . . . . . . . . . . . . . . . . . . . . . . . . . . . . . . . .60-9003-262<br />
Discharge Tube for 1-Bottle Kit (15.0-liter Polyethylene Bottle) . . . . . . . . . . . . . . . . . . . . . . . . . . . . . . .60-9003-264<br />
Discharge Tube for 1-Bottle Kit (18.5-liter Glass Bottle and<br />
20.5-liter Polyethylene Bottle) . . . . . . . . . . . . . . . . . . . . . . . . . . . . . . . . . . . . . . . . . . . . . . . . . . . . . . . .60-9003-266<br />
Bulk Discharge Tube (10 foot Length) . . . . . . . . . . . . . . . . . . . . . . . . . . . . . . . . . . . . . . . . . . . . . . . . . . . .60-6700-046<br />
Bulk Discharge Tube (50 foot Length) . . . . . . . . . . . . . . . . . . . . . . . . . . . . . . . . . . . . . . . . . . . . . . . . . . . .60-6700-047<br />
Distributor Arm (includes nut). . . . . . . . . . . . . . . . . . . . . . . . . . . . . . . . . . . . . . . . . . . . . . . . . . . . . . . . . .60-9004-050<br />
E.5 Bulk Sets of Bottles<br />
with Lids<br />
Set of 24, 350-milliliter Glass Bottles with Teflon Lined Lids . . . . . . . . . . . . . . . . . . . . . . . . . . . . . . . . .68-2100-001<br />
Set of 100, 350-milliliter Glass Bottles with Teflon Lined Lids . . . . . . . . . . . . . . . . . . . . . . . . . . . . . . . .68-3700-048<br />
Set of 24, 1,000-milliliter Polypropylene Bottles with Polyethylene Foam Lined lids). . . . . . . . . . . . . .68-2100-007<br />
Set of 100, 1,000-milliliter Polypropylene Bottles with Polyethylene Foam Lined lids . . . . . . . . . . . . .68-3700-046<br />
Set of 500, 1,000-milliliter Polypropylene Bottles with Polyethylene Foam Lined lids . . . . . . . . . . . . .68-3700-047<br />
Set of 12, 2.5-liter Polyethylene Bottles with Lined Lids . . . . . . . . . . . . . . . . . . . . . . . . . . . . . . . . . . . . .68-6700-059<br />
Set of 100, 2.5-liter Polyethylene Bottles with Lined Lids . . . . . . . . . . . . . . . . . . . . . . . . . . . . . . . . . . . .68-6700-060<br />
Set of 8, 1.8-liter Glass Bottles with Teflon Lined Lids . . . . . . . . . . . . . . . . . . . . . . . . . . . . . . . . . . . . . .68-2740-027<br />
Set of 100, 1.8-liter Glass Bottles with Teflon Lined Lids . . . . . . . . . . . . . . . . . . . . . . . . . . . . . . . . . . . .68-3720-030<br />
Set of 8, 2.0-liter Polyethylene Bottle with Unlined Lids . . . . . . . . . . . . . . . . . . . . . . . . . . . . . . . . . . . . .68-2740-026<br />
Set of 100, 2.0-liter Polyethylene Bottle with Unlined Lids . . . . . . . . . . . . . . . . . . . . . . . . . . . . . . . . . . .68-3720-028<br />
7.5-liter Polyethylene Bottle . . . . . . . . . . . . . . . . . . . . . . . . . . . . . . . . . . . . . . . . . . . . . . . . . . . . . . . . . . . .299-0013-07<br />
9.4-liter (2 1 /2-gallon) Glass Bottle with Two Teflon Lined Lids . . . . . . . . . . . . . . . . . . . . . . . . . . . . . . . .68-2930-006<br />
9.4-liter (2 1 /2-gallon) Polyethylene Bottle with Two Unlined Lid . . . . . . . . . . . . . . . . . . . . . . . . . . . . . . .68-2740-009<br />
15.0-liter (4-gallon) Polyethylene Bottle with Two Unlined Lids . . . . . . . . . . . . . . . . . . . . . . . . . . . . . . .68-2930-004<br />
18.5-liter (5 gallon) Glass Bottle with Two Teflon lined Lids . . . . . . . . . . . . . . . . . . . . . . . . . . . . . . . . . .68-6700-057<br />
20.5-liter (5 1 /2-gallon) Polyethylene Bottle with Two Unlined Lids . . . . . . . . . . . . . . . . . . . . . . . . . . . . .68-2930-005<br />
E-2
E.6 Pump Tubes, Suction<br />
Line, Strainers<br />
<strong>6712FR</strong> <strong>Refrigerated</strong> <strong>Sampler</strong><br />
Appendix E Accessories List<br />
Pump Tube (Qty 5) . . . . . . . . . . . . . . . . . . . . . . . . . . . . . . . . . . . . . . . . . . . . . . . . . . . . . . . . . . . . . . . . . . .68-6700-062<br />
Pump Tube (Qty 10) . . . . . . . . . . . . . . . . . . . . . . . . . . . . . . . . . . . . . . . . . . . . . . . . . . . . . . . . . . . . . . . . . .68-6700-044<br />
Pump Tube (Qty 25) . . . . . . . . . . . . . . . . . . . . . . . . . . . . . . . . . . . . . . . . . . . . . . . . . . . . . . . . . . . . . . . . . .68-6700-045<br />
Weighted Polypropylene Strainer with 10 foot Suction Line . . . . . . . . . . . . . . . . . . . . . . . . . . . . . . . . . .60-3704-071<br />
Weighted Polypropylene Strainer with 25 foot Suction Line . . . . . . . . . . . . . . . . . . . . . . . . . . . . . . . . . .60-3704-072<br />
Teflon Suction Line (10 foot length) . . . . . . . . . . . . . . . . . . . . . . . . . . . . . . . . . . . . . . . . . . . . . . . . . . . . . .60-1683-146<br />
Teflon Suction Line (25 foot length) . . . . . . . . . . . . . . . . . . . . . . . . . . . . . . . . . . . . . . . . . . . . . . . . . . . . . .60-2703-114<br />
Bulk Vinyl Suction Line (100 foot length) . . . . . . . . . . . . . . . . . . . . . . . . . . . . . . . . . . . . . . . . . . . . . . . . .68-1680-058<br />
Bulk Vinyl Suction Line (500 foot length) . . . . . . . . . . . . . . . . . . . . . . . . . . . . . . . . . . . . . . . . . . . . . . . . .68-1680-059<br />
3 /8-inch Vinyl Suction Line Accessory Kit (includes tube coupling, clamp, and instructions) . . . . . . . . .68-3700-007<br />
CPVC Strainer. . . . . . . . . . . . . . . . . . . . . . . . . . . . . . . . . . . . . . . . . . . . . . . . . . . . . . . . . . . . . . . . . . . . . . .60-3704-066<br />
Polypropylene Weighted Strainer. . . . . . . . . . . . . . . . . . . . . . . . . . . . . . . . . . . . . . . . . . . . . . . . . . . . . . . .60-1394-071<br />
Stainless Steel Low Flow Strainer . . . . . . . . . . . . . . . . . . . . . . . . . . . . . . . . . . . . . . . . . . . . . . . . . . . . . . .60-2903-079<br />
Stainless Steel Strainer . . . . . . . . . . . . . . . . . . . . . . . . . . . . . . . . . . . . . . . . . . . . . . . . . . . . . . . . . . . . . . .60-1684-110<br />
E.7 Data Collection<br />
Devices and Cables<br />
581 Rapid Transfer Device (RTD) . . . . . . . . . . . . . . . . . . . . . . . . . . . . . . . . . . . . . . . . . . . . . . . . . . . . . . .60-9004-027<br />
Power Cable 581 Rapid Transfer Device (RTD). . . . . . . . . . . . . . . . . . . . . . . . . . . . . . . . . . . . . . . . . . . . .60-9004-077<br />
Flowlink 4 for Windows Software – New License . . . . . . . . . . . . . . . . . . . . . . . . . . . . . . . . . . . . . . . . . . .60-2544-047<br />
Flowlink 4 for Windows Software – Upgrade . . . . . . . . . . . . . . . . . . . . . . . . . . . . . . . . . . . . . . . . . . . . . .60-2544-048<br />
SAMPLINK Software (Includes Instruction Manual). . . . . . . . . . . . . . . . . . . . . . . . . . . . . . . . . . . . . . . .60-3774-013<br />
Computer Connect Cable (25-pin) . . . . . . . . . . . . . . . . . . . . . . . . . . . . . . . . . . . . . . . . . . . . . . . . . . . . . . .60-2544-040<br />
Computer Connect Cable (9-pin) . . . . . . . . . . . . . . . . . . . . . . . . . . . . . . . . . . . . . . . . . . . . . . . . . . . . . . . .60-2544-044<br />
Connector to Attach Non-Isco Flow Meter to Customer Supplied Cable . . . . . . . . . . . . . . . . . . . . . . . . .68-1680-060<br />
Serial Output Connect Cable (for use with the periodic serial output feature). . . . . . . . . . . . . . . . . . . .60-9004-263<br />
External 12-volt DC Power Cable. . . . . . . . . . . . . . . . . . . . . . . . . . . . . . . . . . . . . . . . . . . . . . . . . . . . . . . .60-1394-023<br />
Flow-Meter to Two-<strong>Sampler</strong>s Cable . . . . . . . . . . . . . . . . . . . . . . . . . . . . . . . . . . . . . . . . . . . . . . . . . . . . . .60-3004-018<br />
Dual <strong>Sampler</strong> Mode Interconnect Cable . . . . . . . . . . . . . . . . . . . . . . . . . . . . . . . . . . . . . . . . . . . . . . . . . .60-3704-065<br />
Dual <strong>Sampler</strong> Mode to Flow-Meter Cable . . . . . . . . . . . . . . . . . . . . . . . . . . . . . . . . . . . . . . . . . . . . . . . . .60-3704-080<br />
Non-Isco Flow-Meter to <strong>Sampler</strong> Cable . . . . . . . . . . . . . . . . . . . . . . . . . . . . . . . . . . . . . . . . . . . . . . . . . . .60-1394-077<br />
Power Cable for 581 Rapid Transfer Device (RTD) . . . . . . . . . . . . . . . . . . . . . . . . . . . . . . . . . . . . . . . . . .60-9004-077<br />
<strong>Sampler</strong> to Flow Meter /1640 Liquid Level Actuator “Y” Cable . . . . . . . . . . . . . . . . . . . . . . . . . . . . . . . .60-3004-019<br />
<strong>Sampler</strong> to Flow Meter Cable . . . . . . . . . . . . . . . . . . . . . . . . . . . . . . . . . . . . . . . . . . . . . . . . . . . . . . . . . . .60-3004-107<br />
Solar Panel “Y” Cable . . . . . . . . . . . . . . . . . . . . . . . . . . . . . . . . . . . . . . . . . . . . . . . . . . . . . . . . . . . . . . . . .60-3004-098<br />
Solar Panel/Interrogator. Extension Cable . . . . . . . . . . . . . . . . . . . . . . . . . . . . . . . . . . . . . . . . . . . . . . . .60-2544-028<br />
Solar Panel Cable (25 foot length) . . . . . . . . . . . . . . . . . . . . . . . . . . . . . . . . . . . . . . . . . . . . . . . . . . . . . . .60-3004-097<br />
Rain Gauge/Refrigerator Temperature Sensor “Y” cable . . . . . . . . . . . . . . . . . . . . . . . . . . . . . . . . . . . . .60-9004-294<br />
E.8 12-Volt Power Sources<br />
913 High Capacity Power Pack (120-volt) . . . . . . . . . . . . . . . . . . . . . . . . . . . . . . . . . . . . . . . . . . . . . . . . .60-1684-088<br />
914 Battery-Backed Power Pack (120-volt) . . . . . . . . . . . . . . . . . . . . . . . . . . . . . . . . . . . . . . . . . . . . . . . .60-3004-130<br />
921 Nickel-Cadmium Battery . . . . . . . . . . . . . . . . . . . . . . . . . . . . . . . . . . . . . . . . . . . . . . . . . . . . . . . . . . .60-1684-040<br />
923 High Capacity Power Pack (240-volt) . . . . . . . . . . . . . . . . . . . . . . . . . . . . . . . . . . . . . . . . . . . . . . . . .60-1684-093<br />
924 Battery-Backed Power Pack (240-volt) . . . . . . . . . . . . . . . . . . . . . . . . . . . . . . . . . . . . . . . . . . . . . . . .60-3004-160<br />
947 Lead-Acid Battery . . . . . . . . . . . . . . . . . . . . . . . . . . . . . . . . . . . . . . . . . . . . . . . . . . . . . . . . . . . . . . . .60-3004-106<br />
Manual Body - Power Products Guide . . . . . . . . . . . . . . . . . . . . . . . . . . . . . . . . . . . . . . . . . . . . . . . . . . . .60-9003-092<br />
E-3
<strong>6712FR</strong> <strong>Refrigerated</strong> <strong>Sampler</strong><br />
Appendix E Accessories List<br />
E.9 Modules, Rain Gauges,<br />
& Interfacing<br />
Instruments<br />
(Note: Additional accessories for modules and interfacing instruments appear in the accessories list at the back of<br />
the manual for each module or instrument.)<br />
701 pH Module with Double Junction pH Sensor with Temperature Sensor . . . . . . . . . . . . . . . . . . . . .68-6700-052<br />
710 Ultrasonic Flow Module . . . . . . . . . . . . . . . . . . . . . . . . . . . . . . . . . . . . . . . . . . . . . . . . . . . . . . . . . . . .68-6700-049<br />
720 Submerged Probe Module, 10 ft range . . . . . . . . . . . . . . . . . . . . . . . . . . . . . . . . . . . . . . . . . . . . . . . .68-6700-068<br />
720 Submerged Probe Module, 30 ft range . . . . . . . . . . . . . . . . . . . . . . . . . . . . . . . . . . . . . . . . . . . . . . . .68-6700-069<br />
730 Bubbler Flow Module . . . . . . . . . . . . . . . . . . . . . . . . . . . . . . . . . . . . . . . . . . . . . . . . . . . . . . . . . . . . . .68-6700-050<br />
780 Analog Interface Module . . . . . . . . . . . . . . . . . . . . . . . . . . . . . . . . . . . . . . . . . . . . . . . . . . . . . . . . . . .68-6700-048<br />
674 Rain Gauge (.01-inch tip) . . . . . . . . . . . . . . . . . . . . . . . . . . . . . . . . . . . . . . . . . . . . . . . . . . . . . . . . . . .60-3284-001<br />
674 Rain Gauge (0.1-millimeter tip). . . . . . . . . . . . . . . . . . . . . . . . . . . . . . . . . . . . . . . . . . . . . . . . . . . . . .68-3280-001<br />
1640 Liquid Level Actuator . . . . . . . . . . . . . . . . . . . . . . . . . . . . . . . . . . . . . . . . . . . . . . . . . . . . . . . . . . . .60-1644-000<br />
4-20 mA <strong>Sampler</strong> Input Interface. . . . . . . . . . . . . . . . . . . . . . . . . . . . . . . . . . . . . . . . . . . . . . . . . . . . . . . .60-3704-075<br />
Refrigerator Temperature Sensor with 5 ft (1.55 m) cable . . . . . . . . . . . . . . . . . . . . . . . . . . . . . . . . . . . .68-6700-136<br />
E.10 SDI-12 Data<br />
Acquisition Connect<br />
Cables<br />
Note: Y-connect cables can be combined with other Y-connect cables or SDI-12 adapter cables if multiple SDI-12<br />
devices are to be connected.<br />
Rain Gauge Y-Connect Cable . . . . . . . . . . . . . . . . . . . . . . . . . . . . . . . . . . . . . . . . . . . . . . . . . . . . . . . . . . .60-9004-294<br />
(This cable allows connection of 2 of the following: rain gauge, SDI-12 adapter cable, SDI-12 Y-connect cable,<br />
I/O adapter, temperature sensor.)<br />
YSI SDI-12 Adapter Cable . . . . . . . . . . . . . . . . . . . . . . . . . . . . . . . . . . . . . . . . . . . . . . . . . . . . . . . . . . . . .60-9004-337<br />
YSI SDI-12 Y-Connect Cable. . . . . . . . . . . . . . . . . . . . . . . . . . . . . . . . . . . . . . . . . . . . . . . . . . . . . . . . . . . .60-9004-338<br />
(This cable allows connection of a YSI SDI-12 sonde and an Isco 674 Rain Gauge.)<br />
Hydrolab Quanta SDI-12 Adapter Cable . . . . . . . . . . . . . . . . . . . . . . . . . . . . . . . . . . . . . . . . . . . . . . . . . .60-9004-339<br />
Hydrolab Quanta SDI-12 Y-Connect Cable . . . . . . . . . . . . . . . . . . . . . . . . . . . . . . . . . . . . . . . . . . . . . . . .60-9004-340<br />
(This cable allows connection of a Hydrolab Quanta SDI-12 sonde and an Isco 674 Rain Gauge.)<br />
SDI-12 Adapter Cable (6 foot length, no connector) . . . . . . . . . . . . . . . . . . . . . . . . . . . . . . . . . . . . . . . . .60-9004-341<br />
(This is for use with a customer supplied connector to an SDI-12 device.)<br />
SDI-12 Y-Connect Cable (6 foot length, no connector). . . . . . . . . . . . . . . . . . . . . . . . . . . . . . . . . . . . . . . .60-9004-342<br />
(This is for use with a customer supplied connector to an SDI-12 device and an Isco 674 Rain Gauge.)<br />
E-4
Index<br />
A<br />
Accessories<br />
bottle racks E-2<br />
bulk bottles E-2<br />
bulk discharge tubing E-3<br />
cables E-3<br />
data collection accessories E-3<br />
power sources and battery chargers E-3<br />
pump tube E-3<br />
refrigerator temperature sensor E-4<br />
retaining rings E-2<br />
strainers E-3<br />
suction line E-3<br />
Alkaline battery<br />
battery warning 7-13<br />
opening controller case 7-10<br />
replacing 7-13<br />
Analog output 5-31<br />
B<br />
Backlighting 5-26<br />
Bottle kits<br />
installing 2-3<br />
Bottle Number Signal 5-27<br />
Bottles-per-sample distribution 4-6, 5-16<br />
C<br />
Cables<br />
Master/Slave-to-Flow-Meter Cable 5-25<br />
Calendar 3-5<br />
setting clock and calendar 3-5, 7-4<br />
Calibration<br />
during a manual pause 4-12<br />
sample volumes 4-13<br />
Cleaning protocols 7-2<br />
Clock<br />
setting clock and calendar 3-5, 7-4<br />
Clock start-time menu 3-6<br />
Combined results report<br />
see Sampling reports<br />
Compatible Isco products 1-3<br />
Configuring reports 4-18<br />
Construction<br />
compact and standard sampler 1-7<br />
Continuous sampling 2-12, 4-6, 5-17<br />
Controller<br />
mounting on refrigerator 2-1<br />
Count Switched Distribution<br />
<strong>Sampler</strong> Enable 5-19<br />
D<br />
Data collection accessories<br />
accessories list E-3<br />
Debris deflectors<br />
attaching to suction line and strainers 2-7<br />
Desiccant<br />
opening controller case 7-10<br />
recharging and replacing 7-11<br />
safety notes about recharging 7-11<br />
Diagnostic tests<br />
distributor test 7-7<br />
Diagnostics 7-6<br />
Dialout alarms 4-16, 5-32<br />
Display Backlighting 5-26<br />
Distribution 4-6, 5-16<br />
bottles-per-sample distribution 4-6, 5-16<br />
continuous sampling 4-6, 5-17<br />
<strong>6712FR</strong> <strong>Refrigerated</strong> <strong>Sampler</strong><br />
count-switched distribution 5-16<br />
event pacing 5-13<br />
multiple-bottle compositing 5-16<br />
random-interval pacing 5-15<br />
Samples per bottle 4-6, 5-16<br />
sequential distribution 4-6, 5-16<br />
time-switched distribution 5-16<br />
Distributor arm<br />
moving arm 4-16<br />
E<br />
Enable<br />
see <strong>Sampler</strong> enable<br />
Error messages 7-14<br />
Event marks 5-26<br />
3-second pulse 5-26<br />
master/slave sampling 5-25<br />
timing diagram 5-27<br />
variable-duration pulse 5-26<br />
Event pacing 5-13<br />
Extended programming<br />
extended programming features 1-5–??<br />
one-part and two-part programs 5-1<br />
showing extended screens 3-1, 4-1, 5-1<br />
F<br />
First valid day 4-8, 5-23<br />
Flow pacing 4-5<br />
G<br />
Grab samples 4-12, 4-14<br />
H<br />
Hardware set-up<br />
master/slave sampling 5-25<br />
Hardware setup 5-30<br />
I<br />
I/O pin programming 5-31<br />
Installing<br />
locating base for 2-bottle kit 2-5<br />
suction line 2-10<br />
Interrupting<br />
interrupting a running program 4-11<br />
manual paused operation 4-11<br />
L<br />
Line rinses 5-12<br />
Liquid detector enable/disable 5-24<br />
Locating base<br />
2-bottle kit 2-5<br />
M<br />
Maintenance<br />
alkaline battery 7-13<br />
cleaning<br />
guidelines 7-1<br />
protocols for bottles and tubing 7-2<br />
maintenance programming screens 7-3<br />
diagnostics 7-6<br />
pump counts for pump tube warning 7-8<br />
pump tube alarm 7-8<br />
reinitializing 7-7<br />
opening controller case 7-10<br />
servicing the refrigerator<br />
electrical system 7-15<br />
refrigeration system 7-18
Manual functions 4-13<br />
calibrate volume 4-13<br />
grab samples 4-13<br />
moving distributor 4-16<br />
running pump manually 4-16<br />
Manual paused operation 4-11–??<br />
Master/slave sampling 5-25<br />
event marks 5-25<br />
sampler enable 5-25<br />
Master/Slave-to-Flow-Meter Cable 5-25<br />
Materials<br />
used in sampler construction 1-7<br />
Memory 1-4, 5-33<br />
capacity 1-2, 5-34<br />
creating partitions 5-33<br />
data-storage interval 5-33<br />
partition sizes 5-33<br />
roll-over 5-34<br />
sampling results 5-33<br />
stored data will be lost! 5-1<br />
triggered 5-34<br />
Menu screens 3-3<br />
Module summary report<br />
see Sampling reports<br />
Modules<br />
700 Series Modules 1-2<br />
displayed readings 4-11<br />
Multiple-bottle compositing 5-16<br />
N<br />
Nonuniform time pacing 5-15<br />
O<br />
One-part programs 5-1<br />
Operating<br />
running sampling programs 4-10, 5-23<br />
Other Functions<br />
see Hardware setup 4-13, 5-24<br />
see Maintenance 4-13, 5-24<br />
see Manual functions 4-13, 5-24<br />
see Programming Style 4-13, 5-24<br />
P<br />
Pacing 4-5, 5-12<br />
event pacing 5-13<br />
flow pacing 4-5<br />
nonuniform clock-time pacing 5-15<br />
nonuniform time pacing 5-15<br />
random-interval pacing 5-15<br />
time pacing 4-5, 5-12<br />
trigger pacing 4-5<br />
Pause and resume 5-23<br />
Periodic serial output 5-32<br />
Power sources<br />
accessories list E-3<br />
Presample purge<br />
event marks 5-26<br />
Program name menu<br />
how to use 3-6<br />
Program settings report<br />
see Sampling reports<br />
Program storage<br />
see Stored programs<br />
Program Style 3-3, 5-24<br />
Programming<br />
changing program name 3-7<br />
changing site description 3-7<br />
clock and calendar 3-5<br />
extended programming features 1-5–??<br />
menu screens 3-3<br />
<strong>6712FR</strong> <strong>Refrigerated</strong> <strong>Sampler</strong><br />
program name menu 3-6<br />
running programs 4-10, 5-23<br />
site description menu 3-6<br />
text entry 3-6<br />
Pump<br />
running pump manually 4-16<br />
Pump Counts<br />
pump tube warning 7-8<br />
Pump counts<br />
purging a nonstandard suction line 5-27<br />
Pump tube<br />
accessories list E-3<br />
warning 7-4<br />
Q<br />
Quick View Screens 3-3<br />
see Program Style<br />
R<br />
Random-interval pacing 5-15<br />
Refrigerator temperature sensor 5-31, E-4<br />
Reinitialize controller<br />
effects on stored programs 7-7<br />
Replacing internal alkaline battery 7-13<br />
Resume 5-23<br />
Retries 5-12<br />
Rinses 5-12<br />
Running programs 4-10, 5-23<br />
S<br />
Sample volume<br />
calibrating 4-13<br />
measuring 2-9<br />
<strong>Sampler</strong> enable 4-9, 5-19<br />
"dry period" option 5-22<br />
master/slave sampling 5-25<br />
repeatable enable 5-21<br />
sample at enable 5-21<br />
start delay 5-21<br />
start times 4-8<br />
stay enabled 5-21<br />
Samples per bottle 4-6, 5-16<br />
Sampling cycle 2-8<br />
Sampling programs<br />
running programs 4-10, 5-23<br />
Sampling reports<br />
Collecting reports 4-16, 5-24<br />
configuring 4-18<br />
sampling results report 4-18<br />
Viewing 4-17<br />
Sampling results report<br />
see Sampling reports<br />
Sampling retries 5-12<br />
Sequential distribution 4-6, 5-16<br />
Serial output 5-32<br />
Servicing 2-12<br />
service schedule 2-12<br />
Site description menu<br />
how to use 3-6<br />
Start times<br />
clock start-time menu 3-6<br />
event pacing 5-13<br />
first valid day 4-8, 5-23<br />
sampler enable 4-8<br />
Stored data 5-1<br />
Stored programs 5-2<br />
effects of reinitializing controller to factory settings 7-7<br />
selecting a program 5-2<br />
Stormwater monitoring<br />
Two-part programs 5-2
Strainers<br />
accessories list E-3<br />
selecting 2-7<br />
Suction head<br />
auto suction head 5-12<br />
automatic determination 5-12<br />
manual (ENTER HEAD) settings 5-12<br />
maximum head for peristaltic pumps 2-6<br />
variations in pump counts for fluctuating heads 4-18<br />
Suction line<br />
accessories list E-3<br />
attaching to pump tube 2-6<br />
installing and routing 2-10<br />
measuring and cutting 2-6<br />
System IDs 4-16, 5-32<br />
T<br />
Technical specifications<br />
refrigerator ??–1-13<br />
Text entry<br />
numbers 3-3<br />
program names 3-6<br />
site descriptions 3-6<br />
Time pacing 4-5, 5-12<br />
Times and dates<br />
entering times and dates 3-5<br />
Time-switched distribution 5-16<br />
pause and resume 5-23<br />
Trigger pacing 4-5<br />
Tube coupling<br />
attaching suction line 2-6<br />
Two-part programs 5-1<br />
storm-water monitoring 5-2<br />
V<br />
Variable-duration pulse 5-26<br />
event marks 5-26<br />
W<br />
Warning<br />
warning messages 7-15<br />
Y<br />
YSI 600<br />
about the sonde 1-2<br />
displayed readings 4-11<br />
<strong>6712FR</strong> <strong>Refrigerated</strong> <strong>Sampler</strong>
<strong>6712FR</strong> <strong>Refrigerated</strong> <strong>Sampler</strong>
DECLARATION OF CONFORMITY<br />
Application of Council Directive: 89/336/EEC – The EMC Directive<br />
73/23/EEC – The Low Voltage Directive<br />
Manufacturer's Name: Isco, Inc.<br />
Manufacturer's Address: 4700 Superior, Lincoln, Nebraska 68504 USA<br />
Mailing Address: P.O. Box 82531, Lincoln, NE 68501<br />
Equipment Type/Environment: Laboratory Equipment for Light Industrial/Commercial Environments<br />
Trade Name/Model No: 4200T Modem<br />
Year of Issue: 2001<br />
Standards to which Conformity is Declared: EN 55024-1998 EMC Requirements for Information Technology Equipment<br />
EN 60950 Safety Requirements for Information Technology Equipment<br />
FCC Part 68<br />
Standard Description Severity Applied Performance Criteria<br />
EN61000-4-2 Electrostatic Discharge Level 2 - 4kV contact discharge<br />
Level 3 - 8kV air discharge<br />
EN61000-4-3 Radiated RF Immunity 80 MHz to 1000MHz 80% AM at 1kHz<br />
Level 1 – 10V/m<br />
EN61000-4-4 Electrical Fast Transient Level 2 - 2kV on ac lines B<br />
EN61000-4-5 Surge on AC Lines 2kV common mode,<br />
1kV differential mode<br />
EN61000-4-6 Conducted RF on AC lines 150 kHz to 80 MHz,<br />
3V rms, 80% modulated<br />
EN61000-4-11 Voltage Dips/Short Interruptions 0.5 cycle, each polarity/100% B<br />
EN 55022 RF Emissions Group 1, Class A, Information Technology<br />
Equipment<br />
EN61000-3-2, 3-3 Harmonic, Flicker<br />
We, the undersigned, hereby declare that the design of the equipment specified above conforms to the above Directive(s) and<br />
Standards as of July 5, 2001.<br />
Bill Foster<br />
USA Representative<br />
Bill Foster<br />
Director of Engineering<br />
Isco, Inc.<br />
4700 Superior Street<br />
Lincoln, Nebraska 68504<br />
Phone: (402) 464-0231<br />
Fax: (402) 464-4543<br />
60-3212-049<br />
Rev.<br />
Michael Teutscher<br />
European Authorized Representative<br />
Contact: Dr. Dirk Köppenkastrop<br />
Geschäftsführer Managing Director<br />
STIP ISCO GmbH<br />
Siemensstraße 2<br />
64823 Groß-Umstadt<br />
Telefon: 06078 7 86-82<br />
Telefax: 06078 7 86-88<br />
B<br />
B<br />
A<br />
B<br />
B
DECLARATION OF CONFORMITY<br />
Application of Council Directive: 89/336/EEC – The EMC Directive<br />
73/23/EEC – The Low Voltage Directive<br />
Manufacturer's Name: Isco, Inc.<br />
Manufacturer's Address: 4700 Superior, Lincoln, Nebraska 68504 USA<br />
Mailing Address: P.O. Box 82531, Lincoln, NE 68501<br />
Equipment Type/Environment: Laboratory Equipment for Light Industrial/Commercial Environments<br />
Trade Name/Model No: 6712 FR <strong>Refrigerated</strong> <strong>Sampler</strong><br />
Year of Issue: 2001<br />
Standards to which Conformity is Declared: EN 61326-1998 EMC Requirements for Electrical Equipment for<br />
Measurement, Control, and Laboratory Use<br />
EN 61010-1 Safety Requirements for Electrical Equipment for Measurement,<br />
Control, and Laboratory Use<br />
Standard Description Severity Applied Performance Criteria<br />
EN61000-4-2 Electrostatic Discharge Level 2 - 4kV contact discharge<br />
Level 3 - 8kV air discharge<br />
EN61000-4-3 Radiated RF Immunity 80 MHz to 1000MHz 80% AM at 1kHz<br />
Level 1 – 10V/m<br />
EN61000-4-4 Electrical Fast Transient Level 2 - 2kV on ac lines B<br />
EN61000-4-5 Surge on AC Lines 2kV common mode,<br />
1kV differential mode<br />
EN61000-4-6 Conducted RF on AC lines 150 kHz to 80 MHz,<br />
3V rms, 80% modulated<br />
EN61000-4-11 Voltage Dips/Short Interruptions 0.5 cycle, each polarity/100% B<br />
CISPR11/<br />
EN 55011<br />
EN61000-3-2, 3-3 Harmonic, Flicker<br />
RF Emissions Group 1, Class A Industrial, Scientific, and<br />
Medical Equipment<br />
We, the undersigned, hereby declare that the design of the equipment specified above conforms to the above Directive(s) and<br />
Standards as of March 6, 2001.<br />
Bill Foster<br />
USA Representative<br />
Bill Foster<br />
Director of Engineering<br />
Isco, Inc.<br />
4700 Superior Street<br />
Lincoln, Nebraska 68504<br />
Phone: (402) 464-0231<br />
Fax: (402) 464-4543<br />
60-9002-072<br />
Rev.<br />
Michael Teutscher<br />
European Authorized Representative<br />
Contact: Dr. Dirk Köppenkastrop<br />
Geschäftsführer Managing Director<br />
STIP ISCO GmbH<br />
Siemensstraße 2<br />
64823 Groß-Umstadt<br />
Telefon: 06078 7 86-82<br />
Telefax: 06078 7 86-88<br />
B<br />
B<br />
A<br />
B<br />
B