Twïnlux/m3 Ba 16e
Twïnlux/m3 Ba 16e
Twïnlux/m3 Ba 16e

You also want an ePaper? Increase the reach of your titles
YUMPU automatically turns print PDFs into web optimized ePapers that Google loves.
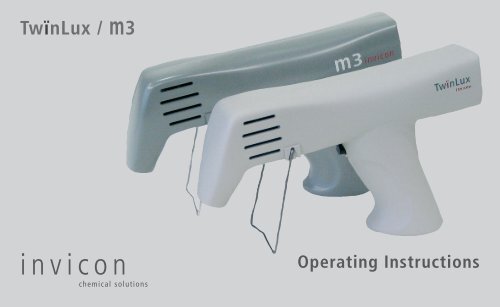
TwïnLux / <strong>m3</strong><br />
i n v i c o n<br />
chemical solutions<br />
Operating Instructions
TwïnLux / <strong>m3</strong><br />
Date information prepared:<br />
10/2007<br />
Manufacturer<br />
Invicon chemical solutions GmbH<br />
Millennium Park 9<br />
A 6890 Lustenau<br />
Austria<br />
Tel: +43 (5577) 625 76-22<br />
Fax:+43 (5577) 625 76-10<br />
office@invicon.at<br />
www.invicon.at<br />
2<br />
Table of Contents 5 Maintenance and cleaning 11<br />
1 Safety 3<br />
1.1 General information 3<br />
1.2 Signs and symbols 3<br />
1.3 Safety notes 4<br />
1.4 Intended use 5<br />
1.5 Applicabable standards and<br />
classifications 5<br />
1.6 Identification data of the light unit 5<br />
2 Product description 5<br />
3 First time start-up 8<br />
3.1 TwinLux and <strong>m3</strong> 8<br />
3.2 Charging the battery 9<br />
4 Operation 10<br />
4.1 Carrying out light-curing cycles 10<br />
4.2 Extending the duration of curing<br />
cycles during operation 11<br />
6 Troubleshooting 11<br />
7 Technical data 12<br />
7.1 Light unit 12<br />
7.2 <strong>Ba</strong>ttery 12<br />
7.3 Power supply 12<br />
7.4 Ambient conditions 12<br />
7.5 Storage conditions 12<br />
7.6 Weight 12<br />
8 Delivery range and spare parts 12<br />
9 Warranty 13<br />
9.1 Warranty terms and conditions 13<br />
9.2 What is not covered by the warranty 13<br />
9.3 Procedure in case of a claim<br />
under warranty 13
1 Safety<br />
1.1 General information<br />
Please read these Operating Instructions carefully before installing and starting up the<br />
light unit. The Instructions contain important information for your safety as well as on<br />
the correct use of the device and its accompanying components.<br />
1.2 Signs and symbols<br />
The Operating Instructions contain special warning symbols next to working steps that<br />
may involve a certain degree of danger. These symbols are classified into the following<br />
categories:<br />
This symbol identifies a condition or action which may result in severe injury or death<br />
to an individual.<br />
This symbol identifies a condition or action which may result in severe injury to an<br />
individual or severe damage to equipment or other property.<br />
This symbol identifies a condition or action which may result in injury to an individual<br />
or damage to equipment or other property.<br />
This symbol identifies a condition or action which may result in damage to equipment<br />
or other property.<br />
In addition to these warning symbols, the Instructions also contain a sign for useful<br />
additional information on the usage of the light unit:<br />
i<br />
DANGER!<br />
WARNING!<br />
CAUTION!<br />
CAUTION!<br />
NOTE!<br />
This symbol identifies important information on the usage of the device.<br />
3
1.3 Safety notes<br />
DANGER!<br />
Light emission of LED source<br />
Danger of explosion in rooms with explosive atmosphere<br />
> Do not operate the light unit in rooms with explosive mixtures of ignitable<br />
substances and air.<br />
DANGER!<br />
Electromagnetic interference<br />
Electromagnetic radiation may interfere with pacemakers or other implanted electronic<br />
medical devices.<br />
> Do not use the light unit if you or somebody in your vicinity is fitted with a<br />
pacemaker or other implanted electronic medical device.<br />
WARNING!<br />
Light emission of LED source<br />
Direct exposure to the light of the LED light source may cause damage to the eyes.<br />
> Do not look directly into the LED light source.<br />
> Use the light unit only with a properly mounted and fully functioning light<br />
protection shield.<br />
> Always check if the light protection shield is correctly mounted on the light unit.<br />
> Do not point the light beam of the LED light source directly into the eyes.<br />
> Always direct the light beam of the LED light source directly towards the surface<br />
to be polymerized.<br />
4<br />
WARNING!<br />
Defective device<br />
Malfunctioning devices or components may cause injury.<br />
> Before each use, check the device for the following:<br />
– The light unit and its accompanying components are in proper working condition.<br />
– The light protection shield is mounted properly.<br />
– The air vents are free of obstruction.<br />
CAUTION!<br />
Exposure to water<br />
Exposure to water may cause damage to the device.<br />
> Do not hold the light unit under running water. Do not dip the light unit into water.<br />
> Store the apparatus out of the reach of children.<br />
> Use only original accessories and spare parts.<br />
> In case of malfunction, immediately ask for support from an authorized<br />
customer support centre or directly from Invicon chemical solutions.
1.4 Intended use<br />
The light unit has been designed for the polymerization of light-curing materials used<br />
in the crafts and industry sector.<br />
> The light unit must only be used by specialized personnel.<br />
> The light unit must only be used with the light protection shield properly in place.<br />
1.5 Applicable standards and classifications<br />
The light unit complies with the following standards and classifications:<br />
• EC standard EN 6060-1<br />
• Classification according to IEC 60825-1:2001: LED Product Class 2<br />
• Classification according to CIE S009: Risk Group 2<br />
1.6 Identification data of the light unit<br />
The following identification data can be found on the light unit and the power pack:<br />
• Model type<br />
• Serial number<br />
• Power supply<br />
• Power consumption<br />
Please always provide this information whenever you contact an authorized service<br />
centre or Invicon chemical solutions. These data enable our After Sales Service to<br />
respond to your queries quickly and efficiently.<br />
2 Product description<br />
TwinLux and <strong>m3</strong> have been designed for the polymerization of light-curing materials<br />
used in the crafts and industry sector.<br />
The light unit is equipped with two high-performance monochromatic LEDs, which emit<br />
light in the wavelength range from 440nm to 480nm and have a peak wavelength of<br />
460nm. In contrast to the spectral output of conventional halogen lights, the entire<br />
range of light emitted by TwinLux and <strong>m3</strong> can be absorbed by the photoinitiators<br />
contained in light-curing materials; the polymerization reaction is triggered reliably.<br />
As a result, excellent polymerization results can be achieved, while power consumption<br />
is low and little heat is given off.<br />
The light unit offers a choice of three curing settings:<br />
TwinLux<br />
• 30 seconds<br />
• 60 seconds<br />
• Continuous operation (unrestricted)<br />
<strong>m3</strong><br />
• 180 seconds<br />
• Continuous operation (unrestricted)<br />
5
i<br />
NOTE!<br />
Light unit shown on the pictures of the Operating Instructions<br />
The pictures below refer to TwinLux or <strong>m3</strong> light unit.<br />
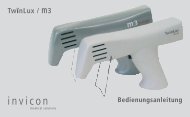
TwinLux with accessories<br />
1 Power pack plug 5 LED light source<br />
2 Electrical socket 6 Stand<br />
3 Power pack 7 On/off and timer switch<br />
4 Cooling vents 8 Light protection shield<br />
Power pack (3)<br />
TwinLux and <strong>m3</strong> are powered by means of the power pack (3) supplied together with<br />
the light unit. To connect the power pack to the light unit, the power pack plug (1) is<br />
connected to the electrical socket (2) at the rear of the light unit.<br />
6<br />
3<br />
1<br />
2<br />
4<br />
8<br />
7<br />
6<br />
5<br />
TwinLux and <strong>m3</strong> are powered with a battery, which is charged by means of the power<br />
pack (3) supplied together with the light unit.<br />
Air vents (4)<br />
TwinLux and <strong>m3</strong> have been designed for intensive use and continuous operation.<br />
The light unit is equipped with overheating protection including air vents (4) to protect<br />
it from overheating. The overheating protection system of TwinLux automatically switches<br />
on if the temperature of the heat dissipator rises above 40°C and additional air<br />
ventilation cools the light unit. If the temperature goes back down below 40°C,<br />
the overheating protection system automatically switches off. For <strong>m3</strong> – due to reduced<br />
heat build-up – this additional overheating protection system is not necessary.<br />
LED light source (5)<br />
WARNING!<br />
Light emission of LED source<br />
Direct exposure to the light of the LED light source may cause damage to the eyes.<br />
> Do not look directly into the LED light source.<br />
> Use the light unit only with a properly mounted and fully functioning light<br />
protection shield.<br />
> Always make sure that the light protection shield is mounted properly.<br />
> Do not point the light beam of the LED source directly into the eyes.<br />
> Always direct the light beam of the LED light source directly towards the surface<br />
to be polymerized.<br />
The LED light source (5) comprises two LEDs, which are positioned behind a protective<br />
plexiglass window.
Stand (6)<br />
The integrated stand (6) is used to position the light source at an appropriate distance<br />
to the polymerization surface during the curing procedure.<br />
On/off and timer switch (7)<br />
The LED light source (5) is switched on and off by means of the on/off and timer switch<br />
(7). The individual curing times are chosen by applying varying degrees of pressure to<br />
the on/off and timer switch. As soon as the on/off switch is pressed down and the LED<br />
source starts emitting light, the curing time indicator (11) lights up or starts blinking.<br />
Light protection shield (8)<br />
The light protection shield prevents uncontrolled light emission from the<br />
LED source (5).<br />
11<br />
10<br />
9<br />
LED indicators<br />
9 Power on indicator<br />
10 <strong>Ba</strong>ttery charge indicator<br />
11 Curing time indicator<br />
Power on indicator (9)<br />
The red light emitting LED (9) on the rear of the light shows whether the unit is<br />
connected to the power supply:<br />
Power supply TwinLux <strong>m3</strong><br />
LED is off No power supply No power supply<br />
Continuously illuminated <strong>Ba</strong>ttery is being <strong>Ba</strong>ttery is being<br />
charged with power charged with power<br />
<strong>Ba</strong>ttery charge indicator (10)<br />
The red light emitting LED (10) on top of the light shows the amount of power left in<br />
the battery (see also Section 3.2).<br />
i<br />
NOTE!<br />
Exact indication of the amount of power left<br />
You are given a more precise indication of the amount of power left in the battery<br />
after having carried out two to three curing cycles.<br />
Curing time indicator (11)<br />
The green light emitting LED (11) on top of the unit shows which curing setting has<br />
been selected. The unit switches off automatically after the curing time has elapsed<br />
(except for continuous operation).<br />
Curing time indicator (11) TwinLux <strong>m3</strong><br />
Fast blinking 30 seconds –<br />
Slow blinking 60 seconds 180 seconds<br />
Continuously illuminated Continuous light Continuous light<br />
7
3 First time start-up<br />
3.1 TwinLux and <strong>m3</strong><br />
Checking the battery charge<br />
> Check the amount of power left in the battery.<br />
i<br />
NOTE!<br />
Accuracy of the remaining time available<br />
The remaining time indications are only valid at room temperatures<br />
(approx. 18 – 25 ºC) and after the device has been used in continuous operation<br />
for approximately five minutes.<br />
8<br />
Indication on the light unit <strong>Ba</strong>ttery Time remaining on<br />
charge the battery<br />
<strong>Ba</strong>ttery charge indicator (10)<br />
blinks 1 time<br />
Full Approx. 30 minutes left<br />
<strong>Ba</strong>ttery charge indicator (10)<br />
blinks 2 to 3 times<br />
2/3 full Approx. 20 minutes left<br />
<strong>Ba</strong>ttery charge indicator (10)<br />
blinks 4 to 5 times<br />
1/3 full Approx. 15 minutes left<br />
<strong>Ba</strong>ttery charge indicator (10) <strong>Ba</strong>ttery Approx. 10 minutes left<br />
blinks continuously low<br />
There is enough power left in the<br />
battery to carry out the following<br />
light-curing cycles:<br />
> 10 to 20 curing cycles<br />
of 30 seconds each<br />
> 5 to 10 curing cycles<br />
of 60 seconds each<br />
The light does not switch on when <strong>Ba</strong>ttery Connect the power pack to the<br />
the on/off switch is pressed empty light unit and the mains and<br />
charge the battery for 7 to 12 hours<br />
The light switches off automatically automatically <strong>Ba</strong>ttery<br />
Have the light unit checked by an<br />
defective authorized service centre or direct-<br />
ly by Invicon chemical solutions
3.3 Charging the battery<br />
i<br />
NOTE!<br />
Prolonging the life of the battery<br />
Carrying out a full charge and discharge cycle prolongs the life of the battery.<br />
i<br />
NOTE!<br />
<strong>Ba</strong>ttery charge level at delivery<br />
The battery is not fully charged upon delivery.<br />
> Charge the battery for 12 to 14 hours before using it for the first time.<br />
> Always re-charge the battery to its full capacity (charging time: 7 to 12 hours)<br />
after it has been discharged.<br />
> Place the light unit on a flat, horizontal surface.<br />
> Connect the plug (1) of the power pack to electrical socket (2) of the light unit.<br />
> Connect the power pack (3) to the mains.<br />
9
4 Operation<br />
WARNING!<br />
Light emission of LED source<br />
Direct exposure to the light of the LED light source may cause damage to the eyes.<br />
> Do not look directly into the LED light source.<br />
> Use the light unit only with a properly mounted and fully functioning<br />
light protection shield.<br />
> Always make sure that the light protection shield is mounted properly.<br />
> Do not point the light beam of the LED source directly into the eyes.<br />
> Always direct the light beam of the LED light source towards the surface<br />
to be polymerized.<br />
WARNING!<br />
Defective device<br />
Malfunctioning devices or components may cause injury.<br />
> Before each use, check the device for the following:<br />
– The device and its accompanying components are in proper working condition.<br />
– The light protection shield is correctly mounted on the light unit.<br />
– The air vents are free of obstruction.<br />
10<br />
4.1 Carrying out light-curing cycles<br />
5<br />
8<br />
Light emission<br />
5 LED light source<br />
7 On/off and timer switch<br />
8 Light protection shield<br />
7<br />
TwinLux<br />
> Mount the light protection shield (8) over the LED light source (5).<br />
> Select the desired curing time by pressing the on/off and timer switch (7) as follows:<br />
On/off switch (7) Curing time Curing time indicator (11)<br />
Short touch (< 1 sec) 30 seconds Fast blinking<br />
Short pressure (approx. 2 sec) 60 seconds Slow blinking<br />
Sustained pressure (> 2 sec) Continuous light emission Continuously illuminated<br />
> To interrupt or stop the curing cycle, press again on the on/off switch (7).<br />
8<br />
7
<strong>m3</strong><br />
> Mount the light protection shield (8) over the LED light source (5).<br />
> Select the desired curing time by pressing the on/off and timer switch (7) as follows:<br />
On/off switch (7) Curing time Curing time indicator (11)<br />
Short touch (< 1 sec) 180 seconds Blinking<br />
Sustained pressure (> 2 sec) Continuous light emission Continuously illuminated<br />
> To interrupt or stop the curing cycle, press again on the on/off switch (7).<br />
4.2 Extending the curing time during the curing cycle<br />
The curing time can be extended to the next longer cycle during operation as follows:<br />
TwinLux<br />
> To increase the curing time from 30 to 60 seconds, press the on/off switch (7)<br />
for 2 seconds, while the 30-second cycle is in operation.<br />
> To increase the illumination time from 60 seconds to continuous operation,<br />
press the on/off switch (7) for more than 2 seconds, while the 60-second cycle<br />
is in operation.<br />
<strong>m3</strong><br />
> To increase the illumination time from 180 seconds to continuous operation,<br />
press the on/off switch (7) for more than 2 seconds, while the 60-second cycle<br />
is in operation.<br />
5 Maintenance and cleaning<br />
If the surface of the curing light or LED light source (5) has become soiled, proceed<br />
as follows:<br />
> Switch off the light unit.<br />
> Disconnect the plug (1) of the power pack from the light unit.<br />
CAUTION!<br />
Cleaning the surfaces of the device<br />
Exposure to water may damage the light unit<br />
> Do not hold the light unit under running water. Do not dip the light unit into water.<br />
> Do not allow fluid to enter the air vents (4).<br />
> Allow the device to dry for at least 5 minutes after cleaning.<br />
> Clean surfaces with a damp cloth (methylated spirits containing detergent).<br />
If the air vents (4) are heavily contaminated with dirt, proceed as follows:<br />
> Switch off the light unit.<br />
> Disconnect the plug (1) of the power pack from the light unit.<br />
> Clean the air vents (4) with compressed air.<br />
6 Troubleshooting<br />
Malfunction Possible problem Solution<br />
Light unit switches <strong>Ba</strong>ttery is Have the light unit checked by an<br />
off prematurely defective authorized service centre or directly by<br />
Invicon chemical solutions<br />
11
7 Technical data<br />
7.1 Light unit<br />
Light source: 2 LEDs<br />
Wavelength: 440nm – 480nm<br />
Emission duration: Unrestricted<br />
7.2 <strong>Ba</strong>ttery<br />
First time charging: 12 – 14 hours<br />
Re-charging: 7 – 12 hours<br />
Cells: TwinLux: 6, <strong>m3</strong>: 4<br />
Type: NiMH, HHR-210AAB2B<br />
Voltage: TwinLux: 7.2V, <strong>m3</strong>: 4.8V<br />
Power pack: 12.6A<br />
7.3 Power supply<br />
Power pack: 90 – 260 VAC / 50 – 60 Hz<br />
7.4 Ambient conditions<br />
Temperature: +10°C – +40°C<br />
Relative air humidity: 30% – 85%<br />
7.5 Storage conditions<br />
Temperature: –10°C to +70°C<br />
Relative air humidity: 10% – 90%<br />
Air pressure: 500hPa – 1060hPa<br />
7.6 Weight<br />
TwinLux 394 g (without power pack)<br />
<strong>m3</strong> 334 g (without power pack)<br />
12<br />
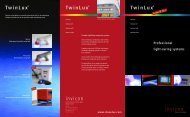
8 Delivery range and spare parts<br />
1 x TwinLux or <strong>m3</strong> Light Unit 1 x Operating Instructions<br />
1 x Power Pack 1 x Warranty Form<br />
1 x Light Protection Shield<br />
1 x Power Cord<br />
TwinLux or <strong>m3</strong> Light Unit Power Pack<br />
Light Protection Shield Power Cord
9 Warranty<br />
9.1 Warranty terms and conditions<br />
Invicon chemical solutions gives a warranty of 2 (two) years on all TwinLux and <strong>m3</strong><br />
light units as of the date of purchase. This also applies to light units purchased from an<br />
Invicon retailer or importer. The warranty is limited to defects related to the manufacture<br />
and material of the product.<br />
Invicon, in its sole discretion, may repair or replace the defective parts of the product<br />
free of charge within the warranty period.<br />
In general, the „General Terms and Conditions of Sale and Delivery” shall apply.<br />
This warranty does not provide for the replacement of entire TwinLux or <strong>m3</strong> light units.<br />
9.2 What is not covered by the warranty<br />
The following will void this warranty:<br />
• The apparatus and its components were not used in compliance with the safety<br />
instructions and directions provided in these Operating Instructions.<br />
• The apparatus and its components were not used for the intended purpose.<br />
• The apparatus or its components were altered by the user or other third parties.<br />
• Assembly, settings, alterations, additions and repairs were not carried out by<br />
specialized Invicon personnel or authorized specialist.<br />
• The electrical facilities of the room in which the apparatus was used did not comply<br />
with the current local laws and regulations.<br />
• The conditions in the premises where the apparatus was used, kept or stored did<br />
not comply with the conditions listed in the Technical Data section of these<br />
Operating Instructions.<br />
• Damage arising from catastrophic events, such as impact, accident, vandalism and<br />
events beyond the control of the manufacturer.<br />
The following items are not covered by this warranty:<br />
• LED light source<br />
• LED indicators<br />
• Switch<br />
• Accompanying components/accessories<br />
The following damage is not covered by the warranty:<br />
• Damage caused during transportation<br />
• Damage arising from improper use or negligence<br />
• Damage arising from wrong usage of electrical supply and voltage<br />
9.3 Procedure in case of a claim under warranty<br />
The warranty is only valid if the warranty form supplied with the apparatus is fully filled<br />
in and returned together with the receipt (including the date of purchase) to Invicon<br />
chemical solutions or to an authorized Invicon dealer within fifteen (15) days as of the<br />
date of purchase.<br />
In case of a claim under warranty, the customer shall put the light unit at the disposal<br />
of Invicon or the company’s distribution partner and provide the following information:<br />
• Name, address, telephone number, email of the owner<br />
• Name and address of the Invicon distribution partner from whom the light unit was<br />
purchased<br />
• Serial number of the light unit<br />
• Receipt (delivery note)<br />
• Detailed description of the malfunction<br />
The data and descriptions contained in these Operating Instructions are not binding<br />
and may be varied by the manufacturer at any time without previous notice.<br />
13
Information to be included on warranty form<br />
Date of purchase ____________________<br />
Serial number ____________________<br />
Company ____________________<br />
Contact ____________________<br />
Address ____________________<br />
Postal code ___________________<br />
Town/City ____________________<br />
Street/No. ____________________<br />
Country ____________________<br />
Telephone ____________________<br />
Email ____________________<br />
Distribution partner ____________________<br />
14<br />
Invicon chemical solutions GmbH<br />
Millennium Park 9<br />
A 6890 Lustenau<br />
Austria<br />
Tel: +43 (5577) 625 76-0<br />
Fax:+43 (5577) 625 76-10<br />
office@invicon.at<br />
www.invicon.at
EC Declaration of Conformity<br />
Invicon chemical solutions GmbH<br />
Millennium Park 9<br />
6890 Lustenau<br />
Austria<br />
We, the undersigned, declare under our sole responsibility that the devices<br />
specified below<br />
TwinLux<br />
<strong>m3</strong><br />
have been developed, built and manufactured in compliance with the following<br />
EC Directives (as well as in compliance with the provisions of domestic law adopted<br />
in the field governed by these Directives):<br />
• EN 61010-1<br />
• EN 50081-2<br />
• EN 50082-2<br />
• 73/23 EWG<br />
• 89/336/EWG<br />
Lustenau, 1 October 2007 Gerhard Zanghellini, General Manager<br />
15
TwïnLux / <strong>m3</strong><br />
Invicon chemical solutions GmbH<br />
Millennium Park 9<br />
A 6890 Lustenau<br />
Austria<br />
Tel: +43 (5577) 625 76-0<br />
Fax:+43 (5577) 625 76-10<br />
office@invicon.at<br />
www.invicon.at<br />
i n v i c o n<br />
chemical solutions