
Create successful ePaper yourself
Turn your PDF publications into a flip-book with our unique Google optimized e-Paper software.
A sheer fabric is one that is transparent. Some<br />
examples are voile, organdy, chiffon, batiste,<br />
georgette, dotted Swiss, and gauze. They are<br />
pretty, feminine fabrics that are also fragile and<br />
delicate. <strong>Sheer</strong>s are available in many types of<br />
fibers and fiber blends.<br />
Soft sheers such as chiffon are silky and very<br />
drape able. Crisp sheers, such as organdy, have<br />
more body and are easier to handle. Both types<br />
have gentle, light, airy, see-through<br />
characteristics. (Figure 1) They inspire the finest<br />
workmanship.<br />
Figure 1<br />
All sheer fabrics require special handling. Some<br />
are more difficult to work with than others<br />
because of the fiber content and/or hand of the<br />
fabric. <strong>Fabrics</strong> made of manufactured fibers are<br />
usually more slippery than those made of natural<br />
fibers. Sometimes sheers are underlined with an<br />
opaque fabric or with another layer of the sheer<br />
fabric.<br />
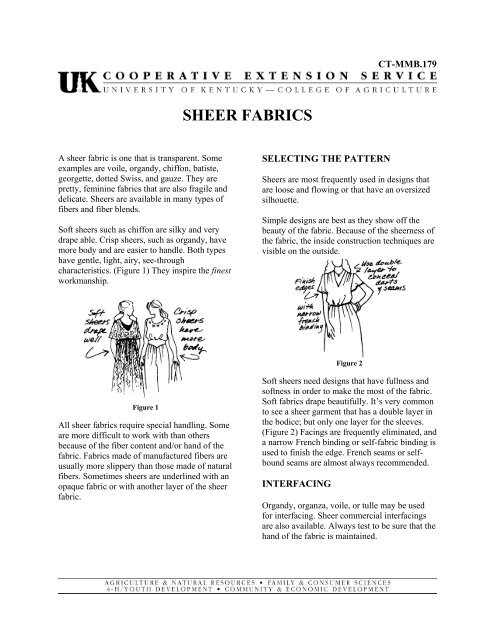
SHEER FABRICS<br />
SELECTING THE PATTERN<br />
CT-MMB.179<br />
<strong>Sheer</strong>s are most frequently used in designs that<br />
are loose and flowing or that have an oversized<br />
silhouette.<br />
Simple designs are best as they show off the<br />
beauty of the fabric. Because of the sheerness of<br />
the fabric, the inside construction techniques are<br />
visible on the outside.<br />
Figure 2<br />
Soft sheers need designs that have fullness and<br />
softness in order to make the most of the fabric.<br />
Soft fabrics drape beautifully. It’s very common<br />
to see a sheer garment that has a double layer in<br />
the bodice; but only one layer for the sleeves.<br />
(Figure 2) Facings are frequently eliminated, and<br />
a narrow French binding or self-fabric binding is<br />
used to finish the edge. French seams or selfbound<br />
seams are almost always recommended.<br />
INTERFACING<br />
Organdy, organza, voile, or tulle may be used<br />
for interfacing. <strong>Sheer</strong> commercial interfacings<br />
are also available. Always test to be sure that the<br />
hand of the fabric is maintained.
LAYOUT AND CUTTING<br />
If a washable fabric has been chosen, be sure to<br />
pre-wash before using. Straighten fabric ends<br />
and check to see that the fabric is on-grain<br />
before moving to the layout stage. When<br />
working with one of the slippery sheers, cover<br />
the cutting area with a sheet that has been<br />
secured to the cutting table surface. (Figure 3)<br />
Pin the fabric to the sheet, being sure not to pull<br />
the fabric off-grain. Another possibility is to<br />
tape tissue paper the length and width of the<br />
fabric and pin the sheer to the paper. Some<br />
sheers may have selvages that are woven very<br />
tight. They must be clipped and the fabric<br />
smoothed before laying out the pattern.<br />
Figure 3<br />
If cutting more than one layer, as for a double<br />
bodice or skirt, diagonally baste the fabric layers<br />
together before cutting. More pins may be<br />
required than usual. Before cutting, check<br />
carefully that shears and/or rotary cutter is<br />
smooth with no rough edges. Hold the fabric<br />
securely with your free hand while cutting with<br />
sharp shears or rotary cutter. (Figure 4) Be very<br />
careful not to stretch the fabric. Wipe lint off<br />
frequently.<br />
Figure 4<br />
2<br />
MARKING<br />
Select the method of marking carefully. Always<br />
test technique on scrap fabric before using.<br />
Generally tailor's tacks are the recommended<br />
technique. (Figure 5) Make sure to use a fine<br />
needle. On crisp sheers, soap slivers, marking<br />
pen/pencil, or chalk is suggested.<br />
SEWING<br />
Figure 5<br />
Carefully staystitch all curved areas of the<br />
garment to prevent stretching. Loosen the<br />
machine tension slightly. Use a size 8 to 11 (60<br />
to 75) universal needle, a straight stitch throat<br />
plate, and 12 to 15 stitches per inch. If there are<br />
problems with skipped stitches, place a piece of<br />
masking tape over the throat plate hole, to make<br />
a very small hole. (Figure 6)<br />
Figure 6<br />
When filling the bobbin, wind slowly to prevent<br />
the thread from stretching. Stretched thread can<br />
cause puckered seams. Position the threads to<br />
the back of the sewing machine and hold for the<br />
first inch of stitching. (Figure 6). If the machine<br />
feed dog is marring the fabric, stitch over tissue<br />
paper. Place tissue paper next to the feed dog, or<br />
use a stabilizer. (Figure 7)<br />
Figure 7
Using an even feed foot will also help prevent<br />
puckering.<br />
To prevent jamming of thread, do not backstitch<br />
on sheers. Machine stitch carefully and<br />
accurately, since it is difficult to remove<br />
stitching without damaging the delicate fabric.<br />
Use an extra-fine all-purpose thread (lingerie,<br />
machine embroidery), if possible.<br />
Darts<br />
Darts may be finished in one of the following<br />
ways:<br />
• Fold dart and stitch, then stitch again ⅛<br />
inch from the first stitching. (Figure 8)<br />
Trim close to stitching. Finish raw edge<br />
by binding or overcasting.<br />
Figure 8<br />
• Fold dart and stitch. Cut on fold. To finish<br />
raw edges, carefully turn dart edges in.<br />
Stitch along edge. (Figure 9) This creates<br />
a false French seam appearance.<br />
Seams<br />
Figure 9<br />
• For straight seams, use a French seam.<br />
(Figure 10) To construct:<br />
3<br />
a. Pin wrong sides of fabric<br />
together and stitch ⅜ inch from<br />
raw edge.<br />
b. Trim close to the stitching. Press.<br />
c. Turn so the right sides are<br />
together and press along the<br />
seam. Stitch ¼-inch seam.<br />
• For curved seams use a false French<br />
seam. (Figure 10) To construct:<br />
a. Pin right sides together and stitch<br />
a ⅝-inch seam.<br />
b. Press, and then fold raw edge in<br />
¼ inch on each side.<br />
c. Hand slipstitch or machine stitch<br />
at the edge. Press.<br />
Figure 10<br />
• A double-stitched seam may be used on<br />
semi-sheer fabrics. Stitch seam on the<br />
stitching line. Stitch again ⅛ inch from<br />
the first stitching. Trim close to the<br />
stitching. (Figure 11)<br />
Pressing<br />
Figure 11<br />
It is always a good idea to check pressing<br />
techniques on a scrap of fabric. The amount of<br />
heat and moisture that can be used is determined<br />
by the fiber content of the fabric. Always press a
sheer with a light touch. A press cloth will<br />
prevent shine and water spots.<br />
Collars<br />
If a straight collar cut is part of the design, place<br />
the straight outer edge on the fold in order to<br />
eliminate the seam. To stitch the outer edge of<br />
the curved collar, use a hairline seam or set<br />
machine for a narrow zigzag stitch, and trim<br />
seam allowance close to the stitching.<br />
Facings<br />
Neck and armhole facings may be eliminated by<br />
cutting a double bodice and using a narrow<br />
French binding as the edge finish. This<br />
technique is preferred in ready-to-wear and<br />
quality constructed garments. (Figure 12)<br />
Figure 12<br />
If the garment has a shirt-type bodice, cut the<br />
facing and bodice together, eliminating the<br />
seam. The width of the facing should be exactly<br />
the same on both sides of center front when<br />
finished. This will give a “band” effect. (Figure<br />
13).<br />
Figure 13<br />
4<br />
Sleeves<br />
Long sleeves are usually left “sheer” with no<br />
lining. Frequently, short sleeves are cut double<br />
with a fold on the straight lower edge. (Figure<br />
14)<br />
Closures<br />
Figure 14<br />
Machine, hand-worked, or loop buttonholes may<br />
be used. An extra-small rectangle of interfacing<br />
may need to be used to keep horizontal<br />
buttonholes from sagging, or stretching. Delicate<br />
fabrics require dainty, delicate buttons. Use only<br />
lightweight zippers that are hand-picked with a<br />
single thread. (Figure 15)<br />
Hand-picked Zipper<br />
Hems<br />
Figure 15<br />
Let the garment hang at least 24 hours before<br />
marking the hem. Use either a hand rolled hem<br />
or narrow machine-stitched hem on flared skirts.<br />
A double hem can be used on full straight skirts.<br />
For a party dress, a horsehair braid hem can be<br />
used for added flare at the hemline edge. On<br />
some sheers a serged hem or serged-rolled hem<br />
can be used.
Hand Rolled Hem – This is a beautiful and<br />
fluid hem.<br />
• Stitch 1/8 inch below hemline to<br />
stabilize the edge.<br />
• Trim hem allowance to within 1/8 inch<br />
of stitching line.<br />
• Use a fine hand sewing needle and a<br />
single strand of light weight silk or<br />
cotton thread. With your fingers, fold<br />
the fabric along stitching line and secure<br />
thread in fold. Come out of the fold, go<br />
straight to just beyond the raw edge and<br />
pick up a single thread of the sheer<br />
fabric. Bring needle directly back to the<br />
fold and take a ¼-inch stitch in fold.<br />
Again pick up a single thread just<br />
beyond the raw edge. Continue in this<br />
manner for about 2 inches. (Figure 16)<br />
Figure 16<br />
• Pull thread gently until fabric rolls and<br />
stitching disappears. (Figure 17)<br />
Figure 17<br />
Machine Rolled Hem – This requires a special<br />
rolled hem presser foot. The coil shape on the<br />
presser foot turns the fabric under as the<br />
machine sews. Different widths are available for<br />
different weights of fabric.<br />
Narrow Machine Stitched Hem – This hem<br />
requires a 5/8-inch hem allowance. The resulting<br />
hem is somewhat stiffer than the hand rolled<br />
hem.<br />
5<br />
• Press under ½ inch and stitch close to<br />
folded edge.<br />
½ “<br />
Figure 18<br />
• Trim hem allowance close to stitching.<br />
(Figure 19)<br />
Figure 19<br />
• Turn up 1/8 inch and edge stitch again.<br />
Figure 20<br />
Double Hem<br />
Allow twice the depth of the hem allowance<br />
when cutting pattern out. Seam allowances<br />
should be graded before stitching hem.<br />
Figure 21
Turn up half the hem allowance, twice,<br />
enclosing the raw edge. Press. Stitch hem in<br />
place by top stitching, blind hemming, or<br />
slipstitching.<br />
Horsehair Braid Hem<br />
Figure 22<br />
Select a narrow horsehair braid for sheer fabrics.<br />
Lap braid ¼ inch over right side of hem edge.<br />
Turn under to the wrong side. Stitch close to the<br />
edge of the braid. Turn to the inside. Machine<br />
stitch close to the folded edge. If needed, tack<br />
the horsehair braid at the seams. (Figure 23)<br />
Figure 23<br />
6<br />
Serged Hem<br />
Serge the edge of the hem allowance. If<br />
possible, use a 2-thread stitch for less bulk.<br />
Turn up and press the lower edge along the<br />
serging; edge stitch.<br />
Serged Rolled Hem<br />
Be sure to test first, some sheers are not strong<br />
enough to support this type of hem. Depending<br />
on your fabric, use regular, wooly nylon, or<br />
decorative thread in the loopers.<br />
Follow your machine manual for rolled edge set<br />
up. The lower looper thread tension will need to<br />
be tightened to roll the stitched edge.<br />
Experiment with stitch length until you get the<br />
look you want.<br />
Prepared by Nadine Hackler, Associate Professor Extension Clothing Specialist. First Published: May 1997 Revised February 1998.<br />
Permission to use granted by Nadine Hackler, Emeritus Extension Clothing Specialist, Institute of Food & Agriculture Sciences, University of<br />
Florida, Gainesville FL.<br />
Adapted for use in Kentucky by Linda Heaton, Ph.D.<br />
Extension Professor for Textiles & Environment, Family & Consumer Sciences.<br />
September 1999, rev. 4/2004<br />
Revised by Marjorie M. Baker, M.S.<br />
Extension Associate Textiles & Clothing<br />
January 2005<br />
<strong>Sheer</strong><strong>Fabrics</strong>.doc<br />
Educational programs of the Kentucky Cooperative Extension serve all people regardless of race, color, age, sex, religion, disability, or national origin.