Perfecto2 Owner's Manual - Invacare
Perfecto2 Owner's Manual - Invacare
Perfecto2 Owner's Manual - Invacare

Create successful ePaper yourself
Turn your PDF publications into a flip-book with our unique Google optimized e-Paper software.
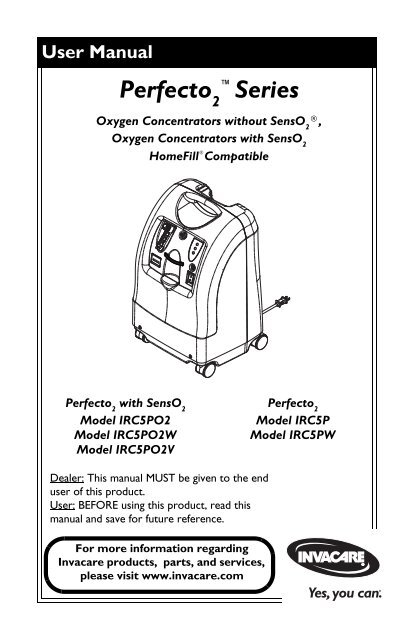
User <strong>Manual</strong><br />
Perfecto Series 2<br />
Oxygen Concentrators without SensO 2 ®,<br />
Oxygen Concentrators with SensO 2<br />
HomeFill ® Compatible<br />
Perfecto 2 with SensO 2<br />
Model IRC5PO2<br />
Model IRC5PO2W<br />
Model IRC5PO2V<br />
Dealer: This manual MUST be given to the end<br />
user of this product.<br />
User: BEFORE using this product, read this<br />
manual and save for future reference.<br />
For more information regarding<br />
<strong>Invacare</strong> products, parts, and services,<br />
please visit www.invacare.com<br />
Perfecto 2<br />
Model IRC5P<br />
Model IRC5PW
WARNING<br />
WARNING<br />
DO NOT USE THIS PRODUCT OR ANY AVAILABLE<br />
OPTIONAL EQUIPMENT WITHOUT FIRST<br />
COMPLETELY READING AND UNDERSTANDING<br />
THESE INSTRUCTIONS AND ANY ADDITIONAL<br />
INSTRUCTIONAL MATERIAL SUCH AS OWNER’S<br />
MANUALS, SERVICE MANUALS OR INSTRUCTION<br />
SHEETS SUPPLIED WITH THIS PRODUCT OR<br />
OPTIONAL EQUIPMENT. IF YOU ARE UNABLE TO<br />
UNDERSTAND THE WARNINGS, CAUTIONS OR<br />
INSTRUCTIONS, CONTACT A HEALTHCARE<br />
PROFESSIONAL, DEALER OR TECHNICAL<br />
PERSONNEL BEFORE ATTEMPTING TO USE THIS<br />
EQUIPMENT - OTHERWISE, INJURY OR DAMAGE<br />
MAY OCCUR.<br />
ACCESSORIES WARNING<br />
<strong>Invacare</strong> products are specifically designed and<br />
manufactured for use in conjunction with <strong>Invacare</strong><br />
accessories. Accessories designed by other manufacturers<br />
have not been tested by <strong>Invacare</strong> and are not<br />
recommended for use with <strong>Invacare</strong> products.<br />
ACCESSORIES<br />
There are many different types of humidifiers, oxygen tubing,<br />
cannulas and masks that can be used with this device. You<br />
should contact your local home care provider for<br />
recommendations on which of these devices will be best for<br />
you. They should also give you advice on the proper usage,<br />
maintenance, and cleaning.<br />
NOTE: Updated versions of this manual can be found at<br />
www.invacare.com.<br />
Perfecto Series 2 Part No 1143482<br />
2
TABLE OF CONTENTS<br />
Table of Contents<br />
ACCESSORIES .................................................. 2<br />
SPECIAL NOTES ............................................... 4<br />
LABEL LOCATION ............................................ 6<br />
SECTION 1—GENERAL GUIDELINES .................. 7<br />
To Reduce the Risk of Burns, Electrocution, Fire or Injury to<br />
Persons ......................................................................................................... 7<br />
Operating Information ....................................................................... 8<br />
Radio Frequency Interference.......................................................... 8<br />
SECTION 2—FEATURES .................................. 10<br />
SECTION 3—HANDLING ................................. 11<br />
Unpacking............................................................................................11<br />
Inspection............................................................................................11<br />
Storage.................................................................................................11<br />
SECTION 4—TYPICAL PRODUCT<br />
PARAMETERS ............................................... 12<br />
SECTION 5—OPERATING INSTRUCTIONS ....... 15<br />
Introduction........................................................................................15<br />
Select a Location ...............................................................................15<br />
Set Up ..................................................................................................16<br />
Power Switch .....................................................................................18<br />
Flowrate...............................................................................................19<br />
Front Panel Indicators - Units with SensO2 ...............................20<br />
Front Panel Indicators - Units without SensO2.........................21<br />
SECTION 6—MAINTENANCE .......................... 23<br />
Routine Maintenance........................................................................23<br />
SECTION 7—TROUBLESHOOTING GUIDE ......... 26<br />
LIMITED WARRANTY .................................... 31<br />
Part No 1143482 3 Perfecto Series<br />
2
SPECIAL NOTES<br />
SPECIAL NOTES<br />
Signal words are used in this manual and apply to hazards or<br />
unsafe practices which could result in personal injury or<br />
property damage. Refer to the following table for definitions<br />
of the signal words.<br />
SIGNAL WORD MEANING<br />
DANGER<br />
WARNING<br />
CAUTION<br />
Danger indicates an imminently hazardous situation<br />
which, if not avoided, will result in death or serious<br />
injury.<br />
Warning indicates a potentially hazardous situation<br />
which, if not avoided, could result in death or<br />
serious injury.<br />
Caution indicates a potentially hazardous situation<br />
which, if not avoided, may result in property<br />
damage or minor injury or both.<br />
NOTICE<br />
The information contained in this document is subject to<br />
change without notice.<br />
DANGER<br />
DO NOT SMOKE while using this device. Keep all<br />
matches, lighted cigarettes or other sources of ignition<br />
out of the room in which this product is located and away<br />
from where oxygen is being delivered.<br />
NO SMOKING signs should be prominently displayed.<br />
Textiles and other materials that normally would not<br />
burn are easily ignited and burn with great intensity in<br />
oxygen enriched air. Failure to observe this warning can<br />
result in severe fire, property damage and cause physical<br />
injury or death.<br />
Perfecto Series 4 Part No 1143482<br />
2
CAUTION<br />
SPECIAL NOTES<br />
“Caution: Federal law restricts this device to sale or rental by<br />
or on order of a physician, or any other practitioner licensed<br />
by the law of the State in which he/she practices to use or<br />
order the use of this device.”<br />
<strong>Invacare</strong> recommends an alternate source of supplemental<br />
oxygen in the event of a power outage, alarm condition or<br />
mechanical failure. Consult your physician or equipment<br />
provider for the type of reserve system required.<br />
This equipment is to be used as an oxygen supplement and is<br />
not considered life supporting or life sustaining.<br />
Part No 1143482 5 Perfecto Series<br />
2
LABEL LOCATION<br />
P/N 1147920 Rev. B<br />
LABEL LOCATION<br />
Perfecto 2 <br />
FOR OPERATING INSTRUCTIONS or ALARMS (See Operator’s <strong>Manual</strong>)<br />
DANGER - RISK OF FIRE<br />
NO SMOKING - Keep ALL sources of ignition out of the room in which this product is located and<br />
away from areas where oxygen is being delivered. Textiles, oil and other combustibles are easily<br />
ignited and burn with great intensity in oxygen enriched air.<br />
DANGER - ELECTRIC SHOCK<br />
DO NOT remove cover. Refer servicing to qualified service personnel.<br />
Flowrates below 0.5 L/min. will trigger Low Flow Alarm (rapid audible alarm).<br />
Set flowmeter at 3.0 L/min. or less when filling HomeFill® cylinders.<br />
CAUTION: Federal (USA) law restricts this device to sale by or on the order of a physician.<br />
HomeFill®<br />
Compatible<br />
Serial Number Label is<br />
located on the resonator<br />
intake assembly<br />
Specification Label is<br />
located on the back<br />
near the bottom<br />
Perfecto Series 6 Part No 1143482<br />
2
SECTION 1—GENERAL GUIDELINES<br />
SECTION 1—GENERAL GUIDELINES<br />
In order to ensure the safe installation, assembly and<br />
operation of the Perfecto 2 concentrator these instructions<br />
MUST be followed.<br />
WARNING<br />
This section contains important information for the safe<br />
operation and use of this product.<br />
To Reduce the Risk of Burns,<br />
Electrocution, Fire or Injury to Persons<br />
DANGER<br />
Risk of electric shock. DO NOT disassemble. Refer servicing<br />
to qualified service personnel. No user serviceable parts.<br />
Avoid using while bathing. If continuous usage is required<br />
by the physician’s prescription, the concentrator MUST be<br />
located in another room at least 7 ft from the bath.<br />
DO NOT come in contact with the concentrator while wet.<br />
DO NOT place or store product where it can drop into<br />
water or other liquid.<br />
DO NOT reach for product that has fallen into water.<br />
Unplug IMMEDIATELY.<br />
If the concentrator has a damaged cord or plug, if it is not<br />
working properly, if it has been dropped or damaged, or<br />
dropped into water, call qualified technician for<br />
examination and repair.<br />
A spontaneous and violent ignition may occur if oil, grease<br />
or greasy substances come in contact with oxygen under<br />
pressure. These substances MUST be kept away from the<br />
oxygen concentrator, tubing and connections, and all<br />
other oxygen equipment. DO NOT use any lubricants<br />
unless recommended by <strong>Invacare</strong>.<br />
Avoid creation of any spark near medical oxygen<br />
equipment. This includes sparks from static electricity<br />
created by any type of friction.<br />
Part No 1143482 7 Perfecto Series<br />
2
SECTION 1—GENERAL GUIDELINES<br />
Operating Information<br />
For optimum performance, <strong>Invacare</strong> recommends that each<br />
concentrator be on and running for a minimum of 30 minutes<br />
at a time. Shorter periods of operation may reduce maximum<br />
product life.<br />
Keep the oxygen tubing, cord, and unit out from under such<br />
items as blankets, bed coverings, chair cushions, clothing and<br />
away from heated or hot surfaces, including space heaters,<br />
stoves and similar electrical appliances.<br />
DO NOT move or relocate concentrator by pulling on the<br />
power cord.<br />
NEVER drop or insert any object or liquid into any opening.<br />
<strong>Invacare</strong> recommends that Crush‐Proof oxygen tubing be<br />
used with this product and not exceed 50 ft in length.<br />
There are no user serviceable parts. This does not include<br />
normal maintenance items. See maintenance section for user<br />
maintenance items.<br />
A product should NEVER be left unattended when plugged<br />
in. Make sure the Perfecto is Off when not in use.<br />
2<br />
Close supervision is necessary when this product is used near<br />
children or physically‐challenged individuals.<br />
Additional monitoring or attention may be required for<br />
patients using this device who are unable to hear or see<br />
alarms or communicate discomfort.<br />
DO NOT connect the concentrator in parallel or series with<br />
other oxygen concentrators or oxygen therapy devices.<br />
Radio Frequency Interference<br />
This equipment has been tested and found to comply with<br />
EMC limits specified by IEC/EN 60601‐1‐2. These limits are<br />
designed to provide a reasonable protection against<br />
electromagnetic interference in a typical medical installation.<br />
Perfecto Series 8 Part No 1143482<br />
2
SECTION 1—GENERAL GUIDELINES<br />
Other devices may experience interference from even the low<br />
levels of electromagnetic emissions permitted by the above<br />
standards. To determine if the emissions from the Perfecto is 2<br />
causing the interference, turn the Perfecto Off. If the<br />
2<br />
interference with the other device(s) stops, then the Perfecto 2<br />
is causing the interference. In such rare cases, interference<br />
may be reduced or corrected by one of the following<br />
measures:<br />
• Reposition, relocate, or increase the separation<br />
between the equipment.<br />
• Connect the equipment into an outlet on a circuit<br />
different from that to which the other device(s) is<br />
connected.<br />
Part No 1143482 9 Perfecto Series<br />
2
SECTION 2—FEATURES<br />
SECTION 2—FEATURES<br />
Oxygen Outlet<br />
Flowmeter<br />
Elapsed Time<br />
Meter<br />
Power<br />
Cord<br />
REAR VIEW<br />
Cabinet Filter<br />
*Outlet<br />
Fitting<br />
Oxygen Purity Indicator<br />
Lights / Fault and Power<br />
Indicator Lights<br />
Circuit Breaker<br />
Power Switch<br />
ACCESSORIES (NOT SHOWN):<br />
PreciseRX Pediatric Humidifier/Flowmeter<br />
Accessory - IRCPF16 (Perfecto 2 5 Only)<br />
HomeFill home oxygen compressor - IOH200<br />
*NOTE: This outlet fitting is to be<br />
used only for filling oxygen cylinders<br />
with the HomeFill home oxygen<br />
compressor. The outlet fitting does not<br />
affect concentrator performance.<br />
Refer to the HomeFill ownerʹs<br />
manual, part number 1100873, for<br />
connection and operating<br />
instructions. When not in use, the<br />
plug provided with the concentrator<br />
should be inserted into the outlet<br />
fitting. For more information about<br />
the HomeFill, contact your <strong>Invacare</strong><br />
dealer.<br />
Perfecto Series 10 Part No 1143482<br />
2
SECTION 3—HANDLING<br />
SECTION 3—HANDLING<br />
The concentrator should ALWAYS be kept in the upright<br />
position to prevent cabinet damage while being transported.<br />
If the concentrator is to be reshipped by common carrier,<br />
additional cartons are available from <strong>Invacare</strong>.<br />
Unpacking<br />
NOTE: For this procedure, refer to FIGURE 3.1.<br />
1. Check for any obvious<br />
damage to the carton or<br />
its contents. If damage is<br />
evident, notify the<br />
carrier, or your local<br />
dealer.<br />
2. Remove all loose packing<br />
from the carton.<br />
3. Carefully remove all the<br />
components from the<br />
carton. FIGURE 3.1 Unpacking<br />
NOTE: Unless the oxygen concentrator is to be used immediately,<br />
retain containers and packing materials for storage until use of the<br />
concentrator is required.<br />
Inspection<br />
Inspect/examine exterior of the oxygen concentrator for nicks,<br />
dents, scratches or other damages. Inspect all components.<br />
Storage<br />
1. Store the repackaged oxygen concentrator in a dry area.<br />
2. DO NOT place objects on top of repackaged concentrator.<br />
Part No 1143482 11 Perfecto Series<br />
2
SECTION 4—TYPICAL PRODUCT PARAMETERS<br />
SECTION 4—TYPICAL PRODUCT<br />
PARAMETERS<br />
Electrical Requirements: 120 VAC ± 10% (132 VAC/108 VAC), 60 Hz<br />
Rated Current Input: 3 A<br />
Sound Level: 43 ± 2 dBA Average for Perfecto Models and<br />
2<br />
Perfecto V Model<br />
2<br />
40 ± 2 dBA Average for Perfecto W Models<br />
2<br />
Altitude: All Perfecto 2 Models: Up to 8,000 ft (2438<br />
meters) above sea level without degredation of<br />
concentration levels. From 8,000 ft to 13,129<br />
(4000 meters) below 90% efficiency.<br />
*Oxygen Output<br />
Concentration Levels:<br />
Maximum Outlet Pressure:<br />
All Perfecto 2 Models while filling a<br />
HomeFill System: Up to 6,000 ft (1828 meters)<br />
above sea level without degradation of<br />
concentration levels. From 6,000 ft (1828 meters)<br />
to 13,129 ft (4000 meters) below 90% efficiency.<br />
87% to 95.6% for flows ranging at 0.5 to 5 L/min<br />
5 psi ± 0.5 psi (34.5 kPa ± 3.45 kPa)<br />
Flow Range: 0.5 to 5 L/min<br />
For flowrates less than 1 L/min, we recommend<br />
the use of the <strong>Invacare</strong> Pediatric Flowmeter<br />
IRCPF16 Accessory.<br />
Low Flow Alarm: 0 L/min to 0.5 L/min<br />
Rapid Audible Alarm Beeping (No Accessories<br />
Connected).<br />
Average Power<br />
Consumption:<br />
Pressure Relief Mechanism<br />
Operational at:<br />
Perfecto 2 and Perfecto 2 W Models: 280 W<br />
(Operating @ 3 L/min)<br />
Perfecto 2 V Model: 325 W<br />
35 psi ± 3.5 psi (241 kPa ± 24.1 kPa)<br />
Perfecto Series 12 Part No 1143482<br />
2
Change in maximum<br />
recommended flow when<br />
back pressure of 7kPa is<br />
applied:<br />
SECTION 4—TYPICAL PRODUCT PARAMETERS<br />
0.7 L/min<br />
Filters: Cabinet, Outlet HEPA and Compressor Inlet<br />
Safety System: Current overload or line surge shutdown. High<br />
temperature compressor shutdown. High<br />
Pressure Alarm w/compressor shutdown. Low<br />
Pressure Alarm w/compressor shutdown.<br />
Battery Free Power Loss Alarm. SensO Oxygen<br />
2<br />
System (SensO Model) Low Flow Alarm.<br />
2<br />
Width: 15 in ± 3/8 in (38.1 cm ± 1 cm)<br />
Height: 23 in ± 3/8 in (58.4 cm ± 1 cm)<br />
Depth: 12 in ± 3/8 in (30.5 cm ± 1 cm)<br />
Weight: 43 lbs ± 2 lbs (19.5 kg ± 1 kg) Perfecto Models<br />
2<br />
45 lbs ± 2 lbs (20.5 kg ± 1 kg) Perfecto W Models<br />
2<br />
40 lbs ± 2 lbs (18.1 kg ± 1 kg) Perfecto V Model<br />
2<br />
Shipping Weight: 48 lbs ± 2 lbs (21.8 kg ± 1 kg) Perfecto 2 Models<br />
50 lbs ± 2 lbs (22.8 kg ± 1 kg) Perfecto 2 W Models<br />
45 lbs ± 2 lbs (20.4 kg ± 1 kg) Perfecto 2 V Model<br />
Operating Ambient<br />
Temperature:<br />
50°F - 95°F (10°C - 35°C) at 20-60% relative<br />
humidity Perfecto 2 Models and Perfecto 2 V Model<br />
50°F - 90°F (10°C - 32°C) at 20-60% relative<br />
humidity Perfecto 2 W Models<br />
Exhaust: Less than Ambient + 35°F (+19°C)<br />
Oxygen Output<br />
Temperature:<br />
Less than Ambient + 6°F (+3°C)<br />
Cabinet: Impact Resistant flame-retardant plastic cabinet<br />
that conforms to UL94V-0.<br />
Regulatory Listing: Double Insulated Product ETL certified<br />
complying with UL1431 and UL1097 ETL certified<br />
to CSA C22.2 No. 68.<br />
Electrical: No extension cords.<br />
Part No 1143482 13 Perfecto Series<br />
2
SECTION 4—TYPICAL PRODUCT PARAMETERS<br />
Placement: No closer than three inches from any wall,<br />
furniture, draperies, or similar surfaces.<br />
Tubing: 7 ft cannula with a maximum 50 ft of Crush-Proof<br />
Tubing (DO NOT pinch).<br />
Relative Humidity: 20 to 60%<br />
Time of Operation: Up to 24 hours per day.<br />
Recommended Storage<br />
and Shipping Temperature:<br />
-20°F to 150°F (-29°C to 65°C), at 15-95%<br />
relative humidity.<br />
*NOTE: Stated concentration levels achieved after initial warm‐up<br />
period (approximately 30 minutes).<br />
Perfecto Series 14 Part No 1143482<br />
2
SECTION 5—OPERATING INSTRUCTIONS<br />
SECTION 5—OPERATING<br />
INSTRUCTIONS<br />
Introduction<br />
Your oxygen concentrator is intended for individual use<br />
indoors. It is an electronically operated device that separates<br />
oxygen from room air. It provides high concentration of oxygen<br />
directly to you through a nasal cannula. Clinical studies have<br />
documented that oxygen concentrators are therapeutically<br />
equivalent to other types of oxygen delivery systems.<br />
Your provider will show you how to use your oxygen<br />
concentrator. He/She should be contacted with any questions<br />
or problems regarding your oxygen concentrator. This<br />
owner’s manual will tell you about your concentrator and will<br />
serve as a reference as you use your concentrator.<br />
Select a Location<br />
WARNING<br />
NEVER block the air openings of the product or place it on a<br />
soft surface, such as a bed or couch, where the air opening may<br />
be blocked. Keep the openings free from lint, hair and the like.<br />
Keep unit at least 3 inches away from walls, draperies,<br />
furniture, and the like.<br />
You may select a room where using your oxygen concentrator<br />
would be most convenient. Your concentrator can be easily<br />
rolled from room to room on its casters.<br />
Your oxygen concentrator will perform best when operated<br />
under the following conditions. Refer to Typical Product<br />
Parameters on page 12. Usage in environments other than<br />
those described may result in the need for increased<br />
equipment maintenance. The air intake of the unit should be<br />
located in a well ventilated area to avoid smoke, airborne<br />
pollutants and/or fumes. DO NOT place in a closet.<br />
Part No 1143482 15 Perfecto Series<br />
2
SECTION 5—OPERATING INSTRUCTIONS<br />
Set Up<br />
Plug in Power Cord<br />
Plug in power cord to an electrical outlet.<br />
Connect Humidifier (If So Prescribed)<br />
WARNING<br />
DO NOT overfill humidifier.<br />
DO NOT reverse the oxygen input and output connections.<br />
Water from the humidifier bottle will travel through the<br />
cannula back to the patient.<br />
NOTE: For this procedure, refer to FIGURE 5.1, FIGURE 5.2 on<br />
page 17, FIGURE 5.3 on page 18.<br />
1. Remove cap from bottle.<br />
2. Fill humidifier with distilled water to the level indicated<br />
by the manufacturer. Replace the humidifier cap and<br />
securely tighten.<br />
Humidifier<br />
Bottle with Cap<br />
Humidifier<br />
Bottle w/o Cap<br />
FIGURE 5.1 Filling the Humidifier<br />
3. Insert a flathead screwdriver in the plate groove on the top<br />
edge of the filter access door and gently pry the filter<br />
access door off (FIGURE 5.2).<br />
4. Pull up and remove the humidifier bottle adapter<br />
(FIGURE 5.2).<br />
Perfecto Series 16 Part No 1143482<br />
2
Humidifier<br />
Bottle Adapter<br />
SECTION 5—OPERATING INSTRUCTIONS<br />
Insert Flat Head<br />
Screwdriver<br />
Here<br />
Cabinet Filter<br />
Filter Access Door<br />
FIGURE 5.2 Humidifer Bottle Adapter<br />
5. Attach the humidifier bottle adapter to the humidifier<br />
bottle by turning the wing nut on the humidifier bottle<br />
counterclockwise until it is securely fastened. See Detail<br />
“A” in FIGURE 5.3.<br />
6. Place the humidifier bottle/adapter assembly in the<br />
humidifier compartment on the concentrator. See Detail<br />
“B” in FIGURE 5.3.<br />
7. Attach oxygen tubing from the humidifier bottle/adapter<br />
assembly to oxygen outlet connector on the concentrator.<br />
See Detail “B” in FIGURE 5.3.<br />
8. Attach the cannula/patient supply tubing to the<br />
humidifier bottle outlet. See Detail “B” in FIGURE 5.3.<br />
9. After assembly, ensure that oxygen is flowing through the<br />
cannula.<br />
Part No 1143482 17 Perfecto Series<br />
2
SECTION 5—OPERATING INSTRUCTIONS<br />
DETAIL “A” DETAIL “B”<br />
Humidifier<br />
Bottle<br />
Adapter<br />
Humidifier<br />
Bottle<br />
Power Switch<br />
Oxygen<br />
Tubing<br />
Humidifier<br />
Bottle<br />
Outlet<br />
Humidifier<br />
Bottle<br />
Humidifier<br />
Compartment<br />
FIGURE 5.3 Humidifier Compartment<br />
NOTE: For this procedure, refer to<br />
FIGURE 5.4.<br />
1. Press power switch to on<br />
position. All the panel<br />
lights and the audible<br />
alarm will come on for<br />
one second, indicating<br />
that the unit is functioning<br />
properly.<br />
Oxygen Outlet<br />
Connector<br />
On/Off<br />
(I/O)<br />
Power<br />
Switch<br />
FIGURE 5.4 Power Switch<br />
Perfecto Series 18 Part No 1143482<br />
2
Flowrate<br />
SECTION 5—OPERATING INSTRUCTIONS<br />
NOTE: For this procedure, refer to FIGURE 5.5 on page 20.<br />
1. Turn the flowrate knob to the setting prescribed by your<br />
physician or therapist.<br />
CAUTION<br />
Never set the flow greater than 5 L/min.<br />
WARNING<br />
DO NOT change the L/min setting on the flowmeter unless a<br />
change has been prescribed by your physician or therapist.<br />
NOTE: To properly read the flowmeter, locate the prescribed flowrate<br />
line on the flowmeter. Next, turn the flow knob until the ball rises to<br />
the line. Now, center the ball on the L/min line prescribed.<br />
2. If the flowrate on the flowmeter ever falls below 0.5 L/min<br />
for more than about one minute, the LOW FLOW alarm<br />
will be triggered. This is a rapid beeping of the audible<br />
alarm. Check your tubing or accessories for blocked or<br />
kinked tubing or a defective humidifier bottle. After rated<br />
flow is restored, between 0.5 L/min and 0.75 L/min, the<br />
LOW FLOW audible alarm will turn off.<br />
NOTE: The use of some accessories such as the pediatric flowstand<br />
and the HomeFill compressor will deactivate the Low Flow Alarm.<br />
Part No 1143482 19 Perfecto Series<br />
2
SECTION 5—OPERATING INSTRUCTIONS<br />
Flow Knob<br />
Flowmeter<br />
0.5 L/min<br />
Ball<br />
Front Panel<br />
FIGURE 5.5 Flowrate<br />
Front Panel Indicators - Units with<br />
SensO 2<br />
The SensO 2 feature monitors the purity of oxygen generated<br />
by the oxygen concentrator. If purity falls below factory preset<br />
standards, indicator lights on the control panel will<br />
illuminate.<br />
Auto Shut Down<br />
Use Backup<br />
Below<br />
Normal<br />
Normal<br />
OXYGEN PURITY<br />
O2<br />
RED<br />
Call Supplier<br />
YELLOW<br />
GREEN<br />
FIGURE 5.6 Front Panel Indicators - Units with SensO2<br />
Perfecto Series 20 Part No 1143482<br />
2
SECTION 5—OPERATING INSTRUCTIONS<br />
Initial Startup of the Concentrator<br />
NOTE: Concentrator may be used during the initial start warm‐up<br />
time (approximately 30 min.) while waiting for the O 2 purity to<br />
reach maximum.<br />
LABEL<br />
SYMBOL<br />
O2<br />
O 2 PURITY INDICATOR LIGHTS (LED)<br />
SYSTEM OKAY<br />
O 2 over 85% (± 2%)<br />
O 2 Between 73% (± 3%)<br />
to 85% (±2%)<br />
SYSTEM FAILURE<br />
O 2 Below 73% (±3%)<br />
GREEN Indicator Light<br />
Front Panel Indicators - Units without<br />
SensO 2<br />
NOTE: For this procedure, refer to FIGURE 5.7.<br />
Auto Shut Down<br />
Use Backup<br />
Normal<br />
I/O<br />
YELLOW Indicator light<br />
A. YELLOW Solid<br />
B. YELLOW Flashing Sensor<br />
Failure<br />
Call a qualified technician. Have a<br />
back-up supply of oxygen ready.<br />
RED Indicator Light<br />
Continuous Audible Alarm<br />
Sieve-GARD Compressor Shutdown.<br />
Call a qualified technician.<br />
Switch to a back-up supply of oxygen<br />
immediately.<br />
RED<br />
Call Supplier<br />
GREEN<br />
FIGURE 5.7 Front Panel Indicators - Units without SensO2<br />
Part No 1143482 21 Perfecto Series<br />
2
SECTION 5—OPERATING INSTRUCTIONS<br />
Initial Startup of the Concentrator<br />
NOTE: Concentrator may be used during the initial start warm‐up<br />
time (approximately 30 min). O 2 purity will build to a maximum<br />
during this period.<br />
LABEL<br />
SYMBOL<br />
I/O<br />
STATUS INDICATOR LIGHTS<br />
(LED)<br />
SYSTEM OKAY GREEN Indicator Light<br />
SYSTEM FAILURE RED Indicator light<br />
Continuous Audible Alarm<br />
Sieve-GARDCompressor<br />
Shutdown<br />
Call a qualified technician. Switch<br />
to a back-up supply of oxygen<br />
immediately.<br />
Perfecto Series 22 Part No 1143482<br />
2
SECTION 6—MAINTENANCE<br />
SECTION 6—MAINTENANCE<br />
WARNING<br />
The <strong>Invacare</strong> concentrators are specifically designed to<br />
minimize routine preventive maintenance. Only qualified<br />
personnel should perform preventive maintenance on the<br />
concentrator.<br />
Power should be disconnected before beginning preventive<br />
maintenance on the <strong>Invacare</strong> concentrator.<br />
NOTE: At a minimum, preventive maintenance MUST be<br />
performed according to the maintenance record guidelines. In places<br />
with high dust or soot levels, maintenance may need to be performed<br />
more often. Refer to Preventive Maintenance Record on page 25.<br />
Routine Maintenance<br />
NOTE: The following routine maintenance should be performed<br />
more frequently. See recommended intervals in each section and<br />
preventive maintenance record.<br />
Cleaning the Cabinet Filter<br />
CAUTION<br />
DO NOT operate the concentrator without the filter installed.<br />
NOTE: For this procedure, refer to FIGURE 6.1 on page 24.<br />
NOTE: There is one cabinet filter located on the back of the cabinet.<br />
1. Remove the filter and clean at least once a week depending<br />
on environmental conditions.<br />
NOTE: Environmental conditions that may require more frequent<br />
cleaning of the filters include but are not limited to: high dust, air<br />
pollutants, etc.<br />
Part No 1143482 23 Perfecto Series<br />
2
SECTION 6—MAINTENANCE<br />
2. Clean the cabinet filter with a vacuum cleaner or wash in<br />
warm soapy water and rinse thoroughly.<br />
3. Dry the filter thoroughly before reinstallation.<br />
FIGURE 6.1 Cleaning the Cabinet Filter<br />
Cleaning the Cabinet<br />
Clean the cabinet with a mild household cleaner and<br />
non‐abrasive cloth or sponge.<br />
Cleaning the Humidifier<br />
NOTE: To clean the oxygen humidifier, follow the instructions<br />
provided by the manufacturer. If none are provided, follow these<br />
STEPS:<br />
1. Clean the humidifier every day.<br />
2. Wash it in soapy water and rinse it with a solution of ten<br />
parts water and one part vinegar.<br />
3. Rinse thoroughly with hot water and refill with distilled<br />
water to the level shown on the humidifier.<br />
Perfecto Series 24 Part No 1143482<br />
2
PREVENTIVE MAINTENANCE RECORD<br />
MODEL NO. IRC SERIAL NO.<br />
ON EACH INSPECTION<br />
Record Date of Service<br />
Record Elapsed Hours On Hour Meter<br />
Clean Cabinet Filter(s)<br />
Check Prescribed L/min. Flow Rate<br />
EVERY 4,380 HOURS<br />
Check Oxygen Concentration<br />
(UNITS WITHOUT SensO ) 2<br />
EVERY 26,280 HOURS OR 3 YEARS, WHICHEVER COMES FIRST<br />
Check Oxygen Concentration<br />
( UNITS WITH SensO 2)<br />
DURING PREVENTIVE MAINTENANCE SCHEDULE, OR BETWEEN PATIENTS<br />
Clean/Replace Cabinet Filter(s)<br />
Check Outlet HEPA Filter*<br />
Check Compressor Inlet Filter*<br />
SECTION 6—MAINTENANCE<br />
FIGURE 6.2 Preventive Maintenance Record<br />
Part No 1143482 25 Perfecto Series<br />
2<br />
Check Power Loss Alarm<br />
AS REQUIRED<br />
Clean Heat Exchanger<br />
Replace Exhaust Muffler<br />
Rebuild Top End of Compressor<br />
*NOTE: Refer to Preventive Maintenance section of Service <strong>Manual</strong>.<br />
NOTE:<br />
4,380 hours are equivalent to usage 24 hours per day, 7 days per week, for 6 months.<br />
26,280 hours are equivalent to usage 24 hours per day, 7 days per week, for 3 years.
SECTION 7—TROUBLESHOOTING GUIDE<br />
SECTION 7—TROUBLESHOOTING<br />
GUIDE<br />
SYMPTOM: PROBABLE CAUSE: SOLUTION:<br />
Alarm:<br />
Short beeps, long<br />
pause<br />
Concentrator not<br />
operating,<br />
power switch On.<br />
Beep......Beep......<br />
Alarm:<br />
Continuous<br />
Concentrator not<br />
operating, Power<br />
Switch On.<br />
Beeeeeeeep....<br />
Alarm:<br />
Rapid<br />
Beep....Beep...<br />
Beep...Beep<br />
Main Power Loss:<br />
1. Power cord not<br />
plugged in.<br />
1. Insert plug into outlet.<br />
2. No power at outlet. 2. Inspect house circuit<br />
breakers or fuses. If problem<br />
recurs, use a different outlet.<br />
3. Tripped circuit 3. Call Service Provider.<br />
breaker.<br />
System Failure:<br />
1. Unit overheating due<br />
to blocked air intake.<br />
2. Insufficient power at<br />
outlet.<br />
3. Internal repairs<br />
required.<br />
Low Flow Alarm:<br />
1. Kinked or blocked<br />
tubing, cannula or<br />
humidifier.<br />
2. Flowmeter set at 0.5<br />
L/min or less.<br />
1a. Remove and clean cabinet<br />
filters.<br />
1b. Move oxygen<br />
concentrator at least three<br />
inches away from walls,<br />
draperies or furniture.<br />
2. DO NOT use extension<br />
cords. Move to another<br />
electrical outlet or circuit.<br />
3. Call Service Provider.<br />
1. Inspect for kinks or<br />
blockages. Correct, clean or<br />
replace item. Once<br />
corrected, turn power Off for<br />
60 seconds and then turn<br />
power back ON.<br />
2. Reset flowmeter to<br />
prescribed flowrate. If<br />
prescribed flowrate is below<br />
0.5 L/min, use the Pediatric<br />
Flowmeter IRCPF16 (Only<br />
with Perfecto 5).<br />
2<br />
Perfecto Series 26 Part No 1143482<br />
2
YELLOW or RED<br />
light Illuminated.<br />
Alarm:<br />
Continuous<br />
On RED light<br />
only.<br />
* Only applies to<br />
IRC5PO2.<br />
SECTION 7—TROUBLESHOOTING GUIDE<br />
SYMPTOM: PROBABLE CAUSE: SOLUTION:<br />
GREEN light with<br />
YELLOW Light<br />
Flashing.<br />
1. Low oxygen purity.* 1. Clean or Replace filters.<br />
2. Kinked or blocked<br />
tubing, cannula or<br />
humidifier.*<br />
3. Flowmeter set at 0.5<br />
L/min or less.*<br />
4. Unit overheating due<br />
to blocked air intake.<br />
5. Insufficient power at<br />
outlet.<br />
6. Internal repairs<br />
required.<br />
1. Internal repairs<br />
required.<br />
2. Inspect for kinks or<br />
blockages. Correct, clean or<br />
replace item. Once<br />
corrected, turn power Off for<br />
60 seconds and then turn<br />
power back On.<br />
3. Check flowmeter is set to<br />
1.0 L/min or more.<br />
4a. Remove and clean cabinet<br />
filters.<br />
4b. Move concentrator at<br />
least three inches from walls,<br />
draperies, and furniture.<br />
5. DO NOT use extension<br />
cords. Move to another<br />
electrical outlet or circuit.<br />
6. Call Service Provider.<br />
1. Call Service Provider.<br />
Part No 1143482 27 Perfecto Series<br />
2
NOTES<br />
NOTES<br />
Perfecto Series 28 Part No 1143482<br />
2
NOTES<br />
NOTES<br />
Part No 1143482 29 Perfecto Series<br />
2
NOTES<br />
NOTES<br />
Perfecto Series 30 Part No 1143482<br />
2
LIMITED WARRANTY<br />
LIMITED WARRANTY<br />
NOTE: THE WARRANTY BELOW HAS BEEN DRAFTED TO COMPLY<br />
WITH FEDERAL LAW APPLICABLE TO PRODUCTS<br />
MANUFACTURED AFTER JULY 4, 1975.<br />
This warranty is extended only to the original purchaser who purchases<br />
this product when new and unused from <strong>Invacare</strong> Corporation or a<br />
dealer. This warranty is not extended to any other person or entity and it<br />
is not transferable or assignable to any subsequent purchaser or owner.<br />
Coverage under this warranty will end upon any such subsequent sale or<br />
other transfer of title to any other person. This warranty gives you specific<br />
legal rights and you may also have other legal rights which may vary from<br />
state to state.<br />
<strong>Invacare</strong> Corporation warrants its Perfecto 2 Oxygen Concentrators when<br />
purchased new and unused to be free from defects in materials and<br />
workmanship for a period of three years from date of purchase from<br />
<strong>Invacare</strong> or a dealer, with a copy of the seller’s invoice required for<br />
coverage under this warranty.<br />
DO NOT OPEN OR ATTEMPT TO SERVICE THE 4-WAY VALVE<br />
BODY. This will void any and all warranty applicable to the valve body. If<br />
within such warranty periods any such product shall be proven to <strong>Invacare</strong><br />
Corporation's satisfaction to be defective, such product shall be repaired<br />
or replaced, at <strong>Invacare</strong> Corporation's option. This warranty only applies<br />
to the labor for repairs performed by the <strong>Invacare</strong> Service Department or<br />
<strong>Invacare</strong> Authorized Service Centers. It does not apply to the labor<br />
performed by the purchaser or user. This warranty does not include<br />
normal wear and tear or shipping charges. <strong>Invacare</strong> Corporation's sole<br />
obligation and your exclusive remedy under this warranty shall be limited<br />
to such repair or replacement. Routine maintenance items, such as filters,<br />
are excluded from this warranty.<br />
For warranty service, please contact <strong>Invacare</strong> Corporation's Service<br />
Department at the toll free number on the back cover. Upon receiving<br />
notice of an alleged defect in a product, <strong>Invacare</strong> Corporation will issue a<br />
serialized return authorization. It shall then be the responsibility of the<br />
purchaser to return the entire unit or remove, at purchaser's cost, the<br />
defective component part(s) identified, pack the component part(s) in a<br />
manner to avoid shipping damage and to ship the component part(s) to<br />
either <strong>Invacare</strong> Corporation's plant or service center as specified by<br />
<strong>Invacare</strong> Corporation in advance. Defective component part(s) MUST be<br />
returned for warranty inspection using the serial number as identification<br />
within thirty days of return authorization date. DO NOT return products<br />
to our factory without prior consent. C.O.D. shipments will be refused;<br />
please prepay shipping charges.<br />
Part No 1143482 31 Perfecto Series<br />
2
LIMITATIONS AND EXCLUSIONS: THE FOREGOING WARRANTY<br />
SHALL NOT APPLY TO PRODUCTS SUBJECTED TO NEGLIGENCE,<br />
ACCIDENT, IMPROPER OPERATION, MAINTENANCE OR STORAGE,<br />
SOOT OR SMOKE-FILLED ENVIRONMENTS, OR OTHER THAN<br />
NORMAL APPLICATION, USE OR SERVICE, OR TO PRODUCTS<br />
MODIFIED WITHOUT INVACARE CORPORATION'S EXPRESS<br />
WRITTEN CONSENT (INCLUDING, BUT NOT LIMITED TO,<br />
MODIFICATION THROUGH THE USE OF UNAUTHORIZED PARTS<br />
OR ATTACHMENTS) OR TO PRODUCTS DAMAGED BY REASON OF<br />
REPAIRS MADE TO ANY COMPONENT WITHOUT THE SPECIFIC<br />
CONSENT OF INVACARE CORPORATION OR TO PRODUCTS<br />
DAMAGED BY CIRCUMSTANCES BEYOND INVACARE<br />
CORPORATION'S CONTROL.<br />
THE FOREGOING EXPRESS WARRANTY IS EXCLUSIVE AND IN<br />
LIEU OF ANY OTHER WARRANTIES WHATSOEVER, WHETHER<br />
EXPRESS OR IMPLIED, INCLUDING THE IMPLIED WARRANTIES OF<br />
MERCHANTABILITY AND FITNESS FOR A PARTICULAR PURPOSE,<br />
AND THE SOLE REMEDY FOR VIOLATIONS OF ANY WARRANTY<br />
WHATSOEVER, SHALL BE LIMITED TO REPAIR OR REPLACEMENT<br />
OF THE DEFECTIVE PRODUCT PURSUANT TO THE TERMS<br />
CONTAINED HEREIN. THE APPLICATION OF ANY IMPLIED<br />
WARRANTY WHATSOEVER SHALL NOT EXTEND BEYOND THE<br />
DURATION OF THE EXPRESS WARRANTY PROVIDED HEREIN.<br />
INVACARE SHALL NOT BE LIABLE FOR ANY CONSEQUENTIAL OR<br />
INCIDENTAL DAMAGES WHATSOEVER.<br />
SOME STATES DO NOT ALLOW THE EXCLUSION OR LIMITATION<br />
OF INCIDENTAL OR CONSEQUENTIAL DAMAGE, OR LIMITATION<br />
OF HOW LONG AN IMPLIED WARRANTY LASTS, SO THE ABOVE<br />
EXCLUSION AND LIMITATION MAY NOT APPLY TO YOU.<br />
THIS WARRANTY SHALL BE EXTENDED TO COMPLY WITH<br />
STATE/PROVINCIAL LAWS AND REQUIREMENTS.<br />
<strong>Invacare</strong> Corporation www.invacare.com<br />
USA<br />
One <strong>Invacare</strong> Way<br />
Elyria, Ohio USA<br />
44036-2125<br />
800-333-6900<br />
Technical Services<br />
800-832-4707<br />
Part No 1143482 Rev E - 11/09<br />
© 2009 <strong>Invacare</strong> Corporation. All rights<br />
reserved. Republication, duplication or<br />
modification in whole or in part is<br />
prohibited without prior written<br />
permission from <strong>Invacare</strong>. Trademarks are<br />
identified by and ®. All trademarks are<br />
owned by or licensed to <strong>Invacare</strong><br />
Corporation or its subsidiaries unless<br />
otherwise noted.