Recurve Stabilisation - Perris Archery
Recurve Stabilisation - Perris Archery
Recurve Stabilisation - Perris Archery

You also want an ePaper? Increase the reach of your titles
YUMPU automatically turns print PDFs into web optimized ePapers that Google loves.
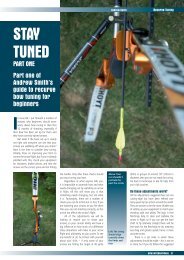
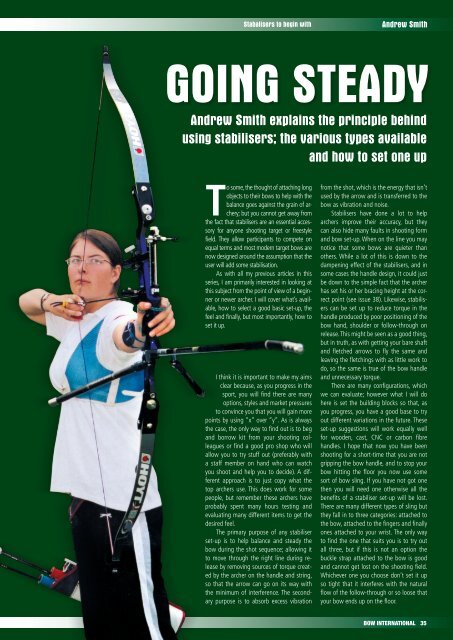
Stabalisers to begin with Andrew Smith<br />
GOING STEADY<br />
Andrew Smith explains the principle behind<br />
using stabilisers; the various types available<br />
and how to set one up<br />
To some, the thought of attaching long<br />
objects to their bows to help with the<br />
balance goes against the grain of archery;<br />
but you cannot get away from<br />
the fact that stabilisers are an essential accessory<br />
for anyone shooting target or freestyle<br />
field. They allow participants to compete on<br />
equal terms and most modern target bows are<br />
now designed around the assumption that the<br />
user will add some stabilisation.<br />
As with all my previous articles in this<br />
series, I am primarily interested in looking at<br />
this subject from the point of view of a beginner<br />
or newer archer. I will cover what’s available,<br />
how to select a good basic set-up, the<br />
feel and finally, but most importantly, how to<br />
set it up.<br />
I think it is important to make my aims<br />
clear because, as you progress in the<br />
sport, you will find there are many<br />
options, styles and market pressures<br />
to convince you that you will gain more<br />
points by using “x” over “y”. As is always<br />
the case, the only way to find out is to beg<br />
and borrow kit from your shooting colleagues<br />
or find a good pro shop who will<br />
allow you to try stuff out (preferably with<br />
a staff member on hand who can watch<br />
you shoot and help you to decide). A different<br />
approach is to just copy what the<br />
top archers use. This does work for some<br />
people, but remember these archers have<br />
probably spent many hours testing and<br />
evaluating many different items to get the<br />
desired feel.<br />
The primary purpose of any stabiliser<br />
set-up is to help balance and steady the<br />
bow during the shot sequence; allowing it<br />
to move through the right line during release<br />
by removing sources of torque created<br />
by the archer on the handle and string,<br />
so that the arrow can go on its way with<br />
the minimum of interference. The secondary<br />
purpose is to absorb excess vibration<br />
from the shot, which is the energy that isn’t<br />
used by the arrow and is transferred to the<br />
bow as vibration and noise.<br />
Stabilisers have done a lot to help<br />
archers improve their accuracy, but they<br />
can also hide many faults in shooting form<br />
and bow set-up. When on the line you may<br />
notice that some bows are quieter than<br />
others. While a lot of this is down to the<br />
dampening effect of the stabilisers, and in<br />
some cases the handle design, it could just<br />
be down to the simple fact that the archer<br />
has set his or her bracing height at the correct<br />
point (see issue 38). Likewise, stabilisers<br />
can be set up to reduce torque in the<br />
handle produced by poor positioning of the<br />
bow hand, shoulder or follow-through on<br />
release. This might be seen as a good thing,<br />
but in truth, as with getting your bare shaft<br />
and fletched arrows to fly the same and<br />
leaving the fletchings with as little work to<br />
do, so the same is true of the bow handle<br />
and unnecessary torque.<br />
There are many configurations, which<br />
we can evaluate; however what I will do<br />
here is set the building blocks so that, as<br />
you progress, you have a good base to try<br />
out different variations in the future. These<br />
set-up suggestions will work equally well<br />
for wooden, cast, CNC or carbon fibre<br />
handles. I hope that now you have been<br />
shooting for a short-time that you are not<br />
gripping the bow handle, and to stop your<br />
bow hitting the floor you now use some<br />
sort of bow sling. If you have not got one<br />
then you will need one otherwise all the<br />
benefits of a stabiliser set-up will be lost.<br />
There are many different types of sling but<br />
they fall in to three categories: attached to<br />
the bow, attached to the fingers and finally<br />
ones attached to your wrist. The only way<br />
to find the one that suits you is to try out<br />
all three, but if this is not an option the<br />
buckle strap attached to the bow is good<br />
and cannot get lost on the shooting field.<br />
Whichever one you choose don’t set it up<br />
so tight that it interferes with the natural<br />
flow of the follow-through or so loose that<br />
your bow ends up on the floor.<br />
BOW INTERNATIONAL 35
Andrew Smith<br />
The two stabiliser set ups we will<br />
look at are:<br />
• Using a single longrod.<br />
• V-bar configurations using a<br />
longrod, twin rods, v-bar and a v-bar<br />
extender.<br />
Initial considerations<br />
Before we start I am assuming that your<br />
bow is correctly set-up; your tiller and nocking<br />
point are right and your limb tips are<br />
not twisted (see issue 38 Bow Tuning parts<br />
1 & 2).<br />
One of the first considerations when<br />
looking at any stabiliser configuration is<br />
weight. Adding any stabilisers to your bow<br />
will increase the physical weight of your<br />
set-up. You may have experienced this feeling<br />
already when moving from the club’s<br />
wooden-handled bows to your first metalhandled<br />
bow. Too much weight is not a<br />
good thing as it may cause damage to the<br />
bow shoulder. It can also cause the bow<br />
shoulder to rise up and out of line in an attempt<br />
to counteract the additional weight.<br />
The good news is that carbon stabiliser<br />
rods are now readily available at all price<br />
breaks. Carbon rods reduce the physical<br />
weight and have better vibration-absorbing<br />
qualities compared to their aluminium<br />
counterparts.<br />
The second consideration is the distance<br />
the set-up sticks out from the front of<br />
your bow. I suggest for juniors and ladies<br />
with low poundage bows a good starting<br />
point with a single longrod would be<br />
26”-28” and gents 28”-30”. Draw-length<br />
and physical height also plays a part in this<br />
selection. However, this is not to say a 6ft<br />
archer with a 30” draw-length and 38lb on<br />
the fingers cannot use a 26” rod, but they<br />
would benefit more in terms of balance and<br />
vibration absorption from a 30” rod . But a<br />
10-year-old will probably find a 30” rod too<br />
difficult to manoeuvre.<br />
The third consideration is how much<br />
weight you should have on the end of the<br />
rod and/or twin rods.<br />
The single longrod<br />
The first configuration we will look at is the<br />
most simple: a single longrod. This will help<br />
the bow to move directly forwards at release<br />
and not tip backwards while keeping<br />
the bow in a vertical line and will do a lot<br />
to help you improve your scores. Some club<br />
coaches introduce the longrod as soon as<br />
the basics have been covered; others prefer<br />
to wait until the archer has some sort<br />
of consistent form. There is merit in both<br />
views but adding weight to a bow when<br />
the archer is still struggling with basic form<br />
can slow down their development.<br />
36 BOW INTERNATIONAL<br />
Stabalisers to begin with<br />
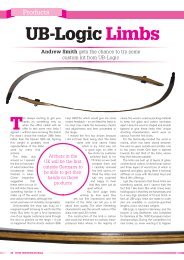
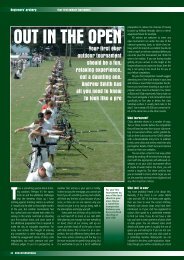
Longrods come in all shapes<br />
and sizes<br />
V-bar with extender<br />
There are many rods of different designs,<br />
lengths and weights on the market, and I<br />
have already mentioned that the only way<br />
to select one with the best feel is to try out<br />
all those within your budget. However, as<br />
you progress you will obtain a better understanding<br />
of how you want your bow to<br />
feel and be able to make sense of the finer<br />
differences. When you are ready to make<br />
this choice it’s most likely that this will<br />
not include the first longrod you buy, so at<br />
this stage a simple low-cost round parallel<br />
carbon rod with a standard weight on the<br />
end is normally sufficient. What you should<br />
really consider at this stage is the length of<br />
the rod. I made some simple rule of thumb<br />
suggestions in the introduction and if you<br />
follow these you will not go too far wrong.<br />
It is also worth trying the same make rods<br />
in different lengths to understand the difference<br />
in how they feel.<br />
When you shoot your bow with no sta-<br />
Stabilisers have<br />
done a lot to<br />
help archers<br />
improve their<br />
accuracy, but<br />
they can also<br />
hide many faults<br />
in shooting form<br />
and bow set-up<br />
One of the first<br />
considerations<br />
when looking<br />
at any stabiliser<br />
configuration is<br />
weight<br />
bilisation you have probably noticed that<br />
the bow tips backwards after each shot. In<br />
the early days, providing it’s not too dramatic,<br />
this does not matter as you are concentrating<br />
on building good form. As your<br />
shooting form improves,however, this will<br />
start to disrupt the accuracy of your shooting<br />
as the bow handle is interfering with<br />
the arrow’s path past the bow.<br />
What you are looking to achieve with<br />
any stabiliser set-up is to correct this rotation<br />
and make the bow rotate in the opposite<br />
direction (clockwise in the vertical<br />
plane) after you have released the arrow.<br />
A common mistake to achieve this is to put<br />
lots of weight at the end of the longrod,<br />
but all you should need is the weight of the<br />
rod and a small weight at the end. If you<br />
have too much weight attached to the rod<br />
you will notice that the bow wants to tip<br />
forwards at full-draw, pushing the bottom<br />
of the grip in to the palm of the hand; a<br />
similar feeling to not having the tiller set<br />
correctly. All this extra weight does is cause<br />
the arrow to go low on the target, as a<br />
result of the natural reaction to push the<br />
bottom of the grip away with the heal of<br />
the hand and send the arrow wobbling to<br />
the target. If in doubt I would suggest that<br />
you take weight off as the length/weight<br />
of the rod will work better than not using<br />
a rod at all and you can always add it later<br />
if needed.<br />
Using a longrod, v-bar, twins<br />
and a v-bar extender<br />
The most important factor in achieving<br />
good scores is good shooting form, and although<br />
most target archers eventually end<br />
up with a v-bar configuration, it is not compulsory.<br />
It is better to spend time getting<br />
used to shooting with a single longrod and<br />
perfecting your form rather than rushing in<br />
to a v-bar set up, as all you will be doing is<br />
masking basic faults and not achieving the<br />
results you deserve.<br />
If you look back through some of the<br />
older archery publications you will see that<br />
archers have tried many different stabiliser<br />
combinations, however, the most popular<br />
configuration used today is the v-bar setup<br />
and you will see it used by most of the<br />
top archers. The main reason is because it<br />
covers both bases as it helps with the vertical<br />
and horizontal balance. The downside<br />
for many beginners is that it can take time<br />
to set-up, get used to and it does add a lot<br />
of extra weight to the bow, which can be<br />
very difficult to adjust to and control, causing<br />
problems with shoulder alignment and<br />
possible injury to the shoulder muscles.<br />
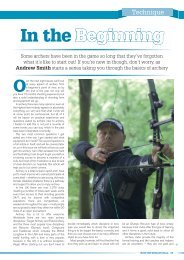
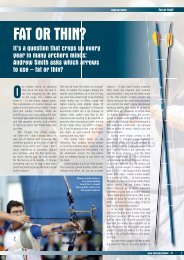
V-bars come in all shapes and sizes.<br />
There are fixed v-bars, which are basically
Twin rods<br />
a piece of rectangular aluminium where<br />
the manufacturer has predetermined the<br />
horizontal and vertical angles that the twin<br />
rods stick out. The alternative is the adjustable<br />
v-bar where you can set the angles.<br />
Personally, I prefer an adjustable v-bar as<br />
this gives me more control. The downside is<br />
that you have to make sure that the locking<br />
screws are always tight, otherwise they can<br />
move. AGF does an adjustable stabliliser<br />
that I have yet to see move, but at £42, it’s<br />
not cheap.<br />
Despite the extra equipment bolted to<br />
your bow, the set-up principle and feel required<br />
is exactly the same as that described<br />
for the single longrod. The major difference<br />
is that you can set up the twin rods to finetune<br />
the balance as they also help to keep<br />
the bow vertical at the critical time when<br />
the arrow is clearing the bow.<br />
What do I choose?<br />
All new bows these days come with 5 /16”<br />
bushings for stabilisers, some older bows<br />
maybe 8mm and in general the weights<br />
and dampeners on the end of the rods<br />
and twins are ¼” unf. Which makes things<br />
simple when mixing and matching bits and<br />
pieces.<br />
The choice of equipment is enormous,<br />
with new and updated products being<br />
introduced each year. Almost all the topbrand<br />
names offer solutions in differing<br />
price brackets. Again, I would suggest going<br />
with simple round carbon parallel rods.<br />
Some archers might say that this is a false<br />
economy as it’s possible that you will want<br />
to change it for a more expensive option in<br />
the future, however, at this stage, it’s best<br />
to keep it simple. After all, the expensive<br />
stuff may not work for you when you come<br />
to try it at a later date.<br />
The first consideration is the overall<br />
length of the final set-up and at this stage<br />
anything over 35” is probably going to be<br />
difficult to handle. As a suggestion, a 28”<br />
rod, 3” v-bar extender and 10” twin rods<br />
is a good place to start for an adult and<br />
around 29” for a junior. For younger juniors,<br />
however, the extra weight of a v-bar<br />
set-up might hinder their progress so it<br />
might be better to stay with just a longrod<br />
until their shooting form has been properly<br />
developed.<br />
V-bar configurations<br />
V-Bar attached to handle<br />
This is the easier of the two set-ups, but<br />
it can restrict your options with regards to<br />
balance, and by putting all of the weight of<br />
the v-bar on the handle below the grip it<br />
can make the set-up prone to twisting on<br />
the horizontal plain. To get the right balance,<br />
you may need a longer rod, more<br />
weight on the end or adjust the angle of the<br />
twins downwards. On the plus side it does<br />
tend to feel lighter and there is an initial<br />
feeling of increased control over the bow.<br />
When opting for this set-up make sure that<br />
either the longrod screw is long enough to<br />
go through the v-bar and securely attach<br />
to the bow or you will need to buy a v-bar<br />
bolt adapter.<br />
V-bar with extender<br />
The advantage of using the extender is that<br />
it takes some of the weight directly away<br />
from below the hand and moves the balance<br />
point further forwards. This reduces<br />
the torque on the handle, though it also<br />
changes the forward balance. You may<br />
have to reduce the weights on the end of<br />
the long rod. The length of the extension<br />
rod is personal when starting out. 3”- 4”<br />
is adequate because if it is too long it will<br />
make the set-up harder to control and/or<br />
the overall configuration will be too long,<br />
but if you get the chance to try all the options,<br />
do so. The weight of the v-bar is also<br />
more critical with this type of set-up as it<br />
will feel heavier the further away you put<br />
it from the bow.<br />
Different types of v-bars<br />
Stabalisers to begin with Andrew Smith<br />
V-bar without extender<br />
The primary<br />
purpose of<br />
any stabiliser<br />
set-up is to help<br />
balance and<br />
steady the bow<br />
during the shot<br />
sequence<br />
Stabilisers are all<br />
about balance<br />
and reducing<br />
after-shot noise<br />
and vibration<br />
Setting up the balance<br />
Stabilisers are all about balance and reducing<br />
after-shot noise and vibrations, but it<br />
is the balance that is most important; get<br />
this wrong and it will have you and the bow<br />
moving in all the wrong directions.<br />
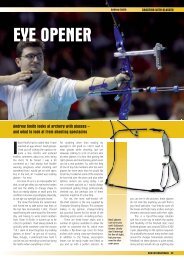
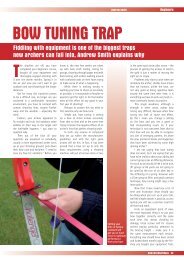
As pictures describe the balance points<br />
and desired results better than words, I<br />
have included two pictures (see next page),<br />
both showing that the bow is stable in the<br />
horizontal and vertical plane. They are not<br />
the be-all-and-end-all but they are a great<br />
place to start and most people rarely deviate<br />
too far from these settings. Once you<br />
have adjusted the stabilisers, you should<br />
find that the bow sits comfortably in the<br />
hand at full-draw with no tendency to tip<br />
forwards, backwards to the left or right and<br />
flows smoothly forwards after the release.<br />
Make sure when doing these adjustments<br />
that you put all the equipment on your bow<br />
ie sight and button, as these also affect the<br />
balance. It’s worth bearing in mind that if<br />
you have a particularly heavy sight and you<br />
move it in or out to shoot different distances<br />
this will affect the balance of your bow and<br />
is one reason archers do not feel comfortable<br />
shooting one distance over another.<br />
To get these balance-points you might<br />
find it necessary to add weights to the twins<br />
and/or longrod especially with the sight attached,<br />
which will make the bow heavier on<br />
one side. Alternatively, if you have an adjustable<br />
v-bar, you can change the horizontal<br />
and vertical angles to get the same effect.<br />
If you watch some of the top archers<br />
you will see that they let the bow rotate<br />
nearly 180˚ or until it hits their leg. Whilst<br />
it is important not to hold the grip and let<br />
the bow move smoothly forwards not all<br />
set-ups will react in this way and it is a matter<br />
of personal preference to shoot in this<br />
style. All you are trying to achieve for now<br />
BOW INTERNATIONAL 37
Andrew Smith<br />
is to get the bow to jump gently forwards<br />
and stay vertical until the arrow has cleared<br />
the bow.<br />
Dampeners and limb savers<br />
Today’s recurve target bows are designed<br />
to be shot with some level of stabilisation,<br />
not only for balance, but also to reduce<br />
noise and vibrations. In terms of shock<br />
absorption, the latest carbon fibre handles<br />
are the best, followed by cast handles and,<br />
finally, machined CNC. If your bow does<br />
sound noisy make sure that it is set-up correctly<br />
(brace height, tiller, limb alignment<br />
and everything is screwed down) before<br />
you add any additional rubber to your bow,<br />
otherwise these add-ons will only serve to<br />
mask the real problem.<br />
A dampener of some sort at the end<br />
of the longrod is very effective in reducing<br />
vibration, but again, not an essential item.<br />
An additional short rod/damper attached<br />
to the top of the handle sometimes helps<br />
with the overall balance and irons out any<br />
top limb flutter, but these are options you<br />
may want to try in the future.<br />
Finally, adding weight to the bow will<br />
affect how you shoot it and, as a direct result,<br />
how your arrows will behave so once<br />
you have set your stabilisers up it is worth-<br />
Within the last few years, I have treated<br />
more and more archers due to pain in<br />
the shoulder of the shooting arm. The<br />
pain seems to stem from the pause phase<br />
that comes directly after release. This discomfort<br />
is apparently unrelated to the<br />
usual stress placed on the arm from high<br />
draw-weight, which could arguably be the<br />
cause of shoulder pain. It is more likely<br />
that an archer would experience pain in<br />
the forearm due to a high draw-weight or<br />
improper string length (or a combination<br />
of the two), rather than experiencing it in<br />
the shoulder.<br />
Still, it is important not only to treat<br />
the injury, but rather to get to the root of<br />
the problem which lies in the choice of<br />
equipment.<br />
After speaking with patients, I have<br />
determined that, without exception, they<br />
38 BOW INTERNATIONAL<br />
Stabalisers to begin with<br />
Before we start I am<br />
assuming that your bow<br />
is correctly set-up;<br />
your tiller and nocking<br />
point are right and your<br />
limb tips are not twisted<br />
while just checking the tune of the bow to<br />
see if any changes are needed.<br />
The balance-settings above do provide<br />
a good starting point and will ensure that<br />
your bow, if shot correctly, will not be working<br />
against you on the line. As to finding<br />
the optimum set-up for you, that will come<br />
in time. However, once you have it set up<br />
as suggested, I would just spend time getting<br />
used to it and continue to work hard<br />
on your form as it is this area that will get<br />
you to where you want to be. I know many<br />
archers who have never had to deviate<br />
from these settings.<br />
Good luck, and if you have any questions<br />
or comments on this or any previous<br />
article please email me at edit@blazepublishing.co.uk.<br />
A weighty issue<br />
Germany’s 2002 national compound champion and<br />
chriopractic sports physician, Hans Pfeffer, explains the<br />
potential health risks of using overly-heavy stabilisers<br />
all use heavy stabiliser systems. Systems<br />
such as Mono-stabilisers without v-bars<br />
with side stabilisers on compound bows, as<br />
well as complete systems with Mono-stabilisers,<br />
v-bars and extender are among the<br />
examples specified. The lengths are generally<br />
between 37- 40”; the mono stabilisers<br />
were equipped with either two, three or<br />
four tuners.<br />
From personal experience, I know what<br />
such systems weigh because I used these<br />
heavy systems myself while shooting between<br />
900-1,000 shots a week. At that time,<br />
I also experienced pain in my bow shoulder.<br />
Fortunately, I was able to partly resolve<br />
the problem by using only one tuner<br />
on my stabiliser in order to reduce the<br />
weight and the amount of strength needed<br />
to hold the bow.<br />
The results were not really surprising:<br />
1st balance point<br />
2nd Balance point<br />
with a reduction in stabiliser weight, the<br />
shoulder pain also decreased. However,<br />
this created more difficulties; by reducing<br />
the amount of tuners the bow vibration<br />
increased. This is clearly not the desired<br />
result. At this time I was given the opportunity<br />
to test OK <strong>Archery</strong>’s ‘the better one’<br />
system. I was also able to let other archers<br />
to test these systems and observe the<br />
results. Adding a small weight on the end<br />
of the stabiliser ensures a clean followthrough<br />
of the bow after the shot, without<br />
dramatically increasing the total weight of<br />
the system.<br />
I determined that the strength needed<br />
to hold the bow was indeed reduced. In<br />
the meantime, many of my patients have<br />
switched to the lighter system and, since<br />
that time, the shoulder pain they were experiencing<br />
has been eliminated.