Manual - RJshop
Manual - RJshop
Manual - RJshop

Create successful ePaper yourself
Turn your PDF publications into a flip-book with our unique Google optimized e-Paper software.
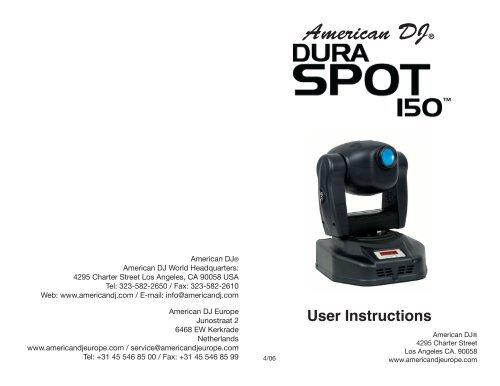
American DJ®<br />
American DJ World Headquarters:<br />
4295 Charter Street Los Angeles, CA 90058 USA<br />
Tel: 323-582-2650 / Fax: 323-582-2610<br />
Web: www.americandj.com / E-mail: info@americandj.com<br />
American DJ Europe<br />
Junostraat 2<br />
6468 EW Kerkrade<br />
Netherlands<br />
www.americandjeurope.com / service@americandjeurope.com<br />
Tel: +31 45 546 85 00 / Fax: +31 45 546 85 99<br />
4/06<br />
American DJ®<br />
User Instructions<br />
American DJ®<br />
4295 Charter Street<br />
Los Angeles CA. 90058<br />
www.americandjeurope.com
American DJ®<br />
Dura Spot 150<br />
Table of Contents<br />
Unpacking......................................................................3<br />
Introduction....................................................................3<br />
Customer Support......................................................................3<br />
Safety Precautions......................................................................4<br />
Handling Precautions..................................................................5<br />
Discharge Lamp Warnings..........................................................5<br />
Registration......................................................................6<br />
Features.........................................................................6<br />
Controls and Functions..............................................................7<br />
Set-Up.............................................................................10<br />
System Menu............................................................................13<br />
Editing Program.........................................................................25<br />
Operating Modes.......................................................................30<br />
Fuse and Lamp Replacement...................................................32<br />
DMX Traits.................................................................................34<br />
Gobo Replacement...................................................................37<br />
Cleaning..................................................................38<br />
Trouble Shooting.......................................................................38<br />
Warranty.................................................................39<br />
Specifications....................................................................40<br />
American DJ® - www.americandjeurope.com - Dura Spot 150 Instruction <strong>Manual</strong> Page 2<br />
Dura Spot 150 Specifications<br />
Model: Dura Spot 150<br />
Voltage*: 230v/50Hz<br />
Lamp: ZB-HTI152 150w 2000 Hours<br />
Dimensions: 14.7”(L) x 11.5”(W) x 17.7”(H)<br />
373mm x 292mm x 550mm<br />
Colors: 9 Plus White<br />
Gobos: 7 Rotating + Spot - All Replaceable<br />
27cm Outside/ 21cm Viewable<br />
Weight: 29 Lbs. / 10.4 kgs.<br />
Fuse: 4A (220v)<br />
Duty Cycle: None<br />
DMX: 8 Channels<br />
Sound Active: Yes<br />
Working Position: Any Safe, Secure Position<br />
Warranty: 1 Year (365 days)<br />
*Voltage is preset at the factory and is not user selectable<br />
Please Note: Specifications and improvements in the design<br />
of this unit and this manual are subject to change without any<br />
prior written notice.<br />
American DJ® - www.americandjeurope.com - Dura Spot 150 Instruction <strong>Manual</strong> Page 27
Dura Spot 150 Notes<br />
American DJ® - www.americandjeurope.com - Dura Spot 150 Instruction <strong>Manual</strong> Page 26<br />
Dura Spot 150 General Information<br />
Unpacking: Thank you for purchasing the Dura Spot 150 by American<br />
DJ®. Every Dura Spot 150 has been thoroughly tested and has<br />
been shipped in perfect operating condition. Carefully check the shipping<br />
carton for damage that may have occurred during shipping. If the<br />
carton appears to be damaged, carefully inspect your fixture for any<br />
damage and be sure all equipment necessary to operate the unit has<br />
arrived intact. In the event damage has been found or parts are missing,<br />
please contact our toll free customer support number for further<br />
instructions. Please do not return this unit to your dealer without contacting<br />
customer support first.<br />
Introduction: This unit is a 8 channel DMX intelligent scanner. It can<br />
be run as a stand-alone, sound active unit, DMX controlled unit, or in<br />
a Master/Slave configuration. This unit has been tested and the lamp<br />
has been installed at the factory, there is no assembly required. The<br />
unit is ready to be plugged in to a power outlet. There are no dipswitch<br />
settings for Master/Slave mode, just simply link the units together. To<br />
enhance the beams effects you can use a fog machine. This unit looks<br />
good in pairs.<br />
During the initial start-up or use of this product a light smoke or<br />
smell may arise from the unit. This is a normal process and is<br />
cause by the heat associated with the lamp.<br />
Customer Support: American DJ Europe® provides a customer<br />
support line, to provide help and to answer any question should you<br />
encounter problems during your set up or initial operation. You may<br />
also visit us on the web at www.americandjeurope.com for any comments<br />
or suggestions. Service Hours are Monday through Friday 9:00<br />
a.m. to 5:00 p.m.<br />
Voice: +31 45 546 85 00<br />
Fax: +31 45 546 85 99<br />
E-mail: service@americandjeurope.com<br />
Warning! To prevent or reduce the risk of electrical shock or fire, do<br />
not expose this unit to rain or moisture.<br />
Warning! This may cause severe eye damage. Avoid looking directly<br />
into the light source at all times!<br />
American DJ® - www.americandjeurope.com - Dura Spot 150 Instruction <strong>Manual</strong> Page 3
Dura Spot 150 Safety Precautions<br />
For Your Own Personal Safety, Please Read and Understand This<br />
<strong>Manual</strong> Completely Before You Attempt To Install Or Operate<br />
This Unit!<br />
• To reduce the risk of electrical shock or fire, do not expose this unit<br />
rain or moisture<br />
• Do not spill water or other liquids into or on to your unit.<br />
• Be sure that the local power outlet match that of the required voltage<br />
for your unit.<br />
• Do not attempt to operate this unit if the power cord has been<br />
frayed or broken.<br />
• Do not attempt to remove or break off the ground prong from<br />
the electrical cord. This prong is used to reduce the risk of electrical<br />
shock and fire in case of an internal short.<br />
• Disconnect from main power before making any type of connection.<br />
• Do not remove the cover under any conditions. There are no user<br />
serviceable parts inside.<br />
• Never operate this unit when it’s cover is removed.<br />
• Always be sure to mount this unit in an area that will allow proper<br />
ventilation. Allow about 6” (15cm) between this device and a wall.<br />
• Do not attempt to operate this unit, if it becomes damaged.<br />
• This unit is intended for indoor use only, use of this product outdoors<br />
voids all warranties.<br />
• Always mount this unit in safe and stable matter.<br />
• Power-supply cords should be routed so that they are not likely to<br />
be walked on or pinched by items placed upon or against them,<br />
paying particular attention to cords at plugs, convenience recep-<br />
tacles, and the point where they exit from the appliance.<br />
• Cleaning -The fixture should be cleaned only as recommended by<br />
the manufacturer. See page 38 for cleaning details.<br />
• Heat -This fixture should be situated away from heat sources such<br />
as radiators, heat registers, stoves, or other appliances (including<br />
amplifiers) that produce heat.<br />
• The fixture should be serviced by qualified service personnel when:<br />
A. Objects have fallen, or liquid has been spilled into the appliance.<br />
B. The appliance has been exposed to rain or water.<br />
C. The appliance does not appear to operate normally or exhibits a<br />
marked change in performance.<br />
Dura Spot 150 Warranty<br />
1-YEAR LIMITED WARRANTY<br />
A. American DJ® hereby warrants, to the original purchaser, American DJ® products to be<br />
free of manufacturing defects in material and workmanship for a period of 1 Year (365 days)<br />
from the date of purchase. This warranty shall be valid only if the product is purchased<br />
within the United States of America, including possessions and territories. It is the owner’s<br />
responsibility to establish the date and place of purchase by acceptable evidence, at the<br />
time service is sought.<br />
B. For warranty service, send the product only to the American DJ® factory. All shipping<br />
charges must be pre-paid. If the requested repairs or service (including parts replacement)<br />
are within the terms of this warranty, American DJ® will pay return shipping charges only<br />
to a designated point within the United States. If the entire instrument is sent, it must be<br />
shipped in its original package. No accessories should be shipped with the product. If any<br />
accessories are shipped with the product, American DJ® shall have no liability whatsoever<br />
for loss of or damage to any such accessories, nor for the safe return thereof.<br />
C. This warranty is void if the serial number has been altered or removed; if the product is<br />
modified in any manner which American DJ® concludes, after inspection, affects the reliability<br />
of the product; if the product has been repaired or serviced by anyone other than<br />
the American DJ® factory unless prior written authorization was issued to purchaser by<br />
American DJ®; if the product is damaged because not properly maintained as set forth in<br />
the instruction manual.<br />
D. This is not a service contract, and this warranty does not include maintenance, cleaning<br />
or periodic check-up. During the period specified above, American DJ® will replace defective<br />
parts at its expense, and will absorb all expenses for warranty service and repair labor<br />
by reason of defects in material or workmanship. The sole responsibility of American DJ®<br />
under this warranty shall be limited to the repair of the product, or replacement thereof,<br />
including parts, at the sole discretion of American DJ®. All products covered by this warranty<br />
were manufactured after January 1, 1990, and bear identifying marks to that effect.<br />
E. American DJ® reserves the right to make changes in design and/or improvements upon<br />
its products without any obligation to include these changes in any products theretofore<br />
manufactured.<br />
F. No warranty, whether expressed or implied, is given or made with respect to any accessory<br />
supplied with products described above. Except to the extent prohibited by applicable<br />
law, all implied warranties made by American DJ® in connection with this product, including<br />
warranties of merchantability or fitness, are limited in duration to the warranty period<br />
set forth above. And no warranties, whether expressed or implied, including warranties of<br />
merchantability or fitness, shall apply to this product after said period has expired. The<br />
consumer’s and or Dealer’s sole remedy shall be such repair or replacement as is expressly<br />
provided above; and under no circumstances shall American DJ® be liable for any loss or<br />
damage, direct or consequential, arising out of the use of, or inability to use, this product.<br />
G. This warranty is the only written warranty applicable to American DJ® Products and<br />
supersedes all prior warranties and written descriptions of warranty terms and conditions<br />
heretofore published.<br />
H. Lamps are not covered under this or any other warranty, either written or implied.<br />
American DJ® - www.americandjeurope.com - Dura Spot 150 Instruction <strong>Manual</strong> Page 4 American DJ® - www.americandjeurope.com - Dura Spot 150 Instruction <strong>Manual</strong> Page 25
Dura Spot 150 Cleaning<br />
Fixture Cleaning: Due to fog residue, smoke, and dust cleaning the<br />
internal and external optical lenses and mirror should be carried out<br />
periodically to optimize light output. Cleaning frequency depends on<br />
the environment in which the fixture operates (I.e. smoke, fog residue,<br />
dust, dew). In heavy club use we recommend cleaning on a monthly<br />
basis. Periodic cleaning will ensure longevity, and crisp output.<br />
1. Use normal glass cleaner and a soft cloth to wipe down the outside<br />
casing.<br />
2. Use a brush to wipe down the cooling vents and fan grill.<br />
3. Clean the external optics and mirror with glass cleaner and a soft<br />
cloth every 20 days.<br />
4. Clean the internal optics with glass cleaner and a soft cloth every<br />
30-60 days.<br />
5. Always be sure to dry all parts completely before plugging the unit<br />
back in.<br />
Dura Spot 150 Trouble Shooting<br />
Trouble Shooting: Listed below are a few common problems that<br />
you may encounter, with solutions.<br />
No light output from the unit;<br />
1. Be sure you have connected your unit into a standard 120v wall<br />
outlet.<br />
2. Be sure the external fuse has not blown. The fuse is located on<br />
the bottom panel of the unit.<br />
3. Remove the lamp holder and be sure the lamp is seated in its<br />
socket properly. Occasionally lamps become loose during shipping<br />
be sure the lamp is push in to its socket all the way.<br />
4. Be sure the fuse holder is completely and properly seated.<br />
Unit does not respond to sound;<br />
1. Low frequencies (bass) should cause the unit to react to sound.<br />
Tapping on the microphone, quiet or high pitched sounds may<br />
not activate the unit.<br />
American DJ® - www.americandjeurope.com - Dura Spot 150 Instruction <strong>Manual</strong> Page 24<br />
Dura Spot 150 Handling Precautions<br />
Caution! There are no user serviceable parts inside this unit. Do not<br />
attempt any repairs yourself, doing so will void your manufactures<br />
warranty. In the unlikely event your unit may require service please<br />
contact American DJ®.<br />
During operation the housing may become extremely hot. Avoid<br />
touching the unit with bare hands while in use.<br />
American DJ® will not accept any liability for any resulting damages<br />
caused by the non-observance of this manual or any unauthorized<br />
modification to this unit.<br />
Dura Spot 150 Discharge Lamp Warning<br />
This fixture is fitted with a discharge lamp which<br />
is highly susceptible to damage if improperly<br />
handled. Never touch the lamp with your bare fingers<br />
as the oil from your hands will shorten lamp<br />
life. Also, never move the fixture until the lamps<br />
have had ample time to cool. Remember, lamps<br />
are not covered under warranty conditions.<br />
This unit emits intense UV radiation which is harmful to the eyes and<br />
skin. The intense luminance of the lamp can cause severe damage<br />
to the retina. Never operate this unit without it’s covers, these covers<br />
have been specially designed to shield against UV radiation.<br />
Epileptic Warning: Those suffering from epilepsy should avoid looking<br />
directly into the lamp at all times.<br />
Avoid switching the fixture on and off repeatedly in short intervals as<br />
this will reduce lamp life and intensity.<br />
To achieve the intensity associated with discharge lamps, these lamps<br />
use gas sealed in a high pressure environment to emit a brilliant output.<br />
Due to the high pressure involved with the construction of the lamp,<br />
the lamp may explode during prolonged extensive use. This risk is<br />
increased with age, added care is encouraged when dealing with older<br />
lamps. Extreme caution should be used when operating this or any<br />
fixture fitted with a gas discharge lamp. Never open this unit while in<br />
use.<br />
American DJ® - www.americandjeurope.com - Dura Spot 150 Instruction <strong>Manual</strong> Page 5
Dura Spot 150 General Instructions<br />
To optimize the performance of this product, please read these operating<br />
instructions carefully to familiarize yourself with the basic operations of<br />
this unit. These instructions contain important safety information regarding<br />
the use and maintenance of this unit. Please keep this manual with<br />
the unit, for future reference.<br />
Dura Spot 150 Product Registration<br />
The Dura Spot 150 carries a one year limited warranty. Please fill<br />
out the enclosed warranty card to validate your purchase. All returned<br />
service items whether under warranty or not, must be freight pre-paid<br />
and accompany a return authorization (R.A.) number. The R.A. number<br />
must be clearly written on the outside of the return package. A brief<br />
description of the problem as well as the R.A. number must also be<br />
written down on a piece of paper and included in the shipping carton.<br />
If the unit is under warranty, you must provide a copy of your proof of<br />
purchase invoice. You may obtain a R.A. number by contacting our<br />
customer support team on our toll free customer support number. All<br />
packages returned to the service department not displaying a R.A.<br />
number on the outside of the package will be returned to the shipper<br />
at the shippers cost.<br />
Dura Spot 150 Features<br />
• Micro-Stepping Motors for Smooth Color and Gobo Transitions<br />
• DMX-512 Protocol Compatible (Uses Eight DMX Channels)<br />
• Independent Gobo and Color Wheels<br />
• 7 Rotating Gobos w/ Shake, + Spot - All Replaceable<br />
• 9 Colors, Plus White - With Rainbow Effect<br />
• 3 Operating Modes - Master/Slave; Stand Alone; Sound Active<br />
• Internal Microphone<br />
• ZB-HTI152 Discharge Lamp, 150w 2000 Hours<br />
• <strong>Manual</strong> Focus Lens<br />
• Variable Strobe<br />
• 360˚ Pan Movement<br />
• 265˚ Tilt Movement<br />
• Digital Display for Address and Function Setting<br />
• Mini/C Input Jack for Blackout Function<br />
(Mini/C Controller Not Included)<br />
American DJ® - www.americandjeurope.com - Dura Spot 150 Instruction <strong>Manual</strong> Page 6<br />
Dura Spot 150 Gobo Replacement<br />
Caution! Never open the unit when in use. Always disconnect<br />
the main power before attempting to change the gobos.<br />
1. To change the gobos, you must remove the bottom half of the<br />
moving head. The bottom half of the moving head is wear the fan is<br />
located.<br />
2. Unscrew the four phillips screws, that secure the bottom half, and<br />
remove.<br />
3. When you remove the bottom half, the gobo and color wheel will<br />
now be accessible. Turn the wheel with your hand until you find the<br />
gobo you would like to change. Turn the color wheel until the empty<br />
space is behind the gobo you would like to change.<br />
4. Remove the gobo fixation-ring with a small flat-head screwdriver.<br />
Put your finger through the empty space in the color wheel, and push<br />
the gobo out towards the front. When doing this you do not need a<br />
lot of pressure. You can also use tweezers to gently pull the gobo out,<br />
or a small flat-head screwdriver and gently pry out the gobo.<br />
5. Change the gobo, replace the fixation-ring, and reassemble the<br />
unit.<br />
American DJ® - www.americandjeurope.com - Dura Spot 150 Instruction <strong>Manual</strong> Page 23
Dura Spot 150 DMX Traits cont.<br />
Channel Value Function<br />
5 78 - 85 PINK<br />
86 - 92 COLOR MIX<br />
93 - 99 MAGENTA<br />
100 - 106 COLOR MIX<br />
107 - 113 LIGHT YELLOW<br />
114 - 120 COLOR MIX<br />
121 - 127 LIGHT GREEN<br />
128 - 255 RAINBOW EFFECT<br />
SLOW FAST<br />
6 SHUTTER/STROBE<br />
0 - 130 DIMMER 0 - 100<br />
131 - 253 STROBE<br />
SLOW FAST<br />
254 - 255 SHUTTER OPEN<br />
7 0 - 255 GOBO SHAKE<br />
8 0 - 255 PAN/TILT SPEED<br />
SLOW FAST<br />
American DJ® - www.americandjeurope.com - Dura Spot 150 Instruction <strong>Manual</strong> Page 22<br />
Dura Spot 150 Set Up<br />
Power Supply: Before plugging your unit in, be sure the source voltage<br />
in your area matches the required voltage for your American DJ®<br />
Dura Spot 150. The American DJ® Dura Spot 150 is available in a<br />
120v and 220v version. Because line voltage may vary from venue to<br />
venue, you should be sure your unit voltage matches the wall outlet<br />
voltage before attempting to operate you fixture. Also be sure to only<br />
use the included I.E.C. power cable supplied with the unit, this cable<br />
matches the voltage and current requirements of the unit.<br />
DMX-512: DMX is short for Digital Multiplex. This is a universal protocol<br />
used by most lighting and controller manufactures as a form of<br />
communication between intelligent fixtures and controllers. A DMX<br />
controller sends DMX data instructions from the controller to the fixture.<br />
DMX data is sent as serial data that travels from fixture to fixture<br />
via the DATA “IN” and DATA “OUT” XLR terminals located on all DMX<br />
fixtures (most controllers only have a DATA “OUT” terminal).<br />
DMX Linking: DMX is a language allowing all makes and models<br />
of different manufactures to be linked together and operate from a<br />
single controller, as long as all fixtures and the controller are DMX<br />
compliant. To ensure proper DMX data transmission, when using<br />
several DMX fixtures try to use the shortest cable path possible. The<br />
order in which fixtures are connected in a DMX line does not influence<br />
the DMX addressing. For example; a fixture assigned a DMX address<br />
of 1 may be placed anywhere in a DMX line, at the beginning, at the<br />
end, or anywhere in the middle. Therefore, the first fixture controlled<br />
by the controller could be the last fixture in the chain. When a fixture<br />
is assigned a DMX address of 1, the DMX controller knows to send<br />
DATA assigned to address 1 to that unit, no matter where it is located<br />
in the DMX chain.<br />
Data Cable (DMX Cable) Requirements (For DMX<br />
and Master/Slave Operation): The Dura Spot<br />
150 can be controlled via DMX-512 protocol.<br />
The Dura Spot 150 is a eight channel DMX unit.<br />
The DMX address is set electronically using the<br />
controls on the side panel of the unit. Your unit and<br />
your DMX controller require a standard 3-pin XLR<br />
connector for data input and data output (Figure Figure 1<br />
1). If you are making your own cables, be sure to use standard two<br />
American DJ® - www.americandjeurope.com - Dura Spot 150 Instruction <strong>Manual</strong> Page 7
SOUND<br />
1<br />
3<br />
2<br />
REMOTE<br />
CONTROL<br />
INPUT OUTPUT<br />
INPUT OUTPUT<br />
SOUND<br />
SOUND<br />
INPUT<br />
INPUT<br />
Dura Spot 150 Set Up<br />
conductor shielded cable (This cable may be purchased at almost all<br />
professional sound and lighting stores). Your cables should be made<br />
with a male and female XLR connector on either end of the cable. Also<br />
remember that DMX cable must be daisy chained and cannot be split.<br />
POWER<br />
Notice: Be sure to follow figures two and three when making your own<br />
DMX512<br />
cables. Do not use DMX+,DMX-,COMMON the ground lug on the XLR connector. Do not connect<br />
the cable’s shield conductor to the ground lug or allow the shield<br />
conductor to come in contact with the XLR’s outer casing. Grounding<br />
the shield could cause a short circuit and erratic behavior.<br />
Figure 3<br />
DMX512 OUT<br />
3-PIN XLR<br />
1<br />
3<br />
2<br />
COMMON<br />
DMX +<br />
DMX -<br />
DMX512 IN<br />
3-PIN XLR<br />
REMOTE<br />
CONTROL<br />
American DJ® - www.americandjeurope.com - Dura Spot 150 Instruction <strong>Manual</strong> Page 8<br />
1<br />
3<br />
2<br />
Figure 2<br />
XLR Male Socket XLR Female Socket XLR Pin Configuration<br />
1 Ground<br />
2 Cold 2 Cold<br />
1 Ground Pin 1 = Ground<br />
3 Hot<br />
3 Hot<br />
Pin 2 INPUT = Data Compliment (negative)<br />
Pin 3 = Data True (positive)<br />
Special Note: Line Termination. When longer runs of cable are<br />
POWER<br />
POWER<br />
used, you may need to use a terminator on the last unit to avoid erratic<br />
behavior. A terminator is a 90-120 ohm 1/4 watt resistor which is connected<br />
between pins 2 and 3 of a male XLR connector (DATA + and<br />
DATA -). This unit is inserted in the female XLR connector of the last<br />
unit in your daisy chain to terminate the line. Using a cable terminator<br />
(ADJ part number Z-DMX/T) will decrease the possibilities of erratic<br />
behavior.<br />
DMX512 IN<br />
3-PIN XLR<br />
REMOTE<br />
CONTROL<br />
INPUT<br />
INPUT OUTPUT<br />
1<br />
3<br />
2<br />
SOUND<br />
Termination reduces signal errors and<br />
avoids signal transmission problems<br />
and interference. It is always advisable<br />
to connect a DMX terminal, (Resistance<br />
120 Ohm 1/4 W) between PIN 2 (DMX-)<br />
and PIN 3 (DMX +) of the last fixture.<br />
REMOTE<br />
CONTROL<br />
INPUT OUTPUT<br />
Figure 4<br />
POWER<br />
1<br />
3<br />
2<br />
SOUND<br />
Termination reduces signal errors and<br />
avoids signal transmission problems<br />
and interference. It is always advisable<br />
to connect a DMX terminal, (Resistance<br />
120 Ohm 1/4 W) between PIN 2 (DMX-)<br />
and PIN 3 (DMX +) of the last fixture.<br />
REMOTE<br />
CONTROL<br />
INPUT<br />
INPUT OUTPUT<br />
Dura Spot 150 DMX Traits<br />
Channel Value Function<br />
1 0 - 255 PAN<br />
2 0 - 255 TILT<br />
POWER<br />
3 0 - 255 GOBO WHEEL<br />
0 - 15 SPOT<br />
16 - 31 GOBO 1<br />
32 - 47 GOBO 2<br />
48 - 63 GOBO 3<br />
64 - 79 GOBO 4<br />
80 - 95 GOBO 5<br />
96 - 111 GOBO 6<br />
112 - 127 GOBO 7<br />
128 - 255 GOBO SCROLL<br />
SLOW FAST<br />
4 GOBO ROTATION<br />
0 - 83 FAST SLOW<br />
84 - 87 NO ROTATION<br />
88 - 170 SLOW FAST<br />
171 - 178 NO ROTATION<br />
179 - 255 FAST SLOW<br />
5 0 - 255 COLOR WHEEL<br />
0 - 7 WHITE<br />
8 - 14 DARK BLUE<br />
15 - 21 COLOR MIX<br />
22 - 28 DARK YELLOW<br />
29 - 35 COLOR MIX<br />
36 - 42 DARK GREEN<br />
43 - 49 COLOR MIX<br />
50 - 56 LIGHT BLUE<br />
57 - 63 COLOR MIX<br />
64 - 71 ORANGE<br />
72 - 77 COLOR MIX<br />
American DJ® - www.americandjeurope.com - Dura Spot 150 Instruction <strong>Manual</strong> Page 21
Dura Spot 150 Fuse & Lamp Replacement<br />
Optimizing Lamp Alignment: This procedure centers the lamp in the<br />
reflector. Proper optimization will increase lamp life and ensure a bright<br />
crisp output. Improper optimization may add a yellow tint to the lamp<br />
output and reduce intensity.<br />
1. Be sure main power is disconnected and allow the unit to cool. If<br />
the you have just installed a new unit you can obviously skip this<br />
step.<br />
2. Make a preliminary adjustment: Turn the three lamp adjustment<br />
thumb screws completely in (clockwise). Then back them each<br />
out (counter-clockwise) about three complete turns.<br />
3. Turn the unit on and allow it to reset.<br />
4. Using either a DMX controller or the control panel on the unit,<br />
strike the lamp and focus the light on a flat surface.<br />
5. Center the hot-spot (the brightest part of the beam) using the 3<br />
adjustment screws. Turn one screw at a time to drag the hot-spot<br />
diagonally across the projected image. If you cannot detect a hotspot,<br />
adjust the lamp until the light is even.<br />
6. To reduce a hot-spot, pull the lamp in by turning all three screws<br />
clockwise 1/4-turn at a time until the light is evenly distributed.<br />
7. If the light is brighter around the edge than it is in the center, or if<br />
light output is low, the lamp is too far back in the reflector. “Push”<br />
the lamp out by turning the screws.<br />
Optimizing Screws<br />
Optimizing Screws<br />
Fuse Replacement: Locate the unit’s power cord. The fuse holder is<br />
located above the power cord. Using a flat-head screw driver unscrew<br />
the fuse holder. Remove the bad fuse and replace with a new one.<br />
American DJ® - www.americandjeurope.com - Dura Spot 150 Instruction <strong>Manual</strong> Page 20<br />
Dura Spot 150 Set Up<br />
5-Pin XLR DMX Connectors. Some manufactures use 5-pin XLR<br />
connectors for DATA transmission in place of 3-pin. 5-pin XLR fixtures<br />
may be implemented in a 3-pin XLR DMX line. When inserting standard<br />
5-pin XLR connectors in to a 3-pin line a cable adaptor must be<br />
used, these adaptors are readily available at most electric stores. The<br />
chart below details a proper cable conversion.<br />
Conductor 3-Pin XLR Female (Out) 5-Pin XLR Male (In)<br />
Ground/Shield<br />
Data Compliment (- signal)<br />
Data True (+ signal)<br />
Not Used<br />
Not Used<br />
3-Pin XLR to 5-Pin XLR Conversion<br />
Pin 1<br />
Pin 2<br />
Pin 3<br />
Pin 1<br />
Pin 2<br />
Pin 3<br />
Pin 4 - Do Not Use<br />
Pin 5 - Do Not Use<br />
American DJ® - www.americandjeurope.com - Dura Spot 150 Instruction <strong>Manual</strong> Page 9
Dura Spot 150 System Menu<br />
MENUS: To access these menus you must press the ESC button<br />
twice and then press the UP button until you find the specific menu<br />
you are looking for.<br />
A001: At this menu you can set the DMX address. Press the Enter<br />
button, and the “A” will start flashing. Press the UP or Down buttons<br />
to find your desird address. When you have found your desired address<br />
press the Enter button to set it.<br />
TEST: In this menu you can select one of three test modes to run.<br />
Using the Up button scroll to “test” and press Enter. It will now<br />
display “Mode 1”. You can scroll to another test mode by pressing<br />
the Up button. To select your desired test mode press the Enter<br />
button. Then press the Up button to access the Speed menu. Adjust<br />
the speed, and then press the ESC (Escape) button. The test mode<br />
should now be activated. To pause the test mode, press Enter. If you<br />
want to stop test mode, pause it and then press ESC.<br />
AUDI: In this menu you can activate Sound Active mode. Using the<br />
Up button scroll to “AUDI” and press Enter. Press the Up button until<br />
“On” is displayed, and press Enter. Now, press ESC, so that the address<br />
is showing. It will take about 10 sec. for Sound Activity to start.<br />
The display will flash TEST RUN. Don’t worry the unit will be sound<br />
active.<br />
REVERSE PAN (RPAN): In this menu you can reverse the Pan function.<br />
Using the Up button scroll to “rPan” and press Enter. Press the<br />
Up button until “On” is displayed, and press Enter. Now, press ESC.<br />
This function works better when you have two units connected in a<br />
Master/Slave setup. Have one unit set to reverse Pan and the other<br />
unit left in normal Pan.<br />
REVERSE TILT ( RTILT): In this menu you can reverse the Tilt function.<br />
Using the Up button scroll to “rTilt” and press Enter. Press the<br />
Up button until “On” is displayed, and press Enter. Now, press ESC.<br />
This function works better when you have two units connected in a<br />
Master/Slave setup. Have one unit set to reverse Tilt and the other<br />
unit left in normal Tilt.<br />
DISP (Display): In this menu you can “flip” the display 180°. Using<br />
the Up button scroll to “disp” and press Enter. “Turn” should now be<br />
American DJ® - www.americandjeurope.com - Dura Spot 150 Instruction <strong>Manual</strong> Page 10<br />
Dura Spot 150 Fuse & Lamp Replacement<br />
Caution: Always replace with the exact same type lamp and fuse,<br />
unless otherwise specified by an authorized American DJ® service<br />
technician. Replacing with anything other than the specified part can<br />
damage your unit and will void your manufactures warranty.<br />
Warning: If you continue to blow lamps or fuses, STOP using the<br />
unit. Contact customer support for further instructions, you may have<br />
to return the unit for servicing. Continuing to use the unit may cause<br />
serious damage.<br />
Lamp Replacement: Caution! Never attempt to change the lamp<br />
while the fixture is plugged in. Always disconnect the main power<br />
and allow the unit ample time to cool before attempting to replace<br />
the lamp. Lamp replacement has been made simple by incorporating<br />
a slide out lamp assembly that is retained by two phillips screws.<br />
1. Be sure to follow the proper handling procedures that deal with<br />
discharge lamps.<br />
2. Remove the two small screws (A,B) on the rear of the unit<br />
3. After removing the screws, gently slide out the socket assembly<br />
from the rear of the unit to expose the lamp.<br />
4. Carefully remove the old lamp and discard it in the trash.<br />
5. Replace the lamp with an exact match and reassemble in reverse<br />
order.<br />
6. After replacing the lamp follow the optimization procedures on the<br />
next page to be sure the lamp is center in the reflector<br />
A B<br />
American DJ® - www.americandjeurope.com - Dura Spot 150 Instruction <strong>Manual</strong> Page 19
Dura Spot 150 Operation<br />
function will allow you to link up to 16 units together and operate without<br />
a controller. The units can be sound activate or run in a test mode.<br />
In Master-Slave operation one unit will act as the controlling unit and<br />
the others will react to the controlling units programs. Any unit can act<br />
as a Master or as a Slave.<br />
1. This is a very simple process. Using standard XLR microphone<br />
cables, daisy chain your units together via the XLR connector on<br />
the rear of the units. Remember the Male XLR connector is the<br />
input and the Female XLR connector is the output. For longer<br />
cable runs we suggest a terminator at the last fixture. You do not<br />
have to assign the units Master/Slave. They will automatically<br />
fall into Master/Slave mode.<br />
2. Use the sensitivity knob on the rear of the master unit to make it<br />
more or less sensative to sound.<br />
3. The optional Mini/C blackout Controller may be used with in this<br />
operation for blackout.<br />
American DJ® - www.americandjeurope.com - Dura Spot 150 Instruction <strong>Manual</strong> Page 18<br />
Dura Spot 150 System Menu<br />
displayed. Press the Up button if we wish to “flip” the display, and<br />
press Enter.<br />
VERS (Version): In this menu you can view the software version. Using<br />
the Up button scroll to “VerS” and press Enter. The version should<br />
be displayed. Press ESC to exit this menu.<br />
DEFA (Default): In this menu you can reset to the default settings.<br />
Using the Up button scroll to “deFA” and press Enter. “Yes” should<br />
be displayed. Press Enter to start the default function.<br />
R.S.E.T. (Reset): In this menu you can activate reset function. Using<br />
the Up button scroll to “r.S.e.t.” and press Enter. The unit will now<br />
begin to reset.<br />
American DJ® - www.americandjeurope.com - Dura Spot 150 Instruction <strong>Manual</strong> Page 11
Dura Spot 150 System Menu<br />
On-Board System Menu. To access these menus you must press<br />
the ESC button twice and then press the UP button until you find the<br />
specific menu you are looking for.<br />
A001 - DMX Address Setting via control board -<br />
1. Access the main menu.<br />
2. Tap the ESC button until “ADDR” is displayed, press ENTER.<br />
3. Now the display will show “A001”. Adjust the DMX address<br />
by pressing the UP or DOWN buttons.<br />
4. Press ENTER to confirm.<br />
5. Press the ESC button to return to the main menu.<br />
TEST - This will test the functions of this light.<br />
1. Access the main menu.<br />
2. Tap the ESC button until “TEST” is displayed, press ENTER.<br />
3. The display will show “Mod 1”. You can now press the up<br />
button to change between the three different modes.<br />
4. Press ESC to exit.<br />
AUDI - This function is the Sound Active mode.<br />
1. Press the ESCAPE (ESC) button until “A.001” is displayed.<br />
Then press the UP button until “AUDI” is displayed. Press the<br />
ENTER button.<br />
2. Press the UP button to display “YES”. Press ENTER to confirm.<br />
3. You can adjust the audio sensitivity of the unit by turning the<br />
audio sensitivity knob clockwise, located in the rear.<br />
Note: When the unit is in Sound Active mode, “test run” will<br />
continuously flash on the LCD screen.<br />
American DJ® - www.americandjeurope.com - Dura Spot 150 Instruction <strong>Manual</strong> Page 12<br />
Dura Spot 150 Operation<br />
this mode when running a single unit, or when running several units as<br />
individuals.<br />
SOUND ACTIVE MODE:<br />
1. To activate Sound Active mode, press the ESC button twice until<br />
“TEST” is displayed. Now press the Up button until the L.E.D. dis-<br />
plays “AUDI”, press Enter. Press the Up button until “ON” is dis-<br />
played. If “ON” is already displayed then press Enter. Now press<br />
the ESC button.<br />
2. You can now press the Up button to access the speed menu for<br />
the pan/tilt. Once you access the speed menu you can press the<br />
Up or Down buttons to change the speed. The higher the value<br />
the faster the speed.The unit will react to the low frequencies of<br />
music via the internal microphone.<br />
3. Adjust the audio sensitivity knob on the bottom of the unit to make<br />
the unit more or less sensitive to sound. Turning the sensitivity knob<br />
in the clockwise direction will increase the sensitivity, turning the<br />
knob in the counter-clockwise direction will decrease the fixture’s<br />
sensitivity to sound.<br />
4. The optional E122/C Controller may be used with this mode to<br />
control blackout.<br />
TEST MODE:<br />
When power is supplied to the unit this is the default setting. Press<br />
ESC once to select from three different modes.<br />
1. To reactivate a Test mode, press the ESC button twice. The LCD<br />
will display “TEST”, press Enter. You now have three test programs<br />
(modes) to choose from. Press the Up button or Down button to<br />
find the program that you want to activate. When you have found<br />
your desired program press Enter.<br />
2. You can now press the Up button to access the speed menu for<br />
the pan/tilt. Once you access the speed menu you can press the<br />
Up or Down buttons to change the speed. The higher the value<br />
the faster the speed.<br />
3. Now press the ESC button. The unit will react to the low frequencies<br />
of music via the internal microphone.<br />
4. The optional E122/C Controller may be used with this mode to<br />
control blackout.<br />
Master-Slave Operation (Sound Active or Test Mode): This<br />
American DJ® - www.americandjeurope.com - Dura Spot 150 Instruction <strong>Manual</strong> Page 17
Dura Spot 150 Operation<br />
Operating Modes: The Dura Spot 150 can operate in three<br />
different modes. This next section will detail the differences in<br />
the operating modes.<br />
• Stand alone mode -<br />
The unit will react to sound, chasing through the built-in programs.<br />
• Master/Slave mode -<br />
You can daisy chain up to 16 units together to get a synchronized<br />
light show without the need of an external controller. The units will<br />
react to sound chasing through the several built-in programs.<br />
• DMX control mode -<br />
This function will allow you to control each individual fixtures traits<br />
with a standard DMX-512 controller such as the Elation® Show<br />
Designer. <br />
Universal DMX Control: This unit allows you to use any universal<br />
DMX-512 controller to control mirror movement, the color wheel, the<br />
gobo wheel, and the shutter (strobe). A DMX controller allows you to<br />
create unique programs tailored to your individual needs. Follow the<br />
set-up specifications that are included with your DMX controller.<br />
1. The Dura Spot 150 uses eight DMX channels. Channel 1 con-<br />
trols pan, channel 2 controls tilt, channel 3 controls the gobo<br />
wheel, channel 4 controls the gobo rotation, channel 5 controls<br />
the color wheel, channel 6 controls the strobe effect, channel 7<br />
controls the gobo shake, and channel 8 controls the speed of pan<br />
and tilt.<br />
2. To control your fixture in DMX mode, press the ESC button twice.<br />
Now press the UP button until “A001” is displayed, press ENTER.<br />
3. Now press the UP button to set your desired address and press<br />
ENTER.<br />
4. Use the controller’s faders to control the various DMX fixture traits.<br />
5. For longer cable runs (more than a 100 feet) use a terminator on<br />
the last fixture.<br />
6. For help operating in DMX mode consult the manual included<br />
with your DMX controller.<br />
Stand-Alone Operation (Sound Active or Test Mode): This<br />
mode allows a single unit to run to the beat of the music. Only use<br />
American DJ® - www.americandjeurope.com - Dura Spot 150 Instruction <strong>Manual</strong> Page 16<br />
Dura Spot 150 System Menu<br />
RPAN - The movement of the Pan will be reversed.<br />
1. Access the main menu.<br />
2. Tap the UP button until “RPAN” is displayed, press ENTER.<br />
4. The display will show “ON/OFF”.<br />
5. Press the UP button to select “ON” to activate this function,<br />
or “OFF” to deactivate this function.<br />
6. Press ESC to confirm.<br />
7. Press ESC to return to the main menu.<br />
RTILT - The movement of the Tilt will be reversed.<br />
1. Access the main menu.<br />
3. Tap the UP button until “RTILT” is displayed, press ENTER.<br />
4. The display will show “ON/OFF”.<br />
5. Press the UP button to select “ON” to activate this function,<br />
or “OFF” to deactivate this function.<br />
6. Press ENTER to confirm.<br />
7. Press ESC to return to the main menu.<br />
DISP - This function will reverse the display 180º.<br />
1. Access the main menu.<br />
2. Tap the UP button until “DISP” is displayed.<br />
3. Press ENTER, the display will show “ON/OFF”.<br />
4. Press the UP button to select “ON” to activate this function,<br />
or “OFF” to deactivate this function.<br />
5. Press ENTER to confirm.<br />
American DJ® - www.americandjeurope.com - Dura Spot 150 Instruction <strong>Manual</strong> Page 13
Dura Spot 150 System Menu<br />
6. Press ESC to return to the main menu.<br />
VER - Use this function to display the Software version of<br />
the unit.<br />
1. Access the main menu.<br />
2. Tap the UP button until “VER” is displayed, press ENTER.<br />
3. The display will show “V-2.0”, or the latest version number.<br />
4. Press ESC to exit.<br />
DEFA - With this function you can restore the factory<br />
settings of the device. All settings will be set back to the<br />
default values.<br />
1. Access the main menu.<br />
2. Tap the UP button until “DEFA” is displayed, press ENTER.<br />
3. The display will show “ON/OFF”.<br />
4. Press the UP button to display “ON” to activate this function,<br />
or “OFF” to deactivate this function.<br />
5. Press ENTER to confirm.<br />
6. Press ESC to return to the main menu.<br />
When you exit this function, the unit will begin to reload<br />
data.<br />
R.S.E.T. - When you activate the reset function, the fixture<br />
will begin the reset motion.<br />
1. Press the ESC button until “A.001” is displayed. Then press<br />
the UP button until “R.S.E.T.” is displayed. Press the ENTER<br />
button.<br />
2. The display will show “ON/OFF”.<br />
American DJ® - www.americandjeurope.com - Dura Spot 150 Instruction <strong>Manual</strong> Page 14<br />
Dura Spot 150 System Menu<br />
3. Press the UP button to select “ON” to activate this function,<br />
or “OFF” to deactivate this function.<br />
4. Press ENTER to confirm.<br />
5. Press ESC button to return to the main menu.<br />
American DJ® - www.americandjeurope.com - Dura Spot 150 Instruction <strong>Manual</strong> Page 15