Implementing SecureW2 for Using the Wireless ... - DESY - IT
Implementing SecureW2 for Using the Wireless ... - DESY - IT
Implementing SecureW2 for Using the Wireless ... - DESY - IT

Create successful ePaper yourself
Turn your PDF publications into a flip-book with our unique Google optimized e-Paper software.
<strong>Implementing</strong> <strong>SecureW2</strong> <strong>for</strong> <strong>Using</strong> <strong>the</strong> <strong>Wireless</strong> Networks<br />
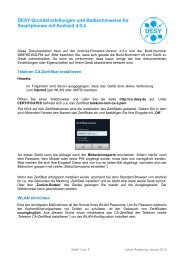
<strong>DESY</strong> and eduroam<br />
Introduction<br />
This short reference guide describes which settings are needed to implement <strong>the</strong> pre-configured<br />
<strong>SecureW2</strong> client. This tool is pre-configured <strong>for</strong> <strong>the</strong> “<strong>DESY</strong>” and “eduroam” WLAN, and it is<br />
available <strong>for</strong> download at www-it.desy.de → Services → Networks → WLAN → WLAN-<br />
Instruction. It should normally be sufficient to run <strong>the</strong> installation. The necessary network<br />
configuration will be done automatically.<br />
Install <strong>SecureW2</strong><br />
Note:<br />
Please make sure at <strong>the</strong> beginning that your <strong>Wireless</strong> network card is enabled. The<br />
procedure <strong>for</strong> this is different <strong>for</strong> each device. Support on this topic can be taken<br />
from <strong>the</strong> manual of your notebook.<br />
Windows must be activated <strong>for</strong> <strong>the</strong> WLAN management and <strong>for</strong> <strong>the</strong> automatic WLAN<br />
configuration. If you have not installed any o<strong>the</strong>r WLAN-Client, this configuration is done<br />
automatically as soon as <strong>the</strong> WLAN card is enabled. If <strong>the</strong>re exists an active WLAN client on your<br />
device it has to be deactivated. The WLAN management in Windows will <strong>the</strong>n be activated<br />
automatically.<br />
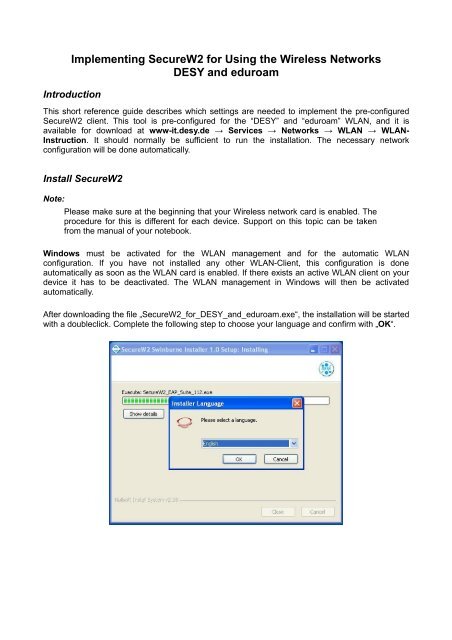
After downloading <strong>the</strong> file „<strong>SecureW2</strong>_<strong>for</strong>_<strong>DESY</strong>_and_eduroam.exe“, <strong>the</strong> installation will be started<br />
with a doubleclick. Complete <strong>the</strong> following step to choose your language and confirm with „OK“.
Click on „Next“ if <strong>the</strong> assistent <strong>for</strong> <strong>the</strong> set-up routine window pops-up.<br />
Confirm <strong>the</strong> terms of licence GNU General Public License, with „I Agree“.
Leave <strong>the</strong> choice of components as default and start <strong>the</strong> installation by clicking „Install“.<br />
In <strong>the</strong> registration mask that now opens indicate your <strong>DESY</strong> user name and <strong>the</strong> assigned WLAN<br />
password. Confirm <strong>the</strong> settings with „OK“.
To complete <strong>the</strong> installation click on „Finish“. The computer has to be rebooted.<br />
Connecting to <strong>the</strong> WLAN<br />
After <strong>the</strong> <strong>SecureW2</strong> Client had been installed and <strong>the</strong> computer was rebooted, <strong>the</strong> connection will<br />
be established automatically, if <strong>the</strong> WLAN card is enabled and provided that you are within reach of<br />
<strong>the</strong> WLAN.<br />
Note: If <strong>the</strong> connection should not be established automatically, we recommend to read<br />
<strong>the</strong> documentation „Windows XP unter Verwendung von <strong>SecureW2</strong> für die Nutzung<br />
der Drahtlosnetzwerke <strong>DESY</strong> und eduroam einrichten“ and to check <strong>the</strong> network<br />
settings. During <strong>the</strong> installation old devices or old drivers could also cause<br />
misconfiguration.<br />
If you should have any questions or suggestions, please contact <strong>the</strong> UCO by phone at 5005, or by<br />
E-mail to uco@desy.de.