

Instruction Book - Breville
Instruction Book - Breville
Instruction Book - Breville

Create successful ePaper yourself
Turn your PDF publications into a flip-book with our unique Google optimized e-Paper software.
Operating your <strong>Breville</strong> ikon Blender<br />
Before first use<br />
Before using your <strong>Breville</strong> ikon Blender for<br />
the first time, remove any packaging material<br />
and promotional labels. Ensure the appliance is<br />
switched off at the power outlet and the power<br />
cord is unplugged.<br />
Wash the lid, inner lid, blender jug and blade<br />
assembly (refer to Disassembling the blender<br />
jug on page 10) in warm, soapy water with<br />
a soft cloth. Rinse and dry thoroughly. The<br />
motor base can be wiped with a damp cloth.<br />
Dry thoroughly.<br />
When using your <strong>Breville</strong> ikon Blender<br />
for the first time, you may notice an odour<br />
coming from the motor. This is normal and will<br />
dissipate with use.<br />
The blending blades are extremely sharp.<br />
Avoid any contact with fingers and hands.<br />
Assembling and attaching the<br />
blender jug<br />
Step 1<br />
Place the motor base on a flat, dry surface<br />
such as a bench top. Ensure that the motor<br />
base is switched off at the power outlet and<br />
the power cord is unplugged.<br />
Step 2<br />
To assemble the blender jug, replace the silicon<br />
seal onto the blade assembly (see page 11).<br />
Upturn the blender jug and insert the blade<br />
assembly on to the jug base (see Page 11).<br />
Twist the Blade Removal System anticlockwise<br />
until firmly locked into position.<br />
Step 3<br />
Turn the blender jug upright and insert onto the<br />
motor base. The handle of the blender can be<br />
positioned to the left or the right of the appliance.<br />
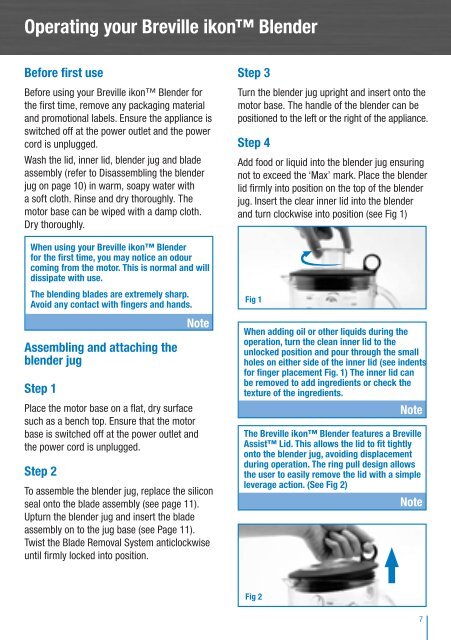
Step 4<br />
Add food or liquid into the blender jug ensuring<br />
not to exceed the ‘Max’ mark. Place the blender<br />
lid firmly into position on the top of the blender<br />
jug. Insert the clear inner lid into the blender<br />
and turn clockwise into position (see Fig 1)<br />
Fig 1<br />
When adding oil or other liquids during the<br />
operation, turn the clean inner lid to the<br />
unlocked position and pour through the small<br />
holes on either side of the inner lid (see indents<br />
for finger placement Fig. 1) The inner lid can<br />
be removed to add ingredients or check the<br />
texture of the ingredients.<br />
The <strong>Breville</strong> ikon Blender features a <strong>Breville</strong><br />
Assist Lid. This allows the lid to fit tightly<br />
onto the blender jug, avoiding displacement<br />
during operation. The ring pull design allows<br />
the user to easily remove the lid with a simple<br />
leverage action. (See Fig 2)<br />
BBL550_IB_FA.indd 7 10/02/10 2:31 PM<br />
Fig 2<br />
7


