notice - Boston Whaler
notice - Boston Whaler
notice - Boston Whaler

Create successful ePaper yourself
Turn your PDF publications into a flip-book with our unique Google optimized e-Paper software.
“The mission of <strong>Boston</strong> <strong>Whaler</strong> ®<br />
is to provide consumers with the<br />
safest, highest quality, most durable<br />
boats in the world”
T H E U N S I N K A B L E L E G E N D TM<br />
Welcome to the <strong>Boston</strong> <strong>Whaler</strong> family! Congratulations on your purchase of a <strong>Boston</strong> <strong>Whaler</strong> boat.<br />
For over 50 years now, <strong>Boston</strong> <strong>Whaler</strong> has been represented by a select group of the best dealers in<br />
the boating industry. <strong>Boston</strong> <strong>Whaler</strong> depends on this extremely qualifi ed network of dealers to<br />
provide you, our customer, with a truly exceptional boating experience.<br />
Should you have any questions or concerns regarding your boat, please don’t hesitate to contact your<br />
selling dealer. They will be more than happy to provide you with all the information and<br />
assistance that you require.<br />
Information and assistance is also available at our corporate website, www.whaler.com. At whaler.<br />
com you will fi nd information about upcoming events happening in your area. Things like fi shing<br />
tournaments, rendezvous, boat shows, and many others are listed, as are maintenance tips and back<br />
issues of our e-newsletter, the <strong>Whaler</strong> News.<br />
Since <strong>Boston</strong> <strong>Whaler</strong>’s inception in 1958, we have been committed to providing customers with the<br />
safest, highest quality, most durable boats in the world. I am confi dent that you, as a <strong>Whaler</strong> owner,<br />
will also appreciate the quality and pride that is built into every <strong>Boston</strong> <strong>Whaler</strong> boat.<br />
From all of us here at <strong>Whaler</strong>, thank you for purchasing one of our boats. May it<br />
bring you many years of boating enjoyment.<br />
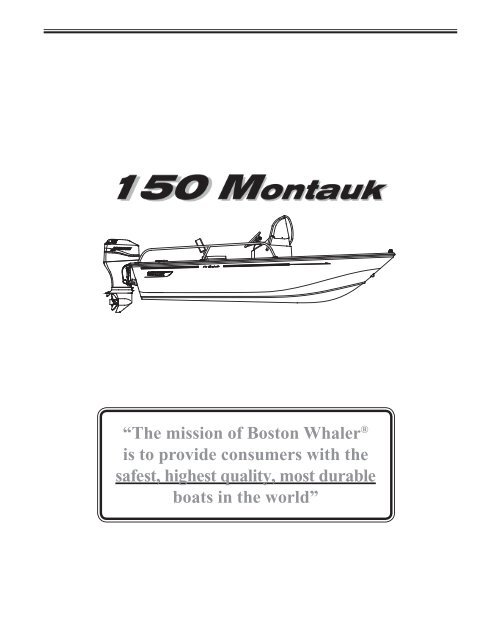
150 Montauk<br />
R<br />
R<br />
1958, The legend is born<br />
as company founder Dick Fisher<br />
demonstrates a <strong>Boston</strong> <strong>Whaler</strong>’s<br />
total unsinkability.<br />
iii
In 1958, company founder Richard T. Fisher<br />
introduced the first <strong>Boston</strong> <strong>Whaler</strong> ® boat in<br />
Braintree, Massachussetts. It featured two signifi cant<br />
innovations: first, its twin sponson hull design<br />
produced superior stability and a remarkably dry ride;<br />
second, its unique foam core construction made the<br />
boat not only durable, but unsinkable as well.<br />
Fisher took every opportunity to illustrate the unique<br />
characteristics of the <strong>Boston</strong> <strong>Whaler</strong> ® . His most<br />
famous demonstration was captured in 1961, by<br />
Life Magazine. The series of photographs showed<br />
the boat underway, the boat being sawed in half and<br />
ultimately Fisher motoring away in the remaining<br />
half of the boat. And through the years many other<br />
demonstrations have proved the toughness and<br />
durability of the <strong>Boston</strong> <strong>Whaler</strong> hull. And though<br />
you may never cut your boat in half, this only goes<br />
to show one thing, people whose livelihood and lives<br />
depend on boats consistently choose <strong>Boston</strong> <strong>Whaler</strong> ®<br />
because of their seaworthiness, dependablility and<br />
the inherent safety of a hull that won’t sink even if<br />
severely damaged.<br />
HISTORY<br />
<strong>Boston</strong> <strong>Whaler</strong>s are built to last. For over 50 years<br />
<strong>Boston</strong> <strong>Whaler</strong> ® has strived to make each model<br />
better, providing you with a safe and fun boating<br />
experience. That is the reason we offer a 10 year<br />
limited transferable warranty. It is also an excellent<br />
reason why you can trust the safety of your family<br />
and friends to a <strong>Boston</strong> <strong>Whaler</strong> ® .<br />
On September 26, 1996, Richard T. Fisher was<br />
posthumously inducted into the NMMA (National<br />
Marine Manufacturer’s Association) Hall of Fame for<br />
accomplishments made in marine engineering and<br />
construction.<br />
iv 150 Montauk<br />
R<br />
1958, The legend is born<br />
as company founder Dick Fisher<br />
demonstrates a <strong>Boston</strong> <strong>Whaler</strong>’s<br />
total unsinkability.<br />
PLEASE KEEP THIS OWNER’S MANUAL PACKET IN A SECURE PLACE, AND BE SURE<br />
TO HAND IT OVER TO THE NEW OWNER IF YOU SELL THE BOAT.
Welcome Letter ..........................................iii<br />
History ......................................................iv<br />
Preface .....................................................vii<br />
<strong>Boston</strong> <strong>Whaler</strong> Limited Warranty ............... viii<br />
Privacy Statement ......................................xi<br />
Introduction ..............................................xii<br />
Owner’s manual ....................................xii<br />
Your responsibilites ................................xii<br />
Source of Information ............................xii<br />
Warranties ............................................xii<br />
Contact Phone Numbers and<br />
Internet Addresses..............................xii<br />
Section 1 • Safety<br />
Explanation of Safety Labels .................... 1-1<br />
Warning Labels ....................................... 1-1<br />
Safe Boating means ................................. 1-2<br />
In Addition ....................................... 1-2<br />
Safe Boating Checklist ............................. 1-2<br />
Before departure ................................. 1-2<br />
Trailering (if applicable) ........................ 1-2<br />
After Return ........................................ 1-2<br />
General Considerations ............................ 1-3<br />
Maintain Control ...................................... 1-3<br />
Boarding ................................................. 1-3<br />
Impaired Operation ................................. 1-3<br />
Legally Mandated Equipment<br />
(Minimum Required) ............................ 1-5<br />
Personal Flotation devices (PFD’s) ......... 1-5<br />
Fire Extinquisher (Portable) .................. 1-5<br />
Whistle, Horn ...................................... 1-5<br />
Visual Distress Signal ........................... 1-5<br />
Additional recommended Equipment for<br />
Safe Operation .................................... 1-5<br />
Carbon Monoxide (CO) ............................ 1-6<br />
In The Event CO Alarm Activates .......... 1-6<br />
Lifesaving Equipment............................... 1-7<br />
PFD Requirement ................................ 1-7<br />
PFD Classifi cation ................................ 1-7<br />
Emergency Situations .............................. 1-9<br />
Medical Emergency .............................. 1-9<br />
Water Rescue ...................................... 1-9<br />
Returning to the victim ...................... 1-9<br />
Making contact ................................. 1-9<br />
150 Montauk<br />
TABLE of CONTENTS<br />
Getting back on board ....................... 1-9<br />
Fire ....................................................... 1-9<br />
To lessen the danger of fi re ................ 1-10<br />
Flooding, Swamping and Capsizing ......... 1-10<br />
Flooding ........................................... 1-10<br />
Swamping ......................................... 1-10<br />
Capsizing .......................................... 1-10<br />
Collision ................................................ 1-11<br />
Propulsion, Control or Steering Failure .... 1-11<br />
Grounding ............................................ 1-11<br />
Distress Signals ..................................... 1-11<br />
Visual distress signals (VDS) ............... 1-11<br />
Audible distress signals ...................... 1-12<br />
Radio Communication ............................ 1-12<br />
Weather ............................................... 1-12<br />
Swimming, Diving & Water Skiing ........... 1-13<br />
Swimming ......................................... 1-13<br />
Diving ............................................... 1-13<br />
Water Skiing ..................................... 1-14<br />
Water Skiing Signals .......................... 1-14<br />
Emergency Engine Stop Switch .............. 1-16<br />
Float Plan ............................................. 1-16<br />
Chart Your Course ................................. 1-16<br />
Environmental Considerations ................ 1-17<br />
Fuel & Oil Spillage ............................. 1-17<br />
Excessive Noise ................................. 1-17<br />
Wake/Wash ....................................... 1-17<br />
Homeland Security Restrictions .............. 1-18<br />
America’s Waterway Watch .................... 1-18<br />
Warning Label Locations ........................ 1-18<br />
Key To Symbols Used on Controls<br />
& Prints ............................................ 1-20<br />
Section 2 • General Information<br />
Construction Standard ............................. 2-1<br />
Our Hull .................................................. 2-1<br />
Hull Identifi cation Number .................... 2-1<br />
Servicing Your <strong>Boston</strong> <strong>Whaler</strong> ................... 2-1<br />
Manufacturer’s Certifi cation ...................... 2-1<br />
CE Certifi cation design Category ........... 2-3<br />
Power Capacity .................................... 2-3<br />
Specifi cations & Dimensions ..................... 2-4<br />
Passenger Locations ................................ 2-5<br />
Location Of Thru-Hull Fittings ................... 2-6<br />
Features ................................................. 2-7<br />
Control Station Switch Panel..................... 2-8<br />
R<br />
v
Seating & Storage ................................... 2-8<br />
Recommended Seating ............................ 2-9<br />
Gear Shift & Throttle Control .................. 2-10<br />
Power Trim Operation ............................ 2-10<br />
Navigation Lighting ................................ 2-11<br />
Operating The navigation Lighting ...... 2-11<br />
Steering ............................................... 2-12<br />
Steering Pull ......................................... 2-12<br />
Trolling Motor Panel (Option) ................. 2-13<br />
Canvas (Option) .................................... 2-14<br />
Propeller ............................................... 2-15<br />
Docking, Lifting and Trailering ................ 2-16<br />
Docking ............................................ 2-16<br />
Lifting ................................................... 2-16<br />
Trailering .......................................... 2-17<br />
Trailer safety ......................................... 2-17<br />
Securing the Boat to the Trailer .......... 2-17<br />
Securing the Trailer to the<br />
Tow Vehicle .................................... 2-17<br />
Trailer Description ................................. 2-18<br />
Section 3 • Systems & Components<br />
Overview & Operation<br />
Bilge Pump ............................................. 3-1<br />
Maintenance ....................................... 3-1<br />
Fuel & Oil Spillage ............................... 3-1<br />
Fuel System ............................................ 3-2<br />
Primer Bulb ......................................... 3-3<br />
Static Electricity and the Fuel System .... 3-3<br />
Ethanol-Blended Fuels ......................... 3-4<br />
Starting the Engine.................................. 3-5<br />
Warming Up the Engine ........................... 3-6<br />
Stopping the Engine ................................ 3-6<br />
Livewell (Option) ..................................... 3-7<br />
Operation ............................................ 3-7<br />
Maintenance ....................................... 3-7<br />
Anchoring ............................................... 3-8<br />
Considerations ..................................... 3-8<br />
Lowering the Anchor ............................ 3-9<br />
Setting the Anchor ............................... 3-9<br />
Weighing the Anchor ........................... 3-9<br />
Section 4 • Electrical<br />
Electrical System ..................................... 4-1<br />
DC Electrical System ................................ 4-1<br />
Battery ................................................... 4-1<br />
Battery Box ......................................... 4-1<br />
Main DC Breaker ..................................... 4-2<br />
Component Breakers ............................... 4-2<br />
12V Accessory Receptacle ........................ 4-2<br />
Battery Switch (CE Option) ...................... 4-3<br />
Trolling Motor Wiring (Option) .................. 4-3<br />
Trolling Motor Connection ..................... 4-3<br />
Wiring Identifi cation Chart ....................... 4-4<br />
Electrical Schematics & Harnesses ............ 4-5<br />
Section 5 • care & Maintenance<br />
Routine Care & Maintenance .................... 5-1<br />
Hull .................................................... 5-1<br />
Waxing the Gel Coat Surfaces .................. 5-1<br />
Hull Maintenance..................................... 5-2<br />
Hull Blistering ......................................... 5-2<br />
Prevention .......................................... 5-1<br />
Bottom Painting ...................................... 5-2<br />
Bottom Painting a Bare Hull .................. 5-3<br />
Bottom Painting a Pre-Painted Hull ........ 5-3<br />
Rubrail care ............................................ 5-4<br />
Cleaning Fiberglass & Non-Skid ................ 5-4<br />
Stainless Steel Care ................................. 5-4<br />
Aluminum Care ....................................... 5-5<br />
Cushions................................................. 5-5<br />
To Clean Your Cushions ........................ 5-5<br />
Cleaning Your Instrument Gauges ............ 5-6<br />
Canvas Care and Maintenance .................. 5-6<br />
Maintaining a Good Appearance ............ 5-6<br />
On a Regular Basis ............................ 5-6<br />
Cleaning stubborn Stains ...................... 5-7<br />
Maintaining Zippers and Hardware ............ 5-7<br />
vi 150 Montauk<br />
R
Cleaning Acrylic Windscreen ..................... 5-7<br />
Long term Storage .................................. 5-7<br />
Engine ................................................ 5-7<br />
Fuel System ........................................ 5-8<br />
Electrical System ................................. 5-8<br />
Battery ............................................... 5-8<br />
Deck ................................................... 5-8<br />
Drainage ............................................. 5-8<br />
Avoid Loss .......................................... 5-9<br />
Cover.................................................. 5-9<br />
Trailer Storage ........................................ 5-9<br />
This Owner’s Manual has been written to provide specifi c information about your boat and it should be read<br />
carefully. Keep this booklet with the Manuals in the Owner’s Manual Packet. The Owner’s Manual Packet<br />
has been compiled to help you operate your boat with safety and pleasure. It contains details of the boat, the<br />
equipment supplied or fi tted, it’s systems and information on it’s operation and maintenance. Please familiarize<br />
yourself with the boat and it’s operation before using it. If this is your fi rst boat, or you are changing to a type<br />
of boat you are not familiar with, for your own comfort and safety, please ensure that you obtain handling<br />
and operating experience before “assuming command” of your boat. Your <strong>Boston</strong> <strong>Whaler</strong> ® dealer or local<br />
Yacht Club will be pleased to advise you of marine safety classes and safe boating classes in your area.<br />
150 Montauk<br />
PREFACE<br />
INFORMATION IN THIS PUBLICATION IS BASED ON THE LATEST PRODUCT SPECIFICATIONS AVAILABLE AT PRINTING, BOSTON WHALER ® BOATS, INC. RESERVES THE RIGHT<br />
TO MAKE CHANGES AT ANY TIME WITHOUT NOTICE, IN THE COLORS, EQUIPMENT, SPECIFICATIONS, MATERIALS AND PRICES OF ALL MODELS, OR TO DISCONTINUE MODELS.<br />
SHOULD CHANGES OR MODIFICATIONS TO THE MODELS BE MADE BOSTON WHALER ® IS NOT OBLIGATED TO MAKE SIMILAR CHANGES OR MODIFICATIONS TO MODELS SOLD<br />
PRIOR TO THE DATE OF SUCH CHANGES.<br />
BOSTON WHALER ® • A BRUNSWICK COMPANY<br />
MRP #2023863<br />
Printed in the U.S.A. © <strong>Boston</strong> <strong>Whaler</strong>, Inc. All rights reserved.<br />
150 Montauk<br />
May, 2010<br />
THE FOLLOWING ARE REGISTERED TRADEMARKS OF THE BRUNSWICK CORPORATION:<br />
Montauk, <strong>Boston</strong> <strong>Whaler</strong> ®<br />
Environment ........................................... 5-9<br />
Reinforcement Location Diagram ............ 5-10<br />
Reinforcement Locations ........................ 5-11<br />
Maintenance Log ................................... 5-12<br />
Attachments<br />
Commissioning Checklist<br />
Product Registration Card<br />
Specifi cations and standard equipment are subject to change. <strong>Boston</strong> <strong>Whaler</strong> is not responsible for changes to parts or accessories manufactured by companies other than <strong>Boston</strong> <strong>Whaler</strong>.<br />
Active Deck Suspension System, <strong>Boston</strong> <strong>Whaler</strong>, <strong>Whaler</strong>, the <strong>Boston</strong> <strong>Whaler</strong> logo, Conquest, Dauntless, Montauk, and Outrage are registered trademarks of <strong>Boston</strong> <strong>Whaler</strong>, Incorporated.<br />
Accutrack, Unibond, The Unsinkable Legend, Ventura, and Whaleboard are trademarks of <strong>Boston</strong> <strong>Whaler</strong>, Incorporated. Mercury and Optimax are registered trademarks of Mercury Marine, and<br />
SmartCraft and Verado are trademarks of Mercury Marine. Trademarks of others are the property of their respective owners. All mercury engine information provided by Mercury Marine, June<br />
2007. Information contained within this publication is believed to be correct at the time of printing.<br />
R<br />
R<br />
vii
<strong>Boston</strong> <strong>Whaler</strong>, Inc. (“<strong>Boston</strong> <strong>Whaler</strong>”) provides the following Limited Warranty to the original retail<br />
owner of its 2011 model year boats, if purchased from an authorized <strong>Boston</strong> <strong>Whaler</strong> Dealer and operated<br />
under normal, non-commercial use (“Boat’’), subject to the remedies, exclusions, and limitations set out below.<br />
1. Ten-Year Pro-Rated Structural Hull Limited Warranty: Any Structural Hull Defect in material or workmanship which<br />
is reported within ten (10) years from the date of sale to the original purchaser will be repaired or replaced at <strong>Boston</strong><br />
<strong>Whaler</strong>’s sole discretion based on the following depreciation schedule. The “Hull” shall mean the single fi berglass<br />
molded shell and integral structural components. A Structural Hull Defect shall mean a substantial defect in the Boat’s<br />
Hull which causes the boat to be unfi t or unsafe for general use as a pleasure craft under normal operating conditions.<br />
2. Three-Year Limited Warranty on Components Manufactured or Installed By <strong>Boston</strong> <strong>Whaler</strong>: <strong>Boston</strong> <strong>Whaler</strong> will repair<br />
or replace, at its sole discretion, any components manufactured or installed by <strong>Boston</strong> <strong>Whaler</strong> that are defective in factory<br />
materials and/or workmanship, which are reported within three years from the date of sale to the original purchaser, and<br />
are not addressed in the specifi c warranties listed in paragraph 1 or 3 or set out in the Exclusions paragraph below.<br />
3. One-Year Limited Warranty on Upholstered Items, Canvas, Teak, and Powder Coating: <strong>Boston</strong> <strong>Whaler</strong> will repair<br />
or replace, at its sole discretion, any upholstered items, canvas, teak, and powder coating manufactured or installed by<br />
<strong>Boston</strong> <strong>Whaler</strong> that are defective in factory materials and/or workmanship and are reported within one year from the date<br />
of sale to the original purchaser.<br />
EXCLUSIONS<br />
This limited warranty does not apply to any boat which has been salvaged or declared a total loss or constructive total<br />
loss for any reason not covered in this limited warranty. This warranty also does not apply to the following items:<br />
(1) Expenses for hauling out, transportation to and from the dealer or the <strong>Boston</strong> <strong>Whaler</strong> factory for<br />
warranty service.<br />
(2) Equipment or accessories which are not installed by <strong>Boston</strong> <strong>Whaler</strong> or which carry their own<br />
individual warranties, including but not limited to engines, engine components, batteries,<br />
propellers, controls, steering mechanisms, and electronics.<br />
(3) Damage or deterioration of cosmetic surface finishes, including discoloration, chalking, cracking,<br />
crazing, fading or oxidation of gel coat, stress lines, plated or painted metal and stainless steel<br />
fi nishes, plastics or acrylic materials, or anti-fouling bottom paint.<br />
(4) Windshield breakage and leakage.<br />
<strong>Boston</strong> <strong>Whaler</strong> Limited Warranty<br />
Year 1 2 3 4 5 6 7 8 9 10<br />
<strong>Boston</strong> <strong>Whaler</strong> Pays 100% 100% 100% 100% 100% 90% 70% 50% 30% 10%<br />
You Pay 0% 0% 0% 0% 0% 10% 30% 50% 70% 90%<br />
(5) Any <strong>Boston</strong> <strong>Whaler</strong> boat initially sold at retail by a party other than an authorized <strong>Boston</strong> <strong>Whaler</strong><br />
dealer.<br />
(6) Damage resulting from abuse, misuse, accidents, overloading or powering in excess of the<br />
recommended maximum horsepower.<br />
(7) Failure of the owner to use, maintain, or store the boat as specified in the <strong>Boston</strong> <strong>Whaler</strong> owner’s<br />
manual; and any other failure to provide reasonable care and maintenance. Normal wear and<br />
tear maintenance items are excluded from warranty coverage including but not limited to filters,<br />
bulbs, batteries, bungees, anchor rope, trailer fi nishes, tires, brakes, bearings and lights.<br />
viii 150 Montauk<br />
R
(8) Any <strong>Boston</strong> <strong>Whaler</strong> boat which has been altered or modified from <strong>Boston</strong> <strong>Whaler</strong> factory<br />
specifications, including penetration of the hull by anyone other than <strong>Boston</strong> <strong>Whaler</strong> factory<br />
personnel or <strong>Boston</strong> <strong>Whaler</strong> authorized dealer service personnel following factory specified<br />
procedures.<br />
(9) Use of improper trailer.<br />
(10) Any <strong>Boston</strong> <strong>Whaler</strong> boat used for commercial, which includes but is not limited to any for-profi t uses, or other<br />
revenue-generating purposes.<br />
(11) Any representation or implication relating to speed, range, fuel consumption or estimated performance<br />
characteristics.<br />
(12) Any failure or defect caused by an act of nature resulting in damage, cost, or expense;<br />
(13) Any failure or defect arising from a previous repair made by a non-authorized service provider.<br />
(14) Any item exceeding the expressed coverage limits specifi ed in any <strong>Boston</strong> <strong>Whaler</strong> Limited Warranty.<br />
(15) Any defect or repair requiring redesign of the Boat, except pursuant to the recall provisions of the<br />
United States Federal Boat Safety Act of 1971 or the recall laws of any other foreign jurisdiction.<br />
SOLE REMEDY<br />
THE REMEDY OF REPAIR OR REPLACEMENT OF PARTS OR MATERIALS THAT ARE FOUND TO BE<br />
DEFECTIVE IN FACTORY MATERIALS OR WORKMANSHIP COVERED BY THIS LIMITED WARRANTY<br />
SHALL CONSTITUTE THE OWNER’S SOLE AND EXCLUSIVE REMEDY AGAINST BOSTON WHALER FOR<br />
ANY CLAIMS WHATSOEVER OF ECONOMIC LOSS RESULTING FROM PRODUCT FAILURE. In keeping with<br />
environmental policies and practices, <strong>Boston</strong> <strong>Whaler</strong> reserves the right to utilize reconditioned, refurbished, repaired<br />
or remanufactured products or parts in the warranty repair or replacement process. Such products and parts will be<br />
comparable in function and performance to an original product or part and warranted for the remainder of the original warranty<br />
period. In no event shall any repair or replacement under this Limited Warranty exceed the fair market value of the product<br />
as of the date of the owner’s claim. Acceptance of any product returned or any refund provided by <strong>Boston</strong> <strong>Whaler</strong> shall not<br />
be deemed an admission that the product is defective. Products that are replaced become the property of <strong>Boston</strong> <strong>Whaler</strong>.<br />
OTHER LIMITATIONS<br />
EXCEPT AS SET FORTH HEREIN, THERE ARE NO OTHER WARRANTIES EITHER EXPRESS OR<br />
IMPLIED PROVIDED BY BOSTON WHALER ON THIS BOAT. ALL OTHER WARRANTIES, EXPRESS OR<br />
IMPLIED, INCLUDING IMPLIED WARRANTIES OF FITNESS AND MERCHANTABILITY, ARE EXPRESSLY<br />
EXCLUDED. BOSTON WHALER FURTHER DISCLAIMS ANY LIABILITY FOR ECONOMIC LOSS ARISING<br />
FROM CLAIMS OF PRODUCT FAILURE, NEGLIGENCE, DEFECTIVE DESIGN, MANUFACTURING DEFECT,<br />
FAILURE TO WARN AND/OR INSTRUCT, LACK OF SEAWORTHINESS, AND ANY OTHER THEORY OF<br />
LIABILITY NOT EXPRESSLY COVERED UNDER THE TERMS OF THIS LIMITED WARRANTY.<br />
ANY IMPLIED WARRANTY OF MERCHANTABILITY OR FITNESS FOR A PARTICULAR PURPOSE<br />
IS DISCLAIMED. TO THE EXTENT THE IMPLIED WARRANTY CANNOT BE DISCLAIMED, IT IS<br />
LIMITED TO THE SHORTER OF ONE YEAR FROM THE DATE OF DELIVERY TO THE FIRST<br />
RETAIL OWNER OR THE DURATION OF THE RESPECTIVE EXPRESS LIMITED WARRANTIES<br />
STATED HEREIN. TO THE EXTENT ALLOWED BY LAW, NEITHER BOSTON WHALER, NOR THE<br />
SELLING DEALER, SHALL HAVE ANY RESPONSIBILITY FOR LOSS OF THE BOAT, LOSS OF TIME,<br />
INCONVENIENCE, COMMERCIAL LOSS OR CONSEQUENTIAL DAMAGES. SOME STATES DO NOT ALLOW<br />
LIMITATIONS ON HOW LONG AN IMPLIED WARRANTY LASTS, SO THE ABOVE LIMITATION<br />
MAY NOT BE APPLICABLE. SOME STATES DO NOT ALLOW THE EXCLUSION OR LIMITATION OF<br />
150 Montauk<br />
R<br />
ix
INCIDENTAL OR CONSEQUENTIAL DAMAGES, SO THE ABOVE LIMITATIONS OR EXCLUSIONS MAY<br />
NOT BE APPLICABLE. THIS WARRANTY GIVES THE OWNER SPECIFIC LEGAL RIGHTS, AND THE<br />
OWNER MAY ALSO HAVE OTHER RIGHTS WHICH VARY FROM STATE TO STATE OR COUNTRY TO<br />
COUNTRY.<br />
RETAIL CUSTOMERS IN THE EUROPEAN ECONOMIC AREA (EEA) MAY HAVE LEGAL RIGHTS UNDER<br />
APPLICABLE NATIONAL LEGISLATION REGARDING THE SALE OF CONSUMER GOODS WHICH ARE<br />
NOT AFFECTED BY THIS LIMITED WARRANTY. THE RETAIL CUSTOMER’S LEGAL RIGHTS UNDER ANY<br />
APPLICABLE NATIONAL LEGISLATION REGARDING THE SALE OF CONSUMER GOODS<br />
SHALL NOT BE AFFECTED. Information on authorized EEA dealers and EEA Privacy may be obtained by<br />
contacting <strong>Boston</strong> <strong>Whaler</strong> at www.whaler.com.<br />
STATUTE OF LIMITATIONS<br />
Any action for rescission or revocation against <strong>Boston</strong> <strong>Whaler</strong> shall be barred unless it is commenced within one (1) year<br />
from the date of accrual of such cause of action. This provision does not grant any consumer a right of rescission or revocation<br />
against <strong>Boston</strong> <strong>Whaler</strong>, where such right does not otherwise exist under applicable law. Some states may not allow the<br />
applicable statute of limitations for rescission or revocation to be reduced, so this provision may not apply to each retail owner.<br />
OWNER’S OBLIGATIONS<br />
To initiate a warranty claim, it is the responsibility of the purchaser to contact an authorized <strong>Boston</strong> <strong>Whaler</strong> dealer immediately<br />
after discovery of any defect, describe the nature of the problem, and provide a hull serial number, date of<br />
purchase, and name of selling dealer. The authorized dealer will notify <strong>Boston</strong> <strong>Whaler</strong>, who is solely responsible for<br />
determining and authorizing in writing the remedial action(s) to be performed at either an authorized <strong>Boston</strong> <strong>Whaler</strong><br />
dealership chosen by <strong>Boston</strong> <strong>Whaler</strong> or at the <strong>Boston</strong> <strong>Whaler</strong> factory. The purchaser should notify <strong>Boston</strong> <strong>Whaler</strong> of any<br />
boat being repaired by an authorized <strong>Boston</strong> <strong>Whaler</strong> dealer which has been at the dealership for fi fteen (15) days, or of any<br />
claimed defect which was not corrected after one repair attempt. Our privacy policies are available at www.whaler.com.<br />
ASSIGNMENT OF COMPONENT WARRANTIES<br />
Except as expressly set out herein, all warranties provided by the manufacturers and distributors of components, equipment,<br />
and parts on the boat (collectively “Component Manufacturers”) are hereby assigned to the owner to the extent<br />
permitted by the Component Manufacturers, as the owner’s sole and exclusive remedy with respect to such items.<br />
REGISTRATION & WARRANTY TRANSFER POLICY<br />
<strong>Boston</strong> <strong>Whaler</strong> provides each new boat owner with a product registration card which should be fi lled out and sent<br />
to <strong>Boston</strong> <strong>Whaler</strong> within 30 days of purchase. Please complete and return the product registration card within 30<br />
days of purchase of your boat in order to facilitate processing of warranty claims and for manufacturer notifi cations.<br />
The ten-year, three-year, and one-year limited warranties are transferable to a subsequent owner, except this limited<br />
warranty will not transfer to any new owner of a boat which has been salvaged and resold, or resold after a declaration<br />
of a total loss or a constructive total loss, i.e. the cost of repair exceeds the value of the boat. The new owner must<br />
fi ll out and send in a <strong>Boston</strong> <strong>Whaler</strong> warranty transfer form, accessible from www.whaler.com, a copy of the bill of<br />
sale, and a $50.00 fee to <strong>Boston</strong> <strong>Whaler</strong>, 100 <strong>Whaler</strong> Way, Edgewater, Florida 32141, within 30 days of purchase.<br />
MODIFICATIONS & SEVERABILITY<br />
The terms and conditions contained herein, as well as those of any documents prepared in conjunction<br />
with the sale of this vessel may not be modifi ed, altered or waived by any action, inaction, or<br />
representations, whether oral or in writing, except upon the expressed, written authority of a management level<br />
employee of <strong>Boston</strong> <strong>Whaler</strong>. The invalidity or unenforceability of any one or more of the provisions herein<br />
shall not affect the validity and enforceability of the other provisions.<br />
World Headquarters, 100 <strong>Whaler</strong> Way, Edgewater, FL 32141<br />
Phone (386) 428-0057<br />
Internet Address: www.whaler.com<br />
x 150 Montauk<br />
R
150 Montauk<br />
PRIVACY STATEMENT<br />
Thank you for purchasing a boat or requesting information from <strong>Boston</strong> <strong>Whaler</strong>! This Privacy Statement is to inform you<br />
how we collect, use, disclose, and safeguard the personal information you provide to us through your purchases, requests for<br />
brochures, product registration cards, promotions, surveys, call centers, or other customer contacts. To see our full Privacy Policy<br />
and any updates, please visit www.whaler.com and select the Privacy Statement link.<br />
“Personal information” may include your name, age, mailing address, residential phone number, or e-mail address. It may also<br />
include income ranges, marital status, product or lifestyle preferences, and information concerning dealer service.<br />
How We Collect Personal Information: Our authorized dealer provided <strong>Boston</strong> <strong>Whaler</strong> or our company in the European Union<br />
with personal information collected at the time of your boat order/purchase with other product registration data and will continue<br />
to provide warranty and servicing information on your boat. We will send you customer satisfaction surveys which you may<br />
elect to return to provide us with information on your boat purchase and your servicing needs. Your personal information may be<br />
gather5ed by or shared with <strong>Boston</strong> <strong>Whaler</strong>’s marketing providers and affi liated companies, who have comparable<br />
levels of privacy protection, for the purposes described in this statement. <strong>Boston</strong> <strong>Whaler</strong>, your dealer, and our marketing<br />
providers collect personal information when your request information about our companies and from surveys, promotions, contests,<br />
correspondence, your e-mails, telephone inquiries, web forms, and other communications.<br />
How We Use & Disclose Personal Information: Unless you advise us otherwise, <strong>Boston</strong> <strong>Whaler</strong>, our authorized dealers,<br />
affi liated companies, and our marketing providers may generally collect, use, disclose, hold, and fi le your personal information<br />
for the following purposes: (1) Providing goods, brochures, information, incentives, and/or services to you or on your behalf; (2)<br />
Fulfi lling the terms of our limited warranty or other service obligation; (3) Facilitating recalls or service campaigns if necessary;<br />
(4) Reviewing goods and/or services provided to you in product, services, and marketing analyses; (5) Ensuring your satisfaction<br />
through surveys or other contacts; (6) Administration, billing, accounting, and collections; and protecting against fraud and error;<br />
and (7) Investigating a breach or a contravention of a law, complying with a subpoena, warrant, court order, or as required or<br />
otherwise permitted by law. BOSTON WHALER WILL NOT SELL YOUR PERSONAL INFORMATION OR SUBJECT<br />
YOU TO TELEMARKETING OR UNSOLICITED E-MAIL.<br />
Safeguards: We use security safeguards appropriate to the sensitivity of personal information to protect it from loss or theft, as<br />
well as prohibiting unauthorized access, disclosure, copying, use or modifi cation of your personal information. These safeguards<br />
include restricted access to offi ces and equipment, security clearances, the use of passwords and/or encryption, publishing our<br />
privacy policy to appropriate personnel with instructions to act in accordance with its principles, and contractual provisions with<br />
our marketing agents and authorized dealers to follow the principles of our privacy policy.<br />
Access and Correction to Your Personal Information: Subject to the exceptions provided by applicable law, we will<br />
provide, upon written request, your specifi c personal information collected in a form which is generally understandable. Your<br />
Personal Information is held by us and for us by our marketing agency, AVALA, who has contractually agreed to protect your<br />
information according to our privacy policies at the following addresses: <strong>Boston</strong> <strong>Whaler</strong> Inc., 100 <strong>Whaler</strong> Way, Edgewater, FL<br />
32141. Please direct corrections, withdrawal of consent for specifi c purpose, complaints or other inquiries regarding personal<br />
information to: Terry Domian, AVALA Marketing Group; 1078 Headquarters Park Drive, Fenton, MO, 63026; Phone: (636)<br />
343-9988, Fax: (636) 326-3282, E-mail: terryd@Marketing Agencymarketing.com. You can withdraw consent for us to use your<br />
personal information at any time or provide corrections upon providing to us a 30-day <strong>notice</strong>, unless withdrawing consent would<br />
impede the performance of legal obligations. We are requires by law to provide you with information for product recall and other<br />
product safety relates purposes. The withdrawal of your consent may also adversely affect our ability to provide products and<br />
services to you and to maintain our relationship. Please note, notifying us will not result in withdrawing consent from your dealer,<br />
who should be contacted separately.<br />
Obtaining Consent: If any supplementary disclosure is required, we will obtain your consent for disclosure to other persons or<br />
organizations and for other purposes than stated herein, unless otherwise permitted by law.<br />
Thank you again for your business. We hope you have many years of wonderful boating experiences!<br />
R<br />
xi
Owner’s manual<br />
The material here and in the rest of the Owner’s<br />
Manual Packet:<br />
• Gives you basic safety information;<br />
• Describes the features of your boat;<br />
• Describes the equipment on your boat;<br />
• Describes the fundamentals of boat use; and<br />
• Contains service and maintenance<br />
information.<br />
You must learn to operate this boat as well as read,<br />
understand and use this manual.<br />
What this manual does not give you is a course in<br />
boating safety, or how to navigate, anchor or dock<br />
your boat. Operating a power boat safely requires<br />
more skills, knowledge and awareness than is<br />
necessary for a car or truck.<br />
Your responsibilities<br />
For your safety, the safety of your passengers, other<br />
boaters and people in the water, you must:<br />
• Take a boating safety course;<br />
• Get instruction in the safe and proper handling<br />
of your boat;<br />
• Understand and follow the “rules of the road”;<br />
• Learn how to navigate.<br />
Source of Information<br />
In North America, contact one of the following for<br />
boating courses:<br />
• U.S. Coast Guard Auxiliary<br />
• U.S. Power Squadron<br />
• Canadian Power and Sail Squadrons<br />
• Red Cross<br />
• State Boating Offi ces<br />
• Yacht Club<br />
Contact the Boat/U.S. Foundation at 1-800-336-2628<br />
or go to www.boatus.com/foundation<br />
INTRODUCTION<br />
Outside of North America, contact your boat dealer<br />
and/or your governmental boating agency for<br />
assistance.<br />
A comprehensive background in boating can be<br />
found in the book, Chapman - Piloting, Seamanship<br />
and Small Boat Handling, by Elbert S. Maloney,<br />
published by Hearst Marine.<br />
Warranties<br />
In addition to the <strong>Boston</strong> <strong>Whaler</strong> ® Limited Warranty<br />
for your boat (See next page), each component and/<br />
or system on your boat has its own warranty that will<br />
be found with the specifi c information and manual<br />
for that component. The manuals are included with<br />
your Owner’s Manual Packet. Locate and read the<br />
individual warranties; then keep them together for<br />
easy future reference.<br />
Contact Phone Numbers and<br />
Internet Addresses<br />
<strong>Boston</strong> <strong>Whaler</strong>, Inc.<br />
Phone.............................................1-877-294-5645<br />
Internet ........................................www.whaler.com<br />
United States Coast Guard<br />
Phone.............................................1-800-368-5647<br />
Internet .................................www.uscgboating.org<br />
Boat US Foundation<br />
Phone.............................................1-800-336-2628<br />
Internet ..................... www.boatus.com/foundation<br />
Canadian Coast Guard<br />
Phone.............................................1-800-267-6687<br />
Internet ................ www.ccg-gcc.gc.ca/main_e.htm<br />
xii 150 Montauk<br />
R
Explanation of Safety Labels<br />
The most important aspect of boating is safety.<br />
Although every effort is made to address the<br />
numerous issues regarding the safe usage of your<br />
boat, it is strongly recommended that you avail<br />
yourself of the training and knowledge available<br />
through boating safety courses, etc.<br />
Warning Labels<br />
Mounted at key locations throughout your boat are<br />
warning labels (See page 1-19) which advise the<br />
owner/operator of imperative safety precautions<br />
to follow when operating and/or servicing<br />
equipment.<br />
The examples below indicate the level of hazard by<br />
color and explanation.<br />
! DANGER<br />
Denotes an immediate hazard exists that WILL<br />
result in severe personal injury or death.<br />
Denotes hazards or unsafe practices that MAY<br />
result in severe personal injury or death.<br />
Denotes hazards or unsafe practices that COULD<br />
result in minor personal injury, product or<br />
property damage.<br />
150 Montauk<br />
! WARNING<br />
! CAUTION<br />
NOTICE<br />
Denotes information that is important to know<br />
prior to operation and/or maintenance, but is<br />
not hazard related.<br />
Section 1 • Safety<br />
Safety Precautions<br />
The examples below are of precautions which appear<br />
throughout this manual and must be observed when<br />
operating or servicing your boat. Learn to recognize<br />
the degree of hazard and understand the explanations<br />
of safety prior to reading this manual.<br />
Always use common sense in the operation and<br />
servicing of your boat.<br />
R<br />
! DANGER<br />
Denotes an immediate hazard exists that WILL<br />
result in severe personal injury or death.<br />
!<br />
WARNING<br />
Denotes hazards or unsafe practices that MAY<br />
result in severe personal injury or death.<br />
! CAUTION<br />
Denotes hazards or unsafe practices that COULD<br />
result in minor personal injury, product or<br />
property damage.<br />
NOTICE<br />
Denotes information that is important to know<br />
prior to operation and/or maintenance, but is<br />
not hazard related.<br />
1-1
SAFE Boating means:<br />
• Knowing the limitations of your boat<br />
• Following the “RULES of the ROAD”<br />
• Keeping a sharp lookout for people and objects<br />
in the water.<br />
• Not boating in water or weather conditions that<br />
are beyond the boat’s and operator’s capability.<br />
• Never operating the boat while under the<br />
infl uence of drugs or alcohol.<br />
• Being aware of your passengers safety at all<br />
times.<br />
• Reducing speed when there is limited visibility,<br />
rough water, people in the water nearby, boats<br />
or structures.<br />
In Addition:<br />
• Maintain your boat and its safety and other<br />
systems as recommended in this manual.<br />
• Have the boat inspected by a qualified<br />
mechanic or dealer, at least annually.<br />
• Ensure that the Coast Guard required safety<br />
equipment is on board and functioning.<br />
NOTICE<br />
As a boat owner or operator, YOU are responsible<br />
for your safety and the safety of your passengers<br />
and other boaters.<br />
Boating in beautiful weather and calm water<br />
conditions can be a wonderful experience. Boating<br />
however requires considerably greater skills than<br />
operating a land vehicle. Taking a boating course<br />
is the best way to prepare for a safe and enjoyable<br />
experience on the water.<br />
• Take a Coast Guard, U.S. Power Squadron or<br />
equivalent boating safety course. (Call<br />
the Boat/U.S. Foundation at 1-800 336-2628<br />
for information on available courses, or<br />
go to: “www.boatus.com/foundation” on<br />
the internet.)<br />
• Get hands-on training on how to operate your<br />
boat properly.<br />
Section 1• Safety<br />
Safe Boating Checklist<br />
Before Departure<br />
Update checklists when equipment is added or<br />
modifi ed.<br />
Weather-forecast safe<br />
Required documents-on board<br />
Navigation charts & equipment-on board<br />
Safety equipment-on board<br />
Safety training-passengers & crew instructed<br />
on procedures, location, and use of safety<br />
equipment.<br />
Drain plugs-installed<br />
Bilge pumps-working & clean<br />
Navigation lights-working<br />
Sound signal device on board<br />
Fuel system-no leaks or fumes<br />
Power steering fl uid-fi lled (if applicable)<br />
Steering system-working smoothly & properly<br />
Battery-electrolyte level within range<br />
Float plan-fi led with friend or relative<br />
Trailering (if applicable)<br />
Boat position-secure on trailer<br />
Tiedowns-tight<br />
Winch-locked<br />
Trailer hitch-connected<br />
Safety chains-attached<br />
Swing tongue-secured with safety clip<br />
Engine clearance-in trailering position<br />
(See engine manual for recommended<br />
guidelines)<br />
Electrical-Lights, brake lights, turn signals<br />
working<br />
Mirrors-adjusted for trailering<br />
After Return<br />
PFD’s & other safety gear-dry, stowed for<br />
next use<br />
Fuel tanks-fi lled (allow for expansion) to<br />
prevent condensation<br />
Fuel system-no leaks<br />
Bilge pump-operating properly<br />
Bilge-clean, no leaks<br />
Float plan-notify person with whom you<br />
fi led plan<br />
1-2 150 Montauk<br />
R
General Considerations<br />
• Know how your boat handles under different<br />
conditions. Recognize your limitations and the<br />
boat’s limitations. Modify speed in keeping<br />
with weather, sea and traffi c conditions.<br />
• Instruct passengers on location and use of<br />
safety equipment and procedures.<br />
• Instruct passengers on the fundamentals of<br />
operating your boat in case you are unable to<br />
do so.<br />
• You are responsible for passenger’s actions. If<br />
they place themselves or the boat in danger,<br />
immediately correct them.<br />
• Remember the “Rule of Thirds”: one third<br />
total fuel usage for the trip out; one third total<br />
fuel sage while out; one third total fuel usage<br />
for the return trip.<br />
Maintain Control<br />
On the water there are no marked traffi c lanes, no<br />
traffi c signs or lights, and boats have no turn signals.<br />
The boat operator must keep her or his attention<br />
focused not only on what’s ahead but what’s on the<br />
left, right and behind the boat.<br />
The operator must always be alert to approaching<br />
boats (from the rear, right and left sides, as well<br />
as those ahead). There can be people in the water,<br />
partially submerged debris, and other navigational<br />
hazards such as rocks, sand bars or dangerous<br />
currents, to name a few.<br />
Your passengers are relying on you to operate and<br />
maneuver the boat safely so that they are not in<br />
danger of going overboard. If you turn too quickly,<br />
increase or decrease speed abruptly, your passengers<br />
are at risk of being thrown overboard or thrown<br />
about the boat.<br />
When visibility becomes impaired because of<br />
weather, time of day or high bow angle you must<br />
slow down so that you have suffi cient time to react<br />
if an emergency occurs. Nearby boats face similar<br />
risks in avoiding a collision with you.<br />
150 Montauk<br />
Section 1 • Safety<br />
Boarding<br />
• Board only one person at a time.<br />
• Never jump into boat. Step or climb into<br />
cockpit.<br />
• Load gear after you are aboard. Carrying<br />
gear while boarding can cause you to lose<br />
balance.<br />
• Distribute weight evenly.<br />
• Instruct passengers where to sit during<br />
on-plane operation to reduce the<br />
possibility of falling overboard during<br />
high speed maneuvers.<br />
• If gear is not immediately needed, stow it in<br />
secure areas.<br />
• Safety gear must be immediately accessible<br />
at all times.<br />
Impaired Operation<br />
A qualifi ed operator must be in control of the<br />
boat at all times. Do not operate the boat while<br />
under the infl uence of alcohol or drugs. never<br />
operate your boat at speeds which exceed<br />
the operator’s ability to react if an emergency<br />
develops. At night, turn on the appropriate<br />
navigation lights and cruise at a reduced speed<br />
that will allow you plenty of time to avoid<br />
dangerous situations.<br />
R<br />
! WARNING<br />
CONTROL HAZARD-Federal laws prohibit<br />
operating a boat while under the infl uence of<br />
alcohol or drugs. These laws are vigorously<br />
enforced.<br />
The detrimental effects of alcohol and drugs are<br />
increased by wind, waves and sun, and will decrease<br />
your response time and ability to act in critical<br />
situations. Give special attention to the effects of<br />
alcohol and drugs while boating. No other single<br />
factor causes as many marine accidents and deaths.<br />
Death or serious injury and damage to personal and<br />
private property can result from being impaired while<br />
operating a boat.<br />
! WARNING<br />
1-3
! WARNING<br />
Death or serious injury can result if you fail to<br />
observe these safety rules:<br />
• Anyone who controls the boat should<br />
have taken a boating safety course and<br />
have trained in the proper operation of<br />
the boat.<br />
• Always operate the boat at speeds that<br />
will not put people or property in<br />
danger.<br />
• Be constantly aware of conditions in<br />
all directions when underway and<br />
before turning.<br />
• Reduce speed, use a lookout to<br />
identify possible hazards or diffi culties,<br />
and turn on navigation lights when:<br />
- visibility is impaired;<br />
- in rough water; and<br />
- in congested waterways.<br />
• Watch your wake. It can capsize a<br />
small boat or damage moored boats or<br />
other property. You are responsible for<br />
damage caused by your wake.<br />
! WARNING<br />
NEVER operate a boat at a speed at which you<br />
do not feel in control.<br />
Section 1• Safety<br />
1-4 150 Montauk<br />
R<br />
! WARNING<br />
STABILITY HAZARD<br />
• Load boat properly. The<br />
manufacturer’s load rating is the<br />
maximum allowed under normal<br />
conditions. Adjust downward if<br />
weather, water or other conditions<br />
are adverse.<br />
• Allow passengers to ride only in areas<br />
that do not pose a hazard to<br />
themselves or the boat.<br />
DO NOT allow passengers to ride on<br />
the bow of a closed bow boat.<br />
DO NOT allow several passengers to<br />
ride in the bow of a small open-bow<br />
boat, causing the boat to “plow” into<br />
the water.<br />
DO NOT allow passengers to ride on<br />
the stern cushion or gunwales.<br />
DO NOT overload the stern.<br />
• Observe manufacturer’s<br />
recommended on-plane seating<br />
locations.<br />
• Passengers should remain seated<br />
while boat is moving.<br />
PERSONAL INJURY HAZARD-Stay alert. Use of<br />
drugs, alcohol, or other substances which impair<br />
judgement poses a serious threat to yourself<br />
and others. The boat operator is responsible for<br />
the behavior of passengers.<br />
DROWNING HAZARD-Boats must carry one<br />
wearable personal fl otation device (PFD) for<br />
every passenger on board. Boats must have at<br />
least one throwable life preserver.<br />
SLIPPING HAZARD-Wet decks are slippery.<br />
Wear proper footwear and use extreme caution<br />
on wet surfaces.
Legally Mandated Equipment<br />
(Minimum Required)<br />
Consult your national and state boating law<br />
enforcement agency.<br />
The following equipment is the minimum required<br />
by the U.S. Coast Guard for a boat less than 26’ (7.9<br />
meters) in length.<br />
Personal Flotation Devices (PFD’s)<br />
• One (1) Coast Guard approved Type I, II<br />
or III PFD for each person aboard or being<br />
towed on water skis, tubes, etc.<br />
Depending on the state or country of operation,<br />
the operator of a vessel may be fi ned for failure<br />
to comply with local or national rules regarding<br />
PFD usage.<br />
Fire Extinquisher (Portable)<br />
It is recommended that you carry one (1) A, B or C<br />
Type fi re extinguisher on board and located near the<br />
helm for easy reach.<br />
FIRE EXTINGUISHER LOCATION<br />
A storage pocket for the portable fi re extinguisher<br />
is located on the lower starboard side of the center<br />
console.<br />
150 Montauk<br />
! WARNING<br />
There is rarely time to reach stowed life jackets<br />
in time of emergency. Boaters should always<br />
wear a properly fi tting, approved life jacket<br />
when on the water.<br />
Children and non-swimmers MUST wear PFDs<br />
at all times when aboard.<br />
NOTICE<br />
Section 1 • Safety<br />
Whistle, Horn<br />
You must have on board, some means of making<br />
a loud sound signal. Navigation rules require that<br />
a sound made by any audible device be capable<br />
of a four (4) second blast, and must be audible for<br />
1/2 mi. (.80 Km).<br />
Visual distress Signals<br />
Boats operating in coastal waters, the Great Lakes<br />
& US owned boats on the high seas are required to<br />
carry approved visual distress signals for nighttime<br />
use. They must be readily accessible, in serviceable<br />
condition and not be expired.<br />
Store all pyrotechnic signals in a well marked,<br />
waterproof container.<br />
Additional Recommended equipment for<br />
safe operation<br />
In addition to the legally mandated equipment, the<br />
following items are recommended for safe boating.<br />
• First Aid kit • Compass<br />
• Charts/Maps • Manual bilge pump<br />
• Visual distress signals • GPS or LORAN<br />
(for day or night use) • Spare keys<br />
• Marine VHF radio • EPIRB-Emergency<br />
• Moisture repellent positioning-indicat-<br />
• Mooring Lines ing radio beacon<br />
• Fenders • Boat hook<br />
• Waterproof fl ashlights • Extra batteries<br />
• High power spotlight • Instruction manuals<br />
• Spare propeller • Lubricating oil<br />
• Tool kit:<br />
- Screwdrivers, (phillips & fl at)<br />
- Pliers, (regular, vise-grip, tongue & groove)<br />
- Wrenches, (box, open end, allen & adjustable)<br />
- Socket set, (metric and U.S.)<br />
- Electrical tape & duct tape<br />
- Hammer<br />
- Spare parts kit, (spark plugs, fuses, etc.)<br />
R<br />
1-5
Carbon Monoxide (CO)<br />
! DANGER<br />
• Fumes from the engine(s), Generator(s)<br />
and other equipment and appliances<br />
that burn fuel contain Carbon Monoxide.<br />
Carbon Monoxide can kill you. Open all<br />
doors, hatches, curtains and windows to<br />
allow fresh air to circulate and dissipate<br />
the amounts of Carbon Monoxide<br />
present in enclosed spaces, especially<br />
when the boat is moored or anchored.<br />
• Proper ventilation must be<br />
maintained, even during inclement<br />
weather to prevent dangerous levels of<br />
Carbon Monoxide build-up.<br />
• Sleeping aboard a boat will require a<br />
working Carbon monoxide detection<br />
system, preferably in each sleeping<br />
quarter.<br />
Carbon Monoxide is an oderless, colorless, and<br />
tasteless, extremely toxic gas produced by engines,<br />
heaters, stoves or generators. When inhaled it<br />
combines with hemoglobin in the blood, preventing<br />
absorption of oxygen and is unlikely to be <strong>notice</strong>d<br />
until the person is overcome.<br />
Prolonged exposure to low concentration or very<br />
short exposure to high concentrations can result in<br />
asphyxiation and death.<br />
Symptoms of Carbon Monoxide poisoning include:<br />
• Dizziness • Headaches<br />
• Ringing in the ears<br />
• Unconsiousness<br />
• Nausea<br />
GET MEDICAL ATTENTION AS SOON AS<br />
POSSIBLE.<br />
Symptoms of CO poisoning are often confused with<br />
seasickness or intoxication, so those affected may not<br />
receive the medical attention they need.<br />
The poisoning victim’s skin often turns cherry red.<br />
If CO poisoning is suspected, have the victim breath<br />
fresh air deeply. If breathing stops, resusitate. A<br />
victim often revives, then relapses because organs<br />
are damaged by lack of oxygen.<br />
Section 1• Safety<br />
Carbon Monoxide can accumulate in dangerous<br />
concentrations anywhere in or around your boat<br />
including on back decks, swim platforms, or in water<br />
around exhausts. CO can remain in or around your<br />
boat at dangerus levels even if your engine is no<br />
longer running.<br />
Remember:<br />
• If you can smell engine exhaust, you are<br />
inhaling CO.<br />
• Changing course and speed to place boat<br />
heading into the wind can improve<br />
ventilation.<br />
To minimize the danger of Carbon Monoxide<br />
accumulation when the Engine is running (or by use<br />
of fuel burning equipment.):<br />
• Do not idle the engine without moving the<br />
boat for more than 15 minutes at a time.<br />
• Inspect the exhaust system regularly.<br />
• Operate all fuel burning appliances, such as<br />
charcoal, propane, LPG, CNG or alcohol<br />
cooking devices in areas where fresh air can<br />
circulate.<br />
1-6 150 Montauk<br />
R<br />
! DANGER<br />
Never ignore an alarm.<br />
In the event the CO alarm activates:<br />
• Evacuate enclosed areas immediately.<br />
• Shut OFF any fuel burning equipment or<br />
appliances.<br />
• Open hatches, doors, portlights, etc. to<br />
improve ventilation.<br />
• If making way, head boat into the wind.
150 Montauk<br />
! DANGER<br />
Even in rainy cold weather, ventilation must be<br />
maintained to avoid Carbon Monoxide poisoning.<br />
You will get wet and/or cold.<br />
Examples of accumulation of Carbon Monoxide<br />
Fig. 1.7.1<br />
WINDS BLOWING EXHAUSTS TOWARD BOAT OCCUPANTS.<br />
BLOCKING EXHAUSTS<br />
OPERATING WITH “BOW HIGH”<br />
OPERATING AT SLOW SPEED OR DEAD IN WATER<br />
GOOD AIR FLOW<br />
Section 1 • Safety<br />
Lifesaving Equipment<br />
Even strong swimmers can tire quickly in the water<br />
and drown due to exhaustion, hypothermia, or both.<br />
The bouyancy provided by a personal fl otation device<br />
(PFD) will allow the person who has fallen overboard<br />
to remain afl oat with far less effort and body heat<br />
loss, extending survival time necessary to fi nd and<br />
retrieve them.<br />
PFD Requirement<br />
One (1) Coast Guard approved PFD, Type I, II or<br />
III for each person aboard or being towed on water<br />
skis, tubes, etc.<br />
The law requires that PFDs must be readily<br />
accessible, if not worn. “Readily Accessible” means<br />
removed from storage bags and unbuckled.<br />
Children and non-swimmers MUST wear PFDs<br />
at all times when aboard.<br />
PFD Classifi cations<br />
Listed below are the several different types of PFDs,<br />
each life jacket has different purposes, choose one<br />
that will suit your purpose.<br />
R<br />
NOTICE<br />
Type I, Off-shore Life Jacket is<br />
considered the most bouyant, it is<br />
designed to turn an unconscious<br />
person face up. Use in all types<br />
of waters where rescue may be<br />
slow, particularly in cold or rough<br />
water conditions.<br />
Type II, Near-shore Life Vest,<br />
“keyhole” vest with flotation<br />
fi lled head and neck support is<br />
also designed to turn a person<br />
face up, but the turning action is<br />
not as pronounced. Use in calm<br />
inland waters or where quick<br />
rescue is likely.<br />
1-7
Type III, Flotation-aid Life<br />
vest is designed so that<br />
conscious wearers can turn face-up.<br />
Often designed for comfort while<br />
engaged in water skiing or other<br />
forms of water activities.<br />
Type IV, Throwable Devices,<br />
horseshoe bouys, ring bouys and<br />
bouyant cushions are designed to<br />
be grasped, not worn.<br />
Section 1• Safety<br />
1-8 150 Montauk<br />
R<br />
Type V, Special-Use devices,<br />
sailboat harnesses, white water<br />
vests, float coats, and hybrid<br />
vests which have minimum<br />
inherent bouyancy and an<br />
infl atable chamber.<br />
Before purchasing PFDs, ensure that there is an<br />
attached tag indicating they are approved by the<br />
U.S.Coast Guard or by your National Boating Law<br />
Enforcment Agency.<br />
The operator is responsible for instructing everyone<br />
onboard on their location and use. The best<br />
precaution is to wear the PFD at all times while<br />
on the boat.
Prevention is the safest approach. We hope that you<br />
are never involved in an emergency situation, but if<br />
you are it is imperative that you react.<br />
Medical Emergency<br />
You may be far from professional medical help when<br />
you are boating. At least two (2) persons on board<br />
your boat should be CPR certifi ed, and should have<br />
taken a fi rst aid course. Your boat should have a well<br />
stocked fi rst aid kit on board. In many situations<br />
your radio will be your only link to reaching medical<br />
assistance. Keep the radio in working order and<br />
understand which channels are used for emergencies,<br />
these channels are constantly monitored and will<br />
be useful when situations arise. Cell phones are<br />
becoming more common and can help in some areas,<br />
but they are limited and unreliable and should not be<br />
used in the place of a good VHF radio.<br />
Water Rescue<br />
In most situations a person that has fallen overboard<br />
will succumb to hypothermia if not rescued<br />
immediately. Life expectancy decreases as rescue<br />
time increases in water temperatures below 70°<br />
(21.1°C).<br />
There are three (3) steps that must be taken when a<br />
person has fallen overboard:<br />
1. Returning to the victim:<br />
• Immediately make everyone onboard aware<br />
that someone is overboard and keep the victim<br />
in sight.<br />
• Slow the boat and keep pointing toward the<br />
person overboard. At night or in low light, point<br />
the best available light source at the person.<br />
150 Montauk<br />
Section 1 • Safety<br />
Emergency Situations • Throw a life ring/preserver to the victim, even<br />
if they are wearing one it will serve as another<br />
marker.<br />
NOTICE<br />
The law requires the operator to assist any<br />
person or boat in distress as long as rendering<br />
assistance does not endanger the operator, the<br />
passengers or the boat.<br />
2. Making contact:<br />
• Stop or slow the boat and circle toward the<br />
person overboard. Never reverse your boat to<br />
pick up someone in the water.<br />
• Try to approach heading into the wind or into<br />
the waves.<br />
• Keep person overboard constantly in sight.<br />
• When almost alongside, stop the engine in gear<br />
to prevent propeller “windmilling”.<br />
3. Getting back aboard:<br />
• Try to reach the person overboard with a pole,<br />
or by throwing a life preserver. NEVER swim<br />
to them except as a last resort.<br />
• Assist the person in boarding. Boarding should<br />
be done at the stern of the boat.<br />
• If the person is injured or incapable of boarding<br />
by themselves, a rescuer should don a life<br />
preserver with a safety line and enter the water<br />
to assist the person onto the boat.<br />
• Handle the person carefully, spinal injuries<br />
might have occurred and could be worsened by<br />
rough handling.<br />
• Check for other injuries, render medical<br />
assistance immediately.<br />
Fire<br />
Fire is a serious boating hazard. Boats will burn<br />
quickly. Do not remain onboard and fi ght a fi re for<br />
more than a few minutes. If the fi re is out of control<br />
and cannot be put out with the fi re suppression<br />
equipment onboard, abandon ship immediately.<br />
The fumes released during a fi re are toxic and should<br />
be avoided. Even after the fi re has been extinguished,<br />
proper ventilation of the area is required to minimize<br />
exposure to these harmful fumes.<br />
R<br />
1-9
! DANGER<br />
• Fires can spread quickly. Your reaction<br />
to the fi re is important. Have the proper<br />
fi re fi ghting equipment close at hand,<br />
and in good working order to respond<br />
quickly.<br />
• Small fi re extinguishers have small<br />
discharge times. Aim at the base of the<br />
fi re with a sweeping motion to maximize<br />
the use of the fi re extinguisher contents.<br />
To lessen the danger of fi re:<br />
• Extinguish all smoking materials, shut off<br />
blowers, stoves, engine(s) and generator(s).<br />
• Keep bilge area clean, oil and fuel spills should<br />
be cleaned immediately.<br />
• If possible throw burning materials overboard.<br />
• If fi re is accessible, release the contents of the<br />
fi re extinguisher(s) into the base of the fi re.<br />
• If the fi re is in an enclosed compartment, and<br />
you have an automatic extinguisher for the<br />
compartment, wait 15 min. before opening the<br />
compartment. Have an extinguisher handy in<br />
case of a fl are up.<br />
• If possible, signal for help. Radio, visual, or<br />
audible signal should be used as needed. You<br />
must render assistance to any boater requesting<br />
help.<br />
• If fi re is out of control, grab all neccesary<br />
survival gear, distress signals, don your PFD<br />
and prepare to abandon ship.<br />
• If you do abandon ship, make sure the<br />
passengers have PFDs. Take a head count<br />
before entering the water and take another<br />
head count when in the water. STAY<br />
TOGETHER.<br />
Flooding, Swamping and Capsizing<br />
In the event of Flooding, Swamping or Capsizing:<br />
FLOODING<br />
• Always wear your PFD, or have it within<br />
reach.<br />
Section 1• Safety<br />
• If the bilge pump(s) have not automatically<br />
turned ON, switch them ON immediately.<br />
• Find the source of the fl ooding and determine<br />
the best fi x.<br />
• Keep the bilge pump running until the fl ooding<br />
is under control.<br />
• Call for assistance if the source of the fl ooding<br />
cannot be controlled.<br />
• Head back to port if possible.<br />
SWAMPING<br />
• Always wear your PFD, or have it within<br />
reach.<br />
• Swamping is usually a result of wave action,<br />
immediately get control of the helm and turn<br />
the boat into the waves.<br />
• Swamping can also be caused by an overloaded<br />
boat.<br />
• If the bilge pump has not automatically<br />
turned ON, switch it ON immediately.<br />
• The deck scuppers on your boat are designed to<br />
drain the deck of water.<br />
• Keep the bilge pump running until the fl ooding<br />
is under control.<br />
• Take a head count of all passengers.<br />
CAPSIZING<br />
• “Capsized” is when a boat is on its side or<br />
completely upside-down (usually as a result<br />
of wave action, improper loading or<br />
load shifting).<br />
• Always wear your PFD, or have it within<br />
reach.<br />
• If the boat will not right itself, get out of the<br />
water and climb onto the exposed hull.<br />
• Do a head count of all passengers<br />
• STAY TOGETHER<br />
• Usually a capsizing will happen quickly and<br />
without warning.<br />
• Use whatever is at hand to signal for help.<br />
1-10 150 Montauk<br />
R
The chances of fl ooding, swamping or capsizing can<br />
be reduced by being aware of:<br />
• Weather<br />
• Water Conditions<br />
• Proper boat handling techniques<br />
• Proper loading of the boat<br />
Collision<br />
In the event of collision:<br />
• Cut the engine(s)<br />
• Always wear your PFD, or have it within<br />
reach.<br />
• Check on passengers<br />
• If the bilge pump has not automatically<br />
turned ON, switch it ON immediately.<br />
• Determine the amount of damage to your boats<br />
structure.<br />
• Call for assistance<br />
• In the event of collision you are required to fi le<br />
an accident report. Contact a state enforcement<br />
agency or the nearest U.S. Coast Guard offi ce.<br />
If you are boating outside U.S. waters, consult<br />
the nation you are visiting for accident<br />
reporting requirements.<br />
Propulsion, Control or Steering failure<br />
If there is a propulsion, control or steering failure:<br />
• Stop the engine, (shut off at Ignition or pull on<br />
the Emergency Engine Shut-Off Switch.)<br />
• Drop anchor to prevent drifting.<br />
• Determine if the problem can be fi xed or will<br />
assistance be needed.<br />
• Call for assistance if needed<br />
When loss of propulsion or steering is <strong>notice</strong>d, your<br />
quick reaction is required to prevent further damage<br />
to your boat or injuries to your passengers.<br />
Outboard engines require propulsion to control the<br />
direction the boat will take. Without propulsion, the<br />
150 Montauk<br />
Section 1 • Safety<br />
steering is virtually useless. If you are in a congested<br />
waterway you will need to react quickly to warn<br />
others that you have lost power, propulsion or<br />
steering control and that assistance will be needed.<br />
Grounding<br />
Running aground may be avoided by paying attention<br />
to marker bouys or observing the waves as they form<br />
into breakers when passing over a sand bar.<br />
If you do run aground, the course of action depends<br />
on how hard the boat hits bottom and whether the<br />
boat remains stranded. If it is a simple touch, you may<br />
need only to inspect the lower drive of the engine<br />
and the hull of the boat. If possible do a thorough<br />
inspection before trying to get loose, throwing the<br />
boat into reverse before this is done may do more<br />
damage.<br />
Distress Signals<br />
VISUAL DISTRESS SIGNALS, (VDS)<br />
• U.S. Coast Guard regulations require boats<br />
in coastal waters and the Great Lakes to<br />
carry a Visual Distress Signal (VDS) for<br />
day and night use, as well as appropriate for<br />
the time of operation. Exempt from the<br />
day signals requirement, but not night<br />
signals, are boats less than 16 feet (4.8 m),<br />
open sailboats less than 26 feet (7.9m),<br />
boats participating in organized events and<br />
manually propelled boats.<br />
• If you are required to have visual distress<br />
signals, at least three safety approved<br />
pyrotechnic devices in serviceable condition<br />
must be readily accessible. They must be<br />
marked with a date showing the service life<br />
which must not be expired.<br />
• Carry three signals for day use and three<br />
for night use. Some pyrotechnic devices<br />
such as red fl ares, meet both day and night<br />
use requirements.<br />
• Store pyrotechnic signals in a cool, dry<br />
location. An orange or red watertight<br />
container prominently marked “DISTRESS<br />
SIGNALS” is recommended.<br />
R<br />
1-11
Other recognized visual distress signals include:<br />
• Flames in a bucket<br />
• Code flags November & Charlie displayed<br />
together.<br />
• Black square & ball on orange background<br />
fl ag<br />
• Orange fl ag (certifi ed)<br />
• Electric distress light (certifi ed)-for night use<br />
• Dye marker (any color)<br />
• Person waving arms (slowly)<br />
• U.S. ensign fl own upside down<br />
AUDIBLE DISTRESS SIGNALS, (ADS)<br />
U.S. Coast Guard regulations require one hand,<br />
mouth or power operated whistle or horn, audible<br />
for at least 1/2 mile.<br />
Other recognized audible distress signals include:<br />
• Radio communication (see Radio<br />
Communication below)<br />
• Radio-telegraph/telephone alarm<br />
• Position indicating radio beacon (EPIRB)<br />
• Morse Code S-O-S (3 short 3 long 3 short)<br />
sounded by any means.<br />
• Fog horn sounded continuously.<br />
Radio Communication<br />
A radio is the boat operator’s main method of<br />
recieving safety information and summoning aid.<br />
VHF-FM radio is the primary means of short range<br />
communication. Single sideband radio (SSB) is used<br />
for longer range communication.<br />
VHF-FM channel 16 and SSB 2182 kHz are<br />
designated for emergency use. Such situations can<br />
be categorized as:<br />
• EMERGENCY-<br />
“MAYDAY, MAYDAY, MAYDAY,”- used<br />
when life or vessel is in imminent danger.<br />
Section 1• Safety<br />
• URGENCY-<br />
1-12 150 Montauk<br />
R<br />
“PAN-PAN, PAN-PAN, PAN-PAN”<br />
(pronounced PAHN-PAHN)-used when<br />
a person or vessel is in some jeopardy less<br />
than indicated by a “MAYDAY” call.<br />
• SAFETY-<br />
“SECURITY, SECURITY, SECURITY”<br />
(pronounced SAY-CURE-IT-AY)-used for<br />
navigational safety or weather warning.<br />
An emergency situation will be hectic and there will<br />
not be time to learn proper radio procedure. LEARN<br />
WHAT TO DO BEFORE YOU NEED TO DO IT.<br />
If you hear a distress call, stop all radio transmissions.<br />
If you can directly assist, respond on the emergency<br />
frequency. If you cannot assist, do not transmit on<br />
that frequency. However, continue to monitor until<br />
it is obvious that help is being provided.<br />
Weather<br />
! DANGER<br />
DO NOT attempt to boat in severe weather<br />
conditions. Death or serious injury can occur.<br />
Get to shore before the weather turns bad.<br />
Getting caught in severe weather is hazardous. Bad<br />
weather and/or rough sea or water conditions can<br />
cause an unsafe situation. Consult local weather<br />
services for up-to-date forecasts on weather and sea<br />
conditions. Television, Radio, Internet can give you<br />
access to NOAA weather reports that will help you<br />
make a determination on where and when to get<br />
underway.<br />
Following are some weather related rules:<br />
• Understand the design limitations of your boat.<br />
• Check the weather forecast and water<br />
conditions before leaving and while underway.<br />
• Wear a Personal Flotation Device, (PFD).
A sudden change in wind direction or speed or an<br />
increase in wave height indicates deteriorating<br />
weather.<br />
Weather Warning Penants<br />
Fig. 1.13.1<br />
Red fl agwinds<br />
to 33 knots<br />
(38 mph).<br />
Storm<br />
Square Red fl ag<br />
w/Black box<br />
winds 48 - 63 knots<br />
(55 - 73 mph)<br />
150 Montauk<br />
! WARNING<br />
NOTICE<br />
Check the weather forecast and water conditions<br />
before leaving and while underway<br />
Gale<br />
2 Red fl ags<br />
winds 34 - 47 knots<br />
(38 - 54 mph)<br />
• If a storm approaches, immediately seek a safe<br />
harbor.<br />
• If a storm hits have everyone sit in the cabin<br />
or cockpit deck in the boat. Head the bow into<br />
the wind with enough power to maintain slow<br />
headway.<br />
Section 1 • Safety<br />
Hurricane<br />
Two (2) Square Red fl ags<br />
w/Black box<br />
winds 64+ knots<br />
(74+ mph)<br />
• If you encounter fog, determine your position,<br />
set a safe course, slow down and alert other boats<br />
of your presence with a sound signal.<br />
• If a lightning storm approaches, the safest action<br />
is to dock and disembark. If you cannot return to<br />
shore, have passengers go inside the cabin and<br />
remain there until the storm passes.<br />
• Stay out of the water during a lightning storm.<br />
If caught swimming during a storm, get back<br />
into the boat and remain there until the storm<br />
passes. (remember that lightning can strike several<br />
miles away from the storm itself. Be aware of the<br />
storms location relative to your location and the<br />
direction the storm is moving).<br />
Swimming, Diving & Water Skiing<br />
Swimming<br />
• Do not swim from a moving boat.<br />
• Many areas prohibit swimming from a<br />
boat except in designated areas. Never enter<br />
swimming zones.<br />
• Turn off engine in gear (to prevent propeller<br />
“windmilling”) before picking up swimmer.<br />
Diving<br />
Recognize and respect diving fl ags. Keep at least 100<br />
feet (30 meters) away.<br />
Diver’s Flags<br />
Fig. 1.13.2<br />
RED<br />
SPORT DIVER’S<br />
FLAG<br />
SPORT DIVERS FLAG-Red fl ag with diagonal<br />
white stripe marks a diver in the water.<br />
CODE ALPHA FLAG-Blue and white pennant<br />
designates boat being used in dive operations.<br />
R<br />
WHITE WHITE BLUE<br />
CODE ALPHA<br />
FLAG<br />
1-13
Water Skiing<br />
• Always have at least two persons in the boat,<br />
one at the controls and one who can easily and<br />
continuously look at the skier.<br />
• Insist that anyone who water skis must know<br />
how to swim.<br />
• Insist that skiers wear approved Personal<br />
Flotation Devices (PFD’s)<br />
• Ski only in daylight when visibility is good.<br />
• Never drive the boat directly behind a water<br />
skier. At 22 knots (25 m.p.h.) it takes only 5<br />
seconds to overtake a fallen skier who was 60<br />
meters (200 feet) in front.<br />
• Ski only in areas where skiing is permitted.<br />
• Observe local restrictions on length of tow<br />
line.<br />
• Learn the signals to communicate with a skier.<br />
The skier is to control the boat through hand<br />
signals (Figure 1.14.1).<br />
• Your boat will handle differently while towing<br />
a skier. Experiment carefully to learn the<br />
difference.<br />
• Skiers may start from the shore or dock, if boat<br />
traffi c allows. When returning, pick up skiers<br />
from water. Do not ski back to shore or dock.<br />
• Give immediate attention to fallen skiers.<br />
• Keep a downed skier in sight and on the<br />
operator’s side of the boat when approaching<br />
the skier. Never back up to anyone in the<br />
water.<br />
• Turn off engine in gear (to prevent propeller<br />
“windmilling”) before picking up skier.<br />
• If the skier suddenly releases the tow rope,<br />
it can backlash into cockpit. Spotters who<br />
are watching the skier must be aware of this<br />
fact and be prepared to take appropriate action<br />
to avoid injury.<br />
Section 1• Safety<br />
Water Skiing Signals<br />
Skiing Signals<br />
Fig. 1.14.1<br />
TURN TURN RIGHT TURN LEFT STOP<br />
Turn – Arm raised, circle with index fi nger<br />
extended.<br />
Turn Right – Extend arm out from body to<br />
the right.<br />
Turn Left – Extend arm out from body to the<br />
left.<br />
Stop – Raise arm with palm vertical and facing<br />
forward.<br />
Faster – Thumb pointed up or palm up, move<br />
hand up and down.<br />
Speed OK – Raise arm and form a circle with<br />
thumb and index fi nger.<br />
Slow Down – Thumb pointed down or palm<br />
down, move hand up and down.<br />
OK After a Fall – Clasp hands together<br />
overhead.<br />
Skier in Water – Extend one ski vertically<br />
out of water.<br />
Cut Motor – Draw fi nger across throat.<br />
Back to Dock – Pat top of head.<br />
1-14 150 Montauk<br />
R<br />
OR<br />
GO FASTER<br />
SPEED OK<br />
GO SLOWER<br />
OK AFTER FALL SKIER IN WATER CUT MOTOR BACK TO DOCK<br />
Never allow anyone to board or exit your boat<br />
from the water when engines are on.<br />
OR<br />
! WARNING
150 Montauk<br />
! WARNING<br />
SWIMMING/SKIING HAZARD<br />
• Keep clear of areas designated only for<br />
swimmers and skin divers. Recognize<br />
markers used for such areas.<br />
• Never swim when there is lightning in<br />
the area.<br />
SKIING HAZARDS<br />
• Skiers must use a safety approved<br />
Personal Flotation Device (PFD).<br />
• Ski only during daylight and in good<br />
visibility.<br />
• Avoid shallow water, other boats,<br />
navigational aids and other<br />
obstructions.<br />
• Keep at least 100 ft. (30 meters) from<br />
other objects.<br />
• Never drive directly behind a water<br />
skier.<br />
• A competent observer must watch the<br />
skier at all times. A competent observer<br />
is a person that has the ability to assess<br />
when a skier is in trouble, knows or<br />
understands water skiing hand signals<br />
and is capable of helping a skier.<br />
• Keep a downed skier in constant sight.<br />
• Turn off engine in gear before you get<br />
close to person in the water.<br />
• Never back up to anyone in the water.<br />
• Use caution in boat when skier is being<br />
towed. Sudden release of tow rope can<br />
cause it to backlash into the cockpit.<br />
PERSONAL INJURY HAZARD<br />
Use transom tow ring only to pull water skiers.<br />
Unless specified by the manufacturer, any<br />
other use, such as parasailing, kite flying,<br />
towing other boats, etc. may create too much<br />
stress on the tow ring, resulting in personal<br />
injury and/or equipment damage.<br />
Section 1 • Safety<br />
PROPELLER SAFETY<br />
• Before starting your boat, walk to the<br />
stern and look in the water to assure<br />
there is no one near your propeller.<br />
R<br />
! DANGER<br />
People near propeller may not be visible<br />
from helm.<br />
• NEVER allow passengers to board or exit<br />
your boat from the water when engines<br />
are on.<br />
• Educate passengers about the dangers<br />
of propellers<br />
• Be especially alert when operating in<br />
congested areas. NEVER enter swimming<br />
zones.<br />
• Take extra precautions near boats that<br />
are towing skiers or tubers.<br />
• NEVER permit passengers to ride on the<br />
bow, gunwale, transom, seatbacks,<br />
or other locations where they may fall<br />
overboard.<br />
• STOP! if someone falls overboard. Slowly<br />
turn the boat around, and keep the<br />
person in sight as you approach. Turn<br />
your engine off FIRST and then bring the<br />
person aboard.<br />
• NEVER reverse your boat to pick someone<br />
up out of the water.<br />
1-15
Emergency Engine Stop Switch<br />
! WARNING<br />
Wear the lanyard at all times when operating<br />
the boat. Use it to stop only in an emergency. DO<br />
NOT use it to shut off the engine during normal<br />
operation<br />
Your boat is equipped with an ignition shutdown<br />
safety switch. The switch is located on the control<br />
console next to the gear shift/throttle control unit.<br />
The ignition shut down safety switch incorporates a<br />
shut-off switch, switch clip, lanyard and lanyard clip,<br />
which is clipped to the operator when running.<br />
If an emergency arises and the engine must be shut<br />
down, a pull on the cord to release the clip from the<br />
shut-off will shut off the engine.<br />
This switch is designed to shut the engine off when<br />
the operator of the boat leaves the control station,<br />
either accidentally by falling into the boat, or by<br />
being ejected overboard. This would most likely<br />
occur as a result of poor operating practices.<br />
Emergency Engine Stop Switch<br />
Fig. 1.16.1<br />
4<br />
1 IGNITION SHUT-DOWN<br />
SWITCH<br />
2 IGNITION SHUT-DOWN<br />
SWITCH CLIP, (ATTACHED TO SWITCH)<br />
3 LANYARD<br />
4 IGNITION SHUT-DOWN<br />
SWITCH CLIP,(ATTACH TO OPERATOR)<br />
1<br />
2<br />
Section 1• Safety<br />
4<br />
3<br />
The lanyard should be long enough to prevent<br />
inadvertant activation. Do not let the lanyard become<br />
entangled.<br />
Accidental loss of power can be hazardous,<br />
particularly while docking or in heavy seas, strong<br />
current or high winds. Passengers and crew may lose<br />
balance and the boat may lose steering control.<br />
Should the operator fall out of the boat at planing<br />
speed, it may take several seconds for the engine<br />
and propeller to stop turning. The boat may continue<br />
to coast for several hundred feet, causing injury to<br />
anyone in its path.<br />
Float Plan<br />
Float plans are important to you should you<br />
encounter problems on the water. A fl oat plan should<br />
contain a description of your boat along with any<br />
distinguishing features. It should describe where you<br />
will be boating, your departure time and estimated<br />
return. The number and names of passengers, and<br />
destination should also be noted.<br />
The fl oat plan should be given to a friend or relative,<br />
so they can give the information to a national boating<br />
agency like the U.S. Coast Guard, in the event you do<br />
not return at the time specifi ed on the fl oat plan.<br />
If there are any changes to the fl oat plan they should<br />
be conveyed to the person holding the fl oat plan. Once<br />
you return you should contact the person holding the<br />
fl oat plan to let them know you are back.<br />
Chart Your Course<br />
To avoid boating in unsafe areas where there are<br />
underwater obstructions, shallow water, unnavigable<br />
conditions such as dangerous currents, and others,<br />
you must chart a course. this means having and<br />
using National Oceanic and Atmospheric<br />
Administration (NOAA) charts for coastal waters,<br />
observing and understanding all navigational aids,<br />
using the knowledge and guidence of experienced<br />
boaters, and being aware of the tides and times<br />
where appropriate. If you are boating in an area you<br />
are unfamiliar with, proceed with caution and post<br />
a lookout to watch for hazards.<br />
1-16 150 Montauk<br />
R
Hitting an object in or under the water or<br />
boating in dangerous currents can cause serious<br />
injury or death to occupants in the boat.<br />
You must know where the hazards are and<br />
avoid them. In uncharted waters, boat very<br />
slowly and post a lookout.<br />
If an object is struck or if you run aground:<br />
• Shut the engine OFF<br />
150 Montauk<br />
! WARNING<br />
• Check the hull for damage<br />
• Check the propeller(s) for damage<br />
• If aground, consider the bottom<br />
grade before moving off, (damage<br />
to the hull and propeller(s) could be<br />
worsened).<br />
• Determine the tides and whether it<br />
will help or hinder you from the<br />
grounding.<br />
• Do not have anyone other than a<br />
trained and competent service tow<br />
your boat.<br />
Environmental Considerations<br />
Fuel & Oil Spillage<br />
Regulations prohibit discharging fuel or oily waste<br />
in navigable waters. Discharge is defi ned as any<br />
action which causes a fi lm, sheen or discoloration<br />
on the water surface, or causes a sludge or emulsion<br />
beneath the water surface. A common violation is<br />
Section 1 • Safety<br />
bilge discharge. Use rags or sponges to soak up fuel<br />
or oily waste, then dispose of it properly ashore.<br />
If there is much fuel or oil in the bilge, contact a<br />
knowledgeable marine service to remove it. Never<br />
pump contaminated bilge overboard. Help protect<br />
your waters.<br />
Excessive Noise<br />
Many areas regulate noise limits. Even if there are no<br />
laws, courtesy demands that boats operate quietly.<br />
Wake / Wash<br />
Power boat wakes can endanger people and vessels.<br />
Each power boat operator is responsible for injury<br />
or damage caused by the boat’s wake. Be especially<br />
careful in confi ned areas such as channels or marinas.<br />
Observe “no wake” warnings.<br />
SPEED HAZARD - Watch your wake. It might<br />
capsize a smaller craft. You are responsible<br />
for damage caused by your wake.<br />
R<br />
! WARNING<br />
! WARNING<br />
Reduce speed in congested waterway. Be<br />
alert for No Wake markers.<br />
1-17
Homeland Security restrictions<br />
Recreational boaters have a role in keeping our<br />
waterways safe and secure. Violators of the<br />
restrictions below can expect a quick and severe<br />
response.<br />
• DO NOT approach within 100 yards, and slow<br />
to minimum speed within 500 yards of any<br />
U.S. Naval vessel. If you need to pass within<br />
100 yards of a U.S. Naval vessel for safe<br />
passage, you must contact the U.S. Naval<br />
vessel or the Coast Guard escort vessel on<br />
VHF-FM channel 16.<br />
• Observe and avoid all security zones. Avoid<br />
commercial port areas, especially those that<br />
involve military, cruise line or petroleum<br />
facilities. Observe and avoid other restricted<br />
areas near dams, power plants, etc.<br />
• DO NOT stop or anchor beneath bridges or in<br />
channels.<br />
! DANGER<br />
DO NOT approach within 100 yards of any U.S.<br />
Naval vessel without fi rst contacting the vessel<br />
on VHF-FM channel 16. To do so will result in a<br />
quick and severe response.<br />
Section 1• Safety<br />
America’s Waterway Watch<br />
In March, 2005, the U.S. Coast Guard offi cially<br />
launched America’s Waterway Watch to encourage<br />
the boating public to report suspicious activities<br />
in our nation’s ports and waterways. America’s<br />
Waterway Watch simply asks anyone who works,<br />
lives, or recreates on the water to keep an eye out for<br />
suspicious activities. Anyone who spots such activity<br />
is asked to call the National Response Center’s<br />
24-hour hotline, 800-424-8802 or 877-24WATCH<br />
(877-249-2824).<br />
Warning Label Locations<br />
Mounted at key locations throughout the boat (See<br />
fi gure 1.19.1), warning labels advise the owner/<br />
operator of imperative safety precautions to follow<br />
when operating and/or servicing equipment.<br />
DO NOT REMOVE OR OBSTRUCT ANY<br />
WARNING LABEL. Replace any label which<br />
becomes illegible.<br />
1-18 150 Montauk<br />
R
Warning Label Locations<br />
Warning Label Locations<br />
Fig.1.19.1<br />
1<br />
2<br />
3<br />
4<br />
5<br />
150 Montauk<br />
! WARNING<br />
Section 1 • Safety<br />
Required under AB2222 for use on all boats in the State of California<br />
co<br />
co co co Carbon monoxide (CO) can cause brain damage or death.<br />
co<br />
co<br />
co<br />
co<br />
Engine and generator exhaust contains odorless and colorless carbon monoxide gas.<br />
co<br />
co co<br />
co co<br />
co Signs of carbon monoxide poisoning include nausea, headache, dizziness, drowsiness,<br />
and lack of conciousness.<br />
co<br />
co<br />
co co<br />
co co<br />
Get fresh air if anyone shows signs of carbon monoxide poisoning.<br />
See Owner’s Manual for information regarding carbon monoxide poisoning.<br />
1<br />
4<br />
5<br />
THIS BOAT HAS BEEN DESIGNED FOR A MAXIMUM<br />
OUTBOARD ENGINE WEIGHT OF<br />
NOTICE<br />
305 Lb / 138 kg<br />
NOTE: Boat shown with bow rail and<br />
livewell options.<br />
It is important to replace any damaged or<br />
unreadable label. Call your <strong>Boston</strong> <strong>Whaler</strong><br />
dealer for replacement labels.<br />
NW-204-05<br />
Replacement<br />
Part No.<br />
WARNING CO HELM .......................................................1811368<br />
PROP 65 HANG TAG .......................................................1795087<br />
DANGER CO TRANSOM .................................................1811367<br />
MAXIMUM ENGINE WEIGHT 305 LBS/138 KG ..............1735925<br />
VESSEL CERTIFICATION PLATE ...................................SEE FIGURE 2.2.1<br />
3<br />
CO<br />
CO<br />
CO<br />
CO<br />
CO<br />
CO<br />
CO<br />
CO<br />
CO<br />
CO<br />
CO<br />
CO CO CO<br />
CO<br />
CO<br />
CO<br />
CO<br />
CO<br />
R<br />
2<br />
! DANGER<br />
Proposition 65<br />
! WARNING<br />
A WIDE VARIETY OF COMPONENTS USED ON THIS VESSEL<br />
CONTAIN OR EMIT CHEMICALS KNOWN TO THE STATE OF<br />
CALIFORNIA TO CAUSE CANCER AND BIRTH DEFECTS AND OTHER<br />
REPRODUCTIVE HARM.<br />
EXAMPLES INCLUDE:<br />
• ENGINE AND GENERATOR EXHAUST<br />
• ENGINE AND GENERATOR FUEL, AND OTHER<br />
LIQUIDS SUCH AS COOLANTS AND OIL,<br />
ESPECIALLY USED MOTOR OIL<br />
• COOKING FUELS<br />
• CLEANERS, PAINTS, AND SUBSTANCES USED<br />
FOR VESSEL REPAIR<br />
• WASTE MATERIALS THAT RESULT FROM WEAR<br />
OF VESSEL COMPONENTS<br />
• LEAD FROM BATTERY TERMINALS AND FROM<br />
OTHER SOURCES SUCH AS BALLAST OR FISHING<br />
SINKERS<br />
TO AVOID HARM:<br />
• KEEP AWAY FROM ENGINE, GENERATOR, AND<br />
COOKING FUEL EXHAUST FUMES<br />
• WASH AREAS THOROUGHLY WITH SOAP AND WATER<br />
AFTER HANDLING THE SUBSTANCES ABOVE<br />
CALIFORNIA RESIDENTS ONLY<br />
THIS WARNING IS ATTACHED TO THE STEER-<br />
ING WHEEL PRIOR TO DELIVERY OF ANY<br />
BOATS SOLD IN THE STATE OF CALIFORNIA IN<br />
ACCORDANCE WITH CALIFORNIA HEALTH &<br />
SAFETY CODE §§ 25249.5-.13<br />
Carbon monoxide (CO) can cause brain damage<br />
or death.<br />
Engine and generator exhaust contains odorless and<br />
colorless carbon monoxide gas.<br />
Carbon monoxide will be around the back of the boat<br />
when engines or generators are running.<br />
Move to fresh air if you feel nausea, headache,<br />
dizziness or drowsiness.<br />
NW-206-05<br />
Required under AB2222 for use on all boats in the State of California<br />
1-19
Key to Symbols on Controls & Prints<br />
Although not used in this manual, some of these<br />
symbols may be found on the controls, gauges, and<br />
hardware on your boat. This page is to help you<br />
understand what the symbols mean.<br />
PROPULSION SYSTEM<br />
TRIM<br />
FUEL GENERAL<br />
TRIM TAB<br />
TRIMMING<br />
OPERATION<br />
FUEL<br />
LEVEL<br />
SINGLE LEVER<br />
CONTROL<br />
Section 1• Safety<br />
LIFT POINT / SLING<br />
LOCATION<br />
WARNING<br />
ELECTRICAL HAZARD<br />
1-20 150 Montauk<br />
R<br />
STOP<br />
ENGINE START ENGINE STOP<br />
OUTBOARD<br />
OUTBOARD DRIVE<br />
BILGE PUMP PROPELLER<br />
DRIVE<br />
TILT<br />
PUMP<br />
ANCHOR<br />
ANCHOR LIGHT<br />
LEADED<br />
FUEL<br />
INTERIOR LIGHT<br />
UNLEADED<br />
FUEL<br />
LIFT POINT<br />
HORN<br />
FIRE RISK<br />
BATTERY<br />
NO OPEN FLAME<br />
NO SMOKING<br />
FRESH WATER GRAY WATER<br />
SEAWATER SEWAGE<br />
RUNNING LIGHTS<br />
UNDER POWER<br />
WINDSHIELD<br />
WIPER AND WASHER<br />
OIL<br />
ROTARY CONTROL<br />
(WIDTH OF SYMBOL<br />
INDICATES INCREASE)<br />
MAGNETIC<br />
COMPASS
Construction Standards<br />
<strong>Boston</strong> <strong>Whaler</strong> ® is dedicated to creating a superior<br />
product which will provide comfort, performance,<br />
safety and dependability. All of our boats comply<br />
with the safety standards set by the United States<br />
Coast Guard and are designed, engineered and<br />
manufactured in accordance with applicable<br />
recommendations and guidelines of the American<br />
Boat and Yacht Council (A.B.Y.C.) and certifi ed<br />
by the National Marine Manufacturers Association<br />
(N.M.M.A.).<br />
Our Hull<br />
<strong>Boston</strong> <strong>Whaler</strong> ® hulls are constructed with our<br />
patented Unibond construction process. This<br />
involves foam injection into a closed mold system<br />
where the foam expands to fi ll all voids in the hull.<br />
When the fi nished product is pulled from the mold,<br />
the hull and deck are chemically bonded to form a<br />
solid, inseparable unit.<br />
Hull Construction<br />
Fig. 2.1.1<br />
1<br />
1<br />
2<br />
3<br />
4<br />
NO AIR VOIDS<br />
HIGH DENSITY CLOSED CELL<br />
NON-ABSORBENT FOAM<br />
HIGH QUALITY RESINS AND GELCOATS<br />
WOVEN GLASS MATTING<br />
Hull Identifi cation Number<br />
The “Hull Identifi cation Number” is located on the<br />
starboard side of the transom.<br />
This is the most important identifying factor and<br />
must be included in all correspondence related to<br />
your vessel. Also of vital importance are the engine<br />
serial numbers, part numbers, etc. when writing about<br />
or ordering parts for your engine.<br />
150 Montauk<br />
4<br />
Section 2 • General Information<br />
2<br />
3<br />
Hull Identifi cation Number (HIN)<br />
Fig. 2.1.2<br />
Record your HIN here:<br />
Servicing Your <strong>Boston</strong> <strong>Whaler</strong><br />
When your <strong>Whaler</strong> requires service or maintenance<br />
work, it should be taken to an authorized <strong>Boston</strong><br />
<strong>Whaler</strong> ® dealer.<br />
To fi nd a <strong>Boston</strong> <strong>Whaler</strong> ® dealer in your area call:<br />
1-800-942-5379 (Domestic/International).<br />
In the unlikely event that a problem is not handled<br />
to your satisfaction, discuss any warranty related<br />
problems directly with the service manager of the<br />
dealership or your sales person. Give the dealership<br />
an opportunity to help the service department resolve<br />
the matter for you.<br />
Manufacturer’s Certifi cation<br />
All boats must comply with federal regulations<br />
regarding maximum capacities. The certifi cation<br />
plate (See fi gure 2.2.1) located on the control console<br />
indicates the maximum weight, number of persons,<br />
and horsepower your boat is rated to handle.<br />
R<br />
2-1
The number of persons on board must be reduced if<br />
you go out in poor weather and rough water.<br />
The information present on the certifi cation plate<br />
does not relieve the operator from responsibility. Use<br />
common sense and sound judgement when placing<br />
equipment and/or passengers in your boat.<br />
• Do not load to capacity in poor weather or rough<br />
water.<br />
• The number of seats does not indicate how many<br />
people a boat can carry, especially in poor weather<br />
and rough water.<br />
• Above idle speed, all passengers must be seated<br />
on the seats provided.<br />
NMMA Certification means that your <strong>Boston</strong><br />
<strong>Whaler</strong> ® has been judged by the National Marine<br />
manufacturers Association to be in compliance with<br />
applicable federal regulations and American Boat<br />
and Yacht Council standards.<br />
A Canada Conforming Sticker means that your<br />
<strong>Boston</strong> <strong>Whaler</strong> ® has been certifi ed to comply with<br />
construction standards for small vessels by Transport<br />
Canada.<br />
A CE mark means that your <strong>Boston</strong> <strong>Whaler</strong> ®<br />
has been certified with applicable International<br />
Organization for Standardization directives.<br />
An Australian Builder’s plate means that your<br />
<strong>Boston</strong> <strong>Whaler</strong> ® has been certifi ed to comply with<br />
safety standards set by the National Marine Safety<br />
Committee.<br />
! DANGER<br />
NEVER carry more weight or passengers than<br />
indicated on the certifi cation plate, regardless<br />
of the weather or water conditions.<br />
Section 2 • General Information<br />
Certifi cation Plates<br />
Fig. 2.2.1<br />
2-2 150 Montauk<br />
1<br />
2<br />
3<br />
4<br />
R<br />
2<br />
3<br />
4<br />
1<br />
MAXIMUM CAPACITIES<br />
6<br />
825<br />
PERSONS OR LBS.<br />
1400 LBS. PERSONS, MOTOR, GEAR<br />
60 H.P MOTOR<br />
THIS BOAT COMPLIES WITH U.S. COAST GUARD SAFETY<br />
STANDARDS IN EFFECT ON THE DATE OF CERTIFICATION<br />
MANUFACTURER:<br />
BOSTON WHALER<br />
MODEL: 150 Montauk EDGEWATER, FL 32141<br />
DESIGN COMPLIANCE WITH NMMA REQUIREMENTS BELOW IS<br />
VERIFIED. MFGR. RESPONSIBLE FOR PRODUCTION CONTROL.<br />
LOAD AND H.P CAPACITY LEVEL FLOTATION<br />
STEERING, FUEL AND ELECTRICAL SYSTEMS<br />
NAVIGATION LIGHTS MANEUVERABILITY<br />
NATIONAL MARINE MANUFACTURERS ASSN.<br />
Replacement Part No. 1807946<br />
Canada<br />
Fisheries and Oceans Peches et Oceans<br />
Canada<br />
Canada<br />
Coast Guard<br />
Garde cotiere<br />
RATINGS IN FAIR WEATHER - RECOMMENDATIONS PAR BEAU TEMPS<br />
LOAD* CHARGE* POWER - PUISSANCE<br />
355 kg<br />
850 lbs.<br />
NO. -no XXXX00001<br />
OCCUPANTS<br />
6<br />
* OCCUPANTS, EQUIPMENT<br />
45<br />
60<br />
kw<br />
BUILDER - CONSTRUCTUER MODEL - MODELE<br />
BOSTON WHALER, INC -USA 150 MONTAUK<br />
HP<br />
The manufacturer certifies that this product complies with the<br />
Construction standards for small vessels/ Le fabricant certifie que<br />
ce produit este conforme aux Normes de construction des petits bateaux<br />
Replacement Part No. 1807948<br />
BOSTON WHALER, INC.<br />
150 Montauk<br />
6 635 kg<br />
C 45kW<br />
Replacement Part No. 1807947<br />
AUSTRALIAN BUILDERS PLATE<br />
MANUFACTURER: BOSTON WHALER, INC. - USA<br />
MODEL: 150 MONTAUK<br />
INFORMATION DETERMINED: ISO STANDARDS<br />
MAX OUTBOARD: 45 kw; 138 kg<br />
MAX PERSONS: 6 = 450 kg<br />
MAX LOAD: 635 kg<br />
BOUYANCY: LEVEL<br />
! WARNING<br />
ALTERATION OF THE BOAT’S HULL OR PERMANENT FITTINGS<br />
MAY INVALIDATE THE PARTICULARS ON THIS PLATE<br />
Replacement Part No. 1850570<br />
NMMA CERTIFICATE<br />
CANADA CONFORMING STICKER<br />
CE MARK (INT’L) BUILDER’S PLATE<br />
AUSTRALIAN BUILDER’S PLATE
CE Certifi cation Design Category<br />
A (Ocean): Designed for extended voyages<br />
where conditions may exceed wind force 8 on the<br />
Beaufort scale (47 mph and above) and signifi cant<br />
wave heights of 4 meters (13.12 feet) and above, and<br />
vessels largely self-suffi cient.<br />
B (Offshore): Designed for offshore voyages<br />
where conditions up to, and including, wind force 8<br />
(39-46 mph) and signifi cant wave heights up to, and<br />
including 4 meters (13.12 feet) may be<br />
experienced.<br />
C (Inshore): Designed for voyages in coastal<br />
waters, large bays, estuaries, lakes and rivers<br />
where conditions up to, and including, wind force 6<br />
(25-31 mph) and signifi cant wave heights up to, and<br />
including, 2 meters (6.56 feet) may be<br />
experienced.<br />
D (Sheltered waters): Designed for voyages on<br />
small lakes, rivers and canals where conditions up<br />
to, and including, wind force 4 (13-18 mph) and<br />
signifi cant wave heights up to, and including, 0.5<br />
meters (1.64) feet may be experienced.<br />
The signifi cant wave height is considered to be the<br />
primary factor for determining design category. Other<br />
parameters (e.g. meteorological) are descriptions of<br />
when these wave heights may be expected to occur.<br />
Refer to page 1-12 for weather information.<br />
150 Montauk<br />
NOTICE<br />
Your 150 Montauk is design category C<br />
! WARNING<br />
It is imperative that you follow the<br />
recommendations listed on your capacity plate<br />
regarding the maximum amount of weight the<br />
boat can safely carry.<br />
Section 2 • General Information<br />
Power Capacity<br />
The certifi cation plate, as well as “Specifi cations<br />
& Dimensions” on the following page has the<br />
maximum rated power listed for your boat. DO<br />
NOT EXCEED THIS RATING. The various<br />
engine types offered today are more powerful and<br />
require constant maintenance to stay at optimal<br />
performance. It is required of the owner/operator<br />
to read all information regarding safety features,<br />
warning <strong>notice</strong>s and maintenance schedules for<br />
continued safe operation of the engine.<br />
The engine on the 150 Montauk has been tested and<br />
proven to be best suited for general use under normal<br />
conditions and load.<br />
If you are re-powering your <strong>Boston</strong> <strong>Whaler</strong> ® , you<br />
should pay particular attention to the maximum/<br />
minimum horsepower and maximum safe engine<br />
weight load your <strong>Boston</strong> <strong>Whaler</strong> ® boat is rated for.<br />
The 150 Montauk is designed for a maximum<br />
outboard engine weight of 305 LBS (138kg).<br />
• DO NOT Exceed the maximum engine power<br />
rating stated on the certifi cation plate.<br />
• Use caution while accelerating. Make sure<br />
passengers are safely seated in designated<br />
areas of the boat and all gear is stowed<br />
securely.<br />
Always adjust the speed and direction of the<br />
craft to the varying sea conditions.<br />
R<br />
! WARNING<br />
NOTICE<br />
2-3
Dimensions & Clearances<br />
Fig. 2.4.1<br />
Overall Length 15’5” 4.70 m<br />
Bridge Clearance (no top) 4’7” 1.39 m<br />
Bridge Clearance (Sun- Top) 6’10” 2.08 m<br />
Beam 6’ 6” 1.98 m<br />
Boat on Trailer 6’ 5” 1.95 m<br />
Draft, (Hull only) 1 7” .17 m<br />
Weight (dry, no engine) 950 lbs. 430 kg<br />
Swamped Capacity 2900 lbs 1315 kg<br />
Section 2 • General Information<br />
15’ 5”<br />
(4.70m)<br />
Specifi cations & Dimensions<br />
(Specifi ed measurements are approximations and are subject to variance.)<br />
1 Optional equipment and loading of the boat will affect the draft measurements. Follow the recommendations listed<br />
on your capacity plate regarding the maximum amount of weight your boat can safely carry.<br />
2 Exceeding this weight will affect the boat’s performance. DO NOT Exceed the weights listed on the<br />
capacity plate.<br />
2-4 150 Montauk<br />
R<br />
7”<br />
4’7”<br />
(1.39m)<br />
6’10”<br />
(2.08m)<br />
6’6”<br />
(1.98m)<br />
Maximum Engine Weight 305 lbs. 138 kg<br />
MaximumWeight, 1400 lbs 635 kg<br />
(passengers, engine(s), gear 2 )<br />
Persons 6<br />
Maximum Horsepower 60 HP 44.7 kw<br />
Minimum Horsepower 40 HP 29.8 kw<br />
Fuel Capacity 13.2 gal. 49 L
Passenger Locations<br />
Deck Occupancy<br />
Fig. 2.5.1<br />
Working deck<br />
150 Montauk<br />
Section 2 • General Information<br />
This area is intended for occupation<br />
ONLY while mooring, anchoring,<br />
loading/unloading or when the boat is at<br />
rest. NEVER operate the engine while<br />
loading or unloading swimmers/divers<br />
from the swim platform/ladder.<br />
Accomodation deck<br />
This area of the boat is inside the cockpit<br />
and includes helm seating. Movement<br />
in this area should be done with extreme<br />
caution while the boat is underway. A<br />
sudden shift in boat direction can cause<br />
a loss of balance and lead to injury or death.<br />
! DANGER<br />
Be aware of your footing while the boat is<br />
underway, slipping or falling could result<br />
in serious injury or death, especially if the<br />
boat is in motion or in rough seas. Keep the<br />
accomodation deck clean, so if movement is<br />
neccessary it will be free of obstruction.<br />
! WARNING<br />
• Gelcoat surfaces are slippery when wet. Use<br />
extreme caution when walking on wet<br />
surfaces.<br />
• Never occupy the working decks<br />
while the boat is underway.<br />
• Use care when waxing to ensure<br />
that walkways are not made dangerously<br />
slippery.<br />
R<br />
2-5
Location of Thru-Hull Fittings<br />
Through Hull Fittings<br />
Fig. 2.6.1<br />
1<br />
1<br />
2<br />
3<br />
4<br />
5<br />
Section 2 • General Information<br />
BILGE SUMP DRAIN<br />
LIVEWELL SEACOCK (OPTION)<br />
BOW LOCKER DRAIN<br />
BILGE PUMP DRAIN<br />
LIVEWELL DRAIN (OPTION)<br />
2<br />
NOTICE<br />
• Depending on the type of boat you have, you may have underwater fi ttings that need drain plugs.<br />
Garboard drain plugs and fi shbox drain plugs need to be in place before the boat goes into the<br />
water. Any fi tting that will be underwater needs to be plugged or the seacock needs to be closed<br />
• Through hull fi ttings should be checked for proper seal annually. When the boat is in the water the<br />
underwater fi ttings can be checked for dripping. It is recommended that the underwater fi ttings<br />
be removed, cleaned and resealed every other year.<br />
• If the through hull fi ttings need to be replaced, it is recommended that an authorized <strong>Boston</strong><br />
<strong>Whaler</strong> ® dealer perform this type of repair. Through hull fi ttings that are improperly installed can<br />
cause premature hull failure and may void the <strong>Boston</strong> <strong>Whaler</strong> ® limited warranty.<br />
• A standard 1” “Snap-Tite” plug can be used to replace the drain plug(s) in your boat. It is<br />
recommended that you carry spare plugs to be used in the event that the drain plug(s) become lost<br />
or damaged.<br />
2-6 150 Montauk<br />
R<br />
3<br />
5<br />
4
Features<br />
Features<br />
Fig. 2.7.1<br />
1<br />
2<br />
3<br />
4<br />
5<br />
6<br />
7<br />
8<br />
9<br />
10<br />
11<br />
12<br />
13<br />
14<br />
15<br />
16<br />
17<br />
18<br />
19<br />
20<br />
21<br />
22<br />
23<br />
24<br />
20<br />
150 Montauk<br />
OK<br />
CANCEL<br />
OUT<br />
WPTS<br />
MOB<br />
ACTIVE<br />
RANGE<br />
IN<br />
PAGE/<br />
MENU<br />
Section 2 • General Information<br />
NAVIGATION LIGHT<br />
BOW CLEAT<br />
CLASSIC BOW RAIL/SIDE RAIL (OPTION)<br />
BOW LOCKER<br />
CONSOLE<br />
REVERSIBLE PILOT SEAT WITH LOCKING BACKREST<br />
LIVEWELL (OPTION)<br />
STERN CLEAT (P&S)<br />
TELESCOPING SWIM LADDER<br />
60 ELPT EFI BIGFOOT 4-STROKE MERCURY ENGINE<br />
DECK ACCESS TO BILGE PUMP<br />
DECK ACCESS PLATE<br />
PEDESTAL FISHING SEAT (OPTION)<br />
36 QT (34 L) COOLER WITH CUSHION AND<br />
BACKREST (OPTION)*<br />
CONSOLE MOUNTED ROD HOLDERS (OPTION)*<br />
FIRE EXTINGUISHER POCKET<br />
TACKLE DRAWERS (OPTION)*<br />
EMERGENCY ENGINE SHUTOFF SWITCH<br />
GEAR SHIFT/THROTTLE CONTROL<br />
CONSOLE ACCESS DOOR W/STORAGE POCKET<br />
HELM SWITCH PANEL<br />
ANCHOR LIGHT RECEPTACLE<br />
RAYMARINE A50D GPS, CHART PLOTTER,<br />
FISHFINDER (OPTION)**<br />
RAYMARINE RAY49 VHF RADIO (OPTION)<br />
21<br />
22<br />
18<br />
23<br />
* Fishing package option<br />
** Navigation package option<br />
19<br />
17<br />
24<br />
16<br />
5<br />
3<br />
R<br />
6<br />
7<br />
8<br />
4<br />
3<br />
9<br />
2<br />
10<br />
1<br />
14<br />
11<br />
12<br />
NOTE: Boat shown with bow rail and<br />
livewell options.<br />
15<br />
13<br />
13<br />
3<br />
8<br />
2-7
Control Station Switch Panel<br />
Switch Panel<br />
Fig. 2.8.1<br />
1<br />
2<br />
3<br />
4<br />
5<br />
6<br />
7<br />
8<br />
9<br />
Section 2 • General Information<br />
NAV/ANC BILGE PUMP ACCY<br />
OFF / AUTO / ON<br />
TACHOMETER<br />
BILGE PUMP SWITCH<br />
NAV/ANC LIGHT SWITCH<br />
NAV/ANC BREAKER ........................... 5 AMP<br />
ACCESSORY BREAKER .................... 2.5 AMP<br />
ACCESSORY SWITCH<br />
12V RECEPTACLE BREAKER ........... 10 AMP<br />
12V RECEPTACLE<br />
IGNITION SWITCH<br />
Seating & Storage<br />
Seating and Storage<br />
Fig. 2.8.2<br />
1<br />
2<br />
3<br />
4<br />
5<br />
6<br />
7<br />
8<br />
1<br />
4<br />
3<br />
2<br />
2<br />
8<br />
1<br />
2-8 150 Montauk<br />
0<br />
1 2<br />
R<br />
3<br />
RPM<br />
X1000<br />
REVERSIBLE PILOT SEAT W/ LOCKING BACKREST<br />
BOW CUSHION (OPTION)<br />
CUPHOLDERS (2)<br />
TACKLE DRAWERS (OPTION)<br />
FIRE EXTINQUISHER POCKET<br />
36 QT (34 L) COOLER WITH CUSHION AND BACKREST (OPTION)<br />
BOW/ANCHOR LOCKER<br />
CENTER CONSOLE STORAGE<br />
4<br />
5<br />
6<br />
12V<br />
OFF ON START<br />
5 6 7 8 9<br />
3<br />
4<br />
5<br />
7<br />
6
Recommended Seating<br />
150 Montauk<br />
Section 2 • General Information<br />
Recommended Seating & On-Plane Locations<br />
Fig. 2.9.1<br />
! WARNING<br />
RECOMMENDED SEATING<br />
while moored, at idle or at speed under 5 mph<br />
NEVER allow passengers to ride<br />
in an area (i.e. bow, gunnels,<br />
transom, etc.) that will pose<br />
a hazard to themselves or the<br />
boat.<br />
R<br />
RECOMMENDED ON-PLANE<br />
LOCATIONS<br />
2-9
Gear Shift & Throttle Control<br />
! CAUTION<br />
Shift controls into NEUTRAL before starting<br />
engine. Shift only when engine is at idle.<br />
Reversing at high speeds can cause fl ooding/<br />
swamping due to water being pushed over the<br />
transom.<br />
NOTICE<br />
Wind and sea currents can change how your<br />
boat responds while in motion. Understanding<br />
your boat and its reactions at speed will make<br />
boating for you safer and more enjoyable.<br />
The 150 Montauk is equipped with a gear shift/<br />
throttle control unit mounted on the console directly<br />
starboard of the steering wheel. The gear shift/throttle<br />
control unit for the engine activates both shifting<br />
mechanism and throttle.<br />
The control must be in the “NEUTRAL” position to<br />
start your engine. Neutral is the most upright position<br />
of the control unit and acts as an idle, the propeller<br />
is not rotating. There is a “throttle only” button at<br />
the center of the throttle control that when depressed<br />
will disengage the shifting mechanism and will<br />
allow you to operate the throttle without engaging<br />
the propeller. This button will automatically engage<br />
the shifting mechanism once the throttle control has<br />
been moved back to its center position (you will<br />
hear and feel a click when it is engaged). Moving<br />
the lever forward engages the forward gear and then<br />
the throttle advance.<br />
Gear shift/Throttle<br />
Fig. 2.10.1 DN<br />
1<br />
2<br />
1<br />
THROTTLE ONLY BUTTON<br />
POWER TRIM SWITCH<br />
Section 2 • General Information<br />
UP<br />
2<br />
To reverse power, bring the control lever back to<br />
engage the reverse gear and increase the reverse<br />
thrust. The throttle control regulates the RPM of<br />
the engine. Regulating the RPM of the engine will<br />
control the speed of the boat.<br />
Reducing forward speed quickly, suddenly<br />
slowing the boat will create a following wake<br />
which may rise above the transom and fl ood<br />
the boat.<br />
Understanding your boat and its reactions at<br />
speed will make boating for you safer and more<br />
enjoyable.<br />
Power Trim Operation<br />
The power trim & tilt system allows you to raise and<br />
lower the engine outdrive<br />
for trailering, launching and<br />
beaching. This also allows for<br />
ideal boat angle (in relation to<br />
the water surface) for a given<br />
load and water condition. In<br />
most cases, best all-round<br />
performance is obtained with the engine adjusted so<br />
that the boat will run at a 3° to 5° angle to the water.<br />
The power trim is located on the inboard side of the<br />
gear shift/throttle lever handle.<br />
2-10 150 Montauk<br />
R<br />
! CAUTION<br />
NOTICE<br />
Boats can be operated in a manner and speed<br />
resulting in trim angles that cause visibility to be<br />
obscurred. Motor trim, hull trim plane and speed<br />
are factors that affect a boat’s trim angle.<br />
NOTICE<br />
Boats can be operated in a manner and at<br />
certain speeds resulting in trim angles that<br />
could cause visibility to be obscured. Motor trim,<br />
hull trim plane angles (if equipped), boat load<br />
distribution and speed are factors that affect a<br />
boat’s trim angle.<br />
REFER TO THE ENGINE MANUFACTURER’S MANUAL<br />
IN YOUR OWNER’S MANUAL PACKET FOR COMPLETE<br />
INSTRUCTIONS, INFORMATION AND WARRANTY.<br />
DN<br />
UP
When operating in reduced visibility or at night it<br />
is only prudent to slow the boats speed and keep a<br />
“proper lookout”. It is important that you understand<br />
navigation lights and their usage for your safety and<br />
the safety of others.<br />
When using the canvas sun-top with the console<br />
mounted anchor light be sure to slide the light through<br />
the opening in the top of the sun-top. Be sure to<br />
remove the light pole from the base before stowing<br />
the canvas Sun-top.<br />
When not being used, the aft pole light can be stowed<br />
in clips located on the starboard aft cockpit area.<br />
Navigation/Anchor Lighting<br />
Fig. 2.11.1<br />
150 Montauk<br />
Section 2 • General Information<br />
Navigation Lighting<br />
Your boat comes equipped with navigation lighting<br />
for your safety. Regulations state that all boats, no<br />
matter the size, must display navigation lights. The<br />
lights must be displayed underway at night (sunset<br />
to sunrise) or in low visibility conditions. The term<br />
“underway” means not at anchor or docked. It is<br />
the responsibility of the operator to ensure that the<br />
navigation lights are in good working order and that<br />
the proper lighting is shown.<br />
1<br />
2<br />
3<br />
NOTICE<br />
When using the optional SUN-TOP, make certain<br />
that all securing straps are taut. Damage to the<br />
navigation light can happen if the canvas frame<br />
straps are loose or not secured properly.<br />
PORT NAVIGATION LIGHT (RED)<br />
VISIBLE 1 NAUTICAL MILES<br />
STARBOARD NAVIGATION LIGHT (GREEN)<br />
VISIBLE 1 NAUTICAL MILES<br />
360 0 ALL ROUND LIGHT (WHITE)<br />
VISIBLE 2 NAUTICAL MILES<br />
The improper sequence of navigation lighting<br />
may be as dangerous as no lighting at all.<br />
A three-position switch, located on the console switch<br />
panel marked “NAV/ANC” (See below) controls the<br />
navigation and anchor lighting. In the “Navigation<br />
Lights” position the port (red), starboard (green) and<br />
360o all around lights will illuminate. These lights<br />
let other vessels know the approximate size and<br />
direction of travel of your boat, depending on which<br />
lights they can see. In the “Anchor Lights” position,<br />
the white, 360o Operating the Navigation Lighting<br />
light will illuminate, showing other<br />
boaters your location while at anchor.<br />
NAV/ANC Switch<br />
Fig. 2.11.2<br />
1<br />
2<br />
3<br />
3<br />
R<br />
1<br />
NOTICE<br />
“OFF”<br />
NAVIGATIONAL LIGHTS “ON”<br />
ANCHOR LIGHT “ON”<br />
2<br />
3<br />
2<br />
1<br />
2-11
Steering<br />
Your 150 Montauk is equipped with a teleflex<br />
no-feedback steering system. The Teleflex<br />
no-feedback steering system has a clutch mechanism<br />
which prevents the engine torque from being felt at<br />
the steering wheel. This reduces driver fatigue by<br />
eliminating the constant need to fi ght the wheel.<br />
Maintenance:<br />
! CAUTION<br />
Do not cover cracks in the steering cable or<br />
fi ttings with tape or other sealants. This will<br />
create a hazard in which the cable can fail<br />
without warning.<br />
The mechanical steering system should be checked<br />
periodically by your <strong>Boston</strong> <strong>Whaler</strong> ® dealer for<br />
proper lubrication, alignment and to make sure<br />
there is no looseness or binding of the cable. Proper<br />
maintenance of this system will ensure worry-free<br />
usage for the life of your boat.<br />
No-feedback steering system maintenance should<br />
include the following:<br />
• After the fi rst few hours of operation and at<br />
regular intervals, check all fasteners and the<br />
complete steering system for security and<br />
integrity.<br />
• Check all moving parts to be sure they are free<br />
of salt build-up and other foreign material. Such<br />
build-up will affect their operation.<br />
Section 2 • General Information<br />
Steering Pull<br />
Steering pull is unnecessary and unsafe! Steering<br />
trim tabs provided on most engines are frequently<br />
improperly adjusted, (they work opposite to normal<br />
expectation).<br />
To set steering trim tab for neutral steering:<br />
There is a bolt on the underside center of the tab;<br />
loosen the bolt prior to adjustment.<br />
If boat veers to the right, (hands off), move the aft<br />
end of the tab to the right.<br />
If boat veers to the left, (hands off), move the aft end<br />
of the tab to the left.<br />
Steering Trim<br />
Fig. 2.12.1<br />
STEERING<br />
TRIM TAB<br />
REFER TO THE ENGINE MANUFACTURER’S MANUAL<br />
IN YOUR OWNER’S MANUAL PACKET FOR COMPLETE<br />
INSTRUCTIONS AND WARRANTY.<br />
2-12 150 Montauk<br />
R
Trolling Motor Panel (Option)<br />
If equipped, the trolling motor receptacle is located at<br />
the bow of the boat. The panel is wired for 12V and<br />
includes a 12V accessory receptacle. Your boat has<br />
reinforced areas of the bow that will make it easier to<br />
mount a trolling motor. The reinforced sections are<br />
located on either side of the bow navigation light and<br />
extend back along the gunwale.The phenolic material<br />
can be drilled and tapped to hold machine screws.<br />
There are a variety of trolling motors and mounts<br />
that can be fi tted to your boat. See your <strong>Boston</strong><br />
<strong>Whaler</strong> ® dealer or talk to a reputable trolling motor<br />
dealer for the right type and size of trolling motor<br />
and battery that will work best with your boat.<br />
When looking for a trolling motor you will need to<br />
know the distance from the top of the deck to the<br />
waterline.<br />
In addition to the trolling motor receptacle panel,<br />
your boat will have a removable bow light (See fi g.<br />
2.13.1) which replaces the standard bow light, an<br />
additional battery box located in the console interior,<br />
plus a 40 amp breaker located on the component<br />
board in the center console which can be accessed<br />
through the door on the port side.<br />
Trolling Motor Panel (Option)<br />
Fig. 2.13.1<br />
4<br />
1<br />
2<br />
3<br />
4<br />
5<br />
150 Montauk<br />
1 3<br />
2<br />
REINFORCED BOW<br />
REMOVABLE BOW LIGHT<br />
TROLLING MOTOR PLUG<br />
TROLLING MOTOR RECEPTACLE<br />
12 VOLT ACCESSORY RECEPTACLE<br />
Section 2 • General Information<br />
5<br />
Trolling motor (Option)<br />
Fig. 2.13.2<br />
Refer to Section 4 • Electrical System, page 4-3 for<br />
additional information regarding the trolling motor<br />
electrical hookup.<br />
There is a risk of electrical shock. Always<br />
have a qualified marine electrician install<br />
any system upgrades that are not already<br />
installed on your boat. There are a variety of<br />
wiring confi gurations up to 36Volts. Incorrect<br />
wiring will adversly affect your trolling motors<br />
performance. Always use the correct circuit<br />
protection and wire gauge when installing an<br />
upgraded trolling motor wiring system.<br />
Battery Boxes (Option)<br />
Fig. 2.13.3<br />
R<br />
! WARNING<br />
NOTICE<br />
Refer to the Trolling Motor Owner’s Manual for<br />
the correct size and type of battery.<br />
REFER TO THE TROLLING MOTOR MANUFACTURER’S<br />
MANUAL IN YOUR OWNER’S MANUAL PACKET FOR<br />
COMPLETE INSTRUCTIONS AND WARRANTY.<br />
3‘<br />
2-13
Canvas (Option)<br />
Chafi ng, fi ber wear from dirt and grit and deterioration<br />
from ultraviolet light can cause your canvas sun top<br />
and covers to degrade over time.<br />
The effects of ultraviolet light can sometimes be<br />
reduced by chemical treatment of canvas items.<br />
Consult your <strong>Boston</strong> <strong>Whaler</strong>® dealer or check with<br />
your owner’s manual before using any chemical<br />
treatments on your canvas. To keep the canvas and<br />
metal parts in good working condition and keep<br />
a good appearance, you will need to keep them<br />
clean.<br />
The fabric should be cleaned regularly before<br />
substances such as dirt, pollen, etc. are allowed to<br />
accumulate on and become embedded in the fabric.<br />
The fabric can be cleaned without removing the<br />
framework.<br />
Simply brush off any loose dirt, pollen, etc. hose<br />
down and clean with a mild solution of a natural<br />
soap in lukewarm water (no more than 100 ° F. 38°<br />
C.). Rinse thoroughly to remove soap.<br />
Canvas (Option)<br />
Fig. 2.14.1<br />
1<br />
2<br />
3<br />
4<br />
5<br />
Section 2 • General Information<br />
SUN TOP (BLACK OR BLUE)<br />
FORWARD SUPPORT STRAPS DETAIL<br />
SUN TOP PROPERLY STOWED IN BOOT & FOR<br />
TRAILERING<br />
CONSOLE COVER (BLACK OR BLUE)<br />
PEDESTAL SEAT COVER (BLACK OR BLUE)<br />
Allow the canvas to completely air-dry. After each<br />
use especially in salt water areas, rinse the canvas<br />
completely with fresh cold water. Let the canvas dry<br />
completely before stowing. All metal components<br />
of the canvas frame should be rinsed with fresh cold<br />
water and exposed components wiped dry to maintain<br />
appearance and working order.<br />
Lubricate the snaps of the canvas with petroleum<br />
jelly, use a parafi n wax on the zippers to keep them<br />
in proper working order. If you have stubborn cleaning<br />
cases call your <strong>Boston</strong> <strong>Whaler</strong> ® dealer for proper<br />
cleaning procedures.<br />
Do not use bleach or solvents to clean the canvas<br />
material.<br />
1 2<br />
2-14 150 Montauk<br />
R<br />
5<br />
NOTICE<br />
The sun-top canvas must be secured in<br />
the canvas boot before trailering. NEVER<br />
TRAILER THE CANVAS SUN-TOP IN THE OPEN<br />
POSITION.<br />
4<br />
3
Propeller<br />
• It is advised that you always carry a spare<br />
propeller, propeller hardware and propeller<br />
wrench on board. Should your propeller<br />
become damaged it can then be easily<br />
replaced.<br />
• Under no circumstance should you use a<br />
propeller which allows the engine to operate<br />
at a higher than recommended RPM.<br />
150 Montauk<br />
NOTICE<br />
• changes to the boat, such as the addition of<br />
bottom paint, additional equipment, etc. will<br />
affect performance.<br />
The engine on your 150 Montauk has been equipped<br />
with a propeller which our tests have shown to be<br />
best suited for general use under normal conditions<br />
and load. In some situations you may wish to change<br />
the propeller to give your boat slightly different<br />
performance characteristics.<br />
Propellers have two basic characteristics, diameter<br />
and pitch.<br />
Diameter is that distance measured across the<br />
propeller hub from the outer edge of the 360 o that<br />
is made by the propeller’s blade during a single<br />
rotation.<br />
Propeller Assembly<br />
Fig. 2.15.1<br />
12<br />
11<br />
10<br />
9<br />
13<br />
8<br />
14 15<br />
7<br />
6<br />
Section 2 • General Information<br />
5<br />
4<br />
1<br />
2<br />
3<br />
4<br />
5<br />
6<br />
7<br />
8<br />
3<br />
2<br />
Pitch is that distance in inches that a propeller<br />
will travel if rotated one revolution without any<br />
slippage.<br />
Propeller Pitch & Diameter<br />
Fig. 2.15.2<br />
1<br />
1<br />
2<br />
R<br />
PITCH<br />
DIAMETER<br />
ENGINE SHAFT<br />
FORWARD THRUST WASHER<br />
DRIVE SLEEVE<br />
INNER HUB<br />
BLADE BACK<br />
OUTER HUB<br />
EXHAUST PASSAGE<br />
DIFFUSER RING<br />
In general, changing to a lower pitch propeller will<br />
increase acceleration and load pulling capability,<br />
with a slight decrease in top end speed. If you choose<br />
to change propellers, the type should be discussed<br />
with your <strong>Boston</strong> <strong>Whaler</strong> ® dealer. All propellers<br />
are designed to provide maximum forward thrust,<br />
consequently, the reverse thrust of the propeller will<br />
not be as effi cient.<br />
! DANGER<br />
Disconnect power by moving the battery switch<br />
to the “OFF” position prior to removing the<br />
propeller.<br />
1<br />
9<br />
10<br />
11<br />
12<br />
13<br />
14<br />
15<br />
PROP NUT<br />
LOCK RING<br />
DRIVE SLEEVE ADAPTER<br />
BLADE TIP<br />
LEADING EDGE<br />
TRAILING EDGE<br />
BLADE FACE<br />
2<br />
2-15
Docking, lifting and trailering<br />
Cleat Locations<br />
Fig. 2.16.1<br />
Docking<br />
Your 150 Montauk has (3) 8 inch cleats, One at the<br />
bow and two located at the sternm, one port and one<br />
starboard. The cleats are used to secure the boat to<br />
the dock while loading/unloading or mooring. Please<br />
learn the proper way to secure the boat and how best<br />
to use the mooring points of your boat.<br />
Figure 2.16.2 shows the correct method for tieing<br />
a belaying knot, commonly used to secure a boat<br />
to a dock. This knot will hold fast and is simple to<br />
release when needed.<br />
Belaying Knot<br />
Fig. 2.16.2<br />
From<br />
Boat<br />
(1)<br />
(make loop and<br />
rotate before pulling<br />
over the horn)<br />
(A)<br />
From<br />
Boat<br />
(2)<br />
Section 2 • General Information<br />
From<br />
Boat<br />
(3)<br />
(pull tight to complete<br />
the belaying<br />
knot)<br />
Lifting<br />
The bow eye is used to haul out and hold your boat<br />
onto a trailer. The stern eyes are used as tie down<br />
points while trailering the boat. The bow and stern<br />
eyes may be used only for short term lifting of the<br />
boat. Long term lifting with bow and stern eyes<br />
can cause stress on the fi berglass and gel coat<br />
For long term lifting or storage, use flat, wide<br />
belt-type slings and spreaders long enough to keep<br />
pressure from gunwales. DO NOT place slings where<br />
they may lift on underwater fi ttings.<br />
! CAUTION<br />
2-16 150 Montauk<br />
R<br />
! DANGER<br />
Use only the lifting points specifi ed. Using the<br />
cleats for lifting is dangerous and could cause<br />
serious injury or death.<br />
Long term lifting with the bow and stern eyes<br />
or lifting with the bow locker eyelet can cause<br />
stress on the fi berglass and gel coat and is not<br />
recommended.<br />
Proper Short Duration lifting<br />
Fig. 2.16.3<br />
1 2<br />
1<br />
2<br />
3<br />
4<br />
5<br />
5<br />
LIFT CABLE<br />
CHAFING PROTECTION<br />
BOW EYE<br />
STERN EYE (P&S)<br />
BOW LOCKER/ANCHOR EYE<br />
3<br />
(DO NOT LIFT BOAT FROM THIS POINT)<br />
2<br />
1<br />
4
Whether you are lifting your boat out of the water for<br />
routine maintenance or long term storage, consider<br />
the following:<br />
• If you are using a professional lifting<br />
service, it is prudent to check all credentials<br />
and ask for proof of insurance to protect<br />
your investment.<br />
• Use a wide, fl at, belting sling for lifting ,to<br />
minimize stress on the gunwales. Careful<br />
location of the sling is required. DO NOT<br />
PLACE SLINGS WHERE UNDER<br />
WATER FITTINGS WILL BE IN<br />
CONTACT.<br />
• If using a lifting hook, attach to bow eye and<br />
the stern lifting eyes mounted on the<br />
transom.<br />
Always use a spreader bar on the stern eyes<br />
and use chafi ng protection on the top of the<br />
transom.<br />
• All drain plugs (i.e. transom, fi shwell,<br />
deck, etc.) should be pulled out and the boat<br />
positioned with the bow slightly higher than<br />
the stern so that any water which is allowed to<br />
accumulate in the cock pit and/or bilge can<br />
easily drain from the boat.<br />
Trailering<br />
The 150 Montauk is equipped with a galvanized<br />
trailer which is best suited for length and width of<br />
the boat.<br />
If you have a trailer or plan on purchasing a trailer<br />
separately, there are some points you need to<br />
consider, such as:<br />
• Having a center roller and keel guards will help<br />
provide good support for the keel, also provide<br />
good fore and aft support.<br />
150 Montauk<br />
Section 2 • General Information<br />
• Trailers equipped with rollers instead of bunks<br />
can damage the foam sandwich hull of your<br />
boat and should never be used.<br />
• Bunks provide a more even weight<br />
distribution.<br />
Trailer Safety<br />
Securing the Boat to the Trailer<br />
Safety Chain/Cable - There is a safety chain/cable<br />
that attaches to the bow eye and will keep the boat<br />
from sliding off the trailer in the event that the winch<br />
strap or cable breaks. Hook this up fi rst.<br />
Tie-Down Straps - Can be used to secure the boat<br />
from the stern. The tie-down straps hook into the tiedown<br />
loops on the trailer frame and to the stern eyes<br />
on the transom. Padding (or similar) chafe protection<br />
should be used wherever the tie-down straps come<br />
in contact with the hull.<br />
Securing the Trailer to the Tow Vehicle<br />
Safety Chains/Cables - Safety chains/cables are<br />
also important; the chains/cables are connected to<br />
the trailer and should be of suffi cient length to reach<br />
the frame of the tow vehicle and should be long<br />
enough to allow the tow vehicle to turn without<br />
binding or tensioning. Attach the chains/cables by<br />
crisscrossing them under the tongue of the trailer and<br />
then attaching them to the tow vehicle.<br />
Trailer Hitch - A properly matched trailer hitch<br />
ball and coupler is important. Make certain that the<br />
coupler and the hitch ball are properly seated and<br />
locked.<br />
The trailer features a unique “swing tongue” (See<br />
fi gure 2.18.1). Be sure that the pin is in place and<br />
the hairpin cotter is inserted to prevent the pin from<br />
backing out while pulling the trailer.<br />
R<br />
NOTICE<br />
Your warranty may be void if you use a trailer<br />
with rollers. Use a trailer with bunks ONLY<br />
! DANGER<br />
Tie-down straps should never be used by<br />
themselves, they are only used to help in<br />
keeping the boat secured to the trailer. Make<br />
certain that the safety chain is properly secured<br />
to the bow eye.<br />
2-17
Trailering the Engine<br />
It is best to trailer your boat with the outboard tilted<br />
down in a vertical operating position.<br />
However, if additional road clearance is required<br />
due to railroad crossings, driveway clearance, trailer<br />
bounce, etc., the outboard should be tilted up and<br />
supported using an accessory outboard support<br />
device.<br />
Your <strong>Boston</strong> <strong>Whaler</strong> ® dealer will have<br />
recommendations regarding the support of your<br />
engine.<br />
Trailer description<br />
Single Axle Bunk Trailer<br />
Fig. 2.18.1<br />
1<br />
2<br />
3<br />
4<br />
5<br />
6<br />
7<br />
8<br />
9<br />
10<br />
11<br />
12<br />
10<br />
SAFETY CHAINS/CABLES<br />
TONGUE/BALL HITCH RECEIVER<br />
TONGUE BALL LATCH<br />
WINCH<br />
WINCH HOOK/STRAP<br />
BUNKS<br />
TAIL LIGHT (P&S)<br />
RADIAL TIRES (OPTION)<br />
TONGUE JACK<br />
SWING TONGUE<br />
COTTER PIN<br />
REMOVABLE PIN<br />
Section 2 • General Information<br />
12<br />
2 3<br />
1<br />
11<br />
4<br />
Refer to the engine manual in your owner’s<br />
manual packet for proper engine support while<br />
trailering.<br />
2-18 150 Montauk<br />
5<br />
NEVER use a hitchball and coupler that are not matched.<br />
DO NOT secure the safety chains to the bumper of the tow vehicle.<br />
R<br />
! CAUTION<br />
DO NOT rely on the power trim/tilt system or<br />
tilt support lever on your outboard to maintain<br />
proper ground clearance for trailering. THE<br />
OUTBOARD TILT SUPPORT LEVER IS NOT<br />
INTENDED TO SUPPORT THE OUTBOARD FOR<br />
TRAILERING<br />
NOTICE<br />
9<br />
! CAUTION<br />
8<br />
6<br />
7
150 Montauk<br />
Section 3 • Systems & Components Overview & Operation<br />
Bilge Pump<br />
The bilge pump located under a hatch in the aft<br />
cockpit deck is rated at 500 GPH (1893 LPH). The<br />
pump is activated automatically by a fl oat switch<br />
when the water in the bilge reachs a predetermined<br />
level.<br />
A switch on the console switch panel labeled BILGE<br />
PUMP (See fi gure 2.8.1) controls the operation of<br />
the pump. The switch should remain in the AUTO<br />
position while in use, unless the operator wishes to<br />
manually operate the pump by depressing the switch<br />
to the ON position.<br />
Bilge Pump Switch<br />
Fig. 3.1.1<br />
1<br />
2<br />
3<br />
Bilge Pump<br />
Fig. 3.1.2<br />
1<br />
2<br />
3<br />
1<br />
“OFF”<br />
BILGE PUMP “AUTO”<br />
BILGE PUMP “ON”<br />
NOTICE<br />
The bilge pump is wired directly to the battery.<br />
Therefore it is imperative that the fl oat switch<br />
remain clear of debris to prevent continuous<br />
operation and subsequentdischarge of the<br />
battery.<br />
BILGE PUMP (500 GPH/1893 LPH)<br />
BILGE ACCESS COVER<br />
TRANSOM<br />
1<br />
3<br />
2<br />
3<br />
2<br />
FWD<br />
Bilge Pump Maintenance<br />
Fig. 3.1.3 1<br />
1<br />
2<br />
3<br />
4<br />
Maintenance<br />
Frequently inspect the area under the fl oat switch<br />
to ensure it is free from debris and gummy bilge<br />
oil. To clean, soak in heavy duty bilge cleaner<br />
for 10 minutes, agitating several times. Check<br />
for unrestricted operation of the fl oat. Repeat the<br />
cleaning procedure if necessary.<br />
Inspect the bilge pump intakes and keep them free<br />
of dirt or material which may impede the fl ow of<br />
water through the pump.<br />
To clean the pump strainer, depress the lock tabs on<br />
both sides of the pump and lift the pump motor.<br />
If water does not come out of discharge hose:<br />
1. Remove the motor module to see if the<br />
impeller rotates with the power on.<br />
2. Remove any debris that may have<br />
accumulated in the nozzle section or strainer<br />
base.<br />
3. Check hose and connection on hull side for<br />
debris and proper connections.<br />
Fuel & Oil Spillage<br />
Regulations prohibit discharging fuel or oily waste in<br />
navigable waters. Discharge is defi ned as any action<br />
which causes a fi lm, sheen or discoloration on the<br />
water surface, or causes a sludge or emulsion beneath<br />
the water surface. A common violation is bilge<br />
discharge. Violators are subject to severe penalties<br />
R<br />
2<br />
BILGE PUMP (500 GPH/1893 LPH)<br />
OUTLET<br />
WATER INTAKE<br />
LOCKING TAB (ON EACH SIDE)<br />
4<br />
3<br />
3-1
Section 3 • Systems & Components Overview & Operation<br />
and may also be responsible for the cost of clean up,<br />
which can be substantial.<br />
Use rags or sponges to soak up fuel or oily waste,<br />
then dispose of them properly ashore. If there is a<br />
large quantity of fuel or oil in the bilge, contact a<br />
knowledgeable marine service to remove it. Never<br />
pump contaminated bilge discharge overboard.<br />
Avoid fuel spills by fi lling the portable fuel tanks less<br />
than rated capacity, allowing for fuel expansion.<br />
Fuel System<br />
NOTICE<br />
Fuel tanks should never be fi lled to capacity.<br />
Allow 2% for expansion.<br />
The 150 Montauk is equipped for a gasoline<br />
fuel system. There are a pair of 6.6 Gal.(24.5 L)<br />
removable fuel tanks located under the reversible<br />
pilot seat for a total fuel capacity of 13.2 gal (49 L).<br />
Straps are used to secure the tanks to the deck. There<br />
is a rigging tube under the deck for running the fuel<br />
line to the engine. It is recommended that you follow<br />
all instructions regarding the fi lling and transporting<br />
of the removable fuel tanks.<br />
! CAUTION<br />
Use of improper fuel can seriously damage your<br />
engine. Engine damage resulting from use of<br />
improper fuel is considered misuse of engine<br />
and will void the warranty. Follow engine<br />
manufacturer’s recommendations regarding<br />
the types of fuel and oil to use.<br />
! CAUTION<br />
Be sure fuel tanks are secured to the deck while<br />
underway.<br />
A fuel tank with levels less than 1/4 full can cause<br />
engine stalling problems due to fuel starvation or by<br />
allowing sediment and dirt to enter the fuel supply<br />
lines. Keep the tank full and monitor the fuel level<br />
often to prevent this from happening.<br />
Remove portable tanks from boat and fi ll from<br />
shore. When fueling is complete, secure tanks<br />
to deck with straps provided.<br />
Fuel tanks<br />
Fig. 3.2.1<br />
3-2 150 Montauk<br />
1<br />
2<br />
3<br />
4<br />
5<br />
6<br />
7<br />
8<br />
R<br />
3<br />
1<br />
2<br />
6<br />
NOTICE<br />
5<br />
PEDESTAL SEAT<br />
6.6 GAL (24.5 L) FUEL TANKS (2)<br />
PRIMER BULB<br />
FUEL FEED TO ENGINE<br />
FUEL TANK LEVEL GAUGE<br />
FUEL LINE RECEPTACLE<br />
FUEL VENT<br />
FULL FILL<br />
4<br />
7<br />
8
150 Montauk<br />
Section 3 • Systems & Components Overview & Operation<br />
Primer Bulb<br />
Use the primer bulb (See fi gure 3.2.1) to draw fuel<br />
from the tank(s) to the engine when connecting the<br />
portable tank or when fuel has been drained from<br />
the system. There are instructions regarding proper<br />
use of the primer bulb in the engine manufacturers<br />
handbook.<br />
Static Electricity and the Fuel System<br />
! DANGER<br />
• Static electricity can ignite gasoline vapors<br />
causing serious injury or death and/or<br />
destruction of property.<br />
• Check for leaks in tubing, connections and<br />
hoses. Avoid all forms of ignition when the<br />
odor of fuel is <strong>notice</strong>d.<br />
Correct the cause of the leaks and<br />
ventilate the area to insure that no fumes<br />
remain prior to energizing any electrical<br />
equipment, smoking and/or starting the<br />
engines.<br />
There is a danger that static electricity can ignite<br />
gasoline vapors that have not been ventilated outside<br />
an enclosed area. Use extreme caution when fueling<br />
your boat from a source outside the regular venues,<br />
(e.g. marinas, fuel service stations).<br />
Your boats bonding system protects it from creating<br />
and discharging static electricity. Your boat must be<br />
in contact with the water or a land based grounding<br />
system. The following suggestions will help keep<br />
you safe from static electricity while refueling your<br />
boat.<br />
Your boat has safety features that can be circumvented<br />
by not adhering to standard fueling practices.<br />
• NEVER fuel your boat in unsafe conditions such<br />
as suspended on a sling or in a situation that<br />
increases the liklihood of static discharge.<br />
• NEVER use homemade containers to fi ll your<br />
fuel tanks.<br />
• Oil and fuel spills can be dangerous and can<br />
subject offenders to severe penalties<br />
• Leaking fuel is a fi re and explosion hazard,<br />
inspect the system regularly. Examine fuel<br />
tanks and exposed lines for leaks and<br />
corrosion.<br />
R<br />
! CAUTION<br />
NOTICE<br />
it is your responsibility to read and understand<br />
the engine manufacturer’s manual in your<br />
owner’s manual packet for complete fuel and<br />
fueling information and warnings.<br />
• Fuel carried on-board outside of a<br />
fixed fuel system should be stored in an<br />
approved container or in a portable tank such<br />
as provided for outboard engines and be<br />
stowed safely outside of the engine or living<br />
compartment(s).<br />
• Shut down the engine, motors and fans prior<br />
to taking on fuel. Any ignition sources<br />
should be extinguished before fi lling the fuel<br />
tank.<br />
• Close all ports, windows, doors and hatches.<br />
• Fueling should never be done at night except<br />
in well-lighted areas.<br />
• Always keep the fuel nozzle in contact with<br />
the fuel fi ll plate or the edge of the fuel tank<br />
opening throughout the fi lling process.<br />
• Allow areas where gasoline vapors could<br />
collect to be ventilated before starting the<br />
engine.<br />
• Wipe any spillage completely and dispose of<br />
rags or waste on shore.<br />
• Secure the fi ll cap tightly.<br />
• Portable tanks should only be fi lled while on<br />
shore, never on board the boat.<br />
REFER TO THE “DO’S AND DON’TS AT THE GAS<br />
PUMP” DVD IN YOUR OWNER’S MANUAL PACKET<br />
FOR MORE INFORMATION.<br />
3-3
Section 3 • Systems & Components Overview & Operation<br />
Ethanol-Blended Fuels<br />
Ethanol is an oxygenated hydrocarbon compound<br />
that has a high octane rating and therefore is useful<br />
in increasing the octane level of unleaded gasoline.<br />
NOTICE<br />
The use of improper gasoline or additives can<br />
damage your fuel system and is considered<br />
misuse of the system. Damaged caused by<br />
improper gasoline or additives WILL NOT be<br />
covered under warranty.<br />
The fuel-system components of your Mercury<br />
engine(s) have been tested to perform with the<br />
maximum level of ethanol-blended gasoline (10%<br />
ethanol) currently allowed by the EPA in the United<br />
States.<br />
Special precautions should be considered with the use<br />
of fuel containing ethanol in your system. Fuels with<br />
ethanol can attack some fuel-system components,<br />
such as tanks and lines, if they are not made from<br />
acceptable ethanol-compatible materials. This can<br />
lead to operational problems or safety issues such as<br />
clogged fi lters, leaks or engine damage.<br />
Your boat was manufactured, and shipped from the<br />
factory, with ethanol-compatible materials. Before<br />
introducing gasoline with ethanol into your fuel<br />
tank, ask your dealer if any components have been<br />
added or replaced that are not recommended by<br />
<strong>Boston</strong> <strong>Whaler</strong>, Mercury or may not be ethanolcompatible.<br />
Filling The Tank<br />
It is best to maintain a full tank of fuel when the<br />
engine is not in use. This will reduce air fl ow in and<br />
out of the tank due to changes in temperature as<br />
well as limiting exposure of the ethanol in the fuel<br />
to humidity and condensation.<br />
! CAUTION<br />
The use of fuels containing ethanol higher than<br />
10 percent (E-10) can damage your engine and/<br />
or fuel system and will void the warranty.<br />
E85 FUELS COULD SERIOUSLY DAMAGE YOUR<br />
ENGINES AND MUST NEVER BE USED.<br />
Example of Phase Separation<br />
Fig. 3.4.1<br />
1 2<br />
3-4 150 Montauk<br />
1<br />
2<br />
3<br />
4<br />
R<br />
4<br />
CONDENSATION<br />
UPPER PHASE (WATER+FUEL+ETHANOL)<br />
LOWER PHASE (WATER+ETHANOL)<br />
FUEL INLET TO ENGINE<br />
Phase Separation<br />
Humidity and condensation create water in your fuel<br />
tank which can adversly effect the ethanol blended<br />
fuel. A condition called phase separation can occur<br />
if water is drawn into the fuel beyond the saturation<br />
point. The presence of water in the fuel beyond the<br />
saturation level will cause most of the ethanol in the<br />
fuel to separate from the bulk fuel and drop to the<br />
bottom of the tank, signifi cantly reducing the level of<br />
ethanol in the fuel mixture in the upper level (phase).<br />
If the lower level (phase), consisting of water and<br />
ethanol, is deep enough to reach the fuel inlet, it<br />
could be pumped directly to the engine(s) and cause<br />
signifi cant problems. Engine problems can also result<br />
from the reduced ethanol/fuel mixture left in the<br />
upper phase of the tank.<br />
Additives<br />
There is no practical additive known that can prevent<br />
or correct phase separation. The only solution is to<br />
keep water from accumulating in the tank.<br />
If phase separation does occur, your only remedy is<br />
to drain the fuel, clean and dry the tank completely<br />
and refi ll with a fresh, dry load of fuel.<br />
Fuel Filters<br />
Mercury already provides the appropriate level of<br />
fi ltration to protect the engine from debris. The<br />
addition of another in-line fi lter to the system will<br />
3
150 Montauk<br />
Section 3 • Systems & Components Overview & Operation<br />
create a possible fl ow restriction that can starve the<br />
engine(s) of fuel.<br />
As a precaution, it is advisable to carry extra onengine<br />
fi lters in case fi lter plugging from debris in<br />
the fuel tank becomes a problem during boating.<br />
Maintenance<br />
Periodically inspect for the presence of water in the<br />
fuel tank. If any is found, all water must be removed<br />
and the tank completely dried before refi lling the<br />
tank with any fuel containing ethanol.<br />
Storage<br />
Fuel Systems with Portable tanks:<br />
Most portable fuel tanks have closable vents. Close<br />
the vent while in storage to prevent air from entering<br />
the tank.<br />
Long periods of storage and/or non-use, common to<br />
boats, create unique problems. When preparing to<br />
store a boat for extended periods, of two months or<br />
more, it is best to completely remove all fuel from<br />
the tank(s).<br />
A partially full tank is not recommended because the<br />
void space above the fuel allows air movement that<br />
can bring in water through condensation as the air<br />
temperature moves up and down. This condensation<br />
could potentially become a problem.<br />
! CAUTION<br />
• Oil and fuel spills can be dangerous and can<br />
subject offenders to severe penalties<br />
• Leaking fuel is a fi re and explosion hazard,<br />
inspect the system regularly. Examine fuel<br />
tanks and exposed lines for leaks and<br />
corrosion.<br />
NOTICE<br />
it is your responsibility to read and understand<br />
the engine manufacturer’s manual in your<br />
owner’s manual packet for complete fuel and<br />
fueling information and warnings.<br />
REFER TO THE ENGINE MANUFACTURER’S MANUAL<br />
IN YOUR OWNER’S MANUAL PACKET FOR COMPLETE<br />
INSTRUCTIONS AND WARRANTY.<br />
Starting the Engine<br />
R<br />
! CAUTION<br />
NEVER start or operate your engines (even<br />
momentarily) without water circulating<br />
through all the cooling water intake holes in the<br />
gearcase to prevent damage to the water pump<br />
(running dry) or overheating of the engine.<br />
Prior to Starting<br />
• Operator should know boating safety, safe<br />
navigation, and boat operating procedures.<br />
• Make sure that the lower unit of the engine<br />
is in the water.<br />
• Be sure the emergency<br />
engine shutoff switch<br />
(See fi gure 1.14.1) is in<br />
the “RUN” position.<br />
• Be sure gear shift and<br />
throttle control levers<br />
are in the NEUTRAL<br />
position.<br />
NOTICE<br />
• If equipped, make<br />
sure the battery switch<br />
is turned “ON”.<br />
RUN<br />
OFF<br />
The gear shift/throttle control levers will not<br />
allow engine starting if the control levers are<br />
in any other position than NEUTRAL.<br />
DN<br />
UP<br />
3-5
Ignition Switch<br />
Fig. 3.6.1<br />
1<br />
2<br />
2<br />
Section 3 • Systems & Components Overview & Operation<br />
NAV/ANC BILGE PUMP ACCY<br />
OFF / AUTO / ON<br />
0<br />
1 2<br />
3<br />
RPM<br />
X1000<br />
IGNITION SWITCH<br />
CONSOLE SWITCH PANEL<br />
Start Engine:<br />
Warming Up the Engine<br />
4<br />
5<br />
6<br />
• Turn key to “Start”<br />
position and hold until<br />
engine starts.<br />
• When engine starts,<br />
release key. The key<br />
will return to the “ON”<br />
position.<br />
12V<br />
OFF ON START<br />
The “THROTTLE ONLY” button on the gear shift/<br />
throttle control allows the operator to increase engine<br />
RPM for warm-up without shifting the engines into<br />
gear.<br />
• Be sure that the gear<br />
shift and throttle<br />
control handle is in the<br />
NEUTRAL position.<br />
• Press and hold the<br />
“THROTTLE ONLY“<br />
button while moving<br />
the control handle<br />
ahead to the forward<br />
position.<br />
OFF ON START<br />
1<br />
OFF ON START<br />
DN<br />
UP<br />
• Advance the control<br />
handle to increase<br />
engine RPM.<br />
NOTE: Engine RPM is limited to prevent engine<br />
damage.<br />
• To disengage, return<br />
the control handle back<br />
to the neutral position.<br />
The warm-up mode can be re-activated by turning<br />
the engine off and re-starting.<br />
Stopping the Engine<br />
• Be sure that the gear<br />
shift and throttle<br />
control handle is in the<br />
NEUTRAL position<br />
• Turn Key to the “OFF”<br />
position.<br />
• If equipped, turn<br />
the battery switch<br />
“OFF”.<br />
3-6 150 Montauk<br />
R<br />
! CAU-<br />
DN<br />
DN<br />
DN<br />
UP<br />
UP<br />
UP<br />
OFF ON START<br />
TION<br />
NEVER turn the battery switch to the “OFF”<br />
position while the engine is running. Equipment<br />
damage will occur.
150 Montauk<br />
Section 3 • Systems & Components Overview & Operation<br />
Livewell (Option)<br />
If equipped, the livewell located in the aft cockpit<br />
will keep baitfi sh alive by circulating fresh seawater<br />
through the tank.<br />
NOTICE<br />
The seacock MUST be in the OPEN position<br />
before activating the livewell pump. Running<br />
the pump dry may cause damage to the unit.<br />
Operation<br />
Before operating the system make certain the hull<br />
seacock is in the open position. The seacock can be<br />
accessed through the aft cockpit deck hatch (aft of<br />
the livewell).<br />
Place the removable standpipe (supplied) in the drain<br />
at the bottom of the livewell tank. The standpipe<br />
serves as an overfl ow drain to control the level of the<br />
water in the livewell while water is being circulated<br />
through the system. A fl ow control valve (Figure<br />
3.7.2) at the livewell water inlet controls the fl ow of<br />
water into the livewell. To increase the water fl ow,<br />
turn the valve counterclockwise. To decrease fl ow,<br />
turn the valve clockwise.<br />
Livewell (Option)<br />
Fig. 3.7.1<br />
NOTE: Boat shown with bow rail and<br />
livewell options.<br />
1<br />
2<br />
3<br />
4<br />
5<br />
LIVEWELL TANK<br />
FILL HOSE<br />
LIVEWELL PUMP<br />
DRAIN HOSE<br />
TRANSOM THRU HULL DRAIN<br />
9<br />
Fill the livewell by pressing the switch marked<br />
“ACCY” on the console switch panel (See fi gure<br />
2.8.1).<br />
A drain /overflow hose with a strainer, directs<br />
overflow/excess water to the transom thru-hull<br />
drain.<br />
Maintenance<br />
Maintenance of the livewell system requires periodic<br />
inspection of the raw water intake strainer and all<br />
hose connections. Clean away debris and/or tighten<br />
hose connections as required.<br />
1<br />
6<br />
7<br />
8<br />
9<br />
Livewell Flow Control Valve<br />
Fig. 3.7.2<br />
R<br />
2<br />
Decrease Flow<br />
(Clockwise)<br />
8<br />
7<br />
Increase Flow<br />
(Counterclockwise)<br />
SEACOCK THRU HULL INTAKE FITTING<br />
SEACOCK<br />
LIVEWELL DRAIN<br />
AFT COCKPIT ACCESS HATCH<br />
3<br />
6<br />
4<br />
5<br />
3-7
Section 3 • Systems & Components Overview & Operation<br />
Anchoring<br />
The 150 Montauk is equipped with an anchor storage<br />
compartment located in the bow of the boat. Because<br />
there are a variety of anchors, with a variety of uses,<br />
discuss the types of anchors with your dealer to<br />
fi nd the right anchor for your boat.<br />
Considerations<br />
• Wind and sea conditions can affect the boat.<br />
• Because the boat is not moving through the<br />
water, there is no control.<br />
• Be sure that the anchor will hold under all<br />
circumstances if you are leaving the boat.<br />
• Understand the principles of rode and scope<br />
and their effect on anchor performance.<br />
Proper anchoring requires knowledge of RODE and<br />
SCOPE and understanding the relationship between<br />
rode, scope and anchor performance.<br />
The rode is the line connecting the anchor to the<br />
boat. Nylon line is ideal because it is light, strong<br />
Proper Anchoring<br />
Fig. 3.8.1<br />
! WARNING<br />
SWAMPING HAZARD - Anchor from the bow if<br />
using one anchor. A small current can make a<br />
stern anchored boat unsteady. A heavy current<br />
can drag a stern anchored boat underwater.<br />
Water Depth<br />
Bow Height<br />
and stretches, it also can be stored wet and is easy<br />
to handle. Add a length of chain between the anchor<br />
and the nylon line to aid in setting of the anchor.<br />
The scope is technically defi ned as the ratio of rode<br />
length to the vertical distance from the bow to the<br />
sea fl oor. Scope also depends on the type of anchor,<br />
tides, winds, sea conditions and type of sea fl oor the<br />
anchor is in. Since you want to know how much rode<br />
to use when anchoring, use this common formula:<br />
Rode length = (bow height + water depth) X<br />
Scope<br />
The minimum is 5:1 for calm conditions; normal is<br />
7:1, and severe conditions may require a 10:1.<br />
Example:<br />
3-8 150 Montauk<br />
R<br />
Rode length = (3 feet + 10 feet) X 7*<br />
Rode length = 13 feet X 7*<br />
Rode length = 91 feet<br />
* Scope may range from 5 to 10 or more. However,<br />
less than 5, the anchor will break out too easily.<br />
Rode<br />
Rode length = (bow height + water depth) X Scope<br />
NOTICE<br />
Before using the anchor be sure the anchor<br />
line is secured to the eye in the bottom of the<br />
anchor locker.
150 Montauk<br />
Section 3 • Systems & Components Overview & Operation<br />
Lowering The Anchor<br />
• Be sure there is adequate rode.<br />
• Secure rode to both the anchor and the boat<br />
at bow locker eyelet.<br />
• Stop completely before lowering the anchor.<br />
• Keep feet clear of lines.<br />
Setting the Anchor<br />
NOTICE<br />
Before using the anchor be sure the anchor<br />
line’s bitter end is secured to the eye in the<br />
bottom of the anchor locker.<br />
NOTICE<br />
Anchor light must be on when at anchor or<br />
drifting (not under power) at night or in low<br />
visibility.<br />
There is no best way to set an anchor. Experiment to<br />
see how it performs. One method is to turn the rode<br />
around a bitt or a cleat and slowly pay out as the boat<br />
backs from the anchor site. When the proper scope<br />
has been reached snub the rode quickly, causing the<br />
anchor to dig in to the sea bottom.<br />
Weighing the Anchor<br />
To weigh (retrieve) the anchor, start the boat and run<br />
slowly up to the anchor, taking up the rode as you<br />
go. The anchor will usually break out when the rode<br />
becomes vertical. Coil lines to let them dry before<br />
stowing.<br />
R<br />
• Reverse the engine slowly to drive the anchor<br />
in and to prevent it from dragging.<br />
• Secure the rode to the bitt or cleat to prevent<br />
loss of anchor.<br />
! CAUTION<br />
Be careful that trailing lines do not foul in the<br />
propeller<br />
3-9
Section 3 • Systems & Components Overview & Operation<br />
THIS PAGE INTENTIONALLY LEFT BLANK<br />
3-10 150 Montauk<br />
R
Electrical Systems<br />
DC Electrical System<br />
The electrical system on the 150 Montauk is powered<br />
by one (1) lead-acid battery. The battery is charged<br />
by the engine when the engine is running. The battery<br />
powers essential systems on your boat:<br />
Battery<br />
• Engine Ignition.<br />
• Engine tilt trim system<br />
• Helm switch panel & helm instrument panel<br />
• Lighting/Navigation systems<br />
• Livewell system (Option)<br />
• Electronics and add-on accessories<br />
Battery Box<br />
Your battery should always be enclosed in the<br />
battery box provided with your boat and located in<br />
the center console. The box will contain any spilled<br />
acid, as well as protect the battery terminals from<br />
damage or inadvertent shorting from contact with<br />
metal objects.<br />
The battery box should always be secured in place<br />
by using the straps and clamps provided, the straps<br />
will ensure that while underway the battery will not<br />
move around, causing damage to components and/<br />
or equipment stored in the same area.<br />
150 Montauk<br />
NOTICE<br />
Your battery should always be stored in the<br />
battery box.<br />
NOTICE<br />
REFER TO YOUR ENGINE OWNER’S MANUAL FOR<br />
EXACT BATTERY REQUIREMENTS.<br />
The chart below is provided for reference purposes<br />
only.<br />
Application Group Volts MCA* CCA** Reserve Qty.<br />
Engine<br />
*Marine Cranking Amps<br />
** Cold Cranking Amps<br />
24 12 465 350 N/A 1<br />
Section 4 • Electrical System<br />
Batteries contain sulfuric acid which is<br />
dangerous and can cause serious injury.<br />
AVOID contact with skin, eyes and clothing. If<br />
contact occurs, immediately fl ush the affected<br />
area with large quantities of water and call for<br />
medical assistance.<br />
Battery Box<br />
Fig.4.1.1<br />
1<br />
3<br />
2<br />
! DANGER<br />
1 BATTERY BOX<br />
2 TIE DOWN STRAP<br />
3 QUICK RELEASE BUCKLE<br />
Before use, check the battery for loose connections<br />
or wiring. Normal maintenance should include:<br />
• Coating the terminals with dielectric grease<br />
• Keeping the battery dry<br />
• If not using a sealed battery, check &<br />
maintain the water level. USE DISTILLED<br />
WATER ONLY.<br />
• Removing the battery from the boat during<br />
cold weather or long term storage.<br />
The most life shortening experience for the battery is<br />
to be drained to zero charge before recharging.<br />
When a battery discharges, the active material on<br />
both positive and negative plates converts to lead<br />
sulfate, causing the plates to become more alike in an<br />
electrical charge. The electricity conducting battery<br />
acid becomes weaker and the voltage drops. As the<br />
FWD<br />
4-1
attery remains discharged, the process continues<br />
until recharging the battery becomes impossible.<br />
If the battery does become run down be sure to<br />
recharge it as soon as possible. Over charging the<br />
battery can be just as detrimental to its life as running<br />
it down too far<br />
• NEVER use an open fl ame in the battery<br />
storage area.<br />
• Avoid striking sparks near the battery.<br />
• A battery will explode if a fl ame or spark<br />
ignites the free hydrogen given off during<br />
charging.<br />
• ALWAYS disconnect the battery before<br />
doing any work or maintenance on the<br />
electrical system.<br />
• NEVER turn off the battery switches or<br />
disconnect the battery cables while the<br />
engines are running.<br />
Main DC Breaker<br />
The Main DC breaker reset is located on the aft wall<br />
of the console interior. In the event that the main DC<br />
breaker trips determine and correct the problem prior<br />
to resetting the breaker.<br />
DC Main Breaker Box<br />
Fig. 4.2.1<br />
1<br />
2<br />
! CAUTION<br />
DC MAIN<br />
BILGE<br />
MAIN DC BREAKER ..... 30 AMP<br />
BILGE PUMP ................... 2 AMP<br />
Section 4 • Electrical System<br />
2<br />
1<br />
NEVER reset a breaker without fi rst determining<br />
and correcting the cause of the trip. Should<br />
a circuit repeatedly trip, have a qualified<br />
electrician determine and correct the cause.<br />
Component Breakers<br />
Component breakers are located on the helm switch<br />
panel. If a component breaker trips, determine and<br />
correct the problem before resetting the breaker.<br />
Should a circuit breaker trip repeatedly, have a<br />
qualifi ed electrician determine and correct the cause<br />
of the trip.<br />
Component Circuit Breakers<br />
Fig. 4.2.2<br />
4-2 150 Montauk<br />
1<br />
2<br />
3<br />
R<br />
NAV/ANC BILGE PUMP ACCY<br />
OFF / AUTO / ON<br />
! CAUTION<br />
0<br />
1 2 3<br />
NAV/ANC ......................... 5 AMP<br />
ACCESSORY ............... 2.5 AMP<br />
12V RECEPTACLE ....... 10 AMP<br />
1 2<br />
! WARNING<br />
Use of higher amperage breakers is a fire<br />
hazard.<br />
Use ONLY breakers having the same amperage<br />
rating as the original or as specifi ed.<br />
3<br />
RPM<br />
X1000<br />
4<br />
5<br />
6<br />
12V<br />
OFF ON START
12 Volt Accessory Receptacle<br />
Your boat is equipped with a 12 volt accessory<br />
receptacle located on the switch panel (See above).<br />
It is a DC (cigarette lighter) style receptacle to be<br />
used with any 12 volt accessories using this type of<br />
plug. The receptacle is made of corrosion resistant<br />
marine grade materials and has a moisture proof cap.<br />
There is a 10 amp breaker button located just below<br />
the receptacle. Be sure to use accessories that do<br />
not exceed the rated capacity of the circuit, (10<br />
amps) or the breaker will trip.<br />
Battery Switch (CE Option)<br />
The 150 Montauk has the option of using a battery<br />
switch. The switch, located on the aft wall of the<br />
console interior, allows you to control the delivery<br />
of DC power from the battery to the engine as well<br />
as allowing the alternator to charge the battery. Your<br />
battery selector switch has two settings, “ON” and<br />
“OFF”, “ON” gives you power from the battery only.<br />
“OFF” you have no power to the engine. Remember<br />
to turn the battery selector switch to “ON” before you<br />
attempt to start your engine.<br />
Note: The bilge pump cannot be turned off with the<br />
battery selector switch.<br />
Battery Switch<br />
Fig. 4.3.1<br />
150 Montauk<br />
NOTICE<br />
DO NOT insert a cigarette lighter into this<br />
receptacle. Damage to the unit & system could<br />
occur.<br />
! CAUTION<br />
If equipped with a battery switch, you will need<br />
to stop the engine before moving the switch to<br />
the “OFF” position.<br />
Section 4 • Electrical System<br />
Trolling Motor (Option)<br />
Your trolling motor manual will have location and<br />
connection instructions for the motor wiring. Read<br />
and understand the manual before proceeding to<br />
connect the extension cord to your motor and your<br />
boat’s electrical systems.<br />
Trolling Motor Connection<br />
Using a 12 foot extension cord, connect the BLACK<br />
and RED leads to your trolling motor wiring by<br />
crimping and heat shrinking the butt connectors.<br />
Trolling Motor wiring (Option)<br />
Fig. 4.3.2<br />
1<br />
2<br />
3<br />
4<br />
5<br />
BATTERY #2<br />
102-6 BLK<br />
40<br />
100<br />
6 RED<br />
+<br />
NOTICE<br />
IT IS IMPORTANT to crimp and heat seal the<br />
unused butt connector on your extension<br />
cord to avoid damage to your trolling motor<br />
system.<br />
1<br />
101-6 RED<br />
2<br />
12V WIRING DIAGRAM<br />
TROLLING MOTOR RECEPTACLE<br />
EXTENSION CORD PLUG W/12’ CORD<br />
BLACK LEAD<br />
HEAT SHRINKABLE BUTT CONNECTORS<br />
RED LEAD<br />
3<br />
3<br />
1<br />
4<br />
4<br />
2<br />
5<br />
4-3
! WARNING<br />
There is a risk of electrical shock. Always<br />
have a qualified marine electrician install<br />
any system upgrades that are not already<br />
installed on your boat. There are a variety of<br />
wiring confi gurations up to 36Volts. Incorrect<br />
wiring will adversly affect your trolling motors<br />
performance. Always use the correct circuit<br />
protection and wire gauge when installing an<br />
upgraded trolling motor wiring system.<br />
The system is protected by a 40 amp breaker located<br />
on the component board in the center console.<br />
In the event a breaker trips, determine the cause and<br />
correct the problem before resetting the breaker. A<br />
breaker which trips repeatedly should be examined<br />
by a qualifi ed electrician to determine and correct<br />
the cause of the trip.<br />
REFER TO THE TROLLING MOTOR MANUFACTURER’S<br />
MANUAL IN YOUR OWNER’S MANUAL PACKET FOR<br />
COMPLETE INSTRUCTIONS, INFORMATION AND<br />
WARRANTY.<br />
COLOR FUNCTION<br />
GRN GROUNDING MAIN/TOWER &<br />
ALUMINUM FUEL TANKS<br />
GRN GROUNDING<br />
ORN STARBOARD 30 AMP<br />
RECEPTACLE<br />
RED MAIN FEEDS/PORT 30 AMP<br />
RECEPTACLE<br />
BRN/BLK STARBOARD FISHBOX PUMP<br />
BRN/VIO FORWARD FISHBOX PUMP<br />
BRN/YEL LIVEWELL PUMP<br />
(HIGH CURRENT)<br />
BRN/BLU PORT FISHBOX PUMP<br />
RED +12V MAIN<br />
BLK GROUND<br />
BLK/YEL STOP CIRCUIT<br />
BLK/WHT GEN SHUTDOWN<br />
BLU COMPASS<br />
BLU/BLK DOME LIGHT<br />
BLU/GRN SPREADER LIGHT<br />
BLU/ORN LIVEWELL LIGHT<br />
BLU/RED COURTESY LIGHTS<br />
BLU/VIO CABIN LIGHTS<br />
BRN BILGE PUMP (SWITCHED)<br />
BRN/GRY RAW WATER<br />
BRN/GRN FRESH WATER<br />
Section 4 • Electrical System<br />
Trolling Motor Receptacle Breaker<br />
Fig. 4.4.1<br />
Wiring Identifi cation Chart<br />
Wire Color Chart for DC and Special Circuit<br />
<strong>Boston</strong> <strong>Whaler</strong> ® adheres to electrical wiring<br />
requirements which meet all the ABYC-11 standards.<br />
The following chart outlines the gauge, color and<br />
function of the wiring used.<br />
4-4 150 Montauk<br />
R<br />
COLOR FUNCTION<br />
BRN/ORN SUMP PUMP<br />
BRN/RED BILGE PUMP (UNSWITCHED)<br />
BRN/WHT MACERATOR<br />
GRY RUNNING LIGHTS<br />
GRY/BLK ACC 1<br />
GRY/BLU ACC 2<br />
GRY/GRN ACC 3<br />
GRY/RED AFT MAST/ACC 4<br />
GRY/WHT ALL ROUND/FWD MAST LIGHT<br />
ORN REFRIGERATOR or CENTER<br />
WIPER<br />
ORN/BLU HORN<br />
ORN/BRN STARBOARD WIPER PARK<br />
ORN/GRN STARBOARD WIPER<br />
ORN/RED PORT WIPER<br />
ORN/VIO VACUUM PUMP<br />
ORN/WHT CENTER WIPER<br />
PINK FUEL SENDER<br />
RED 12V RECEPTACLE<br />
VIO IGNITION<br />
WHT CO MONITOR/ELECTRIC TRIM<br />
TAB (SWITCHED)<br />
YLW BLOWER/STEREO MEMORY<br />
YLW/RED START
150 Montauk<br />
Section 4 • Electrical System<br />
Electrical Schematics & Harnesses Instead, we suggest that you take your boat to an<br />
The following page contains an electrical schematic<br />
pertaining to the electrical system in your boat.<br />
The schematic was generated by technicians in the<br />
<strong>Boston</strong> <strong>Whaler</strong> ® Engineering Department and are for<br />
reference and to be used by service technicians.<br />
<strong>Boston</strong> <strong>Whaler</strong> ® does not recommend that you<br />
attempt to work on the electrical system yourself.<br />
Switch and Breaker Panel Schematic<br />
Fig. 4.5.1<br />
authorized <strong>Boston</strong> <strong>Whaler</strong> ® dealer for electrical<br />
service.<br />
<strong>Boston</strong> <strong>Whaler</strong> ® reserves the right to change or<br />
update the electrical system on any model at any time<br />
without <strong>notice</strong> to the customer and is not obligated to<br />
make any updates to units built prior to the change.<br />
4-5
Section 4 • Electrical System<br />
THIS PAGE INTENTIONALLY LEFT BLANK<br />
4-6 150 Montauk<br />
R
Routine Care & Maintenance<br />
Routine inspection, service and maintenance of<br />
your boat, boat systems and components are vital to<br />
assure your safety, as well as prolonging the life of<br />
your boat. You should develop regular routines for<br />
inspecting and servicing your boat.<br />
! WARNING<br />
IMPORTANT<br />
Regularly inspect & test hardware, fi ttings,<br />
windshields, hatches, seams, etc. for proper<br />
seal. Reseal and/or readjust/tighten fi ttings,<br />
latches, etc. as needed.<br />
The interval between necessary service or maintenance<br />
is highly variable, depending on the environment in<br />
which your boat will be used. For example, corrosion<br />
of boat parts and components will occur far more<br />
rapidly in a salt water environment than on a boat<br />
which is used in fresh water.<br />
This section provides only general guidelines<br />
for the care and cleaning of your boat. It is your<br />
responsibility to determine whether maintenance<br />
and care intervals need to be accelerated due to your<br />
boat usage and/or operating environment.<br />
150 Montauk<br />
NOTICE<br />
Refer to the individual manufacturers’ manuals<br />
for important information regarding service,<br />
care and maintenance of your boat, equipment<br />
and components. Failure to do so may in some<br />
cases void the warranty.<br />
Owner’s Manuals for your boat and each of the<br />
various components and equipment can be<br />
found in your Owner’s Manual Packet.<br />
! DANGER<br />
When using solvents read all information from<br />
the solvent manufacturer regarding safety and<br />
handling of the material.<br />
Wear proper protective equipment to ensure<br />
your personal safety.<br />
Only use solvents in a well ventilated area and<br />
keep all solvents away from open fl ame and any<br />
other forms of ignition.<br />
Section 5 • Care & Maintenance<br />
Hull<br />
Fresh water, saltwater and water temperature can all<br />
affect the types of growth that you will fi nd on your<br />
boat’s hull.<br />
Any growth will affect the boat’s performance<br />
and overall look. If it has been a while between<br />
inspections you might <strong>notice</strong> algae or slime growth<br />
on the hull. This can be cleaned with a coarse towel<br />
or soft bristle brush. The growth should be cleaned<br />
immediately after the boat has been removed from<br />
the water. If the growth is allowed to dry it will be<br />
much harder to remove.<br />
Compounding may be necessary to remove more<br />
stubborn stains and chalking from the surface of your<br />
boat. If compounding is necessary it must be done<br />
after a thorough washing and prior to waxing.<br />
If the growth is more severe, you may need to<br />
enlist the services of a professional hull cleaning<br />
company.<br />
Check with your <strong>Boston</strong> <strong>Whaler</strong> ® dealer for<br />
recommendations on a compatible rubbing compound<br />
for your boat or a professional hull cleaning company<br />
in your area.<br />
Waxing the Gel Coat Surfaces<br />
Waxing is necessary to provide added protection to<br />
the gel coat. A periodic good cleaning and waxing<br />
will also ensure that your boat will be protected and<br />
look good longer.<br />
Do not wax over dirt. Make sure the surface of your<br />
boat has received a thorough washing and rinsing and<br />
is clean before waxing. If a rubbing compound has<br />
been necessary, make sure that any minor scratches or<br />
surface pitting is cleaned of compound residue. Use<br />
a good quality carnauba wax or a high quality wax<br />
designed for marine gel coat. Apply several coats.<br />
R<br />
NOTICE<br />
Waxing of the exterior surfaces is recommended<br />
to be done at least twice a year to protect the<br />
gel coat of your boat.<br />
5-1
Hull Maintenance<br />
If using a pressure washer to clean the hull and<br />
deck surfaces of your boat it is important that you<br />
use the wide fan nozzle only and move the spray<br />
head in a continuous motion. Do not concentrate<br />
the high pressure on a small area of the boat surface<br />
and NEVER use the fi ne pinpoint nozzle as the<br />
concentrated stream can cause damage to the surface<br />
of your boat.<br />
It is also recommended that your refrain from<br />
pressure washing the console as high pressure may<br />
compromise the integrity of the electronics and<br />
gauges as well as other equipment installed on your<br />
boat. Also avoid pressure washing all caulk seams.<br />
When staining from build-up does occur, use only<br />
cleaning agents that are recommended for marine gel<br />
coat for use on those stubborn stains.<br />
NEVER use an abrasive cleaner to wash your boat’s<br />
hull.<br />
NEVER use an abrasive pad to attempt to remove<br />
stubborn stains.<br />
NEVER use strong solvents to clean.<br />
NEVER apply tape or any other type of adhesives<br />
directly to the painted surfaces on your boat.<br />
Use care when covering your boat’s painted surfaces<br />
as tarps and other such covers can trap dirt and<br />
cause chafi ng. It is best to use a frame of either<br />
aluminum or wood to keep the cover up and allow<br />
air to circulate.<br />
Hull Blistering<br />
Due to the quality of the materials used in the hulls<br />
of <strong>Boston</strong> <strong>Whaler</strong>s, blistering is rarely ever seen.<br />
Blistering is caused by water soluble materials in<br />
the hull laminate. The fi berglass and resin structure<br />
of your boat is porous. However, intrusion of water<br />
into the gel coat will take some time. The effect of<br />
osmotic pressure allows water to impregnate below<br />
the gel coat and substrate thus forming a blister.<br />
5-2<br />
Section 5 • Care & Maintenance<br />
There have been extensive university studies funded<br />
by the United States Coast Guard regarding the cause<br />
and effect of blistering in the gel coat of fi berglass<br />
boats. Fiberglass blisters can form anywhere from<br />
near-surface layers of the gel coat to very deep into<br />
the fi berglass structure. The damage can range from<br />
cosmetic to catastrophic, (although the latter is a very<br />
rare occurrence). The studies seemed to point toward<br />
long term immersion of the hull in warm water as<br />
a primary cause of hull blisters. Stress cracks on<br />
the hull below the waterline also contribute to the<br />
formation of hull blisters.<br />
Prevention<br />
There are a variety of ways to prevent the formation<br />
of hull blistering. Epoxy coatings can be applied<br />
to the hull, followed by hull painting. An alkydurethane-silicone<br />
marine paint can also be used to<br />
aid in the prevention of hull blisters.<br />
Reducing the amount of time that your boat stays<br />
in the water also helps prevent hull blisters from<br />
forming. Use of a trailer or boat lift will reduce the<br />
likelihood of hull blisters forming. Be sure to use a<br />
bunk type lift or trailer for storage of the boat out<br />
of water.<br />
Contact your <strong>Boston</strong> <strong>Whaler</strong> ® dealer for more<br />
information on the prevention and treatment of hull<br />
blisters.<br />
Bottom Painting<br />
There are risks and dangers inherent with the<br />
use of paints and solvents. Dispose properly<br />
of all rags, rollers and trays used for painting.<br />
Follow all the precautions and regulations listed<br />
by the manufacturer before and after painting<br />
your boats hull.<br />
R<br />
! DANGER<br />
NOTICE<br />
If blisters are present in the hull, they need to<br />
be properly cleaned and dried out before any<br />
barrier protection can be applied.<br />
150 Montauk
If your boat will spend most of its time in the water,<br />
painting the bottom of your boat’s hull is a good way<br />
to slow the formation of hull blisters and to keep<br />
bottom growth (fouling) under control.<br />
If you will be trailering the boat to and from the<br />
water, you might want to forgo the painting.<br />
Following is an abbreviated section on painting your<br />
hull bottom. Your <strong>Boston</strong> <strong>Whaler</strong> ® dealer should<br />
have information on properly painting your boat’s<br />
hull or recommendations on businesses that will<br />
paint your hull for you.<br />
150 Montauk<br />
! CAUTION<br />
DO NOT paint over zinc plates. This action will<br />
render them usless and lead to deterioration of<br />
the underwater metal parts of your boat.<br />
Some bottom paints contain metals that can<br />
cause corrosion of the outboard engine. Leave<br />
a minimum of 3/4” unpainted around all engine<br />
parts. Use only a paint specifi cally designed for<br />
aluminum engines as anti fouling protection.<br />
Bottom Painting a Bare Hull<br />
Since the boat has never been painted preparation is<br />
the key to successful hull painting. Take extra care<br />
and time in preparation before proceeding to paint.<br />
Begin by scrubbing the surface thoroughly with a<br />
stiff brush using an all-purpose marine soap and<br />
water to remove loose dirt and contamination. Flush<br />
with fresh water to remove all soap residue.<br />
The gelcoat will have to be dewaxed of mold release<br />
wax before sanding can begin, otherwise the wax<br />
! WARNING<br />
Proper ventilation and capture of the dust<br />
created by sanding is essential. The dust<br />
created by sanding is toxic and should not be<br />
breathed. A proper fi tting respirator must be<br />
used.<br />
DO NOT use a paper fi lter mask.<br />
Section 5 • Care & Maintenance<br />
will be dragged into the scratches and will reduce<br />
the adhesion properties of the paint.<br />
Remove any mold release wax that may be present<br />
using fi berglass surface prep solvent and a scrub<br />
pad. Scrub only a few square feet at a time. Flush<br />
with fresh water. If the water beads up or separates,<br />
continue scrubbing the surface. When the water<br />
sheets off, the wax contaminate has been removed.<br />
After the dewaxing is complete, application of a<br />
primer coat is recommended. Pay close attention to<br />
scratches, nicks and dings in the surface. If necessary,<br />
fi ll any repair areas with a watertite epoxy fi ller. After<br />
fi ller is cured, sand with 80 grit paper until smooth.<br />
Remove the sanding residue using a fi berglass solvent<br />
wash.<br />
The paint can be applied after sanding and cleaning<br />
is complete. Follow the paint manufacturer’s<br />
recommendations for application.<br />
Bottom Painting a Pre-Painted Hull<br />
If the hull bottom is already painted, you must be<br />
sure to test the paint’s adhesion to the already painted<br />
surface. If the paints are incompatible, the new paint<br />
will not adhere to the hull bottom or the paint will<br />
“lift” the old paint. NEVER apply paint without fi rst<br />
preparing the old painted surface following the paint<br />
manufacturer’s recommendations.<br />
Follow the paint manufacturer’s recommendation for<br />
applying the paint. Humidity and weather will play<br />
a role in how and when the paint is applied. Several<br />
thin layers are better than one thick layer.<br />
To determine the waterline, you will need to place the<br />
boat in water with a full load of fuel and gear.Mark<br />
the waterline and measure above the marked line<br />
1 to 3 inches for placement of the tape line.<br />
R<br />
! WARNING<br />
Bottom paint is designed to resist algae growth<br />
which means it has chemicals embedded in<br />
the paint that are harmful if ingested. Take all<br />
necessary precautions required before painting<br />
or repainting your boat’s hull.<br />
5-3
5-4<br />
NOTICE<br />
Masking tape is NOT recommended for the types<br />
of paint you will be using.<br />
Make sure that there is enough paint left to cover<br />
areas that were not accessible, (slings, jack stands<br />
etc.) and paint accordingly. Follow the paint<br />
manufacturer’s recommendation for do’s and dont’s<br />
after the painting is complete.<br />
NOTICE<br />
Painting your boat’s hull will adversely affect the<br />
boat’s speed and performance and may require<br />
re-propping if the maximum engine RPMs drop<br />
below the engine model/mfg recommended<br />
operating range.<br />
Rubrail Care<br />
The rubrail on your boat is constructed of an injected<br />
high density PVC vinyl material which laboratory<br />
tests have proven to be highly resistant to staining,<br />
fading and cracking.<br />
As resilient as this material is, you still need to follow<br />
some basic maintenance precautions.<br />
General maintenance requires a thorough cleaning<br />
with mild soap & water. DO NOT use any cleaning<br />
agents which contain chemicals.<br />
Although the outer shell is tough and durable, there<br />
is a chance that it can be breached. Use care when<br />
docking or exposing the rubrail to conditions which<br />
may cause damage such as docking against heavily<br />
barnacle-encrusted pilings.<br />
Some tears (cleanly sliced) can be repaired with a<br />
“Super Glue” type product.<br />
Thoroughly clean and dry the affected area. Apply<br />
glue and hold the surfaces together.<br />
Areas which have been torn or are affected by heavy<br />
abrasion will have to have the damaged section<br />
replaced. Please see your <strong>Boston</strong> <strong>Whaler</strong>® dealer for<br />
this type of repair.<br />
Section 5 • Care & Maintenance<br />
Cleaning Fiberglass & Non-Skid<br />
To protect your deck and non-skid areas from the<br />
deteriorating affects of the sun, oxidation, water spots<br />
and pollution, use a good quality “fi berglass and nonskid<br />
deck” wax every two to three months.<br />
When applied to your deck and non-skid areas, as<br />
recommended by the manufacturer, the wax forms a<br />
protective non-slick surface which will keep debris<br />
from sticking. Dirt, soot, bird droppings, and even<br />
fi sh blood will rinse right off.<br />
Stainless Steel Care<br />
The cleaner your stainless trim and fi ttings can<br />
be kept, the greater the assurance of optimum<br />
corrosion resistance. Without proper care even<br />
the best stainless steel will corrode.<br />
Stainless steel is strong and corrosion resistant, but<br />
still requires maintenance to keep its appearance.<br />
Frequent routine cleaning of your stainless steel<br />
with a mild soap and water solution and coating with<br />
a good grade cleaning wax will help maintain the<br />
fi nish.<br />
R<br />
NOTICE<br />
NEVER use abrasive cleaners, detergents or<br />
soft scrub type cleaners to wash your boats<br />
surfaces.<br />
NEVER use abrasive pads, brushes or sponges<br />
to attempt to remove stubborn stains.<br />
NEVER use strong solvents or detergents which<br />
contain chlorine.<br />
• Wash with mild soap and cold or<br />
lukewarm water.<br />
• Dry THOROUGHLY.<br />
• Apply cleaning wax with a soft, dry cloth.<br />
• Allow wax to dry, then polish and buff.<br />
150 Montauk
Even the fi nest cleaning powders can scratch or<br />
burnish a mill-rolled surface. On polished fi nishes,<br />
rubbing or wiping should be done in the direction of<br />
the polish lines, NOT across them.<br />
Crevice corrosion, a brownish coloring which occurs<br />
where two pieces of stainless hardware meet is<br />
caused by impurities in water and air. It can be easily<br />
cleaned with a good grade marine polish using a<br />
sponge, cloth or small bristled brush (for nooks and<br />
crannies).<br />
Aluminum Care<br />
150 Montauk<br />
NOTICE<br />
NEVER use abrasive cleaners, detergents or<br />
soft scrub type cleaners to wash your boats<br />
surfaces.<br />
NEVER use abrasive pads, brushes or sponges<br />
to attempt to remove stubborn stains.<br />
NEVER use strong solvents or detergents which<br />
contain chlorine.<br />
NEVER use silver cleaners.<br />
Preventative maintenance is essential to life of the<br />
metals on your boat. The presence of salt particles<br />
and moisture is the major cause of white spots, pitting<br />
and corrosion.<br />
The use of harsh chemicals can also cause deterioration.<br />
Manufacturers and applicators of protective coatings<br />
will not warrant protective coatings on metals in the<br />
marine environment. Proper owner maintenance is<br />
required to reduce deterioration which will result in<br />
most cases by failure to wash down and wipe dry<br />
after each use and/or the use of abrasive, acidic or<br />
other improper cleaners.<br />
Wash completely using a soft cloth and mild<br />
detergent to remove salt particles. Hosing alone will<br />
not dislodge all particles. DO NOT allow soap to dry<br />
as it may cause stains on coated surfaces. Make sure<br />
to wash and dry the full circumference of aluminum<br />
parts.<br />
Section 5 • Care & Maintenance<br />
Apply an aluminum protectorant at least twice each<br />
year, more frequently as conditions warrant. Neglect<br />
will cause pitting of the surface which cannot be<br />
reversed.<br />
Inspect and repair or replace all damaged nylon<br />
bushings, washers or other hardware designed to<br />
prevent contact with dissimilar metals.<br />
Whenever electrical or electronic changes are made<br />
to the boat, a qualifi ed marine technician should<br />
check aluminum parts for stray currents. Make sure<br />
all electronic equipment is properly grounded with<br />
adequate sized wire.<br />
Cushions<br />
Saltwater, salt residue, dirt, ultra-violet rays etc. will<br />
take their toll on vinyl products causing them to lose<br />
their luster and texture.<br />
The cushions on your boat are made of a durable<br />
vinyl material called OMNOVA which is protected<br />
by a fi nish called PreFixx ® . PreFixx ® will keep your<br />
cushions looking new far longer than most other<br />
vinyl upholstery.<br />
To Clean Your Cushions<br />
R<br />
! CAUTION<br />
Solvents are flammable. Exercise proper<br />
care. Wear rubber gloves during all cleaning<br />
activity.<br />
Use caution when cleaning around buttons,<br />
stitching and wooden or decorative trim as<br />
these solvents could seriously damage such<br />
areas.<br />
• Remove ordinary dirt and smudges with a mild<br />
soap and water solution. Dry with a soft, lintfree<br />
cloth or towel.<br />
• More diffi cult stains can be cleaned using<br />
rubbing alcohol (isopropyl alcohol).<br />
Rinse cleaned area with fresh water and<br />
dry with a clean, soft, lint-free cloth or<br />
towel.<br />
5-5
5-6<br />
• Seemingly permanent stains like ballpoint ink<br />
can be cleaned with active solvents such as<br />
nail polish remover when applied with a soft<br />
cloth or damp sponge and rubbed. Rinse<br />
cleaned area with fresh water and dry<br />
with a clean, soft, lint-free cloth or towel.<br />
The vinyl material and superior fi nish has been<br />
tested to resist heavy abrasion. Complete cleaning<br />
instructions are included in the owner’s packet. Read<br />
all information provided by the cushion manufacturer<br />
regarding the proper cleaning and maintenance.<br />
Your cushions are not waterproof. They are<br />
constructed of open-cell foam and will absorb and<br />
hold water. The foam is wrapped with a plastic barrier<br />
which helps to keep water from being absorbed into<br />
the foam but also will not allow water to dissipate<br />
once the foam is soaked. Do not leave the cushions<br />
in standing water or exposed to heavy, prolonged<br />
rain.<br />
If, in the event your cushions become waterlogged,<br />
remove the foam from the cushion, press as much<br />
water as you can from the foam and allow to air dry.<br />
Make sure the plastic wrap is dry before wrapping<br />
the foam and inserting it back into the cushion.<br />
To prevent mildew, keep the vinyl dry and make<br />
sure that moisture does not accumulate between the<br />
cushions.<br />
Cleaning Your Instrument Gauges<br />
When gauges are exposed to a saltwater environment,<br />
salt crystals may form on the bezel and plastic covers.<br />
Remove the salt crystals with a soft damp cloth.<br />
Clean with a mild household detergent or plastic<br />
cleaner.<br />
Never use abrasives or rough, dirty cloths to clean<br />
plastic parts. A mild household detergent or plastic<br />
cleaner should be used. Wipe clean with a damp<br />
chamois.<br />
FOR MORE INFORMATION, CONTACT MERCURY MARINE<br />
CUSTOMER SERVICE AT 1-920-929-5040<br />
Section 5 • Care & Maintenance<br />
Canvas Care and Maintenance<br />
To keep your canvas and metal parts in good working<br />
condition and in good appearance, you will need to<br />
keep them clean.<br />
The fabric should be cleaned regularly before<br />
substances such as dirt, pollen, etc. are allowed to<br />
accumulate on and become embedded in the fabric.<br />
The canvas can be cleaned without being removed<br />
from the installation.<br />
Chafi ng, fi ber wear from dirt and grit and deterioration<br />
from ultraviolet light can cause your canvas to<br />
degrade over time.<br />
Maintaining a good appearance<br />
• After each use, especially if used in salt<br />
water areas, rinse the canvas completely<br />
with fresh cold water.<br />
On a regular basis<br />
• Brush off any loose dirt, pollen, etc.<br />
R<br />
NOTICE<br />
DO NOT use detergents, bleach or solvents to<br />
clean your canvas.<br />
• Hose down with fresh cold water and clean<br />
with a mild solution of a natural soap in<br />
lukewarm water (maximum 100°F / 38°C).<br />
• Allow the canvas to soak. DO NOT ALLOW<br />
THE SOAP TO DRY.<br />
• Rinse thoroughly with fresh water.<br />
• Let the canvas dry completely. DO NOT<br />
store any of the canvas pieces while wet.<br />
The effects of ultraviolet light can sometimes be<br />
reduced by chemical treatment of canvas items.<br />
Consult your <strong>Boston</strong> <strong>Whaler</strong> ® dealer or check your<br />
canvas manufacturer’s manual BEFORE using any<br />
chemical treatments on your canvas.<br />
150 Montauk
Cleaning Stubborn Stains<br />
Soak fabric for approximately twenty minutes in<br />
a mild solution consisting of no more than 1/2<br />
cup (4 oz.) of bleach and 1/4 cup (2 oz.) of natural<br />
soap per gallon of lukewarm water (not to exceed<br />
100° F / 38° C).<br />
Rinse thoroughly in cold water several times.Allow<br />
the fabric to air dry completely.<br />
150 Montauk<br />
NOTICE<br />
Failure to remove all of the soap solution can<br />
cause deterioration of seams and prevent fabric<br />
from proper retreating.<br />
Retreat the fabric using an air curing product such<br />
as 303 High Tech Fabric Guard to ensure water and<br />
stain repellency.<br />
All canvas should be stored fl at or rolled in a clean,<br />
dry space.<br />
Maintaining Zippers and Hardware<br />
Lubricate zippers and fasteners periodically with a<br />
clear silicone spray. In the absence of silicone spray,<br />
a wax candle can be used to lubricate the zipper<br />
track.<br />
Replace any missing fasteners or any fasteners<br />
showing signs of corrosion.<br />
NOTICE<br />
DO NOT use petroleum based products, such as<br />
petroleum jelly, on the zippers or fasteners.<br />
Section 5 • Care & Maintenance<br />
Cleaning Acrylic Windscreen<br />
R<br />
• Rinse windscreen thoroughly with clear water<br />
to remove any dust, dirt particles, salt water<br />
or environmental agents before applying<br />
cleaning products.<br />
Use your bare hand, with plenty of water, to<br />
feel and dislodge any stuck-on dirt or foreign<br />
particles.<br />
This should be done frequently to<br />
avoid build up of salt water, dirt and<br />
other environmental contaminants.<br />
• Using a soft non-abrasive cloth, wash windows<br />
inside and out with a mild soap (Woolite,<br />
Joy, Palmolive, etc.) and water solution.<br />
Rinse completely with cool water.<br />
DO NOT USE DETERGENTS.<br />
• Blot dry with a soft cloth or chamois to<br />
prevent water spots.<br />
The use of a polycarbonate protective cleaner/<br />
restorer is recommended to keep your acrylic scratch<br />
resistant, clean and minimize the deteriorating effects<br />
of sunlight.<br />
NOTICE<br />
Never use a dry cloth or duster or glass cleaning<br />
solutions on acrylic.<br />
DO NOT use solvents such as acetone, silicone<br />
spray, benzine, carbon tetrachloride, fire<br />
extinguisher fl uid, dry cleaning fl uid, lacquer<br />
thinner, glass cleaning solution or harsh<br />
detergents on acrylic.<br />
The above substances will attack the surface<br />
of the acrylic.<br />
5-7
Long Term Storage & Winterization<br />
Long periods of storage, winter lay-up and/or nonuse,<br />
common to boats, create unique problems. When<br />
preparing to store a boat for extended periods of two<br />
months or more it is best to make sure that the boat<br />
and its systems are properly conditioned for such<br />
extended periods of non-usage.<br />
The guidelines presented on the following pages<br />
give basic instructions on “winterizing” your boat<br />
and boat systems. If inexperienced with the process<br />
of winterization it is best to hire the services of a<br />
professional.<br />
In addition, always consult the owner’s manuals of<br />
the various systems and equipment on your boat for<br />
the manufacturer’s recommendations on winterizing<br />
and long term storage.<br />
Engine<br />
5-8<br />
! CAUTION<br />
Never start or run your outboard (even<br />
momentarily) without having water circulating<br />
through the cooling water intake holes in the<br />
gear case. This will prevent damage to the<br />
water pump (running dry) or overheating of<br />
the engine.<br />
Protecting your engine’s vital moving parts from<br />
corrosion and rust caused by freezing of trapped<br />
water or excessive condensation due to climatic<br />
changes is very important. Freezing water in the<br />
engine can cause extensive damage to the internal<br />
moving parts. Internal engine parts can also be<br />
affected by rust due to lack of proper lubrication<br />
• Replace the engine oil and fi lter, running the<br />
engine to drain out as much old oil as<br />
possible.<br />
• Flush the engine with fresh water using fl ush<br />
muffs or a similar device attached to the raw<br />
water pickup.<br />
• Let all water drain from the engine.<br />
Section 5 • Care & Maintenance<br />
R<br />
• Fog the engine while it is running. Spray until<br />
it stalls.<br />
• Run fuel which has been treated with<br />
conditioner and stabilizer through the<br />
engine.<br />
• Replace lower unit gear oil. Check for<br />
moisture in old oil, a sign of deteriorating<br />
seals.<br />
• Remove the prop and grease the shaft and<br />
threads.<br />
• Treat all grease fi ttings with the recommended<br />
lubricant.<br />
• Lightly lubricate the exterior of the engine or<br />
polish with a good wax.<br />
• Check engine mount bolts. Ensure that they<br />
are torqued to 55 ft/lbs.<br />
In addition, be sure to follow all recommendations in<br />
your engine manufacturers operation manual.<br />
Fuel System<br />
Tank(s), hoses, and fuel pumps should be treated to<br />
help prevent the formation of varnish and gum.<br />
Temperature extremes will cause condensation to<br />
accumulate in an empty or partially fi lled fuel tank<br />
leading to fuel contamination and/or premature wear<br />
of your system.<br />
Fill the tank 95% full to allow for expansion, and<br />
add fuel stabilizer and conditioner, following the<br />
manufacturer’s recommendations, to provide fuel<br />
stability and corrosion protection.<br />
NOTICE<br />
Pay particular attention to the information<br />
provided in “Ethanol-Blended Fuel” in section<br />
3 of this manual.<br />
150 Montauk
Electrical System<br />
Battery<br />
Remove battery from boat and store in a cool,<br />
dry location. Periodically check the battery<br />
during storage.<br />
• Disconnect the battery cables (negative<br />
cable fi rst).<br />
• Remove the battery from the boat.<br />
• Clean the terminal ends of the cables and battery<br />
teminals with a solution of baking soda and<br />
water. Rinse thoroughly with clean water.<br />
• Apply a coat of grease on the terminal ends of<br />
the cables and the battery terminals.<br />
• Store the battery in a cool, dry area.<br />
• Use a trickle charger to keep the battery<br />
charged or charge the battery every<br />
30-60 days.<br />
150 Montauk<br />
NOTICE<br />
NOTICE<br />
Follow the manufacturer’s recommendations for<br />
long term storage of your battery(s).<br />
Deck<br />
• Check all connections and tighten if<br />
necessary.<br />
• Spray all connections with an anti-corrosion<br />
spray.<br />
Clean the deck with soap, hot water and a stiff brush<br />
to clean up any oil spills.<br />
Section 5 • Care & Maintenance<br />
Drainage<br />
It is important to raise the bow of the boat enough<br />
to allow for proper drainage of water from the deck<br />
and bilge area. Make sure all the drainage fi ttings are<br />
clear and free of debris and plugs are removed. Store<br />
the engine in an upright position to promote adequate<br />
drainage of water.<br />
Avoid Loss<br />
Remove any valuables or anything that can be easily<br />
removed from the boat such as electronics, lines,<br />
PFDs, fenders, cushions, etc. and store at home.<br />
Cover<br />
When covering your boat it is best to use a frame of<br />
either aluminum or wood to keep the cover up. This<br />
allows air to circulate and discourages water from<br />
pooling on the cover.<br />
R<br />
NOTICE<br />
DO NOT USE a bimini top in lieu of a cover.<br />
Damage and aging will occur while providing<br />
no protection for your boat.<br />
Vents along the entire length of the cover will allow<br />
condensation to escape. Placing a series of foam<br />
pads between the hull and cover will also aid in air<br />
circulation and reduce condensation.<br />
To help keep your boat dry and mildew free, consider<br />
placing commercial odor and moisture absorbing<br />
products in the boat under the cover.<br />
Trailer Storage<br />
Repeatedly immersing the trailer in water during boat<br />
launching can cause a variety of problems. Water<br />
seeping into the wheel hubs will cause the grease to<br />
emulsify and can prematurely corrode the bearings.<br />
Check with the trailer manufacturer for scheduled<br />
maintenence of your trailer.<br />
5-9
Environment<br />
Antifreeze and other winterizing fl uids can be toxic to<br />
aquatic life and cause harmful effects to plant life.<br />
Improper disposal of, or spillage of antifreeze and/<br />
or any winterization fl uids can cause environmental<br />
problems when allowed to empty into waterways or<br />
on the ground. Furthermore, it is illegal, punishable<br />
at minimum by fi nes.<br />
Reinforcement Location Diagram<br />
Reinforcement Locations<br />
Your boat has been manufactured with reinforcement<br />
in various locations throughout the deck.<br />
In the event you wish to add equipment to your<br />
boat which requires you to penetrate the deck with<br />
fasteners, the diagram above illustrates the size,<br />
location and type of the reinforcement available. The<br />
5-10<br />
4 x 8<br />
3.5 x 6<br />
Section 5 • Care & Maintenance<br />
Used antifreeze or any winterization fl uids, should<br />
not be disposed of into sanitary sewers or publicly<br />
owned treatment plants.<br />
Persons who have any questions regarding recycling<br />
antifreeze or other toxic fl uids should write or call<br />
their state’s EPA offi ce.<br />
DO NOT attempt to secure equipment in any<br />
location other than those that are illustrated.<br />
R<br />
! CAUTION<br />
3.5 x 18<br />
3.5 x 24.25<br />
chart below provides a description of the material and<br />
recommended fasteners to secure your equipment.<br />
Reinforcement Construction Equipment weight Fastener Type*<br />
Plywood Standard boatbuilding material Light Self-tapping screws<br />
Trevira Thick spunbound polyester fabric Light Sheet Metal screws<br />
Sparalloy High density plastic Medium Self-tapping screws<br />
Phenolic** Fiberglass reinforced composite board Heavy Drill & Tap<br />
* In all cases it is recommended to drill and countersink a pilot hole to prevent damage to the gelcoat surface.<br />
**Also known as Whaleboard<br />
3.5 x 15<br />
150 Montauk
Section 5 • Care & Maintenance<br />
Fill out the log below after scheduled service or maintenance is performed.<br />
150 Montauk<br />
MAINTENANCE LOG<br />
ENGINE SERVICED<br />
DATE HOURS BY MAINTENANCE PERFORMED<br />
NOTES<br />
R<br />
5-11
5-12<br />
Section 5 • Care & Maintenance<br />
THIS PAGE LEFT INTENTIONALLY BLANK<br />
R<br />
150 Montauk