Owners Manual (JUPITER-50_e01_W.pdf) - Roland
Owners Manual (JUPITER-50_e01_W.pdf) - Roland
Owners Manual (JUPITER-50_e01_W.pdf) - Roland

You also want an ePaper? Increase the reach of your titles
YUMPU automatically turns print PDFs into web optimized ePapers that Google loves.
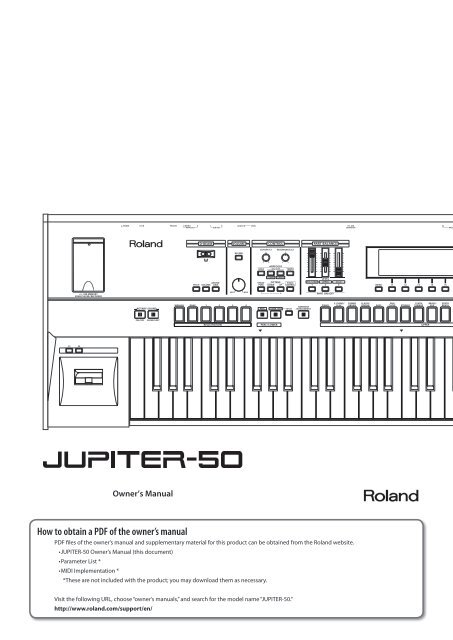
How to obtain a PDF of the owner’s manual<br />
PDF files of the owner’s manual and supplementary material for this product can be obtained from the <strong>Roland</strong> website.<br />
• <strong>JUPITER</strong>-<strong>50</strong> Owner’s <strong>Manual</strong> (this document)<br />
• Parameter List *<br />
• MIDI Implementation *<br />
*These are not included with the product; you may download them as necessary.<br />
Visit the following URL, choose “owner’s manuals,” and search for the model name “<strong>JUPITER</strong>-<strong>50</strong>.”<br />
http://www.roland.com/support/en/
2<br />
USING THE UNIT SAFELY<br />
Before using this unit, carefully read the sections entitled: “USING THE UNIT SAFELY” (p. 2) and “IMPORTANT NOTES” (p. 4). These sections provide<br />
important information concerning the proper operation of the unit. Additionally, in order to feel assured that you have gained a good grasp<br />
of every feature provided by your new unit, Owner’s manual should be read in its entirety. The manual should be saved and kept on hand as a<br />
convenient reference.<br />
Copyright © 2012 ROLAND CORPORATION<br />
All rights reserved. No part of this publication may be reproduced in any form without the written permission of ROLAND CORPORATION.<br />
About WARNING and CAUTION Notices About the Symbols<br />
WARNING<br />
Do not disassemble or modify by yourself<br />
Do not open (or modify in any way)<br />
the unit or its AC adaptor.<br />
Do not repair or replace parts by yourself<br />
Do not attempt to repair the unit,<br />
or replace parts within it (except<br />
when this manual provides specific<br />
instructions directing you to do so).<br />
Refer all servicing to your retailer, the<br />
nearest <strong>Roland</strong> Service Center, or an authorized<br />
<strong>Roland</strong> distributor, as listed on the “Information”<br />
page.<br />
Do not use or store in the following types of<br />
locations<br />
• Subject to temperature extremes<br />
(e.g., direct sunlight in an enclosed<br />
vehicle, near a heating duct, on top<br />
of heat-generating equipment);<br />
or are<br />
• Damp (e.g., baths, washrooms, on<br />
wet floors); or are<br />
• Exposed to steam or smoke; or are<br />
• Subject to salt exposure; or are<br />
• Humid; or are<br />
• Exposed to rain; or are<br />
• Dusty or sandy; or are<br />
• Subject to high levels of vibration and<br />
shakiness.<br />
Use only Stand that is recommended<br />
This unit should be used only with a<br />
rack or stand that is recommended<br />
by <strong>Roland</strong>.<br />
Used for instructions intended to alert the<br />
user to the risk of death or severe injury<br />
should the unit be used improperly.<br />
Used for instructions intended to alert the<br />
user to the risk of injury or material<br />
damage should the unit be used<br />
improperly.<br />
* Material damage refers to damage or<br />
other adverse effects caused with<br />
respect to the home and all its<br />
furnishings, as well to domestic animals<br />
or pets.<br />
ALWAYS OBSERVE THE FOLLOWING<br />
WARNING<br />
Do not place in an unstable location<br />
When using the unit with a rack or<br />
stand recommended by <strong>Roland</strong>, the<br />
rack or stand must be carefully placed<br />
so it is level and sure to remain stable.<br />
If not using a rack or stand, you still<br />
need to make sure that any location you choose<br />
for placing the unit provides a level surface that<br />
will properly support the unit, and keep it from<br />
wobbling.<br />
Precautions regarding placement of this<br />
unit on a stand<br />
Be sure to follow the instructions in<br />
the Owner’s <strong>Manual</strong> carefully when<br />
placing this unit on a stand (p. 30).<br />
If it is not set up properly, you risk<br />
creating an unstable situation which could lead<br />
to the unit falling or the stand toppling, and<br />
may result in injury.<br />
Use only the included AC adaptor and the<br />
correct voltage<br />
Be sure to use only the AC adaptor<br />
included with the unit. Also,<br />
make sure the line voltage at the<br />
installation matches the input voltage<br />
specified on the AC adaptor’s body.<br />
Other AC adaptors may use a different polarity,<br />
or be designed for a different voltage, so their<br />
use could result in damage, malfunction, or<br />
electric shock.<br />
Use only the included power cord<br />
Use only the attached power-supply<br />
cord. Also, the included power cord<br />
must not be used with any other<br />
device.<br />
The symbol alerts the user to important instructions or<br />
warnings.The specific meaning of the symbol is<br />
determined by the design contained within the triangle. In<br />
the case of the symbol at left, it is used for general<br />
cautions, warnings, or alerts to danger.<br />
The symbol alerts the user to items that must never be<br />
carried out (are forbidden). The specific thing that must<br />
not be done is indicated by the design contained within<br />
the circle. In the case of the symbol at left, it means that<br />
the unit must never be disassembled.<br />
The symbol alerts the user to things that must be<br />
carried out. The specific thing that must be done is<br />
indicated by the design contained within the circle. In the<br />
case of the symbol at left, it means that the power-cord<br />
plug must be unplugged from the outlet.<br />
WARNING<br />
Do not bend the power cord or place heavy<br />
objects on it<br />
Do not excessively twist or bend the<br />
power cord, nor place heavy objects<br />
on it. Doing so can damage the cord,<br />
producing severed elements and<br />
short circuits. Damaged cords are fire<br />
and shock hazards!<br />
Avoid extended use at high volume<br />
This unit, either alone or in<br />
combination with an amplifier<br />
and headphones or speakers, may<br />
be capable of producing sound<br />
levels that could cause permanent<br />
hearing loss. Do not operate for a long period<br />
of time at a high volume level, or at a level<br />
that is uncomfortable. If you experience any<br />
hearing loss or ringing in the ears, you should<br />
immediately stop using the unit, and consult an<br />
audiologist.<br />
Don’t allow foreign objects or liquids to<br />
enter unit; never place containers with<br />
liquid on unit<br />
Do not place containers containing<br />
liquid on this product. Never allow<br />
foreign objects (e.g., flammable<br />
objects, coins, wires) or liquids<br />
(e.g., water or juice) to enter this<br />
product. Doing so may cause short<br />
circuits, faulty operation, or other<br />
malfunctions.
WARNING<br />
Turn off the unit if an abnormality or<br />
malfunction occurs<br />
Immediately turn the unit off, remove<br />
the AC adaptor from the outlet, and<br />
request servicing by your retailer, the<br />
nearest <strong>Roland</strong> Service Center, or an<br />
authorized <strong>Roland</strong> distributor, as listed on the<br />
“Information” page when:<br />
• The AC adaptor, the power-supply cord, or<br />
the plug has been damaged; or<br />
• If smoke or unusual odor occurs; or<br />
• Objects have fallen into, or liquid has been<br />
spilled onto the unit; or<br />
• The unit has been exposed to rain (or<br />
otherwise has become wet); or<br />
• The unit does not appear to operate normally<br />
or exhibits a marked change in performance.<br />
Adults must provide supervision in places<br />
where children are present<br />
When using the unit in locations<br />
where children are present, be<br />
careful so no mishandling of the<br />
unit can take place. An adult should<br />
always be on hand to provide supervision and<br />
guidance.<br />
Do not drop or subject to strong impact<br />
Protect the unit from strong impact.<br />
(Do not drop it!)<br />
Do not share an outlet with an<br />
unreasonable number of other devices<br />
Do not force the unit’s powersupply<br />
cord to share an outlet with<br />
an unreasonable number of other<br />
devices. Be especially careful when<br />
using extension cords—the total<br />
power used by all devices you have connected<br />
to the extension cord’s outlet must never<br />
exceed the power rating (watts/amperes) for<br />
the extension cord. Excessive loads can cause<br />
the insulation on the cord to heat up and<br />
eventually melt through.<br />
Do not use overseas<br />
Before using the unit in a foreign<br />
country, consult with your retailer,<br />
the nearest <strong>Roland</strong> Service Center, or<br />
an authorized <strong>Roland</strong> distributor, as<br />
listed on the “Information” page.<br />
Do not use a CD-ROM in an audio CD player<br />
or DVD player<br />
DO NOT play a CD-ROM disc on a<br />
conventional audio CD player. The<br />
resulting sound may be of a level that<br />
could cause permanent hearing loss.<br />
Damage to speakers or other system<br />
components may result.<br />
CAUTION<br />
Place in a well ventilated location<br />
The unit and the AC adaptor should<br />
be located so their location or<br />
position does not interfere with their<br />
proper ventilation.<br />
Use only the specified stand (s)<br />
This unit is designed to be used in<br />
combination with specific stands<br />
(KS-18Z, KS-G8, KS-12) manufactured<br />
by <strong>Roland</strong>. If used in combination<br />
with other stands, you risk sustaining injuries<br />
as the result of this product dropping down or<br />
toppling over due to a lack of stability.<br />
Evaluate safety issues before using stands<br />
Even if you observe the cautions<br />
given in the owner’s manual, certain<br />
types of handling may allow this<br />
product to fall from the stand, or<br />
cause the stand to overturn. Please be mindful<br />
of any safety issues before using this product.<br />
Grasp the plug when connecting or<br />
disconnecting the AC adaptor<br />
Always grasp only the plug on the<br />
AC adaptor cord when plugging into,<br />
or unplugging from, an outlet or this<br />
unit.<br />
Periodically clean the AC adaptor’s plug<br />
At regular intervals, you should<br />
unplug the AC adaptor and clean it<br />
by using a dry cloth to wipe all dust<br />
and other accumulations away from<br />
its prongs. Also, disconnect the power<br />
plug from the power outlet whenever the unit<br />
is to remain unused for an extended period of<br />
time. Any accumulation of dust between the<br />
power plug and the power outlet can result in<br />
poor insulation and lead to fire.<br />
Manage cables for safety<br />
Try to prevent cords and cables from<br />
becoming entangled. Also, all cords<br />
and cables should be placed so they<br />
are out of the reach of children.<br />
Avoid climbing on top of the unit, or placing<br />
heavy objects on it<br />
Never climb on top of, nor place<br />
heavy objects on the unit.<br />
Do not connect or disconnect the AC adaptor<br />
with wet hands<br />
Never handle the AC adaptor or its<br />
plugs with wet hands when plugging<br />
into, or unplugging from, an outlet or<br />
this unit.<br />
Disconnect everything before moving the<br />
unit<br />
Before moving the unit, disconnect<br />
the AC adaptor and all cords coming<br />
from external devices.<br />
USING THE UNIT SAFELY<br />
CAUTION<br />
Unplug the AC adaptor from the outlet<br />
before cleaning<br />
Before cleaning the unit, turn it off<br />
and unplug the AC adaptor from the<br />
outlet (p. 29).<br />
If there is a possibility of lightning strike,<br />
disconnect the AC adaptor from the outlet<br />
Whenever you suspect the possibility<br />
of lightning in your area, disconnect<br />
the AC adaptor from the outlet.<br />
Take care not to get fingers pinched by lid<br />
Be careful so you don’t get your<br />
fingers pinched when you handle any<br />
moving parts such as the following.<br />
Adult supervision is recommended<br />
whenever small children use the unit.<br />
• USB memory cover (p. 25)<br />
Keep small items out of the reach of children<br />
To prevent accidental ingestion of the<br />
parts listed below, always keep them<br />
out of the reach of small children.<br />
• Included Parts<br />
Screw that secures the USB memory cover (p. 69)<br />
Allen wrench (p. 69)<br />
Handle the ground terminal carefully<br />
If you remove the screw from the<br />
ground terminal, be sure to replace<br />
it; don’t leave it lying around where<br />
it could accidently be swallowed by<br />
small children. When refastening the<br />
screw, make that it is firmly fastened, so it won’t<br />
come loose.<br />
3<br />
Quick Guide<br />
Introduction Playing Sounds Editing Sounds<br />
Other Convenient<br />
Functions<br />
Connecting Other<br />
Equipment<br />
Appendix
4<br />
IMPORTANT NOTES<br />
Power Supply<br />
• Do not connect this unit to same electrical<br />
outlet that is being used by an electrical<br />
appliance that is controlled by an inverter<br />
or a motor (such as a refrigerator, washing<br />
machine, microwave oven, or air conditioner).<br />
Depending on the way in which the electrical<br />
appliance is used, power supply noise<br />
may cause this unit to malfunction or may<br />
produce audible noise. If it is not practical<br />
to use a separate electrical outlet, connect a<br />
power supply noise filter between this unit<br />
and the electrical outlet.<br />
• The AC adaptor will begin to generate heat<br />
after long hours of consecutive use. This is<br />
normal, and is not a cause for concern.<br />
• To prevent malfunction and equipment<br />
failure, always make sure to turn off the<br />
power on all your equipment before you<br />
make any connections.<br />
• With the factory settings, the <strong>JUPITER</strong>-<strong>50</strong> will<br />
automatically be switched off four hours after<br />
you stop playing or operating the unit. If you<br />
don’t want the unit to turn off automatically,<br />
change the “Auto Off” setting to “OFF” as<br />
described on p. 79.<br />
* The settings you were editing will be lost when the<br />
unit is turned off. If you want to keep your settings,<br />
you must save your settings before turning the<br />
unit off.<br />
Placement<br />
• Using the unit near power amplifiers (or<br />
other equipment containing large power<br />
transformers) may induce hum. To alleviate<br />
the problem, change the orientation of this<br />
unit; or move it farther away from the source<br />
of interference.<br />
• This device may interfere with radio and<br />
television reception. Do not use this device in<br />
the vicinity of such receivers.<br />
• Noise may be produced if wireless<br />
communications devices, such as cell phones,<br />
are operated in the vicinity of this unit.<br />
Such noise could occur when receiving or<br />
initiating a call, or while conversing. Should<br />
you experience such problems, you should<br />
relocate such wireless devices so they are at<br />
a greater distance from this unit, or switch<br />
them off.<br />
• Do not expose the unit to direct sunlight,<br />
place it near devices that radiate heat, leave<br />
it inside an enclosed vehicle, or otherwise<br />
subject it to temperature extremes. Excessive<br />
heat can deform or discolor the unit.<br />
• When moved from one location to another<br />
where the temperature and/or humidity is<br />
very different, water droplets (condensation)<br />
may form inside the unit. Damage or<br />
malfunction may result if you attempt to use<br />
the unit in this condition. Therefore, before<br />
using the unit, you must allow it to stand for<br />
several hours, until the condensation has<br />
completely evaporated.<br />
• Do not allow objects to remain on top of<br />
the keyboard. This can be the cause of<br />
malfunction, such as keys ceasing to produce<br />
sound.<br />
• Depending on the material and temperature<br />
of the surface on which you place the unit, its<br />
rubber feet may discolor or mar the surface.<br />
You can place a piece of felt or cloth<br />
under the rubber feet to prevent this from<br />
happening. If you do so, please make<br />
sure that the unit will not slip or move<br />
accidentally.<br />
• Do not put anything that contains water on<br />
this unit. Also, avoid the use of insecticides,<br />
perfumes, alcohol, nail polish, spray cans, etc.,<br />
near the unit. Swiftly wipe away any liquid<br />
that spills on the unit using a dry, soft cloth.<br />
Maintenance<br />
• For everyday cleaning wipe the unit with a<br />
soft, dry cloth or one that has been slightly<br />
dampened with water. To remove stubborn<br />
dirt, use a cloth impregnated with a mild,<br />
non-abrasive detergent. Afterwards, be sure<br />
to wipe the unit thoroughly with a soft, dry<br />
cloth.<br />
• Never use benzine, thinners, alcohol or<br />
solvents of any kind, to avoid the possibility<br />
of discoloration and/or deformation.<br />
Repairs and Data<br />
• Please be aware that all data contained in the<br />
unit’s memory may be lost when the unit is<br />
sent for repairs. Important data should always<br />
be backed up USB flash drives, or written<br />
down on paper (when possible). During<br />
repairs, due care is taken to avoid the loss of<br />
data. However, in certain cases (such as when<br />
circuitry related to memory itself is out of<br />
order), we regret that it may not be possible<br />
to restore the data, and <strong>Roland</strong> assumes no<br />
liability concerning such loss of data.<br />
Additional Precautions<br />
• Please be aware that the contents of memory<br />
can be irretrievably lost as a result of a<br />
malfunction, or the improper operation of<br />
the unit. To protect yourself against the risk<br />
of loosing important data, we recommend<br />
that you periodically save a backup copy of<br />
important data you have stored in the unit’s<br />
memory on USB flash drives.<br />
• Unfortunately, it may be impossible to<br />
restore the contents of data that was stored<br />
in the unit’s memory or USB flash drives once<br />
it has been lost. <strong>Roland</strong> Corporation assumes<br />
no liability concerning such loss of data.<br />
• Use a reasonable amount of care when using<br />
the unit’s buttons, sliders, or other controls;<br />
and when using its jacks and connectors.<br />
Rough handling can lead to malfunctions.<br />
• Never strike or apply strong pressure to the<br />
display.<br />
• When disconnecting all cables, grasp the<br />
connector itself—never pull on the cable.<br />
This way you will avoid causing shorts, or<br />
damage to the cable’s internal elements.<br />
• To avoid disturbing others nearby, try to keep<br />
the unit’s volume at reasonable levels. You<br />
may prefer to use headphones, so you do not<br />
need to be concerned about those around<br />
you.<br />
• The sound of keys being struck and vibrations<br />
produced by playing an instrument can be<br />
transmitted through a floor or wall to an<br />
unexpected extent. Please take care not to<br />
cause annoyance to others nearby.<br />
• When you need to transport the unit,<br />
package it in the box (including padding)<br />
that it came in, if possible. Otherwise, you will<br />
need to use equivalent packaging materials.<br />
• Use only the specified expression pedal<br />
(EV-5; sold separately). By connecting any<br />
other expression pedals, you risk causing<br />
malfunction and/or damage to the unit.<br />
• Some connection cables contain resistors.<br />
Do not use cables that incorporate resistors<br />
for connecting to this unit. The use of such<br />
cables can cause the sound level to be<br />
extremely low, or impossible to hear. For<br />
information on cable specifications, contact<br />
the manufacturer of the cable.<br />
• The usable range of D-BEAM controller will<br />
become extremely small when used under<br />
strong direct sunlight. Please be aware of this<br />
when using the D-BEAM controller outside.<br />
• The sensitivity of the D-BEAM controller<br />
will change depending on the amount of<br />
light in the vicinity of the unit. If it does not<br />
function as you expect, adjust the sensitivity<br />
as appropriate for the brightness of your<br />
location.<br />
• When operating an expression pedal, or<br />
opening and closing the USB memory cover,<br />
please take care not to pinch your fingers or<br />
toes between a moving part and the main<br />
unit. In places where small children are<br />
present, make sure that an adult provides<br />
supervision and guidance.
Before Using External Memories<br />
Using External Memories<br />
• Carefully insert the USB flash drives all the<br />
way in—until it is firmly in place.<br />
• Never touch the terminals of the USB flash<br />
drives. Also, avoid getting the terminals dirty.<br />
• USB flash drives are constructed using<br />
precision components; handle the memories<br />
carefully, paying particular note to the<br />
following.<br />
• To prevent damage to the cards from static<br />
electricity, be sure to discharge any static<br />
electricity from your own body before<br />
handling the cards.<br />
• Do not touch or allow metal to come into<br />
contact with the contact portion of the<br />
cards.<br />
• Do not bend, drop, or subject cards to<br />
strong shock or vibration.<br />
• Do not keep cards in direct sunlight, in<br />
closed vehicles, or other such locations.<br />
• Do not allow cards to become wet.<br />
• Do not disassemble or modify the cards.<br />
Handling CDs / DVDs<br />
• Avoid touching or scratching the shiny<br />
underside (encoded surface) of the disc.<br />
Damaged or dirty CD, DVD discs may not be<br />
read properly. Keep your discs clean using a<br />
commercially available disc cleaner.<br />
Copyrights<br />
• It is forbidden by law to make an audio recording,<br />
video recording, copy or revision of a third party’s<br />
copyrighted work (musical work, video work,<br />
broadcast, live performance, or other work),<br />
whether in whole or in part, and distribute, sell, lease,<br />
perform, or broadcast it without the permission of<br />
the copyright owner.<br />
• Do not use this product for purposes that could<br />
infringe on a copyright held by a third party. We<br />
assume no responsibility whatsoever with regard to<br />
any infringements of third-party copyrights arising<br />
through your use of this product.<br />
• The copyright of content in this product (the sound<br />
waveform data, style data, accompaniment patterns,<br />
phrase data, audio loops and image data) is reserved<br />
by <strong>Roland</strong> Corporation.<br />
• Purchasers of this product are permitted to utilize<br />
said content for the creating, performing, recording<br />
and distributing original musical works.<br />
• Purchasers of this product are NOT permitted to<br />
extract said content in original or modified form, for<br />
the purpose of distributing recorded medium of said<br />
content or making them available on a computer<br />
network.<br />
Licenses / Trademarks<br />
• MMP (Moore Microprocessor Portfolio) refers to a<br />
patent portfolio concerned with microprocessor<br />
architecture, which was developed by Technology<br />
Properties Limited (TPL). <strong>Roland</strong> has licensed this<br />
technology from the TPL Group.<br />
• MPEG Layer-3 audio compression technology<br />
is licensed from Fraunhofer IIS Corporation and<br />
THOMSON Multimedia Corporation.<br />
• “<strong>JUPITER</strong>” is a registered trademark of and is licensed<br />
by K.H.S. MUSICAL INSTRUMENT CO. LTD. in the<br />
United States and other countries.<br />
• <strong>Roland</strong>, COSM, SuperNATURAL, and D-BEAM are<br />
either registered trademarks or trademarks of <strong>Roland</strong><br />
Corporation in the United States and/or other<br />
countries.<br />
• Cakewalk is a registered trademark of Cakewalk, Inc.<br />
in the United States.<br />
• SONAR is a trademark of Cakewalk, Inc.<br />
• Company names and product names appearing<br />
in this document are registered trademarks or<br />
trademarks of their respective owners.<br />
IMPORTANT NOTES<br />
5<br />
Quick Guide<br />
Introduction Playing Sounds Editing Sounds<br />
Other Convenient<br />
Functions<br />
Connecting Other<br />
Equipment<br />
Appendix
6<br />
Contents<br />
USING THE UNIT SAFELY . . . . . . . . . . . . . . . . . . . . . . . . . . . . . . . . . . . . . . . . . 2<br />
IMPORTANT NOTES . . . . . . . . . . . . . . . . . . . . . . . . . . . . . . . . . . . . . . . . . . . . . . 4<br />
Quick Guide 8<br />
01 How the <strong>JUPITER</strong>-<strong>50</strong>’s Sound Generator is Structured . . . . . . . . . . . 8<br />
02 About the <strong>JUPITER</strong>-<strong>50</strong>’s Sounds . . . . . . . . . . . . . . . . . . . . . . . . . . . . . . .10<br />
03 Using Controllers to Modify the Sound . . . . . . . . . . . . . . . . . . . . . . . .13<br />
04 Registrations are Convenient for Live Performance . . . . . . . . . . . .14<br />
05 Example of Creating a Registration . . . . . . . . . . . . . . . . . . . . . . . . . . .17<br />
Introduction 18<br />
Main Features . . . . . . . . . . . . . . . . . . . . . . . . . . . . . . . . . . . . . . . . . . . . . . . . . .18<br />
Getting Acquainted with the <strong>JUPITER</strong>-<strong>50</strong> . . . . . . . . . . . . . . . . . . . . . . . . .20<br />
How the Sound Generator is Organized . . . . . . . . . . . . . . . . . . . . . . . . .20<br />
Tones . . . . . . . . . . . . . . . . . . . . . . . . . . . . . . . . . . . . . . . . . . . . . . . . . . . .21<br />
Live Sets . . . . . . . . . . . . . . . . . . . . . . . . . . . . . . . . . . . . . . . . . . . . . . . . .22<br />
Parts . . . . . . . . . . . . . . . . . . . . . . . . . . . . . . . . . . . . . . . . . . . . . . . . . . . . .22<br />
Registrations . . . . . . . . . . . . . . . . . . . . . . . . . . . . . . . . . . . . . . . . . . . . .23<br />
About Memory . . . . . . . . . . . . . . . . . . . . . . . . . . . . . . . . . . . . . . . . . . . . . . . .24<br />
Temporary Memory (the Temporary Area) . . . . . . . . . . . . . . . .24<br />
Rewritable Memory . . . . . . . . . . . . . . . . . . . . . . . . . . . . . . . . . . . . . .24<br />
Non-rewritable Memory . . . . . . . . . . . . . . . . . . . . . . . . . . . . . . . . . .24<br />
USB Flash Drive . . . . . . . . . . . . . . . . . . . . . . . . . . . . . . . . . . . . . . . . . .24<br />
USB Memory Song Player/Recorder . . . . . . . . . . . . . . . . . . . . . . . . . . . . .25<br />
Audio Files that can be Played . . . . . . . . . . . . . . . . . . . . . . . . . . . .25<br />
Audio Files that will be Saved . . . . . . . . . . . . . . . . . . . . . . . . . . . . .25<br />
Panel Descriptions . . . . . . . . . . . . . . . . . . . . . . . . . . . . . . . . . . . . . . . . . . . . . .26<br />
Top Panel . . . . . . . . . . . . . . . . . . . . . . . . . . . . . . . . . . . . . . . . . . . . . . . . . . . . . .26<br />
Rear Panel Connections . . . . . . . . . . . . . . . . . . . . . . . . . . . . . . . . . . . . . . . .28<br />
Placing the <strong>JUPITER</strong>-<strong>50</strong> on a Stand . . . . . . . . . . . . . . . . . . . . . . . . . . . . . . .30<br />
Turning the Power On . . . . . . . . . . . . . . . . . . . . . . . . . . . . . . . . . . . . . . . . . . .31<br />
Turning the Power On . . . . . . . . . . . . . . . . . . . . . . . . . . . . . . . . . . . . . . . . . .31<br />
Basic Operation . . . . . . . . . . . . . . . . . . . . . . . . . . . . . . . . . . . . . . . . . . . . . . . .32<br />
How the Function Buttons Work . . . . . . . . . . . . . . . . . . . . . . . . . . . . . . . .32<br />
Moving the Cursor . . . . . . . . . . . . . . . . . . . . . . . . . . . . . . . . . . . . . . . . . . . . .32<br />
Editing a Value . . . . . . . . . . . . . . . . . . . . . . . . . . . . . . . . . . . . . . . . . . . . . . . . .33<br />
[SHIFT] Button Operations . . . . . . . . . . . . . . . . . . . . . . . . . . . . . . . . . . . . .33<br />
What the [WRITE] Button Does . . . . . . . . . . . . . . . . . . . . . . . . . . . . . . . . .34<br />
Assigning a Name . . . . . . . . . . . . . . . . . . . . . . . . . . . . . . . . . . . . . . . . . . . . . .34<br />
Navigating Between Screens . . . . . . . . . . . . . . . . . . . . . . . . . . . . . . . . . . . .35<br />
Top Screen . . . . . . . . . . . . . . . . . . . . . . . . . . . . . . . . . . . . . . . . . . . . . . . . . . . . .35<br />
Menu Screen . . . . . . . . . . . . . . . . . . . . . . . . . . . . . . . . . . . . . . . . . . . . . . . . . .35<br />
REGISTRATION Screen . . . . . . . . . . . . . . . . . . . . . . . . . . . . . . . . . . . . . . . . . .36<br />
LIVE SET (UPPER) Screen . . . . . . . . . . . . . . . . . . . . . . . . . . . . . . . . . . . . . . . .36<br />
SONG Screen . . . . . . . . . . . . . . . . . . . . . . . . . . . . . . . . . . . . . . . . . . . . . . . . . .37<br />
VISUAL CONTROL Screen . . . . . . . . . . . . . . . . . . . . . . . . . . . . . . . . . . . . . . .37<br />
SYSTEM MENU Screen . . . . . . . . . . . . . . . . . . . . . . . . . . . . . . . . . . . . . . . . . .37<br />
UTILITY MENU Screen . . . . . . . . . . . . . . . . . . . . . . . . . . . . . . . . . . . . . . . . . .37<br />
Playing Sounds 38<br />
Switching Registrations . . . . . . . . . . . . . . . . . . . . . . . . . . . . . . . . . . . . . . . . .38<br />
Switching Banks . . . . . . . . . . . . . . . . . . . . . . . . . . . . . . . . . . . . . . . . . . . . . . .38<br />
Switching Registration Sets . . . . . . . . . . . . . . . . . . . . . . . . . . . . . . . . . . . .39<br />
Using the [MANUAL] Button . . . . . . . . . . . . . . . . . . . . . . . . . . . . . . . . . . . .39<br />
Single Part Play . . . . . . . . . . . . . . . . . . . . . . . . . . . . . . . . . . . . . . . . . . . . . . . .39<br />
Selecting the Sound for Each Part (Selecting Live Sets / Tones) . . . .40<br />
Using the Part Sound Buttons to Switch Live Sets . . . . . . . . . . . . . . .40<br />
Using the Part Sound Buttons to Switch the Solo Part’s Tone . . . . .41<br />
Switching the Tone of the Percussion/Lower Part . . . . . . . . . . . . . . . .41<br />
Instantly Switching the Variation Sounds (Alternate<br />
Button) . . . . . . . . . . . . . . . . . . . . . . . . . . . . . . . . . . . . . . . . . . . . . . . . . .42<br />
Turning Each Part On/Off and Adjusting its Volume . . . . . . . . . . . . .42<br />
Playing Drum Sounds and Sound Effects (Percussion/Lower) . . . . . .43<br />
Playing Percussion Sounds and Voice Phrases (<strong>Manual</strong><br />
Percussion) . . . . . . . . . . . . . . . . . . . . . . . . . . . . . . . . . . . . . . . . . . . . . . . . . . . .43<br />
Playing Drum Sounds on the Entire Keyboard (Drums/SFX) . . . . . .43<br />
Split Performance . . . . . . . . . . . . . . . . . . . . . . . . . . . . . . . . . . . . . . . . . . . . . .44<br />
Turning Split On . . . . . . . . . . . . . . . . . . . . . . . . . . . . . . . . . . . . . . . . . . . . . . .44<br />
How Split and Parts are Related . . . . . . . . . . . . . . . . . . . . . . . . . . .45<br />
Changing the Split Point . . . . . . . . . . . . . . . . . . . . . . . . . . . . . . . . . . . . . . .45<br />
Changing the Keyboard Settings . . . . . . . . . . . . . . . . . . . . . . . . . . . . . . . .46<br />
Changing the Pitch by Octaves . . . . . . . . . . . . . . . . . . . . . . . . . . . . . . . . .46<br />
Transposing . . . . . . . . . . . . . . . . . . . . . . . . . . . . . . . . . . . . . . . . . . . . . . . . . . .46<br />
Using the Arpeggiator . . . . . . . . . . . . . . . . . . . . . . . . . . . . . . . . . . . . . . . . . .47<br />
Turning the Arpeggiator On . . . . . . . . . . . . . . . . . . . . . . . . . . . . . . . . . . . .47<br />
Setting the Arpeggiator Tempo . . . . . . . . . . . . . . . . . . . . . . . . . . .47<br />
Holding the Arpeggio (HOLD) . . . . . . . . . . . . . . . . . . . . . . . . . . . .47<br />
Editing the Arpeggiator Settings . . . . . . . . . . . . . . . . . . . . . . . . . . . . . . .48<br />
Arpeggio Parameters . . . . . . . . . . . . . . . . . . . . . . . . . . . . . . . . . . . . .48<br />
Creating an Arpeggio Style from a MIDI File (Import) . . . . . .49<br />
Erasing an Original Arpeggio Style . . . . . . . . . . . . . . . . . . . . . . . .49<br />
Performing With Added Harmony . . . . . . . . . . . . . . . . . . . . . . . . . . . . . . .<strong>50</strong><br />
Changing the Harmony Intelligence Type . . . . . . . . . . . . . . . . . . . . . . .<strong>50</strong><br />
Controlling the Performance . . . . . . . . . . . . . . . . . . . . . . . . . . . . . . . . . . . .51<br />
Moving Your Hand to Modify the Pitch or Volume (D-BEAM<br />
Controller) . . . . . . . . . . . . . . . . . . . . . . . . . . . . . . . . . . . . . . . . . . . . . . . . . . . . .51<br />
Changing the Pitch/Applying Vibrato (Pitch Bend/Modulation<br />
Lever) . . . . . . . . . . . . . . . . . . . . . . . . . . . . . . . . . . . . . . . . . . . . . . . . . . . . . . . . .51<br />
Using the Buttons and Knobs to Modify the Sound ([S1] [S2]<br />
buttons / [C1] [C2] knobs) . . . . . . . . . . . . . . . . . . . . . . . . . . . . . . . . . . . . . .52<br />
Using Pedals . . . . . . . . . . . . . . . . . . . . . . . . . . . . . . . . . . . . . . . . . . . . . . . . . . .52<br />
Sustaining the Notes (Hold Pedal) . . . . . . . . . . . . . . . . . . . . . . . .52<br />
Adding Expression to Your Performance (Control Pedal) . . .52<br />
Controlling the Rotary Effect and Reverb . . . . . . . . . . . . . . . . . . . . . . . . .53<br />
Controlling the Rotary Effect . . . . . . . . . . . . . . . . . . . . . . . . . . . . . . . . . . .53<br />
Controlling Reverb . . . . . . . . . . . . . . . . . . . . . . . . . . . . . . . . . . . . . . . . . . . . .53
Editing Sounds 54<br />
Editing a Registration . . . . . . . . . . . . . . . . . . . . . . . . . . . . . . . . . . . . . . . . . . .54<br />
Saving a Registration . . . . . . . . . . . . . . . . . . . . . . . . . . . . . . . . . . . . . . . . . . .55<br />
Cancelling the Save of a Registration . . . . . . . . . . . . . . . . . . . . . .55<br />
Initializing a Registration . . . . . . . . . . . . . . . . . . . . . . . . . . . . . . . . . . . . . . .56<br />
Editing a Live Set . . . . . . . . . . . . . . . . . . . . . . . . . . . . . . . . . . . . . . . . . . . . . . .57<br />
Changing a Live Set’s Tones . . . . . . . . . . . . . . . . . . . . . . . . . . . . . . . . . . . . .58<br />
Layer On/Off and Volume Adjustment . . . . . . . . . . . . . . . . . . . . . . . . . .58<br />
Switching the MFX (Multi-effects) . . . . . . . . . . . . . . . . . . . . . . . . . . . . . . .58<br />
Turning MFX On/Off . . . . . . . . . . . . . . . . . . . . . . . . . . . . . . . . . . . . . .58<br />
Adjusting the Effect Send Levels and Effect Output Levels . . . . . . .59<br />
Editing the MFX . . . . . . . . . . . . . . . . . . . . . . . . . . . . . . . . . . . . . . . . . .59<br />
Editing the Reverb . . . . . . . . . . . . . . . . . . . . . . . . . . . . . . . . . . . . . . .59<br />
Editing the Tones Assigned to a Layer (Tone Modify) . . . . . . . . . . . . .60<br />
Simultaneously Adjusting Multiple Live Set Parameters (Tone<br />
Blender) . . . . . . . . . . . . . . . . . . . . . . . . . . . . . . . . . . . . . . . . . . . . . . . . . . . . . . .60<br />
Convenient Ways to Use the Tone Blender . . . . . . . . . . . . . . . . .61<br />
Saving a Live Set . . . . . . . . . . . . . . . . . . . . . . . . . . . . . . . . . . . . . . . . . . . . . . .62<br />
Cancelling the Save of a Live Set . . . . . . . . . . . . . . . . . . . . . . . . . .62<br />
Initializing a Live Set . . . . . . . . . . . . . . . . . . . . . . . . . . . . . . . . . . . . . . . . . . . .63<br />
Copying a Layer . . . . . . . . . . . . . . . . . . . . . . . . . . . . . . . . . . . . . . . . . . . . . . . .63<br />
Other Convenient Functions 64<br />
Using the USB Memory Song Player/Recorder . . . . . . . . . . . . . . . . . . . .64<br />
Basic Operations in the SONG Screen . . . . . . . . . . . . . . . . . . . . . . . . . . .64<br />
Playback . . . . . . . . . . . . . . . . . . . . . . . . . . . . . . . . . . . . . . . . . . . . . . . . . . . . . . .64<br />
Changing the Playback Speed or Pitch . . . . . . . . . . . . . . . . . . . .65<br />
Looping a Specific Region of Time . . . . . . . . . . . . . . . . . . . . . . . .65<br />
Playing Audio Files Consecutively (Chain Play) . . . . . . . . . . . . .66<br />
Creating a Folder . . . . . . . . . . . . . . . . . . . . . . . . . . . . . . . . . . . . . . . . .66<br />
Deleting an Audio File or Folder. . . . . . . . . . . . . . . . . . . . . . . . . . .67<br />
Renaming an Audio File or Folder . . . . . . . . . . . . . . . . . . . . . . . . .67<br />
Moving an Audio File or Folder . . . . . . . . . . . . . . . . . . . . . . . . . . .67<br />
Basic Operations in the Audio Rec Standby Screen . . . . . . . . . . . . . .68<br />
Recording . . . . . . . . . . . . . . . . . . . . . . . . . . . . . . . . . . . . . . . . . . . . . . . . . . . . . .68<br />
Audio Signal Flow . . . . . . . . . . . . . . . . . . . . . . . . . . . . . . . . . . . . . . . . . . . . . .69<br />
Using the Included USB Memory Protector . . . . . . . . . . . . . . . . . . . . . .69<br />
Settings and Convenient Functions . . . . . . . . . . . . . . . . . . . . . . . . . . . . . .70<br />
Basic Procedure for Utility Operations . . . . . . . . . . . . . . . . . . . . . . . . . . .70<br />
Initializing a USB Flash Drive (Format) . . . . . . . . . . . . . . . . . . . . . . . . . . .70<br />
Backing Up All Settings . . . . . . . . . . . . . . . . . . . . . . . . . . . . . . . . . . . . . . . . .70<br />
Backing Up to a USB Flash Drive . . . . . . . . . . . . . . . . . . . . . . . . . .70<br />
Restoring Backed-up Settings from a USB Flash Drive . . . . . .70<br />
Backing Up USB Flash Drive Data to a Computer . . . . . . . . . . .71<br />
Restoring Backed-up Data from a Computer to a USB<br />
Flash Drive . . . . . . . . . . . . . . . . . . . . . . . . . . . . . . . . . . . . . . . . . . . . . . .71<br />
Exchanging Registration Sets . . . . . . . . . . . . . . . . . . . . . . . . . . . . . . . . . . .71<br />
Exporting/Importing Sound Data . . . . . . . . . . . . . . . . . . . . . . . . . . . . . . .72<br />
Exporting Sound Data . . . . . . . . . . . . . . . . . . . . . . . . . . . . . . . . . . . .72<br />
Importing Sound Data . . . . . . . . . . . . . . . . . . . . . . . . . . . . . . . . . . . .72<br />
Viewing Sound Data You’ve Marked . . . . . . . . . . . . . . . . . . . . . . .73<br />
Marking Multiple Items of Data . . . . . . . . . . . . . . . . . . . . . . . . . . .73<br />
Deleting an Exported File . . . . . . . . . . . . . . . . . . . . . . . . . . . . . . . . .73<br />
Renaming an Exported File . . . . . . . . . . . . . . . . . . . . . . . . . . . . . . .73<br />
Moving a Registration . . . . . . . . . . . . . . . . . . . . . . . . . . . . . . . . . . . . . . . . . .73<br />
Exchanging Registrations . . . . . . . . . . . . . . . . . . . . . . . . . . . . . . . . . . . . . . .74<br />
Contents<br />
The <strong>JUPITER</strong>-<strong>50</strong>’s System Settings . . . . . . . . . . . . . . . . . . . . . . . . . . . . . . . .75<br />
Making System Settings . . . . . . . . . . . . . . . . . . . . . . . . . . . . . . . . . . . . . . . .75<br />
Saving the System Settings . . . . . . . . . . . . . . . . . . . . . . . . . . . . . . . . . . . . .75<br />
System Parameters . . . . . . . . . . . . . . . . . . . . . . . . . . . . . . . . . . . . . . . . . . . . .75<br />
SETUP . . . . . . . . . . . . . . . . . . . . . . . . . . . . . . . . . . . . . . . . . . . . . . . . . . .75<br />
LIVE SET/TONE BUTTONS . . . . . . . . . . . . . . . . . . . . . . . . . . . . . . . . .78<br />
INFORMATION . . . . . . . . . . . . . . . . . . . . . . . . . . . . . . . . . . . . . . . . . . .78<br />
Restoring the Factory Settings (Factory Reset) . . . . . . . . . . . . . . . . . . .79<br />
Making the Power Automatically Turn Off After a Time (Auto Off) 79<br />
Connecting Other Equipment 80<br />
Connecting to Your Computer via USB . . . . . . . . . . . . . . . . . . . . . . . . . . .80<br />
Connecting the <strong>JUPITER</strong>-<strong>50</strong> to Your Computer . . . . . . . . . . . . . . . . . . .80<br />
USB Driver . . . . . . . . . . . . . . . . . . . . . . . . . . . . . . . . . . . . . . . . . . . . . . . . . . . . .80<br />
Connecting an External MIDI Device . . . . . . . . . . . . . . . . . . . . . . . . . . . . .81<br />
About MIDI . . . . . . . . . . . . . . . . . . . . . . . . . . . . . . . . . . . . . . . . . . . . . . . . . . . .81<br />
About MIDI Connectors . . . . . . . . . . . . . . . . . . . . . . . . . . . . . . . . . . .81<br />
Using the <strong>JUPITER</strong>-<strong>50</strong> as a Master Keyboard (External Part<br />
Settings) . . . . . . . . . . . . . . . . . . . . . . . . . . . . . . . . . . . . . . . . . . . . . . . . . . . . . . .81<br />
Enabling the External Part Settings . . . . . . . . . . . . . . . . . . . . . . .81<br />
Specifying the Transmit Channel . . . . . . . . . . . . . . . . . . . . . . . . . .82<br />
Specifying the Sound for Each Channel . . . . . . . . . . . . . . . . . . .82<br />
Detailed Settings for External Parts . . . . . . . . . . . . . . . . . . . . . . .82<br />
Playing the <strong>JUPITER</strong>-<strong>50</strong> from an External MIDI Device . . . . . . . . . . . .83<br />
Setting the Receive Channel . . . . . . . . . . . . . . . . . . . . . . . . . . . . . .83<br />
Setting the Program Change Receive Switch . . . . . . . . . . . . . .83<br />
Synchronizing with an External MIDI Device . . . . . . . . . . . . . . . . . . . . .84<br />
Controlling Visuals . . . . . . . . . . . . . . . . . . . . . . . . . . . . . . . . . . . . . . . . . . . . . .85<br />
What is Visual Control? . . . . . . . . . . . . . . . . . . . . . . . . . . . . . . . . . . . . . . . . .85<br />
Turning Visual Control On/Off. . . . . . . . . . . . . . . . . . . . . . . . . . . . . . . . . . .85<br />
Visual Control Settings . . . . . . . . . . . . . . . . . . . . . . . . . . . . . . . . . . . . . . . . .86<br />
Controlling SONAR (ACT) . . . . . . . . . . . . . . . . . . . . . . . . . . . . . . . . . . . . . . . .87<br />
Turning ACT On/Off . . . . . . . . . . . . . . . . . . . . . . . . . . . . . . . . . . . . . . . . . . . .87<br />
Making Settings for ACT . . . . . . . . . . . . . . . . . . . . . . . . . . . . . . . . . . . . . . . .87<br />
Appendix 88<br />
Parameter List . . . . . . . . . . . . . . . . . . . . . . . . . . . . . . . . . . . . . . . . . . . . . . . . . .88<br />
LIVE SET TONE MODIFY Screen (SuperNATURAL Acoustic Tones) .88<br />
Control Change Assign List . . . . . . . . . . . . . . . . . . . . . . . . . . . . . . . . . . . . .92<br />
Performance Variations for SuperNATURAL Acoustic Tones . . . . . . .98<br />
Error Message List . . . . . . . . . . . . . . . . . . . . . . . . . . . . . . . . . . . . . . . . . . . . . .99<br />
Troubleshooting . . . . . . . . . . . . . . . . . . . . . . . . . . . . . . . . . . . . . . . . . . . . . . 100<br />
Specifications . . . . . . . . . . . . . . . . . . . . . . . . . . . . . . . . . . . . . . . . . . . . . . . . . 102<br />
MIDI Implementation Chart . . . . . . . . . . . . . . . . . . . . . . . . . . . . . . . . . . . 103<br />
Index . . . . . . . . . . . . . . . . . . . . . . . . . . . . . . . . . . . . . . . . . . . . . . . . . . . . . . . . . 104<br />
7<br />
Quick Guide<br />
Introduction Playing Sounds Editing Sounds<br />
Other Convenient<br />
Functions<br />
Connecting Other<br />
Equipment<br />
Appendix
01 How the <strong>JUPITER</strong>-<strong>50</strong>’s Sound Generator is Structured<br />
8<br />
The <strong>JUPITER</strong>-<strong>50</strong> is <strong>Roland</strong>’s new synthesizer that inherits the powerful SuperNATURAL sounds and unrivaled real-time<br />
performance capabilities of the <strong>JUPITER</strong>-80.<br />
It comes with a generous collection of the latest SuperNATURAL sounds created using Behavior Modeling Technology, making<br />
possible expression that is richer and more natural than ever before.<br />
This section explains the sounds of the <strong>JUPITER</strong>-<strong>50</strong>.<br />
SuperNATURAL<br />
These are proprietary <strong>Roland</strong> sounds created using Behavior Modeling Technology, which<br />
enables natural and rich expression that was difficult to achieve on earlier sound generators.<br />
Behavior Modeling Technology<br />
Not only physical modeling of the instruments, <strong>Roland</strong> takes it a step further by modeling the instrument’s distinctive<br />
behavior that responds to how the performer plays, resulting in true-to-life, expressive sounds in realtime.<br />
SuperNATURAL Acoustic Tones<br />
These are SuperNATURAL acoustic tones that can reproduce not only the sound of<br />
Crescendo<br />
an acoustic instrument, but also the expressiveness of the techniques used when<br />
playing it.<br />
A dedicated sound engine optimized for each tone is used to automatically analyze<br />
the phrase played by the musician, and take account of the differences between<br />
Glissando technique<br />
chordal and melodic playing.<br />
Vibrato<br />
SuperNATURAL acoustic tones represent a completely new sound generator<br />
technology, which uses Behavior Modeling Technology to model even the distinctive<br />
response that is specific to each musical instrument.<br />
For example, the SuperNATURAL acoustic tone “violin” lets you obtain—via conventional keyboard playing—a solo violin sound<br />
that’s imbued with the same realistic expression that you might enjoy if an actual violinist were playing.<br />
In addition, you can use pitch bend, modulation lever, and assignable buttons ([S1], [S2]) to freely simulate the richly expressive<br />
performance that is characteristic of acoustic instruments.<br />
SuperNATURAL Synth Tones<br />
These are SuperNATURAL synth tones, which realistically reproduce sounds ranging<br />
from vintage analog synths to digital synths. Each synth tone consists of three sets of<br />
OSC, FILTER, AMP, and LFO, meaning that powerful synth sounds can be created using<br />
just a single synth tone.<br />
In addition, the behaviors of the oscillators and filters of analog synths have been<br />
analyzed, allowing their distinctive sounds to be reproduced. The <strong>JUPITER</strong>-<strong>50</strong> contains<br />
more than 1,<strong>50</strong>0 preloaded sounds, which cover every type of synth sound from analog<br />
to digital.<br />
Layer Four SuperNATURAL Tones in a Live Set<br />
The <strong>JUPITER</strong>-<strong>50</strong> lets you layer up to four SuperNATURAL tones to create a sound,<br />
and save this as a “Live Set.”<br />
You can use a Live Set to perform truly impressive and expressive sounds.<br />
To play a Live Set, you need to assign it to the Upper Part.<br />
Live set<br />
Layer 1<br />
Layer 2<br />
Layer 3<br />
Layer 4<br />
SuperNATURAL tone<br />
SuperNATURAL tone<br />
SuperNATURAL tone<br />
SuperNATURAL tone
SuperNATURAL<br />
Acoustic Tone<br />
Example:<br />
Piano sounds<br />
These are the ultimate piano<br />
sounds, with a natural decay and no<br />
gradations in their tonal changes.<br />
You can adjust parameters such as<br />
Stereo Width and Hammer Noise.<br />
Example:<br />
Trumpet sounds<br />
These reproduce the dynamic tonal<br />
changes that are characteristic of<br />
brass instruments. You can express<br />
the transitions that take place in the<br />
harmonics when the pitch changes<br />
dramatically, as well as half-valve<br />
sounds when playing a trill.<br />
Performance information<br />
• The phrase you play<br />
• The speed at which you play<br />
• Chordal playing<br />
• Legato<br />
• Staccato<br />
Example:<br />
Organ sounds<br />
These inherit the combo organ<br />
sounds of instruments such as the<br />
VK series or the V-Combo.<br />
You can use harmonic bars to create<br />
your own sound.<br />
Example:<br />
Sitar sounds<br />
You can use legato playing to express<br />
the distinctive ornamentation notes,<br />
as well as the various sound effects<br />
(such as the chikari strings) that are<br />
heard below note number 47 (B2).<br />
The [S1] button plays a tambura<br />
phrase.<br />
Behavior Modeling Technology<br />
Controller information<br />
SuperNATURAL<br />
Synth Tone<br />
• Pitch bend lever<br />
• Modulation lever<br />
• D-BEAM controller<br />
• Assignable buttons (S1, S2)<br />
• Control pedals (1, 2)<br />
Synthesizer sounds<br />
Based on analysis of how the<br />
oscillators and filters of analog<br />
synthesizers behave, the<br />
SuperNATURAL synth tones<br />
provide realistic and expressive<br />
reproductions of every type of<br />
sound, ranging from vintage analog<br />
synthesizers to digital synthesizers.<br />
9<br />
Quick Guide<br />
Introduction Playing Sounds Editing Sounds<br />
Other Convenient<br />
Functions<br />
Connecting Other<br />
Equipment<br />
Appendix
02 About the <strong>JUPITER</strong>-<strong>50</strong>’s Sounds<br />
10<br />
The Structure of the <strong>JUPITER</strong>-<strong>50</strong>’s Sound Generator<br />
The <strong>JUPITER</strong>-<strong>50</strong>’s sound generator consists of three parts, and settings for these three parts are collectively managed as a<br />
“registration.”<br />
What is a Live Set?<br />
Registration<br />
Solo part<br />
Upper part<br />
SuperNATURAL tone<br />
Live set<br />
SuperNATURAL tone<br />
SuperNATURAL tone<br />
SuperNATURAL tone<br />
SuperNATURAL tone<br />
Percussion/Lower part<br />
SuperNATURAL tone<br />
The smallest unit of sound in the <strong>JUPITER</strong>-<strong>50</strong>’s sound generator is called a “Tone”; this consists of a SuperNATURAL sound.<br />
A Live Set consists of up to four of these tones layered, producing the richly expressive sounds that you’ll mainly be playing<br />
on the <strong>JUPITER</strong>-<strong>50</strong>.<br />
You can freely create and save Live Sets, and select them as the sound for the Upper Part.<br />
What is a Registration?<br />
In addition to the Upper Part, the <strong>JUPITER</strong>-<strong>50</strong> lets you assign SuperNATURAL tones to a Percussion/Lower Part and to a Solo<br />
Part, allowing you to use sounds for a total of three parts.<br />
The combination of sounds assigned to each part, along with the <strong>JUPITER</strong>-<strong>50</strong>’s settings, are collectively called a “registration.”<br />
By calling up a registration, you can instantly switch sounds as appropriate for the song you’re playing, or switch setups for<br />
live performance or studio recording.<br />
Selecting Favorite Sounds (Live Sets)<br />
When you press the [MANUAL] button, only the Upper Part will be on, and a piano<br />
sound will be selected (with the factory settings).<br />
At this time if you select a tone for the Solo Part or the Percussion/Lower Part, the<br />
selected part will automatically turn on, allowing you to layer the sounds.<br />
MEMO<br />
You can also use the [MANUAL] button to easily put the <strong>JUPITER</strong>-<strong>50</strong> in a state in which only the Upper Part will sound. This button is<br />
convenient when you want to check the sound of a specific Live Set, or when you want to create a registration from scratch.<br />
Now, try using the [MANUAL] button to audition the sounds of Live Sets.<br />
MFX 1<br />
MFX 2<br />
MFX 3<br />
MFX 4<br />
Reverb
Playing a Violin Sound<br />
Selecting a Violin Sound Live Set<br />
1. Press the [MANUAL] button .<br />
2. Press the UPPER [STRINGS] button .<br />
3. Press the UPPER [STRINGS] button, once again .<br />
A list of the Live Sets assigned to Strings will be displayed.<br />
Switching to a Different Performance Technique<br />
1. While playing the keyboard, press the [S1] button .<br />
Now you can play sforzando.<br />
2. While playing the keyboard, press the [S2] button .<br />
Now you can play pizzicato.<br />
Playing a Guitar Sound<br />
Selecting a Guitar Sound Live Set<br />
4. Turn the value dial to select “1782<br />
Violin 3,” and press the [ENTER] button .<br />
This selects the violin sound you’ll be playing.<br />
1. Press the [MANUAL] button .<br />
2. Access the Live Set list for “GUITAR .”<br />
3. Turn the value dial to select “2000 FlamencoGuitar1,” and press the [ENTER] button .<br />
Strumming<br />
1. Play consecutive chords on the keyboard .<br />
You’ll be playing alternate up and down strokes.<br />
MEMO<br />
It is effective to use the Hold pedal.<br />
Changing the Dynamics of Your Playing<br />
1. While playing the keyboard, move the pitch bend/<br />
modulation lever away from yourself .<br />
This allows you to smoothly control dynamics and vibrato.<br />
Switching to a Different Performance Technique<br />
1. While playing the keyboard, press the [S1] button .<br />
This allows you to play using the rasgueado technique.<br />
2. While playing the keyboard, press the [S2] button .<br />
This allows you to play harmonics.<br />
When you play legato, the speed at which you switch to the next key will determine the change between hammering and glissando.<br />
11<br />
Quick Guide<br />
Introduction Playing Sounds Editing Sounds<br />
Other Convenient<br />
Functions<br />
Connecting Other<br />
Equipment<br />
Appendix
02 About the <strong>JUPITER</strong>-<strong>50</strong>’s Sounds<br />
12<br />
Playing a Synth Sound<br />
Selecting a Synth Sound Live Set<br />
1. Press the [MANUAL] button .<br />
2. Access the Live Set list for “SYNTH BRASS .”<br />
3. Turn the value dial to select “0004 Jupiter Brass 4,” and press the [ENTER] button .<br />
Using a Filter While You Play<br />
1. While playing the keyboard, turn the [CUTOFF/C1] knob .<br />
The low-pass filter will smoothly modify the sound.<br />
2. While playing the keyboard, turn the [RESONANCE/C2]<br />
knob .<br />
The resonance will change, modifying the distinctive<br />
character of the sound.<br />
Playing an Organ Sound<br />
Selecting an Organ Sound Live Set<br />
Switching the Rotary Sound<br />
1. While playing the keyboard, press the ROTARY<br />
SOUND [SLOW/FAST] button .<br />
Each time you press the button, the rotational speed of the<br />
rotary speaker will speed up or slow down.<br />
Playing Arpeggios<br />
1. Press the [MANUAL] button .<br />
2. Access the Live Set list for “COMBO ORGAN .”<br />
3. Turn the value dial to select “1628 ToneWheel Org1,” and press the [ENTER] button .<br />
page 53<br />
page 47<br />
1. Press the ARPEGGIO [UPPER] button .<br />
An arpeggio will begin sounding when you play a chord on<br />
the keyboard.<br />
Using the Harmonic Bars to Change the Sound<br />
1. While holding down the [SHIFT] button, press the<br />
UPPER [PIANO] button .<br />
The TONE MODIFY screen (p. 60) will appear.<br />
2. Use the cursor buttons and the value dial to edit<br />
the values .
03 Using Controllers to Modify the Sound<br />
Moving Your Hand to Modify the Pitch or Volume<br />
1. Press the D-BEAM [PITCH],<br />
[VOLUME], or [ASSIGNABLE]<br />
button .<br />
2. While playing the keyboard,<br />
position your hand above the<br />
D-BEAM controller .<br />
The effect corresponding to the<br />
button you pressed will be applied.<br />
Using the [S1] [S2] Buttons to Modify the Sound<br />
1. While playing the<br />
keyboard, press the [S1]<br />
[S2] button .<br />
The [S1] [S2] button<br />
assignments are specified by<br />
the Registration Control parameters S1/S2 (p. 54).<br />
Changing the Pitch<br />
1. Move the pitch bend/<br />
modulation lever to the left<br />
or right .<br />
While playing the keyboard,<br />
move the lever toward the left<br />
to lower the pitch, or toward the<br />
right to raise the pitch.<br />
Sustaining the Notes (HOLD jack)<br />
1. While playing the keyboard, step<br />
on the pedal switch .<br />
You can hold (sustain) the notes by<br />
stepping on the pedal switch.<br />
page 28<br />
Button Explanation<br />
[PITCH] button<br />
[VOLUME] button<br />
[ASSIGNABLE] button<br />
Using the [C1] [C2] Knobs to Modify the Sound<br />
1. While playing the<br />
keyboard, turn the [C1]<br />
[C2] knobs .<br />
The [C1] [C2] knob<br />
assignments are specified by the Registration Control<br />
parameters KNOB (p. 54).<br />
Adding Vibrato or Dynamics<br />
1. Move the pitch bend/<br />
modulation lever away from<br />
yourself .<br />
Moving the lever away from<br />
yourself will apply vibrato. This is<br />
called “modulation.”<br />
For some sounds, the modulation<br />
lever will produce a dynamics effect.<br />
Adding Expression to Your<br />
Performance (CTRL 1, CTRL 2 jacks)<br />
1. While playing the keyboard, raise or<br />
lower the expression pedal .<br />
You can make your performance more<br />
expressive by varying the volume.<br />
page 51<br />
The pitch will change as you move your<br />
hand above the D-BEAM controller.<br />
The volume will change, allowing you to<br />
add expression to your performance.<br />
The function assigned to the D-BEAM<br />
controller will be controlled (p. 54).<br />
page 28<br />
13<br />
Quick Guide<br />
Introduction Playing Sounds Editing Sounds<br />
Other Convenient<br />
Functions<br />
Connecting Other<br />
Equipment<br />
Appendix
04 Registrations are Convenient for Live Performance<br />
14<br />
How a Registration is Structured<br />
Your favorite sounds can be saved as a registration.<br />
In addition to the Upper Part, the <strong>JUPITER</strong>-<strong>50</strong> has a Solo Part and a Percussion/Lower Part. You can assign one SuperNATURAL<br />
tone to each of these three parts, and save these settings together as a registration.<br />
In addition to the sound data, a registration also contains settings for the controllers and arpeggiator, making it very<br />
convenient.<br />
Selecting a Registration<br />
A registration contains the settings of these areas<br />
The <strong>JUPITER</strong>-<strong>50</strong> already contains numerous registrations.<br />
By selecting and playing these registrations, you can experience the enormous potential of the <strong>JUPITER</strong>-<strong>50</strong>’s synthesizer<br />
sounds.<br />
1. Press a registration button .<br />
The sounds and settings of the Upper Part, Percussion/Lower Part, and Solo Part will be<br />
switched.<br />
Selecting a Registration of a Different Bank<br />
1. Press the [BANK] button, and then press a registration button [1]–[4] .<br />
The bank will be switched.<br />
2. Press a registration button .<br />
The registration will change.
Creating a Registration<br />
1. Use the sound select buttons of each part to select the desired sound .<br />
Selecting a Sound for the Upper Part<br />
1. Press a Live Set button .<br />
A Live Set will be selected.<br />
Upper part Solo part<br />
Percussion/Lower part<br />
2. Specify each part’s on/off status and volume setting .<br />
3. If you want to make more detailed settings, press the [MENU] button [F1] (EDIT) button [F1] (REG) button .<br />
The REGISTRATION screen will appear.<br />
Volume of the registration<br />
Main settings for the<br />
Percussion/Lower Part<br />
2. Once again press the same<br />
Live Set button .<br />
A list of Live Sets will be<br />
displayed.<br />
3. Turn the value dial to select<br />
a variation, and press the<br />
[ENTER] button .<br />
This allows you to select other<br />
sounds of the selected category.<br />
Main settings for the<br />
Upper Part<br />
Main settings for<br />
the Solo Part<br />
Live Set category<br />
Access the each setting<br />
screen<br />
4. Move the cursor to the item that you want to edit, and use the value dial to edit it .<br />
For more about registration editing, refer to “Editing a Registration” (p. 54).<br />
Live Set name<br />
Use the sliders to adjust<br />
the volume of each Part.<br />
Turn each Part on/off.<br />
15<br />
Quick Guide<br />
Introduction Playing Sounds Editing Sounds<br />
Other Convenient<br />
Functions<br />
Connecting Other<br />
Equipment<br />
Appendix
04 Registrations are Convenient for Live Performance<br />
16<br />
Selecting a Sound for the Percussion/Lower Part<br />
1. In the Top screen (p . 35), press the [LOWER TONE] button so it’s lit .<br />
The Percussion/Lower Part will turn on.<br />
The cursor will move to the sound number for the Percussion/Lower Part.<br />
2. Press the [ENTER] button .<br />
A sound list will appear.<br />
3. Press the [F1] (SN .AC) or [F2] (SN .SYN) button, to SuperNATURAL Acoustic or Synth .<br />
4. Use the [ ] [ ] (cursor) buttons to select a category, and use the [ ] [ ] (cursor) buttons to select a tone .<br />
5. Press the [ENTER] button .<br />
The tone for the Percussion/Lower Part will be selected.<br />
Selecting a Sound for the Solo Part<br />
1. In the Top screen (p . 35), press the SOLO button .<br />
The tone for the Solo Part will be selected.<br />
If the Solo Part was off when you selected a tone, the Solo Part will automatically be switched on.<br />
2. Press the same solo button once again .<br />
The solo tone list will appear.<br />
3. Turn the value dial to select a tone, and press the [ENTER] button .<br />
This allows you to select other sounds of the selected category.<br />
Saving a Registration<br />
1. In the Top screen (p . 35) or the REGISTRATION screen (p . 36), press the [WRITE] button .<br />
Registration number<br />
If the Live Set has also been edited, it can<br />
be saved at the same time (p. 55).<br />
2. Move the cursor to the position shown in the illustration to select the save destination, and press the [F6] (WRITE) button .<br />
3. Press the [F5] (OK) button .<br />
The screen will indicate “Completed!”<br />
The Registration has been saved.
05 Example of Creating a Registration<br />
Layering Piano and Strings Sounds<br />
1. Press the [MANUAL] button .<br />
2. Select the desired piano sound for the Upper Part .<br />
3. Press the [LOWER TONE] button and select the desired strings sound .<br />
The piano and strings will be layered.<br />
4. Use the [PART BALANCE] sliders to adjust the volume .<br />
5. Save the settings as a registration .<br />
MEMO<br />
The Lower Tone can also be selected by holding down the [LOWER TONE] button and pressing one of<br />
the Upper Part sound buttons.<br />
Splitting Piano and Bass Sounds<br />
1. Press the [MANUAL] button .<br />
2. Select the desired piano sound for the Upper Part .<br />
3. Press the [LOWER TONE] button and select the desired bass sound .<br />
The piano and bass will be layered.<br />
4. Press the [SPLIT] button .<br />
The sounds will be split.<br />
MEMO<br />
You can change the split point by holding down the [SPLIT] button and pressing the desired note<br />
on the keyboard.<br />
5. Use the [PART BALANCE] sliders to adjust the volume .<br />
6. Save the settings as a registration .<br />
Using the Solo Part Effectively<br />
1. Press the [MANUAL] button .<br />
2. Press the [PAD/CHOIR] button and select the desired pad sound for the Upper<br />
Part .<br />
3. Press the [FLUTE/OBOE] button and select a flute sound for the Solo Part .<br />
The flute sound will be sounded only for the highest note you play on the keyboard.<br />
This allows effective performances with a solo part that would be difficult to play conventionally on a<br />
keyboard.<br />
4. Use the [PART BALANCE] sliders to adjust the volume .<br />
5. Save the settings as a registration .<br />
MEMO<br />
You can use the Solo part to sound the highest (or lowest) note you’re playing.<br />
In the REGISTRATION SOLO EDIT screen (p. 54), access the MISC tab and set the Mono/Poly parameter<br />
to SOLO1 (highest note) or SOLO2 (lowest note).<br />
17<br />
Quick Guide<br />
Introduction Playing Sounds Editing Sounds<br />
Other Convenient<br />
Functions<br />
Connecting Other<br />
Equipment<br />
Appendix
18<br />
Main Features<br />
The <strong>Roland</strong> <strong>JUPITER</strong>-<strong>50</strong> synthesizer inherits the powerful SuperNATURAL sounds and superb realtime capabilities of the <strong>JUPITER</strong>-80.<br />
It comes with a generous collection of the latest SuperNATURAL sounds created using Behavior Modeling Technology, allowing richly natural<br />
expression as never before.<br />
What are SuperNATURAL Tones?<br />
Taking advantage of Behavior Modeling Technology, SuperNATURAL is <strong>Roland</strong>’s exclusive sound set<br />
that achieves a new level of realism and expression that were difficult to realize with previous sound<br />
generators.<br />
Behavior Modeling Technology<br />
Not only physical modeling of the instruments, <strong>Roland</strong> takes it a step further by modeling the instrument’s distinctive behavior that responds<br />
to how the performer plays, resulting in true-to-life, expressive sounds in realtime.<br />
Powerful Live Sets with SuperNATURAL x 4<br />
The <strong>JUPITER</strong>-<strong>50</strong> can handle up to four SuperNATURAL tones layered as a “Live Set,” letting you<br />
perform with awesome and richly expressive sounds.<br />
Three-part Registrations for Extensive Performance Potential<br />
In addition to the Upper Part that are the core of your performance, the <strong>JUPITER</strong>-<strong>50</strong> provides a<br />
Solo Part that lets you play a melody or solo on the top note, and a Percussion/Lower Part that<br />
spices up your performance.<br />
All of these together can be instantly called up by pressing a Registration button.<br />
Tone Blender<br />
A Live Set features the new Tone Blender function, which lets you simultaneously control multiple<br />
parameters such as the level, pan, cutoff, and MFX send for each of the four tones.<br />
By using a knob or the D-BEAM to simultaneously control multiple parameters of four tones in the<br />
Live Set, you can easily generate powerful sonic transformations that were impossible on previous<br />
synthesizers (p. 60).<br />
Controllers Optimized for Live Performance<br />
A color-coded panel layout ensure that the status of the sound is instantly comprehensible.<br />
Dedicated buttons are provided for instant access to the functions you need, guaranteeing<br />
intuitive operation during your live performances. In addition, the <strong>JUPITER</strong>-<strong>50</strong> provides<br />
a modulation lever for expressive dynamics, [S1] and [S2] buttons for switching between<br />
performance techniques, and a D-BEAM controller for additional performance possibilities—all<br />
focused on realtime playability.<br />
Live Set<br />
Layer 1<br />
Layer 2<br />
Layer 3<br />
Layer 4<br />
Registration (Part)<br />
Solo<br />
Upper<br />
Percussion/<br />
Lower<br />
SuperNATURAL Tone<br />
SuperNATURAL Tone<br />
SuperNATURAL Tone<br />
SuperNATURAL Tone<br />
SuperNATURAL Tone x 1<br />
SuperNATURAL Tone x 4<br />
SuperNATURAL Tone x 1<br />
or<br />
Tone (Perc) x 1
Sturdy Body and a 76-note Weighted Keyboard<br />
The keyboard is the most important factor in your performance, and the <strong>JUPITER</strong>-<strong>50</strong> provides a<br />
weighted 76-note keyboard that gives you superb playing feel for confident performances on<br />
stage.<br />
Coupled with the sturdy aluminum-paneled body, this is a keyboard that expressively responds to<br />
every nuance of your playing.<br />
USB Audio Player/Recorder<br />
USB MIDI/AUDIO Support<br />
The built-in Audio Recorder provides a great way to capture your phrases and inspirations on a<br />
USB flash drive as audio files (WAV). Of course, audio files (WAV, AIFF, MP3) can also be played back<br />
from your USB flash drive, allowing you to use them as backing tracks for your performance.<br />
The <strong>JUPITER</strong>-<strong>50</strong> also provides a USB MIDI/AUDIO connection to your computer. Even when you’re<br />
in your production studio, you’ll enjoy the same familiar setup as when performing live.<br />
Main Features<br />
19<br />
Quick Guide<br />
Introduction Playing Sounds Editing Sounds<br />
Other Convenient<br />
Functions<br />
Connecting Other<br />
Equipment<br />
Appendix
20<br />
Getting Acquainted with the <strong>JUPITER</strong>-<strong>50</strong><br />
How the Sound Generator is Organized<br />
The sound generator is organized into units of sounds called “Registrations,” “Live Sets,” and “tones.”<br />
The <strong>JUPITER</strong>-<strong>50</strong>’s sound generator<br />
Registration<br />
Solo Part<br />
Tone<br />
Upper Part<br />
Live Set<br />
Tone 1<br />
Tone 2<br />
Tone 3<br />
Tone 4<br />
Percussion/Lower Part<br />
Tone<br />
What is a Tone?<br />
MFX 1<br />
MFX 2<br />
MFX 3<br />
MFX 4<br />
Reverb<br />
Harmony<br />
Intelligence<br />
Only when the LOWER TONE<br />
is selected<br />
Audio data flow Performance data flow<br />
Arpeggio<br />
Although a Tone is the smallest unit of sound handled by the <strong>JUPITER</strong>-<strong>50</strong>, it boasts an extravagantly powerful structure based on SuperNATURAL<br />
sounds.<br />
“SuperNATURAL Acoustic Tones” not only reproduce the sounds of an acoustic instrument, but also automatically analyze—in a way that’s<br />
appropriate for each different tone—the differences between the phrases, chords, and melodies played by the performer, and deliver the<br />
responsiveness that is characteristic of that specific acoustic instrument. Starting with the SuperNATURAL piano, each of these sounds brings you the<br />
highest possible level of expressive power that has been developed for the sound engines of earlier <strong>Roland</strong> products.<br />
Each “SuperNATURAL Synth Tone” incorporates three OSC, FILTER, AMP, and LFO sets; this means that powerful synth sounds can be created using just<br />
a single tone.<br />
The <strong>JUPITER</strong>-<strong>50</strong> contains more than 1,<strong>50</strong>0 preloaded sounds, covering the full range of synth sounds from analog to digital.<br />
What is a Live Set?<br />
In the <strong>JUPITER</strong>-<strong>50</strong>’s sound engine, the smallest unit of sound is the “tone”; each tone consists of a SuperNATURAL sound.<br />
Up to four tones can be layered to create impressive and richly expressive sounds.<br />
Such a combination can be saved as a “Live Set.”<br />
What is a Registration?<br />
The combination of sounds assigned to the Upper Part, Solo Part, and Percussion/Lower Part, together with settings for the <strong>JUPITER</strong>-<strong>50</strong> itself, can be<br />
saved as a single “Registration.”<br />
A Registration can be called up instantly, allowing you to switch sounds as appropriate for the song you’re playing, or to instantly get the settings you<br />
need for live performance or studio recording.
Tones<br />
Getting Acquainted with the <strong>JUPITER</strong>-<strong>50</strong><br />
The “tone” is the smallest unit of sound that is managed on the <strong>JUPITER</strong>-<strong>50</strong>.<br />
There are four types of tones, as shown in the table below. These tones are the elements that make up Registrations (p. 23) and Live Sets (p. 22).<br />
Type Explanation<br />
These are acoustic-type SuperNATURAL sounds.<br />
SuperNATURAL Acoustic Tone<br />
Many realistic sounds using Behavior Modeling Technology are provided.<br />
You can also use the LIVE SET TONE MODIFY screen (p. 60) to adjust certain parameters that have been selected<br />
as most appropriate for each sound.<br />
SuperNATURAL Synth Tone<br />
<strong>Manual</strong> Percussion<br />
Drums/SFX<br />
These tones can be assigned to a Live Set (Upper Part, Lower Part), to the Solo Part, or to the Percussion Part.<br />
These are synthesizer-type SuperNATURAL sounds.<br />
These tones can be assigned to the Live Set (Upper Part), Solo Part, and Percussion/Lower Part.<br />
You can also use the LIVE SET TONE MODIFY screen (p. 60) to adjust parameters.<br />
These produce the sounds of percussion instruments or sound effects.<br />
A wide variety of percussion instruments and sound effects will be heard depending on the key (note number)<br />
you play.<br />
These tones can be assigned only to the Percussion/Lower Part.<br />
MEMO<br />
The results of your editing a SuperNATURAL Acoustic Tone/Synth Tone, <strong>Manual</strong> Percussion, and Drums/SFX can be saved as a Registration or as a<br />
Live Set.<br />
21<br />
Quick Guide<br />
Introduction Playing Sounds Editing Sounds<br />
Other Convenient<br />
Functions<br />
Connecting Other<br />
Equipment<br />
Appendix
Getting Acquainted with the <strong>JUPITER</strong>-<strong>50</strong><br />
Live Sets<br />
22<br />
A Live Set consists of the Tones assigned to the four layers, settings<br />
for four MFX units, and settings for one reverb unit.<br />
Live Set<br />
Layer 1<br />
Layer 2<br />
Layer 3<br />
Layer 4<br />
Tone 1<br />
Tone 2<br />
Tone 3<br />
Tone 4<br />
MFX 1<br />
MFX 2<br />
MFX 3<br />
MFX 4<br />
Reverb<br />
You can select a Live Set as the sound for the Upper Part.<br />
You can save 2,560 Live Sets you’ve edited, then call them up when<br />
desired.<br />
0001–2560<br />
Live Set<br />
MEMO<br />
Edits you make to the parameters of a Live Set are relative<br />
adjustments that increase or decrease the values of the Tones;<br />
they do not directly modify the Tones themselves.<br />
This means that even if the same tone is used in other Live Sets,<br />
the other Live Sets will not be affected by your editing.<br />
Parts<br />
The <strong>JUPITER</strong>-<strong>50</strong> has three parts; Solo, Upper,Percussion/Lower. You<br />
can assign a Tone or Live Set to each Part and play it.<br />
Percussion/Lower<br />
Upper<br />
Solo<br />
You can play all Parts from the same keys, or use the Split function<br />
(p. 44) to divide the keyboard and assign the sounds of different Parts<br />
to their own zones.<br />
Not split<br />
Split<br />
The Registration screen shows the name of each Part’s<br />
sound.<br />
Percussion/Lower<br />
Solo<br />
Upper<br />
Percussion/Lower<br />
Upper<br />
Solo<br />
For details on split, refer to “Split Performance” (p. 44).
Registrations<br />
Getting Acquainted with the <strong>JUPITER</strong>-<strong>50</strong><br />
A Registration consists of these three Parts: Solo, Upper, and Percussion/Lower.<br />
Stored within a Registration are the settings for the sound selected for each Part, as well as settings for the Solo Part and Percussion/Lower Part.<br />
By switching Registrations, you can change all of these settings at once (except for the system parameters).<br />
Registration<br />
Solo Part<br />
Upper Part<br />
Tone<br />
Live Set<br />
Percussion/Lower Part<br />
Tone<br />
How Registrations are Organized<br />
Reverb<br />
Audio data flow Audio data flow<br />
Harmony<br />
Intelligence<br />
Only when the LOWER<br />
TONE is selected<br />
Registrations are managed in “banks” of four. In turn, these banks are managed as “sets” of four banks.<br />
Since there are eight sets, 4 Registrations x 4 banks x 8 sets makes a total of 128 Registrations.<br />
Set 1<br />
Bank<br />
1<br />
Bank<br />
2<br />
Set 8<br />
Registration<br />
Registration<br />
Bank<br />
3<br />
Bank<br />
4<br />
Registration<br />
Registration<br />
Arpeggio<br />
23<br />
Quick Guide<br />
Introduction Playing Sounds Editing Sounds<br />
Other Convenient<br />
Functions<br />
Connecting Other<br />
Equipment<br />
Appendix
Getting Acquainted with the <strong>JUPITER</strong>-<strong>50</strong><br />
About Memory<br />
24<br />
The area in which sounds and other settings are stored is called “memory.”<br />
Memory is divided into three areas: temporary memory (the temporary area), rewritable memory, and non-rewritable memory.<br />
<strong>JUPITER</strong>-<strong>50</strong><br />
USB Flash Drive<br />
Non-rewritable Memory<br />
ROLAND Folder<br />
SuperNATURAL<br />
Acoustic Tones<br />
<strong>Manual</strong> Percussions<br />
Drums/SFX<br />
Preset Arpeggio Styles<br />
Temporary Area<br />
Select Select Write<br />
Registrations (256)<br />
Live Sets (2,560)<br />
SuperNATURAL<br />
Synth Tones (2,048) *1<br />
Preset Arpeggio Styles (16)<br />
Temporary Memory (the Temporary<br />
Area)<br />
Rewritable Memory<br />
Registrations (256)<br />
Live Sets (2,560)<br />
SuperNATURAL<br />
Synth Tones (2,048) *1<br />
User Arpeggio Styles (16)<br />
System<br />
Settings<br />
Restore Backup Import Export Import<br />
System<br />
Settings<br />
The data for a sound you select is called into this area.<br />
When you play the keyboard, the sounds you hear are produced<br />
according to the settings in the temporary area. When you edit<br />
sounds, you’re editing the data that’s in the temporary area.<br />
Settings in the temporary area are temporary; they will be lost<br />
when you turn off the power or select other settings. If you want<br />
to keep the settings of the temporary area, you must save them to<br />
rewritable memory.<br />
MEMO<br />
When you import a SuperNATURAL synth tone, or import an<br />
SMF (Standard MIDI File) as a user arpeggio style (p. 49), it will<br />
be written directly into rewritable memory without passing<br />
through the temporary area.<br />
Rewritable Memory<br />
This is where you can save Registrations, Live Sets, SuperNATURAL<br />
Synth Tones, user arpeggio styles, and system settings (system<br />
parameters).<br />
SOUND<br />
Folder<br />
Sound data<br />
files<br />
SMF<br />
(Standard MIDI<br />
files)<br />
Non-rewritable Memory<br />
This contains SuperNATURAL Acoustic Tones, <strong>Manual</strong> Percussion,<br />
Drums/SFX, and preset arpeggio style data. This data cannot be<br />
directly rewritten; however, you are free to save the edited results in<br />
a Registration or Live Set.<br />
USB Flash Drive<br />
*1 SuperNATURAL Synth Tones can<br />
only be imported/exported<br />
The data saved in rewritable memory can be backed up to a USB<br />
flash drive (p. 70). A USB flash drive can contain one set of backup<br />
data.<br />
In addition to this, registrations, live sets, tones (SuperNATURAL<br />
Synth Tones only) can be exported to a USB flash drive. You can also<br />
select and load the desired Registrations, Live Sets, or tones from<br />
data that was exported to a USB flash drive.<br />
MEMO<br />
You can also import live sets and tones that you exported from<br />
<strong>JUPITER</strong>-80.
USB Memory Song Player/Recorder<br />
Audio Files that can be Played<br />
MP3<br />
Format MPEG-1 audio layer 3<br />
Sampling Frequency 44.1 kHz<br />
32 k, 40 k, 48 k, 56 k, 64 k, 80 k, 96 k, 112 k, 128 k,<br />
Bit Rate<br />
160 k, 192 k, 224 k, 256 k, 320 kbps / VBR (Variable<br />
Bit Rate)<br />
WAV/AIFF<br />
Sampling Frequency 44.1 kHz, 48 kHz, 96 kHz<br />
Bit 8, 16, 24-bit<br />
MEMO<br />
Use only single-byte alphanumeric characters in file names and<br />
folder names.<br />
Getting Acquainted with the <strong>JUPITER</strong>-<strong>50</strong><br />
The USB Memory Song Player/Recorder plays back audio files (WAV, MP3, AIFF) that you’ve copied from your computer to a USB flash drive (p. 64).<br />
Copy to a USB Flash Drive<br />
MP3/WAV/AIFF<br />
Insert USB Flash Drive<br />
You can also record the <strong>JUPITER</strong>-<strong>50</strong>’s performance and save it on a USB flash drive as a WAV file (p. 68).<br />
NOTE<br />
• When opening and closing the USB memory cover, please take care not to pinch your fingers or toes between the moving part and the main unit.<br />
• Use USB Flash Memory sold by <strong>Roland</strong>. We cannot guarantee operation if other products are used.<br />
Data Saved in USB Flash Drive<br />
Audio Files that will be Saved<br />
WAV<br />
Sampling Frequency 44.1 kHz<br />
Bit Rate 16-bit<br />
A USB flash drive can hold audio files, MIDI files that you want to import as user arpeggio styles, sound data that you want to export, and backup data<br />
of the <strong>JUPITER</strong>-<strong>50</strong>’s internal memory.<br />
USB Flash Drive<br />
ROLAND Folder<br />
SOUND Folder<br />
Audio Files<br />
MIDI Files<br />
:<br />
This folder is created when you back up (p. 70) or export (p. 72) data.<br />
This contains the backup file for the <strong>JUPITER</strong>-<strong>50</strong>’s internal memory. The SOUND folder contains files for<br />
import or export.<br />
WAVE files created by the USB memory song player/recorder and audio files or MIDI files (WAV, MP3, AIFF)<br />
copied from your computer are saved here.<br />
Copy your audio files (WAV, MP3, AIFF) to the root folder (the top level) of your USB flash drive, or create a folder on your USB flash drive<br />
and copy the files into it.<br />
MEMO<br />
• Use only single-byte alphanumeric characters in file names and folder names.<br />
• A maximum of 200 files can be recognized in a folder.<br />
25<br />
Quick Guide<br />
Introduction Playing Sounds Editing Sounds<br />
Other Convenient<br />
Functions<br />
Connecting Other<br />
Equipment<br />
Appendix
Top Panel<br />
26<br />
1 2 3<br />
12<br />
4 5 6<br />
7<br />
9 10<br />
11<br />
Number Area Name Explanation Page<br />
1 USB MEMORY USB MEMORY port Connect USB flash drive (sold separately) here. p. 25<br />
2<br />
3<br />
4<br />
5<br />
6<br />
Panel Descriptions<br />
D-BEAM<br />
VOLUME<br />
CONTROL<br />
PART BALANCE<br />
Display<br />
D-BEAM controller<br />
By moving your hand above the D-BEAM you can apply various effects to the<br />
sound.<br />
[PITCH] button If this is on, the D-BEAM controller will control the pitch.<br />
[VOLUME] button If this is on, the D-BEAM controller will control the volume.<br />
[ASSIGNABLE] button If this is on, the D-BEAM controller will control the function you’ve assigned.<br />
REVERB button Turns on/off the output of the Live Set’s reverb. p. 53<br />
[VOLUME] knob Adjusts the volume of the output from the MAIN OUT jacks and PHONES jack. p. 31<br />
[CUTOFF/C1] knob<br />
[RESONANCE/C2] knob<br />
These adjust the parameters specified by the Registration. p. 52<br />
[HOLD] button Turns the arpeggiator Hold function on/off.<br />
ARPEGGIO [LOWER] button<br />
ARPEGGIO [UPPER] button<br />
If this is on, the arpeggiator will apply to the Lower Part.<br />
If this is on, the arpeggiator will apply to the Upper Part.<br />
p. 47<br />
[TEMPO] button Accesses the tempo screen.<br />
[TRANSPOSE] button<br />
By holding down the [TRANSPOSE] button and using the [–] [+] buttons, you<br />
can transpose the keyboard in semitone steps.<br />
p. 46<br />
OCTAVE [DOWN] button Lowers the key range in steps of one octave.<br />
OCTAVE [UP] button Raises the key range in steps of one octave.<br />
[VISUAL CONTROL] button<br />
Turns MIDI Visual Control on/off. When you press this button to turn it on, the<br />
setting screen will appear.<br />
[LEVEL] slider Adjust the volume of each Part, or the volume of each layer in the Live Set. p. 42<br />
PART ON/OFF [PERC/LOWER] button Turns the Percussion/Lower Part on/off.<br />
PART ON/OFF [UPPER] button Turns the Upper Part on/off.<br />
PART ON/OFF [SOLO] button Turns the Solo Part on/off.<br />
Display Shows various information for the operation. p. 35–p. 37<br />
[MENU] button Accesses the Menu screen. p. 35<br />
[F1]–[F6] buttons Execute the functions shown in the bottom of the display. p. 32<br />
[SHIFT] button<br />
This is used in conjunction with other buttons to access setting screens<br />
related to those buttons.<br />
8<br />
p. 51<br />
p. 46<br />
p. 85<br />
p. 42<br />
p. 33
Panel Descriptions<br />
Number Area Name Explanation Page<br />
7<br />
8<br />
9<br />
10<br />
11<br />
12<br />
VALUE<br />
SONG PLAYER/RECORDER<br />
ROTARY SOUND<br />
Registration<br />
Selecting tones for Parts<br />
Controller<br />
[WRITE] button Accesses the WRITE screen.<br />
[DEC]/[INC] buttons<br />
Use these buttons to edit values. To make the change occur more rapidly, hold<br />
down one button and press the opposite button. You can also make the value<br />
change rapidly by holding down the [SHIFT] button and pressing one of these<br />
buttons.<br />
[ ][ ][ ][ ](Cursor) buttons Move the cursor up/down/left/right. p. 32<br />
Value dial<br />
[EXIT] button<br />
[ENTER] button<br />
Use this to edit values. To make the value change rapidly, operate the value<br />
dial while holding down the [SHIFT] button.<br />
Returns you to the previous screen, or closes the currently open window. In<br />
some screens, this button cancels the function you were executing.<br />
Confirms a value or executes an operation. This button also displays a list of<br />
Live Sets or tones.<br />
[SONG] button Accesses the SONG screen. p. 64<br />
[REC] button<br />
Selects recording-standby mode. Next, press the [ ] button to start<br />
recording.<br />
[ ] button Returns to the beginning of the audio file.<br />
[ ] button Rewinds the audio file while you hold down the button.<br />
[ ] button Fast-forwards the audio file while you hold down the button.<br />
[ ] (Stop) button Stops audio file playback or recording.<br />
[ ] (Play) button Plays back the audio file.<br />
ROTARY SOUND [ON/OFF] button Turns on/off the rotary effect assigned to the MFX of the Live Set.<br />
ROTARY SOUND [SLOW/FAST] button Switches the speaker rotation speed between Slow and Fast.<br />
[MANUAL] button Selects a simple Registration in which only the Upper Part will be heard. p. 39<br />
[BANK] button Select the Registration bank. p. 38<br />
Registration buttons ([1]–[4]) Select a Registration. p. 38<br />
[PERC] button Select the Percussion tone for the Percussion/Lower Part. p. 43<br />
[LOWER TONE] button Select the tone for the Percussion/Lower Part. p. 41<br />
Live Set UPPER buttons Select the Live Set for the Upper Part. p. 40<br />
SOLO Tone buttons Select the Tone for the Solo Part. p. 41<br />
UPPER [ALTERNATE] button<br />
SOLO [ALTERNATE] button<br />
These buttons call up different sounds that are similar to the sounds of the<br />
Part sound buttons.<br />
p. 42<br />
[HARMONY INTELLIGENCE] button Turns the Harmony Intelligence function on/off. p. <strong>50</strong><br />
[SPLIT] button<br />
[SOLO SPLIT] button<br />
Splits the keyboard. Keys to the left of the Lower Split Point will play only the<br />
sounds of the Lower Part and the Percussion Part.<br />
Splits the keyboard. Keys to the right of the Solo Split Point will play only the<br />
sound of the Solo Part.<br />
p. 44<br />
[S1] [S2] buttons Convenient performance functions can be assigned to these buttons. p. 52<br />
Pitch Bend/Modulation Lever Modifies the pitch, applies vibrato, etc. p. 51<br />
p. 55, p. 62,<br />
p. 75<br />
p. 33<br />
p. 33<br />
–<br />
–<br />
p. 68<br />
p. 64<br />
p. 53<br />
27<br />
Quick Guide<br />
Introduction Playing Sounds Editing Sounds<br />
Other Convenient<br />
Functions<br />
Connecting Other<br />
Equipment<br />
Appendix
Panel Descriptions<br />
Rear Panel Connections<br />
28<br />
NOTE<br />
To prevent malfunction and equipment failure, always turn down the volume, and turn off all the units before making any connections.<br />
DISPLAY CONTRAST knob<br />
Adjusts the contrast of the screen.<br />
FOOT PEDAL jacks<br />
HOLD jack<br />
Here you can connect a pedal<br />
switch (such as one from the DP<br />
series; sold separately) and use it<br />
as a Hold pedal (p. 52).<br />
MIDI connectors<br />
For connecting MIDI device<br />
(p. 81).<br />
USB COMPUTER port<br />
With a USB cable, you can connect the <strong>JUPITER</strong>-<strong>50</strong><br />
to your computer (p. 80).<br />
CTRL 1, CTRL 2 jacks<br />
Here you can connect an expression pedal (EV-5; sold separately) or a pedal switch (such as one from the DP series; sold<br />
separately) and use it to control various parameters or functions (p. 52).<br />
* Use only the specified expression pedal (EV-5; sold separately). By connecting any other expression pedals, you risk<br />
causing malfunction and/or damage to the unit.<br />
* When operating an expression pedal, please take care not to pinch your fingers or toes between the moving part and<br />
the main unit.
SUB OUT jacks<br />
You can connect speakers here for use as monitors, or for outputting only the reverb<br />
sound. The system setting “Output Assign” (p. 75) specifies which sounds will be output<br />
from the SUB OUT jacks.<br />
* The [VOLUME] knob on the top panel does not adjust the volume of these jacks.<br />
AUDIO IN (STEREO) jack<br />
Connect your digital audio player or audio playback<br />
device here. Use a stereo mini-plug cable (commercially<br />
available) to make the connection.<br />
The input level is adjusted by the [LEVEL] knob<br />
located at the left of the jack.<br />
PHONES jack<br />
You can connect a set of headphones (sold separately)<br />
here.<br />
[POWER] switch<br />
Turns the power on/off (p. 31).<br />
Panel Descriptions<br />
MAIN OUT (TRS) jacks<br />
Connect your speakers here. To employ monaural output, connect to the L/MONO<br />
jack.<br />
DC IN jack/Cord hook<br />
Connect the included AC adaptor here.<br />
Cord Hook<br />
The cord of<br />
the supplied<br />
AC Adaptor<br />
This instrument is equipped with balanced<br />
(TRS) type jacks. Wiring diagrams for these<br />
jacks are shown below. Make connections<br />
after first checking the wiring diagrams of<br />
other equipment you intend to connect.<br />
TIP: HOT<br />
RING: COLD<br />
SLEEVE: GND<br />
* When connection cables with resistors are used, the volume level of equipment connected to the AUDIO IN jack may be low. If this happens, use<br />
connection cables that do not contain resistors.<br />
2: HOT<br />
3: COLD<br />
Ground terminal<br />
Depending on the conditions of your setup, you may<br />
experience a slight tingling sensation when you touch<br />
a metal component of the <strong>JUPITER</strong>-<strong>50</strong>. This is due to<br />
an infinitesimal electrical charge, which is absolutely<br />
harmless. However, if you are concerned about this,<br />
connect the ground terminal (see figure) with an external<br />
ground. When the unit is grounded, a slight hum may<br />
occur, depending on the particulars of your installation.<br />
If you are unsure of the connection method, contact the<br />
nearest <strong>Roland</strong> Service Center, or an authorized <strong>Roland</strong><br />
distributor, as listed on the “Information” page.<br />
Unsuitable places for connection<br />
• Water pipes (may result in shock or<br />
electrocution)<br />
• Gas pipes (may result in fire or explosion)<br />
• Telephone-line ground or lightning rod (may<br />
be dangerous in the event of lightning)<br />
AC Adaptor<br />
Indicator<br />
Power Cord<br />
AC Outlet<br />
* To prevent the inadvertent disruption of power to your unit (should the<br />
plug be pulled out accidentally), and to avoid applying undue stress to<br />
the DC IN jack, anchor the power cord using the cord hook, as shown in<br />
the illustration.<br />
* Place the AC adaptor so the side with the indicator (see illustration)<br />
faces upwards and the side with textual information faces downwards.<br />
The indicator will light when you plug the AC adaptor into an AC outlet.<br />
29<br />
Quick Guide<br />
1: GND<br />
Introduction Playing Sounds Editing Sounds<br />
Other Convenient<br />
Functions<br />
Connecting Other<br />
Equipment<br />
Appendix
30<br />
Placing the <strong>JUPITER</strong>-<strong>50</strong> on a Stand<br />
Be careful not to pinch your fingers when setting up the stand.<br />
If you want to place the <strong>JUPITER</strong>-<strong>50</strong> on a stand, use the <strong>Roland</strong> KS-G8, KS-18Z, or KS-12.<br />
Place the instrument on the stand as follows.<br />
KS-G8<br />
KS-18Z<br />
Align the front of the<br />
<strong>JUPITER</strong>-<strong>50</strong> with the<br />
front of the stand<br />
KS-12<br />
Align the back panel<br />
of the <strong>JUPITER</strong>-<strong>50</strong><br />
with the rubber base<br />
of the stand.<br />
Adjust so that<br />
the height does<br />
not exceed 1<br />
meter (Adjust<br />
the stand to a<br />
level no higher<br />
than the fourth<br />
level from the<br />
bottom)<br />
Adjust the width of the stand<br />
so that the rubber feet on the<br />
keyboard side of the bottom of<br />
the keyboard fit into the holes<br />
provided for the rubber feet.<br />
Top view<br />
Place the <strong>JUPITER</strong>-<strong>50</strong> so<br />
that its rubber feet are in<br />
the inner side of the stand<br />
Top view<br />
Adjust the width of the stand<br />
so that the rubber feet of the<br />
<strong>JUPITER</strong>-<strong>50</strong> straddle the stand<br />
Top view
Turning the Power On<br />
Turning the Power On<br />
Once everything is properly connected (p. 28), be sure to follow the procedure below to turn on their power. If you turn on equipment in the wrong<br />
order, you risk causing malfunction or equipment failure.<br />
Turning the Power On<br />
* Before turning the unit on/off, always be sure to turn the volume down. Even with the volume turned down, you might hear some sound when<br />
switching the unit on/off. However, this is normal and does not indicate a malfunction.<br />
1. Minimize the volume of the <strong>JUPITER</strong>-<strong>50</strong> and your speakers .<br />
2. On the <strong>JUPITER</strong>-<strong>50</strong>’s rear panel, turn the [POWER] switch ON .<br />
* This unit is equipped with a protection circuit. A brief interval (a few seconds) after turning the unit on is required before it will operate normally.<br />
3. Turn on the power of your speakers .<br />
4. Use the [VOLUME] knob to adjust the volume appropriately .<br />
NOTE<br />
With the factory settings, the <strong>JUPITER</strong>-<strong>50</strong> will automatically be switched off four hours after you stop playing or operating the unit.<br />
If you don’t want the unit to turn off automatically, change the “Auto Off” setting to “OFF” as described on p. 79.<br />
• The settings you were editing will be lost when the unit is turned off. If you want to keep your settings, you must save your<br />
settings before turning the unit off (p. 34).<br />
• When turning the power back on after it was turned off by the Auto-Off function, you must wait at least 10 seconds before turning the power<br />
on. If you do not allow this interval to pass, the Auto-Off function might not be reset, and the power might not turn on normally.<br />
Turning the Power Off<br />
1. Minimize the volume of the <strong>JUPITER</strong>-<strong>50</strong> and your speakers .<br />
2. Turn off the power of your speakers .<br />
3. Turn the <strong>JUPITER</strong>-<strong>50</strong>’s [POWER] switch OFF .<br />
31<br />
Quick Guide<br />
Introduction Playing Sounds Editing Sounds<br />
Other Convenient<br />
Functions<br />
Connecting Other<br />
Equipment<br />
Appendix
32<br />
Basic Operation<br />
This section explains the basic button and knob operations used to operate the <strong>JUPITER</strong>-<strong>50</strong>.<br />
[MENU] button<br />
Accesses the Menu screen. Here<br />
you can select various settings and<br />
functions of the <strong>JUPITER</strong>-<strong>50</strong>.<br />
page 35<br />
[VISUAL CONTROL] button<br />
Accesses the VISUAL CONTROL<br />
screen.<br />
page 37<br />
Function buttons<br />
These function buttons are used to<br />
execute various functions.<br />
page 32<br />
[SHIFT] button<br />
This button is used in combination<br />
with other buttons to access the<br />
corresponding edit screen.<br />
How the Function Buttons Work<br />
page 33<br />
[WRITE] button<br />
Accesses a screen where you can<br />
save settings for the function<br />
you’re using, or edit a name.<br />
Value dial<br />
Edits a value.<br />
page 34<br />
page 33<br />
[SONG] button<br />
Accesses a screen where you<br />
can select songs or change the<br />
playback settings.<br />
Cursor buttons<br />
Move the cursor.<br />
page 37<br />
page 32<br />
The [F1]–[F6] buttons located below the display are used to carry out various functions, which differ depending on the screen. The current function of<br />
each button is shown in the bottom of the screen.<br />
In some screens, you can hold down the [SHIFT] button to see other functions.<br />
Moving the Cursor<br />
A single screen or window will contain multiple items (parameters) to edit or select. To edit a parameter’s setting, you must first move the cursor to<br />
that parameter’s value.<br />
The value of the selected parameter is highlighted.<br />
Cursor buttons<br />
Cursor<br />
You can move the cursor by pressing the [ ] [ ] [ ] [ ] (cursor) buttons.<br />
If you hold down a cursor button, the cursor will continue moving.<br />
If you hold down the cursor button for the desired direction, and then press the opposite cursor button, the cursor will move more quickly.
Editing a Value<br />
To edit the value highlighted by the cursor, use either of the following controllers.<br />
• Value dial<br />
Value dial<br />
• [DEC] [INC] buttons<br />
Turning the value dial toward the right will increase the value, and turning it toward the left will decrease the value.<br />
If you hold down the [SHIFT] button while turning the value dial, the value will change in larger steps.<br />
[DEC] [INC] buttons<br />
Press the [INC] button to increase the value, or press the [DEC] button to decrease the value.<br />
• If you hold down a button, the value will increase (or decrease) continuously.<br />
• To rapidly increase the value, hold down the [INC] button and press the [DEC] button. Conversely, to<br />
rapidly decrease the value, hold down the [DEC] button and press the [INC] button.<br />
• If you hold down the [SHIFT] button and press the [INC] button or [DEC] button, the value will change in<br />
larger steps.<br />
[SHIFT] Button Operations<br />
Basic Operation<br />
By holding down the [SHIFT] button and pressing another button, you can edit the settings of the button you pressed, or access a specific screen<br />
(shortcut).<br />
Shortcut Description Page<br />
[SHIFT] + [ASSIGNABLE] Accesses the D-BEAM Assign setting screen. p. 54<br />
[SHIFT] + [S1] (or [S2])<br />
[SHIFT] + [HOLD]<br />
Accesses the Switch S1 Assign (or Switch S2 Assign) setting screen. p. 54<br />
[SHIFT] + ARPEGGIO [LOWER]<br />
[SHIFT] + ARPEGGIO [UPPER]<br />
Accesses the arpeggiator setting screen. p. 48<br />
[SHIFT] + [HARMONY INTELLIGENCE] Accesses the Harmony Type setting screen. p. <strong>50</strong><br />
[SHIFT] + [SPLIT] Accesses the Lower Split Point setting screen. p. 54<br />
[SHIFT] + [SOLO SPLIT]<br />
[SHIFT] + UPPER [PIANO]<br />
Accesses the Solo Split Point setting screen. p. 54<br />
[SHIFT] + UPPER [E . PIANO/CLAV]<br />
[SHIFT] + UPPER [COMBO ORGAN]<br />
[SHIFT] + UPPER [CLASSIC ORGAN]<br />
Accesses the LIVE SET TONE MODIFY screen for Layer 1–4 of the Live Set assigned to the Upper Part. p. 60<br />
[SHIFT] + UPPER [SYNTH LEAD] Accesses the LIVE SET COMMON screen of the Upper Part. p. 57<br />
[SHIFT] + UPPER [VIBES/MARIMBA] Accesses the LIVE SET LAYER screen of the Upper Part. p. 57<br />
[SHIFT] + UPPER [OTHER] Accesses the LIVE SET EFFECTS screen of the Upper Part. p. 58<br />
[SHIFT] + rotate the [C1] [C2] knobs<br />
The following are for the Top screen<br />
Accesses the Knob 1 Assign (or Knob 2 Assign) screen. p. 54<br />
[SHIFT] + [F1] Accesses the REGISTRATION screen. p. 54<br />
[SHIFT] + [F2] Accesses the REGISTRATION PERC/LOWER EDIT screen. p. 54<br />
[SHIFT] + [F3] Accesses the REGISTRATION SOLO EDIT screen. p. 54<br />
[SHIFT] + [F4] Accesses the REGISTRATION EFFECT screen. p. 54<br />
[SHIFT] + [F5] Accesses the LIVE SET(UPPER) screen. p. 57<br />
[SHIFT] + [F6] Accesses the LIVE SET TONE BLENDER screen. p. 60<br />
If you hold down the [SHIFT] button while editing a parameter’s value, the value will change in larger steps.<br />
33<br />
Quick Guide<br />
Introduction Playing Sounds Editing Sounds<br />
Other Convenient<br />
Functions<br />
Connecting Other<br />
Equipment<br />
Appendix
Basic Operation<br />
What the [WRITE] Button Does<br />
34<br />
Pressing the [WRITE] button will save the settings of the function<br />
you’re executing.<br />
Registration screen<br />
Save the Registration.<br />
Live Set screen<br />
Save the Live Set.<br />
SYSTEM SETUP screen<br />
Save overall settings for the <strong>JUPITER</strong>-<strong>50</strong>.<br />
Assigning a Name<br />
The <strong>JUPITER</strong>-<strong>50</strong> lets you assign names to the following items.<br />
• Registration<br />
• Live set<br />
• User arpeggio style<br />
• Song<br />
• Exported sound data<br />
• Sound data to be exported<br />
Regardless of what you’re naming, the procedure is the same.<br />
1. Press the [ ] [ ] buttons to move the cursor to the<br />
location where you wish to input a character .<br />
2. Turn the VALUE dial, or press the [DEC] [INC] buttons to<br />
specify the character .<br />
Button Explanation<br />
Selects the type of character Each time you press<br />
this, you will alternately select the first character<br />
[2] (TYPE)<br />
of a character set: uppercase (A), lowercase (a), or<br />
numerals and symbols (0).<br />
[3] (DELETE) Deletes the character at the cursor location.<br />
[4] (INSERT) Inserts a space at the cursor location.<br />
[5] (CANCEL) Cancels the input and exits the naming screen.<br />
[6] (NEXT)<br />
or<br />
Saves the changes you’ve made.<br />
[6] .(EXEC)<br />
[ ] [ ] Move the cursor.<br />
page 55<br />
page 62<br />
page 75<br />
[ ] [ ] Switch between uppercase and lowercase letters.
Navigating Between Screens<br />
On the <strong>JUPITER</strong>-<strong>50</strong>, you can navigate between the screens by pressing each button or the function buttons assigned to various features. Here we<br />
explain how to navigate between screens.<br />
The explanations in this manual include illustrations that depict what should typically be shown by the display. Note, however, that your unit may<br />
incorporate a newer, enhanced version of the system (e.g., includes newer sounds), so what you actually see in the display may not always match<br />
what appears in the manual.<br />
Top Screen<br />
This is the main screen that appears when you turn on the power.<br />
It shows the name of the currently selected Registration, the sound<br />
and volume of each Part, and the split status.<br />
REGISTRATION screen<br />
([SHIFT] + [F1](REG) button)<br />
Edit the Registration’s volume, and the volume and pan of each<br />
part.<br />
REGISTRATION PERC/LOWER EDIT screen<br />
([SHIFT] + [F2](PRC/LWR) button)<br />
Make settings for the Percussion/Lower Part.<br />
REGISTRATION SOLO EDIT screen<br />
([SHIFT] + [F3](SOLO) button)<br />
Make settings for the Solo Part.<br />
REGISTRATION EFFECT screen<br />
([SHIFT] + [F4](EFFECT) button)<br />
Make effect settings for the Registration.<br />
LIVE SET (UPPER) screen<br />
([SHIFT] + [F5](UPPER) button)<br />
page 54<br />
page 54<br />
page 54<br />
page 54<br />
page 57<br />
Edit the tone assigned to each layer of the Live Set, and specify its<br />
volume.<br />
LIVE SET TONE BLENDER screen<br />
([SHIFT] + [F6](BLENDER) button)<br />
page 60<br />
Simultaneously edit multiple parameters for the Live Set.<br />
Menu Screen<br />
Press the [MENU] button; the Menu screen will appear in the<br />
display.<br />
1. Press the [MENU] button .<br />
The Menu screen will appear.<br />
2. Select one of the following items, and press the [ENTER]<br />
button .<br />
Edit<br />
([F1] (EDIT) button)<br />
Access the Registration or Live Set edit screen.<br />
Registration<br />
Access the Registration edit screen.<br />
Live Set (UPPER)<br />
Access the Live Set edit screen.<br />
Initialize<br />
([F2] (INIT) button)<br />
Initialize the Registration or Live Set.<br />
Registration<br />
Initialize the Registration.<br />
Live Set (UPPER)<br />
Initialize the Live Set.<br />
System<br />
([F3] (SYSTEM) button)<br />
Make overall settings for the entire <strong>JUPITER</strong>-<strong>50</strong>.<br />
Utility<br />
([F4] (UTILITY) button)<br />
Execute operations such as backing up user data or initializing.<br />
ACT<br />
([F5] (ACT) button)<br />
Make ACT settings.<br />
page 54<br />
page 57<br />
page 56<br />
page 63<br />
page 75<br />
page 70<br />
page 87<br />
35<br />
Quick Guide<br />
Introduction Playing Sounds Editing Sounds<br />
Other Convenient<br />
Functions<br />
Connecting Other<br />
Equipment<br />
Appendix
Navigating Between Screens<br />
REGISTRATION Screen<br />
36<br />
1. In the Menu screen, choose “Edit” “Registration .”<br />
Here you can view the volume of the Registration, and the volume<br />
and pan settings of each Part.<br />
MEMO<br />
From the Top screen, you can also access the REGISTRATION<br />
screen by holding down the [SHIFT] button and pressing the<br />
[F1] (REG) button.<br />
2. Press one of the [F1]–[F6] buttons to select the<br />
Registration parameters that you want to edit .<br />
page 54<br />
3. Move the cursor to the parameter that you want to edit,<br />
and edit the value .<br />
MEMO<br />
When a Registration has been edited, an “*” symbol will appear<br />
at the left of the Registration number.<br />
REGISTRATION COMMON<br />
([F1] (COMMON) button)<br />
Make overall settings for the Registration.<br />
REGISTRATION CONTROL<br />
([F2] (CONTROL) button)<br />
Edit the controller settings.<br />
REGISTRATION PERC/LOWER EDIT<br />
([F3] (PRC/LWR) button)<br />
Edit the settings of the Percussion/Lower Part.<br />
REGISTRATION SOLO EDIT<br />
([F4] (SOLO) button)<br />
Edit the settings of the Solo Part.<br />
REGISTRATION EXT PART<br />
([F5] (EXT PART) button)<br />
Edit Part settings for an external MIDI device.<br />
REGISTRATION EFFECT<br />
([F6] (EFFECT) button)<br />
Edit the effect settings for the Registration.<br />
Initializing a Registration<br />
([SHIFT] + [F6] (INIT)button)<br />
page 56<br />
Here’s how to initialize the currently selected Registration.<br />
LIVE SET (UPPER) Screen<br />
1. In the Menu screen, choose “Edit” “Live Set (UPPER) .”<br />
View the name and volume of the Tones assigned to each layer of<br />
the Live Set.<br />
MEMO<br />
From the Top screen, you can also access the LIVE SET (UPPER)<br />
screen by holding down the [SHIFT] button and pressing the<br />
[F5] (UPPER) button.<br />
2. Press one of the [F1]–[F4], [F6] buttons to select the Live<br />
Set parameters that you want to edit .<br />
page 57<br />
3. Move the cursor to the parameter that you want to edit,<br />
and edit the value .<br />
MEMO<br />
When a Live Set has been edited, an “*” symbol will appear at the<br />
left of the Live Set number.<br />
LIVE SET COMMON<br />
([F1] (COMMON) button)<br />
Make overall settings for the Live Set.<br />
LIVE SET LAYER<br />
([F2] (LAYER) button)<br />
Edit the settings of each layer.<br />
LIVE SET EFFECT<br />
([F3] (EFFECT) button)<br />
Edit the effect settings for the Live Set.<br />
LIVE SET MODIFY<br />
([F4] (MODIFY) button)<br />
Edit the tone of each layer.<br />
LIVE SET TONE BLENDER<br />
([F6] (BLENDER) button)<br />
page 60<br />
Simultaneously edit multiple parameters of the Live Set.<br />
Copying a Layer<br />
([SHIFT] + [F5] (COPY) button)<br />
Here’s how to copy a layer to a different layer.<br />
page 59<br />
page 60<br />
page 63<br />
Initializing a Live Set<br />
([SHIFT] + [F6] (INIT) button)<br />
page 63<br />
Here’s how to initialize the currently selected Live Set.
SONG Screen<br />
1. Press the [SONG] button .<br />
Here you can operate the USB song player/recorder.<br />
SONG LIST screen<br />
SONG SETUP screen<br />
VISUAL CONTROL Screen<br />
1. Press the [VISUAL CONTROL] button .<br />
The VISUAL CONTROL screen will appear when you press the<br />
[VISUAL CONTROL] button. Here you can use the <strong>JUPITER</strong>-<strong>50</strong> to<br />
control video equipment that supports Visual Control.<br />
page 85<br />
SYSTEM MENU Screen<br />
1. In the Menu screen, choose “System .”<br />
The SYSTEM MENU screen will appear.<br />
2. Select the item whose settings you want to change, and<br />
press the [ENTER] button .<br />
Setup<br />
([F1] (SETUP) button)<br />
Make overall settings for the entire <strong>JUPITER</strong>-<strong>50</strong>.<br />
Live/Tone Buttons<br />
([F2] (BUTTONS) button)<br />
Make assignments for the part tone buttons.<br />
Information<br />
([F3] (INFO) button)<br />
page 64<br />
page 75<br />
page 78<br />
page 78<br />
View the software version and the status of USB flash drive usage.<br />
UTILITY MENU Screen<br />
1. In the Menu screen, choose “Utility .”<br />
The UTILITY MENU screen will appear.<br />
Here you can back up or initialize user data.<br />
Navigating Between Screens<br />
2. Select the function that you want to execute, and press<br />
the [ENTER] button .<br />
Backup<br />
Save user data to a USB flash drive.<br />
Restore<br />
page 70<br />
Restore data from a USB flash drive back into the <strong>JUPITER</strong>-<strong>50</strong>.<br />
Format USB Mem<br />
Initialize a USB flash drive.<br />
Factory Reset<br />
Return the <strong>JUPITER</strong>-<strong>50</strong> to its factory-set state.<br />
Reg Set Exchange<br />
Exchange the order of Registration Sets.<br />
Reg Move/Exchang<br />
Move<br />
Change the order of the Registrations.<br />
Exchange<br />
Exchange the numbers of two Registrations.<br />
Export<br />
page 72<br />
Write the <strong>JUPITER</strong>-<strong>50</strong>’s sound data to a USB flash drive.<br />
Import<br />
page 70<br />
page 70<br />
page 79<br />
page 71<br />
page 73<br />
page 74<br />
page 72<br />
Load data previously exported to a USB flash drive back into the<br />
<strong>JUPITER</strong>-<strong>50</strong>.<br />
37<br />
Quick Guide<br />
Introduction Playing Sounds Editing Sounds<br />
Other Convenient<br />
Functions<br />
Connecting Other<br />
Equipment<br />
Appendix
38<br />
Switching Registrations<br />
A Registration is used to store the sounds selected for each Part, as<br />
well as various performance-related settings (system parameters<br />
are excepted).<br />
By switching Registrations, you can instantly change the song’s<br />
sounds while you perform, or change numerous settings with a<br />
single operation.<br />
Here’s how to switch Registrations and verify that the settings have<br />
been changed.<br />
1. Press a Registration button ([1]–[4]) to select a<br />
Registration .<br />
The Registration will change.<br />
MEMO<br />
In the Top screen, you can also switch Registrations by moving<br />
the cursor to the Registration number and using the value dial<br />
or the [DEC] [INC] buttons.<br />
Switching Banks<br />
Each bank contains 4 Registrations. There are 4 banks, 1–4, meaning<br />
that 4 Registrations x 4 banks = 16 Registrations are available.<br />
Set 1<br />
Bank<br />
1<br />
Bank<br />
2<br />
Registration<br />
Registration<br />
Bank<br />
3<br />
Bank<br />
4<br />
Registration<br />
Registration<br />
You can select other Registrations by switching banks.<br />
1. Press the [BANK] button, and then press a registration<br />
button ([1]–[4]) to select the desired bank .<br />
The [BANK] button and the registration button corresponding to<br />
the currently selected bank will light; the other buttons will blink.<br />
When you switch banks, the registration buttons ([1]–[4]) will blink.<br />
MEMO<br />
If you decide to cancel without switching banks, press the [EXIT]<br />
button or the lit bank button.<br />
2. Press a Registration button ([1]–[4]) to select a<br />
Registration .<br />
The bank and Registration will be changed.
Switching Registration Sets<br />
A Registration Set contains 4 banks (1–4). You can create 8<br />
Registration Sets, meaning that 4 Registrations x 4 banks x 8 sets =<br />
128 Registrations are available.<br />
Here’s how to switch the Registration Set so that you can select<br />
other banks.<br />
Set 1<br />
Bank<br />
1<br />
Bank<br />
2<br />
Set 8<br />
Registration<br />
Registration<br />
Bank<br />
3<br />
Bank<br />
4<br />
Registration<br />
Registration<br />
1. In the Top screen, move the cursor to the registration<br />
number and press the [ENTER] button .<br />
The REGISTRATION LIST screen will appear.<br />
2. Use the value dial to select a registration .<br />
You can also use the [ ] [ ] (cursor) buttons to switch<br />
registration sets.<br />
Registration Set<br />
MEMO<br />
You can use the “Registration Exchange” function (p. 71) to swap<br />
entire sets of Registrations.<br />
Using the [MANUAL] Button<br />
Switching Registrations<br />
If you press the [MANUAL] button, only the Upper Part will turn on,<br />
and a piano sound will be selected (with the factory settings).<br />
You can layer sounds by turning on the Solo Part or the Percussion/<br />
Lower Part.<br />
MEMO<br />
• The [MANUAL] button lets you easily put the <strong>JUPITER</strong>-<strong>50</strong> in a<br />
state where only the Upper Part will sound. This button is also<br />
convenient when you want to audition the sound of a Live Set,<br />
or when you want to start creating a registration.<br />
• The results of editing a manual registration can be saved as a<br />
conventional registration ([01] 1-1–[08] 4-4).<br />
Single Part Play<br />
The <strong>JUPITER</strong>-<strong>50</strong>’s sound generator plays three parts in combination.<br />
If you want to sound only one part, you’ll need to turn off the other<br />
parts.<br />
The single part play registration limits the sounding parts to one<br />
part; other parts will automatically be off .<br />
1. Call up the registration [01]1-1 .<br />
2. Press the [DEC] button to select the registration<br />
“[00]---: SINGLE PART PLAY .”<br />
The single part play registration will be selected.<br />
MEMO<br />
• When using single part play, the Split function and Harmony<br />
Intelligence function are unavailable.<br />
• The results of editing a single part play registration can be saved<br />
as a conventional registration ([01] 1-1–[08] 4-4).<br />
39<br />
Quick Guide<br />
Introduction Playing Sounds Editing Sounds<br />
Other Convenient<br />
Functions<br />
Connecting Other<br />
Equipment<br />
Appendix
40<br />
Selecting the Sound for Each Part (Selecting Live Sets / Tones)<br />
The <strong>JUPITER</strong>-<strong>50</strong> has three Parts: Solo, Upper, and Percussion/Lower.<br />
You can assign a Tone or Live Set to each Part, and play it.<br />
Solo Part<br />
Upper Part<br />
Percussion/Lower Part<br />
Tone<br />
Live Set<br />
Tone<br />
You can use the value dial or the [DEC] [INC] buttons to switch the<br />
sound at the cursor location in the Top screen (p. 35).<br />
Select sounds.<br />
Using the Part Sound Buttons to<br />
Switch Live Sets<br />
You can use the Part sound buttons to switch Live Sets for the<br />
Upper Part.<br />
1. Access the Top screen (p . 35), and press one of the Part<br />
sound buttons for the Upper Part .<br />
Upper<br />
The sound of the Upper Part will change.<br />
For example, if you press the UPPER [PIANO] button, the Upper Part<br />
will switch to a piano sound.<br />
2. If you press the same Part sound button once again, you’ll<br />
be able to choose sounds from a list .<br />
3. Use the [ ] [ ] (cursor) buttons to select a category .<br />
4. Use the [ ] [ ] (cursor) buttons to select a Live Set .<br />
5. Press the [ENTER] button .<br />
Sound buttons and sound categories<br />
The sound buttons correspond to the following sound categories.<br />
Button Category Explanation<br />
Ac. Piano Acoustic piano<br />
PIANO<br />
Pop Piano Piano suitable for pop music<br />
E. Grand Piano Electric grand piano<br />
E. Piano 1<br />
Electric piano<br />
E . PIANO/CLAV E. Piano 2<br />
Clav Clavi<br />
COMBO ORGAN E. Organ Electric organ<br />
CLASSIC ORGAN<br />
Pipe Organ<br />
Read Organ<br />
Pipe organ<br />
Read Organ<br />
Ac. Bass Acoustic bass<br />
BASS<br />
E. Bass Electric bass<br />
Synth Bass Synth bass<br />
Synth Pad/Strings Synth pads and synth strings<br />
PAD/CHOIR Synth Bellpad Synth bellpad<br />
Vox/Choir Human voice and choir<br />
Solo Strings Solo Strings<br />
STRINGS Ensemble Strings String ensembles<br />
Orchestral Orchestral strings<br />
SYNTH STRINGS Synth Pad/Strings Synth pads and synth strings<br />
Solo Brass Brass instruments such as trumpet<br />
BRASS/SAX Ensemble Brass Brass instrument ensembles<br />
Sax Sax<br />
SYNTH BRASS Synth Brass Synth brass<br />
Wind Woodwinds<br />
WOOD WINDS Flute Flute<br />
Recorder Recorder<br />
Ac. Guitar Acoustic guitar<br />
GUITAR E. Guitar Electric guitar<br />
Dist. Guitar Distortion guitar<br />
SYNTH LEAD Synth Lead Synth read<br />
VIBES/MARIMBA Mallet Vibraphone and marimba<br />
OTHER All Categories All sounds<br />
MEMO<br />
If you move the cursor to the sound number of the Upper Part<br />
and press the [ENTER] button, a list of Live Sets for all categories<br />
will appear.
Using the Part Sound Buttons to<br />
Switch the Solo Part’s Tone<br />
You can use the Part sound buttons to switch the tone of the Solo<br />
Part.<br />
1. Access the Top screen (p . 35), and press one of the part<br />
sound buttons (SOLO tone buttons) of the Solo Part .<br />
SOLO<br />
The sound of the Solo Part will be switched.<br />
2. By pressing the same part sound button once again, you<br />
can select sounds from a list .<br />
3. Press the [F1] (SN .AC) or [F2] (SN .SYN) button .<br />
Button Explanation<br />
[F1] (SN .AC) SuperNATURAL acoustic tone<br />
[F2] (SN .SYN) SuperNATURAL synth tone<br />
4. Use the [ ] [ ] (cursor) buttons to select a category .<br />
5. Use the [ ] [ ] (cursor) buttons to select a tone .<br />
6. Press the [ENTER] button .<br />
Sound buttons and sound categories<br />
The sound buttons correspond to the following sound categories.<br />
Button Category Explanation<br />
VIOLIN Solo Strings Solo strings such as violin<br />
TRUMPET/SAX<br />
Solo Brass<br />
Sax<br />
Brass instruments such as trumpet<br />
Sax<br />
FLUTE/OBOE<br />
Flute<br />
Wind<br />
Flute<br />
Woodwinds such as oboe<br />
All sounds<br />
OTHER All Categories * The SuperNATURAL Acoustic<br />
Tone 0028: TW Organ cannot be<br />
selected.<br />
MEMO<br />
• The sound that is selected when you press a sound button is<br />
determined by the “LIVE SET/TONE BUTTONS” (p. 78).<br />
• If you move the cursor to the sound number of the Solo Part and<br />
press the [ENTER] button, a list of Tones for all categories will<br />
appear.<br />
Selecting the Sound for Each Part (Selecting Live Sets / Tones)<br />
Switching the Tone of the<br />
Percussion/Lower Part<br />
The sound of the Percussion/Lower Part can be switched from the<br />
Tone List.<br />
1. Press the [LOWER TONE] or [PERC] button so it’s lit .<br />
2. In the Top screen, move the cursor to the sound number<br />
of the Percussion/Lower Part, and press the [ENTER]<br />
button .<br />
The Tone List will appear.<br />
3. Press the [F1] or [F2] button .<br />
If LOWER TONE is selected<br />
Button Explanation<br />
[F1] (SN .AC) SuperNATURAL acoustic tone<br />
[F2] (SN .SYN) SuperNATURAL synth tone<br />
If PERC is selected<br />
Button Explanation<br />
[F1] (DRUMS) Drums<br />
[F2] (M .PERC) <strong>Manual</strong> Percussion<br />
4. Use the [ ] [ ] (cursor) buttons to select a category .<br />
5. Use the [ ] [ ] (cursor) buttons to select a tone .<br />
6. Press the [ENTER] button .<br />
MEMO<br />
For details on selecting percussion sounds, refer to “Playing<br />
Drum Sounds and Sound Effects (Percussion/Lower)” (p. 43).<br />
41<br />
Quick Guide<br />
Introduction Playing Sounds Editing Sounds<br />
Other Convenient<br />
Functions<br />
Connecting Other<br />
Equipment<br />
Appendix
Selecting the Sound for Each Part (Selecting Live Sets / Tones)<br />
Sound buttons and sound categories<br />
The Lower Tone can also be selected by holding down the [LOWER<br />
TONE] button and pressing one of the Upper Part sound buttons.<br />
The sound buttons correspond to the following sound categories.<br />
42<br />
Button Category Explanation<br />
PERC Drums Drums and sound effects<br />
LOWER TONE<br />
+<br />
PIANO<br />
LOWER TONE<br />
+<br />
E .PIANO/CLAV<br />
LOWER TONE<br />
+<br />
COMBO ORGAN<br />
LOWER TONE<br />
+<br />
CLASSIC ORGAN<br />
LOWER TONE<br />
+<br />
BASS<br />
LOWER TONE<br />
+<br />
PAD/CHOIR<br />
LOWER TONE<br />
+<br />
STRINGS<br />
LOWER TONE<br />
+<br />
SYNTH STRINGS<br />
LOWER TONE<br />
+<br />
BRASS/SAX<br />
LOWER TONE<br />
+<br />
SYNTH BRASS<br />
LOWER TONE<br />
+<br />
WOOD WINDS<br />
LOWER TONE<br />
+<br />
GUITAR<br />
LOWER TONE<br />
+<br />
SYNTH LEAD<br />
LOWER TONE<br />
+<br />
VIBES/MARIMBA<br />
LOWER TONE<br />
+<br />
OTHER<br />
Ac. Piano Acoustic piano<br />
E. Grand Piano Electric grand piano<br />
E. Piano 1<br />
Electric piano<br />
E. Piano 2<br />
Clav Clavi<br />
E. Organ Electric organ<br />
Pipe Organ Pipe Organ<br />
Ac. Bass Acoustic bass<br />
E. Bass Electric bass<br />
Synth Bass Synth bass<br />
Synth Pad/Strings Synth pads and synth strings<br />
Synth Bellpad Synth bellpad<br />
Vox/Choir Human voice and choir<br />
Solo Strings Solo Strings<br />
Ensemble Strings String ensembles<br />
Orchestral Orchestral strings<br />
Synth Pad/Strings Synth pads and synth strings<br />
Solo Brass<br />
Brass instruments such as<br />
trumpet<br />
Ensemble Brass Brass instrument ensembles<br />
Sax Sax<br />
Synth Brass Synth brass<br />
Wind Woodwinds<br />
Flute Flute<br />
Ac. Guitar Acoustic guitar<br />
E. Guitar Electric guitar<br />
Dist. Guitar Distortion guitar<br />
Synth Lead Synth read<br />
Mallet Vibraphone and marimba<br />
All Categories<br />
All sounds<br />
* The SuperNATURAL Acoustic<br />
Tone 0028: TW Organ cannot<br />
be selected.<br />
Instantly Switching the Variation Sounds<br />
(Alternate Button)<br />
By pressing the [ALTERNATE] button, you can select a different<br />
sound of the same type as that of the Part sound button.<br />
The sound that’s selected will be the one that is specified in “LIVE<br />
SET/TONE BUTTONS” (p. 78) (with the factory settings).<br />
MEMO<br />
If the [ALTERNATE] button is turned on, pressing a Part sound<br />
button will display all categories.<br />
For example, you can also assign sounds of other types (such as<br />
bass) to the [PIANO] button.<br />
Turning Each Part On/Off and<br />
Adjusting its Volume<br />
When the Top screen or the REGISTRATION edit screen is displayed,<br />
you can use the PART BALANCE area of the panel to turn on/off the<br />
three parts and adjust their volume.<br />
Use the [LEVEL] sliders<br />
to adjust the volume of<br />
each Part.<br />
Turn each Part on/off.
Playing Drum Sounds and Sound Effects (Percussion/Lower)<br />
The <strong>JUPITER</strong>-<strong>50</strong> provides a “Percussion” function, which lets you play<br />
a variety of drum sounds and sound effects.<br />
Playing Percussion Sounds and Voice<br />
Phrases (<strong>Manual</strong> Percussion)<br />
You can use the 15 leftmost keys of the keyboard to play a variety of<br />
percussion instrument sounds and voice phrases.<br />
This function is called “<strong>Manual</strong> Percussion.”<br />
Percussion instrument sounds (15 keys)<br />
1. Press the [PERC] button so it’s lit .<br />
2. In step 3 of “Switching the Tone of the Percussion/Lower<br />
Part” (p . 41), press the [F2] (M .PERC) button .<br />
3. Use the [ ] [ ] (cursor) buttons to select a tone .<br />
4. Press the [ENTER] button .<br />
The <strong>Manual</strong> Percussion function will turn on.<br />
Play the 15 leftmost keys of the keyboard, and you’ll hear a different<br />
percussion instrument sound or voice phrase for each key.<br />
Percussion instrument sounds<br />
(15 keys)<br />
MEMO<br />
• The [PERC] button and [LOWER TONE] button can’t be used<br />
simultaneously.<br />
• If <strong>Manual</strong> Percussion is turned on, the 15 leftmost keys of the<br />
keyboard are used only for the Percussion/Lower Part.<br />
5. To turn this off, press the [PERC] button once again .<br />
The <strong>Manual</strong> Percussion function will turn off (the button will be<br />
unlit).<br />
Playing Drum Sounds on the Entire<br />
Keyboard (Drums/SFX)<br />
You can use the entire keyboard to play various drum and sound<br />
effects (SFX). This function is called “Drums/SFX.”<br />
1. Press the [PERC] button so it’s lit .<br />
2. In step 3 of “Switching the Tone of the Percussion/Lower<br />
Part” (p . 41), press the [F1] (DRUMS) button .<br />
3. Use the [ ] [ ] (cursor) buttons to select a tone .<br />
4. Press the [ENTER] button .<br />
The “Drums/SFX” function will turn on. Play the keyboard; each key<br />
will play a different drum sound or sound effect.<br />
MEMO<br />
Depending on the drums or sound effects, some keys might not<br />
produce sound.<br />
5. To turn this off, press the [PERC] button once again .<br />
The “Drums/SFX” function will turn off (the button will be unlit.)<br />
43<br />
Quick Guide<br />
Introduction Playing Sounds Editing Sounds<br />
Other Convenient<br />
Functions<br />
Connecting Other<br />
Equipment<br />
Appendix
44<br />
Split Performance<br />
A “split” is a setup in which the keyboard is divided into zones, each<br />
playing a different Part.<br />
Lower Part Upper Part<br />
Lower Split Point (B3)<br />
Solo Part<br />
Solo Split Point (C6)<br />
Splits can be either “splits,” which divide the keyboard into an Upper<br />
Part and Percussion/Lower Part, or “Solo Splits,” which divide the<br />
keyboard into a Solo Part and Upper Part. The point at which the<br />
keyboard is divided is called either the “Lower Split Point” or “Solo<br />
Split Point.”<br />
If Split is turned on, keys to the right of the Lower Split Point will<br />
play the sound of the Upper Part, and keys to the left will play the<br />
sound of the Percussion/Lower Part.<br />
The Lower Split Point key itself (B3) is the highest key of the<br />
Percussion/Lower Part (it is included in the Percussion/Lower Part).<br />
If Solo Split is turned on, keys to the right of the Solo Split Point will<br />
play the sound of the Solo Part, and keys to the left will play the<br />
sound of the Upper Part.<br />
The Solo Split Point key itself (C6) is the lowest key of the Solo Part<br />
(it is included in the Solo Part).<br />
MEMO<br />
• You can change the Split Point and the Solo Split Point (p. 45).<br />
• The split settings are saved in the Registration.<br />
• For more about split for the Percussion/Lower Part, refer to “How<br />
Split and Parts are Related” (p. 45).<br />
Turning Split On<br />
1. Press the [SPLIT] button or [SOLO SPLIT] button .<br />
Split or Solo Split will turn on (the button will light).<br />
2. To turn it off, press the [SPLIT] button or [SOLO SPLIT]<br />
button once again .<br />
Split or Solo Split will turn off (the button will go out).
How Split and Parts are Related<br />
The following table shows how the split status determines the Parts that are assigned to the keyboard.<br />
[PERC]<br />
[LOWER TONE]<br />
On<br />
[SPLIT] [SOLO SPLIT]<br />
On On<br />
On On<br />
On On On<br />
Changing the Split Point<br />
Percussion/Lower<br />
You can change the point (Split Point or Solo Split Point) at which the keyboard is divided when Split or Solo Split are on.<br />
The Split Point is the top key of the Percussion/Lower Part; you can specify it in the range of E1–F#7.<br />
The Solo Split Point is the bottom key of the Solo Part; you can specify it in the range of F1–G7.<br />
Upper<br />
Split Performance<br />
1. Hold down the [SPLIT] button or [SOLO SPLIT] button, and press the key that you want to specify as the split point .<br />
Hold down the [SPLIT] button and press a key to specify the Split Point. Hold down the [SOLO SPLIT] button and press a key to specify the Solo Split<br />
Point.<br />
Solo<br />
45<br />
Quick Guide<br />
Introduction Playing Sounds Editing Sounds<br />
Other Convenient<br />
Functions<br />
Connecting Other<br />
Equipment<br />
Appendix
Changing the Pitch by Octaves<br />
By pressing the OCTAVE [DOWN] button or OCTAVE [UP] button you<br />
can shift the keyboard’s pitch range in steps of an octave.<br />
When using your right hand to play low sounds such as the bass<br />
Part, it will be easier to play if you lower the pitch range by one or<br />
two octaves.<br />
1. Press the OCTAVE [DOWN] button or OCTAVE [UP] button .<br />
46<br />
Changing the Keyboard Settings<br />
A message will appear when you press the button.<br />
• Pressing the OCTAVE [DOWN] button raises the pitch by one<br />
octave; pressing the OCTAVE [UP] button lowers the pitch by<br />
one octave.<br />
• The pitch can be changed in a range of three octaves down (-3)<br />
to three octaves up (+3).<br />
• If the value is anything other than “0,” the OCTAVE [DOWN]<br />
button or OCTAVE [UP] button will light.<br />
• If you press the OCTAVE [DOWN] button and OCTAVE [UP]<br />
button simultaneously, the value will be reset to “0.”<br />
• The octave shift setting is saved in the Registration.<br />
• If you want to change the octave setting of each Part, edit the<br />
Octave setting in the “Editing a Registration” (p. 54), and save the<br />
Registration.<br />
• If you want to change the octave setting of each layer in the<br />
Live Set, edit the Octave setting in “Pitch” of the LIVE SET LAYER<br />
screen (p. 57), and save the Live Set.<br />
• The octave shift function does not affect the <strong>Manual</strong> Percussion.<br />
• The split point and solo split point will not change.<br />
Transposing<br />
Transpose is a function that shifts the keyboard’s pitch range in<br />
steps of a semitone.<br />
By using this setting, a transposing instrument such as trumpet or<br />
clarinet can be played at the pitches shown in the printed score.<br />
1. Hold down the [TRANSPOSE] button and press the<br />
OCTAVE [DOWN] button or OCTAVE [UP] button .<br />
A message will appear when you press the button. The Top screen<br />
will show the amount of transposition.<br />
Amount of transposition<br />
• Specify the amount of transposition in semitone steps (G–F#:<br />
-5 – +6 semitones).<br />
• If the value is anything other than “0,” the [TRANSPOSE] button<br />
will light.<br />
• You can use the [TRANSPOSE] button to turn Transpose on/off<br />
(when the Transpose setting is other than 0).<br />
• If you hold down the [TRANSPOSE] button and press<br />
the OCTAVE [DOWN] button and OCTAVE [UP] button<br />
simultaneously, the value will be reset to “0.”<br />
• The transpose setting is saved in the Registration.<br />
• The Transpose function does not apply to Drums/SFX or <strong>Manual</strong><br />
Percussion.<br />
• The split point and solo split point will not change.<br />
MEMO<br />
You can also change the transposition setting in the GENERAL<br />
tab of the REGISTRATION COMMON screen.
Using the Arpeggiator<br />
The <strong>JUPITER</strong>-<strong>50</strong> has an arpeggiator that automatically plays<br />
arpeggios. When you press notes on the keyboard, those notes will<br />
be automatically played as an arpeggio.<br />
Arpeggios can be played in the Percussion/Lower Part (when lower<br />
tone is selected) and Upper Part.<br />
MEMO<br />
Arpeggiator settings are saved in the Registration.<br />
Turning the Arpeggiator On<br />
1. Press the ARPEGGIO [LOWER] button or ARPEGGIO<br />
[UPPER] button .<br />
The arpeggiator will turn on (the button will light).<br />
2. Press a chord on the keyboard .<br />
The Part whose arpeggiator you turned on will sound an arpeggio<br />
consisting of the notes of the chord you play.<br />
3. To turn off the arpeggiator, press the ARPEGGIO [LOWER]<br />
button or the ARPEGGIO [UPPER] button once again .<br />
The arpeggiator will turn off (the button will go out).<br />
MEMO<br />
If a manual percussion or drum sound is selected for the<br />
Percussion/Lower Part, the arpeggiator won’t be applied to the<br />
Percussion/Lower Part.<br />
Setting the Arpeggiator Tempo<br />
Here’s how to set the tempo of the arpeggiator/rhythm function.<br />
1. Press the [TEMPO] button .<br />
The TEMPO screen will appear.<br />
2. Set the tempo .<br />
MEMO<br />
You can set the tempo by pressing the [F4] (TAP) button at<br />
the desired timing (Tap Tempo). Press three times or more at<br />
quarter-note intervals of the desired tempo.<br />
Holding the Arpeggio (HOLD)<br />
The Hold function allows you to have the arpeggio continue even<br />
after you release your fingers from the keyboard.<br />
1. Press the [HOLD] button .<br />
Hold will turn on (the button will light).<br />
2. Play a chord on the keyboard .<br />
According to the notes of the chord you press, an arpeggio will<br />
begin playing on the Part for which you turned the arpeggiator on.<br />
If you play a different chord or other keys while Hold is on, the<br />
arpeggio will change accordingly.<br />
3. To turn Hold off, press the [HOLD] button once again .<br />
Hold will turn off (the button will go out).<br />
Using a pedal switch<br />
By playing a chord while holding down a pedal<br />
switch (p. 28), you can make the arpeggio continue<br />
playing even after you release the keyboard.<br />
1. Connect a pedal switch (such as one from<br />
the DP series; sold separately) to the<br />
HOLD jack .<br />
2. Press the ARPEGGIO [LOWER] button or the ARPEGGIO<br />
[UPPER] button .<br />
3. Hold down the pedal switch, and play a chord .<br />
If you play other chords or keys while the arpeggio is being held,<br />
the arpeggio will change accordingly.<br />
47<br />
Quick Guide<br />
Introduction Playing Sounds Editing Sounds<br />
Other Convenient<br />
Functions<br />
Connecting Other<br />
Equipment<br />
Appendix
Using the Arpeggiator<br />
Editing the Arpeggiator Settings<br />
Here’s how to make detailed arpeggiator settings for the style,<br />
timing, and accent.<br />
1. Hold down the [SHIFT] button and press the ARPEGGIO<br />
[LOWER] button or ARPEGGIO [UPPER] button .<br />
The REGISTRATION COMMON screen (p. 54) will appear.<br />
2. Edit the settings .<br />
3. When you’ve finished editing, press the [EXIT] button .<br />
Arpeggio Parameters<br />
Parameter Value Explanation<br />
Upper Sw OFF, ON<br />
Lower Sw OFF, ON<br />
Style<br />
48<br />
P001–P128,<br />
U001–U128<br />
Turns the arpeggiator on/off for the Upper<br />
Part.<br />
Turns the arpeggiator on/off for the Lower<br />
Part.<br />
Specifies the basic style of the arpeggio.<br />
You can create your own original arpeggio<br />
style by importing an SMF into an arpeggio<br />
style. For details, refer to “Creating an Arpeggio<br />
Style from a MIDI File (Import)” (p. 49).<br />
Hold OFF, ON Turns the arpeggio hold function on/off.<br />
Each arpeggio style provides several<br />
Variation 1–<br />
variations (patterns). Here you can select the<br />
variation number. The number of variations<br />
will depend on the arpeggio style.<br />
Choose one of the following to specify the order in which the<br />
notes of the chord you play will be sounded.<br />
UP<br />
The notes will be sounded from the lowest<br />
to the highest note you play.<br />
DOWN<br />
The notes will be sounded from the highest<br />
to the lowest note you play.<br />
The notes will be sounded from the lowest<br />
UP&DOWN to the highest note, and then back down to<br />
the lowest note.<br />
RANDOM<br />
The notes you play will be sounded in<br />
random order.<br />
The notes you play will be sounded in the<br />
order you played them. You can create a<br />
NOTE ORDER melody line by playing the notes in the<br />
appropriate order. The order of up to 128<br />
notes can be remembered.<br />
Motif<br />
A chromatic glissando will be sounded<br />
upward and then downward repeatedly<br />
GLISSANDO between the lowest and highest notes<br />
you played. Play two notes; the lowest and<br />
highest desired notes.<br />
CHORD<br />
All of the notes you play will sound<br />
simultaneously.<br />
The timing at which each note will sound<br />
AUTO1<br />
is assigned automatically, starting at the<br />
lowest note you play.<br />
AUTO2<br />
PHRASE<br />
Velocity REAL, 1–127<br />
The timing at which each note will sound<br />
is assigned automatically, starting at the<br />
highest note you play.<br />
Play only one key; a phrase based on the<br />
pitch of that key will be sounded. If you play<br />
more than one key, the last key you play will<br />
take priority.<br />
Specifies the loudness at which the notes<br />
you play will be sounded. If you want the<br />
notes to be sounded at the velocity with<br />
which you actually struck the key, choose<br />
“REAL.” If you want the notes to be sounded<br />
at a fixed velocity regardless of how strongly<br />
you struck the key, specify that value<br />
(1–127).<br />
Oct Range -3–+3<br />
Accent 0–100%<br />
Shuffle Rate 0–100%<br />
Shuffle<br />
Resolution<br />
,<br />
Specifies the range in octaves in which the<br />
arpeggio will be sounded. Choose “0” if you<br />
want only the notes you play to be sounded.<br />
Choose “+1” if you want the notes of the<br />
chord you played as well as the same notes<br />
one octave higher to be sounded. Choose<br />
“-1” if you want the notes of the chord you<br />
played as well as the notes one octave lower<br />
to be sounded.<br />
Modifies the groove of the performance by<br />
adjusting the strength of the accents and<br />
the duration of the notes. The “100%” setting<br />
produces the strongest sense of groove.<br />
Produces a shuffle rhythm by adjusting the<br />
timing of the notes.<br />
With the “<strong>50</strong>%” setting, notes will be<br />
sounded at equal intervals. As this value is<br />
increased, the result will be more like dotted<br />
notes.<br />
Shuffle Rate= <strong>50</strong>%<br />
<strong>50</strong> <strong>50</strong> <strong>50</strong> <strong>50</strong><br />
Shuffle Rate= 90%<br />
90 10 90 10<br />
Specifies the timing (as a note value) at<br />
which the notes will be heard.
Creating an Arpeggio Style from a MIDI<br />
File (Import)<br />
You can create your own original arpeggio style by importing an<br />
SMF (Standard MIDI File).<br />
MEMO<br />
• Before you import the SMF, use your computer to copy the SMF<br />
to the root folder (top level) of your USB flash drive, or create a<br />
folder on your USB flash drive and copy the SMF into that folder.<br />
• Use only single-byte alphanumeric characters in the file name<br />
and folder name.<br />
• A maximum of 200 files can be recognized within a folder.<br />
1. Hold down the [SHIFT] button, and press the ARPEGGIO<br />
[LOWER] or ARPEGGIO [UPPER] button .<br />
The Registration Common screen will appear.<br />
2. In the REGISTRATION COMMON screen, press the [F2]<br />
(ARP) button .<br />
3. Select the import-destination user style (U001–U016) .<br />
4. Press the [F5] (IMPORT) button .<br />
The ARPEGGIO STYLE IMPORT screen will appear.<br />
Select the SMF.<br />
5. Select the SMF that you want to import, and press the [F6]<br />
(IMPORT) button .<br />
The RENAME screen will appear.<br />
6. Assign a name to the arpeggio style .<br />
For details on how to assign a name, refer to “Assigning a Name”<br />
(p. 34).<br />
7. Press the [F6] (EXEC) button .<br />
The screen will ask “Are you sure?”<br />
8. Press the [F5] (OK) button .<br />
The SMF will be imported into the style number you specified.<br />
* Please note the following points when importing an arpeggio.<br />
• Only SMF Format 0 data is supported. If the format is incorrect,<br />
the screen will indicate “Cannot Import SMF Format 1!” or<br />
“Incorrect File!”<br />
• Only the following data will be imported into the arpeggio: note<br />
messages, control change messages, channel pressure, and<br />
pitch bend.<br />
• A maximum of <strong>50</strong>0 note events can be imported, with on/off<br />
counted as a single event.<br />
In addition to note events, a total of up to <strong>50</strong>0 events of control<br />
change messages, channel pressure, and pitch bend can be<br />
imported. If you try to import more than the allowable number<br />
of events, the message “Too Much Data!” will appear.<br />
Using the Arpeggiator<br />
Erasing an Original Arpeggio Style<br />
Here’s how to erase an arpeggio style that you imported.<br />
NOTE<br />
An arpeggio style you’ve erased cannot be recovered. Take care<br />
not to erase any important data.<br />
1. Hold down the [SHIFT] button and press the ARPEGGIO<br />
[LOWER] button or the ARPEGGIO [UPPER] button .<br />
The REGISTRATION COMMON screen will appear.<br />
2. In the REGISTRATION COMMON screen, press the [F2]<br />
(ARP) button .<br />
3. Select the number (U001–U016) of the style that you want<br />
to erase .<br />
4. Press the [F6] (ERASE) button .<br />
The screen will ask “Are you sure?”<br />
5. Press the [F5] (OK) button .<br />
The specified style will be erased.<br />
49<br />
Quick Guide<br />
Introduction Playing Sounds Editing Sounds<br />
Other Convenient<br />
Functions<br />
Connecting Other<br />
Equipment<br />
Appendix
<strong>50</strong><br />
Performing With Added Harmony<br />
The Harmony Intelligence function adds appropriate harmony to<br />
the highest notes of the Upper Part, based on the chords you play<br />
in the Percussion/Lower Part.<br />
When you turn Harmony Intelligence on, Split (p. 44) will also turn on;<br />
the right keyboard zone will play the sound of the Upper Part, and<br />
the left keyboard zone will play the sound of the Percussion/Lower<br />
Part.<br />
MEMO<br />
Harmony Intelligence settings are saved in the Registration.<br />
1. Press the [HARMONY INTELLIGENCE] button .<br />
Harmony Intelligence will turn on (the button will light).<br />
MEMO<br />
When you turn on Harmony Intelligence, the split (p. 44) will also<br />
turn on automatically.<br />
2. Press a chord in the Percussion/Lower Part, and play the<br />
keyboard in the Upper Part .<br />
Harmony based on the chord of the Percussion/Lower Part will be<br />
added to the highest notes of the Upper Part.<br />
MEMO<br />
The harmony is added to the highest note played in the Upper<br />
Part.<br />
3. To turn off the function, press the [HARMONY<br />
INTELLIGENCE] button once again .<br />
Harmony Intelligence will turn off (the button will go out).<br />
MEMO<br />
Turning off Harmony Intelligence will not automatically turn off<br />
the split function (p. 44).<br />
When Harmony Intelligence is on, the name of the chord you<br />
play in the Lower Part is shown in the Registration screen.<br />
Chord name played<br />
in the Lower Part<br />
Changing the Harmony Intelligence<br />
Type<br />
You can choose from 17 types of Harmony Intelligence.<br />
The Harmony Intelligence type will affect the number of harmony<br />
notes and how they are sounded (the number of voices played).<br />
1. Hold down the [SHIFT] button and press the [HARMONY<br />
INTELLIGENCE] button .<br />
The REGISTRATION COMMON screen (p. 54) for Harmony Intelligence<br />
settings will appear.<br />
2. Choose the desired Harmony Type .<br />
Harmony Type Explanation<br />
ORGAN<br />
BIG BAND<br />
STRINGS<br />
BLOCK<br />
HYMN<br />
TRADITIONAL<br />
DUET<br />
COMBO<br />
COUNTRY<br />
BROADWAY<br />
GOSPEL<br />
OCTAVE1<br />
OCTAVE2<br />
1NOTE<br />
2NOTES<br />
3NOTES<br />
4NOTES<br />
Harmony appropriate for organ sounds will be<br />
produced.<br />
Harmony typical of big band jazz will be produced.<br />
This is appropriate for brass sounds.<br />
Harmony typical of a string ensemble will be<br />
produced. This is appropriate for string sounds.<br />
Block chord harmony will be produced.<br />
This is appropriate for piano or mallet sounds.<br />
Harmony appropriate for hymns will be produced.<br />
This is appropriate for choir sounds.<br />
Two notes of harmony will be added to the notes<br />
you play.<br />
Simple duet harmony will be produced. This is<br />
appropriate for brass sounds.<br />
Combination harmony will be produced.<br />
This is appropriate for brass or wind sounds.<br />
Open chord harmony will be produced.<br />
This is appropriate for guitar sounds.<br />
Flamboyant show-type harmony will be produced.<br />
This is appropriate for organ sounds.<br />
Gospel harmony will be produced. This is appropriate<br />
for organ or choir sounds.<br />
The note you play will be layered with a note one<br />
octave lower.<br />
The note you play will be layered with a note two<br />
octaves lower.<br />
One note of harmony will be added to the note you<br />
play.<br />
Two notes of harmony will be added to the note you<br />
play.<br />
Three notes of harmony will be added to the note<br />
you play.<br />
Four notes of harmony will be added to the note<br />
you play.<br />
MEMO<br />
For optimal harmony, select appropriate sounds for the Upper<br />
Part and Lower Part as indicated in the explanation for each<br />
harmony type.<br />
3. Press the [EXIT] button .
Controlling the Performance<br />
Moving Your Hand to Modify the<br />
Pitch or Volume (D-BEAM Controller)<br />
You use the D-BEAM controller simply by moving your hand above<br />
it. By assigning different functions to it, you can control the sound<br />
in various ways.<br />
MEMO<br />
D-BEAM controller settings are saved in the Registration.<br />
1. Press the D-BEAM [PITCH], [VOLUME], or [ASSIGNABLE]<br />
button to turn the D-BEAM controller on (the button will<br />
light) .<br />
Button Explanation<br />
[PITCH] button<br />
[VOLUME] button<br />
[ASSIGNABLE] button<br />
The pitch will change as you move your hand<br />
above the D-BEAM controller.<br />
The volume will change, allowing you to add<br />
expression to your performance.<br />
The function assigned to the D-BEAM<br />
controller will be controlled.<br />
MEMO<br />
You can assign a performance-related function to the<br />
[ASSIGNABLE] button. The function assigned to the<br />
[ASSIGNABLE] button is specified by the REGISTRATION<br />
CONTROL parameter D-BEAM (p. 54).<br />
2. While playing the keyboard to produce sound, position<br />
your hand above the D-BEAM controller and slowly move<br />
it up and down .<br />
3. To turn off the D-BEAM controller, once again press the<br />
button you pressed in step 1 (the button will go out) .<br />
Effective range of the D-BEAM controller<br />
This illustration shows the effective range<br />
of the D-BEAM controller. No effect will be<br />
obtained if you position your hand outside the<br />
effective range.<br />
NOTE<br />
The effective range of the D-BEAM<br />
controller will change depending on<br />
the lighting conditions. If the D-BEAM<br />
controller does not work as you expect, readjust the sensitivity.<br />
For details on readjust the sensitivity, refer to “D-BEAM Sens” (p.<br />
76).<br />
Changing the Pitch/Applying Vibrato<br />
(Pitch Bend/Modulation Lever)<br />
While playing the keyboard, move the lever toward the left to lower<br />
the pitch, or toward the right to raise the pitch. This is called “pitch<br />
bend.”<br />
Moving the lever away from yourself will apply vibrato.<br />
This is called “modulation.”<br />
Moving the lever away from yourself while also moving it to left or<br />
right will apply both effects simultaneously.<br />
MEMO<br />
For some sounds, the modulation lever will produce a dynamics<br />
effect.<br />
51<br />
Quick Guide<br />
Introduction Playing Sounds Editing Sounds<br />
Other Convenient<br />
Functions<br />
Connecting Other<br />
Equipment<br />
Appendix
Controlling the Performance<br />
Using the Buttons and Knobs to Modify the<br />
Sound ([S1] [S2] buttons / [C1] [C2] knobs)<br />
52<br />
Performance-related functions are assigned to the [S1] [S2] buttons<br />
and [CUTOFF/C1] [RESONANCE/C2] knobs. While you perform, you<br />
can operate the [S1] [S2] buttons or [CUTOFF/C1] [RESONANCE/C2]<br />
knobs to modify the sound in real time.<br />
Turning the [S1] [S2] buttons on/off will turn on/off or switch the<br />
assigned function.<br />
MEMO<br />
You can assign performance-related functions to the [S1] [S2]<br />
buttons.<br />
To assign functions to the [S1] [S2] buttons, go to the<br />
REGISTRATION CONTROL screen (p. 54), choose [F5] (S1/S2), and<br />
set Switch S1 Assign or Switch S2 Assign to the desired function.<br />
Operating the [CUTOFF/C1] [RESONANCE/C2] knobs will control the<br />
function assigned to each knob.<br />
MEMO<br />
You can assign performance-related functions to the [CUTOFF/<br />
C1] [RESONANCE/C2] knobs.<br />
To assign functions to the [CUTOFF/C1] [RESONANCE/C2] knobs,<br />
go to the REGISTRATION CONTROL screen (p. 54), choose [F4]<br />
(knob), and set knob1 Assign or knob2 Assign to the desired<br />
function.<br />
Using Pedals<br />
The <strong>JUPITER</strong>-<strong>50</strong> allows you to connect hold pedals (such as one<br />
from the DP series; sold separately) and expression pedals (EV-5;<br />
sold separately).<br />
If a hold pedal (such as one from the DP series; sold separately)<br />
is connected to the rear panel PEDAL HOLD jack, notes will be<br />
sustained (held) while you hold down the pedal even after you take<br />
your hands off the keyboard.<br />
If an expression pedal or pedal switch (EV-5, DP series unit; sold<br />
separately) is connected to the rear panel CTRL 1 or CTRL 2 jack,<br />
you can use the pedal to vary the volume or control a variety of<br />
functions.<br />
Sustaining the Notes (Hold Pedal)<br />
While playing the keyboard, step on the pedal switch.<br />
You can hold (sustain) the notes by stepping on the pedal switch.<br />
Adding Expression to Your Performance<br />
(Control Pedal)<br />
While playing the keyboard, raise or lower the expression pedal.<br />
You can make your performance more expressive by varying the<br />
volume.<br />
* You must use the specified expression pedal (EV-5; sold<br />
separately). Connecting a product made by another<br />
manufacturer may cause the <strong>JUPITER</strong>-<strong>50</strong> to malfunction.<br />
MEMO<br />
Performance-related functions can be assigned to the pedals<br />
connected to the CTRL 1 and CTRL 2 jacks. The CTRL 1 and<br />
CTRL 2 assignments are specified by the ”System Setup” (p. 75)<br />
parameters Pedal 1 Assign and Pedal 2 Assign.
Controlling the Rotary Effect and Reverb<br />
The rotary effect adds modulation similar to what is produced by<br />
rotary speakers to the sound. Reverb applies the reverberation<br />
that accompanies a sound played in a hall or other acoustic<br />
environment.<br />
You can control these effects by using panel buttons.<br />
Controlling the Rotary Effect<br />
The ROTARY SOUND [ON/OFF] button and [SLOW/FAST] button<br />
allow you to control the effect if a rotary effect is assigned to MFX of<br />
the Live Set.<br />
1. First, assign 21: Rotary or 22: VK-Rotary to the MFX of the<br />
Live Set (p . 58) .<br />
2. Press the ROTARY SOUND [ON/OFF] button .<br />
The rotary effect will turn on (the button will light).<br />
3. Press the ROTARY SOUND [SLOW/FAST] button .<br />
The speed of the rotary effect will change.<br />
The rotary effect can be switched between two settings: “SLOW”<br />
and “FAST.”<br />
ROTARY SOUND<br />
[SLOW/FAST]<br />
button<br />
Unlit (SLOW)<br />
Lit (FAST)<br />
Explanation<br />
The effect produced when the rotary speaker is<br />
turning slowly.<br />
The effect produced when the rotary speaker is<br />
turning rapidly.<br />
When you switch the rotary effect from “SLOW” to “FAST,” the<br />
modulation speed will increase; when you switch from “FAST” to<br />
“SLOW,” the modulation speed will decrease.<br />
Controlling Reverb<br />
The [REVERB] button simultaneously turns on/off the output of<br />
the Live Set’s reverb and of the reverb shared by the Solo and<br />
Percussion Parts.<br />
If you want reverb to always be off, turn off the [REVERB] button.<br />
The illustration below shows how the [REVERB] button works.<br />
Registration<br />
Solo Part<br />
Tone<br />
Upper Part<br />
Live set<br />
Percussion/<br />
Lower Part<br />
Tone<br />
Reverb<br />
REVERB<br />
[ON/OFF]<br />
MEMO<br />
The state of the [REVERB] button is not saved. It will<br />
automatically turn on when you turn on the power.<br />
53<br />
Quick Guide<br />
Introduction Playing Sounds Editing Sounds<br />
Other Convenient<br />
Functions<br />
Connecting Other<br />
Equipment<br />
Appendix
54<br />
Editing a Registration<br />
A Registration stores the sounds selected for each Part, as well as<br />
various performance-related settings.<br />
The REGISTRATION screen (p. 36) shows basic information about the<br />
currently selected Registration.<br />
REFERENCE<br />
• For details on basic operation, refer to “REGISTRATION<br />
Screen” (p. 36).<br />
• For a list of all parameters download “<strong>JUPITER</strong>-<strong>50</strong> Parameter<br />
Guide” (PDF file) from “<strong>JUPITER</strong>-<strong>50</strong>” in the “Owner’s <strong>Manual</strong>s”<br />
list on the <strong>Roland</strong> website (http;//www.roland.com/support/<br />
en/).<br />
Volume of the registration<br />
Main settings of the<br />
Percussion/Lower Part<br />
Main settings of the<br />
Upper Part<br />
Main settings of<br />
the Solo Part<br />
The Registration saves the following parameters.<br />
Screen Tab Explanation<br />
Settings common to the entire Registration<br />
REGISTRATION<br />
COMMON<br />
REGISTRATION<br />
CONTROL<br />
REGISTRATION<br />
PERC/LOWER<br />
EDIT<br />
GENERAL<br />
Registration Level<br />
Tempo<br />
Octave Shift, Transpose<br />
ARP Arpeggiator<br />
HARMONY<br />
Controller settings<br />
Harmony Intelligence<br />
KBD Split<br />
PEDAL Pedal assignments<br />
D-BEAM D-BEAM controller assignments<br />
KNOB<br />
[CUTOFF/C1] [RESONANCE/C2] knob<br />
assignments<br />
S1/S2 [S1]/[S2] button assignments<br />
CTRL SW<br />
Control and other data sent to each<br />
Part<br />
Settings for the Percussion/Lower Part<br />
PITCH Pitch<br />
OUTPUT<br />
Tone, pan, volume, and reverb send<br />
level<br />
KBD Keyboard range<br />
OFFSET Offset values for filter and envelope<br />
VIBRATO Vibrato<br />
VELOCITY Velocity<br />
MISC<br />
Mono/poly switch<br />
Legato<br />
RX FLTR Control data received by each Part<br />
MODIFY<br />
Tone adjustment (when manual<br />
percussion or drum is selected)<br />
Screen Tab Explanation<br />
REGISTRATION<br />
SOLO EDIT<br />
REGISTRATION<br />
EXT PART<br />
REGISTRATION<br />
EFFECT<br />
Settings for the Solo Part<br />
PITCH Pitch<br />
OUTPUT<br />
Tone, pan, volume, and reverb send<br />
level<br />
KBD Keyboard range<br />
OFFSET Offset values for filter and envelope<br />
VIBRATO Vibrato<br />
VELOCITY Velocity<br />
MISC<br />
Mono/poly switch<br />
Legato<br />
RX FLTR<br />
CH1-4<br />
Control data received by each Part,<br />
etc.<br />
CH5-8<br />
Settings for messages sent to<br />
CH9-12<br />
CH13-16<br />
external MIDI devices<br />
Effects for the Percussion/Lower Part and Solo Part<br />
LIVE EFX Effect assigned to the Live Set
Saving a Registration<br />
Edits you make to a Registration are temporary; they will be lost<br />
when you turn off the power or select another Registration. If you<br />
want to keep an edited Registration, you must save it.<br />
NOTE<br />
When you execute the Write operation, the existing data at the<br />
write destination will be overwritten.<br />
REFERENCE<br />
For details on how a Registration is structured, refer to “How<br />
Registrations are Organized” (p. 23).<br />
1. In the REGISTRATION screen (p . 36), press the [WRITE]<br />
button .<br />
The REGISTRATION WRITE screen will appear. The [WRITE] button<br />
will light, and the Registration buttons will blink.<br />
2. Move the cursor to the position shown in the illustration,<br />
and select the write destination .<br />
Registration number<br />
MEMO<br />
You can also use the Registration buttons ([1]–[4]) to directly<br />
specify the write destination.<br />
3. Press the [F6] (WRITE) button .<br />
A message will ask “Are you sure?”<br />
4. To write the data, press the [F5] (OK) button .<br />
The message “Completed!” will appear.<br />
The Registration has been saved.<br />
NOTE<br />
Never turn off the power while data is being saved.<br />
Editing a Registration<br />
Cancelling the Save of a Registration<br />
You can cancel the save operation by doing one of the following.<br />
• Press the [EXIT] button<br />
• Press the [WRITE] button<br />
Naming a Registration<br />
If you want to rename the Registration, press the [F5]<br />
(RENAME) button of step 2.<br />
The REGISTRATION NAME screen will appear.<br />
For details on assigning a name, refer to “Assigning a Name”<br />
(p. 34).<br />
If the following display appears when you save<br />
If Live Set parameters have been edited, the check box on left of<br />
the Live Set name will be marked automatically when you save the<br />
Registration.<br />
The Live Set has been edited.<br />
You have the option of saving the edited Live Set at the same time<br />
that you save the Registration.<br />
MEMO<br />
If you save without selecting this check box, only the<br />
Registration will be saved. The Live Sets you’ve edited will<br />
remain in their edited state without being saved.<br />
1. If you want to save to a specified Live Set number, move<br />
the cursor to the position shown in the illustration and<br />
select the desired number .<br />
If you want to overwrite the current Live Set, proceed to the next<br />
step without changing the writing destination.<br />
2. Press the [F6] (WRITE) button .<br />
A message will ask “Are you sure?”<br />
3. To write the data, press the [F5] (OK) button .<br />
The message “Completed!” will appear.<br />
55<br />
Quick Guide<br />
Introduction Playing Sounds Editing Sounds<br />
Other Convenient<br />
Functions<br />
Connecting Other<br />
Equipment<br />
Appendix
Editing a Registration<br />
Initializing a Registration<br />
56<br />
Here’s how to initialize the currently selected Registration.<br />
MEMO<br />
• Initializing the Registration will affect the data in the temporary<br />
area (p. 24).<br />
• If you want to return the parameters of all sounds to their<br />
factory-set state, use Factory Reset (p. 79).<br />
1. In the Menu screen (p . 35), choose “Initialize”<br />
“Registration .”<br />
A message will ask “Are you sure?”<br />
2. Press the [F5] (OK) button .<br />
MEMO<br />
You can also initialize the Registration from the REGISTRATION<br />
screen by holding down the [SHIFT] button and pressing the<br />
[F6] (INIT) button.
Editing a Live Set<br />
You can edit a Live Set by switching the Tones in the Live Set, and<br />
by adjusting offset values relative to the value of each tone.<br />
The LIVE SET (UPPER) screen (p. 36) shows basic information about<br />
the currently selected Live Set.<br />
REFERENCE<br />
• For details on basic operation, refer to “LIVE SET (UPPER)<br />
Screen” (p. 36).<br />
• For a list of all parameters download “<strong>JUPITER</strong>-<strong>50</strong> Parameter<br />
Guide” (PDF file) from “<strong>JUPITER</strong>-<strong>50</strong>” in the “Owner’s <strong>Manual</strong>s”<br />
list on the <strong>Roland</strong> website (http;//www.roland.com/support/<br />
en/).<br />
The following parameters are stored in a Live Set.<br />
Screen Tab Explanation<br />
Settings common to the entire Live Set<br />
• Live set name, Live Set category<br />
LIVE SET<br />
COMMON<br />
• Volume<br />
• Filter<br />
• Phase lock, etc.<br />
Settings for each layer<br />
Layer on/off<br />
LV&PAN Volume<br />
Pan<br />
KBD Keyboard range<br />
EFXSEND<br />
Layer audio output destination and<br />
send level<br />
LIVE SET LAYER<br />
PITCH Pitch<br />
VIBRATO Vibrato<br />
OFFSET Offset values for filter and envelope<br />
VELOCITY Velocity<br />
MISC<br />
Mono/poly switch<br />
Legato<br />
RX FLTR 1<br />
RX FLTR 2<br />
MFX settings<br />
Control data received by each Layer<br />
MFX1<br />
Layer audio output destination and<br />
send level<br />
Send level to MFX<br />
MFX2 MFX type selection<br />
LIVE SET<br />
MFX on/off<br />
EFFECTS MFX3 MFX volume<br />
MFX settings, reverb settings<br />
MFX4<br />
Send levels from the Tone to reverb, and<br />
from MFX to reverb, etc.<br />
REVERB Reverb settings<br />
SWITCH MFX on/off<br />
Screen Tab Explanation<br />
TONE MODIFY<br />
Offset settings for each layer<br />
For a SuperNATURAL Synth Tone<br />
• Pitch<br />
• Filter<br />
• Amp<br />
• LFO<br />
• Modulation<br />
• Portamento, etc.<br />
For a SuperNATURAL Acoustic Tone<br />
• Noise level<br />
• Variation, etc.<br />
Settings for the Tone Blender function<br />
TONE BLENDER<br />
Specifies the current values as the new<br />
SET SRC initial values (the parameters of the Live<br />
Set will be updated).<br />
SHUFFLE Randomly sets all destination values.<br />
Restores the original state of the<br />
UNDO destination values that were randomly<br />
set when you pressed [F2] (SHUFFLE).<br />
Sets the destination values to match the<br />
RESET<br />
initial values.<br />
Tips for editing a Live Set<br />
A Registration consists of up to three Parts.<br />
Editing will be easier if you’re listening only to the Upper<br />
Parts (turn on the part button) (p. 42).<br />
Editing the Tones<br />
By pressing each layer’s [F4] (MODIFY) button in the LIVE SET<br />
(UPPER) screen (p. 36), you can modify the tone assigned to<br />
that layer (the LIVE SET TONE MODIFY screen will appear).<br />
For details, refer to “Editing the Tones Assigned to a Layer<br />
(Tone Modify)” (p. 60).<br />
57<br />
Quick Guide<br />
Introduction Playing Sounds Editing Sounds<br />
Other Convenient<br />
Functions<br />
Connecting Other<br />
Equipment<br />
Appendix
Editing a Live Set<br />
Changing a Live Set’s Tones<br />
58<br />
Here’s how to change the Tones in a Live Set.<br />
1. In the LIVE SET (UPPER) screen (p . 36), move the cursor to<br />
the tone name and press the [ENTER] button .<br />
The TONE LIST screen will appear.<br />
2. Select the new tone, and then press the [ENTER] button .<br />
The tone category is shown at the top of the list of tones.<br />
The Tone will change.<br />
MEMO<br />
The SuperNATURAL Acoustic Tone 0028: TW Organ can be<br />
assigned only to layer 1.<br />
Layer On/Off and Volume Adjustment<br />
Here’s how to turn each layer on/off or adjust its volume.<br />
1. In the LIVE SET (UPPER) screen (p . 36), hold down the<br />
[SHIFT] button and press a button from [F1] (LAYER 1)<br />
through [F4] (LAYER 4) .<br />
Layer Status<br />
OFF<br />
By holding down the [SHIFT] button while you press one of the<br />
[F1]–[F4] buttons, you can turn the corresponding layer on/off.<br />
MEMO<br />
Alternatively, you can move the cursor to a layer that you want<br />
to change, and use the value dial to turn that layer on/off.<br />
2. Move the cursor to a slider and adjust the volume .<br />
ON<br />
Switching the MFX (Multi-effects)<br />
Each Live Set contains four MFX (multi-effects) processors.<br />
The “LIVE SET EFFECTS screen” is used to switch MFX settings.<br />
1. In the LIVE SET (UPPER) screen (p . 36), press the [F3]<br />
(EFFECT) button .<br />
2. Move the cursor to the MFX processor that you want to<br />
change, and use the value dial to change the effect type .<br />
Turning MFX On/Off<br />
1. In the LIVE SET (UPPER) screen (p . 36), press the [F3]<br />
(EFFECT) button .<br />
2. Press the [F6] (SWITCH) button .<br />
The EFFECT SWITCH window will appear.<br />
3. Use the [F1] (MFX 1)–[F5] (REVERB) buttons to turn each<br />
effect on/off .<br />
The effect will turn on/off each time you press the corresponding<br />
button.<br />
4. To close the edit window, press the [F6] (CLOSE) button or<br />
the [EXIT] button .<br />
You’ll be returned to the LIVE SET EFFECTS screen.
Adjusting the Effect Send Levels and<br />
Effect Output Levels<br />
You can adjust the level at which the sound of each layer is sent to<br />
MFX, and the output level of the sound that has passed through the<br />
effect.<br />
Set the level of sound sent to<br />
MFX or reverb.<br />
Set the output destination and<br />
output level of the selected layer.<br />
Editing the MFX<br />
Set the level of sound sent from<br />
MFX to reverb.<br />
Set the output level of MFX or<br />
reverb.<br />
To edit MFX settings, access the MFX parameter screen.<br />
1. In the LIVE SET (UPPER) screen (p . 36), press the [F3]<br />
(EFFECT) button .<br />
2. Press the button to which the effect you want to edit is<br />
assigned, from [F1] (MFX 1) through [F4] (MFX 4) .<br />
The MFX parameter screen will appear.<br />
Use the [F1] (MFX 1)–[F4] (MFX 4) buttons to switch between<br />
screens.<br />
3. Edit the MFX settings .<br />
From the MFX edit screen, pressing [F5] (CTRL) button will take you<br />
to the MFX control edit screen.<br />
For details on MFX parameters, refer to the parameter list in the PDF<br />
manual.<br />
Editing the Reverb<br />
Editing a Live Set<br />
To edit Reverb settings, access the Reverb parameter screen.<br />
1. In the LIVE SET (UPPER) screen (p . 36), press the [F3]<br />
(EFFECT) button .<br />
2. Press the [F5] (Reverb) button .<br />
The Reverb parameter screen will appear.<br />
3. Edit the Reverb settings .<br />
The parameters that can be edited will depend on the effect type<br />
you’ve selected. For details on Reverb parameters, refer to the<br />
parameter list in the PDF manual.<br />
59<br />
Quick Guide<br />
Introduction Playing Sounds Editing Sounds<br />
Other Convenient<br />
Functions<br />
Connecting Other<br />
Equipment<br />
Appendix
Editing a Live Set<br />
Editing the Tones Assigned to a Layer<br />
(Tone Modify)<br />
Here’s how to modify the sound of each layer.<br />
You’ll be able to modify selected parameters for each sound (Modify<br />
parameters and Offset parameters).<br />
1. In the LIVE SET (UPPER) screen (p . 36), select the tone that<br />
you want to edit .<br />
60<br />
2. Press the [F4] (MODIFY) button .<br />
The LIVE SET TONE MODIFY screen will appear.<br />
3. Edit the Tone .<br />
Example screen for a SuperNATURAL Acoustic Tone<br />
Example screen for a SuperNATURAL Synth Tone<br />
REFERENCE<br />
For details on the parameters for SuperNATURAL acoustic<br />
tones, refer to ”Parameter List” (p. 88).<br />
MEMO<br />
On the Top screen, you can access the TONE MODIFY screen by<br />
holding down the [SHIFT] button and pressing the following<br />
buttons.<br />
Layer 1 Layer 2<br />
Layer 3 Layer 4<br />
Simultaneously Adjusting Multiple<br />
Live Set Parameters (Tone Blender)<br />
The Tone Blender function lets you shift between the initial<br />
values (the currently specified Live Set parameter values) and the<br />
destination values (which you may set freely) by turning just a<br />
single [RESONANCE/C2] knob.<br />
You can use the Tone Blender function to create enormously varied<br />
modifications in the sound simply by turning a knob, and save the<br />
resulting sound as a new Live Set.<br />
Example<br />
Tone Blender<br />
Control value<br />
Source<br />
values<br />
Parameter<br />
A<br />
Parameter<br />
B<br />
Parameter<br />
C<br />
Min 0 -100 30<br />
Max 100 60 -<strong>50</strong><br />
+100<br />
-100<br />
Value<br />
Current<br />
values<br />
Min Max<br />
Destination values<br />
Parameter A<br />
Parameter B<br />
Tone Blender<br />
Control value<br />
Parameter C<br />
MEMO<br />
The following Live Set parameters can be adjusted by the Tone<br />
Blender: level, pan, cutoff, resonance, attack, delay, release, MFX<br />
1–4 send level, and reverb send level.<br />
1. In the LIVE SET (UPPER) screen (p . 36), press the [F6]<br />
(BLENDER) button .<br />
The LIVE SET TONE BLENDER screen will appear.
2. Set the destination values (lower half of the screen) .<br />
Indicates the current values.<br />
Specify the destination values.<br />
Button Explanation<br />
[F1] (SET SRC)<br />
Specifies the current values as the new initial values (the<br />
parameters of the Live Set will be updated).<br />
[F2] (SHUFFLE) Randomly sets all destination values.<br />
[F3] (UNDO)<br />
Restores the original state of the destination values that<br />
were randomly set when you pressed [F2] (SHUFFLE).<br />
[F4] (RESET) Sets the destination values to match the initial values.<br />
[F5] (LAYER )<br />
[F6] (LAYER )<br />
Switch between layers 1–4.<br />
MEMO<br />
• For details on using the [F1] (SET SRC) button, refer to “Saving<br />
the sound created by the Tone Blender” (p. 61).<br />
• After pressing the [F2] (SHUFFLE) button, you can press the [F3]<br />
(UNDO SHUFFLE) button to return the destination values to the<br />
state they were in prior to pressing the [F2] (SHUFFLE) button.<br />
3. Turn the [RESONANCE/C2] knob .<br />
All Live Set parameters will move between the source values and<br />
destination values.<br />
MEMO<br />
By saving the Live Set in this state, you can save the initial values<br />
and the destination values.<br />
However, the current values (the sound you’re currently hearing)<br />
will not be saved.<br />
If you want to save the sound you’re currently hearing, refer to<br />
”Saving the sound created by the Tone Blender” (p. 61).<br />
Editing a Live Set<br />
Convenient Ways to Use the Tone Blender<br />
Saving the sound created by the Tone Blender<br />
After using the value dial to get a sound you like, you can save that<br />
state as a Live Set.<br />
1. Use the value dial to get the sound you like, and then<br />
press the [F1] (SET SRC) button .<br />
The parameters for the sound produced by the Tone Blender<br />
function will be set as the new initial values of the current Live Set.<br />
2. Save the Live Set (p . 62) .<br />
The current sound will be saved as a Live Set.<br />
When you call up the saved Live Set, the sound produced by the<br />
Tone Blender will be called up.<br />
Using the D-BEAM controller to control the<br />
Tone Blender<br />
1. In the REGISTRATION screen (p . 36), press the [F2]<br />
(CONTROL) button .<br />
2. Press the [F3] (D-BEAM) button .<br />
3. Set the D-BEAM Assign parameter to “CC79 (Tone<br />
Blender) .”<br />
Now you can control the Tone Blender by operating the D-BEAM<br />
controller.<br />
61<br />
Quick Guide<br />
Introduction Playing Sounds Editing Sounds<br />
Other Convenient<br />
Functions<br />
Connecting Other<br />
Equipment<br />
Appendix
Editing a Live Set<br />
Saving a Live Set<br />
62<br />
Edits you make to the Live Set are temporary; they will be lost if you<br />
turn off the power or select another Live Set. If you want to keep<br />
the edited Live Set, you must save it to user memory.<br />
NOTE<br />
When you save, the data previously existing in the save<br />
destination will be overwritten.<br />
1. With the LIVE SET (UPPER) screen (p . 36) displayed, press the<br />
[WRITE] button .<br />
The LIVE SET WRITE screen will appear.<br />
2. Move the cursor to Write Destination and use the value<br />
dial or the [DEC] [INC] buttons to change the write<br />
destination .<br />
3. Press the [F6] (WRITE) button .<br />
A message will ask “Are you sure?”<br />
4. To save the Live Set, press the [F5] (OK) button .<br />
The screen will indicate “Completed!”<br />
The Live Set has been saved to the save-destination Live Set<br />
number you specified.<br />
NOTE<br />
Never turn off the power while data is being saved.<br />
Cancelling the Save of a Live Set<br />
You can cancel the save operation by doing one of the following.<br />
• Press the [EXIT] button<br />
• Press the [WRITE] button<br />
Naming a Live Set<br />
If you want to rename the Live Set, press the [F5] (RENAME)<br />
button of step 2.<br />
The LIVE SET NAME screen will appear.<br />
For details on assigning a name, refer to “Assigning a Name”<br />
(p. 34).
Initializing a Live Set<br />
Here’s how to initialize the currently selected Live Set.<br />
MEMO<br />
• Initializing the Live Set affects the data in the temporary area<br />
(p. 24).<br />
• If you want to return the parameters of all sounds to their<br />
factory-set state, use Factory Reset (p. 79).<br />
1. In the Menu screen (p . 35), choose “Initialize” “Live Set .”<br />
A message will ask “Are you sure?”<br />
2. Press the [F5] (OK) button<br />
MEMO<br />
In the LIVE SET (UPPER) screen (p. 36), you can also initialize the<br />
Live Set by holding down the [SHIFT] button and pressing the<br />
[F6] (INIT) button.<br />
.<br />
Copying a Layer<br />
Editing a Live Set<br />
Here’s how to copy a layer to a different layer.<br />
This is a convenient way to create a variation based on an edited<br />
layer.<br />
1. In the LIVE SET (UPPER) screen (p . 36), hold down the<br />
[SHIFT] button and press the [F5] (COPY) button .<br />
2. As the Source, specify the copy-source layer . As the<br />
Destination, specify the copy-destination layer .<br />
NOTE<br />
When you copy a layer, the sound of the specified Destination<br />
layer will be lost, and overwritten by the sound of the specified<br />
Source layer.<br />
3. Press the [F6] (EXEC) button .<br />
A message will ask “Are you sure?”<br />
4. Press the [F5] (OK) button .<br />
The sound of the specified Source layer will be copied to the<br />
specified Destination layer.<br />
63<br />
Quick Guide<br />
Introduction Playing Sounds Editing Sounds<br />
Other Convenient<br />
Functions<br />
Connecting Other<br />
Equipment<br />
Appendix
64<br />
Using the USB Memory Song Player/Recorder<br />
The USB Memory Song Player/Recorder lets you<br />
play back audio files (WAV, MP3, AIFF) that you’ve<br />
copied from your computer to a USB flash drive,<br />
or to record your keyboard performance to a USB<br />
flash drive.<br />
NOTE<br />
• Never insert or remove a USB flash drive while this unit’s power<br />
is on. Doing so may corrupt the unit’s data or the data on the<br />
USB flash drive.<br />
• Carefully insert the USB flash drive all the way in-until it is firmly<br />
in place.<br />
• Use USB flash drive available from <strong>Roland</strong>. Proper operation<br />
cannot be guaranteed if other USB device is used.<br />
• Don’t connect anything other than a USB flash drive to the USB<br />
MEMORY connector.<br />
MEMO<br />
If the USB flash drive contains a large number of song files, it<br />
may take some time for them to be read.<br />
Basic Operations in the SONG Screen<br />
When you press the [SONG] button, the SONG LIST screen or the<br />
SONG SETUP screen will appear.<br />
Use the [F1] (LIST) button and [F2] (SETUP) button to switch<br />
between screens.<br />
In the SONG LIST screen you can select an audio file to playback.<br />
In the SONG SETUP screen you can make settings for playback.<br />
Audio files are listed<br />
here.<br />
Adjust the volume<br />
of the song player.<br />
Assign the currently<br />
playing (or<br />
stopped) location<br />
as the start of loop<br />
playback.<br />
Turn chain play on/<br />
off (p. 66).<br />
Set the playback<br />
speed (p. 65).<br />
Assign the currently<br />
playing (or<br />
stopped) location<br />
as the end of loop<br />
playback.<br />
Indicates the current time<br />
of the audio file.<br />
Turn loop play on/<br />
off (p. 65).<br />
Set the playback<br />
pitch (p. 65).<br />
MEMO<br />
Copy your audio files (WAV, MP3, AIFF) to the root folder (the top<br />
level) of your USB flash drive, or create a folder on your USB flash<br />
drive and copy the files into it. For more about folders in USB<br />
flash drive, refer to “USB Flash Drive” (p. 25).<br />
Playback<br />
Here’s how to play back audio files saved on the USB flash drive.<br />
1. Press the [SONG] button .<br />
The SONG LIST screen will appear. A list of the audio files on the<br />
USB flash drive will appear.<br />
If the SONG SETUP screen is displayed, press the [F1] (LIST) button<br />
to access the SONG LIST screen.<br />
MEMO<br />
If the file name or folder name contains double-byte characters<br />
(e.g., Japanese), they will not be shown correctly in the display.<br />
2. Use the value dial or the [DEC] [INC] buttons to select an<br />
audio file .<br />
MEMO<br />
• To view files that are inside a folder, select that folder and press<br />
the [ ] (cursor) or [ENTER] button.<br />
• The folder you’re currently viewing is shown at the top of the<br />
list. To return to the next higher level folder, press the [ ]<br />
(cursor) button.<br />
Currently shown folder<br />
Folder<br />
3. Press the [ ] (PLAY) button .<br />
The selected audio file will play.<br />
• Press the [ ] (STOP) button to stop playback.<br />
When you press the [ ] (PLAY) button once again, playback<br />
will resume from where it was stopped.<br />
• Press the [ ] button to return to the beginning of the audio<br />
file.<br />
• Rewinds the audio file while you hold down the [ ] button.<br />
• Fast-forwards the audio file while you hold down the [ ]<br />
button.
Audio files that can be played<br />
MP3<br />
Format MPEG-1 audio layer 3<br />
Sampling Frequency 44.1 kHz<br />
32 k, 40 k, 48 k, 56 k, 64 k, 80 k, 96 k, 112 k,<br />
Bit Rate<br />
128 k, 160 k, 192 k, 224 k, 256 k, 320 kbps<br />
/ VBR (Variable Bit Rate)<br />
WAV, AIFF<br />
Sampling Frequency 44.1 kHz, 48 kHz, 96 kHz<br />
Bit Rate 8, 16, 24-bit<br />
Caution when Playing Back Audio Files<br />
Playing back an MP3 file or changing the playback tempo<br />
of an audio file places a significant processing burden<br />
on the <strong>JUPITER</strong>-<strong>50</strong>, and in some cases may cause it to be<br />
unable to completely process all of the performance data<br />
from the keyboard.<br />
If this occurs, you may be able to solve the problem by<br />
taking the following actions.<br />
• Use WAV format data rather than MP3 format data<br />
• Return the song tempo to its original setting (to 100%)<br />
Changing the Playback Speed or Pitch<br />
You can change the speed or pitch at which an audio file plays back.<br />
1. In the SONG screen (p . 37), press the [F2] (SETUP) button .<br />
2. Change the Play Speed or the Play Pitch .<br />
Parameter Value Explanation<br />
Play Speed 75–125 [%] Changes the speed of playback.<br />
Play Pitch 30–170 [%] Changes the pitch of playback.<br />
Using the USB Memory Song Player/Recorder<br />
Looping a Specific Region of Time<br />
You can specify start and end points within an audio file, and make<br />
the playback loop between those points.<br />
1. In the SONG screen (p . 37), press the [F6] (LOOP) button .<br />
Loop playback will turn on, and the check box will be selected.<br />
2. Use either of the following methods to specify the start<br />
and end points for loop playback .<br />
• Use Loop Top Point to specify the start, and Loop End Point to<br />
specify the end.<br />
The value is specified in terms of (hours) : (minutes) : (seconds) .<br />
(1/100th second).<br />
• Carry out playback until you reach the desired loop start or end<br />
point, and then press the [F3] (SET TOP) button (start) or [F4]<br />
(SET END) (end).<br />
MEMO<br />
When using loop playback with an MP3 file, the time you<br />
specified might shift somewhat forward or backward (loop<br />
playback will occur near the time you specified).<br />
3. Press the [ ] (PLAY) button .<br />
Playback will loop between the Loop Top Point (start) and Loop End<br />
Point (end).<br />
4. To turn off loop playback, press the [F6] (LOOP) button<br />
once again .<br />
Loop playback will turn off, and the check box will be cleared.<br />
MEMO<br />
You can’t play back a loop of a specified time if chain play is on.<br />
65<br />
Quick Guide<br />
Introduction Playing Sounds Editing Sounds<br />
Other Convenient<br />
Functions<br />
Connecting Other<br />
Equipment<br />
Appendix
Using the USB Memory Song Player/Recorder<br />
Playing Audio Files Consecutively (Chain<br />
Play)<br />
Here’s how the audio files in the same folder can be played<br />
consecutively.<br />
1. In the SONG screen (p . 37), press the [F5] (CHAIN) button .<br />
Chain play will turn on, and the check box will be selected.<br />
2. Press the [ ] (PLAY) button .<br />
The audio files will begin playing. When a song ends, playback will<br />
continue with the next song.<br />
66<br />
MEMO<br />
• Audio files will be played in the order in which they appear in<br />
the audio file list.<br />
The “N ” symbol indicates the song that will be played next.<br />
• During playback, you can change the song that will be played<br />
next simply by moving cursor to another audio file (the “N ”<br />
symbol will move).<br />
Currently selected<br />
audio file<br />
Audio file that will<br />
be played next<br />
3. To turn chain play off, press the [F5] (CHAIN) button once<br />
again .<br />
Chain play will turn off, and the check box will be cleared.<br />
MEMO<br />
• Chain play will automatically turn off if you press the [ ] (STOP)<br />
button.<br />
• If chain play is on, turning “Loop Switch” on will make the audio<br />
files in the folder play repeatedly. When the last audio file in the<br />
folder has finished playing, playback will return to the first file<br />
and continue.<br />
Creating a Folder<br />
Here’s how to create a new folder inside the currently selected<br />
folder.<br />
In this example, we’ll create a new folder inside the audio folder<br />
that you created on your computer.<br />
1. In the SONG LIST screen, move the cursor to the audio<br />
folder and press the [ ] (cursor) button (p . 64) .<br />
The contents of the audio folder will be displayed.<br />
2. Hold down the [SHIFT] button, and press the [F1] (CREATE)<br />
button .<br />
The Create Folder screen will appear.<br />
3. Assign a name to the folder .<br />
For details on how to assign a name, refer to “Assigning a Name” (p.<br />
34).<br />
4. Press the [F6] (EXEC) button .<br />
The message “Create Folder Completed!” will appear; the folder has<br />
been created.<br />
MEMO<br />
It’s not possible to create folders eight or more levels deep,<br />
including the root folder.
Deleting an Audio File or Folder<br />
Here’s how to delete an unwanted audio file or folder.<br />
NOTE<br />
If you delete an audio file or folder, it cannot be recovered. Take<br />
care not to delete important data.<br />
MEMO<br />
You can’t delete a folder that contains files. Before you can<br />
delete a folder, you must delete all the files within that folder.<br />
1. In the SONG LIST screen (p . 64), select the audio file or folder<br />
that you want to delete .<br />
2. Hold down the [SHIFT] button and press the [F2] (DELETE)<br />
button .<br />
The message “Are you sure?” will appear.<br />
3. To execute the deletion, press the [F5] (OK) button .<br />
The message “Delete Song/Folder Completed!” will appear; the<br />
audio file or folder has been deleted.<br />
Renaming an Audio File or Folder<br />
Here’s how to rename an audio file or folder.<br />
1. In the SONG LIST screen (p . 64), select the audio file or folder<br />
that you want to rename .<br />
2. Hold down the [SHIFT] button, and press the [F3]<br />
(RENAME) button .<br />
The RENAME SONG/FOLDER screen will appear.<br />
3. Assign the desired name .<br />
For details on how to assign a name, refer to “Assigning a Name” (p.<br />
34).<br />
4. Press the [F6] (EXEC) button .<br />
The message “Rename Song/Folder Completed!” will appear; the<br />
audio file or folder has been renamed.<br />
Using the USB Memory Song Player/Recorder<br />
Moving an Audio File or Folder<br />
Here’s how to move an audio file or folder to a different folder.<br />
1. In the SONG LIST screen (p . 64), select the audio file or folder<br />
that you want to move .<br />
2. Hold down the [SHIFT] button, and press the [F4] (MOVE)<br />
button .<br />
The Move Folder Select screen will appear.<br />
3. Move the cursor to the destination folder, and press the<br />
[ ] (cursor) button to view the contents of the folder<br />
(p . 64) .<br />
MEMO<br />
As the destination of the move, you cannot specify a sub-folder<br />
(folder 2) of the folder you’re moving (folder 1).<br />
/<br />
Root folder<br />
:<br />
OK<br />
Folder 1<br />
Folder 3<br />
Folder 2<br />
4. Press the [F6] (EXEC) button .<br />
The message “Are you sure?” will appear.<br />
5. To execute the move, press the [F5] (OK) button .<br />
The message “Move Song/Folder Completed!” will appear; the audio<br />
file or folder has been moved.<br />
OK<br />
67<br />
Quick Guide<br />
Introduction Playing Sounds Editing Sounds<br />
Other Convenient<br />
Functions<br />
Connecting Other<br />
Equipment<br />
Appendix
Using the USB Memory Song Player/Recorder<br />
Basic Operations in the Audio Rec Standby Screen<br />
68<br />
When you press the [REC] button, the Audio Rec Standby screen will appear.<br />
Here you can make settings for recording.<br />
Recording Mode<br />
Recording<br />
Mode<br />
MIX<br />
KEYBOARD<br />
Recording<br />
Recording Folder/Recording File<br />
Indicates the name of the folder and file<br />
in which the recorded result will be saved.<br />
Explanation<br />
Sound from the<br />
keyboard, the USB<br />
COMPUTER port, the<br />
AUDIO IN jack, and the<br />
playback from the USB<br />
memory song player<br />
will be recorded.<br />
Sound from the<br />
keyboard will be<br />
recorded.<br />
Metronome Beat<br />
Specifies the time signature<br />
of the click sound.<br />
The Audio Rec Standby screen will appear.<br />
P .SYNC (Player Sync)<br />
If this is on, audio file playback will begin at<br />
the same moment that recording begins.<br />
RENAME<br />
Renames the file in which<br />
the recording will be saved.<br />
FOLDER<br />
Changes the folder in which<br />
the recording will be saved.<br />
CNT IN (Count In)<br />
Turn this on if you want a two-measure<br />
count before recording.<br />
REC LEVEL Knob<br />
/Level Meter<br />
Use the Recording Level<br />
knob to adjust the recording<br />
level. Adjust it so the<br />
“CLIP” indication does not<br />
appear in the level meter.<br />
[ ] (Play) button<br />
Recording will begin.<br />
CLICK<br />
Switches on/off the click sound<br />
during recording.<br />
Your keyboard performance can be recorded to a USB flash drive.<br />
The audio being input via the <strong>JUPITER</strong>-<strong>50</strong>’s AUDIO IN jack and USB COMPUTER port can also be recorded.<br />
NOTE<br />
2. Make the recording settings, and then press the [ ]<br />
While the Audio Rec Standby screen is displayed, you must not<br />
(Play) button .<br />
turn off the <strong>JUPITER</strong>-<strong>50</strong>’s power, or disconnect or connect your<br />
The [REC] button and [ ] (Play) button will light, and recording<br />
USB flash drive.<br />
will begin.<br />
Also, you must not turn off the <strong>JUPITER</strong>-<strong>50</strong>’s power or disconnect<br />
or connect the USB flash drive while recording.<br />
MEMO<br />
If you do so, the data might not be written correctly, or the<br />
• One minute of recorded data will occupy approximately 10 MB.<br />
contents of memory might be destroyed.<br />
• To see how much free space remains on the USB flash drive,<br />
1. Press the [REC] button .<br />
refer to “INFORMATION” (p. 78).<br />
3. To stop recording, press the [ ] (STOP) button .<br />
Recording will stop, and the recorded result will be saved on the<br />
USB flash drive.<br />
Audio files that will be saved<br />
WAV<br />
Sampling Frequency 44.1 kHz<br />
Bit Rate 16-bit
Audio Signal Flow<br />
<strong>JUPITER</strong>-<strong>50</strong> Sound Generator<br />
(keyboard)<br />
USB MEMORY SONG PLAYER<br />
AUDIO IN<br />
USB COMPUTER (from computer)<br />
Song Level<br />
Recording<br />
Mode<br />
Using the Included USB Memory Protector<br />
Recording<br />
Level<br />
Using the USB Memory Song Player/Recorder<br />
USB MEMORY<br />
SONG RECORDER<br />
You can use the included USB memory protector to prevent theft of the USB flash drive connected to the <strong>JUPITER</strong>-<strong>50</strong>.<br />
USB COMPUTER<br />
(to computer)<br />
MAIN OUT/SUB OUT<br />
NOTE<br />
• You must use the included screws.<br />
• You must use the included Allen wrench to tighten or remove the screws. Using a tool that does not match the screw heads will damage them.<br />
• Be careful not to over-tighten the screws. Doing so may damage the screw’s head, causing the wrench to rotate uselessly.<br />
• To tighten the screws, turn the Allen wrench clockwise. To loosen the screws, turn the Allen wrench counter-clockwise.<br />
loosen tighten<br />
• Keep the removed screws out of the reach of small children to ensure they are not swallowed accidentally.<br />
• Never allow foreign objects (e.g., coins, wires) to enter the USB memory box.<br />
69<br />
Quick Guide<br />
Introduction Playing Sounds Editing Sounds<br />
Other Convenient<br />
Functions<br />
Connecting Other<br />
Equipment<br />
Appendix
70<br />
Settings and Convenient Functions<br />
Access the UTILITY MENU screen to select the desired setting or<br />
function.<br />
Basic Procedure for Utility<br />
Operations<br />
1. In the Menu screen (p . 35), choose “Utility” and press the<br />
[ENTER] button .<br />
The UTILITY MENU screen will appear.<br />
2. Select the function that you want to execute, and press<br />
the [ENTER] button .<br />
Menu Explanation Page<br />
Backup Saves user data to a USB flash drive. p. 70<br />
Restore<br />
Restores the <strong>JUPITER</strong>-<strong>50</strong>’s settings<br />
from a USB flash drive.<br />
Format the USB flash drive that’s<br />
p. 70<br />
Format USB Mem connected to the USB MEMORY<br />
connector.<br />
p. 70<br />
Factory Reset<br />
Resets the <strong>JUPITER</strong>-<strong>50</strong> to its factory<br />
settings.<br />
p. 79<br />
Regist Set Exchange Exchanges Registration Sets. p. 71<br />
Reg Move/Exchang<br />
Changes the order of the registrations,<br />
or exchanges the numbers of<br />
two registrations.<br />
p. 73<br />
p. 74<br />
Export<br />
Writes <strong>JUPITER</strong>-<strong>50</strong> sound data to a<br />
USB flash drive.<br />
p. 72<br />
Import<br />
Reads previously exported data from<br />
a USB flash drive into the <strong>JUPITER</strong>-<strong>50</strong>.<br />
p. 72<br />
Initializing a USB Flash Drive<br />
(Format)<br />
This operation will initialize (format) a USB flash drive.<br />
NOTE<br />
When you execute this operation, all data saved on the USB<br />
flash drive will be lost. If the USB flash drive contains important<br />
data, back it up to your computer before initializing the USB<br />
flash drive.<br />
1. In the UTILITY MENU screen (p . 37), choose “Format USB<br />
Mem” and press the [ENTER] button .<br />
A message will ask “Are you sure?”<br />
2. To initialize, press the [F5] (OK) button .<br />
NOTE<br />
Never turn off the power while an USB flash drive is being<br />
formatted.<br />
Backing Up All Settings<br />
You can back up all of settings in the <strong>JUPITER</strong>-<strong>50</strong> to a USB flash drive<br />
(sold separately), or restore those settings into the <strong>JUPITER</strong>-<strong>50</strong>’s<br />
memory.<br />
MEMO<br />
One set of backup data can be saved on a USB flash drive.<br />
NOTE<br />
• When you execute the backup operation, the backup data that<br />
is currently saved on the USB flash drive will be overwritten. If<br />
you want to keep the backup data that’s on the USB flash drive,<br />
copy it to your computer as described in “Backing Up USB Flash<br />
Drive Data to a Computer” (p. 71).<br />
• Never insert or remove a USB flash drive while this unit’s power<br />
is on. Doing so may corrupt the unit’s data or the data on the<br />
USB flash drive.<br />
• Carefully insert the USB flash drive all the way in-until it is firmly<br />
in place.<br />
• Use USB flash drive available from <strong>Roland</strong>. Proper operation<br />
cannot be guaranteed if other USB device is used.<br />
• Don’t connect anything other than a USB flash drive to the USB<br />
MEMORY connector.<br />
Backing Up to a USB Flash Drive<br />
1. In the UTILITY MENU screen (p . 37), choose “Backup” and<br />
press the [ENTER] button .<br />
A message will ask “Are you sure?”<br />
2. To execute, press the [F5] (OK) button .<br />
NOTE<br />
Never turn off the power while the backup operation is<br />
occurring.<br />
Restoring Backed-up Settings from a USB<br />
Flash Drive<br />
1. In the UTILITY MENU screen (p . 37), choose “Restore” and<br />
press the [ENTER] button .<br />
A message will ask “Are you sure?”<br />
NOTE<br />
When you execute the Restore operation, all settings currently<br />
saved in the <strong>JUPITER</strong>-<strong>50</strong> will be lost. If you want to keep the<br />
current settings, back them up to a different USB flash drive.<br />
2. To execute, press the [F5] (OK) button .<br />
NOTE<br />
Never turn off the power while the restore operation is<br />
occurring.
Backing Up USB Flash Drive Data to a<br />
Computer<br />
Here’s how to back up the data from a USB flash drive to your<br />
computer.<br />
1. Turn off the <strong>JUPITER</strong>-<strong>50</strong>’s power .<br />
2. Disconnect the USB flash drive from the <strong>JUPITER</strong>-<strong>50</strong>, and<br />
connect it to your computer .<br />
3. On your computer, open the USB flash drive .<br />
4. Copy (drag and drop) the entire “ROLAND” folder from the<br />
USB flash drive into a folder on your computer .<br />
NOTE<br />
You must copy the entire “ROLAND” folder.<br />
The data will not be backed up correctly if you copy only part of<br />
the files in the “ROLAND” folder.<br />
5. When the copy is completed, unmount (eject) the USB<br />
flash drive from your computer, and then disconnect it<br />
from the computer .<br />
Windows 7/ Windows Vista / Windows XP users:<br />
In My Computer (or Computer), right-click the “removable disk”<br />
icon and choose “Eject.”<br />
Mac OS X users:<br />
Drag the USB flash drive icon into the Trash.<br />
Restoring Backed-up Data from a<br />
Computer to a USB Flash Drive<br />
1. Connect the USB flash drive to your computer, and open<br />
the USB flash drive .<br />
2. Copy (drag and drop) the entire backed-up “ROLAND”<br />
folder from your computer into the USB flash drive .<br />
NOTE<br />
• When you copy the backed-up data to your USB flash drive, the<br />
data that was previously on the USB flash drive will be lost.<br />
• You must copy the entire “ROLAND” folder. The system will not<br />
operate correctly if you copy only some of the files from the<br />
“ROLAND” folder.<br />
3. Disconnect the USB flash drive from your computer as<br />
described in step 5 of “Backing Up USB Flash Drive Data to<br />
a Computer” (p . 71) .<br />
Settings and Convenient Functions<br />
Exchanging Registration Sets<br />
Here’s how to exchange entire Registration Sets.<br />
1. In the UTILITY MENU screen (p . 37), choose “Regist Set<br />
Exchange” and press the [ENTER] button .<br />
The REGISTRATION SET EXCHANGE screen will appear.<br />
2. Specify the numbers of the Registration Sets that you<br />
want to exchange .<br />
3. Press the [F6] (EXEC) button .<br />
A message will ask “Are you sure?”<br />
4. Press the [F5] (OK) button .<br />
When the Registration Sets have been exchanged, the message<br />
“Exchange Completed!” will appear.<br />
NOTE<br />
Never turn off the power while a Registration Set is being<br />
exchanged.<br />
71<br />
Quick Guide<br />
Introduction Playing Sounds Editing Sounds<br />
Other Convenient<br />
Functions<br />
Connecting Other<br />
Equipment<br />
Appendix
Settings and Convenient Functions<br />
Exporting/Importing Sound Data<br />
72<br />
From the registrations, live sets, and tones saved in the <strong>JUPITER</strong>-<strong>50</strong>,<br />
you can select the desired items and export them to a USB flash<br />
drive.<br />
Here’s how to select the desired registrations, live sets, or tones<br />
from a file that was exported to a USB flash drive, and import them<br />
into the <strong>JUPITER</strong>-<strong>50</strong>.<br />
When you export a registration, the live sets and tones used by<br />
that registration will also be exported. In the same way, when<br />
you export a live set, the tones used by that live set will also be<br />
exported.<br />
Exporting Sound Data<br />
1. In the UTILITY MENU screen (p . 37), choose “Export” and<br />
press the [ENTER] button .<br />
The EXPORT screen will appear.<br />
2. Mark the sound data that you want to export .<br />
Select the desired registration, live set, or tone, and press the<br />
[F4] (MARK) button or the [F5] (MARKALL) button. If the item was<br />
already marked, the mark will be cleared.<br />
You can use the [F1] (REG), [F2] (LIVE SET), and [F3] (TONE) buttons<br />
to mark or unmark registrations, live sets, and tones, respectively.<br />
When you mark an item, an “*” will appear at the left of the Number/<br />
Name.<br />
A “+” symbol will automatically appear for the live sets or tones used<br />
by sound data marked with an “*” symbol. The “+” symbol cannot be<br />
directly erased.<br />
MEMO<br />
The only tones that can be exported are SuperNATURAL Synth<br />
tones.<br />
3. Press the [F6] (EXPORT) button .<br />
You can rename the file that will be exported.<br />
To rename the file, press the [F1] (RENAME) button.<br />
MEMO<br />
• The exported sound data will be saved together in a single file<br />
named ***.SVD, located below /ROLAND/SOUND in the USB<br />
flash drive.<br />
• If you export a registration that uses a user arpeggio style, the<br />
two files ***.SVD and ***.BIN will be created.<br />
4. Press the [F6] (EXEC) button .<br />
The screen will ask “Are you sure?”<br />
5. To carry out the export, press the [F5] (OK) button .<br />
NOTE<br />
Never turn off the power while the export operation is in<br />
progress.<br />
Importing Sound Data<br />
1. In the UTILITY MENU screen (p . 37), choose “Import” and<br />
press the [ENTER] button .<br />
The IMPORT screen will appear.<br />
2. Select the data file from which you want to import, and<br />
press the [F6] (Select) button .<br />
3. Select the sound data that you want to import .<br />
Select the desired registration, live set, or tone, and press the<br />
[F4] (MARK) button or the [F5] (MARKALL) button. If the item was<br />
already marked, the mark will be cleared.<br />
You can use the [F1] (REG), [F2] (LIVE SET), and [F3] (TONE) buttons<br />
to mark or unmark registrations, live sets, and tones, respectively.<br />
When you mark an item, an “*” will appear at the left of the Number/<br />
Name.<br />
A “+” symbol will automatically appear for the live sets or tones used<br />
by sound data marked with an “*” symbol. The “+” symbol cannot be<br />
directly erased.<br />
4. Press the [F6] (IMPORT) button .<br />
A screen will appear, allowing you to specify the destination for the<br />
import.<br />
The names “INIT REGIST,” “INIT LIVESET,” and “INIT SYNTH” will be<br />
used when assigning the import destinations; this occurs in order,<br />
starting with the lowest number.<br />
NOTE<br />
If you’ve edited a sound and have saved it with the name<br />
“INIT REGIST,”“INIT LIVESET,” or “INIT SYNTH,” it may be<br />
automatically selected as the destination for the import.<br />
If you then execute the import, this data will be overwritten<br />
and lost. The lost sound data cannot be recovered.<br />
Please save your important sound data using names other than<br />
“INIT REGIST,” “INIT LIVESET,” and “INIT SYNTH.”<br />
5. If you want to change the destination of the import, clear<br />
the specified mark, and then select and mark the desired<br />
destination for the import .<br />
Select the same number of import destinations as the sound<br />
data you’re importing. (Importing is not possible if the number is<br />
insufficient.)<br />
You cannot select more import destinations than the number of<br />
sound data items being imported.<br />
6. Press the [F6] (EXEC) button .<br />
The screen will ask “Are you sure?”<br />
7. To carry out the operation, press the [F5] (OK) button .<br />
NOTE<br />
Never turn off the power while the import is in progress.<br />
MEMO<br />
You can also import live sets and tones that you exported from<br />
<strong>JUPITER</strong>-80.
Viewing Sound Data You’ve Marked<br />
You can use the Search function to quickly move to sound data that<br />
you’ve marked.<br />
1. In the screen where you’re marking sound data to export<br />
(or import), hold down the [SHIFT] button and press the<br />
[F1] (SEARCH ) or [F2] (SEARCH ) button .<br />
You’ll be taken to the next marked sound data in the list.<br />
Marking Multiple Items of Data<br />
You can select multiple consecutive items of sound data, and mark<br />
or unmark them.<br />
1. In the screen where you’re selecting sound data, select<br />
the lowest-numbered item of sound data that you want<br />
to select .<br />
2. Hold down the [SHIFT] button and use the [ ] [ ]<br />
(cursor) buttons to select the highest-numbered item of<br />
sound data that you want to select .<br />
All sounds between the numbers you selected in steps 1 and 2 will<br />
be selected.<br />
The number of currently selected data items is shown in the upper<br />
right of the screen.<br />
3. Press the [F4] (MARK) button .<br />
The marks will be added to (or cleared from) the sound data.<br />
Deleting an Exported File<br />
In the screen where you select the data file to be imported, you can<br />
delete data files.<br />
1. In the UTILITY MENU screen (p . 37), choose “Import” and<br />
press the [ENTER] button .<br />
The IMPORT screen will appear.<br />
2. Select the data file that you want to delete .<br />
NOTE<br />
Data that you delete cannot be recovered.<br />
Take care not to inadvertently delete important data.<br />
3. Press the [F2] (DELETE) button .<br />
The screen will ask “Are you sure?”<br />
4. Press the [F5] (OK) button .<br />
Renaming an Exported File<br />
Settings and Convenient Functions<br />
In the screen where you select the data file to be imported, you can<br />
rename the data file.<br />
1. In the UTILITY MENU screen (p . 37), choose “Import” and<br />
press the [ENTER] button .<br />
The IMPORT screen will appear.<br />
2. Select the data file that you want to rename .<br />
3. Press the [F1] (RENAME) button .<br />
For details on assigning a name, refer to “Assigning a Name” (p. 34).<br />
4. Press the [F6] (EXEC) button .<br />
Moving a Registration<br />
Here’s how to rearrange the order of the registrations.<br />
1. In the UTILITY MENU screen (p . 37), choose “Reg Move/<br />
Exchang” and press the [ENTER] button .<br />
2. Use the cursor [ ] [ ] buttons to select a registration<br />
set .<br />
3. Use the value dial to select the registration that you want<br />
to move .<br />
4. Press the [F1] (Move) button to turn on the check box .<br />
5. Use the value dial to select the destination for the move .<br />
The numbers of the registrations between the source of the move<br />
and the destination of the move will automatically be revised.<br />
6. Press the [F6] (EXEC) button .<br />
The screen will ask “Are you sure?”<br />
7. To execute,press the [F5] (OK) button .<br />
73<br />
Quick Guide<br />
Introduction Playing Sounds Editing Sounds<br />
Other Convenient<br />
Functions<br />
Connecting Other<br />
Equipment<br />
Appendix
Settings and Convenient Functions<br />
Exchanging Registrations<br />
74<br />
Here’s how to exchange the numbers of two registrations.<br />
1. In the UTILITY MENU screen (p . 37), choose “Reg Move/<br />
Exchang” and press the [ENTER] button .<br />
2. Select one of the registrations that you want to exchange .<br />
3. Press the [F2] (EXCHG) button to turn on the check box .<br />
4. Select the other registration to be targeted for the<br />
exchange .<br />
5. Press the [F6] (EXEC) button .<br />
The screen will ask “Are you sure?”<br />
6. To execute, press the [F5] (OK) button .
The <strong>JUPITER</strong>-<strong>50</strong>’s System Settings<br />
Making System Settings<br />
These settings apply to the entire <strong>JUPITER</strong>-<strong>50</strong>; for example, here you<br />
can set the tuning and specify how MIDI messages will be received.<br />
1. In the Menu screen (p . 35), choose “System” and press the<br />
[ENTER] button .<br />
The SYSTEM MENU screen will appear.<br />
2. Select the item that contains the settings you want to<br />
change, and press the [ENTER] button .<br />
Item Explanation Page<br />
Setup Overall settings p. 75<br />
Live/Tone Buttons<br />
Sound settings for the Part sound<br />
buttons<br />
View the software version and<br />
p. 78<br />
Information<br />
the USB flash drive’s available free<br />
space<br />
p. 78<br />
3. Choose the parameter that you want to set, and change<br />
its value .<br />
Saving the System Settings<br />
System settings will return to their original values when you turn off<br />
the power. If you want the settings you’ve made to be remembered<br />
after the power is turned off, you must save the system settings.<br />
1. In either the SYSTEM SETUP screen, the SYSTEM LIVE SET/<br />
TONE BUTTONS screen, or the SYSTEM INFORMATION<br />
screen, press the [WRITE] button .<br />
The screen will ask “Are you sure?”<br />
2. Press the [F5] (OK) button .<br />
A message will indicate “Completed!” and the settings will be saved.<br />
NOTE<br />
Never turn off the power while settings are being saved.<br />
System Parameters<br />
This section explains what each system parameter does, and how<br />
the parameters are organized.<br />
SETUP<br />
These settings apply to the <strong>JUPITER</strong>-<strong>50</strong> as a whole.<br />
SOUND ([F1] button)<br />
Parameter<br />
Sound<br />
Value Explanation<br />
Local Switch OFF, ON<br />
Master Tune<br />
415.3–466.2<br />
[Hz]<br />
Master Key Shift -24–+24<br />
Master Level 0–127<br />
Output Gain -12–+12 [dB]<br />
Song Level 0–127<br />
Tone Remain OFF, ON<br />
Specifies whether the controller section<br />
(keyboard, pitch bend/modulation lever,<br />
[S1] [S2] buttons, D-BEAM controller, pedals,<br />
etc.) will be connected to the internal sound<br />
generator. Normally, this should be left at<br />
“ON.” Turn it “OFF” if you want to use the<br />
<strong>JUPITER</strong>-<strong>50</strong>’s controllers only to control an<br />
external sound generator.<br />
Sets the <strong>JUPITER</strong>-<strong>50</strong>’s overall tuning (the<br />
frequency of the A4 key)<br />
Shifts the <strong>JUPITER</strong>-<strong>50</strong>’s overall pitch range in<br />
semitone steps.<br />
Sets the <strong>JUPITER</strong>-<strong>50</strong>’s overall volume (except<br />
for the signal from the USB COMPUTER port.<br />
Adjusts the <strong>JUPITER</strong>-<strong>50</strong>’s overall output<br />
gain (except for the signal from the USB<br />
COMPUTER port). If you’re playing a fewer<br />
number of voices, boosting this setting can<br />
help you obtain an optimal output level<br />
when recording on an external device.<br />
Sets the volume of the USB memory song<br />
player.<br />
Specifies whether the currently sounding<br />
notes will remain (ON) or not (OFF) when you<br />
select a different sound.<br />
* In some cases, the effect sound might not<br />
remain.<br />
Output Assign<br />
Here you can specify which sounds will be sent from each output jack. Select the<br />
desired check boxes for each output jack (MAIN OUT, SUB OUT).<br />
Upper Upper Part<br />
Solo Solo Part<br />
Perc/Lower Percussion/Lower Part<br />
Reverb Reverb sound<br />
USB Song/Audio IN<br />
The sound from the USB memory song player and the AUDIO<br />
IN jack<br />
USB Audio The sound from USB audio<br />
Metronome The metronome sound<br />
75<br />
Quick Guide<br />
Introduction Playing Sounds Editing Sounds<br />
Other Convenient<br />
Functions<br />
Connecting Other<br />
Equipment<br />
Appendix
The <strong>JUPITER</strong>-<strong>50</strong>’s System Settings<br />
Parameter<br />
Scale Tune Template<br />
Value Explanation<br />
These are templates that set all of the Scale Tune C–B settings (the values for each<br />
key shown in the screen).<br />
EQUAL Equal temperament<br />
JUST-MAJ Just intonation (major)<br />
JUST-MIN Just intonation (minor)<br />
Scale Tune Type<br />
PYTHAGORE<br />
KIRNBERGE<br />
Pythagorean tuning<br />
Kirnberger (type 3)<br />
MEANTONE Meantone temperament<br />
WERCKMEIS Werckmeister (type 1, number 3)<br />
ARABIC Arabic scale<br />
Scale Tune Key<br />
Scale Tune<br />
C–B<br />
Specifies the tonic note for the scale tune<br />
template.<br />
Scale Tune for C–B -64–+63 Specifies the scale tuning.<br />
76<br />
Using the Local Switch setting<br />
If you’re using an external sequencer with the <strong>JUPITER</strong>-<strong>50</strong>’s keyboard<br />
controller section and sound generator section, you should turn the Local<br />
Switch OFF. Here’s why.<br />
We need to connect these sections in the following order: the <strong>JUPITER</strong>-<strong>50</strong>’s<br />
keyboard external sequencer the <strong>JUPITER</strong>-<strong>50</strong>’s sound generator.<br />
Since the <strong>JUPITER</strong>-<strong>50</strong>’s keyboard section and sound generator section are<br />
connected internally, such a connection order would normally be impossible.<br />
However, if the Local Switch is OFF, the <strong>JUPITER</strong>-<strong>50</strong>’s keyboard section and its<br />
sound generator section will be independent, allowing you to use an external<br />
sequencer as shown here in the illustration.<br />
Connections between the <strong>JUPITER</strong>-<strong>50</strong> and the<br />
external sequencer<br />
<strong>JUPITER</strong>-<strong>50</strong> Keyboard<br />
CONTROL ([F2] button)<br />
Local Off<br />
(External) Sequencer<br />
Parameter Value Explanation<br />
Control Pedal 1/Control Pedal 2<br />
Pedal 1 Assign<br />
Source<br />
Pedal 2 Assign<br />
Source<br />
SYSTEM,<br />
REGISTRATION<br />
<strong>JUPITER</strong>-<strong>50</strong><br />
Sound Generator<br />
Specifies whether the functions<br />
controlled by the pedals connected to<br />
the FOOT PEDAL CTRL 1 and 2 jacks will<br />
be determined by the system settings<br />
(SYSTEM) or by the Registration Settings<br />
(REGISTRATION).<br />
Parameter Value Explanation<br />
Pedal 1 Assign<br />
Pedal 2 Assign<br />
Pedal 1 Polarity<br />
Pedal 2 Polarity<br />
Hold Pedal<br />
Functions controlled by the pedals connected to the FOOT<br />
PEDAL CTRL 1 and 2 jacks<br />
OFF No function is assigned.<br />
CC01–31, CC33–95 Controller number 1–31, 33–95<br />
AFTERTOUCH Aftertouch<br />
BEND UP<br />
The same effect as moving the pitch<br />
bend lever to the right.<br />
BEND DOWN<br />
The same effect as moving the pitch<br />
bend lever to the left.<br />
REGISTRATION UP Select the next-numbered Registration.<br />
REGISTRATION<br />
DOWN<br />
PANEL INC<br />
PANEL DEC<br />
Select the previous-numbered<br />
Registration.<br />
The same effect as pressing the panel<br />
[INC] button.<br />
The same effect as pressing the panel<br />
[DEC] button.<br />
START/STOP Start/stop the USB memory song player.<br />
Selects the polarity of the pedals<br />
connected to the CTRL 1 and 2 jacks.<br />
STANDARD,<br />
REVERSE<br />
Hold Pedal Polarity STANDARD,<br />
REVERSE<br />
Continuous Hold<br />
Pedal<br />
D-BEAM<br />
OFF, ON<br />
D-BEAM Sens 0–127<br />
Slider<br />
Slider Mode<br />
Specifies how the sliders will operate.<br />
DIRECT<br />
CATCH<br />
Depending on the model of pedal, the<br />
result of depressing or releasing the<br />
pedal might be the opposite of what<br />
you expect. If so, choose the “REVERSE”<br />
setting. If you’re using a <strong>Roland</strong> pedal<br />
(that has no polarity switch), choose the<br />
“STANDARD” setting.<br />
Selects the polarity of the pedal connected<br />
to the FOOT PEDAL HOLD jack.<br />
Depending on the model of pedal, the<br />
result of depressing or releasing the<br />
pedal might be the opposite of what<br />
you expect. If so, choose the “REVERSE”<br />
setting. If you’re using a <strong>Roland</strong> pedal<br />
(that has no polarity switch), choose the<br />
“STANDARD” setting.<br />
If this is ON, the HOLD jack will support<br />
half-pedaling. If half-pedaling is enabled,<br />
you can connect a damper pedal (such<br />
as the DP-10; sold separately) and use<br />
the pedal to control subtle nuances of<br />
the piano sounds you play.<br />
The higher the value you set for this<br />
parameter, the more sensitive the<br />
D-BEAM controller becomes.<br />
When you move a slider, control data<br />
indicating its position will always be<br />
output.<br />
When you move a slider, control data will<br />
start being transmitted only when the<br />
current value of the parameter has been<br />
reached.
KBD ([F3] button)<br />
Parameter Value Explanation<br />
Keyboard<br />
Keyboard Velocity<br />
Keyboard Velocity<br />
Curve<br />
Keyboard Velocity<br />
Sens<br />
MIDI ([F4] button)<br />
Specifies the velocity transmitted when a key is played.<br />
The transmitted velocity value will<br />
REAL correspond to the force with which you strike<br />
the key.<br />
The transmitted velocity value will be fixed,<br />
1–127 regardless of the force with which you strike<br />
the key.<br />
The keyboard will have a lighter-feeling<br />
touch. Since you’ll be able to reach fortissimo<br />
(ff) without having to play as strongly as<br />
LIGHT with the MEDIUM setting, the keyboard will<br />
feel lighter. This setting makes it easier for<br />
people with reduced finger strength to play<br />
the keyboard.<br />
MEDIUM This is the standard keyboard touch setting.<br />
The key will have a heavier-feeling touch.<br />
Since you’ll need to play more strongly than<br />
with the MEDIUM setting in order to reach<br />
HEAVY fortissimo (ff), the keyboard will feel heavier.<br />
This setting allows you to use your playing<br />
dynamics to add more expression to your<br />
performances.<br />
This is a fine adjustment to the keyboard<br />
sensitivity that’s applied after the Keyboard<br />
-63–+63 Velocity Curve setting. Higher values will<br />
cause a greater velocity value to be transmitted<br />
for a key-strike of the same force.<br />
Parameter<br />
MIDI<br />
Value Explanation<br />
Device ID 17–32<br />
Soft Thru OFF, ON<br />
Remote<br />
Keyboard<br />
Switch<br />
USB MIDI<br />
OFF, ON<br />
USB-MIDI Thru OFF, ON<br />
MIDI Channel<br />
Registration<br />
Control<br />
Channel<br />
UPPER Part<br />
Channel,<br />
SOLO Part<br />
Channel,<br />
PERC/LOWER<br />
Part Channel<br />
1–16, OFF<br />
1–16<br />
If you want to send and receive system exclusive<br />
messages, the device ID numbers of both devices<br />
need to be matched.<br />
If this is “ON,” MIDI messages received at the MIDI<br />
IN connector will be retransmitted without change<br />
from the MIDI OUT connector.<br />
Turn this “ON” if you’re using an external MIDI<br />
keyboard instead of the <strong>JUPITER</strong>-<strong>50</strong>’s keyboard.<br />
In this case, the MIDI transmit channel of your<br />
external MIDI keyboard does not matter. Normally,<br />
this can be left at “OFF.”<br />
* If you want to control the arpeggiator from an<br />
external MIDI device, turn this “ON.”<br />
If you’re using MIDI via a USB connection, this specifies<br />
whether the MIDI messages received at the<br />
USB port/MIDI IN connector will be retransmitted<br />
without change from the MIDI OUT connector/USB<br />
port (ON) or will not be retransmitted (OFF).<br />
Specifies the MIDI receive channel on which<br />
Registrations can be switched by an external MIDI<br />
device. Turn this “OFF” if you don’t want to switch<br />
Registrations from a connected MIDI device.<br />
Specifies the MIDI receive channel that will play<br />
each of the <strong>JUPITER</strong>-<strong>50</strong>’s Parts (PREC, LOWER,<br />
UPPER, SOLO), and the MIDI transmit channel on<br />
which each Part will transmit to an external MIDI<br />
device.<br />
The <strong>JUPITER</strong>-<strong>50</strong>’s System Settings<br />
Parameter<br />
MIDI Transmit<br />
Transmit<br />
Value Explanation<br />
Program<br />
Change<br />
OFF, ON Program change message transmission on/off<br />
Transmit Bank<br />
Select<br />
OFF, ON Bank select message transmission on/off<br />
Transmit Active<br />
OFF, ON<br />
Sensing<br />
Active sensing message transmission on/off<br />
Transmit Edit<br />
Data<br />
MIDI Receive<br />
Receive<br />
OFF, ON<br />
Specifies whether parameter edits will be transmitted<br />
as system exclusive messages.<br />
Program<br />
Change<br />
OFF, ON Program change message reception on/off<br />
Receive Bank<br />
Select<br />
OFF, ON Bank select message reception on/off<br />
Receive<br />
Exclusive<br />
OFF, ON System exclusive message reception on/off<br />
SYNC ([F5] button)<br />
Parameter<br />
Sync<br />
Value Explanation<br />
Sync Mode<br />
This selects the synchronization source used by the<br />
<strong>JUPITER</strong>-<strong>50</strong>.<br />
MASTER<br />
SLAVE<br />
Sync Output OFF, ON<br />
Clock Source<br />
The <strong>JUPITER</strong>-<strong>50</strong> will be the synchronization<br />
master. Choose this setting if you’re using the<br />
<strong>JUPITER</strong>-<strong>50</strong> on its own without synchronizing<br />
it to another device, or if you want the tempo<br />
of an external MIDI device to synchronize<br />
with the <strong>JUPITER</strong>-<strong>50</strong>.<br />
The <strong>JUPITER</strong>-<strong>50</strong> will be the synchronization<br />
slave. Choose this setting if you want the<br />
<strong>JUPITER</strong>-<strong>50</strong> to synchronize to MIDI clock<br />
messages received from an external device.<br />
If this is ON, MIDI clock messages will be<br />
transmitted to an external MIDI device.<br />
* These messages will not be transmitted if<br />
the Sync Mode is “SLAVE.”<br />
This specifies whether the <strong>JUPITER</strong>-<strong>50</strong> will synchronize to<br />
tempo data from the MIDI IN connector or to tempo data<br />
from the USB connector when the Sync Mode is SLAVE.<br />
Synchronize to tempo data from the MIDI IN<br />
MIDI<br />
connector.<br />
Synchronize to tempo data from the USB<br />
USB<br />
COMPUTER port.<br />
77<br />
Quick Guide<br />
Introduction Playing Sounds Editing Sounds<br />
Other Convenient<br />
Functions<br />
Connecting Other<br />
Equipment<br />
Appendix
The <strong>JUPITER</strong>-<strong>50</strong>’s System Settings<br />
MISC ([F6] button)<br />
Parameter<br />
Metronome<br />
Value Explanation<br />
Metronome Level 0–10 Specifies the metronome volume.<br />
Metronome Sound TYPE1–TYPE4 Specifies the metronome type.<br />
System Control Source<br />
Here you can specify the MIDI messages that will be used as<br />
system controls.<br />
System controls 1–4 are parameters to which you can assign<br />
MIDI messages such as control change messages.<br />
For example, on the <strong>JUPITER</strong>-<strong>50</strong>, if you choose a system<br />
control as the MFX CONTROL Source (LIVE SET EFFECT<br />
screen; p. 58), you’ll be able to use MIDI messages to control<br />
effect parameters.<br />
It is convenient to use system controls when you don’t need<br />
to use different MIDI messages for MFX CONTROL of each<br />
System Control 1–4 Live Set, or if you want to use a specific MIDI message for<br />
Source<br />
MFX CONTROL.<br />
SuperNATURAL Acoustic Tones can be controlled using the<br />
MIDI messages that you’ve assigned to system controls 1<br />
and 2, allowing you to produce effects such as vibrato or<br />
dynamics (for some tones there will be no change).<br />
OFF System control will not be used.<br />
CC01–31, CC32<br />
(OFF), 33–95<br />
Controller 1–95<br />
PITCH BEND Pitch Bend<br />
AFTERTOUCH Aftertouch<br />
Startup Registration<br />
Startup Registra- [00] ---,<br />
Specifies the Registration that will be<br />
tion<br />
<strong>Manual</strong> Registration<br />
[01] 1-1–[08] 4-4 selected when you turn on the power.<br />
Registration<br />
<strong>Manual</strong> Button<br />
MANUAL,<br />
SINGLE<br />
Specifies whether pressing the<br />
[MANUAL] button will select <strong>Manual</strong> or<br />
Single Part Play.<br />
Specifies the Live Set that will be<br />
Live Set<br />
Screen Saver<br />
0001–2560 selected when you press the [MANUAL]<br />
button.<br />
Specifies the time (minutes) until the<br />
Screen Saver Time<br />
Auto Off<br />
OFF,<br />
1–60 [min]<br />
screen saver is activated.<br />
If this is OFF, the screen saver will not<br />
operate.<br />
Auto Off OFF, 30, 240 [min]<br />
Visual Control<br />
Visual Control<br />
Mode<br />
USB Driver<br />
USB Driver<br />
78<br />
With the factory settings, the<br />
<strong>JUPITER</strong>-<strong>50</strong>’s power will automatically<br />
be switched off 4 hours after you stop<br />
playing or operating the unit (factory<br />
setting).<br />
If you don’t want the power to turn<br />
off automatically, set the “Auto Off”<br />
parameter to “OFF” (p. 79).<br />
MVC<br />
Control a device compatible with MIDI<br />
Visual Control.<br />
V-LINK Control a device compatible with V-LINK.<br />
VENDER<br />
(MIDI+AUDIO)<br />
GENERIC<br />
(MIDI only)<br />
The dedicated <strong>JUPITER</strong>-<strong>50</strong> driver<br />
provided by <strong>Roland</strong> will be used.<br />
MIDI and audio will be available.<br />
The generic driver provided by the<br />
operating system will be used.<br />
Only MIDI will be available.<br />
LIVE SET/TONE BUTTONS<br />
Here you can specify the sounds (Live Sets or tones) that will be<br />
assigned to the Part sound buttons (Upper, Percussion/Lower, Solo).<br />
MEMO<br />
The sounds you specify here will be saved as system parameters<br />
(settings for the entire <strong>JUPITER</strong>-<strong>50</strong>). If you specify sounds within<br />
a Registration, the Registration settings will take priority.<br />
REFERENCE<br />
• “Using the Part Sound Buttons to Switch Live Sets” (p. 40)<br />
• “Using the Part Sound Buttons to Switch the Solo Part’s Tone”<br />
(p. 41)<br />
• “Instantly Switching the Variation Sounds (Alternate Button)”<br />
(p. 42)<br />
Parameter Explanation<br />
SOLO<br />
SOLO Alternate<br />
UPPER<br />
UPPER Alternate<br />
PERCUSSION<br />
LOWER<br />
INFORMATION<br />
Specifies the sounds that will be assigned to the Solo Part sound<br />
buttons.<br />
Specifies the sounds that will be assigned to the sound buttons<br />
when the Solo Part [ALTERNATE] button is pressed.<br />
Specifies the sounds that will be assigned to the Upper Part<br />
sound buttons.<br />
Specifies the sounds that will be assigned to the sound buttons<br />
when the Upper Part [ALTERNATE] button is pressed.<br />
Specifies the sounds that will be assigned to the Percussion Part<br />
sound buttons.<br />
Specifies the sounds that will be assigned to the Lower Part<br />
sound buttons.<br />
Here you can view information such as the <strong>JUPITER</strong>-<strong>50</strong>’s software<br />
version and the amount of free space available on the USB flash<br />
drive.<br />
VERSION<br />
Shows the <strong>JUPITER</strong>-<strong>50</strong>’s software version.<br />
USB MEM<br />
Shows the amount of free space available on the USB flash drive.
Restoring the Factory Settings<br />
(Factory Reset)<br />
This “Factory Reset” operation will restore all settings of the<br />
<strong>JUPITER</strong>-<strong>50</strong> to their factory-set state.<br />
NOTE<br />
When you execute the Factory Reset operation, all data in the<br />
<strong>JUPITER</strong>-<strong>50</strong> will be lost. If there is any data that you want to<br />
keep, back it up to a USB flash drive (p. 70).<br />
1. In the Menu screen (p . 35), choose “Utility” and press the<br />
[ENTER] button .<br />
The UTILITY MENU screen will appear.<br />
2. Choose "Factory Reset" and press the [ENTER] button .<br />
A message will ask “Are you sure?”<br />
3. To execute the factory reset, press [F5] (OK) button .<br />
NOTE<br />
The factory reset operation will take several minutes. Never turn<br />
off the power before the factory reset has been completed.<br />
When the factory reset has been completed, the screen will indicate<br />
“Completed. Please Power Off.”<br />
4. Turn the power off, and then on again .<br />
The <strong>JUPITER</strong>-<strong>50</strong>’s System Settings<br />
Making the Power Automatically<br />
Turn Off After a Time (Auto Off)<br />
With the factory settings, the <strong>JUPITER</strong>-<strong>50</strong>’s power will automatically<br />
be switched off 4 hours after you stop playing or operating the unit.<br />
If you don’t need the power to turn off automatically, set “Auto Off”<br />
to the “OFF” setting as described below.<br />
1. In the Menu screen (p . 35), choose “System” and press the<br />
[ENTER] button .<br />
The SYSTEM MENU screen will appear.<br />
2. Choose "Setup” and press the [ENTER] button .<br />
The SYSTEM SETUP screen will appear.<br />
3. Press the [F6] (MISC) button .<br />
4. Use the cursor buttons to choose “Auto off,” and change<br />
the setting .<br />
Value Explanation<br />
OFF The power will not turn off automatically.<br />
30 [min]<br />
The power will automatically turn off if no operation is<br />
performed for 30 minutes.<br />
240 [min]<br />
(default)<br />
The power will automatically turn off if no operation is<br />
performed for 240 minutes (4 hours).<br />
5. Press the [WRITE] button .<br />
The screen will ask “Are you sure?”<br />
6. Press the [F5] (OK) button .<br />
A message will indicate “Completed!” and the settings will be saved.<br />
NOTE<br />
• Never turn off the power while data is being saved.<br />
• When turning the unit’s power back on after it has been shut<br />
down due to the Auto Off function, always make sure to allow<br />
at least ten seconds to pass after the power has been shut off<br />
before you turn the power back on. If you turn it back on too<br />
rapidly, the Auto Off function will not have had enough time to<br />
reset itself, and you may not be able to turn on the power in the<br />
normal way.<br />
79<br />
Quick Guide<br />
Introduction Playing Sounds Editing Sounds<br />
Other Convenient<br />
Functions<br />
Connecting Other<br />
Equipment<br />
Appendix
80<br />
Connecting to Your Computer via USB<br />
If you use a commercially available USB cable to connect the USB<br />
COMPUTER port on the <strong>JUPITER</strong>-<strong>50</strong>’s rear panel to your computer’s<br />
USB connector, audio or MIDI data played by your MIDI software<br />
(DAW software) can be sounded by the <strong>JUPITER</strong>-<strong>50</strong>.<br />
<strong>JUPITER</strong>-<strong>50</strong><br />
USB cable<br />
(Supports USB 2 .0 Hi-Speed)<br />
Computer’s USB port<br />
(Supports USB 2 .0 Hi-Speed)<br />
USB COMPUTER<br />
port<br />
For details on operating requirements, refer to the <strong>Roland</strong> website.<br />
http://www.roland.com/<br />
NOTE<br />
• For some models of computer, the system might not operate<br />
correctly. Refer to the <strong>Roland</strong> website for the operating systems<br />
that are supported.<br />
• Before you make connections to other equipment, turn down<br />
the volume and turn off the power off on all equipment in order<br />
to prevent malfunction and/or speaker damage.<br />
• A USB cable is not included. To purchase one, please contact the<br />
dealer where you purchased the <strong>JUPITER</strong>-<strong>50</strong>.<br />
• Use a USB cable that supports USB 2.0 Hi-Speed.<br />
• Use a computer with a USB connector that supports USB 2.0<br />
Hi-Speed.<br />
• Switch on the <strong>JUPITER</strong>-<strong>50</strong>’s power before you start up the DAW<br />
software on your computer. Do not switch the <strong>JUPITER</strong>-<strong>50</strong> on/off<br />
while your DAW software is running.<br />
What is the USB driver?<br />
The USB driver is software that transfers data between the<br />
<strong>JUPITER</strong>-<strong>50</strong> and the application (e.g., DAW software) on your<br />
computer when the <strong>JUPITER</strong>-<strong>50</strong> is connected via USB to your<br />
computer.<br />
The USB driver sends data from your application to the <strong>JUPITER</strong>-<strong>50</strong>,<br />
and data from the <strong>JUPITER</strong>-<strong>50</strong> to your application.<br />
USB audio<br />
Settings for <strong>JUPITER</strong>-<strong>50</strong> computer<br />
If the <strong>JUPITER</strong>-<strong>50</strong> is connected via a USB cable to the application<br />
(e.g., DAW software) on your computer, the same sound as from<br />
the <strong>JUPITER</strong>-<strong>50</strong>’s MAIN OUT can be recorded into your computer<br />
(except for the metronome sound).<br />
Settings for computer <strong>JUPITER</strong>-<strong>50</strong><br />
If the <strong>JUPITER</strong>-<strong>50</strong> is connected via a USB cable to your computer,<br />
sound from your computer can be played from the audio system<br />
connected to the <strong>JUPITER</strong>-<strong>50</strong>’s MAIN OUT jacks, or recorded on the<br />
<strong>JUPITER</strong>-<strong>50</strong>’s USB memory song player/recorder.<br />
If you want to record this audio using the USB memory song player/<br />
recorder, set “Recording Mode” (p. 68) to “MIX.”<br />
USB MIDI<br />
If the <strong>JUPITER</strong>-<strong>50</strong> is connected via USB to your computer, your<br />
DAW software can record the <strong>JUPITER</strong>-<strong>50</strong>’s performance data (MIDI<br />
data), and performance data (MIDI data) played back by your DAW<br />
software can play the <strong>JUPITER</strong>-<strong>50</strong>’s sound generator section.<br />
Connecting the <strong>JUPITER</strong>-<strong>50</strong> to Your<br />
Computer<br />
1. Install the USB driver on your computer .<br />
The USB driver is on the included CD-ROM “<strong>JUPITER</strong>-<strong>50</strong> DRIVER<br />
CD-ROM.”<br />
The driver installation procedure will depend on your system, so be<br />
sure to carefully read the “Readme” file on the CD-ROM.<br />
2. Use a USB cable (sold separately) to connect the<br />
<strong>JUPITER</strong>-<strong>50</strong> to your computer .<br />
USB Driver<br />
Here’s how to switch between the dedicated <strong>JUPITER</strong>-<strong>50</strong> USB driver<br />
and the generic driver provided by the operating system.<br />
1. In the Menu screen (p . 35), choose “System” and press the<br />
[ENTER] button .<br />
2. Choose “SETUP” and press the [ENTER] button .<br />
3. Choose “Misc .”<br />
4. Specify the USB Driver that you want to use .<br />
Driver Explanation<br />
VENDER<br />
(MIDI+AUDIO)<br />
GENERIC<br />
(MIDI only)<br />
The dedicated <strong>JUPITER</strong>-<strong>50</strong> driver provided by <strong>Roland</strong><br />
will be used.<br />
MIDI and audio will be available.<br />
The generic driver provided by the operating system<br />
will be used.<br />
Only MIDI will be available.<br />
MEMO<br />
This setting will take effect after you’ve carried out a System<br />
Write, and you’ve turned the power off, then back on again.<br />
5. Press the [WRITE] button to save the setting .<br />
6. Turn the power off, then on again .
Connecting an External MIDI Device<br />
About MIDI<br />
MIDI (Musical Instrument Digital Interface) is a standard<br />
specification that allows musical data to be transferred between<br />
electronic musical instruments and computers. If a MIDI cable<br />
is connected between devices equipped with MIDI connectors,<br />
you’ll be able to play multiple devices from a single MIDI keyboard,<br />
perform ensembles using multiple MIDI instruments, program the<br />
settings to change automatically as the song progresses, and more.<br />
About MIDI Connectors<br />
The <strong>JUPITER</strong>-<strong>50</strong> is equipped with the<br />
following two types of MIDI connectors, each<br />
of which has the following role.<br />
MIDI IN connector<br />
This connector receives MIDI messages that are sent from an<br />
external MIDI device. When the <strong>JUPITER</strong>-<strong>50</strong> receives MIDI messages,<br />
it can respond by playing notes, switching sounds, etc.<br />
MIDI OUT connector<br />
This connector transmits MIDI messages to an external MIDI device.<br />
Use it when you want to control an external MIDI device.<br />
Using the <strong>JUPITER</strong>-<strong>50</strong> as a Master<br />
Keyboard (External Part Settings)<br />
You can connect external MIDI devices to the <strong>JUPITER</strong>-<strong>50</strong>’s MIDI<br />
OUT connector, and use the <strong>JUPITER</strong>-<strong>50</strong> to control the connected<br />
MIDI devices.<br />
MEMO<br />
External Part settings are saved in the Registration.<br />
Connection example<br />
MIDI sound module<br />
MIDI IN connector<br />
<strong>JUPITER</strong>-<strong>50</strong> MIDI OUT connector<br />
Enabling the External Part Settings<br />
1. In the REGISTRATION screen (p . 36),press the [F5] (EXT PART)<br />
button .<br />
The REGISTRATION EXT PART screen will appear.<br />
2. Press the [F6] (EXT) button to add a check mark .<br />
The External Part settings will be enabled.<br />
MEMO<br />
• If a check mark is not shown for the [F6] (EXT) button, MIDI<br />
messages will be transmitted from parts that are turned on. If<br />
you want to record the performance data of a part on a MIDI<br />
sequencer or control the <strong>JUPITER</strong>-<strong>50</strong> from a MIDI sequencer,<br />
then clear the [F6] (EXT) button’s check mark.<br />
• The MIDI channel of each Part is specified by the system<br />
parameter “UPPER Part Channel, SOLO Part Channel, PERC/<br />
LOWER Part Channel” (p. 77).<br />
81<br />
Quick Guide<br />
Introduction Playing Sounds Editing Sounds<br />
Other Convenient<br />
Functions<br />
Connecting Other<br />
Equipment<br />
Appendix
Connecting an External MIDI Device<br />
Specifying the Transmit Channel<br />
Set the <strong>JUPITER</strong>-<strong>50</strong>’s transmit channel so it matches the channel<br />
your external MIDI device is using for reception.<br />
1. In the REGISTRATION EXT PART screen, select the “KB”<br />
check box of the channel on which you want to transmit,<br />
and use the value dial to turn it on .<br />
82<br />
When you play the keyboard, performance data will be transmitted<br />
from the MIDI OUT connector on the channel you specified.<br />
MEMO<br />
For details on how to set the receive channel of your external<br />
MIDI device, refer to its owner’s manual.<br />
Specifying the Sound for Each Channel<br />
To switch the tones of an external MIDI device, the program<br />
number and the MSB/LSB of the Bank Select message are entered<br />
as numerical values on the <strong>JUPITER</strong>-<strong>50</strong>.<br />
1. Specify the program change and bank select MSB/LSB for<br />
the channel whose “KB” check box you turned on in the<br />
REGISTRATION EXT PART screen .<br />
MEMO<br />
• When this setting is “- - -,” bank select and program change<br />
messages will not be transmitted.<br />
• If the external MIDI sound module receives a Program number<br />
or a Bank number for which no Tone has been assigned, an<br />
alternate Tone may be selected, or in some cases, there may be<br />
no sound played.<br />
Detailed Settings for External Parts<br />
Here you can make detailed settings for the messages transmitted<br />
to an external MIDI device.<br />
Parameter Value Explanation<br />
KB<br />
(Keyboard)<br />
MSB<br />
(Bank Select<br />
MSB)<br />
LSB<br />
(Bank Select<br />
LSB)<br />
PC<br />
(Program<br />
Change)<br />
OCT<br />
(Octave Shift)<br />
KL<br />
(Key Range<br />
Lower)<br />
KU<br />
(Key Range<br />
Upper)<br />
VL<br />
(Velocity<br />
Range Lower)<br />
VU<br />
(Velocity<br />
Range Upper)<br />
LVL<br />
(Level)<br />
PAN<br />
(Pan)<br />
Specifies whether the perfor-<br />
OFF, ON<br />
mance data of the External Part<br />
will be transmitted.<br />
Specifies the MSB (controller<br />
0–127, ---<br />
number 0) of the bank select<br />
number transmitted when you<br />
* Not transmitted for switch Registrations.<br />
Parts whose KB is off. Choose “---” if you don’t want<br />
this to be transmitted.<br />
Specifies the LSB (controller<br />
0–127, ---<br />
number 32) of the bank select<br />
number transmitted when you<br />
* Not transmitted for switch Registrations.<br />
Parts whose KB is off. Choose “---” if you don’t want<br />
this to be transmitted.<br />
Specifies the program change<br />
1–128, ---<br />
number transmitted when you<br />
* Not transmitted for switch Registrations.<br />
Parts whose KB is off. Choose “---” if you don’t want<br />
this to be transmitted.<br />
-3–+3<br />
* This parameter is valid Specifies the octave shift.<br />
only for Parts whose<br />
KB is on.<br />
C- –(KU)<br />
* This parameter is valid Specifies the lowest key of the<br />
only for Parts whose range that will sound.<br />
KB is on.<br />
(KL)–G9<br />
* This parameter is valid Specifies the highest key of the<br />
only for Parts whose range that will sound.<br />
KB is on.<br />
1–(VU)<br />
* This parameter is valid Specifies the lowest velocity<br />
only for Parts whose value.<br />
KB is on.<br />
(VL)–127<br />
* This parameter is valid Specifies the highest velocity<br />
only for Parts whose value.<br />
KB is on.<br />
Specifies the volume message<br />
0–127, ---<br />
transmitted when you switch<br />
* Not transmitted for Registrations.<br />
Parts whose KB is off. Choose “---” if you don’t want<br />
this to be transmitted.<br />
Specifies the pan message<br />
L64–0–63R, ---<br />
transmitted when you switch<br />
* Not transmitted for Registrations.<br />
Parts whose KB is off. Choose “---” if you don’t want<br />
this to be transmitted.
Playing the <strong>JUPITER</strong>-<strong>50</strong> from an<br />
External MIDI Device<br />
Connection example<br />
MIDI keyboard<br />
<strong>JUPITER</strong>-<strong>50</strong><br />
Setting the Receive Channel<br />
MIDI OUT connector<br />
MIDI IN connector<br />
You’ll need to match your external MIDI device’s transmit channel<br />
with the <strong>JUPITER</strong>-<strong>50</strong>’s receive channel.<br />
1. In the SYSTEM SETUP screen (p . 75), press the [F4] (MIDI)<br />
button .<br />
2. Use the Part Channel settings (UPPER, SOLO, PERC/<br />
LOWER) to specify the MIDI channel for each part .<br />
3. To save the settings, press the [WRITE] button .<br />
The screen will ask “Are you sure?”<br />
4. Press the [F5] (OK) button .<br />
A message will indicate “Completed!” and the settings will be saved.<br />
Connecting an External MIDI Device<br />
Setting the Program Change Receive<br />
Switch<br />
Here’s how to on/off the receive switch for program change and<br />
bank select messages. With the factory settings, both are turned<br />
“ON.”<br />
1. In the SYSTEM SETUP screen (p . 75), press the [F4] (MIDI)<br />
button .<br />
2. Turn ON the “Receive Program Change” and “Receive Bank<br />
Select” settings under “MIDI Receive .”<br />
3. To save the settings, press the [WRITE] button .<br />
The screen will ask “Are you sure?”<br />
4. Press the [F5] (OK) button .<br />
A message will indicate “Completed!” and the settings will be saved.<br />
MEMO<br />
• For details on these settings, refer to “MIDI ([F4] button)” (p. 77).<br />
• For details on how to set the transmit channel of your external<br />
MIDI device, refer to its owner’s manual.<br />
83<br />
Quick Guide<br />
Introduction Playing Sounds Editing Sounds<br />
Other Convenient<br />
Functions<br />
Connecting Other<br />
Equipment<br />
Appendix
Connecting an External MIDI Device<br />
Synchronizing with an External MIDI<br />
Device<br />
84<br />
Here’s how to synchronize the <strong>JUPITER</strong>-<strong>50</strong>’s tempo to an external<br />
MIDI device.<br />
Connection example<br />
MIDI device<br />
<strong>JUPITER</strong>-<strong>50</strong><br />
MIDI OUT connector<br />
MIDI IN connector<br />
MIDI OUT<br />
connector<br />
MIDI IN<br />
connector<br />
1. In the SYSTEM SETUP screen (p . 75), press the [F5] (SYNC)<br />
button .<br />
2. Set the Sync Mode, Sync Output, and Clock Source .<br />
For details on each parameter, refer to “SYNC ([F5] button)” (p. 77).<br />
3. To save the settings, press the [WRITE] button .<br />
The screen will ask “Are you sure?”<br />
4. Press the [F5] (OK) button .<br />
A message will indicate “Completed!” and the settings will be saved.
Controlling Visuals<br />
Video equipment that supports MIDI Visual Control can be controlled from the <strong>JUPITER</strong>-<strong>50</strong>.<br />
What is Visual Control?<br />
Visual Control is a function that lets you control video along with your performance.<br />
The <strong>JUPITER</strong>-<strong>50</strong> can control video equipment that supports MIDI Visual Control or V-LINK.<br />
MIDI Visual Control is an internationally-used recommended practice that was added to the MIDI specification so that visual<br />
expression could be linked with musical performance. Video equipment that is compatible with MIDI Visual Control can be<br />
connected to electronic musical instruments via MIDI in order to control video equipment in tandem with a performance.<br />
V-LINK is <strong>Roland</strong>’s proprietary specification that allows visual expression to be linked with musical performance. Video<br />
equipment that is compatible with V-LINK can be connected to electronic musical instruments via their MIDI ports, making it<br />
easy to enjoy a variety of visual effects that are linked with the performance.<br />
MEMO<br />
You’ll need a MIDI cable (sold separately) to connect the <strong>JUPITER</strong>-<strong>50</strong> to your Visual Control compatible device.<br />
Connection example<br />
Use a MIDI cable to connect the <strong>JUPITER</strong>-<strong>50</strong>’s MIDI OUT connector (p. 28) to the Visual Control compatible device’s MIDI IN connector.<br />
NOTE<br />
To prevent malfunction and speaker damage, be sure to minimize the volume on all devices and turn off their power before making connections.<br />
<strong>JUPITER</strong>-<strong>50</strong><br />
Visual Control<br />
compatible device<br />
MIDI IN connector<br />
Turning Visual Control On/Off<br />
MIDI OUT connector<br />
1. Press the [VISUAL CONTROL] button .<br />
Visual Control will turn on.<br />
In this state, playing the <strong>JUPITER</strong>-<strong>50</strong>’s keyboard will control the image along with your performance.<br />
Visual Control function Transmitted MIDI message <strong>JUPITER</strong>-<strong>50</strong> operation<br />
Switch images<br />
CC0 (Bank Select): 0–30<br />
Program change: 1–45<br />
Play black key<br />
Play white key<br />
2. To turn Visual Control off, press the [VISUAL CONTROL] button once again .<br />
Visual Control will turn off.<br />
85<br />
Quick Guide<br />
Introduction Playing Sounds Editing Sounds<br />
Other Convenient<br />
Functions<br />
Connecting Other<br />
Equipment<br />
Appendix
Controlling Visuals<br />
Visual Control Settings<br />
86<br />
1. Press the [VISUAL CONTROL] button .<br />
The VISUAL CONTROL screen will appear.<br />
2. Set the following parameters .<br />
Parameter Value Explanation<br />
Clip Ch 1–16 Specifies the MIDI channel used to switch images.<br />
Effect Ch 1–16 Specifies the MIDI channel used to switch video effects.<br />
Playback Speed Ctrl<br />
Playback Speed Range<br />
Dissolve Time Ctrl<br />
Effect Ctrl 1<br />
Effect Ctrl 2<br />
Effect Ctrl 3<br />
Keyboard Range Lower<br />
Keyboard Range Upper<br />
OFF, CC01–CC31, CC64–CC95, Bender,<br />
Ch Aftertouch<br />
0.1–1.0–2.0, 0.5–1.0–2.0,<br />
0.0–1.0–4.0, 0.5–1.0–4.0,<br />
0.0–1.0–8.0, 0.5–1.0–8.0,<br />
0.0–1.0–16.0, 0.5–1.0–16.0,<br />
0.0–1.0–32.0, 0.5–1.0–32.0,<br />
0.0–2.0–4.0, 0.0–4.0–8.0,<br />
0.0–8.0–16.0, 0.0–16.0–32.0,<br />
-2.0–1.0–4.0, -6.0–1.0–8.0<br />
Note Message Enabled OFF, Assignable<br />
Local Sw OFF, ON<br />
OFF, CC01–CC31, CC64–CC95, Bender,<br />
Ch Aftertouch<br />
OFF, CC01–CC31, CC64–CC95, Bender,<br />
Ch Aftertouch<br />
3. To save the settings, press [WRITE] button .<br />
Specifies the controller used to change the video playback speed.<br />
Specifies the range in which the video playback speed will change.<br />
The three values specify the playback speed (as a multiple of normal speed) when the controller<br />
selected by Playback Speed Ctrl is at the minimum value, center value, and maximum value,<br />
respectively.<br />
Specifies the controller used to control the dissolve time (video switching time).<br />
Specifies the controller used to control the video effect.<br />
E1–G7 Specifies the range of keys that will switch images.<br />
Turn this Assignable if you want note data to switch images. Normally, program change messages<br />
are used to switch images, so you would leave this OFF.<br />
Specifies whether the <strong>JUPITER</strong>-<strong>50</strong> will (ON) or will not (OFF) produce sound when you play notes in<br />
the zones specified for Keyboard Range Lower and Keyboard Range Upper.<br />
* The Local Sw setting is not saved. It will automatically be ON when you turn on the power.<br />
MEMO<br />
Use the system setting “Visual Control Mode” (p. 78) to specify whether Visual Control is being used to control a MIDI Visual Control compatible<br />
device or a V-LINK compatible device.
Controlling SONAR (ACT)<br />
If you’re using SONAR, you can use the <strong>JUPITER</strong>-<strong>50</strong> as a controller for SONAR simply by turning on the <strong>JUPITER</strong>-<strong>50</strong>’s “ACT” function.<br />
What is ACT?<br />
ACT (Active Controller Technology) is a function that allows you to operate SONAR from an external device such as the <strong>JUPITER</strong>-<strong>50</strong>.<br />
With no need for complicated settings, you can operate the plug-in effect or plug-in synthesizer that is currently active in SONAR.<br />
In order to use ACT, you’ll need to install the control surface plug-in.<br />
Here’s how to install it.<br />
1. Insert the included <strong>JUPITER</strong>-<strong>50</strong> CD-ROM into your CD drive .<br />
When the auto-play dialog box appears, click [Open Folder to View Files].<br />
2. In the <strong>JUPITER</strong>-<strong>50</strong> CD-ROM, open the “<strong>JUPITER</strong>-<strong>50</strong>_CSP” folder and double-click “Setup .exe .”<br />
3. Proceed with the installation as directed by the installer .<br />
For details on making settings after installation, refer to SONAR’s online help.<br />
For details on using the control surface plug-in, refer to the online help for the control surface plug-in.<br />
Turning ACT On/Off<br />
1. In the Menu screen (p . 35), choose “ACT” and press the [ENTER] button .<br />
The ACT screen will appear.<br />
2. Press the [F6] (ACT) button .<br />
Each time you press the [F6] (ACT) button, the ACT function will turn on or off.<br />
Making Settings for ACT<br />
In the ACT screen you can make the following settings.<br />
Parameter Value Explanation<br />
Mode<br />
ALL<br />
The PART BALANCE [LEVEL] sliders, the PART ON/OFF buttons, and the SONG PLAYER/RECORDER buttons can be<br />
used as ACT controllers.<br />
SONG PLAYER ONLY The SONG PLAYER/RECORDER buttons can be used as ACT controllers.<br />
Tx MIDI Channel<br />
REGISTRATION<br />
Ch 1–Ch 16<br />
MIDI messages will be transmitted on the MIDI transmit channel specified by the registration.<br />
MIDI messages will be transmitted on the MIDI channel you specify here, regardless of the registration’s settings.<br />
Local Switch OFF, ON Specifies the Local Switch on/off status.<br />
87<br />
Quick Guide<br />
Introduction Playing Sounds Editing Sounds<br />
Other Convenient<br />
Functions<br />
Connecting Other<br />
Equipment<br />
Appendix
For a list of all parameters download “<strong>JUPITER</strong>-<strong>50</strong> Parameter Guide” (PDF file) from<br />
“<strong>JUPITER</strong>-<strong>50</strong>” in the “Owner’s <strong>Manual</strong>s” list on the <strong>Roland</strong> website<br />
(http;//www.roland.com/support/en/).<br />
LIVE SET TONE MODIFY Screen<br />
(SuperNATURAL Acoustic Tones)<br />
Changes in dynamics<br />
You can produce changes in dynamics that are idiomatic to each specific instrument,<br />
shifting smoothly from subtle to powerful sounds in a natural way that goes beyond<br />
a mere change in volume.<br />
* Dynamics can be controlled by Note-on Velocity, the Modulation controller (CC01),<br />
or Expression (CC11).<br />
After playing a key, you can operate the Modulation controller (CC01) to continuously<br />
control the dynamics (percussion instruments, struck-string instruments, and<br />
plucked-string instruments are excepted).<br />
Legato effect<br />
With the exception of some sounds, legato playing (the technique of playing the<br />
next key before releasing the previous key) lets you play notes that are smoothly<br />
connected.<br />
* To obtain a legato effect, set Mono/Poly to TONE or MONO.<br />
Performance variation sounds<br />
Musically appropriate performance variations are provided for each instrument,<br />
and you can use control changes (CC80–CC83) to instantly switch between these<br />
variations while you perform.<br />
0001:Concert Grand–0009:Honky Tonk<br />
Differences in your playing strength will smoothly change the tone character in a<br />
natural way.<br />
Parameter Value Explanation<br />
String Resonance 0–127<br />
Key Off Resonance 0–127<br />
Hammer Noise -2– +2<br />
Stereo Width 0–63<br />
Nuance<br />
Tone Character -5– +5<br />
88<br />
Parameter List<br />
TYPE1, TYPE2,<br />
TYPE3<br />
When the keys are pressed on an<br />
acoustic piano, the strings for keys<br />
that are already pressed also vibrate<br />
sympathetically. The function used to<br />
reproduce is called “String Resonance.”<br />
Increasing the value will increase the<br />
amount of effect.<br />
This adjusts resonances such as the<br />
key-off sound of an acoustic piano<br />
(subtle sounds that are heard when you<br />
release a key).<br />
Higher values will increase the volume<br />
of the resonances.<br />
This adjusts the sound of the hammer<br />
striking the string of an acoustic piano.<br />
Higher values will increase the sound of<br />
the hammer striking the string.<br />
The higher the value set, the wider the<br />
sound is spread out.<br />
This changes the Tone’s subtle nuances<br />
by altering the phase of the left and<br />
right sounds.<br />
This effect is difficult to hear when<br />
headphones are used.<br />
This has no effect for 0008:Concert<br />
Mono.<br />
Higher values produce a harder sound;<br />
lower values produce a more mellow<br />
sound.<br />
0010:Pure Vintage EP1–0025:Clav CA Combo<br />
A key-off noise typical of that instrument will be heard when you release the key.<br />
Parameter Value Explanation<br />
Key Off Noise (CC16) -64– +63<br />
Adjusts the amount of key-off noise.<br />
Higher settings will raise the volume.<br />
This has no effect for 0012:Pure Wurly.<br />
0026:Vibraphone, 0027:Marimba, 0078:APS<br />
Vibraphone, 0079:APS Marimba<br />
You can play a roll by operating the Modulation controller (CC01) while playing a<br />
note.<br />
You can produce a glissando effect by operating the pitch bend lever while holding<br />
down a note, or by playing legato with the Portamento SW (CC65) turned on.<br />
If Bend Range is set to Tone, you can produce a glissando effect by operating the<br />
pitch bend lever.<br />
If Bend Range is set to anything other than Tone, this effect will be obtained if Bend<br />
Mode (CC19) is turned on. Use this when you want to switch between glissando<br />
playing and conventional pitch change.<br />
By using Mute (CC18) you can simulate the technique of using your hand or mallet to<br />
mute the vibration (sound). It is effective to assign this to the D-BEAM controller.<br />
Parameter Value Explanation<br />
Mallet Hardness<br />
(CC16)<br />
-64– +63<br />
Adjusts the hardness of the mallet.<br />
Higher settings produce the sound of a<br />
harder mallet.<br />
Roll Speed (CC17) -64– +63 Adjusts the speed of the roll effect.<br />
Variation Refer to p. 98 Performance variation sounds<br />
0028:TW Organ<br />
0028:TW Organ can be assigned only to layer 1 of the upper part or lower part.<br />
Parameter<br />
Harmonic Bar tab<br />
Value Explanation<br />
Harmonic Bar 16' 0–8<br />
Harmonic Bar 5-1/3' 0–8<br />
Adjust the level of each footage.<br />
Harmonic Bar 8'<br />
Harmonic Bar 4'<br />
0–8<br />
0–8<br />
A different harmonic component is<br />
assigned to each footage; the sound of<br />
the organ is created by mixing these<br />
Harmonic Bar 2-2/3' 0–8<br />
components.<br />
Harmonic Bar 2'<br />
Harmonic Bar 1-3/5'<br />
0–8<br />
0–8<br />
The 8’ footage is the core of the sound;<br />
this is the basic pitch around which the<br />
Harmonic Bar 1-1/3' 0–8<br />
sound is created.<br />
Harmonic Bar 1' 0–8<br />
Level at which the signal of tonewheels<br />
Leakage Level<br />
Percussion tab<br />
0–127<br />
unrelated to the pressed keys is mixed<br />
into the input<br />
Percussion Switch OFF, ON<br />
If this is on, a crisp attack will be added<br />
to the beginning of the notes.<br />
The percussion sound will be at the<br />
NORM<br />
normal volume, and the sound of the<br />
harmonic bars will be reduced.<br />
Percussion Soft<br />
The percussion sound will be reduced,<br />
SOFT<br />
and the harmonic bars will be at the<br />
normal volume.<br />
Percussion Soft Level 0–15<br />
Volume of the percussion sound when<br />
Percussion Soft is set to SOFT<br />
Percussion Normal<br />
Level<br />
0–15<br />
Volume of the percussion sound when<br />
Percussion Soft is set to NORM<br />
Percussion Slow<br />
FAST<br />
SLOW<br />
The percussion sound will disappear<br />
immediately, producing a sharp attack.<br />
The percussion sound will disappear<br />
slowly, producing a more gentle attack.
Parameter Value Explanation<br />
Percussion Slow Time 0–127<br />
Percussion Fast Time 0–127<br />
Percussion Harmonic<br />
Percussion Recharge<br />
Time<br />
Percussion Harmonic<br />
Bar Level<br />
Click Level tab<br />
2ND<br />
3RD<br />
0–10<br />
0–127<br />
Key On Click Level 0–31<br />
Key Off Click Level 0–31<br />
Decay time of the percussion sound<br />
when Percussion Slow is set to SLOW<br />
Decay time of the percussion sound<br />
when Percussion Slow is set to FAST<br />
The percussion sound will be the same<br />
pitch as the 4’ harmonic bar.<br />
The percussion sound will be the same<br />
pitch as the 2-2/3’ harmonic bar.<br />
Normally, the percussion sound will<br />
be added only to the first note of<br />
successive notes played legato.<br />
This reproduces the characteristics of<br />
the analog circuitry that produced the<br />
percussion sound in tonewheel organs,<br />
which caused the percussion sound<br />
to be softer when keys were pressed<br />
in quick succession. This specifies the<br />
characteristics of this analog circuit.<br />
The volume of the organ will be<br />
reduced if Percussion Soft is set to<br />
NORM.<br />
This specifies how much the volume<br />
will be reduced.<br />
Level of the key-click when a key is<br />
pressed<br />
Level of the key-click when a key is<br />
released<br />
0029:French Accordion, 0030:Italian Accordion,<br />
0032:Bandoneon, 0080:APS Accordion,<br />
0082:APS Bandoneon<br />
These sounds let you produce distinctive volume changes, as if you were operating<br />
the bellows of the instrument.<br />
If Bend Range is set to Tone, moving the pitch bend lever upward will produce a<br />
tremolo effect, as if you were moving the bellows in small steps.<br />
If Bend Range is set to anything other than Tone, this effect will be produced if Bend<br />
Mode (CC19) is turned on. Use this when you want to switch between the tremolo<br />
effect and conventional pitch change.<br />
Parameter Value Explanation<br />
Noise Level (CC16) -64– +63<br />
Adjusts the amount of key noise heard<br />
when you press or release a key.<br />
0031:Harmonica, 0081:APS Harmonica<br />
If Bend Range is set to Tone, moving the pitch bend lever upward will produce a wah<br />
effect as if you were using your hands to enclose the harmonica.<br />
If Bend Range is set to anything other than Tone, this effect will be produced if Bend<br />
Mode (CC19) is turned on. Use this when you want to switch between the wah effect<br />
and conventional pitch change.<br />
Parameter Value Explanation<br />
Noise Level (CC16) -64– +63 Adjusts the amount of breath noise.<br />
Growl Sens (CC18) 0–127<br />
Adjusts the distinctive nuance (growl)<br />
of the breath noise.<br />
Parameter List<br />
0033:Nylon Guitar–0035:SteelStr Guitar,<br />
0083:APS Nylon Guitar–0084:APS SteelStr Gt.<br />
Note numbers 34 and lower will produce ghost notes as played on a guitar.<br />
Parameter Value Explanation<br />
Noise Level (CC16) -64– +63<br />
Adjusts the volume of the string<br />
grazing or picking noise.<br />
This has no effect on the 0083:APS<br />
Nylon Guitar and 0084:APS SteelStr Gt.<br />
Adjusts the deviation in the timing of<br />
sound production by the strings when<br />
Strum Speed (CC17) -64– +63<br />
strumming with Strum Mode turned<br />
on. Higher values produce a greater<br />
time deviation. The effect will be more<br />
significant for lower velocities.<br />
If Strum Mode is turned on, strumming<br />
will be produced when you play<br />
multiple keys simultaneously. This<br />
also reproduces the difference in time<br />
at which each string of a guitar is<br />
Strum Mode (CC19) OFF, ON sounded.<br />
The guitar’s up strokes and down<br />
strokes will alternately be produced<br />
when chords are played in succession.<br />
It is effective to use this with Hold<br />
turned on.<br />
Variation Refer to p. 98 Performance variation sounds<br />
0036:Acoustic Bass–0041:Fretless Bass,<br />
0085:APS Acoustic Bs.–0088:APS Fretless Bs.<br />
By playing legato rapidly, you can simulate techniques that are distinctive of a bass,<br />
such as slides or hammering-on, depending on the speed at which you played the<br />
notes.<br />
Parameter Value Explanation<br />
Noise Level (CC16) -64– +63<br />
Adjusts the volume of the string<br />
grazing or picking noise.<br />
This has no effect on the 0085:APS<br />
Acoustic Bs. – 0088:APS Fretless Bs.<br />
Variation Refer to p. 98 Performance variation sounds<br />
0042:Violin–0047:Contrabass, 0089:APS<br />
Violin–0092:APS Contrabass<br />
If Porta SW is turned on, a portamento effect typical of a violin will be produced. Note<br />
ranges corresponding to open strings will produce an open-string sound without<br />
vibrato.<br />
Parameter Value Explanation<br />
Noise Level (CC16) -64– +63<br />
Adjusts the amount of string grazing<br />
noise.<br />
Variation Refer to p. 98 Performance variation sounds<br />
89<br />
Quick Guide<br />
Introduction Playing Sounds Editing Sounds<br />
Other Convenient<br />
Functions<br />
Connecting Other<br />
Equipment<br />
Appendix
Parameter List<br />
0048:Harp, 0093:APS Harp<br />
By turning Glissando mode (CC19) on, you can cause only the notes included in a<br />
specific scale to be sounded.<br />
This lets you easily produce an idiomatic harp glissando simply by playing a glissando<br />
on the white keys.<br />
It is effective to play this while holding down the HOLD pedal.<br />
By using Mute (CC18) you can simulate the technique of using your hand to stop the<br />
vibration of the strings.<br />
Parameter Value Explanation<br />
Glissando Mode<br />
(CC19)<br />
Play Scale<br />
Scale Key<br />
90<br />
OFF, ON<br />
7th, Major, Minor,<br />
Hrm-Mi<br />
(Harmonic<br />
Minor), Dim<br />
(Diminish),<br />
Whole (Whole<br />
Tone)<br />
C, Db, D, Eb, E, F,<br />
Gb, G, Ab, A, Bb, B<br />
If this is on, you can produce the effect<br />
of sweeping across the harp strings by<br />
playing a glissando on the keyboard.<br />
Specifies the scale used when<br />
Glissando Mode is on.<br />
Specifies the key of the scale produced<br />
when you play a glissando with<br />
Glissando Mode turned on.<br />
Variation Refer to p. 98 Performance variation sounds<br />
0049:Timpani, 0094:APS Timpani<br />
You can play a roll by operating the Modulation controller (CC01) while playing a<br />
note.<br />
You can use Mute (CC18) to simulate the muting technique of using your hand to<br />
press down on the timpani.<br />
It is effective to assign this to the D-BEAM controller.<br />
Parameter Value Explanation<br />
Roll Speed (CC17) -64– +63 Adjusts the speed of the roll effect.<br />
Variation Refer to p. 98 Performance variation sounds<br />
00<strong>50</strong>:Strings, 0095:APS Strings<br />
Parameter Value Explanation<br />
Variation Refer to p. 98 Performance variation sounds<br />
0051:Trumpet, 0052:Flugel Horn, 0056:Mute<br />
Trumpet, 0057:French Horn, 0096:APS<br />
Trumpet, 0098:APS Mute Trumpet, 0099:APS<br />
French Horn<br />
By setting Bend Range to Tone, you can use the pitch bend lever to create discontinuous<br />
pitch changes or falls that are typical of a brass instrument.<br />
• Moving the pitch bend lever in the upward direction will create a discontinuous<br />
pitch change typical of brass instruments.<br />
• Moving the pitch bend lever in the downward direction will produce a fall effect.<br />
If Bend Range is set to anything other than Tone, this effect will be produced if Bend<br />
Mode (CC19) is turned on. Use this when you want to switch between discontinuous<br />
pitch changes or falls, and conventional pitch change.<br />
Parameter Value Explanation<br />
Noise Level (CC16) -64– +63<br />
Adjusts the amount of breath noise for<br />
the brass instrument.<br />
Adjusts the distinctive nuance (growl)<br />
Growl Sens (CC18) 0–127<br />
that occurs when a brass instrument<br />
is blown.<br />
Variation Refer to p. 98 Performance variation sounds<br />
0053:Trombone–0055:Bass Trombone,<br />
0097:APS Trombone<br />
By playing legato with the Portamento SW turned on, you can create the effect of<br />
glissando performance on a trombone.<br />
By setting Bend Range to Tone, you can use the pitch bend lever to create discontinuous<br />
pitch changes or falls that are typical of a brass instrument.<br />
• Moving the pitch bend lever in the upward direction will create a discontinuous<br />
pitch change typical of brass instruments.<br />
• Moving the pitch bend lever in the downward direction will produce a fall effect.<br />
If Bend Range is set to anything other than Tone, this effect will be produced if Bend<br />
Mode (CC19) is turned on. Use this when you want to switch between discontinuous<br />
pitch changes or falls, and conventional pitch change.<br />
Parameter Value Explanation<br />
Noise Level (CC16) -64– +63<br />
Adjusts the amount of breath noise for<br />
the brass instrument.<br />
Adjusts the distinctive nuance (growl)<br />
Growl Sens (CC18) 0–127<br />
that occurs when a brass instrument<br />
is blown.<br />
Variation Refer to p. 98 Performance variation sounds<br />
0058:Soprano Sax–0061:Baritone Sax,<br />
0100:APS Soprano Sax–0103:APS Baritone Sax<br />
If Bend Range is set to Tone, you can use the pitch bend lever to create glissando or<br />
fall effects.<br />
• Moving the pitch bend lever in the upward direction will produce a glissando<br />
effect.<br />
• Moving the pitch bend lever in the downward direction will produce a fall effect.<br />
If Bend Range is set to anything other than Tone, this effect will be produced if Bend<br />
Mode (CC19) is turned on. Use this when you want to switch between glissando/fall<br />
effects and conventional pitch change.<br />
Parameter Value Explanation<br />
Noise Level (CC16) -64– +63<br />
Adjusts the amount of the brass<br />
instrument’s breath noise or key noise.<br />
Adjusts the distinctive nuance (growl)<br />
Growl Sens (CC18) 0–127<br />
that occurs when a brass instrument<br />
is blown.<br />
Variation Refer to p. 98 Performance variation sounds<br />
0062:Oboe–0069:Flute 2, 0104:APS Oboe–<br />
0109:APS Flute<br />
If Bend Range is set to Tone, you can use the pitch bend lever to create glissando or<br />
fall effects.<br />
• Moving the pitch bend lever in the upward direction will produce a glissando<br />
effect.<br />
• Moving the pitch bend lever in the downward direction will produce a fall effect.<br />
If Bend Range is set to anything other than Tone, this effect will be produced if Bend<br />
Mode (CC19) is turned on. Use this when you want to switch between glissando/fall<br />
effects and conventional pitch change.<br />
Parameter Value Explanation<br />
Noise Level (CC16) -64– +63<br />
Adjusts the amount of breath noise for<br />
the brass instrument.<br />
Adjusts the distinctive nuance (growl)<br />
Growl Sens (CC18) 0–127<br />
that occurs when a brass instrument<br />
is blown.<br />
Variation Refer to p. 98 Performance variation sounds
0070:Pan Flute, 0110:APS Pan Flute<br />
If Bend Range is set to Tone, you can use the pitch bend lever to create glissando or<br />
fall effects.<br />
• Moving the pitch bend lever in the upward direction will produce a glissando<br />
effect.<br />
• Moving the pitch bend lever in the downward direction will produce a fall effect.<br />
If Bend Range is set to anything other than Tone, this effect will be produced if Bend<br />
Mode (CC19) is turned on. Use this when you want to switch between glissando/fall<br />
effects and conventional pitch change.<br />
You can create a flutter sound by using Flutter (CC81) to switch the variation. Strongly<br />
played notes will sound a phrase typical of pan flutes.<br />
Parameter Value Explanation<br />
Noise Level (CC16) -64– +63<br />
Adjusts the amount of breath noise for<br />
the brass instrument.<br />
Adjusts the distinctive nuance (growl)<br />
Growl Sens (CC18) 0–127<br />
that occurs when a brass instrument<br />
is blown.<br />
Variation Refer to p. 98 Performance variation sounds<br />
0071:Shakuhachi, 0072:Ryuteki, 0111:APS<br />
Shakuhachi, 0112:APS Ryuteki<br />
Legato playing will produce notes that are connected as if they were played in a<br />
single breath.<br />
Parameter Value Explanation<br />
Noise Level (CC16) -64– +63<br />
Adjusts the amount of breath noise for<br />
the brass instrument.<br />
Adjusts the distinctive nuance (growl)<br />
Growl Sens (CC18) 0–127<br />
that occurs when a brass instrument<br />
is blown.<br />
Variation Refer to p. 98 Performance variation sounds<br />
0073:Sitar, 0113:APS Sitar<br />
Note numbers 47 and below will produce a sitar sound effect.<br />
CC80 values in the range of 64–127 will play a tambura phrase, and values in the<br />
range 0–63 will silence it.<br />
Parameter Value Explanation<br />
Resonance Level<br />
(CC16)<br />
-64– +63<br />
Tambura Level -64– +63<br />
Tambura Pitch -12– +12<br />
Adjusts the sympathetic resonance.<br />
Higher settings will increase the<br />
sympathetic resonance.<br />
Adjusts the volume of the tambura<br />
sound effect sounded by CC80.<br />
Adjusts the pitch of the tambura sound<br />
effect sounded by CC80.<br />
0074:Uilleann Pipes, 0114:APS UilleannPipe<br />
CC80 values in the range of 64–127 will sound a drone. Values in the range of 0–63<br />
will silence the drone.<br />
Parameter Value Explanation<br />
Drone Level -64– +63<br />
Adjusts the volume of the drone sound<br />
effect sounded by CC80.<br />
Drone Pitch -12– +12<br />
Adjusts the pitch of the drone sound<br />
effect sounded by CC80.<br />
Variation Refer to p. 98 Performance variation sounds<br />
0075:Erhu, 0115:APS Erhu<br />
Parameter List<br />
Turning the Portamento SW on will produce the smooth pitch change typical of this<br />
instrument.<br />
Note ranges corresponding to open strings will produce an open-string sound<br />
without vibrato.<br />
Parameter Value Explanation<br />
Noise Level (CC16) -64– +63<br />
Adjusts the amount of string grazing<br />
noise.<br />
Variation Refer to p. 98 Performance variation sounds<br />
0076:Sarangi, 0116:APS Sarangi<br />
Turning the Portamento SW on will produce the smooth pitch change typical of this<br />
instrument.<br />
Note ranges corresponding to open strings will produce an open-string sound<br />
without vibrato.<br />
CC80 values in the range of 64–127 will play a tambura phrase, and values in the<br />
range 0–63 will silence it.<br />
Parameter Value Explanation<br />
Resonance Level<br />
(CC16)<br />
-64– +63<br />
Tambura Level -64– +63<br />
Tambura Pitch -12– +12<br />
Adjusts the sympathetic resonance.<br />
Higher settings will increase the<br />
sympathetic resonance.<br />
Adjusts the volume of the tambura<br />
sound effect sounded by CC80.<br />
Adjusts the pitch of the tambura sound<br />
effect sounded by CC80.<br />
0077:Steel Drums, 0117:APS Steel Drums<br />
You can play a roll by operating the Modulation controller (CC01) while playing a<br />
note.<br />
You can produce a glissando effect by employing pitch bend while playing the<br />
keyboard, or by playing legato with the Portamento SW (CC65) turned on.<br />
If Bend Range is set to Tone, you can use the pitch bend lever to produce a glissando<br />
effect.<br />
If Bend Range is set to anything other than Tone, this effect will be produced if Bend<br />
Mode (CC19) is turned on. Use this when you want to switch between glissando/fall<br />
effects and conventional pitch change.<br />
By using Mute (CC18) you can simulate the technique of using your hand or mallet to<br />
mute the vibration (sound). It is effective to assign this to the D-BEAM controller.<br />
Parameter Value Explanation<br />
Resonance Level<br />
(CC16)<br />
-64– +63<br />
Adjusts the sympathetic resonance.<br />
Higher settings will increase the<br />
sympathetic resonance.<br />
Roll Speed (CC17) -64– +63 Adjusts the speed of the roll effect.<br />
Variation Refer to p. 98 Performance variation sounds<br />
91<br />
Quick Guide<br />
Introduction Playing Sounds Editing Sounds<br />
Other Convenient<br />
Functions<br />
Connecting Other<br />
Equipment<br />
Appendix
Parameter List<br />
Control Change Assign List<br />
92<br />
The sound of the SuperNATURAL acoustic tone can be controlled by receiving a specified control change (CC).<br />
The parameters that are controlled by CC16–CC19 are the same as the parameters listed in “Editing the Tones Assigned to a Layer (SuperNATURAL<br />
Acoustic Tones)” (p. 60) (except for *4–*9).<br />
CC80–CC83 are performance variation sounds (except for *10).<br />
SuperNATURAL<br />
Acoustic Tone<br />
CC16 CC17 CC18 CC19 CC80 CC81 CC82 CC83<br />
0001 Concert Grand – – – – – – – –<br />
0002 Grand Piano1 – – – – – – – –<br />
0003 Grand Piano2 – – – – – – – –<br />
0004 Grand Piano3 – – – – – – – –<br />
0005 Mellow Piano – – – – – – – –<br />
0006 Bright Piano – – – – – – – –<br />
0007 Upright Piano – – – – – – – –<br />
0008 Concert Mono – – – – – – – –<br />
0009 Honky-tonk – – – – – – – –<br />
0010 Pure Vintage EP1 Key Off Noise – – – – – – –<br />
0011 Pure Vintage EP2 Key Off Noise – – – – – – –<br />
0012 Pure Wurly – – – – – – – –<br />
0013 Pure Vintage EP3 Key Off Noise – – – – – – –<br />
0014 Tined EP1 Key Off Noise – – – – – – –<br />
0015 Tined EP2 Key Off Noise – – – – – – –<br />
0016 Old Hammer EP Key Off Noise – – – – – – –<br />
0017 Dyno Piano Key Off Noise – – – – – – –<br />
0018 Clav CB Flat Key Off Noise – – – – – – –<br />
0019 Clav CA Flat Key Off Noise – – – – – – –<br />
0020 Clav CB Medium Key Off Noise – – – – – – –<br />
0021 Clav CA Medium Key Off Noise – – – – – – –<br />
0022 Clav CB Brillia Key Off Noise – – – – – – –<br />
0023 Clav CA Brillia Key Off Noise – – – – – – –<br />
0024 Clav CB Combo Key Off Noise – – – – – – –<br />
0025 Clav CA Combo Key Off Noise – – – – – – –<br />
0026 Vibraphone Mallet Hardness Roll Speed Mute (*4) Bend Mode (*9) Dead Stroke Tremolo Sw – –<br />
0027 Marimba Mallet Hardness Roll Speed Mute (*4) Bend Mode (*9) Dead Stroke – –<br />
0028 TW Organ – – – – – – –<br />
0029 French Accordion Noise Level – – Bend Mode (*6) – – – –<br />
0030 ItalianAccordion Noise Level – – Bend Mode (*6) – – – –<br />
0031 Harmonica Noise Level – Growl Sens Bend Mode (*7) – – – –<br />
0032 Bandoneon Noise Level – – Bend Mode (*6) – – – –<br />
0033 Nylon Guitar Noise Level Strum Speed – Strum Mode Mute Harmonics – –<br />
0034 Flamenco Guitar Noise Level Strum Speed – Strum Mode Rasgueado Harmonics – –<br />
0035 SteelStr Guitar Noise Level Strum Speed – Strum Mode Mute Harmonics – –<br />
0036 Acoustic Bass Noise Level – – – Staccato Harmonics – –<br />
0037 Fingered Bass Noise Level – – – Slap Harmonics – –<br />
0038 Fingered Bass 2 Noise Level – – – Slap Harmonics – –<br />
0039 Picked Bass Noise Level – – – Bridge Mute Harmonics – –<br />
0040 Picked Bass 2 Noise Level – – – Bridge Mute Harmonics – –<br />
0041 Fretless Bass Noise Level – – – Staccato Harmonics – –<br />
0042 Violin Noise Level – – – Staccato Pizzicato Tremolo –<br />
0043 Violin 2 Noise Level – – – Staccato Pizzicato Tremolo –<br />
0044 Viola Noise Level – – – Staccato Pizzicato Tremolo –<br />
0045 Cello Noise Level – – – Staccato Pizzicato Tremolo –<br />
0046 Cello 2 Noise Level – – – Staccato Pizzicato Tremolo –<br />
0047 Contrabass Noise Level – – – Staccato Pizzicato Tremolo –<br />
0048 Harp – – Mute (*5) Glissando Mode Nail – – –
SuperNATURAL<br />
Acoustic Tone<br />
CC65 CC76<br />
CC01 (System Control 1<br />
Source) *1<br />
0001 Concert Grand Portamento – Vibrato –<br />
0002 Grand Piano1 Portamento – Vibrato –<br />
0003 Grand Piano2 Portamento – Vibrato –<br />
0004 Grand Piano3 Portamento – Vibrato –<br />
0005 Mellow Piano Portamento – Vibrato –<br />
0006 Bright Piano Portamento – Vibrato –<br />
0007 Upright Piano Portamento – Vibrato –<br />
0008 Concert Mono Portamento – Vibrato –<br />
0009 Honky-tonk Portamento – Vibrato –<br />
0010 Pure Vintage EP1 Portamento – Vibrato –<br />
0011 Pure Vintage EP2 Portamento – Vibrato –<br />
0012 Pure Wurly Portamento – Vibrato –<br />
0013 Pure Vintage EP3 Portamento – Vibrato –<br />
0014 Tined EP1 Portamento – Vibrato –<br />
0015 Tined EP2 Portamento – Vibrato –<br />
0016 Old Hammer EP Portamento – Vibrato –<br />
0017 Dyno Piano Portamento – Vibrato –<br />
0018 Clav CB Flat Portamento – Vibrato –<br />
0019 Clav CA Flat Portamento – Vibrato –<br />
0020 Clav CB Medium Portamento – Vibrato –<br />
0021 Clav CA Medium Portamento – Vibrato –<br />
0022 Clav CB Brillia Portamento – Vibrato –<br />
0023 Clav CA Brillia Portamento – Vibrato –<br />
0024 Clav CB Combo Portamento – Vibrato –<br />
0025 Clav CA Combo Portamento – Vibrato –<br />
0026 Vibraphone Portamento Tremolo Speed Roll Sw+Dynamics (*3) –<br />
0027 Marimba Portamento – Roll Sw+Dynamics (*3) –<br />
0028 TW Organ – – – –<br />
0029 French Accordion Portamento – Dynamics –<br />
0030 ItalianAccordion Portamento – Dynamics –<br />
0031 Harmonica Portamento – Dynamics Vibrato<br />
0032 Bandoneon Portamento – Dynamics –<br />
0033 Nylon Guitar Portamento – Vibrato Vibrato<br />
0034 Flamenco Guitar Portamento – Vibrato Vibrato<br />
0035 SteelStr Guitar Portamento – Vibrato Vibrato<br />
0036 Acoustic Bass Portamento – Vibrato Vibrato<br />
0037 Fingered Bass Portamento – Vibrato Vibrato<br />
0038 Fingered Bass 2 Portamento – Vibrato Vibrato<br />
0039 Picked Bass Portamento – Vibrato Vibrato<br />
0040 Picked Bass 2 Portamento – Vibrato Vibrato<br />
0041 Fretless Bass Portamento – Vibrato Vibrato<br />
0042 Violin Portamento – Dynamics+Vibrato Vibrato<br />
0043 Violin 2 Portamento – Dynamics+Vibrato Vibrato<br />
0044 Viola Portamento – Dynamics+Vibrato Vibrato<br />
0045 Cello Portamento – Dynamics+Vibrato Vibrato<br />
0046 Cello 2 Portamento – Dynamics+Vibrato Vibrato<br />
0047 Contrabass Portamento – Dynamics+Vibrato Vibrato<br />
0048 Harp Portamento – Vibrato Vibrato<br />
AFTERTOUCH<br />
(System Control 2<br />
Source) *2<br />
Parameter List<br />
93<br />
Quick Guide<br />
Introduction Playing Sounds Editing Sounds<br />
Other Convenient<br />
Functions<br />
Connecting Other<br />
Equipment<br />
Appendix
Parameter List<br />
94<br />
SuperNATURAL<br />
Acoustic Tone<br />
CC16 CC17 CC18 CC19 CC80 CC81 CC82 CC83<br />
0049 Timpani – Roll Speed Mute (*4) – Flam Accent Roll – –<br />
00<strong>50</strong> Strings – – – – Staccato Pizzicato Tremolo Fall<br />
0051 Trumpet Noise Level – Growl Sens Bend Mode (*8) Staccato Fall – –<br />
0052 Flugel Horn Noise Level – Growl Sens Bend Mode (*8) Staccato Fall – –<br />
0053 Trombone Noise Level – Growl Sens Bend Mode (*8) Staccato Fall – –<br />
0054 Trombone 2 Noise Level – Growl Sens Bend Mode (*8) Staccato Fall – –<br />
0055 Bass Trombone Noise Level – Growl Sens Bend Mode (*8) Staccato Fall – –<br />
0056 Mute Trumpet Noise Level – Growl Sens Bend Mode (*8) Staccato Fall – –<br />
0057 French Horn Noise Level – Growl Sens Bend Mode (*8) Staccato – – –<br />
0058 Soprano Sax Noise Level – Growl Sens Bend Mode (*8) Staccato Fall – –<br />
0059 Alto Sax Noise Level – Growl Sens Bend Mode (*8) Staccato Fall – –<br />
0060 Tenor Sax Noise Level – Growl Sens Bend Mode (*8) Staccato Fall – –<br />
0061 Baritone Sax Noise Level – Growl Sens Bend Mode (*8) Staccato Fall – –<br />
0062 Oboe Noise Level – Growl Sens Bend Mode (*8) Staccato – – –<br />
0063 English Horn Noise Level – Growl Sens Bend Mode (*8) Staccato – – –<br />
0064 Bassoon Noise Level – Growl Sens Bend Mode (*8) Staccato – – –<br />
0065 Clarinet Noise Level – Growl Sens Bend Mode (*8) Staccato – – –<br />
0066 Bass Clarinet Noise Level – Growl Sens Bend Mode (*8) Staccato – – –<br />
0067 Piccolo Noise Level – Growl Sens Bend Mode (*8) Staccato – – –<br />
0068 Flute Noise Level – Growl Sens Bend Mode (*8) Staccato – – –<br />
0069 Flute2 Noise Level – Growl Sens Bend Mode (*8) Staccato – – –<br />
0070 Pan Flute Noise Level – Growl Sens Bend Mode (*8) Staccato Flutter – –<br />
0071 Shakuhachi Noise Level – Growl Sens – Staccato Ornament – –<br />
0072 Ryuteki Noise Level – Growl Sens – Staccato Ornament – –<br />
0073 Sitar Resonance Level – – – Tambura (*10) – – –<br />
0074 Uilleann Pipes – – – – Drone (*10) Ornament – –<br />
0075 Erhu Noise Level – – – Staccato Ornament – –<br />
0076 Sarangi Resonance Level – – – Tambura (*10) – – –<br />
0077 Steel Drums Resonance Level Roll Speed Mute (*4) Bend Mode (*9) Mute – – –<br />
0078 APS Vibraphone Mallet Hardness Roll Speed Mute (*4) Bend Mode (*9) Dead Stroke Tremolo Sw – –<br />
0079 APS Marimba Mallet Hardness Roll Speed Mute (*4) Bend Mode (*9) Dead Stroke – –<br />
0080 APS Accordion Noise Level – – Bend Mode (*6) – – – –<br />
0081 APS Harmonica Noise Level – Growl Sens Bend Mode (*7) – – – –<br />
0082 APS Bandoneon Noise Level – – Bend Mode (*6) – – – –<br />
0083 APS Nylon Guitar – Strum Speed – Strum Mode Mute Harmonics – –<br />
0084 APS SteelStr Gt . – Strum Speed – Strum Mode Mute Harmonics – –<br />
0085 APS Acoustic Bs . – – – – Staccato Harmonics – –<br />
0086 APS Fingered Bs . – – – – Slap Harmonics – –<br />
0087 APS Picked Bass – – – – Bridge Mute Harmonics – –<br />
0088 APS Fretless Bs . – – – – Staccato Harmonics – –<br />
0089 APS Violin Noise Level – – – Staccato Pizzicato Tremolo –<br />
0090 APS Viola Noise Level – – – Staccato Pizzicato Tremolo –<br />
0091 APS Cello Noise Level – – – Staccato Pizzicato Tremolo –<br />
0092 APS Contrabass Noise Level – – – Staccato Pizzicato Tremolo –<br />
0093 APS Harp – – Mute (*5) Glissando Mode Nail – – –<br />
0094 APS Timpani – Roll Speed Mute (*4) – Flam Accent Roll – –<br />
0095 APS Strings – – – – Staccato Pizzicato Tremolo Fall<br />
0096 APS Trumpet Noise Level – Growl Sens Bend Mode (*8) Staccato Fall – –<br />
0097 APS Trombone Noise Level – Growl Sens Bend Mode (*8) Staccato Fall – –<br />
0098 APS Mute Trumpet Noise Level – Growl Sens Bend Mode (*8) Staccato Fall – –<br />
0099 APS French Horn Noise Level – Growl Sens Bend Mode (*8) Staccato – – –<br />
0100 APS Soprano Sax Noise Level – Growl Sens Bend Mode (*8) Staccato Fall – –<br />
0101 APS Alto Sax Noise Level – Growl Sens Bend Mode (*8) Staccato Fall – –<br />
0102 APS Tenor Sax Noise Level – Growl Sens Bend Mode (*8) Staccato Fall – –<br />
0103 APS Baritone Sax Noise Level – Growl Sens Bend Mode (*8) Staccato Fall – –
SuperNATURAL<br />
Acoustic Tone<br />
CC65 CC76<br />
CC01 (System Control 1<br />
Source) *1<br />
0049 Timpani – – Roll Sw+Dynamics (*3) –<br />
00<strong>50</strong> Strings Portamento – Dynamics+Vibrato Level<br />
0051 Trumpet Portamento – Dynamics+Vibrato Vibrato<br />
0052 Flugel Horn Portamento – Dynamics+Vibrato Vibrato<br />
0053 Trombone Portamento – Dynamics+Vibrato Vibrato<br />
0054 Trombone 2 Portamento – Dynamics+Vibrato Vibrato<br />
0055 Bass Trombone Portamento – Dynamics+Vibrato Vibrato<br />
0056 Mute Trumpet Portamento – Dynamics+Vibrato Vibrato<br />
0057 French Horn Portamento – Dynamics+Vibrato Vibrato<br />
0058 Soprano Sax Portamento – Dynamics+Vibrato Vibrato<br />
0059 Alto Sax Portamento – Dynamics+Vibrato Vibrato<br />
0060 Tenor Sax Portamento – Dynamics+Vibrato Vibrato<br />
0061 Baritone Sax Portamento – Dynamics+Vibrato Vibrato<br />
0062 Oboe Portamento – Dynamics+Vibrato Vibrato<br />
0063 English Horn Portamento – Dynamics+Vibrato Vibrato<br />
0064 Bassoon Portamento – Dynamics+Vibrato Vibrato<br />
0065 Clarinet Portamento – Dynamics+Vibrato Vibrato<br />
0066 Bass Clarinet Portamento – Dynamics+Vibrato Vibrato<br />
0067 Piccolo Portamento – Dynamics+Vibrato Vibrato<br />
0068 Flute Portamento – Dynamics+Vibrato Vibrato<br />
0069 Flute2 Portamento – Dynamics+Vibrato Vibrato<br />
0070 Pan Flute Portamento – Dynamics+Vibrato Vibrato<br />
0071 Shakuhachi Portamento – Dynamics+Vibrato Vibrato<br />
0072 Ryuteki Portamento – Dynamics+Vibrato Vibrato<br />
0073 Sitar Portamento – Vibrato Vibrato<br />
0074 Uilleann Pipes Portamento – Dynamics Vibrato<br />
0075 Erhu Portamento – Dynamics+Vibrato Vibrato<br />
0076 Sarangi Portamento – Dynamics Vibrato<br />
0077 Steel Drums Portamento – Roll Sw+Dynamics (*3) –<br />
0078 APS Vibraphone Portamento Tremolo Speed Roll Sw+Dynamics (*3) –<br />
0079 APS Marimba Portamento – Roll Sw+Dynamics (*3) –<br />
0080 APS Accordion Portamento – Dynamics –<br />
0081 APS Harmonica Portamento – Dynamics Vibrato<br />
0082 APS Bandoneon Portamento – Dynamics –<br />
0083 APS Nylon Guitar Portamento – Vibrato Vibrato<br />
0084 APS SteelStr Gt . Portamento – Vibrato Vibrato<br />
0085 APS Acoustic Bs . Portamento – Vibrato Vibrato<br />
0086 APS Fingered Bs . Portamento – Vibrato Vibrato<br />
0087 APS Picked Bass Portamento – Vibrato Vibrato<br />
0088 APS Fretless Bs . Portamento – Vibrato Vibrato<br />
0089 APS Violin Portamento – Dynamics+Vibrato Vibrato<br />
0090 APS Viola Portamento – Dynamics+Vibrato Vibrato<br />
0091 APS Cello Portamento – Dynamics+Vibrato Vibrato<br />
0092 APS Contrabass Portamento – Dynamics+Vibrato Vibrato<br />
0093 APS Harp Portamento – Vibrato Vibrato<br />
0094 APS Timpani – – Roll Sw+Dynamics (*3) –<br />
0095 APS Strings Portamento – Dynamics+Vibrato Level<br />
0096 APS Trumpet Portamento – Dynamics+Vibrato Vibrato<br />
0097 APS Trombone Portamento – Dynamics+Vibrato Vibrato<br />
0098 APS Mute Trumpet Portamento – Dynamics+Vibrato Vibrato<br />
0099 APS French Horn Portamento – Dynamics+Vibrato Vibrato<br />
0100 APS Soprano Sax Portamento – Dynamics+Vibrato Vibrato<br />
0101 APS Alto Sax Portamento – Dynamics+Vibrato Vibrato<br />
0102 APS Tenor Sax Portamento – Dynamics+Vibrato Vibrato<br />
0103 APS Baritone Sax Portamento – Dynamics+Vibrato Vibrato<br />
AFTERTOUCH<br />
(System Control 2<br />
Source) *2<br />
Parameter List<br />
95<br />
Quick Guide<br />
Introduction Playing Sounds Editing Sounds<br />
Other Convenient<br />
Functions<br />
Connecting Other<br />
Equipment<br />
Appendix
Parameter List<br />
96<br />
SuperNATURAL<br />
Acoustic Tone<br />
CC16 CC17 CC18 CC19 CC80 CC81 CC82 CC83<br />
0104 APS Oboe Noise Level – Growl Sens Bend Mode (*8) Staccato – – –<br />
0105 APS English Horn Noise Level – Growl Sens Bend Mode (*8) Staccato – – –<br />
0106 APS Bassoon Noise Level – Growl Sens Bend Mode (*8) Staccato – – –<br />
0107 APS Clarinet Noise Level – Growl Sens Bend Mode (*8) Staccato – – –<br />
0108 APS Piccolo Noise Level – Growl Sens Bend Mode (*8) Staccato – – –<br />
0109 APS Flute Noise Level – Growl Sens Bend Mode (*8) Staccato – – –<br />
0110 APS Pan Flute Noise Level – Growl Sens Bend Mode (*8) Staccato Flutter – –<br />
0111 APS Shakuhachi Noise Level – Growl Sens – Staccato Ornament – –<br />
0112 APS Ryuteki Noise Level – Growl Sens – Staccato Ornament – –<br />
0113 APS Sitar Resonance Level – – – Tambura (*10) – – –<br />
0114 APS UilleannPipe – – – – Drone (*10) Ornament – –<br />
0115 APS Erhu Noise Level – – – Staccato Ornament – –<br />
0116 APS Sarangi Resonance Level – – – Tambura (*10) – – –<br />
0117 APS Steel Drums Resonance Level Roll Speed Mute (*4) Bend Mode (*9) Mute – – –
SuperNATURAL<br />
Acoustic Tone<br />
CC65 CC76<br />
CC01 (System Control 1<br />
Source) *1<br />
0104 APS Oboe Portamento – Dynamics+Vibrato Vibrato<br />
0105 APS English Horn Portamento – Dynamics+Vibrato Vibrato<br />
0106 APS Bassoon Portamento – Dynamics+Vibrato Vibrato<br />
0107 APS Clarinet Portamento – Dynamics+Vibrato Vibrato<br />
0108 APS Piccolo Portamento – Dynamics+Vibrato Vibrato<br />
0109 APS Flute Portamento – Dynamics+Vibrato Vibrato<br />
0110 APS Pan Flute Portamento – Dynamics+Vibrato Vibrato<br />
0111 APS Shakuhachi Portamento – Dynamics+Vibrato Vibrato<br />
0112 APS Ryuteki Portamento – Dynamics+Vibrato Vibrato<br />
0113 APS Sitar Portamento – Vibrato Vibrato<br />
0114 APS UilleannPipe Portamento – Dynamics Vibrato<br />
0115 APS Erhu Portamento – Dynamics+Vibrato Vibrato<br />
0116 APS Sarangi Portamento – Dynamics Vibrato<br />
0117 APS Steel Drums Portamento – Roll Sw+Dynamics (*3) –<br />
AFTERTOUCH<br />
(System Control 2<br />
Source) *2<br />
Parameter List<br />
*1 The setting of System Control 1 Source is used. With the factory settings, CC01 is assigned.<br />
*2 The setting of System Control 2 Source is used. With the factory settings, AFTERTOUCH is assigned.<br />
*3 Regardless of the System Control 1 Source setting, this can always be controlled by CC01.<br />
*4 Mute: Simulates the technique of using a hand or mallet to stop the vibration (sound) of the instrument. Higher values will produce stronger muting.<br />
*5 Mute: Simulates the technique of using a hand to stop the vibration of the string.<br />
*6 Bend Mode: If Bend Range is set to anything other than Tone, operating the pitch bend lever when Bend Mode (CC19) is ON will produce a bellows tremolo effect.<br />
Use this if you want to switch between the tremolo effect and conventional pitch change.<br />
*7 Bend Mode: If Bend Range is set to anything other than Tone, operating the pitch bend lever when Bend Mode (CC19) is ON will simulate the wah effect produced<br />
by cupping the hands around the instrument. Use this when you want to switch between the wah effect and conventional pitch change.<br />
*8 Bend Mode: If Bend Range is set to anything other than Tone, operating the pitch bend lever when Bend Mode (CC19) is ON will produce a discontinuous pitch<br />
change. Use this if you want to switch between discontinuous pitch change and conventional pitch change.<br />
*9 Bend Mode: If Bend Range is set to anything other than Tone, operating the pitch bend lever when Bend Mode (CC19) is ON will produce a glissando effect. Use this<br />
if you want to switch between glissando playing and conventional pitch change.<br />
*10 The sound of the corresponding technique will be produced.<br />
97<br />
Quick Guide<br />
Introduction Playing Sounds Editing Sounds<br />
Other Convenient<br />
Functions<br />
Connecting Other<br />
Equipment<br />
Appendix
Parameter List<br />
Performance Variations for<br />
SuperNATURAL Acoustic Tones<br />
SuperNATURAL<br />
Variation<br />
Acoustic Tones<br />
1 2 3 4<br />
0001 Concert Grand – – – –<br />
0002 Grand Piano1 – – – –<br />
0003 Grand Piano2 – – – –<br />
0004 Grand Piano3 – – – –<br />
0005 Mellow Piano – – – –<br />
0006 Bright Piano – – – –<br />
0007 Upright Piano – – – –<br />
0008 Concert Mono – – – –<br />
0009 Honky-tonk – – – –<br />
0010 Pure Vintage EP1 – – – –<br />
0011 Pure Vintage EP2 – – – –<br />
0012 Pure Wurly – – – –<br />
0013 Pure Vintage EP3 – – – –<br />
0014 Tined EP1 – – – –<br />
0015 Tined EP2 – – – –<br />
0016 Old Hammer EP – – – –<br />
0017 Dyno Piano – – – –<br />
0018 Clav CB Flat – – – –<br />
0019 Clav CA Flat – – – –<br />
0020 Clav CB Medium – – – –<br />
0021 Clav CA Medium – – – –<br />
0022 Clav CB Brillia – – – –<br />
0023 Clav CA Brillia – – – –<br />
0024 Clav CB Combo – – – –<br />
0025 Clav CA Combo – – – –<br />
0026 Vibraphone Dead Stroke Tremolo Sw – –<br />
0027 Marimba Dead Stroke – – –<br />
0028 TW Organ – – – –<br />
0029 French Accordion – – – –<br />
0030 ItalianAccordion – – – –<br />
0031 Harmonica – – – –<br />
0032 Bandoneon – – – –<br />
0033 Nylon Guitar Mute Harmonics – –<br />
0034 Flamenco Guitar Rasgueado Harmonics – –<br />
0035 SteelStr Guitar Mute Harmonics – –<br />
0036 Acoustic Bass Staccato Harmonics – –<br />
0037 Fingered Bass Slap Harmonics – –<br />
0038 Fingered Bass 2 Slap Harmonics – –<br />
0039 Picked Bass Bridge Mute Harmonics – –<br />
0040 Picked Bass 2 Bridge Mute Harmonics – –<br />
0041 Fretless Bass Staccato Harmonics – –<br />
0042 Violin Staccato Pizzicato Tremolo –<br />
0043 Violin 2 Staccato Pizzicato Tremolo –<br />
0044 Viola Staccato Pizzicato Tremolo –<br />
0045 Cello Staccato Pizzicato Tremolo –<br />
0046 Cello 2 Staccato Pizzicato Tremolo –<br />
0047 Contrabass Staccato Pizzicato Tremolo –<br />
0048 Harp Nail – – –<br />
0049 Timpani Flam Accent Roll – –<br />
00<strong>50</strong> Strings Staccato Pizzicato Tremolo Fall<br />
0051 Trumpet Staccato Fall – –<br />
0052 Frugal Horn Staccato Fall – –<br />
0053 Trombone Staccato Fall – –<br />
0054 Trombone 2 Staccato Fall – –<br />
0055 Bass Trombone Staccato Fall – –<br />
0056 Mute Trumpet Staccato Fall – –<br />
0057 French Horn Staccato – – –<br />
0058 Soprano Sax Staccato Fall – –<br />
0059 Alto Sax Staccato Fall – –<br />
0060 Tenor Sax Staccato Fall – –<br />
98<br />
SuperNATURAL<br />
Variation<br />
Acoustic Tones<br />
1 2 3 4<br />
0061 Baritone Sax Staccato Fall – –<br />
0062 Oboe Staccato – – –<br />
0063 English Horn Staccato – – –<br />
0064 Bassoon Staccato – – –<br />
0065 Clarinet Staccato – – –<br />
0066 Bass Clarinet Staccato – – –<br />
0067 Piccolo Staccato – – –<br />
0068 Flute Staccato – – –<br />
0069 Flute2 Staccato – – –<br />
0070 Pan Flute Staccato Flutter – –<br />
0071 Shakuhachi Staccato Ornament – –<br />
0072 Ryuteki Staccato Ornament – –<br />
0073 Sitar – – – –<br />
0074 Uilleann Pipes – Ornament – –<br />
0075 Erhu Staccato Ornament – –<br />
0076 Sarangi – – – –<br />
0077 Steel Drums Mute – – –<br />
0078 APS Vibraphone Dead Stroke Tremolo Sw – –<br />
0079 APS Marimba Dead Stroke – – –<br />
0080 APS Accordion – – – –<br />
0081 APS Harmonica – – – –<br />
0082 APS Bandoneon – – – –<br />
0083 APS Nylon Guitar Mute Harmonics – –<br />
0084 APS SteelStr Gt . Mute Harmonics – –<br />
0085 APS Acoustic Bs . Staccato Harmonics – –<br />
0086 APS Fingered Bs . Slap Harmonics – –<br />
0087 APS Picked Bass Bridge Mute Harmonics – –<br />
0088 APS Fretless Bs . Staccato Harmonics – –<br />
0089 APS Violin Staccato Pizzicato Tremolo –<br />
0090 APS Viola Staccato Pizzicato Tremolo –<br />
0091 APS Cello Staccato Pizzicato Tremolo –<br />
0092 APS Contrabass Staccato Pizzicato Tremolo –<br />
0093 APS Harp Nail – – –<br />
0094 APS Timpani Flam Accent Roll – –<br />
0095 APS Strings Staccato Pizzicato Tremolo Fall<br />
0096 APS Trumpet Staccato Fall – –<br />
0097 APS Trombone Staccato Fall – –<br />
0098 APS Mute Trumpet Staccato Fall – –<br />
0099 APS French Horn Staccato – – –<br />
0100 APS Soprano Sax Staccato Fall – –<br />
0101 APS Alto Sax Staccato Fall – –<br />
0102 APS Tenor Sax Staccato Fall – –<br />
0103 APS Baritone Sax Staccato Fall – –<br />
0104 APS Oboe Staccato – – –<br />
0105 APS English Horn Staccato – – –<br />
0106 APS Bassoon Staccato – – –<br />
0107 APS Clarinet Staccato – – –<br />
0108 APS Piccolo Staccato – – –<br />
0109 APS Flute Staccato – – –<br />
0110 APS Pan Flute Staccato Flutter – –<br />
0111 APS Shakuhachi Staccato Ornament – –<br />
0112 APS Ryuteki Staccato Ornament – –<br />
0113 APS Sitar – – – –<br />
0114 APS UilleannPipe – Ornament – –<br />
0115 APS Erhu Staccato Ornament – –<br />
0116 APS Sarangi – – – –<br />
0117 APS Steel Drums Mute – – –
Error Message List<br />
If an incorrect operation is performed, or if processing could not be performed as you specified, an error message will appear.<br />
Refer to the explanation for the error message that appears, and take the appropriate action.<br />
Message Meaning Action<br />
Cannot Copy!<br />
Layer 1, to which the SuperNATURAL Acoustic Tone 0028: TW Organ is<br />
assigned, cannot be copied to another layer.<br />
Change the layer 1 Tone to something other than the SuperNATURAL Acoustic<br />
Tone 0028: TW Organ (p. 58).<br />
Cannot Create Folder!<br />
The allowable number of folders has been exceeded.<br />
It is not possible to create more than 8 levels of folders.<br />
Delete unneeded folders (p. 67).<br />
Create the folder at a level higher than the 8th level (p. 66).<br />
Cannot Delete! You attempted to delete a folder that was not empty. Empty the folder before deleting it (p. 67).<br />
The allowable number of files has been exceeded.<br />
Move the file to a different folder, or delete unneeded files before moving the<br />
file (p. 67).<br />
Cannot Move!<br />
The folder cannot be moved.<br />
A folder cannot be moved into a folder within itself (i.e., its own sub-folder)<br />
(p. 67).<br />
You attempted to move a folder to a level deeper than the 8th level. Move it to a folder that is higher than the 8th level (p. 67).<br />
Cannot Write!<br />
When saving Live Sets at the same time that you save a Registration,<br />
the same write destination was selected.<br />
Select a different write destination for the edited Live Set (p. 62).<br />
Cannot Import SMF<br />
Format 1!<br />
Import of the arpeggio style is not possible.<br />
Only SMF data in SMF Format 0 can be imported.<br />
Make sure that the SMF you’re importing as arpeggio style is in Format 0 (p. 49).<br />
There is no room to import the user arpeggio style included in the registra-<br />
Cannot Import! Sound data cannot be imported.<br />
tion.<br />
Delete unneeded user styles to create more free space.<br />
Cannot Undo! Undo is not possible.<br />
When executing recording, Create Folder, or Rename operations, you<br />
In the tone blender screen, Undo cannot be performed by pressing the [F3]<br />
(UNDO) button before you’ve pressed the [F2] (SHUFFLE) button.<br />
Duplicate File Name!<br />
specified a name that was identical to an existing file. When executing<br />
the Move operation, an identically named file existed at the move<br />
destination.<br />
Specify a different file name (p. 67).<br />
File Not Selected! No file is selected. Select a file (p. 64).<br />
This is a file that the <strong>JUPITER</strong>-<strong>50</strong> is unable to play. Select a file that is supported by the <strong>JUPITER</strong>-<strong>50</strong> (p. 65).<br />
Incorrect File! The format of an SMF you intend to import to an arpeggio style must<br />
be Format 0.<br />
Make sure that the SMF you’re importing is in Format 0 (p. 49).<br />
In the Create Folder or Rename operations, the name must not begin with a<br />
Incorrect File Name! The file name is invalid.<br />
“.” (period), and must not contain a character prohibited for file names (\ / ; * ?<br />
“ < > |) (p. 67).<br />
MIDI Buffer Full!<br />
An unusually large amount of MIDI data was received, and could not<br />
be processed.<br />
Reduce the amount of MIDI messages that are being transmitted.<br />
MIDI Offline! The MIDI IN connection was broken.<br />
Check that there is no problem with the MIDI cable connected to the<br />
<strong>JUPITER</strong>-<strong>50</strong>’s MIDI IN, and that the MIDI cable was not disconnected.<br />
Move or Exchange Not<br />
Selected!<br />
You have not selected Move or Exchange. Select Move or Exchange.<br />
Percussion Tone Not<br />
Selected!<br />
<strong>Manual</strong> percussion or drum is not selected.<br />
The PERC TONE MODIFY screen will not appear if manual percussion or drum<br />
is not selected.<br />
Permission Denied!<br />
The operation could not be performed because the read-only attribute<br />
is set for the folder or file.<br />
Use your computer to clear the read-only attribute of the file or folder.<br />
Program Error!<br />
The <strong>JUPITER</strong>-<strong>50</strong> was unable to start up.<br />
The program could not be read correctly. Alternatively, the system<br />
update program may be invalid.<br />
Use the correct program to perform the update once again.<br />
If this does not solve the problem, contact your dealer or customer support.<br />
Read Error!<br />
Data could not be read from the USB flash drive.<br />
Make sure that USB flash drive is correctly connected (p. 5, p. 25).<br />
Also make sure that you’re using a USB flash drive sold by <strong>Roland</strong>.<br />
The file is damaged. Do not use this file.<br />
Rotary Effects (MFX)<br />
Not Selected!<br />
Rotary or VK-Rotary are not selected as the Live Set’s MFX Type. Select Rotary or VK-Rotary as the MFX Type (p. 58).<br />
System Memory<br />
Damaged!<br />
The contents of system memory may be damaged.<br />
Execute the factory reset operation (p. 79).<br />
If this does not solve the problem, contact your dealer or customer support.<br />
Too Much Data!<br />
There was too much data in the SMF you attempted to import into an<br />
arpeggio style.<br />
Reduce the amount of data in the SMF. For details on the amount of data<br />
that can be imported, refer to “Creating an Arpeggio Style from a MIDI File<br />
(Import)” (p. 49).<br />
USB Memory Full! There is insufficient space on the USB flash drive. Delete unneeded data (p. 67).<br />
The USB flash drive is not inserted, or is inserted incompletely.<br />
Turn off the power, firmly insert the USB flash drive, and then turn on the<br />
USB Memory Not<br />
Ready!<br />
The USB flash drive was removed after you selected data that was on<br />
the USB flash drive.<br />
power once again (p. 5, p. 25).<br />
The format of the USB flash drive is invalid. Use the <strong>JUPITER</strong>-<strong>50</strong> to format the USB flash drive (p. 70).<br />
User Style Not<br />
Selected .<br />
Import or Erase cannot be executed because a user arpeggio style is<br />
not selected.<br />
Select the user arpeggio style that you want to import or erase.<br />
Write Error!<br />
Data could not be written to the USB flash drive.<br />
Make sure that USB flash drive is correctly connected (p. 5, p. 25).<br />
Also make sure that you’re using a USB flash drive sold by <strong>Roland</strong>.<br />
The format of the USB flash drive is invalid. Use the <strong>JUPITER</strong>-<strong>50</strong> to format the USB flash drive (p. 70).<br />
99<br />
Quick Guide<br />
Introduction Playing Sounds Editing Sounds<br />
Other Convenient<br />
Functions<br />
Connecting Other<br />
Equipment<br />
Appendix
100<br />
Troubleshooting<br />
Problem Items to check Action Page<br />
Overall problems<br />
Power won’t turn on<br />
Are the included AC adaptor and power cord correctly<br />
Check that the power cord is connected correctly.<br />
Do not use any AC adaptor or power cord other than the supplied<br />
connected to an outlet and to the <strong>JUPITER</strong>-<strong>50</strong>?<br />
items.<br />
Doing so will cause malfunctions.<br />
Have the connected amp or speakers been powered up? Turn on the power of the connected amp or speakers.<br />
Could the volume of a connected device have been lowered? Adjust the volume of the connected equipment.<br />
Could the [VOLUME] knob be set to the minimum level? Adjust the [VOLUME] knob.<br />
No sound<br />
Are your amp, speakers, headphones, etc., connected correctly? Correctly connect your amp, speakers, and headphones.<br />
If you hear sound through your headphones, it may be that there<br />
p. 28<br />
Can you connect headphones and hear sound through them?<br />
is a broken connection cable, or that your amp or mixer have<br />
malfunctioned. Check your connection cables and equipment<br />
once again.<br />
p. 28<br />
Could you be using a connection cable that contains a resistor? Use a connection cable that does not contain a resistor. —<br />
Problems with the Synthesizer sound<br />
No sound<br />
No sound from a specific<br />
range of keys<br />
Sound is distorted<br />
Pitch is wrong<br />
Notes are broken off<br />
Notes remain sounding<br />
when you play the<br />
keyboard<br />
Sound is still heard from<br />
the opposite side as well<br />
even when panned all the<br />
way to one side<br />
Notes played in a high<br />
register sound funny<br />
Changing the tempo does<br />
not affect the arpeggio<br />
tempo or delay time<br />
If pressing the keyboard does not produce sound, could the<br />
Local switch be turned off?<br />
Could the level setting be too low?<br />
Are the effect settings correct?<br />
Could the volume have been lowered by a pedal operation, a<br />
D-BEAM controller operation, or a MIDI message (volume or<br />
expression) received from an external MIDI device?<br />
p. 29<br />
p. 31<br />
Turn the Local Switch setting on. p. 75, p. 86<br />
Check the Registration level, Part level, and the level of the Live<br />
Set layer.<br />
Check the effect on/off settings. Also check settings such as the<br />
effect levels.<br />
Step on the pedal, move your hand above the D-BEAM controller,<br />
and check settings of the other controllers.<br />
p. 42, p. 58<br />
p. 59<br />
p. 51, p. 52<br />
Could the PART ON/OFF buttons be turned off? Turn on the PART ON/OFF buttons. p. 42<br />
Could a key range be set?<br />
If you don’t hear sound from a specific range of keys, check the key<br />
range settings.<br />
p. 54, p. 57<br />
Could you be applying an effect that intentionally distorts the<br />
sound?<br />
If the sound of a specific Part or Live Set layer is distorted, lower<br />
the volume for that Part or Live Set layer.<br />
p. 42, p. 58<br />
Could the [VOLUME] knob be set too high? If the overall sound is distorted, lower the [VOLUME] knob. p. 26<br />
Could the Output Gain be raised excessively? Check the system setting “SOUND”. p. 75<br />
Could the <strong>JUPITER</strong>-<strong>50</strong>’s tuning be incorrect? Check the system setting “Master Tune”. p. 75<br />
Could the pitch have been changed by a pedal operation or by<br />
a pitch bend message received from an external MIDI device?<br />
Check the pedal and the pitch bender. p. 51, p. 52<br />
Could the Coarse Tune or Fine Tune parameters be set? Check the Coarse Tune and Fine Tune settings. —<br />
Notes will be interrupted if more than 128 notes are sounded<br />
simultaneously.<br />
Reduce the number of layers in the Live Set you’re using. Increase<br />
the voice reserve setting for layers in which notes must not drop<br />
out.<br />
Could the polarity of the hold pedal be reversed? Check the system setting “Hold Pedal Polarity”. p. 76<br />
Could effects be applied?<br />
When you play high notes on the <strong>JUPITER</strong>-<strong>50</strong>, you might hear<br />
notes that fail to sound, whose pitch fails to rise, or a noise that<br />
changes depending on the note you play (a warbling, chirping,<br />
rustling, beeping, etc.)<br />
Could the system setting “USB Song Sync Mode” have been set<br />
to “SLAVE”?<br />
Since the <strong>JUPITER</strong>-<strong>50</strong>’s internal effects are stereo, applying an<br />
insert effect will allow effect sound to be heard from the opposite<br />
side even if the source sound is panned all the way to one side.<br />
This is usually because you have exceeded the highest note that<br />
the <strong>JUPITER</strong>-<strong>50</strong> is able to produce, and won’t occur with the notes<br />
you would normally use. This does not indicate a malfunction.<br />
If “Sync Mode” is set to “SLAVE,” change the tempo of the external<br />
device that is transmitting MIDI clock data.<br />
p. 58<br />
—<br />
—<br />
p. 77
Troubleshooting<br />
Problem Items to check Action Page<br />
Problems with the Synthesizer effects<br />
Could the effect switch be off? Check the on/off setting of each effect. p. 58<br />
Is each layer’s Output Assign set to “MFX”?<br />
With the factory settings, the Output Assign of some are not set to<br />
“MFX.” Set the Output Assign to “MFX.”<br />
p. 75<br />
Effect not applied<br />
The effect won’t be obtained if the send level to that effect is set<br />
Check the send level to each effect.<br />
at 0. Even if the send levels to the effect is set above 0, the effect<br />
won’t be applied if the multi-effect output level, or reverb level are<br />
set to 0. Check each of these settings.<br />
p. 59<br />
You specified a delay time<br />
value (for example for multi<br />
effect 43: DELAY) as a note<br />
Check the delay time setting.<br />
value, but there’s a limit<br />
beyond which the delay<br />
time will not change<br />
Problems with the USB Memory Song Player/Recorder<br />
Increase the tempo.<br />
Since the delay time has an upper limit, specifying the delay time<br />
as a note value and then slowing down the tempo may reach this<br />
upper limit. The maximum delay time is the highest value that can<br />
be specified numerically (i.e., other than in terms of a note value).<br />
Format the USB flash drive on the <strong>JUPITER</strong>-<strong>50</strong>.<br />
p. 47<br />
USB flash drive is not<br />
detected / Song files are<br />
not displayed<br />
Check the format of your USB flash drive.<br />
The <strong>JUPITER</strong>-<strong>50</strong> can use USB flash drive that is formatted as FAT.<br />
(Normally, when you purchase USB flash drive, it will be formatted<br />
as FAT, so you can start using it immediately.) However, the<br />
<strong>JUPITER</strong>-<strong>50</strong> cannot recognize a USB flash drive that is formatted in<br />
a format other than FAT (e.g., NTFS).<br />
p. 70<br />
The audio file’s file type might not be a file type that can be<br />
played on the <strong>JUPITER</strong>-<strong>50</strong>.<br />
Use an audio file of the types listed in “Song files that can be<br />
played”.<br />
p. 65<br />
Audio files on USB flash<br />
drive won’t play<br />
The audio file may be damaged. Check the audio file. —<br />
Could the level be turned down?<br />
Check the [VOLUME] knob setting, the Song Level setting and the<br />
SONG EQ’s Level setting.<br />
p. 26, p. 64,<br />
p. 75<br />
Noise and distortion is<br />
heard in the recorded<br />
sound<br />
Was the input sensitivity appropriate?<br />
If the input sensitivity is too high, the recorded sound will be<br />
distorted; if the input sensitivity is too low, the recorded sound<br />
will be buried in noise.<br />
Raise the Recording Level knob as high as possible without<br />
causing the level meter’s CLIP indicator to light in red.<br />
p. 68<br />
Problems with external MIDI devices<br />
No sound from an external<br />
MIDI device<br />
Does the <strong>JUPITER</strong>-<strong>50</strong>’s MIDI transmit channel match the<br />
connected device’s MIDI receive channel?<br />
Match the <strong>JUPITER</strong>-<strong>50</strong>’s transmit channel and your connected<br />
device’s receive channel.<br />
p. 77<br />
Exclusive messages are not<br />
received<br />
When using sequencer<br />
Does the transmitting unit’s Device ID number match the<br />
<strong>JUPITER</strong>-<strong>50</strong>’s Device ID number?<br />
Set the Device ID numbers. p. 77<br />
software, operating knobs<br />
or other controls does not<br />
affect the sound<br />
Some sequencer software does not “soft thru” system exclusive<br />
messages.<br />
If you want to record system exclusive messages, turn on the Local<br />
Switch parameter.<br />
p. 75, p. 86<br />
Problems with an external device you’re recording<br />
The volume level of the Could you be using a connection cable that contains a resistor? Use a connection cable that does not contain a resistor. —<br />
instrument connected to<br />
AUDIO IN (STEREO) is too<br />
Is the volume of the external device adjusted correctly? Adjust the volume of your external device to an appropriate level. —<br />
low .<br />
Is the [LEVEL] knob adjusted correctly? Adjust the [LEVEL] knob. p. 28<br />
Problems with the USB flash drive<br />
Could you have turned off the power while the USB song<br />
player/recorder was operating?<br />
Data on the USB flash drive<br />
was damaged<br />
Could a strong physical shock have been applied to the USB<br />
flash drive?<br />
Could the power have been turned off while accessing the USB<br />
flash drive?<br />
Format the USB flash drive on the <strong>JUPITER</strong>-<strong>50</strong>. p. 70<br />
Can’t back up to USB flash<br />
drive<br />
Is there sufficient free space on the USB flash drive?<br />
Check the format of the USB flash drive. The <strong>JUPITER</strong>-<strong>50</strong> can use<br />
USB flash drive that are formatted in FAT format.<br />
Use an SD card that has sufficient free space.<br />
Format the USB flash drive on the <strong>JUPITER</strong>-<strong>50</strong>.<br />
p. 78<br />
p. 70<br />
101<br />
Quick Guide<br />
Introduction Playing Sounds Editing Sounds<br />
Other Convenient<br />
Functions<br />
Connecting Other<br />
Equipment<br />
Appendix
<strong>Roland</strong> <strong>JUPITER</strong>-<strong>50</strong>: Synthesizer<br />
Keyboard 76 keys (with velocity)<br />
Sound Generator Section<br />
Maximum Polyphony 128 voices (varies according to the sound generator load)<br />
Parts 3 parts (Upper, Solo, Percussion/Lower)<br />
Registrations 128 (including pre-loaded registrations)<br />
Live Sets 2,560 (including pre-loaded live sets)<br />
Multi-Effects (MFX): 4 units (parallel connection only), 76 types<br />
Effects<br />
Reverb: 1 unit, 5 types<br />
* Multi-Effects can be used only with a Live Set.<br />
USB Memory Song Player/Recorder Section<br />
Tracks 1 stereo track<br />
Playable File Format Audio File: WAV, AIFF, MP3<br />
Recording File Format Audio File: WAV (44.1 kHz, 16-bit Linear, stereo)<br />
USB Flash Memory (sold separately)<br />
External Memory<br />
* Use USB Flash Memory sold by <strong>Roland</strong>. We cannot guarantee operation if other products are used.<br />
Others<br />
Preset: 128 styles<br />
Arpeggiator<br />
User: 16 styles<br />
Harmony Intelligence 17 types<br />
D-BEAM Controller<br />
Pitch Bend/Modulation Lever<br />
Controllers<br />
Assignable buttons (S1, S2)<br />
Assignable knobs (CUTOFF/C1, RESONANCE/C2)<br />
PART LEVEL sliders (PERC/LOWER, UPPER, SOLO)<br />
Display 240 x 64 dots graphic LCD (with backlit)<br />
PHONES jack (stereo 1/4-inch phone type)<br />
MAIN OUT jacks (L/MONO, R) (1/4-inch TRS phone type)<br />
SUB OUT jacks (L, R) (1/4-inch phone type)<br />
AUDIO IN jack (Stereo miniature phone type)<br />
Connectors<br />
FOOT PEDAL jacks (CTRL 1, CTRL 2, HOLD)<br />
MIDI Connectors (IN, OUT)<br />
USB COMPUTER port (Audio/MIDI)<br />
USB Memory port<br />
DC IN jack<br />
Power Supply AC Adaptor<br />
Current draw 800 mA<br />
1,268 (W) x 361 (D) x 117 (H) mm<br />
Dimensions<br />
49-15/16 (W) x 14-1/4 (D) x 4-5/8 (H) inches<br />
Weight 11.0 kg / 24 lbs 5 oz<br />
Owner’s manual<br />
CD-ROM (USB Audio/MIDI driver)<br />
DVD-ROM (SONAR LE)<br />
Accessories<br />
USB MEMORY Protector<br />
AC Adaptor<br />
Power Cord<br />
Keyboard stand: KS-G8, KS-12, KS-18Z (When using the KS-18Z, ensure that the height of the unit is one meter or lower.)<br />
Pedal switch: DP series<br />
Footswitch: BOSS FS-5U<br />
Options (sold separately) Expression pedal: EV-5<br />
Stereo Headphones<br />
USB Flash Memory<br />
* Use USB Flash Memory sold by <strong>Roland</strong>. We cannot guarantee operation if other products are used.<br />
102<br />
Specifications<br />
* In the interest of product improvement, the specifications and/or appearance of this unit are subject to change without prior notice.
MIDI Implementation Chart<br />
Model <strong>JUPITER</strong>-<strong>50</strong><br />
Basic<br />
Channel<br />
Mode<br />
Note<br />
Number<br />
Velocity<br />
After<br />
Toucn<br />
Pitch Bend<br />
Control Change<br />
Function...<br />
Program<br />
Change : True Number<br />
System Exclusive<br />
System<br />
Common<br />
System<br />
Realtime<br />
Aux<br />
Messages<br />
Notes<br />
Default<br />
Changed<br />
Default<br />
Message<br />
Altered<br />
: True Voice<br />
Note On<br />
Note O<br />
Key’s<br />
Channel’s<br />
Mode 1: Omni On, Poly<br />
Mode 3: Omni O, Poly<br />
: Song Position<br />
: Song Select<br />
: Tune<br />
0, 32<br />
1<br />
2<br />
4<br />
5<br />
6, 38<br />
7<br />
10<br />
11<br />
16<br />
17<br />
18<br />
19<br />
64<br />
65<br />
66<br />
67<br />
68<br />
71<br />
72<br />
73<br />
74<br />
75<br />
76<br />
77<br />
78<br />
79<br />
80<br />
81<br />
82<br />
83<br />
84<br />
91<br />
93<br />
1–31, 33–95<br />
96, 97<br />
98, 99<br />
100, 101<br />
102, 119<br />
: Clock<br />
: Commands<br />
: All Sound O<br />
: Reset All Controllers<br />
: Local On/O<br />
: All Notes O<br />
: Active Sensing<br />
: System Reset<br />
Transmitted Recognized Remarks<br />
1–16<br />
1–16<br />
1–16<br />
1–16<br />
Mode 3<br />
Mono, Poly<br />
**************<br />
0–127<br />
**************<br />
o<br />
o<br />
x<br />
x<br />
o<br />
o<br />
o<br />
o<br />
o<br />
o<br />
o<br />
o<br />
o<br />
o<br />
o<br />
o<br />
o<br />
o<br />
o<br />
o<br />
o<br />
o<br />
o<br />
o<br />
o<br />
o<br />
o<br />
o<br />
o<br />
o<br />
o<br />
o<br />
o<br />
o<br />
o<br />
o<br />
o<br />
o<br />
o<br />
o<br />
x<br />
x<br />
x<br />
x<br />
o *1<br />
**************<br />
o *3<br />
x<br />
x<br />
x<br />
o<br />
x<br />
x<br />
x<br />
x<br />
x<br />
o<br />
x<br />
Mode 3<br />
Mode 3, 4 (M=1)<br />
0–127<br />
0–127<br />
o<br />
o<br />
o *1<br />
o *1<br />
o *1<br />
o<br />
o<br />
o<br />
o<br />
o<br />
o<br />
o<br />
o<br />
o<br />
o (Tone Modify 1)<br />
o (Tone Modify 2)<br />
o (Tone Modify 3)<br />
o (Tone Modify 4)<br />
o<br />
o<br />
o<br />
o<br />
o<br />
o<br />
o<br />
o<br />
o<br />
o<br />
o<br />
o<br />
o<br />
o<br />
o (Tone Variation 1)<br />
o (Tone Variation 2)<br />
o (Tone Variation 3)<br />
o (Tone Variation 4)<br />
o<br />
o (Reverb)<br />
x (Chorus)<br />
o<br />
x<br />
x<br />
o<br />
x<br />
o *1<br />
0–127<br />
o *1<br />
x<br />
x<br />
x<br />
o<br />
x<br />
o<br />
o<br />
x<br />
o (123–127)<br />
o<br />
x<br />
*1 O X is selectable.<br />
*2 Recognized as M=1 even if M 1.<br />
*3 Transmitted only when “Transmitted Edit Data” is ON or RQ1 is received.<br />
Mode 2: Omni On, Mono<br />
Mode 4: Omni O, Mono<br />
*1<br />
*1<br />
*1<br />
*1<br />
*1<br />
*1<br />
*1<br />
*1<br />
*1<br />
*1<br />
*1<br />
*1<br />
*1<br />
*1<br />
*1<br />
*1<br />
*1<br />
*1<br />
*1<br />
*1<br />
*1<br />
*1<br />
*1<br />
*1<br />
*2<br />
Date : Mar. 1, 2012<br />
Version : 1.00<br />
Bank select<br />
Modulation<br />
Breath type<br />
Foot type<br />
Portamento time<br />
Data entry<br />
Volume<br />
Panpot<br />
Expression<br />
General purpose controller 1<br />
General purpose controller 2<br />
General purpose controller 3<br />
General purpose controller 4<br />
Hold 1<br />
Portamento<br />
Sostenuto<br />
Soft<br />
Legato foot switch<br />
Resonance<br />
Release time<br />
Attack time<br />
Cuto<br />
Decay time<br />
Vibrato rate<br />
Vibrato depth<br />
Vibrato delay<br />
Tone blender<br />
General purpose controller 5<br />
General purpose controller 6<br />
General purpose controller 7<br />
General purpose controller 8<br />
Portamento control<br />
General purpose eect 1<br />
General purpose eect 3<br />
General purpose controller<br />
Increment, Decrement<br />
NRPN LSB, MSB<br />
RPN LSB, MSB<br />
Program Number 1–128<br />
o: Yes<br />
x: No<br />
103<br />
Quick Guide<br />
Introduction Playing Sounds Editing Sounds<br />
Other Convenient<br />
Functions<br />
Connecting Other<br />
Equipment<br />
Appendix
104<br />
A<br />
Accent . . . . . . . . . . . . . . . . . . . . . . . . . . . . . 48<br />
ACT . . . . . . . . . . . . . . . . . . . . . . . . . . . . . . . . 87<br />
Allen wrench . . . . . . . . . . . . . . . . . . . . . . . 69<br />
Alternate button . . . . . . . . . . . . . . . . . . . . 42<br />
ARP . . . . . . . . . . . . . . . . . . . . . . . . . . . . . . . . 54<br />
Arpeggiator . . . . . . . . . . . . . . . . . . . . . . . . 47<br />
ARPEGGIO [LOWER] button . . . . . . . . . 47<br />
ARPEGGIO [UPPER] button . . . . . . . . . . 47<br />
Assigning a name . . . . . . . . . . . . . . . . . . . 34<br />
AUDIO IN (STEREO) jack . . . . . . . . . . . . . 29<br />
Audio Rec Standby screen . . . . . . . . . . 68<br />
Audio Signal Flow . . . . . . . . . . . . . . . . . . 69<br />
Auto Off . . . . . . . . . . . . . . . . . . . . . . . . . . . . 79<br />
B<br />
Backup . . . . . . . . . . . . . . . . . . . . . . . . . . . . . 70<br />
Computer . . . . . . . . . . . . . . . . . . . . . . 71<br />
USB Flash Drive . . . . . . . . . . . . . . . . . 70<br />
Bank . . . . . . . . . . . . . . . . . . . . . . . . . . . . . . . 38<br />
[BANK] button . . . . . . . . . . . . . . . . . . . . . . 38<br />
Behavior Modeling Technology . . . . . . . 8<br />
C<br />
[C1] knob . . . . . . . . . . . . . . . . . . . . . . . . . . . 52<br />
[C2] knob . . . . . . . . . . . . . . . . . . . . . . . . . . . 52<br />
Cannot Copy! . . . . . . . . . . . . . . . . . . . . . . . 99<br />
Cannot Create Folder! . . . . . . . . . . . . . . . 99<br />
Cannot Delete! . . . . . . . . . . . . . . . . . . . . . 99<br />
Cannot Import! . . . . . . . . . . . . . . . . . . . . . 99<br />
Cannot Import SMF Format 1! . . . . . . . 99<br />
Cannot Move! . . . . . . . . . . . . . . . . . . . . . . 99<br />
Cannot Undo! . . . . . . . . . . . . . . . . . . . . . . 99<br />
Cannot Write! . . . . . . . . . . . . . . . . . . . . . . . 99<br />
Chain Play . . . . . . . . . . . . . . . . . . . . . . . . . . 66<br />
Clock Source . . . . . . . . . . . . . . . . . . . . . . . 77<br />
Computer . . . . . . . . . . . . . . . . . . . . . . . . . . 80<br />
Continuous Hold Pedal . . . . . . . . . . . . . 76<br />
Controller . . . . . . . . . . . . . . . . . . . . . . . . . . 13<br />
Control Pedal . . . . . . . . . . . . . . . . . . . . . . . 52<br />
Copy<br />
LAYER . . . . . . . . . . . . . . . . . . . . . . . . . . 63<br />
Cord hook . . . . . . . . . . . . . . . . . . . . . . . . . . 29<br />
CTRL 1 jack . . . . . . . . . . . . . . . . . . . . . . 28, 52<br />
CTRL 2 jack . . . . . . . . . . . . . . . . . . . . . . 28, 52<br />
CTRL SW . . . . . . . . . . . . . . . . . . . . . . . . . . . 54<br />
Cursor buttons . . . . . . . . . . . . . . . . . . 27, 32<br />
[CUTOFF/C1] knob . . . . . . . . . . . . . . . . . . 52<br />
D<br />
D-BEAM . . . . . . . . . . . . . . . . . . . . . . . . . . . . 51<br />
[ASSIGNABLE] button . . . . . . . . . . . 51<br />
[PITCH] button . . . . . . . . . . . . . . . . . . 51<br />
[VOLUME] button . . . . . . . . . . . . . . . 51<br />
D-BEAM controller . . . . . . . . . . . . . . . . . . 51<br />
D-BEAM Sens . . . . . . . . . . . . . . . . . . . . . . . 76<br />
DC IN jack . . . . . . . . . . . . . . . . . . . . . . . . . . 29<br />
[DEC] button . . . . . . . . . . . . . . . . . . . . . . . 33<br />
Delete<br />
Exported File . . . . . . . . . . . . . . . . . . . 73<br />
File or Folder. . . . . . . . . . . . . . . . . . . . 67<br />
Device ID . . . . . . . . . . . . . . . . . . . . . . . . . . . 77<br />
Display . . . . . . . . . . . . . . . . . . . . . . . . . . . . . 26<br />
DISPLAY CONTRAST knob . . . . . . . . . . . 28<br />
Drums/SFX . . . . . . . . . . . . . . . . . . . . . . . . . 43<br />
Duplicate File Name! . . . . . . . . . . . . . . . . 99<br />
E<br />
Edit<br />
Live Set . . . . . . . . . . . . . . . . . . . . . . . . . 57<br />
MFX . . . . . . . . . . . . . . . . . . . . . . . . . . . . 59<br />
Registration . . . . . . . . . . . . . . . . . . . . 54<br />
Reverb . . . . . . . . . . . . . . . . . . . . . . . . . 59<br />
Tone . . . . . . . . . . . . . . . . . . . . . . . . . . . 60<br />
EFXSEND . . . . . . . . . . . . . . . . . . . . . . . . . . . 57<br />
[ENTER] button . . . . . . . . . . . . . . . . . . . . . 27<br />
Erase<br />
Arpeggio . . . . . . . . . . . . . . . . . . . . . . . 49<br />
Exchange . . . . . . . . . . . . . . . . . . . . . . . . . . . 74<br />
Exchanging Registration Sets . . . . . . . 71<br />
[EXIT] button . . . . . . . . . . . . . . . . . . . . . . . 27<br />
Export . . . . . . . . . . . . . . . . . . . . . . . . . . . . . . 72<br />
Sound Data . . . . . . . . . . . . . . . . . . . . . 72<br />
Expression pedal . . . . . . . . . . . . . . . . 28, 52<br />
External Part . . . . . . . . . . . . . . . . . . . . . . . . 81<br />
F<br />
[F1]–[F6] buttons . . . . . . . . . . . . . . . . . . . 32<br />
Factory Reset . . . . . . . . . . . . . . . . . . . . . . . 79<br />
File Not Selected! . . . . . . . . . . . . . . . . . . . 99<br />
Folder<br />
Create . . . . . . . . . . . . . . . . . . . . . . . . . . 66<br />
Delete . . . . . . . . . . . . . . . . . . . . . . . . . . 67<br />
Move . . . . . . . . . . . . . . . . . . . . . . . . . . . 67<br />
FOOT PEDAL jacks . . . . . . . . . . . . . . . . . . 28<br />
Format . . . . . . . . . . . . . . . . . . . . . . . . . . . . . 70<br />
Format USB Mem . . . . . . . . . . . . . . . . . . . 70<br />
Function buttons . . . . . . . . . . . . . . . . . . . 32<br />
G<br />
GENERAL . . . . . . . . . . . . . . . . . . . . . . . . . . . 54<br />
Ground terminal . . . . . . . . . . . . . . . . . . . . 29<br />
H<br />
HARMONY . . . . . . . . . . . . . . . . . . . . . . . . . 54<br />
Harmony Intelligence . . . . . . . . . . . . . . . <strong>50</strong><br />
[HARMONY INTELLIGENCE] button . . <strong>50</strong><br />
Harmony type . . . . . . . . . . . . . . . . . . . . . . <strong>50</strong><br />
Headphones . . . . . . . . . . . . . . . . . . . . . . . 29<br />
Hold . . . . . . . . . . . . . . . . . . . . . . . . . . . . . . . 48<br />
[HOLD] button . . . . . . . . . . . . . . . . . . . . . . 47<br />
HOLD jack . . . . . . . . . . . . . . . . . . . . . . . 28, 52<br />
Hold pedal . . . . . . . . . . . . . . . . . . . . . . 28, 52<br />
Hold Pedal Polarity . . . . . . . . . . . . . . . . . 76<br />
I<br />
Import . . . . . . . . . . . . . . . . . . . . . . . . . . . . . 72<br />
Arpeggio . . . . . . . . . . . . . . . . . . . . . . . 49<br />
Sound Data . . . . . . . . . . . . . . . . . . . . . 72<br />
[INC] button . . . . . . . . . . . . . . . . . . . . . . . . 33<br />
Incorrect File! . . . . . . . . . . . . . . . . . . . . . . . 99<br />
Incorrect File Name! . . . . . . . . . . . . . . . . 99<br />
INFORMATION . . . . . . . . . . . . . . . . . . . . . . 78<br />
Initialize<br />
Live Set . . . . . . . . . . . . . . . . . . . . . . . . . 63<br />
Registration . . . . . . . . . . . . . . . . . . . . 56<br />
K<br />
KBD . . . . . . . . . . . . . . . . . . . . . . . . . 54, 57, 77<br />
KB (Keyboard) . . . . . . . . . . . . . . . . . . . . . . 82<br />
Keyboard Velocity . . . . . . . . . . . . . . . . . . 77<br />
Keyboard Velocity Curve . . . . . . . . . . . . 77<br />
Keyboard Velocity Sens . . . . . . . . . . . . . 77<br />
KL (Key Range Lower) . . . . . . . . . . . . . . . 82<br />
KNOB . . . . . . . . . . . . . . . . . . . . . . . . . . . . . . 54<br />
KS-G8, KS-18Z, KS-12. . . . . . . . . . . . . . . . 30<br />
KU (Key Range Upper) . . . . . . . . . . . . . . 82<br />
L<br />
Layer<br />
On/Off . . . . . . . . . . . . . . . . . . . . . . . . . 58<br />
Volume . . . . . . . . . . . . . . . . . . . . . . . . . 58<br />
[LEVEL] slider . . . . . . . . . . . . . . . . . . . . . . . 42<br />
LIVE EFX . . . . . . . . . . . . . . . . . . . . . . . . . . . . 54<br />
Live Set. . . . . . . . . . . . . . . . . . . 10, 20, 22, 78<br />
Edit . . . . . . . . . . . . . . . . . . . . . . . . . . . . 57<br />
Tone . . . . . . . . . . . . . . . . . . . . . . . . . . . 58<br />
LIVE SET COMMON . . . . . . . . . . . . . . . . . 57<br />
LIVE SET EFFECTS . . . . . . . . . . . . . . . . . . . 57<br />
LIVE SET LAYER . . . . . . . . . . . . . . . . . . . . . 57<br />
LIVE SET/TONE BUTTONS . . . . . . . . . . . 78<br />
Live Set UPPER buttons . . . . . . . . . . . . . 27<br />
LIVE SET (UPPER) screen. . . . . . . . . . . . . 36<br />
Local Switch . . . . . . . . . . . . . . . . . . . . . . . . 75<br />
Lower Sw . . . . . . . . . . . . . . . . . . . . . . . . . . . 48<br />
[LOWER TONE] button . . . . . . . . . . . . . . 27<br />
LSB (Bank Select LSB) . . . . . . . . . . . . . . . 82<br />
LVL (Level) . . . . . . . . . . . . . . . . . . . . . . . . . . 82<br />
LV&PAN . . . . . . . . . . . . . . . . . . . . . . . . . . . . 57<br />
M<br />
MAIN OUT (TRS) jacks . . . . . . . . . . . . . . . 29<br />
[MANUAL] button . . . . . . . . . . . . . . . 10, 39<br />
<strong>Manual</strong> Percussion . . . . . . . . . . . . . . . . . . 43<br />
Master Keyboard . . . . . . . . . . . . . . . . . . . 81<br />
Master Key Shift . . . . . . . . . . . . . . . . . . . . 75<br />
Master Level . . . . . . . . . . . . . . . . . . . . . . . . 75<br />
Master Tune . . . . . . . . . . . . . . . . . . . . . . . . 75<br />
Memory . . . . . . . . . . . . . . . . . . . . . . . . . . . . 24<br />
[MENU] button . . . . . . . . . . . . . . . . . . . . . 35<br />
Menu screen . . . . . . . . . . . . . . . . . . . . . . . 35<br />
Metronome Level . . . . . . . . . . . . . . . . . . . 78<br />
Metronome Sound . . . . . . . . . . . . . . . . . 78<br />
MFX . . . . . . . . . . . . . . . . . . . . . . . . . . . . . . . . 58<br />
MFX1–4 . . . . . . . . . . . . . . . . . . . . . . . . . . . . 57<br />
MIDI Buffer Full!. . . . . . . . . . . . . . . . . . . . . 99<br />
MIDI Connector . . . . . . . . . . . . . . . . . . 28, 81<br />
MIDI Offline! . . . . . . . . . . . . . . . . . . . . . . . . 99<br />
MIDI Visual Control . . . . . . . . . . . . . . . . . 85<br />
MISC . . . . . . . . . . . . . . . . . . . . . . . . . . . . 54, 57<br />
MODIFY . . . . . . . . . . . . . . . . . . . . . . . . . . . . 54<br />
Motif . . . . . . . . . . . . . . . . . . . . . . . . . . . . . . . 48<br />
Move<br />
File or Folder. . . . . . . . . . . . . . . . . . . . 67<br />
Registration . . . . . . . . . . . . . . . . . . . . 73<br />
Move or Exchange Not Selected! . . . . 99<br />
MSB (Bank Select MSB) . . . . . . . . . . . . . . 82<br />
Multi-effects . . . . . . . . . . . . . . . . . . . . . . . . 58<br />
N<br />
Non-rewritable Memory . . . . . . . . . . . . 24<br />
O<br />
Octave . . . . . . . . . . . . . . . . . . . . . . . . . . . . . 46<br />
OCTAVE [DOWN] button . . . . . . . . . . . . 46<br />
OCTAVE [UP] button . . . . . . . . . . . . . . . . 46<br />
OCT (Octave Shift) . . . . . . . . . . . . . . . . . . 82<br />
Oct Range . . . . . . . . . . . . . . . . . . . . . . . . . . 48<br />
OFFSET . . . . . . . . . . . . . . . . . . . . . . . . . . 54, 57<br />
OUTPUT . . . . . . . . . . . . . . . . . . . . . . . . . . . . 54<br />
Output Assign . . . . . . . . . . . . . . . . . . . . . . 75<br />
Output Gain . . . . . . . . . . . . . . . . . . . . . . . . 75<br />
P<br />
PAN (Pan) . . . . . . . . . . . . . . . . . . . . . . . . . . . 82<br />
Part . . . . . . . . . . . . . . . . . . . . . . . . . . . . . . . . 22<br />
On/Off . . . . . . . . . . . . . . . . . . . . . . . . . 42<br />
PART ON/OFF [PERC/LOWER] button 42<br />
PART ON/OFF [SOLO] button . . . . . . . . 42<br />
PART ON/OFF [UPPER] button . . . . . . . 42<br />
PC (Program Change) . . . . . . . . . . . . . . . 82<br />
Pedal . . . . . . . . . . . . . . . . . . . . . . . . . . . . . . . 52<br />
PEDAL . . . . . . . . . . . . . . . . . . . . . . . . . . . . . . 54<br />
Pedal 1 Assign . . . . . . . . . . . . . . . . . . . . . . 76<br />
Pedal 1 Assign Source . . . . . . . . . . . . . . . 76<br />
Pedal 1 Polarity . . . . . . . . . . . . . . . . . . . . . 76<br />
Pedal 2 Assign . . . . . . . . . . . . . . . . . . . . . . 76<br />
Pedal 2 Assign Source . . . . . . . . . . . . . . . 76<br />
Pedal 2 Polarity . . . . . . . . . . . . . . . . . . . . . 76<br />
[PERC] button . . . . . . . . . . . . . . . . . . . . . . 43<br />
PERC/LOWER Part Channel . . . . . . . . . . 77<br />
Percussion Tone Not Selected!. . . . . . . 99<br />
Permission Denied! . . . . . . . . . . . . . . . . . 99<br />
PHONES jack . . . . . . . . . . . . . . . . . . . . . . . 29<br />
PITCH . . . . . . . . . . . . . . . . . . . . . . . . . . . 54, 57<br />
Pitch Bend/Modulation Lever . . . . 27, 51<br />
Playback . . . . . . . . . . . . . . . . . . . . . . . . . . . 64<br />
Play Pitch . . . . . . . . . . . . . . . . . . . . . . . . . . . 65<br />
Play Speed . . . . . . . . . . . . . . . . . . . . . . . . . 65<br />
Power On. . . . . . . . . . . . . . . . . . . . . . . . . . . 31<br />
[POWER] switch. . . . . . . . . . . . . . . . . . 29, 31<br />
Program Error! . . . . . . . . . . . . . . . . . . . . . . 99<br />
R<br />
Read Error! . . . . . . . . . . . . . . . . . . . . . . . . . 99<br />
[REC] button . . . . . . . . . . . . . . . . . . . . . . . . 68<br />
Receive Bank Select . . . . . . . . . . . . . . . . . 77<br />
Receive channel . . . . . . . . . . . . . . . . . . . . 83<br />
Receive Exclusive . . . . . . . . . . . . . . . . . . . 77<br />
Receive Program Change . . . . . . . . . . . 77<br />
Receive switch . . . . . . . . . . . . . . . . . . . . . . 83<br />
Recorder . . . . . . . . . . . . . . . . . . . . . . . . . . . 25<br />
Recording . . . . . . . . . . . . . . . . . . . . . . . . . . 68<br />
Registration . . . . . . . . . . . . . . 10, 20, 23, 38<br />
Edit . . . . . . . . . . . . . . . . . . . . . . . . . . . . 54<br />
Save . . . . . . . . . . . . . . . . . . . . . . . . . . . . 55<br />
Registration button . . . . . . . . . . . . . . . . . 27<br />
REGISTRATION COMMON . . . . . . . . . . . 54<br />
REGISTRATION CONTROL . . . . . . . . . . . 54<br />
Registration Control Channel. . . . . . . . 77<br />
REGISTRATION EFFECT . . . . . . . . . . . . . . 54<br />
REGISTRATION EXT PART . . . . . . . . . . . . 54<br />
Registration <strong>Manual</strong> Button . . . . . . . . . 78<br />
REGISTRATION PERC/LOWER EDIT . . . 54<br />
REGISTRATION screen . . . . . . . . . . . . . . . 36<br />
REGISTRATION SOLO EDIT . . . . . . . . . . . 54<br />
Regist Set Exchange . . . . . . . . . . . . . . . . 71<br />
Reg Move/Exchang . . . . . . . . . . . . . . 73, 74<br />
Remote Keyboard Switch . . . . . . . . . . . 77<br />
Rename<br />
Exported File . . . . . . . . . . . . . . . . . . . 73<br />
File or Folder. . . . . . . . . . . . . . . . . . . . 67<br />
RESET . . . . . . . . . . . . . . . . . . . . . . . . . . . . . . 57<br />
[RESONANCE/C2] knob . . . . . . . . . . . . . 52<br />
Restore . . . . . . . . . . . . . . . . . . . . . . . . . . . . . 70<br />
Reverb . . . . . . . . . . . . . . . . . . . . . . . . . . . . . 53<br />
REVERB . . . . . . . . . . . . . . . . . . . . . . . . . . . . . 57<br />
[REVERB] button . . . . . . . . . . . . . . . . . . . . 53<br />
Rewritable Memory . . . . . . . . . . . . . . . . . 24<br />
Rotary Effect . . . . . . . . . . . . . . . . . . . . . . . . 53<br />
Rotary Effects (MFX) Not Selected!. . . 99<br />
ROTARY SOUND [ON/OFF] button . . . 53<br />
ROTARY SOUND [SLOW/FAST] button 53<br />
RX FLTR . . . . . . . . . . . . . . . . . . . . . . . . . . . . 54<br />
RX FLTR 1 . . . . . . . . . . . . . . . . . . . . . . . . . . . 57<br />
RX FLTR 2 . . . . . . . . . . . . . . . . . . . . . . . . . . . 57<br />
Index
S<br />
S1/S2 . . . . . . . . . . . . . . . . . . . . . . . . . . . . . . . 54<br />
[S1] [S2] buttons . . . . . . . . . . . . . . . . . . . . 52<br />
Save<br />
Live Set . . . . . . . . . . . . . . . . . . . . . . . . . 62<br />
Registration . . . . . . . . . . . . . . . . . . . . 55<br />
System Settings. . . . . . . . . . . . . . . . . 75<br />
Scale Tune Key . . . . . . . . . . . . . . . . . . . . . . 76<br />
Scale Tune Type. . . . . . . . . . . . . . . . . . . . . 76<br />
Screen Saver Time . . . . . . . . . . . . . . . . . . 78<br />
Selecting the Sound . . . . . . . . . . . . . . . . 40<br />
SET SRC . . . . . . . . . . . . . . . . . . . . . . . . . . . . 57<br />
SETUP . . . . . . . . . . . . . . . . . . . . . . . . . . . . . . 75<br />
[SHIFT] button . . . . . . . . . . . . . . . . . . . . . . 33<br />
SHUFFLE . . . . . . . . . . . . . . . . . . . . . . . . . . . 57<br />
Shuffle Rate . . . . . . . . . . . . . . . . . . . . . . . . 48<br />
Shuffle Resolution . . . . . . . . . . . . . . . . . . 48<br />
Single Part Play . . . . . . . . . . . . . . . . . . . . . 39<br />
Slider Mode . . . . . . . . . . . . . . . . . . . . . . . . 76<br />
Soft Thru . . . . . . . . . . . . . . . . . . . . . . . . . . . 77<br />
SOLO [ALTERNATE] button . . . . . . . . . . 42<br />
SOLO Part Channel . . . . . . . . . . . . . . . . . 77<br />
[SOLO SPLIT] button . . . . . . . . . . . . . . . . 44<br />
SOLO tone button . . . . . . . . . . . . . . . . . . 41<br />
SOLO Tone buttons . . . . . . . . . . . . . . . . . 27<br />
Song<br />
Loop . . . . . . . . . . . . . . . . . . . . . . . . . . . 65<br />
Pitch . . . . . . . . . . . . . . . . . . . . . . . . . . . 65<br />
Speed . . . . . . . . . . . . . . . . . . . . . . . . . . 65<br />
[SONG] button. . . . . . . . . . . . . . . . . . . . . . 64<br />
Song Level . . . . . . . . . . . . . . . . . . . . . . . . . 75<br />
Song player . . . . . . . . . . . . . . . . . . . . . . . . 25<br />
Song screen . . . . . . . . . . . . . . . . . . . . . 37, 64<br />
Split . . . . . . . . . . . . . . . . . . . . . . . . . . . . . . . . 44<br />
[SPLIT] button . . . . . . . . . . . . . . . . . . . . . . 44<br />
Split Point . . . . . . . . . . . . . . . . . . . . . . . . . . 45<br />
Startup Registration . . . . . . . . . . . . . . . . 78<br />
Style . . . . . . . . . . . . . . . . . . . . . . . . . . . . . . . 48<br />
SUB OUT jacks . . . . . . . . . . . . . . . . . . . . . . 29<br />
SuperNATURAL Acoustic Tones . . . . . . . . 8<br />
SuperNATURAL Synth Tones . . . . . . . . . . 8<br />
SWITCH . . . . . . . . . . . . . . . . . . . . . . . . . . . . 57<br />
Synchronize . . . . . . . . . . . . . . . . . . . . . . . . 84<br />
Sync Mode . . . . . . . . . . . . . . . . . . . . . . . . . 77<br />
Sync Output . . . . . . . . . . . . . . . . . . . . . . . . 77<br />
System Control 1–4 Source . . . . . . . . . . 78<br />
System Memory Damaged! . . . . . . . . . 99<br />
SYSTEM MENU screen . . . . . . . . . . . . . . . 37<br />
System Settings . . . . . . . . . . . . . . . . . . . . 75<br />
T<br />
Tempo . . . . . . . . . . . . . . . . . . . . . . . . . . . . . 47<br />
[TEMPO] button . . . . . . . . . . . . . . . . . . . . 47<br />
Temporary Area . . . . . . . . . . . . . . . . . . . . 24<br />
Temporary Memory . . . . . . . . . . . . . . . . . 24<br />
Tone . . . . . . . . . . . . . . . . . . . . . . . . . . . . 20, 21<br />
TONE BLENDER . . . . . . . . . . . . . . . . . . 57, 60<br />
TONE MODIFY . . . . . . . . . . . . . . . . . . . 57, 60<br />
Tone Remain . . . . . . . . . . . . . . . . . . . . . . . 75<br />
Too Much Data! . . . . . . . . . . . . . . . . . . . . . 99<br />
Top screen. . . . . . . . . . . . . . . . . . . . . . . . . . 35<br />
Transmit Active Sensing . . . . . . . . . . . . 77<br />
Transmit Bank Select . . . . . . . . . . . . . . . . 77<br />
Transmit Channel . . . . . . . . . . . . . . . . . . . 82<br />
Transmit Edit Data . . . . . . . . . . . . . . . . . . 77<br />
Transmit Program Change . . . . . . . . . . 77<br />
Transpose . . . . . . . . . . . . . . . . . . . . . . . . . . 46<br />
[TRANSPOSE] button . . . . . . . . . . . . . . . 46<br />
Troubleshooting . . . . . . . . . . . . . . . . . . . 100<br />
U<br />
UNDO . . . . . . . . . . . . . . . . . . . . . . . . . . . . . . 57<br />
UPPER [ALTERNATE] button . . . . . . . . . 42<br />
UPPER Part Channel . . . . . . . . . . . . . . . . 77<br />
Upper Sw . . . . . . . . . . . . . . . . . . . . . . . . . . . 48<br />
USB audio . . . . . . . . . . . . . . . . . . . . . . . . . . 80<br />
USB COMPUTER port. . . . . . . . . . . . . 28, 80<br />
USB Driver . . . . . . . . . . . . . . . . . . . . . . . 78, 80<br />
USB Flash Drive . . . . . . . . . . . . . . . . . . . . . 24<br />
Initialize . . . . . . . . . . . . . . . . . . . . . . . . 70<br />
USB MEMORY connector . . . . . . . . . . . . 26<br />
USB Memory Full! . . . . . . . . . . . . . . . . . . . 99<br />
USB Memory Not Ready! . . . . . . . . . . . . 99<br />
USB Memory Protector . . . . . . . . . . . . . . 69<br />
USB MIDI . . . . . . . . . . . . . . . . . . . . . . . . . . . 80<br />
USB-MIDI Thru . . . . . . . . . . . . . . . . . . . . . . 77<br />
User Style Not Selected. . . . . . . . . . . . . . 99<br />
UTILITY MENU screen . . . . . . . . . . . . . . . 37<br />
V<br />
Value dial . . . . . . . . . . . . . . . . . . . . . . . . 27, 33<br />
Variation . . . . . . . . . . . . . . . . . . . . . . . . . . . 48<br />
Velocity . . . . . . . . . . . . . . . . . . . . . . . . . . . . 48<br />
VELOCITY. . . . . . . . . . . . . . . . . . . . . . . . 54, 57<br />
VIBRATO . . . . . . . . . . . . . . . . . . . . . . . . . 54, 57<br />
[VISUAL CONTROL] button . . . . . . . . . . 85<br />
Visual Control Mode . . . . . . . . . . . . . . . . 78<br />
Visual Control screen . . . . . . . . . . . . . . . 37<br />
V-LINK . . . . . . . . . . . . . . . . . . . . . . . . . . . . . . 85<br />
VL (Velocity Range Lower) . . . . . . . . . . 82<br />
Volume<br />
Layer . . . . . . . . . . . . . . . . . . . . . . . . . . . 58<br />
Part . . . . . . . . . . . . . . . . . . . . . . . . . . . . 42<br />
[VOLUME] knob . . . . . . . . . . . . . . . . . . . . 31<br />
VU (Velocity Range Upper) . . . . . . . . . . 82<br />
W<br />
[WRITE] button . . . . . . . . . . . . . . . . . . . . . 34<br />
Write Error! . . . . . . . . . . . . . . . . . . . . . . . . . 99<br />
Index<br />
105<br />
Quick Guide<br />
Introduction Playing Sounds Editing Sounds<br />
Other Convenient<br />
Functions<br />
Connecting Other<br />
Equipment<br />
Appendix
106<br />
For EU Countries<br />
For China
IMPORTANT: THE WIRES IN THIS MAINS LEAD ARE COLOURED IN ACCORDANCE WITH THE FOLLOWING CODE.<br />
BLUE:<br />
BROWN:<br />
NEUTRAL<br />
LIVE<br />
For the U.K.<br />
As the colours of the wires in the mains lead of this apparatus may not correspond with the coloured markings identifying<br />
the terminals in your plug, proceed as follows:<br />
The wire which is coloured BLUE must be connected to the terminal which is marked with the letter N or coloured BLACK.<br />
The wire which is coloured BROWN must be connected to the terminal which is marked with the letter L or coloured RED.<br />
Under no circumstances must either of the above wires be connected to the earth terminal of a three pin plug.<br />
Model Name :<br />
Type of Equipment :<br />
Responsible Party :<br />
Address :<br />
Telephone :<br />
DECLARATION OF CONFORMITY<br />
Compliance Information Statement<br />
<strong>JUPITER</strong>-<strong>50</strong><br />
Synthesizer<br />
<strong>Roland</strong> Corporation U.S.<br />
5100 S. Eastern Avenue Los Angeles, CA 90040-2938<br />
(323) 890-3700<br />
This product complies with the requirements of EMC Directive 2004/108/EC.<br />
FEDERAL COMMUNICATIONS COMMISSION<br />
RADIO FREQUENCY INTERFERENCE STATEMENT<br />
NOTICE<br />
For EU Countries<br />
This Class B digital apparatus meets all requirements of the Canadian Interference-Causing Equipment Regulations.<br />
AVIS<br />
For the USA<br />
This equipment has been tested and found to comply with the limits for a Class B digital device, pursuant to Part 15 of the<br />
FCC Rules. These limits are designed to provide reasonable protection against harmful interference in a residential<br />
installation. This equipment generates, uses, and can radiate radio frequency energy and, if not installed and used in<br />
accordance with the instructions, may cause harmful interference to radio communications. However, there is no guarantee<br />
that interference will not occur in a particular installation. If this equipment does cause harmful interference to radio or<br />
television reception, which can be determined by turning the equipment off and on, the user is encouraged to try to correct the<br />
interference by one or more of the following measures:<br />
– Reorient or relocate the receiving antenna.<br />
– Increase the separation between the equipment and receiver.<br />
– Connect the equipment into an outlet on a circuit different from that to which the receiver is connected.<br />
– Consult the dealer or an experienced radio/TV technician for help.<br />
This device complies with Part 15 of the FCC Rules. Operation is subject to the following two conditions:<br />
(1) this device may not cause harmful interference, and<br />
(2) this device must accept any interference received, including interference that may cause undesired operation.<br />
This equipment requires shielded interface cables in order to meet FCC class B limit.<br />
Any unauthorized changes or modifications not expressly approved by the party responsible for compliance could void the user’s<br />
authority to operate the equipment.<br />
For Canada<br />
Cet appareil numérique de la classe B respecte toutes les exigences du Règlement sur le matériel brouilleur du Canada.<br />
WARNING<br />
For the USA<br />
For C.A. US (Proposition 65)<br />
This product contains chemicals known to cause cancer, birth defects and other reproductive harm, including lead.
Information<br />
AFRICA<br />
EGYPT<br />
Al Fanny Trading O ce<br />
9, EBN Hagar Al Askalany Street,<br />
ARD E1 Golf, Heliopolis,<br />
Cairo 11341, EGYPT<br />
TEL: (022)-417-1828<br />
REUNION<br />
MARCEL FO-YAM Sarl<br />
25 Rue Jules Hermann,<br />
Chaudron - BP79 97 491<br />
Ste Clotilde Cedex,<br />
REUNION ISLAND<br />
TEL: (0262) 218-429<br />
SOUTH AFRICA<br />
T.O.M.S. Sound & Music (Pty)Ltd.<br />
2 ASTRON ROAD DENVER<br />
JOHANNESBURG ZA 2195,<br />
SOUTH AFRICA<br />
TEL: (011) 417 3400<br />
Paul Bothner(PTY)Ltd.<br />
Royal Cape Park, Unit 24<br />
Londonderry Road, Ottery 7800<br />
Cape Town, SOUTH AFRICA<br />
TEL: (021) 799 4900<br />
ASIA<br />
CHINA<br />
<strong>Roland</strong> Shanghai Electronics<br />
Co.,Ltd.<br />
5F. No.1<strong>50</strong>0 Pingliang Road<br />
Shanghai 200090, CHINA<br />
TEL: (021) 5580-0800<br />
<strong>Roland</strong> Shanghai Electronics<br />
Co.,Ltd. (BEIJING OFFICE)<br />
3F, Soluxe Fortune Building<br />
63 West Dawang Road, Chaoyang<br />
District, Beijing, CHINA<br />
TEL: (010) 5960-2565<br />
HONG KONG<br />
Tom Lee Music<br />
11/F Silvercord Tower 1<br />
30 Canton Rd<br />
Tsimshatsui, Kowloon,<br />
HONG KONG<br />
TEL: 852-2737-7688<br />
Parsons Music Ltd.<br />
8th Floor, Railway Plaza, 39<br />
Chatham Road South, T.S.T,<br />
Kowloon, HONG KONG<br />
TEL: 852-2333-1863<br />
INDIA<br />
Rivera Digitec (India) Pvt. Ltd.<br />
411, Nirman Kendra Mahalaxmi<br />
Flats Compound O . Dr. Edwin<br />
Moses Road, Mumbai-400011,<br />
INDIA<br />
TEL: (022) 2493 9051<br />
INDONESIA<br />
PT. Citra Intirama<br />
Ruko Garden Shopping Arcade<br />
Unit 8 CR, Podomoro City<br />
Jl.Letjend. S.Parman Kav.28<br />
Jakarta Barat 11470, INDONESIA<br />
TEL: (021) 5698-5519/5520<br />
KOREA<br />
Cosmos Corporation<br />
1461-9, Seocho-Dong,<br />
Seocho Ku, Seoul, KOREA<br />
TEL: (02) 3486-8855<br />
MALAYSIA/<br />
SINGAPORE<br />
<strong>Roland</strong> Asia Paci c Sdn. Bhd.<br />
45-1, Block C2, Jalan PJU 1/39,<br />
Dataran Prima, 47301 Petaling<br />
Jaya, Selangor, MALAYSIA<br />
TEL: (03) 7805-3263<br />
PHILIPPINES<br />
G.A. Yupangco & Co. Inc.<br />
339 Gil J. Puyat Avenue<br />
Makati, Metro Manila 1200,<br />
PHILIPPINES<br />
TEL: (02) 899 9801<br />
When you need repair service, call your nearest <strong>Roland</strong> Service Center or authorized <strong>Roland</strong><br />
distributor in your country as shown below.<br />
TAIWAN<br />
ROLAND TAIWAN ENTERPRISE<br />
CO., LTD.<br />
9F-5, No. 112 Chung Shan<br />
North Road Sec. 2 Taipei 104,<br />
TAIWAN R.O.C.<br />
TEL: (02) 2561 3339<br />
THAILAND<br />
Theera Music Co. , Ltd.<br />
100-108 Soi Verng Nakornkasem,<br />
New Road,Sumpantawong,<br />
Bangkok 10100, THAILAND<br />
TEL: (02) 224-8821<br />
VIET NAM<br />
VIET THUONG CORPORATION<br />
386 CACH MANG THANG TAM ST.<br />
DIST.3, HO CHI MINH CITY,<br />
VIET NAM<br />
TEL: (08) 9316540<br />
OCEANIA<br />
AUSTRALIA/<br />
NEW ZEALAND<br />
<strong>Roland</strong> Corporation<br />
Australia Pty.,Ltd.<br />
38 Campbell Avenue<br />
Dee Why West. NSW 2099,<br />
AUSTRALIA<br />
For Australia<br />
TEL: (02) 9982 8266<br />
For New Zealand<br />
TEL: (09) 3098 715<br />
CENTRAL/LATIN<br />
AMERICA<br />
ARGENTINA<br />
Instrumentos Musicales S.A.<br />
Av.Santa Fe 2055<br />
(1123) Buenos Aires, ARGENTINA<br />
TEL: (011) 4<strong>50</strong>8-2700<br />
BARBADOS<br />
A&B Music Supplies LTD<br />
12 Webster Industrial Park<br />
Wildey, St.Michael, BARBADOS<br />
TEL: (246) 430-1100<br />
BRAZIL<br />
<strong>Roland</strong> Brasil Ltda.<br />
Rua San Jose, 211<br />
Parque Industrial San Jose<br />
Cotia - Sao Paulo - SP, BRAZIL<br />
TEL: (011) 4615 5666<br />
CHILE<br />
Comercial Fancy II S.A.<br />
Rut.: 96.919.420-1<br />
Nataniel Cox #739, 4th Floor<br />
Santiago - Centro, CHILE<br />
TEL: (02) 688-9540<br />
COLOMBIA<br />
Centro Musical Ltda.<br />
Cra 43 B No 25 A 41 Bododega 9<br />
Medellin, COLOMBIA<br />
TEL: (574) 3812529<br />
COSTA RICA<br />
JUAN Bansbach Instrumentos<br />
Musicales<br />
Ave.1. Calle 11, Apartado 10237,<br />
San Jose, COSTA RICA<br />
TEL: 258-0211<br />
CURACAO<br />
Zeelandia Music Center Inc.<br />
Orionweg 30<br />
Curacao, Netherland Antilles<br />
TEL: (305) 5926866<br />
DOMINICAN REPUBLIC<br />
Instrumentos Fernando Giraldez<br />
Calle Proyecto Central No.3<br />
Ens.La Esperilla<br />
Santo Domingo,<br />
DOMINICAN REPUBLIC<br />
TEL: (809) 683 0305<br />
ECUADOR<br />
Mas Musika<br />
Rumichaca 822 y Zaruma<br />
Guayaquil - ECUADOR<br />
TEL: (593-4) 2302364<br />
EL SALVADOR<br />
OMNI MUSIC<br />
75 Avenida Norte y Final Alameda<br />
Juan Pablo II,<br />
Edi cio No.4010 San Salvador,<br />
EL SALVADOR<br />
TEL: 262-0788<br />
GUATEMALA<br />
Casa Instrumental<br />
Calzada Roosevelt 34-01,zona 11<br />
Ciudad de Guatemala,<br />
GUATEMALA<br />
TEL: (<strong>50</strong>2) 599-2888<br />
HONDURAS<br />
Almacen Pajaro Azul S.A. de C.V.<br />
BO.Paz Barahona<br />
3 Ave.11 Calle S.O<br />
San Pedro Sula, HONDURAS<br />
TEL: (<strong>50</strong>4) 553-2029<br />
MARTINIQUE<br />
Musique & Son<br />
Z.I.Les Mangle<br />
97232 Le Lamentin,<br />
MARTINIQUE F.W.I.<br />
TEL: 596 596 426860<br />
Gigamusic SARL<br />
10 Rte De La Folie<br />
97200 Fort De France<br />
MARTINIQUE F.W.I.<br />
TEL: 596 596 715222<br />
MEXICO<br />
Casa Veerkamp, s.a. de c.v.<br />
Av. Toluca No. 323, Col. Olivar<br />
de los Padres 01780 Mexico D.F.,<br />
MEXICO<br />
TEL: (55) 5668-6699<br />
NICARAGUA<br />
Bansbach Instrumentos<br />
Musicales Nicaragua<br />
Altamira D'Este Calle Principal<br />
de la Farmacia 5ta.Avenida<br />
1 Cuadra al Lago.#<strong>50</strong>3<br />
Managua, NICARAGUA<br />
TEL: (<strong>50</strong>5) 277-2557<br />
PANAMA<br />
SUPRO MUNDIAL, S.A.<br />
Boulevard Andrews, Albrook,<br />
Panama City, REP. DE PANAMA<br />
TEL: 315-0101<br />
PARAGUAY<br />
Distribuidora De Instrumentos<br />
Musicales<br />
J.E. Olear y ESQ. Manduvira<br />
Asuncion, PARAGUAY<br />
TEL: (595) 21 492147<br />
PERU<br />
Audionet<br />
Distribuciones Musicales SAC<br />
Juan Fanning 530<br />
Mira ores<br />
Lima - PERU<br />
TEL: (511) 4461388<br />
TRINIDAD<br />
AMR Ltd<br />
Ground Floor<br />
Maritime Plaza<br />
Barataria TRINIDAD W.I.<br />
TEL: (868) 638 6385<br />
URUGUAY<br />
Todo Musica S.A.<br />
Francisco Acuna de Figueroa<br />
1771<br />
C.P.: 11.800<br />
Montevideo, URUGUAY<br />
TEL: (02) 924-2335<br />
VENEZUELA<br />
Instrumentos Musicales<br />
Allegro,C.A.<br />
Av.las industrias edf.Guitar import<br />
#7 zona Industrial de Turumo<br />
Caracas, VENEZUELA<br />
TEL: (212) 244-1122<br />
EUROPE<br />
BELGIUM/FRANCE/<br />
HOLLAND/<br />
LUXEMBOURG<br />
<strong>Roland</strong> Central Europe N.V.<br />
Houtstraat 3, B-2260, Oevel<br />
(Westerlo) BELGIUM<br />
TEL: (014) 575811<br />
CROATIA<br />
ART-CENTAR<br />
Degenova 3.<br />
HR - 10000 Zagreb, CROATIA<br />
TEL: (1) 466 8493<br />
CZECH REP.<br />
CZECH REPUBLIC DISTRIBUTOR<br />
s.r.o<br />
Voctárova 247/16<br />
180 00 Praha 8, CZECH REP.<br />
TEL: (2) 830 20270<br />
DENMARK<br />
<strong>Roland</strong> Scandinavia A/S<br />
Skagerrakvej 7 Postbox 880<br />
DK-2100 Copenhagen,<br />
DENMARK<br />
TEL: 3916 6200<br />
FINLAND<br />
<strong>Roland</strong> Scandinavia As, Filial<br />
Finland<br />
Vanha Nurmijarventie 62<br />
01670 Vantaa, FINLAND<br />
TEL: (0) 9 68 24 020<br />
GERMANY/AUSTRIA<br />
<strong>Roland</strong> Elektronische<br />
Musikinstrumente HmbH.<br />
Oststrasse 96, 22844 Norderstedt,<br />
GERMANY<br />
TEL: (040) 52 60090<br />
GREECE/CYPRUS<br />
STOLLAS S.A.<br />
Music Sound Light<br />
155, New National Road<br />
Patras 26442, GREECE<br />
TEL: 2610 435400<br />
HUNGARY<br />
<strong>Roland</strong> East Europe Ltd.<br />
2045. Törökbálint, FSD Park 3. ép.,<br />
HUNGARY<br />
TEL: (23) 511011<br />
IRELAND<br />
<strong>Roland</strong> Ireland<br />
E2 Calmount Park, Calmount<br />
Avenue, Dublin 12,<br />
Republic of IRELAND<br />
TEL: (01) 4294444<br />
ITALY<br />
<strong>Roland</strong> Italy S. p. A.<br />
Viale delle Industrie 8,<br />
20020 Arese, Milano, ITALY<br />
TEL: (02) 937-78300<br />
NORWAY<br />
<strong>Roland</strong> Scandinavia Avd.<br />
Kontor Norge<br />
Lilleakerveien 2 Postboks 95<br />
Lilleaker N-0216 Oslo,<br />
NORWAY<br />
TEL: 2273 0074<br />
POLAND<br />
ROLAND POLSKA SP. Z O.O.<br />
ul. Kty Grodziskie 16B<br />
03-289 Warszawa, POLAND<br />
TEL: (022) 678 9512<br />
PORTUGAL<br />
<strong>Roland</strong> Systems Group EMEA, S.L.<br />
Branch O ce Porto<br />
Edifício Tower Plaza<br />
Rotunda Eng. Edgar Cardoso<br />
23, 9ºG<br />
4400-676 Vila Nova de Gaia,<br />
PORTUGAL<br />
TEL: (+351) 22 608 00 60<br />
ROMANIA<br />
FBS LINES<br />
Piata Libertatii 1,<br />
535<strong>50</strong>0 Gheorgheni, ROMANIA<br />
TEL: (266) 364 609<br />
RUSSIA<br />
<strong>Roland</strong> Music LLC<br />
Dorozhnaya ul.3,korp.6<br />
117 545 Moscow, RUSSIA<br />
TEL: (495) 981-4967<br />
SERBIA<br />
Music AP Ltd.<br />
Sutjeska br. 5 XS - 24413 Palic,<br />
SERBIA<br />
TEL: (024) 539 395<br />
SLOVAKIA<br />
DAN Acoustic s.r.o.<br />
Povazská 18.<br />
SK - 940 01 Nové Zámky,<br />
SLOVAKIA<br />
TEL: (035) 6424 330<br />
SPAIN<br />
<strong>Roland</strong> Systems Group EMEA, S.L.<br />
Paseo García Faria, 33-35<br />
08005 Barcelona, SPAIN<br />
TEL: 93 493 91 00<br />
SWEDEN<br />
<strong>Roland</strong> Scandinavia A/S<br />
SWEDISH SALES OFFICE<br />
Mårbackagatan 31, 4 tr.<br />
SE-123 43 Farsta, SWEDEN<br />
TEL: (0) 8 683 04 30<br />
SWITZERLAND<br />
<strong>Roland</strong> (Switzerland) AG<br />
Landstrasse 5, Postfach,<br />
CH-4452 Itingen, SWITZERLAND<br />
TEL: (061) 975-9987<br />
UKRAINE<br />
EURHYTHMICS Ltd.<br />
P.O.Box: 37-a.<br />
Nedecey Str. 30<br />
UA - 89600 Mukachevo, UKRAINE<br />
TEL: (03131) 414-40<br />
UNITED KINGDOM<br />
<strong>Roland</strong> (U.K.) Ltd.<br />
Atlantic Close, SWANSEA SA7 9FJ,<br />
UNITED KINGDOM<br />
TEL: (01792) 702701<br />
MIDDLE EAST<br />
BAHRAIN<br />
Moon Stores<br />
No.1231&1249 Rumaytha<br />
Building Road 3931,<br />
Manama 339, BAHRAIN<br />
TEL: 17 813 942<br />
IRAN<br />
MOCO INC.<br />
Jadeh Makhsous Karaj (K-9),<br />
Nakhe Zarin Ave.<br />
Jalal Street, Reza Alley No.4<br />
Tehran 1389716791, IRAN<br />
TEL: (021)-44545370-5<br />
ISRAEL<br />
Halilit P. Greenspoon & Sons<br />
Ltd.<br />
8 Retzif Ha'alia Hashnia St.<br />
Tel-Aviv-Yafo ISRAEL<br />
TEL: (03) 6823666<br />
JORDAN<br />
MUSIC HOUSE CO. LTD.<br />
FREDDY FOR MUSIC<br />
P. O. Box 922846<br />
Amman 11192, JORDAN<br />
TEL: (06) 5692696<br />
KUWAIT<br />
EASA HUSAIN AL-YOUSIFI &<br />
SONS CO.<br />
Al-Yousi Service Center<br />
P.O.Box 126 (Safat) 13002,<br />
KUWAIT<br />
TEL: 00 965 802929<br />
LEBANON<br />
Chahine S.A.L.<br />
George Zeidan St., Chahine Bldg.,<br />
Achra eh, P.O.Box: 16-5857<br />
Beirut, LEBANON<br />
TEL: (01) 20-1441<br />
OMAN<br />
TALENTZ CENTRE L.L.C.<br />
Malatan House No.1<br />
Al Noor Street, Ruwi<br />
SULTANATE OF OMAN<br />
TEL: 2478 3443<br />
QATAR<br />
AL-EMADI TRADING &<br />
CONTRACTING CO.<br />
P.O. Box 62, Doha, QATAR<br />
TEL: 4423-554<br />
SAUDI ARABIA<br />
aDawliah Universal Electronics<br />
APL<br />
Behind Pizza Inn<br />
Prince Turkey Street<br />
aDawliah Building,<br />
PO BOX 2154,<br />
Alkhobar 31952,<br />
SAUDI ARABIA<br />
TEL: (03) 8643601<br />
SYRIA<br />
Technical Light & Sound Center<br />
PO Box 13520 Bldg No.49<br />
Khaled Abn Alwalid St.<br />
Damascus, SYRIA<br />
TEL: (011) 223-5384<br />
TURKEY<br />
ZUHAL DIS TICARET A.S.<br />
Galip Dede Cad. No.33<br />
Beyoglu, Istanbul, TURKEY<br />
TEL: (0212) 249 85 10<br />
U.A.E.<br />
Zak Electronics & Musical<br />
Instruments Co. L.L.C.<br />
Zabeel Road, Al Sherooq Bldg.,<br />
No. 14, Ground Floor, Dubai,<br />
U.A.E.<br />
TEL: (04) 3360715<br />
NORTH AMERICA<br />
CANADA<br />
<strong>Roland</strong> Canada Ltd.<br />
(Head O ce)<br />
5480 Parkwood Way Richmond B.<br />
C., V6V 2M4, CANADA<br />
TEL: (604) 270 6626<br />
<strong>Roland</strong> Canada Ltd.<br />
(Toronto O ce)<br />
170 Admiral Boulevard<br />
Mississauga On L5T 2N6,<br />
CANADA<br />
TEL: (905) 362 9707<br />
U. S. A.<br />
<strong>Roland</strong> Corporation U.S.<br />
5100 S. Eastern Avenue<br />
Los Angeles, CA 90040-2938,<br />
U. S. A.<br />
TEL: (323) 890 3700<br />
As of Feb. 1, 2011 (ROLAND)<br />
* 5 1 0 0 0 2 7 6 8 7 - 0 1 *