Canon Paleontology Curriculum Unit 3
Canon Paleontology Curriculum Unit 3
Canon Paleontology Curriculum Unit 3
You also want an ePaper? Increase the reach of your titles
YUMPU automatically turns print PDFs into web optimized ePapers that Google loves.
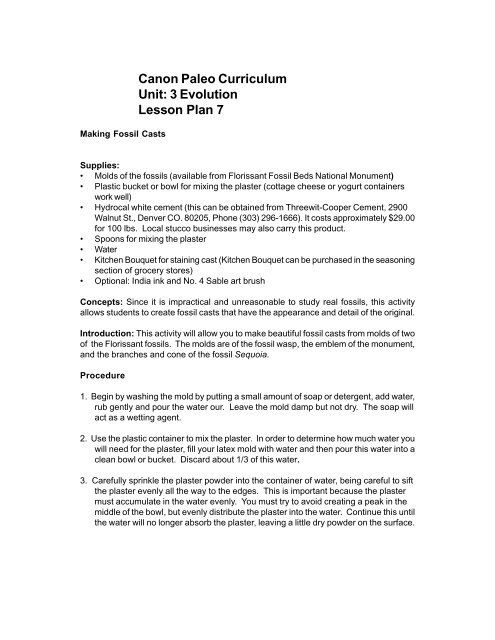
Making Fossil Casts<br />
<strong>Canon</strong> Paleo <strong>Curriculum</strong><br />
<strong>Unit</strong>: 3 Evolution<br />
Lesson Plan 7<br />
Supplies:<br />
Molds of the fossils (available from Florissant Fossil Beds National Monument )<br />
Plastic bucket or bowl for mixing the plaster (cottage cheese or yogurt containers<br />
work well)<br />
Hydrocal white cement (this can be obtained from Threewit-Cooper Cement, 2900<br />
Walnut St., Denver CO. 80205, Phone (303) 296-1666). It costs approximately $29.00<br />
for 100 lbs. Local stucco businesses may also carry this product.<br />
Spoons for mixing the plaster<br />
Water<br />
Kitchen Bouquet for staining cast (Kitchen Bouquet can be purchased in the seasoning<br />
section of grocery stores)<br />
Optional: India ink and No. 4 Sable art brush<br />
Concepts: Since it is impractical and unreasonable to study real fossils, this activity<br />
allows students to create fossil casts that have the appearance and detail of the original.<br />
Introduction: This activity will allow you to make beautiful fossil casts from molds of two<br />
of the Florissant fossils. The molds are of the fossil wasp, the emblem of the monument,<br />
and the branches and cone of the fossil Sequoia.<br />
Procedure<br />
1. Begin by washing the mold by putting a small amount of soap or detergent, add water,<br />
rub gently and pour the water our. Leave the mold damp but not dry. The soap will<br />
act as a wetting agent.<br />
2. Use the plastic container to mix the plaster. In order to determine how much water you<br />
will need for the plaster, fill your latex mold with water and then pour this water into a<br />
clean bowl or bucket. Discard about 1/3 of this water.<br />
3. Carefully sprinkle the plaster powder into the container of water, being careful to sift<br />
the plaster evenly all the way to the edges. This is important because the plaster<br />
must accumulate in the water evenly. You must try to avoid creating a peak in the<br />
middle of the bowl, but evenly distribute the plaster into the water. Continue this until<br />
the water will no longer absorb the plaster, leaving a little dry powder on the surface.


