D-Jetronic Fuel Injection for the Porsche 914 - Bowlsby.net
D-Jetronic Fuel Injection for the Porsche 914 - Bowlsby.net
D-Jetronic Fuel Injection for the Porsche 914 - Bowlsby.net
Create successful ePaper yourself
Turn your PDF publications into a flip-book with our unique Google optimized e-Paper software.
D-<strong>Jetronic</strong> <strong>Fuel</strong> <strong>Injection</strong> <strong>for</strong> <strong>the</strong> <strong>Porsche</strong> <strong>914</strong><br />
SECTION 1:<br />
Introduction<br />
Theory<br />
<strong>Fuel</strong> Pump<br />
Pressure Regulator<br />
Injectors<br />
Trigger Points<br />
Temperature Sensor I<br />
Temperature Sensor II<br />
Throttle Switch<br />
Pressure Sensor<br />
Electronic Control<br />
Unit<br />
Deceleration Mixture<br />
Control Valve<br />
Auxiliary Air<br />
Regulator<br />
Cold Start Injector<br />
Air Filter Housing<br />
Relay Board<br />
SECTION 2:<br />
Procedure <strong>for</strong><br />
Renewing and Testing<br />
<strong>the</strong> <strong>Fuel</strong> <strong>Injection</strong><br />
SECTION 3:<br />
Adjustment &<br />
Modifications<br />
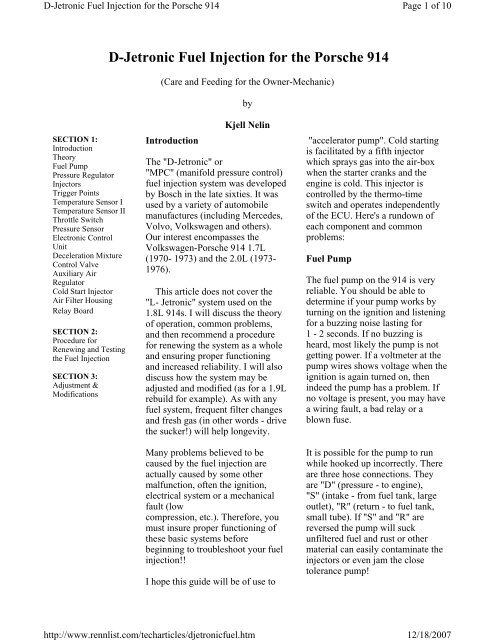
D-<strong>Jetronic</strong> <strong>Fuel</strong> <strong>Injection</strong> <strong>for</strong> <strong>the</strong> <strong>Porsche</strong> <strong>914</strong><br />
(Care and Feeding <strong>for</strong> <strong>the</strong> Owner-Mechanic)<br />
Introduction<br />
by<br />
Kjell Nelin<br />
The "D-<strong>Jetronic</strong>" or<br />
"MPC" (manifold pressure control)<br />
fuel injection system was developed<br />
by Bosch in <strong>the</strong> late sixties. It was<br />
used by a variety of automobile<br />
manufactures (including Mercedes,<br />
Volvo, Volkswagen and o<strong>the</strong>rs).<br />
Our interest encompasses <strong>the</strong><br />
Volkswagen-<strong>Porsche</strong> <strong>914</strong> 1.7L<br />
(1970- 1973) and <strong>the</strong> 2.0L (1973-<br />
1976).<br />
This article does not cover <strong>the</strong><br />
"L- <strong>Jetronic</strong>" system used on <strong>the</strong><br />
1.8L <strong>914</strong>s. I will discuss <strong>the</strong> <strong>the</strong>ory<br />
of operation, common problems,<br />
and <strong>the</strong>n recommend a procedure<br />
<strong>for</strong> renewing <strong>the</strong> system as a whole<br />
and ensuring proper functioning<br />
and increased reliability. I will also<br />
discuss how <strong>the</strong> system may be<br />
adjusted and modified (as <strong>for</strong> a 1.9L<br />
rebuild <strong>for</strong> example). As with any<br />
fuel system, frequent filter changes<br />
and fresh gas (in o<strong>the</strong>r words - drive<br />
<strong>the</strong> sucker!) will help longevity.<br />
Many problems believed to be<br />
caused by <strong>the</strong> fuel injection are<br />
actually caused by some o<strong>the</strong>r<br />
malfunction, often <strong>the</strong> ignition,<br />
electrical system or a mechanical<br />
fault (low<br />
compression, etc.). There<strong>for</strong>e, you<br />
must insure proper functioning of<br />
<strong>the</strong>se basic systems be<strong>for</strong>e<br />
beginning to troubleshoot your fuel<br />
injection!!<br />
I hope this guide will be of use to<br />
http://www.rennlist.com/techarticles/djetronicfuel.htm<br />
"accelerator pump". Cold starting<br />
is facilitated by a fifth injector<br />
which sprays gas into <strong>the</strong> air-box<br />
when <strong>the</strong> starter cranks and <strong>the</strong><br />
engine is cold. This injector is<br />
controlled by <strong>the</strong> <strong>the</strong>rmo-time<br />
switch and operates independently<br />
of <strong>the</strong> ECU. Here's a rundown of<br />
each component and common<br />
problems:<br />
<strong>Fuel</strong> Pump<br />
Page 1 of 10<br />
The fuel pump on <strong>the</strong> <strong>914</strong> is very<br />
reliable. You should be able to<br />
determine if your pump works by<br />
turning on <strong>the</strong> ignition and listening<br />
<strong>for</strong> a buzzing noise lasting <strong>for</strong><br />
1 - 2 seconds. If no buzzing is<br />
heard, most likely <strong>the</strong> pump is not<br />
getting power. If a voltmeter at <strong>the</strong><br />
pump wires shows voltage when <strong>the</strong><br />
ignition is again turned on, <strong>the</strong>n<br />
indeed <strong>the</strong> pump has a problem. If<br />
no voltage is present, you may have<br />
a wiring fault, a bad relay or a<br />
blown fuse.<br />
It is possible <strong>for</strong> <strong>the</strong> pump to run<br />
while hooked up incorrectly. There<br />
are three hose connections. They<br />
are "D" (pressure - to engine),<br />
"S" (intake - from fuel tank, large<br />
outlet), "R" (return - to fuel tank,<br />
small tube). If "S" and "R" are<br />
reversed <strong>the</strong> pump will suck<br />
unfiltered fuel and rust or o<strong>the</strong>r<br />
material can easily contaminate <strong>the</strong><br />
injectors or even jam <strong>the</strong> close<br />
tolerance pump!<br />
12/18/2007
D-<strong>Jetronic</strong> <strong>Fuel</strong> <strong>Injection</strong> <strong>for</strong> <strong>the</strong> <strong>Porsche</strong> <strong>914</strong><br />
Page 2....<br />
<strong>the</strong> owner-mechanic. I can not<br />
cover everything in detail, but this<br />
article should set you on <strong>the</strong> road to<br />
understanding you fuel injection.<br />
For more in<strong>for</strong>mation, I recommend<br />
<strong>the</strong> following books ; "How To<br />
Tune & Modify Bosch <strong>Fuel</strong><br />
<strong>Injection</strong>" by Ben Watson, and<br />
"Bosch <strong>Fuel</strong> <strong>Injection</strong> Handbook<br />
and Engine Management" by<br />
Charles Probst. If you are a serious,<br />
long term <strong>914</strong> owner, I suggest that<br />
you purchase a set of factory<br />
Workshop-Manuals. Also, many of<br />
<strong>the</strong> parts catalogs have a short<br />
troubleshooting guide as part of <strong>the</strong><br />
fuel injection section, tear out that<br />
page or Xerox it, it's handy to have<br />
in <strong>the</strong> glove box.<br />
Theory<br />
<strong>Fuel</strong> is delivered to <strong>the</strong> injectors via<br />
a high pressure roller type pump.<br />
Pressure is regulated by an<br />
adjustable regulator. A simple<br />
analog computer (ECU) processes a<br />
number of inputs and opens each<br />
injector as necessary to ensure<br />
proper mixture. The main<br />
determinant of mixture is <strong>the</strong> intake<br />
manifold pressure as measured by<br />
<strong>the</strong> pressure sensor. The mixture is<br />
fine tuned by <strong>the</strong> head temp sensor<br />
and an air temp sensor. The FI<br />
points located in <strong>the</strong> bottom of <strong>the</strong><br />
distributor provides <strong>the</strong> ECU timing<br />
and speed data. A throttle switch<br />
functions as an<br />
The 1.7L injectors are yellow, 2.0L<br />
injectors have a slightly larger hole<br />
(<strong>for</strong> more flow) and are green in<br />
http://www.rennlist.com/techarticles/djetronicfuel.htm<br />
If care is taken, <strong>the</strong> pump can be<br />
opened and cleared out, be careful<br />
not to damage <strong>the</strong> O-ring and keep<br />
work area etc. clean. The fuel pump<br />
also incorporates a<br />
check valve which maintains<br />
pressure to <strong>the</strong> injectors <strong>for</strong> some<br />
time after <strong>the</strong> engine is stopped.<br />
The purpose is to facilitate<br />
restarting. Failure of <strong>the</strong> checkvalve<br />
is not a serious problem.<br />
Speaking of fuel pumps, do you<br />
have trouble starting your car when<br />
it's warm? Is your pump (pre '75<br />
models) still located in <strong>the</strong> engine<br />
compartment? If so you<br />
have vapor lock. Do yourself and<br />
your car a big favor, move your<br />
pump to <strong>the</strong> front trunk, near <strong>the</strong><br />
gas tank.<br />
Pressure Regulator<br />
The pressure regulator, located at<br />
<strong>the</strong> rear of <strong>the</strong> engine on <strong>the</strong> drivers<br />
side is very reliable. Testing and<br />
adjustment will be covered later.<br />
Injectors<br />
The solenoid operated injectors are<br />
driven by short pulses which are<br />
generated by <strong>the</strong> ECU.<br />
Throttle Switch<br />
Page 2 of 10<br />
The throttle switch can be found<br />
12/18/2007
D-<strong>Jetronic</strong> <strong>Fuel</strong> <strong>Injection</strong> <strong>for</strong> <strong>the</strong> <strong>Porsche</strong> <strong>914</strong><br />
color. The electrical resistance of<br />
<strong>the</strong> injectors is about 2.4 ohms.<br />
The injectors are very reliable if<br />
given clean filtered gas.<br />
I will cover flow testing and<br />
cleaning in a later section.<br />
Trigger points<br />
Located in <strong>the</strong> base of <strong>the</strong><br />
distributor, <strong>the</strong> trigger points<br />
synchronize <strong>the</strong> injector pulses with<br />
<strong>the</strong> crank shaft. Because <strong>the</strong>y pass<br />
very little current (unlike <strong>the</strong><br />
ignition<br />
points) <strong>the</strong>y can last <strong>for</strong> up to<br />
100,000 mi. There are two sets of<br />
points, one set controls cyl #1 and<br />
#4. The o<strong>the</strong>r set controls cyl #2<br />
and #3. So, if only two<br />
injectors are firing in <strong>the</strong> pairs<br />
described, <strong>the</strong> most likely suspect is<br />
<strong>the</strong> trigger points. To replace,<br />
remove <strong>the</strong> distributor from <strong>the</strong><br />
engine (this is <strong>the</strong> easiest way to<br />
replace <strong>the</strong> ignition points and<br />
condenser, also) and pull <strong>the</strong> trigger<br />
points out after removing <strong>the</strong> two<br />
retaining screws. You may be able<br />
to simply clean <strong>the</strong> points<br />
with a little emery paper. I use a<br />
tiny amount of distributor grease on<br />
<strong>the</strong> parts that rub on <strong>the</strong> cam. When<br />
reinstalling, note that <strong>the</strong>re is some<br />
variability in <strong>the</strong><br />
range setting of <strong>the</strong> points, try to get<br />
<strong>the</strong>m near <strong>the</strong> middle of <strong>the</strong> range.<br />
You can now test <strong>the</strong>m by using a<br />
voltmeter set to <strong>the</strong> ohms scale.<br />
Measure first between<br />
<strong>the</strong> middle connection and one of<br />
<strong>the</strong> outside connections. Spin <strong>the</strong><br />
distributer shaft and you should see<br />
<strong>the</strong> points make and break<br />
connection. Now measure<br />
between <strong>the</strong> middle and <strong>the</strong> o<strong>the</strong>r<br />
side and repeat <strong>for</strong> <strong>the</strong> second set of<br />
points. Replace distributor and don't<br />
<strong>for</strong>get to plug in <strong>the</strong> trigger points.<br />
http://www.rennlist.com/techarticles/djetronicfuel.htm<br />
mounted underneath <strong>the</strong> throttle<br />
body. To test, turn on <strong>the</strong> ignition<br />
and open <strong>the</strong> throttle with your<br />
hand. You should be able to hear<br />
<strong>the</strong> injectors firing, a sort of<br />
"brrrrrrp" noise. If working<br />
correctly, <strong>the</strong> injectors will fire 20<br />
times <strong>for</strong> <strong>the</strong> full range of<br />
movement. One very mysterious<br />
intermittent<br />
fault caused by <strong>the</strong> throttle switch is<br />
an occasional "bucking" while<br />
driving at constant speed. This is<br />
caused by <strong>the</strong> switch cutting of <strong>the</strong><br />
fuel and <strong>the</strong>n turning it back<br />
on. Test by disconnecting <strong>the</strong><br />
switch (it is amazing how well <strong>the</strong><br />
car will run without it, actually),<br />
you will notice that acceleration<br />
will be a little sluggish as <strong>the</strong><br />
"accelerator pump" action will be<br />
missing.<br />
Pressure Sensor<br />
Page 3 of 10<br />
Located at a bracket near <strong>the</strong><br />
battery, <strong>the</strong> pressure sensor is <strong>the</strong><br />
single most important sensor in <strong>the</strong><br />
fuel injection system. Consisting of<br />
an iron core surrounded by<br />
a pair of coils, mechanically<br />
connected to a thin metal<br />
diaphragm, this sensor measures <strong>the</strong><br />
pressure at <strong>the</strong> intake air distributor<br />
relative to <strong>the</strong> ambient pressure<br />
(that is, it can correct <strong>for</strong> changes in<br />
altitude).<br />
It can fail in several ways. The coils<br />
can develop an electrical fault, or<br />
<strong>the</strong> diaphragm can leak. A defective<br />
sensor will often result in a very<br />
rich running condition.<br />
However, I have seen one fault<br />
resulting in <strong>the</strong> mixture becoming<br />
so lean that <strong>the</strong> engine wouldn't run.<br />
The coils can be tested by<br />
measuring <strong>the</strong> resistance between<br />
terminals #7 & # 15 (should be<br />
about 90 ohms) and between #8 &<br />
#10 (should be about 350 ohms).<br />
12/18/2007
D-<strong>Jetronic</strong> <strong>Fuel</strong> <strong>Injection</strong> <strong>for</strong> <strong>the</strong> <strong>Porsche</strong> <strong>914</strong><br />
Page 3....<br />
Temperature Sensor I<br />
This temp sensor, mounted on <strong>the</strong><br />
air intake distributor, is used to fine<br />
tune <strong>the</strong> mixture. Even if faulty, it<br />
has little effect on <strong>the</strong> running of<br />
<strong>the</strong> system. The resistance of this<br />
<strong>the</strong>rmistor is about 400 - 500 ohms<br />
at 50 deg. F, it is about 150 - 200<br />
ohms at 100 deg. F.<br />
Temperature Sensor II<br />
Temp sensor II is located in <strong>the</strong><br />
head near <strong>the</strong> #3 spark plug. This<br />
signal is an important parameter <strong>for</strong><br />
determining mixture. You can<br />
measure its resistance with an<br />
ohm meter, it should be about 2,000<br />
- 3,000 ohms cold. After <strong>the</strong> engine<br />
has reached operating temp <strong>the</strong><br />
resistance will be less than 1,000<br />
ohms.<br />
1. Temp Sensor I<br />
2. Not used<br />
3. #1 Injector<br />
4. #4 Injector<br />
5. #2 Injector<br />
6. #3 Injector<br />
7. Pressure sensor, primary winding<br />
8. Pressure sensor, secondary<br />
winding<br />
9. Throttle switch (full load signal)<br />
10. Pressure sensor, secondary<br />
winding<br />
11. Ground, engine<br />
12. Trigger points, common<br />
13. Temp sensor I<br />
14. Not used<br />
http://www.rennlist.com/techarticles/djetronicfuel.htm<br />
You can try blowing into <strong>the</strong> sensor<br />
to test <strong>the</strong> diaphragm.<br />
Although <strong>the</strong>y carry different part<br />
numbers, <strong>the</strong> only difference<br />
between <strong>the</strong> 1.7L and 2.0L pressure<br />
sensors is calibration. I will<br />
describe how you can change this<br />
yourself later on.<br />
Electronic Control Unit (ECU)<br />
The ECU, mounted to <strong>the</strong> battery<br />
tray, is one of <strong>the</strong> most reliable<br />
components of <strong>the</strong> FI system<br />
components although it is often<br />
accused in error of causing<br />
problems.<br />
Some of <strong>the</strong>se units have been<br />
damaged by battery acid however (a<br />
visual inspection will quickly<br />
determine if this is <strong>the</strong> case). The<br />
knob located on <strong>the</strong> top of <strong>the</strong><br />
unit (after '71) is used to adjust <strong>the</strong><br />
idle mixture. Here's a breakdown of<br />
all <strong>the</strong> connections from <strong>the</strong> wiring<br />
harness to <strong>the</strong> ECU (#1 is at <strong>the</strong><br />
top):<br />
cold start injector will spray fuel<br />
when <strong>the</strong> starter is cranked if <strong>the</strong><br />
engine is cold. If your motor is<br />
hard to start when cold you may<br />
have a problem with <strong>the</strong> cold start<br />
valve. If it starts with <strong>the</strong> use of<br />
cold starting fluid <strong>the</strong>n short out <strong>the</strong><br />
<strong>the</strong>rmo-time switch, it it now starts,<br />
<strong>the</strong> switch is at fault, if it still won't<br />
start, it's <strong>the</strong> injector. The injector<br />
can also fail by leaking, thus<br />
causing a rich running condition.<br />
Air Filter Housing<br />
Page 4 of 10<br />
The early 1.7L cars used an oil bath<br />
12/18/2007
D-<strong>Jetronic</strong> <strong>Fuel</strong> <strong>Injection</strong> <strong>for</strong> <strong>the</strong> <strong>Porsche</strong> <strong>914</strong><br />
15. Pressure sensor, primary<br />
winding<br />
16. 12V power (from relay board)<br />
17. Throttle switch<br />
18. Starter motor (terminal 50)<br />
19. <strong>Fuel</strong> pump relay<br />
20. Throttle switch<br />
21. Trigger points<br />
22. Trigger points<br />
23. Temp sensor II<br />
24. 12V power<br />
Deceleration Mixture Control<br />
Valve<br />
Located at <strong>the</strong> pressure sensor<br />
bracket, this valve leans out <strong>the</strong><br />
mixture when <strong>the</strong> throttle is closed.<br />
This is purely an emissions control<br />
device. If it is removed and its<br />
associated air lines plugged, no<br />
per<strong>for</strong>mance change will result.<br />
However, this may cause you to fail<br />
smog certification in some states. A<br />
leaking decel valve will cause a<br />
high idle condition (test by pinching<br />
off <strong>the</strong> air lines).<br />
Auxiliary Air Regulator<br />
Located next to <strong>the</strong> airbox (front,<br />
drivers side), <strong>the</strong> Aux. Air<br />
Regulator supplies extra air to <strong>the</strong><br />
engine during warm-up. A bimetallic<br />
spring closes <strong>the</strong> valve as it<br />
warms up. There is also a built in<br />
heater powered by 12V from <strong>the</strong><br />
fuel pump relay . Failure of <strong>the</strong><br />
valve to close results in a very high<br />
idle after warm-up!<br />
Test by connecting to a 12V source<br />
(I use a battery charger). The valve<br />
should close within 5 minutes. The<br />
valve will still close without <strong>the</strong><br />
electric heater, it just takes longer.<br />
You can test <strong>the</strong> valve <strong>for</strong><br />
mechanical functioning by placing<br />
it in a stove at 200 - 300 degrees F.<br />
If it doesn't close, you should try to<br />
http://www.rennlist.com/techarticles/djetronicfuel.htm<br />
air filter (yeeechhh!). Fortunately<br />
<strong>the</strong> dry element filter housing used<br />
in 1973 is a direct bolt on<br />
replacement. The 2.0L cars have a<br />
very nice square air filter housing<br />
with an efficient filter.<br />
Relay Board<br />
Although this is not really a part of<br />
<strong>the</strong> fuel injection, it is often a cause<br />
of trouble. A common problem is<br />
due to voltage drop caused by <strong>the</strong><br />
fact that <strong>the</strong> connections<br />
thru <strong>the</strong> board are riveted, not<br />
soldered. These boards are now 20+<br />
years old and moisture has begun to<br />
effect most of <strong>the</strong>m. You can<br />
remove <strong>the</strong>m easily, <strong>the</strong>n strip of<br />
<strong>the</strong> rubber coating by soaking<br />
overnight in solvent if needed and<br />
<strong>the</strong>n properly solder <strong>the</strong> thru <strong>the</strong><br />
board connections. Rebuilt boards<br />
can also be purchased. This board,<br />
located in <strong>the</strong> engine compartment<br />
has places <strong>for</strong> four relays starting<br />
from <strong>the</strong> front, <strong>the</strong>y are <strong>for</strong> <strong>the</strong> rear<br />
window defogger (missing on most<br />
cars), <strong>the</strong> power supply relay (12V<br />
<strong>for</strong> <strong>the</strong> ECU), <strong>the</strong> fuel pump, and<br />
<strong>the</strong> heater blower. There are two<br />
fuses on <strong>the</strong> board <strong>the</strong> one toward<br />
<strong>the</strong> rear is a 25A fuse which<br />
provides power to <strong>the</strong> fuel pump. If<br />
<strong>the</strong> fuel pump is not working, try<br />
replacing <strong>the</strong> relay with a known<br />
good one (<strong>the</strong>re are two in <strong>the</strong> front<br />
trunk <strong>for</strong> <strong>the</strong> headlight motors <strong>for</strong><br />
example), check <strong>the</strong> fuse, corrosion<br />
often <strong>for</strong>ms in <strong>the</strong> holder it can be<br />
cleaned off with a piece of emery<br />
paper (fuse also).<br />
Procedure <strong>for</strong> Renewing and<br />
Testing <strong>the</strong> <strong>Fuel</strong> <strong>Injection</strong><br />
Page 5 of 10<br />
Here's <strong>the</strong> procedure I've used on<br />
three different cars in <strong>the</strong> last year<br />
or so. In each case, I started with a<br />
poorly running (or not running)<br />
12/18/2007
D-<strong>Jetronic</strong> <strong>Fuel</strong> <strong>Injection</strong> <strong>for</strong> <strong>the</strong> <strong>Porsche</strong> <strong>914</strong><br />
Page 4....<br />
fix it as new ones are no longer<br />
available.<br />
To fix <strong>the</strong> valve you'll need to open<br />
it by prying up <strong>the</strong> <strong>for</strong>med flange of<br />
<strong>the</strong> housing (I place it in a vise and<br />
<strong>the</strong>n carefully tap it up with a chisel<br />
and hammer), pull <strong>the</strong> valve out and<br />
clean <strong>the</strong> rust out, <strong>the</strong>n reassemble.<br />
Sometimes <strong>the</strong> valve is too far gone<br />
and a used one must be found.<br />
Cold Start Injector/Thermo-time<br />
Switch<br />
Located at <strong>the</strong> front of <strong>the</strong> air box<br />
on <strong>the</strong> 1.7L and at <strong>the</strong> rear (drivers<br />
side) on <strong>the</strong> 2.0L, <strong>the</strong><br />
timing, adjust <strong>the</strong> valves and check<br />
compression. Leave <strong>the</strong> spark plugs<br />
out after <strong>the</strong> compression test<br />
(you'll see why later). I will not<br />
discuss <strong>the</strong>se systems in this article,<br />
if you are unfamiliar with <strong>the</strong>m,<br />
learn about <strong>the</strong>m be<strong>for</strong>e tearing into<br />
your fuel injection.<br />
If you have recently replaced <strong>the</strong><br />
gas lines, intake runner boots, and<br />
vacuum lines, you can skip some of<br />
<strong>the</strong> following. If your hoses are<br />
more than 4 years old or are of<br />
unknown age, please, change <strong>the</strong>m<br />
all! OK, here's my<br />
recommendations<br />
1) Renew all <strong>the</strong> fuel lines, use<br />
good quality German hose if<br />
possible. O<strong>the</strong>rwise, make sure you<br />
get high pressure fuel injection<br />
hose. You will need 7mm and 9mm<br />
fuel line, also replace any suspect<br />
clamps. This will require removal<br />
of <strong>the</strong> gas tank, so run <strong>the</strong> tank<br />
down be<strong>for</strong>e you start (if your car<br />
runs) and drain <strong>the</strong> rest. I drain <strong>the</strong><br />
http://www.rennlist.com/techarticles/djetronicfuel.htm<br />
Page 6 of 10<br />
engine and ended up with a<br />
strong, reliable motor which easily<br />
passed Cali<strong>for</strong>nia smog testing.<br />
*WARNING* Please exercise<br />
caution when working on fuel<br />
systems! It doesn't take a lot of gas<br />
fumes to cause lots of damage. I<br />
recommend doing <strong>the</strong> following<br />
procedures outside. Always have a<br />
fire extinguisher nearby.<br />
Be<strong>for</strong>e proceeding with <strong>the</strong> FI<br />
overhaul, I recommend that you<br />
per<strong>for</strong>m <strong>the</strong> following; check all<br />
components of <strong>the</strong> ignition system<br />
including proper functioning of <strong>the</strong><br />
mechanical and vacuum advance (I<br />
also test each spark plug <strong>for</strong> good<br />
spark), set <strong>the</strong><br />
into <strong>the</strong> fuel intake <strong>the</strong>n a gentle<br />
blast of compressed air (you would<br />
be amazed at what might come out).<br />
Now install a short piece of fuel<br />
line with a (???)<br />
3) Replace <strong>the</strong> intake runner boots<br />
and vacuum lines. In order to<br />
replace <strong>the</strong> intake runner boots,<br />
unbolt <strong>the</strong> intake runners from <strong>the</strong><br />
heads, pull off (you may wish to<br />
remove your pressure sensor and<br />
decel valve to make extra room <strong>for</strong><br />
<strong>the</strong> passenger side runner). Most<br />
likely you will want to replace <strong>the</strong><br />
intake to head plastic blocks also.<br />
After removing <strong>the</strong> old runner boots<br />
and cleaning off <strong>the</strong> intake air<br />
distributor and <strong>the</strong> runners, seat <strong>the</strong><br />
new runners on <strong>the</strong> intake air<br />
distributor. Make sure <strong>the</strong>y are<br />
pushed on as far as possible or <strong>the</strong>y<br />
will leak, <strong>the</strong>n push on <strong>the</strong> intake<br />
runners and install <strong>the</strong> nuts (4 on<br />
each side <strong>for</strong> 1.7L, 3 on 2.0L). I use<br />
a little high temp gasket compound<br />
to seal <strong>the</strong> boots. Don't over-tighten<br />
<strong>the</strong> runner nuts.<br />
12/18/2007
D-<strong>Jetronic</strong> <strong>Fuel</strong> <strong>Injection</strong> <strong>for</strong> <strong>the</strong> <strong>Porsche</strong> <strong>914</strong><br />
tank at <strong>the</strong> back of <strong>the</strong> car by<br />
pulling one of <strong>the</strong> lines coming<br />
from <strong>the</strong> plastic lines that run<br />
through <strong>the</strong> passenger<br />
compartment, clamping with a pair<br />
of small lock grip pliers and<br />
draining into a gas can. If its good<br />
gas, just pour it into your o<strong>the</strong>r car,<br />
o<strong>the</strong>rwise dispose of carefully. This<br />
is a good time to take a look inside<br />
you gas tank, so pull off <strong>the</strong> filler<br />
assembly once it is drained (<strong>the</strong>re's<br />
also less chance of scratching <strong>the</strong><br />
inside of your trunk lid when you<br />
pull <strong>the</strong> tank if this is removed) and<br />
pull your tank. You may have to cut<br />
<strong>the</strong> fuel lines going into <strong>the</strong> tank (I<br />
use a large pair of wire cutters) in<br />
order to get it out. Inspect <strong>the</strong> inside<br />
of <strong>the</strong> tank carefully, if <strong>the</strong>re's a<br />
good amount of rust, deal with it<br />
now or replace <strong>the</strong> tank. If your car<br />
is a '74 or earlier, <strong>the</strong> fuel pump<br />
may still be located back in <strong>the</strong><br />
engine compartment. Move it to <strong>the</strong><br />
front trunk area to avoid vapor lock<br />
problems (you'll need <strong>the</strong> gas tank<br />
out to do this so this is a good<br />
time).<br />
Once you are happy with <strong>the</strong><br />
condition of <strong>the</strong> gas tank replace it<br />
using new fuel lines. Do yourself a<br />
favor and use long pieces of line so<br />
you can lift <strong>the</strong> tank out far enough<br />
to disconnect <strong>the</strong>m <strong>the</strong> next time<br />
you pull it. Also replace your fuel<br />
filter at this time. Next, at <strong>the</strong><br />
engine compartment replace all <strong>the</strong><br />
pieces of fuel line. Be sure to<br />
inspect <strong>the</strong> plastic line and replace<br />
with copper or stainless steel if<br />
necessary (I've only replaced <strong>the</strong><br />
lines that run through <strong>the</strong> car when<br />
<strong>the</strong> engine has been out). You may<br />
wish to remove <strong>the</strong> engine cover at<br />
this time <strong>for</strong> a little extra access. I<br />
also recommend removing <strong>the</strong><br />
battery <strong>for</strong> safety reasons. Boy,<br />
<strong>the</strong>re sure are a lot of fuel hoses,<br />
http://www.rennlist.com/techarticles/djetronicfuel.htm<br />
Page 7 of 10<br />
Next, replace <strong>the</strong> vacuum lines. Do<br />
<strong>the</strong>m one at a time and you won't<br />
get <strong>the</strong>m mixed up. Of course,<br />
someone else might have misconnected<br />
<strong>the</strong>m in <strong>the</strong> past so it<br />
can't hurt to check <strong>the</strong> routing if<br />
you have a manual which shows <strong>the</strong><br />
hose arrangement. Don't <strong>for</strong>get <strong>the</strong><br />
hoses <strong>for</strong> <strong>the</strong> distributor<br />
advance/retard. These hoses should<br />
all be available at your nearest<br />
German Car parts supplier.<br />
4) Inspect <strong>the</strong> engine wiring<br />
harness, and replace <strong>the</strong> boots (if<br />
needed). Check out you harness and<br />
look carefully <strong>for</strong> loose wires. Bad<br />
grounds are a very common cause<br />
of fuel injection problems. Look <strong>for</strong><br />
<strong>the</strong> grounds on <strong>the</strong> top of <strong>the</strong><br />
engine, under <strong>the</strong> back of <strong>the</strong> air<br />
distributor on <strong>the</strong> passenger side. I<br />
pull <strong>the</strong>m off, clean up <strong>the</strong> terminals<br />
on <strong>the</strong> engine with some fine emery<br />
paper, give <strong>the</strong> connectors on <strong>the</strong><br />
harness a blast of contact cleaner<br />
and a little squeeze with a pair of<br />
pliers (so <strong>the</strong>y'll make good<br />
contact) and reconnect. If <strong>the</strong><br />
injector boots on <strong>the</strong> wiring harness<br />
are worn out, <strong>the</strong>y can be replaced.<br />
To replace, you must dismantle <strong>the</strong><br />
connectors. I got a wire terminal<br />
tool at a local auto parts place, its a<br />
Lisle #56500 (about $12). If you are<br />
not experienced working with<br />
wiring, you may want to get<br />
someone else to do this <strong>for</strong> you.<br />
5) Back to <strong>the</strong> injectors. Check <strong>the</strong><br />
injector seals and replace <strong>the</strong>m if<br />
<strong>the</strong>y are cracked. Install <strong>the</strong><br />
injectors on <strong>the</strong> fuel rails and plug<br />
<strong>the</strong>m into <strong>the</strong> harness. Do not install<br />
into <strong>the</strong> intake runners yet. For <strong>the</strong><br />
next part you will need <strong>the</strong><br />
following: A pressure gauge<br />
(compatible with fuel) 0 - 50 psi,<br />
and 4 small clear vials (I use 20cc<br />
graduated cylinders, available at<br />
12/18/2007
D-<strong>Jetronic</strong> <strong>Fuel</strong> <strong>Injection</strong> <strong>for</strong> <strong>the</strong> <strong>Porsche</strong> <strong>914</strong><br />
Page 5....<br />
aren't <strong>the</strong>re! While you are at it, pull<br />
<strong>the</strong> injectors and inspect <strong>the</strong> hoses.<br />
Unless <strong>the</strong>re fairly new, you'll want<br />
to replace <strong>the</strong>se also. Yes, <strong>the</strong>y are<br />
most likely <strong>the</strong> original clamped<br />
hoses. I use a grinder to cut way <strong>the</strong><br />
clamps. Don't replace <strong>the</strong> injector<br />
hoses yet, because <strong>the</strong> next step is<br />
to:<br />
2)Deal with <strong>the</strong> injectors. First<br />
clean <strong>the</strong>m up. I use some spray<br />
type carburetor cleaner and give<br />
<strong>the</strong>m a good squirt<br />
6) Set <strong>the</strong> fuel system supply<br />
pressure. Connect <strong>the</strong> pressure<br />
gauge at <strong>the</strong> "T" connection on <strong>the</strong><br />
top of <strong>the</strong> drivers side fuel rail<br />
(disconnect <strong>the</strong> hose going to <strong>the</strong><br />
cold start valve on <strong>the</strong> 2.0L) with a<br />
piece of 7mm fuel line and 2 hose<br />
clamps. Go over all <strong>the</strong> connections<br />
<strong>for</strong> all <strong>the</strong> fuel hoses that you just<br />
replaced! Now, put a gallon or so of<br />
fuel in <strong>the</strong> gas tank. Next, place<br />
each injector in one of <strong>the</strong> clear<br />
vials. Supply 12V to your fuel<br />
pump (I use a couple of push on<br />
style connectors crimped to two<br />
pieces of wire and connect to a<br />
battery charger (remember, <strong>the</strong><br />
battery is still out of <strong>the</strong> car). Once<br />
<strong>the</strong> pump is running, check<br />
EVERYWHERE <strong>for</strong> fuel leaks.<br />
Take your time. If no fuel leaks are<br />
found (and don't <strong>for</strong>get <strong>the</strong> hoses<br />
under <strong>the</strong> tank, that's why I<br />
recommended only 1 gal, so you<br />
could easily pull <strong>the</strong> tank if<br />
needed), go look at your fuel<br />
pressure gauge. It should at least 28<br />
psi (I set mine to 30 psi). If not,<br />
adjust <strong>the</strong> fuel pressure regulator<br />
(first loosen <strong>the</strong> locking nut on <strong>the</strong><br />
adjusting screw). After <strong>the</strong> system<br />
http://www.rennlist.com/techarticles/djetronicfuel.htm<br />
Page 8 of 10<br />
Camera stores or chemical supply<br />
houses).<br />
Why, you ask, it's because you have<br />
most likely fixed a good number of<br />
vacuum leaks. Just readjust <strong>the</strong> idle<br />
screw on <strong>the</strong> throttle body.<br />
9) Want some free horsepower?<br />
OK, with <strong>the</strong> engine turned off,<br />
place a heavy object on <strong>the</strong><br />
accelerator pedal (or get someone to<br />
floor it <strong>for</strong> you) and look at <strong>the</strong><br />
position of <strong>the</strong> throttle butterfly. Is<br />
it all <strong>the</strong> way open? If not adjust <strong>the</strong><br />
stop under <strong>the</strong> throttle pedal and<br />
that's free horsepower! (make sure<br />
that <strong>the</strong> cable is not being stretched<br />
or it will wear out prematurely).<br />
Adjustment and Modifications<br />
There are several mixture<br />
adjustments possible with this<br />
system. The easiest is to simple<br />
adjust <strong>the</strong> knob on <strong>the</strong> top of <strong>the</strong><br />
ECU ('72 and later). This will fine<br />
tune <strong>the</strong> idle mixture only. Here's<br />
how you can make major changes<br />
in <strong>the</strong> mixture (if <strong>the</strong> engine is<br />
getting worn or if you have changed<br />
cams, or displacement during a<br />
rebuild). Some people recommend<br />
changing to <strong>the</strong> 2.0L injectors if a<br />
12/18/2007
D-<strong>Jetronic</strong> <strong>Fuel</strong> <strong>Injection</strong> <strong>for</strong> <strong>the</strong> <strong>Porsche</strong> <strong>914</strong><br />
has been up to pressure <strong>for</strong> awhile,<br />
turn off <strong>the</strong> power to <strong>the</strong> pump.<br />
Check <strong>the</strong> vials at <strong>the</strong> injectors. If<br />
<strong>the</strong>re is any fuel in <strong>the</strong> vials <strong>the</strong>n <strong>the</strong><br />
injector (or injectors) are leaking<br />
and must be replaced. Check <strong>the</strong><br />
pressure gauge again, is it holding<br />
pressure? If not, <strong>the</strong> check valve in<br />
<strong>the</strong> fuel pump is not working, or<br />
one or more of <strong>the</strong> injectors are<br />
leaking.<br />
7) OK, time <strong>for</strong> <strong>the</strong> Injector Flow<br />
Test. Be very careful, as you will<br />
now have four "fuel leaks" in your<br />
engine compartment (that is, if<br />
everything is working). Reinstall<br />
your battery. Disconnect <strong>the</strong> wire<br />
from <strong>the</strong> distributor to <strong>the</strong> coil<br />
(Important - you don't want any<br />
sparks flying around!). With each<br />
injector in its cylinder or vial, floor<br />
your accelerator and crank <strong>the</strong><br />
engine <strong>for</strong> 15 - 20 sec. Now,<br />
carefully remove <strong>the</strong> vials and line<br />
<strong>the</strong>m up on a level surface. The<br />
exact amount is not important (I get<br />
about 7 - 8 cc in 15 sec <strong>for</strong> a 1.7L)<br />
at this point. What we want to see is<br />
<strong>the</strong> same amount <strong>for</strong> each injector<br />
(ideally, up to 10 percent variation<br />
is all right unless you are racing in<br />
which case....optimize). If <strong>the</strong>y look<br />
good, you are done, however, my<br />
experience has been that one or<br />
more injectors are faulty! Most<br />
common is low flow or no flow<br />
(though occasionally <strong>the</strong>re will be<br />
too much). Warning, if <strong>the</strong>re is no<br />
flow <strong>the</strong> problem may be elsewhere<br />
in <strong>the</strong> system. I switch injectors (or<br />
just switch wires) and rerun <strong>the</strong> test,<br />
if <strong>the</strong> problem stays with <strong>the</strong><br />
injector, replace it. You may also<br />
wish to inspect <strong>the</strong> spray pattern of<br />
each injector (certainly if you are<br />
building that auto-cross winner).<br />
The pattern should be cone shaped.<br />
My experience has been that flow<br />
rate is <strong>the</strong> most important<br />
http://www.rennlist.com/techarticles/djetronicfuel.htm<br />
Page 9 of 10<br />
1.7L is bumped up to 1.9L,<br />
however I have found this to be<br />
unnecessary if <strong>the</strong> stock cam is<br />
retained.<br />
First, remove <strong>the</strong> pressure sensor.<br />
You will notice a large plug with a<br />
slot in it sealed with epoxy on <strong>the</strong><br />
end of <strong>the</strong> unit. Heat <strong>the</strong> epoxy (I<br />
use a heat shrink gun but a powerful<br />
hair drier should work) and scrap it<br />
away with a screwdriver. Once <strong>the</strong><br />
slot is clear, turn <strong>the</strong> plug in a bit<br />
and remove <strong>the</strong> epoxy from <strong>the</strong><br />
threads. Continue turning <strong>the</strong> plug<br />
out <strong>the</strong>n in and scrape <strong>the</strong> epoxy<br />
away until you can remove <strong>the</strong><br />
plug. Allow <strong>the</strong> unit to cool. You<br />
will see an adjusting screw inside<br />
<strong>the</strong> pressure sensor.<br />
Mount <strong>the</strong> sensor in <strong>the</strong> car with <strong>the</strong><br />
access hole pointing up so that you<br />
can see <strong>the</strong> adjusting screw.<br />
Turning <strong>the</strong> screw clockwise will<br />
lean out <strong>the</strong> mixture,<br />
counterclockwise will make it<br />
richer. Ideally, use a CO meter or<br />
an O2 (lambda) sensor to set <strong>the</strong><br />
mixture. Set <strong>the</strong> mixture to 2.0 - 2.5<br />
% CO at 2,500 RPM. I use a single<br />
wire O2 sensor mounted on <strong>the</strong><br />
exhaust system on my 1.9L which<br />
gives me <strong>the</strong> instantaneous air/fuel<br />
ratio at all times, even while driving<br />
<strong>the</strong> car.<br />
You can set <strong>the</strong> mixture "by ear" if<br />
you must. Make sure <strong>the</strong> engine is<br />
up to normal operating temperature.<br />
Run it up to 2,500 RPM and hold it<br />
<strong>the</strong>re, adjust mixture <strong>for</strong> <strong>the</strong><br />
smoo<strong>the</strong>st sounding running. This<br />
will set <strong>the</strong> overall mixture. Turn<br />
off <strong>the</strong> engine, install <strong>the</strong> plug and<br />
mount <strong>the</strong> pressure sensor as<br />
normal. Now, to set <strong>the</strong> idle<br />
mixture, try turning <strong>the</strong> adjustment<br />
on <strong>the</strong> top of <strong>the</strong> ECU, clockwise<br />
enriches in this case.<br />
12/18/2007
D-<strong>Jetronic</strong> <strong>Fuel</strong> <strong>Injection</strong> <strong>for</strong> <strong>the</strong> <strong>Porsche</strong> <strong>914</strong><br />
Page 6....<br />
parameter.<br />
8) Once you have verified that you<br />
have all four injectors present and<br />
accounted <strong>for</strong>, install <strong>the</strong>m in <strong>the</strong><br />
intake runners, remove <strong>the</strong> pressure<br />
gauge (be careful if <strong>the</strong> system is<br />
still under pressure), install <strong>the</strong><br />
plugs and reconnect <strong>the</strong> coil wire.<br />
Cross your fingers and start <strong>the</strong> car.<br />
Does it run? It should, but I'll bet<br />
<strong>the</strong> idle is now too low (when<br />
warm).<br />
<strong>the</strong> pot with <strong>the</strong> engine running<br />
(again, at full operating temp) until<br />
<strong>the</strong> idle smoo<strong>the</strong>s out or <strong>the</strong> CO<br />
reads about 1.5 - 2.0 %. Shut off <strong>the</strong><br />
engine, remove <strong>the</strong> pot and measure<br />
<strong>the</strong> resistance. Get a fixed resistor<br />
near this value and install<br />
permanently.<br />
Finally, adjust <strong>the</strong> idle mixture with<br />
<strong>the</strong> ECU adjustment and set <strong>the</strong> idle<br />
speed with <strong>the</strong> air bypass screw at<br />
<strong>the</strong> throttle body. Lastly, drive and<br />
enjoy your rejuvenated <strong>914</strong> <strong>for</strong><br />
many years to come!<br />
This article is Copyright © 1995,<br />
Kjell Nelin. Printed with permission<br />
Comments or questions are always<br />
welcome, Kjell<br />
kn@bigbear.caltech.edu<br />
http://www.rennlist.com/techarticles/djetronicfuel.htm<br />
Page 10 of 10<br />
If <strong>the</strong> idle "hunts" when turned up<br />
all <strong>the</strong> way it is too lean. Do <strong>the</strong><br />
following, get a 2,000 ohm variable<br />
resistor ("pot") and install it in<br />
series with <strong>the</strong> Temp Sensor II (in<br />
<strong>the</strong> head). Set <strong>the</strong> ECU idle<br />
adjustment at <strong>the</strong> middle of its<br />
range. Starting at zero ohms adjust<br />
12/18/2007


