You also want an ePaper? Increase the reach of your titles
YUMPU automatically turns print PDFs into web optimized ePapers that Google loves.
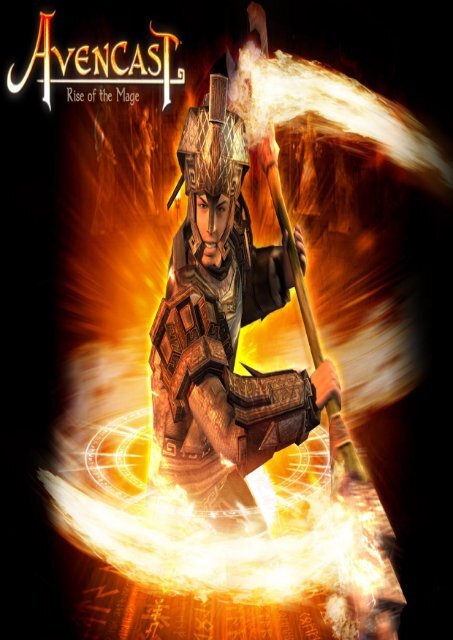
<strong>AVENCAST</strong>: <strong>RISE</strong> <strong>OF</strong> <strong>THE</strong> <strong>MAGE</strong>
<strong>AVENCAST</strong>: <strong>RISE</strong> <strong>OF</strong> <strong>THE</strong> <strong>MAGE</strong><br />
TABLE <strong>OF</strong> CONTENTS<br />
STORY<br />
CONTROLS<br />
PC<br />
FAQ<br />
SPELLS TREE<br />
SPELLS<br />
WALKTHROUGH<br />
MALVAREN: <strong>THE</strong> THREE SEALS<br />
HORATIO’S SEAL<br />
DELLA GUSTERA’S SEAL<br />
ULDRET AND PAGAIN [OPTIONAL]<br />
ARCHIBALD’S SEAL<br />
RUFUS [OPTIONAL]<br />
SEVERIN [OPTIONAL]<br />
GEORGIUS [OPTIONAL]<br />
DOLCINA [OPTIONAL]<br />
HUBERTUS [OPTIONAL]<br />
GORLIN [OPTIONAL]<br />
SWIFTLINA [OPTIONAL]<br />
MALVAREN: <strong>THE</strong> SOUL STONE<br />
<strong>THE</strong>ODOSIUS: <strong>THE</strong> DEMON’S STAFF<br />
<strong>THE</strong>ODOSIUS: <strong>THE</strong> CALL FOR HELP<br />
KELIOS [OPTIONAL]<br />
DOLCINA [OPTIONAL]<br />
MURIUS AND <strong>THE</strong> O<strong>THE</strong>R STUDENTS [OPTIONAL]<br />
AGITATIUS [OPTIONAL]<br />
GORLIN [OPTIONAL]<br />
GORLIN [OPTIONAL]<br />
MEGANTEOLIS: <strong>THE</strong> ARCANE DESTRUCTUROS<br />
MEGANTEOLIS: <strong>THE</strong> SECRET WING<br />
KULKURAZZ: <strong>THE</strong> PACT<br />
ANITALIS: <strong>THE</strong> KEY<br />
GYRON: <strong>THE</strong> NECROMANTIC MACHINE<br />
GYRON: BACK TO <strong>THE</strong> PRESENT<br />
<strong>THE</strong>ODOSIUS: <strong>THE</strong> PROTECTION SPHERE<br />
<strong>THE</strong>ODOSIUS: BACK TO <strong>THE</strong> PORTAL<br />
MEGANTEOLIS<br />
PSION: <strong>THE</strong> DEACTIVATED TELEPORTER<br />
GAIAN [OPTIONAL]<br />
PAJAOU [OPTIONAL]<br />
ENRAEL [OPTIONAL]<br />
MORGATH<br />
COPYRIGHTS<br />
STORY<br />
The game starts when a baby was found floating in the river bank, an old man picks him up and raises him as his own<br />
apprentice. After several years, he sends you to Avencast, where you’ll study magic [Like Hogwarts]. The game picks up<br />
when you were sent to Crystal Cave for your final exam. After finding your soul stone, you returns to the academy only<br />
to find it outrun by demons. With the help of the other mages, you manages to kill the demons and save the academy.<br />
But then Meganteolis betrays and uses the portal of dimension to escape. You decides to follow him and enters the<br />
portal. You’ll arrive in a strange floating piece of land, where you’ll kill Magenteolis in a ruined fortress. Then Gorlin tells<br />
you about your ancestry and Magenteolis is your elder brother. Your ancestors tried to destroy Mrogath but Morgath<br />
was too strong, the battle ended and only you and Meganteolis survived. After hearing about your ancestors, you decides<br />
to kill Morgath by yourself and goes to the large meeting hall of Kyranians, where Morgath is sleeping. After a fierce<br />
fight, you manages to kill Morgath and destroy his crystal heart.
<strong>AVENCAST</strong>: <strong>RISE</strong> <strong>OF</strong> <strong>THE</strong> <strong>MAGE</strong><br />
CONTROLS<br />
PC<br />
MOVE UP W<br />
MOVE DOWN S<br />
MOVE LEFT A<br />
MOVE RIGHT D<br />
RUNNING MODE R [In the option menu, choose between the three control<br />
modes or press V]<br />
BASIC BLOW Left Click<br />
CAST SOUL SPARKS Right Click<br />
FAST EVADING STEPS Space + WASD<br />
EVADING ROLL Tap WASD twice<br />
CAMERA CONTROL Ctrl + Mouse<br />
POSITION CAMERA BEHIND <strong>THE</strong> HERO Middle Mouse Button<br />
DISPLAY USABLE OBJECTS F<br />
USE OBJECTS AND TALK TO CHARACTERS E [In order to apply an object, you only have to use the<br />
object. As soon as the correct item is in your inventory,<br />
the item will be employed automatically. The will appear in<br />
the small window and you'll need to confirm the application<br />
by pressing the 'use' key]<br />
OPEN INVENTORY I<br />
OPEN CHARACTER SHEET C<br />
DISPLAY SPELLS K [Information on your items in the inventory, or an<br />
attribute in your character page, is displayed by right<br />
clicking on it. In order to use magic potions, double-click<br />
on them in your inventory or draw them to the quick-use<br />
inventory. You can use them by pressing the number keys<br />
of the respective inventory slot (1, 2 or 3)]<br />
QUEST LOGBOOK L<br />
FAQ<br />
SPELLS TREE<br />
BLOOD MAGIC<br />
Lash Of Rang------Whip Of Immolation------Inferno Lash<br />
Fire Thrust---Blood Flame Thrust---------Domino Thrust<br />
l<br />
l<br />
l<br />
Hammer Of Rage---------Hammer Of Wrath---Hammer Of Blood Vengeance<br />
l<br />
l<br />
l<br />
Fire Wheel------Inferno Wheel------Cyclone Of Blood Vengeance<br />
------Shadow Undertow------Vortex Of Paralysis<br />
l<br />
l<br />
l<br />
Deep Freeze------Mighty Ice Quake<br />
Blood Drain Shadow Walk Plague Weapon Berserker Assault<br />
SOUL MAGIC<br />
Ice Bullet/Shot---Mighty Ice Bullet-----Mighty Ice Bullet Of Penetration<br />
l
<strong>AVENCAST</strong>: <strong>RISE</strong> <strong>OF</strong> <strong>THE</strong> <strong>MAGE</strong><br />
l<br />
l------Ice Sparks<br />
Wave Of Power---Rolling Firewall Of Penetration---Waves Of Annihilation Fire Lance Inferno Lance<br />
Soul Nova------United Soul Nova---Unified Souls Nova Soul Storm<br />
Soul Chalice---Soul Chalice Of Incursion------Mighty Soul Beam<br />
l<br />
l<br />
l<br />
Meteor Of Might---------Ice Meteor---Glacial Soul Meteor<br />
l<br />
l<br />
l<br />
Firewall---Inferno Wall------Fireball<br />
Cold Soul Hail------Glacial Soul Hail<br />
SUMMONING<br />
SPELLS<br />
BLOOD MAGIC<br />
Magic Shield<br />
Imp Obelisk<br />
Killer Fly Crystal Scorpio<br />
LASH <strong>OF</strong> RAGE<br />
Fast blow against several enemies<br />
Combo – A, W, left click<br />
Mana cost – 40<br />
Requires level – 2<br />
Cost – 6<br />
Crystal Golem Crystal Seahorse<br />
WHIP <strong>OF</strong> IMMOLATION<br />
Uses fire and blood magic for a horizontal blow, which causes several enemies to blast into flame<br />
Combo – A, W, left click<br />
Mana cost – 48<br />
Requires level – 14<br />
Cost – 6<br />
INFERNO LASH<br />
Horizontal magic blow affecting several enemies, setting them on fire and flinging them backward<br />
Combo – A, W, left click<br />
Mana cost – 56<br />
Requires level – 22<br />
Cost – 6<br />
FIRE THRUST<br />
Fast thrust against one enemy<br />
Combo – D, W, left click<br />
Mana cost – 32<br />
Requires level – 2<br />
Cost – 6<br />
BLOOD FLAME THRUST<br />
Combined blood and fire for thrust against one enemy<br />
Combo – D, W, left click<br />
Mana cost – 40<br />
Requires level – 9
<strong>AVENCAST</strong>: <strong>RISE</strong> <strong>OF</strong> <strong>THE</strong> <strong>MAGE</strong><br />
Cost – 6<br />
DOMINO THRUST<br />
Thrust attack which topples enemies by throwing one of them against the others<br />
Combo – D, W, left click<br />
Mana cost – 48<br />
Requires level – 24<br />
Cost – 6<br />
HAMMER <strong>OF</strong> RAGE<br />
Powerful blunt blow against one enemy<br />
Combo – S, W, left click<br />
Mana cost – 100<br />
Requires level – 5<br />
Cost – 6<br />
HAMMER <strong>OF</strong> WRATH<br />
Mammoth blunt blow against one enemy<br />
Combo - S, W, left click<br />
Mana cost - 64<br />
Required level - 17<br />
Cost - 6<br />
HAMMER <strong>OF</strong> BLOOD VENGEANCE<br />
Devastating blunt blow against one enemy<br />
Combo – S, W, left click<br />
Mana cost – 140<br />
Requires level – 24<br />
Cost – 6<br />
FIRE WHEEL<br />
Fast round attack that uses fire magic against several nearby enemies<br />
Combo – A, D, left click<br />
Mana cost – 100<br />
Requires level – 10<br />
Cost – 6<br />
INFERNO WHEEL<br />
Fast round attack that uses fire magic against several nearby enemies<br />
Combo – A, D, left click<br />
Mana cost – 120<br />
Requires level – 18<br />
Cost – 6<br />
CYCLONE <strong>OF</strong> BLOOD VENGEANCE<br />
Massive round attack followed by monumental blunt blow, the blood mage’s most powerful attack<br />
Combo – W, D, A, left click<br />
Mana cost – 200<br />
Requires level – 27<br />
Cost – 6<br />
SHADOW UNDERTOW<br />
Power mind spell which teleports the distant enemy to the spell caster and parlays him for a short time<br />
Combo – W, D, left click<br />
Mana cost – 100<br />
Requires level – 14<br />
Cost – 6<br />
VORTEX <strong>OF</strong> PARALYSIS<br />
Powerful mind spell, a vortex of energy which sucks in opponents and immobilizes them<br />
Combo – D, S, left click<br />
Mana cost – 220
<strong>AVENCAST</strong>: <strong>RISE</strong> <strong>OF</strong> <strong>THE</strong> <strong>MAGE</strong><br />
Requires level – 21<br />
Cost – 6<br />
DEEP FREEZE<br />
Paralyzing blow using ice magic against one enemy<br />
Combo – W, S, left click<br />
Mana cost – 32<br />
Requires level – 4<br />
Cost – 6<br />
MIGHTY ICE QUAKE<br />
Paralyzing blow using ice magic against several enemies located nearby<br />
Combo – W, S, left click<br />
Mana cost – 48<br />
Requires level – 13<br />
Cost – 6<br />
BLOOD DRAIN<br />
Magic spell, which drains energy from the enemy and returns it to the mage as health points<br />
Combo – W, A, left click<br />
Mana cost – 80<br />
Requires level – 6<br />
Cost – 6<br />
SHADOW WALK<br />
Invisibility spell which allows a particularly powerful surprise attack. It can only be employed when the mage has not<br />
been detected<br />
Combo – S, A, left click<br />
Mana cost – 60<br />
Requires level – 12<br />
Cost – 6<br />
PLAGUE WEAPON<br />
Weapon is poisoned for short time. All attacks will inflict additional poison damage<br />
Combo – A, S, left click<br />
Mana cost – 160<br />
Requires level – 20<br />
Cost – 6<br />
BERSERKER ASSAULT<br />
Powerful charge attack against several enemies<br />
Combo – S, D, left click<br />
Mana cost – 80<br />
Requires level – 26<br />
Cost – 6<br />
SOUL MAGIC<br />
ICE BULLET/SHOT<br />
Small ice projectile which freeze an enemy briefly<br />
Combo – D, W, right click<br />
Mana cost – 80<br />
Require level – 2<br />
Cost – 6<br />
MIGHTY ICE BULLET<br />
Ice projectile which freeze an enemy for short period<br />
Combo – D, W, right click<br />
Mana cost – 16<br />
Require level – 9<br />
Cost – 6
<strong>AVENCAST</strong>: <strong>RISE</strong> <strong>OF</strong> <strong>THE</strong> <strong>MAGE</strong><br />
MIGHTY ICE BULLET <strong>OF</strong> PENETRATION<br />
Ice projectile which freeze several enemies in succession<br />
Combo – D, W, right click<br />
Mana cost – 24<br />
Require level – 16<br />
Cost – 6<br />
ICE SPARKS<br />
Self enchantment which propels volley of ice shards instead of soul sparks<br />
Combo – A, S, right click<br />
Mana cost – 180<br />
Require level – 20<br />
Cost – 6<br />
WAVE <strong>OF</strong> POWER<br />
Powerful magic wave affecting several enemies<br />
Combo – D, A, right click<br />
Mana cost – 48<br />
Require level – 2<br />
Cost – 6<br />
ROLLING FIRE WALL <strong>OF</strong> PENETRATION<br />
Powerful roaming firewall affecting several enemies in succession<br />
Combo – D, A, right click<br />
Mana cost – 64<br />
Require level – 10<br />
Cost – 6<br />
WAVES <strong>OF</strong> ANNIHILATION<br />
Powerful wave using <strong>com</strong>bined fire and soul magic against several enemies lined up in a row<br />
Combo – D, A, right click<br />
Mana cost – 96<br />
Require level – 15<br />
Cost – 6<br />
FIRE LANCE<br />
Soul lance using fire magic against one enemy<br />
Combo – D, A, right click<br />
Mana cost – 260<br />
Require level – 18<br />
Cost – 6<br />
INFERNO LANCE<br />
Soul lance using fire magic against several enemies lined up in row<br />
Combo – D, S, right click<br />
Mana cost – 340<br />
Require level – 24<br />
Cost – 6<br />
SOUL NOVA<br />
Powerful pulsing nova affecting several nearby enemies<br />
Combo – W, S, right click<br />
Mana cost – 68<br />
Require level – 4<br />
Cost – 6<br />
UNITED SOUL NOVA<br />
Bundled pulsing nova affecting several nearby enemies<br />
Combo – W, S, right click<br />
Mana cost – 140<br />
Require level – 12<br />
Cost – 6
<strong>AVENCAST</strong>: <strong>RISE</strong> <strong>OF</strong> <strong>THE</strong> <strong>MAGE</strong><br />
UNIFIED SOULS NOVA<br />
The soul mage’s most powerful pulse nova; affecting several enemies nearby<br />
Combo – W, S, right click<br />
Mana cost – 260<br />
Require level – 20<br />
Cost – 6<br />
SOUL STORM<br />
Devastating meteorites shower on several enemies<br />
Combo – S, D, right click<br />
Mana cost – 400<br />
Require level – 24<br />
Cost – 6<br />
SOUL CHALICE<br />
Leaching projectile spell against one enemy<br />
Combo – S, W, right click<br />
Mana cost – 24<br />
Require level – 10<br />
Cost – 6<br />
SOUL CHALICE <strong>OF</strong> INCURSION<br />
Leaching projectile spell against several enemies lined up in a row<br />
Combo – S, W, right click<br />
Mana cost – 32<br />
Require level – 18<br />
Cost – 6<br />
MIGHTY SOUL BEAM<br />
Power soul beam targeting several queued up enemies. Most powerful soul mage attack<br />
Combo – D, S, A, right click<br />
Mana cost – 320<br />
Require level – 27<br />
Cost – 6<br />
METEOR <strong>OF</strong> MIGHT<br />
Powerful meteor against one enemy. Long casting time<br />
Combo – W, D, right click<br />
Mana cost – 80<br />
Require level – 5<br />
Cost – 6<br />
ICE METEOR<br />
Powerful ice meteor flung at an enemy, long casting time<br />
Combo – W, D, right click<br />
Mana cost – 112<br />
Require level – 17<br />
Cost – 6<br />
GLACIAL SOUL METEOR<br />
Powerful meteor using ice and soul magic against one enemy. Long casting time<br />
Combo – W, D, right click<br />
Mana cost – 144<br />
Require level – 24<br />
Cost – 6<br />
FIREWALL<br />
Firewall affecting several enemies, also poses a risk to the mage himself<br />
Combo – A, D, right click<br />
Mana cost – 120<br />
Require level – 6
<strong>AVENCAST</strong>: <strong>RISE</strong> <strong>OF</strong> <strong>THE</strong> <strong>MAGE</strong><br />
Cost – 6<br />
INFERNO WALL<br />
Massive firewall affecting several enemies, also poses a risk to the mage himself<br />
Combo – A, D, right click<br />
Mana cost – 180<br />
Require level – 13<br />
Cost – 6<br />
FIREBALL<br />
Powerful fireball affecting several enemies<br />
Combo – A, W, right click<br />
Mana cost – 240<br />
Require level – 25<br />
Cost – 6<br />
COLD SOUL HAIL<br />
Soul and ice magic spell, fan-shaped volley affecting several enemies<br />
Combo – W, A, right click<br />
Mana cost – 28<br />
Require level – 14<br />
Cost – 6<br />
GLACIAL SOUL HAIL<br />
Powerful soul and ice magic spell, massive fan-shaped volley against several enemies<br />
Combo – W, A, right click<br />
Mana cost – 48<br />
Require level – 21<br />
Cost – 6<br />
SUMMONING<br />
MAGIC SHIELD<br />
Creates a protective aura for a short time<br />
Combo – S, left click<br />
OBELISK<br />
Summons a shooting crystal obelisk of soul magic<br />
Combo – S, A, S, right click<br />
Mana cost – 60<br />
CRYSTAL SCORPION<br />
Summons a soul magical crystal scorpion that has close <strong>com</strong>bat and range attack skill<br />
Combo – S, W, S, right click<br />
Mana cost – 80<br />
CRYSTAL SEAHORSE<br />
Summons a soul magical seahorse, which has close <strong>com</strong>bat and range attack skill<br />
Combo –S, D, S, right click<br />
Mana cost – 100<br />
CRYSTAL GOLEM<br />
Summons a blood magical crystal golem, which is powerful in close <strong>com</strong>bat<br />
Combo – S, D, S, left click<br />
Mana cost – 100<br />
KILLER FLIES<br />
Summons a blood magical swarm of fast attacking killer flies<br />
Combo – S, W, S, left click<br />
Mana cost – 80<br />
IMP
<strong>AVENCAST</strong>: <strong>RISE</strong> <strong>OF</strong> <strong>THE</strong> <strong>MAGE</strong><br />
Summons a blood magical imp for close <strong>com</strong>bat<br />
Combo – S, A, S, left click<br />
Mana cost - 60<br />
WALKTHROUGH<br />
MALVAREN: <strong>THE</strong> THREE SEALS<br />
The story starts when you are sleeping in your alchemy class. After the cut scene, Xivarious sends you to your mentor,<br />
Malvaren. Pick up the manual from the bench and staff from the rack beside the door. Open the door and speak with<br />
Malvaren. He wants you to collect three seals from Horatio, Archibald, and Della Gustera.<br />
HORATIO’S SEAL<br />
Horatio wants you to fight four sets of monster to get his seal. They are basically very weak, if you are having trouble<br />
dealing with them in melee <strong>com</strong>bat then try using soul sparks. After killing four sets of mobs, accept the fifth set and<br />
kill them for a bonus.<br />
DELLA GUSTERA’S SEAL<br />
Della Gustera wants you to restore peace in the crypt. Go to the crypt and pull the lever, follow the stone platform to<br />
the next room and speak with Istaros. Then pull the lever and enter the left room, you will find a plate saying ‘Here Lies<br />
Dagrius. He died trying to walk through a wall’. Walk into the wall and grab the fire resist potion, then go to the centre<br />
room and enter the northwest gate. Use the fire resist potion and cross the wall, grab all the things inside and run<br />
outside before the effect runs out. Kill the undead and search them for a missing level, pick it up and use it to open the<br />
locked door at the end of the corridor. Return to the centre room and pull the lever to move the platform to the last<br />
room. Here, you will find Tertius, your First Boss. Kill him and place his dead body on the Stone Platform. Use the levers<br />
and move the platform near the 2 Dragons statue. Pull the lever behind the Dragon Statue to Cremate Tertius.<br />
ULDRET AND PAGAIN [OPTIONAL]<br />
Before returning to Della Gustera, go the centre courtyard in the crypt and enter northwest gate. Walk along the outer<br />
side of the invisible bridge to across it. Grab the history of Uldret and Pagain book and return to the center courtyard,<br />
proceed to the northeast gate and enter the codeP^b^ in the candle stand to lit them. Return to Della Gusta to get your<br />
Seal.<br />
ARCHIBALD’S SEAL<br />
Archibald wants you to tame the trees in the garden. Go to Kelios’s lab and he asks you to bring the ice spray from the<br />
store room. Go to the store room and insert the ice spray to your belt, return to the lab and use the ice spray on the<br />
fire dwarfs to kill them. Talk to him again and he asks to use the ice spray on the pots to prevent them from eruption.<br />
Here <strong>com</strong>es the hard part, you need to keep spraying for around 2-3 minutes. If a single pot erupts then you need to<br />
play from the beginning, so be quick and don’t let the pots turn red. After helping Kelios, get the taming potion and use<br />
it on both the trees in the garden. Kill the remaining branches and return to Archibald for your final seal.<br />
RUFUS [OPTIONAL]<br />
Rufus challenges you to a duel. You will get five guilders and a bread roll if you win the first match, five guilder for the<br />
rematch and again five guilders if you for the third time. But don’t go for the fourth round, he’ll Archibald if you force<br />
him.<br />
SEVERIN [OPTIONAL]<br />
Severin asks you to help him clean the library. Go to the library and kill all the imps, then proceed to the next corridors<br />
and rooms and clear the remaining creatures. Pull the lever to open the door beyond the bookshelves and speak with<br />
Severin to <strong>com</strong>plete the mission.<br />
GEORGIUS [OPTIONAL]
<strong>AVENCAST</strong>: <strong>RISE</strong> <strong>OF</strong> <strong>THE</strong> <strong>MAGE</strong><br />
Enter the room opposite to Della Guster’s history class to find out that Severin has taken an invisibility potion without<br />
the antidote. Talk to Xivarius and he’ll give you an antidote, take it back to Severin to make him visible again.<br />
DOLCINA [OPTIONAL]<br />
Go to the centre courtyard and Dolcina asks you to help her find her pink imp. Go to the room near the Kelios’s lab and<br />
pull all the levers in the rooms, then chase the imp into the cage and shut the gate to lock it inside. Return to the<br />
courtyard and inform Dolcina about her imp.<br />
HUBERTUS [OPTIONAL]<br />
Hubertus lost his crystal bag near the crystal caves and wants you to find it. Go to the entrance of the crystal caves<br />
and pick up the bag, return it Hubertus to get a crystal piece as reward.<br />
GORLIN [OPTIONAL]<br />
Gorlin will be in the centre courtyard, talk to him and he will ask you to bring him a book from the library. Go to the<br />
library and you’ll get kicked out by the librarian. Enter the library for the second time and avoid the librarian while<br />
searching for the book, get the book and give it Gorlin to end the mission.<br />
SWIFTLINA [OPTIONAL]<br />
She will challenge you to a ranged targeting, accept it and shoot all the moving targets in ten sec to earn ten guilders. If<br />
you win then she’ll challenge to a rematch, you need to shoot all the moving targets in five sec. You can reject the<br />
challenge but it’s not that hard so why not do it if you are going to get some guilders.<br />
MALVAREN: <strong>THE</strong> SOUL STONE<br />
Talk to Malveren and he’ll take you to crystal caves, where your final exam will be held. Enter the cave and pull the lever<br />
to deactivate the lighting barrier. Go to the left side of the cave and you will find an abandoned camp, pick up the<br />
wooden pranks and the crystal. Go to the right side of the cave and you will <strong>com</strong>e across a round opening where you will<br />
see a huge Spider. Avoid her poison while fighting and use your soul sparks from distance to finish her off. Once you are<br />
finished, pick up the spider queen staff and spider gland from her corpse.<br />
At the centre of the cave, you will find a broken bridge. Use the wooden pranks and the spider gland you picked up and<br />
mend it. Cross the bridge and you will find Shandri, who will give a golden lever. At the northwest side of the Cave, you<br />
will find a locked coffin. Use the golden lever to open it and pick up the stuffs inside. Then go to the north side of the<br />
cave and put the crystals to the lighting barriers. Move forward and a crystal crab will emerge, spill the oil on the<br />
ground and light it with your soul spark. Run past the lighting barriers and activate them to kill the crab. Once the crab<br />
is <strong>com</strong>pletely fried, pick up the crab mask.<br />
Go to the left side of the cave and destroy the golems to find a red crystal. Go to the centre of the cave through<br />
northwest and you will see a broken gate and crab under it, use the red crystal to resurrect it. Fight your way to the top<br />
right side of the cave and you will find your soul stone at the end, proceed to the centre north of the cave to meet He<br />
Anrail, the guardian of the paths. Talk to him and he’ll ask you to decide whether you want be<strong>com</strong>e a blood mage or a soul<br />
mage.<br />
BLOOD PATH: Destroy the cracked walls with your staff and make your way to the end of the maze. At the end, you will<br />
find a fire golem protecting your magic embedded soul stone. Kill the golem and pick up your soul stone to be<strong>com</strong>e a<br />
blood mage.<br />
SOUL PATH: Find the room where the two elemental lizards are locked behind the gates. Lure the water elemental to<br />
the next room and lock it inside the chamber. Go to the first set of pipes and turn the crank and the levers in the<br />
following manner: O//\. When the water elemental is fully destroyed, turn off the fire and pick up the ice flower. Then<br />
lure the fire elemental to the same room and lock it inside, go to the second set of pipes and turn the cranks and levers<br />
in the following manner: \//O and destroy it. Once the fire elemental is also destroyed, turn off the water and pick up<br />
fire pearl. Place the ice flower and fire pearl on the stand in front of the right chamber to open the door. Enter the<br />
room and place your soul stone, ice flower and fire pearl on the stand. Turn the cranks and levers in the following<br />
manner: O/\//\/O, wait until your soul stone is fully forged and enter the room to pick up your magic embedded soul<br />
stone.<br />
<strong>THE</strong>ODOSIUS: <strong>THE</strong> DEMON’S STAFF
<strong>AVENCAST</strong>: <strong>RISE</strong> <strong>OF</strong> <strong>THE</strong> <strong>MAGE</strong><br />
When you return to the academy, it was out run by demons, you manage to find a stronghold where the remaining mages<br />
are hiding. Talk to Theodosius and he’ll ask to bring him an item from monsters. Go outside and kill the nearby creatures,<br />
pick up the staff and give to Theodosius so that he can study it.<br />
<strong>THE</strong>ODOSIUS: <strong>THE</strong> CALL FOR HELP<br />
Theodosius tells you to call for help using the Planetarium. Proceed to the blood magic wing and enter Stellatius room,<br />
pick up the manual and key to planetarium and proceed to the planetarium. Go to the centre room and use the telescope,<br />
press the switches to move the telescope to the desirable direction. Move it until you see a blue star and point the<br />
crosshair on the blue star, a beam of light will appear in the basement. Pull the lever to rotate the beam, wait until it<br />
reaches the south mirror and pull the lever again to stop it there. Go to the south mirror house and pull the lever here<br />
to move the mirror so that the beam gets reflected to the left glass. Then proceed to the left mirror house and pull the<br />
lever to move the mirror to point the beam to the generator. Use the generator to send a message to the neighbour<br />
academies, then return to the stronghold and talk to Theodosius.<br />
KELIOS [OPTIONAL]<br />
Pancratius tells that Kelios is missing. Go to the northeast of the summoning master’s quarters. In one of the rooms<br />
you’ll find Kelios petrified into stone and a written note. Take the note to Pancratius and he will give<br />
an unpetrfying spell, return to Kelios and read the spell to release him.<br />
DOLCINA [OPTIONAL]<br />
Talk to Dolcina’s and she asks you to find her pink imp. What?! I just found it a little while ago. Oh well, go to the garden<br />
and you’ll see it flying around. Hit it with your staff to knock it out cold, pick it up and return it to Dolcina.<br />
MURIUS AND <strong>THE</strong> O<strong>THE</strong>R STUDENTS [OPTIONAL]<br />
Go to the top right of the blood magic wing and you will find some students hiding. Talk to them they’ll ask you to safely<br />
escort them to the stronghold, kill the enemies outside and lead them to the stronghold.<br />
AGITATIUS [OPTIONAL]<br />
Talk to Agitatius and he’ll ask you to find his missing staff. First, find a letter from the scorpius and then talk to<br />
Agitatius, he’ll tell to meet Icarius. Go to the library in the soul magic wing and open the hidden door using the stone<br />
statue. Talk to Icarius and he will give the staff, take it back to Agitatius.<br />
GORLIN [OPTIONAL]<br />
Talk to Gorllin and he’ll ask you to find his golden cage. Proceed to the eastern guest wing and examine the ledger to find<br />
Quallus’s room, pick up the key and return to the eastern lounge. Pick up the golden cage and give it back to Gorlin.<br />
GORLIN [OPTIONAL]<br />
Once you return the golden cage, Gorlin asks you to find some chimakoos from the fairy land. Talk to him again he’ll give<br />
the golden cage and a fairy coin, go to the garden and toss the coin into the pool to open the portal to the fairy land. Go<br />
to the northwest of the fairy land to pick up some fruits from the plants. Proceed northeast and place the golden cage<br />
and the fruits on the ground. Wait until the chimakoos to enter the cage and pick it. Go back through the portal and give<br />
the cage to Gorlin.<br />
MEGANTEOLIS: <strong>THE</strong> ARCANE DESTRUCTUROS<br />
Meganteolis wants you to find the Destructuros in the soul magic wing. Go to the south of the soul magic wing and pick<br />
up the Destructuros, return it to Meganteolis and he’ll tell you to charge it in the Planetarium. Proceed to the<br />
planetarium and adjust the mirror in the western mirror house to point the beam on the north glass. Go to the north<br />
mirror house and pull the lever to move the mirror to point the beam on the generator core, place the Destructuros in<br />
the charge unit and start the process.<br />
At the middle of the process, Indragul <strong>com</strong>es and resets the telescope. Return to the telescope room and attack him.<br />
Damn. His protected by an energy shield. Use the telescope and move the crosshair at blue star or red star. Pull the<br />
lever to rotate the beam around the room, wait until the shield gets removed and kill him. Once you’re done, pick up the
<strong>AVENCAST</strong>: <strong>RISE</strong> <strong>OF</strong> <strong>THE</strong> <strong>MAGE</strong><br />
key and reset the telescope on the blue star. Return to the north mirror house and start the charging process again.<br />
When the process is done, pick up the charged Destructuros and return it to Meganteolis.<br />
MEGANTEOLIS: <strong>THE</strong> SECRET WING<br />
Get the disenchanting spell scroll from Meganteolis and proceed to the small meeting room. Go to the room where there<br />
are five statues, stand in front of the left wall and read the spell. Enter the arch mages secret wing to trigger a cut<br />
scene.<br />
KULKURAZZ: <strong>THE</strong> PACT<br />
Go to the torture room and you’ll see creature trapped inside, talk to him and he’ll offer you a pact. If you free him, he<br />
will in return open the locked door for you. Go to the bottom of the Labyrinth and defeat Raga, pick the green crystal<br />
and return to Kulkurazz.<br />
ANITALIS: <strong>THE</strong> KEY<br />
Proceed to the Prison and talk to the mad Anitalis using the magical or special word. He will give you the key to the<br />
locked room. Go to locked room in the left side and you will find five pictures inside. Look at the pictures in the follow<br />
order: portrait of a man, man in court, man in prison, man in chain and man sucked by flame and you will get teleported to<br />
the past.<br />
GYRON: <strong>THE</strong> NECROMANTIC MACHINE<br />
Go to the next cell and speak with Chaired to get the code for Necromantic Chamber. Proceed to the Necromantic<br />
Chamber, go to the northern docking station and swap the code P^e^ to Hln. Then go to southern docking station and<br />
swap the password hLN to P^e^. Save Gyron from the guards and proceed to the Prison.<br />
GYRON: BACK TO <strong>THE</strong> PRESENT<br />
Kill the Torture Master and follow Gyron to the cell, he’ll send you back to the present. Once you are back in present, go<br />
to the Lab and pick up the ingredients from tables. Go to the explosive fungus machine and make three bombs by adding<br />
one crystalline dragon fire, dried sulfurous and voldarian morel. Go back to the prison and bring Anitalis to the<br />
Necromantic Chamber.<br />
Use the bombs on the walls to open a way to the docking stations of suction. Go to the northern docking station and<br />
change the code from hLN to P^e^ and southern docking station’s code to hLN from P^e^. Then go to the western<br />
docking station and change the code to PJNH/. Activate all three of them and if you did everything right then the<br />
northern docking station will have red light, the southern will have green light and the western will also have red light.<br />
Pull the lever of the centre docking station and Anitalis will get his memory back and give you the demon liberation spell.<br />
Go to the torture room and replace the old crystal with the new one and read the spell to free Kulkurazz. Follow<br />
Kulkurazz to the locked room and he will open the door for you. Enter the room and you’ll get attacked by Harrassys,<br />
maintain your distance and use your powerful spell, try using AOE spells instead of melee. Once you are done, enter the<br />
portal of dimensions to trigger a cut scene. After the cut scene, run directly to the stronghold and you’ll see Fraazzz<br />
attacking the survivors. Use the same technique you used for Harrassys and kill it.<br />
<strong>THE</strong>ODOSIUS: <strong>THE</strong> PROTECTION SPHERE<br />
Theodosius asks you to recharge the protection sphere in the planetarium. Take the protection sphere to the<br />
planetarium and place it in the charging unit to start the charging process. Wait until it’s fully charged and take it back<br />
to the stronghold.<br />
<strong>THE</strong>ODOSIUS: BACK TO <strong>THE</strong> PORTAL<br />
Theodosius asks you to lead him to the dimensional portal in the small meeting room in the arch mage quarters, take him<br />
there to trigger a cut scene where he’ll summon Qirius.<br />
MEGANTEOLIS
<strong>AVENCAST</strong>: <strong>RISE</strong> <strong>OF</strong> <strong>THE</strong> <strong>MAGE</strong><br />
Enter the portal of dimensions and you will arrive in a strange floating land. Fight your way to the end and you’ll see a<br />
ruined stronghold, use your medallion on the stand to open the front door. Proceed north and you will find a teleport<br />
machine, use it and to the interior fortification of the main gate.<br />
PSION: <strong>THE</strong> DEACTIVATED TELEPORTER<br />
Proceed northwest and you will meet Psion, he asks you to bring the energy cell so that he can repair the teleporter and<br />
gives you the key to the generator room. Go the northeast side of the fortress and use the key on the locked door.<br />
Inside you will find a teleporter, use it to enter the generator room. Safely make your way through the traps and you<br />
will see the energy cell in the end. Pick it up and return to Psion.<br />
Use the teleporter to enter the Kyranian quarters, where you will meet Gorlin. After the conversation, go to the room at<br />
the right side of the quarters to find a key and two cogwheels. Use the key to open the locked door and you will see a<br />
sphinx statue and a chest inside, place the cogwheels and pins correctly and click on the crank to open the chest. Grab<br />
the eyes and place them on the sphinx to awake a spawn of files, kill them and the sphinx will self destruct. Loot its<br />
body and proceed to explore the Kyranian Quarters.<br />
Eventually you will <strong>com</strong>e across your parent’s chamber. See the horographic message of your mother and pick up the key<br />
and the elixirs of Transcendency. Exit the room through the north door and you will find Meganteolis. He’ll try to vanish<br />
and reappear behind you, try to shift position everytime he disapeears. Have your summoning distract him and hit him<br />
with AOE spells, deplete his health bit by bit and he’ll eventually fall. Once his dead, loot his body and proceed to the<br />
next room.<br />
GAIAN [OPTIONAL]<br />
You can find Gaian outside the fortress, talk to him and he will ask you to purify his spring. Go to the centre of the<br />
fortress and you will find a crystal calice, pick it up and fill it with water from spring next to it. Go back outside and use<br />
the water on Gaian to purify him, remember to talk to him again to receive your reward.<br />
PAJAOU [OPTIONAL]<br />
Go to your parent’s chamber and use the key on the locked door. Make your way to the south and you will <strong>com</strong>e across<br />
Pajaou, who will ask you to find a remedy for black scorage curse. Go to the left side of the map and pick up the Kyrarian<br />
crystals from the stone chest and elemental water using the crystal calice. Go to the lab which is located in the<br />
northeast and get the instruction from the stand. Use the mixer and prepare the remedy, go back to Pajaou and give it<br />
him to <strong>com</strong>plete the quest.<br />
Return to the Kyranian quarters and make your to the last room in north, use the teleporter to enter the Kyranian<br />
security gate. Upon arriving you will see Kulkurazz sealing both the teleport units leaving you trapped. Open your<br />
inventory and call Gorlin-O-Mat, wait for few seconds and Gorlin will <strong>com</strong>e and teleport you to Kyranian museum.<br />
ENRAEL [OPTIONAL]<br />
Enrael asks you to place the royal diamond in the museum, take the diamond and place it in the display case in the<br />
museum. Then proceed to the museum and kill all the creatures in your way to find the key. Use the key on the last door<br />
and you will see Gorlin attacked by mutated chimakoos. Kill the chimakoos and talk to Gorlin to trigger a cut scene,<br />
where he’ll tell you about your past.<br />
MORGATH<br />
After the cut scene, Gorlin will open the door for you. Proceed north and you’ll enter the Kyrarian palace and sanctuary.<br />
Go to the left side of the sanctuary where you will find a locked door which requires you to solve a puzzle to open the<br />
door. Arrange the art in order: from left to right starting with snake head pointing its head to the left. When you are<br />
done press activate to open the door, Kill all the monsters inside and pick up the key to the sphere horn chamber and a<br />
sphere horn tablet.<br />
Return to the centre hall and bid farewell to Gorlin. Enter the next room and you’ll see two doors with two statues<br />
inside, enter the following codes in both the statues to open the door to the large meeting halls of Kyranians, left<br />
room/Ky’Ral: bird, snake, labyrinth and mushroom and right room/Erend/Ur: bag, mushroom, butterfly and man. Enter<br />
the meeting hall and you will <strong>com</strong>e across a trapped platform. Step on the symbols in the following manner: butterfly<br />
[straight], maze [straight], labyrinth [straight], snake [right], mushroom [right], snail [back], head [right], bird [right],<br />
maze [straight], witch [straight], eagle labyrinth [left], bag [left] and bird [straight].
<strong>AVENCAST</strong>: <strong>RISE</strong> <strong>OF</strong> <strong>THE</strong> <strong>MAGE</strong><br />
Once you reach the other side, move forward and you will enter a large meeting, where you get attacked by the Dark<br />
Prince, Morgath. First, he’ll try to kill you with his tentacles, roll behind them and hit them few times to destroy them.<br />
After the cut scene, take the elixirs of Transcendency and go for Morgath. Wait for him to bent forward and hit him<br />
with your most powerful spell viz., Cyclone of Blood Vengeance or Glacial Soul. This’ll drain most of his health, but make<br />
sure you don’t get hurt in the process, timely heal yourself and repeat the same technique seven to eight times to bring<br />
him down. Then destry his crystal heart to <strong>com</strong>plete the game.<br />
COPYRIGHT<br />
This document is copyrighted to me and it is only intended to help a lazy gamer beat his/her game. In other words, it<br />
cannot be copied and used in any <strong>com</strong>mercial business. Any illegal distribution of this document without my permission<br />
will be direct violation of copyrights law, so if you want to use any of the content found in this document then please<br />
contact me before doing so or else you will be screwed.<br />
WEBSITES WITH PERMISSION: Game Spot – anju91, Super Cheats – anju91, Chapter Cheats – Gaming Dragon and<br />
<strong>IGN</strong> – GamingDragon91<br />
CONTACT: gamingdragon@gmail.<strong>com</strong> http://gamingdragons.blospot.<strong>com</strong>/<br />
<strong>THE</strong> END


