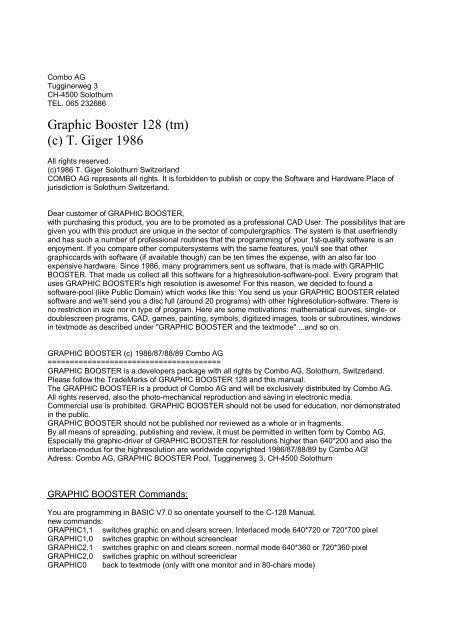
Graphic Booster 128 (tm) (c) T. Giger 1986 - C128
Graphic Booster 128 (tm) (c) T. Giger 1986 - C128
Graphic Booster 128 (tm) (c) T. Giger 1986 - C128

You also want an ePaper? Increase the reach of your titles
YUMPU automatically turns print PDFs into web optimized ePapers that Google loves.
Combo AG<br />
Tugginerweg 3<br />
CH-4500 Solothurn<br />
TEL. 065 232686<br />
<strong>Graphic</strong> <strong>Booster</strong> <strong>128</strong> (<strong>tm</strong>)<br />
(c) T. <strong>Giger</strong> <strong>1986</strong><br />
All rights reserved.<br />
(c)<strong>1986</strong> T. <strong>Giger</strong> Solothurn Switzerland<br />
COMBO AG represents all rights. It is forbidden to publish or copy the Software and Hardware.Place of<br />
jurisdiction is Solothurn Switzerland.<br />
Dear customer of GRAPHIC BOOSTER,<br />
with purchasing this product, you are to be promoted as a professional CAD User. The possibilitys that are<br />
given you with this product are unique in the sector of computergraphics. The system is that userfriendly<br />
and has such a number of professional routines that the programming of your 1st-quality software is an<br />
enjoyment. If you compare other computersystems with the same features, you'll see that other<br />
graphiccards with software (if available though) can be ten times the expense, with an also far too<br />
expensive hardware. Since <strong>1986</strong>, many programmers sent us software, that is made with GRAPHIC<br />
BOOSTER. That made us collect all this software for a highresolution-software-pool. Every program that<br />
uses GRAPHIC BOOSTER's high resolution is awesome! For this reason, we decided to found a<br />
software-pool (like Public Domain) which works like this: You send us your GRAPHIC BOOSTER related<br />
software and we'll send you a disc full (around 20 programs) with other highresolution-software. There is<br />
no restriction in size nor in type of program. Here are some motivations: mathematical curves, single- or<br />
doublescreen programs, CAD, games, painting, symbols, digitized images, tools or subroutines, windows<br />
in tex<strong>tm</strong>ode as described under "GRAPHIC BOOSTER and the tex<strong>tm</strong>ode" ...and so on.<br />
GRAPHIC BOOSTER (c) <strong>1986</strong>/87/88/89 Combo AG<br />
=======================================<br />
GRAPHIC BOOSTER is a developers package with all rights by Combo AG, Solothurn, Switzerland.<br />
Please follow the TradeMarks of GRAPHIC BOOSTER <strong>128</strong> and this manual.<br />
The GRAPHIC BOOSTER is a product of Combo AG and will be exclusively distributed by Combo AG.<br />
All rights reserved, also the photo-mechanical reproduction and saving in electronic media.<br />
Commercial use is prohibited. GRAPHIC BOOSTER should not be used for education, nor demonstrated<br />
in the public.<br />
GRAPHIC BOOSTER should not be published nor reviewed as a whole or in fragments.<br />
By all means of spreading, publishing and review, it must be permitted in written form by Combo AG.<br />
Especially the graphic-driver of GRAPHIC BOOSTER for resolutions higher than 640*200 and also the<br />
interlace-modus for the highresolution are worldwide copyrighted <strong>1986</strong>/87/88/89 by Combo AG!<br />
Adress: Combo AG, GRAPHIC BOOSTER Pool, Tugginerweg 3, CH-4500 Solothurn<br />
GRAPHIC BOOSTER Commands:<br />
You are programming in BASIC V7.0 so orientate yourself to the C-<strong>128</strong> Manual.<br />
new commands:<br />
GRAPHIC1,1 switches graphic on and clears screen. Interlaced mode 640*720 or 720*700 pixel<br />
GRAPHIC1,0 switches graphic on without screenclear<br />
GRAPHIC2,1 switches graphic on and clears screen. normal mode 640*360 or 720*360 pixel<br />
GRAPHIC2,0 switches graphic on without screenclear<br />
GRAPHIC0 back to tex<strong>tm</strong>ode (only with one monitor and in 80-chars mode)
GRAPHIC3,1 switches graphic on and clears screen. 720*400 or 640*400 (as choosen in Startprogram)<br />
GRAPHIC3,0 switches graphic on without screenclear<br />
GRAPHIC4 like GRAPHIC2, but 2nd screen<br />
GRAPHIC4,2 switches on GRAPHIC4 and copies GRAPHIC2 into GRAPHIC4<br />
GRAPHIC4,3 switches on GRAPHIC4 but draws in GRAPHIC2<br />
GRAPHIC4,4 switches on GRAPHIC4 and copies GRAPHIC4 into GRAPHIC2<br />
GRAPHIC4,5 switches on GRAPHIC4 and clears GRAPHIC2<br />
With this commands you're able to draw hided and to pop up the whole screen.<br />
If you use the 1750 REU, you are able to load hided from there.<br />
With GRAPHIC2 the second value works like on GRAPHIC4.<br />
On multicolor mode, only GRAPHIC1 is active.<br />
TEXT(0-1),x,y,(writeyourtextinhere),(inverse) is like the charcommand from BASIC V7.0 but writes only<br />
on the textscreen<br />
OLD gets back a basicprogram, deleted with NEW<br />
OFF switches GRAPHIC BOOSTER off<br />
80-columns-mode graphic-commands:<br />
DRAW, BOX, CIRCLE, SSHAPE, GSHAPE (syntax like in BASIC V7.0 in 40-columns-mode)<br />
40-columns-mode graphic-commands:<br />
VGRAPHIC, VDRAW, VBOX, VCIRCLE, VPAINT, VCHAR, VSSHAPE, VGSHAPE, VCOLOR, VWIDTH,<br />
VSCNCLR, VSPRITEDEF (syntax like in Basic V7.0)<br />
These commands can be mixed optionally. The same SHAPEs can be used on both screens. Sprites can<br />
be defined while the program runs (VSPRITEDEF) and can be transfered into the SHAPEs of the 80columns-screen!<br />
Sprites together with the BYTE and FBYTE command lets you use both screens as one!<br />
If you want to move pixelwise also in x-direction, do like this: Get the matrix into the stringvariable with<br />
VSSHAPE or with SPRSAV, then move with GSHAPE 7 times (one pixel moved at a time) on the bottom<br />
save 80-columns and swap with FBYTE. Such tools always are useful and shouldn't be absent in any<br />
programming session. Like mentioned above build these tools like that: the first bunch of REMs explain<br />
the INPUT and OUTPUT values, then follows the function and confirm with RETURN. At a later MERGE<br />
the numbering don't must be changed anymore before loading, if the tools numbered high from the start<br />
and with the same numbering.<br />
GRAPHIC BOOSTER and the tex<strong>tm</strong>ode<br />
(this isn't understandable for me, also, although I'm german! Original manual: site 3, right block,<br />
translated it anyway... maybe you get it?)<br />
Load a resolution, twocolored and 640 width Height isn't relevant.<br />
The graphic-commands are cool to use on tex<strong>tm</strong>ode. BYTE, FBYTE and SSHAPE, GSHAPE give you<br />
possibilitys, that you dreamt of, before. Real filling of windows and screenparts, characterpokes,<br />
atributpokes, plot/noplot of single pixel (underline, blinking, reverse, color and intensity), manipulation of<br />
charset like change as whole, swap single characters. No problem, since GRAPHIC BOOSTER manages<br />
full 64kB!<br />
In medias res: S/GSHAPE takes 3 textlines 80chars width OR 251/witdh=height OR 15width 15height.<br />
The x-coordinate calculates like this: x * 8 (coordinate-system of SHAPE is 640 width)<br />
Some examples:<br />
POKE13480,PEEK(2606) equals the start of textscreen<br />
if you want to change or copy the atribute of the char, write:<br />
POKE13480,PEEK(2607) LOCATE0,0 equals the atribute left, top.<br />
Define following parameters before start:<br />
POKE2606,0:POKE2607,16:bank15:SYS52684,16,20:GRAPHIC4:GRAPHIC0
for example: text on the screen<br />
POKE13480,0:PRINT"CLR HOME":FORI=0TO4:PRINT"GRAPHIC BOOSTER";:NEXT<br />
FBYTE1,0,1,80:DRAW,0,0TO0,20<br />
for example: underline from text on/off<br />
POKE13480,PEEK(2607):WIDTH20,10:BYTE2,32:DRAW,10,10:SLEEP2:DRAW,10,10<br />
Systemenhancements:<br />
The 1750 REU is implemented for easyer usage. The commands STASH, FETCH, SWAP also work in<br />
fas<strong>tm</strong>ode. Bank1 is accessable from REU now. Simply write Bank1. Negative values doesn't give a<br />
?ILLEGAL QUANTITY ERROR anymore. The char-command now works fine. It's possible to use CHAR<br />
also on 80-columns-screen.<br />
The transfer of programs of GRAPHIC BOOSTER V1:<br />
List the listing on screen; 15lines-wise and accept with RETURN. The COLOR command has to be<br />
corrected. Save the program and check it.<br />
Printing:<br />
With EPSON or compatible printers<br />
Syntax:<br />
EPSON(mode),(devicenumber),(number of lines * 8)<br />
mode 0-13 Devicenumber 4-7 Number of lines 1-255<br />
mode 0-6 printing over serial bus<br />
mode 7-13 printing over centronics (on Userport with special cable) mode0=7 1=8 ...<br />
mode0 480ppi (ESC"K")<br />
mode1 960ppi (ESC"L")<br />
mode2 960ppi (ESC"Y") fast<br />
mode3 1920ppi (ESC"Z")<br />
mode4 640ppi<br />
mode5 576ppi<br />
mode6 720ppi<br />
Example: EPSON4,4,65<br />
IBM(mode),(devicenumber),(number of lines * 8)<br />
mode 0-8<br />
mode 0-3 serial<br />
mode 4-8 parallel centronics 4=0 5=1 ...<br />
mode0 480ppi<br />
mode1 960ppi<br />
mode2 960ppi fast<br />
mode3 1920ppi<br />
Secondary adress is 16248. Default is 4<br />
Switch secondary adress to 1: SCREENB:POKE 16248,1<br />
Print 640ppi with MPS1000: SCREENB:POKE14814,32:POKE14314,7<br />
IBM3,4,65<br />
Reset: SCREENB:POKE14814,76:POKE14314,2<br />
Printing Mode2 default is: GRAPHIC2 SCREENB:POKE14782,127<br />
GRAPHIC4 SCREENB:POKE14782,255<br />
Linefeed off: SCREENB:POKE12250,13<br />
on: SCREENB:POKE12250,10<br />
switch to 80-columns (VDC): SCREENB<br />
switch to 40-columns (VIC): SCREENV<br />
activate mouse1531 port2: MOUSE(0-3)<br />
MOUSE0 on
MOUSE1,20,30 Mouse on x=20 Y=31<br />
MOUSE2,a,b peeks mouseposition and saves in a,b<br />
MOUSE3 off<br />
Mousebuttons: left: t=JOY(2) t=<strong>128</strong><br />
right: t=JOY(2) t=1<br />
both: t=JOY(2) t=129<br />
no: t=JOY(2) t=0<br />
move 40-char bi<strong>tm</strong>ap to CharRAM and viceversa: TRANS(0-3)<br />
Charsets on 40-char VIC can be build or whole<br />
pictures can be set as Charset.<br />
CharRAM is at $E000-$EFFF. (see CHAR) TRANS0 transfers $2000-$2FFF to $E00-$EFFF<br />
(1st half of VIC)<br />
TRANS1 transfers $E000-$EFFF to $2000-$2FFF<br />
(1st half of VIC)<br />
TRANS2 transfers $E000-$EFFF to $3000-$3FFF<br />
(2nd half of VIC)<br />
TRANS3 transfers $3000-$3FFF to $E000-$EFFF<br />
(2nd half of VIC)<br />
Example: BLOAD"charset",U8,ONB0,PDEC("E000")<br />
TRANS1:VGRAPHIC1:VCIRCLE3,3,3:TRANS0:CHAR,30,30,1,1,1,"@"<br />
with all commands the charset can be changed (see VGRAPHIC commands)<br />
CHAR writes text in a GRAPHIC BOOSTER graphic.<br />
CHAR(set),X,Y,(width),(height),(mode),(string or number)<br />
set0: set<br />
set1: delete<br />
width/height: zoomfactor 1-255<br />
mode0: Capitals/graphic (from charROM)<br />
mode1: lower/Capitals (from charROM)<br />
mode2: Capitals/graphic (from RAM)<br />
mode3: lower/Capitals (from RAM)<br />
mode4: pokecodes (from charROM)<br />
mode5: pokecodes (from RAM)<br />
Example: CHAR,40,40,1,2,0,"GRAPHIC BOOSTER <strong>128</strong>"<br />
CHAR,40,60,1,2,1,"<strong>Graphic</strong> <strong>Booster</strong> <strong>128</strong>"<br />
mode4 and mode5 is a comfortable way to transfer charROM and RAM<br />
CHAR,40,80,1,2,4,0,1,2,3,4,5,6,7,8,9 etc.<br />
or FORI=0TO20:CHAR,40,120+I,8,2,2,4,122,153,I,250,255:NEXT<br />
or FORI=0TO20:CHAR,40+I,8,100,1,2,4,I:NEXT<br />
Instead of strings you can insert values between 0 and 511, which is the pokecode of charROM or RAM.<br />
The zoomfactor also works with own charset.40-columns-graphic can be zoomed easily on 80-columnsscreen.<br />
Reversed chars mode0-3 are printed with CTRL-RVSON "(RVS)text"<br />
PAINTx,y,(mode) fill a closed area with or without pattern<br />
x,y: position in coordinatesystem<br />
mode0: fill, point set<br />
mode1: fill, point set, fine pattern<br />
mode2: fill new, test on point not set<br />
mode3: delete new, point set<br />
mode4,(0-3),(0-3),(0-3): tests if not set, fine pattern<br />
mode5,(0-3),(0-3),(0-3): tests if not set, big pattern<br />
mode6,(0-3),(0-3),(0-3): tests if set, fine pattern<br />
mode7,(0-3),(0-3),(0-3): tests if set, big pattern
Mode 0 and 1 works like PAINT on th 40-columns-screen<br />
Mode 2 to 7 fills or deletes with or without pattern. Tests around point is the four quadrants. Filling will only<br />
be around these testpoints. Fillspeed is twice the speed of mode0/1. PAINT also changes PATTERN, so<br />
you have to change to full linethickness after PAINT with PATTERN0.<br />
Example: CIRCLE,50,50,50:PAINT30,30,4,2,3,2:PATTERN0<br />
PATTERN(mode0-2) set Pattern<br />
PATTERN0: no pattern<br />
PATTERN1,(0-3),(0-3),(0-3) fine pattern (0-3 for different patterns)<br />
PATTERN2,(0-3),(0-3),(0-3) big pattern<br />
Example: PATTERN1,0,0,0 fine quadrants<br />
PATTERN1,1,1,1 fine quadrants<br />
PATTERN1,2,2,2 bigger quadrants<br />
PATTERN1,3,3,3 big quadrants<br />
PATTERN is used in all drawing commands like DRAW. Big patterns can be seen after change of<br />
linethickness (WIDTH), els the line will be dashed.<br />
RLOAD(bank),(0-2) loads a picture from 1750 REU<br />
(bank0-7 for 1750, bank 0-1 for 1700)<br />
0: graphic1 interlace picture<br />
1: graphic2<br />
2: graphic2<br />
RSAVE(bank),(0-2) save a picture onto the REU<br />
(parameters like RLOAD)<br />
GLOADa$,(devicenumber) loads a picture from disc, device 8-15<br />
Example: GLOAD"picture",8 or A$="picture".GLOADA$,8<br />
GSAVEa$,8 saves a picture on disc 8<br />
(works with GRAPHIC1 and GRAPHIC2 pictures)<br />
Oversize picture2 is saved with GRAPHIC1:GSAVEa$,8 or GRAPHIC4<br />
MERGE(A$),U8 merges a basicprogram with a program in memory<br />
Example: MERGE"tool" or A$="tool":MERGE(A$),U8<br />
With MERGE you can merge your GRAPHIC BOOSTER subroutines and<br />
make them executable with RENUMBER<br />
BWINDOW(0-12) calls two different windows, one on the right side (80 pixel width) and one<br />
in the middle (320width *174(GRAPHIC1) / *87(GRAPHIC4) height)<br />
Startpoint from left border is 160 or 200 pixel (differs from choosen<br />
resolution) and from top border 143 (GRAPHIC1) / 72 (GRAPHIC4) pixel.<br />
BOX,160,143,479,316<br />
these parameters relate to the right window<br />
BWINDOW0 Swap changes data with buffer<br />
BWINDOW1 Fetch gets data from buffer<br />
BWINDOW2 Stash writes data into buffer<br />
BWINDOW3 deletes window (on multicolor the color has to be set separately)<br />
the parameter 4-7 relate to window in the middle on GRAPHIC4<br />
BWINDOW4 Swap<br />
BWINDOW5 Fetch<br />
BWINDOW6 Stash
BWINDOW7 delete<br />
the parameters 8-12 relate to the window in the middle on GRAPHIC1<br />
BWINDOW8 Swap<br />
BWINDOW9 Fetch<br />
BWINDOW10 Stash<br />
BWINDOW11 delete<br />
BWINDOW12 sets color, which is defined in ECOL<br />
(range of adress see BUFFER)<br />
BUFFER(0-4),(0-2) copys adressrange from 80-columns-screen into a buffer<br />
BUFFER0 relates to atributeRAM in multicolor mode<br />
BUFFER1 relates to the first 16Kbyte in VDC<br />
BUFFER2 relates to the second 16Kbyte in VDC<br />
BUFFER3 relates to the third 16Kbyte in VDC<br />
BUFFER4 relates to the fourth 16Kbyte in VDC<br />
BUFFER0,0 Swap changes atributeRAM with buffer<br />
BUFFERx,1 Fetch gets data from buffer and writes them into VDC RAM<br />
BUFFERx,2 Stash writes data from VDC into buffer<br />
BUFFER 1-4 can be used as alternative to GLOAD/GSAVE. It's also useful in tex<strong>tm</strong>ode with full 64Kbyte.<br />
The buffer is used also with BWINDOW, so the buffer is deleted then.<br />
With SCREENV the buffer is now at $2000-$5FFF (dec. 8192-24575 in bank1). This adressarea can now<br />
be saved/loaded from disc/1750 REU).<br />
You may have asked yourself, how to save from bank1 to REU. Thats easy, as GRAPHIC BOOSTER gets<br />
the data out of the last defined bank!<br />
Also you may use STASH, FETCH and SWAP in FASTmode with REU (without systemcrash anymore)!<br />
The buffer from the right window is at BANK1:SCREENV (dec. 8192-16383), the buffer from the window in<br />
the middle also with BANK1:SCREENV<br />
at adress (dec. 16384-25856).<br />
Example: Save screen with buffer<br />
Special copy and fill commands:<br />
The following commands change the actual MODE. With TMODEa the actual value is saved in variable<br />
"a", to get it back MODEa.<br />
PIXEL(mode),w,z copies pixelwise<br />
w: x-offset to drawpoint (LOCATE DRAW)<br />
z: y-offset to drawpoint<br />
0 : Swap exchange<br />
1 : copy<br />
2 : copy inverse<br />
3 : EOR and copy inverse<br />
4 : copy only EOR<br />
5 : OR copy<br />
6 : AND copy<br />
Example: copy area 150,100 200,250 to 0,0<br />
PIXEL1,-150,-100<br />
WIDTH50,1<br />
DRAW,150,100TO150,250<br />
or WIDTH1,1<br />
PIXEL1,-150,-100<br />
FORI=150TO200:DRAW,I,100TOI,250:NEXT<br />
or WIDTH1,1<br />
PIXEL1,-150,-100
BOX,150,100,200,250<br />
With pixelwise copy you can zoom in and out, if you write PIXEL in the FOR-NEXT-routine and change the<br />
factor in DRAW. Overlap of target and source give special effects.<br />
If the target is inside the source, you have to follow this instructions:<br />
If startpoint of target is smaller than the startpoint of the source: DRAW [small value to high value] for X<br />
and Y<br />
If startpoint of target is bigger than the startpoint of the source: DRAW [highvalue to small value] for X and<br />
Y<br />
For SWAP, the first coordinates have to be set with LOCATEx,y because DRAW sets the first pixel twice<br />
and therefore changes them twice.<br />
Effect: The first pixel wouldn't be changed. LOCATE10,10:DRAWto10,50 instead of DRAW,10,10to10,50<br />
this has to be used for all following SWAP-commands.<br />
BYTE(0-9) Copy and Swapcommands bytewise with 640 pixel width these are 80 bytes.<br />
BYTE0,value sets a byte, value 0-255<br />
BYTE1,value sets a byte, OR linked<br />
BYTE2,value sets a byte, EOR<br />
BYTE3,value sets a byte, AND<br />
BYTE4,value1,value2 only sets byte with value1, if same as value2<br />
BYTE5,value1,value2 only sets byte with value1, if not same as value2<br />
BYTE6,x,y like PIXEL, copies EOR linked<br />
BYTE7,x,y OR<br />
BYTE8,x,y AND<br />
BYTE9,x,y SWAP swaps ;-)<br />
What phantastic possibylities this command has in the tex<strong>tm</strong>ode, you only can imagine here!<br />
(check GRAPHIC BOOSTER and the tex<strong>tm</strong>ode)<br />
for example:<br />
GRAPHIC1,1<br />
WIDTH3,8<br />
BYTE0,170<br />
CIRCLE,40,300,20,160<br />
WIDTH1,1<br />
BYTE1,112<br />
BOX,0,0,40,200<br />
BYTE2,20<br />
BOX,0,0,20,100<br />
SLEEP1<br />
BOX,0,0,20,100<br />
WIDTH15,0<br />
BYTE6,30,150<br />
LOCATE0,0:DRAWTO0,100<br />
SLEEP2<br />
LOCATE0,100:DRAWTO0,0<br />
WIDTH10,0<br />
BYTE9,50,300<br />
LOCATE0,0:DRAWTO0,100<br />
SLEEP1<br />
LOCATE0,100:DRAWTO0,0<br />
If you want to display or print a picture reverse:<br />
WIDTH80,1<br />
BYTE2,255<br />
DRAW,0,0TO0,500
FBYTE(mode),x,y,width fast COPY and SWAP mode 0-7<br />
FBYTE0,x,y,width COPY with offset x y and width byte<br />
FBYTE1,x,y,width SWAP<br />
FBYTE2,x,y,width COPY attribute multicolor to pixelbi<strong>tm</strong>ap<br />
FBYTE3,x,y,width COPY pixelbi<strong>tm</strong>ap to attribute<br />
FBYTE4,x,y,width SWAP attribute with pixel<br />
FBYTE5,x,y,width SWAP pixel with attribute<br />
FBYTE6,x,y,width COPY attribute with attribute<br />
FBYTE7,x,y,width SWAP attribute with attribute<br />
On twocolorbooster only Mode 0 and 1<br />
Why Mode2-5? If you only use blockgraphic, you can use the bi<strong>tm</strong>apmemory as hidden extramemory.<br />
ECOL2,2,2,2 set fore-and backgroundcolor to same value<br />
examples:<br />
FILL0,width,value fills area with Byte value 0-255<br />
FILL1,width,value fills area with color from ECOL<br />
TBYTEa read Byte at actual cursorposition<br />
LOCATE20,200:TBYTEA:PRINTA<br />
USER for own machinelanguage programs, jumps over Vector $1BEB $1BEC<br />
(7149 7150) POKE7149,0 POKE7150,12<br />
USER runs program from $0C00<br />
General informations:<br />
=================<br />
The standard commands can be combined with each other. For example with COPY you can copy any<br />
area with a circle or a line.<br />
PIXEL, BYTE, FBYTE, FILL work together with DRAW, CIRCLE, BOX ...that means, instead of setting a<br />
pixel, one of these specialcommands will be used.<br />
GRAPHIC BOOSTER is programmed to get the most out of it with simple commands.<br />
For beginners: Try to work with draw-commands in Mode0,1 or 2 in the 2-color GRAPHIC BOOSTER<br />
Important: Always define MODE, PATTERN, WIDTH and ECOL at the first lines of your program.<br />
The multicolor commands couldn't be used in the 2-color mode. CTEST:ECOL:RECOL:CHANGE:SCLR<br />
On the end of the directory on disc are some tools, you can use.<br />
With the userprogram "Grafik Tablet" you can load the file "Shuttle" instead of "Körper".<br />
This are the datas for the shuttle. With these, you may extend the graphic tablet: make your own program<br />
for zooming, moving or rotating and use the data again.<br />
You also could send this program in or extend the other programs on the disc.<br />
The data of the "Shuttle" only may used together with GRAPHIC BOOSTER, copyright Combo AG.<br />
WIDTHx,y sets the thickness of the line, value 1-255, 0 equals 1<br />
Set the thickness to WIDTH1,1, if a new mode is tried out. If a drawfunction<br />
doesn't end, maybe the thickness is set too big. But function will be executed.<br />
example: MODE2:WIDTH16,16:CIRCLE,150,150,100<br />
MODE0:WIDTH16,16:CIRCLE,350,150,100<br />
MODE(0-17) sets different drawingmodes<br />
0 sets a pixel<br />
1 sets a pixel EOR<br />
2 sets a pixel EOR for CIRCLE<br />
3 Fore-and backgroundcolor and pixel<br />
4 fore-and backgroundcolor without pixel<br />
5 only foregroundcolor and pixel<br />
6 only backgroundcolor and pixel
7 only foregroundcolor without pixel<br />
8 only backgroundcolor without pixel<br />
9 fore-and backgroundcolor Colorblock<br />
10 only foregroundcolor<br />
11 only backgroundcolor<br />
12 CHANGE only foregroundcolor<br />
13 CHANGE only backgroundcolor<br />
14 CHANGE only foregroundcolor Colorblock<br />
15 CHANGE only backgroundcolor Colorblock<br />
16 CHANGE fore-and backgroundcolor<br />
17 CHANGE fore-and backgroundcolor Colorblock<br />
On the 2color-mode only Mode 0,1 and 2 are active.<br />
Colorblock means, that only the colorattributes will be set; in a coordinate of 80 x 96 pixel.<br />
TESTx,y,(var) tests if pixel is set or not. The result will be found then in the variable. 0=set 1=not<br />
set<br />
example: TEST10,59,a:PRINTa<br />
CTESTa,b,c,d reads the colorattribute at the actual cursorposition and saves them in a,b,c,d<br />
ECOLa,b,c,d sets colorattributes for pixelcolor value 0-15<br />
ECOL2,2,8,8<br />
ECOLa,b also is allowed<br />
RECOLa,b,c,d reads the actual pixelcolor from ECOL<br />
the first two parameters of CTEST ECOL RECOL set the foregroundcolor, the second two the<br />
backgroundcolor. With the corresponding PATTERN1,0,0,0 you can display over 65000 colors. If you<br />
exchange a and b, you may get other colors again. With even and odd y-coordinates, you can set other<br />
effects. If you add the fading of the color-command (0-15), you could get a total of 980.000 colors!<br />
The colorblocks 8x6 pixel can be set independent from each other. 256 foreground and 256<br />
backgroundcolors. If this matrix is filled with PATTERN1,0,0,0 you can display 65000 colors in this matrix.<br />
With a total of 7200 of such blocks 80x94, the possibilitys are endless. Also you are not limited to use a<br />
8x6 raster, because these matrices can be cut out and used with mode0 without dependency of colors.<br />
Not all colors are useful for direct working on the screen. But for pictures every combination is possible. A<br />
screenfilter or a monitor with long afterglow like the Commodore 2020 will help then. The CHANGE<br />
command can be used optimal then. First you drwa with odd colors, then CHANGE it.<br />
CHANGEa,b,c,d changes the predefined colors with that in ECOL defined ones. Use<br />
Mode12-17 for that.<br />
Use DRAW like you alsways do and so on. So only the colors will be changed,<br />
that equal with CHANGE.<br />
example:<br />
MODE0:ECOL2,2,8,8:GRAPHIC1,1:SCLR:CIRCLE,50,50,50:PAINT50,50,2:LOCATE50,50:CTESTa,b,c,d<br />
:CHANGEa,b,c,d:ECOL5,5:MODE14:BOX,0,0,14,20,,1<br />
This is a very simple example. If in this pixelarea 100x100 pixel are other colors, then these wouldn't be<br />
touched.<br />
COLOR(backgroundcolor),(foregroundcolor),(fading) values 0-15 each<br />
COLOR2,8,5 changes bgcol to 2, fgcol to 8 and fading to 5<br />
SCLR sets the colors defined in ECOL to the whole screen. In multicolormode, the<br />
colorattributes have to be set with SCLR after GRAPHIC1,1<br />
SWITCH switches from multicolormode to 2-color mode and vice versa. Loading from REU1750 is<br />
more than twice the speed.
TMODEa saves actual drawingmode to 'a' (see the example 'Maus' on disc)<br />
TMODEa:PRINTa<br />
UPa scrolls the screen up pixelwise, but only in 2-color mode. value 1-255<br />
UP20 scrolls the screen up 20 pixels<br />
DOWNa scrolls the screen down pixelwise, but only in 2-color mode. value 1-255<br />
DOWN20 scrolls the screen down 20 pixels<br />
UP same like UPa, but without value for multicolor mode<br />
DOWN same like DOWNa, but without value for multicolor mode<br />
BLEFT(0-9) moves the screen to the left. For adjusting the monitor and for effects.<br />
BLEFT0 = GRAPHIC1<br />
BRIGHT(0-9) moves the screen to the right.<br />
BRIGHT4<br />
Installation of the hardware:<br />
======================<br />
Remove from mains plug first !! Remove then all peripherie.<br />
Commodore <strong>128</strong><br />
--------------------------<br />
Open the computer with a screwdriver on the bottom, where the screws are located. Push gently on the<br />
bottom-part housing, above the Joystickport1, while lifting the top of the housing. Remove the<br />
keyboardcable and Power-LED-cable. Remove the metalcasing, that covers the whole C<strong>128</strong>-board. Also<br />
remove the little metal-cover which covers the graphic-IC. Now you can remove the 8563-IC with the help<br />
of two screwdrivers, don't bend any of the pins! Remember the orientation of the nose of the IC; you have<br />
to plug it with the same orientation later. Now install the <strong>Graphic</strong><strong>Booster</strong> Hardware to where the IC was<br />
and bend the transistor and other components to another position, to install it without shortcircuit. The<br />
board, which is connected to the <strong>Graphic</strong><strong>Booster</strong>Hardware you have to install in the U36 socket. The<br />
socket has to be installed with the connected wire bottom-left, near the U4 (see drawing in original<br />
Manual, if needed). Now reinstall the 8563 into the GB-Hardware nose oriented to userport, like it was<br />
installed before. Doublecheck your installation! For a first test, reconnect the keyboard and press the 80columns<br />
key. reconnect the power-unit and peripherie and switch on the C<strong>128</strong>. The known screen should<br />
show up now. If the screen remains black, turn of after 4 seconds and check the installation, again. If the<br />
test passed, you can reinstall the metalcasings and housing again. Don't mind, if the metalcasing doesn't<br />
fit properly. You have to lay the wire to U36, so the casing can't be closed. After closing the housing with<br />
the screwdriver, installation is finished.<br />
Commodore <strong>128</strong>D<br />
----------------------------<br />
1. housing bottom-side: remove 4 screws with screwdriver Phillips PH2<br />
2. move carrying handle to the side<br />
3. lift housing<br />
4. remove floppy-board with removing the three screws<br />
5a. Important!: mark the connections with a marker, so that you know later, how to reassamble the<br />
connections!<br />
5b. remove the connections from the floppy-board<br />
6. move the floppy-board out of its place<br />
7. remove the mains-connector from the board<br />
8.-17. remove screws from metalcasing of floppy
18. remove disc-shutter<br />
19. lift floppy and remove<br />
20. remove the metalcasing that covers the whole C<strong>128</strong>-board (7 screws)<br />
21. remove MainsPowerUnit<br />
22. now the metalcasing can be removed.<br />
23. prepare the casing so that the place over U36 is liftet for 1cm, so the socket at U36 will hold the<br />
hardware for GB<strong>128</strong> without shortcircuit.<br />
24. (see drawing in orig. manual)<br />
25. installation is done like explained before in C<strong>128</strong>-installation<br />
26. remount all connections and cables (check the right orientation)<br />
Installation is done at own risk!<br />
Guarantee will expire, if you open the Computer!<br />
If you install the GB<strong>128</strong> hardware careful, no defect to the C<strong>128</strong> hardware will occur.<br />
If you don't feel experienced enough, let the local hardware-shop do it for you!<br />
Commodore <strong>128</strong> DCR (with metal-housing)<br />
Installation: Remove the 5 screws on the back and side,<br />
slide the housing to the back and lift to remove.<br />
Remove the EPROM on U34 with a screwdriver,<br />
install the Eprom, delivered with GB<strong>128</strong>.<br />
Check same orientation as removed Eprom.<br />
Remount housing and close. Ready.<br />
Technical improvements reserved.<br />
Userprograms for the GRAPHIC BOOSTER <strong>128</strong><br />
====================================<br />
1. Boxes 1 screen: self explanatory<br />
2. Boxes 2 screen: self explanatory, for 2 monitors<br />
3. Circle 1 screen: self explanatory<br />
4. Circle 2 screen: self explanatory, for 2 monitors<br />
5. Grafiktablet:<br />
the use of the "-" before the x-coordinate chooses a new startpoint<br />
for example: x=-200 y=-300 :line begins on 200/300. without "-" draws from point to point.<br />
end the program with "END"<br />
6. Artillerie: self explanatory<br />
7. 3-D Konstruktionen:<br />
after setting the first pixel with the firebutton, wait for a short while.<br />
arrow-left then calculates 3-D data.<br />
"W" stores on Ram-expansion 1750<br />
"R" loads from Ram-expansion 1750<br />
"E" restarts<br />
Translated by Thunder.Bird on 5. March 2007 (V.1)<br />
Original supply: (c)<strong>1986</strong> T. <strong>Giger</strong> Solothurn Switzerland / COMBO AG