BIOS Developer's Guide - AMD Developer Central
BIOS Developer's Guide - AMD Developer Central
BIOS Developer's Guide - AMD Developer Central

Create successful ePaper yourself
Turn your PDF publications into a flip-book with our unique Google optimized e-Paper software.
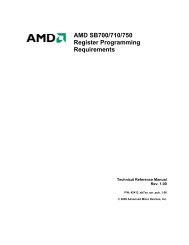
<strong>AMD</strong> SB700/710/750<br />
<strong>BIOS</strong> <strong>Developer</strong>’s <strong>Guide</strong><br />
Technical Reference Manual<br />
Rev. 1.00<br />
PN: 43366_sb7xx_bdg_pub_1.00<br />
© 2009 Advanced Micro Devices, Inc.
Trademarks<br />
<strong>AMD</strong>, the <strong>AMD</strong> Arrow logo, Athlon, and combinations thereof, ATI, ATI logo, Radeon, and CrossFire are trademarks of<br />
Advanced Micro Devices, Inc.<br />
HyperTransport is a licensed trademark of the HyperTransport Technology Consortium.<br />
Microsoft and Windows are registered trademarks of Microsoft Corporation.<br />
Other product names used in this publication are for identification purposes only and may be trademarks of their<br />
respective companies.<br />
Disclaimer<br />
The contents of this document are provided in connection with Advanced Micro Devices, Inc. ("<strong>AMD</strong>") products. <strong>AMD</strong><br />
makes no representations or warranties with respect to the accuracy or completeness of the contents of this publication<br />
and reserves the right to make changes to specifications and product descriptions at any time without notice. No license,<br />
whether express, implied, arising by estoppel, or otherwise, to any intellectual property rights are granted by this<br />
publication. Except as set forth in <strong>AMD</strong>'s Standard Terms and Conditions of Sale, <strong>AMD</strong> assumes no liability whatsoever,<br />
and disclaims any express or implied warranty, relating to its products including, but not limited to, the implied warranty of<br />
merchantability, fitness for a particular purpose, or infringement of any intellectual property right.<br />
<strong>AMD</strong>'s products are not designed, intended, authorized or warranted for use as components in systems intended for<br />
surgical implant into the body, or in other applications intended to support or sustain life, or in any other application in<br />
which the failure of <strong>AMD</strong>'s product could create a situation where personal injury, death, or severe property or<br />
environmental damage may occur. <strong>AMD</strong> reserves the right to discontinue or make changes to its products at any time<br />
without notice.<br />
.
Table of Contents<br />
1 Introduction ............................................................................................................. 7<br />
1.1 About this Manual........................................................................................................................... 7<br />
1.2 Overview ........................................................................................................................................ 7<br />
1.3 Block Diagram ................................................................................................................................ 8<br />
1.4 Internal PCI Devices....................................................................................................................... 9<br />
1.5 Major Differences between SB700 and SB600............................................................................ 10<br />
2 SB700 Programming Architecture ....................................................................... 11<br />
2.1 PCI Devices and Functions.......................................................................................................... 11<br />
2.2 I/O Map......................................................................................................................................... 12<br />
2.2.1 Fixed I/O Address Ranges ...................................................................................................................12<br />
2.2.1.1 Fixed I/O Address Ranges – SB700 Proprietary Ports......................................................................................... 12<br />
2.2.2 Variable I/O Decode Ranges................................................................................................................12<br />
2.3 Memory Map ................................................................................................................................ 13<br />
3 SB700 Early-POST Initialization ........................................................................... 14<br />
3.1 512K/1M ROM Enable ................................................................................................................. 14<br />
3.1.1 PCI ROM..............................................................................................................................................14<br />
3.1.2 LPC ROM.............................................................................................................................................14<br />
3.1.3 LPC ROM Read/Write Protect..............................................................................................................14<br />
3.1.4 SPI ROM Controller .............................................................................................................................15<br />
3.2 Real Time Clock (RTC) ................................................................................................................ 16<br />
3.2.1 RTC Access .........................................................................................................................................16<br />
3.2.1.1 Special Locked Area in CMOS ............................................................................................................................. 16<br />
3.2.1.2 Century Byte ......................................................................................................................................................... 16<br />
3.2.1.3 Date Alarm............................................................................................................................................................ 16<br />
3.3 <strong>BIOS</strong> RAM.................................................................................................................................... 17<br />
3.4 Serial IRQ..................................................................................................................................... 17<br />
3.5 SubSystem ID and SubSystem Vendor ID .................................................................................. 18<br />
3.6 <strong>AMD</strong> K8 Registers........................................................................................................................ 18<br />
3.7 System Restart after Power Fail .................................................................................................. 19<br />
3.7.1 Power Fail and Alarm Setup.................................................................................................................19<br />
4 PCI IRQ Routing..................................................................................................... 20<br />
4.1 PCI IRQ Routing Registers .......................................................................................................... 20<br />
4.2 PCI IRQ <strong>BIOS</strong> Programming........................................................................................................20<br />
4.3 Integrated PCI Devices IRQ Routing ........................................................................................... 21<br />
4.3.1 IRQ Routing for HD Audio....................................................................................................................21<br />
4.4 PCI IRQ Routing for APIC Mode.................................................................................................. 22<br />
5 SMBus Programming............................................................................................ 23<br />
5.1 SMBus I/O Base Address ............................................................................................................ 23<br />
5.2 SMBus Timing .............................................................................................................................. 23<br />
5.3 SMBus Host Controller Programming.......................................................................................... 24<br />
6 IDE Controller ........................................................................................................ 26<br />
©2009 Advanced Micro Devices, Inc. Table of Contents<br />
<strong>AMD</strong> SB700 <strong>BIOS</strong> <strong>Developer</strong>’s <strong>Guide</strong> <strong>AMD</strong> Confidential Page 3
6.1 IDE Channel Enable/Disable........................................................................................................ 26<br />
6.1.1 IDE Channel Enable.............................................................................................................................26<br />
6.1.2 IDE Channel Disable............................................................................................................................26<br />
6.2 PIO Modes ................................................................................................................................... 27<br />
6.2.1 PIO Mode.............................................................................................................................................27<br />
6.2.2 PIO Timing ...........................................................................................................................................27<br />
6.3 DMA Modes.................................................................................................................................. 27<br />
6.3.1 Legacy (Multi-Words) DMA mode ........................................................................................................27<br />
6.3.2 Ultra-DMA Mode ..................................................................................................................................28<br />
7 USB Controllers..................................................................................................... 29<br />
7.1 Interrupt Routing for USB Controllers .......................................................................................... 29<br />
8 Serial ATA (SATA) ................................................................................................. 30<br />
8.1 SATA New Features..................................................................................................................... 31<br />
8.2 Device ID...................................................................................................................................... 33<br />
8.3 SATA Controller Operating Modes............................................................................................... 34<br />
8.4 SATA Hot Plug ............................................................................................................................. 34<br />
8.4.1 Sample Code .......................................................................................................................................34<br />
9 Power Management............................................................................................... 35<br />
9.1 SMI Handling – EOS (PM IO Reg10h[Bit0]) ................................................................................ 35<br />
9.2 Programmable I/Os ...................................................................................................................... 35<br />
9.3 Power Management Timers .........................................................................................................36<br />
9.3.1 PM Timer 1 (Inactivity Timer) ...............................................................................................................36<br />
9.3.2 PM Timer 2 (Activity Timer)..................................................................................................................36<br />
9.4 SMI Events ................................................................................................................................... 37<br />
9.4.1 Power Button........................................................................................................................................38<br />
9.5 C-State Break Events................................................................................................................... 38<br />
9.5.1 Break Events for C2 State....................................................................................................................38<br />
9.5.2 Break Events for C3 and C4 States .....................................................................................................38<br />
9.6 Save/Restore Sequence for S3 State .......................................................................................... 38<br />
9.6.1 Register Save Sequence for S3 State..................................................................................................38<br />
9.7 Wake on Events ........................................................................................................................... 39<br />
9.8 Sleep SMI Events......................................................................................................................... 39<br />
9.8.1 Sleep SMI Control Register..................................................................................................................39<br />
9.8.2 Sleep SMI Programming Sequence .....................................................................................................39<br />
9.8.2.1 Set Sleep SMI Control Register............................................................................................................................ 39<br />
9.8.2.2 Enter Sleep SMI# Routine .................................................................................................................................... 39<br />
10 APIC Programming................................................................................................ 40<br />
10.1 Northbridge APIC Enable............................................................................................................. 40<br />
10.2 Southbridge APIC Enable ............................................................................................................ 40<br />
10.3 IOAPIC Base Address.................................................................................................................. 40<br />
10.4 APIC IRQ Assignment.................................................................................................................. 40<br />
10.5 APIC IRQ Routing ........................................................................................................................ 41<br />
11 Watchdog Timer .................................................................................................... 42<br />
©2009 Advanced Micro Devices, Inc. Table of Contents<br />
<strong>AMD</strong> SB700 <strong>BIOS</strong> <strong>Developer</strong>’s <strong>Guide</strong> <strong>AMD</strong> Confidential Page 4
12 A-Link Bridge......................................................................................................... 44<br />
12.1 Programming Procedure .............................................................................................................. 45<br />
12.2 A-Link Express Configuration DMA Access................................................................................. 46<br />
12.3 Enable Non-Posted Memory Write for K8 Platform. .................................................................... 47<br />
13 High Precision Event Timer (HPET) ..................................................................... 48<br />
13.1 Initialization................................................................................................................................... 48<br />
13.1.1 Sample Initialization Code....................................................................................................................48<br />
13.2 ACPI HPET Description Table .....................................................................................................49<br />
13.3 HPET Support for Vista................................................................................................................ 49<br />
14 Sample Programs.................................................................................................. 50<br />
14.1 IXP700 Register Initialization on Power-Up ................................................................................. 50<br />
14.1.1 Initialization of PCI IRQ Routing before Resource Allocation...............................................................50<br />
14.2 Setup Options............................................................................................................................... 51<br />
14.2.1 64 Bytes DMA ......................................................................................................................................51<br />
14.2.2 USB Overcurrent Detection Disable.....................................................................................................51<br />
14.2.3 C3 Support...........................................................................................................................................51<br />
14.2.4 Subtractive Decoding for P2P Bridge...................................................................................................52<br />
14.2.5 Enable/Disable On-Chip SATA ............................................................................................................53<br />
14.2.6 Change Class ID for SATA...................................................................................................................53<br />
14.2.7 Disable AC97 Audio or MC97 Modem .................................................................................................55<br />
14.2.8 Enable EHCI Controller........................................................................................................................56<br />
14.2.9 Enable OHCI Controller .......................................................................................................................58<br />
14.3 IDE Settings ................................................................................................................................. 58<br />
14.3.1 PIO Mode Settings ...............................................................................................................................58<br />
14.3.2 Multiword DMA Settings.......................................................................................................................60<br />
14.3.3 UDMA Mode Settings...........................................................................................................................60<br />
14.3.4 IDE Channel Disable............................................................................................................................61<br />
14.3.5 IDE Channel Enable.............................................................................................................................63<br />
14.4 USB Controller Reset at Hard Reset............................................................................................ 64<br />
14.5 Clock Throttling ............................................................................................................................ 64<br />
14.6 Lid Switch ..................................................................................................................................... 66<br />
14.6.1 Lid Switch Hardware Connection .........................................................................................................66<br />
14.6.2 Associated Registers ...........................................................................................................................66<br />
14.6.3 <strong>BIOS</strong> Initialization.................................................................................................................................66<br />
14.6.4 ACPI Programming ..............................................................................................................................67<br />
14.7 SATA Hot Plug Sample Program ................................................................................................. 69<br />
14.8 Temperature Limit Shutdown through SMI# ................................................................................ 74<br />
14.8.1 Setting Up ITE 8712 Super I/O Registers ............................................................................................75<br />
14.8.2 Initialize Southbridge Registers for SMI# .............................................................................................80<br />
14.8.3 SMI Programming to Shut Down the System.......................................................................................81<br />
14.9 Sleep Trap through SMI# ............................................................................................................. 82<br />
14.9.1 Enable Sleep SMI# in ACPI ASL code.................................................................................................82<br />
14.9.2 Sleep Trap SMI Routine.......................................................................................................................83<br />
14.10 HD Audio – Detection and Configuration ..................................................................................... 84<br />
©2009 Advanced Micro Devices, Inc. Table of Contents<br />
<strong>AMD</strong> SB700 <strong>BIOS</strong> <strong>Developer</strong>’s <strong>Guide</strong> <strong>AMD</strong> Confidential Page 5
15 Chipset Integration Module Extensive (SB700 CIMx)......................................... 93<br />
15.1 Introduction................................................................................................................................... 93<br />
15.2 Distribution Model......................................................................................................................... 93<br />
15.3 CIMx Architecture......................................................................................................................... 93<br />
15.4 Binary File .................................................................................................................................... 95<br />
15.4.1 Overview ..............................................................................................................................................95<br />
15.4.2 Binary Header ......................................................................................................................................96<br />
15.5 CIMx Interface Calls Environment................................................................................................96<br />
15.6 Interface Definition ....................................................................................................................... 96<br />
15.6.1 Southbridge Power-On/Reset Initialization...........................................................................................96<br />
15.6.2 SouthBridge <strong>BIOS</strong> Post Initialization ..................................................................................................101<br />
15.6.3 S3 resume Initialization ......................................................................................................................110<br />
15.7 Callback Interface Definition ...................................................................................................... 111<br />
15.7.1 SATA OEM Call Back “SATA_PHY_PROGRAMMING”.....................................................................111<br />
15.7.2 Integrated Pull-up and Pull-down Settings “PULL_UP_PULL_DOWN_SETTINGS” .............................111<br />
15.8 SMM Functions Support............................................................................................................. 112<br />
15.9 Reference Code ......................................................................................................................... 112<br />
Appendix: Revision History...................................................................................... 113<br />
©2009 Advanced Micro Devices, Inc. Table of Contents<br />
<strong>AMD</strong> SB700 <strong>BIOS</strong> <strong>Developer</strong>’s <strong>Guide</strong> <strong>AMD</strong> Confidential Page 6
1 Introduction<br />
1.1 About this Manual<br />
This manual provides guidelines for <strong>BIOS</strong> developers working with the <strong>AMD</strong> SB700-series Southbridges.<br />
(Note: The term ”SB700” is used in this document to refer to all the SB700-series Southbridges; however, not<br />
all information in this book is applicable to all products in the series. Please refer to the databook of any<br />
particular Southbridge for its features and functionality.) It describes the <strong>BIOS</strong> and software modifications<br />
required to fully support the device.<br />
Other documents on the SB700 are available at <strong>AMD</strong>’s Partner Resource Center<br />
(http://www.amd.com/designpartners/index.html) or from your <strong>AMD</strong> FAE representative.<br />
Note: To help the reader to readily identify changes/updates in this document, changes/updates over the<br />
previous revision are highlighted in red. Refer to Appendix: Revision History at the end of this document for a<br />
detailed revision history.<br />
1.2 Overview<br />
<strong>AMD</strong>’s SB700 Southbridges integrate the key I/O, communications, and audio features required in a state-ofthe-art<br />
PC into a single device. These products are specifically designed to operate with <strong>AMD</strong>’s RADEON<br />
IGP Xpress family of integrated graphics processor products in both desktop and mobile PCs.<br />
©2009 Advanced Micro Devices, Inc.<br />
<strong>AMD</strong> SB700 <strong>BIOS</strong> <strong>Developer</strong>s <strong>Guide</strong> Page 7
1.3 Block Diagram<br />
This section contains a diagram for the SB700. Figure 1 below shows the SB700 internal PCI devices and the<br />
major function blocks.<br />
25MHz X1 / X2<br />
PCIE_GFX_Clock<br />
CPU_HT_HT<br />
GPP_P/N (3:0)<br />
CPU_NB_HT<br />
NB Disp Clock<br />
USB Clock<br />
SIO Clock<br />
PICD[0]<br />
RTC_IRQ#,<br />
PIDE_INTRQ,<br />
USB_IRQ#,<br />
SATA_IRQ#,<br />
AZ_IRQ#<br />
Flash Cont Clock<br />
USB clock<br />
SATA Clock<br />
©2009 Advanced Micro Devices, Inc.<br />
B-LINK A-LINK<br />
<strong>AMD</strong> SB700 <strong>BIOS</strong> <strong>Developer</strong>s <strong>Guide</strong> Page 8<br />
IMC_INT<br />
(not supported)<br />
Figure 1: SB700 PCI Internal Devices and Major Function Blocks<br />
8051
1.4 Internal PCI Devices<br />
Note: The SB700 internal PCI devices are listed in Figure 2 below. The sub-sections that follow provide<br />
descriptions of the PCI configuration space, the I/O space, and the memory space registers for each device. PCI<br />
configuration space registers are only accessible with configuration Read or configuration Write cycles and with<br />
the target device selected by settling its corresponding IDSEL bit in the configuration cycle address field.<br />
©2009 Advanced Micro Devices, Inc.<br />
Figure 2: SB700 PCI Internal Devices<br />
<strong>AMD</strong> SB700 <strong>BIOS</strong> <strong>Developer</strong>s <strong>Guide</strong> Page 9
1.5 Major Differences between SB700 and SB600<br />
The following table lists the major differences between SB700 and SB600 (previous generation SB). There may<br />
be other differences which are not mentioned here since they may not be important for a <strong>BIOS</strong> developer.<br />
©2009 Advanced Micro Devices, Inc.<br />
SB700 SB600<br />
Supports 5 OHCI controllers (Bus 0 Dev 12h Fn 0, 1,<br />
Bus 0 Dev 13h Fn 0, 1, Bus 0 Dev 14h Fun 5) & 2<br />
EHCI controllers (Bus 0 Dev 12h Fn 2, Bus 0 Dev 13h<br />
Fn 2)<br />
Supports 5 OHCI controllers (Bus 0 Dev 13h Fn 0, 1,<br />
2, 3, 4) & 1 EHCI controller (Bus 0 Dev 13h Fn 5)<br />
SATA controller supports upto 6 ports. SATA controller supports only 4 ports<br />
SATA controller supports a unique architecture that<br />
allows the user to configure the SATA controller to<br />
work in-conjunction with the PATA controller to<br />
provide configurations that cannot be supported with<br />
SATA controller alone. This feature is referred as<br />
“Combined Mode”.<br />
SB600 doesn’t support this mode.<br />
Supports internal clock Does not support internal clock<br />
Does not support these legacy audio/modem<br />
controllers.<br />
Supports AC97/MC97 controllers.<br />
Supports Integrated Micro Controller Does not support Integrated Micro Controller<br />
Alternate software interface to PMIO and legacy<br />
registers (per customer’s request). Use MMIO instead<br />
of IO CD6/CD7 and other legacy IO addresses<br />
SMBUS IO base address should be programmed at<br />
offset 90h in Smbus Controller (Bus 0 Device 14h<br />
Func 0). Offset 10h in Smbus controller is no longer<br />
used.<br />
Doesn’t support this feature<br />
SMBUS IO base address can be programmed at<br />
offset 10h or offset 90h in Smbus Controller (Bus 0<br />
Device 14h Func 0).<br />
<strong>AMD</strong> SB700 <strong>BIOS</strong> <strong>Developer</strong>s <strong>Guide</strong> Page 10
2 SB700 Programming Architecture<br />
2.1 PCI Devices and Functions<br />
Bus:Device:Function Function Description Dev ID Enable/Disable<br />
Bus 0:Device 14h:Function 0 SMBus Controller 4385h Always enabled<br />
Bus 0:Device 14h:Function 1 IDE Controller 438Ch PM IO Reg59h[Bit3]<br />
0: Disables flash controller and<br />
enables ide controller<br />
1: Enables flash controller and<br />
disables ide controller<br />
Bus 0:Device 14h:Function 2 Azalia Controller 4383h PM IO Reg59h[Bit3]<br />
0: Disables Azalia<br />
1: Enables Azailia<br />
Bus 0:Device 14h:Function 3 LPC Controller 438Dh SMBus PCI Reg64h[Bit20]<br />
0: Disables LPC controller<br />
1: Enables LPC controller<br />
Bus 0:Device 14h:Function 4 PCI to PCI Bridge 4384h Always enabled<br />
Bus 0:Device 12h:Function 2<br />
Bus 0:Device 13h:Function 2<br />
Bus 0:Device 12h:Function 0<br />
Bus 0:Device 12h:Function 1<br />
Bus 0:Device 13h:Function 0<br />
Bus 0:Device 13h:Function 1<br />
Bus 0:Device 14h:Function 5<br />
©2009 Advanced Micro Devices, Inc.<br />
USB #1EHCI Controller<br />
USB #2EHCI Controller<br />
USB #1 OHCI Controller #0<br />
USB #1 OHCI Controller #1<br />
USB #1 OHCI Controller #0<br />
USB #1 OHCI Controller #1<br />
USB #3 OHCI Controller<br />
Bus 0:Device 11h:Function 0 Native/Legacy IDE Mode<br />
AHCI mode<br />
Non-Raid-5 Mode<br />
Raid5 Mode<br />
<strong>AMD</strong> AHCI mode (uses <strong>AMD</strong><br />
AHCI drivers instead of MS<br />
drivers)<br />
4396h<br />
4396h<br />
4397h<br />
4398h<br />
4397h<br />
4398h<br />
438Bh<br />
4390h<br />
4391h<br />
4392h<br />
4393h<br />
4394h<br />
SMBus PCI Reg68h[Bit0]<br />
SMBus PCI Reg68h[Bit4]<br />
0: Enables EHCI controller<br />
1: Disables EHCI controller<br />
SMBus PCI Reg68h[Bit1]<br />
SMBus PCI Reg68h[Bit2]<br />
SMBus PCI Reg68h[Bit5]<br />
SMBus PCI Reg68h[Bit6]<br />
SMBus PCI Reg68h[Bit7]<br />
0: Disables OHCI controller<br />
1: Enables OHCI controller<br />
SMBus PCI Reg ADh[bit 0]<br />
0: Disables SATA controller<br />
1: Enables SATA controller<br />
<strong>AMD</strong> SB700 <strong>BIOS</strong> <strong>Developer</strong>s <strong>Guide</strong> Page 11
2.2 I/O Map<br />
The I/O map is divided into Fixed and Variable address ranges. Fixed ranges cannot be moved, but<br />
can be disabled in some cases. Variable ranges are configurable.<br />
2.2.1 Fixed I/O Address Ranges<br />
2.2.1.1 Fixed I/O Address Ranges – SB700 Proprietary Ports<br />
I/O Address Description Enable Bit<br />
C00h-C01h IRQ Routing Index/Data register SMBus PCI Reg64h[Bit0]<br />
C14h PCI Error Control register SMBus PCI Reg78h[Bit4]<br />
C50h-C51h Client Management Index /Data<br />
registers<br />
©2009 Advanced Micro Devices, Inc.<br />
SMBus PCI Reg 79h[Bit3]<br />
C52h Gpm Port SMBus PCI Reg78h[Bit6]<br />
C6Fh Flash Rom Program Enable SMBus PCI Reg78h[Bit8]<br />
CD0h-CD1h PM2 Index/Data<br />
CD4h-CD5h <strong>BIOS</strong> RAM Index/Data<br />
CD6h-CD7h Power Management I/O register SMBus PCI Reg64h[Bit2] & Reg78h[Bit9]<br />
2.2.2 Variable I/O Decode Ranges<br />
I/O Name Description Configure Register Range Size<br />
(Bytes)<br />
PIO0 Programmable I/O Range 0 PM IO Reg14h & Reg15h
Note:<br />
• The SMI CMD Block must be defined on the 16-bit boundary, i.e., the least significant<br />
nibble of the address must be zero (for example, B0h, C0h etc.)<br />
• The SMI CMD Block consists of two ports – the SMI Command Port at base address, and<br />
the SMI Status Port at base address+1.<br />
• The writes to SMI Status Port will not generate an SMI. The writes to the SMI Command<br />
Port will generate an SMI.<br />
• The SMI Command and SMI Status ports may be written individually as 8 bit ports, or<br />
together as a 16-bit port.<br />
2.3 Memory Map<br />
Memory Range Description Enable Bit<br />
0000 0000h-000D FFFFh<br />
0010 0000h- TOM<br />
Main System Memory<br />
000E 0000h-000F FFFFh Either PCI ROM or LPC<br />
ROM<br />
FFC0 0000h-FFC7 FFFFh<br />
FF80 0000h-FF87 FFFFh<br />
FFC8 0000h-FFCF FFFFh<br />
FF88 0000h-FF8F FFFFh<br />
FFD0 0000h-FFD7 FFFFh<br />
FF90 0000h-FF97 FFFFh<br />
FFD8 0000h-FFDF FFFFh<br />
FF98 0000h-FF9F FFFFh<br />
FFE0 0000h-FFE7 FFFFh<br />
FFA0 0000h-FFA7 FFFFh<br />
FFE8 0000h-FFEF FFFFh<br />
FFA8 0000h-FFAF FFFFh<br />
FFF0 0000h-FFF7 FFFFh<br />
FFB0 0000h-FFB7 FFFFh<br />
FFF8 0000h-FFFF FFFFh<br />
FFB8 0000h-FFBF FFFFh<br />
©2009 Advanced Micro Devices, Inc.<br />
FWH LPC Reg70h[3:0]<br />
FWH LPC Reg70h[7:4]<br />
FWH LPC Reg70h[11:8]<br />
FWH LPC Reg70h[15:12]<br />
FWH LPC Reg70h[19:16]<br />
FWH LPC Reg70H[23:20]<br />
FWH LPC Reg70h[27:24]<br />
FWH LPC Reg70h[31:28]<br />
PCI ROM : SMBus PCI Reg41h[Bit4]<br />
LPC ROM : LPC Reg68h & LPC_Rom strap<br />
<strong>AMD</strong> SB700 <strong>BIOS</strong> <strong>Developer</strong>s <strong>Guide</strong> Page 13
3 SB700 Early-POST Initialization<br />
The system <strong>BIOS</strong> needs to configure the SB700 at the very beginning of POST. Some of the settings<br />
will change depending on the OEM design, or on the newer revision chipset.<br />
3.1 512K/1M ROM Enable<br />
With the SB700 design, there can be two possible ROM sources: PCI ROM and LPC ROM. Two pin<br />
straps (UseLpcRom, FWHDisable) decide where the ROM is (see the SB700 databook). Upon<br />
system power on, the SB700 enables 256K ROM by default. The <strong>BIOS</strong> needs to enable 512K ROM<br />
or up to 1M for LPC ROM, if required.<br />
3.1.1 PCI ROM<br />
Control Bit Description<br />
SMBus PCI Reg41h[Bit1] When set to 1, the address between FFF80000h<br />
to FFFDFFFFh will be directed to the PCI ROM<br />
interface.<br />
SMBus PCI Reg41h[Bit4] When set to 1, the address between 0E0000h to<br />
0EFFFFh will be directed to the PCI ROM<br />
interface.<br />
3.1.2 LPC ROM<br />
©2009 Advanced Micro Devices, Inc.<br />
256K ROM<br />
(Default)<br />
To use the LPC ROM, the pin straps UseLpcRom, FWHDisable must be set accordingly.<br />
Control Bit(s) Description Default<br />
LPC PCI<br />
Reg68h<br />
16-bit starting & end address of the<br />
LPC ROM memory address range 1.<br />
LPC PCI Reg6Ch 16-bit starting & end address of the<br />
LPC ROM memory address range 2.<br />
LPC PCI<br />
Reg48Hh[Bits4:3]<br />
Enable bits for LPC ROM memory<br />
address range 1 & 2.<br />
Note: with pins straps set to LPC ROM,<br />
these two bits have no effect on Reg68<br />
& Reg6C.<br />
3.1.3 LPC ROM Read/Write Protect<br />
512K ROM<br />
Setting<br />
512K ROM<br />
Setting<br />
0 1<br />
0 1<br />
1 M ROM<br />
Setting<br />
000E0000h 000E0000h 000E0000h<br />
FFFE0000h FFF80000h FFF00000h<br />
00b 11b 11b<br />
The SB700 allows all or a portion of the LPC ROM addressed by the firmware hub to be read<br />
protected, write protected, or both read and write protected. Four dword registers are provided to<br />
select up to 4 LPC ROM ranges for read or write protection. The ROM protection range is defined by<br />
the base address and the length. The base address is aligned at a 2K boundary. The address length<br />
can be from 1K to 256K in increments of 1K.<br />
<strong>AMD</strong> SB700 <strong>BIOS</strong> <strong>Developer</strong>s <strong>Guide</strong> Page 14
Register 50h, 54h, 58h, 5ch of Device 14h, Function 3<br />
Field Name Bits Description<br />
Base Address 31:11 ROM Base address. The most significant 21 bits of the base address<br />
are defined in this field. Bits 10:0 of the base address are assumed to<br />
be zero. Base address, therefore, is aligned at a 2K boundary.<br />
Length 10:2 These 9 bits (0-511) define the length from 1K to 512K in increments of<br />
1K.<br />
Read Protect 1 When set, the memory range defined by this register is read protected.<br />
Reading any location in the range returns FFh.<br />
Write Protect 0 When set, the memory range defined by this register is write protected.<br />
Writing to the range has no effect.<br />
Example:<br />
Protect 32K LPC ROM starting with base address FFF80000.<br />
Base address bits 31:11 1111 1111 1111 1000 0000 0 b<br />
Length 32K bit 10:2 = 31h = 000 0111 11 b<br />
Read protect bit 1 = 1<br />
Write protect bit 0 = 1<br />
Register 50h = 1111 1111 1111 1000 0000 0000 0111 1111 b = FFF8007F h<br />
Note:<br />
1. Registers 50h ~ 5Fh can be written once after the hardware reset. Subsequent writes to<br />
them have no effect.<br />
2. Setting sections of the LPC ROM to either read or write protect will not allow the ROM to<br />
be updated by a flash programming utility. Most flash utilities write and verify ROM<br />
sectors, and will terminate programming if verification fails due to read protect.<br />
3.1.4 SPI ROM Controller<br />
The SPI ROM interface is a new feature added to the SB700. Refer to the <strong>AMD</strong> SB700/710/750<br />
Register Reference Manual for more information on this feature. <strong>AMD</strong> will provide reference code for<br />
this feature.<br />
Note: The LPC ROM Read/Write Protect mentioned in the previous paragraph also applies to SPI.<br />
Two strap pins, PCICLK0 and PCICLK1, determine the SB700 boot up from LPC ROM or SPI ROM.<br />
There is no register status to reflect whether the current ROM interface is LPC or SPI.<br />
©2009 Advanced Micro Devices, Inc.<br />
<strong>AMD</strong> SB700 <strong>BIOS</strong> <strong>Developer</strong>s <strong>Guide</strong> Page 15
3.2 Real Time Clock (RTC)<br />
3.2.1 RTC Access<br />
The internal RTC is divided into two sections: the clock and alarm function (registers 0 to 0Dh), and<br />
CMOS memory (registers 0Eh to FFh). The clock and alarm functions must be accessed through I/O<br />
ports 70h/71h. The CMOS memory (registers 0Eh to FFh) should be accessed through I/O ports<br />
72h/73h.<br />
3.2.1.1 Special Locked Area in CMOS<br />
Some CMOS memory locations may be disabled for read/write. Register 6Ah of SMBus (Bus 0,<br />
Device 14h, Function 0) has bits to disable these CMOS memory locations. These bits can be written<br />
only once after each power up reset or PCI reset.<br />
RTCProtect- RW - 8 bits - [PCI_Reg: 6Ah]<br />
Field Name Bits Default Description<br />
RTCProtect 0 0h When set, RTC RAM index 38h:3Fh will be locked from<br />
read/write. This bit can only be written once.<br />
RTCProtect 1 0h When set, RTC RAM index F0h:FFh will be locked from<br />
read/write. This bit can only be written once.<br />
RTCProtect 2 0h When set, RTC RAM index E0h:EFh will be locked from<br />
read/write. This bit can only be written once.<br />
RTCProtect 3 0h When set, RTC RAM index D0h:DFh will be locked from<br />
read/write. This bit can only be written once.<br />
RTCProtect 4 0h When set, RTC RAM index C0h:CFh will be locked from<br />
read/write. This bit can only be written once.<br />
Reserved 7:5 0h<br />
3.2.1.2 Century Byte<br />
The RTC has a century byte at CMOS location 32h. Century is stored in a single byte and the BCD<br />
format is used for the century (for example, 20h for the year 20xx). This byte is accessed using I/O<br />
ports 70h and 71h. (The <strong>BIOS</strong> must set PMIO register 7Ch bit 4 to 1 to use this century byte at<br />
CMOS location 32h<br />
3.2.1.3 Date Alarm<br />
The RTC has a date alarm byte. This byte is accessed as follows:<br />
1. Set to 1 the RTC register 0Ah , bit 4, using I/O ports 70h and 71h.<br />
2. Write Date Alarm in BCD to register 0Dh using I/O ports 70h and 71h.<br />
3. Clear to 0 the RTC register 0Ah bit 4 using I/O ports 70h and 71h.<br />
Note: It is important to clear RTC register 0Ah bit 4 to zero; otherwise, the CMOS memory may not be<br />
accessed correctly from this point onward.<br />
©2009 Advanced Micro Devices, Inc.<br />
<strong>AMD</strong> SB700 <strong>BIOS</strong> <strong>Developer</strong>s <strong>Guide</strong> Page 16
3.3 <strong>BIOS</strong> RAM<br />
The SB700 has 256 bytes of <strong>BIOS</strong> RAM. Data in this RAM is preserved until RSMRST# or S5 is<br />
asserted, or until power is lost.<br />
This RAM is accessed using index and data registers at CD4h/CD5h.<br />
3.4 Serial IRQ<br />
The SB700 supports serial IRQ, which allows one single signal to report multiple interrupt requests.<br />
The SB700 supports a message for 21 serial interrupts, which include 15 IRQs, SMI#, IOCHK#, and 4<br />
PCI interrupts.<br />
SMBus PCI Reg69h is used for setting serial IRQ.<br />
Bits in SMBus<br />
Description<br />
PCI Reg69<br />
7 1 – Enables the serial IRQ function<br />
0 – Disables the serial IRQ function<br />
6 1 – Active (quiet) mode<br />
0 – Continuous mode<br />
5:2 Total number of serial IRQs = 17 +<br />
NumSerIrqBits<br />
0 – 17 serial IRQs (15 IRQs, SMI#,<br />
IOCHK#)<br />
1 – 18 serial IRQs (15 IRQs, SMI#,<br />
IOCHK#, INTA#)<br />
...<br />
15 - 32 serial IRQ's<br />
The SB700 serial IRQ can support 15<br />
IRQs, SMI#, IOCHK#, INTA#, INTB#,<br />
INTC#, and INTD#.<br />
©2009 Advanced Micro Devices, Inc.<br />
Power-on Recommended<br />
Default<br />
Value<br />
0 1<br />
0 0<br />
0 0100b<br />
1:0 Number of clocks in the start frame 0 00b<br />
Note: The <strong>BIOS</strong> should enter the continuous mode first when enabling the serial IRQ protocol, so that<br />
the SB700 can generate the start frame.<br />
<strong>AMD</strong> SB700 <strong>BIOS</strong> <strong>Developer</strong>s <strong>Guide</strong> Page 17
3.5 SubSystem ID and SubSystem Vendor ID<br />
SubSytem ID and SubSystem Vendor ID can be programmed in various functions of SB700 register<br />
2Ch. These registers are write-once registers. For example, to program a SubSytem vendor ID of<br />
1002h and SubSystem ID of 4341h in AC97 device 14h, function 5, use the following assembly<br />
language sample code:<br />
mov eax,8000A52Ch<br />
mov dx,0CF8h<br />
out dx,eax<br />
mov dx,0CFCh<br />
mov eax,43411002h<br />
out dx,eax<br />
3.6 <strong>AMD</strong> K8 Registers<br />
The SB700 is set for the <strong>AMD</strong> K8 processor by hardware strap. The following registers in the PM IO<br />
space (accessed through index/data registers at CD6h/CD7h) are specific for the <strong>AMD</strong> K8 processor.<br />
For the early post initialization these registers may be left at default values.<br />
SMAFx in the table below are sent with STPCLK messages down the HyperTransport link.<br />
Register Name Default Description<br />
PM IO 80h SMAF0 06h System Management Action for C2 and S4/S5<br />
PM IO 81h SMAF1 21h System Management Action for VFID and C3<br />
PM IO 82h SMAF2 43h System Management Action for S3 and S1<br />
PM IO 83h SMAF3 55h System Management Action for thermal and normal<br />
throttling.<br />
PM IO 85h CF9Rst 00h Full reset/INIT<br />
PM IO 86h Thermal Throttle<br />
Control<br />
00h Enables time control for thermal throttling.<br />
PM IO 87h LdtStpCmd 00h Write bit[0] = 1 to generate C3<br />
PM IO 88h LdtStartTime 00h LDTSTP# assertion delay in microseconds<br />
PM IO 8Ah LdtAgpTimeCntl 00h LDTSTP# de-assertion delay select<br />
PM IO 8Bh StutterTime 00h Stutter LDTSTP# duration in microseconds<br />
PM IO 8Ch StpClkDlyTime 00h STPCLK# assertion in microseconds<br />
PM IO 8Dh AbPmeCntl 0Eh Fake A-link bridge PME<br />
©2009 Advanced Micro Devices, Inc.<br />
<strong>AMD</strong> SB700 <strong>BIOS</strong> <strong>Developer</strong>s <strong>Guide</strong> Page 18
3.7 System Restart after Power Fail<br />
The way the system restarts following the power-fail/ power-restore cycle depends both on the PMIO<br />
register 74h [bits 1:0], and the hardware jumper on the SB700 pin ACPWR_Strap.<br />
PMIO Register 74h bits[1:0] Description<br />
00b The system restart will depend on the ACPWR_Strap pin pull<br />
up/down state.<br />
Pin = 0 : The system will restart without pressing the power<br />
button<br />
Pin = 1 : The system will remain off until the power button in<br />
pressed.<br />
01b The system will always restart after the power is restored.<br />
10b The system will remain off until the power button is pressed.<br />
11b At power-up the system will either restart or remain off<br />
depending on the state of the system at power failure. If the<br />
system was on when the power failed, the system will restart<br />
at power-up. If the system was off when the power failed, the<br />
system will remain off after the power is restored. Pressing<br />
the power button is required to restart the system.<br />
Notes on programming the PMIO register 74h:<br />
1. PMIO register bits[3:0] should be used for programming. Bits[7:4] are read-only bits<br />
and reflect the same values as bits[3:0].<br />
2. Bit2 is used by the hardware to save the power on/off status. This bit should not be<br />
modified during Software/<strong>BIOS</strong> programming. The <strong>BIOS</strong> programmer should always<br />
read the PMIO register 74h, modify bit3 and bits[1:0] as required, and write back the<br />
PMIO register 74h.<br />
3.7.1 Power Fail and Alarm Setup<br />
The state of the machine after the power-fail/power-restore cycle is controlled by PMIO register 74h<br />
bits[1:0] as described above. This programming can be over-ridden for the special case when the<br />
alarm is set. When both the alarm and the PMIO register 74h bit3 are set, the system will restart after<br />
the power is restored, regardless of how register 74h bits [1:0] are defined.<br />
©2009 Advanced Micro Devices, Inc.<br />
<strong>AMD</strong> SB700 <strong>BIOS</strong> <strong>Developer</strong>s <strong>Guide</strong> Page 19
4 PCI IRQ Routing<br />
4.1 PCI IRQ Routing Registers<br />
The SB700 uses one pair of I/O ports to do the PCI IRQ routing. The ports are at C00h/C01h.<br />
Address Register Name Description<br />
C00h PCI_Intr_Index PCI IRQ Routing Index<br />
0 – INTA#<br />
1 – INTB#<br />
2 – INTC#<br />
3 – INTD#<br />
4 – SCI<br />
5 – SMBus interrupt<br />
9 – INTE#<br />
0Ah – INTF#<br />
0Bh – INTG#<br />
0Ch – INTH#<br />
C01h PCI_Intr_Data 0 ~ 15 : IRQ0 to IRQ15<br />
IRQ0, 2, 8, 13 are reserved<br />
4.2 PCI IRQ <strong>BIOS</strong> Programming<br />
PCI IRQs are assigned to interrupt lines using I/O ports at C00h and C01h in index/data format. The<br />
register C00h is used for index as written with index number 0 through 0Ch as described in section<br />
4.1 above. Register C01h is written with the interrupt number as data.<br />
The following assembly language example assigns INTB# line to interrupt 10 (0Ah).<br />
mov dx,0C00h ; To write to IO port C00h<br />
mov al,02h ; Index for PCI IRQ INTB# as defined in section 4.1<br />
out dx,al ; Index is now set for INTB#<br />
mov dx,0C01h ; To write interrupt number 10 (0Ah)<br />
mov al,0Ah ; Data is interrupt number 10 (0Ah )<br />
out dx,al ; Assign IRQB# to interrupt 10<br />
©2009 Advanced Micro Devices, Inc.<br />
<strong>AMD</strong> SB700 <strong>BIOS</strong> <strong>Developer</strong>s <strong>Guide</strong> Page 20
4.3 Integrated PCI Devices IRQ Routing<br />
In the SB700, the AC’97 and USB need PCI IRQ. Internally, they are routed to different PCI INT#s.<br />
Device Reg3Dh of<br />
PCI Device<br />
PCI INT# Description<br />
Bus 0:Device 14h:Function 1 01 INTA# IDE Controller*<br />
Bus 0:Device 14h: Function 2 01 Programmable** High Definition Audio<br />
Bus 0:Device 14h: Function 5 03 Programmable*** USB #3 OHCI Controller<br />
Bus 0:Device 12h:Function 0 01 Programmable*** USB #1 OHCI Controller #0<br />
Bus 0:Device 12h:Function 1 01 Programmable*** USB #1 OHCI Controller #1<br />
Bus 0:Device 12h:Function 2 02 Programmable*** USB #1 EHCI Controller<br />
Bus 0:Device 13h: Function 0 01 Programmable*** USB #2 OHCI Controller #0<br />
Bus 0:Device 13h: Function 1 01 Programmable*** USB #2 OHCI Controller #1<br />
Bus 0:Device 13h: Function 2 02 Programmable*** USB #2 EHCI Controller<br />
Bus 0:Device 11h:Function 0 01 Programmable**** SATA Controller #2<br />
Notes:<br />
* IDE controller needs PCI IRQ only if it is set to the native mode.<br />
** Refer to section 4.3.1 for details.<br />
***Refer to section 7.1 for details.<br />
**** Smbus_pci_config 0xAF [4:2] for SATA Controller<br />
4.3.1 IRQ Routing for HD Audio<br />
Interrupt routing for device 14h, function 2 HD Audio is done through PCI SMBUS (device 14h,<br />
function 0) register 63h. Values from INTA# to INTH# can be set in this register.<br />
Sample Code: Set High Definition Audio interrupt routing to INTA#:<br />
mov eax,8000A060h ; Device 14h, function 0, registers 60h-63h<br />
mov dx,0CF8h ; PCI configuration Index register<br />
out dx,eax ; Set to read/write registers 60h-63h<br />
mov dx,0CFFh ; PCI configuration Data register for 63h<br />
mov al,0 ; Set to INTA#<br />
out dx,al ; Write to PCI register 63h<br />
Note: The SB700 has provisions to modify the interrupt pin register (PCI register 3Dh) for special<br />
conditions. This pin is modified through device 14h, function 2, register 44h. Under normal<br />
circumstances do not modify this register. The default is Pin 1.<br />
©2009 Advanced Micro Devices, Inc.<br />
<strong>AMD</strong> SB700 <strong>BIOS</strong> <strong>Developer</strong>s <strong>Guide</strong> Page 21
4.4 PCI IRQ Routing for APIC Mode<br />
©2009 Advanced Micro Devices, Inc.<br />
PCI IRQ APIC Assignment<br />
INTA# 16<br />
INTB# 17<br />
INTC# 18<br />
INTD# 19<br />
INTE# 20<br />
INTF# 21<br />
INTG# 22<br />
INTH# 23<br />
<strong>AMD</strong> SB700 <strong>BIOS</strong> <strong>Developer</strong>s <strong>Guide</strong> Page 22
5 SMBus Programming<br />
The SB700 SMBus (System Management Bus) complies with SMBus Specification Version 2.0.<br />
5.1 SMBus I/O Base Address<br />
The <strong>BIOS</strong> needs to set a valid SMBus I/O base address before enabling the SMBus Controller. The<br />
SMBus I/0 base address should be set at PCI Reg90h in the SMBus Controller (Bus 0, Device 14h,<br />
Function 0).<br />
The SMBus controller enable bit is bit 0, register D2h, of the SMBus device (Bus 0, Device 14h,<br />
Function 0).<br />
The following is a sample code to enable the SMBus with a temporary I/O base address:<br />
SMB_IO EQU 8040h<br />
; Set SMBus I/O base address<br />
mov dx, 0CF8h ; PCI Index Register<br />
mov eax, 8000A090h<br />
out dx, eax<br />
; Reg90h on SMBus PCI Controller<br />
mov dx, 0CFCh ; PCI Data Register<br />
mov eax, SMB_IO<br />
out dx, eax<br />
; Temp SMBus I/O base address<br />
; Enable the SMBus controller<br />
mov dx, 0CF8h ; PCI Index Register<br />
mov eax, 8000A0D0h<br />
out dx, eax<br />
; RegD0 on SMBus PCI Controller<br />
mov dx, 0CFEh ; PCI Data Register<br />
in al, dx ; Read back from RegD2h<br />
or al, 01<br />
out dx, al<br />
; Bit [0] for enabling SMBus Controller interface<br />
5.2 SMBus Timing<br />
The SMBus frequency can be adjusted using different values in an 8-bit I/O register at the SMBus<br />
base + 0Eh location.<br />
The SMBus frequency is set as follows:<br />
SMBus Frequency = (Primary Alink Clock )/(Count in index 0Eh * 4)<br />
The power-up default value in register 0Eh is A0h, therefore the default frequency is (66MHz)/(160 *<br />
4), or approximately 103 KHz.<br />
The minimum SMBus frequency can be set with the value FFh in the register at index 0Eh, which<br />
yields the following: (66MHz)/(255*4) = 64.7 KHz.<br />
©2009 Advanced Micro Devices, Inc.<br />
<strong>AMD</strong> SB700 <strong>BIOS</strong> <strong>Developer</strong>s <strong>Guide</strong> Page 23
5.3 SMBus Host Controller Programming<br />
Step Descriptions Register in<br />
SMBus I/O<br />
Space<br />
1 Wait until SMBus is idle. Reg00h[Bit0] 0 – Idle<br />
1 – Busy<br />
2 Clear SMBus status. Reg00h[Bit4:1] Write all 1’s to clear<br />
©2009 Advanced Micro Devices, Inc.<br />
Comments<br />
3 Set SMBus command. Reg03h The command will go to SMBus device.<br />
4 Set SMBus device address with<br />
read/write protocol<br />
5 Select SMBus protocol Reg02h[Bit4:2]<br />
6 Do a read from Reg02 to reset<br />
the counter if it’s going to be a<br />
block read/write operation<br />
7 Set low byte when write<br />
command<br />
8 Set high byte when write<br />
command<br />
Reg04h Bit7:1 – address<br />
Bit0 – 1 for read, 0 for write<br />
Reg02h<br />
Reg05h Byte command – It is the written data<br />
Word command – It is the low byte data<br />
Block command – It is block count<br />
Others – Don’t care<br />
Reg06h Word command – It is the high byte data<br />
Others – Don’t care<br />
9 Write the data when block write Reg07h Block write – write data one by one to it<br />
Others – Don’t care<br />
10 Start SMBus command execution Reg02h[Bit6] Write 1 to start the command<br />
11 Wait for host not busy Reg00h[Bit0]<br />
12 Check status to see if there is any<br />
error<br />
Reg00h[Bit4:2] With 1 in the bit, there is error<br />
13 Read data Reg05h Byte command – It is the read data<br />
Word command – It is the low byte data<br />
Block command – It is block count<br />
Others – Don’t care<br />
14 Read data Reg06h Word command – It is the high byte data<br />
Others – Don’t care<br />
15 Read the data when block write Reg07h Block read – read data one by one.<br />
Others – Don’t care<br />
The following flow chart illustrates the steps in programming the SMBus host controller.<br />
<strong>AMD</strong> SB700 <strong>BIOS</strong> <strong>Developer</strong>s <strong>Guide</strong> Page 24
©2009 Advanced Micro Devices, Inc.<br />
Figure 3: SMBus Host Controller Programming<br />
<strong>AMD</strong> SB700 <strong>BIOS</strong> <strong>Developer</strong>s <strong>Guide</strong> Page 25
6 IDE Controller<br />
The SB700 IDE controller supports Ultra ATA 33/66/100/133 modes. The IDE controller can be<br />
configured into either the compatible mode or the native mode. Under the compatible mode, the IDE<br />
controller will use the legacy resources.<br />
The SB700 allows programming of the IDE timing and mode for each drive independently on each<br />
channel.<br />
6.1 IDE Channel Enable/Disable<br />
Register on IDE<br />
Controller<br />
Bit Description<br />
Reg09h 1 Primary IDE channel programmable logic enable.<br />
Reg48h 0 Set 1 to disable the primary IDE channel.<br />
Reg48h 8 Set 1 to disable the secondary IDE channel.<br />
With the SB700, the <strong>BIOS</strong> must follow particular sequences to enable or disable the IDE channels<br />
(see section 6.1.1 and 6.1.2 below for further information).<br />
6.1.1 IDE Channel Enable<br />
Both of the IDE channels are enabled as power-on default. To enable an IDE channel, the <strong>BIOS</strong> must<br />
be set as follows:<br />
1. Set the IDE channel programmable logic enable bit in Reg09h.<br />
2. Clear the IDE channel disable bit in Reg48h to enable the IDE channel.<br />
Note: No IDE I/O port access is allowed in between step (1) and step (2). It is recommended that the<br />
<strong>BIOS</strong> execute step (2) immediately after step (1).<br />
Refer to section 14.3.5 for a programming sample.<br />
6.1.2 IDE Channel Disable<br />
To disable an IDE channel, the <strong>BIOS</strong> must:<br />
1. Set IDE channel programmable logic enable bit in Reg09h.<br />
2. Set IDE channel disable bit in Reg48h to disable IDE channel.<br />
Note: No IDE I/O port access is allowed in between step (1) and (2). It’s recommended that the <strong>BIOS</strong><br />
execute step (2) immediately after step (1).<br />
Note: Secondary IDE channel should always be disabled for there is no pin out for secondary IDE.<br />
After the IDE disable sequence, the IDE channel programmable logic enable bit will be cleared<br />
automatically.<br />
Refer to section 14.3.4 for a programming sample.<br />
©2009 Advanced Micro Devices, Inc.<br />
<strong>AMD</strong> SB700 <strong>BIOS</strong> <strong>Developer</strong>s <strong>Guide</strong> Page 26
6.2 PIO Modes<br />
The SB700 supports IDE PIO mode 0, 1, 2, 3, and 4. For PIO mode selection, the <strong>BIOS</strong> needs to<br />
program not only the PIO mode register, but also the PIO timing register.<br />
6.2.1 PIO Mode<br />
The <strong>BIOS</strong> can simply give the PIO mode number through Reg4Ah on the IDE controller.<br />
6.2.2 PIO Timing<br />
Two parameters determine the PIO bus-cycle timing: the command width and the recovery width.<br />
CT (bus-cycle timing) = 30ns * ((command width + 1) + (recovery width + 1))<br />
For each PIO mode, the command width and the recovery width must be set by the <strong>BIOS</strong><br />
accordingly:<br />
PIO<br />
Mode<br />
Command<br />
Width<br />
(In Reg40h)<br />
©2009 Advanced Micro Devices, Inc.<br />
Recovery Width<br />
(In Reg40h) CT<br />
0 9 9 600ns = 30 * ((9+1) + (9+1))<br />
1 4 7 390ns = 30 * ((4+1) + (7+1))<br />
2 3 4 270ns = 30 * ((3+1) + (4+1))<br />
3 2 2 180ns = 30 * ((2+1) + (2+1))<br />
4 2 0 120ns = 30 * ((2+1) + (0+1))<br />
6.3 DMA Modes<br />
The SB700 IDE controller can run at either the legacy (Multi-Words) DMA mode, or the Ultra-DMA<br />
mode.<br />
6.3.1 Legacy (Multi-Words) DMA mode<br />
The SB700 IDE controller will run at the legacy DMA mode only when the Ultra-DMA mode is<br />
disabled.<br />
Two parameters determine the DMA bus-cycle timing: the command width and the recovery width.<br />
CT (bus-cycle timing) = 30ns * ((command width + 1) + (recovery width + 1))<br />
<strong>AMD</strong> SB700 <strong>BIOS</strong> <strong>Developer</strong>s <strong>Guide</strong> Page 27
For each legacy DMA mode, the command width and recovery width must be set by the <strong>BIOS</strong><br />
accordingly:<br />
Legacy DMA<br />
Mode<br />
6.3.2 Ultra-DMA Mode<br />
Command<br />
Width<br />
(In Reg44h)<br />
©2009 Advanced Micro Devices, Inc.<br />
Recovery<br />
Width<br />
(In Reg44h)<br />
0 7 7 480ns = 30 * ((7+1) + (7+1))<br />
1 2 1 150ns = 30 * ((2+1) + (1+1))<br />
2 2 0 120ns = 30 * ((2+1) + (0+1))<br />
The SB700 IDE controller supports UDMA mode 0, 1, 2, 3, 4, 5, and 6.<br />
It only takes two simple steps to program the SB700 IDE controller into the UDMA mode:<br />
1. Set the mode number in UDMA mode register (Reg56h).<br />
2. Enable the UDMA mode through the UDMA control register (Reg54h). The UDMA<br />
bus-cycle timing is fixed after the UDMA mode is selected.<br />
UDMA Mode Bus-Cycle Timing (ns)<br />
0 120<br />
1 90<br />
2 60<br />
3 45<br />
4 30<br />
5 20<br />
6 15<br />
<strong>AMD</strong> SB700 <strong>BIOS</strong> <strong>Developer</strong>s <strong>Guide</strong> Page 28<br />
CT
7 USB Controllers<br />
7.1 Interrupt Routing for USB Controllers<br />
Bus 0 Dev 14h Func 0 Reg 0BEh is used to program the interrupt routing for the usb controllers 1 &<br />
2.<br />
UsbIntMap - RW - 16 bits - [PCI_Reg: BEh]<br />
Field Name Bits Default Description<br />
UsbInt1Map 2:0 000b UsbInt1 interrupt mapping to PCI interrupt<br />
UsbInt2Map 5:3 001b UsbInt2 interrupt mapping to PCI interrupt<br />
Reserved 7:6<br />
UsbInt3Map 10:8 010b UsbInt3 interrupt mapping to PCI interrupt<br />
UsbInt4Map 13:11 011b UsbInt4 interrupt mapping to PCI interrupt<br />
Reserved 15:14<br />
UsbIntMap register<br />
Encoding:<br />
000 - INTA#, 001 - INTB#, 010 - INTC#, 011 - INTD#, 100 - INTE#, 101 - INTF#, 110 - INTG#, 111 - INTH#<br />
The Interrupt mapping from USB controllers to Interrupt controller is as following,<br />
USB1(device-18) : OHCI0(fun-0)/OHCI1(fun-1) – UsbInt1<br />
EHCI (fun-2) – UsbInt2<br />
USB2(device-19) : OHCI0(fun-0)/OHCI1(fun-1) – UsbInt3<br />
EHCI (fun-2) – UsbInt4<br />
Bus 0 Dev 14h Func 0 Reg 063h is used to program the interrupt routing for the standalone ohci<br />
controller(Bus 0 Dev 14h Func 5).<br />
Usb3AzIntMap- RW - 8 bits - [PCI_Reg: 63h]<br />
Field Name Bits Default Description<br />
AzIntMap 2:0 110b Interrupt routing table for HD Audio. Setting this register<br />
routes the HD audio’s interrupt to the specific PCI interrupt<br />
before it is routed to the interrupt controller. In general<br />
software should not need to reroute HDaudio interrupt. SW<br />
only needs to do so for debugging purpose or special<br />
circumstance<br />
EcIRQ12En 3 Set to 1 to enable the IRQ12 coming from IMC<br />
Usb3IntMap 6:4 010b Interrupt routing table for USB3 (stand alone OHCI controller)<br />
EcIRQ1En 7 Set to 1 to make IRQ1 comes from IMC<br />
AzIntMap register<br />
Encoding:<br />
000 - INTA#, 001 - INTB#, 010 – INTC#, 011 - INTD#, 100 - INTE#, 101 - INTF#, 110 - INTG#, 111 - INTH#<br />
©2009 Advanced Micro Devices, Inc.<br />
<strong>AMD</strong> SB700 <strong>BIOS</strong> <strong>Developer</strong>s <strong>Guide</strong> Page 29
8 Serial ATA (SATA)<br />
The SB700 has one SATA controller. The SATA devices are enabled/disabled through register ADh<br />
in the SMBus controller (Device 14h, function 0).<br />
MiscSata - RW - 8 bits - [PCI_Reg: ADh]<br />
Field Name Bits Default Description<br />
SATA Enable 0 1 SATA enable<br />
SataSmbusEn 1 0 SATA SMBus enable<br />
SataSmbusMode 2 0 SATA SMBus mode, set to 1 to put SATA I2C on GPIO pins<br />
SataPsvEn<br />
Enable<br />
MiscSata register<br />
5 1 SATA power saving enable<br />
The SATA option ROM initial load size is 64KB, and the run time size is 50KB.<br />
A SATA controller enable/disable sample code is found in section 14.2.5.<br />
A SATA class ID change sample code is found in section 14.2.6.<br />
©2009 Advanced Micro Devices, Inc.<br />
<strong>AMD</strong> SB700 <strong>BIOS</strong> <strong>Developer</strong>s <strong>Guide</strong> Page 30
8.1 SATA New Features<br />
The SB700 SATA controller compared to the previous generation Southbridges<br />
differs in two areas:<br />
1. SATA Controller supports two additional ports providing a total of six SATA ports.<br />
2. SATA controller supports a unique architecture that allows the user to configure<br />
the SATA controller to work in-conjunction with the PATA controller to provide<br />
configurations that cannot be supported with SATA controller alone. This feature<br />
is referred as “Combined Mode” in this document.<br />
In the combined mode, the SATA Controller can be configured as either AHCI mode<br />
or RAID mode and support up to four (4) SATA ports. Ports 0:3 are assigned for this<br />
configuration. The other two (2) SATA ports will be configured as PATA ports and<br />
function in IDE mode. Two SATA ports (port 4 and port5) share one IDE channel<br />
(could be either Primary or Secondary channel) from IDE (PATA) controller.<br />
Alternatively, the SATA controller can be configured as IDE mode supporting up to six<br />
IDE channels. In this configuration the SATA ports will be assigned to the Primary /<br />
Secondary channels as defined in Table 1 below. The configuration for six IDE ports<br />
can also be achieved in two modes simultaneously by using the combined mode. I.E.<br />
Two IDE ports can be configured to work in Legacy mode while the other four ports<br />
can be configured to work in Native or compatibility mode.<br />
Table 1 SATA Port assignment in combined IDE mode<br />
©2009 Advanced Micro Devices, Inc.<br />
Port Number Primary , Secondary ,<br />
Master / Slave assignment<br />
SATA drive controlled by<br />
Port 0 Primary master SATA controller<br />
Port 1 Secondary master SATA controller<br />
Port 2 Primary slave SATA controller<br />
Port 3 Secondary slave SATA controller<br />
Port 4 Primary (Secondary) master PATA controller<br />
Port 5 Primary (Secondary) slave PATA controller<br />
The following figures show the combined mode configurations:<br />
<strong>AMD</strong> SB700 <strong>BIOS</strong> <strong>Developer</strong>s <strong>Guide</strong> Page 31
SATA controller in<br />
AHCI mode /<br />
Combined mode<br />
PATA Controller<br />
SATA drivers<br />
Vista inbox AHCI<br />
or <strong>AMD</strong> RAID /<br />
AHCI driver<br />
IDE Driver<br />
MS inbox driver<br />
©2009 Advanced Micro Devices, Inc.<br />
Hardware configuration view<br />
P0<br />
P1<br />
P2<br />
P3<br />
P4<br />
P5<br />
PATA<br />
Software view AHCI combined mode<br />
PATA Controller<br />
SATA device<br />
SATA device<br />
SATA device<br />
SATA device<br />
SATA device<br />
SATA device<br />
SATA controller in<br />
AHCI mode /<br />
Combined mode<br />
Ide/atapi device<br />
Port 4 and Port 5 operate in<br />
IDE mode. Configured as<br />
IDE mode Primary or<br />
Secondary channel.<br />
(selectable)<br />
<strong>AMD</strong> SB700 <strong>BIOS</strong> <strong>Developer</strong>s <strong>Guide</strong> Page 32<br />
PATA<br />
PATA<br />
P0<br />
P1<br />
P2<br />
P3<br />
SATA device<br />
SATA device<br />
SATA device<br />
SATA device<br />
Ide/atapi device<br />
Ide/atapi device<br />
Note: In this mode the MS inbox driver will control all PATA drives showing all devices under<br />
two physical IDE controllers.<br />
Fig 4: Combined Mode Configurations
8.2 Device ID<br />
The SB700 SATA will have different device IDs for different drivers, because they are totally<br />
different devices from driver point of view. It’s not sufficient for OS to know whether to load<br />
IDE, AHCI, or RAID driver. In non fresh installed condition, Windows will match 4 IDs (vendor<br />
ID, device ID, sub-system ID, sub-vendor ID) first, and if they are matched, it will load the<br />
driver. Window will not check sub-class code if 4-IDs are matched. This will cause blue<br />
screen WinXP when SATA RAID driver loaded, and SATA controller is in IDE mode, if device<br />
ID is shared.<br />
Device ID Device<br />
4390 SATA in IDE mode<br />
4391 SATA in AHCI mode with MS driver<br />
4392 SATA in RAID mode with Promise non-Raid 5 driver<br />
4393 SATA in RAID mode with Promise Raid5 driver<br />
©2009 Advanced Micro Devices, Inc.<br />
<strong>AMD</strong> SB700 <strong>BIOS</strong> <strong>Developer</strong>s <strong>Guide</strong> Page 33
8.3 SATA Controller Operating Modes<br />
Whenever SATA is set to any IDE mode (native ide, legacy ide, ide->ahci, ide->hfs) and combined<br />
mode is set to OFF, only 4 ports (0-3) can be supported in SATA controller and other 2 ports (4-5)<br />
cannot be used (it may work under OS but will not work under <strong>BIOS</strong>). IDE->Hyperflash mode is<br />
intended only for driver testing and debugging. In IDE->Hyperflash mode, ports 1 & 3 will not work<br />
under <strong>BIOS</strong> post and this is limitation of hardware.<br />
When combined mode is ON, Ports 4/5 will always be connected through PATA controller, meaning<br />
any device connected to this port will be shown as PATA IDE device. For trevally reference board,<br />
SATA port 4 is the one which is closest to CPU and port 5 is the one which has mobile sata<br />
connector. For Shiner reference board ports 4, 5 are the two e-sata ports.<br />
Standalone mode was intended for debugging and bringup purposes only. Behind SATA mode will be<br />
the official driver supported mode and all qualification should be done in this mode.<br />
8.4 SATA Hot Plug<br />
The SATA hot plug feature is implemented through the following registers:<br />
1. ACPI GPE0 Block status register bit 31 for SCI status.<br />
2. ACPI GPE0 Block enable register bit 31 for SCI enable.<br />
3. PMIO register 37h bit 2 to trigger SATA hot plug SCI.<br />
1 = Rising edge.<br />
0 = Falling edge trigger.<br />
4. The SATA internal status is set whenever a SATA hard drive is plugged in,<br />
unplugged, powered up, or powered down. The status registers are:<br />
Register BAR 5 + 10Ah, bit 0, for primary channel.<br />
Register BAR 5 + 18Ah, bit 0, for secondary channel.<br />
8.4.1 Sample Code<br />
See section 14.7 for the SATA Hot Plug sample code.<br />
©2009 Advanced Micro Devices, Inc.<br />
<strong>AMD</strong> SB700 <strong>BIOS</strong> <strong>Developer</strong>s <strong>Guide</strong> Page 34
9 Power Management<br />
On the SB700, PM registers can be accessed through I/O ports CD6h/CD7h. Before initiating any<br />
power management functions in the SB700, the <strong>BIOS</strong> needs to set the I/O base addresses for the<br />
ACPI I/O register, the SMI Command Port, and the SpeedStep Control register (etc):<br />
Notes:<br />
I/O Name Description Configure Register Range Size<br />
(Bytes)<br />
PM1_EVT ACPI PM1a_EVT_BLK PM IO Reg20h & Reg21h 4<br />
PM1_CNT ACPI PM1a_CNT_BLK PM IO Reg22h & Reg23h 2<br />
PM_TMR ACPI PM_TMR_BLK PM IO Reg24h & Reg25h 4<br />
P_BLK ACPI P_BLK PM IO Reg26h & Reg27h 6<br />
GPE0_EVT ACPI GPE0_EVT_BLK PM IO Reg28h & Reg29h 8<br />
SMI CMD Block * SMI Command Block PM IO Reg2Ah & Reg2Bh 2<br />
• The SMI CMD Block must be word aligned, i.e., the least significant bit of the address<br />
must be zero (address[0] must be 0). For example, B0h, B2h, B4h, B6h, B8h etc.<br />
• The SMI CMD Block consists of two ports – the SMI Command Port at base address, and<br />
the SMI Status Port at base address+1.<br />
• The writes to the SMI Status Port will not generate an SMI. The writes to the SMI<br />
Command Port will generate an SMI.<br />
• The SMI Command and SMI Status ports may be written individually as 8 bit ports, or<br />
together as a 16 bit port.<br />
9.1 SMI Handling – EOS (PM IO Reg10h[Bit0])<br />
Upon each SMI generation, the SB700 will clear the EOS bit automatically. At the end of the SMI<br />
service, the <strong>BIOS</strong> needs to clear the status bit of the SMI event and re-enable the EOS; otherwise,<br />
the SB700 will not be able to generate SMI, even if SMI events arrive.<br />
9.2 Programmable I/Os<br />
There are eight sets of programmable I/Os available on the SB700. The <strong>BIOS</strong> can use them for I/O<br />
trapping, which means that an SMI will be generated if any access falls into the PIO range.<br />
The PIO address range can be set to 2, 4, 8, and 16.<br />
I/O Name Description Configure Register Enable Status<br />
PIO0 Programmable I/O Range 0 PM IO Reg14h & Reg15h PM IO Reg1Ch[Bit7] PM IO Reg1Dh[Bit7]<br />
PIO1 Programmable I/O Range 1 PM IO Reg16h & Reg17h PM IO Reg1Ch[Bit6] PM IO Reg1Dh[Bit6]<br />
PIO2 Programmable I/O Range 2 PM IO Reg18h & Reg19h PM IO Reg1Ch[Bit5] PM IO Reg1Dh[Bit5]<br />
PIO3 Programmable I/O Range 3 PM IO Reg1Ah & Reg1Bh PM IO Reg1Ch[Bit4] PM IO Reg1Dh[Bit4]<br />
©2009 Advanced Micro Devices, Inc.<br />
<strong>AMD</strong> SB700 <strong>BIOS</strong> <strong>Developer</strong>s <strong>Guide</strong> Page 35
I/O Name Description Configure Register Enable Status<br />
PIO4 Programmable I/O Range 4 PM IO RegA0 & RegA1h PM IO Reg A8h[Bit0] PM IO RegA9h[Bit0]<br />
PIO5 Programmable I/O Range 5 PM IO RegA2 & RegA3h PM IO Reg A8h[Bit1] PM IO RegA9h[Bit1]<br />
PIO6 Programmable I/O Range 6 PM IO RegA4 & RegA5h PM IO Reg A8h[Bit2] PM IO RegA9h[Bit2]<br />
PIO7 Programmable I/O Range 7 PM IO RegA6 & RegA7h PM IO Reg A8h[Bit3] PM IO RegA9h[Bit3]<br />
Note: PM IO Reg04h[Bit7] is the overall control bit for enabling all the PIOs. The <strong>BIOS</strong> must set it before using any<br />
PIO.<br />
9.3 Power Management Timers<br />
There are two PM timers available on the SB700 – PM Timer 1 and PM Timer 2. The PM Timer 1<br />
(Inactivity Timer) can be programmed to reload on some activities, but not the PM Timer 2 (Activity<br />
Timer).<br />
9.3.1 PM Timer 1 (Inactivity Timer)<br />
The PM Timer 1 is a 6-bit timer with a granularity of 1 minute. The <strong>BIOS</strong> can set the initial value of the<br />
PM Timer 1 through PM IO Reg0Bh. PM IO Reg0Ch will return the current value of the decrementing<br />
counter.<br />
The PM Timer 1 is typically used as a stand-by timer under the APM mode.<br />
PM Timer1 Reloading On Description Enable<br />
IRQ[15:8] IRQ[15:8] activity. PM IO Reg08h[Bit7:0]<br />
IRQ[7:3], NMI, and IRQ[1:0] IRQ[7:3], NMI, and IRQ[1:0] activity PM IO Reg09h[Bit7:0]<br />
Programmable IO Any access to PIO ports. PM IO Reg0Ah[Bit7]<br />
Parallel Port Parallel ports activity PM IO Reg0Ah[Bit6]<br />
Serial Port Serial Ports activity PM IO Reg0Ah[Bit5]<br />
IDE Port IDE port activity PM IO Reg0Ah[Bit4]<br />
Floppy Port Floppy port activity PM IO Reg0Ah[Bit3]<br />
Game Port Game port (201H) activity PM IO Reg0Ah[Bit2]<br />
ExtEvent1 Assert ExtEvent1 pin PM IO Reg0Ah[Bit1]<br />
ExtEvent0 Assert ExtEvent0 pin PM IO Reg0Ah[Bit0]<br />
9.3.2 PM Timer 2 (Activity Timer)<br />
The PM Timer 2 is an 8-bit timer with a granularity of 500 µs. The <strong>BIOS</strong> can set the initial value of the<br />
PM Timer 2 through PM IO Reg12h. PM IO Reg13h will return the current value of the decrementing<br />
counter.<br />
Note: The PM Timer 2 cannot be configured to reload on any system activities.<br />
©2009 Advanced Micro Devices, Inc.<br />
<strong>AMD</strong> SB700 <strong>BIOS</strong> <strong>Developer</strong>s <strong>Guide</strong> Page 36
9.4 SMI Events<br />
The following is a list of all the SMI events available on the SB700. The events can only generate<br />
SMI, not SCI or wakeup events.<br />
The global SMI disable bit is PM IO register 53h, bit [3].<br />
PM IO register 53h bit [3] = 0 SMI# enabled (default)<br />
PM IO register 53h bit [3] = 1 SMI# disabled (all events disabled)<br />
SMI Source Description Enable Status<br />
Software SMI<br />
(obsolete way)<br />
©2009 Advanced Micro Devices, Inc.<br />
Set SmiReq (PM IO<br />
Reg00h[Bit4]) to generate SMI.<br />
Software SMI Any writing to SMI Command<br />
port.<br />
PM Timer 1 Timeout on PM Timer 1.<br />
Activity on PM IO register 08h,<br />
09h, 0Ah will retrigger timer<br />
PM Timer 2 Timeout on PM Timer 2.<br />
(See section 9.3.2)<br />
Always PM IO Reg01h[Bit4]<br />
PM IO Reg0Eh[Bit2] PM IO Reg0Fh[Bit2]<br />
PM IO Reg00h[Bit1] PM IO Reg01h[Bit1]<br />
PM IO Reg00h[Bit2] PM IO Reg01h[Bit2]<br />
IRQ[15:8] IRQ[15:8] activity. PM IO Reg02h[Bit7:0] PM IO Reg05h[Bit7:0]<br />
IRQ[7:3], NMI, and<br />
IRQ[1:0]<br />
IRQ[7:3], NMI, and IRQ[1:0]<br />
activity<br />
Programmable I/O Any access to PIO ports PM IO Reg04h[Bit7]<br />
AND<br />
PM IO Reg1Ch[Bit7:4]<br />
PM IO Reg03h[Bit7:0] PM IO Reg06h[Bit7:0]<br />
PM IO Reg1Dh[Bit7:4]<br />
Parallel Port Parallel ports activity PM IO Reg04h[Bit6] PM IO Reg07h[Bit6]<br />
Serial Port Serial Ports activity PM IO Reg04h[Bit5] PM IO Reg07h[Bit5]<br />
IDE Port IDE port activity PM IO Reg04h[Bit4] PM IO Reg07h[Bit4]<br />
Floppy Port Floppy port activity PM IO Reg04h[Bit3] PM IO Reg07h[Bit3]<br />
Game Port Game port (201h) activity PM IO Reg04h[Bit2] PM IO Reg07h[Bit2]<br />
ExtEvent1 Assert ExtEvent1 pin PM IO Reg04h[Bit1] PM IO Reg07h[Bit1]<br />
ExtEvent0 Assert ExtEvent0 pin PM IO Reg04h[Bit0] PM IO Reg07h[Bit0]<br />
Mouse/Keyboard Mouse/Keyboard port activity PM IO Reg1Ch[Bit3] PM IO Reg1Dh[Bit3]<br />
Audio/MSS Audio/MSS port activity PM IO Reg1Ch[Bit2] PM IO Reg1Dh[Bit2]<br />
MIDI MINI port activity PM IO Reg1Ch[Bit1] PM IO Reg1Dh[Bit1]<br />
AD_LIB AD_LIB port activity PM IO Reg1Ch[Bit0] PM IO Reg1Dh[Bit0]<br />
SERR# port System error to report parity<br />
errors or special cycle command<br />
or other catastrophic system<br />
errors.<br />
Global Release<br />
Write<br />
Temperature<br />
Warning<br />
PCI SMBus Reg 66h,<br />
bit[0]<br />
PCI SMBus reg 04h, bit<br />
[30].<br />
PM IO reg 0Fh[Bit 1]<br />
OS write to PM1 Control register PM IO 0Eh[Bit 0] PM IO 0Fh[Bit0]<br />
C50/C51, index 03,<br />
[bit1]<br />
C50/C51, index 02,<br />
[bit1]<br />
<strong>AMD</strong> SB700 <strong>BIOS</strong> <strong>Developer</strong>s <strong>Guide</strong> Page 37
9.4.1 Power Button<br />
Power button is always a wake-up event and can be programmed as an SCI wake-up event. The<br />
power button status register is AcpiPmEvtBlk, bit[8]. The <strong>BIOS</strong> must make sure this bit is cleared prior<br />
to the entry into any C or S states.<br />
In addition, when the power button is pressed for 4 seconds, the SB700 will shut down the entire<br />
system (by going to S5). No programming is required for this function.<br />
9.5 C-State Break Events<br />
9.5.1 Break Events for C2 State<br />
Under C2 the break events are as follows:<br />
• PBE#<br />
• Special_message from CPU (K8 mode)<br />
• I/O write to special register (K8 mode)<br />
• SMI#<br />
• NMI<br />
• INIT<br />
• Interrupts (in PIC mode only)<br />
9.5.2 Break Events for C3 and C4 States<br />
All of the events listed (above) as break events in C2 state are also break events in C3 and C4 states.<br />
In addition, the Bus Master Status is also a break event in C3 and C4 states.<br />
9.6 Save/Restore Sequence for S3 State<br />
9.6.1 Register Save Sequence for S3 State<br />
Prior to initiating S3 states, the <strong>BIOS</strong> must save the registers on the machine. The <strong>BIOS</strong> reserves a<br />
section of the memory and a section of the CMOS to save the registers. Depending on the <strong>BIOS</strong><br />
architecture, these registers may be saved either one time just prior to handing of the control over to<br />
the OS, or every time just before going into the S3 states.<br />
The following registers must be saved:<br />
• Some Northbridge registers in CMOS<br />
• Some Northbridge and Memory Controller registers<br />
• Southbridge PCI registers on the SB700<br />
• Southbridge non-PCI registers<br />
• PCI registers not on the SB700<br />
• Super I/O and other I/O registers.<br />
©2009 Advanced Micro Devices, Inc.<br />
<strong>AMD</strong> SB700 <strong>BIOS</strong> <strong>Developer</strong>s <strong>Guide</strong> Page 38
The <strong>BIOS</strong> typically sets aside an area in the memory to save the registers prior to the S3 state. The<br />
Southbridge registers may be saved in any order as long as those registers are visible to the <strong>BIOS</strong>.<br />
Some of the registers, such as SubSystem ID and SubSystem Vendor ID, may be saved, but written<br />
only once as dword. They are handled separately during restore.<br />
9.7 Wake on Events<br />
TBD<br />
9.8 Sleep SMI Events<br />
These events provide an SMI# before the system transits to an SX state (e.g. ACPI S1, S2, S3,<br />
S4, and S5). This feature helps the System <strong>BIOS</strong> to develop software workarounds or<br />
debugging routines before the system goes to sleep state.<br />
9.8.1 Sleep SMI Control Register<br />
There is a Sleep SMI control register in the SB700. Its base I/O address is defined at PMIO Reg 0x04.<br />
SLP_SMI_EN is a R/W register bit for controlling a Sleep SMI when the system transits to an ACPI<br />
SX state. The register definition is as follows:<br />
• SLP_SMI_EN [Bit7] = 0, Disables Sleep SMI event.<br />
• SLP_SMI_EN [Bit7] = 1, Enables Sleep SMI event.<br />
There is a Sleep SMI Status register in the SB700. Its base I/O address is defined at PMIO Reg 0x07.<br />
SLP_SMI_Status [Bit7] is asserted when the system goes to an ACPI SX state, and when<br />
SLP_SMI_EN is set to enable.<br />
9.8.2 Sleep SMI Programming Sequence<br />
9.8.2.1 Set Sleep SMI Control Register<br />
The Sleep SMI Control Register does not necessary have to be enabled before the system goes to<br />
the ACPI SX state. One may enable the control the bit in the ACPI ASL code. Please refer to section<br />
14.9 “Sleep Trap Through SMI#” for the sample code.<br />
9.8.2.2 Enter Sleep SMI# Routine<br />
The system does not go into the sleep state (set by ACPI PM1_CNT) when SMI# is asserted. The<br />
System <strong>BIOS</strong> has to follow the sequence below:<br />
1. Disable Sleep SMI Control register (SLP_SMI_EN).<br />
2. Software workaround or system <strong>BIOS</strong> debugging routing implementation.<br />
3. Write SLP_SMI_Status 1 to clear this event.<br />
4. Rewrite sleep command to ACPI register (ACPI PM1_CNT).<br />
5. RSM if necessary.<br />
©2009 Advanced Micro Devices, Inc.<br />
<strong>AMD</strong> SB700 <strong>BIOS</strong> <strong>Developer</strong>s <strong>Guide</strong> Page 39
10 APIC Programming<br />
With the <strong>AMD</strong> integrated chipset solution, the <strong>BIOS</strong> needs to program both the Northbridge and the<br />
Southbridge in order to support APIC.<br />
10.1 Northbridge APIC Enable<br />
There are three bits in the Northbridge that the <strong>BIOS</strong> should set before enabling APIC support.<br />
For RS480/RS690:<br />
• Enable Local APIC in K8. (Set bit11 in APIC_BASE MSR(001B) register.)<br />
• Reg4C[bit1] - This bit should be set to enable. It forces the CPU request with address<br />
0xFECx_xxxx to the Southbridge.<br />
• Reg4C[bit18] - This bit should be set to enable. It sets the Northbridge to accept MSI<br />
with address 0xFEEx_xxxx from the Southbridge.<br />
10.2 Southbridge APIC Enable<br />
There are two bits in the Southbridge that the <strong>BIOS</strong> should set before enabling APIC support.<br />
• Reg64[bit3] = 1 to enable the APIC function.<br />
• Reg64[bit7] = 1 to enable the xAPIC function. It is only valid if Bit3 is being set.<br />
10.3 IOAPIC Base Address<br />
The IOAPIC base address can be defined at SMBus PCI Reg. 74h. The power-on default value is<br />
FEC00000h.<br />
Note: This register is 32-bit access only. The <strong>BIOS</strong> should not use the byte restore mechanism to<br />
restore its value during S3 resume.<br />
10.4 APIC IRQ Assignment<br />
SB700 has IRQ assignments under APIC mode as follows:<br />
• IRQ0~15 – legacy IRQ<br />
• IRQ 16 – PCI INTA<br />
• IRQ 17 – PCI INTB<br />
• IRQ 18 – PCI INTC<br />
• IRQ 19 – PCI INTD<br />
• IRQ 20 – PCI INTE<br />
• IRQ 21 – PCI INTF<br />
• IRQ 22 – PCI INTG<br />
• INT 23 – PCI INTH<br />
• IRQ 09 – ACPI SCI<br />
SCI is still as low-level trigger with APIC enabled.<br />
©2009 Advanced Micro Devices, Inc.<br />
<strong>AMD</strong> SB700 <strong>BIOS</strong> <strong>Developer</strong>s <strong>Guide</strong> Page 40
10.5 APIC IRQ Routing<br />
During the <strong>BIOS</strong> POST, the <strong>BIOS</strong> will do normal PCI IRQ routing through port C00h/C01h. Once<br />
APIC is fully enabled by the OS, the routing in C00h/C01 must be all cleared to zero.<br />
The following is a sample ASL code that may be incorporated into the <strong>BIOS</strong>:<br />
Name(PICF,0x00)<br />
Method(_PIC, 0x01, NotSerialized)<br />
{<br />
Store (Arg0, PICF)<br />
If(Arg0) {<br />
\_SB.PCI0.LPC0.DSPI() // clear interrupt at 0xC00/0xC01<br />
}<br />
}<br />
OperationRegion(PIRQ, SystemIO, 0xC00, 0x2)<br />
Field(PIRQ, ByteAcc, NoLock, Preserve)<br />
{<br />
PIID, 8,<br />
PIDA, 8<br />
}<br />
IndexField(PIID, PIDA, ByteAcc, NoLock, Preserve)<br />
{<br />
PIRA, 8,<br />
PIRB, 8,<br />
PIRC, 8,<br />
PIRD, 8,<br />
PIRS, 8<br />
Offset(0x09),<br />
PIRE, 8,<br />
PIRF, 8,<br />
PIRG, 8,<br />
PIRH, 8<br />
}<br />
Method(DSPI)<br />
{<br />
Store(0x00, PIRA)<br />
Store(0x00, PIRB)<br />
Store(0x00, PIRC)<br />
Store(0x00, PIRD)<br />
Store(0x00, PIRS)<br />
Store(0x00, PIRE)<br />
Store(0x00, PIRF)<br />
Store(0x00, PIRG)<br />
Store(0x00, PIRH)<br />
}<br />
©2009 Advanced Micro Devices, Inc.<br />
<strong>AMD</strong> SB700 <strong>BIOS</strong> <strong>Developer</strong>s <strong>Guide</strong> Page 41
11 Watchdog Timer<br />
To enable the watchdog timer in the SB700, the following registers must be initialized:<br />
• Enable the watchdog timer by resetting bit 0 in PMIO register 069h.<br />
• Set bit 3 in SMBus PCI Config (Bus 0 Device 20 Function 0) Reg 41h to enable the<br />
watchdog decode.<br />
• Ensure that the watchdog timer base address is set to a non zero value, typically<br />
0FEC000F0h. The watchdog base address is set at PMIO address 6Ch-6Fh as shown in<br />
the sample program below. (PMIO is addressed as byte index/data):<br />
Sample Program:<br />
mov dx,0CD6h ; PMIO index register<br />
mov al,6Fh ; Most significant base address location<br />
out dx,al ; Set the index to 6Fh<br />
mov dx,0CD7h ; PMIO data register<br />
mov<br />
out dx,al<br />
al,0FEh ; Most significant base address<br />
mov dx,0CD6h ; PMIO index register<br />
mov al,6Eh ; Second significant base address location<br />
out dx,al ; Set the index to 6Eh<br />
mov dx,0CD7h ; PMIO data register<br />
mov<br />
out dx,al<br />
al,0C0h ; Second significant base address<br />
mov dx,0CD6h ; PMIO index register<br />
mov al,6Dh ; Third significant base address location<br />
out dx,al ; Set the index to 6Dh<br />
mov dx,0CD7h ; PMIO data register<br />
mov<br />
out dx,al<br />
al,00h ; Third significant base address<br />
mov dx,0CD6h ; PMIO index register<br />
mov al,6Ch ; Least significant base address location<br />
out dx,al ; Set the index to 6Ch<br />
mov dx,0CD7h ; PMIO data register<br />
mov<br />
out dx,al<br />
al,0F0h ; Least significant base address<br />
©2009 Advanced Micro Devices, Inc.<br />
<strong>AMD</strong> SB700 <strong>BIOS</strong> <strong>Developer</strong>s <strong>Guide</strong> Page 42
To verify that the watchdog timer works correctly, perform the following steps:<br />
• Write 100 (count) to the watchdog count register at address 0FEC000F4h.<br />
• Enable and start the watchdog timer by writing 00000081h to the watchdog control<br />
register at 0FEC000F0h.<br />
• The counter will start decrementing and will reset the system once it reaches 0. This<br />
means that the watchdog timer is working as designed.<br />
©2009 Advanced Micro Devices, Inc.<br />
<strong>AMD</strong> SB700 <strong>BIOS</strong> <strong>Developer</strong>s <strong>Guide</strong> Page 43
12 A-Link Bridge<br />
The registers are accessed using an address-register/data-register mechanism. The address register<br />
is AB_INDX[31:0], and the data register is AB_DATA[31:0].<br />
31:30 29:17 16:2 1:0<br />
RegSpace[1:0] Reserved Register address[16:2] Reserved<br />
©2009 Advanced Micro Devices, Inc.<br />
AB_INDX [31:0]<br />
31:0<br />
Data[31:0]<br />
AB_DATA[31:0]<br />
RegSpace[1:0]<br />
00b AXINDC Index/Data Registers. (AX_INDXC)<br />
01b AXINPD Index/Data Registers (AX_INDXP)<br />
10b Alink Express Configuration (AXCFG)<br />
11b Alink Bridge Configuration (ABCFG)<br />
Definition of RegSpace[1:0]<br />
In order to read or write a particular register, the software will write the register address and the<br />
register space identifier to AB_INDX and then do a read or write to AB_DATA. This is analogous to<br />
how PCI configuration reads and writes work through I/O addresses CF8h/CFCh.<br />
The location of AB_INDX in the I/O space is defined by the abRegBaseAddr register located at<br />
Device 14h, function 0, register 0F0h. The AB_DATA register address is offset 4h from the AB_INDX<br />
address. The address of the AB_INDX must be 8 byte aligned.<br />
31:3 2:0<br />
BaseAddr[31:3] Rsv<br />
abRegBAR[31:0] at Bus 0, Device 14h, Function 0, Register 0F0h<br />
AXCFG and ABCFG registers are accessed indirectly through AB_INDX/AB_DATA. To read or write<br />
a particular register through AB_INDX/AB_DATA, the register address and the register space<br />
identifier is first written to AB_INDX. The specified register is then accessed by doing a read or write<br />
to AB_DATA (see the example below).<br />
Access to AXINDC and AXINDP registers requires a second level of indirection. Registers in these<br />
spaces are addressed through the following indirection registers: AX_INDEXC/AX_DATAC and<br />
AX_INDEXP/AX_DATAP.<br />
<strong>AMD</strong> SB700 <strong>BIOS</strong> <strong>Developer</strong>s <strong>Guide</strong> Page 44
©2009 Advanced Micro Devices, Inc.<br />
Register Indirect Address<br />
AX_INDXC 30h<br />
AX_DATAC 34h<br />
AX_INDXP 38h<br />
AX_DATAP 3Ch<br />
Example: To write to register 21h in the INDXC space with a data of 00, the following steps are<br />
required:<br />
1. Out 30h to AB_INDX. This will prepare to write register from INDXC<br />
2. Out 21h to AB_DATA. This will set register 21h of INDXC<br />
3. Out 34h to AB_INDX. This will prepare to write data to register defined in steps 1<br />
and 2 above<br />
4. Out 00 to AB_DATA. This will write the data to the register defined n steps 1 and<br />
2 above.<br />
12.1 Programming Procedure<br />
Indirect access is required to access both A-Link Express Configuration and A-Link Bridge<br />
Configuration register space. The programming procedure is as follows:<br />
Write:<br />
1. Set the A-Link bridge register access address. This address is set at device 14h,<br />
function 0, register 0F0h. This is an I/O address and needs to be set only once<br />
after power-up. The I/O address must be on a 8-byte boundary (i.e., 3 LS bits<br />
must be zeroes).<br />
Example: To set C80h as an A-Link bridge register access address:<br />
mov dx,0CF8h ; To access device 14h, function 0<br />
mov eax,8000A0F0h ;<br />
out dx,eax<br />
mov dx,0CFCh<br />
mov eax,00000C80h ; A-Link bridge register access address<br />
out dx,eax<br />
Note: Although the 32-bit I/O address is set for the A-Link bridge (e.g.,<br />
00000C80h), the bridge may be accessed by a 16-bit address (i.e., 0C80h). The<br />
MS word is set to 00 by default (see the example below).<br />
2. Write the register address in the AB_INDX.<br />
Example: To write to the A-Link Bridge configuration register space at 90h:<br />
mov dx,0c80h ; I/O address index assigned to A-Link<br />
mov eax, 0C0000090h ; Bits[31:30] = 11 for A-Link Bridge register<br />
; space<br />
<strong>AMD</strong> SB700 <strong>BIOS</strong> <strong>Developer</strong>s <strong>Guide</strong> Page 45
Read:<br />
©2009 Advanced Micro Devices, Inc.<br />
out dx,eax ; Register index is set<br />
mov dx,0c84h ; I/O address for data<br />
mov eax,00000001h ; Power down 2 lanes to save power<br />
out dx,eax<br />
Use a similar indirect procedure to read out the register value inside AB and BIF.<br />
12.2 A-Link Express Configuration DMA Access<br />
To enable A-Link Express Configuration DMA access, a specific register space needs to be<br />
configured first. This register is in the A-Link Express register space that refers to port-specific<br />
configuration registers (see section 12 above for a description of the AB_INDX register). When<br />
configuring the register, bit2 of byte 4 needs to be set to “1” to enable the DMA access.<br />
Follow these steps to initialize A-Link Express configuration DMA access (this initialization has to be<br />
performed during S3 wakeup also):<br />
1. Issue an I/O write to AB_INDX. The write data's bit [31:30] should be 10 b(binary).<br />
The register to be written is in the port-specific configuration register space, and bit<br />
[16:0] should be 0x4 (hex).<br />
2. Issue an I/O write to AB_Data. This write data's bits[31:0] should be 0x4h (i.e.,<br />
32'b0000_0000_0000_0100 binary).<br />
mov dx, _0C80h ; ALINK_ACCESS_INDEX<br />
in eax, dx<br />
and eax, NOT (0C001FFFFh)<br />
or eax, 080000004h<br />
out dx, eax<br />
mov dx, 0C84h ; ALINK_ACCESS_DATA<br />
mov<br />
out dx, eax<br />
eax, 04h<br />
;Write AB_INDX 0x30<br />
;Write AB_DATA 0x21<br />
;Write AB_INDX 0x34<br />
;Write AB_DATA 0x00<br />
mov dx, 0C80h ; ALINK_ACCESS_INDEX<br />
mov<br />
out dx, eax<br />
eax, 30h<br />
mov dx, 0C84h ; ALINK_ACCESS_DATA<br />
mov<br />
out dx, eax<br />
eax, 21h<br />
mov dx,0C80h ; ALINK_ACCESS_INDEX<br />
<strong>AMD</strong> SB700 <strong>BIOS</strong> <strong>Developer</strong>s <strong>Guide</strong> Page 46
mov<br />
out dx, eax<br />
eax, 34h<br />
mov dx, 0C84h ; ALINK_ACCESS_DATA<br />
mov<br />
out dx, eax<br />
eax, 00h<br />
12.3 Enable Non-Posted Memory Write for K8 Platform.<br />
The register index 10h of AXINDC bit9 should be set to 1.<br />
mov dx,AB_INDX ; AB index register<br />
mov eax,30h ; Address of AXINDC<br />
out dx,eax ; Set register address<br />
mov dx,AB_DATA ; To write register address<br />
mov<br />
out dx,eax<br />
eax,10h ; Write register address<br />
mov dx,AB_INDX<br />
mov<br />
out dx,eax<br />
eax,34h ; To write data portion of the AXINDC<br />
mov dx,AB_DATA<br />
in eax,dx ; Read the current data<br />
or al,200h ; Set bit 9<br />
out dx,eax ; Write data back.<br />
©2009 Advanced Micro Devices, Inc.<br />
<strong>AMD</strong> SB700 <strong>BIOS</strong> <strong>Developer</strong>s <strong>Guide</strong> Page 47
13 High Precision Event Timer (HPET)<br />
The SB700 includes an industry standard High Precision Event Timers (HPET). The details and the<br />
operation of the timer are described in the IA-PC HPET specification. This section describes the timer<br />
initialization in the SB700 chipset.<br />
13.1 Initialization<br />
For SB700 is HPET usage is required, then during the early POST, the timer base address must be<br />
programmed in Device 14h, Function 0, register 14h. This base address is also reported to the<br />
operating system through the ACPI table as specified in the specification. In addition, the HPET<br />
interrupts may also be enabled through Device 14h, Function 0, register 64h, bit 10.<br />
13.1.1 Sample Initialization Code<br />
HpetBaseAddress EQU 0FED00000H ; OEM specific address<br />
; Set Base address in Device 14h, Function 0, Register 14h<br />
mov dx,0CF8h ; PCI index register<br />
mov eax,8000A014h ; Bus 0, Device 14h, Function 0, Register 14h<br />
out dx,eax ; Set PCI index to register 14h<br />
mov dx,0CFCh ; PCI data register<br />
mov eax,0FED00000h ; Base address, OEM specific<br />
out dx,eax<br />
; Enable the HPET interrupts, if needed. Set Device 14h, Function 0, Register<br />
64h, bit 10<br />
mov dx,0CF8h ; PCI index register<br />
mov eax,8000A064h ; Bus 0, Device 14h, Function 0, Register<br />
64h<br />
out dx,eax ; Set PCI index to register 64h<br />
mov dx,0CFCh ; PCI data register<br />
in eax,dx ; Read current value of register 64h<br />
or eax,00000400h ; Set bit 10<br />
out dx,eax<br />
©2009 Advanced Micro Devices, Inc.<br />
<strong>AMD</strong> SB700 <strong>BIOS</strong> <strong>Developer</strong>s <strong>Guide</strong> Page 48
13.2 ACPI HPET Description Table<br />
As described in the specification, an ACPI HPET table is required to report the base address to the<br />
operating system. The table includes a ACPI table header, and HPET table-specific fields. The<br />
sample values for the HPET specific fields are as follows:<br />
Event Timer Block ID DD 00000000h<br />
Base Address (Lower 4 bytes) DD 00000800h<br />
Base Address (Middle 4 bytes) DD 0FED00000h ; Address on 32 bit system<br />
Base Address (Upper 4 bytes) DD 00000000h ; Used on 64 bit system<br />
HPET Number DB 00h<br />
Minimum Clock Tick DW 37EEh ; 14318 (decimal)<br />
13.3 HPET Support for Vista<br />
For the SB700, PM_IO register 72h bits [2:0] should be set to 111b for Longhorn support.<br />
©2009 Advanced Micro Devices, Inc.<br />
<strong>AMD</strong> SB700 <strong>BIOS</strong> <strong>Developer</strong>s <strong>Guide</strong> Page 49
14 Sample Programs<br />
14.1 IXP700 Register Initialization on Power-Up<br />
14.1.1 Initialization of PCI IRQ Routing before Resource Allocation<br />
The PCI IRQs are programmed using index/data format through registers C00h/C01h. Index<br />
0 through 3, and 9 through 0Ch, are for PCI IRQ lines. Index 4 is for SCI interrupt generated<br />
for ACPI, and Index 5 is for SMBus interrupt.<br />
Sample Program<br />
The following routine initializes all PCI interrupts to zeroes.<br />
PciIrqInit proc near<br />
push ax ; Save the registers used in the routine<br />
push dx<br />
mov ax,00h ; Start with index = 0, data = 0<br />
ClearPciIrq0To5:<br />
mov dx,0C00h ; PCI interrupt index port<br />
out dx,al ; Set index<br />
mov dx,0C01h ; PCI interrupt data port<br />
xchg<br />
out dx,al<br />
ah,al ; Get data in AL = 0<br />
xchg ah,al ; AL = Index<br />
inc al ; Point to next index<br />
cmp al, 05h ; Max index in 0 to 5 series<br />
jbe ClearPciIrq0To5<br />
; Initialize for index 9 through 0Ch<br />
mov ax,0009h ; To clear from index 09 to 0Ch<br />
ClearPciIrq9ToC:<br />
mov dx,0C00h ; PCI interrupt index port<br />
out dx,al ; Set index<br />
mov dx,0C01h ; PCI interrupt data port<br />
xchg<br />
out dx,al<br />
ah,al ; Get data in AL = 0<br />
xchg ah,al ; AL = Index<br />
inc al ; Point to next index<br />
cmp al, 0Ch ; Max index in 9 to 0Ch series<br />
jbe ClearPciIrq9ToC<br />
pop dx ; Restore the registers<br />
©2009 Advanced Micro Devices, Inc.<br />
<strong>AMD</strong> SB700 <strong>BIOS</strong> <strong>Developer</strong>s <strong>Guide</strong> Page 50
pop ax<br />
ret<br />
PciIrqInit endp<br />
14.2 Setup Options<br />
14.2.1 64 Bytes DMA<br />
If 64 bytes DMA is selected for P2P bridge, set PCI to PCI bridge device 14h, function 4, register 4Bh,<br />
bit 4 to 1.<br />
14.2.2 USB Overcurrent Detection Disable<br />
To disable over-current detection for both OHCI and EHCI USB devices, set USB device 13h,<br />
function 0 register 51h, bit 0.<br />
Sample Program<br />
UsbOverCurrentDetectionDisable proc near<br />
push eax ; Save registers used by this device<br />
push dx<br />
mov dx,0CF8h ; PCI configuration space index register<br />
mov<br />
out dx,eax<br />
eax,8000A850h ; Device 13h, function 0, register 50h-53h<br />
mov dx,0CFDh ; PCI configuration space. Access reg. 51h<br />
in dx,al ; Read current value<br />
or al,01h<br />
out dx,al<br />
; Set to disable USB OHCI and EHCI overcurrent<br />
pop dx<br />
pop eax<br />
ret<br />
; Restore registers used by this routine<br />
UsbOverCurrentDetectionDisable endp<br />
14.2.3 C3 Support<br />
The C3 support depends on the processor PBE support and HyperThreading. The ACPI FACP table<br />
also needs to be modified for C3 support. The description below applies only to the SB700 registers<br />
affected by C3 support.<br />
PM I/O register 51h is set to C3 latency as follows:<br />
C3 Latency = (bits[5:0] of PM I/O register 51h) * 8us<br />
Hence for recommended C3 Latency = 40us, set (bits[5:0] of PM I/O register 51h) = 5<br />
©2009 Advanced Micro Devices, Inc.<br />
<strong>AMD</strong> SB700 <strong>BIOS</strong> <strong>Developer</strong>s <strong>Guide</strong> Page 51
For deep C3 support, in addition to setting register 51h above, PM I/O register 50h bit0 must also be<br />
set to 1.<br />
14.2.4 Subtractive Decoding for P2P Bridge<br />
To enable the subtractive decoding, set device 14h, function 4, P2P bridge register 40h bit 5 to 1.<br />
Sample Program:<br />
EnableSubtractiveDecoding proc near<br />
push eax ; Save registers used in this routine<br />
push dx<br />
mov dx,0CF8h<br />
mov<br />
out dx,eax<br />
eax,8000A440h ; Bus 0, device 14h, function 4, register 40h, P2P<br />
mov dx,0CFCh ; To access register 40h<br />
in al,dx<br />
or al,20h<br />
out dx,al<br />
; Set bit 5 for subtractive decoding<br />
; Set bit 7 of register 4Bh to show subtractive decoding in class code reg. 09h bit 0<br />
mov dx,0CF8h<br />
mov<br />
out dx,eax<br />
eax,8000A448h ; Bus 0, device 14h, function 4, register 48h-4Bh<br />
mov dx,0CFFh ; To access register 4Bh<br />
in al,dx<br />
or al,80h<br />
out dx,al<br />
; Control bit for PI register<br />
pop dx<br />
pop eax<br />
ret<br />
; Restore registers<br />
EnableSubtractiveDecoding endp<br />
©2009 Advanced Micro Devices, Inc.<br />
<strong>AMD</strong> SB700 <strong>BIOS</strong> <strong>Developer</strong>s <strong>Guide</strong> Page 52
14.2.5 Enable/Disable On-Chip SATA<br />
SATA may be disabled/enabled by Miscellaneous SATA register located at bus 0, device 14h,<br />
function 0, register ADh. Bit 0 of this register, when set to 1, enables SATA.<br />
Sample Program:<br />
This sample program will enable SATA<br />
EnableDisableSataSampleProgram proc near<br />
push eax ; Save registers used by this routine<br />
push dx<br />
mov dx,0CF8h ; To access PCI configuration space<br />
mov<br />
out dx,eax<br />
eax,8000A0ACh ; Register ACh to AFh of device 14h, function 0<br />
mov dx,0CFDh ; To access register 0ADh<br />
in al,dx ; Read current value<br />
or al,01h ; Set bit 0 to enable SATA<br />
out dx,al<br />
pop dx<br />
pop eax<br />
ret<br />
; Write the byte back<br />
EnableDisableSataSampleProgram endp<br />
14.2.6 Change Class ID for SATA<br />
The SATA device may have multiple PCI class codes. Some of the class codes are as follows:<br />
Class Base Class Code<br />
Register 0Bh<br />
©2009 Advanced Micro Devices, Inc.<br />
SubClass Code<br />
Register 0Ah<br />
Programming<br />
Interface Register<br />
09h<br />
IDE Class 01h 01h 8Fh<br />
AHCI Class 01h 06h 01h<br />
Raid Class 01h 04h 00h<br />
To change the class ID for the SATA*:<br />
1. Enable header write: Set the SATA PCI Bus 0, Device 12h, Function 0 (for SATA),<br />
register 40h, bit 0 to 1.<br />
2. Write to the same SATA device registers (9h, 0Ah, 0Bh) with the class ID.<br />
3. Disable header write: Clear the SATA device register 40h, bit 0 to 0.<br />
<strong>AMD</strong> SB700 <strong>BIOS</strong> <strong>Developer</strong>s <strong>Guide</strong> Page 53
Sample Program:<br />
This sample program will set SATA-1, Bus 0, Device 12h, Function 0 to class code for IDE class<br />
01018Fh.<br />
SataClassIdSampleProgram proc near<br />
push eax ; Save registers used by this routine<br />
push dx<br />
; Enable header write. Set register 40h, bit 0 to 1<br />
mov dx,0CF8h ; To access PCI configuration space<br />
mov<br />
out dx,eax<br />
eax, 80009040h ; SATA-1, Bus 0, Device 12h, Function 0, reg 40h<br />
mov dx,CFCh ; To access register 40h<br />
in al,dx<br />
or al,01h<br />
out dx,al<br />
; Current register 40h value<br />
; Write class code. Register 08 is read only and will not be modified<br />
mov dx,0CF8h ; To access PCI configuration space<br />
mov<br />
out dx,eax<br />
eax,80009008h ; Bus 0, Device 12h, Function 0 , register 08h<br />
mov dx,0CFCh ; To access dword at starting at register 08h<br />
mov<br />
out dx,eax<br />
eax,01018F00h ; Reg 08 is read only. Reg 9-0b will be written<br />
; Disable header write. Clear register 40h, bit 0 to 0<br />
mov dx,0CF8h ; To access PCI configuration space<br />
mov<br />
out dx,eax<br />
eax, 80009040h ; SATA-1, Bus 0, Device 12h, Function 0, reg 40h<br />
mov dx,0CFCh ; To access register 40h<br />
in al,dx ; Current register 40h value<br />
and al,0FEh<br />
out dx,al<br />
pop dx<br />
pop eax<br />
ret<br />
; Restore registers used by this routine<br />
SataClassIdSampleProgram endp<br />
Note: For SB700 revision A11 and revision A12, the SATA controller was at Bus 0, Device 13h,<br />
©2009 Advanced Micro Devices, Inc.<br />
<strong>AMD</strong> SB700 <strong>BIOS</strong> <strong>Developer</strong>s <strong>Guide</strong> Page 54
function 3 and 4.<br />
14.2.7 Disable AC97 Audio or MC97 Modem<br />
For, the AC97 PCI device 14h, functions 5 or 6 may be disabled by setting bits in PM I/O register 59h.<br />
The setting of bit 0 will mask out AC97 device 14h, function 5. the setting of bit 1 will mask out MC97<br />
device 14h, function 6.<br />
Any memory resources assigned to audio and modem PCI devices should also be cleared prior to<br />
disabling these devices.<br />
Sample Program:<br />
The following sample program shows how to disable AC97 audio device 14h, function 5. To disable<br />
MC97 modem device 14h, function 6, set PM I/O register bit 1.<br />
DisableAc97Sample proc near<br />
push eax ; Save registers used by this routine<br />
push dx<br />
; If AC97 audio was previously enabled, clear the memory resources assigned.<br />
mov dx,0CD6h ; PM I/O index register<br />
mov<br />
out dx,al<br />
al, 59h ; AC97 Mask register<br />
mov dx,0CD7h ; PM I/O data register<br />
in al,dx ; Read current value<br />
test al,01h ; Is the AC97 audio previously disabled<br />
jnz DisableDone ; Already disabled , so exit the routine<br />
; Clear the address at reg. 10h of AC97 device 14h, function 5 to release the resources<br />
mov dx,0CF8h ; To access PCI configuration register<br />
mov<br />
out dx,eax<br />
eax,8000A510h ; Device 14h, function 5, register 10h<br />
mov dx,0CFCh ; To access dword starting at 10h<br />
mov eax,0<br />
out dx,eax<br />
; Disable the AC-97 device by setting PM I/O register 59h bit 0 to 1<br />
mov dx,0CD6h ; PM I/O index register<br />
mov<br />
out dx,al<br />
al, 59h ; AC97 Mask register<br />
mov dx,0CD7h ; PM I/O data register<br />
in al,dx ; Read current value<br />
or al,01h ; Set AC97 audio to disable<br />
©2009 Advanced Micro Devices, Inc.<br />
<strong>AMD</strong> SB700 <strong>BIOS</strong> <strong>Developer</strong>s <strong>Guide</strong> Page 55
out dx,al<br />
DisableDone:<br />
pop dx<br />
pop eax<br />
ret<br />
DisableAc97Sample endp<br />
14.2.8 Enable EHCI Controller<br />
The memory must be in big real mode to access the USB operational registers through the 32-bit<br />
base address register.<br />
push eax<br />
push dx<br />
push ebp<br />
push es<br />
; Set up a temporary Base Address Register (BAR)<br />
; The value of BAR will be board specific and vary with the <strong>BIOS</strong> vendor<br />
; This step may be skipped if the BAR is already assigned.<br />
mov dx,0CF8h<br />
mov<br />
out dx,eax<br />
eax,80009810h ; BAR for device 13h, function 0<br />
mov dx,0CFCh<br />
mov<br />
out dx,eax<br />
eax,0E0000000h ; This value will differ with the <strong>BIOS</strong> vendor<br />
mov ebp,eax<br />
; Enable memory, I/O, and bus master access<br />
mov dx,0CF8h<br />
mov<br />
out dx,eax<br />
eax,80009A04h<br />
mov dx,0CFCh<br />
mov<br />
out dx,al<br />
al, 07h<br />
; Issue host controller reset through operational register 0<br />
xor ax,ax<br />
mov es,ax ; To access operational registers through BAR<br />
mov eax, es:[ebp]<br />
or eax,02h<br />
©2009 Advanced Micro Devices, Inc.<br />
<strong>AMD</strong> SB700 <strong>BIOS</strong> <strong>Developer</strong>s <strong>Guide</strong> Page 56
mov es:[ebp],eax<br />
; Enables the USB PHY auto calibration resistor<br />
mov eax, 00020000h<br />
mov es[ebp+0C0h], eax<br />
; Program EHCI FIFO threshold.<br />
; Out threshold = 20h, In threshold = 10h for 2lane NB-SB link<br />
; Out threshold = 20h, In threshold = 40h for 4lane NB-SB link<br />
mov eax,00200010h<br />
mov es:[ebp+0A4h],eax<br />
pop es<br />
pop ebp<br />
pop dx<br />
pop eax<br />
ret<br />
©2009 Advanced Micro Devices, Inc.<br />
<strong>AMD</strong> SB700 <strong>BIOS</strong> <strong>Developer</strong>s <strong>Guide</strong> Page 57
14.2.9 Enable OHCI Controller<br />
OHCI Device 13h, function 1 and 5, may be enabled/disabled by bits 1 and 5 in SMBus device 14h,<br />
function 0, register 068h.<br />
If disable is done after BAR resources are allocated, set BAR to zero.<br />
USB SMI enabled, when appropriate, at SMBus device 14h, function 0, register 65h, bit 7.<br />
Sample Program:<br />
Enable 5 OHCIs .<br />
EnableOhciSample proc near<br />
push eax ; Save registers used in this program<br />
push dx<br />
mov dx,0CF8h ; To access PCI configuration space<br />
mov<br />
out dx,eax<br />
eax,8000A068h ; SMBus device 14h, function 0, register 68h<br />
mov dx,0CFCh ; To read register 068h<br />
in al,dx<br />
or al,03Eh<br />
out dx,al<br />
pop dx<br />
pop eax<br />
ret<br />
; Set bit [5:1] to enable OHCI<br />
EnableOhciSample endp<br />
14.3 IDE Settings<br />
The primary IDE channel is enabled on power-up by default. Refer to section 14.3.4 to disable the<br />
IDE channels.<br />
14.3.1 PIO Mode Settings<br />
IDE PIO mode and timing is set through the registers 40h-43h, 4Ah-4Bh, the PIO timing is<br />
programmed in registers 40h-43h, and PIO mode is programmed in registers 4Ah–4Bh.<br />
The PCI IDE device is 14h, function 1.<br />
Reg 40h Primary slave timing<br />
Reg 41h Primary master timing<br />
Reg 42h Secondary slave timing<br />
Reg 43h Secondary master timing<br />
Reg 4Ah, bits[2:0] Primary master mode number<br />
Reg 4Ah bits[6:4] Primary slave mode number<br />
©2009 Advanced Micro Devices, Inc.<br />
<strong>AMD</strong> SB700 <strong>BIOS</strong> <strong>Developer</strong>s <strong>Guide</strong> Page 58
Reg 4Bh bits[2:0] Secondary master mode number<br />
Reg 4Bh bits[6:4] Secondary slave mode number<br />
PIO timing has two components – the command width, and the recovery width. The widths are stated<br />
in number of cycles of PCICLK and the following values are defined for PCICLK frequency of 33MHz<br />
and 66MHz:<br />
Width PIO Mode 4 PIO Mode 3 PIO Mode 2 PIO Mode 1 PIO Mode 0<br />
Command<br />
Width (cycles)<br />
Recovery<br />
Width<br />
©2009 Advanced Micro Devices, Inc.<br />
2 2 3 4 5<br />
0 2 4 7 Dh<br />
Sample Program: Set primary master to PIO mode 4<br />
; Set register 41h with timing and 4Ah, bits[2:0] with mode number<br />
mov dx,0CF8h ; To set PCI configuration space index<br />
mov<br />
out dx,eax<br />
eax,8000A140h ; To access registers 40h-43h<br />
mov dx,0CFDh ; To access PCI configuration space data at 41h<br />
mov al,20h ; Timing for mode 4 (See table above)<br />
out dx,al ; Set PIO timing<br />
mov dx,0CF8h ; To set PCI configuration space index<br />
mov eax,8000A148h ; To access registers 48-4Bh<br />
out dx,eax<br />
mov dx,0CFEh ; To access register 4Ah<br />
in al,dx ; Read current value<br />
and al,0F8h ; Clear bits 2:0<br />
or al,4h<br />
out dx,al<br />
; Set to mode 4<br />
<strong>AMD</strong> SB700 <strong>BIOS</strong> <strong>Developer</strong>s <strong>Guide</strong> Page 59
14.3.2 Multiword DMA Settings<br />
IDE multiword DMA setting is done through registers 44h to 47h. The timing for the multiword DMA<br />
modes has two components – the command width, and the recovery width.<br />
Width MW DMA Mode 2 MW DMA Mode 1 MW DMA Mode 0<br />
Command Width (Cycles) 2h 2h 7h<br />
Recovery Width (Cycles 0h 1h 7h<br />
The register assignment is as follows:<br />
Register 44h Primary slave MW DMA timing<br />
Register 45h Primary master MW DMA timing<br />
Register 46h Secondary slave MW DMA timing<br />
Register 47h Secondary master MW DMA timing<br />
Sample Program:<br />
The following Assembly language code sample programs the secondary master to multiword DMA<br />
Mode 2 (i.e., it programs register 47h to 20h).<br />
mov dx,0CF8h ; To access PCI configuration space, index register<br />
mov eax,8000A144h ; Device 14h, function 1, registers 44h-47h<br />
out dx,eax ;<br />
mov dx,0CFFh ; To access PCI register 47h<br />
mov<br />
out dx,al<br />
al,20h ; Timing for MW DMA Mode 2<br />
14.3.3 UDMA Mode Settings<br />
IDE UDMA enable/disable is set through register 54h, and the UDMA mode is set through the<br />
registers 56h-57h. The register assignments are as follows:<br />
Register 54h, bit[0] Primary master. 1 = Enable, 0 = Disable<br />
Register 54h, bit[1] Primary slave. 1 = Enable, 0 = Disable<br />
Register 54h, bit[2] Secondary master. 1 = Enable, 0 = Disable<br />
Register 54h, bit[3] Secondary slave. 1 = Enable, 0 = Disable<br />
Register 56h, bits[2:0] Primary master UDMA mode, 000b-110b<br />
Register 56h, bits[6:4] Primary slave UDMA mode, 000b-110b<br />
Register 57h, bits[2:0] Secondary master UDMA mode, 000b-110b<br />
Register 57h, bits[6:4] Secondary slave UDMA mode, 000b-110b<br />
©2009 Advanced Micro Devices, Inc.<br />
<strong>AMD</strong> SB700 <strong>BIOS</strong> <strong>Developer</strong>s <strong>Guide</strong> Page 60
Sample Program<br />
The sample program below sets the primary slave to UDMA mode 5:<br />
push eax<br />
push dx<br />
; For primary slave, set register 56h, bits [6:4] to 5 for UDMA mode 5<br />
mov dx,0CF8h ; To access PCI configuration space of IDE controller<br />
mov eax,8000A154h ; Device 14h, function 1, register space 54h – 57h<br />
out dx,eax<br />
mov dx,0CFEh ; To access register 56h<br />
in al,dx ; Current value of register 56h<br />
and al,8Fh ; Clear bits 6:4.<br />
or al,50h<br />
out dx,al<br />
; Set UDMA 5 mode for primary slave.<br />
; Enable primary slave UDMA mode in register 54h, bit 1,<br />
mov dx,CFCh ; To access register 54h<br />
in al,dx ; Current value of register 54h<br />
or al,02h<br />
out dx,al<br />
pop dx<br />
pop eax<br />
ret<br />
; Set bit 1<br />
14.3.4 IDE Channel Disable<br />
To disable an IDE channel, the <strong>BIOS</strong> must:<br />
1. Set IDE channel programmable logic enable bit in Reg09h.<br />
2. Set IDE channel disable bit in Reg48h to disable IDE channel.<br />
Note: No IDE I/O port access is allowed between step (1) and step (2). It is recommended that the<br />
<strong>BIOS</strong> execute step (2) immediately after step (1). There should be no ‘in’ instruction between two ‘out’<br />
instructions to register 09h and 48h.<br />
After the IDE disable sequence, the IDE channel programmable logic enable bit will be cleared<br />
automatically.<br />
Sample program: Disable secondary channel<br />
; Read current register 48h-49h on IDE controller<br />
push eax<br />
push bx<br />
push dx<br />
mov eax,8000A148h ; To modify register 48h on the IDE controller<br />
©2009 Advanced Micro Devices, Inc.<br />
<strong>AMD</strong> SB700 <strong>BIOS</strong> <strong>Developer</strong>s <strong>Guide</strong> Page 61
mov dx,0CF8h ; PCI index register<br />
out dx,eax ; Set index for register 48h-4Bh<br />
mov dx,0CFCh ; Set PCI data register for 48h<br />
in ax,dx ; Read register 49h<br />
mov bx,ax ; Save current 48h-49h registers<br />
; Unlock the IDE controller to be enabled/disabled bit<br />
mov eax,8000A108h ; To write to PCI register 08h on IDE controller<br />
mov dx,0CF8h ; PCI index register<br />
out dx,eax ; Set index for registers 08h – 0Bh<br />
mov dx,0CFDh ; To read register 09h<br />
in al,dx ; Read register 09h<br />
or al,08h ; Set bit 3 to enable secondary channel program<br />
out dx,al ; Write back to register<br />
; Disable the secondary IDE channel. The register 48h-49h is saved in BX<br />
mov eax,8000A148h ; To modify register 48h on the IDE controller<br />
mov dx,0CF8h ; PCI index register<br />
out dx,eax ; Set index for register 48h-4Bh<br />
mov dx,0CFCh ; Set PCI data register for 49h<br />
or bx,0100h ; Set bit 8 of 48h<br />
mov ax,bx<br />
out dx,ax<br />
; Lock in the secondary channel to enable/disable bit<br />
mov eax,8000A108h ; To write to PCI register 08h on IDE controller<br />
mov dx,0CF8h ; PCI index register<br />
out dx,eax ; Set index for registers 08h – 0Bh<br />
mov dx,0CFDh ; To read register 09h<br />
in al,dx ; Read register 09h<br />
and al,0F7h ; Clear bit 3 to enable secondary channel program<br />
out dx,al ; Write back to register<br />
pop dx<br />
pop bx<br />
pop eax<br />
; End of secondary channel disable<br />
©2009 Advanced Micro Devices, Inc.<br />
<strong>AMD</strong> SB700 <strong>BIOS</strong> <strong>Developer</strong>s <strong>Guide</strong> Page 62
14.3.5 IDE Channel Enable<br />
The primary IDE channel is enabled as power-on default. To enable an IDE channel after they have<br />
been disabled, the <strong>BIOS</strong> must:<br />
1. Set the IDE channel programmable logic enable bit in Reg09h.<br />
2. Clear the IDE channel disable bit in Reg48h to enable the IDE channel.<br />
Note: No IDE I/O port access is allowed between step (1) and step (2). It is recommended that the<br />
<strong>BIOS</strong> execute step (2) immediately after step (1). There should be no ‘in’ instruction between two ‘out’<br />
instructions to register 09h and 48h.<br />
Sample Program: Enable Primary IDE channel<br />
; Read current register 48h-49h on IDE controller<br />
push eax<br />
push bx<br />
push dx<br />
mov eax,8000A148h ; To modify register 48h on the IDE controller<br />
mov dx,0CF8h ; PCI index register<br />
out dx,eax ; Set index for register 48h-4Bh<br />
mov dx,0CFCh ; Set PCI data register for 48h<br />
in ax,dx ; Read register 49h<br />
mov bx,ax ; Save current 48h-49h registers<br />
; Unlock the IDE controller to enable/disable bit<br />
mov eax,8000A108h ; To write to PCI register 08h on IDE controller<br />
mov dx,0CF8h ; PCI index register<br />
out dx,eax ; Set index for registers 08h – 0Bh<br />
mov dx,0CFDh ; To read register 09h<br />
in al,dx ; Read register 09h<br />
or al,02h ; Set bit 1 to enable primary channel program<br />
out dx,al ; Write back to register<br />
; Enable the primary IDE channel. The register 48h-49h is saved in BX<br />
mov eax,8000A148h ; To modify register 48h on the IDE controller<br />
mov dx,0CF8h ; PCI index register<br />
out dx,eax ; Set index for register 48h-4Bh<br />
mov dx,0CFCh ; Set PCI data register for 49h<br />
and bx,0FFFEh ; Clear bit 0 of 48h<br />
mov ax,bx<br />
out dx,ax<br />
; Lock in the primary channel to enable/disable bit<br />
mov eax,8000A108h ; To write to PCI register 08h on IDE controller<br />
mov dx,0CF8h ; PCI index register<br />
out dx,eax ; Set index for registers 08h – 0Bh<br />
mov dx,0CFDh ; To read register 09h<br />
©2009 Advanced Micro Devices, Inc.<br />
<strong>AMD</strong> SB700 <strong>BIOS</strong> <strong>Developer</strong>s <strong>Guide</strong> Page 63
in al,dx ; Read register 09h<br />
and al,0FBh ; Clear bit 1 to enable primary channel program<br />
out dx,al ; Write back to register<br />
pop dx<br />
pop bx<br />
pop eax<br />
; End of primary channel enable<br />
14.4 USB Controller Reset at Hard Reset<br />
This USB controller reset sequence is not required for SB700<br />
14.5 Clock Throttling<br />
The SB700 has a register for setting clock duty cycle (throttling). The CLKVALUE register is located<br />
in the ACPI region. Bit 4 of this register, when set to 1, enables clock throttling, while bits [3:1] select<br />
the duty cycle from 12.5% to 87.5%, in seven steps of 12.5% each.<br />
The address of ACPI CLKVALUE register is at PM IO location (Index/Data through 0CD6h/0CD7h)<br />
index 26h and 27h.<br />
CLKVALUE register<br />
Bit 4 Bits[3:1] Duty Cycle<br />
0 x x x 100%<br />
1 0 0 0 Invalid<br />
1 0 0 1 12.5%<br />
1 0 1 0 25%<br />
1 0 1 1 37.5%<br />
1 1 0 0 50%<br />
1 1 0 1 62.5%<br />
1 1 1 0 75%<br />
1 1 1 1 87.5%<br />
Sample program: Clock throttling<br />
ClockThrottleExample proc near<br />
push ax ; Save registers used by this routine<br />
push dx<br />
; Get ACPI CLKVALUE register address from PM IO index 26h and 27h<br />
mov dx,0CD6h ; Set the PM IO register index<br />
mov<br />
out dx,al<br />
al, 27h ; Index = High byte, ACPI clock address<br />
mov dx,0CD7h ; Get PM IO register data<br />
©2009 Advanced Micro Devices, Inc.<br />
<strong>AMD</strong> SB700 <strong>BIOS</strong> <strong>Developer</strong>s <strong>Guide</strong> Page 64
in al,dx ; High byte of ACPI clock address<br />
mov ah,al ; Save High byte of address<br />
mov dx,0CD6h ; Set the PM IO register index<br />
mov<br />
out dx,al<br />
al, 26h ; Index = Low byte, ACPI clock address<br />
mov dx,0CD7h ; Get PM IO register data<br />
in al,dx ; Low byte of ACPI clock address<br />
mov dx,ax ; dx = CLKVALUE address<br />
; Enable throttling (set bit 4=1) and set duty cycle to 50%,(Set bits [3:1]=100b<br />
in al,dx ; Read current CLKVALue<br />
and al,0E1h ; Keep the unused bits<br />
or al,18h ; Set bit 4 to enable and bits [3:1]=100b for 50%<br />
out dx,al ; Write new throttling value<br />
pop dx<br />
pop ax<br />
ret<br />
; Restore registers used by this routine<br />
ClockThrottleExample endp<br />
©2009 Advanced Micro Devices, Inc.<br />
<strong>AMD</strong> SB700 <strong>BIOS</strong> <strong>Developer</strong>s <strong>Guide</strong> Page 65
14.6 Lid Switch<br />
The Lid Switch programming is implementation specific. In a typical implementation the output of the<br />
debounced lid switch is connected to one of the Gevent or GPM pins. The Gevent and GPM pins can<br />
trigger the ACPI event, and the trigger polarity is programmable through the Southbridge register. The<br />
Gevent and GPM pins are in S5 plane and hence can trigger the event in S5 state.<br />
14.6.1 Lid Switch Hardware Connection<br />
This sample program assumes that the SB700 ExtEvent0 pin is connected to the lid switch.<br />
14.6.2 Associated Registers<br />
The registers associated with ExtEvent0 are:<br />
ExtEvent0 Trigger polarity at PMIO index 37h, bit 0. Set to 1 for rising edge trigger<br />
and clear to 0 for falling edge trigger. (Default = 0)<br />
ExtEvent0 signal to S5 region at PMIO index 78h bit 2. Set to 1 for S5 plane. (Default<br />
=1).<br />
ExtEvent0 set as ACPI function at Device 14h, function 0, register 66h, bit 6. Set to 1<br />
to enable ExtEvent0 as ACPI function. ExtEvent0 is a multi function pin and it must be<br />
set for the ACPI function.<br />
ExtEvent0 ACPI event enable. This register is part of ACPI GPE0 block. The address<br />
is <strong>BIOS</strong> implementation specific (refer to PMIO register at index 28h and 29h). For this<br />
sample program, the ACPI GPE0 block starts at 820h. ExtEvent0 is bit 16 of the<br />
block.<br />
14.6.3 <strong>BIOS</strong> Initialization<br />
The registers must be initialized during the boot up process. The order of initialization is not critical.<br />
The initialization may be done in the <strong>BIOS</strong> at any stage of the boot up process after GPE0 block is set<br />
in PMIO registers 28h,29h).<br />
; Select EvtEvent0 as ACPI pin by setting device 14h, function 0, register 66h, bit 6 = 1<br />
mov eax,8000A064h ; To access registers 64h-67h<br />
mov<br />
out dx,eax<br />
dx,0CF8h ; PCI index register<br />
mov dx,0CFEh ; PCI data register for 66h<br />
in al,dx ; Read current value<br />
or al,40h<br />
out dx,al<br />
; Set bit 6<br />
; Program ExtEvent0 trigger polarity to 0 (falling edge trigger ) to indicate lid open .<br />
; Clear PMIO register 37h, bit 0 = 0<br />
mov dx,0CD6h ; PMIO index<br />
mov al,37h ;<br />
out dx,al ; Set PMIO index<br />
©2009 Advanced Micro Devices, Inc.<br />
<strong>AMD</strong> SB700 <strong>BIOS</strong> <strong>Developer</strong>s <strong>Guide</strong> Page 66
mov dx,0CD7h ; PMIO data<br />
in al,dx ; Read current value<br />
and al,0Feh<br />
out dx,al<br />
; Falling edge trigger (on closing the lid)<br />
; Enable ExtEvent bit in ACPI GPE0 enable block.<br />
mov dx,824h ; GPE0 enable is offset 4 of GPE0 block<br />
in eax,dx ; Read GPE0 block<br />
or eax,0100h<br />
out dx,eax<br />
; Set bit 16, ExeEvent0 enable<br />
; Enable ExtEvent0 to S5 plane. This step is optional as the bit is set by default.<br />
mov dx,0CD6h ; PMIO index<br />
mov<br />
out dx,al<br />
al,78h ; S5 plane enable register<br />
mov dx,0CD7h ; PMIO data register<br />
in al,dx ; Read current register<br />
or al,04h<br />
out dx,al<br />
; ExtEvent0 to S5 plane<br />
14.6.4 ACPI Programming<br />
The ASL code defines the following:<br />
The operation region where the lid polarity resides in address space. In our example<br />
that is at PMIO register 37h, bit 0.<br />
A device called \_SB.LID with HID of PNP0C0D.<br />
Method _LID to return current lid status.<br />
A _PRW package that defines wake from S4 states (which includes wake from S1, S3<br />
also).<br />
Event handler _GPE.<br />
©2009 Advanced Micro Devices, Inc.<br />
<strong>AMD</strong> SB700 <strong>BIOS</strong> <strong>Developer</strong>s <strong>Guide</strong> Page 67
// Code for Lid Switch control. //<br />
// This code is based on Lid switch connected to ExtEvent0. //<br />
// ExtEvent0 causes ACPI event 16 or 0x10 //<br />
// ExtEvent0 trigger polarity is controlled by GPIO register 37h, bit 0 //<br />
// PMIO reg 37h bit 0 = 0 Trigger ACPI event on falling edge //<br />
// PMIO reg 37h bit 0 = 1 Trigger ACPI event on rising edge //<br />
// //<br />
// In addition, ExtEvent0 needs to be enabled for ACPI event. Device 14h,//<br />
// function 0, register 66h, bit 6 should be set to 1 in the <strong>BIOS</strong> //<br />
// initialization code for ExtEvent0 to be ACPI event causing SMI. //<br />
///////////////////////////////////////////////////////////////////////////////////////////////////////////////////////<br />
OperationRegion (PMIO, SystemIO, 0xCD6, 0x2)<br />
Field (PMIO, ByteAcc, NoLock, Preserve)<br />
{<br />
INPM,8,<br />
DAPM,8<br />
}<br />
IndexField (INPM, DAPM, ByteAcc, NoLock, Preserve) //R07<br />
{<br />
Offset(0x37), // To change trigger polarity for ExtEvent0<br />
LPOL,1, // 1 = rising edge, 0 = falling edge<br />
//<br />
} //end of indexed field<br />
// Define the Lid Device. Lid switch is connected to ExtEvent0 which<br />
// causes ACPI event 16 (0x10)<br />
Device(\_SB.LID)<br />
{<br />
Name(_HID, EISAID("PNP0C0D"))<br />
Method(_LID)<br />
{<br />
if(LPOL){Return(0x00)} // Lid is closed<br />
else {Return(0x1)} // Lid is open<br />
©2009 Advanced Micro Devices, Inc.<br />
<strong>AMD</strong> SB700 <strong>BIOS</strong> <strong>Developer</strong>s <strong>Guide</strong> Page 68
}<br />
Name(_PRW, Package(2)<br />
{ 0x10, 0x03} // ACPI event 0x10 can wake-up from S3<br />
)<br />
}<br />
//ACPI event<br />
Scope(\_GPE)<br />
{ Method(_L10)<br />
{<br />
Not(LPOL, LPOL) // Reverse the polarity from sleep to wake and vice versa<br />
Notify(\_SB.LID, 0x80) // Notify the OS that status has changed.<br />
}<br />
}<br />
14.7 SATA Hot Plug Sample Program<br />
Scope(\_GPE)<br />
{<br />
Method(_L1F,0x0,Notserialized) // GPE0 Block bit 31 is used for SATA hot plug<br />
{<br />
sleep(2000)<br />
// For SATA at Bus 0, Device 12h, Function 0, channel 0 device<br />
// Check if change in the status of the Serial ATA PHY<br />
if(\_SB_.PCI0.SATA.STA0) { // BAR5, offset 10ah, bit0<br />
Notify(\_SB.PCI0.SATA.PRID.P_D0, 0x00)<br />
sleep(2000)<br />
Notify(\_SB.PCI0.SATA.PRID, 0x01)<br />
sleep(2000)<br />
store(\_SB_.PCI0.SATA.STA0,\_SB_.PCI0.SATA.STA0) // Clear Status of master SATA<br />
}<br />
// For SATA at Bus 0, Device 12h, Function 0, channel 1 device<br />
// Check if change in the status of the Serial ATA PHY<br />
if(\_SB_.PCI0.SATA.STA1) { // BAR5, offset 18Ah, bit 0<br />
Notify(\_SB.PCI0.SATA.SECD.S_D0, 0x00)<br />
sleep(2000)<br />
Notify(\_SB.PCI0.SATA.SECD, 0x01)<br />
©2009 Advanced Micro Devices, Inc.<br />
<strong>AMD</strong> SB700 <strong>BIOS</strong> <strong>Developer</strong>s <strong>Guide</strong> Page 69
}<br />
sleep(2000)<br />
store(\_SB_.PCI0.SATA.STA1,\_SB_.PCI0.SATA.STA1) // Clear Status of slave SATA<br />
// For SATA at Bus 0, Device 11h, Function 0 , channel 0 device<br />
// Check if change in the status of the Serial ATA PHY<br />
if(\_SB_.PCI0.SAT2.STA0){ // BAR5, offset 10ah, bit0<br />
Notify(\_SB.PCI0.SAT2.PRID.P_D0, 0x00)<br />
sleep(2000)<br />
Notify(\_SB.PCI0.SAT2.PRID, 0x01)<br />
sleep(2000)<br />
store(\_SB_.PCI0.SAT2.STA0,\_SB_.PCI0.SAT2.STA0) // Clear Status of master SATA<br />
}<br />
// For SATA at Bus 0, Device 11h, Function 0, channel 1 device<br />
// Check if change in the status of the Serial ATA PHY<br />
if(\_SB_.PCI0.SAT2.STA1) { //BAR4, offset 18Ah, bit 0<br />
Notify(\_SB.PCI0.SAT2.SECD.S_D0, 0x00)<br />
sleep(2000)<br />
Notify(\_SB.PCI0.SAT2.SECD, 0x01)<br />
sleep(2000)<br />
store(\_SB_.PCI0.SAT2.STA1,\_SB_.PCI0.SAT2.STA1) // Clear Status of slave SATA<br />
}<br />
} // End of Method(_L1F)<br />
} // End of Scope(\_GPE)<br />
Scope(\_SB_.PCI0.SATA) // Bus 0, Device 12h, Function 0<br />
{<br />
OperationRegion(BAR5, SystemMemory, 0xFFF80000, 0x1000) // The address should<br />
// be replaced by the<br />
// <strong>BIOS</strong><br />
Field(BAR5, AnyAcc, NoLock, Preserve)<br />
{<br />
Offset(0x104), // Channel 0<br />
CSTX, 1, // Device detected but no communication with Phy<br />
CST0, 1, // Communication with Phy established. (Physgood)<br />
©2009 Advanced Micro Devices, Inc.<br />
<strong>AMD</strong> SB700 <strong>BIOS</strong> <strong>Developer</strong>s <strong>Guide</strong> Page 70
Offset(0x10A), // Channel 0<br />
STA0, 1, // Change in Phy status<br />
Offset(0x184), // Channel 1<br />
CSTY, 1, // Device detected but no communications with Phy<br />
CST1, 1, // Communication with Phy established (Physgood)<br />
Offset(0x18A), // Channel 1<br />
STA1, 1, // Changes in Phy status<br />
} // End of Field(BAR5….)<br />
Method(_INI) { // For Bus 0, Device 12h, Function 0<br />
if(\_SB_.PCI0.SATA.STA0){<br />
store(\_SB_.PCI0.SATA.STA0,\_SB_.PCI0.SATA.STA0) // Clear channel 0 SATA status<br />
}<br />
if(\_SB_.PCI0.SATA.STA1){<br />
store(\_SB_.PCI0.SATA.STA1,\_SB_.PCI0.SATA.STA1) // Clear channel 1 SATA status<br />
}<br />
} // End of Method (_INI)<br />
Device(PRID) {<br />
Name(_ADR, 0) // IDE Primary Channel<br />
Device(P_D0) {<br />
Name(_ADR, 0) // Drive 0 - Master<br />
Method(_STA,0){<br />
if (\_SB_.PCI0.SATA.CST0) { // If SATA detected<br />
return(0x0f)<br />
}<br />
else {<br />
return (0x00)<br />
}<br />
} End of Method (_STA )<br />
} // End of P_D0<br />
} // End of PRID<br />
©2009 Advanced Micro Devices, Inc.<br />
<strong>AMD</strong> SB700 <strong>BIOS</strong> <strong>Developer</strong>s <strong>Guide</strong> Page 71
Device(SECD) {<br />
Name(_ADR, 1) // IDE Secondary Channel<br />
Device(S_D0) {<br />
Name(_ADR, 0) // Drive 0 - Master<br />
Method(_STA,0){<br />
if (\_SB_.PCI0.SATA.CST1) {<br />
return (0x0f)<br />
}<br />
else {<br />
return (0x00)<br />
// If SATA detected<br />
} /<br />
} // End of Method (_STA)<br />
} // End of S_D0<br />
} // End of SECD<br />
} // End of Scope(_SB.PCI0.SATA)<br />
// Bus 0, Device 11h, Function 0<br />
Scope(\_SB_.PCI0.SAT2)<br />
{<br />
OperationRegion(BAR5, SystemMemory, 0xFFF80000, 0x1000) // Replace address in <strong>BIOS</strong><br />
Field(BAR5, AnyAcc, NoLock, Preserve)<br />
{<br />
Offset(0x104), //Channel 0<br />
CSTX, 1, // Device detected but no communication with Phy<br />
CST0, 1, // Communication with PHY established<br />
Offset(0x10A), // Channel 0<br />
STA0, 1, // Change in PHY status<br />
Offset(0x184), // Channel 1<br />
CSTY, 1, // Device detected but no communication with PHY<br />
CST1, 1, // Communication with PHY established<br />
Offset(0x18A), //Channel 1<br />
STA1, 1, // Change in PHY status<br />
©2009 Advanced Micro Devices, Inc.<br />
<strong>AMD</strong> SB700 <strong>BIOS</strong> <strong>Developer</strong>s <strong>Guide</strong> Page 72
} // End of Field<br />
Method(_INI) { // For Bus 0, Device 11h, Function 0<br />
if(\_SB_.PCI0.SAT2.STA0){<br />
store(\_SB_.PCI0.SAT2.STA0,\_SB_.PCI0.SAT2.STA0) // Clear SATA channel0 status<br />
}<br />
if(\_SB_.PCI0.SAT2.STA1)<br />
{<br />
store(\_SB_.PCI0.SAT2.STA1,\_SB_.PCI0.SAT2.STA1) // Clear SATA channel 1 status<br />
}<br />
} // End of Method(_INI)<br />
Device(PRID) {<br />
Name(_ADR, 0) // IDE Primary Channel<br />
Device(P_D0) {<br />
Name(_ADR, 0) // Drive 0 - Master<br />
Method(_STA,0){<br />
if (\_SB_.PCI0.SAT2.CST0) { // If SATA detected<br />
}<br />
else {<br />
}<br />
return(0x0f)<br />
return (0x00)<br />
} // End of Method(_STA)<br />
} // End of P_D0<br />
} // End of PRID<br />
Device(SECD) {<br />
Name(_ADR, 1) // IDE Secondary Channel<br />
Device(S_D0) {<br />
Name(_ADR, 0) // Drive 0 - Master<br />
©2009 Advanced Micro Devices, Inc.<br />
<strong>AMD</strong> SB700 <strong>BIOS</strong> <strong>Developer</strong>s <strong>Guide</strong> Page 73
Method(_STA,0){<br />
if (\_SB_.PCI0.SAT2.CST1) { // If SATA detected<br />
return(0x0f)<br />
}<br />
else {<br />
return (0x00)<br />
}<br />
} //End of Method(_STA)<br />
} // End of S_D0<br />
} // End of SECD<br />
} // End of Scope(\_SB_.PCI0.SAT2)<br />
14.8 Temperature Limit Shutdown through SMI#<br />
The program to shut down the system when the temperature exceeds a pre-set limit requires the<br />
following:<br />
1. A temperature sensing diode or thermistor positioned under the CPU socket.<br />
2. A Super I/O device capable of monitoring the temperature and toggle an SMI# line when<br />
the temperature exceeds the pre-set limit.<br />
3. SMI programming in the SB700 to shut down the system.<br />
The discussion below assumes that an ITE-8712 Super I/O is present in the system and is connected<br />
to the thermal diode to measure temperature-1 and temperature-2, and a thermistor to measure<br />
temperature-3. This code example shows thermal programming in the Super I/O, and SMI<br />
programming related to thermal shutdown.<br />
Please refer to ITE-8712 Super I/O device manual for register details.<br />
This code example assumes that the GP47 from Super I/O is connected to the ExtEvent1 pin on the<br />
SB700.<br />
©2009 Advanced Micro Devices, Inc.<br />
<strong>AMD</strong> SB700 <strong>BIOS</strong> <strong>Developer</strong>s <strong>Guide</strong> Page 74
14.8.1 Setting Up ITE 8712 Super I/O Registers<br />
ITE 8712 Super I/O registers are set during the boot up process through the <strong>BIOS</strong> program.<br />
1. Set the Environmental Controller base address.<br />
Select a base address in the I/O range which is not used by any device and is also<br />
accessible to the LPC. The address range is 8 bytes. In this example the I/O address 228h –<br />
22Fh will be used. This address is set in Super I/O logical device 04h, registers 60h, and 61h.<br />
After the base address is set, the environment registers are accessed by index/data method<br />
at base address+5 as index, and base address+6 as data. For this example the index/data<br />
address would be 22Dh/22Eh.<br />
; Define equates for index/data, shutdown temperature, and Super I/O access port.<br />
Sensor_Port EQU 22Dh<br />
TemperatureLimit EQU 75<br />
SuperIo_Config_Port EQU 2EH<br />
call SuperIoEnterConfig ; Write 87h, 01h, 55h, 55h to SuperIo<br />
; Enable the access to device 04 registers, i.e. set Super I/O address<br />
; register to 04<br />
; Device 04 is the Environment controller<br />
mov dx,2Eh ; Super I/O index<br />
mov al, 07h ; Register 07 is device select<br />
out dx,al<br />
mov dx,2Fh ; Super I/O data<br />
mov al, 04h ; Set register to 04<br />
out dx,al<br />
; Logical Device Number (LDN) is now set to 04.<br />
; Set Base address to 0228h in registers 60h and 61h of this LDN = 04<br />
; Set MS byte of base address to 02h<br />
mov dx,2Eh<br />
mov dx,60h<br />
out dx,al<br />
mov dx,2Fh ; Super I/O index<br />
mov al,02h ; MS byte of 0228h<br />
out dx,al<br />
; Set LS byte of the base address to 28h<br />
mov dx,2Eh<br />
mov dx,61h<br />
out dx,al<br />
©2009 Advanced Micro Devices, Inc.<br />
<strong>AMD</strong> SB700 <strong>BIOS</strong> <strong>Developer</strong>s <strong>Guide</strong> Page 75
mov dx,2Fh ; Super I/O index<br />
mov al,28h ; MS byte of 0228h<br />
out dx,al<br />
; The environment (temperature, voltage etc.) registers can now be accessed<br />
; through Base address + 5 (index), and base address + 6, i.e. 22Dh and 22Eh<br />
mov ah, TemperatureLimit ; Selected through setup or OEM<br />
; Set limit for 1st Thermistor<br />
; Register 40h is for upper limit, register 41h is for lower limit<br />
; If lower limit is set to 7Fh, then the temperature controller is in the<br />
; comparator mode<br />
mov dx,Sensor_Port ; The register is written through index at<br />
; 22Dh<br />
mov al,40h ; To set the upper limit<br />
out dx,al<br />
mov dx,Sensor_Port+1 ; The temperature value is written through<br />
; 22Eh<br />
mov al,ah ; Get the Temperature upper limit<br />
out dx,al<br />
mov dx,Sensor_Port ; The register is written through index at<br />
; 22Dh<br />
mov al,41h ; To set the lower limit<br />
out dx,al<br />
mov dx,Sensor_Port+1<br />
mov al,7fh ; Lower limit of 7Fh to enable the comparator mode<br />
out dx,al<br />
; Set limit for 2nd Thermistor<br />
; Register 42h is for upper limit, register 43h is for lower limit<br />
; If lower limit is 7Fh then it is comparator mode<br />
mov dx,Sensor_Port ; The register is written through index at<br />
; 22Dh<br />
mov al,42h ; To set the upper limit<br />
out dx,al<br />
mov dx,Sensor_Port+1 ; The temperature value is written through<br />
; 22Eh<br />
mov al,ah ; Get the Temperature upper limit<br />
out dx,al<br />
mov dx,Sensor_Port ; The register is written through index at<br />
; 22Dh<br />
mov al,43h ; To set the lower limit<br />
out dx,al<br />
©2009 Advanced Micro Devices, Inc.<br />
<strong>AMD</strong> SB700 <strong>BIOS</strong> <strong>Developer</strong>s <strong>Guide</strong> Page 76
mov dx,Sensor_Port+1 ; The temperature value is written through<br />
; 22Eh<br />
mov al,7fh ; For comparator mode<br />
out dx,al<br />
; Set limit for 3rd Thermistor<br />
; Register 44h is for upper limit, register 45h is for lower limit<br />
; If lower limit is 7Fh then it is comparator mode<br />
mov dx,Sensor_Port ; The register is written through index at<br />
; 22Dh<br />
mov al,44h ; To set the upper limit<br />
out dx,al<br />
mov dx,Sensor_Port+1 ; The temperature value is written through<br />
; 22Eh<br />
mov al,ah ; Get the temperature upper limit<br />
out dx,al<br />
mov dx,Sensor_Port ; The register is written through index at<br />
; 22Dh<br />
mov al,45h ; To set the lower limit<br />
out dx,al<br />
mov dx,Sensor_Port+1 ; The temperature value is written through<br />
; 22Eh<br />
mov al,7Fh ; For comparator mode<br />
out dx,al<br />
; Set Thermal out limit registers at 52h, 53h, 54h<br />
mov dx,Sensor_Port ; The register is written through index at<br />
; 22Dh<br />
mov al,52h ; Thermal limit for diode 1<br />
out dx,al<br />
mov dx,Sensor_Port+1 ; The temperature value is written through<br />
; 22Eh<br />
mov al,ah ; Get temperature upper limit<br />
out dx,al<br />
mov dx,Sensor_Port ; The register is written through index at<br />
; 22Dh<br />
mov al,53h ; Thermal limit for diode 2<br />
out dx,al<br />
mov dx,Sensor_Port+1 ; The temperature value is written through<br />
; 22Eh<br />
mov al,ah ; Get temperature upper limit<br />
out dx,al<br />
mov dx,Sensor_Port ; The register is written through index at<br />
; 22Dh<br />
mov al,54h ; Thermal limit for thermistor 3<br />
out dx,al<br />
©2009 Advanced Micro Devices, Inc.<br />
<strong>AMD</strong> SB700 <strong>BIOS</strong> <strong>Developer</strong>s <strong>Guide</strong> Page 77
mov dx,Sensor_Port+1 ; The temperature value is written through<br />
; 22Eh<br />
mov al,ah ; Get temperature upper limit<br />
out dx,al<br />
; Read status from register 03 to clear the status<br />
mov dx,Sensor_Port ; The register is read through index at 22Dh<br />
mov al,03h<br />
out dx,al<br />
mov dx,Sensor_Port+1 ; The register is read through data at 22Eh<br />
in al,dx<br />
; Enable Interrupt/SMI# register at 00.<br />
mov dx,Sensor_Port ; The register is written through index at<br />
; 22Dh<br />
mov al,00h<br />
out dx,al<br />
mov dx,Sensor_Port+1 ; The register is written through data at<br />
; 22Eh<br />
in al,dx<br />
or al,07h ; Enable IRQ, SMI# and enable monitoring<br />
out dx,al<br />
; In logical device 7, set SMI registers, thermal out register, and enable the<br />
; SMI.<br />
; 1. Set logical device to 7<br />
mov al,07h<br />
mov dx,SuperIo_Config_Port<br />
out dx,al<br />
mov al,07h<br />
inc dx<br />
out dx,al<br />
; 2. Set SMI pin to GP47 ( 00 100 111 = 27h) in reg 0f4h<br />
; Register F4 is SMI mapping register<br />
mov al,0f4h<br />
mov dx,SuperIo_Config_Port<br />
out dx,al<br />
inc dx<br />
mov al,27h<br />
out dx,al<br />
©2009 Advanced Micro Devices, Inc.<br />
<strong>AMD</strong> SB700 <strong>BIOS</strong> <strong>Developer</strong>s <strong>Guide</strong> Page 78
; 3. Set Thermal output to GP47(00 100 111 = 27h) in reg 0F5h<br />
; Register 0F is thermal mapping register<br />
mov al,0f5h<br />
mov dx,SuperIo_Config_Port<br />
out dx,al<br />
inc dx<br />
mov al,27h<br />
out dx,al<br />
; Enable generation of SMI# due to environment condition<br />
mov al,0f0h<br />
mov dx,SuperIo_Config_Port<br />
out dx,al<br />
inc dx<br />
in al,dx<br />
or al,10h<br />
out dx,al<br />
; Set GP47 as general purpose pins<br />
; Registers 25h and 28 are global access registers<br />
; Select IRTX/GP47 as GP47<br />
mov al,028h ; For GP-47<br />
mov dx,SuperIo_Config_Port<br />
out dx,al<br />
inc dx<br />
in al,dx<br />
or al,80h<br />
out dx,al<br />
call SuperioExitConfig ; Write 02, 02 to Super IO<br />
©2009 Advanced Micro Devices, Inc.<br />
<strong>AMD</strong> SB700 <strong>BIOS</strong> <strong>Developer</strong>s <strong>Guide</strong> Page 79
14.8.2 Initialize Southbridge Registers for SMI#<br />
; Enable the base address range (228h-22Fh) in the LPC register.<br />
; Address range 228h-22Fh is enabled in LPC Device 14h, function 3, Register 45h, bit 1<br />
mov dx,0CF8h ; PCI device access index register<br />
mov eax,8000A344h ; Device 14h, function 3, registers 44h-47h<br />
out dx,eax<br />
mov dx,0CFDh ; To access register 45h<br />
in al,dx ; Read register 45h<br />
or al,02h ; Set bit 1<br />
out dx,al<br />
; Configure ExtEvent1 for SMI#. ExtEvent1 is configured through PMIO<br />
; register 32h bit 3:2 = 00<br />
mov dx,0cd6h<br />
mov al,32h<br />
out dx,al<br />
mov dx,0cd7h<br />
in al,dx<br />
and al,0f3h ; Clear bits 3:2<br />
or al,04h ; Set [3:2] = 01 for SMI<br />
out dx,al<br />
; Set ExtEvent1 for SMI, negative edge through PMIO register 37h, bit 1 = 0<br />
mov dx,0cd6h<br />
mov al,37h<br />
out dx,al<br />
mov dx,0cd7h<br />
in al,dx<br />
and al,0fdh ; Clear bit 1 for Negative edge<br />
out dx,al<br />
; Also set PMIO register 04 to enable ExtEvent1 for SMI<br />
mov dx,0cd6h<br />
mov al,04h<br />
out dx,al<br />
mov dx,0cd7h<br />
in al,dx<br />
or al,02h<br />
out dx,al<br />
; End of temperature setting program<br />
©2009 Advanced Micro Devices, Inc.<br />
<strong>AMD</strong> SB700 <strong>BIOS</strong> <strong>Developer</strong>s <strong>Guide</strong> Page 80
14.8.3 SMI Programming to Shut Down the System<br />
The SMI programming should shut down the system when the line connected to Super I/O for<br />
temperature over run is set.<br />
; Check ExtEvent1 status. The ExtEvent1 status is on the PMIO register 07h, bit1<br />
mov dx,0cd6h<br />
mov al,07h<br />
out dx,al<br />
mov dx,0cd7h<br />
in al,dx<br />
test al,02h ; Bit 1 for ExtEvent1<br />
jnz ShutDownFromTalert ; ExtEvent1 is set, shut down<br />
; Check alternate ExtEvent 1 status<br />
mov dx,0cd6h<br />
mov dl,3ah<br />
out dx,al<br />
mov dx,0cd7h<br />
in al,dx<br />
test al,02h<br />
jz NoShutDown<br />
ShutDownFromTalert:<br />
mov dx,PM1a_CNT_BLK+1<br />
mov al,34h ; Set S5 status<br />
out dx,al<br />
jmp $<br />
NoShutDown:<br />
; Continue with rest of the SMI routine.<br />
©2009 Advanced Micro Devices, Inc.<br />
<strong>AMD</strong> SB700 <strong>BIOS</strong> <strong>Developer</strong>s <strong>Guide</strong> Page 81
14.9 Sleep Trap through SMI#<br />
This sample code provides an SMI# routine to develop some software workarounds or debugging<br />
functions before the system goes into ACPI sleep state.<br />
14.9.1 Enable Sleep SMI# in ACPI ASL code<br />
The following example implements Sleep SMI Control Register enable by the ASL code _PTS<br />
method.<br />
Method(_PTS, 1) {<br />
Store(One, \_SB.PCI0.SMBS.SLPS)<br />
PTS(Arg0)<br />
Store(0, Index(WAKP,0)) // Clear Wake up package.<br />
Store(0, Index(WAKP,1)) // Clear Wake up package.<br />
}<br />
OperationRegion (PMIO, SystemIO, 0xCD6, 0x2)<br />
Field (PMIO, ByteAcc, NoLock, Preserve)<br />
{<br />
INPM,8,<br />
DAPM,8<br />
}<br />
IndexField (INPM, DAPM, ByteAcc, NoLock, Preserve) //R07<br />
{<br />
Offset(0x00),<br />
,1,<br />
TM1E,1, // Set to 1 to enable SMI# when PM_TIMER1 expires<br />
TM2E,1, // Set to 1 to enable SMI# when PM_TIMER2 expires<br />
Offset(0x01),<br />
,1,<br />
TM1S,1, // SB sets this bit to indicate that PM_TIMER1 has expired<br />
TM2S,1, // SB sets this bit to indicate that PM_TIMER2 has expired<br />
Offset(0x04),<br />
,7,<br />
SLPS,1, // Set this bit to enable SLP2SMI<br />
Offset(0x1C),<br />
,3,<br />
MKME,1, //<br />
PI3E,1, //<br />
I2E,1, //<br />
PI1E,1, //<br />
PI0E,1, //<br />
Offset(0x1D),<br />
,3,<br />
MKMS,1, //<br />
PI3S,1, //<br />
PI2S,1, //<br />
PI1S,1, //<br />
PI0S,1, //<br />
Offset(0x55),<br />
SPRE,1, //<br />
©2009 Advanced Micro Devices, Inc.<br />
<strong>AMD</strong> SB700 <strong>BIOS</strong> <strong>Developer</strong>s <strong>Guide</strong> Page 82
Offset(0x68),<br />
,3,<br />
TPDE,1, //<br />
,1<br />
} //end of indexed field<br />
14.9.2 Sleep Trap SMI Routine<br />
The following example implements the Sleep Trap SMI# routine.<br />
SLPSMI_HANDLER_FAR PROC FAR PUBLIC<br />
; Read PM1_CNT to get sleep type<br />
mov dx, PM_BASE_ADDRESS + SB_PM_IO_PM1_CTRL; (PM1_CNT 04h)<br />
in ax, dx<br />
and ax, PM1_CNT_SLP_TYPE<br />
shr ah, 2<br />
dec ah ; For Table from 0<br />
movzx bx, ah<br />
shl bx, 1<br />
add bx, offset cs:ACPISleepTrapTable<br />
mov bx, cs:[bx]<br />
SleepTrapPatch:<br />
cmp word ptr cs:[bx], 0ffffh<br />
je short SleepTrapPatchDone<br />
push bx<br />
call word ptr cs:[bx]<br />
pop bx<br />
inc bx<br />
inc bx<br />
jmp short SleepTrapPatch<br />
SleepTrapPatchDone:<br />
; Disable SLP2SMI<br />
mov ah, SB_PMU_REG_04 ; PMIO_REG.04h[7] = SLP2SMI Enable<br />
call read_io_pmu<br />
and al, NOT BIT7 ; Disable SLP2SMI<br />
call write_io_pmu<br />
; Clear SLP2SMI Status bit<br />
mov ah, SB_PMU_REG_07 ; PMIO_REG.07h[7] = SLP2SMI Status<br />
call read_io_pmu<br />
call write_io_pmu ; Write 1 to clear SLP2SMI status<br />
; Write SLP_EN to put SB into sleep<br />
mov dx, PM_BASE_ADDRESS + SB_PM_IO_PM1_CTRL ; PM1_CNT 04h<br />
in ax, dx<br />
or ax, Bit13 ; PM1_CNT_SLP_EN<br />
out dx, ax ; This puts SB to sleep state<br />
ret<br />
SLPSMI_HANDLER_FAR ENDP<br />
ACPISleepTrapTable label byte<br />
dw offset cs:ACPISleepTrapS1<br />
dw offset cs:ACPISleepTrapS2<br />
dw offset cs:ACPISleepTrapS3<br />
dw offset cs:ACPISleepTrapS4<br />
dw offset cs:ACPISleepTrapS5<br />
©2009 Advanced Micro Devices, Inc.<br />
<strong>AMD</strong> SB700 <strong>BIOS</strong> <strong>Developer</strong>s <strong>Guide</strong> Page 83
ACPISleepTrapS1 label byte<br />
dw offset cs:OemACPISleepTrapS1<br />
dw 0FFFFh<br />
ACPISleepTrapS3 label byte<br />
dw offset cs:Port80_Enabled<br />
dw offset cs:OemACPISleepTrapS3<br />
dw 0FFFFh<br />
ACPISleepTrapS4 label byte<br />
dw offset cs:OemACPISleepTrapS4<br />
dw 0FFFFh<br />
ACPISleepTrapS5 label byte<br />
dw offset cs:OemACPISleepTrapS5<br />
dw 0FFFFh<br />
14.10 HD Audio – Detection and Configuration<br />
:********************************************************************************************<br />
; Equates for HD Audio detection<br />
<strong>AMD</strong>_PCIE_BAR3 EQU 0E0000000h ; NB BAR3 base at Bus-0,Dev-0, func<br />
; 0,Reg 1ch<br />
<strong>AMD</strong>_AZALIA_BUS_DEV_FUN EQU (14h) shl 3 + 2<br />
<strong>AMD</strong>_SMBUS_BUS_DEV_FUN EQU (14H) shl 3 + 0<br />
<strong>AMD</strong>_AZALIA_ID EQU 0437b1002h<br />
<strong>AMD</strong>_AZALIA_ExtBlk_Addr EQU 0F8h<br />
<strong>AMD</strong>_AZALIA_ExtBlk_DATA EQU 0FCh<br />
;*********************************************************************************************<br />
; <strong>AMD</strong>_SB_Cfg_Azalia *<br />
; *<br />
; Configure HD Audios *<br />
; *<br />
; Input: EBP = 0 *<br />
; ES = 0 *<br />
; *<br />
;*********************************************************************************************<br />
<strong>AMD</strong>_SB_Cfg_Azalia PROC NEAR<br />
pushad<br />
; OEM specific CMOS setup option to Auto/Disable/enable HD Audio<br />
mov ax,CMOS_Azalia_Option ; OEM specific<br />
call ReadCMOSOption ; OEM specific<br />
cmp ax,1 ; Is it disable?<br />
je DisableAzaliaController ; Jump for Disable HD Audio<br />
; OEMs may have a CMOS setup option for HD Audio clock source.<br />
©2009 Advanced Micro Devices, Inc.<br />
<strong>AMD</strong> SB700 <strong>BIOS</strong> <strong>Developer</strong>s <strong>Guide</strong> Page 84
; The options may be USB 48 MHz or HD Audio 48 MHz<br />
; Device 14h, function 2, register 43h, bit 0 = 1 for HD Audio clock.<br />
mov ax,CMOS_AZA_CLOCK ; OEM specific<br />
call ReadCMOSOption ; OEM specific<br />
cmp ax,1 ; Is it HD Audio clock at 48 MHz<br />
jne @f ; Jump for USB 48 MHz clock<br />
or Byte PTR es:[ebp+<strong>AMD</strong>_PCIE_BAR3+<strong>AMD</strong>_AZALIA_BUS_DEV_FUN shl 12 +<br />
043h], BIT0<br />
; Enable xAz48Mhz pin as clock source of 48Mhz<br />
call <strong>AMD</strong>_fixed_delay_1ms_far ; Wait 1ms<br />
@@:<br />
; OEM may have CMOS setup for HD Audio snoop (0= Disable, 1=Enable)<br />
; Device 14h, function 2, register 42, bits 1 and 0 control snoop option<br />
mov ax,CMOS_AZA_SNOOP ; OEM specific<br />
call ReadCMOSOption ; OEM specific<br />
cmp ax,1 ; Snoop enabled?<br />
jne @f ; Jump for disabled<br />
or Byte PTR es:[ebp+<strong>AMD</strong>_PCIE_BAR3+<strong>AMD</strong>_AZALIA_BUS_DEV_FUN shl 12 +<br />
042h], BIT1<br />
; Enable Snoop<br />
@@:<br />
; Set subsystem ID at device 14h, function 2, register 2ch<br />
mov Dword PTR es:[ebp+<strong>AMD</strong>_PCIE_BAR3+<strong>AMD</strong>_AZALIA_BUS_DEV_FUN shl 12<br />
+2Ch], \<br />
<strong>AMD</strong>_AZALIA_ID ; Write subsystem ID<br />
+10h]<br />
; Get HD Audio controller’s memory mapped configuration registers in EBX<br />
mov ebx, Dword PTR es:[ebp+<strong>AMD</strong>_PCIE_BAR3+<strong>AMD</strong>_AZALIA_BUS_DEV_FUN shl 12<br />
; HD Audio port configuration through Extended registers.<br />
; Extended registers are addressed as index/data through SMBUS(Dev 14h, func0)<br />
; register 0F8h,<br />
; and 0FCh<br />
; Index 0 is Audio port configuration. 2 bit per port for total of 4 ports<br />
mov Dword PTR es:[ebp+<strong>AMD</strong>_PCIE_BAR3+<strong>AMD</strong>_SMBUS_BUS_DEV_FUN shl 12 \<br />
+<strong>AMD</strong>_AZALIA_ExtBlk_Addr], 0 ; Set index to 0<br />
; First declare all the lines as GPIO lines by setting index 00 to all 1's.<br />
; Then read the input status of these line at index 02<br />
; If the line is 1, it is guaranteed not to be HD Audio<br />
; This step is necessary because after S4 resume from ring, the AC-97 gives same status<br />
; as HD Audio<br />
©2009 Advanced Micro Devices, Inc.<br />
<strong>AMD</strong> SB700 <strong>BIOS</strong> <strong>Developer</strong>s <strong>Guide</strong> Page 85
\<br />
mov Byte PTR es:[ebp+<strong>AMD</strong>_PCIE_BAR3+<strong>AMD</strong>_SMBUS_BUS_DEV_FUN shl 12 \<br />
+SB700_SMBUS_REGFC], 11111111b ; Set to GPIO<br />
call <strong>AMD</strong>_fixed_delay_1ms_far ; Wait 1ms<br />
mov ecx, dword PTR es:[ebp+<strong>AMD</strong>_PCIE_BAR3+<strong>AMD</strong>_SMBUS_BUS_DEV_FUN shl 12<br />
+SB700_SMBUS_REGFC]<br />
shr ecx,10h<br />
mov di,cx ; Save GPIO lines status at di[7:0]<br />
mov Byte PTR es:[ebp+<strong>AMD</strong>_PCIE_BAR3+<strong>AMD</strong>_SMBUS_BUS_DEV_FUN shl 12 \<br />
+<strong>AMD</strong>_AZALIA_ExtBlk_DATA], 10101010b ; Set pin to HD Audio<br />
; Interrupt routing table for HD Audio is at SMBUS ( Dev 14h, func 0) register 63h<br />
mov Byte PTR es:[ebp+<strong>AMD</strong>_PCIE_BAR3+<strong>AMD</strong>_SMBUS_BUS_DEV_FUN shl 12 +<br />
063h], 0<br />
; Set PCI routing to #INTA<br />
; Attempt to exit the reset state. This is done by command to exit the reset state and<br />
; waiting for status of ready to begin operation.<br />
mov ecx, 10 ; Make up to 10 attempt to exit reset<br />
; state<br />
re_do_reset:<br />
and bx, BIT15+BIT14 ; Clear bit0-13<br />
or Byte PTR ES:[ebx+08h], BIT0 ; Exit the reset state<br />
call <strong>AMD</strong>_fixed_delay_1ms_far ; Wait 1ms<br />
test Byte PTR ES:[ebx+08h], BIT0 ; Read of 1 = Ready to begin operation<br />
jnz @f ; Go if reset bit is set<br />
loop re_do_reset ; Wait until ready to begin operation<br />
jmp <strong>AMD</strong>_SB_Cfg_Azalia_exit ; Exit because reset bit can not be set<br />
@@:<br />
; Ready to begin operation.<br />
; Check codecs present by examining memory mapped register (pointed by EBX) at 0Eh<br />
call <strong>AMD</strong>_fixed_delay_1ms_far ; Wait 1ms<br />
mov al, Byte PTR ES:[ebx+0eh] ; State change status register<br />
and al, 0fh ; Bits 3:0 are for state change status<br />
jnz At_least_one_azalia ; Codec present<br />
; Disable Azalia controller and leave<br />
DisableAzaliaController:<br />
0<br />
; Clear memory access at PCI register 04<br />
and Word PTR es:[ebp+<strong>AMD</strong>_PCIE_BAR3+<strong>AMD</strong>_AZALIA_BUS_DEV_FUN shl 12 +04h],<br />
; Disable HD Audio module through PMIO register 59h bit 3<br />
mov dx,0cd6h ; PMIO index register<br />
©2009 Advanced Micro Devices, Inc.<br />
<strong>AMD</strong> SB700 <strong>BIOS</strong> <strong>Developer</strong>s <strong>Guide</strong> Page 86
mov al,59h ; Set PMIO index to 59h<br />
out dx,al ;<br />
mov dx,0cd7h ; PMIO data register<br />
in al,dx ; Read current data<br />
not al, BIT3 ; Clear bit 3 to disable HD Audio<br />
out dx,al ; Output new data<br />
; HD Audio port configuration through Extended registers.<br />
; Extended registers are addressed as index/data through SMBUS(Dev 14h, func0)<br />
; register 0F8h,<br />
; and 0FCh<br />
; Index 0 is Audio port configuration. 2 bit per port for total of 4 ports<br />
mov Byte PTR es:[ebp+<strong>AMD</strong>_PCIE_BAR3+<strong>AMD</strong>_SMBUS_BUS_DEV_FUN shl 12 \<br />
+<strong>AMD</strong>_AZALIA_ExtBlk_DATA], 01010101b ;Set pin routine to AC97<br />
jmp <strong>AMD</strong>_SB_Cfg_Azalia_exit<br />
; Audio codec present<br />
; Register AL has codec present bit map in bits 3:0<br />
; Register EBX points to memory mapped configuration registers<br />
At_least_one_azalia:<br />
mov dl, al<br />
; After resume from S4 through ring, the AC97 lines give same status as HD Audio<br />
; It is necessary to remove HD Audio status from those bits. The AC-97 ring resume<br />
; status is in register<br />
; DI[3:0]<br />
mov ax,di ; Get GPIO status and AC97 S4 ring wakeup<br />
mov ah,0fh ; To keep only bits 3:0<br />
and al,ah ; Keep only bits 3:0<br />
xor al,ah ; Invert the AC97 ring bits<br />
and dl,al ; Remove GPIO and AC-97 bits from HD Audio bits<br />
mov cl, 0<br />
test_SDI:<br />
test dl, BIT0 ; Test for specific codec present<br />
jnz configure_Azalia_channel ; Jump, codec is present<br />
; This specific codec is not present. Set pin config to AC97<br />
; This pin is set through index 0 of extended registers.<br />
; The extended registes are accessed as index/data at SMBus (dev 14h, func 0) registers<br />
; 0F8h/0FCh<br />
; There are two bits per codec. Register CL has the codec number.<br />
mov ah, 01b ; 01 = Set codec as AC97<br />
shl ah, cl ; Move in the position for this codec<br />
shl ah, cl ; Two bits per codec<br />
mov al, 11b ; Mask for this codec<br />
shl al, cl ; Move it in the position for this codec<br />
shl al, cl ; Two bits per codec<br />
©2009 Advanced Micro Devices, Inc.<br />
<strong>AMD</strong> SB700 <strong>BIOS</strong> <strong>Developer</strong>s <strong>Guide</strong> Page 87
xor al, -1 ; Zero these two bits<br />
and Byte PTR es:[ebp+<strong>AMD</strong>_PCIE_BAR3+<strong>AMD</strong>_SMBUS_BUS_DEV_FUN shl 12 \<br />
+<strong>AMD</strong>_AZALIA_ExtBlk_DATA], al ; Clear channel pin config<br />
or Byte PTR es:[ebp+<strong>AMD</strong>_PCIE_BAR3+<strong>AMD</strong>_SMBUS_BUS_DEV_FUN shl 12 \<br />
+<strong>AMD</strong>_AZALIA_ExtBlk_DATA], ah ; Set channel pin config to AC97<br />
jmp test_next_SDI<br />
configure_Azalia_channel:<br />
call <strong>AMD</strong>_SB_Cfg_Azalia_Pin_CMD ; Configure this pin<br />
test_next_SDI:<br />
shr dl, 1 ; Get next codec present<br />
inc cl ; Update the codec Channel number<br />
cmp cl, 4 ; Completed all channels<br />
je re_do_clear_reset ; Yes, jump. Reset the controller and exit<br />
jmp test_SDI ; Do the next codec<br />
; Reset the controller and wait till it enters reset state.<br />
re_do_clear_reset:<br />
and Byte PTR ES:[ebx+08h], NOT (BIT0) ; Controller transition to reset state<br />
test Byte PTR ES:[ebx+08h], (BIT0) ; Test the reset status. 0 = Controller in<br />
; reset state<br />
jnz re_do_clear_reset ; If 1, wait to enter reset state<br />
<strong>AMD</strong>_SB_Cfg_Azalia_exit:<br />
popad<br />
ret<br />
<strong>AMD</strong>_SB_Cfg_Azalia ENDP<br />
;******************************************************************************************************<br />
; <strong>AMD</strong>_SB_Cfg_Azalia_Pin_CMD *<br />
; *<br />
; Configure each codec pin *<br />
; *<br />
; Input: cl, = channel number *<br />
; ebx = Memory mapped configuration register address *<br />
; *<br />
;******************************************************************************************************<br />
<strong>AMD</strong>_SB_Cfg_Azalia_Pin_CMD PROC NEAR<br />
pushad<br />
; OEM may have CMOS setup option for Pin Configuration (0= Disable, 1=Enable)<br />
mov ax CMOS_Pin_Config ; OEM specific<br />
call ReadCMOSOption ; OEM specific<br />
cmp ax,1<br />
jne <strong>AMD</strong>_SB_Cfg_Azalia_Pin_CMD_exit ; Jump if Pin Configuration is disabled<br />
©2009 Advanced Micro Devices, Inc.<br />
<strong>AMD</strong> SB700 <strong>BIOS</strong> <strong>Developer</strong>s <strong>Guide</strong> Page 88
; Set codec channel number in bits 31:28<br />
; Write command for ID read<br />
shl ecx, 28<br />
mov eax, 0F0000h ; Read IDs command<br />
or eax, ecx<br />
mov Dword PTR ES:[ebx+60h], eax ; Immediate command output register<br />
call <strong>AMD</strong>_SB_Cfg_Azalia_Delay ; About 30 uSec delay<br />
mov eax, Dword PTR ES:[ebx+64h] ; Immediate command input<br />
cmp eax, 010ec0880h ; Is it Realtec codec?<br />
jne <strong>AMD</strong>_SB_Cfg_Azalia_Pin_CMD_exit ; This routine works only with Realtec<br />
; codec<br />
mov si, offset Azalia_Codec_Table_Start<br />
mov di, offset Azalia_Codec_Table_end ; Table end does not include front panel<br />
; OEM may have a CMOS setup selection for Front panel audio (0=Auto, 1=Disable)<br />
mov ax CMOS_Front_Panel ; OEM specific<br />
call ReadCMOSOption ; OEM specific<br />
cmp ax,1 ; Front panel disable<br />
je loop_Immediat_Command_Output_Interface ; Jump for front panel disable<br />
; Front panel option is Auto. GPIO9 detects the front panel audio in the SB700, and<br />
; GPIO8 detects the front panel audio in SB460.<br />
;Check whether SB460?Call DetectSB460<br />
Jz SB460_Chip ;jmp if SB460<br />
;Control comes here if SB700<br />
; Set GPIO9 as input through SMBus (Dev 14h, func 0) register A9h, bit 5<br />
; Read GPIO9 through SMBus (Dev 14h, func 9) register AAh, bit 5<br />
or Byte PTR es:[ebp+<strong>AMD</strong>_PCIE_BAR3+<strong>AMD</strong>_SMBUS_BUS_DEV_FUN shl 12 +<br />
0A9h], BIT5<br />
; Set GPIO9 Input<br />
test Byte PTR es:[ebp+<strong>AMD</strong>_PCIE_BAR3+<strong>AMD</strong>_SMBUS_BUS_DEV_FUN shl 12 +<br />
0AAh], BIT5<br />
; GPIO9 0:connected 1:not<br />
jmp DetectFrontPanelAudio<br />
SB460_Chip:<br />
;Control comes here if SB460<br />
; Set GPIO8 as input through SMBus (Dev 14h, func 0) register A9h, bit 4<br />
; Read GPIO8 through SMBus (Dev 14h, func 9) register AAh, bit 4<br />
or Byte PTR es:[ebp+<strong>AMD</strong>_PCIE_BAR3+<strong>AMD</strong>_SMBUS_BUS_DEV_FUN shl 12 +<br />
0A9h], BIT4<br />
; Set GPIO8 Input<br />
test Byte PTR es:[ebp+<strong>AMD</strong>_PCIE_BAR3+<strong>AMD</strong>_SMBUS_BUS_DEV_FUN shl 12 +<br />
0AAh], BIT4<br />
; GPIO8 0:connected 1:not<br />
©2009 Advanced Micro Devices, Inc.<br />
<strong>AMD</strong> SB700 <strong>BIOS</strong> <strong>Developer</strong>s <strong>Guide</strong> Page 89
DetectFrontPanelAudio:<br />
jnz loop_Immediat_Command_Output_Interface ; Jump, Front Panel audio is not<br />
; present<br />
; Front panel audio is present. Extend the end pointer to include front panel commands<br />
mov di, offset Azalia_Codec_Table_FP_Enable_end<br />
; Write the codec commands<br />
loop_Immediat_Command_Output_Interface:<br />
cmp si, di ; End of table?<br />
je <strong>AMD</strong>_SB_Cfg_Azalia_Pin_CMD_exit ; Jump at the end of the command<br />
test_again:<br />
test Byte PTR ES:[ebx+68h], BIT0 ; Immediate command status register<br />
jnz test_again ; If bit 0 == 1, codec is not ready for<br />
; command<br />
mov eax, cs:[si] ; Get the command from the table<br />
or eax, ecx ; Add codec number 0 to 3<br />
mov Dword PTR ES:[ebx+60h], eax ; Write immediate command<br />
call <strong>AMD</strong>_SB_Cfg_Azalia_Delay ; About 30 uSec delay<br />
add si, 4 ; Update the pointer<br />
jmp loop_Immediat_Command_Output_Interface ; Next command<br />
<strong>AMD</strong>_SB_Cfg_Azalia_Pin_CMD_exit:<br />
popad<br />
ret<br />
<strong>AMD</strong>_SB_Cfg_Azalia_Pin_CMD ENDP<br />
;********************************************************************************************<br />
: <strong>AMD</strong>_SB_Cfg_Azalia_Delay *<br />
; *<br />
; Wait about 30 uSec *<br />
; *<br />
: Input : None *<br />
;*********************************************************************************************<br />
<strong>AMD</strong>_SB_Cfg_Azalia_Delay PROC NEAR<br />
push cx<br />
mov cx, 4<br />
call <strong>AMD</strong>_fixed_delay_far ; Wait approx cx * 7 uSec<br />
pop cx<br />
ret<br />
<strong>AMD</strong>_SB_Cfg_Azalia_Delay ENDP<br />
;*********************************************************************************************<br />
; <strong>AMD</strong>_Fixed_delay_1ms_FAR *<br />
; *<br />
; Delay for approx 1 mSec *<br />
; *<br />
; Input: None *<br />
;*********************************************************************************************<br />
©2009 Advanced Micro Devices, Inc.<br />
<strong>AMD</strong> SB700 <strong>BIOS</strong> <strong>Developer</strong>s <strong>Guide</strong> Page 90
PUBLIC <strong>AMD</strong>_fixed_delay_1ms_FAR<br />
<strong>AMD</strong>_fixed_delay_1ms_FAR PROC FAR<br />
push cx<br />
mov cx, 1000/15<br />
call <strong>AMD</strong>_fixed_delay<br />
pop cx<br />
ret<br />
<strong>AMD</strong>_fixed_delay_1ms_FAR ENDP<br />
;*********************************************************************************************<br />
; <strong>AMD</strong>_fixed_delay_far *<br />
; *<br />
; Delay for about 30 uSec *<br />
; Input: None *<br />
; *<br />
;*********************************************************************************************<br />
<strong>AMD</strong>_fixed_delay_far PROC FAR<br />
push ax<br />
fixed_delay_1:<br />
in al, 61h ; refresh_port<br />
test al, 00010000b<br />
jz fixed_delay_1<br />
dec cx<br />
jz fixed_delay_2<br />
fixed_delay_3:<br />
in al, 61h ; refresh_port<br />
test al, 00010000b<br />
jnz fixed_delay_3<br />
dec cx<br />
jnz fixed_delay_1<br />
fixed_delay_2:<br />
pop ax<br />
ret<br />
<strong>AMD</strong>_fixed_delay ENDP<br />
Azalia_Codec_Table_Start:<br />
dd 01471C10h<br />
dd 01471D40h<br />
dd 01471E01h<br />
dd 01471F01h<br />
dd 01571C11h<br />
dd 01571D10h<br />
dd 01571E01h<br />
dd 01571F01h<br />
dd 01671C12h<br />
dd 01671D60h<br />
dd 01671E01h<br />
©2009 Advanced Micro Devices, Inc.<br />
<strong>AMD</strong> SB700 <strong>BIOS</strong> <strong>Developer</strong>s <strong>Guide</strong> Page 91
dd 01671F01h<br />
dd 01771C13h<br />
dd 01771D20h<br />
dd 01771E01h<br />
dd 01771F01h<br />
dd 01871C30h<br />
dd 01871D91h<br />
dd 01871Ea1h<br />
dd 01871F01h<br />
dd 01971C00h<br />
dd 01971D00h<br />
dd 01971E00h<br />
dd 01971F40h<br />
dd 01a71C31h<br />
dd 01a71D31h<br />
dd 01a71E81h<br />
dd 01a71F01h<br />
dd 01b71C00h<br />
dd 01b71D00h<br />
dd 01b71E00h<br />
dd 01b71F40h<br />
dd 01c71C70h<br />
dd 01c71D10h<br />
dd 01c71E33h<br />
dd 01c71F99h<br />
dd 01d71C00h<br />
dd 01d71D10h<br />
dd 01d71E7fh<br />
dd 01d71F90h<br />
dd 01e71C50h<br />
dd 01e71D00h<br />
dd 01e71E44h<br />
dd 01e71F01h<br />
dd 01f71C60h<br />
dd 01f71D00h<br />
dd 01f71Ec4h<br />
dd 01f71F01h<br />
Azalia_Codec_Table_end:<br />
dd 01971C20h<br />
dd 01971D91h<br />
dd 01971E21h<br />
dd 01971F02h<br />
dd 01B71C40h<br />
dd 01B71D41h<br />
dd 01B71EA1h<br />
dd 01B71F02h<br />
Azalia_Codec_Table_FP_Enable_end:<br />
©2009 Advanced Micro Devices, Inc.<br />
<strong>AMD</strong> SB700 <strong>BIOS</strong> <strong>Developer</strong>s <strong>Guide</strong> Page 92
15 Chipset Integration Module Extensive (SB700 CIMx)<br />
15.1 Introduction<br />
CIMx-SB7xx introduces a new interface and distribution model to help quickly integrate SB7xx<br />
(SB700/SB710/SB750) Southbridge family support in the customer products.<br />
15.2 Distribution Model<br />
To avoid miscellaneous build issues and simplify integration with different <strong>BIOS</strong> code bases,<br />
CIMx-SB7xx is distributed in the form of binary files called “B1” and “B2”. B1 contains<br />
minimum initialization required for <strong>BIOS</strong> recovery, while B2 contains full chipset initialization<br />
code.<br />
15.3 CIMx Architecture<br />
CIMx is completely re-architected from the previous generation of CIM code. CIMx release<br />
contains two binary files (B1 and B2). B1 image must be integrated in the boot block part of<br />
the <strong>BIOS</strong> in uncompressed form to ensure possibility of recovery if the main bios image is<br />
corrupted. There are no restrictions on B2 location. B2 image should be integrated in the main<br />
<strong>BIOS</strong> in uncompressed form. B1 contains the minimal chipset initialization required for boot<br />
block recovery. B2 supports the complete chipset initialization which is required for normal<br />
<strong>BIOS</strong> post.<br />
During power on, the boot block <strong>BIOS</strong> code should call the B1 module to do the power on<br />
settings required for the chipset. Boot block <strong>BIOS</strong> code can inform the B1 module the location<br />
of the B2 module and whether B1 module is allowed to call the B2 module. If the B2 module<br />
location is not given as input, B1 can search for the B2 module. Once the B1 module finds the<br />
B2 module, it validates the B2 module, and if valid, passes the call to B2 module if the boot<br />
block <strong>BIOS</strong> allows it to do so. If the B2 module is invalid or if boot bblock <strong>BIOS</strong> doesn’t allow<br />
B1 to call B2, then B1 module services the call itself. Since B1 module searches the ROM for<br />
B2 module, B2 module should be integrated into the <strong>BIOS</strong> as uncompressed. Also to speed<br />
up the search for B2 module, B2 module should be integrated in 32K Byte alignment.<br />
B1 & B2 modules should be given control in 32-bit flat protected mode with both DS, ES & SS<br />
set to 0-4GB flat mode descriptors. B1 & B2 can be executed from ROM or by copying to<br />
memory with cache enabled. Cache needs to be enabled for the modules to be executed in<br />
ROM.<br />
CIMx code is mostly written in ‘C’ in order to be compatible with both legacy <strong>BIOS</strong> and EFI<br />
environments. Figure 5 shows the flow of system <strong>BIOS</strong> which has integrated the CIMx<br />
modules to support <strong>AMD</strong> chipsets.<br />
©2009 Advanced Micro Devices, Inc.<br />
<strong>AMD</strong> SB700 <strong>BIOS</strong> <strong>Developer</strong>s <strong>Guide</strong> Page 93
Memory detection.<br />
System <strong>BIOS</strong> shadowing<br />
Notrhbridge Start Post Initialization<br />
CIMx-SB7xx - InitSBeforePciEnum<br />
PCI enumeration and resource allocation<br />
Video <strong>BIOS</strong> call<br />
CIMx-SB7xx - InitSBAfterPciEnum<br />
Cnfigure all IO device.<br />
Enumerate USB.<br />
Detect and initialize all boot devices.<br />
Initialize and execute Option ROM.<br />
<strong>BIOS</strong> setup, etc<br />
CIMx-SB7xx - LatePostInitialization<br />
Norhbridge late Post initialization<br />
©2009 Advanced Micro Devices, Inc.<br />
No<br />
No<br />
Power on Reset<br />
CIMx-SB7xx POR Init<br />
HT Initialization<br />
Notrhbridge HT Initialization<br />
Warm Reset Required ?<br />
Notrhbridge Power On Initialization<br />
Is S3 Resume<br />
Operatin System<br />
Restore Memory Controller<br />
Restore PCI Device configuration space<br />
Misc. Restore CPU<br />
Norhbridge S3 initialization<br />
Figure 5 Flowchart of S<strong>BIOS</strong> with Integrated CIMx<br />
Misc <strong>BIOS</strong> restore.<br />
Give control to OS<br />
<strong>AMD</strong> SB700 <strong>BIOS</strong> <strong>Developer</strong>s <strong>Guide</strong> Page 94<br />
Yes<br />
Yes<br />
CIMx-SB7xx - InitSbBfPciRestore<br />
CIMx-SB7xx - InitSbAfPciRestore<br />
Norhbridge PCIE S3 initialization
15.4 Binary File<br />
15.4.1 Overview<br />
CIMx-SB700 binary file is modified and rebased in 32-bit PE32 executable generated by<br />
Microsoft Visual Studio. (For additional information about Microsoft Visual Studio file format<br />
refer to “Visual Studio, Microsoft Portable Executable and Common Object File Format<br />
Specification”). Figure 6 illustrates the difference between Microsoft PE executable format<br />
and CIMx-SB700 binary file format.<br />
Microsoft PE executabe<br />
MS-DOS 2.0 Compatible<br />
EXE Header<br />
OEM Identifier<br />
OEM Information<br />
Offset to PE Header<br />
MS-DOS 2.0 Stub Program<br />
and<br />
Relocation Table<br />
PE Header<br />
Section Headers<br />
Raw Data:<br />
Code<br />
Data<br />
debug info<br />
relocations<br />
©2009 Advanced Micro Devices, Inc.<br />
Figure 6 CIMx-SB7xx vs MS PE Executable<br />
CIMx SB7xx Binary<br />
CIM Header<br />
Raw Data:<br />
Code<br />
Data<br />
<strong>AMD</strong> SB700 <strong>BIOS</strong> <strong>Developer</strong>s <strong>Guide</strong> Page 95
15.4.2 Binary Header<br />
The CIMx-SB700 consists of file header followed immediately by Raw Code and Data.<br />
Table 2 CIMx File Header Definition<br />
Offset Size Field Description<br />
0 4 Signature Signature that identifies this as a CIMx<br />
module<br />
4 4 EntryPointAddress Address of the entry point relevant to the<br />
beginning of the binary image.<br />
8 4 ModuleSignature Signature that identify this particular<br />
CIMx module.<br />
12 4 ImageSize Size in number of bytes of complete binary<br />
including the header.<br />
16 2 ModuleVersion Version of the binary module.<br />
16 2 Checksum Checksum of the binary image.<br />
18 5 Reserved Space reserved for future use.<br />
15.5 CIMx Interface Calls Environment<br />
Prior to calling any CIMX interface, it is required that:<br />
1. Place CPU into 32 bit protected mode.<br />
2. Set CS as 32bit code segment with Base/Limit – 0x00000000/0xffffffff.<br />
3. Set DS/ES/SS as 32bit data segment with Base/Limit – 0x00000000/0xffffffff.<br />
See Example.<br />
15.6 Interface Definition<br />
All interface calls to CIMx-SB700 binary are C like calls to the Entry Point of the binary image.<br />
void (*ImageEntryPointPtr)(void* Config)<br />
15.6.1 Southbridge Power-On/Reset Initialization<br />
Upon system power-on, or cold reset, there is minimal initialization required like SMBus base<br />
address programming, enabling the legacy IO (like port 60/64 etc) decoding etc to bring the<br />
system to a working state. <strong>BIOS</strong> should call this entry to B1 module at very early stage during<br />
power on initialization.<br />
CIMx has assumed a set of default values for all the build parameters such as bios size,<br />
smbus base address, power management base addresses etc. If you wan to use your own<br />
set of values for these configurable options, then you can define the buildparameters<br />
structure and give the 32bit physical pointer as input to the CIMx module. If the pointer is<br />
NULL or set to all 1, then the CIMx module uses the default parameters which are built. Also<br />
©2009 Advanced Micro Devices, Inc.<br />
<strong>AMD</strong> SB700 <strong>BIOS</strong> <strong>Developer</strong>s <strong>Guide</strong> Page 96
the bios developer has the flexibility of changing the oem.h file to redefine the values but in<br />
this, the CIMx module needs to be rebuilt for the new values to be included in the binary.<br />
Functions Documentation<br />
Parameters<br />
void (*ImageEntryPointPtr)(<strong>AMD</strong>SBCFGBB* Config)<br />
typedef struct _<strong>AMD</strong>SBCFGBB<br />
{<br />
STDCFG StdHeader; //offset 0:16 - 17 bytes<br />
UINT32 MsgXchgBiosCimxBB; //offset 17:20 - 4 bytes<br />
BUILDPARAM *BuildParametersPtr; //offset 21:24 - 4 bytes<br />
}<strong>AMD</strong>SBCFGBB;<br />
Detail Description<br />
stdHeader – Standard function call<br />
stdHeader.Func = 0x01.<br />
typedef struct _STDCFG{<br />
UINT32 pImageBase;<br />
UINT32 pPcieBase;<br />
UINT8 Func;<br />
UINT32 pCallBack;<br />
UINT32 pB2ImageBase;<br />
}STDCFG;<br />
pImageBase - Physical address of binary image.<br />
pPcieBase - Address of PCIE Extended configuration space MMIO.<br />
Func – Function identifier.<br />
pCallBack - Address of OEM call back function<br />
pB2ImageBase – Optional parameter. Physical address of “B2” image.<br />
MsgXchgBiosCimx – Field to exchange message between <strong>BIOS</strong> & CIMx<br />
Bit Field Description<br />
[0] S3Resume Informs the CIMx module whether the<br />
system is resuming from S3<br />
[1] RebootRequired CIMx informs <strong>BIOS</strong> whether a reboot<br />
is required after returning from<br />
CIMx call. Some internal clock<br />
settings and spread spectrum<br />
settings require a reboot.<br />
[2] Spi33Mhz 0 – Leave the SPI ROM to default<br />
speed(16.5MHz)<br />
1 – Bump up the SPI ROM to 33Mhz.<br />
©2009 Advanced Micro Devices, Inc.<br />
<strong>AMD</strong> SB700 <strong>BIOS</strong> <strong>Developer</strong>s <strong>Guide</strong> Page 97
Bit Field Description<br />
[3] SpreadSpectrum When using external clock<br />
0 – Disable SB internal spread<br />
spectrum on sb pci clocks<br />
1 – Enable SB internal spread<br />
specturm on pci clks. (If this<br />
option is enabled and if the clock<br />
input to SB is already spread, then<br />
it will cause double spread on the<br />
SB pci clks).<br />
When using internal clock boards<br />
0 – Disable SB internal spread<br />
spectrum.<br />
1 – Enable SB internal spread<br />
specturm on clocks going out from<br />
SB. (if this option is enable, then<br />
it will enable spread on all clocks<br />
except USB, SATA and DISP clocks).<br />
[4] UsbIntClock 0 – Use external 48MHz clock source<br />
for usb controllers.<br />
1 – Use SB700 internal clock source<br />
for usb controllers<br />
[5] PciClk5 0 – Leave PCIClk5 pin as GPIO<br />
1 – Enable PCIClk5 pin as PCI CLK.<br />
[7:6] TimerClockSource This option is applicable only for<br />
SB700-A13, SB710 & SB700S.<br />
0 – 100Mhz PCIE Reference clock, Use<br />
100Mhz PCIE reference clock as<br />
timer clock source to SB<br />
(compatible with SB700-A12).<br />
1 – 14Mhz using 25M_48M_66M_OSC pin, ,<br />
Use external 14Mhz clock source for<br />
system timer clock by routing<br />
25M_X1 pin directly into the<br />
internal clock. In the platform,<br />
25M_X1 pin should be connected to<br />
14Mhz clock source for this option.<br />
2 – Auto. If SB700 A12, use 100 Mhz<br />
PCIE reference clock. If SB700 A14,<br />
use external 14Mhz clock source by<br />
routing 25M_X1 pin directly into<br />
the internal clock.<br />
[8] A13ECOs This option is to disable the SB700<br />
A13 ECOs just for testing/debugging<br />
purposes. In general A13 ECOs<br />
should always be enabled.<br />
0 – Enable A13 ECOs.<br />
1 – Disable A13 ECOs.<br />
In future this option will be<br />
removed and A13 ECOs will always be<br />
enabled.<br />
[31:9] MsgXchgBiosCimxDummyBB Dummy place holder for future use<br />
©2009 Advanced Micro Devices, Inc.<br />
<strong>AMD</strong> SB700 <strong>BIOS</strong> <strong>Developer</strong>s <strong>Guide</strong> Page 98
BuildParametersPtr – This is pointer to build parameter structure. It should point to the following<br />
structure (BUILDPARAM) or should be 0xFFFFFFFF and in that case CIMx will use the default<br />
structure. CIMx also provides the flexibility of changing the default build structure parameters by<br />
editing them in oem.h file. In the case CIMx module need to rebuilt so that the new parameters are<br />
updated. So there are basically three options.<br />
1. Build parameters can be given as input by providing a pointer to BUILDPARAM structure as<br />
input.<br />
2. OEM can use the default structure built into the binary by providing a NULL pointer as input.<br />
3. OEM can change the values of default structure by updating them in oem.h file and use the<br />
updated default structure. In this case a NULL pointer should be provided as input. In this<br />
case, OEM needs to rebuild the CIMx module to have the binary updated with the new<br />
values.<br />
typedef struct _BUILDPARAMBB<br />
{<br />
UINT16 BiosSize:3; //0-128KB, 1-256KB, 2-512KB, 4-1MB,....<br />
UINT16 LegacyFree:1;<br />
UINT16 Dummy0:12;<br />
UINT16 EcKbd:1;<br />
UINT16 EcChannel0:1;<br />
UINT16 Dummy1:14;<br />
UINT32 Smbus0BaseAddress;<br />
UINT16 Smbus1BaseAddress;<br />
UINT32 SioPmeBaseAddress;<br />
UINT32 WatchDogTimerBase;<br />
UINT32 SpiRomBaseAddress;<br />
UINT16 AcpiPm1EvtBlkAddr;<br />
UINT16 AcpiPm1CntBlkAddr;<br />
UINT16 AcpiPmTmrBlkAddr;<br />
UINT16 CpuControlBlkAddr;<br />
UINT16 AcpiGpe0BlkAddr;<br />
UINT16 SmiCmdPortAddr;<br />
UINT16 AcpiPmaCntBlkAddr;<br />
UINT16 EcLdn5MailBoxAddr;<br />
UINT8 EcLdn5Irq;<br />
UINT16 EcLdn9MailBoxAddr;<br />
UINT32 ReservedDword0;<br />
UINT32 ReservedDword1;<br />
UINT32 ReservedDword2;<br />
UINT32 ReservedDword3;<br />
}BUILDPARAMBB;<br />
BiosSize – Size of the <strong>BIOS</strong> ROM(0-128KB, 1-256KB, 2-512KB, 4-1MB, 5-2MB, 6-4MB, Others:<br />
Reserved)<br />
©2009 Advanced Micro Devices, Inc.<br />
<strong>AMD</strong> SB700 <strong>BIOS</strong> <strong>Developer</strong>s <strong>Guide</strong> Page 99
LegacyFree – Indicates whether the system is Legacy Free ( 0 – Not Legacy Free, 1 – Legacy<br />
Free)<br />
Dummy0 – Dummy place holder for future use<br />
EcKbd – Indicates whether CIMx needs to enable the KBC in the EC<br />
EcChannel0– Indicates whether CIMx needs to enable the Channel0 in the EC<br />
Dummy1 – Dummy place holder for future use<br />
Smbus0BaseAddress – Base Address of SMBus 0.<br />
Smbus1BaseAddress – Base Address of SMBus 1.<br />
SioPmeBaseAddress – SIO PME Base Address to enable decoding of this address in LPC Bus.<br />
This is not used if system is legacy free.<br />
WatchDogTimerBase – WatchDog Timer Base Address.<br />
SpiRomBaseAddress – SPI ROM Base Address.<br />
AcpiPm1EvtBlkAddr – ACPI Power management Event block address<br />
AcpiPm1CntBlkAddr – ACPI Power management Control block address<br />
AcpiPmTmrBlkAddr – ACPI Power management Timer block address<br />
CpuControlBlkAddr – ACPI Power management CPU Control block address<br />
AcpiGpe0BlkAddr – ACPI Power management General Purpose Event block address<br />
SmiCmdPortAddr – ACPI Power management SMI Command block address<br />
AcpiPmaCntBlkAddr – ACPI Power management Additional control block address<br />
EcLdn5MailBoxAddr – EC Logical Device 5 Mailbox base address.<br />
EcLdn5Irq – Interrupt to be assigned to EC Logical Device 5.<br />
EcLdn9MailBoxAddr – EC Logical Device 9 Mailbox base address.<br />
ReservedDword0 – Reserved for future use.<br />
ReservedDword1 – Reserved for future use.<br />
ReservedDword2 – Reserved for future use.<br />
ReservedDword3 – Reserved for future use.<br />
©2009 Advanced Micro Devices, Inc.<br />
<strong>AMD</strong> SB700 <strong>BIOS</strong> <strong>Developer</strong>s <strong>Guide</strong> Page 100
15.6.2 SouthBridge <strong>BIOS</strong> Post Initialization<br />
SB700 <strong>BIOS</strong> post initialization is divided into 3 stages as before pci enumeration, after pci<br />
enumeration and late post initialization. All these 3 calls need the same inputs except that the<br />
function id should be setup properly. “Before pci enumeration” routine should be called before pci<br />
devices are enumerated and resources are assigned. It is recommended to call the pci before<br />
initialization at very early post after memory detection. “After pci enumeration routine” should be<br />
called after the resources are assigned to the pci devices since this routine initializes MMIO spaces of<br />
some of the devices. Late post initialization should be called at the end of <strong>BIOS</strong> post just before<br />
giving control to OS.<br />
Functions Documentation<br />
Parameters<br />
void (*ImageEntryPointPtr)(<strong>AMD</strong>SBCFG* Config)<br />
typedef struct _<strong>AMD</strong>SBCFG<br />
{<br />
STDCFG StdHeader;<br />
UINT32 MsgXchgBiosCimx;<br />
BUILDPARAM *BuildParametersPtr;<br />
UINT32 SataConfiguration;<br />
UINT16 FCConfig;<br />
UINT16 UsbConfiguration;<br />
UINT32 AzaliaConfiguration;<br />
CODECTBLLIST* pAzaliaOemCodecTablePtr;<br />
UINT32 pAzaliaOemFpCodecTableptr;<br />
UINT32 MiscConfiguration;<br />
UINT32 AsmAslInfoExchange0;<br />
UINT32 AsmAslInfoExchange1;<br />
UINT32 DebugOptions_1;<br />
UINT32 DebugOptions_2;<br />
UINT32 TempMMIO<br />
}<strong>AMD</strong>SBCFG;<br />
Detail Description<br />
stdHeader – Standard function call (see STDCFG definition)<br />
stdHeader.Func = 0x10 – Before PCI enumeration init<br />
stdHeader.Func = 0x20 – After PCI enumeration init<br />
stdHeader.Func = 0x30 – Late post init<br />
MsgXchgBiosCimx – Field to exchange message between <strong>BIOS</strong> & CIMx<br />
©2009 Advanced Micro Devices, Inc.<br />
<strong>AMD</strong> SB700 <strong>BIOS</strong> <strong>Developer</strong>s <strong>Guide</strong> Page 101
Bit Field Description<br />
[0] S3Resume Informs the CIMx module whether the<br />
system is resuming from S3<br />
[1] RebootRequired CIMx informs <strong>BIOS</strong> whether a reboot<br />
is required after returning from<br />
CIMx call. Some internal clock<br />
settings and spread spectrum<br />
settings require a reboot.<br />
[2] Spi33Mhz 0 – Leave the SPI ROM to default<br />
speed(16.5MHz)<br />
1 – Bump up the SPI ROM to 33Mhz.<br />
[3] SpreadSpectrum When using external clock<br />
0 – Disable SB internal spread<br />
spectrum on sb pci clocks<br />
1 – Enable SB internal spread<br />
specturm on pci clks. (if this<br />
option is enabled and if the clock<br />
input to SB is already spread, then<br />
it will cause double spread on the<br />
SB pci clks).<br />
When using internal clock boards<br />
0 – Disable SB internal spread<br />
spectrum.<br />
1 – Enable SB internal spread<br />
specturm on clocks going out from<br />
SB. (if this option is enable, then<br />
it will enable spread on all clocks<br />
except USB, SATA and DISP clocks).<br />
[4] UsbIntClock 0 – Use external 48MHz clock source<br />
for usb controllers.<br />
1 – Use SB700 internal clock source<br />
for usb controllers<br />
[5] PciClk5 0 – Leave PCIClk5 pin as GPIO<br />
1 – Enable PCIClk5 pin as PCI CLK.<br />
[7:6] TimerClockSource This option is applicable only for<br />
SB700-A13, SB710 & SB700S.<br />
0 – 100Mhz PCIE Reference clock, Use<br />
100Mhz PCIE reference clock as<br />
timer clock source to SB<br />
(compatible with SB700-A12).<br />
1 – 14Mhz using 25M_48M_66M_OSC pin, ,<br />
Use external 14Mhz clock source for<br />
system timer clock by routing<br />
25M_X1 pin directly into the<br />
internal clock. In the platform,<br />
25M_X1 pin should be connected to<br />
14Mhz clock source for this option.<br />
2 – Auto. If SB700 A12, use 100 Mhz<br />
PCIE reference clock. If SB700 A14,<br />
use external 14Mhz clock source by<br />
routing 25M_X1 pin directly into<br />
the internal clock.<br />
©2009 Advanced Micro Devices, Inc.<br />
<strong>AMD</strong> SB700 <strong>BIOS</strong> <strong>Developer</strong>s <strong>Guide</strong> Page 102
Bit Field Description<br />
[8] A13ECOs This option is to disable the SB700<br />
A13 ECOs just for testing/debugging<br />
purposes. In general A13 ECOs<br />
should always be enabled.<br />
0 – Enable A13 ECOs.<br />
1 – Disable A13 ECOs.<br />
In future this option will be<br />
removed and A13 ECOs will always be<br />
enabled.<br />
[31:9] MsgXchgBiosCimxDummyBB Dummy place holder for future use<br />
BuildParametersPtr – This is pointer to build parameter structure. It should point to the following<br />
structure (BUILDPARAM) or should be 0xFFFFFFFF and in that case CIMx will use the default<br />
structure. CIMx also provides the flexibility of changing the default build structure parameters by<br />
editing them in oem.h file. In the case CIMx module need to rebuilt so that the new parameters are<br />
updated. So there are basically three options.<br />
1. Build parameters can be given as input by providing a pointer to BUILDPARAM structure as<br />
input.<br />
2. OEM can use the default structure built into the binary by providing a NULL pointer as input.<br />
3. OEM can change the values of default structure by updating them in oem.h file and use the<br />
updated default structure. In this case a NULL pointer should be provided as input. In this<br />
case, OEM needs to rebuild the CIMx module to have the binary updated with the new<br />
values.<br />
typedef struct _BUILDPARAM<br />
{<br />
UINT16 BiosSize:3; //0-128KB, 1-256KB, 2-512KB, 4-1MB,....<br />
UINT16 LegacyFree:1;<br />
UINT16 Dummy0:12;<br />
UINT16 EcKbd:1;<br />
UINT16 EcChannel0:1;<br />
UINT16 Dummy1:14;<br />
UINT32 Smbus0BaseAddress;<br />
UINT16 Smbus1BaseAddress;<br />
UINT32 SioPmeBaseAddress;<br />
UINT32 WatchDogTimerBase;<br />
UINT32 SpiRomBaseAddress;<br />
UINT16 AcpiPm1EvtBlkAddr;<br />
UINT16 AcpiPm1CntBlkAddr;<br />
UINT16 AcpiPmTmrBlkAddr;<br />
UINT16 CpuControlBlkAddr;<br />
UINT16 AcpiGpe0BlkAddr;<br />
UINT16 SmiCmdPortAddr;<br />
UINT16 AcpiPmaCntBlkAddr;<br />
UINT16 EcLdn5MailBoxAddr;<br />
UINT8 EcLdn5Irq;<br />
UINT16 EcLdn9MailBoxAddr;<br />
©2009 Advanced Micro Devices, Inc.<br />
<strong>AMD</strong> SB700 <strong>BIOS</strong> <strong>Developer</strong>s <strong>Guide</strong> Page 103
UINT32 ReservedDword0;<br />
UINT32 ReservedDword1;<br />
UINT32 ReservedDword2;<br />
UINT32 ReservedDword3;<br />
UINT32 HpetBase; //HPET Base address<br />
UINT32 SataIDESsid;<br />
UINT32 SataRAIDSsid;<br />
UINT32 SataRAID5Ssid;<br />
UINT32 SataAHCISsid;<br />
UINT32 Ohci0Ssid;<br />
UINT32 Ohci1Ssid;<br />
UINT32 Ehci0Ssid;<br />
UINT32 Ohci2Ssid;<br />
UINT32 Ohci3Ssid;<br />
UINT32 Ehci1Ssid;<br />
UINT32 Ohci4Ssid;<br />
UINT32 SmbusSsid;<br />
UINT32 IdeSsid;<br />
UINT32 AzaliaSsid;<br />
UINT32 LpcSsid;<br />
UINT32 P2PSsid;<br />
}BUILDPARAM;<br />
BiosSize – Size of the <strong>BIOS</strong> ROM (0-128KB, 1-256KB, 2-512KB, 4-1MB, Others: Reserved)<br />
LegacyFree – Indicates whether the system is Legacy Free ( 0 – Not Legacy Free, 1 – Legacy<br />
Free)<br />
Dummy0 – Dummy place holder for future use<br />
EcKbd – Indicates whether CIMx needs to enable the KBC in the EC<br />
EcChannel0– Indicates whether CIMx needs to enable the Channel0 in the EC<br />
Dummy1 – Dummy place holder for future use<br />
Smbus0BaseAddress – Base Address of SMBus 0.<br />
Smbus1BaseAddress – Base Address of SMBus 1.<br />
SioPmeBaseAddress – SIO PME Base Address to enable decoding of this address in LPC Bus.<br />
This is not used if system is legacy free.<br />
WatchDogTimerBase – WatchDog Timer Base Address.<br />
SpiRomBaseAddress – SPI ROM Base Address.<br />
AcpiPm1EvtBlkAddr – ACPI Power management Event block address<br />
AcpiPm1CntBlkAddr – ACPI Power management Control block address<br />
AcpiPmTmrBlkAddr – ACPI Power management Timer block address<br />
©2009 Advanced Micro Devices, Inc.<br />
<strong>AMD</strong> SB700 <strong>BIOS</strong> <strong>Developer</strong>s <strong>Guide</strong> Page 104
CpuControlBlkAddr – ACPI Power management CPU Control block address<br />
AcpiGpe0BlkAddr – ACPI Power management General Purpose Event block address<br />
SmiCmdPortAddr – ACPI Power management Smi Command block address<br />
AcpiPmaCntBlkAddr – ACPI Power management Additional control block address<br />
EcLdn5MailBoxAddr – EC Logical Device 5 Mailbox base address.<br />
EcLdn5Irq – Interrupt to be assigned to EC Logical Device 5.<br />
EcLdn9MailBoxAddr – EC Logical Device 9 Mailbox base address.<br />
ReservedDword0 – Reserved for future use.<br />
ReservedDword1 – Reserved for future use.<br />
ReservedDword2 – Reserved for future use.<br />
ReservedDword3 – Reserved for future use.<br />
HpetBase – High Precision Timer(HPET) Base Address.<br />
SataIDESsid – Subsystem ID of SATA controller when it is set to IDE mode.<br />
SataRAIDSsid – Subsystem ID of SATA controller when it is set to IDE mode.<br />
SataRAID5Ssid – Subsystem ID of SATA controller when it is set to IDE mode.<br />
SataAHCISsid – Subsystem ID of SATA controller when it is set to AHCI mode.<br />
Ohci0Ssid – Subsystem ID of OHCI controller 0(Bus 0 Dev 18 Func 0).<br />
Ohci1Ssid – Subsystem ID of OHCI controller 1(Bus 0 Dev 18 Func 1).<br />
Ehci0Ssid – Subsystem ID of EHCI controller 0(Bus 0 Dev 18 Func 2).<br />
Ohci2Ssid – Subsystem ID of OHCI controller 2(Bus 0 Dev 19 Func 0).<br />
Ohci3Ssid – Subsystem ID of OHCI controller 3(Bus 0 Dev 19 Func 1).<br />
Ehci1Ssid – Subsystem ID of EHCI controller 1(Bus 0 Dev 19 Func 2).<br />
Ohci4Ssid – Subsystem ID of OHCI controller 5(Bus 0 Dev 20 Func 5).<br />
SmbusSsid - Subsystem ID of SMBUS controller(Bus 0 Dev 20 Func 0).<br />
IdeSsid – Subsystem ID of IDE controller(Bus 0 Dev 20 Func 1).<br />
AzaliaSsid – Subsystem ID of Azalia controller (Bus 0 Dev 20 Func 2).<br />
LpcSsid – Subsystem ID of LPC controller (Bus 0 Dev 20 Func 3).<br />
©2009 Advanced Micro Devices, Inc.<br />
<strong>AMD</strong> SB700 <strong>BIOS</strong> <strong>Developer</strong>s <strong>Guide</strong> Page 105
P2PSsid – Subsystem ID of P2P bridge (Bus 0 Dev 20 Func 4).<br />
SataConfiguration – Configuration Options for SATA Controller<br />
Bit Field Description<br />
[0] SataController Disable or enable the onchip SATA<br />
controller<br />
0 – Disable<br />
1 – Enable<br />
[3:1] SataClass Sata Controller operating mode<br />
0 – Native IDE mode<br />
1 – RAID mode<br />
2 – AHCI mode<br />
3 – Legacy IDE mode<br />
4 – IDE to AHCI mode<br />
5 – HyperFlash mode<br />
6 – IDE to HFS mode<br />
[4] SataSmbus SATA SMBus controller<br />
0 – Disable<br />
1 - Enable<br />
[5] SataAggrLinkPmCap Aggresstive Link Power management<br />
capability<br />
0 – OFF<br />
1 – ON<br />
[6] SataPortMultCap Port multiplier capability<br />
0 – OFF<br />
1 - ON<br />
[8:7] SataReserved Currently not used.<br />
[9] SataClkAutoOff Switch off the clocks for the ports<br />
which doesn’t have a drive<br />
connected to save power.<br />
0 – Disable.<br />
1 – Enable.<br />
If this option is enabled and the<br />
port is not an e-sata port, then<br />
hotplug will not work for that port<br />
since the port is disabled when a<br />
drive is not connected.<br />
[10] SataIdeCombinedMode Disable/Enable the SATA/IDE<br />
combined mode. Combined Mode should<br />
be disabled to support upto 6 SATA<br />
ports<br />
0 – Disable.<br />
1 – Enable.<br />
Combined mode is described in more<br />
detailed in BDG.<br />
[11] SataIdeCombMdPriSecOpt Channel configuration in combined<br />
mode.<br />
0 – SATA as primary channel<br />
1 – SATA as secondary channel<br />
[12:17] SataReserved1 This is currently not used.<br />
©2009 Advanced Micro Devices, Inc.<br />
<strong>AMD</strong> SB700 <strong>BIOS</strong> <strong>Developer</strong>s <strong>Guide</strong> Page 106
Bit Field Description<br />
[18:23] SataEspPort SATA port is external accessible on a<br />
signal only connector (Bit18 – port0,<br />
Bit19 – port1.... Bit23 – port5)<br />
[31..24] SataDummy Dummy place holder for future use<br />
FCConfig – Configuration Options for Flash Controller<br />
Bit Field Description<br />
[0] FlashController Disable or enable the onchip Flash<br />
controller.<br />
0:disable FC & enable IDE 1:enable<br />
FC & disable IDE<br />
[1] FlashControllerMode Flash controller operating mode<br />
0 : FC behind SATA<br />
1 : FC as standalone device<br />
[2] FlashHcCrc Disable/Enable HC CRC.<br />
0 : Disable<br />
1 : Enable<br />
[3] FlashErrorMode Disable/Enable Error mode<br />
0 : Disable<br />
1 : Enable<br />
[4] FlashNumOfBankMode Enables number of bank mode<br />
0 : Disable<br />
1 : Enable<br />
[15..5] FlashDummy Dummy place holder for future use<br />
USBConfiguration – Configuration options for onchip USB host controllers.<br />
Bit Field Description<br />
[0] Usb1Ohci0 Disable/Enable OHCI controller<br />
0(Bus 0 Dev 18 Func 0)<br />
0 – Disable<br />
1 - Enable<br />
[1] Usb1Ohci1 Disable/Enable OHCI controller 1<br />
(Bus 0 Dev 18 Func 1)<br />
0 – Disable<br />
1 – Enable<br />
[2] Usb1Ehci Disable/Enable EHCI controller 0<br />
(Bus 0 Dev 18 Func 2)<br />
0 – Disable<br />
1 – Enable<br />
[3] Usb2Ohci0 Disable/Enable OHCI controller<br />
3(Bus 0 Dev 19 Func 0)<br />
0 – Disable<br />
1 – Enable<br />
©2009 Advanced Micro Devices, Inc.<br />
<strong>AMD</strong> SB700 <strong>BIOS</strong> <strong>Developer</strong>s <strong>Guide</strong> Page 107
Bit Field Description<br />
[4] Usb2Ohci1 Disable/Enable OHCI controller<br />
4(Bus 0 Dev 19 Func 1)<br />
0 – Disable<br />
1 - Enable<br />
[5] Usb2Ehci Disable/Enable EHCI controller<br />
1(Bus 0 Dev 19 Func 1)<br />
0 – Disable<br />
1 – Enable<br />
[6] Usb3Ohci Disable/Enable OHCI controller<br />
5(Bus 0 Dev 20 Func 5)<br />
0 – Disable<br />
1 – Enable<br />
[7] UsbOhciLegacyEmulation Input option to inform CIMx whether<br />
legacy usb emulation is enabled in the<br />
platform <strong>BIOS</strong> or not. CIMx has to do<br />
specific settings based on whether<br />
legacy usb is enabled or not..<br />
0 – USB Legacy emulation support is<br />
enabled.<br />
1 – USB Legacy emulation is disabled.<br />
[15..8] UsbDummy Dummy place holder for future use<br />
AzaliaConfiguration - Configuration options for onchip Azalia audio controller.<br />
Bit Field Description<br />
[1:0] AzaliaController Enable/Disable Azalia controller<br />
0 – Auto<br />
1 – Disable<br />
2 - Enable<br />
[2] AzaliaPinCfg Azalia Pin configuration<br />
0 – Disable<br />
1 – Enable<br />
[4:3] AzaliaFrontPanel Enable/Disable Azalia front panel<br />
controller<br />
0 – Auto<br />
1 – Disable<br />
2 - Enable<br />
[5] FrontPanelDetected Inform CIMx of Azalia front panel<br />
detection<br />
0 – Not detected<br />
1 – Front panel is detected<br />
[7:6] AzaliaSdin0 SDIN0 Pin configuration<br />
0 – GPIO<br />
1 – AC97<br />
2 - Azalia<br />
[9:8] AzaliaSdin1 SDIN1 Pin configuration<br />
0 – GPIO<br />
1 – AC97<br />
2 - Azalia<br />
©2009 Advanced Micro Devices, Inc.<br />
<strong>AMD</strong> SB700 <strong>BIOS</strong> <strong>Developer</strong>s <strong>Guide</strong> Page 108
Bit Field Description<br />
[11:10] AzaliaSdin2 SDIN2 Pin configuration<br />
0 – GPIO<br />
1 – AC97<br />
2 - Azalia<br />
[13:12] AzaliaSdin3 SDIN3 Pin configuration<br />
0 – GPIO<br />
1 – AC97<br />
2 - Azalia<br />
[31:14] AzaliaDummy Dummy place holder for future use<br />
pAzaliaOemCodecTablePtr – Pointer to OEM specific Azalia CODEC table. If the pointer is NULL<br />
then CIMx module will initialize with the default CODEC table.<br />
pAzaliaOemFpCodecTableptr - Pointer to OEM specific CODEC table for front panel. If the<br />
pointer is NULL then CIMx module will initialize with the default CODEC table.<br />
MiscConfiguration – Miscellaneous configuration options.<br />
Bit Field Description<br />
[0] MiscReserved0 Reserved. Currently not used.<br />
[1] HpetTimer HPET Timer<br />
0 – Disable<br />
1 – Enable<br />
[6:2] PciClks Enable/Disable PCI Clks 0 to 4<br />
0 – Disable<br />
1 – Enable<br />
(Bit 2 is for pci clk0, bit 1 for<br />
pci clk 1…. Bit 6 for pci clk 4)<br />
[9:7] MiscReserved1 Reserved. Currently not used.<br />
[10] IdeController 0 – Enable IDE(PATA, Bus 0 Dev 20<br />
Fun 1) controller<br />
1 – Disable IDE controller<br />
[11] MobilePowerSavings 0 – Disable mobile power savings<br />
feature<br />
1 – Enable mobile power savings<br />
feature<br />
[12] ExternalRTCClock 0 – Don’t shutdown external RTC<br />
clock from SB<br />
1 – Shutdown external RTC clock<br />
from SB to save power. This clock<br />
can be shutdown if external RTC<br />
clock signal from SB is not used.<br />
[31:13] MiscDummy Dummy placeholder for future use<br />
AsmAslInfoExchange0 – This DWORD is to use exchange information between the CIMx asm<br />
code and the ASL code.<br />
AsmAslInfoExchange1 - This DWORD is to use exchange information between the CIMx asm<br />
code and the ASL code.<br />
©2009 Advanced Micro Devices, Inc.<br />
<strong>AMD</strong> SB700 <strong>BIOS</strong> <strong>Developer</strong>s <strong>Guide</strong> Page 109
DebugOptions_1 – This Dword is to configure some of the ASIC debug options. The exact definition<br />
will be documented in next release. Please set to recommended values for now.<br />
DebugOptions_2 – This Dword is to configure some of the ASIC debug options. The exact definition<br />
will be documented in next release. Please set to recommended values for now.<br />
TempMMIO – IDE to AHCI mode, IDE to HFS mode needs to set BAR5 MMIO registers in the SATA<br />
controller, so if BAR5 is already not programmed, CIMx will program a temporary MMIO address<br />
(0xFEC1000) to do the MMIO settings. Add a parameter in config structure to let the caller to specify<br />
the temp MMIO address if they don’t want to use the default MMIO address.<br />
15.6.3 S3 resume Initialization<br />
CIMx will do the necessary programming to prepare SB to resume from sleep state. It is highly<br />
recommended to use same copy <strong>AMD</strong>SBCFG for <strong>BIOS</strong> post and S3 resume initialization. This will<br />
allow CIMX to exchange data between interface calls if necessary. There are two calls necessary<br />
during S3 resume time to restore SB to the previous state. The first call should be done before pci<br />
devices config spaces are restored and another call should be done after pci devices config spaces<br />
are restored. Also to save resume time you can call B2 directly during S3 resume instead of calling<br />
B1 to save resume time. This will help to avoid B2 checksum verification procedure which may take<br />
upto 20ms.<br />
Functions Documentation<br />
void (*ImageEntryPointPtr)(PCICFG* Config)<br />
Parameters<br />
typedef struct _<strong>AMD</strong>SBCFG<br />
{<br />
STDCFG StdHeader;<br />
UINT32 MsgXchgBiosCimx;<br />
BUILDPARAM *BuildParametersPtr;<br />
UINT32 SataConfiguration;<br />
UINT16 FCConfig;<br />
UINT16 UsbConfiguration;<br />
UINT32 AzaliaConfiguration;<br />
CODECTBLLIST* pAzaliaOemCodecTablePtr;<br />
UINT32 pAzaliaOemFpCodecTableptr;<br />
UINT32 MiscConfiguration;<br />
UINT32 DebugOptions1;<br />
UINT32 DebugOptions2;<br />
}<strong>AMD</strong>SBCFG;<br />
©2009 Advanced Micro Devices, Inc.<br />
<strong>AMD</strong> SB700 <strong>BIOS</strong> <strong>Developer</strong>s <strong>Guide</strong> Page 110
Detail Description<br />
stdHeader – Standard function call (see STDCFG definition).<br />
stdHeader.Func = 0x40 – Before pci restoration<br />
stdHeader.Func = 0x50 – After pci restoration<br />
15.7 Callback Interface Definition<br />
Callback functions are supported in CIMx module to enable the OEMs to hook at a specific place in<br />
the CIMx module. This will enable the OEMs to do some specific initialization inbetween the CIMx<br />
functions. OEMs who require some callbacks can request <strong>AMD</strong> to add this call in CIMx.<br />
15.7.1 SATA OEM Call Back “SATA_PHY_PROGRAMMING”<br />
This callback function is dedicated to program the SATA PHY settings specific to the platform.<br />
Functions Documentation:<br />
UINT32 (*pCallBack)(UINTN Param1, UINTN Param2, PCICFG* pConfig)<br />
Parameters:<br />
Param1: Function identifier (OEM_CALLBACK_BASE + 0x10, defaults to 0x110)<br />
Param2: NULL.<br />
pConfig: See SB Config Structure Definition in (section 1.6.2)<br />
Return Values:<br />
CIM_SUCCESS (0x00000000): If platform has implemented this callback function and programmed<br />
the PHY values according to platform.<br />
CIM_UNSUPPORTED (0x80000001): If platform does not have this callback function implemented.<br />
15.7.2 Integrated Pull-up and Pull-down Settings “PULL_UP_PULL_DOWN_SETTINGS”<br />
This callback function is dedicated to program the integrated pull-up and pull-down settings specific<br />
to the platform. The <strong>BIOS</strong> needs to set pull-up/down settings for GEVENT/GPM platform specifically.<br />
These pins have integrated pull-up/down enabled by default and they are powered by the S5 power.<br />
If they are to be connected to a device that will be powered down during sleep state, the <strong>BIOS</strong> should<br />
disable the pull-up/down and use external pull-up/down to avoid leakage.<br />
Functions Documentation:<br />
UINT32 (*pCallBack) (UINTN Param1, UINTN Param2, PCICFG* pConfig)<br />
Parameters:<br />
Param1: Function identifier (OEM_CALLBACK_BASE + 0x20, defaults to 0x120)<br />
Param2: NULL.<br />
pConfig: See SB Config Structure Definition in (section 1.6.2)<br />
Return Values:<br />
CIM_SUCCESS (0x00000000): If platform has implemented this callback function and programmed<br />
the integrated pull-up & pull-down settings according to platform.<br />
CIM_UNSUPPORTED (0x80000001): If platform does not have this callback function implemented.<br />
©2009 Advanced Micro Devices, Inc.<br />
<strong>AMD</strong> SB700 <strong>BIOS</strong> <strong>Developer</strong>s <strong>Guide</strong> Page 111
15.8 SMM Functions Support<br />
Currently SMM functions are not supported in the SB700 CIMx module.<br />
15.9 Reference Code<br />
The reference code is in the refcode directory of the CIMx module. Following is a short description of<br />
the files with the definitions and the codes contained in them.<br />
PUSHHIGH.INC – Header file which defines the equates used by bridge files<br />
BRIDGE32.INC – Sample code to switch from Real mode to Protected and then call the CIMx and<br />
then switch back to real mode.<br />
BRIDGE32X.INC – Sample code to enable the caching (WriteThrough) for the CIMx module.<br />
<strong>AMD</strong>SBCFG.INC – Sample definition of config struction and equates used in the SB700 CIMx<br />
module.<br />
<strong>AMD</strong>SBBB.ASM – Sample implementation of the CIMx wrapper before memory is available (for<br />
sbPowerOnInit call).<br />
<strong>AMD</strong>SB.ASM – Sample implementation of the CIMx wrapper after memory is available.<br />
HWM.INC – Sample code for the hardware monitor initialization feature of SB700.<br />
©2009 Advanced Micro Devices, Inc.<br />
<strong>AMD</strong> SB700 <strong>BIOS</strong> <strong>Developer</strong>s <strong>Guide</strong> Page 112
Appendix: Revision History<br />
Date Rev. PDF Description<br />
June, 2009 1.00 43366_sb7xx_bdg_pub_1.00 First public release.<br />
Based on NDA release rev 1.02.<br />
©2009 Advanced Micro Devices, Inc.<br />
<strong>AMD</strong> SB700 <strong>BIOS</strong> <strong>Developer</strong>s <strong>Guide</strong> Page 113