CD Color Printer IV - Primera
CD Color Printer IV - Primera
CD Color Printer IV - Primera

Create successful ePaper yourself
Turn your PDF publications into a flip-book with our unique Google optimized e-Paper software.
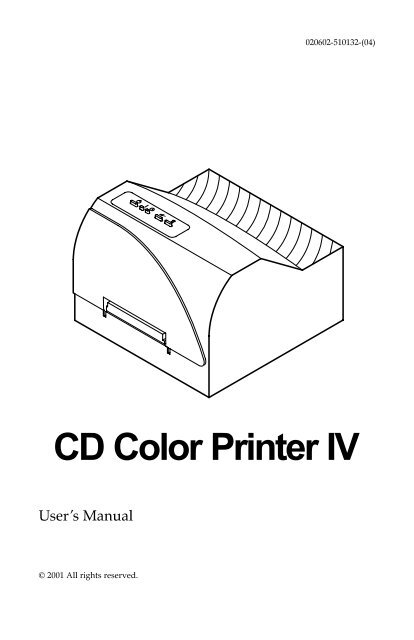
User’s Manual<br />
© 2001 All rights reserved.<br />
020602-510132-(04)<br />
<strong>CD</strong> <strong>Color</strong> <strong>Printer</strong> <strong>IV</strong>
Notices: The information in this document is subject to change without notice.<br />
NO WARRANTY OF ANY KIND IS MADE WITH REGARD TO THIS MATERIAL, INCLUDING, BUT<br />
NOT LIMITED TO, THE IMPLIED WARRANTIES OF MERCHANTABILITY AND FITNESS FOR A<br />
PARTICULAR PURPOSE. No liability is assumed for errors contained herein or for incidental or<br />
consequential damages in connection with the furnishing, performance, or use of this material. This<br />
document contains proprietary information which is protected by copyright. All rights are reserved.<br />
No part of this document may be photocopied, reproduced, or translated into another language<br />
without prior written consent.<br />
Trademark Acknowledgments: IBM is a registered trademark of International Business<br />
Machines Corporation. Windows is a trademark of Microsoft Corporation. All other trademarks are the<br />
property of their respective owners. Candela<strong>Color</strong> ® Charged by Pictographics is a registered trademark<br />
of Pictographics International Corporation.<br />
Printing History<br />
Edition 1.4, #020602, © Copyright 2001, All rights reserved.<br />
FCC Compliance Statement: This device complies with part 15 of the FCC rules. Operation<br />
is subject to the following two conditions: (1) this device may not cause harmful interference, and (2)<br />
this device must accept any interference received, including interference that may cause undesired<br />
operation.<br />
For Users in the United States: This equipment has been tested and found to comply with<br />
the limits for a Class B digital device, pursuant to Part 15 of the FCC Rules. These limits are designed<br />
to provide reasonable protection against harmful interference in a residential installation. This<br />
equipment generates, uses, and can radiate radio frequency energy and, if not installed and used in<br />
accordance with the instructions, may cause harmful interference to radio communications. However,<br />
there is no guarantee that interference will not occur in a particular installation. If this equipment does<br />
cause harmful interference to radio or television reception, which can be determined by turning the<br />
equipment off and on, the user is encouraged to try to correct the interference by one or more of the<br />
following measures:<br />
• Re-orient or relocate the receiving antenna.<br />
• Increase the separation between the equipment and receiver.<br />
• Connect the equipment into an outlet on a circuit different from that to which the receiver is<br />
connected.<br />
• Consult the dealer or an experienced radio/TV technician for help.<br />
Use of a shielded cable is required to comply with the Class B limits of Part 15 of the FCC Rules. You<br />
are cautioned that any changes or modifications not expressly approved in this manual could void<br />
your authority to operate and/or obtain warranty service for this equipment.<br />
Within the U.S., this product is intended to be supplied by a UL Listed Direct Plug-in Power Unit<br />
marked Class 2 and rated 30 Vdc, 500 mA or 830 mA.<br />
For Users in Canada: This digital apparatus does not exceed the Class B limits for radio noise<br />
for digital apparatus set out on the Radio Interference Regulations of the Canadian Department of<br />
Communications. Le present appareil numerique n’emet pas de bruits radioelectriques depassant les<br />
limites applicables aux appareils numeriques de la class B prescrites dans le Reglement sur le<br />
brouillage radioelectrique edicte par le ministere des Communications du Canada.<br />
CAUTION!<br />
ii<br />
TO PREVENT FIRE OR SHOCK HAZARD, DO NOT EXPOSE THE UNIT TO RAIN OR MOISTURE.<br />
TO REDUCE THE RISK OF ELECTRIC SHOCK, DO NOT REMOVE EXTERIOR PANELS. NO USER-<br />
SERVICEABLE PARTS INSIDE. REFER SERVICING TO QUALIFIED SERVICE PERSONNEL. OPERATE<br />
THE UNIT WITH ONLY THE PROPER ELECTRICAL SPECIFICATIONS AS LABELED ON THE<br />
PRINTER AND AC ADAPTER
Read Me First!<br />
Congratulations on the purchase of your new <strong>CD</strong> <strong>Color</strong> <strong>Printer</strong>. To<br />
begin printing with your new printer immediately, please refer to the<br />
following quick start instructions. For more complete information<br />
regarding all aspects of your printer’s operation, please refer to the<br />
printer’s main User’s Manual.<br />
HARDWARE SETUP<br />
1. Unpackage your printer, and check that the following<br />
items are included:<br />
• Power Adapter<br />
• Separate Power Cord (220-240V units only)<br />
• <strong>Printer</strong> Software <strong>CD</strong><br />
• <strong>Color</strong> Ink Cartridge<br />
• Spare Ink Cartridge Holder<br />
• Cardboard <strong>CD</strong> Templates (5)<br />
• Warranty Statement and Registration Card<br />
• Operator’s Manual and Other Printed Information<br />
2. Connect your printer’s power.<br />
3. Install the included color ink cartridge by pressing the<br />
Ink Cartridge Button and inserting the cartridge<br />
copper-end first into the ink cartridge carrier. Then, push<br />
the top of the cartridge back until it snaps into place. When<br />
the cartridge is in place, press the<br />
again to reset the cartridge carrier.<br />
Ink Cartridge Button<br />
4. Press the <strong>CD</strong> Tray Button, and install one of the<br />
5.<br />
cardboard <strong>CD</strong> templates into the <strong>CD</strong> Tray.<br />
Run a self test according to the instructions in Section 2-D<br />
of the printer User’s Manual. This will ensure that both the<br />
printer and the ink cartridge are functioning properly. This<br />
procedure should also be done whenever you install a<br />
new ink cartridge or if your printer has sat for a few days<br />
without printing. If some of the nozzles do not seem to be<br />
firing, perform a clean operation after the printer driver<br />
has been installed. Refer to the cleaning procedure<br />
explained within the Cartridge button description of<br />
section 3-D in the manual to clean the cartridge nozzles.<br />
iii
iv<br />
The self-test should look like this:<br />
6. Connect the printer to your computer using the proper<br />
interface cable. For best results, use a IEEE 1284-Compliant<br />
cable and do not connect to an A/B switch box. Also, note<br />
that the printer will print fastest if your computer’s<br />
parallel port is set to ECP mode (most new computers are<br />
set to ECP). Your computer’s manual will have information<br />
on changing the parallel port mode if you need to switch it<br />
to ECP.<br />
SOFTWARE INSTALLATION<br />
Once you have set up your printer, you must then install all of<br />
the appropriate software required for printing. The included<br />
<strong>CD</strong> contains all of the necessary software. At a minimum, you<br />
must install the printer driver appropriate for your computer’s<br />
specific operation system (Windows ® 95/98/Me or Windows<br />
2000/XP). Below is a description of the <strong>CD</strong> contents as well as<br />
installation instructions for each software component.<br />
<strong>CD</strong> Contents:<br />
• <strong>CD</strong> <strong>Color</strong> <strong>Printer</strong> Driver <strong>IV</strong> for Windows 95/98/Me<br />
• <strong>CD</strong> <strong>Color</strong> <strong>Printer</strong> Driver <strong>IV</strong> for Windows 2000/XP<br />
• 32-Bit Print Spooler for Windows 95/98/Me (provides<br />
optimum print processing under Windows 95/98/Me)<br />
• 2 Sample <strong>CD</strong> Designs (TIFF format)
Installation Instructions:<br />
Windows 95/98/Me or 2000/XP <strong>Printer</strong> Drivers:<br />
1. Insert the included <strong>CD</strong> into your computer’s <strong>CD</strong>-ROM<br />
drive.<br />
2. Click on the Start button on the task bar, point to Settings,<br />
and select <strong>Printer</strong>s.<br />
3. Double-click on the Add <strong>Printer</strong> icon. This will launch the<br />
Add <strong>Printer</strong> Wizard. Click Next, then click Next again.<br />
4. Click the Have Disk button.<br />
5. Click Browse, select your <strong>CD</strong>-ROM drive.<br />
6. For Windows 95/98/Me, open the Win98-Me folder, then<br />
select the Driver folder and select the file named<br />
<strong>CD</strong>COLOR4.INF. For Windows 2000 or Windows XP, open<br />
the Win2000-XP folder and select the file named<br />
OEMSETUP.INF.<br />
(Example: If you are installing the Windows 95/98/Me,<br />
and your <strong>CD</strong>-ROM drive is drive D:, then you would<br />
browse to: D:\Win98-Me\Driver. You would then select<br />
the file named <strong>CD</strong>CLOR4.INF). Follow the on-screen<br />
instructions to complete installation.<br />
32-Bit Print Spooler: (MUST INSTALL if using Windows<br />
95/98/Me only)<br />
1. Insert the included <strong>CD</strong> into your computer’s <strong>CD</strong>-ROM<br />
drive.<br />
2. Close down all other software applications.<br />
3. Click the Start button, point to Settings, and select Control<br />
Panel.<br />
4. Double-click on the Add/Remove Programs icon, and<br />
select the Install button.<br />
5. Click Next, the click on the Browse button.<br />
6. Select your <strong>CD</strong>-ROM drive, open the folder named<br />
Win98-Me, then open the folder named 32-Bit Print<br />
Spooler.<br />
7. Double-click on the Setup.exe file then select the Finish<br />
button to complete installation.<br />
v
vi<br />
Please Note<br />
The Spare Ink Cartridge Holder provides a convenient<br />
place to store an extra ink cartridge and also prevents an<br />
opened ink cartridge from drying out. To use this holder,<br />
simply set it next to the printer. The Spare Ink Cartridge<br />
Holder must always remain in an upright or vertical<br />
position. Insert an Ink Cartridge into the holder, copper-end<br />
first, until it snaps into place. To remove the Ink Cartridge,<br />
push back on the holder’s securing tab and lift the Ink<br />
Cartridge out.<br />
Please Note<br />
To fully utilize <strong>CD</strong> <strong>Color</strong> <strong>Printer</strong> <strong>IV</strong>’s high-speed printing,<br />
you must set your PC parallel printer port to the ECP<br />
setting. Otherwise, you may find that print speed is up to<br />
50% slower than you might expect.<br />
Please refer to your computer system’s documentation for<br />
instructions on enabling ECP. It is almost always found in<br />
the CMOS settings which are entered upon power-up.<br />
Interactive Feature in this<br />
PDF Document<br />
There are interactive features that will allow you to jump to<br />
different locations within the document. Each listing in the<br />
Table of Contents is interactive. Place the cursor on either<br />
the words or the page number. A small hand with a pointing<br />
finger icon appears. Click on the line with the icon and the<br />
document will jump to that page. If you want to return to the<br />
Table of Contents, move the icon to the top of the page and<br />
click on the arrow marked TOC. Navigating through the<br />
Index is similar. Place the icon on one of the listings or<br />
page numbers, click on it, and it will move to that page. The<br />
text relating to the Index listing will appear in red. Returning<br />
to the Index can done by clicking on the arrow marked<br />
Index.
Table of Contents<br />
Section 1: Getting Started<br />
A. Choosing a Good Location...............................................................................1<br />
B. Unpacking and Inspection ...............................................................................1<br />
C. Identifying the Parts..........................................................................................2<br />
D. Applying Power.................................................................................................3<br />
Section 2: Ink Cartridges and Printable <strong>CD</strong>s<br />
A. About Ink Cartridges and Printable <strong>CD</strong>s ......................................................4<br />
B. Installing an Ink Cartridge ..............................................................................4<br />
C. Loading Blank <strong>CD</strong> Media.................................................................................6<br />
D. Printing a Self Test .............................................................................................7<br />
E. Replacing or Switching Ink Cartridges..........................................................8<br />
Section 3: Using the <strong>CD</strong> <strong>Color</strong> <strong>Printer</strong> <strong>IV</strong> with Windows<br />
A. Connecting the <strong>Printer</strong> to Your Computer ..................................................11<br />
B. Installing the <strong>Printer</strong> Driver...........................................................................12<br />
C. Installing the 32-Bit Spooler for Windows 95/98/Me...............................14<br />
D. Setting Up the <strong>Printer</strong> Driver ........................................................................16<br />
E. Printing a <strong>CD</strong>....................................................................................................24<br />
Section 4: Interpreting the <strong>Printer</strong> Indicator Lights...............................................26<br />
Section 5: Maintaining the <strong>Printer</strong><br />
A. Cleaning the Ink Cartridge Nozzles.............................................................28<br />
B. Cleaning the <strong>CD</strong> Tray and <strong>Printer</strong> Casing ...................................................28<br />
C. Clearing a <strong>CD</strong> Media Jam..............................................................................28<br />
D. Technical Support ............................................................................................28<br />
Section 6: Technical Specifications ...........................................................................29<br />
Appendix A: Interfacing Information<br />
A. Introduction......................................................................................................30<br />
B. 6-Pin Minicircular Auxiliary Interface .........................................................31<br />
Index ................................................................................................................................32<br />
vii
viii
Section 1: Getting Started<br />
THANK YOU…<br />
...for choosing the <strong>CD</strong> <strong>Color</strong> <strong>Printer</strong> <strong>IV</strong>. This printer is the<br />
perfect way for you to label all of your custom <strong>CD</strong>s quickly,<br />
easily, and with a touch of class. The <strong>CD</strong> <strong>Color</strong> <strong>Printer</strong> <strong>IV</strong> lets<br />
you print razor-sharp text, vibrant spot colors, and even<br />
stunning photo-realistic photographs directly onto the surface<br />
of printable <strong>CD</strong>s. Operation is simple, quality is high, and<br />
printed images are durable and highly smudge-resistant.<br />
To begin using the printer, please refer to the remainder of this<br />
manual. This User’s Manual is your complete step-by-step<br />
guide to quickly and easily setting up and printing with your<br />
new <strong>CD</strong> <strong>Color</strong> <strong>Printer</strong>!<br />
A. CHOOSING A GOOD LOCATION<br />
• Place the printer in a location with adequate air circulation<br />
to prevent internal heat build up.<br />
• Do not place the printer near heat sources such as radiators<br />
or air ducts, or in a place subject to direct sun-light,<br />
excessive dust, mechanical vibration or shock.<br />
• Allow for adequate clearance in front of the printer to<br />
accommodate the length of the unit with its <strong>CD</strong> Tray open.<br />
B. UNPACKING AND INSPECTION<br />
While unpacking your printer, inspect the carton to ensure that<br />
no damage has occurred during shipping. Make sure that all<br />
supplied accessories are included with your unit. The<br />
following items should be included:<br />
• <strong>Printer</strong><br />
• PowerAdapter<br />
• Separate Power Cord (220-240 VAC units only)<br />
• <strong>Printer</strong> Software <strong>CD</strong><br />
• <strong>Color</strong> Ink Cartridge<br />
• Spare Ink Cartridge Holder<br />
Getting Started 1
2 Getting Started<br />
• Cardboard <strong>CD</strong> Templates (5)<br />
• Warranty Statement and Registration Card<br />
• This manual and other printed information<br />
Save the carton and packing materials. They will come in<br />
handy when transporting the printer.<br />
C. IDENTIFYING THE PARTS<br />
This illustration shows the extended <strong>CD</strong> Tray and all of the<br />
control buttons and LED indicator lights found on the printer.<br />
Front Cover<br />
Power Button<br />
<strong>CD</strong> Tray<br />
Power Light<br />
Busy Light<br />
<strong>CD</strong> Tray Button<br />
Ink Cartridge Button<br />
The Power Button turns the printer’s power ON and OFF.<br />
This button also serves to cancel the current print job if a print<br />
error occurs and to reset the printer for the next print job.<br />
The <strong>CD</strong> Tray Button opens or closes the <strong>CD</strong> Tray for<br />
loading and ejecting <strong>CD</strong>s.<br />
The Ink Cartridge Button positions the Cartridge Carrier for<br />
easy ink cartridge replacement.<br />
The Power Light indicates that power is ON. The Busy<br />
Light indicates that the printer is printing, processing, or is in<br />
some way busy. Both of these lights can also indicate several<br />
other printer conditions. For complete information on these<br />
lights, please refer to Section 6.
This illustration shows the input ports found on the rear panel<br />
of the printer. Both a parallel and a serial interface port are<br />
provided. If using the printer with Windows, you will use its<br />
Parallel Interface Port. Note that the printer’s auxiliary port is<br />
for use with auto loaders and automatic duplicators only,<br />
which are sold separately. For more information on each of the<br />
interface ports, please refer to Appendix A.<br />
Auxiliary Port<br />
Power Port<br />
D. APPLYING POWER<br />
Parallel Interface Port<br />
1. Locate the power adapter supplied with your printer.<br />
2. Place one end of the adapter cord into the power port on<br />
the rear panel of the printer.<br />
3. Plug the power cord of the adapter into an available wall<br />
outlet. Once the power cord is connected, the printer will<br />
automatically turn ON.<br />
Getting Started 3
Section 2: Ink Cartridges and<br />
Printable <strong>CD</strong>s<br />
A. ABOUT INK CARTRIDGES AND PRINTABLE <strong>CD</strong>S<br />
For full-color printing, a 3-color ink cartridge is available. This<br />
cartridge contains the three process-color inks of yellow,<br />
magenta, and cyan, which combine to produce up to 16.7<br />
million printable colors. A monochrome ink cartridge is also<br />
available for fast, inexpensive black and white printing.<br />
With either of these ink cartridges, you can print directly onto<br />
virtually any brand of printable-surface <strong>CD</strong> media. Since<br />
different brands of <strong>CD</strong>s have different printable coatings,<br />
however, you may need to adjust the printer driver settings to<br />
accommodate your specific brand of <strong>CD</strong> media. Refer to<br />
Section 3 for further printer driver information.<br />
Due to the wide variety of printable-surface <strong>CD</strong> media, you<br />
may find that certain brands of <strong>CD</strong>s provide higher print<br />
quality than others. For maximum print quality, use <strong>CD</strong> media<br />
authorized by the printer manufacturer. Contact your local <strong>CD</strong><br />
<strong>Color</strong> <strong>Printer</strong> reseller or contact the printer manufacturer<br />
directly for selection and pricing on all printer supplies and<br />
accessories.<br />
B. INSTALLING AN INK CARTRIDGE<br />
1. With the <strong>CD</strong> Tray closed, open the printer’s front cover by<br />
pulling down on its top-left corner.<br />
2. Remove the ink cartridge from its packaging.<br />
4 Ink Cartridges and Printable <strong>CD</strong>s
3. Slowly remove the tape covering the cartridge’s printhead,<br />
being careful to avoid damaging or removing the barcode<br />
label on the underside of the cartridge.<br />
DO NOT TOUCH THE COPPER AREA!<br />
4. Press and release the Ink Cartridge button to move the<br />
5.<br />
carrier to the load position.<br />
Insert the ink cartridge into the cartridge carrier, copper<br />
end first. DO NOT REMOVE THE COLOR BARCODE<br />
LABEL!<br />
6. Push the cartridge back until it snaps into place.<br />
7. Close the printer’s front cover. If you leave the door open,<br />
ambient light can interfere with proper cartridge<br />
initialization.<br />
8. Press and hold the Ink Cartridge button until the<br />
carriage returns home, then release. This will reset the on<br />
board ink levels.<br />
NOTE: When changing to subsequent new cartridges, refer to Section E.<br />
NOTE: A Spare Ink Cartridge Holder is included with your printer. This<br />
holder provides a convenient place to store an extra ink cartridge and<br />
also prevents an opened ink cartridge from drying out. To use this<br />
holder, simply insert an Ink Cartridge into the holder, copper-end<br />
first, until it snaps into place.<br />
Ink Cartridges and Printable <strong>CD</strong>s 5
C. LOADING BLANK <strong>CD</strong> MEDIA<br />
The <strong>CD</strong> <strong>Color</strong> <strong>Printer</strong> <strong>IV</strong> is capable of printing onto a variety of<br />
<strong>CD</strong> related media including printable <strong>CD</strong>s and DVDs, and<br />
cardboard <strong>CD</strong> templates. Each of these items is loaded one at a<br />
time, before the start of each print job.<br />
Loading a Blank <strong>CD</strong><br />
1. With the printer’s front cover shut, press and release the<br />
<strong>CD</strong> Tray button.<br />
2. Once the <strong>CD</strong> Tray is fully extended, place the blank <strong>CD</strong><br />
onto the tray with the printable side facing upward.<br />
Handle the <strong>CD</strong> only along its edges and DO NOT touch<br />
its printable surface.<br />
3. Press and release the <strong>CD</strong> Tray button to close the <strong>CD</strong><br />
Tray. If you wish, you may also leave the <strong>CD</strong> Tray open<br />
and it will automatically close at the start of the print job.<br />
Once the <strong>CD</strong> has been printed, the <strong>CD</strong> Tray will<br />
automatically re-open so the next blank <strong>CD</strong> can be loaded<br />
(if Manual Load is selected in the printer driver then you<br />
must press the <strong>CD</strong> Tray button to manually open and close<br />
the tray).<br />
NOTE: Blank Cardboard <strong>CD</strong> templates are available for printing inexpensive<br />
test prints and can be printed on both sides. Load in the exact same<br />
fashion as an actual <strong>CD</strong>.<br />
6 Ink Cartridges and Printable <strong>CD</strong>s
D. PRINTING A SELF TEST<br />
Now that the printer is set up and print supplies are loaded, a<br />
self test should be performed to check for proper operation of<br />
the printer. A sample of the self test print is shown below.<br />
Refer to the following steps to run a self test:<br />
1. If power is ON, turn it OFF now. The Power light should<br />
be OFF. Verify that print supplies are installed and that the<br />
<strong>CD</strong> Tray is closed. Also, disconnect the interface cable from<br />
the printer if connected.<br />
2. With the printer’s front cover shut, press and hold the<br />
<strong>CD</strong> Tray button as you turn the printer power ON.<br />
3. Continue to hold the <strong>CD</strong> Tray button down for a few<br />
seconds, until you hear the self test begin to print.<br />
Ink Cartridges and Printable <strong>CD</strong>s 7
E. REPLACING OR SWITCHING INK CARTRIDGES<br />
Once you begin using your <strong>CD</strong> <strong>Color</strong> <strong>Printer</strong> <strong>IV</strong> on a regular<br />
basis, you will eventually need to replace an empty ink<br />
cartridge or switch between color and monochrome cartridges.<br />
Please refer to the following steps:<br />
1. With the <strong>CD</strong> Tray closed, open the printer’s front cover by<br />
pulling down on its top-left corner.<br />
2. If installing a new, replacement ink cartridge, slowly<br />
remove the tape covering the cartridge’s printhead, being<br />
careful to avoid damaging or removing the barcode label<br />
on the underside of the cartridge. DO NOT TOUCH THE<br />
COPPER AREA!<br />
3. If switching between color and monochrome cartridges,<br />
simply remove the extra cartridge from the Spare Ink<br />
Cartridge Holder by grasping the top of the cartridge and<br />
firmly pulling it straight toward you. You will hear the<br />
cartridge snap out of position. DO NOT REMOVE THE<br />
BARCODE LABEL!<br />
8 Ink Cartridges and Printable <strong>CD</strong>s
4. From within the printer driver setup window, click on the<br />
Cartridge button and then on the Change button to move<br />
the carrier to the load position. Note that the printer driver<br />
must be installed and that the printer must be connected to<br />
your computer (see Section 3) in order to complete this<br />
step.<br />
If you prefer, you may instead press the Ink Cartridge<br />
button on the top of the printer.<br />
5. Remove the installed ink cartridge by grasping the top of<br />
the cartridge and firmly pulling it straight toward you. You<br />
will hear the cartridge snap out of position. Remove it<br />
from the printer.<br />
6. Insert the replacement or alternate ink cartridge into the<br />
cartridge carrier, copper-end first.<br />
Ink Cartridges and Printable <strong>CD</strong>s 9
7. Push the cartridge back until it snaps into place.<br />
8. Close the printer’s front cover.<br />
9. Go back to the printer driver setup window and click on<br />
either the New Cartridge Installed or the Old Cartridge<br />
Installed button to indicate whether you installed a fresh,<br />
new cartridge or simply switched between a previously<br />
used color cartridge and a previously used monochrome<br />
cartridge. The cartridge carrier will return to its home<br />
position. See Section 3-D for more information on these<br />
buttons.<br />
Alternately, you may use the Ink Cartridge button; to<br />
indicate a previously used cartridge simply press the<br />
button and release quickly. If you have installed a fresh<br />
new cartridge, press and hold the button until the cartridge<br />
returns to its home position.<br />
NOTE: When you choose New Cartridge, the ink levels are cleared and the<br />
ink level indicator should go back to full capacity (for either color or<br />
monochrome).<br />
If you use the Ink Cartridge button, the ink levels are cleared by<br />
pressing and holding the button until the two green LED’s flash and<br />
the cartridge returns to its home position.<br />
NOTE: Front door must be closed for printer to recognize the cartridge.<br />
10 Ink Cartridges and Printable <strong>CD</strong>s
Section 3: Using the <strong>CD</strong> <strong>Color</strong><br />
<strong>Printer</strong> <strong>IV</strong> with Windows<br />
A. CONNECTING THE PRINTER TO YOUR COMPUTER<br />
The <strong>CD</strong> <strong>Color</strong> <strong>Printer</strong> <strong>IV</strong> is designed to be used with nearly any<br />
IBM-PC ® or compatible running Windows 2000/XP, or<br />
Windows 95/98/Me.<br />
The printer is equipped with a standard 8-bit Centronics-type<br />
parallel port. This port is the means through which it receives<br />
data from your computer. To connect the printer to your<br />
computer, simply obtain a shielded, bi-directional parallel<br />
cable, and refer to the following steps:<br />
NOTE: For faster printing, your computer’s parallel port mode should be set<br />
to ECP. If you experience problems with this setting or if your<br />
computer’s parallel port is not ECP compatible, set your computer’s<br />
parallel port to the standard “<strong>Printer</strong> Port” setting. Refer to your<br />
computer’s system documentation for instructions on checking and/or<br />
changing the parallel port mode.<br />
1. Connect the Centronics-type parallel side of the cable to the<br />
printer. Snap the fastening clips into place.<br />
2. Connect the other side to the back of your computer at<br />
LPT1, LPT2, or the PARALLEL connector.<br />
Using the <strong>CD</strong> <strong>Color</strong> <strong>Printer</strong> <strong>IV</strong> with Windows 11
The printer must have its Power light illuminated to receive data.<br />
If the light is not on, press the Power button.<br />
B. INSTALLING THE PRINTER DR<strong>IV</strong>ER<br />
The <strong>CD</strong> <strong>Color</strong> <strong>Printer</strong> <strong>IV</strong> can be used with virtually any<br />
Windows application program. This is accomplished by<br />
installing in Windows what is called a “printer driver.” The<br />
printer driver is simply software which gives the printer all the<br />
information needed for printing. Use the following steps to<br />
install the printer driver.<br />
NOTE: This section of the Operator’s Manual assumes that you are already<br />
familiar with Windows and know how it operates. If you are not yet<br />
familiar with Windows, consult the appropriate Microsoft<br />
documentation to become familiar with the basics of Windows before<br />
proceeding.<br />
Windows 95/ 98/Me or Windows 2000/XP<br />
To install the printer driver into Windows 95/98/Me or Windows<br />
2000/XP, refer to the following:<br />
1. Insert the included <strong>CD</strong> into your computer’s <strong>CD</strong>-ROM<br />
drive.<br />
2. Click the Start button, point to Settings, and select <strong>Printer</strong>s.<br />
12 Using the <strong>CD</strong> <strong>Color</strong> <strong>Printer</strong> <strong>IV</strong> with Windows
3. Double-click on the Add <strong>Printer</strong> icon. This will launch the<br />
Add <strong>Printer</strong> Wizard. Click Next, then click Next again.<br />
4. Click the Have Disk button.<br />
5. Click Browse, select your <strong>CD</strong>-ROM drive.<br />
6. For Windows 95/98/Me, open the Win98-Me\Driver<br />
folder and select the file named <strong>CD</strong>COLOR4.INF. For<br />
Windows 2000/XP, open the Win2000-XP folder and select<br />
the file named OEMSETUP.INF. (Example: If you are<br />
installing the Windows 95/98/Me driver, and your<br />
<strong>CD</strong>-ROM drive is drive D:, then you would browse to:<br />
D:\Win98-Me\Driver. You would then select the file<br />
named <strong>CD</strong>COLOR4.INF.) Follow the on-screen instructions<br />
to complete installation. Once installed, the “<strong>CD</strong> <strong>Color</strong><br />
<strong>Printer</strong> III” icon will appear in the <strong>Printer</strong>’s folder.<br />
<strong>CD</strong> <strong>Color</strong> <strong>Printer</strong> <strong>IV</strong><br />
IMPORTANT! During installation of the Windows 2000 and XP drivers<br />
you must de-select (uncheck) the check box “Automatically<br />
detect and install my plug and play printer”.<br />
NOTE: Before installing updated printer driver versions, always delete the<br />
existing printer driver version from your system. To do this, simply<br />
select the printer driver icon from within the <strong>Printer</strong>s folder, and<br />
press the Delete key.<br />
Using the <strong>CD</strong> <strong>Color</strong> <strong>Printer</strong> <strong>IV</strong> with Windows 13
C. INSTALLING THE 32-BIT PRINT SPOOLER FOR<br />
WINDOWS 95/98/ME<br />
Your <strong>CD</strong> <strong>Color</strong> <strong>Printer</strong> <strong>IV</strong> ships with a print utility program<br />
called the 32-Bit Print Spooler. This print spooler is for use only<br />
with Windows 95, Windows 98, or Windows Me. Once installed,<br />
the print spooler is able to process your print jobs and send them<br />
to the printer at consistently faster speeds than if sending print<br />
jobs through the Windows system print spooler. This is especially<br />
true if printing from a somewhat slower computer. As a result, it<br />
is highly recomended that you use the 32-Bit Print Spooler when<br />
printing from Windows 95, Windows 98, or Windows Me.<br />
Also, the 32-Bit Print Spooler will display the ink remaining in<br />
your printer and also the number of prints remaining before the<br />
printer gives an ink low warning.<br />
The 32-Bit Print Spooler is located on the included <strong>Printer</strong><br />
Software <strong>CD</strong> and installs just like any other standard Windows<br />
application program. To install the 32-Bit Print Spooler, refer to<br />
the following:<br />
1. Insert the included <strong>CD</strong> into your computer’s <strong>CD</strong>-ROM drive.<br />
2. Close down all other software applications.<br />
3. Click the Start button, point to Settings, and select Control<br />
Panel.<br />
4. Double-click on the Add/Remove Programs icon, and select<br />
the Install button.<br />
14 Using the <strong>CD</strong> <strong>Color</strong> <strong>Printer</strong> <strong>IV</strong> with Windows
5. Click Next, then click on the Browse button.<br />
6. Select your <strong>CD</strong>-ROM drive, then open the folder named<br />
32 Bit Print Spooler.<br />
7. Double-click on the Setup.exe file, then select the Finish<br />
button to complete installation. When installed, the 32-Bit<br />
Print Spooler icon will appear in the Programs group of the<br />
Start menu.<br />
NOTE: Before installing updated 32-Bit Print Spooler versions, always<br />
uninstall the existing print spooler version from your system. To do<br />
this, simply select 32-Bit Print Spooler from the list of programs in<br />
the Add/Remove Programs Properties window and click on the<br />
Add/Remove button.<br />
To print with the 32-Bit Print Spooler, you must select the Use<br />
32-Bit Spooler option from within the printer driver setup<br />
window as described in Part D of this section. When this<br />
option is selected, the print spooler will automatically open<br />
and close with the start and finish of each print job.<br />
NOTE: You can also manually open the 32-Bit Print Spooler simply by<br />
selecting its icon from the Programs group of the Start menu.<br />
When the 32-Bit Print Spooler is running, its icon will appear in the<br />
Windows 95/98/Me Task Bar. During a print job, it is sometimes<br />
helpful to click on this icon to bring the 32-Bit Print Spooler status<br />
window to the foreground of your application. This window<br />
provides a number of details about the print jobs being sent to the<br />
printer.<br />
Using the <strong>CD</strong> <strong>Color</strong> <strong>Printer</strong> <strong>IV</strong> with Windows 15
The Current Job tab tells you the name and size of the file printing,<br />
the progress of the overall print job, as well as the total number of<br />
copies left to print. It also provides buttons which allow you to<br />
pause or cancel the print job at any time during the printing process.<br />
For the <strong>CD</strong> <strong>Color</strong> <strong>Printer</strong> <strong>IV</strong> it also gives ink remaining information.<br />
The Settings tab tells you the port and printer to which you are<br />
printing and allows you to configure the timeout settings. These<br />
settings will rarely need to be changed. This tab also provides two<br />
other options called Save last job for reprint and Direct to Port<br />
Mode.<br />
When the Save last job for reprint option is selected, the 32-Bit<br />
Print Spooler will automatically save the last print job you sent to<br />
the printer and allow you to instantly reprint the job without the<br />
delay of having to reprocess it. The print job will be saved in the<br />
spooler until another print job is sent and saved over it. If you do<br />
not wish to save the last print job for reprint, deselect this option. To<br />
print a saved job, simply select the Print button from the spooler’s<br />
Current Job tab.<br />
HINT: If you want to send the last job without having to rasterize<br />
it again, simply open the 32-Bit Spooler and click print.<br />
The Direct to Port Mode option allows the spooler to send data to<br />
the printer at its optimum speed. If, however, you experience<br />
problems when printing with this option selected, simply deselect it<br />
and try your print job again. Please note that when using this option<br />
your PC will be completely locked up while printing.<br />
The Job Queue tab appears only when a print job is being sent to<br />
the printer. This tab tells you the name and status of each job in the<br />
queue and shows you the order in which the jobs will print if you<br />
have sent multiple jobs to the printer. A control button is also<br />
provided which allows you to delete every job listed in the queue.<br />
To delete the job currently being printed, simply select the Cancel<br />
Print button under the Current Job tab.<br />
D. SETTING UP THE PRINTER DR<strong>IV</strong>ER<br />
Once the printer driver has been successfully installed, you will<br />
need to set the driver up with the appropriate print options.<br />
Refer to the following steps to change or verify your printer<br />
driver options:<br />
1. Click the Start button, point to Settings, and select <strong>Printer</strong>s.<br />
Then, click on the <strong>CD</strong> <strong>Color</strong> <strong>Printer</strong> <strong>IV</strong> icon with the right<br />
mouse button and select Properties if using Windows<br />
95/98/Me or Document Defaults if using Windows NT, or<br />
Printing Preferences if using Windows 2000.<br />
16 Using the <strong>CD</strong> <strong>Color</strong> <strong>Printer</strong> <strong>IV</strong> with Windows
2. In Windows 95/98/Me, you will see several tabs from<br />
which printer settings can be changed including Media,<br />
Device Options, Cartridge, and Calibrate. In Windows NT,<br />
click on the Advanced tab of the Document Settings<br />
window. In Windows 2000/XP click on the Advanced<br />
button for more driver settings.<br />
NOTE: Most applications allow you to change these same printer driver<br />
options from their “Print” and/or “<strong>Printer</strong> Setup” screens. This<br />
means that you don’t have to go back to the main printer setup<br />
window each time you want to change a setting or option in the<br />
printer driver. These applications will usually give you the same<br />
choices and options, but in a slightly altered format.<br />
3. In Windows 95/98/Me, you must click on one of the four<br />
tabs to see the printer setting options; each tab contains<br />
different printer settings. In Windows 2000 the Layout and<br />
Paper/Quality tabs appear; the Advanced button contains<br />
more printer driver settings. Although each printer driver<br />
displays the print options in a slightly different format, the<br />
basic options are the same. Refer to the remainder of this<br />
section for a description of each printer driver option.<br />
Using the <strong>CD</strong> <strong>Color</strong> <strong>Printer</strong> <strong>IV</strong> with Windows 17
Media<br />
Ink Cartridge<br />
Print Quality<br />
Dither Mode<br />
The media option will be set to <strong>CD</strong> for printing onto printable<br />
surface <strong>CD</strong>s, DVDs, and cardboard template <strong>CD</strong>s. When sizing<br />
your images for printing, keep in mind that each type of <strong>CD</strong><br />
media has the following maximum printable areas:<br />
<strong>CD</strong> 4.567” round (116mm). For a complete description of each<br />
type of print media and to see how each is installed, refer to<br />
Section 2.<br />
Select either <strong>Color</strong> or Monochrome according to the type of<br />
ink cartridge you have installed.<br />
Select the appropriate print quality option for your image.<br />
Keep in mind that Fast 600 provides the lowest quality but<br />
fastest print, and that Super Photo provides the highest quality<br />
but slowest print. You may wish to experiment with these<br />
options to see which one is best for your particular <strong>CD</strong> media<br />
and print quality parameters.<br />
Select this option to choose the appropriate dither mode for<br />
your image. Select Optimize for photos if printing a design<br />
primarily composed of photographic images. Select Optimize<br />
for graphics if mainly printing text, lines, and graphics.<br />
<strong>Color</strong> Matching<br />
Click on the <strong>Color</strong> Matching down arrow and choose the color<br />
matching option that’s right for you. Select None if you are<br />
more interested in print speed rather than color accuracy, if<br />
you have already color corrected your image for printing, or if<br />
you are using some other third party color matching software.<br />
Select Algebraic if you would like the printer driver to make<br />
very simple color balance adjustments based on an RGB color<br />
model. This option gives you more natural looking images<br />
without actually utilizing any specific color matching software.<br />
Select Prima<strong>Color</strong> to enable color matching profiles written<br />
specifically for the <strong>CD</strong> <strong>Color</strong> <strong>Printer</strong> <strong>IV</strong>. The Prima<strong>Color</strong> by<br />
Candela <strong>Color</strong> Management System automatically adjusts the<br />
18 Using the <strong>CD</strong> <strong>Color</strong> <strong>Printer</strong> <strong>IV</strong> with Windows
color of your image according to preconfigured printer profiles<br />
and default system profiles. This results in a very precise color<br />
match compliant with ICC standards.<br />
Ink Saturation<br />
Manual Load<br />
This option controls the ink saturation of the printed image.<br />
When printing onto the printer manufacturer’s TuffCoat <strong>CD</strong><br />
media, this option can be left at its default setting of 50%.<br />
When printing onto other brands of printable <strong>CD</strong> media, you<br />
may need to adjust this control in order to optimize the ink<br />
saturation for the printable surface of your specific <strong>CD</strong> media.<br />
Click and drag on the slide’s box, or click on the left and right<br />
arrows to change the ink saturation setting. Moving the slide’s<br />
box to the left reduces the overall ink saturation, while moving<br />
it to the right increases it.<br />
Select this option when you are printing multiple copies of a<br />
single design or if using an auto-loader. If you do not select<br />
this option when printing multiple copies, the printer has no<br />
way of knowing whether or not you have loaded a blank <strong>CD</strong><br />
and will print each of the selected number of copies onto the<br />
same <strong>CD</strong>. When this option is selected, you must press the<br />
<strong>CD</strong> Tray button after each new <strong>CD</strong> blank is loaded. This<br />
will close the <strong>CD</strong> Tray and let the printer know that a fresh <strong>CD</strong><br />
is installed and ready to be printed.<br />
Write Direct to Port<br />
Select this option to provide faster print processing if printing<br />
from Windows 95/98/Me. When selected, this option allows<br />
the printer driver to bypass the Windows 95/98/Me print<br />
manager and to send all print data directly to the printer. This<br />
option devotes all of your system resources to the current print<br />
job, thereby increasing overall print speed. When the print job<br />
is finished, your system resources will again be devoted to the<br />
normal function of your on-screen applications.<br />
Depending upon the brand of your computer, you may or may<br />
not wish to select this option when printing. For some<br />
computers, selecting this option will enhance the rasterizing<br />
and printing process. In this case, the Write Direct to Port<br />
option may be selected. For some computers, however, this<br />
option may not be supported and should not be selected.<br />
Using the <strong>CD</strong> <strong>Color</strong> <strong>Printer</strong> <strong>IV</strong> with Windows 19
Use 32-Bit Spooler<br />
Cartridge<br />
Select this option for consistently faster print processing under<br />
Windows 95/98/Me. This option is only selectable if operating<br />
under Windows 95/98/Me and if the included 32-Bit Print<br />
Spooler software has been installed. When selected, this option<br />
allows the printer driver to send all print jobs to the 32-Bit<br />
Print Spooler rather than to the Windows system print spooler.<br />
See Part C of this section for complete details on the 32-Bit<br />
Print Spooler. This option and the 32-Bit Print Spooler software<br />
will not function in Windows 2000 or XP.<br />
Select this button to display the type of ink cartridge currently<br />
installed, its current ink levels, as well as options for cleaning<br />
and changing a cartridge. Note that the ink cartridge type<br />
installed and ink levels can only be reported when operating<br />
under Windows 95/98/Me and only if the 32-Bit Print Spooler<br />
has been installed.<br />
Select the Clean button to send a simple test print pattern to<br />
the printer. Be sure to have a <strong>CD</strong> template installed. This test<br />
print pattern purges the ink cartridge nozzles and lets you<br />
know if any one of the Yellow, Magenta, or Cyan nozzles is<br />
clogged. If one of these colors does not appear on the test print,<br />
repeat the cleaning procedure. If nozzles still appear to be<br />
clogged, remove the cartridge and gently wipe the nozzle area<br />
sideways with a clean water-dampened cloth. If after several<br />
cleanings a color still does not appear on the test print, the<br />
cartridge may be damaged or empty and may need to be<br />
replaced.<br />
20 Using the <strong>CD</strong> <strong>Color</strong> <strong>Printer</strong> <strong>IV</strong> with Windows
Calibrate<br />
Select the Change button to install a fresh, new ink cartridge or<br />
to switch back and forth between a previously used color<br />
cartridge and a previously used monochrome cartridge. After<br />
the cartridge has been replaced according to the instructions in<br />
Section 2-E, select either the New Cartridge Installed button or<br />
the Old Cartridge Installed button accordingly. These<br />
selections are necessary for the printer to accurately keep track<br />
of ink cartridge ink levels.<br />
Select this button to display options for fine-tuning the position<br />
of your printed image and the size of a <strong>CD</strong>’s non-printable<br />
center. The following gives a complete description of each of<br />
the Calibration options.<br />
When facing the printer, the Vertical adjustment moves the<br />
printed image toward the back of the printer if a positive<br />
number is entered and toward the front of the printer if a<br />
negative number is entered. The Horizontal adjustment moves<br />
the printed image toward the left-hand side if a positive<br />
number is entered and toward the right-hand side if a negative<br />
number is entered. The Center Size adjustment enlarges the<br />
non-printable center if a positive number is entered and<br />
reduces its size if a negative number is entered. As a rule, an<br />
adjustment of 12 pixels is equivalent to approximately 1<br />
millimeter. Once you have entered the optimum calibration<br />
values, you will most likely not need to change them again.<br />
The following diagram illustrates exactly how each of these<br />
adjustments affect the printed image.<br />
Using the <strong>CD</strong> <strong>Color</strong> <strong>Printer</strong> <strong>IV</strong> with Windows 21
+ Horizontal<br />
HINT: Notice the direction the Vertical and Horizontal adjustment<br />
arrows point within the Calibration window are representative of<br />
the direction the printed image moves on the <strong>CD</strong>.<br />
NOTE: Your printer comes from the factory pre-calibrated to print the image in<br />
the center of the <strong>CD</strong>. You can use the Centering Test Print option if<br />
you need to fine-tune this location.<br />
<strong>Printer</strong><br />
+ Vertical<br />
Center Size<br />
- Vertical<br />
Extended <strong>CD</strong> Tray<br />
To do this, refer to the following steps:<br />
1. Verify that a <strong>CD</strong> is installed in the printer. Also, verify that<br />
the printer is powered ON and that it is connected to your<br />
computer. (Do not use a cardboard <strong>CD</strong> template for best<br />
accuracy).<br />
2. Click on the Centering Test Print button of the<br />
Image Placement box within the Calibration<br />
window. The printer will begin printing the<br />
calibration test print.<br />
3. When the print is complete, rotate the <strong>CD</strong> 180 o in the <strong>CD</strong><br />
Tray and repeat step 2 using the same <strong>CD</strong>.<br />
22 Using the <strong>CD</strong> <strong>Color</strong> <strong>Printer</strong> <strong>IV</strong> with Windows<br />
- Horizontal
4. When the second run of the print is compete, you should<br />
have a test print that looks like the following:<br />
5. Along the Vertical axis of the printed <strong>CD</strong> template, find the<br />
number whose lines touch. For example, in the above<br />
illustration, the number would be 0. Enter that number<br />
into the Vertical box of the Calibration window. Repeat this<br />
same step for the Horizontal axis. In the above illustration<br />
this number would be 0.<br />
6. Select the OK button. The numbers you entered will be<br />
sent and stored inside the printer’s memory. Your images<br />
should now reflect any changes you made. Note that the<br />
numbers always are shown as 0,0 initially and these values<br />
sent are added to or subracted from the currently stored<br />
offsets.<br />
Using the <strong>CD</strong> <strong>Color</strong> <strong>Printer</strong> <strong>IV</strong> with Windows 23
E. PRINTING A <strong>CD</strong><br />
Now that you have hooked up the printer, loaded the print<br />
supplies, and installed the printer driver, you are ready to print<br />
your first <strong>CD</strong>. Follow these steps to print your first image:<br />
1. Go to your favorite graphics application program. Or, install<br />
and open the Windows <strong>CD</strong> creation software included with<br />
your printer.<br />
2. Open or create the image file you wish to print. If using a<br />
program other than the included Windows <strong>CD</strong> creation<br />
software, you will need to create a custom page or canvas<br />
size in your program according to the type of label you<br />
intend to create. The following tips will help you do this:<br />
• If creating a label for a <strong>CD</strong>, set your page size to 4.567” x<br />
4.567” (116 x 116mm). Although your image will appear<br />
square on screen, the printer driver will automatically<br />
crop your image to the round shape of a <strong>CD</strong> for<br />
printing. The driver will also automatically crop out the<br />
center 1.6” (41mm) of your image to accommodate a<br />
<strong>CD</strong>’s non-printable center hub. If you would like to<br />
better visualize where the round outside edge and the<br />
round non-printable center of a <strong>CD</strong> will fall in relation<br />
to your image, simply draw one circle with a 4.567”<br />
(116mm) diameter and another with a 1.6” (41mm)<br />
diameter. Then, center both circles within your active<br />
page or canvas area. These circles will serve as a guide<br />
while designing your image. Be sure to delete these<br />
circles before printing.<br />
24 Using the <strong>CD</strong> <strong>Color</strong> <strong>Printer</strong> <strong>IV</strong> with Windows
3. Once you have created your image and are ready to print,<br />
select Print Setup (or the equivalent) from the program’s<br />
File menu to verify that the printer driver settings are<br />
correct for your image. Be sure the proper Ink Cartridge<br />
options is selected according to the supplies you have<br />
installed in the printer. Once the driver is set, select Print<br />
from the program’s File menu.<br />
4. The printer driver will then begin to process the image.<br />
Depending upon the size of the image and the processing<br />
speed of your computer, processing time can take from<br />
several seconds to a few minutes.<br />
5. Once processing is complete, the printer will begin to print.<br />
Print time will vary depending on whether you are<br />
printing with a color or monochrome cartridge and on<br />
which Print Quality setting you selected. When printing is<br />
complete, the <strong>CD</strong> Tray will automatically open and remain<br />
fully extended until the next print job is received.<br />
Using the <strong>CD</strong> <strong>Color</strong> <strong>Printer</strong> <strong>IV</strong> with Windows 25
Section 4: Interpreting the <strong>Printer</strong>’s<br />
Indicator Lights<br />
The Power and Busy LED indicator lights located on the top of<br />
the printer can tell you a lot about what is happening inside the<br />
printer. To accurately interpret what it means when these lights<br />
are on, off, or flashing, please refer to the following:<br />
Power Light Busy Light<br />
Power Light Busy Light <strong>Printer</strong><br />
on solid off Is ready to receive a print job.<br />
on solid on solid Is processing and printing an image.<br />
on solid blinking slowly Has received a print job and is<br />
waiting for you to load <strong>CD</strong> media<br />
or has a print media jam.<br />
26 Interpreting the <strong>Printer</strong>’s Indicator Lights<br />
If media loading is required, simply<br />
load media into the <strong>CD</strong> Tray<br />
according to Section 2-C and press<br />
the <strong>CD</strong> Tray button to resume<br />
printing. If print media is jammed,<br />
clear the media from the printer and<br />
turn the printer OFF and ON to reset<br />
for the next print job.<br />
both lights are blinking Waiting for a cartridge to be installed<br />
alternately with each other and the Ink Cartridge button to be<br />
pressed.<br />
on solid flashing rapidly<br />
See Section 2-B or 2-E for more<br />
information on changing or replacing<br />
ink cartridges.<br />
The tray or the carrier has stalled.<br />
Turn the unit OFF and ON again. You<br />
may need to clear an obstruction such<br />
as a jammed disc.
Power Light Busy Light <strong>Printer</strong><br />
flashing on solid Has either the wrong cartridge<br />
rapidly or no cartridge installed. Make sure<br />
the proper ink cartridge is installed:<br />
Turn the printer OFF, cancel the job<br />
from the computer, turn the printer<br />
ON, and try again after installing<br />
proper cartridge.<br />
Both lights are flashing at the Ink Low Warning. You can either<br />
same time rapidly and the replace the cartridge now (see Section<br />
printer has paused. 2-B or 2-E) or you can press the <strong>CD</strong><br />
Tray button to continue printing.<br />
Note: If you do replace the cartridge<br />
now then the ink levels will be<br />
cleared. (It assumes you replaced<br />
with a fresh cartridge.) If you instead<br />
press the <strong>CD</strong> Tray button to<br />
continue then the ink levels will not<br />
be cleared and you will not be<br />
warned again until a new cartridge<br />
is installed.<br />
Interpreting the <strong>Printer</strong>’s Indicator Lights 27
Section 5: Maintaining the <strong>Printer</strong><br />
The <strong>CD</strong> <strong>Color</strong> <strong>Printer</strong> <strong>IV</strong> is designed to require very little<br />
maintenance. Nevertheless, there are a few procedures you can<br />
perform on a regular basis or as needed to ensure your<br />
printer’s best performance.<br />
A. CLEANING THE INK CARTRIDGE NOZZLES<br />
It may be necessary to clean the ink cartridge nozzles if the<br />
printer does not seem to be laying down ink evenly or if you<br />
suspect an ink cartridge nozzle has become slightly dried out<br />
or clogged. Refer to the cleaning procedure explained within<br />
the Cartridge button description of Section 3-D to clean the<br />
cartridge nozzles.<br />
B. CLEANING THE <strong>CD</strong> TRAY AND PRINTER CASING<br />
If ink gets on the printer’s <strong>CD</strong> Tray, it may stain if left on the<br />
tray too long. To avoid this, simply wipe off any ink from the<br />
<strong>CD</strong> Tray as soon as you notice it. Use a lint-free cloth slightly<br />
moistened with water to wipe off the <strong>CD</strong> Tray. If necessary, use<br />
these same items to wipe off the outside casing of the printer.<br />
Always disconnect your printer’s power cord before<br />
cleaning. Resume printer operation only after the printer is<br />
completely dry.<br />
C. CLEARING A <strong>CD</strong> MEDIA JAM<br />
If <strong>CD</strong> Media becomes jammed inside the printer, first press the<br />
<strong>CD</strong> Tray button to try and eject the media. If this does<br />
not work, turn the printer power OFF and gently try to clear or<br />
remove the <strong>CD</strong> media manually.<br />
D. TECHNICAL SUPPORT<br />
If you have difficulty operating your <strong>CD</strong> <strong>Color</strong> <strong>Printer</strong> <strong>IV</strong>, the<br />
procedures in this manual should, in most cases, solve the<br />
problem. If you still have difficulty, contact the technical<br />
support number listed on the insert included in the supply<br />
pack.<br />
28 Maintaining the <strong>Printer</strong>
Section 6: Technical Specifications<br />
Model: <strong>CD</strong> <strong>Color</strong> <strong>Printer</strong> <strong>IV</strong><br />
Print Method: Ink-Jet<br />
Printing Resolution: 1200 x 1200 dpi, 600 x 600 dpi, or 600 x 300 dpi, driver<br />
selectable.<br />
Print Speed: Depends upon percentage of coverage and print mode<br />
selected.<br />
About 216 seconds for 100% full-color coverage, SuperPhoto.<br />
About 134 seconds for 100% full-color coverage,<br />
Presentation 1200.<br />
About 106 seconds for 100%, full-color coverage, Best 600<br />
About 68 seconds for 100% full-color coverage, Normal 600<br />
(default).<br />
About 27 seconds for 100% full-color coverage, Fast 600.<br />
About 6 seconds for 15% black monochrome coverage,<br />
Fast 600.<br />
<strong>Color</strong>s: 16.7 million or black monochrome<br />
Ink Types: 3-<strong>Color</strong> (C, M, Y) and black monochrome (K)<br />
Media Types: Printable-surface <strong>CD</strong>-R, <strong>CD</strong>-RW, <strong>CD</strong>-ROM; DVD,<br />
DVD-ROM, DVD-R, DVD-RAM<br />
<strong>Printer</strong> Driver: Windows 95/98/Me and Windows 2000/XP<br />
Data Interfaces: Centronics-type parallel<br />
Recommended System Pentium ® -class computer or greater, 16MB RAM, 100MB<br />
Requirements: free hard drive space<br />
Control Interface: TTL level signals for busy printing, tray open/close, etc.;<br />
available on rear-panel 6-pin DIN connector.<br />
Maximum Print Width: 4.724” (120 mm)<br />
Electrical Ratings: 30 VDC 0.5A<br />
Adapter Types: Three voltages: 100 VAC, 120-127 VAC, 220-240 VAC<br />
Certifications: UL, UL-C, CE, FCC Class B<br />
Dimensions: 7.5"H x 10.5"W x 10.5"D (190mmH x 266mmW x 266mmD)<br />
Weight: 8.5lbs (3.9 kg)<br />
Temperature:<br />
Operating: 50°F to 109.4°F (10ºC to 43ºC)<br />
Storage: -4°F to 140°F (-20ºC to 60ºC)<br />
Humidity:<br />
Operating: 20% to 80% (RH non-condensation)<br />
Storage: 5% to 80% (RH non-condensation)<br />
Warranty: One Year<br />
Technical Specifications 29
Appendix A: Interfacing Information<br />
A. INTRODUCTION<br />
The <strong>CD</strong> <strong>Color</strong> <strong>Printer</strong> <strong>IV</strong> is equipped with a standard 8-bit<br />
centronics-type parallel interface port. This communication<br />
port is the means through which the printer receives data from<br />
your computer. Contact technical support if you need more<br />
information on the parallel port specifications.<br />
30 Interfacing Information
B. 6-PIN MINICIRCULAR AUXILIARY INTERFACE<br />
The 6-pin minicircular auxiliary interface is used for connecting<br />
the printer with auxiliary equipment such as a <strong>CD</strong> transporter/<br />
auto-loader.<br />
Pin assignments are as follows:<br />
Uses 5v logic @ 5mA<br />
Pin Number Signal Description<br />
6<br />
1 Busy - Output is high when the printer is busy<br />
or moving the <strong>CD</strong> Tray.<br />
2 Tray Out - Output is high when the <strong>CD</strong> Tray<br />
is fully ejected.<br />
3 Tray In - Output is high when the <strong>CD</strong> Tray is<br />
fully inserted.<br />
4 <strong>CD</strong> In - Output is high when the <strong>CD</strong> Tray is in<br />
and a <strong>CD</strong> is present.<br />
5 Ground.<br />
6 Tray In/Out - A low input moves the <strong>CD</strong> Tray<br />
in if it is out, and out if it is in.<br />
TABLE A-1: Auxiliary Interface Pin Assignments<br />
NOTE: Pins 1-4 are low if the printer is plugged in but the power has been<br />
turned off using the printer’s Power Button<br />
5<br />
4 3<br />
2 1<br />
Interfacing Information 31
Index<br />
32 Index<br />
Algebraic ...........................................................................................18<br />
Auxiliary Port ...............................................................................3, 31<br />
Busy Light.....................................................................................2, 26<br />
Calibrate ............................................................................................21<br />
Cartridge............................................................................................20<br />
<strong>CD</strong>s...................................................................................................4, 6<br />
<strong>CD</strong> Tray................................................................................................2<br />
<strong>CD</strong> Tray Button ..................................................................................2<br />
<strong>Color</strong> Matching ................................................................................18<br />
Dither Mode .....................................................................................18<br />
Ink Cartridges ..............................................................................4, 18<br />
Ink Cartridge Button.........................................................................2<br />
Ink Saturation ..................................................................................19<br />
Interface Port ................................................................................3, 30<br />
Manual Load.....................................................................................19<br />
Media .................................................................................................18<br />
Parallel Port.............................................................................3, 11, 30<br />
Print Quality.....................................................................................18<br />
Printable <strong>CD</strong>s .....................................................................................4<br />
<strong>Printer</strong> Driver ...................................................................................12<br />
Power Button ......................................................................................2<br />
Power Light...................................................................................2, 26<br />
Self Test ...............................................................................................7<br />
Technical Support............................................................................28<br />
32-Bit Print Spooler...................................................................14, 20<br />
Write Direct to Port .........................................................................19
Printed in the United States of America<br />
P/N 510132