

Model No. HGW-308R - Electric Heaters
Model No. HGW-308R - Electric Heaters
Model No. HGW-308R - Electric Heaters

You also want an ePaper? Increase the reach of your titles
YUMPU automatically turns print PDFs into web optimized ePapers that Google loves.
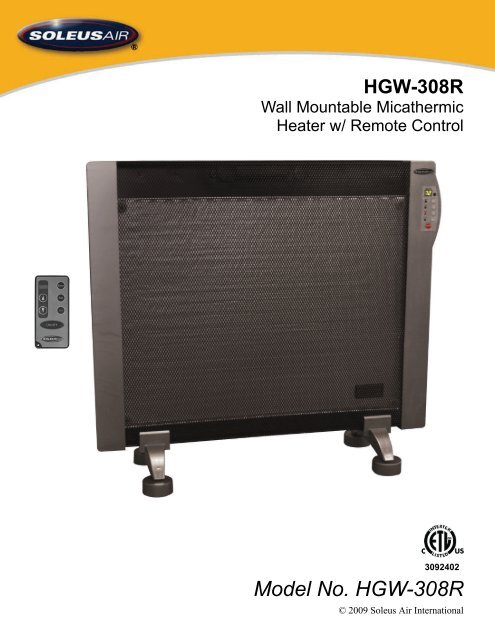
<strong>HGW</strong>-<strong>308R</strong><br />
Wall Mountable Micathermic<br />
Heater w/ Remote Control<br />
3092402<br />
<strong>Model</strong> <strong>No</strong>. <strong>HGW</strong>-<strong>308R</strong><br />
© 2009 Soleus Air International
Thank you for choosing a Soleus Air Micathermic heater. This owner’s manual will provide you with<br />
valuable information necessary for the proper care and maintenance of your new product. Please take<br />
a few moments to thoroughly read the instructions and familiarize yourself with all the operational<br />
aspects of your new Soleus Air Micathermic heater.<br />
For your own records, please attach a copy of your sales receipt to this manual. Also, write the store<br />
name/location, date purchased, and serial number below:<br />
Store Name: ____________________________________________________<br />
Location: ______________________________________________________<br />
Date Purchased: _________________________________________________<br />
Serial Number (located on back of unit): ______________________________<br />
IMPORTANT INSTRUCTIONS<br />
Before using your Soleus Air personal heater, please read this owner’s manual carefully. Store this manual in a<br />
safe place for future reference.<br />
1. Read ALL instructions before using this unit.<br />
2. CAUTION: Risk of <strong>Electric</strong> Shock. DO NOT open or try to repair the heater yourself.<br />
3. This heater is hot when in use. To avoid burns, DO NOT let bare skin touch hot surfaces. If provided,<br />
use handles when moving this heater.<br />
4. Keep combustible materials, such as furniture, pillows, bedding, paper, clothes, and curtains at least 3<br />
ft from the front of the heater and keep them away from the sides and rear. DO NOT place towels or<br />
other objects on the heater.<br />
5. Extreme caution is necessary when any heater is used by or near children or the disabled, or when the<br />
heater is left operating and unattended.<br />
6. DO NOT operate any heater with a damaged cord or after the heater malfunctions, has been dropped<br />
or damaged in any manner. Return heater to authorized service facility for examination, electrical or<br />
mechanical adjustment, or repair.<br />
7. This heater is not intended for use in bathrooms, laundry areas and similar indoor locations. NEVER<br />
locate heater where it may fall into a bathtub or other water container. To protect against electrical<br />
hazards, DO NOT immerse in water or other liquids.<br />
8. DO NOT touch the control panel or plug with a wet hand.<br />
9. DO NOT run cord under carpeting. DO NOT cover cord with throw rugs, runners, or similar<br />
coverings. Arrange cord away from traffic area and where it will not be tripped over.<br />
10. DO NOT insert or allow foreign objects to enter any ventilation or exhaust opening as this may cause<br />
an electric shock or fire, or damage the heater.<br />
11. To prevent a possible fire, DO NOT block air intakes or exhaust in any manner. DO NOT use on soft<br />
surfaces, like a bed, where openings may become blocked.<br />
2
12. A heater has hot and arcing or sparking parts inside. DO NOT use in areas where gasoline, paint,<br />
explosive and/or flammble liquids are used or stored. Keep unit away from heated surfaces and open<br />
flames.<br />
13. Avoid the use of an extension cord because the extension cord may overheat and cause a risk of fire.<br />
However, if you have to use an extension cord, the<br />
cord shall be <strong>No</strong>14.AWG minimum size and rated<br />
not less than 1875W.<br />
14. To avoid fire or shock hazard, plug the unit directly into a 120 V AC electrical outlet.<br />
15. To disconnect heater, turn controls to OFF, then remove plug from outlet. Pull firmly on the plug, DO<br />
NOT unplug by pulling on the cord.<br />
16. Always unplug the unit before moving or cleaning, or whenever the heater is not in use.<br />
17. Use only for intended household use as described in this manual. Any other use not recommended by<br />
the manufacturer may cause fire, electric shock, or injury to persons. The use of attachments not recommended<br />
or sold by unauthorized dealers may cause hazards.<br />
18. Always use on a dry, level surface.<br />
19. DO NOT use outdoors.<br />
20. WARNING: To reduce the risk of fire or electric shock, DO NOT use this unit with any solid-state<br />
speed control device.<br />
21. DO NOT attempt to repair or adjust any electrical or mechanical functions on this unit. Doing so will<br />
void your warranty. The inside of the unit contains no user serviceable parts. Qualified personnel<br />
should perform all servicing only.<br />
22. SAVE THESE INSTRUCTIONS.<br />
PRODUCT INFORMATION & SPECIFICATIONS<br />
Micathermic heating technology combines two popular heating technologies to create the ideal room heater.<br />
Using radiant and convection heat, Micathermic heaters are able to achieve full power within minutes and<br />
provide a consistent and comfortable silent heat without causing dry spots.<br />
DISCLAIMER<br />
Voltage Rating 120 V (60Hz)<br />
Power Consumption 1000W (LOW) /1500W (HIGH)<br />
Unit Size 24.6 in. (W) x 8.5 in. (D) x 22.5 in. (H)<br />
Unit Weight 11 lbs<br />
ALL INFORMATION AND THE TECHNICAL SPECIFICATIONS PRESENTED IN THIS USER’S MANUAL ARE THE<br />
PRESENTATION OF THE MANUFACTURER. SOLEUS INTERNATIONAL HAS NOT CONDUCTED INDEPENDENT<br />
TEST TO THE INFORMATION AND THE SPECIFICATIONS PRESENTED HEREWITHIN.<br />
3
SAFETY FEATURES<br />
Tip-Over Safety Feature<br />
This heater is equipped with a tip-over safety feature. Once the heater is tipped over, an internal switch will<br />
automatically shut the heater off. Once the heater is restored to an upright position, the heater will reset. To<br />
continue operation, turn on the heater using the supplied remote control or the control panel on the heater.<br />
Overheat Safety Feature<br />
This heater is equipped with a overheat safety feature. When the heaters internal components reach a certain<br />
temperature that could cause overheat and possible fire, the heater will automatically shut off. The heater will<br />
automatically reset itself once the internal temperature decreases to acceptable levels.<br />
Polarized Plug<br />
Warning: This appliance has a polarized plug (one blade is wider than the other). To reduce<br />
the risk of electric shock, this plug is intended to fit into a polarized outlet only one way. If<br />
the plug does not fit fully into the outlet, reverse the plug. If it still does not fit, contact a<br />
qualified electrician. Do not attempt to modify the plug in any way.<br />
DO NOT DEFEAT THE SAFETY PURPOSE OF THE POLARIZED PLUG.<br />
WARNING: It is normal for the power cord to feel warm to the touch; however, a loose fit between the outlet<br />
and the plug may cause overheating of the plug. If this occurs, try inserting the plug into a different outlet.<br />
Contact a qualified electrician to inspect the original outlet for damage.<br />
IN THE BOX<br />
• MICATHERMIC HEATER<br />
• REMOTE CONTROL<br />
• REMOTE CONTROL BATTERY<br />
• INSTRUCTION BOOKLET<br />
• WALL MOUNTING BRACKET<br />
• 4 - DRY WALL ANCHORS<br />
• 4 - MOUNTING SCREWS<br />
• 2 - LEGS<br />
• 2 - LEG SCREWS<br />
• 2 - MEDIUM SPRING WASHERS<br />
• 2 - MEDIUM WASHERS<br />
• 4 - WHEELS<br />
• 4 - WHEEL SCREWS<br />
•<br />
•<br />
4 - SMALL SPRING WASHERS<br />
4 - SMALL WASHERS<br />
4
PRODUCT DIAGRAM<br />
WHEELS<br />
DIGITAL<br />
DISPLAY<br />
CONTROL<br />
PANEL<br />
LEGS<br />
5
ASSEMBLY - REMOVING THE HEATER FROM THE PACKAGING<br />
Remove the heater from the box.<br />
NOTE: Product drawings may slightly differ from<br />
actual product. Assembly and packaging are the<br />
same as depicted in the drawings<br />
Remove the Styrofoam from both ends of<br />
the heater, and remove the plastic bag.<br />
Remove the remaining bag from the box..<br />
One bag contains: feet with casters. [Fig 1]<br />
Save the packaging for storing the heater<br />
while it is not in use or during summer<br />
months.<br />
<strong>No</strong>te: If any part is damaged or missing, do<br />
not use or attempt installation. Contact<br />
customer service for a replacement.<br />
6
ASSEMBLY - INSTALLATION<br />
Required Tools for Floor Use:<br />
Phillips screwdriver (not supplied)<br />
Estimated Assembly Time for Floor Use:<br />
1 minute<br />
Assembly Instructions for Floor Use:<br />
Insert the feet and bolts onto the unit as shown in the<br />
diagram.<br />
Required Tools for Wall Mounting:<br />
Phillips screwdriver (not supplied)<br />
Drill (not supplied)<br />
Hammer (not supplied)<br />
Estimated Mounting Time: 5 minutes<br />
Mounting Instructions:<br />
STEP 1<br />
Using the mounting support as a guide, mark the first screw<br />
hole on the wall using the tip of a long nail.<br />
STEP 2<br />
Move the mounting support, and drill the first screw hole.<br />
STEP 3<br />
Insert the first mounting anchor into the drilled hole.<br />
STEP 4<br />
Place the mounting support on the wall. Insert a screw through<br />
the mounting support and anchor. Tighten the screw lightly.<br />
STEP 5<br />
Use the other side of the mounting support to mark the second<br />
screw hole on the wall [approximately 5 7/16 in.].<br />
STEP 6<br />
Move the mounting support, and drill the second hole.<br />
STEP 7<br />
Insert the second mounting anchor into the drilled hole.<br />
STEP 8<br />
Place the mounting support on the wall. Insert the second screw<br />
through the mounting support and anchor. Firmly tighten both<br />
screws.<br />
STEP 9<br />
After mounting the heater, insert two screws into the bottom<br />
holes and secure the heater to the wall for safety purposes.<br />
7
OPERATING INSTRUCTIONS<br />
CONTROL PANEL & REMOTE OPERATION<br />
1. Place the heater on a firm, level surface and plug into a grounded 120V 60Hz power outlet. Only operate<br />
heater in upright position with caster wheels attached.<br />
2. Turn the heater on by pressing the On/Off button on the control panel or the supplied remote control.<br />
3. Select a heat setting:<br />
On the control panel, press the MODE button to toggle between the two heat settings; LOW (1000W) or<br />
HIGH (1500W) . When using the remote control press the HIGH or LOW buttons to select the preferred<br />
power setting.<br />
4. Adjust the thermostat by pressing the TEMPERATURE SELECT buttons (▲ or ▼) on the control panel<br />
or remote control. The digital readout will display the selected temperature.<br />
5. Once you have chosen the desired temperature, the heater will remain on until the room temperature<br />
increases to the temperature on the digital display. The heater will cycle on and off to maintain the desired<br />
room temperature.<br />
6. This heater is equipped with a 12-hour automatic shut-off timer. To activate the timer, press the TIMER<br />
button on the control panel or remote control. Each press of the timer button will increase the heater<br />
operating time by one hour. The digital readout will display the number of hours you have selected. To<br />
turn off the timer, simply press the TIMER button until the digital readout displays your current selected<br />
temperature. Once you have selected a shut off time, the heater will operate for the selected time, then<br />
automatically shut off.<br />
7. The indication lights on the control panel communicate how the heater is operating. The TIMER light will<br />
turn-on when the timer is selected. When HIGH, LOW modes are selected, the corresponding lights will<br />
turn on accordingly.<br />
8. Unplug the heater when not in use.<br />
Temperature & Timer<br />
Display<br />
Indication Lights<br />
Temp./Time<br />
Timer<br />
Low<br />
High<br />
Heat<br />
ON/OFF<br />
Timer<br />
Mode<br />
Receiver for Remote Control<br />
Timer Select Button<br />
Temperature Select Buttons<br />
Mode Select Button<br />
On/Off Button (Power)<br />
8
OPERATING INSTRUCTIONS (CONTINUED)<br />
OPTIMAL OPERATING CONDITIONS<br />
To get the most out of your Soleus Air Micathermic heater, follow these helpful hints:<br />
1. All electric heaters are limited to maximum of 1500 watts (per UL and ETL requirements). Due to this<br />
limitation all electric heaters can heat approximately 150 square feet. Micathermic heaters fit in this<br />
category, but they are able to provide a more comfortable and consistent heat than other heating<br />
technologies.<br />
2. For optimal performance, place the heater in a room and close all windows and doors. This will confine the<br />
heat to the area that needs it most.<br />
3. To save energy and in turn save money in the winter, place the heater in a room or area that needs extra<br />
heat instead of raising the thermostat on your central heating system. This heater will function very well as<br />
an additional heating source and can easily maintain the temperature in most rooms and attached<br />
bathrooms. There is no need to increase the heat in the entire house when you only need comfort in the<br />
room in which you are currently located.<br />
9
MAINTENANCE<br />
1. Unplug the unit and let it cool completely.<br />
2. To keep the heater clean, the outer shell may be cleaned with a soft, damp cloth. You may use a mild<br />
detergent if necessary. After cleaning, dry the unit with a soft cloth. CAUTION: DO NOT let liquid<br />
enter the heater.<br />
3. DO NOT use alcohol, gasoline, abrasive powders, furniture polish, or rough brushes to clean the<br />
heater. This may cause damage or deterioration to the surface of the heater.<br />
4. DO NOT immerse the heater in water.<br />
5. Wait until the unit is completely dry before use.<br />
STORAGE<br />
Store the heater in a cool, dry location when not in use. If available, use the retail packaging and pack up the<br />
heater to prevent dust from collecting on and inside the heater.<br />
TROUBLESHOOTING<br />
If the heater will not operate, please check the following before seeking repair of service:<br />
1. Check if the power cord is plugged into an electrical outlet, if not, plug in.<br />
2. Check if electricity to the main fuse is working.<br />
3. Check if the heater is set to ON by confirming the light on the control panel is lit. If not, press the<br />
POWER button to turn on the unit.<br />
4. Check if the heater is on a level surface. If the tip-over safety mechanism inside the heater is engaged<br />
the heater will not run.<br />
5. The room temperature has reached the temperature on the digital display of the heater. Increase the<br />
temperature on the display so the heater will continue operation or wait for the room temperature to<br />
drop below the set temperature on the heater.<br />
10
WARRANTY<br />
One Year Limited Warranty<br />
Soleus International Inc. warrants the accompanying Soleus Air heater to be free of defects in material and workmanship<br />
for the applications specified in its operation instruction for a period of ONE (1) year from the date of original retail<br />
purchase in the United States.<br />
If the unit exhibits a defect in normal use, Soleus International Inc. will, at its option, either repair or replace it, free of<br />
charge within a reasonable time after the unit is returned during the warranty period.<br />
As a condition to any warranty service obligation, the consumer must present this Warranty Certificate along with a<br />
copy of the original purchase invoice.<br />
THIS WARRANTY DOES NOT COVER:<br />
• Damage, accidental or otherwise, to the unit while in the possession of a consumer not caused by a defect in<br />
material or workmanship.<br />
• Damage caused by consumer misuse, tampering, or failure to follow the care and special handling provisions<br />
in the instructions.<br />
• Damage to the finish of the case, or other appearance parts caused by wear.<br />
• Damage caused by repairs or alterations of the unit by anyone other than those authorized by Soleus International<br />
Inc.<br />
• Freight and Insurance cost for the warranty service.<br />
ALL WARRANTIES, INCLUDING ANY IMPLIED WARRANTY OF MERCHANT ABILITY ARE LIMITED TO<br />
ONE-YEAR DURATION OF THIS EXPRESS LIMITED WARRANTY. SOLEUS INTERNATIONAL INC.<br />
DISCLAIMS ANY LIABILITY FOR CONSEQUENTIAL OR INCIDENTAL DAMAGES AND IN NO EVENT<br />
SHALL SOLEUS INTERNATIONAL INC’S LIABILITY EXCEED THE RETAIL VALUE OF THE UNIT FOR<br />
BREACH OF ANY WRITTEN OR IMPLIED WARRANTY WITH RESPECT TO THIS UNIT.<br />
This warranty covers only new products purchased from our authorized dealers or retailers. It does not cover used, salvaged,<br />
or refurbished products.<br />
As some states do not allow the limitation or exclusion of incidental or consequential damages, or do not allow<br />
limitation on implied warranties, the above limitations and exclusions may not apply to you. This warranty gives you<br />
specific legal rights, and you may also have other rights that vary from state to state.<br />
For Technical Support and Warranty Service<br />
Please Call (888) 876-5387<br />
Or Write To:<br />
Soleus International Inc.<br />
20035 E Walnut Dr, <strong>No</strong>rth<br />
City of Industry, CA 91789<br />
www.soleusair.com<br />
11


