

Earn BISSELL Rewards! - BrandsMart USA
Earn BISSELL Rewards! - BrandsMart USA
Earn BISSELL Rewards! - BrandsMart USA

Create successful ePaper yourself
Turn your PDF publications into a flip-book with our unique Google optimized e-Paper software.
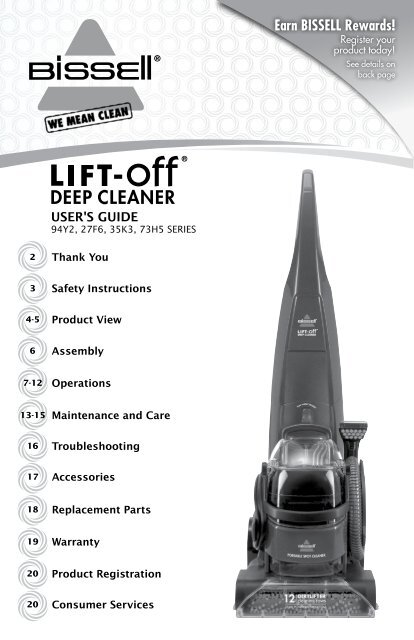
USER'S GUIDE<br />
94Y2, 27F6, 35K3, 73H5 SERIES<br />
2 Thank You<br />
3<br />
4-5<br />
6<br />
7-12<br />
13-15<br />
16<br />
17<br />
18<br />
19<br />
20<br />
20<br />
Safety Instructions<br />
Product View<br />
Assembly<br />
Operations<br />
Maintenance and Care<br />
Troubleshooting<br />
Accessories<br />
Replacement Parts<br />
Warranty<br />
Product Registration<br />
Consumer Services<br />
<strong>Earn</strong> <strong>BISSELL</strong> <strong>Rewards</strong>!<br />
Register your<br />
product today!<br />
See details on<br />
back page
Thanks for buying a <strong>BISSELL</strong> Deep Cleaner<br />
We’re glad you purchased a <strong>BISSELL</strong> deep cleaner. Everything we know<br />
about floor care went into the innovative design and construction of<br />
this complete, high-tech home cleaning system.<br />
Your <strong>BISSELL</strong> deep cleaner is well made, and we back it with a<br />
limited two year warranty. We also stand behind it with a<br />
knowledgeable, dedicated Consumer Services department, so, should<br />
you ever have a problem, you’ll receive fast, considerate assistance.<br />
My great-grandfather invented the floor sweeper in 1876. Today,<br />
<strong>BISSELL</strong> is a global leader in the design, manufacture, and<br />
service of high quality homecare products like your <strong>BISSELL</strong> deep<br />
cleaner.<br />
Thanks again, from all of us at <strong>BISSELL</strong>.<br />
Mark J. Bissell<br />
Chairman, President & CEO<br />
2<br />
DETACHABLE INNOVATION<br />
®<br />
Complete Line of <strong>BISSELL</strong> Lift-Off Products<br />
Lift-Off ®<br />
Steam Mop<br />
Lift-Off ®<br />
Deep Cleaner<br />
Lift-Off ®<br />
Multi Cyclonic<br />
Lift-Off<br />
Vacuum<br />
®<br />
Floors & More<br />
Cordless Stick Vacuum<br />
For more information visit www.bissell.com<br />
www.bissell.com 800.237.7691
IMPORTANT SAFETY INSTRUCTIONS<br />
When using an electrical appliance, basic precautions<br />
should be observed, including the following:<br />
Read all instRuctions befoRe using<br />
youR deeP cleaneR.<br />
WARNING:<br />
To reduce the risk of fire,<br />
electric shock, or injury:<br />
■ Do not immerse.<br />
■ Use only on surfaces moistened by the cleaning process.<br />
■ Always connect to a properly grounded outlet.<br />
■ See Grounding Instructions.<br />
■ Unplug from outlet when not in use and before conducting<br />
maintenance or troubleshooting.<br />
■ Do not leave machine when it is plugged in.<br />
■ Do not service machine when it is plugged in.<br />
■ Do not use with damaged cord or plug.<br />
■ If appliance is not working as it should, has been dropped,<br />
damaged, left outdoors, or dropped into water, have it repaired at<br />
an authorized Service Center.<br />
■ Do not expose to rain, store indoors.<br />
■ Do not pull or carry by cord, use cord as a handle, close door on<br />
cord, pull cord around sharp corners or edges, run appliance over<br />
cord, or expose cord to heated surfaces.<br />
■ Unplug by grasping the plug, not the cord.<br />
■ Do not handle plug or appliance with wet hands.<br />
■ Do not put any object into appliance openings, use with blocked opening, or<br />
restrict air flow.<br />
■ Do not expose hair, loose clothing, fingers or body parts to<br />
openings or moving parts.<br />
■ Do not pick up hot or burning objects.<br />
■ Do not pick up flammable or combustible materials (lighter fluid, gasoline,<br />
kerosene, etc.) or use in the presence of explosive liquids or vapor.<br />
■ Do not use appliance in an enclosed space filled with vapors<br />
given off by oil base paint, paint thinner, some moth proofing<br />
substances, flammable dust, or other explosive or toxic vapors.<br />
■ Do not pick up toxic material (chlorine bleach, ammonia, drain<br />
cleaner, gasoline, etc.).<br />
■ Do not modify the 3-prong grounded plug.<br />
■ Do not allow to be used as a toy.<br />
■ Do not use for any purpose other than described in this User’s Guide.<br />
■ Do not unplug by pulling on the cord.<br />
■ Use only manufacturer’s recommended attachments.<br />
■ Use only cleaning products formulated by <strong>BISSELL</strong> for use in this<br />
appliance to prevent internal component damage. See the cleaning<br />
fluid section of this guide.<br />
■ Keep openings free of dust, lint, hair, etc.<br />
■ Do not point attachment nozzle at people or animals<br />
■ Keep appliance on a level surface.<br />
■ Turn off all controls before unplugging.<br />
■ Unplug before attaching the TurboBrush ® .<br />
■ Be extra careful when cleaning stairs.<br />
■ Close attention is necessary when used by or near children.<br />
SAVE THESE<br />
INSTRUCTIONS.<br />
this model is foR household use<br />
only.<br />
GROUNDING<br />
INSTRUCTIONS<br />
this appliance must be connected to<br />
a grounded wiring system. if it should<br />
malfunction or break down, grounding<br />
provides a safe path of least resistance<br />
for electrical current, reducing the risk of<br />
electrical shock. the cord for this appliance<br />
has an equipment-grounding conductor<br />
and a grounding plug. it must only<br />
be plugged into an outlet that is properly<br />
installed and grounded in accordance<br />
with all local codes and ordinances.<br />
Grounded<br />
Outlets<br />
Grounding Pin<br />
WARNING:<br />
improper connection of the equipmentgrounding<br />
conductor can result in a risk<br />
of electrical shock. check with a qualified<br />
electrician or service person if you aren’t<br />
sure if the outlet is properly grounded.<br />
do not modify the Plug. if it will<br />
not fit the outlet, have a proper outlet<br />
installed by a qualified electrician. this<br />
appliance is designed for use on a nominal<br />
120-volt circuit, and has a grounding<br />
attachment plug that looks like the plug in<br />
the drawing above. make certain that the<br />
appliance is connected to an outlet having<br />
the same configuration as the plug.<br />
no plug adapter should be used with this<br />
appliance.<br />
www.bissell.com 800.237.7691<br />
3
Product view<br />
4<br />
Heat<br />
Indicator Light<br />
Formula &<br />
Water Tank<br />
Power Button<br />
Power Cord<br />
Quick Release<br />
Cord Wrap<br />
Portable Spot<br />
Cleaning Release<br />
Pedal<br />
Edge Sweep ®<br />
Brushes<br />
Upper Handle<br />
Carry Handle<br />
Flex Hose<br />
Dirty Tank<br />
Removeable<br />
Nozzle<br />
www.bissell.com 800.237.7691
Product view<br />
Hose Secure<br />
Latch<br />
Tool Storage<br />
Cleaning fluid<br />
Spray Trigger<br />
Recline Pedal<br />
Cord Clip<br />
Support Handle<br />
Tool Storage<br />
(some models)<br />
WARNING:<br />
to reduce the risk of fire<br />
and electric shock due to<br />
internal component<br />
damage, use only bissell<br />
cleaning fluids intended<br />
for use with the deep<br />
cleaner.<br />
Keep plenty of genuine bissell 2X formula on hand so you can clean and protect whenever<br />
it fits your schedule. always use genuine bissell deep cleaning formulas. non-bissell<br />
cleaning solutions may harm the machine and will void the warranty.<br />
bissell<br />
2X fiber<br />
cleansing<br />
formula with<br />
scotchgard<br />
www.bissell.com 800.237.7691<br />
<br />
bissell bissell<br />
2X Pet stain 2X allergen<br />
and odor cleansing<br />
formula with formula<br />
scotchgard<br />
Protection<br />
<br />
bissell<br />
bissell bissell bissell<br />
2X<br />
2X natural 2X lavender tough<br />
Professional<br />
orange essence stain<br />
deep<br />
formula formula Precleaner<br />
cleaning<br />
formula with<br />
scotchgard<br />
Protection<br />
<br />
Protection<br />
5
Assembly<br />
6<br />
Your deep cleaner comes in two easy<br />
to assemble components:<br />
1. upper handle<br />
2. Portable spot cleaner/base<br />
The only tool you will need to<br />
assemble your cleaner is a Phillips<br />
screwdriver.<br />
1. slide upper handle onto base<br />
2. screw the four included screws into the<br />
marked holes.<br />
Note: two of the holes are located<br />
underneath the support handle indicated<br />
by graphics. Angle screwdriver<br />
to secure into place.<br />
3. Wrap power cord around Quick Release<br />
cord Wrap.<br />
4. Wrap flex hose around the hose wrap<br />
and secure with hose secure latch.<br />
5. snap attachment(s) into the back of unit.<br />
1. 2.<br />
Warning:<br />
Do not plug in your<br />
cleaner until you have<br />
completely assembled it<br />
per the above instructions<br />
and are familiar with all<br />
instructions and operating<br />
procedures.<br />
www.bissell.com 800.237.7691<br />
2.<br />
1.<br />
Screw Holes
Operations<br />
Special features<br />
Innovative cleaning technology<br />
This innovative deep cleaner offers two<br />
machines in one. The upright deep cleaner<br />
uses the power of heat, brushes and cleaning<br />
formula to get deep down dirt for a<br />
maximum clean. The portable spot cleaner<br />
detaches to clean tough spots and stains and<br />
hard to reach areas.<br />
Hot water heater<br />
This deep cleaner features a patented built-in<br />
hot water heater which will heat the hot tap<br />
water you put in to safely optimize cleaning<br />
effectiveness. The heater temperature is limited<br />
to prevent carpet damage. The heater automatically<br />
turns on when you turn the machine<br />
on. This operates only in upright cleaning<br />
mode.<br />
Scotchgard Protector<br />
Carpet protection applied at the mill typically<br />
wears down over time from heavy foot traffic<br />
and everyday cleaning, including deep cleaning.<br />
To help restore this important protection,<br />
only <strong>BISSELL</strong> offers deep cleaning formulas<br />
with Scotchgard protector. This offers extra<br />
protection against dirt and tough stains to<br />
keep your carpets looking good longer.<br />
To maintain your Scotchgard 5-year limited<br />
stain warranty, you do not need to hire a<br />
professional. By using your <strong>BISSELL</strong> deep<br />
cleaner with <strong>BISSELL</strong> 2X formulas containing<br />
Scotchgard protector every 12 months, your<br />
carpet warranty from 3M remains in effect.<br />
No other home deep cleaning system can do<br />
this for you. Refer to the Scotchgard Protector<br />
warranty for details.<br />
Pedal graphic<br />
Tip:<br />
for easy carrying, grab the<br />
carry handle portable spot<br />
cleaner and balance with the<br />
handle on the back of the<br />
machine.<br />
www.bissell.com 800.237.7691<br />
7
Operations<br />
8<br />
Before you clean<br />
1. move furniture to another area if cleaning<br />
an entire room (optional).<br />
2. Vacuum area with a dry vacuum cleaner<br />
thoroughly before deep cleaning.<br />
3. Pretreating (optional):<br />
3a. Pretreating is recommended to improve<br />
cleaning effectiveness for heavily soiled<br />
carpet in high traffic areas such as<br />
entryway and hallways.<br />
3b. <strong>BISSELL</strong> Tough Stain precleaner<br />
spray the bissell tough stain<br />
precleaner formula onto heavy traffic<br />
areas, soiled areas or stains.<br />
allow to penetrate for at least 3 minutes.<br />
clean as normal, using the deep<br />
cleaner in upright mode, following the<br />
instructions below.<br />
Upright cleaning mode<br />
Filling formula & water tank<br />
1. Remove tank from the base of the machine<br />
by lifting up tank carry handle.<br />
Note: This tank was designed with a flat<br />
bottom so it can be easily filled.<br />
2. unscrew the black cap and remove bottle<br />
insert.<br />
3. fill tank with hot tap water to the water fill<br />
line. add two ounces of bissell 2X formula<br />
to the tank.<br />
4. Replace the bottle insert in the tank and<br />
tighten the black cap. Replace the tank on<br />
the deep cleaner.<br />
Cleaning<br />
1. Plug into a proper outlet and press the<br />
power button. allow 1 minute for the hot<br />
water heater to warm-up before cleaning.<br />
2. While pressing the trigger, make one slow<br />
forward wet pass and another one back.<br />
ATTENTION:<br />
some berber carpets have a<br />
tendency to fuzz with wear.<br />
Repeated strokes in the same<br />
area with an ordinary vacuum<br />
or deep cleaner may aggravate<br />
this condition.<br />
www.bissell.com 800.237.7691<br />
1.<br />
3b.<br />
2.
Operations<br />
Upright cleaning mode continued<br />
Cleaning continued<br />
3. Release the trigger and make one slow<br />
forward and backward pass over the same<br />
area. Repeated passes will help aid in dry<br />
time.<br />
4. continue passes until cleaning area is<br />
complete.<br />
Note: Your machine may be equipped<br />
with a circuit breaker that will automatically<br />
shut off the brush if a large<br />
or loose object is caught in the brush<br />
roll. If that happens, be sure to unplug<br />
your machine, remove the foreign<br />
object, and then plug the machine<br />
back in to reset the circuit breaker.<br />
Empty dirty tank<br />
1. When the dirty tank reaches the<br />
“FULL” line on the tank it is time to<br />
empty.<br />
2. Remove dirty tank and carry to a utility<br />
sink, toilet or outside (where you will<br />
dispose of the dirty water).<br />
3. to unlock the dirty tank lid, rotate handle<br />
over the back of the tank. Remove<br />
lid and pour out dirty water. Rinse out<br />
dirty tank to remove any debris.<br />
4. Replace top of tank, and rotate the<br />
handle forward to lock in place on front<br />
of tank.<br />
Cleaning your machine<br />
1. flush out machine of any remaining<br />
residual solution.<br />
fill the formula & water tank with hot<br />
tap water and turn on your machine.<br />
Recline handle and press the spray trigger<br />
for about 15 seconds while making<br />
forward and backward passes on carpet.<br />
continue without pressing the trigger<br />
until there is no more water being<br />
suctioned up.<br />
turn off the machine and wrap the powercord.<br />
make sure the dirty tank and<br />
the formula & water tank are emptied,<br />
rinsed, and dried before the next use.<br />
before you replace tank, clean all<br />
debris from red filter screen.<br />
CAUTION:<br />
Do not overwet. Take care not<br />
to run over loose objects or<br />
edges of area rugs. Stalling<br />
brush may result in premature<br />
belt failure.<br />
Tip:<br />
make only one trip to the sink<br />
by removing the entire portable<br />
cleaner. fill and empty<br />
in the same trip.<br />
2. 3. 4.<br />
WARNING:<br />
to reduce the risk of fire, electric<br />
shock, or injury, turn power<br />
off and disconnect plug from<br />
electrical outlet before performing<br />
maintenance or troubleshooting.<br />
Tip:<br />
for best results empty,<br />
rinse and dry both tanks<br />
before storing.<br />
www.bissell.com 800.237.7691<br />
9
Operations<br />
10<br />
Upright cleaning mode continued<br />
Cleaning your machine continued<br />
2. Rinse front nozzle of any dirt and debris.<br />
Remove portable spot cleaner from the<br />
base of the machine.<br />
unscrew three screws with Phillips screw<br />
driver and remove nozzle.<br />
Rinse nozzle out at the faucet.<br />
Place back onto the machine by hooking<br />
the tabs into the holes on the bottom sides<br />
of the machine. secure with screws.<br />
3. the inside of the end caps can be<br />
wiped out with a clean paper towel,<br />
or for a more thorough clean, the end<br />
caps can be taken off and rinsed clean.<br />
4. any loose hair or debris can be pulled<br />
from the brush rolls and thrown away. for<br />
a more thorough clean, follow directions<br />
on page 15 for removal of brush rolls.<br />
your machine is now ready to be stored.<br />
Note: Store cleaner in a protected,<br />
dry area. Since this product uses<br />
water, it must not be stored where<br />
there is a danger of freezing.<br />
Freezing will damage internal<br />
components and void the warranty.<br />
www.bissell.com 800.237.7691<br />
2.<br />
WARNING:<br />
to reduce the risk of fire, electric<br />
shock or injury unplug from<br />
outlet before servicing.<br />
Tip:<br />
let all parts dry completely<br />
and replace onto machine.
Operations<br />
Portable spot cleaning mode<br />
Preparing the machine<br />
1. step on the portable spot cleaning pedal to<br />
release the portable spot cleaner.<br />
2. Release flex hose by twisting the hose<br />
secure latch clockwise. unwrap flex<br />
hose completely.<br />
3. attach the desired tool to the hose grip<br />
until it snaps together. make certain the<br />
tool is securely attached.<br />
4. twist the Quick Release cord wrap clockwise<br />
to unwrap the power cord completely<br />
and plug into grounded outlet.<br />
Filling tank<br />
1. follow the instructions for filling the tank<br />
in the upright cleaning mode section on<br />
page 8<br />
Cleaning with Tools:<br />
ImPORTANT! If using to clean upholstery,<br />
check upholstery tags. Check<br />
manufacturer’s tag before cleaning.<br />
“W” or “WS” on the tag means you<br />
can use your Lift off Deep Cleaner if<br />
the tag is coded with an “X” or an<br />
“S”(with a diagonal stripe through it),<br />
or says “Dry Clean Only”, do not proceed<br />
with any deep cleaning machine.<br />
Do not use on velvet or silk. If manufacturer’s<br />
tag is missing or not coded,<br />
check with your furniture dealer.”)<br />
1. hold the tool approximately 1" above<br />
the soiled surface. Press the spray trigger<br />
to apply the cleaning solution to the<br />
soiled area.<br />
Note: Hold end of hose below the<br />
tank water level to help prime the<br />
portable spot cleaner.<br />
2. using the brush on the tool, gently scrub the<br />
area to be cleaned.<br />
3. apply downward pressure on the tool and<br />
pull it toward you. the suction will remove<br />
the dirt and cleaning solution. continue until<br />
no more dirt can be removed.<br />
www.bissell.com 800.237.7691<br />
Adsdfdd ghg bvh<br />
cvbbj jkn hnbj jkvh<br />
gcghhjj jhffhl kllgh<br />
Manufacturer’s tag<br />
ImPORTANT<br />
Check for colorfastness in an<br />
inconspicuous place. If possible,<br />
check upholstery stuffing.<br />
Colored stuffing may bleed<br />
through fabric<br />
11
Operations<br />
Cleaning with Deep Reach Tool<br />
1. set tool on soiled surfaces and press the trig- 1.<br />
ger to spray solution onto the soiled area to<br />
be cleaned.<br />
2. slowly move the tool back and forth over<br />
the soiled surface, keeping the tool in contact<br />
with the carpet.<br />
Release trigger and move tool slowly<br />
over the soiled area to suction up water<br />
and dirt.<br />
4. continue to clean the area, working in<br />
small sections, until no more dirt can be<br />
removed.<br />
12<br />
Portable spot cleaning mode continued<br />
Empty dirty tank<br />
Follow the instructions under Empty<br />
dirty tank section on page 9 of the<br />
Upright cleaning mode section.<br />
Replacing portable machine on base<br />
1. align the product as the graphic shows,<br />
with the cord side on the left and hose<br />
side on the right.<br />
2. Push down the portable spot cleaner<br />
until you hear it click securely into<br />
place. test the fit by pulling up on the<br />
carry handle to make sure it is secure.<br />
Cleaning portable machine<br />
1. Remove and rinse the tools in clean, running<br />
water. dry and replace in the tool<br />
storage provided.<br />
2. it is recommended that you suction clean<br />
water from a bowl to rinse out the hose.<br />
then lift end of hose and stretch out to<br />
ensure all water is cleared from hose.<br />
3. coil flex hose around the hose wrap<br />
and secure with latch.<br />
4. check suction gate and if it appears<br />
dirty, follow steps 1-4 under cleaning<br />
suction gate on page 13.<br />
1.<br />
3.<br />
graphic
Maintenance and care<br />
machine care (check regularly)<br />
Cleaning suction gate<br />
The suction gate automatically diverts<br />
air when the portable deep cleaner<br />
is detached. This should be checked<br />
and cleaned regularly for any dirt and<br />
debris.<br />
1. step on the pedal and remove the<br />
portable spot cleaner.<br />
Remove dirty tank.<br />
2. Remove two screws and pull off<br />
suction gate door.<br />
3. Wipe suction gate clean and rinse<br />
suction gate door.<br />
4. Replace suction gate door and two<br />
screws.<br />
Cleaning spray tips<br />
1. step on the pedal and remove the<br />
portable spot cleaner. to remove, push<br />
in tab and pull it out.<br />
2. clean by rinsing under hot water.<br />
3. Replace by snapping back in.<br />
4. Repeat steps on second spray tip.<br />
Cleaning solution filter<br />
1. step on the pedal and remove the<br />
portable spot cleaner. Remove the red<br />
solution filter cap on the base of the<br />
machine by inserting a coin or a flat<br />
head screw driver into the slot on the<br />
top.<br />
2. turn counter clockwise to unscrew. set<br />
aside.<br />
3. Remove the white filter by the post.<br />
Rinse the filter under water.<br />
4. Replace the white filter back into the<br />
filter area.<br />
Note: make sure the white filter<br />
is seated properly before replacing<br />
the red solution filter cap.<br />
5. Replace the red solution filter cap and<br />
turn clockwise to tighten.<br />
Suction<br />
gate<br />
Solution<br />
Filter Cap<br />
www.bissell.com 800.237.7691<br />
2.<br />
3.<br />
5.<br />
Filter<br />
Spray<br />
Tips<br />
1.<br />
WARNING:<br />
to reduce the risk of fire, electric<br />
shock, or injury, turn power<br />
off and disconnect plug from<br />
electrical outlet before performing<br />
maintenance or troubleshooting.<br />
2.<br />
13
Maintenance and care<br />
14<br />
Small belt removal and replacement (as needed)<br />
Occasional replacement of one or<br />
both belts may become necessary.<br />
If that is needed, please follow the<br />
instructions below.<br />
1. turn off the machine, and unplug it from<br />
the outlet. Remove portable spot cleaner.<br />
2. Remove the nozzle by unscrewing three<br />
screws on the nozzle cover.<br />
3. turn the machine on its side.<br />
ImPORTANT: with portable spot<br />
cleaning pedal facing down.<br />
4. Remove end cap by unscrewing the<br />
3 screws. take care not to drop the<br />
screws into the unit.<br />
5. Remove 1 silver screw from the pivot<br />
arm.<br />
6. Remove pivot arm by gently lifting up.<br />
7. Remove small brush belt.<br />
8. Replace small brush belt, and reverse<br />
steps above.<br />
9. manually rotate brushes by hand to make<br />
sure they move freely. may notice a slight<br />
resistance from the motor.<br />
www.bissell.com 800.237.7691<br />
2.<br />
4.<br />
7.<br />
6.<br />
WARNING:<br />
to reduce the risk of fire,<br />
electric shock or injury,<br />
unplug from the outlet<br />
before servicing.<br />
5.<br />
8.
Maintenance and care<br />
Brush removal and large belt replacement (as needed)<br />
Brushes can be removed for cleaning<br />
or replacement as needed.<br />
1. follow small belt removal instructions on<br />
page 14 items 1-7.<br />
2. Remove brush rolls by pulling them off<br />
of the metal rods. Be careful not to<br />
lose the small washer at each<br />
end of the brush rolls.<br />
3. Re-attach the large belt to the grooves<br />
on the end of the new brush rolls. if the<br />
belt is damaged, replace with a new<br />
belt.<br />
4. Place cleaned or new brush rolls back<br />
onto the rods. make sure one washer is<br />
on each end of the rollers prior to sliding<br />
onto the rod. be sure the brush is seated<br />
completely on the rod.<br />
5. Replace small belt over grooves in back<br />
roller and metal cog.<br />
6. Replace pivot arm and secure with silver<br />
screw.<br />
7. Re-attach end cap by tightening with the<br />
(3) black screws.<br />
8. Return front nozzle to front of unit, by<br />
latching from underneath and then<br />
securing with 3 screws.<br />
9. follow step number 8 & 9 on page 14.<br />
if you have any questions or are having<br />
trouble installing or replacing your<br />
belt(s) or brushes, please call<br />
<strong>BISSELL</strong> Consumer Services.<br />
www.bissell.com 800.237.7691<br />
2.<br />
4.<br />
6.<br />
8.<br />
WARNING:<br />
to reduce the risk of fire,<br />
electric shock or injury,<br />
unplug from the outlet<br />
before servicing.<br />
3.<br />
5.<br />
7.<br />
15
Troubleshooting<br />
Built-in heater ready light does not illuminate<br />
Possible causes Remedies<br />
1. The power is not turned ON 1. The power must be ON to activate the heater ready light<br />
2. The portable spot cleaner is not attached completely 2. Make sure the portable spot cleaner is attached<br />
Push down firmly to check<br />
Reduced Spray or No Spray<br />
Possible causes Remedies<br />
1. Formula & water tank may be empty 1. Refill tank<br />
2. Formula & water tank may not be seated completely 2. Turn power OFF. Remove and reseat tank<br />
3. Pump may have lost prime in portable spot cleaning mode 3. Hold end of hose below water level in tank to prime<br />
4. The portable spot cleaner is not attached completely 4. Push down firmly to check connection<br />
5. Solution filter may be clogged 5. Follow steps under cleaning filter on page 13<br />
DirtLifter ® PowerBrush does not turn<br />
Possible causes Remedies<br />
1. The portable spot cleaner is not attached completely 1. Make sure the portable spot cleaner is attached.<br />
Push down firmly to check<br />
2. The unit is in the upright position 2. Brushes only rotate when unit is reclined using the<br />
recline pedal<br />
3. Circuit breaker on machine (if equipped) may have tripped 3. Turn the machine OFF and unplug from outlet. Check<br />
to see if foreign object is caught in brush roll. Remove<br />
object. Plug machine in to reset circuit breaker<br />
4. The belt is off or broken 4. Turn power OFF and unplug unit from outlet. Follow<br />
instructions on pages 14 and 15<br />
Loss of suction power<br />
Possible causes Remedies<br />
1. Tanks may not be seated properly 1. Pick up both tanks and reseat them so it they fit snugly on<br />
the unit<br />
2. Nozzles may not be assembled properly 2. Unplug the unit. Check to make sure the "lip" of the<br />
nozzle is securely hooked into the groove on bottom of<br />
Tank (see page 10)<br />
3. The portable spot cleaner is not attached completely 3. Make sure the portable spot cleaner is attached.<br />
Push down firmly to check<br />
4. Dirty tank has picked up maximum amount of 4. Empty dirty tank<br />
dirty water and has reached full line<br />
5. Formula & water tank is empty 5. Check fluid levels in formula & water tank<br />
6. Suction Gate is open. 6. Check to make sure the suction gate is closed. Follow<br />
“Cleaning Suction Gate” instructions on page 13.<br />
Other maintenance or service not included in the manual should be<br />
performed by an authorized service representative.<br />
Thank you for selecting a <strong>BISSELL</strong> product.<br />
Please do not return this product to the store.<br />
For any questions or concerns, <strong>BISSELL</strong> is happy to be of<br />
service. Contact us directly at 1-800-237-7691.<br />
16<br />
www.bissell.com 800.237.7691
1<br />
6<br />
11<br />
16<br />
Accessories - <strong>BISSELL</strong> deep cleaner<br />
Item Part No. Part Name<br />
1 203-6651 3” tough stain tool<br />
2 203-6652 Powered turbobrush ® hand tool<br />
3 203-6653 4” upholstery tool<br />
4 203-6654 6” stair tool<br />
5 203-7885 spraying crevice tool<br />
6 203-7412 deep Reach Pet tool<br />
7 62e5-2 2X fiber cleansing formula with scotchgard Protection 60 oz.<br />
8 99K5-2 2X Pet stain and odor formula with scotchgard Protection 60 oz.<br />
9 89Q5-2 2X allergen cleansing formula 60 oz.<br />
10 83P3-2 2X natural orange formula 60 oz.<br />
11 34b5-2 2X lavender essence formula 60 oz.<br />
12 78h6-3 2X Professional deep cleaning formula with scotchgard Protection 48 oz.<br />
13 26V2 2X spring breeze formula 60oz.<br />
14 0790 Pet stain and odor Remover 16 oz.<br />
15 4001 tough stain Precleaner 22 oz.<br />
16 310-3040 mesh bag<br />
*not all parts are included with every model.<br />
2<br />
7<br />
12<br />
3<br />
8<br />
13<br />
www.bissell.com 800.237.7691<br />
4<br />
9<br />
14<br />
5<br />
10<br />
15<br />
17
Replacement parts - <strong>BISSELL</strong> deep cleaner<br />
Below please find a list of common replacement parts. While not all of these<br />
parts may have come with your specific machine, all are available to you for<br />
purchase, if desired.<br />
Item Part No. Part Name<br />
1 203-7893 formula & Water tank assembly (includes cap and insert)<br />
2. 203-6675 cap and insert for formula & Water tank<br />
3. 203-7894 dirty tank assembly (includes entire tank)<br />
4. 203-7904 cord Wrap<br />
5. 203-7896 end caps with edge brushes (2 pack, includes screws)<br />
6. 203-7897 spray tips assembly (includes two spray tips)<br />
7. 203-7898 in-line filter assembly (includes cap and filter)<br />
8. 203-7901 nozzle gasket<br />
9. 203-7906 nozzle cover assembly (includes gasket, nozzle cover, and front nozzle cover)<br />
10. 203-7907 front nozzle<br />
11. 203-7915 brush assembly (includes 2 brush rolls, 2 axles, and 2 swivel arms)<br />
12. 203-7916 brush single Pack (includes 1 brush roll, and 1 axle)<br />
13. 203-7900 small brush belt<br />
14. 203-7899 large brush belt<br />
15. 203-6689 hose secure latch<br />
16. 203-7918 dirty tank gasket assembly (include both gaskets)<br />
17. 203-7917 diverter cover assembly (includes cover and screws)<br />
*Not all parts are included with every model.<br />
1<br />
6<br />
11<br />
16<br />
18<br />
2<br />
7<br />
12<br />
17<br />
3<br />
8<br />
13<br />
www.bissell.com 800.237.7691<br />
4<br />
9<br />
14<br />
5<br />
10<br />
15
Warranty - Accessories - <strong>BISSELL</strong> deep cleaner<br />
this warranty gives you specific legal rights, and you may also have other rights which may<br />
vary from state to state. if you need additional instruction regarding this warranty or have<br />
questions regarding what it may cover, please contact bissell consumer services by e-mail,<br />
telephone, or regular mail as described below.<br />
Limited Two Year Warranty<br />
subject to the *eXcePtions and eXclusions identified below, upon receipt of the product<br />
bissell homecare, inc. will repair or replace (with new or remanufactured components or<br />
products), at bissell’s option, free of charge from the date of purchase by the original<br />
purchaser, for two year any defective or malfunctioning part.<br />
see information below on "if your bissell product should require service".<br />
this warranty applies to product used for personal, and not commercial or rental service. this<br />
warranty does not apply to fans or routine maintenance components such as filters, belts, or<br />
brushes. damage or malfunction caused by negligence, abuse, neglect, unauthorized repair, or any<br />
other use not in accordance with the user's guide is not covered.<br />
If your <strong>BISSELL</strong> product should require service:<br />
contact bissell consumer services to locate a bissell authorized service center in your<br />
area.<br />
if you need information about repairs or replacement parts, or if you have questions about<br />
your warranty, contact bissell consumer services.<br />
Website or E-mail:<br />
www.bissell.com<br />
Or Call:<br />
bissell consumer services<br />
1-800-237-7691<br />
monday - friday 8 a.m. - 10 p.m. et<br />
saturday 9 a.m. - 8 p.m. et<br />
Or Write:<br />
bissell homecare, inc.<br />
Po box 3606<br />
grand Rapids, mi 49501<br />
attn: consumer services<br />
bissell homecaRe, inc. is not liable foR incidental oR conseQuential damages<br />
of any natuRe associated With the use of this PRoduct. bissell’s liability Will not<br />
eXceed the PuRchase PRice of the PRoduct.<br />
Some states do not allow the exclusion or limitation of incidental or consequential<br />
damages, so the above limitation or exclusion may not apply to you.<br />
*EXCEPTIONS AND EXCLUSIONS FROm THE TERmS OF THE LImITED WARRANTY<br />
this WaRRanty is eXclusiVe and in lieu of any otheR WaRRanties eitheR oRal oR<br />
WRitten. any imPlied WaRRanties Which may aRise by oPeRation of laW, including<br />
the imPlied WaRRanties of meRchantability and fitness foR a PaRticulaR PuRPose,<br />
aRe limited to the tWo yeaR duRation fRom the date of PuRchase as descRibed<br />
aboVe.<br />
some states do not allow limitations on how long an implied warranty last so the above limitation<br />
may not apply to you.<br />
www.bissell.com 800.237.7691<br />
19
Don't forget to register your product!<br />
Registering is quick, easy and offers you benefits over the lifetime of your product.<br />
you’ll receive:<br />
<strong>BISSELL</strong> <strong>Rewards</strong> Points<br />
automatically earn points for discounts and free shipping on future purchases.<br />
Faster Service<br />
supplying your information now saves you time should you need to contact us with<br />
questions regarding your product.<br />
Product Support Reminders and Alerts<br />
We’ll contact you with any important product maintenance reminders and alerts.<br />
Special Promotions<br />
optional: Register your email to receive notice of offers, contests, cleaning tips and more!<br />
Visit www.bissell.com/registration now!<br />
For information about repairs or replacement parts, or questions about your warranty, call:<br />
<strong>BISSELL</strong> Consumer Services<br />
1-800-237-7691<br />
Monday - Friday 8 a.m. — 10 p.m. ET<br />
Saturday 9 a.m. — 8 p.m. ET<br />
Or write:<br />
<strong>BISSELL</strong> Homecare, Inc.<br />
PO Box 3606<br />
Grand Rapids MI 49501<br />
ATTN: Consumer Services<br />
Or visit the <strong>BISSELL</strong> website - www.bissell.com<br />
When contacting <strong>BISSELL</strong>, have model number of cleaner available.<br />
Please record your Model Number: ___________________<br />
Please record your Purchase Date: ___________________<br />
20<br />
<strong>BISSELL</strong> consumer services<br />
NOTE: Please keep your original sales receipt. It<br />
provides proof of purchase date in the event of a<br />
warranty claim. See Warranty on page 19 for details.<br />
©2011 bissell homecare, inc<br />
grand Rapids, michigan<br />
all rights reserved. Printed in china<br />
Part number 120-4346<br />
Rev 5/11<br />
Visit our website at:<br />
www.bissell.com<br />
scotchgard is a trademark of 3m<br />
www.bissell.com 800.237.7691


