ENEWI-1XN4x_2XN4x Quick Installation Guide - Encore Electronics
ENEWI-1XN4x_2XN4x Quick Installation Guide - Encore Electronics
ENEWI-1XN4x_2XN4x Quick Installation Guide - Encore Electronics

Create successful ePaper yourself
Turn your PDF publications into a flip-book with our unique Google optimized e-Paper software.
© 2010 <strong>Encore</strong> <strong>Electronics</strong>, Inc. All rights reserved.COVER<br />
© 2011 <strong>Encore</strong> <strong>Electronics</strong>, Inc.<br />
Product specifications, size, and shape are subject to change without notice, and actual product appearance may differ from that depicted herein.<br />
All trademarks and brand names are the properties of their respective holders.
TABLE OF CONTENTS<br />
A — OVERVIEW....................................................................................... 2<br />
A.1 PACKAGE CONTENTS ...................................................................... 2<br />
A.2 SYSTEM REQUIREMENTS................................................................. 2<br />
A.3 PRODUCT PERFORMANCE ............................................................... 2<br />
B — HARDWARE INSTALLATION.......................................................... 3<br />
C — SOFTWARE INSTALLATION .......................................................... 3<br />
D — USING WINDOWS WIRELESS MANAGER IN WINDOWS 7 ® AND<br />
WINDOWS VISTA ® ........................................................................................ 5<br />
E — USING ENCORE WIRELESS WIZARD IN WINDOWS XP ® ........... 6<br />
F — TECHNICAL SUPPORT................................................................... 6<br />
Product specifications, size, and shape are subject to change without notice, and actual product appearance<br />
may differ from that depicted herein. All trademarks and brand names are the properties of their respective<br />
holders. © 2011 <strong>Encore</strong> <strong>Electronics</strong>, Inc. All rights reserved.<br />
1<br />
www.encore-usa.com
A — Overview<br />
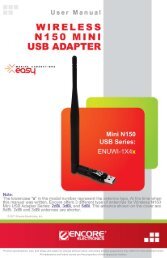
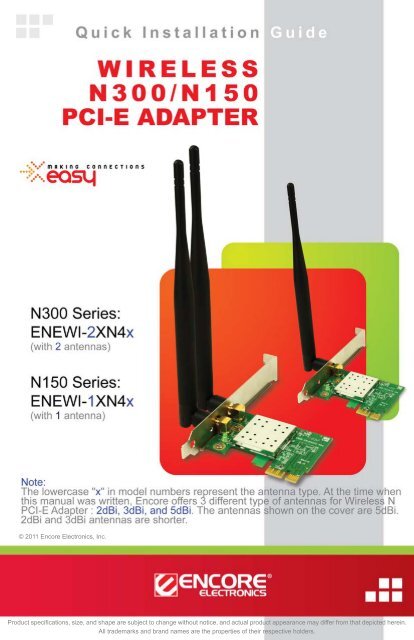
Thank you for choosing <strong>Encore</strong> <strong>Electronics</strong>’ Wireless N300/N150 PCI-E Adapter (<strong>ENEWI</strong>-<strong>2XN4x</strong><br />
or <strong>ENEWI</strong>-<strong>1XN4x</strong>). This pamphlet explains the essential steps to connect to your home or office<br />
wireless network. For more details and screenshots, please refer to the User Manual in the<br />
<strong>Installation</strong> CD.<br />
A.1 Package Contents<br />
Wireless N300/N150 PCI-E Adapter x 1<br />
<strong>Quick</strong> <strong>Installation</strong> <strong>Guide</strong> x 1<br />
<strong>Installation</strong> CD (User Manual on CD) x 1<br />
Detachable, External Antenna* x 2 (for N300 Series)<br />
x 1 (for N150 Series)<br />
* <strong>Encore</strong> <strong>Electronics</strong>’ Wireless N300/N150 PCI-E Adapter comes with different type of<br />
antennas. The antennas shown on the front cover are 5dBi antennas. Other type of antennas,<br />
such as 2dBi and 3dBi antennas, are also available.<br />
A.2 System Requirements<br />
Available 1x PCI-E slot<br />
Operating System: Windows ® 7, Windows Vista ® , or Windows ® XP<br />
CD-ROM Drive<br />
A.3 Product Performance<br />
The two charts below indicate the RELATIVE performance among the Wireless N300/N150<br />
PCI-E Adapters. The product name tells you the adapter’s maximum theoretical speed. The last<br />
digit of the model number tells you an adapter’s range. For example, <strong>ENEWI</strong>-1XN45 comes with<br />
a 5dBi antenna, and <strong>ENEWI</strong>-1XN42 comes with a 2dBi antenna.<br />
2<br />
www.encore-usa.com
B — Hardware <strong>Installation</strong><br />
1. Shut down your computer, and then, disconnect your computer’s power cord.<br />
2. Open the case of your computer<br />
3. Locate an empty PCI-E slot. Make sure the wireless adapter can fit.<br />
4. Insert the wireless adapter firmly into the empty PCI-E slot.<br />
5. Put the cover back to your computer case.<br />
6. Attach the external antennas to the connectors on the back of your wireless adapter.<br />
Note: The N150 Series only has one antenna.<br />
7. Reconnect the power cord, and then, turn on your computer.<br />
C — Software <strong>Installation</strong><br />
1.<br />
Click “Cancel,” if you see the ‘Found New<br />
Hardware Wizard’ window when you start<br />
Windows for the first time after installing the<br />
hardware.<br />
2. Insert the ‘<strong>Installation</strong> CD” to the CD-ROM drive. Depending on your computer’s<br />
configuration, one of the following 3 scenarios will happen (A , B or C).<br />
A. The ‘<strong>Encore</strong> Welcome Window’ appears automatically, and then, the window<br />
switches to the ‘<strong>Quick</strong> Setup’ window in Step 3.<br />
B. The ‘AutoPlay’ window appears automatically<br />
If you see the ‘AutoPlay’ window instead, select<br />
“Run autorun.exe.”<br />
3<br />
www.encore-usa.com
C. Use ‘Run Command’ when A or B does not appear.<br />
Note:<br />
You can use “Browse” to find the CD-ROM drive letter.<br />
If neither the ‘<strong>Encore</strong> Welcome Window nor the<br />
‘AutoPlay’ window appears, type “D:\autorun.exe”<br />
in the “Run Command” window in the Start menu<br />
( ) (‘D’ is the drive letter of your CD-ROM drive).<br />
If the “Run command” window is not in the Start menu, go to the Start menu ( )<br />
→ type “run” in the “search box” → select “Run” in the list of results.<br />
3. <strong>Quick</strong> Setup Window<br />
4. Follow the on-screen instructions.<br />
Note:<br />
Click the “Software & Driver <strong>Installation</strong><br />
” icon.<br />
Click “Yes” to continue, if you see ‘Do you<br />
want to allow the following program to<br />
make changes to this computer?’ in the<br />
‘User Account Control’ window in Windows<br />
7 or Windows Vista.<br />
Click “Install this driver software anyway,” if<br />
you see ‘Windows can’t verify the<br />
publisher of this driver software’ in the<br />
‘Windows Security’ window in Windows 7 or<br />
Windows Vista.<br />
Click “Continue Anyway,” if you see this<br />
warning message in the ‘Hardware<br />
<strong>Installation</strong>’ window in Windows XP.<br />
4<br />
www.encore-usa.com
D — Using Windows Wireless Manager in Windows 7 ® and Windows Vista ®<br />
1. Windows 7 Tray Icon<br />
2.<br />
3.<br />
4.<br />
5.<br />
Windows Vista Tray Icon<br />
Left-click on the “Windows Wireless<br />
Manager Tray Icon” ( in Windows 7 and<br />
5<br />
www.encore-usa.com<br />
in Windows Vista).<br />
Note: If you cannot see the icon, click the “Show<br />
hidden icons ( )” arrow in the system tray.<br />
Click “Connect to a network”<br />
(NOT “Network and Sharing center.”)<br />
Note: This step only applies to Windows Vista.<br />
1. Select the “Wireless Network Connection”<br />
of your choice.<br />
2. Click “Connect.”<br />
1. Enter the “Security Key” (also called<br />
password, passphrase or pre-shared key).<br />
2. Click “OK.”<br />
Note: If no wireless security is turned on, the warning message ‘Information<br />
sent over this network might be visible to others.’ will appear. Select<br />
“Connect Anyway” if you want to proceed.<br />
The ‘Set Network Location’ window may appear.<br />
1. Select “Home”, “Work” or “Public.” Windows<br />
will automatically configure the appropriate<br />
firewall settings.<br />
2. Click “Close” in the follow-up window.<br />
Note: This step only applies to Windows Vista.<br />
6. The “Window Wireless Manager Tray Icon” will become in Windows 7<br />
and in Windows Vista<br />
Note: For help with the Windows Wireless Manager, please refer to “Help and Support” in the<br />
Start menu ( ) at the lower left corner of your screen.
E — Using <strong>Encore</strong> Wireless Wizard in Windows XP ®<br />
1.<br />
2.<br />
3.<br />
4.<br />
5.<br />
6.<br />
F — Technical Support<br />
1. Right-click on the “<strong>Encore</strong> Wireless<br />
6<br />
www.encore-usa.com<br />
Manager Tray Icon .”<br />
2. Select “Set Wizard.”<br />
1. Check “Wireless Local Area Networks<br />
(Infrastructure).”<br />
2. Click “Next,”<br />
in the ‘Select Operation Mode’ window.<br />
1. Select the ‘SSID’ (wireless network name)<br />
you want to connect to.<br />
2. Click “Next,”<br />
in the ‘Select The Infrastructure Connection<br />
List’ window.<br />
Only enter and confirm the “Network Key”<br />
(also called password, passphrase or<br />
pre-shared key) of your router or access<br />
point,<br />
in the ‘Wireless Network Properties’ window.<br />
1. Check “Obtain an IP address<br />
automatically” and “Obtain DNS server<br />
address automatically.”<br />
2. Click “Finish,”<br />
in the “Setup TCP/IP” window.<br />
The ‘<strong>Encore</strong> Wireless Manager Tray Icon’<br />
at the lower right corner of the screen will<br />
become green ( ) when connection is<br />
successful.<br />
Before you contact our technical support, please read the User Manual in the <strong>Installation</strong> CD<br />
and visit the support section in our website at www.<strong>Encore</strong>-USA.com. You can submit your<br />
support request directly on our webpage. You can also reach us through one of the support<br />
hotlines or emails listed on the back of this pamphlet.
––<br />
* Local tech-support numbers are provided in selected countries. Service may change without prior notice.<br />
Please visit www.encore-usa.com for more details.<br />
7<br />
www.encore-usa.com<br />
Product specifications, size, and shape are subject to change without notice, and actual product appearance may differ from that depicted herein.<br />
All trademarks and brand names are the properties of their respective holders.