23632 ccl_Novellini Install guide:CCL Installation Guide
23632 ccl_Novellini Install guide:CCL Installation Guide
23632 ccl_Novellini Install guide:CCL Installation Guide

You also want an ePaper? Increase the reach of your titles
YUMPU automatically turns print PDFs into web optimized ePapers that Google loves.
<strong>23632</strong> <strong>ccl</strong>_<strong>Novellini</strong> <strong>Install</strong> <strong>guide</strong>:<strong>CCL</strong> <strong>Install</strong>ation <strong>Guide</strong> 21/5/08 11:43 Page 1<br />
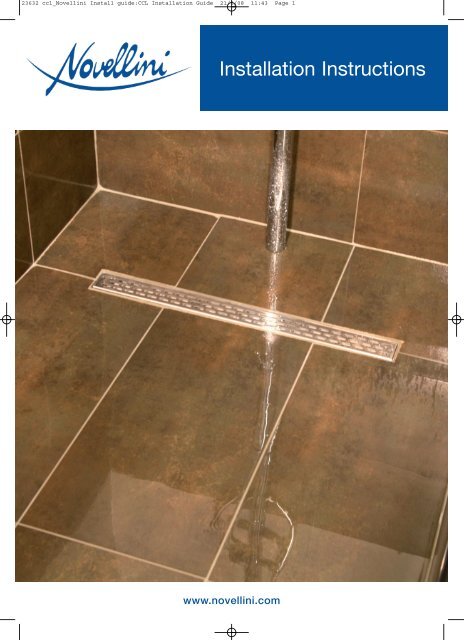
<strong>Install</strong>ation Instructions<br />
www.novellini.com
<strong>23632</strong> <strong>ccl</strong>_<strong>Novellini</strong> <strong>Install</strong> <strong>guide</strong>:<strong>CCL</strong> <strong>Install</strong>ation <strong>Guide</strong> 21/5/08 11:43 Page 2<br />
Fig. 3<br />
Fig. 1<br />
Place Linear Wet-Deck in the desired position and carefully<br />
mark around the edge.<br />
Fig. 2<br />
Remove Linear Wet-Deck and carefully cut along the line you<br />
have marked.<br />
Remove floorboards from the marked area. Measure and mark<br />
to the centre line of the next joist, mark and remove floor<br />
boards.<br />
Check that joists are level. <strong>Install</strong> battens 18mm from the top of the exposed joists. Cut and fit<br />
18mm plywood into the joist spaces. Note: This will provide a completely level base for the<br />
Linear Wet-Deck to be fixed.<br />
Fig. 4<br />
Place the Linear Wet-Deck into the cut-out and position the trough. Check for the best position to place<br />
waste and trap.<br />
Note: Check the flow rate of the shower being used to ensure the required waste and traps are fitted. See<br />
flow rate table. Additional traps can be fitted at this point.<br />
Flowrate Table in Litres per minute -<br />
Number of Traps 1<br />
Number of Wastes<br />
2 3<br />
1 24 lpm X X<br />
2 40 lpm 48 lpm X<br />
3 50 lpm 60 lpm 72 lpm<br />
Drill a 50mm hole in the required position on the scratch line of the trough, allowing the pilot drill of the<br />
hole cutter to drill through the 18mm plywood below. This will give the exact position for the waste and<br />
trap.
<strong>23632</strong> <strong>ccl</strong>_<strong>Novellini</strong> <strong>Install</strong> <strong>guide</strong>:<strong>CCL</strong> <strong>Install</strong>ation <strong>Guide</strong> 21/5/08 11:43 Page 3<br />
Fig. 8<br />
Fig. 5<br />
Remove trough and Linear Wet-Deck from the<br />
cut-out and using the pilot hole, cut a 89mm hole through<br />
the 18mm plywood.<br />
Fig. 6<br />
Remove the required 18mm plywood from the battens and<br />
connect the waste and trap using 40mm solvent weld waste<br />
pipe.<br />
Note: Ensure the top of the trap is flush with the top of the<br />
18mm plywood.<br />
Fig. 7<br />
Replace 18mm plywood and securely fix to battens.<br />
Place the Linear Wet-Deck back into position and check waste and trap for alignment.<br />
Mark, drill and countersink for the 60mm fixing screws.<br />
Note: If required, drill and fix at any point on the Linear Wet-Deck to ensure it is flat and level.<br />
Fig. 9<br />
Fill in remaining floor space with floor boards.<br />
Note: If the floor boards are 18mm, the remaining floor will need<br />
to be ply-lined with 4mm plywood.
<strong>23632</strong> <strong>ccl</strong>_<strong>Novellini</strong> <strong>Install</strong> <strong>guide</strong>:<strong>CCL</strong> <strong>Install</strong>ation <strong>Guide</strong> 21/5/08 11:43 Page 4<br />
Fig. 10<br />
Place trough into the Linear Wet-Deck and mark through pre-drilled holes. Remove trough and<br />
drill 12 x 3.5mm holes, as marked.<br />
Fig. 12<br />
Fig. 11<br />
Replace trough and use 12 x Pozi screws to fix.<br />
Seal with the polysulphide Tilesafe Jointing Compound (part of the Tilesafe kit) and screw the<br />
waste top through the 50mm hole in the trough and tighten using the key provided.<br />
Fig. 13<br />
The Linear Wet-Deck installation is now complete and requires waterproofing. Full instructions for<br />
RIW Tilesafe are included in the Tilesafe Membrane kit or can be found at www.tile-safe.co.uk.<br />
Fig. 14<br />
Use the spacers provided to adjust the height of the stainless steel removable grid frame to finish<br />
approximately 1mm below the tile.<br />
<strong>Novellini</strong> (UK) Ltd, <strong>Novellini</strong> House, Orchard Trading Estate, Toddington, Nr Cheltenham, Gloucestershire, GL54 5EB<br />
T: 01256 766757 F: 01242 622150 W: www.novellini.com