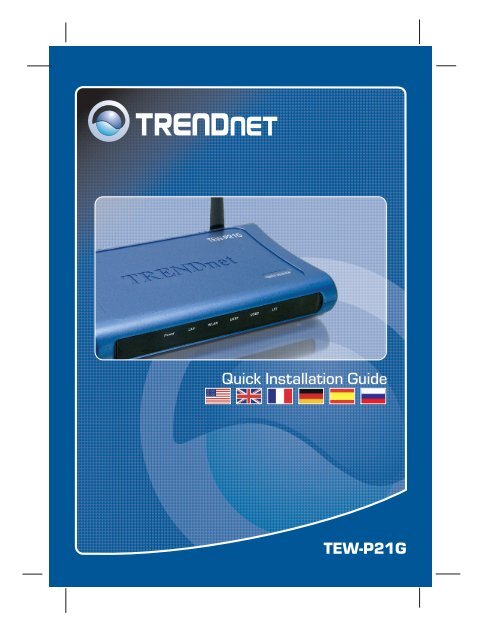
TEW-P21G Quick Installation Guide - TRENDnet
TEW-P21G Quick Installation Guide - TRENDnet
TEW-P21G Quick Installation Guide - TRENDnet

You also want an ePaper? Increase the reach of your titles
YUMPU automatically turns print PDFs into web optimized ePapers that Google loves.
<strong>Quick</strong> <strong>Installation</strong> <strong>Guide</strong><br />
<strong>TEW</strong>-<strong>P21G</strong>
Table of of Contents Contents<br />
English ...................................................................................................... 1<br />
1. Before You Start .................................................................................<br />
1<br />
2. How to Connect ................................................................................. 2<br />
3. Using the Print Server ........................................................................ 3<br />
Troubleshooting ........................................................................................<br />
7<br />
Version 12.13.05
1. Before You Start<br />
System Requirements<br />
1. Pentium 100Mhz or faster processor<br />
2. 8MB RAM or more<br />
3. Windows, Linux, Mac OS X or other OS<br />
Parallel Printer<br />
Notebook with<br />
Wireless PC Card<br />
(<strong>TEW</strong>-421PC)<br />
54Mbps Wireless<br />
USB 2.0 Printers<br />
1<br />
English<br />
Package Content<br />
<strong>TEW</strong>-<strong>P21G</strong><br />
<strong>Quick</strong> <strong>Installation</strong> <strong>Guide</strong><br />
Driver CD-ROM<br />
Power Adapter (5V, 2.5A)<br />
54Mbps 802.11g Wireless<br />
Multi-Port Print Server<br />
(<strong>TEW</strong>-<strong>P21G</strong>)<br />
Cable/DSL 802.11g<br />
54Mbps Wireless Router<br />
(<strong>TEW</strong>-431BRP)<br />
Workstation with<br />
Wireless PCI Adapter<br />
(<strong>TEW</strong>-423PI)<br />
Internet<br />
Cable/DSL Modem
2. How to Connect<br />
Note: Please power off all printers before connecting them to the print server.<br />
Then turn on each printer after you make your hardware connections.<br />
1. Connect the antenna.<br />
2. Connect a Parallel or USB printer to the printer<br />
ports.<br />
3. Connect the RJ45 cable to the LAN port and<br />
to your network hub or switch.<br />
4. Plug the AC power adapter into the Print<br />
Server.<br />
2<br />
English
3. Using the Print Server<br />
Note: For MAC Users, change your computer’s IP address to 192.168.0.X<br />
(where X is an available number from 2-254), and enter 192.168.0.1 in your<br />
web browser to access the Print Server's Web Utility.<br />
For Windows Users<br />
1. After inserting the installation CD,<br />
click Install Utility.<br />
2. Go through each installation step<br />
and click Finish.<br />
3. Double-click the PS-Utility icon.<br />
3<br />
English<br />
PS-Utility<br />
V3.00
4. Click Change IP Address.<br />
5. Select Manually Assign and type<br />
in an IP Address that matches<br />
your current network segment.<br />
Click OK. Another pop-up window<br />
will appear to confirm the change.<br />
Click OK.<br />
6. Click Show Web Setup on PS-<br />
Utility. Take note and write down<br />
the Server Name and the Printer<br />
Name.<br />
4<br />
English
Note: If you are using Windows 95/98(SE)/ME, then make sure that NETBEUI<br />
is installed before you follow the instructions below. If you are using Windows<br />
2000/XP, then you can simply add your printer using the instructions below. For<br />
TCP/IP Printing instructions, please consult the User's <strong>Guide</strong> on the CD-ROM<br />
for details.<br />
7. Go into Control Panel and double-<br />
click Printers and Faxes. Click<br />
Add Printer.<br />
8. Click Next on the Add Printer<br />
Wizard, and select the network<br />
printer option. Click Next.<br />
5<br />
English
9. Select Connect to this printer<br />
and type in the server name and<br />
the printer name in the following<br />
format:<br />
\\server_name\printer_name<br />
Click Next.<br />
10. Click OK.<br />
11. Select the appropriate driver for<br />
your printer and click Next.<br />
12. Select Yes and click Next. Click<br />
Finish to complete the<br />
installation.<br />
Your installation is now complete.<br />
Note: For more detail on advanced features, please consult the User's <strong>Guide</strong>.<br />
6<br />
English
Troubleshooting<br />
Q1. I cannot add a network printer after I typed the server name and printer name.<br />
A1. Please double check your hardware connections. Make sure that your printer<br />
is connected properly to the print server and your power adapter is connected<br />
properly to a power outlet.<br />
Q2. I have double checked my hardware connections and have verified that<br />
everything is connected properly, but I still cannot connect to my printer after I<br />
typed in the server name and printer name.<br />
A2. Make sure that you are typing the correct printer name. If your USB printer is<br />
connected to the USB2 slot, then use the Printer Name that is by the USB2<br />
heading in the web configuration utility.<br />
Q3. I verified that the hardware installation is correct and typed the correct printer<br />
name, but I still cannot find the network printer.<br />
A3. Make sure that the server name and printer name is entered correctly. There<br />
should be no spaces, and the back slashes that separate the server name<br />
and printer name should be this “\\”, instead of this ”//”.<br />
Q4. I typed in the server name and printer name correctly and successfully<br />
installed the network printer. But I can't print a test page.<br />
A4. Make sure that the printer is online by turning the printer on. Make sure the<br />
power adapter of your printer is properly connected to a power outlet.<br />
Q5. I successfully added a network printer to my computer, and my printer is<br />
receiving power. I can also print a test page, but I cannot print anything from<br />
Microsoft Word or other applications.<br />
A5. Make sure to set the newly installed network printer to your default printer.<br />
Q6. I configured my print server to automatically receive an IP Address from a<br />
DHCP server, and now I cannot go into the print server's web utility.<br />
A6. Open PS-Utility to locate your Print Server's IP address. For MAC users,<br />
press the Reset button at the back of the <strong>TEW</strong>-<strong>P21G</strong>, hold the button for 15<br />
seconds, release the button, and enter http://192.168.0.1 in a web browser to<br />
access the web utility feature.<br />
7
Q7. I pressed the reset button and held it for 15 seconds. I also typed in<br />
http://192.168.0.1 in a web browser, but I still cannot access my print server.<br />
A7. Make sure to change your IP Address to 192.168.0.xxx where xxx is an<br />
available number between 2 to 254.<br />
Q8. I configured my Wireless Print Server to have the same SSID as my Access<br />
Point, but I still cannot print from my Wireless Print Server.<br />
A8. Your Access Point or Wireless Router may have enabled its wireless security.<br />
You can either disable wireless security or configure the Print Server's<br />
wireless security feature. Make sure that the encryption method and<br />
password for your Wireless Printer is the SAME as your Access Point or<br />
Wireless Router. Also make sure that the format (HEX or ASCII) and the bit<br />
encryption (64-bit, 128bit, etc.) is the same.<br />
If you have any questions regarding the <strong>TEW</strong>-<strong>P21G</strong>, please contact <strong>TRENDnet</strong><br />
Technical Support Department.<br />
Certifications<br />
This equipment has been tested and found to comply with FCC and CE Rules.<br />
Operation is subject to the following two conditions:<br />
(1) This device may not cause harmful interference.<br />
(2) This device must accept any interference received.<br />
Including interference that may cause undesired operation.<br />
Waste electrical and electronic products<br />
must not be disposed of with household<br />
waste. Please recycle where facilities<br />
exist. Check with you Local Authority or<br />
Retailer for recycling advice.<br />
NOTE: THE MANUFACTURER IS NOT RESPONSIBLE FOR ANY RADIO OR TV<br />
INTERFERENCE CAUSED BY UNAUTHORIZED MODIFICATIONS TO THIS<br />
EQUIPMENT. SUCH MODIFICATIONS COULD VOID THE USER’S AUTHORITY TO<br />
OPERATE THE EQUIPMENT.<br />
8
<strong>TRENDnet</strong> Technical Support<br />
US/Canada Support Center European Support Center<br />
Contact<br />
Contact<br />
Telephone: 1(866) 845-3673<br />
Telephone:<br />
Email: support@trendnet.com<br />
Deutsch : +49 (0) 6331 / 268-460<br />
Tech Support Hours<br />
Français : +49 (0) 6331 / 268-461<br />
0800-90-71-61 (numéro vert)<br />
24/7 Toll Free Tech Support<br />
Español : +49 (0) 6331 / 268-462<br />
English : +49 (0) 6331 / 268-463<br />
Italiano : +49 (0) 6331 / 268-464<br />
Dutch : +49 (0) 6331 / 268-465<br />
Fax: +49 (0) 6331 / 268-466<br />
3135 Kashiwa Street<br />
Torrance, CA 90505<br />
USA<br />
Copyright ©2005. All Rights Reserved. <strong>TRENDnet</strong>.<br />
Tech Support Hours<br />
8:00am - 6:00pm<br />
Middle European Time<br />
Monday - Friday<br />
Product Warranty Registration<br />
Please take a moment to register your product online.<br />
Go to <strong>TRENDnet</strong>’s website at http://www.trendnet.com