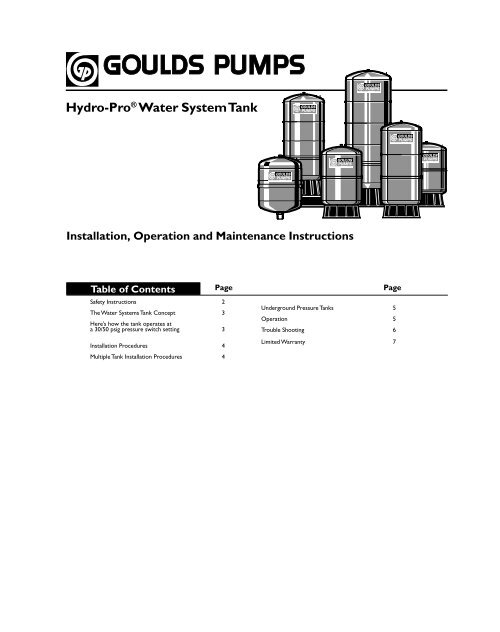
Hydro-Pro® Water System Tank
Hydro-Pro® Water System Tank
Hydro-Pro® Water System Tank

Create successful ePaper yourself
Turn your PDF publications into a flip-book with our unique Google optimized e-Paper software.
<strong>Hydro</strong>-Pro ® <strong>Water</strong> <strong>System</strong> <strong>Tank</strong><br />
Installation, Operation and Maintenance Instructions<br />
Table of Contents Page Page<br />
Safety Instructions 2<br />
The <strong>Water</strong> <strong>System</strong>s <strong>Tank</strong> Concept 3<br />
Here’s how the tank operates at<br />
a 30/50 psig pressure switch setting 3<br />
Installation Procedures 4<br />
Multiple <strong>Tank</strong> Installation Procedures 4<br />
Indice<br />
1<br />
<strong>Hydro</strong>-Pro <strong>Water</strong> <strong>System</strong> <strong>Tank</strong><br />
<br />
<strong>Hydro</strong>-Pro <strong>Water</strong> <strong>System</strong> <strong>Tank</strong><br />
<br />
<strong>Hydro</strong>-Pro <strong>Water</strong> <strong>System</strong> <strong>Tank</strong><br />
<br />
<strong>Hydro</strong>-Pro <strong>Water</strong> <strong>System</strong> <strong>Tank</strong><br />
<br />
<strong>Hydro</strong>-Pro <strong>Water</strong> <strong>System</strong> <strong>Tank</strong><br />
<br />
Underground Pressure <strong>Tank</strong>s 5<br />
Operation 5<br />
Trouble Shooting 6<br />
Limited Warranty 7<br />
ystem <strong>Tank</strong>
Read and Follow<br />
Safety Instructions!<br />
DANGER<br />
WARNING<br />
CAUTION<br />
Safety Instructions<br />
This is the safety-alert symbol. When you see this symbol on your system or in this<br />
manual, look for one of the following signal words and be alert to the potential for<br />
personal injury;<br />
DANGER warns about hazards that will cause serious personal injury, death or<br />
major property damage if ignored.<br />
WARNING warns about hazards that could cause serious personal injury, death or<br />
major property damage if ignored.<br />
CAUTION warns about hazards that may result in minor or moderate injury or<br />
property damage if ignored.<br />
This label NOTICE indicates special instructions which are important but not related<br />
to hazards.<br />
Carefully read and follow all safety instructions in this manual or on system.<br />
Keep safety labels in good condition.<br />
Replace missing or damaged safety labels.<br />
1. WARNING - THESE WATER TANKS ARE DESIGNED FOR<br />
OPERATION ON AMBIENT TEMPERATURE WATER SYSTEMS LIMITED<br />
TO A MAXIMUM WORKING PRESSURE OF 125 POUNDS PER SQUARE INCH<br />
GAUGE (PSIG). IF YOUR SYSTEM HAS THE ABILITY TO EXCEED 125 PSIG<br />
WORKING PRESSURE (100 PSIG IF THIS IS A PUMP MOUNTED UNIT), A<br />
SUITABLE SAFETY DEVICE MUST BE INSTALLED. THIS CAN BE EITHER A<br />
HIGH PRESSURE ELECTRICAL CUT-OFF SWITCH AND/OR A PRESSURE<br />
RELIEF VALVE. FAILURE TO FOLLOW THESE INSTRUCTIONS CAN CAUSE<br />
TANK RUPTURE AND RESULT IN PERSONAL INJURY AND/OR PROPERTY<br />
DAMAGE.<br />
2. It is your responsibility to make sure your installation meets all national and<br />
local plumbing and electrical codes.<br />
3. DANGER - Before installing or servicing your pump or tank be sure power<br />
source is disconnected.<br />
4. If a captive air water systems tank replaces a standard galvanized tank on a<br />
submersible pump installation, bleeder orifices or other air charging devices<br />
must be removed. Air charging devices on jet pumps must be removed.<br />
5. CAUTION - Storage tanks are designed for use on ambient temperature<br />
- (maximum temperature of 120 o F, effective Feb. 2001) water systems. Use of<br />
this product on other applications could cause tank failure and possibly<br />
personal injury. Use of this tank on other applications voids the warranty.<br />
6. Complete pump, tank and piping system must be protected against freezing.<br />
Failure to do so will cause severe damage and voids the warranty.<br />
7. DANGER - <strong>Tank</strong> contains air pressure. Do not puncture. Never throw tank<br />
into fire or incinerator.<br />
2
The water systems<br />
tank concept<br />
Here’s how the<br />
tank works for a<br />
water system<br />
designed to<br />
operate at a<br />
30/50 psig<br />
pressure<br />
switch<br />
30 40<br />
setting. Prior to shipping, the tank<br />
is pressurized to a standard<br />
precharge as defined in<br />
“OPERATION” part of this<br />
manual.<br />
1. 2.<br />
50<br />
3. 4.<br />
The pressure in the tank<br />
rises. <strong>Water</strong> continues to<br />
enter until the pump cut-out<br />
pressure is reached. The<br />
pump shuts off and the tank<br />
is now filled.<br />
AIR WATER<br />
3<br />
The water system tank does more than simply<br />
store water. It helps to protect the system<br />
components. A properly sized tank will provide<br />
adequate flow even when the pump is not<br />
running. It saves energy by reducing the<br />
number of pump starts. Another benefit is<br />
increased system component life due to fewer<br />
pump cycles.<br />
The water system tank consists of a steel tank<br />
(A) containing a sealed-in-place heavy duty<br />
diaphragm (B) which separates air from the<br />
water. The portion of the tank where water is<br />
stored (C) is lined to isolate water from the<br />
metal tank. This protects the tank from<br />
corrosion.<br />
As water enters the tank, the<br />
air above the diaphragm is<br />
compressed and its volume<br />
is reduced by the volume of<br />
water that enters.<br />
45<br />
The pressure in the air chamber<br />
forces water into the system<br />
when a demand is made<br />
without causing the pump to<br />
operate immediately. When<br />
the pressure in the chamber<br />
finally drops to the pump cutin<br />
pressure, the pump switch<br />
activates the pump and<br />
repeats the filling cycle.
Installation Procedures<br />
1. The water system tank should be installed as close<br />
as possible to the pressure switch (24 inches or less)<br />
to reduce the adverse effect of friction loss and<br />
elevation differences.<br />
2. Disconnect electric power.<br />
3. Drain system and remove old tank. On new system<br />
installation this step is unnecessary.<br />
4. Locate the water system tank on a firm, level surface<br />
with adequate drainage. Typical installations are<br />
shown in the following section.<br />
Multiple<br />
<strong>Tank</strong><br />
Installation<br />
Procedure<br />
TYPICAL SUBMERSIBLE<br />
PUMP INSTALLATION<br />
<strong>Water</strong> system tanks can be connected<br />
together to increase the supply of usable<br />
water (drawdown). Two tanks of the same<br />
size will double the supply and three tanks<br />
will triple the supply. When using a high<br />
4<br />
TYPICAL JET<br />
PUMP INSTALLATION<br />
5. If your system is capable of exceeding a working<br />
pressure of 125 psig (typically submersible pumps),<br />
install a pressure relief valve (rated at 125 psig or<br />
less, but greater than turn-off pressure) in the system<br />
near the tank. The valve should be the same pipe<br />
size as the tank outlet.This is not necessary on tankmounted<br />
jet pump units.<br />
6. Connect tank to the pump discharge line using the<br />
same size pipe as the pump tap, or larger.<br />
WARNING: Hold 90° tank street elbow with wrench<br />
when threading and tightening connecting pipe.<br />
7. The tank should be flushed 5 times prior<br />
to household use. (See operations section.)<br />
capacity pump, the manifold and pressure switch<br />
assembly must be installed in the pipe line as close<br />
to the center of the tanks as possible. Manifold and<br />
main should be 2 times the size of the feederline.
Underground<br />
Pressure<br />
<strong>Tank</strong>s<br />
Operation<br />
Buried model water system tanks are<br />
designed for direct burial and can be<br />
installed in the horizontal or vertical<br />
position. To eliminate the danger of<br />
freezing, tank must be buried below frost<br />
line.<br />
The following steps should be taken when<br />
installing the water system tank.<br />
1. Make sure that tank will be buried<br />
below frost line and above water table.<br />
WARNING<br />
2. Use galvanized or plastic pipe<br />
for section of pipe buried in the ground.<br />
3. Check tank precharge. <strong>Tank</strong> precharge<br />
must be adjusted to the pressure required<br />
by the pressure switch setting (see section<br />
on Operation).<br />
4. Install tank on firm rock-free earth.<br />
5. The water line from the pump to the<br />
tank and from the tank to the pressure<br />
switch location should be the same size.<br />
6. Check system for performance<br />
and inspect for leaks.<br />
7. Backfill hole with sand or rock-free dirt.<br />
Firmly tamp fill to prevent settling.<br />
8. Make note of tank location so that it<br />
can be easily located at a later time.<br />
THESE WATER TANKS ARE DESIGNED FOR OPERATION ON AMBIENT TEMPERATURE WATER SYSTEMS<br />
LIMITED TO A MAXIMUM WORKING PRESSURE OF 125 POUNDS PER SQUARE INCH GAUGE (PSIG). IF YOUR<br />
SYSTEM HAS THE ABILITY TO EXCEED 125 PSIG WORKING PRESSURE (100 PSIG IF THIS IS A PUMP MOUNTED<br />
UNIT), A SUITABLE SAFETY DEVICE MUST BE INSTALLED. THIS CAN BE EITHER A HIGH PRESSURE ELECTRICAL<br />
CUT-OFF SWITCH AND/OR A PRESSURE RELIEF VALVE. FAILURE TO FOLLOW THESE INSTRUCTIONS CAN<br />
CAUSE TANK RUPTURE AND RESULT IN PERSONAL INJURY AND/OR PROPERTY DAMAGE.<br />
Before you operate the system you must check your water system tank and system to ensure proper operation.<br />
All water system tanks are precharged at the factory. All 8 and 11 inch diameter tanks are precharged at 18 psig. The 15<br />
inch diameter tanks are precharged at 28 psig while the 22 and 26 inch diameter tanks are precharged to 38 psig. The<br />
final precharge pressure should always be 2 to 3 psig below the cut-in (pump turns on) pressure of the pressure switch.<br />
Release air or add air as required using the following procedure.<br />
1. Determine the pump cut-in pressure setting. The pressure switch should have this information located on/in the<br />
cover.<br />
2. With no water in the tank, measure the precharge of the water system tank using an accurate pressure gauge at the<br />
air valve (similar to an auto tire gauge).<br />
3. Release air or add air to the tank to make the pressure in the tank 2 to 3 psig LESS than the pump cut-in pressure<br />
setting.<br />
4. It will be necessary to expel air from the piping system on new installations. To do this open all faucets and turn on the<br />
pump. Observe that a mixture of water and air will sputter from the faucet. Run the system until a steady flow of<br />
water exists. Open and close the faucets several times to assure that all air has been removed. If streams do not<br />
become steady, an air leak may exist. Check for leaks on suction side piping.<br />
5. It may be necessary to make final adjustments on the system pressure switch setting because at times the actual<br />
pressure switch setting will vary from what is stated on the cover. Such variation, though not harmful, could cause a<br />
momentary lag of water delivery. To make this adjustment the following steps should be followed:<br />
a. Fill the system until the pump shuts off.<br />
b. Open a faucet and drain the water system tank until the pump starts.<br />
c. If there is a pause in the water flow from the time the water system tank is emptied and the pump starts up<br />
again, decrease the air pressure in the tank until it is 2 to 3 psig below the cut-in pressure setting. (See<br />
Trouble Shooting section 3(a-b) for procedure)<br />
d. Close the faucets and refill the water system tank. Repeat steps (b) and (c) if necessary until there no<br />
longer is a pause in water flow.<br />
5
Trouble<br />
Shooting<br />
IF YOU THINK YOU HAVE A PROBLEM WITH YOUR WATER SYSTEM TANK, YOU SHOULD MAKE THE FOLLOWING<br />
TESTS AND OBSERVATIONS BEFORE YOU CALL YOUR PROFESSIONAL DEALER.<br />
1. Observe water system operation and note any unusual occurrence such as water spurting from a faucet rather than a<br />
steady flow (indicates air in the system) or short cycling of the pump (rapid starts and stops).<br />
2. In the event that evidence of a small leak near the water fitting appears, check at elbow. The introduction of cold<br />
water to a warm tank may form condensation especially in warmer climates. It is important to provide adequate<br />
drainage.<br />
3. Measure the water drawdown by collecting water in a sufficiently sized container from the time the pump is off (cut-off<br />
point) to the time it turns on (cut-in point). Compare the gallons with that shown in the table below for your model of<br />
tank. If the volume is close to that shown in the table, your system is operating properly.<br />
a. Air charge in <strong>Tank</strong>. Turn off electric power to the pump. Open faucet nearby and drain the tank completely.<br />
Check the pressure in the water system tank using a standard, high quality tire gauge. If the air pressure in<br />
the tank is below the pump cut-in setting by more than 3 psi, add air to the tank to make it 2 psi less than the<br />
cut-in setting. Replace the valve stem cap. Check around the air stem using a soapy solution to check for<br />
leaks around welds and seams on the remainder of the tank. If a leak appears on the tank itself then<br />
replacement of the tank will be necessary.<br />
b. Pressure Switch Setting. Start the pump and allow the system pressure to shut off pump. Note both the<br />
cut-in and cut-off pressure values on gauge. The difference should not exceed 25 psi. Adjust the pressure<br />
switch if necessary after shutting off the electric power to show a difference of 20 psi. Instructions from the<br />
pressure switch manufacturer will explain how to do this. Test the system after adjusting the limits. If the<br />
pressure switch can’t maintain the proper differential then it may need replacement, not the tank.<br />
<strong>Tank</strong><br />
Specifications<br />
MODEL<br />
NO.<br />
DIMENSIONS ( INCHES)<br />
DRAWDOWN<br />
IN<br />
GALS.<br />
AT<br />
SYSTEM<br />
OPERATING<br />
PRESSURE<br />
RANGE<br />
OF:<br />
MAX.<br />
DRAWDOWN<br />
VOL.<br />
SYSTEM<br />
CONNECTION<br />
DIAMETER IN-LINE<br />
MODELS<br />
HEIGHT 20/ 40<br />
PSIG<br />
30/ 50<br />
PSIG<br />
40/<br />
60<br />
PSIG<br />
( GALS.<br />
)<br />
V6P 8 1115/ 16<br />
0. 7 0. 6 0. 5<br />
1. 2 3/<br />
4"<br />
NPTM<br />
V15P 11 1315/ 16<br />
1. 7 1. 4 1. 2<br />
2. 7 3/<br />
4"<br />
NPTM<br />
V25P 11 231/ 16<br />
3. 1 2. 6 2. 2<br />
4. 5 3/<br />
4"<br />
NPTM<br />
V45P 153/ 8 211/ 16<br />
5. 1 4. 3 3. 7<br />
8. 4 1"<br />
NPTM<br />
FREE<br />
STANDING<br />
MODELS<br />
V45 153/ 8 2415/ 16<br />
5. 1 4. 3 3. 7<br />
8. 4 1"<br />
NPTF<br />
V60 153/ 8 323/ 8 7. 3 6. 1 5. 3 12. 1 1"<br />
NPTF<br />
V80 153/ 8 399/ 16<br />
8. 9 7. 7 6. 7 13. 9 1"<br />
NPTF<br />
V100 153/ 8 471/ 4 11. 8 9. 9 8. 6 13. 8 1"<br />
NPTF<br />
V140 22 369/ 16<br />
16. 5 13. 9 12. 1 27. 3 1 1/<br />
4"<br />
NPTF<br />
V200 22 485/ 8 23. 9 20. 0 17. 4 39. 3 1 1/<br />
4"<br />
NPTF<br />
V250 26 46 30. 9 25. 9 22. 5 50. 8 1 1/<br />
4"<br />
NPTF<br />
V260 22 6011/ 16<br />
31. 2 26. 2 22. 8 44. 7 1 1/<br />
4"<br />
NPTF<br />
V350 26 613/ 16<br />
42. 9 35. 9 31. 5 70. 5 1 1/<br />
4"<br />
NPTF<br />
FREE<br />
STANDING<br />
MODELS<br />
WITH<br />
BASE<br />
EXTENTION<br />
V80EX 153/ 8 425/ 8 8. 9 7. 7 6. 7 13. 9 1"<br />
NPTF<br />
BURIED<br />
MODELS<br />
V45B 153/ 8 211/ 16<br />
5. 1 4. 3 3. 7<br />
8. 4 1"<br />
NPTM<br />
V60B 153/ 8 281/ 2 7. 3 6. 1 5. 3 12. 1 1"<br />
NPTM<br />
V140B 22 323/ 16<br />
16. 5 13. 9 12. 1 27. 3 1 1/<br />
4"<br />
NPTM<br />
V200B 22 441/ 4 23. 9 20. 0 17. 4 39. 3 1 1/<br />
4"<br />
NPTM<br />
MOUNTING<br />
MODELS<br />
* V45MP/PST 153/ 8 2511/ 16<br />
5. 1 4. 3 3. 7<br />
8 . 4 3/ 4"<br />
NPTF<br />
* V60MP/PST 153/ 8 331/ 8 7. 3 6. 1 5. 3 1 2.<br />
1 3/ 4"<br />
NPTF<br />
*Maximum working pressure of tank 100 PSIG; all other models above 125 PSIG.<br />
6
Limited<br />
Warranty<br />
Part No. 205270-000<br />
A.O. Smith Corporation, the warrantor, extends the following LIMITED WARRANTY to the owner of this water system tank.<br />
1. TANK<br />
If within five years after installation the tank or a part thereof shall prove upon examination by the warrantor to be<br />
defective in material or workmanship, the warrantor, at his option, shall exchange or repair such part or portion. The<br />
warranty on the replacement tank will be limited to the unexpired term of the original warranty.<br />
2. CONDITIONS AND EXPECTATIONS<br />
This warranty shall apply only when the tank is installed in accordance with local plumbing and building codes,<br />
ordinances and regulations, and good industry practices. In addition, a high pressure electrical cut-off switch and/or a<br />
pressure relief valve must be installed when the tank is installed on an ambient temperature water system whose<br />
maximum working pressure has the ability to exceed 125 pounds per square inch gauge (psig). (100 pounds per<br />
square inch guage (psig) on certain models)<br />
a. This warranty shall apply only when the water system is used:<br />
(1) on ambient temperature water systems at pressures not exceeding the working<br />
pressure for the water system;<br />
(2) in the United States, its territories or possessions, and Canada.<br />
b. Any accident to the water system tank, any misuse, abuse (including freezing) or alteration of it, any operation of<br />
it in a modified form, any attempt to repair tank leaks will void this warranty.<br />
3. SERVICE AND REPAIR EXPENSE<br />
Under this limited warranty the warrantor will provide only a replacement tank or part thereof. The owner is<br />
responsible for all other costs. Such costs may include but are not limited to:<br />
a. Labor charges for service, removal, repair, or reinstallation of the water system or any component part,<br />
b. Shipping and delivery charges for forwarding the new tank or replacement part from the nearest distributor and<br />
returning the claimed defective tank or part to such distributor except in the state of California where such<br />
charges are the manufacturer’s responsibility.<br />
4. LIMITATION ON IMPLIED WARRANTIES<br />
Implied warranties, including any warranty of merchantability imposed on the sale of this tank under state law are<br />
limited to five (5) year duration for the tank or any of its parts. Some states do not allow limitations on how long an<br />
implied warranty lasts, so the above limitation may not apply to you.<br />
5. CLAIM PROCEDURES<br />
Any claim under this warranty should be initiated with the dealer who sold the tank, or with any other dealer handling<br />
the warrantor’s products. If this is not practicable, the owner should contact:<br />
U.S Customers Canadian Customers<br />
A.O. Smith Corporation A.O. Smith Corporation<br />
5621 W. 115th Street P.O. Box 310-768 Erie Street<br />
Alsip, IL 60803 Stratford, Ontario N5A 6T3<br />
800-323-2636 or 708-489-4600 Telephone: (519) 271-5800<br />
a. The warrantor will only honor replacement with identical or similar tank or parts thereof which are manufactured<br />
or distributed by the warrantor.<br />
b. Dealer replacements are made subject to in-warranty validation by warrantor.<br />
6. DISCLAIMERS<br />
NO OTHER EXPRESS WARRANTY HAS BEEN OR WILL BE MADE ON BEHALF OF THE WARRANTOR WITH<br />
RESPECT TO THE TANK OR THE INSTALLATION, OPERATION, REPAIR OR REPLACEMENT OF THE TANK.<br />
THE WARRANTOR SHALL NOT BE RESPONSIBLE FOR WATER DAMAGE, LOSS OF USE OF THE UNIT,<br />
INCONVENIENCE, LOSS OR DAMAGE TO PERSONAL PROPERTY, OR OTHER CONSEQUENTIAL DAMAGE.<br />
THE WARRANTOR SHALL NOT BE LIABLE BY VIRTUE OF THIS WARRANTY OR OTHERWISE FOR DAMAGE<br />
TO ANY PERSONS OR PROPERTY, WHETHER DIRECT OR INDIRECT, AND WHETHER ARISING IN<br />
CONTRACT OR IN TORT.<br />
a. Some states do not allow the exclusion or limitation of the incidental or consequential damages, so the above<br />
limitation or exclusion may not apply to you.<br />
b. This warranty gives you specific legal rights, and you may also have other rights which vary from<br />
state to state.<br />
Fill in the following for your own reference. Keep it. Registration is not a condition of warranty. The model<br />
and serial number are found on the water system tank.<br />
Model No.______________Serial No.____________________________Date Installed_________________<br />
Dealer’s Name__________________________________________________________________________<br />
Dealer’s Address____________________________________________Phone No.____________________<br />
City & State (Provincial)_______________________________________Zip (Postal Code)______________<br />
Dangerous Goods Permit No. SU 5099 (Ren2) - by road or rail vehicle only, expiration date: March 31, 2003 (Pending<br />
Renewals)<br />
7
20<br />
Part No. 205270-000