MAC2841 MACmark Tuning Films Application Guide - MACtac
MAC2841 MACmark Tuning Films Application Guide - MACtac
MAC2841 MACmark Tuning Films Application Guide - MACtac

Create successful ePaper yourself
Turn your PDF publications into a flip-book with our unique Google optimized e-Paper software.
Your car, your personality<br />
Vehicle <strong>Application</strong> <strong>Guide</strong><br />
<strong>MACtac</strong> ® TAKES YOU THERE.
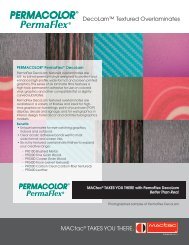
<strong>MACmark</strong> ® <strong>Tuning</strong> <strong>Films</strong> <strong>Application</strong> Overview<br />
Thank you for your interest in <strong>MACtac</strong> ® ’s <strong>Tuning</strong> Film Series. Most of<br />
the <strong>MACmark</strong> <strong>Tuning</strong> <strong>Films</strong> feature the micro-structured air egress<br />
technology and all are repositionable for a successful application.<br />
1) Our Textured series is best suited for flat to moderately curved<br />
surfaces normally found in a typical vehicle wrap. The Silver<br />
Moon, Black Leather, Carbon Fiber, and Brushed Metal vinyl films*,<br />
are easy to handle, fast to apply and brilliant as a final product.<br />
Recommended for flat to simple curves such as:<br />
a. Hoods<br />
b. Spoilers<br />
c. Roofs<br />
d. Interior dash<br />
e. Accessories such as laptops, cell phones, etc.<br />
2) Our Sublime and Iridescent <strong>Films</strong> are also suited for flat and<br />
moderately curved surfaces; however, they are exceptional<br />
on complex surfaces. This 3.4 mil proprietary vinyl film is an<br />
easy to handle high gloss or zero glare matte finished product.<br />
These products are recommended for 2 and 3-dimensional<br />
curves such as:<br />
a. Everything above plus;<br />
b. Fleet<br />
c. Moderate to complex automotive wraps<br />
* Please refer to MAC2839 for more information on all colors and<br />
finishes available.
<strong>MACmark</strong> ® <strong>Tuning</strong> <strong>Films</strong> <strong>Application</strong> Overview<br />
Selecting the media for application:<br />
a) Did you select the correct media for your application? – Do not<br />
attempt to use the thicker, textured <strong>Tuning</strong> <strong>Films</strong> on complex curves.<br />
b) <strong>Tuning</strong> <strong>Films</strong> are not designed or recommended to be printed or<br />
laminated. However, solvent and latex inks will print nicely on most<br />
finishes if desired.<br />
c) Is the media within proper shelf-life and stored in a reasonably<br />
controlled environment? (Ideal is 60° - 80°F @ 50% relative humidity)<br />
Pre-application Planning (<strong>Application</strong> Checklist):<br />
Prior to application, plan your steps for a successful wrap by using the<br />
following checklist:<br />
1) The ideal location for an installation is indoors in a controlled<br />
environment (60-80° F). Minimize changes in temperature, moisture,<br />
wind and dust.<br />
2) Remove all trim items prior to the wrap. This includes: license fixtures,<br />
antennas, name plates, lighting fixtures, etc. Keep items organized<br />
and don’t remove items you cannot comfortably put back on.<br />
3) Inspect the vehicle and fill out the proper inspection sheet (online)<br />
and send it to <strong>MACtac</strong>®. This is required to qualify for the <strong>MACtac</strong><br />
Vehicle Wrap Warranty. (TA2501)<br />
4) The surface of the vehicle must be cleaned at least 12 hours prior to<br />
application and kept indoors to allow proper drying. If not possible,<br />
morning dew will re-wet critical areas, like seams and rivets which<br />
must be re-dried prior to application. Some of the modern finishes<br />
and finish enhancers like waxes and paint conditioners require using<br />
Xylene (a.k.a. Xylol) as a cleaner to remove.<br />
i) Ref: TA2032 (Technical Assistance bulletin) for complete cleaning<br />
recommendations.
5) Just prior to application, the vehicle should be wiped down with<br />
isopropyl alcohol. Wipe with a wet rag and then towel off with a<br />
dry rag, do not simply allow evaporation. Pay special attention to<br />
edges, seams, around moldings and gaskets and where objects were<br />
removed.<br />
6) The recommended surface temperature of the vehicle for<br />
application must be above 60°F.<br />
7) Layout and measure your graphics and tape or magnet to the<br />
vehicle to ensure everything lines up correctly and to avoid seams<br />
wherever possible.<br />
Tool kit:<br />
The standard toolkit for vehicle applications is:<br />
• A temperature adjustable industrial heat gun (propane torch is only<br />
recommended for installation of gloss <strong>Tuning</strong> <strong>Films</strong>)<br />
• No-touch temperature gauge<br />
• A soft squeegee or a hard squeegee with a low friction, scratch<br />
free sleeve<br />
• A sharp knife with many replacement blades!<br />
• Tape measure and positioning tape<br />
• Air release tool (straight pin)<br />
• Rivet brush for riveted applications<br />
• Cotton gloves<br />
• And a helper (if possible)!<br />
• 610 tape for snap tape test<br />
• Masking tape or magnets<br />
<strong>Application</strong> Basics:<br />
1) <strong>Application</strong> begins at the back of the vehicle for vertical panels and<br />
from the bottom up for horizontal panels. This allows for all overlaps<br />
to face the back or the bottom which prevents wind and rain from<br />
causing a premature failure. Seams should have a 1/2 to 1 inch<br />
overlap.<br />
a) Many vehicles are able to be wrapped without seams and this<br />
will achieve a cleaner look. Plan ahead if there are areas which<br />
require seams to make them as small and unnoticeable as<br />
possible. Avoid overlapping textured <strong>Tuning</strong> <strong>Films</strong>.<br />
b) Use firm pressure on the squeegee to apply the media to the<br />
surface, starting at the high points in the middle and working out<br />
toward the edges.<br />
2) For channels, wherever possible, lay the media through the channel<br />
rather than bridging and stretching the media. Any vinyl film can<br />
exhibit shrinking or tenting when overstretched or overheated.<br />
3) In many difficult areas, a thin layer of an adhesive promoter or acrylic<br />
spray primer can enhance adhesion. Be sure to use the primer<br />
sparingly and allow it to completely cure according to the directions<br />
on the can, prior to graphic application.
4) To properly bridge a gap:<br />
a) Apply the film to the flat areas first.<br />
b) Use heat to soften the film, somewhere around 180° to 200°F.<br />
c) Immediately push the film into the groove, starting at the middle<br />
of the groove and working out to both sides. Sometimes using a<br />
cotton glove or soft cloth instead of a squeegee is the way to go.<br />
d) Since the film cools quickly, it is important to work in small areas and<br />
continue to heat the film as your work moves along.<br />
e) Finally, after the film has been applied you must heat the film to a<br />
higher temperature, being careful to not use too much heat on<br />
matte or textured films, to eliminate the stretching stresses created<br />
in this application. Move the heat source slowly. Now that the film<br />
has been applied you are also heating the body of the vehicle and<br />
it takes more heat to achieve the final temperature requirement.<br />
Using a no-touch temperature gauge is strongly recommended to<br />
insure this very important step is done correctly.<br />
5) Edges, seams and trim should now be cut and re-squeegeed to<br />
ensure good adhesion. It is a very good idea to also use high heat<br />
along these areas to speed up the adhesive build and ensure a good<br />
application.<br />
a) Do not wrap films around 180° turns as this will most likely result in<br />
failure.<br />
b) Do not wrap films under the edges of the car or into areas that do<br />
not clean well.<br />
6) <strong>MACtac</strong> <strong>Tuning</strong> <strong>Films</strong> employ air egress technology that allows air to<br />
flow easily in all directions. This will minimize the need to pop bubbles.<br />
However, it is still possible to get an occasional bubble. Should a<br />
bubble appear use an air release tool or pin to pop the bubble. Do<br />
NOT use a knife as this starts a tear which can result in a failure.
Tips and Tricks for Successful <strong>Application</strong>s:<br />
• Know your surface and its limitations (Do not wrap gaskets, rust,<br />
rubber seals, ABS plastic, etc.)<br />
• Fill out and submit the vehicle inspection report as required for<br />
warranty coverage.<br />
• Provide a controlled environment and a clean vehicle.<br />
• Use a felt squeegee or a felt edged hard squeegee to avoid<br />
scratching the films.<br />
• Always use a sharp knife for trimming (snap-off or replace blades<br />
frequently).<br />
• Use an air release tool, not a knife, to relieve air bubbles.<br />
• Heated media applied to cold metal will cool quickly. Apply<br />
enough heat to do the job correctly and work in small areas.<br />
• Use heat to soften the film prior to stretching.<br />
• Use heat to relax the film after it has been stretched into the<br />
channels or complex curves. This also allows the adhesive to build<br />
to a high bond quickly.<br />
• Seams and edges are common failure points. Be sure that edges<br />
are clean and dry. Cut all seams and then heat and re-burnish all<br />
edges to insure a good bond.<br />
• Do not over-heat or over-stretch the media. Channels that result in<br />
the film being stretched too far must be cut. Overheating matte or<br />
textured films can result in glossing and/or loss of texture.<br />
• After all the film has been applied, go back and apply heat to the<br />
graphic to a high temperature with a heat gun in the areas the<br />
vinyl has been stretched to relieve stresses created by stretching.<br />
Use care with a heat gun to apply a liberal amount of heat, and<br />
avoid heating matte or textured films over 180° F.<br />
• Trimming and Finishing Around Windows: Contact with Rubber<br />
Window Seals will cause the adhesive to fail. Therefore, graphics<br />
need to be trimmed off the rubber seals by 1/8 inch minimum or<br />
tucked under the rubber.<br />
<strong>MACtac</strong> ® TAKES YOU THERE.<br />
©2013 Morgan Adhesives Company<br />
<strong>MAC2841</strong> (02/13)<br />
<strong>MACtac</strong> is a registered trademark of<br />
Morgan Adhesives Company<br />
<strong>MACtac</strong> North America<br />
4560 Darrow Road<br />
Stow, Ohio 44224-1898<br />
phone: 866.622.8223<br />
fax: 888-321-8834<br />
email: <strong>MACtac</strong>.Americas@bemis.com<br />
web: <strong>MACtac</strong>.com/graphics