Visa TLMS User Guide - Australia Post
Visa TLMS User Guide - Australia Post
Visa TLMS User Guide - Australia Post

You also want an ePaper? Increase the reach of your titles
YUMPU automatically turns print PDFs into web optimized ePapers that Google loves.
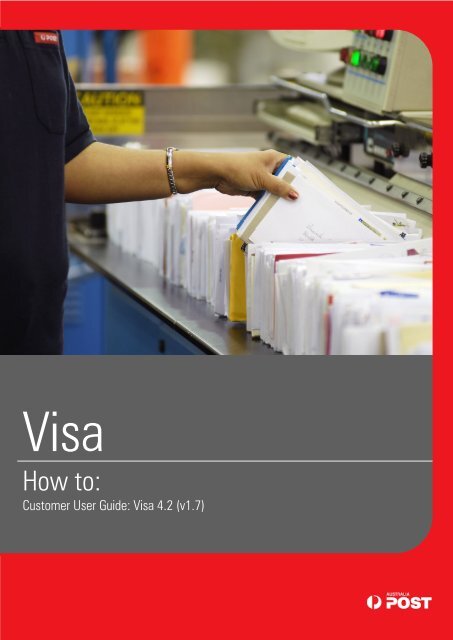
<strong>Visa</strong><br />
How to:<br />
Customer <strong>User</strong> <strong>Guide</strong>: <strong>Visa</strong> 4.2 (v1.7)
<strong>Visa</strong> Tray Label Management System How To: <strong>User</strong> <strong>Guide</strong><br />
National Label Operations - v1.7<br />
This page has been intentionally left blank<br />
2
<strong>Visa</strong> Tray Label Management System How To: <strong>User</strong> <strong>Guide</strong><br />
National Label Operations - v1.7<br />
Version No Date Updated by<br />
Version 1.0 October 2004 S Cooke<br />
Version 1.1 March 2005 S Cooke<br />
Version 1.2 July 2005 S Cooke<br />
Version 1.3 December 2005 J Fowkes<br />
Version 1.4 December 2005 S Cooke<br />
Version 1.5 September 2010 J Fowkes<br />
Version 1.6 November 2011 D Lau / J Fowkes<br />
Version 1.7 June 2012 J Fowkes / D Lau<br />
Simple ways to ensure your labels do their job<br />
Ensure the label has the correct destination. Mail trays are sent to the state and mail centre that appears<br />
on the label -–so if the label is wrong, the mail will end up in the wrong place<br />
Don‟t amend any part of the label with pen or white-out. These changes won‟t be reflected in the<br />
barcode and so won‟t be recognised by the Tray Management System (TMS) technology<br />
Don‟t photocopy labels or use ones that are damaged or defaced. The inferior quality barcode may not<br />
be readable<br />
Ensure that the correct labels identify small letter trays and large letter trays – otherwise mail trays<br />
can get stuck in machinery<br />
Ensure that the right product is in the mail tray. The right label doesn‟t do any good if the contents are<br />
wrong<br />
Ensure that your label software is up-to-date and you have the correct barcode information. Also ensure<br />
that your printer is maintained so that the barcode is always clean and readable.<br />
3
<strong>Visa</strong> Tray Label Management System How To: <strong>User</strong> <strong>Guide</strong><br />
National Label Operations - v1.7<br />
This page has been intentionally left blank<br />
4
<strong>Visa</strong> Tray Label Management System How To: <strong>User</strong> <strong>Guide</strong><br />
CHAPTER 1: WHAT IS VISA? .............................................................................................................................. 9<br />
1.1. WHAT ARE TRAY LABELS? ................................................................................................................................ 9<br />
1.2. HOW ARE VISA LABELS MANAGED? ................................................................................................................ 10<br />
1.3. WHAT ARE THE VISA USER INTERFACES? .......................................................................................................... 10<br />
1.3.1. Explorer Interface ............................................................................................................................. 10<br />
1.3.2 <strong>Visa</strong> Touch Interface......................................................................................................................... 11<br />
1.3.3. Command Line Interface .................................................................................................................. 11<br />
Notes on Command Line ...................................................................................................................................... 11<br />
1.4. WHAT ARE THE MINIUMUM STANDARDS FOR VISA LABELS? ............................................................................... 11<br />
1.4.1. Printing Specification........................................................................................................................ 11<br />
1.4.2 Barcode Verification ......................................................................................................................... 12<br />
1.4.3. Quiet Zones ...................................................................................................................................... 12<br />
CHAPTER 2: HOW TO CREATE A STANDARD MAIL LABEL PLAN........................................................................ 13<br />
2.1 CREATING A STANDARD MAIL LABEL PLAN ....................................................................................................... 13<br />
CHAPTER 3: HOW TO IMPORT / EXPORT LABEL PLAN FILES .............................................................................. 15<br />
3.1 LABEL PLAN IMPORT FILE FORMAT VERSION 3.0 (FOR CUSTOMER USE) ................................................................. 15<br />
3.1.1 Sample File – Format Version 3.0 .................................................................................................... 15<br />
3.1.2 Sample File – Format Version 3.1 .................................................................................................... 19<br />
3.2 LABEL PLAN IMPORT FILE FORMAT VERSION 2.7 (FOR LABEL PLAN TRANSFER) ....................................................... 20<br />
3.3 HOW TO IMPORT A LABEL PLAN FROM TEXT FILE ............................................................................................... 20<br />
3.3.1 Using Command Line ....................................................................................................................... 21<br />
3.4 HOW TO EXPORT A LABEL PLAN TO TEXT FILE .................................................................................................... 21<br />
CHAPTER 4: HOW TO CREATE A STANDARD MAIL LABEL ................................................................................. 23<br />
4.1 HOW TO CREATE A CLEAN MAIL LABEL ............................................................................................................ 23<br />
4.1.1 Product ............................................................................................................................................ 23<br />
4.1.2 Destination ....................................................................................................................................... 23<br />
4.2 HOW TO CREATE A FULL RATE LABEL ............................................................................................................... 24<br />
4.2.1 Product ............................................................................................................................................ 24<br />
4.2.2 Destination ....................................................................................................................................... 24<br />
4.3 HOW TO CREATE AN IMPACT MAIL LABEL ......................................................................................................... 24<br />
4.3.1 Product ............................................................................................................................................ 24<br />
4.3.2 Destination ....................................................................................................................................... 25<br />
4.4 HOW TO CREATE A PRESORT BSP LABEL ......................................................................................................... 25<br />
4.4.1 Product ............................................................................................................................................ 25<br />
4.4.2 Destination ..................................................................................................................................... 25<br />
4.5 HOW TO CREATE A PRESORT STATE RESIDUE LABEL ........................................................................................... 26<br />
4.5.1 Product ............................................................................................................................................ 26<br />
4.5.2 Destination ....................................................................................................................................... 26<br />
4.6 HOW TO CREATE A PRINTPOST POSTCODE LABEL .............................................................................................. 27<br />
4.6.1 Product ............................................................................................................................................ 27<br />
4.6.2 Destination ....................................................................................................................................... 27<br />
4.7 HOW TO CREATE A PRINTPOST SORT PLAN LABEL ............................................................................................ 27<br />
4.7.1 Product ............................................................................................................................................ 27<br />
4.7.2 Destination ....................................................................................................................................... 28<br />
4.8 HOW TO CREATE A PRINTPOST STATE RESIDUE LABEL ....................................................................................... 28<br />
4.8.1 Product ............................................................................................................................................ 28<br />
4.8.2 Destination ....................................................................................................................................... 28<br />
CHAPTER 5: HOW TO IMPORT UNADDRESSED LABEL PLAN FILES .................................................................... 29<br />
5.1 IMPORTING AN UNADDRESSED MAIL LABEL PLAN .............................................................................................. 29<br />
National Label Operations - v1.7<br />
5<br />
Table of Contents
<strong>Visa</strong> Tray Label Management System How To: <strong>User</strong> <strong>Guide</strong><br />
CHAPTER 6: HOW TO CREATE AN UNADDRESSED MAIL LABEL PLAN ................................................................30<br />
6.1 CREATING AN UNADDRESSED MAIL LABEL PLAN ................................................................................................ 30<br />
CHAPTER 7: HOW TO CREATE AN UNADDRESSED MAIL LABEL .........................................................................31<br />
7.1 CREATING AN UNADDRESSED MAIL LABEL ........................................................................................................ 31<br />
7.1.1 Product ............................................................................................................................................ 31<br />
7.1.2 Destination ....................................................................................................................................... 31<br />
7.1.3 Attributes ......................................................................................................................................... 32<br />
CHAPTER 8: HOW TO MAKE CHANGES TO A LABEL PLAN .................................................................................33<br />
8.1 HOW TO COPY LABEL PLANS .......................................................................................................................... 33<br />
8.2. HOW TO EDIT LABEL PLANS ............................................................................................................................ 34<br />
8.3 HOW TO PRINT LABEL PLANS .......................................................................................................................... 34<br />
8.3.1. Using Command Line ....................................................................................................................... 35<br />
8.4. HOW TO DELETE LABEL PLANS ........................................................................................................................ 35<br />
CHAPTER 9: HOW TO MAKE CHANGES TO A LABEL ..........................................................................................36<br />
9.1. HOW TO EDIT LABELS .................................................................................................................................... 36<br />
9.2. HOW TO ADD TEXT TO LABELS ........................................................................................................................ 36<br />
9.3. HOW TO DELETE LABELS ................................................................................................................................ 37<br />
9.4. HOW TO PRINT LABELS FROM CREATE/EDIT ....................................................................................................... 37<br />
9.5. HOW TO COPY LABELS BETWEEN LABEL PLANS ................................................................................................. 37<br />
9.6. HOW TO LABEL SEARCH FUNCTION .................................................................................................................. 39<br />
9.7. HOW TO PREVIEW A LABEL ............................................................................................................................. 40<br />
9.7.1. How to copy a Label Image to Clipboard .......................................................................................... 40<br />
9.7.2. How to display a Label Image at Full Size ........................................................................................ 40<br />
9.8. HOW TO PRINT LABELS FOR DESTINATION ......................................................................................................... 41<br />
9.9. HOW TO MOVE STACKERS ............................................................................................................................. 41<br />
9.10. HOW TO FOR INVALID LABELS ......................................................................................................................... 42<br />
CHAPTER 10: HOW TO USE THE VISA TOUCH ....................................................................................................43<br />
10.1. LABEL PLAN SCREEN ..................................................................................................................................... 43<br />
10.2. STACKERS SCREEN ........................................................................................................................................ 43<br />
10.3. SYSTEM SCREEN ........................................................................................................................................... 44<br />
10.4. MACHINE SCREEN ......................................................................................................................................... 45<br />
CHAPTER 11: HOW TO – OTHER VISA INFORMATION ........................................................................................46<br />
11.1 REPORTS ..................................................................................................................................................... 46<br />
11.2 PRINTING A REPORT ....................................................................................................................................... 46<br />
11.3 MAINTAINING WORKSTATION INFORMATION ..................................................................................................... 47<br />
11.3.1. Workstation Information Details ....................................................................................................... 47<br />
11.4 VIEWING LOG FILES ....................................................................................................................................... 47<br />
11.4.1. <strong>Visa</strong> Explorer Interface ..................................................................................................................... 47<br />
11.4.2. Command Line Interface .................................................................................................................. 48<br />
11.5 PRINTER REQUIREMENTS ................................................................................................................................ 48<br />
11.5.1. Label Printer Settings ....................................................................................................................... 48<br />
11.6 TRAY HYGIENE .............................................................................................................................................. 49<br />
11.6.1. Tray Labels ....................................................................................................................................... 49<br />
11.6.2. Label Pockets ................................................................................................................................... 49<br />
11.6.3. Damaged Trays ................................................................................................................................ 49<br />
National Label Operations - v1.7<br />
6<br />
Table of Contents
<strong>Visa</strong> Tray Label Management System How To: <strong>User</strong> <strong>Guide</strong><br />
Figures<br />
Figure 1.1 – <strong>Visa</strong> Tray Label ........................................................................................................................................................................................ 9<br />
Figure 1.2 - <strong>Visa</strong> Explorer Screen .............................................................................................................................................................................. 10<br />
Figure 1.3 - <strong>Visa</strong> Touch ............................................................................................................................................................................................. 11<br />
Figure 2.1 - Create Label Plan Screen ...................................................................................................................................................................... 13<br />
Table 3.1. Import File Format 3.0 & 3.1 .................................................................................................................................................................... 16<br />
Table 3.2. Fields – Import File Format 3.0 & 3.1 ...................................................................................................................................................... 17<br />
Figure 3.3 – Import Label Plan Dialogue Box............................................................................................................................................................. 20<br />
Figure 3.4 – Import Label Plan Screen ...................................................................................................................................................................... 20<br />
Figure 3.5 – Export Label Plan Dialogue Box ............................................................................................................................................................. 21<br />
Figure 4.1 - Create Label - Clean Mail ...................................................................................................................................................................... 23<br />
Figure 4.2 - Create Label - Full Rate ......................................................................................................................................................................... 24<br />
Figure 4.3 - Create Label – Impact Mail (<strong>Post</strong>code option) ..................................................................................................................................... 25<br />
Figure 4.4 - Create Label – PreSort BSP .................................................................................................................................................................. 26<br />
Figure 4.5 - Create Label – PreSort State Residue .................................................................................................................................................. 26<br />
Figure 4.6 - Create Label – PrintPOST <strong>Post</strong>code ...................................................................................................................................................... 27<br />
Figure 4.7 - Create Label – PrintPOST Sort Plan ...................................................................................................................................................... 28<br />
Figure 4.8 - Create Label – PrintPOST State Residue .............................................................................................................................................. 28<br />
Figure 5.1 – Import Label Plan Dialogue Box – Unaddressed Mail ........................................................................................................................... 29<br />
Figure 5.2 – Import Label Plan screen – Unaddressed Mail ................................................................................................................................... 29<br />
Figure 6.1 – Create Label Plan screen – Unaddressed Mail ..................................................................................................................................... 30<br />
Figure 7.1 – Create Label – Unaddressed Mail ......................................................................................................................................................... 31<br />
Figure 7.2 – Unaddressed Mail Attributes ................................................................................................................................................................ 32<br />
Figure 8.1 - Copy Label Plan Screen......................................................................................................................................................................... 33<br />
Figure 8.2 - Edit Label Plan Screen ........................................................................................................................................................................... 34<br />
Figure 8.3 - Print Conformation Screen .................................................................................................................................................................... 34<br />
Figure 9.1 - Edit Label Screen .................................................................................................................................................................................. 36<br />
Figure 9.2 - Additional Text ....................................................................................................................................................................................... 37<br />
Figure 9.3 - Copy Labels ........................................................................................................................................................................................... 38<br />
Figure 9.4 - Paste Label Options .............................................................................................................................................................................. 38<br />
Figure 9.5 - Labels Pasted to Another Label Plan ..................................................................................................................................................... 39<br />
Figure 9.6 - Label Search Screen ............................................................................................................................................................................. 39<br />
Figure 9.7 - No Results Screen after Search ........................................................................................................................................................... 40<br />
Figure 9.8 - Full Size Label Screen ........................................................................................................................................................................... 40<br />
Figure 9.9 - Print Destination Screen ....................................................................................................................................................................... 41<br />
Figure 9.10 - Move Stacker Screen .......................................................................................................................................................................... 41<br />
Figure 9.11 - <strong>Visa</strong> Explorer Invalid Label .................................................................................................................................................................... 42<br />
Figure 10.1 – Label Plan Screen in <strong>Visa</strong> Touch ......................................................................................................................................................... 43<br />
Figure 10.2 – Stacker Screen in <strong>Visa</strong> Touch ............................................................................................................................................................. 44<br />
Figure 10.4 – System Screen in <strong>Visa</strong> Touch ............................................................................................................................................................. 44<br />
Figure 10.5 – Machine Screen in <strong>Visa</strong> Touch ............................................................................................................................................................ 45<br />
Figure 11.1 - An All Label Plans Report .................................................................................................................................................................... 46<br />
Figure 11.2 - Maintain Workstation Information Screen .......................................................................................................................................... 47<br />
Figure 11.3 Open Log File Screen ............................................................................................................................................................................ 47<br />
Figure 11.4 - Label Printer Setup Screen .................................................................................................................................................................. 48<br />
Table 11.5. Tray Hygiene Problems .......................................................................................................................................................................... 49<br />
Figure 11.6 – Label Pocket........................................................................................................................................................................................ 49<br />
National Label Operations - v1.7<br />
7<br />
Table of Contents
<strong>Visa</strong> Tray Label Management System How To: <strong>User</strong> <strong>Guide</strong><br />
National Label Operations - v1.7<br />
This page has been intentionally left blank<br />
8
<strong>Visa</strong> Tray Label Management System How To: <strong>User</strong> <strong>Guide</strong><br />
Chapter 1: What is <strong>Visa</strong>?<br />
The <strong>Visa</strong> Tray Label Management System (<strong>TLMS</strong>) is an <strong>Australia</strong> <strong>Post</strong>-developed software application. <strong>Visa</strong> is designed to print barcoded tray<br />
labels for a range of mail products.<br />
1.1. What are Tray Labels?<br />
Tray labels are inserted into mail trays to route trays through the postal network to their correct destination.<br />
An example of a <strong>Visa</strong> tray label – HandSort Large Letter label from Dandenong LC – is described below.<br />
Sub Destination<br />
National Label Operations - v1.7<br />
Barcode<br />
Human readable<br />
Barcode text<br />
Tray Size<br />
Destination<br />
<strong>Visa</strong> Version Number &<br />
Application Identifier<br />
Product Time<br />
Figure 1.1 – <strong>Visa</strong> Tray Label<br />
The label barcode can be scanned throughout the <strong>Australia</strong> <strong>Post</strong> mail network. Within the barcode is the Tray Destination Identifier (TDID) which<br />
determines the route of mail trays within the <strong>Australia</strong> <strong>Post</strong> mail network. The label also has text so that people can read it and determine where<br />
the tray is to go. See below for the Label Element Descriptions:<br />
Destination – describes Sorting destination where mail tray will go, e.g. Mail Centre or State<br />
Sub Destination – describes mail sortplan category<br />
Barcode – scanned throughout the <strong>Australia</strong> <strong>Post</strong> Mail Network to assist transporting the mail to the next mail sorting station of the<br />
Mail network<br />
IATA. LongHaul or DC Code – visually assists the identification of the mail destination<br />
Tray Size Indicator – visually provides identification of the size of the mail tray. This is a 4mm black bar running from top to bottom of<br />
the right edge of the label for large letter trays. It will not be printed for small letter trays<br />
Tray Size – describes the size of the mail tray<br />
Product – describes the content of the mail tray<br />
Details – shows Source, Machine ID and Sort Plan name, as well as Stacker number<br />
<strong>Visa</strong> Version Number – shows the visa software version number<br />
<strong>Visa</strong> Application Identifier – shows first 5 digits.<br />
Customer & State – shows the name of the customer and state where mail is lodged<br />
Phone Number – shows the contact phone number of the customer<br />
Job Number – shows the job number of the lodgement<br />
Date – shows the date of the mail lodgement<br />
For more details on the label elements, refer to the Barcode Label Specification V3.0 document.<br />
9<br />
IATA, Intrastate<br />
code<br />
Date<br />
Tray Size Indicator<br />
Customer Name &<br />
Sate<br />
Phone Number
<strong>Visa</strong> Tray Label Management System How To: <strong>User</strong> <strong>Guide</strong><br />
1.2. How Are <strong>Visa</strong> Labels Managed?<br />
<strong>Visa</strong> uses Label Plans to store labels. A Label Plan is a collection of labels, and holds the common data for the set of labels. A Label Plan also holds<br />
the customer details for printing of all labels from the plan.<br />
It is sensible to group similar type labels into a plan.<br />
<strong>Visa</strong> provides three user interfaces to print Label Plans:<br />
The <strong>Visa</strong> Explorer interface is mainly used for creating and editing labels.<br />
The <strong>Visa</strong> Touch interface is used for printing labels.<br />
The Command Line interface is used for automating through DOS command prompt, Run command in the Windows Start menu or in a<br />
batch file.<br />
Label Plans are managed by grouping them by facility, machine type and mail machine IDs.<br />
1.3. What are the <strong>Visa</strong> <strong>User</strong> Interfaces?<br />
There are two interfaces available<br />
<strong>Visa</strong> Explorer<br />
<strong>Visa</strong> Touch<br />
1.3.1. Explorer Interface<br />
The Explorer interface consists of a TreeView menu on the left side of the window and a ListView menu on the right hand side.<br />
Mouse menus are available by right-clicking on items in the TreeView and ListView.<br />
Click a folder in the TreeView to display its contents in the ListView.<br />
Click the plus (+) sign to display the contents of a folder, or click the minus (-) to collapse the contents.<br />
You can also display the contents of a folder by clicking on it in either the TreeView or the ListView.<br />
National Label Operations - v1.7<br />
TreeView ListView<br />
Figure 1.2 - <strong>Visa</strong> Explorer Screen<br />
10
<strong>Visa</strong> Tray Label Management System How To: <strong>User</strong> <strong>Guide</strong><br />
1.3.2 <strong>Visa</strong> Touch Interface<br />
The <strong>Visa</strong> Touch interface allows users to select and print labels. It can be used on both touch-sensitive monitors, and normal monitors with mouse or<br />
keyboard.<br />
The sub screens on the <strong>Visa</strong> Touch are colour coded per function. The colour of the button, and the foreground and background colours for these<br />
screens are matched.<br />
The <strong>Visa</strong> Touch consists of four sub-screens as described in TUChapter 10: How to Use the <strong>Visa</strong> Touch.<br />
1.3.3. Command Line Interface<br />
The Command Line interface provides the ability to import, print and delete a Label Plan by executing a particular command through DOS command<br />
prompt or via Run command in the Windows Start menu or in a batch file.<br />
Notes on Command Line<br />
National Label Operations - v1.7<br />
Press these buttons to move between alternative screens<br />
File name extension (.lpf) in Command Line must be entered in lower case only.<br />
1.4. What Are the Minimum Standards for <strong>Visa</strong> Labels?<br />
The following comprise the make up of a <strong>Visa</strong> label<br />
Printing Specification<br />
Barcode Verification<br />
Quiet Zones<br />
<br />
1.4.1 Printing Specification<br />
1. Minimum image density of 1.25 by Optical Density Method (black).<br />
2. The minimum width of the narrow bar (X dimension) to be within the following ranges to minimise pixilation errors by the printer: the bar-<br />
code shall be printed vertically (picket fence) with a minimum barcode height of 12 mm (within 0.380 mm and 0.420 mm).<br />
3. The barcode printed on labels must be free of picket fence type errors whereby faulty printing causes a bar to be misprinted without<br />
changing the visual appearance of the barcode.<br />
4. The barcode shall be of sufficient contrast when scanned at 635nm wavelength (red) and through <strong>Australia</strong> <strong>Post</strong> standard plastic label<br />
pockets (SAP 8828889).<br />
Figure 1.3 - <strong>Visa</strong> Touch<br />
11
<strong>Visa</strong> Tray Label Management System How To: <strong>User</strong> <strong>Guide</strong><br />
5. The optical characteristics of the barcode shall be sufficient to be readable:<br />
National Label Operations - v1.7<br />
using a contact scanner (wand reader)<br />
at a distance of up to 0.5 metres using a non contact scanner; and<br />
using a fixed scanner on a conveyor moving at speeds of up to 2 metres per second and having a depth of field ranging from 150mm<br />
to 500mm.<br />
6. The barcode to have a read rate success of 100%.<br />
7. Not smudge or leave residues when left in plastic label pockets for up to six weeks.<br />
1.4.2 Barcode Verification<br />
The barcode must be capable of being verified to Grade “C” or higher without a tray pocket using the 10 scan average method (a 10mm viewing<br />
aperture apparatus and measured as described in ANSI X3.182 – 1990, ANSI Bar Code Print Quality <strong>Guide</strong>lines, or its related British standard, BS<br />
1635, Barcode Print Quality <strong>Guide</strong>lines or ISO 15416 2000).<br />
The data must be verified back to the <strong>Visa</strong> data set for the label application.<br />
Note: a clean tray pocket will not lower a barcode verification assessment. A tray pocket containing dirt or smudged particulate matter can result in<br />
a lower (“D” or “Fail”) verification rating.<br />
1.4.3 Quiet Zones<br />
The barcode symbol must be surrounded by blank margin areas or “quiet zones” to assist barcode identification and reading.<br />
15mm to the left<br />
3mm to the bottom on either side<br />
3mm to the top<br />
12<br />
Please Note: Barcode must be a<br />
minimum 70mm – maximum 75mm<br />
5mm to the right<br />
1mm above the Human Readable Text<br />
Additional Information: Mail Label Specification for <strong>Visa</strong> Print on Demand & Preprinted Labels – contact National Label Operations<br />
via e-mail: visalabels@auspost.com.au
<strong>Visa</strong> Tray Label Management System How To: <strong>User</strong> <strong>Guide</strong><br />
Chapter 2: How to Create a Standard Mail Label Plan<br />
Mail Label Plans come in two main categories – Standard and Unaddressed.<br />
Inside the Standard Mail Label Plan category it is sensible to group similar type labels e.g. all PreSort BSP labels into one label plan; all Impact Mail<br />
labels into another label plan, etc.<br />
Standard Mail has eight different product categories:<br />
1. Clean Mail<br />
2. Full Rate<br />
3. Impact Mail<br />
4. PreSort BSP<br />
5. PreSort State Residue<br />
6. PrintPOST <strong>Post</strong>code<br />
7. PrintPOST Sort Plan<br />
8. PrintPOST State Residue.<br />
The instructions set out here show how to create a generic Standard Label Plan for any of the product categories above. For Unaddressed mail<br />
please refer to TUChapter 5: How to Create an Unaddressed Mail Label Plan.<br />
Label Plans are placed under the following folders in the <strong>Visa</strong> Explorer screen:<br />
Facilities folder: contains <strong>Visa</strong> <strong>TLMS</strong><br />
Invalid Label Plans: contains invalid Label Plans<br />
All Label Plans: contains all Label Plans in <strong>Visa</strong> Explorer except those in the Recycle Bin<br />
Workstations: click this icon to view <strong>Visa</strong> computer information<br />
Recycle Bin: contains deleted Label Plans.<br />
2.1 Creating a Standard Mail Label Plan<br />
Label Plan creation is available only in <strong>Visa</strong> Explorer.<br />
Select Label Plan/Create from the <strong>Visa</strong> Explorer menu<br />
The Create Label Plan screen is displayed<br />
National Label Operations - v1.7<br />
Figure 2.1 - Create Label Plan Screen<br />
13
<strong>Visa</strong> Tray Label Management System How To: <strong>User</strong> <strong>Guide</strong><br />
Enter the details in the following fields:<br />
1. Label Plan Name is a mandatory text field (maximum 32 characters). The Label Plan Name is listed in TreeView and ListView of the<br />
<strong>Visa</strong> Explorer screen.<br />
2. Label Plan Type field is left blank.<br />
3. Facility is a mandatory list box. The choice will affect the allocation of the Label Plan in the TreeView.<br />
4. Machine Type is a mandatory list box. The choice will affect the allocation of the Label Plan in the TreeView.<br />
5. Machine is a mandatory list box. The choice will affect the allocation of the Label Plan in the TreeView.<br />
6. SPMS ID: required when creating FMOCR Label Plan.<br />
7. Sp Short Text: Sort Plan Short Text.<br />
8. Customer Details: for External Customers to use.<br />
Click OK to create the Label Plan.<br />
<strong>Visa</strong> will display a Create Labels? dialog box asking if you want to create labels now.<br />
Click Yes if you want to create label/s now or No to create label/s at another time.<br />
When you wish to create a Standard Mail Label, please go to Chapter 4: How to Create a Standard Mail Label.<br />
National Label Operations - v1.7<br />
14
<strong>Visa</strong> Tray Label Management System How To: <strong>User</strong> <strong>Guide</strong><br />
Chapter 3: How to Import / Export Label Plan Files<br />
<strong>Visa</strong> <strong>TLMS</strong> supports two Label Plan file formats for file transfer and backups, from current and previous <strong>Visa</strong> <strong>TLMS</strong> versions – Format Versions 3.0<br />
and 3.1.<br />
Customer and internal formats prior to these versions are no longer supported.<br />
3.1 Label Plan Import File Format Version 3.0 (for customer use)<br />
Customers need to format their label plan input files to format Version 3.0 so the label plan files can be imported.<br />
Version 3.0 may be used for all products apart from Unaddressed Mail, which it no longer supports.<br />
For Unaddressed Mail label plans – please refer to Chapter 5: How to Import Unaddressed Label Plan Files, or contact TUvisalabels@auspost.com.auUT<br />
for further information.<br />
Please note: customers can no longer import .vdf files. These were supported by the <strong>Visa</strong>Print application.<br />
3.1.1 Sample File – Format Version 3.0<br />
The file name extension of the Label Plan Import File Format version 3.0 is .lpf.<br />
Lines starting with # are comment lines, and have no information variable data contained therein; despite that those lines must be present for file<br />
structure verification.<br />
Blank lines are for easy readability only.<br />
The following is a sample file format version 3.0:<br />
#<strong>Australia</strong> <strong>Post</strong> <strong>Visa</strong> Tray Label System - Ver:<br />
3v0-030<br />
#Label Plan File<br />
#Label Plan Header<br />
Sample <strong>Visa</strong> Labels,Customer,(03)9204 xxxx,3,New job<br />
#Label Details<br />
#Service,Sort_Plan_Type,Sort_Plan,Mail_Size,Label_Qty,Date<br />
S,3,7002,L,1,26-Nov-2007<br />
S,4,730,S,1,26-Nov-2007<br />
S,4,731,S,1,26-Nov-2007<br />
A,4,520,L,1,26-Nov-2007<br />
A,4,380,S,1,26-Nov-2007<br />
S,5,6,L,1,26-Nov-2007<br />
S,5,7,L,1,26-Nov-2007<br />
S,5,6,S,1,26-Nov-2007<br />
S,5,7,S,1,26-Nov-2007<br />
S,5,8,S,1,26-Nov-2007<br />
A,5,7,L,1,26-Nov-2007<br />
A,5,8,L,1,26-Nov-2007<br />
A,5,7,S,1,26-Nov-2007<br />
A,5,8,S,1,26-Nov-2007<br />
#End Of File<br />
National Label Operations - v1.7<br />
15
<strong>Visa</strong> Tray Label Management System How To: <strong>User</strong> <strong>Guide</strong><br />
Version Reference Section Contents<br />
3.0 & 3.1 1 Version #<strong>Australia</strong> <strong>Post</strong> <strong>Visa</strong> Tray Label System – Ver:<br />
3.0 & 3.1 2 <br />
3.0 & 3.1 3 Title #Label Plan File<br />
3.0 & 3.1 4 blank line<br />
3.0 & 3.1 5 Header #Label Plan Header<br />
3.0 & 3.1 6 ,,<br />
,, <br />
3.0 & 3.1 7 blank line<br />
3.0 & 3.1 8 Label Details #Label Details<br />
3.0 & 3.1 9 #Service,Sort_Plan_Type,Sort_Plan,Mail_Size,Label_Qty,Date<br />
3.0 & 3.1 10 to N-1<br />
Fields in reference 6 and 10 to N-1 are comma delimited. If field value contains comma, then field value must be enclosed in double quotes. There<br />
must not be any spaces between comma and field value.<br />
Lines beginning with “#” are comment lines and have no information variable data contained therein. Despite that, those lines must be present in<br />
the file for file structure verification except for reference 9.<br />
Blank lines are present in the file just for easier file readability and are ignored during import process.<br />
National Label Operations - v1.7<br />
(number of<br />
labels)<br />
Table 3.1. Import File Format 3.0 & 3.1<br />
3.0 & 3.1 N EOF #End Of File<br />
,,,,<br />
,,<br />
16
<strong>Visa</strong> Tray Label Management System How To: <strong>User</strong> <strong>Guide</strong><br />
Version Section<br />
National Label Operations - v1.7<br />
Field Description Valid Entries Value<br />
Required<br />
Version File Format Version and reference<br />
data version in the format.<br />
Label Plan Header Section<br />
Label_Plan_<br />
Name<br />
CustomerName<br />
Customer ContactPhone<br />
Customer<br />
Lodgment<br />
State<br />
CustomerJobNo<br />
v-<br />
i.e. 3v0-0418 ><br />
Label Plan Name Text.<br />
Customer name<br />
Customer Contact Phone Number<br />
File Major & Minor versions<br />
can be 3v0 or<br />
3v1 only<br />
Double quotes (“) and<br />
forwardslashes (/) characters<br />
are not allowed<br />
Maximum 32 characters.<br />
Text, no double quotes are<br />
allowed<br />
Maximum 20 characters<br />
Text, no double quotes are<br />
allowed<br />
Maximum 25 characters<br />
Lodgment State ID Must exist in the<br />
State_Details table<br />
Customer Job Number<br />
Table 3.2. Fields – Import File Format 3.0 & 3.1<br />
Text, no double quotes are<br />
allowed<br />
Maximum 28 characters<br />
Label_Plan_Type_Id Label Plan Type Must exist in the Label<br />
Plan type table<br />
17<br />
Yes<br />
Yes<br />
No<br />
No<br />
Import Special<br />
Instructions<br />
For format 3.0 and 3.1, if the label plan<br />
type is included, then this field will not be<br />
imported if not required by the label plan<br />
type<br />
For format 3.0 and 3.1, if the label plan<br />
type is included, then this field will not be<br />
imported if not required by the label plan<br />
type<br />
No For format 3.0 and 3.1, if the label plan<br />
type is included, then this field will not be<br />
imported if not required by the label plan<br />
type<br />
No<br />
For format 3.0 and 3.1, if the label plan<br />
type is included, then this field will not be<br />
imported if not required by the label plan<br />
type<br />
No Field is only valid for format 3.0 and 3.1.<br />
When not included the label plan type is<br />
set to Default when editing the label plan.
<strong>Visa</strong> Tray Label Management System How To: <strong>User</strong> <strong>Guide</strong><br />
National Label Operations - v1.7<br />
Field Description<br />
Label Details Section<br />
Services Service standard required for this mail<br />
lodgement:<br />
Sort Plan Type<br />
Describes the way the mail has been<br />
sorted:<br />
1. Barcoded Direct Tray (National Sort<br />
Break 54 ways)<br />
2. Barcoded Residue Tray (States)<br />
3. Direct Tray<br />
(<strong>Post</strong>code Sort)<br />
4. PrintPOST /Impact mail Sort Plan<br />
(58 ways)<br />
5. State Residue Tray (8)<br />
6. Full Rate<br />
Sort Plan The number that relates to the mail<br />
sort.<br />
18<br />
Valid<br />
Entries<br />
Must exist in the Sort<br />
Details table<br />
If Sort Plan Type = 1,<br />
then 001 to 054.<br />
If Sort Plan Type = 2 or<br />
5, or 6 then 1 to 8,<br />
where:<br />
1 = ACT, 2 = NSW,<br />
3 = VIC, 4 = QLD,<br />
5 = SA, 6 = WA,<br />
7 = TAS, 8 = NT<br />
If Sort Plan Type = 3,<br />
then valid <strong>Australia</strong> <strong>Post</strong><br />
postcodes in the range<br />
0200 to 9999.<br />
If Sort Plan Type = 4,<br />
then existing National<br />
Pre-sort Plan (NPSP)<br />
number in the range 085<br />
to 731.<br />
Value<br />
Required<br />
Yes<br />
For<br />
Services<br />
other then<br />
F<br />
Yes<br />
(For Services<br />
other then<br />
F<br />
Import<br />
Special<br />
Instructions<br />
If Service is F then value is ignored, and<br />
defaulted to 6<br />
If Service is F and value is missing then the<br />
default system state id is used.
<strong>Visa</strong> Tray Label Management System How To: <strong>User</strong> <strong>Guide</strong><br />
National Label Operations - v1.7<br />
Field Description<br />
Destination Indicator Value of the Mail Destination Break<br />
Number.<br />
Mail Size Size of the mail:<br />
S = Small,<br />
L = Large<br />
3.1.2 Sample File – Format Version 3.1<br />
The file name extension of the Label Plan Import File Format version 3.1 is .lpf.<br />
Lines starting with # are comment lines, and have no information variable data contained therein; despite that those lines must be present for file<br />
structure verification.<br />
Blank lines are for easy readability only.<br />
19<br />
Valid<br />
Entries<br />
Value<br />
Required<br />
Import<br />
Special<br />
Instructions<br />
Integer from 0 up. No Only exists in Format 3.1 and is only used<br />
when the Sort Plan type is 3 (Direct Tray<br />
<strong>Post</strong>code Sort). Defaults to 0 if sort plan<br />
type is 3 and no value is provided<br />
S or L Yes<br />
Number of Labels Number of Labels to be printed Integer from 0 to 9999 yes<br />
Date Date to be printed on the Label Date in the format<br />
DD MMM YYYY<br />
The following is a sample file format version 3.1:<br />
#<strong>Australia</strong> <strong>Post</strong> <strong>Visa</strong> Tray Label System - Ver:<br />
3v1-850<br />
#Label Plan File<br />
#Label Plan Header<br />
Unaddressed Mail_U0001234, Customer (NSW) 012345678, NSW, U0001234,5<br />
Label Details<br />
#Service,Sort_Plan_Type,Sort_Plan,Destination_Ind,Mail_Size,Label_Qty,Date,Additional_Text<br />
U,3,2365,1,L,2,18-JUL-11,T1/27 A53<br />
U,3,2354,0,L,2,18-JUL-11,T2/27 A300<br />
U,3,2354,0,L,2,18-JUL-11,T3/27 A300<br />
U,3,2354,0,L,2,18-JUL-11,T4/27 A300<br />
U,3,2354,0,L,2,18-JUL-11,T5/27 A300<br />
U,3,2354,0,L,2,18-JUL-11,T6/27 A42<br />
U,3,2430,0,L,2,18-JUL-11,T7/27 A300<br />
U,3,2430,0,L,2,18-JUL-11,T8/27 A300<br />
U,3,2430,0,L,2,18-JUL-11,T9/27 A300<br />
U,3,2430,0,L,2,18-JUL-11,T10/27 A300<br />
U,3,2430,0,L,2,18-JUL-11,T11/27 A300<br />
U,3,2430,0,L,2,18-JUL-11,T12/27 A300<br />
U,3,2430,0,L,2,18-JUL-11,T13/27 A300<br />
U,3,2430,0,L,2,18-JUL-11,T14/27 A300<br />
U,3,2430,0,L,2,18-JUL-11,T15/27 A300<br />
#End Of File<br />
No If the Product has a label attribute that has<br />
date type of „Delivery Week Commencing‟<br />
if the date is missing or not a Monday, then<br />
the label will not be imported.
<strong>Visa</strong> Tray Label Management System How To: <strong>User</strong> <strong>Guide</strong><br />
3.2 Label Plan Import File Format Version 2.7 (for Label Plan Transfer)<br />
This file format is used by <strong>Australia</strong> <strong>Post</strong> only.<br />
3.3 How to Import a Label Plan from Text File<br />
Label Plans can be imported from .lpf text files, where they may have been stored as backups or transferred from other systems. Label Plans from<br />
<strong>Visa</strong> systems prior to 2v7 may not include all the information needed to set up the latest version of <strong>Visa</strong> Label Plans, and some editing may be<br />
needed after importing is completed to place these files in the correct TreeView (facility/type/machine) structure.<br />
A log file provides some user assistance, to view the log file select Tools/View Log Files<br />
Using <strong>Visa</strong> Explorer:<br />
Select Label Plan/Import from Text File from main menu<br />
The import screen will display all the .lpf Label Plans in the default location e.g. C:\Documents and Settings\All <strong>User</strong>s\Documents\<strong>Visa</strong><strong>TLMS</strong>\Data<br />
, or in another location you have specified in Setup 2 during the <strong>Visa</strong> installation<br />
Select a Label Plan file and click Open.<br />
A separate screen allows users to import the plan, with error messages and a progress bar as the data validation progresses. It can be cancelled at<br />
any time.<br />
The Import process:<br />
National Label Operations - v1.7<br />
Figure 3.3 – Import Label Plan Dialogue Box<br />
Figure 3.4 – Import Label Plan Screen<br />
Checks the Label Plan name is unique in the database, or asks for a new name if the name already exists<br />
Checks the Label Plan header and label data for integrity<br />
Prepares a log file of any errors noted during the checks<br />
Places the Label Plan in the appropriate TreeView location<br />
Once importing is complete, the error log can be saved for further analysis in<br />
e.g. C:\Documents and Settings\All <strong>User</strong>s\Documents\<strong>Visa</strong><strong>TLMS</strong>\Data, with the same name as the Label Plan name, but with a .log extension.<br />
Any data errors can be cleared by viewing and editing the Label Plan source text, and re-importing the Label Plan as often as required.<br />
The log file will be overwritten each time.<br />
20
<strong>Visa</strong> Tray Label Management System How To: <strong>User</strong> <strong>Guide</strong><br />
3.3.1 Using Command Line<br />
The Command Line Interface can import a complete Label Plan file into <strong>Visa</strong> via the DOS command prompt or Run command in the Window Start<br />
menu.<br />
The syntax is:<br />
<strong>Visa</strong> Command /i where:<br />
/i is an action switch for the import command<br />
is the name of the Label Plan you want to import. <strong>Visa</strong> uses either the full path and filename, or the filename<br />
only and adds the default directory, e.g. C:\Documents and Settings\All <strong>User</strong>s\Documents\<strong>Visa</strong><strong>TLMS</strong>\Data.<br />
3.4 How to Export a Label Plan to Text File<br />
Label Plans can be exported to a text file for backup and to transfer to another <strong>Visa</strong> system. Exported plans contain all the information of the<br />
original Label Plan, and can be viewed and edited using word processors, etc.<br />
Select a Label Plan, and select Label Plan/Export to Text File from the <strong>Visa</strong> Explorer menu<br />
The Label Plan name will appear in the Export Label Plan dialogue box with a .lpf extension by default<br />
The default names can be edited to another filename<br />
Press Save, and the Label Plan will be saved to the default file location e.g. C:\Documents and Settings\All <strong>User</strong>s\Documents\<strong>Visa</strong><strong>TLMS</strong>\Data\Label<br />
Plans or to another location you have specified in Setup 2 during the <strong>Visa</strong> installation<br />
If the file was exported successfully there is a screen confirmation message, but no separate log file is written.<br />
National Label Operations - v1.7<br />
Figure 3.5 – Export Label Plan Dialogue Box<br />
21
<strong>Visa</strong> Tray Label Management System How To: <strong>User</strong> <strong>Guide</strong><br />
National Label Operations - v1.7<br />
This page has been intentionally left blank<br />
22
<strong>Visa</strong> Tray Label Management System How To: <strong>User</strong> <strong>Guide</strong><br />
Chapter 4: How to Create a Standard Mail Label<br />
Once you have created a Standard Mail Label Plan, you can create Standard Mail labels for that plan.<br />
Open up the related Label Plan for which you wish to create labels in the Explorer TreeView<br />
The Explorer ListView will either show labels you have already created, or a blank screen<br />
Select Label/Create from the Menu bar – the Create Label screen will appear<br />
Go to the appropriate How to … below<br />
Standard Mail labels have eight different product categories:<br />
1. Clean Mail – TU4.1 How to Create a Clean Mail Label<br />
2. Full Rate – TU4.2 How to Create a Full Rate Label<br />
3. Impact Mail – TU4.3 How to Create an Impact Mail Label<br />
4. PreSort BSP – TU4.4 How to Create a PreSort BSP Label<br />
5. PreSort State Residue – TU4.5 How to Create a PreSort State Residue Label<br />
6. PrintPOST <strong>Post</strong>code – TU4.6 How to Create a PrintPOST <strong>Post</strong>code Label<br />
7. PrintPOST Sort Plan – TU4.7 How to Create a PrintPOST Sort Plan Label<br />
8. PrintPOST State Residue – TU4.8 How to Create a PrintPOST State Residue Label.<br />
4.1 How to Create a Clean Mail Label<br />
There are two Steps (tabs) to creating a Clean Mail label – Product and Destination.<br />
Optional Step 3 – Attributes tab: the Attribute default is None – if you want to print a date then also go to the Attributes tab and select as<br />
appropriate.<br />
4.1.1 Product<br />
The Product tab is the first tab displayed. The product list consists of four Product Filters:<br />
Mail Process – Customer is automatically selected<br />
Product Level – Select Clean Mail from the drop-down menu. Select from the list available to the right of the Product filters<br />
(under Product Name): SL – Clean Mail Bulk (States)<br />
Mail Size – Leave blank<br />
Delivery Service – Leave blank.<br />
4.1.2 Destination<br />
The type of Destination screen depends on the tray destination type for the product selected.<br />
With Clean Mail, the Destination and Sub Destination are based on Sort Break 992 (automatically selected) – Clean Mail.<br />
Select the label destination from the list available.<br />
National Label Operations - v1.7<br />
Figure 4.1 - Create Label - Clean Mail<br />
Once all tabs have been completed, click on the Save button. The label is automatically saved to the appropriate Label Plan.<br />
23
<strong>Visa</strong> Tray Label Management System How To: <strong>User</strong> <strong>Guide</strong><br />
4.2 How to Create a Full Rate Label<br />
There are two Steps (tabs) to creating a Full Rate label – Product and Destination.<br />
Optional Step 3 – Attributes tab: the Attribute default is None – if you want to print a date then also go to the Attributes tab and select as<br />
appropriate.<br />
4.2.1 Product<br />
The Product tab is the first tab displayed. The product list consists of four Product Filters:<br />
Mail Process – Customer is automatically selected<br />
Product Level – Select Full Rate from the drop-down menu. Select from the list available to the right of the Product filters (under Product<br />
Name): four options are given<br />
Mail Size – Leave blank<br />
Delivery Service – Leave blank.<br />
4.2.2 Destination<br />
The type of Destination screen depends on the tray destination type for the product selected.<br />
With Full Rate mail, the Destination and Sub Destination are based on Sort Break 992 (automatically selected) – Full Rate.<br />
Select the label destination from the list available.<br />
Once all tabs have been completed, click on the Save button. The label is automatically saved to the appropriate Label Plan.<br />
4.3 How to Create an Impact Mail Label<br />
There are two Steps (tabs) to creating an Impact Mail label – Product and Destination.<br />
Optional Step 3 – Attributes tab: the Attribute default is None – if you want to print a date then also go to the Attributes tab and select as<br />
appropriate.<br />
4.3.1 Product<br />
National Label Operations - v1.7<br />
Figure 4.2 - Create Label – Full Rate<br />
The Product tab is the first tab displayed. The product list consists of four Product Filters:<br />
Mail Process – Customer is automatically selected<br />
Product Level – Select Impact Mail from the drop-down menu. Select from the list available to the right of the Product filters<br />
(under Product Name): three options are given. Each of these options will determine which Destination screen is available<br />
Mail Size – Leave blank<br />
Delivery Service – Leave blank.<br />
24
<strong>Visa</strong> Tray Label Management System How To: <strong>User</strong> <strong>Guide</strong><br />
4.3.2 Destination<br />
The type of Destination screen depends on the tray destination type for the product selected.<br />
With Impact Mail, the Destination and Sub Destination are based on either Sort Break or <strong>Post</strong>code.<br />
1. If you have selected product name: SL – Impact Mail Residue:<br />
Select the label destination from the list available.<br />
2. If you have selected product name: SL – Impact Mail <strong>Post</strong>code:<br />
Type in the relevant postcode in the <strong>Post</strong>code: box<br />
3. If you have selected product name: SL – Impact Mail NPSP, either:<br />
Type in the relevant Sort Break – if known, or<br />
Select from the Mail Destination list, using the scroll bar to search up and down for the relevant destination.<br />
Figure 4.3 - Create Label – Impact Mail (<strong>Post</strong>code option)<br />
Once all tabs have been completed, click on the Save button. The label is automatically saved to the appropriate Label Plan.<br />
4.4 How to Create a PreSort BSP Label<br />
There are two Steps (tabs) to creating a PreSort BSP label – Product and Destination.<br />
Optional Step 3 – Attributes tab: the Attribute default is None – if you want to print a date then also go to the Attributes tab and select as<br />
appropriate.<br />
4.4.1 Product<br />
The Product tab is the first tab displayed. The product list consists of four Product Filters:<br />
Mail Process – Customer is automatically selected<br />
Product Level – Select PreSort BSP from the drop-down menu. Select from the list available to the right of the Product<br />
filters (under Product Name): four options are given<br />
Mail Size – Leave blank<br />
Delivery Service – Leave blank.<br />
4.4.2 Destination<br />
The type of Destination screen depends on the tray destination type for the product selected.<br />
With PreSort BSP, the Destination and Sub Destination are based on Sort Break.<br />
Type in the relevant Sort Break – if known, or<br />
Select from the Mail Destination list, using the scroll bar to search up and down for the relevant destination.<br />
National Label Operations - v1.7<br />
25
<strong>Visa</strong> Tray Label Management System How To: <strong>User</strong> <strong>Guide</strong><br />
Once all tabs have been completed, click on the Save button. The label is automatically saved to the appropriate Label Plan.<br />
4.5 How to Create a PreSort State Residue Label<br />
There are two Steps (tabs) to creating a PreSort State Residue label – Product and Destination.<br />
Optional Step 3 – Attributes tab: the Attribute default is None – if you want to print a date then also go to the Attributes tab and select as<br />
appropriate.<br />
4.5.1 Product<br />
The Product tab is the first tab displayed. The product list consists of four Product Filters:<br />
Mail Process – Customer is automatically selected<br />
Product Level – Select PreSort State Residue from the drop-down menu. Select from the list available to the right of the Product filters<br />
(under Product Name): eight options are given<br />
Mail Size – Leave blank<br />
Delivery Service – Leave blank.<br />
4.5.2 Destination<br />
National Label Operations - v1.7<br />
Figure 4.4 - Create Label – PreSort BSP<br />
Figure 4..5 - Create Label – PreSort State Residue<br />
The type of Destination screen depends on the tray destination type for the product selected.<br />
With PreSort State Residue, the Destination and Sub Destination are based on Sort Break 992 (automatically selected) – PreSort State Residue.<br />
Select the label destination from the list available.<br />
Once all tabs have been completed, click on the Save button. The label is automatically saved to the appropriate Label Plan.<br />
26
<strong>Visa</strong> Tray Label Management System How To: <strong>User</strong> <strong>Guide</strong><br />
4.6 How to Create a PrintPOST <strong>Post</strong>code Label<br />
There are two Steps (tabs) to creating a PrintPOST <strong>Post</strong>code label – Product and Destination.<br />
Optional Step 3 – Attributes tab: the Attribute default is None – if you want to print a date then also go to the Attributes tab and select as<br />
appropriate.<br />
4.6.1 Product<br />
The Product tab is the first tab displayed. The product list consists of four Product Filters:<br />
Mail Process – Customer is automatically selected<br />
Product Level – Select PrintPOST <strong>Post</strong>code from the drop-down menu. Select from the list available to the right of the Product filters<br />
(under Product Name): four options are given<br />
Mail Size – Leave blank<br />
Delivery Service – Leave blank.<br />
4.6.2 Destination<br />
The type of Destination screen depends on the tray destination type for the product selected.<br />
With PrintPOST <strong>Post</strong>code, the Destination and Sub Destination are based on <strong>Post</strong>code.<br />
Type in the relevant postcode in the <strong>Post</strong>code: box.<br />
Once all tabs have been completed, click on the Save button. The label is automatically saved to the appropriate Label Plan.<br />
4.7 How to Create a PrintPOST Sort Plan Label<br />
There are two Steps (tabs) to creating a PrintPOST Sort Plan label – Product and Destination.<br />
Optional Step 3 – Attributes tab: the Attribute default is None – if you want to print a date then also go to the Attributes tab and select as<br />
appropriate.<br />
4.7.1 Product<br />
National Label Operations - v1.7<br />
Figure 4.6 - Create Label – PrintPOST <strong>Post</strong>tcode<br />
The Product tab is the first tab displayed. The product list consists of four Product Filters:<br />
Mail Process – Customer is automatically selected<br />
Product Level – Select PrintPOST Sort Plan from the drop-down menu. Select from the list available to the right of the Product filters<br />
(under Product Name): four options are given<br />
Mail Size – Leave blank<br />
Delivery Service – Leave blank.<br />
27
<strong>Visa</strong> Tray Label Management System How To: <strong>User</strong> <strong>Guide</strong><br />
4.7.2 Destination<br />
The type of Destination screen depends on the tray destination type for the product selected. With PrintPOST Sort Plan, the Destination and<br />
Sub Destination are based on Sort Break.<br />
Type in the relevant Sort Break – if known, or<br />
Select from the Mail Destination list, using the scroll bar to search up and down for the relevant destination.<br />
Once all tabs have been completed, click on the Save button. The label is automatically saved to the appropriate Label Plan.<br />
4.8 How to Create a PrintPOST State Residue Label<br />
There are two Steps (tabs) to creating a PrintPOST State Residue label – Product and Destination.<br />
Optional Step 3 – Attributes tab: the Attribute default is None – if you want to print a date then also go to the Attributes tab and select as<br />
appropriate.<br />
4.8.1 Product<br />
The Product tab is the first tab displayed. The product list consists of four Product Filters:<br />
4.8.2 Destination<br />
Figure 4.7 - Create Label – PrintPOST Sort Plan<br />
Mail Process – Customer is automatically selected<br />
Product Level – Select PrintPOST State Residue from the drop-down menu. Select from the list available to the right of the Product filters<br />
National Label Operations - v1.7<br />
(under Product Name): four options are given<br />
Mail Size – Leave blank<br />
Delivery Service – Leave blank.<br />
The type of Destination screen depends on the tray destination type for the product selected.<br />
With PrintPOST State Residue, the Destination and Sub Destination are based on Sort Break 992 (automatically selected) – PrintPOST State Residue.<br />
Select the label destination from the list available.<br />
Figure 4.8 - Create Label – PrintPOST State Residue<br />
Once all tabs have been completed, click on the Save button. The label is automatically saved to the appropriate Label Plan.<br />
28
<strong>Visa</strong> Tray Label Management System How To: <strong>User</strong> <strong>Guide</strong><br />
Chapter 5: How to Import Unaddressed Label Plan Files<br />
5.1 Importing an Unaddressed Mail Label Plan<br />
Please Note: The <strong>Australia</strong> <strong>Post</strong> Unaddressed Mail Coordination System (UMCS) creates all Unaddressed Mail label plans (lpf file) to be imported into<br />
the <strong>Visa</strong> system.<br />
For further information on the Unaddressed Mail Service please call CCC UMS Coordination Team on 1300 223 571 or ums@auspost.com.au<br />
The import process of Unaddressed Mail Label Plans is the same as a normal label plan – please follow the steps below.<br />
Using <strong>Visa</strong> Explorer:<br />
Select Label Plan/Import from Text File from main menu<br />
The import screen will display all the .lpf Label Plans in the default location<br />
e.g. C:\Documents and Settings\All <strong>User</strong>s\Documents\<strong>Visa</strong><strong>TLMS</strong>\Data , or in another location you have specified in Setup 2 during the<br />
<strong>Visa</strong> installation<br />
Select a Label Plan file and click Open<br />
A separate screen allows users to import the plan, with error messages and a progress bar as the data validation progresses. It can be cancelled at<br />
any time.<br />
The import process:<br />
National Label Operations - v1.7<br />
Figure 5.1 – Import Label Plan Dialogue Box<br />
Figure 5.2 – Import Label Plan Screen<br />
Checks the Label Plan name is unique in the database, or asks for a new name if the name already exists<br />
Checks the Label Plan header and label data for integrity<br />
Prepares a log file of any errors noted during the checks<br />
Places the Label Plan in the appropriate TreeView location<br />
Once importing is complete, the error log can be saved for further analysis in e.g. C:\Documents and Settings\All <strong>User</strong>s\Documents\<strong>Visa</strong><strong>TLMS</strong>\Data,<br />
with the same name as the Label Plan name, but with a .log extension.<br />
A separate screen allows users to import the plan, with error messages and a progress bar as the data validation progresses. It can be cancelled at<br />
any time.<br />
29
<strong>Visa</strong> Tray Label Management System How To: <strong>User</strong> <strong>Guide</strong><br />
Chapter 6: How to Create an Unaddressed Mail Label Plan<br />
6.1 Creating an Unaddressed Mail Label Plan<br />
Label Plan creation is available only in <strong>Visa</strong> Explorer.<br />
1. Select Label Plan/Create from the <strong>Visa</strong> Explorer menu or right-click mouse menu<br />
2. The Create Label Plan screen is displayed<br />
3. Enter the details in the following fields<br />
Label Plan Name is a mandatory text field with a maximum of 32 characters. A suggested Label Plan Name style for Unaddressed Mail is:<br />
National Label Operations - v1.7<br />
Figure 6.1 – Create Label Plan screen – Unaddressed Mail<br />
Unaddressed Mail Small 040405<br />
Where “Unaddressed Mail” is the Label Plan type, “Small” is the letter size, and “040405 is the Delivery Week Commencing date<br />
(always a Monday)<br />
Label Plan Type – Next to Label Plan Type is a drop-down menu. For Unaddressed Mail, the Label Plan Type is Unaddressed Mail<br />
Facility is a mandatory list box – customers may only choose <strong>Visa</strong><strong>TLMS</strong><br />
Machine Type is a mandatory list box. <strong>User</strong> must choose either None or Customer The choice will affect the allocation of the Label Plan in<br />
the TreeView<br />
Machine is a mandatory list box. <strong>User</strong> must choose None or an option here. The choice will affect the allocation of the Label Plan in the<br />
TreeView<br />
Customer Details<br />
- Name is customer or compay name (Maximum 20 characters)<br />
- Job Number is generated from the UMCS lpf file<br />
- Phone Number (maximum 25 characters)<br />
4. Click OK to create the Label Plan<br />
5. <strong>Visa</strong> will display a screen asking if you want to create labels now<br />
6. Click Yes if you want to create label/s now or No to create label/s at another time<br />
30
<strong>Visa</strong> Tray Label Management System How To: <strong>User</strong> <strong>Guide</strong><br />
Chapter 7: How to Create an Unaddressed Mail Label<br />
Once you have created Unaddressed Mail Label Plans, you can create Unaddressed Mail labels for these plans.<br />
Open up the Unaddressed Label Plan for which you wish to create labels in Explorer TreeView<br />
The Explorer ListView will either show labels you have already created, or a blank screen.<br />
7.1 Creating an Unaddressed Mail Label<br />
There are three Steps (tabs) to creating an Unaddressed Mail label – Product, Destination and Attributes.<br />
7.1.1 Product<br />
The Product tab is the first tab displayed. The product list consists of four Product Filters:<br />
Mail Process – Customer is automatically selected<br />
Product Level – Select Unaddressed Mail from the drop-down menu<br />
Mail Size – Leave blank. Select from the list available to the right of the Product filters (under Product Name): either SL – Unaddressed<br />
Mail or LL – Unaddressed Mail<br />
Delivery Service – Leave blank or select Surface.<br />
7.1.2 Destination<br />
The type of Destination screen depends on the tray destination type for the product selected. With Unaddressed Mail, the Destination and<br />
Sub Destination are based on a <strong>Post</strong>code.<br />
Select the label destination by typing the <strong>Post</strong>code into the <strong>Post</strong>code: box<br />
After the user has entered the <strong>Post</strong>code the destination is automatically selected<br />
If a user enters a <strong>Post</strong>code which is not valid for the selected product, no destination and sub destination will be displayed. The user will<br />
then be required to re-enter the <strong>Post</strong>code.<br />
National Label Operations - v1.7<br />
Figure 7.1 - – Create Label – Unaddressed Mail<br />
31
<strong>Visa</strong> Tray Label Management System How To: <strong>User</strong> <strong>Guide</strong><br />
7.1.3 Attributes<br />
If the selected Product is Unaddressed Mail, the Attributes tab will show a different set of attribute options to those for the default Standard<br />
Attributes.<br />
National Label Operations - v1.7<br />
Attribute Options<br />
Delivery Week Commencing<br />
Figure 7.2 – Unaddressed Mail Attributes<br />
The drop-down calendar displayed will only allow users to select a Monday of the relevant<br />
delivery week. All other dates are greyed out and cannot be selected.<br />
The user must select a date (Monday) for Unaddressed Mail Label Plans to be validated and<br />
for labels to be printed.<br />
The user must also select a date (Monday) which is in accordance with the Unaddressed<br />
Mail Service <strong>Guide</strong>.<br />
Once all tabs have been completed, click on the Save button. The label is automatically saved to the appropriate Label Plan.<br />
32
<strong>Visa</strong> Tray Label Management System How To: <strong>User</strong> <strong>Guide</strong><br />
Chapter 8: How to Make Changes to a Label Plan<br />
Chapter 8 covers the following:<br />
1. Coping Label Plans - 8.1 How to Copy label Plans<br />
2. Editing Label Plans - 8.2 How to Edit Label Plans<br />
3. Printing Label Plans - 8.3 How to Print Label Plans<br />
4. Deleting Label Plans - 8.4 How to Delete Label Plans<br />
8.1 How to Copy Label Plans<br />
Label Plan copying is available only in <strong>Visa</strong> Explorer.<br />
In <strong>Visa</strong> Explorer, the Copy Label Plan feature allows you to copy an existing Label Plan without having to go through the Create Label Plan process.<br />
You can also edit a copied Label Plan to quickly update Label Plan contents.<br />
In the TreeView window, click the Label Plan you want to copy<br />
Select Label Plan/Copy from the <strong>Visa</strong> Explorer menu or right-click mouse menu<br />
The Copy Label Plan screen is displayed<br />
Enter the new name in the New Label Plan Name field (you can view and select existing Label Plan names by clicking the button to the<br />
right of the field, select a name and then rename the Label Plan to a unique name)<br />
<strong>User</strong>s are also able to change Facility, Machine Type and/or Machine fields at the same time (you can view and select existing names by<br />
clicking the button to the right of each field)<br />
If you want to use the same label quantity confirm that the Existing Label Quantity is selected. Otherwise, select New Default Quantity<br />
and enter the required number<br />
Indicate label dates by selecting System Date or Specific Date as appropriate. If you do not require any date information select option<br />
None<br />
Click OK to accept the changes<br />
The TreeView and ListView displays are automatically updated to reflect the new (copied) Label Plan. The new Label Plan is highlighted in<br />
the TreeView.<br />
National Label Operations - v1.7<br />
Figure 8.1 - Copy Label Plan Screen<br />
33
<strong>Visa</strong> Tray Label Management System How To: <strong>User</strong> <strong>Guide</strong><br />
8.2. How to Edit Label Plans<br />
Label Plan editing is available only in <strong>Visa</strong> Explorer.<br />
In <strong>Visa</strong> Explorer Label Plan Edit allows you to change Label Plan details:<br />
In the TreeView window, select the Label Plan you want to edit<br />
Select Label Plan/Edit from the <strong>Visa</strong> Explorer menu<br />
The Edit Label Plan screen is displayed<br />
Note: This screen is similar to the Create Label Plan screen except the Label Plan data has already been entered.<br />
Change the details in the fields of the editing screen<br />
Click OK to accept the changes.<br />
The ListView automatically updates the Label Plan.<br />
8.3 How to Print Label Plans<br />
National Label Operations - v1.7<br />
Figure 8.2 - Edit Label Plan Screen<br />
In <strong>Visa</strong> Explorer the Print option allows you to print the complete Label Plan using the quantities associated with each label.<br />
If necessary, you can change the default quantity settings, or specify a particular quantity for the label set as required. You can also select the range<br />
of labels to be printed for each stacker.<br />
To print a Label Plan, select a Label Plan from the TreeView or ListView<br />
Select menu option File/Print Label Plan<br />
Print Confirmation screen is displayed.<br />
Figure 8.3 - Print Confirmation Screen<br />
Select Default Label Quantities or select the New Label Quantities and enter a number in the box provided<br />
Select either All Labels or Label Range and enter a number into the From stacker and a number in the To stacker<br />
Select a label printer from Printer Setup.<br />
Note: You can also print complete Label Plans using <strong>Visa</strong> Touch.<br />
34
<strong>Visa</strong> Tray Label Management System How To: <strong>User</strong> <strong>Guide</strong><br />
8.3.1. Using Command Line<br />
The Command Line Interface can print a complete Label Plan, or a range of labels from a Label Plan, in varying quantities via the DOS command<br />
prompt or Run command in Window Start menu.<br />
The syntax is:<br />
<strong>Visa</strong>Command /p [//] /[q]<br />
where:<br />
/p is the print switch<br />
is the name of the Label Plan you want to print, and can include the full network directory path listing for the Label Plan<br />
is the first stacker number in the range of labels to be printed<br />
is the last stacker number in the range of labels to printed<br />
/q is the optional Quantity switch. If it is omitted, then the default label quantity from the Label Plan will be printed.<br />
8.4. How to Delete Label Plans<br />
Label Plan deletion is available only in <strong>Visa</strong> Explorer.<br />
In <strong>Visa</strong> Explorer Label Plans, and their label sets, can be deleted. Label Plans can only be deleted one at a time, and are deleted by being transferred<br />
to the Recycle Bin. From the Recycle Bin, Label Plans may be restored or deleted permanently from the system.<br />
In the TreeView window, select a Label Plan you want to delete<br />
Select <strong>Visa</strong> menu option Label Plan/Delete<br />
The Delete Confirmation screen is displayed<br />
Click Yes to delete the Label Plan or No to cancel the deleting request.<br />
Note: When creating a Label Plan, you cannot use the same name as that of a Label Plan in the Recycle Bin. The Label Plan must be<br />
deleted from the Recycle Bin before using that name.<br />
8.4.1. Using Command Line<br />
The Command Line interface can delete a Label Plan from <strong>Visa</strong>, via the DOS command prompt or Run command in Window Start menu.<br />
Note: The Label Plan is deleted immediately, UnotU placed into the Recycle Bin.<br />
The syntax is:<br />
<strong>Visa</strong>Command /d <br />
where:<br />
/d is an action switch for the delete command<br />
is the name of the Label Plan you want to delete.<br />
National Label Operations - v1.7<br />
35
<strong>Visa</strong> Tray Label Management System How To: <strong>User</strong> <strong>Guide</strong><br />
Chapter 9: How to Make Changes to a Label<br />
Chapter 9 covers the following:<br />
1. Editing Labels – TU9.1 How to Edit Labels<br />
2. Adding text to Labels – 9.2 How to Add Text to Labels<br />
3. Deleting Labels – TU9.3 How to Delete Labels<br />
4. Printing Labels from Create/Edit – TU9.4 How to Print Labels from Create/Edit<br />
5. Coping Labels – TU9.5 How to Copying Labels between Label Plans<br />
6. Search a Label – TU9.6 How to Label Search Function<br />
7. Previewing Label – TU9.7 How to Preview a Label<br />
8. Printing Labels for Destination – TU9.8 How to Print Labels for Destination<br />
9. Move Stacker – TU9.9 How to Move Stackers<br />
10. Editing Invalid Labels – TU9.9 How to Edit Invalid Labels<br />
9.1. How to Edit Labels<br />
Label editing is available only in <strong>Visa</strong> Explorer. The Edit Label function is used to change labels information or validate an invalid label for printing. The<br />
screen for Edit Labels is identical to the Create Labels screen, and will perform an identical functionality.<br />
Select the Label Plan containing the label you want to edit from the TreeView window<br />
Select the label you want to edit from the ListView window<br />
Select menu option Label/Edit<br />
The Edit Label screen is displayed<br />
If a label does not have a Product defined, then the user will have to pick a new product<br />
If the label does not have a sub-destination defined, the user will have to enter details<br />
Unaddressed Mail – if the label was created as a Standard label and needs to be edited to Unaddressed Mail, or the label is an Unaddressed<br />
Mail label which requires editing, the user will need to update the Attributes associated with Unaddressed Mail – see section<br />
TU7.1.3. Attributes<br />
Press OK to save changes<br />
The ListView window automatically updates any changes made to the label.<br />
National Label Operations - v1.7<br />
Figure 9.1 - Edit Label Screen<br />
As for Create Label, the stacker number in a Label Plan may not be changed to a stacker number already in use. An appropriate error message will<br />
be displayed asking the user to select a different stacker number.<br />
The last modified date and user name will be automatically updated by the system when the user makes a change to the Label Plan.<br />
9.2. How to Add Text to Labels<br />
Labels can have additional text added to them. For example:<br />
information on tray sequencing numbers<br />
extra advice on tray contents<br />
customer reference ID, etc.<br />
36
<strong>Visa</strong> Tray Label Management System How To: <strong>User</strong> <strong>Guide</strong><br />
9.3. How to Delete Labels<br />
National Label Operations - v1.7<br />
Figure 9.2 - Additional Text<br />
Label deletion is available only in <strong>Visa</strong> Explorer. Individual or multiple selected labels can be deleted from a Label Plan in ListView.<br />
In the TreeView window, select the Label Plan containing the label(s) you want to delete<br />
In the ListView window, select the label(s) you want to delete<br />
To select all labels within a range, select the first label, hold down the Shift key and click the mouse on the last label<br />
To select groups of labels, hold down the Control key and click the mouse on the labels to be deleted<br />
Select keyboard Delete key or menu option Label/Delete<br />
For a single label deletion, a message is displaying asking for confirmation of the label deletion request. The user will need to press Yes to<br />
delete the label, or No to cancel the deletion request<br />
For multiple labels deletion, a confirmation for each label is displayed, with the following options:<br />
1. Yes. If selected, the label specified will be deleted and the message reappears for the next selected label.<br />
2. Yes to All. If selected, all selected labels will be deleted and no further confirmation is asked.<br />
3. No. If selected, the selected label is not deleted and the message reappears for the next selected label.<br />
4. Cancel. If selected, no label is deleted and the deletion process is halted. This will not restore any labels that have already been<br />
deleted.<br />
9.4. How to Print Labels from Create/Edit<br />
You can print valid individual labels or a range of labels associated with a Label Plan when creating or editing a label.<br />
In the TreeView, select a Label Plan<br />
In the ListView select a label; or a range of labels (e.g. labels from stacker 1 to 9) using Shift + mouse; or several different labels<br />
(e.g. labels from stackers 1, 3 and 9) using Control + mouse<br />
Select <strong>Visa</strong> menu option File/Print Label for Stacker<br />
The selected labels will be printed<br />
Once the print process is complete the Create/Edit screen is re-displayed, to continue with the Create/Edit process.<br />
9.5. How to Copying Labels between Label Plans<br />
Additional<br />
Text<br />
The Delete Label function PERMANENTLY deletes labels from the system.<br />
The user is able to Copy Labels from one Label Plan and Paste them to another.<br />
The Copy Label menu option is enabled if the user has one or more valid labels selected in the Label list, and has Create Label permission in at least<br />
one Facility. In order to „Paste‟ labels in to a Label Plan, the user must have Create Label permission for the Facility that the Label Plan belongs to<br />
The Copy Label function is initiated by selecting one or more labels in the labelList and selecting „Copy‟ from the label menu.<br />
To Past the Labels into another label plan, the user selects a label plan in the TreeView and selects „Paste‟ from the LabelMenu<br />
37
<strong>Visa</strong> Tray Label Management System How To: <strong>User</strong> <strong>Guide</strong><br />
The user can then choose to perform a direct copy, keeping the stacker numbers from the original label plan or perform an end of label plan copy,<br />
pasting the labels to the end of the label plan. Whatever method of copying is chosen, a check should be done to ensure that the product of the<br />
Label is valid for the Label Plan type of the destination Label Plan The whole Paste action will fail if any of the labels to be pasted have a product type<br />
not valid for the Label Plan Type.<br />
Note: Labels may be „Pasted‟ in to the same Label Plan they were copied from.<br />
When performing a direct copy, if any of the original stacker numbers already exist in the label plan where the labels are being copied to, the copy<br />
will fail. When performing an end of label plan copy, the new labels are assigned stacker numbers starting from the stacker number after the highest<br />
in the Label Plan. If there is not enough free stacker numbers at the end of the label plan, the copy operation will be cancelled and an error message<br />
displayed.<br />
National Label Operations - v1.7<br />
Figure 9.3 - Copy Labels<br />
In the Figure above, five labels are being copied (Stackers 3, 8, 16, 20 and 25) from Label Plan Impact Mail <strong>Post</strong>Code, by highlighting the required<br />
labels and selecting „Copy Labels‟ from the menu.<br />
Figure 9.4 - Paste Label Options<br />
In the Figure above, three labels have been copied and are to be pasted to the end of the Label Plan.<br />
38
<strong>Visa</strong> Tray Label Management System How To: <strong>User</strong> <strong>Guide</strong><br />
In the Figure above, five labels have been pasted to the end of the Label Plan State Residue UnBarcoded Small while retaining the original stacker<br />
numbers (Stackers Stackers 3, 8, 16, 20 and 25).<br />
9.6. How to Label Search Function<br />
National Label Operations - v1.7<br />
Figure 9.5 - Labels Pasted to another Label Plan<br />
The label search function allows a user to search all labels within their facility database for a particular destination.<br />
In the search results ListView the user may re-size any of the columns. The user may also double click on a column divider to expand or collapse the<br />
column width. When expanding, the column width will expand based on the maximum length of contents and title. When collapsing, the column<br />
width will be collapse based on the maximum of the column contents only.<br />
The user may re-order the columns in the results list by selecting and dragging the column header to the new location. The list view should scroll<br />
when dragging the column beyond the current visible columns. The column order is remembered in the Windows Registry per user and will be remembered<br />
for the next time the screen is invoked by the user. The user may order the list by clicking on the column header that they wish to order<br />
the list by. The user may also select which columns they wish to display by using the field chooser.<br />
Interface<br />
When you decide to perform a label search, you will be prompted to enter a Mail Destination name. When entering a destination name<br />
you must type at least 2 characters to a maximum of 16 characters to trigger a search. A list of destinations will be displayed beginning<br />
with the characters in the search text box.<br />
In the example below, the user has type mel, with the matching destination names listed in the list view below. The searching is not case<br />
sensitive. Labels in the recycle bin are not included in the search<br />
Figure 9.6 - Label Search Screen<br />
39
<strong>Visa</strong> Tray Label Management System How To: <strong>User</strong> <strong>Guide</strong><br />
Once a Mail Destination has been selected, the user presses Search, the results are then displayed in the main list view. If the label does not exist,<br />
the main list view will be blank and the following message will appear:<br />
National Label Operations - v1.7<br />
Figure 9.7 - No results screen after search<br />
9.7. How to Preview a Label<br />
The label image preview appears in the Create/Edit Label screen in the <strong>Visa</strong> Explorer interface.<br />
When Create/Edit Label screen is first opened the preview image is blank. As changes occur to Product, Destination and Attributes, the preview<br />
image is automatically updated.<br />
The label product code application determines what Label Format file information should be displayed on the label. It formats and positions data<br />
according to the format and location specified in the file.<br />
If a label format file required to preview the label is missing from the local hard disk an error message is displayed. The preview image will remain<br />
blank.<br />
9.7.1 How to Copy a Label Image to Clipboard<br />
Once a label image has been generated, the user can:<br />
Press Copy Image button or right-click the image with the mouse<br />
Select Copy to Clipboard from the menu. A same size image will be copied to the clipboard<br />
Paste to another application.<br />
9.7.2 How to Display a Label Image at Full Size<br />
Once a label image has been generated the user may:<br />
Double-click on the image to view a full-size label image<br />
Alternatively, right-click the image with the mouse and select Full Size Image from the menu<br />
Press Full Size Image button<br />
Figure 9.8 - Full Size Label Screen<br />
If the full size image is too large scroll bars will appear to allow the entire label image to be viewed.<br />
The user can select either the X button in the top right hand side of the screen, or the Close button to close the full size image.<br />
40
<strong>Visa</strong> Tray Label Management System How To: <strong>User</strong> <strong>Guide</strong><br />
9.8. How to Print Labels for Destination<br />
The Print Label for Destination function enables you to print ad hoc labels.<br />
From <strong>Visa</strong> Explorer, select menu option File/Print Label for Destination<br />
The Print for Destination screen is displayed. The Sort Break and <strong>Post</strong>code destination screens are also available for use<br />
Note: The Print for Destination screen and its functions are identical to the Create Label screen except that the stacker number field and Save<br />
button are not enabled.<br />
Make your selection as required. Refer Chapter 4: How to Create Standard Mail Labels or Chapter 7: How to Create Unaddressed Mail<br />
Labels for selecting Label Details<br />
Click OK to start printing or Cancel to cancel the request<br />
Once the print process is completed, the Print for Destination screen is<br />
re-displayed to allow the user to print another label.<br />
9.9. How to Move Stackers<br />
National Label Operations - v1.7<br />
Figure 9.9 - Print Destination Screen<br />
<strong>User</strong>s are able to move a label or a selection of labels on the list within the Label Plan.<br />
<strong>User</strong>s select one or more labels and request they be moved by changing the label stacker number by a user-entered amount.<br />
To select all labels within a range, select the first label, hold down the Shift key and click the mouse on the last label<br />
To select groups of labels, hold down the Control key and click the mouse on the labels to be moved<br />
Select Move Stackers option<br />
The Move Stackers screen is displayed<br />
Figure 9.10 - Move Stacker Screen<br />
Stacker number and<br />
Print button is<br />
greyed out<br />
Enter a number to move the stackers by. The number must be between –9998 to –1 to 9998<br />
Press OK – a check will be done to ensure that the move will not result in a stacker number outside the range 1 to 9999. If the move is<br />
outside this range, the user will be prompted to re-enter the number<br />
If, during the move, a duplication stacker number occurs, the move is cancelled and the user must begin again. This usually occurs if the<br />
user selects a sub-set of labels in a Label Plan to move. If all labels within a Label Plan are selected then duplication is unlikely to occur.<br />
41
<strong>Visa</strong> Tray Label Management System How To: <strong>User</strong> <strong>Guide</strong><br />
9.10. Invalid Labels<br />
An Invalid Label can be generated in the <strong>Visa</strong> Explorer screen. This can occur when a user selects a Product type without selecting a destination or<br />
postcode; the label will be saved as Invalid. Invalid Labels are displayed with an Invalid Label icon in Red and Yellow .<br />
The Invalid Label can be saved, edited or deleted.<br />
Saving Invalid Label is available to allow the user to keep incomplete Labels for future editing. It is not recommended to store Invalid<br />
Labels in Label Plans, as this can result in missing data/Label Plans<br />
Invalid Labels can be edited by double-clicking the label and reselecting the desired product and destination. Once the label is valid, the<br />
user is able to save and export the Label Plan to file<br />
Deleting Invalid Labels can be done by selecting menu option Label/Delete or right clicking the Label and selecting Delete Label.<br />
National Label Operations - v1.7<br />
Figure 9.11 - <strong>Visa</strong> Explorer Invalid Label<br />
42
<strong>Visa</strong> Tray Label Management System How To: <strong>User</strong> <strong>Guide</strong><br />
Chapter 10: How to Use <strong>Visa</strong> Touch<br />
Unlike <strong>Visa</strong> Explorer, <strong>Visa</strong> Touch only allows the user to print labels – the user cannot edit, copy or perform other features. <strong>Visa</strong> Touch is<br />
generally used on the facility floor by MPEs to print on-demand from Label Plans that have already been set up.<br />
10.1. Label Plan Screen<br />
Use this screen to select a Label Plan and print it.<br />
Touch the arrow buttons on a <strong>Visa</strong> Touch, press Page Up, Page Down, Up and Down arrows on a keyboard, or use a mouse to select a Label Plan<br />
name.<br />
Click Print Label Plan located at the bottom right hand corner of the Label Plan screen to print a Label Plan.<br />
Arrow<br />
Buttons<br />
10.2. Stackers Screen<br />
Use this screen to select a Stacker and print the label(s) of the Stacker.<br />
Press Page Up, Page Down, Up and Down arrows on a keyboard or type a number or click numbers on the keypad located on the right of the<br />
Stackers Screen to select a Stacker.<br />
Press Print Stacker located at the bottom right hand corner of the screen to print a label(s) of the selected stacker.<br />
National Label Operations - v1.7<br />
Press these buttons to move between alternative screens<br />
Figure 10.1 - Label Plan Screen in <strong>Visa</strong> Touch<br />
43
<strong>Visa</strong> Tray Label Management System How To: <strong>User</strong> <strong>Guide</strong><br />
Click left of stacker description to print x labels where x is quantity.<br />
Click quantity box, select required quantity and print.<br />
10.3. System Screen<br />
National Label Operations - v1.7<br />
Press these buttons to move between alternative screens<br />
Figure 10.2 – Stacker Screen in <strong>Visa</strong> Touch<br />
Use this screen to select a printing style for the labels.<br />
Select Machine Dressing in the System Screen to allow for one label of each stacker to be printed first, then the balance of the labels will be printed.<br />
Select Bulk to print all the labels by stacker. This is the only printing option for Customers.<br />
Press these buttons to move between alternative screens<br />
Figure 10.3 – System Screen in <strong>Visa</strong> Touch<br />
44
<strong>Visa</strong> Tray Label Management System How To: <strong>User</strong> <strong>Guide</strong><br />
10.4. Machine Screen<br />
Use this screen to change the default sorting machine details.<br />
Press Page Up, Page Down, Up and Down arrows on the keyboard to make a selection.<br />
1. In the Machine Types section, select an appropriate option.<br />
2. There are 4 options: Facility Type, Facility Name, Machine Type, Machine – you need to choose at least one option.<br />
3. The list on the left of the screen will automatically update accordingly, select an appropriate item in this list.<br />
4. Press Set As Default to change the Machine details, or press Restore Default if you want to keep the existing machine details.<br />
National Label Operations - v1.7<br />
Press these buttons to move between alternative screens<br />
Figure 10.4 – Machine Screen in <strong>Visa</strong> Touch<br />
45
<strong>Visa</strong> Tray Label Management System How To: <strong>User</strong> <strong>Guide</strong><br />
Chapter 11: How to – Other <strong>Visa</strong> Information<br />
Chapter 11 covers the following:<br />
Reports – TU11.1 Reports<br />
Printing a Report – TU11.2 Printing a Report<br />
Maintaining Workstation Information – TU11.3 Maintaining Workstation Information<br />
Viewing Log Files – TU11.4 Viewing Log Files<br />
Printer Requirements – TU11.5 Printer Requirements<br />
Tray Hygiene – TU11.6 Tray Hygiene<br />
11.1 Reports<br />
An All Label Plan Report displays all the Label Plans in the current facility or local database, apart the ones in the Recycle Bin – and you can also<br />
display just a single Label Plan in a Report as well.<br />
Similarly, you can display a Workstation Report, which provides information on each workstation that has used the facility database.<br />
<strong>User</strong>s sometimes require information on just a single Label Plan or all Label Plans in use, or Workstations – for attaching to other documents,<br />
preparing a presentation, etc.<br />
<strong>Visa</strong> Explorer allows users to print a report for such a purpose, from either the TreeView or ListView.<br />
11.2 Printing a Report<br />
Select the Label Plan or Workstation for which you want to generate a report from TreeView or ListView<br />
Select menu option Reports/ Single Label Plan or All Label Plans or Workstations<br />
The Print screen is displayed<br />
Select the appropriate printer options then click OK.<br />
The Label Plan Report or Workstation Report preview screen is displayed. From here, the Report can be copied to the document/presentation etc. or<br />
printed as hard copy.<br />
National Label Operations - v1.7<br />
Figure 11.1 - An All Label Plans Report<br />
Select the print button at the top of the Details Report preview screen to print the report or the X (Close) option to terminate<br />
the report function.<br />
46
<strong>Visa</strong> Tray Label Management System How To: <strong>User</strong> <strong>Guide</strong><br />
11.3 Maintaining Workstation Information<br />
<strong>User</strong>s can change the workstation, machine type or machine the <strong>Visa</strong> system is assigned to<br />
There are two ways to edit Workstation Information:<br />
1. Through File/Print Label Plan then selecting the Change button in the Machine Details section. Accessing the function in this way allows<br />
you to temporarily change facility information for a specific print run.<br />
2. Through Tools/Maintain Workstation Information, editing the fields as per Workstation Information Details.<br />
11.3.1. Workstation Information Details<br />
You can change the details in the fields from the Maintain Workstation Information screen:<br />
State Name e.g. Victoria.<br />
Facility Type – Customer option is displayed by default.<br />
Facility Name – <strong>Visa</strong> <strong>TLMS</strong> option is displayed by default.<br />
Machine Type – Customer option is displayed by default.<br />
Machine e.g. Holding Plans.<br />
Note: The changes may be stored as permanent changes (Store Defaults) or just used until the Restore Defaults is selected, whereby <strong>Visa</strong> will<br />
restore the default settings.<br />
11.4 Viewing Log Files<br />
National Label Operations - v1.7<br />
Figure 11.2 - Maintain Workstation Information Screen<br />
The View Log Files function allows you to view information generated from the Importing Label Plans process through either <strong>Visa</strong> Explorer or Command<br />
Line execution.<br />
11.4.1. <strong>Visa</strong> Explorer Interface<br />
The <strong>Visa</strong> Explorer interface creates a log file if the user clicks the Save Log button from the Import Label Plan screen. The log file is located in the<br />
default location e.g. C:\Documents and Settings\All <strong>User</strong>s\Documents\<strong>Visa</strong><strong>TLMS</strong>\Data, or in another location you have specified in Setup 2 during the<br />
<strong>Visa</strong> installation The log file name will match the import file name with extension .log.<br />
If a log file with the same name already exists it will be overwritten.<br />
To View Log file:<br />
From <strong>Visa</strong> Explorer, select menu option Tools/View Log Files<br />
Open Log Files screen displays files with extension .log<br />
Select a log file and press Open to view the log file in WordPad.<br />
Figure 11.3 Open Log File Screen<br />
47
<strong>Visa</strong> Tray Label Management System How To: <strong>User</strong> <strong>Guide</strong><br />
11.4.2. Command Line Interface<br />
The Command Line Interface produces a continuous log file created on a weekly basis. The log file name is CommandLineJob.log and is located under<br />
e.g. C:\Documents and Settings\All <strong>User</strong>s\Documents\<strong>Visa</strong><strong>TLMS</strong>\Data directory, or in another location you have specified in Setup 2 during the<br />
<strong>Visa</strong> installation.<br />
Importing Label Plans via the Command Line Interface also produces a separate log file in addition to the continuous CommandLine.log file.<br />
This log contains details about the import progress and any errors that occur. The log file is created under C:\Data\<strong>Visa</strong><strong>TLMS</strong>\Log directory. The log<br />
file name will match the import file name with extension .log.<br />
If a log file with the same name already exists it will be overwritten.<br />
11.5 Printer Requirements<br />
A Barcode printer is required for <strong>Visa</strong> software.<br />
When you select a direct thermal printer to suit your operational needs, consider:<br />
Printing Output – check to meet size and print quality required by <strong>Australia</strong> <strong>Post</strong> standards (Refer Barcode Label Specification V3.0 for<br />
more details).<br />
Printing Speed – is appropriate to your production needs.<br />
11.5.1. Label Printer Settings<br />
This section provides the general Printer Setup instructions for label printers:<br />
1. Install Window Driver into your computer/s as per printer instructions.<br />
2. Configure Printer. The configuration of all printers is different, however the following basic settings are required:<br />
Paper Size: Height x Width = 127 mm x 50 mm<br />
Landscape<br />
Direct Thermal<br />
Temperature Setting<br />
Speed.<br />
3. From <strong>Visa</strong>:<br />
The File/Label Printer Setup menu option enables you to select the label printer and its printing output sequences<br />
This setting is different from the report printer setting, which is determined by the Windows default printer setting<br />
To set up a label printer:<br />
National Label Operations - v1.7<br />
Figure 11.4 - Label Printer Setup Screen<br />
Select menu option File/Label Printer Setup. The Label Printer Setup is displayed<br />
Set Default button to make your selection the current default setting<br />
Click a label printer name from the drop-down list box in the Printer section<br />
Press OK to accept your selection.<br />
48
<strong>Visa</strong> Tray Label Management System How To: <strong>User</strong> <strong>Guide</strong><br />
11.6 Tray Hygiene<br />
All mail trays must be kept clean and inspected regularly for any physical damage for the Tray Management System (TMS) to process mail trays<br />
efficiently.<br />
Label pockets should always be clean and free of any physical defects to allow easy recognition of labels by the TMS scanner.<br />
There are three types of mail trays that you will handle during mail processing:<br />
Small letter fibreboard trays (cardboard trays).<br />
Small letter plastic trays (grey trays).<br />
Large letter coreflute trays (white tubs).<br />
11.6.1. Tray Labels<br />
Remove tray labels from all emptied trays and dispose of in a designated recycle bin<br />
Remove any self-adhesive labels from the tray sides (especially FMOCR labels)<br />
Remove any foreign objects from inside the trays and dispose of in the designated bin<br />
Remove soiled or damaged label pockets and replace with new ones<br />
Do not amend the label with white-out or pen, but use the correct label for the destination and product.<br />
11.6.2. Label Pockets<br />
Remove soiled or damaged label pockets and replace with new ones<br />
Ensure that label pockets are mounted in the correct position. Remove any incorrectly mounted label pockets and reposition in the<br />
correct position<br />
Replace old style labels pockets with new label pockets.<br />
The pockets have a clear matt front and a white backing marked with SAP item number 8828889 and the manufacturing date in the centre.<br />
11.6.3. Damaged Trays<br />
Trays that are damaged and no longer suitable for use within the mail network should be returned to a mail centre.<br />
Trays showing any of the following conditions are not suitable for use within the network:<br />
Excessive wear – poor physical strength<br />
Physical damage – crushed sides, surface breaks, bowing, etc.<br />
Exposed sharp edges or broken surfaces<br />
Dirty or soiled surfaces<br />
National Label Operations - v1.7<br />
Table 11.5. Tray Hygiene Problems<br />
Look For Problem Result<br />
Damaged or Deformed trays Can not pass freely through the TMS Disrupts Tray Management System flow and stops production<br />
Dirty or damaged label pockets Barcode Scanner can not “read” label<br />
accurately<br />
Figure 11.6 – Label Pocket<br />
REMEMBER: Check that trays are in good physical condition.<br />
Remove labels from label pockets and self-adhesive labels from sides and dispose of these labels every time a tray is emptied.<br />
49<br />
Scanner misreads label and sends tray/s to wrong destination<br />
Old or defaced labels on trays Barcode Scanner will route tray incorrectly Scanner reads label and sends tray/s to wrong destination,<br />
causing loss of performance standards
<strong>Visa</strong> Tray Label Management System How To: <strong>User</strong> <strong>Guide</strong><br />
Notes<br />
National Label Operations
<strong>Visa</strong> Tray Label Management System How To: <strong>User</strong> <strong>Guide</strong><br />
Notes<br />
National Label Operations
ABN: 28 864 970 579