Inquiry Lesson Plan
Inquiry Lesson Plan
Inquiry Lesson Plan
You also want an ePaper? Increase the reach of your titles
YUMPU automatically turns print PDFs into web optimized ePapers that Google loves.
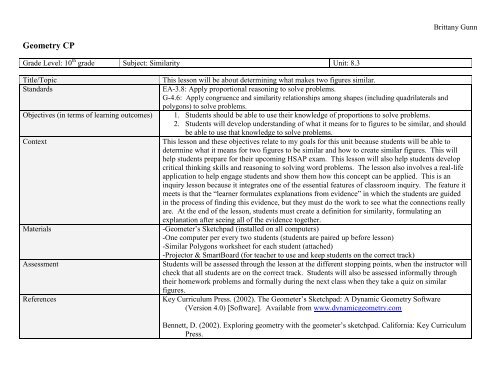
Geometry CP<br />
Grade Level: 10 th grade Subject: Similarity Unit: 8.3<br />
Brittany Gunn<br />
Title/Topic This lesson will be about determining what makes two figures similar.<br />
Standards EA-3.8: Apply proportional reasoning to solve problems.<br />
G-4.6: Apply congruence and similarity relationships among shapes (including quadrilaterals and<br />
polygons) to solve problems.<br />
Objectives (in terms of learning outcomes) 1. Students should be able to use their knowledge of proportions to solve problems.<br />
2. Students will develop understanding of what it means for to figures to be similar, and should<br />
be able to use that knowledge to solve problems.<br />
Context This lesson and these objectives relate to my goals for this unit because students will be able to<br />
determine what it means for two figures to be similar and how to create similar figures. This will<br />
help students prepare for their upcoming HSAP exam. This lesson will also help students develop<br />
critical thinking skills and reasoning to solving word problems. The lesson also involves a real-life<br />
application to help engage students and show them how this concept can be applied. This is an<br />
inquiry lesson because it integrates one of the essential features of classroom inquiry. The feature it<br />
meets is that the “learner formulates explanations from evidence” in which the students are guided<br />
in the process of finding this evidence, but they must do the work to see what the connections really<br />
are. At the end of the lesson, students must create a definition for similarity, formulating an<br />
explanation after seeing all of the evidence together.<br />
Materials -Geometer’s Sketchpad (installed on all computers)<br />
-One computer per every two students (students are paired up before lesson)<br />
-Similar Polygons worksheet for each student (attached)<br />
-Projector & SmartBoard (for teacher to use and keep students on the correct track)<br />
Assessment Students will be assessed through the lesson at the different stopping points, when the instructor will<br />
check that all students are on the correct track. Students will also be assessed informally through<br />
their homework problems and formally during the next class when they take a quiz on similar<br />
figures.<br />
References Key Curriculum Press. (2002). The Geometer’s Sketchpad: A Dynamic Geometry Software<br />
(Version 4.0) [Software]. Available from www.dynamicgeometry.com<br />
Bennett, D. (2002). Exploring geometry with the geometer’s sketchpad. California: Key Curriculum<br />
Press.
Time Part of <strong>Lesson</strong> Details & Specifics<br />
As students walk in, their warm up will be on the board.<br />
20 minutes<br />
60 Minutes<br />
Anticipatory Set (Focus, Review,<br />
Motivation)<br />
Activities<br />
&<br />
Practice<br />
Brittany Gunn<br />
Good Morning Everyone! You’re warm-up is on the board. You should be<br />
working on it as I go around and check homework.<br />
Instructor will go around and check homework while students work on the<br />
warm-up. When completed, Instructor will go over the warm-up problem<br />
with the help of students guiding process. The homework solutions will then<br />
be placed on the board for students to check their homework answers. The<br />
instructor will go over homework problems.<br />
If there are no more homework questions, then it is time for the quiz! Clear<br />
your desks! You will have ten minutes to work on this quiz.<br />
Alright everyone! Now that we have talked about ratios and proportions, we<br />
can talk about similarity! To investigate similarity, we are going to be<br />
working with Geometer’s sketchpad today! We are going to partner up and<br />
each pair will be given one computer. Your partner has already been picked<br />
for you. One student will be on the computer and the other student will need<br />
to be writing down the information on the worksheets I am passing out. This<br />
is most of the notes for today, so you need to make sure to stay on task.<br />
Follow all directions on the sheet. You will see stopping points on the<br />
worksheet. At these points you need raise your hand to let me know that you<br />
have gotten to this point. That is when we will come together to talk about<br />
what you have learned so far. Any questions right now? I am going to pass<br />
out a computer to the pairs and you can get started.<br />
Instructor will pass out the directions and read the target question for the<br />
day. Then the instructor will pass out computers to pairs and walk around to<br />
monitor student work. Instructor will already have stages completed and on<br />
the SmartBoard to show the class where they should be at particular<br />
stopping points.<br />
1 st Stop – Students will look to board and instructor will show students what
10 minutes<br />
Closure (Assessment)<br />
Brittany Gunn<br />
they should have at that time as well. They will discuss that there should be<br />
two figures and that they have just created similar polygons. But we have to<br />
find out the properties to understand what it means to be similar. When you<br />
move the center, what happens? Next you are going to be measuring the<br />
angles. I’m going to show you an example of how to do this.<br />
2 nd Stop – Make sure to answer the question and move on to the next<br />
directions. You’ll be measuring sides next. SWITCH positions with your<br />
partner.<br />
3 rd Stop – Let’s talk about what we’ve seen about sides and angles so far.<br />
What do you notice about the angles in the two figures? Anything about the<br />
sides? For the next portion, you need to use what we learned at the<br />
beginning of this unit about corresponding sides. Then you’ll be finding<br />
ratios.<br />
4 th Stop – Let’s talk about what we have seen overall. What did you notice<br />
about the ratios? What happened when you dragged one point of your<br />
figures? So what does it mean to be similar? Together we will use what we<br />
have learned about similar polygons to answer the question at the beginning<br />
of the worksheet.<br />
Class will work together to answer the question. Then instructor will debrief<br />
students and switch over to a notebook page to work through more<br />
examples and the one theorem from this section. For these examples<br />
students will solve individually, utilizing think-pair-share and students<br />
coming to the board to solve problems.<br />
Your homework assignment is on the board. Problems similar to what we<br />
have done are on your homework.<br />
Review of what we have learned today. Talk about Geometer’s sketchpad<br />
and ask students what they think of it and how it helped them or did not help<br />
them understand similar polygons.


