S250 ins_manual.fh11 - Fakir
S250 ins_manual.fh11 - Fakir
S250 ins_manual.fh11 - Fakir

You also want an ePaper? Increase the reach of your titles
YUMPU automatically turns print PDFs into web optimized ePapers that Google loves.
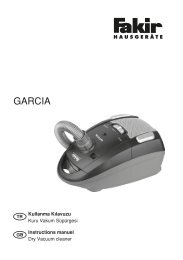
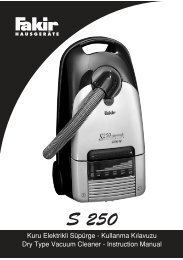
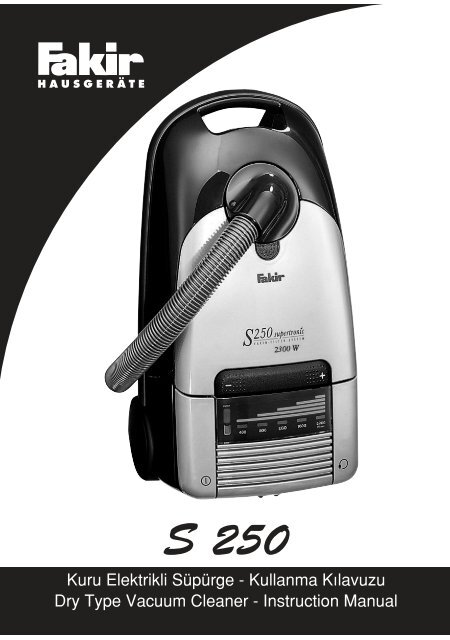
S 250<br />
Kuru Elektrikli Süpürge - Kullanma K›lavuzu<br />
Dry Type Vacuum Cleaner - Instruction Manual
Girifl<br />
Uzun y›llar sorunsuz çal›flmas› için tasarlanan<br />
ve üretilen <strong>Fakir</strong> <strong>S250</strong> Elektrikli Süpürgeyi<br />
sat›n ald›¤›n›z için teflekkür ederiz.<br />
Benzer ürünleri kullanmaya al›fl›k olabilirsiniz,<br />
ancak kullanma k›lavuzunu okumak için lütfen<br />
zaman ay›r›n›z. Bu k›lavuz sat›n alm›fl<br />
oldu¤unuz üründen en iyi performans›<br />
alman›z için haz›rlanm›flt›r.<br />
Güvenlik Önemlidir<br />
Kendi güvenli¤iniz ve di¤erlerinin güvenli¤i<br />
için ürünü çal›flt›rmadan önce kullanma<br />
k›lavuzunu okuyunuz.<br />
Bu k›lavuzu ilerideki kullan›mlar için güvenli<br />
bir yerde saklay›n›z.<br />
Güvenlik Uyar›lar›<br />
Elektrikli bir cihaz kullan›l›rken, afla¤›daki<br />
önlemler her zaman al›nmal›d›r. Yang›n,<br />
elektrik çarpmas› ve kiflisel yaralanmalar›<br />
engellemek için;<br />
• Bu cihaz sadece hafif ev ve ofis kullan›m›<br />
için tasarlanm›flt›r. Cihaz› farkl› bir amaç için<br />
kullanmak, cihaza zarar verecektir.<br />
• Cihaz› kullanmadan önce, flebeke voltaj›n›z<br />
ile cihaz›n voltaj›n›n uyumlu oldu¤undan emin<br />
olunuz.<br />
• Cihaz bir oyuncak de¤ildir. Bundan dolay›<br />
çocuklar›n cihaz› kullanmalar›na izin<br />
vermeyiniz ve cihaz› çocuklar›n yan›nda<br />
kullan›rken daha dikkatli olunuz.<br />
• Ilk kullan›mdan önce cihaz› hasar ve ar›zalara<br />
karfl› kontrol ediniz. Cihazda herhangi bir<br />
ar›za ya da hasar var ise, cihaz› kullanmay›n›z<br />
ve <strong>Fakir</strong> Yetkili Servisi’ne baflvurunuz.<br />
• Cihaz› aç›k alanda kullanmay›n›z.<br />
• Cihaz ile yan›c› s›v›lar›, yanan maddeleri<br />
(sigara, kül vb.) süpürmeyiniz.<br />
• Süpürgeyi hiçbir zaman do¤rudan <strong>ins</strong>anlara<br />
ve hayvanlara tutmay›n›z.<br />
• Cihaz› sadece kendi aksesuarlar› ile<br />
kullan›n›z.<br />
• Bu kullanma k›lavuzunu ilerideki kullan›mlar<br />
için saklay›n›z.<br />
• Prizdeki tozlar› düzenli olarak temizleyiniz.<br />
• Cihaz› hava ç›k›fl kanal› ya da çekifl k›sm›<br />
kapal›yken kesinlikle kullanmay›n›z.<br />
• Cihaz› duvara ya da mobilyan›za sert bir<br />
flekilde vurmay›n›z.<br />
• Cihaz kapal› durumdayken fiflini prizde<br />
b›rakmay›n›z.<br />
• <strong>Fakir</strong> cihazlar› bilinen teknik kurallara ve<br />
güncel cihaz güvenlik yasalar›na uygundur.<br />
• Bu cihazlar Avrupa Birinin 89/336/EWG<br />
‘E)elektromanyetik Uyumluluk ve 73/23/EWG<br />
A1c Gerilim Direktifleri’nin talimatlar›na<br />
tamamen uygundur. Bu ürün cihaz tip<br />
etiketinde CE iflaretine sahiptir.<br />
• <strong>Fakir</strong>, dizayn ve donan›m de¤iflikli¤i hakk›na<br />
sahiptir.<br />
• Hasar gören cihazlar çal›flt›r›lmamal›d›r. E¤er<br />
ba¤lant›da eksiklikler varsa derhal<br />
giderilmelidir.<br />
• Cihaz ancak tip etiketinde belirtilen gerilim<br />
flebekeye uygunsa çal›flt›r›lmal›d›r.<br />
• Prizler 16A’hk ev sigortalar›yla garantiye<br />
al›nmal›d›r.<br />
• Cihaz farkl› bir amaç için ya da hatal› bir<br />
flekilde kullan›l›rsa veya bak›m› ya da tamir<br />
ifllemleri yetkili olmayan kifliler taraf›ndan<br />
yap›l›rsa ç›kabilecek istenmeyen sonuçlardan<br />
<strong>Fakir</strong> sorumlu de¤ildir.<br />
• Cihaz›n kusursuz çal›flmas› için ka¤›t filtrelerin<br />
ve de micro-hava filtresinin tak›lm›fl olmas›<br />
gerekir.<br />
• Filtre de¤iflim göstergesine dikkat edilmeli,<br />
bütün filtreler kontrol edilmeli, kullan›m<br />
k›lavuzuna göre temizlenmeli ve<br />
de¤ifltirilmelidir.<br />
• Aksesuar parçalar› tak›l›rken, cihaz<br />
temizlenirken, tamir veya bakim<br />
çal›flmalar›ndan önce fifli prizden çekilmelidir.<br />
Lüzumu halinde flebeke ba¤lant› kablosu<br />
sadece kablo sarma tertibat›yla birlikte yetkili<br />
3
ir kifli taraf›ndan de¤ifltirilebilir.<br />
• Ba¤lant› kablosu de¤ifltirilirken, üreticinin<br />
belirtti¤i tipten farkl› kablo<br />
kullan›lmamal›d›r.(H 05 W-F2XO.75) fiebeke<br />
ba¤lant› kablosu, sadece yetkili <strong>Fakir</strong><br />
servislerince de¤ifltirilebilir.<br />
• Cihaz›n tamiri ancak yetkili <strong>Fakir</strong><br />
servislerince yap›lmal›d›r(yetkili servis<br />
listesine bakiniz). Yanl›fl tamir ifllemleri<br />
kullan›c› için tehlike oluflturabilir.<br />
• Ba¤lant› kablosunu asla keskin kenarlara<br />
sürtmeyiniz veya ba¤lamay›n›z.<br />
• Hasar görmüfl uzatma kablolar›n›<br />
kullanmay›n›z.<br />
• A¤›zlar ve boru uçlar› asla göz ve kulaklara<br />
yaklaflt›r›lmamal›d›r.<br />
• Alet sadece kuru temizlik için kullan›labilir.<br />
• S›cak veya yanan maddeler, patlay›c› s›v›lar<br />
ve gazlar emilmemelidir,<br />
• Turbo elektrikli f›rça kullan›rken, f›rçan›n<br />
rotasyon s›ras›nda ba¤lant› kablosunun<br />
ezilmemesine dikkat ediniz.<br />
• Cihaz nemli bir ortamda ve yüksek s›cakl›k<br />
alt›nda b›rak›lmamal›d›r.<br />
• Cihaz sadece kuru veya hafif ›slak bezle<br />
temizlenmelidir. Bunu yaparken ak›m geçen<br />
yerler (anahtar, fifl, elektronik, vb.) suyla<br />
temas etmemelidir.<br />
BU KULLANMA KILAVUZUNU<br />
‹LER‹DEK‹ KULLANIMLAR ‹Ç‹N<br />
SAKLAYINIZ.<br />
Ürün bilgileri<br />
Model: <strong>S250</strong> Elektrik Süpürgesi<br />
Güç: Max. 2300 W<br />
4<br />
1. Mobilya koruyucu<br />
2. Elektrikli vakum f›rças›n›n fifli<br />
3. Filtre bölümü açma anahtar›<br />
4. Sap<br />
5. Vakum hortumu<br />
6. Vakum hortumu sökme cihaz›<br />
7. Vakum soketi<br />
8. Aksesuar bölüm kapa sökme butonu<br />
9. Aksesuar bölümü kapa¤›<br />
10. Güç kontrol<br />
11. Ön panel<br />
12. Otomatik sarmal› kablo<br />
13. Kablo<br />
14. D›flar› hava verme ›zgaras›<br />
15. D›flar› hava verme ›zgaras›n› ç›kartma<br />
anahtar›<br />
16. Aparat deste¤i<br />
17. Pedal ON/OFF<br />
18. Filtre de¤iflim göstergesi<br />
19. Filtre bölüm kapa¤›<br />
20. Vakum tüpü deste¤i(alt k›s›m)<br />
21. Tekerlek (alt k›s›m)<br />
22. Güç ayarlama anahtar›(yükseltmek)<br />
23. LED ›fl›kl› ön panel<br />
24. Tekerlekler<br />
Kullan›m<br />
Vakum hortumunun sökülüp<br />
tak›lmas›:<br />
Cihaz bükülebilir vakum hortumuna, vakum<br />
kontrolüne ve <strong>Fakir</strong> patentli fifl girifline<br />
sahiptir. Vakum hortumunu vakum soketinin
içine kilitlenene<br />
kadar itiniz.<br />
Hortumu<br />
sökmek için<br />
vakum<br />
hortumunun<br />
yan›ndaki<br />
sökme<br />
dü¤mesine<br />
bas›n›z ve vakum hortumunu ç›kar›n›z.<br />
Emifl gücünün ayarlanmas›:<br />
Maksimum emifl<br />
gücü=Sürgü<br />
öne (aç›kl›k<br />
kapal›)<br />
Minimum emifl<br />
gücü= Sürgü<br />
arkaya (aç›kl›k<br />
görülebilir<br />
durumda)<br />
Aksesuar Bölümü:<br />
Aksesuar deposu açma dü¤mesine bas›n›z,<br />
kapak otomatik<br />
olarak<br />
aç›lacakt›r.<br />
Gereken<br />
aksesuarlar›<br />
al›n›z ve kapa¤›<br />
kapat›n›z.<br />
Makinenin Çal›flt›r›lmas›:<br />
On/off<br />
dü¤mesine<br />
basarak makine<br />
çal›flt›rabilirsiniz.<br />
Kablonun Toplanmas›:<br />
Kablo<br />
dü¤mesine<br />
bast›¤›n›zda<br />
kablo otomatik<br />
olarak toplan›r.<br />
Kablonun<br />
prizden çekili<br />
olmas›na dikkat<br />
ediniz.<br />
<strong>S250</strong><br />
Dokunmatik<br />
dü¤me ile<br />
cihaz›n h›z›<br />
k›rm›z› ›fl›kla<br />
gösterilen 5<br />
aflamada<br />
ayarlan›r.<br />
Elektronik K›sa Devre:<br />
Motora afl›r› yüklenme sonucu cihaz›n h›z›<br />
otomatik olarak minimum dereceye düfler.<br />
Ar›za sinyali 300W göstergesinde belirir.<br />
Bu durumda cihaz› kapay›n›z. Filtre ve<br />
aksesuarlar› kontrol edip cihaz yeniden<br />
çal›flt›rd›¤›n›zda h›zl› bir flekilde iflleme<br />
bafllayacakt›r.<br />
Boru Deste¤i:<br />
Nakliye ve Muhafaza: Alet dik olarak<br />
konulmal› ve<br />
emme borusu<br />
tutucusu aletin<br />
alt taraf›ndaki<br />
aç›kl›¤a<br />
tak›lmal›d›r.Alet<br />
rahatça<br />
tafl›nabilir.<br />
5
Aparat Deste¤i:<br />
Cihaz<br />
kullan›lmad›¤›nda<br />
komple vakum<br />
borusu aletin arka<br />
taraf›na konulabilir.<br />
Zemin aparat›n›<br />
sabitleme k›sm›n›<br />
aç›kl›¤a itiniz.<br />
Filtre De¤iflim Göstergesi:<br />
Filtre de¤iflimi iflareti gösteriyorsa, hava<br />
ak›fl› azal›r.<br />
Filtre Bofl: Gösterge reaksiyon göstermez.<br />
(Büyük hava geçirgenli¤i)<br />
Filtre Dolu: Filtre de¤iflim göstergesi k›rm›z›<br />
olur. (Filtre hava geçirmez) Filtre<br />
de¤ifltirilmeli. Genelde ka¤›t filtreyi<br />
de¤ifltirmek zorunda kal›n›r.<br />
E¤er filtrenin de¤iflmesine ra¤men filtre<br />
de¤iflim göstergesi hala k›rm›z› gösteriyorsa<br />
vakum kanal›<br />
(borular,<br />
a¤›zlar, emme<br />
hortumu veya<br />
emifl soketi)<br />
t›kanm›flt›r.<br />
Problemi<br />
ortadan<br />
kald›rmak için<br />
t›kanmay› gidermelisiniz.<br />
<strong>Fakir</strong> Filtre Vario Sistemi:<br />
<strong>Fakir</strong> Vario filtre kullan›m flekilleri ya da<br />
çeflitli ihtiyaçlara uyabilecek flekilde<br />
ayarlanm›flt›r. Kullan›c› filtrelerin hepsini ya<br />
da birkaç›n› iste¤e ba¤l› bir flekilde<br />
birbirinden ba¤›ms›z olarak de¤ifltirebilir.<br />
Bu sistem kokulu maddeleri içeren at›klar›n,<br />
makinan›n filtre bölümündeki de¤ifltirilebilen<br />
ka¤›t filtrelerde toparlanabilece¤ini, yani<br />
motora hiçbir tozun ya da baflka bir<br />
maddenin girmeyece¤ini garanti eder. Bu<br />
sistem afla¤›daki filtrelerden oluflmaktad›r.<br />
6<br />
A. Multi ply ka¤›t filtre<br />
B. Ana Mikro Filtre<br />
C. Bir filtre ünitesi<br />
D. Mikro hava iki filtresi.<br />
A. De¤ifltirilebilir Ka¤›t Filtre:<br />
Bu filtre her çeflit toz ve parçalar› tutar. Dolu<br />
ka¤›t filtrenin de¤ifltirilme esnas›nda<br />
kapatma sistemi birikmifl tozlar›n kaç›fl›n›<br />
önler.<br />
B. Ana Mikro Filtresi:<br />
Ka¤›t filtreden s›zabilen ince tozlar ana filtre<br />
taraf›ndan tutulur.<br />
C. Filtre Üniteleri:<br />
Filtre Micro Vario filtre kasetinin içine<br />
yerlefltirilir. Cihaz filtre ünitesi olmadan<br />
kullan›lmaz, Micro Vario filtre kaseti afla¤›da<br />
belirtilen filtre ünite modelleriyle kullan›l›r.<br />
Motor koruma filtresi (siyah)<br />
Bu filtre, ka¤›t filtre zarar gördü¤ünde veya<br />
ana mikro filtre kasetin içine<br />
yerlefltirilmemiflse, büyük toz parçac›klar›n›n<br />
yuvaya girmemesini sa¤lar. ‹stenildi¤i<br />
takdirde su ile temizlenip, kurulan›p kasetin<br />
içine yerlefltirilebilir.<br />
Aktive Edilmis Karbon Filtre (Gri)<br />
Kaliteli, aktive edilmifl karbon fitre ünitesi,<br />
kir ve tozlar›n içinde bulunan etrafa kötü<br />
koku yayabilecek maddeleri tutmak<br />
amac›yla dizayn edilmifltir. Böylece havan›n
daha temiz olmas› sa¤lanm›fl olacakt›r.<br />
(Özellikle evcil hayvan besleyen evlerde<br />
kullan›lmas› tavsiye edilir.)<br />
Bir mikrondan küçük partiküller için etkili<br />
hava filtresi (yeflil)<br />
Bu filtre en ince partikülleri bile (0.3<br />
mikronluk) neredeyse tamamen tutar.<br />
Filtreleme özelli¤i o kadar iyidir ki makineden<br />
ç›kan hava odadaki, havadan daha az toz<br />
içerir. ‹stenilen hijyen ve oda havas›<br />
temizli¤ini elde edebilmek için vakumlama<br />
ifllemi yap›l›rken her zaman HEPA filtreleri<br />
kullan›lmal›d›r.<br />
Mikro Vario Kombinasyon Filtresi<br />
Bu filtre aktive edilmifl karbon filtresinin ve<br />
bir mikrondan küçük partiküller için dizayn<br />
edilmifl filtrenin özelliklerinin tümünü<br />
bar›nd›r›r.<br />
D. Mikro Hava Ç›k›fl Filtresi:<br />
Bu filtre, filtre bölümünde yer almaz fakat<br />
hava ›zgaras›n›n alt›ndaki motorun çal›flmas›<br />
s›ras›nda motor karbon f›rçalar›n›n tozdan<br />
kaynaklanan afl›nmalar›n› engeller.<br />
Yenileme Süreleri<br />
Cihazlardan etkili vakumlama sonucu almak<br />
ve kokuyu azaltmak için filtreleri ve filtre<br />
ünitelerinin göstergede belirtildi¤i zaman<br />
afla¤›daki süreler içinde, daha önce<br />
yenilenmifl bile olsa, de¤ifltiriniz.<br />
Ana mikro filtresi/Mikro hava filtresi<br />
Ka¤›t filtrenin haznesi doldu¤unda<br />
de¤ifltirilir.<br />
Aktif charcoal filtresi / mikro vario<br />
kombinasyan filtresi<br />
Kullan›c›ya ba¤l› olarak 6 ile 12 ay aras›<br />
Yüksek etkili kütle hava filtresi<br />
18 ay ile 2 y›ll›k periodlar aras›nda<br />
Toz Bölmesi Kapa¤›n›n Aç›lmas›:<br />
Toz bölmesi kapa¤› dü¤meye hafif basarak<br />
aç›lmal›d›r. Filtre de¤ifliminde veya temizlikte<br />
kapa¤›<br />
kilitleninceye<br />
kadar itiniz.<br />
Kapak çarpma<br />
noktas›n›n<br />
d›fl›na kadar<br />
zorlan›rsa<br />
yataklar›ndan<br />
ç›kar. Ka¤›t<br />
Filtrenin De¤ifltirilmesi:<br />
Toz bölmesi açma dü¤mesinin kilidini aç›n›z,<br />
kapa¤› kald›r›n›z. Ka¤›t filtre manfletindeki<br />
sürgülü dili filtre manfletindeki sürgülü dili<br />
filtredeki aç›kl›k kapan›ncaya kadar çekiniz.<br />
Hareketli filtre tutucuyla birlikte dolmufl ka¤›t<br />
filtreyi hafifçe kald›r›n›z, k›zaktan çekiniz ve<br />
katlamadan çöp kabinine koyunuz.<br />
Yeni ka¤›t filtreyi filtre k›za¤›na yerlefltiriniz,<br />
arkaya dayan›ncaya kadar itiniz. Filtre<br />
k›za¤›n› yan dayanaklara kadar indiriniz,<br />
toz bölümün kapa¤›n› kapat›n›z.<br />
Mikro Ana Filtrenin De¤ifltirilmesi:<br />
Fitre bölümünün kapa¤›n› aç›n›z, ka¤›t filtreyi<br />
ç›kart›n›z ve filtre tutucuyu yerine yerleflene<br />
kadar çeviriniz.<br />
MIKRO VARIO filtre<br />
kasetini filtre<br />
bölümünden<br />
ç›kart›n›z ve kasetin<br />
›zgaras›n› aç›n›z.<br />
7
Ana mikro filtreyi de¤ifltirip kasetin ›zgaras›n›<br />
kapat›n›z. Filtre kasetini ve ka¤›t filtreyi<br />
yerlefltiriniz ve toz bölümünü kapat›n›z.<br />
Filtre Ünitesinin De¤ifltirilmesi:<br />
Filtre bölümünün kapa¤›n› aç›n›z, ka¤›t filtreyi<br />
ç›kart›n›z ve filtre tutucuyu yerine yerleflene<br />
kadar çeviriniz. MIKRO VARIO filtre kasetini<br />
filtre ünitesi ile birlikte filtre bölümünden<br />
ç›kart›n›z.<br />
Yeni filtreyi paketinden ve koruma<br />
folyosundan ç›kart›n›z ve filtre kasetinin içine<br />
koyunuz. Ana mikro<br />
filtreyi de¤ifltirip<br />
kasetin ›zgaras›n›<br />
kapat›n›z. Filtre<br />
kasetini ve ka¤›t<br />
filtreyi yerlefltiriniz<br />
ve toz bölümünü<br />
kapat›n›z.<br />
Mikro Vario kombinasyon filtresi<br />
Yüksek Etkili Mikron hava filtresi<br />
Aktif Karbon Filtresi<br />
Motor Koruma filtresi<br />
Mikro Hava Ç›k›fl Filtresinin<br />
De¤ifltirilmesi<br />
Hava ç›k›fl ›zgaras›n›n kilit dü¤mesine bas›n<br />
ve ›zgaray› kald›r›n›z. Kirli filtreyi d›flar› al›n<br />
ve çöpe at›n›z. Yeni mikro hava filtresini<br />
›zgara çekmecesine koyunuz, hava ç›k›fl<br />
›zgaras›n› e¤ik<br />
olarak yerine<br />
yerlefltiriniz<br />
dayan›ncaya kadar<br />
öne çekiniz ve<br />
sürgülü anahtar<br />
iflitilebilir flekilde<br />
kilitleninceye kadar<br />
afla¤› bast›r›n›z.<br />
8<br />
Bükülebilir Vakum Hortumu<br />
Bükülebilir vakum hortumu, tutma sap›,<br />
vakum kontrol<br />
bölümü ve <strong>Fakir</strong><br />
patentli fleritten<br />
oluflmufltur.<br />
Teleskopik boru<br />
istenilen boyuta<br />
ayarlanabilir.<br />
Teleskopik boruyu<br />
dilinin bitiminde durdurunuz. Aksi halde<br />
tutma sap› borunun sonuna kadar ilerler.<br />
Dar Aparat<br />
Dar aparat döflemelerinin derin yerlerinin,<br />
köflelerin,<br />
ç›k›nt›lar›n ve<br />
süpürgeliklerin<br />
temizli¤inde<br />
kullan›l›r.<br />
Is› Özellikli F›rça<br />
Dar aparat›n<br />
üzerinde bulunan bu f›rça, radyatör<br />
peteklerinin temizli¤inde kullan›l›r.<br />
Döfleme Aparat›<br />
Döfleme aparat› sadece perdelerin mobilya<br />
döflemelerinin ve dar alanlar›n temizli¤inde<br />
kullan›l›r. Özel<br />
tara¤›yla tozlar› ve<br />
birikmifl kirleri k›sa<br />
bir sürede bir araya<br />
toplar ve temizler.<br />
Resimler, pencere<br />
içleri, kitaplar, bu<br />
mobilya f›rças› ile<br />
temizlenebilir.<br />
Dönen F›rça Aparat›<br />
Bu aparat, hal›lar›n, kiremit ve tahta<br />
zeminlerin temizli¤inde kullan›l›r.<br />
Hali zeminler= k›ldan pervazlar içeri çekik
Sert döfleme= k›ldan pervazlar d›flar› ç›k›k<br />
Turbo Vakum F›rças›<br />
Turbo vakum f›rças› temelde küçük alanlar›n<br />
ve dar hal›lar›n temizli¤inde kullan›labilir.<br />
Toz, kir ve küçük parçac›klar›n<br />
temizlenmesini sa¤lar.<br />
F›rçan›n silindirleri toz, tüy veya kirden<br />
t›kand›¤›ndan aparat›n alt k›sm›ndaki bölümü<br />
aç›n›z ve t›kanan materyalleri ç›kar›p kapa¤›<br />
kapat›n›z.<br />
Elektrikli Vakum F›rças›<br />
Elektrikli vakum f›rças›<br />
güçlü motoru<br />
sayesinde etkili bir<br />
temizlik sa¤lar.<br />
Sert Zemin Aparat›<br />
Sauna, spor salonlar›nda ve benzeri<br />
yenlerde bulunan kiremit, tafl, çimento ve<br />
parke gibi sert zeminlerin temizlenmesinde<br />
bu özel aparat<br />
kullan›labilir.<br />
Cihaz›n Temizlenmesi<br />
Cihaz›, ana soketten ç›kart›n›z ve sadece<br />
kuru ya da az nemli bir bezle temizleyiniz.<br />
Suyun alt›na kesinlikle tutmay›n›z. Gerekli<br />
gördü¤ünüzde filtre bölümünü de nemli bir<br />
bezle temizleyiniz.<br />
Aksesuar ve Filtre Siparifli<br />
Siparifllerinizi <strong>Fakir</strong> yetkili servislerinden<br />
edinebilirsiniz.<br />
Introduction<br />
Thank you for purchasing <strong>Fakir</strong> <strong>S250</strong> Dry<br />
Type Vacuum Cleaner which has been<br />
designed and manufactured to give you<br />
many years of trouble-free service.<br />
You may already be familiar with using a<br />
similar product, but do please take time to<br />
read these <strong>ins</strong>tructions - they have been<br />
written to ensure you get the very best from<br />
your purchase.<br />
9
Safety is Important<br />
To ensure your safety and the safety of<br />
others, please ensure you read the Safety<br />
Instructions before you operate this product.<br />
Keep this information in a safe place for<br />
future reference.<br />
Imported Safeguards<br />
When using an electric appliance, basic<br />
precautions should always be followed,<br />
including the following:<br />
To reduce the risk of fire, electric shock, or<br />
injury:<br />
• The device is only authorized for private,<br />
domestic use only. Using it for any other<br />
purposes will harm the device.<br />
• Before using the device, check that your<br />
local ma<strong>ins</strong> voltage coincides with the<br />
voltage of the ma<strong>ins</strong> adapter.<br />
• The devices is not a toy, therefore please<br />
be particularly careful when children are<br />
around.<br />
• Check the device and connections regularly<br />
for visible damage. The device must not<br />
be used if the housing is damaged or other<br />
damage is present. In case of a damage<br />
please contact with Authorized <strong>Fakir</strong><br />
Service.<br />
• Do not use the unit outside.<br />
• Do not use the device to pick up<br />
inflammable fluids (e.g. Fuel or solvent) or<br />
burning objects (e.g. ash cigarettes).<br />
• Do not point the vacuum cleaner at persons<br />
or animals when in operation.<br />
• Only use the device with the accessories<br />
supplied.<br />
• Please keep these <strong>ins</strong>tructions in a safe<br />
place for future references.<br />
• Clean any dust on the power plug regularly.<br />
• When servicing the unit, never put fingers<br />
or other objects into any rotating unit, the<br />
device would accidentally be turned on.<br />
10<br />
• Do not operate the product covering the<br />
suction or exhaust ports.<br />
• Do not strike the suction head hard aga<strong>ins</strong>t<br />
the wall or furniture.<br />
• Disconnect the power plug from the power<br />
outlet when not in use.<br />
• <strong>Fakir</strong> appliances comply with recognized<br />
technological standards and the current<br />
safety regulations for electrical appliances.<br />
• These appliances fulfil the requirements of<br />
EU Guidelines “89/336/EEC<br />
Electromagnetic compatibility” and<br />
“73/23/EEC Low voltage guideline”. The<br />
appliance is marked with the CE symbol<br />
on the rating plate.<br />
• <strong>Fakir</strong> reserves the right to modify designs<br />
and specifications without notice.<br />
• Appliance only to be connected to voltage<br />
indicated on the rating plate.<br />
• You have acquired an appliance of<br />
exceptionally strong suction power. As fuse<br />
protection a min. 10 ampere fuse has to be<br />
used.<br />
• <strong>Fakir</strong> will not accept any liability for damage<br />
or injury if the appliance is used other than<br />
for its intended purpose or is improperly<br />
operated or inexpertly repaired and<br />
maintained.<br />
• Before use, check to ensure that all the<br />
filters are correctly <strong>ins</strong>talled. The appliance<br />
must not be used without filters.<br />
• Use only genuine <strong>Fakir</strong> filters and<br />
accessories.<br />
• The appropriate filters (paper filter or micro<br />
power filter, micro main filter, motor<br />
protection filter or activated carbon filter or<br />
high efficiency submicron particulate airfilter<br />
or micro vario combination filter and micro<br />
exhaust filter) must be <strong>ins</strong>talled at all times<br />
to ensure the efficient operation of the<br />
appliance.<br />
• lf the filter indicator lamp lights up, <strong>ins</strong>pect<br />
all the filters and clean or replace in<br />
accordance with the Instructions for Use.
• When connecting accessories, cleaning,<br />
repairing or servicing the unit, unplug the<br />
unit.<br />
• Do not let children use electrical appliances<br />
unsupervised.<br />
• This appliance is not suitable to be used<br />
to pick up substances constituting a health<br />
• hazard.<br />
• Repairs should be carried out by an<br />
authorized <strong>Fakir</strong> service center (see<br />
enclosed list of adresses). Incorrect repairs<br />
may the user to electrical danger.<br />
• Do not pull out the plug from power supply<br />
socket by pulling on the connecting lead.<br />
• Do not pull the connecting lead over sharp<br />
edges or allow it to become jammed.<br />
• Do not use damaged extension leads.<br />
• lf required, the connecting lead has to be<br />
replaced together with the cable rewind by<br />
an autorized <strong>Fakir</strong> After-Sales-Service only.<br />
• Before any maintenance operation or<br />
replacing a filter, and after use, switch off<br />
the appliance and pull out the ma<strong>ins</strong> plug.<br />
• Keep the nozzles and ends of tubes well<br />
away from the eyes and ears.<br />
• The appliance must only be used for dry<br />
vacuum cleaning. lt is not a dual-purpose<br />
(wet/dry) vacuum cleaner.<br />
• Do not use the appliance to pick up hot or<br />
glowing substances.<br />
• Do not use the appliance to pick up coarse<br />
slivers of glass.<br />
• Do not use the appliance to pick up any<br />
solvents, explosive liquids or gases.<br />
• When using the turbo suction brush resp.<br />
the electric suction brush, keep the hands<br />
clear of the rotating brush roller and take<br />
care not to run over the connecting lead.<br />
• Do not store the appliance in the open air.<br />
• Do not exposure the machine to weather,<br />
humidity nor excessive heat.<br />
• Clean the appliance only with a dry or<br />
slightly moist cloth. Do not allow any of the<br />
electrical components (switches, plug,<br />
socket, electronics etc.) to come into contact<br />
with water.<br />
Keep this <strong>manual</strong> for future use.<br />
Item Specifications<br />
Model: <strong>S250</strong> Dry Type Vacuum Cleaner<br />
Power: Maximum 2300 W<br />
1 . Furniture protection<br />
2 . Plug* for electric suction brush<br />
3 . Opening key for filter compartment cover<br />
4 . Handle<br />
5 . Suction hose<br />
6 . Release button for suction hose<br />
7 . Suction socket<br />
8 . Release button for accessory compartment<br />
cover<br />
9 . Accessory compartment cover<br />
10. Power control<br />
11. Operation panel<br />
12. Foot key for cable rewind<br />
13. Cable<br />
14. Exhaust air grille<br />
15. Release key for exhaust air grille<br />
16. Nozzle support - parking position<br />
17. Pedal ON-OFF<br />
18. Filter exchange indicator<br />
19. Filter compartment cover<br />
20. Suction tube support (bottom side)<br />
11
21. Guiding wheel (bottom side)<br />
22. (+) Key for power adjustmend (increase)<br />
23. Operation panel with LED lights<br />
24. Castors<br />
USING THE PRODUCT<br />
Installing-removing of suction hose<br />
Fexible suction hose with nadle, suction<br />
controland <strong>Fakir</strong>-patented plug-in fastening<br />
of the hose. Push the suction hose into the<br />
opening of the<br />
suction socket<br />
until it snaps in<br />
audibly. Press the<br />
release button at<br />
the side of the<br />
suction hose<br />
socket and pull<br />
out the suction<br />
hose.<br />
Adjustment of suction power<br />
max. = slider upward (opening closed)<br />
min. = slider downgrade (opening visible)<br />
Accessories compartment<br />
Press the release button - the cover of the<br />
accessory compartment is opening<br />
automatically<br />
and take out the<br />
necessary<br />
accessory.<br />
Then close the<br />
cover until it<br />
snaps in with an<br />
audible click.<br />
12<br />
Switching on and off<br />
By pressing<br />
the switch<br />
button the<br />
vacuum<br />
cleaner is<br />
switched on<br />
and off.<br />
Automatic cable reel with brake<br />
The cable is automatically rewqund when<br />
you press the<br />
cable button.<br />
However, this<br />
should only be<br />
done when the<br />
plug has been<br />
removed from<br />
the wall socket.<br />
With the plus/minus touch control the suction<br />
power can be preselected in 5 stages and<br />
is shown by<br />
LED lights.<br />
When switching<br />
on the<br />
electronic is<br />
automatically<br />
putting in the<br />
ECO power<br />
stage.<br />
Electronic overheat cutout<br />
In case of surcharge of the motor – resulting<br />
from chocked up filters or accessories –<br />
the electronic is automatically switching to<br />
the off position. Switch off the appliance,<br />
control the filter resp. suction accessory<br />
and remove the choking. After a few minutes<br />
the appliance can be operated again.
Tube support / Deposit<br />
When moving<br />
the appliance<br />
and after use :<br />
Place it upright<br />
and <strong>ins</strong>ert the<br />
suction tube<br />
holder into the<br />
aperture in the<br />
underside of the<br />
appliance. It can be moved about with<br />
ease.<br />
Nozzle support / Short-time hold<br />
When not in use,<br />
the entire suction<br />
tube at the back<br />
of the appliance<br />
can be stowed<br />
away by pushing<br />
the retaining bar<br />
on the floor<br />
nozzle into the<br />
aperture provided.<br />
Filter exchange indicator<br />
The filter exchange indicator analyzes the<br />
air permeability of the filter system.<br />
Paper filter empty: no reaction of the<br />
indicator<br />
Paper filter full: filter exchange indicator<br />
shows “RED” The paper filter has to be<br />
exchanged.<br />
Is the filter exchange indicator, <strong>ins</strong>pite of<br />
an exchange of the paper filter, still signaling<br />
a filter exchange,<br />
the filters in the<br />
filter cassette or<br />
the accessories<br />
are chocked up.<br />
In this case the<br />
filters have to be<br />
exchanged or<br />
the choking in<br />
the accessory has to be removed.<br />
<strong>Fakir</strong> VARIO-FILTER-SYSTEM<br />
The <strong>Fakir</strong> Vario filter system can be specially<br />
adjusted to suit particular needs or forms<br />
of use.<br />
The user can replace or, depending on<br />
requirements, exchange all or any of the<br />
filter elements at any time and<br />
independently of each other. The system<br />
ensures that any dirt containing smelly<br />
substances or germs is trapped by the<br />
replaceable working filters, all of which are<br />
located in the filter compartment of the<br />
machine. As a result, no dust or fibres can<br />
get into the motor compartment<br />
(encapsulated system) and lodge there.<br />
The <strong>Fakir</strong> Vario filter system consists of the<br />
following filters (see illustration above):<br />
A Micro-Power-Filter with sealing system<br />
B Micro main filter, located in the MICRO<br />
VARIO filter cassette<br />
C A filter unit (various types), located in the<br />
MICRO VARIO filter cassette<br />
D Micro exhaust air filter, located below the<br />
air outlet grille.<br />
A Micro-Power-Filter<br />
This filter traps coarse and fine dirt of all<br />
kinds. The sealing system prevents any<br />
escape of the contents when the full filter<br />
is removed.<br />
B Micro main filter<br />
Ultra fine dust, which is able to penetrate<br />
through the walls of the replaceable paper<br />
13
filter, is trapped by the main micro filter.<br />
This also serves as a prefilter and protects<br />
the downstream filter elements.<br />
C FILTER UNITS<br />
The MICRO VARIO filter cassette serves to<br />
accommodate a filter unit. One of these is<br />
indispensable, i.e. the vacuum cleaner must<br />
not be used unless a filter unit has been<br />
<strong>ins</strong>talled. The MICRO VARIO filter cassette<br />
can be used with any one of the following<br />
types of filter unit:<br />
Motor protection filter (colour: black)<br />
This filter ensures that no coarse dirt gets<br />
into the housing if the paper filter is defective<br />
and no main micro filter has been <strong>ins</strong>talled<br />
in the cassette. If required, this unit can be<br />
cleaned with water, dried and re<strong>ins</strong>talled<br />
in the cassette.<br />
Activated carbon filter (colour: grey)<br />
This is a high quality, activated charcoal<br />
filter unit which is intended, in particular, to<br />
trap any smelly substances contained in<br />
dust and dirt, thus making an important<br />
contribution to improved air quality<br />
(recommended for households with pets).<br />
High efficiency submicron particulate air<br />
filter (colour: green)<br />
This high performance filter traps the finest<br />
particles (particulates) of 0.3 microns in<br />
size, almost entirely. The filtration effect is<br />
so good that the air coming out of the<br />
machine conta<strong>ins</strong> less dust than the air in<br />
the room. The HEPA filter should always<br />
be used when vacuum cleaning must be<br />
carried out to demanding standards of<br />
hygiene and room air purity.<br />
Micro vario combination filter (colour: red)<br />
This filter combines the effects of an<br />
activated carbon filter with those of a high<br />
efficiency submicron particulate air filter.<br />
D Micro exhaust air filter<br />
This filter is not located in the filter<br />
compartment (dust compartment), but<br />
downstream of the motor under the exhaust<br />
14<br />
air grille, it serves the purpose of trapping<br />
the dust resulting from the abrasion of the<br />
motor carbon brushes.<br />
Replacement intervals<br />
In order to ensure consistently efficient<br />
suction and dust filtration and to minimize<br />
smells, we recommend that filters and filter<br />
units be replaced at the intervals specified<br />
below or at the latest when the filter<br />
replacement display indicates that this is<br />
due, even though a new paper filter and<br />
micro filter may have been <strong>ins</strong>talled.<br />
• Main micro filter / exhaust air micro filter<br />
After the contents of a paper filter pack<br />
have been used (you will find a<br />
corresponding replacement filter in the<br />
paper filter pack)<br />
• Activated charcoal filter / micro vario<br />
combination filter After 6 to 12 months,<br />
depending on use.<br />
• High efficiency particulate air filter After a<br />
period of 18 months to 2 years (provided<br />
the paper and main micro filters are<br />
regularly replaced).<br />
Opening of the dust compartment<br />
lid<br />
For exchange of<br />
filter, press<br />
opening key and<br />
raise dust<br />
compartment lid<br />
until it snaps in.<br />
Exchange of paper filter / Micro-<br />
Power-Filter<br />
Press the dust compartment release button<br />
and raise the lid. Slightly raise the used<br />
filter by the swivelling holder, pull off the<br />
filter (the filter opening is automatically<br />
closed) and dispose of, unfolded, in the<br />
waste bin.
Insert the new filter into the filtr holder by<br />
the cardboard disc, pushing it to the rear<br />
as far as it will go. Lower the filter holder<br />
onto the rests at the sides and re-close the<br />
dust compartment lid.<br />
Exchange of the micro main filter<br />
Open the filter compartment, remove the<br />
paper filter and swivel the filter holder<br />
upwards until it locks into position. Remove<br />
the MICRO VARIO filter cassette from the<br />
filter compartment<br />
and open the<br />
cassette grille.<br />
Replace the main<br />
micro filter and<br />
close the cassette<br />
grille so that it locks.<br />
Re<strong>ins</strong>tall the filter<br />
cassette and paper<br />
filter and close the dust compartment.<br />
Replacing the filter units<br />
Open the filter compartment, remove the<br />
paper filter, swivel the filter holder upwards<br />
until it locks and remove the MICRO VARIO<br />
filter cassette with filter unit from the filter<br />
compartment.<br />
Remove a new filter<br />
unit from its pack,<br />
remove the<br />
protective foil and<br />
<strong>ins</strong>ert it into the filter<br />
cassette so that it<br />
fits precisely.<br />
Re<strong>ins</strong>tall the filter cassette and paper filter<br />
and close the dust compartment.<br />
Micro vario combination filter<br />
High efficiency submicron particulate airfilter<br />
Activated carbon filter<br />
Motor protection filter<br />
Exchange of the micro exhaust air filter<br />
Press the release button and remove the<br />
exhaust air grid. Then remove the<br />
contaminated filter and dispose of<br />
according to the corresponging regulations.<br />
Put in a new<br />
micro exhaust<br />
airfilter into the<br />
grid<br />
compartment.<br />
Position the grid<br />
at an angle, push<br />
forwards as far as<br />
it will go, then press down until the catch<br />
is heard to lock home.<br />
Flexible suction hose<br />
Flexible suction<br />
hose with handle,<br />
suction control<br />
and <strong>Fakir</strong>patented<br />
plug-in<br />
fastening of the<br />
hose.<br />
Telescopic tube<br />
The telescopic tube can be adjusted to the<br />
required lenght. Push the telescopic tube<br />
until only one stop notch is visible, since<br />
otherwise the handle is pushed out of the<br />
tube end.<br />
Crevice nozzle<br />
The crevice nozzle is an effective<br />
attachment for vacuuming deep slots in<br />
upholstery, skirting boards, ledges, corners<br />
etc.<br />
15
Heating element brush<br />
The heating<br />
element brush fits<br />
onto the crevice<br />
nozzle and can be<br />
used to clean the<br />
f<strong>ins</strong> of radiators.<br />
Upholstery nozzle<br />
The upholstery<br />
nozzle can be<br />
used to clean<br />
curta<strong>ins</strong>,<br />
upholsterd<br />
furniture and<br />
narrow crevices.<br />
It features a<br />
special thread rake which picks up even<br />
minute specks of fluff and thread <strong>ins</strong>tantly.<br />
Swivelling floor nozzle<br />
Floor nozzle settings for carpets and tiled,<br />
wood-block or similar floors:<br />
Carpets = brush bar retracted<br />
Hard floors = brush bar extended<br />
Turbo suction brush<br />
The turbo suction brush is used for the<br />
maintenance of small areas with carpets or<br />
fitted carpeting. It brushes dirt as well as<br />
fluffs and pieces of thread out of the pile.<br />
If the brush roller becomes obstructed by<br />
bulky material or solid objects (fluff, nails,<br />
drawing p<strong>ins</strong> etc.) open the lid on the<br />
underside, remove the obstruction and reclose<br />
the lid.<br />
16<br />
Electricsuction brush<br />
Driven by a<br />
motor, the<br />
powerful electric<br />
suction brush<br />
drum warrants for<br />
very thorough<br />
cleaning.<br />
Hard floor nozzle<br />
Special nozzle for<br />
vacuuming and<br />
cleaning of hard<br />
floors like tiles,<br />
stone, cement<br />
floor, parquet<br />
etc., ideal for<br />
adjoning rooms<br />
like hobby room,<br />
boiler-room or similar.<br />
Cleaning the appliance<br />
Disconnect the appliance at the ma<strong>ins</strong><br />
socket. Clean the appliance only with a dry<br />
or damp cloth. Never immerse it in water.<br />
Also clean the filter compartment with a<br />
damp cloth when necessary.